

Page 1
Troubleshooting
Troubleshooting
To better help our customers - this HP Laserjet 2600n series troubleshooting page is simply a
To better help our customers - this HP Laserjet 2600n series troubleshooting page is simply a
guide / additional information for your convenience, as you search for assistance in repairing your
guide / additional information for your convenience, as you search for assistance in repairing your
machine. Although this information is provided for your convenience it is recommended, for the most
machine. Although this information is provided for your convenience it is recommended, for the most
part, that a technician inspects your office equipment.
part, that a technician inspects your office equipment.
It is recommended to consult with a professional when ordering your printer part(s).
It is recommended to consult with a professional when ordering your printer part(s).
Shop with us while you troubleshoot.
Chapter contents
Chapter contents
Troubleshooting
Troubleshooting process
Clearing jams
Print problems
Functional tests (SERVICE ONLY)
Service mode functions (SERVICE ONLY)
Troubleshooting tools
HP Toolbox
Diagnostic resources
Repetitive image defect ruler
Firmware and software updates
Shop with us while you troubleshoot.
* HP oem parts
* HP oem parts
* HP LaserJet maintenance kits
* HP LaserJet maintenance kits
.........
* Toners for your printer
* Toners for your printer
* HP fuser assembly units
* HP fuser assembly units
* HP fuser kit 110v & 220v
* HP fuser kit 110v & 220v
* Parts assemblies for printers
* Parts assemblies for printers
* Service maintenance parts
* Service maintenance parts
* Color laserJet printers
* Color laserJet printers
* LaserJet printers and parts
* LaserJet printers and parts
.........
* Hard to find officejet parts
* Hard to find officejet parts
* Hard to find deskjet parts
* Hard to find deskjet parts
User-friendly SmartSearch!
User-friendly SmartSearch!
www.partshere.com Partshere Troubleshooting
www.partshere.com Partshere Troubleshooting
Page 2

Troubleshooting process
Use the troubleshooting checklist to solve issues with the device.
Troubleshooting checklist
Follow the steps below when trying to solve a problem with the device.
Table 6-1 Troubleshooting checklist
Step
number
1 Is the power on?
2 Does Ready appear in
3 Do information pages
Verification step Possible problems Solutions
When the device is
connected to a grounded
power source, the control
panel shows Hewlett-
Packard with both the
Ready and Attention lights
blinking. The control panel
will then display
Initializing and then
Ready, at which time only
the green light will be on.
the device control panel?
The control panel should
function without error
messages.
print?
Print a Configuration page.
No power due to failed power source,
cable, switch, or fuse.
Control panel shows an error. See Control panel messages for a list
Control panel displays an error
message.
Media does not move smoothly
through the device paper path.
1 Verify that the device is plugged in.
2 Verify that the power cable is
functional and that the power
switch is on.
3 Check the power source by
plugging the device directly into
the wall or into a different outlet.
4 Test the outlet or connect another
device to the outlet to verify that
the outlet is functioning.
of common messages that will help
you correct the error.
See Control panel messages for a list
of common messages that will help
you correct the error.
Clean the paper path.
4 Does the device print
from the computer?
Connect the network cable
or USB cable to the device
and the computer. Use a
word-processing
application to send a print
job to the device.
Poor print quality. For information, see General print
Software is not installed correctly or an
error occurred during software
installation.
The cable is not connected correctly. Reconnect the cable.
An incorrect driver is selected. Select the proper driver.
Other devices are connected to the
USB port.
There is a port driver problem in
Microsoft Windows.
If the error persists, see the support flyer that came in the device box.
quality issues.
Uninstall and then reinstall the device
software. Verify that you are using the
correct installation procedure and the
correct port setting.
Disconnect the other devices and try
again to print.
Uninstall and then reinstall the device
software. Verify that you are using the
correct installation procedure and the
correct port setting.
www.partshere.com Partshere Troubleshootingwww.partshere.com Partshere Troubleshooting
Page 3
Clearing jams
This section contains information about clearing jams.
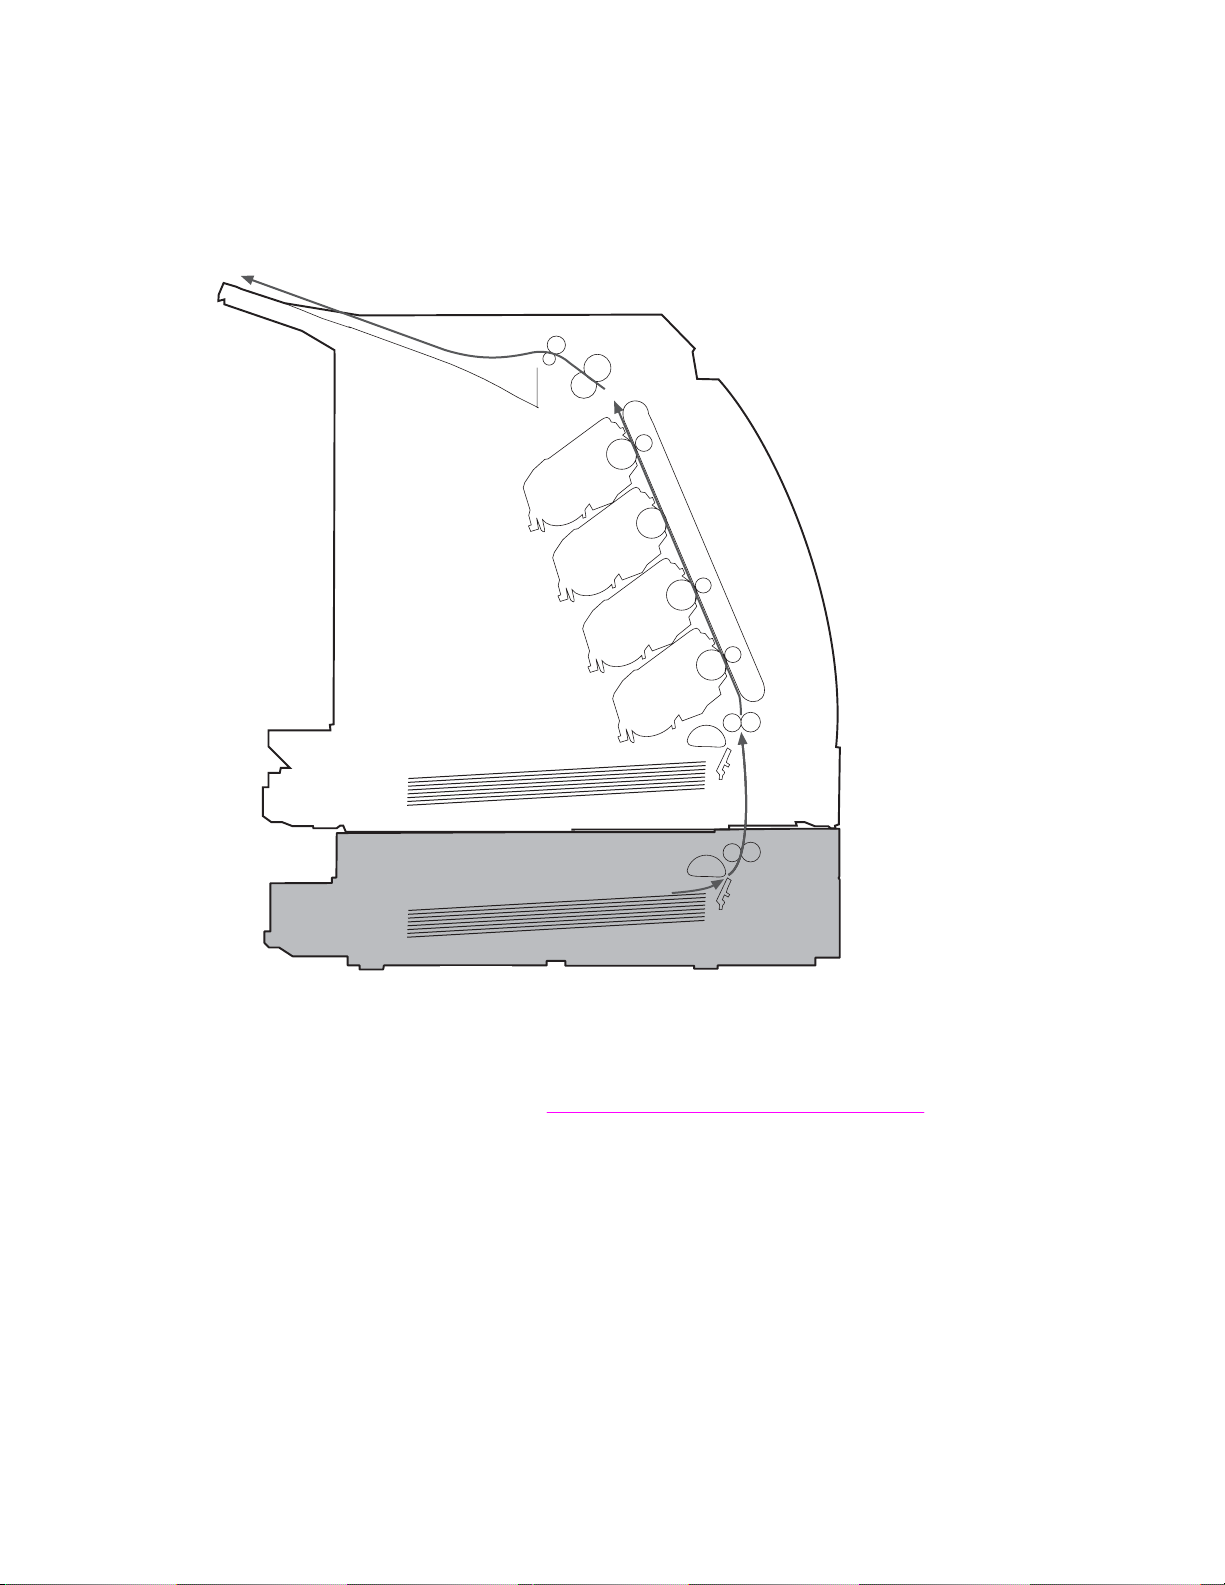
Paper path
Figure 6-1 Paper path
For paper path sensor locations, see Figure 4-12 Paper pickup and feed system.
www.partshere.com Partshere Troubleshootingwww.partshere.com Partshere Troubleshooting
Page 4

Common causes of paper jams
Occasionally, paper or other print media can become jammed during a print job. Some causes
include the following events:
Cause Solution
The input trays are loaded improperly or overfilled. Remove any excess paper from the input tray. Make sure
Tray 2 or optional Tray 3 is opened during a print job. Make sure that Tray 2 or optional Tray 3 is closed.
Too many sheets accumulated in the output area or sheets
blocked the output area.
The print media that is being used does not meet HP
specifications.
The environment in which the print media was stored is too
humid or too dry.
A supply item is installed incorrectly, causing repeated jams. Verify that all print cartridges and the ETB are correctly
Print media is skewed. Input tray guides are not adjusted correctly. Adjust input tray
Print media is binding or sticking together. Remove paper, flex it, rotate it 180 degrees, or flip it over.
that the paper does not exceed the maximum stack height
mark in the input tray.
Remove any accumulated sheets and clear the output area.
For information about clearing jams from the output area,
see
Output jams.
Use only paper that meets HP specifications. For more
information, see the HP LaserJet Printer Family Print Media
Guide or go to
Make sure that the printer environment is within humidity
specifications. For more information, see Printing and
storage environment.
installed.
guides so they hold the print media firmly in place without
bending it.
Reload paper into the input tray.
http://www.hp.com/support/ljpaperguide.
NOTE Do not fan paper. Fanning can create static
electricity, which can cause the paper to stick
together.
Print media is removed before it settles into the output bin. Reset the printer. Wait until the page completely settles in
the output bin before removing it.
Print media is in poor condition. Replace the paper.
Print media is not picked up by the internal rollers from
Tray 2 or Tray 3.
Print media has rough or jagged edges. Replace the paper.
Print media is perforated or embossed. This paper does not separate easily. Feed single sheets
The printer supply items have reached the end of life.
Print media was not stored correctly. Replace the print media. Print media should be stored in the
Remove the top sheet of paper. If the paper is heavier than
2
163 g/m
from Tray 1.
Check the printer control panel for messages prompting a
replacement of supplies, or print a supplies status page to
verify the remaining life of the supplies.
original packaging in a controlled environment.
(43 lb), it may not be picked from the tray.
www.partshere.com Partshere Troubleshootingwww.partshere.com Partshere Troubleshooting
Page 5
Where to look for jams
Jams can occur in these locations:
Ŷ Inside the printer
Ŷ In input areas
Ŷ In the output area
Ŷ Paper path
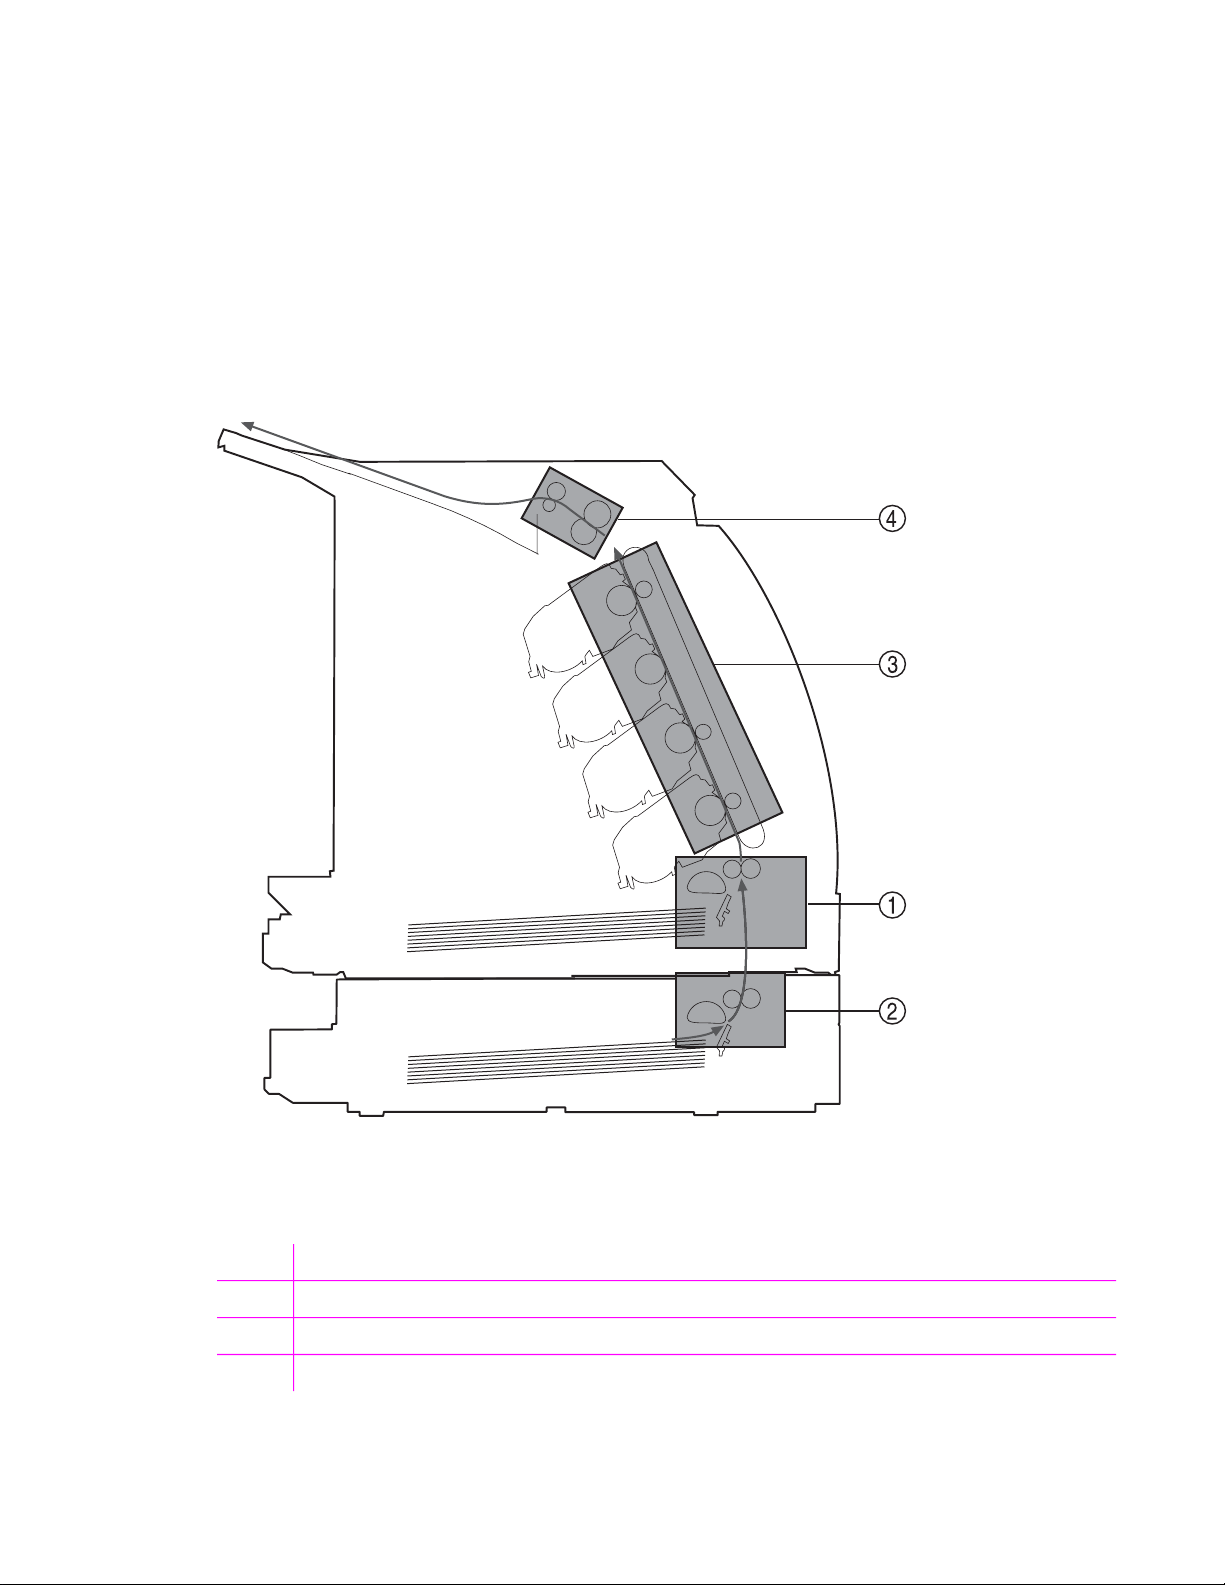
The following illustration identifies the stages when jams can occur.
Figure 6-2 Jam locations and stages
1 Pickup stage
2 Feeder stage
3 Transfer/feed stage
4 Fusing/delivery stage
www.partshere.com Partshere Troubleshootingwww.partshere.com Partshere Troubleshooting
Page 6
Find and remove the jam by using the instructions on the following pages. If the location of the jam is
not obvious, first look inside the printer.
Loose toner might remain in the printer after a jam. This problem should resolve itself after a few
sheets have been printed.
Each section below corresponds to an area where a paper jam could occur. Use the following
procedures to clear the jam. In all cases, grasp the jammed paper by both corners and pull slowly to
remove the paper.
Jams inside the printer
Use the following instructions to clear jams from inside the printer.
CAUTION Jams in this area might result in loose toner on the page. If you get toner on your
clothes or hands, wash them in cold water. (Hot water will set the toner into the fabric.)
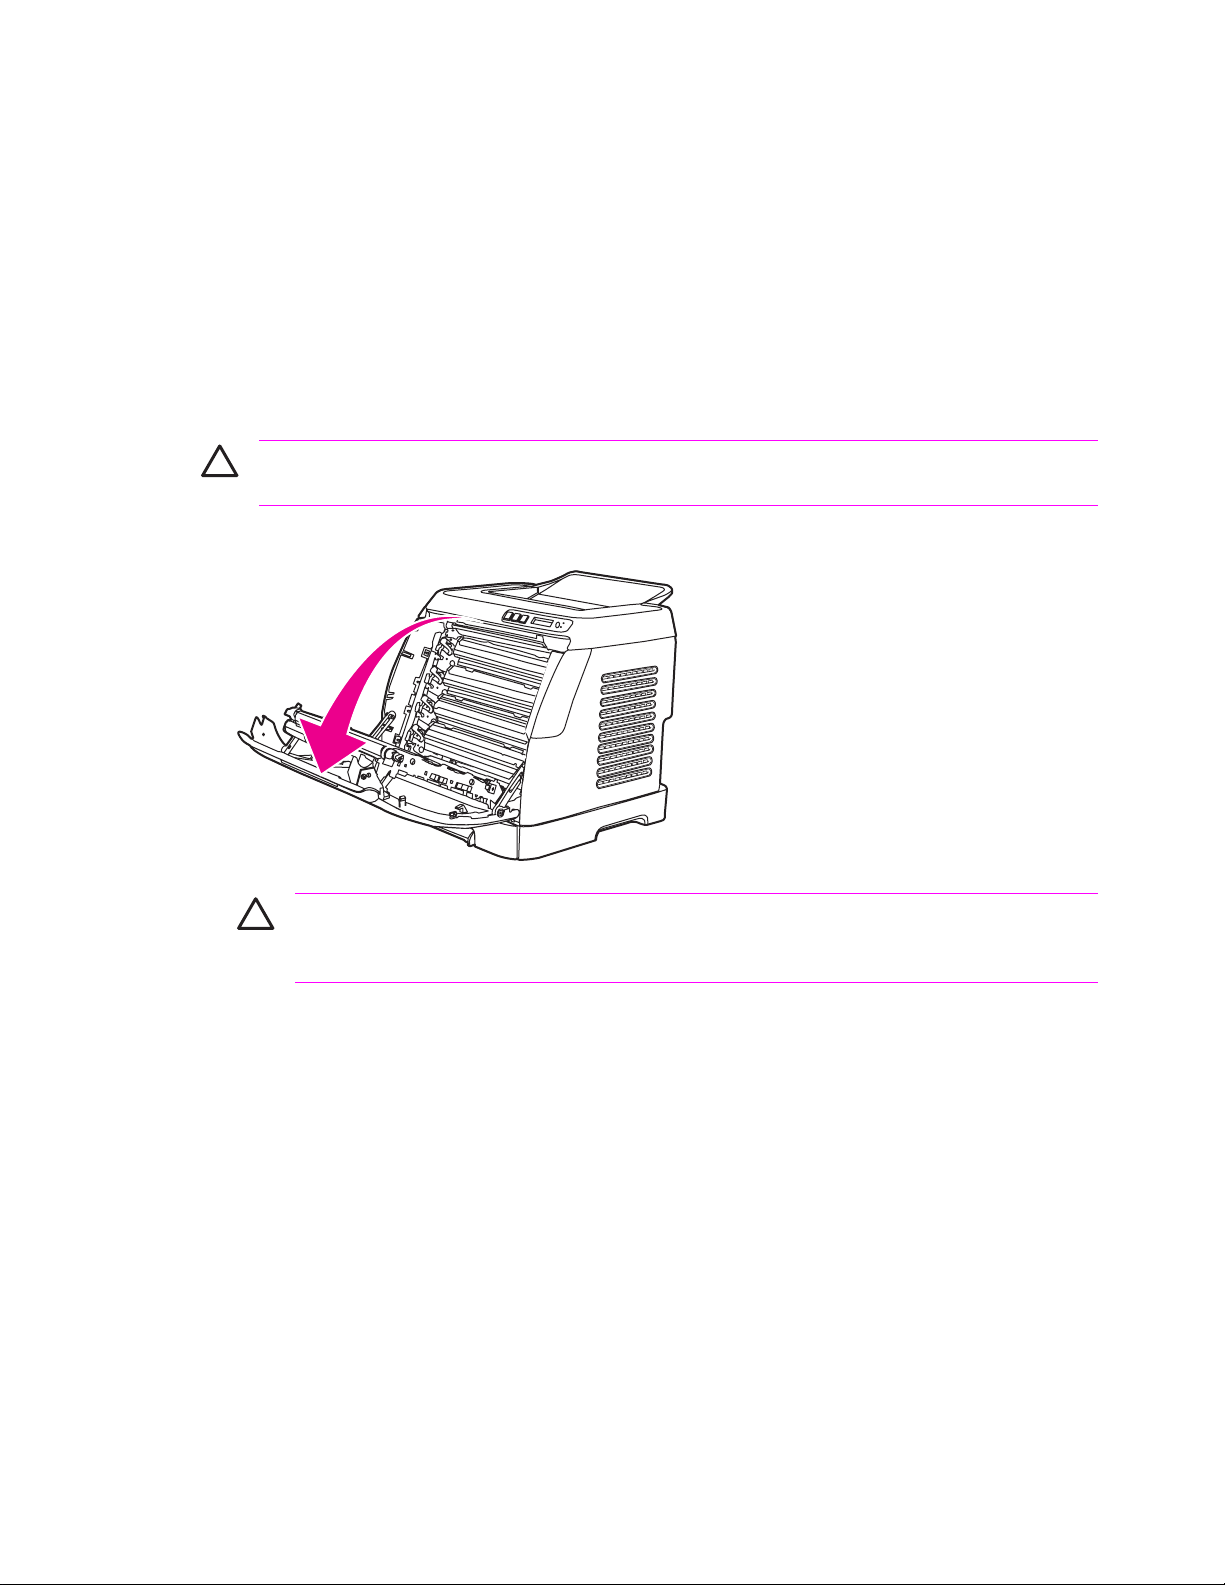
1 Open the front door.
CAUTION Do not place anything on the transfer belt, which is located on the
inside of the front door. Otherwise, the printer may be damaged, adversely affecting
print quality.
www.partshere.com Partshere Troubleshootingwww.partshere.com Partshere Troubleshooting
Page 7
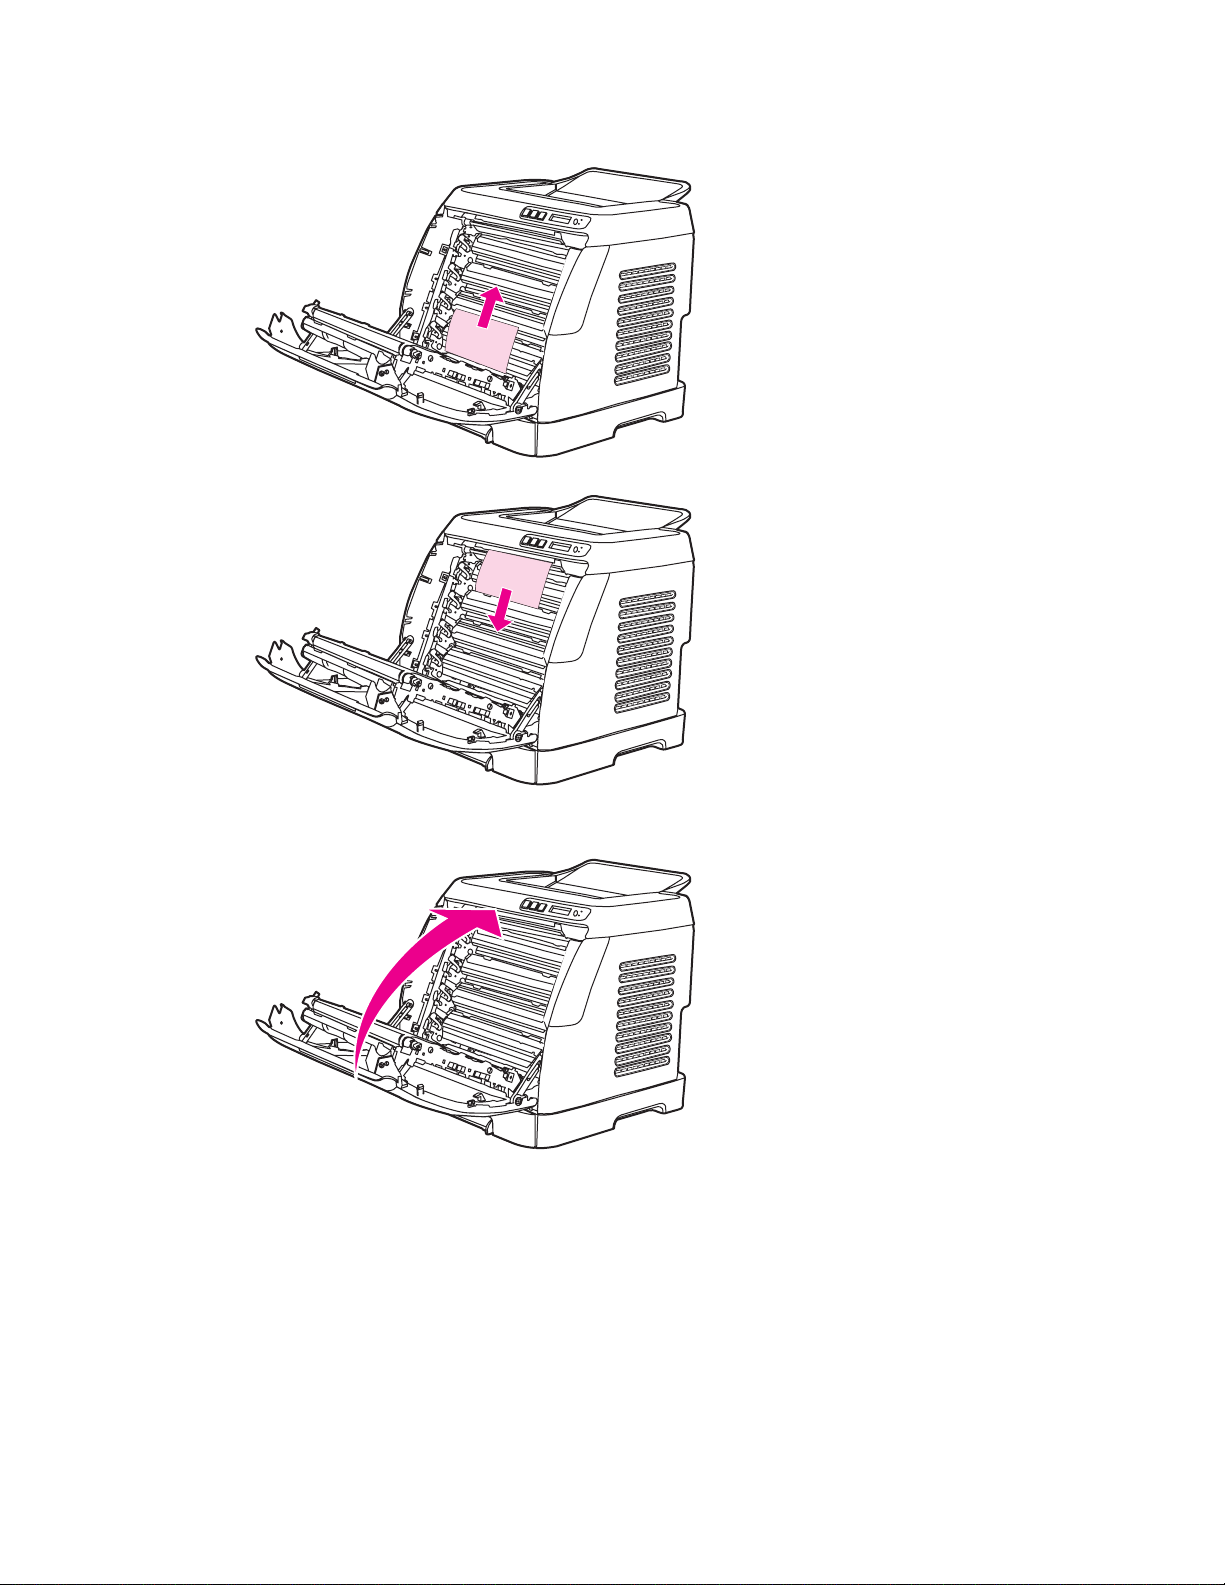
2 Carefully grasp the jammed paper by both corners and pull slowly to remove the paper.
3 Close the front door.
Input jams
Tray 1
If the jammed paper is easily accessible from the outside of the printer, grasp both edges of the
paper and firmly pull to remove. Otherwise, follow the directions for Tray 2.
www.partshere.com Partshere Troubleshootingwww.partshere.com Partshere Troubleshooting
Page 8
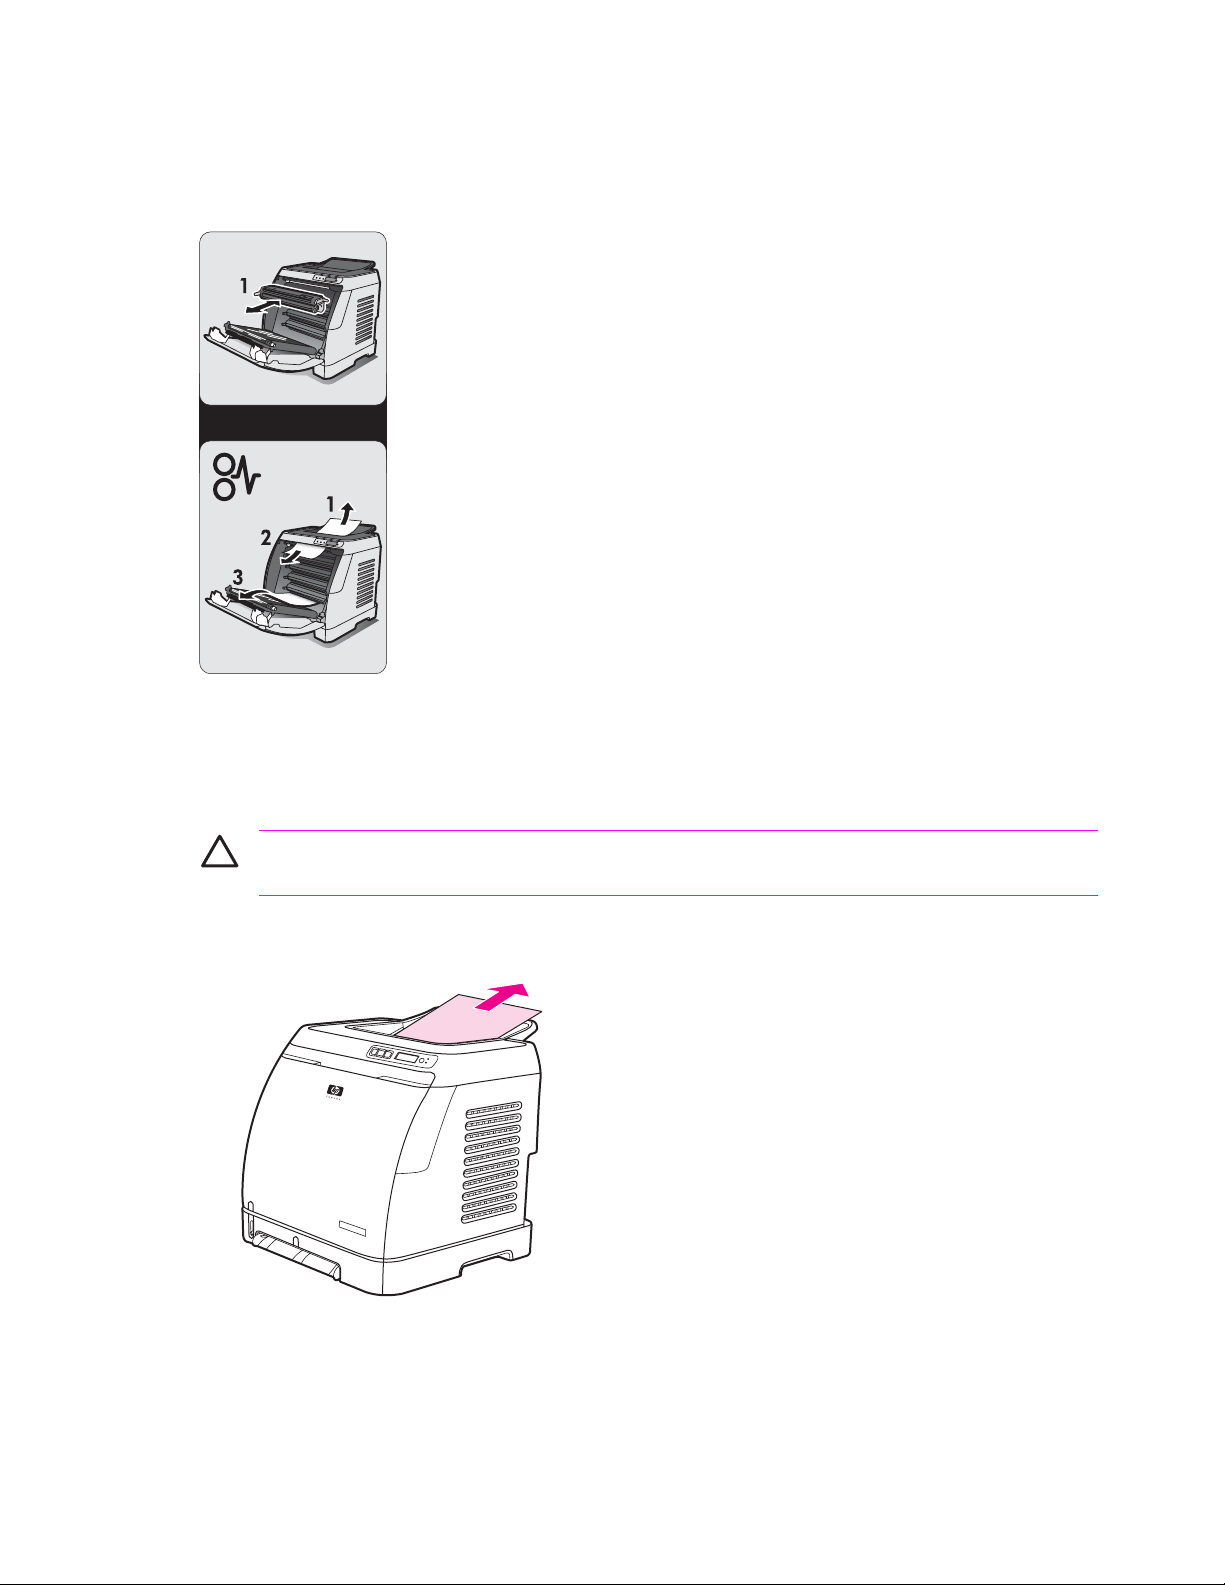
Tray 2
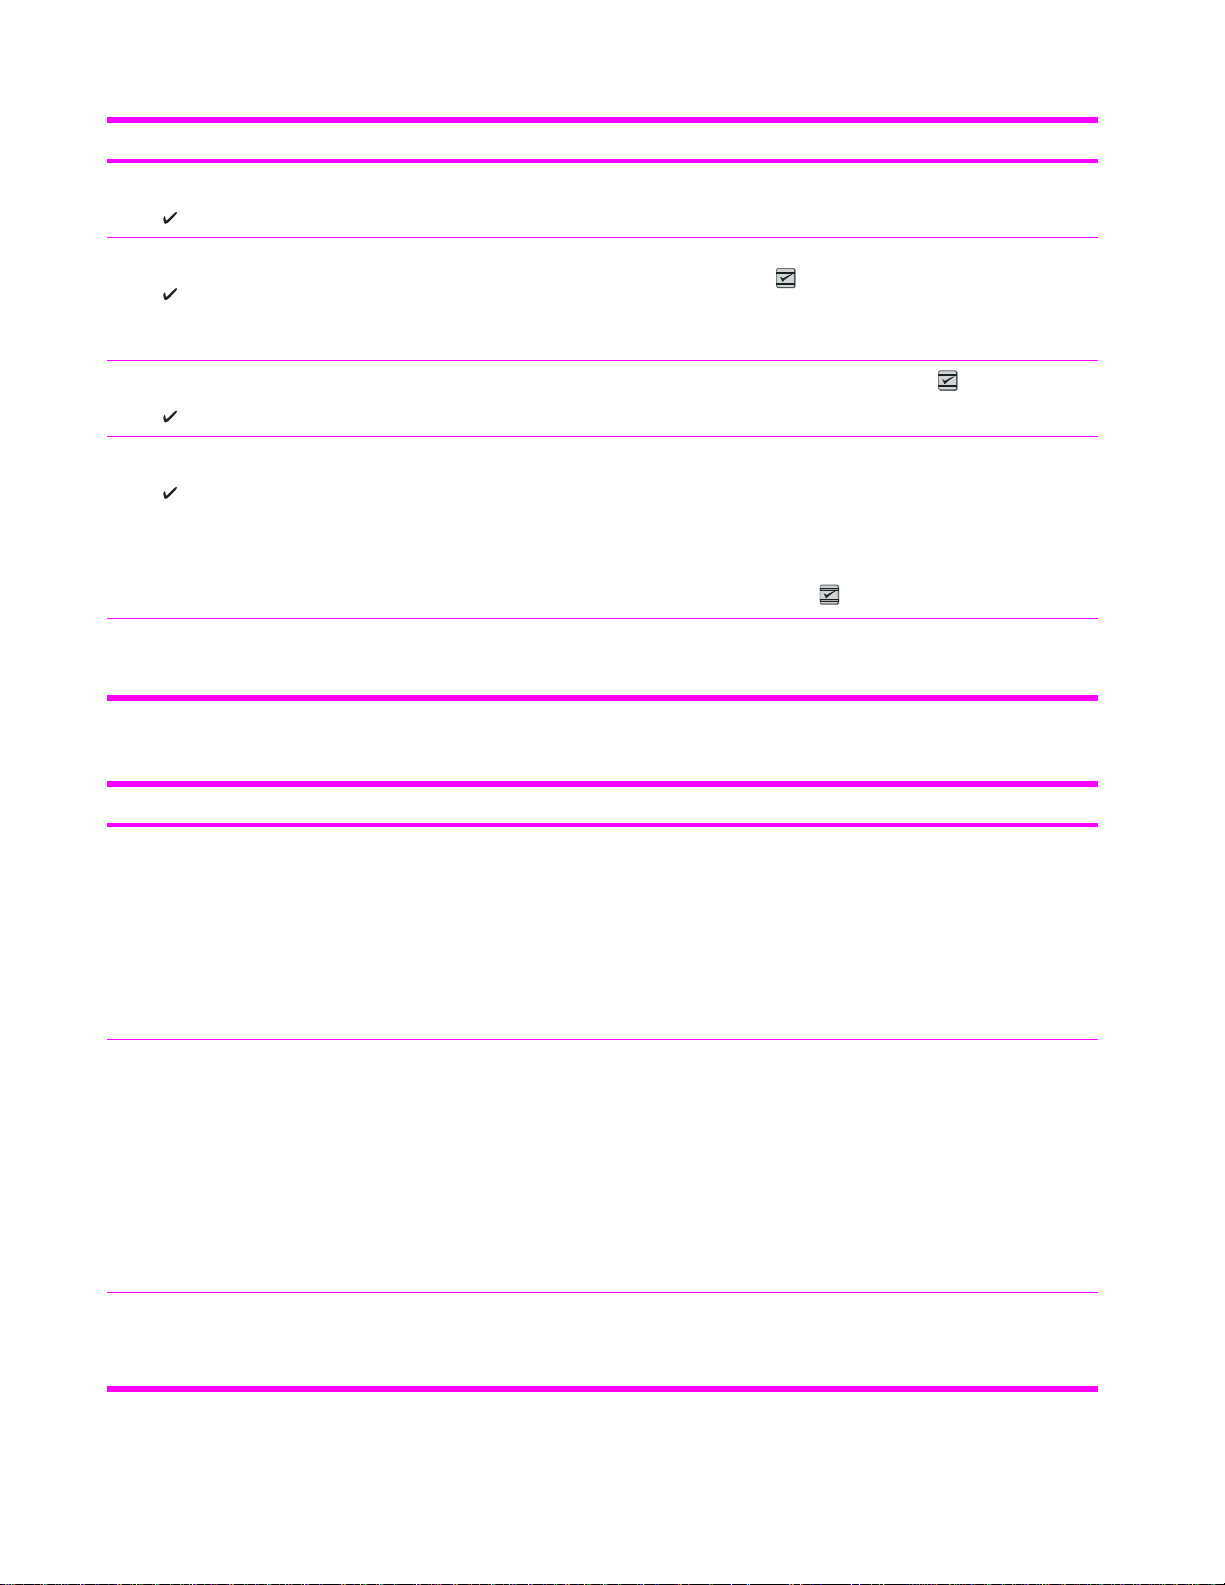
Open the front door of the printer and remove paper as indicated on the jam instruction label, located
on the interior right side of the printer. Input jams are indicated on the label with the number 3.
Figure 6-3 Tray 2 input jam label
Output jams
Jams in the top bin
CAUTION Jams in these areas might result in loose toner on the page. If you get toner on
your clothes or hands, wash them in cold water. (Hot water will set the toner into the fabric.)
1 Carefully grasp the jammed paper by both corners and pull slowly to remove the paper from the
top bin.
www.partshere.com Partshere Troubleshootingwww.partshere.com Partshere Troubleshooting
Page 9
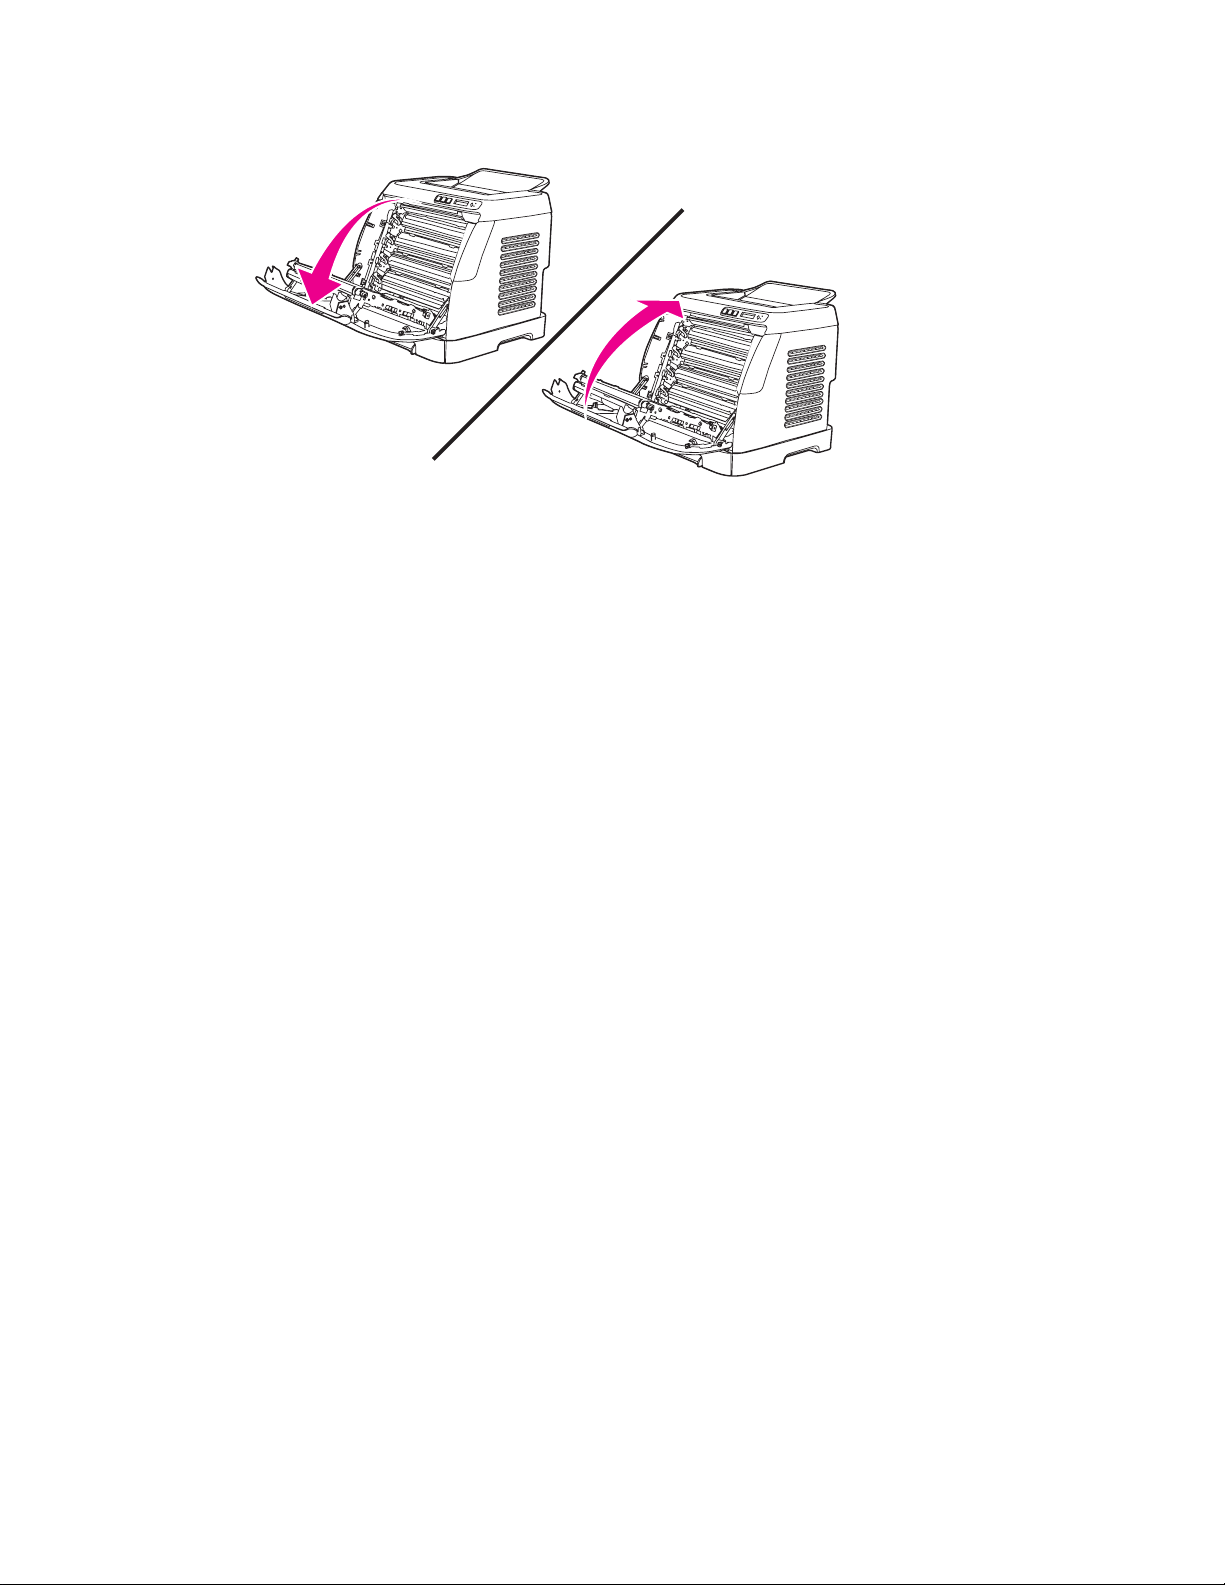
2 Open and close the front door.
Pickup delay jam
The printer performs the retry control, which executes the pickup operation three times, to retrieve
the pickup delay jam caused by the pickup error. When the registration paper sensor (SR1) does not
detect the leading edge of the paper within approximately 2.5 seconds (4.5 seconds for optional
cassette) after the pickup solenoid (SL1) is turned ON, the CPU tries to pick up the paper three times.
Pickup stationary jam
The CPU determines the pickup stationary jam when the registration paper sensor (SR1) does not
detect the trailing edge of the paper within approximately 8.6 seconds after it detects the leading edge.
Delivery delay jam
The CPU determines the delivery delay jam when the fuser delivery paper sensor (SR4) does not
detect the leading edge of the paper within approximately 6.6 seconds after the registration paper
sensor (SR1) detects the leading edge.
Wrapping jam
The CPU executes the wrapping jam detection after it assesses no delivery delay jam. The CPU
determines the wrapping jam, when the fusing delivery paper sensor (SR4) detects the paper
absence before the time equivalent to paper passage of its length minus 40 mm (1.6 inches) after the
SR4 detected the leading.
Delivery stationary jam
The CPU executes the delivery stationary jam detection after it assesses no wrapping jam. The CPU
determines the delivery stationary jam, when the fuser delivery paper sensor (SR4) detects the paper
presence after the time equivalent to paper passage of its length plus 50 mm (1.9 inches) from when
it detected the trailing edge.
Start-up residual paper jam
The CPU determines the start-up residual paper jam when either the pre-fuser paper sensor (SR5)
or the fuser delivery paper width sensor (SR4) detects the paper when the initial rotation is started.
www.partshere.com Partshere Troubleshootingwww.partshere.com Partshere Troubleshooting
Page 10

Door open jam
The CPU determines the door open jam, when either the pre-fuser paper sensor (SR5) or the fuser
delivery paper width sensor (SR4) detects paper when a door open is detected.
www.partshere.com Partshere Troubleshootingwww.partshere.com Partshere Troubleshooting
Page 11
Print problems
Getting information
The following sections contain information about control panel messages, error reports, and available
service menus.
Control panel messages
The majority of the control-panel messages are intended to guide the user through typical operation.
The control-panel messages indicate the status of the current operation, and include a page count on
the second line of the display, if appropriate. When the device is printing data, control-panel
messages indicate this status. In addition, alert messages, warning messages, and critical error
messages indicate situations that might require some action.
Alert and warning messages
Control panel message Description Recommended action
Device error
Press
Door open The printer door is open. The door must be closed before printing
Engine comm.
error
Invalid driver You are using the incorrect printer driver. Reselect the printer driver appropriate for
Invalid entry Invalid data or response. Correct the entry.
Jam in
tray 2
Jam in
tray 3
Jam in
print paper path
Jam in
Cartridge area
An internal error occurred in the device.
The device experienced an internal
communication error.
A paper jam has occurred in Tray 2.
A paper jam has occurred in Tray 3.
A paper jam has occurred in the print path. Open the door and clear the jam. Then
A paper jam has occurred in the print path. Open the door and clear the jam. Then
Press (S
can continue.
This is a warning message only. Job output
might be affected.
your device.
Clear the jam, and then press the
(S
ELECT
Clear the jam, and then press the
(S
ELECT
press the (S
panel.
press the (S
panel.
ELECT
) to resume the job.
) button on the control panel.
) button on the control panel.
ELECT
) button on the control
ELECT
) button on the control
Jam in
Output bin
Load paper The HP Color LaserJet 2600n printer is out
Load Tray X
[TYPE] [SIZE]
A paper jam has occurred in the output area.
of paper.
The printer is processing job, but the tray
indicated is empty.
Clear the jam, and then press the
ELECT
(S
) button on the control panel.
Please load specified paper type into the
tray indicated.
Please load specified paper type and size
into the tray indicated.
www.partshere.com Partshere Troubleshootingwww.partshere.com Partshere Troubleshooting
Page 12
Control panel message Description Recommended action
Manual feed
Press
Memory is low
Press
Misprint
Press
No paper pickup
Press
Unexpected size
in tray X
Critical error messages
The printer is waiting for paper in the tray
indicated.
The device memory has been almost
completely filled.
The printed pages have been incorrectly
placed on the paper.
The print engine has failed to pick up a
piece of media.
Unexpected paper size error. The media
size loaded in the tray does not match the
media size configured for the tray.
Load the paper as indicated.
Allow the device to finish the job, or press
ELECT
(S
) to cancel the job.
Break the job into smaller jobs that contain
fewer pages.
To continue, press the (S
ELECT
) button
on the control panel.
In Tray 1, verify that the media was inserted
far enough into the tray. In Tray 2 or
optional Tray 3, verify that the paper-length
guide is in the correct position for the media
size that you are using.
Reload the media in the input tray and
(S
) to continue the job.
press
ELECT
Verify that the print settings are set to the
specified media in the tray.
Control panel message Description Recommended action
50.1 Fuser Error
The device has experienced an internal
hardware error.
Turn off the device, wait at least
25 minutes, and then turn on the device.
50.2 Fuser Error
50.3 Fuser Error
50.1 Fuser Error—low temperature
50.3 Fuser Error—slow fuser
If a surge protector is being used, remove
it. Plug the device directly into the wall
socket. Use the power switch to turn on the
device.
50.2 Fuser Error—high temperature
If this does not clear the error, replace the
fuser.
51.20 Error
51.21 Error
The device has experienced an internal
hardware error.
51.20 Error—black scanner error
Turn off the power by using the power
switch, wait at least 30 seconds, and then
turn on the power and wait for the device to
initialize.
51.22 Error
51.23 Error
51.21 Error—cyan scanner error
51.22 Error—magenta scanner error
51.23 Error—yellow scanner error
If a surge protector is being used, remove
it. Plug the device directly into the wall
socket. Use the power switch to turn the
device on.
Laser scanners are not replaceable.
Replace the engine.
55.1 Error DC controller error. The device has
experienced an internal hardware error.
Turn off the power by using the power
switch, wait at least 30 seconds, and then
turn on the power and wait for the device to
initialize.
www.partshere.com Partshere Troubleshootingwww.partshere.com Partshere Troubleshooting
Page 13

Control panel message Description Recommended action
If a surge protector is being used, remove
it. Plug the device directly into the wall
socket. Use the power switch to turn the
device on.
Check the engine (DCC) firmware version.
Update if needed. Replace the DCC if a
firmware upgrade does not resolve the issue.
57 Fan Error
Turn off then on
The device has experienced a problem with
its internal fan.
Turn off the power by using the power
switch, wait at least 30 seconds, and then
turn on the power and wait for the device to
initialize.
The fan is not replaceable. Replace the
engine.
Supplies messages
Control panel message Description Recommended action
10.000x Supply error E-label cannot be read or print cartridge is
10.100x Supply error
alternates with
Reinstall
not properly installed.
10.0000 = Black print cartridge
10.0001 = Cyan print cartridge
10.0002 = Magenta print cartridge
10.0003 = Yellow print cartridge
A print cartridge is missing.
10.1000 = Black print cartridge
10.1001 = Cyan print cartridge
1 Reinstall print cartridge.
2 Turn on the printer.
3 If the problem is not solved, replace the
cartridge.
Install the correct print cartridge.
The supplies gauge will display the
consumption levels of print cartridges.
HP supplies
installed
One of the following messages may display:
Incorrect black
Incorrect cyan
Incorrect magenta
Incorrect yellow
One of the following messages may display:
Install black cartridge
Install cyan cartridge
10.1002 = Magenta print cartridge
10.1003 = Yellow print cartridge
The printer transitioned from having one or
more non-HP supplies to having all HP
supplies installed.
The <color> print cartridge not installed
correctly.
The out threshold has been reached. The supply must be replaced before
No action required.
Reinstall the <color> print cartridge.
printing can continue.
www.partshere.com Partshere Troubleshootingwww.partshere.com Partshere Troubleshooting
Page 14
Control panel message Description Recommended action
Install magenta cartridge
Install yellow cartridge
The supplies gauge will display the
consumption levels of print cartridges.
Install supplies
The supplies gauge will display the
consumption levels of print cartridges.
One of the following messages may display:
Non HP black
installed
Non HP cyan
installed
Non HP magenta
installed
Non HP yellow
installed
alternates with
To accept
Press
Non HP supply
in use
alternates with
Multiple supplies are not installed. Install correct print cartridges.
A non-HP <color> cartridge is installed.
NOTE Any printer repair required
as a result of using a non-HP or
unauthorized supply is not covered
under warranty.
To use this cartridge, override by pressing
(S
) button on the control panel.
ELECT
A non HP (cloned or refilled) supply has
been installed that is not made by HP and
was overridden.
the
If you believe you purchased an HP supply,
please call the HP fraud hotline at
1-877-219-3183. Service or repairs
required as a result of using non-HP
supplies is not covered under HP warranty.
Ready
The supplies gauge will display the
consumption levels of print cartridges.
One of the following messages may display:
Order black
The <color> print cartridge low threshold
has been reached.
For more information go to the HP Color
LaserJet 2600n toolbox and click Supplies
Status. To order supplies online, click
Order Supplies.
cartridge,
Order cyan
cartridge,
Order magenta
cartridge, or
Order yellow
cartridge
www.partshere.com Partshere Troubleshootingwww.partshere.com Partshere Troubleshooting
Page 15

Control panel message Description Recommended action
alternates with
Ready
The supplies gauge will display the
consumption levels of print cartridges.
ORDER SUPPLIES
alternates with
Ready
The supplies gauge will display the
consumption levels of print cartridges.
One of the following messages may display:
Replace black cartridge
Replace cyan cartridge
Replace magenta cartridge
Replace yellow cartridge
Replace Supplies
The supplies gauge will display the
consumption levels of print cartridges.
Replace supplies
Override in use
alternates with
Ready
Multiple supplies are low. For more information go to the HP Color
The out threshold has been reached. The supply must be replaced before
The out threshold has been reached. The supply must be replaced before
Supply override in use. The user has
decided to continue printing beyond the out
point. A supply is low and using Override
may result in unsatisfactory print quality.
LaserJet 2600n toolbox and click Supplies
Status. To order supplies online, click
Order Supplies.
printing can continue.
printing can continue.
Replace the supply that is low.
The supplies gauge will display the
consumption levels of print cartridges.
Replace supply.
Override in use
alternates with
Ready
The supplies gauge will display the
consumption levels of print cartridges.
Supply override in use. The user has
decided to continue printing beyond the out
point. A supply is low and using Override
may result in unsatisfactory print quality.
Replace the supply that is low.
www.partshere.com Partshere Troubleshootingwww.partshere.com Partshere Troubleshooting
Page 16

Control panel message Description Recommended action
Unauthorized
supply in use
alternates with
Ready
The supplies gauge will display the
consumption levels of print cartridges.
One of the following messages may display:
Unauthorized yellow
Unauthorized magenta
Unauthorized cyan
Unauthorized black
A new supply has been installed that is not
made by HP and was overridden.
A new supply has been installed that is not
made by HP. One of these four messages
is displayed until an HP supply is installed
or
(S
) is pressed.
ELECT
If you believe you purchased an HP supply,
please call the HP fraud hotline at
1-877-219-3183. Service or repairs
required as a result of using non-HP
supplies is not covered under HP warranty.
If you believe you purchased an HP supply,
please call the HP fraud hotline at
1-877-219-3183. Service or repairs
required as a result of using non-HP
supplies is not covered under HP warranty.
To continue printing, press
Status messages
Status messages are used to inform the user of the current state of the system. Status messages do
not require user action or acknowledgement, and are for information only.
Control panel message Description Recommended action
(S
ELECT
).
Calibrating... The printer is calibrating. No action is required.
Cleaning... The printer is in cleaning mode. No action is required.
Status log only messages
The following messages are not displayed on the control panel. They are printed on the Status log.
Table 6-2 Status log only messages
Error log code Description
54.06 Color density sensor error
54.10 Color plane registration sensor(s) error
54.11 Yellow density out of range
54.12 Magenta density out of range
54.13 Cyan density out of range
54.14 Black density out of range
www.partshere.com Partshere Troubleshootingwww.partshere.com Partshere Troubleshooting
Page 17

Reports menu
The following reports are available from the Reports menu.
Ŷ Demo Page—used to help market the product at retail stores
Ŷ Menu structure—highlights the control panel menu layout
Ŷ Config report—details all default device settings including network configuration and information
Ŷ Supplies Status—provides information on each of the print cartridges, including estimated
pages remaining, cartridge serial number, and pages printed
www.partshere.com Partshere Troubleshootingwww.partshere.com Partshere Troubleshooting
Page 18

Configuration page
The Configuration page lists the current settings and properties of the printer. You can print a
Configuration page from the printer or HP Toolbox. To print the Configuration page from the printer,
Configuration page.
see
Table 6-3 Configuration page
1 Product information. This section contains the following basic information about the printer:
Ŷ Product name
Ŷ Formatter number
Ŷ Serial number
Ŷ Service ID
Ŷ Firmware version
Ŷ Maximum print resolution
2 Memory. This section lists memory-related information, such as the total memory that is installed.
3 Paper settings. This section lists information about the media type for each tray and about the type settings for
4 Page counts. This section lists the total number of pages printed, the number of color pages printed, and
all the media that the printer supports.
information about paper jams.
www.partshere.com Partshere Troubleshootingwww.partshere.com Partshere Troubleshooting
Page 19

5 DC controller version. This section lists the DC controller version.
6 USB settings. This section contains information for the USB setting options.
Ŷ U=0 Hi speed
Ŷ U=4 Full speed
Ŷ U=5 Full speed auto switched from hi speed
7 Extended print modes enabled. The following list contains the options for enabling extended print modes.
Ŷ DM=0 Default setting
Ŷ DM=1 Extended print mode enabled
8 Status log. This section contains information about printer errors, including an error code and the page count at
9 Paper types. This section contains information about paper types that can be configured by the user. The default
10 Network settings. This section contains the following network information about the printer.
11 Product settings. This section lists the following information that is gathered during software installation:
which the error occurred. For a list of status log messages, see Table 6-5 Status log messages.
setting is Plain.
Ŷ Host name
Ŷ Hardware address
Ŷ LInk settings
Ŷ IP address information
Ŷ IP subnet mask
Ŷ IP default gateway
Ŷ WINS configuration information
Ŷ DHCP server and lease time information
Ŷ Preferred WINS server information
Ŷ mDNS name
Ŷ Language
Ŷ Company name
Ŷ Jam recovery settings (if set to ON, the last page will reprint if there is a paper jam)
Ŷ I/O timeout information (default is 120 seconds)
NOTE The color bars on the sides of the Configuration page represent 100%, 75%, 50%,
and 25% coverage.
www.partshere.com Partshere Troubleshootingwww.partshere.com Partshere Troubleshooting
Page 20

Supplies Status page
The Supplies Status page lists the remaining life of HP print cartridges. It also lists the estimated
pages remaining, number of pages printed, and other supplies information. You can print a Supplies
Status page from the printer or the HP Toolbox.
To print the Supplies Status page from the printer control panel
1
Press
2
Press
3
Press
4
Press
EFT ARROW
(L
ELECT
(S
EFT ARROW
(L
ELECT
(S
) or (R
IGHT ARROW
) to select the Reports menu.
).
) or (R
IGHT ARROW
) to select Supplies Status.
) to print the Supplies Status page.
NOTE Supplies information is also available through the HP Toolbox.
Table 6-4 Supplies Status page
1 Print cartridge area
2 Ordering information
3 Return and recycling information
Status log
The status log for this printer is located on the Configuration page and lists the last five events. For
more information, see Configuration page.
www.partshere.com Partshere Troubleshootingwww.partshere.com Partshere Troubleshooting
Page 21

Table 6-5 Status log messages
Error log code Description
10.0000 Black e-label error
10.0001 Cyan e-label error
10.0002 Magenta e-label error
10.0003 Yellow e-label error
10.1000 Black e-label missing
10.1001 Cyan e-label missing
10.1002 Magenta e-label missing
10.1003 Yellow e-label missing
10.3000 Non-HP black
10.3001 Non-HP cyan
10.3002 Non-HP magenta
10.3003 Non-HP yellow
13.0000 Paper jam, Tray 1 area
13.0001 Paper jam, Tray 2 area
13.0002 Paper jam, Tray 3 area
13.0003 Paper jam, registration drum area
13.0004 Paper jam, drum fuser area
13.0005 Paper jam, fuser output area
20.0000 Memory out
21.0000 Video under run
50.1000 Low temperature fuser error
50.2000 Slow fuser error
50.3000 High temperature fuser error
50.4000 Fuser heater wire failure
50.5000 Fuser low temperature subtherm failure
50.6000 Fuser high temperature subtherm failure
52.0000 Scanner error, black laser failure
52.0100 Scanner error, cyan laser failure
52.0200 Scanner error, magenta laser failure
52.0300 Scanner error, yellow laser failure
54.0600 Density sensor error
54.1000 Color plane registration sensor error
54.2800 Sensor density contaminated
www.partshere.com Partshere Troubleshootingwww.partshere.com Partshere Troubleshooting
Page 22

Table 6-5 Status log messages (continued)
Error log code Description
54.2801 Sensor color plane registration contaminated
55.0000 Engine comm fatal error
55.0001 Engine comm critical error
55.1000 DC controller memory error
57.0000 Fan motor error
57.0001 Fan cartridge failure
59.0000 Paper path/ETB rotation failure
59.0001 Paper path/ETB ramp up failure
101.0000 Color plane registration error
102.0000 DMAX calibration error
103.0000 DHALF calibration error
Service menu settings
The service menu is used to calibrate, restore factory default settings, and clean the print paper path.
The following service menu items are available:
Ŷ Restore defaults—used to reset all customer-accessible menu settings back to the factory
default settings (except language) via the control panel or software
NOTE This service menu item does not reset factory-settable settings, including
formatter number, page counts, factory paper settings, language, and so on.
Ŷ PowerSave—used to configure the amount of idle time before the engine enters sleep mode
Ŷ Cleaning mode—used to remove dust and toner from the print paper path
Secondary service menu
The secondary service menu is intended for use by manufacturing engineers, service engineers,
developers, and support personnel. This menu provides options to perform various tests and print
out special reports.
www.partshere.com Partshere Troubleshootingwww.partshere.com Partshere Troubleshooting
Page 23

The following secondary service menu items are available:
Ŷ Service Reports—used to print out a continuous configuration report, translation report, and
error report
Ŷ USB Speed—enables or disables the ability for the printer to operate in high speed.
The following USB Speed setting options are available:
Ŷ Auto
Ŷ Hi speed
Ŷ Full speed
Ŷ Display test—verifies that all of the characters on the display function correctly by allowing you
to manually scroll through the characters
Ŷ Clean ETB—used to clean the ETB
Ŷ Calibrations
Ŷ All Cals
Ŷ CPR Cal
Ŷ DMAX/DHALF Cal
Ŷ DHALF Only Cal
Ŷ Test Page
To enter the secondary service menu, use the following procedure:
1 Confirm that the device is in a Ready state.
2
Press the
3
Press the
4
Press the
5
Press the (L
button (S
button (L
button (S
EFT ARROW
) to enter the main menu system.
ELECT
EFT ARROW
ELECT
) and the button (C
) to confirm 2ndary Service.
) button and button (R
ANCEL JOB
IGHT ARROW
) simultaneously.
) to navigate to the secondary
service menu.
Printed image quality problems
Improving print quality
Use the print-quality settings in the HP Toolbox to improve print-quality problems. To access the
HP Toolbox, see
settings. To restore the default settings, open the HP Toolbox and click Device Settings. Then click
Settings, Service, and in Restore Factory Settings, click Restore.
HP Toolbox. The following menus contain paper type, print mode, and print-quality
Paper Types menu
The purpose of this menu is to specify the print mode for paper types which are non-specific.
To make changes in the Paper Types menu, make the desired selections and click Apply.
www.partshere.com Partshere Troubleshootingwww.partshere.com Partshere Troubleshooting
Page 24

Table 6-6 Print modes for paper types
Print Modes for paper types Weight Default media types
Normal mode
75-89 g/m
2
Plain, color, preprinted, prepunched,
recycled
Transparency Transparencies
Labels Labels
Light
Heavy
Cardstock
Light Glossy
Glossy
Heavy Glossy
75-89 g/m
90-105 g/m
106-163 g/m
75-105 g/m
106-120 g/m
121-163 g/m
2
2
2
2
2
2
Light
Heavy
Cardstock, bond
Light Glossy
Glossy
Heavy Glossy
HP Tough paper HP Tough paper
Envelope Envelopes
Print Modes menu
Under the Print Modes menu in HP Toolbox, each Media Type will have a Fusing menu, a Transfer
menu, and a Toner menu. Select a setting for each menu item.
Media types are listed with the plain papers together, glossy papers together, and special media at
the end. To make changes in the Print Modes menu, make the desired selections and click Apply.
Table 6-7 Extended print modes
HP Toolbox extended print mode Printer adjustment Change in printer setting
Paper curl Fusing adjustment Reduced fuser temperature for less
Heavy coverage Fusing adjustment Increased fuser temperature for less
Toner offset Fusing adjustment Reduced fuser temperature for less
Flap sealing Fusing adjustment Reduced fuser temperature to keep
Less fusing Fusing adjustment Reduced fuser temperature
More fusing Fusing adjustment Increased fuser temperature
Dry paper Transfer adjustment Increased transfer bias for high
Humid paper Transfer adjustment Decreased transfer bias for high
negative paper curl
positive paper curl with heavy toner
coverage
toner offset
envelope flaps from sealing
resistivity paper
resistivity paper
Rough paper Transfer adjustment Increased transfer bias for high
resistivity paper
www.partshere.com Partshere Troubleshootingwww.partshere.com Partshere Troubleshooting
Page 25

Table 6-7 Extended print modes (continued)
HP Toolbox extended print mode Printer adjustment Change in printer setting
Less transfer current Transfer adjustment Reduced transfer bias
More transfer current Transfer adjustment Increased transfer bias
Less toner Toner adjustment Tone curve is scaled back so that solid
is not 100% halftone
Print quality menu
Under the Print Quality menu in HP Toolbox, there will be an Optimize section containing a number
of On/Off adjustments which will apply to all media types.
Table 6-8 Optimize menu
Adjustment type Default setting Extended print mode Description
Background Toner Off EEC95-9 Will reduce the developer
Extra Cleaning Off EEC93-11 Increases rotations of the
Trailing Edge
Over-development
(full-speed)
Trailing Edge
Over-development
(half-speed)
Mottle Prevention Off EEC96-12 Will increase the developer
Off EEC95-14
Off EEC95-14
DC bias
ETB
DC bias
Less Duplex Transfer Current Off EEC68-10
EEC91>16h
EEC92>-1
More Duplex Transfer Current Off EEC68-10
EEC91>16h
EEC92>+1
*
> means write xxh to bits 11–15
**
> means +/-y to bits 9–15
*
**
*
**
Decreases transfer bias on
the 2nd side of duplex jobs.
For media that has low
resistivity after fusing.
Increases transfer bias on
the 2nd side of duplex jobs.
For media that has high
resistivity after fusing.
Understanding print-quality settings
Print-quality settings affect how light or dark the print is on the page and the style in which the
graphics are printed. You can also use the print-quality settings to optimize the print quality for a
specific media type.
You can change the settings in the device properties to accommodate the types of jobs that you are
printing. The following settings are available, depending on the printer driver that you are using:
Ŷ Draft (600 dpi)
Ŷ Normal (Image REt 2400)
www.partshere.com Partshere Troubleshootingwww.partshere.com Partshere Troubleshooting
Page 26

NOTE Changing the resolution can change the formatting of your text.
To temporarily change print-quality settings
To change the print-quality settings only for the current software program, open the properties
through the Print Setup menu in the program that you are using to print.
To change print-quality settings for all future jobs
For Windows 98, Windows 2000, and Windows Me:
1 In the Windows system tray, click Start, select Settings, and then click Printers.
2 Right-click the device icon.
3 Click Properties (in Windows 2000, you can also click Printing Preferences).
4 Change the settings, and click OK.
For Windows XP (Classic view):
1 In the Windows system tray, click Start, and then click Printers and Faxes.
2 Right-click the device icon.
3 Click Properties, or click Printing Preferences.
4 Change the settings, and click OK.
Identifying and correcting printed image defects
Use the checklist and print-quality issues charts in this section to solve print-quality problems.
Print-quality checklist
General print-quality problems can be solved by using the following checklist:
1 Make sure that the paper or print media that you are using meets specifications. Generally,
smoother paper provides better results.
2 If you are using a special print media such as labels, transparencies, glossy, or letterhead,
ensure that you have printed by type.
3 Print a Configuration page and Supplies Status page at the device.
Ɣ Check the Supplies Status page to see if any supplies are low or empty. No information is
provided for non-HP print cartridges.
Ɣ If the pages do not print correctly, the problem is with the hardware.
4 Print a Demo page from the HP Toolbox. If the page prints, the problem is with the printer driver.
5 Try printing from a different program. If the page prints correctly, the problem is with the program
from which you were printing.
www.partshere.com Partshere Troubleshootingwww.partshere.com Partshere Troubleshooting
Page 27

6 Restart the computer and the device and try printing again. If the problem is not resolved, choose
one of these options:
Ɣ If the problem is affecting all printed pages, see General print quality issues.
Ɣ If the problem is affecting only pages printed in color, see
Solving issues with color documents.
Paper handling issues
The following sections contains information about paper handling issues.
Wrong size/type media
Use the following procedure to troubleshoot and resolve wrong size or type media problems.
1 Make sure that the software program is selecting the correct media size or type.
2 Make sure that the printer driver for the software program is correctly installed, configured, and
capable of requesting the desired media size and type.
3 Make sure that the paper guides are touching the edges of the stack of media.
4 If the size of media requested is not loaded in the tray selected, the printer draws media from the
next default tray that contains the correct size. Load the correct media in the tray and make sure
that the tray is adjusted correctly. Load the tray with enough media to complete the print job.
(See the HP Color LaserJet 2600n User Guide for information about configuring the input trays.)
Cannot select a tray or feature to use
When you cannot select a tray or feature to use, use the following procedure to troubleshoot and
resolve problems.
1 When the size of media requested is not loaded in the tray selected, the printer draws media
from the next default tray that contains the correct size. Load the correct media in the tray and
make sure that the tray is adjusted correctly. Load the tray with enough media to complete the
print job. (See the HP Color LaserJet 2600n User Guide for information about configuring the
input trays.)
2 Make sure that the driver for the software program is correctly installed, configured, and capable
of requesting the desired media size and type, or feature.
Performance problems
Try the tips in this section if pages exit the device, but have nothing printed on them, or when the
device does not print any pages.
Table 6-9 Performance issues
Problem Cause Solution
Pages print but are totally blank.
The sealing tape might still be in the
print cartridges.
The document might contain blank
pages.
Verify that the sealing tape has been
completely removed from the print
cartridges.
Check the document that you are
printing to see if content appears on all
of the pages.
www.partshere.com Partshere Troubleshootingwww.partshere.com Partshere Troubleshooting
Page 28

Table 6-9 Performance issues (continued)
Problem Cause Solution
Pages print very slowly.
Pages did not print.
The device might be malfunctioning. To check the device, print a
Heavier media types can slow the print
job.
Complex pages will print slower. Proper fusing may require a slower
The device might not be pulling media
correctly.
The media is jamming in the device. Clear the jam.
The USB cable might be defective or
incorrectly connected.
Other devices are running on your
computer.
Configuration page.
Print on a different type of media.
print speed to ensure the best print
quality.
See Paper handling issues.
Ŷ Disconnect the USB cable at both
ends and reconnect it.
Ŷ Try printing a job that has printed
in the past.
Ŷ Try using a different USB cable.
The device might not share a USB
port. If you have an external hard drive
or network switchbox that is connected
to the same port as the device, the
other device might be interfering. To
connect and use the device, you must
disconnect the other device or you
must use two USB ports on the
computer.
www.partshere.com Partshere Troubleshootingwww.partshere.com Partshere Troubleshooting
Page 29

Functional tests (SERVICE ONLY)
Engine test print
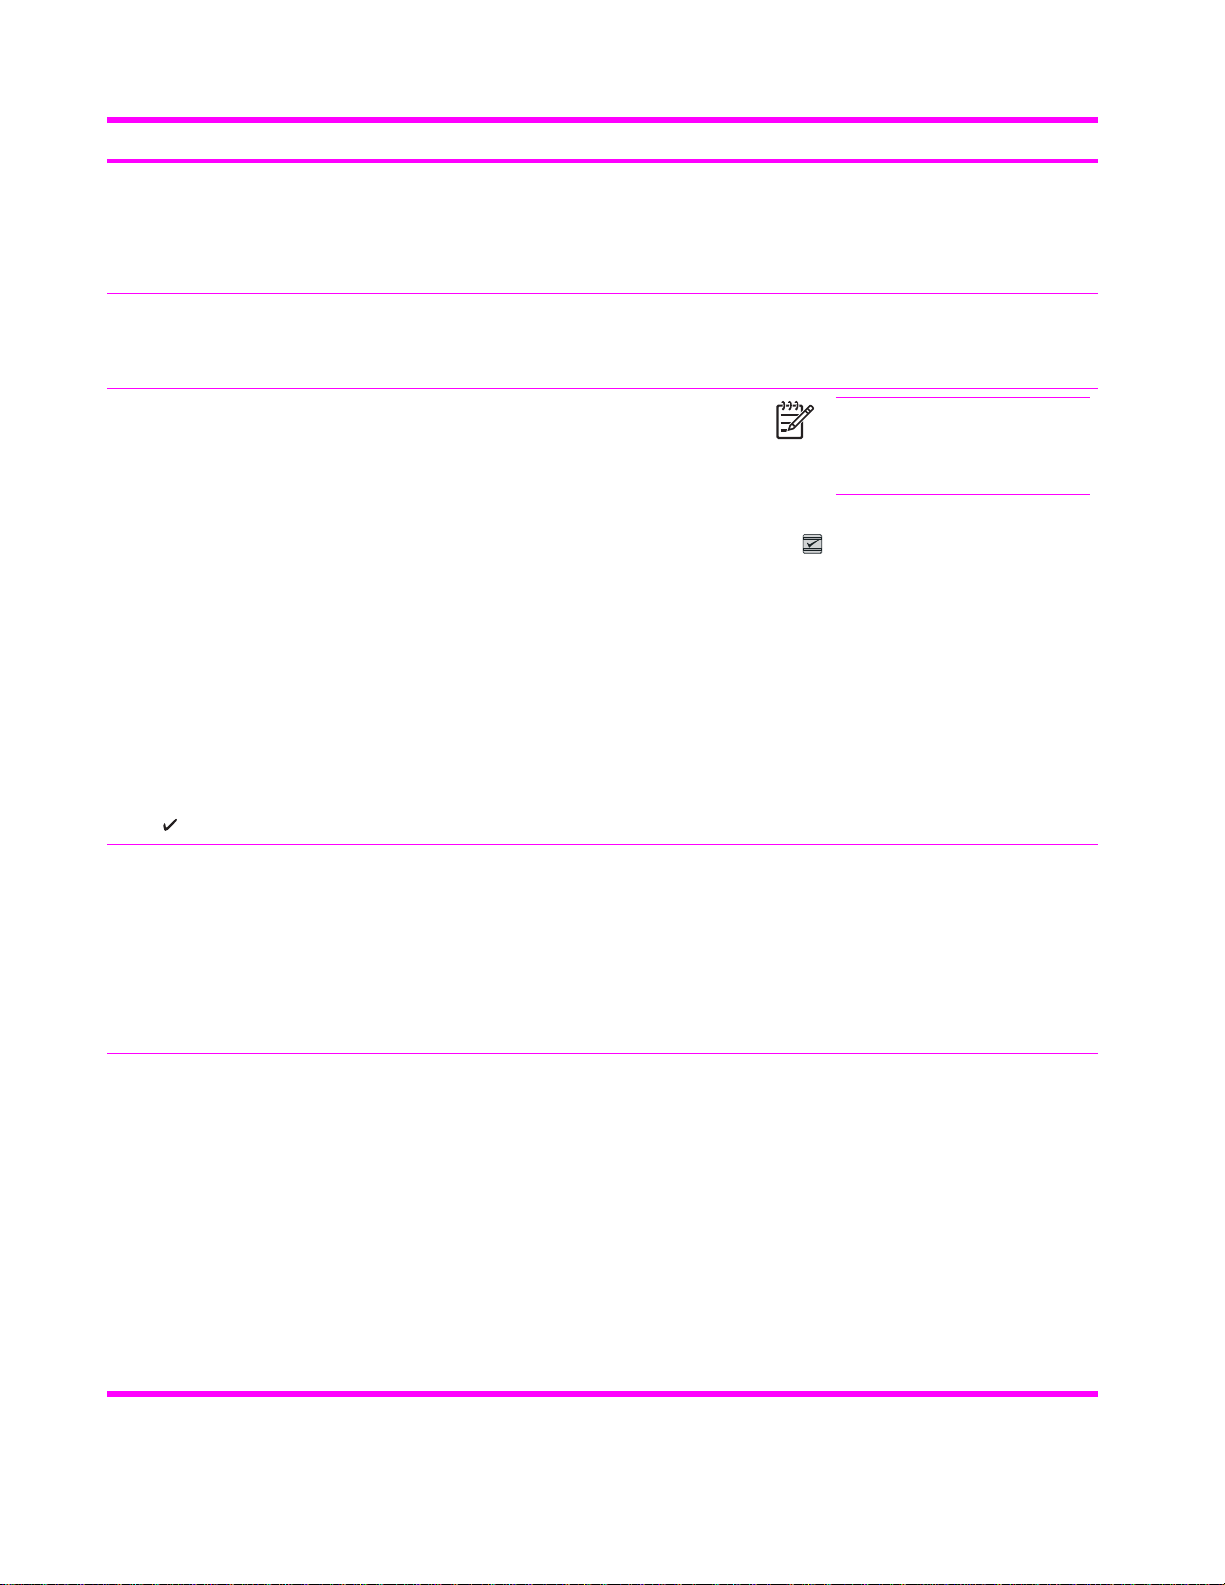
The engine test print is used to confirm whether the printer operates correctly or not. It is performed
by the engine controller.
If a malfunction occurs in the printer, perform an engine test print while the printer is in STBY mode
and then press the test print switch (on the rear side of the printer) once. A one-page test pattern of
horizontal lines will print as shown below.
Figure 6-4 Engine test print switch
1 Engine test print switch
www.partshere.com Partshere Troubleshootingwww.partshere.com Partshere Troubleshooting
Page 30

Service mode functions (SERVICE ONLY)
Cold reset
Cold-reset, which power-cycles the engine with a special button press, is not supported for this
printer. Instead, use the feature “Restore defaults” located in the Service menu to reset default
settings. For more information, see
NVRAM initializer
CAUTION NVRAM initialization will erase all network settings. Before performing NVRAM
initialization, print a Configuration page, which contains network setting information.
NVRAM init will perform the following functions:
Ŷ Resets all customer-accessible menu settings via control panel and software back to the factory
default settings
Ŷ Resets the language to the value set at the factory
Ŷ Resets the default media size to cold reset media size
Ŷ Resets the symbol set to PC-8
Use the following procedure to execute an NVRAM-init.
Service menu.
1 Turn off the printer.
2
Press and hold the
3 Turn on the printer.
4
When you see the message Permanent storage init displays, release the
(C
ANCEL JOB
When the NVRAM init is complete, the printer will return to the Ready state.
) buttons.
(S
ELECT
) and (C
ANCEL JOB
) buttons simultaneously.
(S
ELECT
) and
Super NVRAM initializer
CAUTION Super NVRAM initialization will erase all network settings. Before performing
Super NVRAM initialization, print a Configuration page, which contains network setting
information.
When a super NVRAM init is performed, the printer enters the Generic Product Mode, which
changes the language and country/region settings to “undefined.”
NOTE Super NVRAM init will erase all data stored in the protected NVRAM settings.
Use the following procedure to execute a super NVRAM init.
1 Turn off the printer.
2
Press and hold the
www.partshere.com Partshere Troubleshootingwww.partshere.com Partshere Troubleshooting
(L
EFT ARROW
) and (R
IGHT ARROW
) buttons simultaneously.
Page 31

3 Turn on the printer.
4
When you see the message Permanent storage init displays, release the (L
(R
IGHT ARROW
) buttons.
EFT ARROW
) and
When the super NVRAM init is complete, the printer will return to the Ready state.
Restoring page counts and serial number
A software utility is available on the Service and Support CD-ROM to restore page counts and serial
numbers when the formatter is replaced or when any of the following settings are lost:
Ŷ Color page count
Ŷ Total page count
Ŷ Formatter number
Ŷ Service ID
Ŷ USB serial number
To access the utility on the Service and Support CD-ROM, in the Library folder, double-click the
2600config.exe program. You can run the utility from the CD-ROM or copy it to your computer.
NOTE To use this program, the printer must be directly connected to your computer with a
USB cable.
Cleaning the ETB
To clean the ETB, use the following procedure:
1 Enter the Secondary service menu. For more information, see Secondary service menu.
2 Scroll through the menu and select C
3
Press the
(S
) button to start the cleaning mode.
ELECT
LEAN
ETB.
www.partshere.com Partshere Troubleshootingwww.partshere.com Partshere Troubleshooting
Page 32

Troubleshooting tools
The section describes the tools that can help you solve problems with your device.
Printer pages and reports
This section describes the pages and reports that help you diagnose and solve problems with the
device.
Demo page
To print the Demo page, press the (L
control panel simultaneously. You can also print this page from the HP Toolbox.
EFT ARROW
) and (R
IGHT ARROW
) buttons on the printer
www.partshere.com Partshere Troubleshootingwww.partshere.com Partshere Troubleshooting
Page 33

Configuration page
The Configuration page lists the current settings and properties of the printer. You can print a
Configuration page from the printer or HP Toolbox. To print the Configuration page from the printer,
complete the following steps.
1
Press the
2
Press the
3
Press the
4
Press the
EFT ARROW
(L
button (S
EFT ARROW
(L
button (S
) or the (R
).
ELECT
) or the (R
ELECT
) to print the Configuration page.
IGHT ARROW
IGHT ARROW
) buttons to select the Reports menu.
) buttons to select Config report.
Table 6-10 Configuration page
1 Product information. This section contains the following basic information about the printer:
Ŷ Product name
Ŷ Formatter number
Ŷ Serial number
Ŷ Service ID
Ŷ Firmware version
Ŷ Maximum print resolution
www.partshere.com Partshere Troubleshootingwww.partshere.com Partshere Troubleshooting
Page 34

2 Memory. This section lists memory-related information, such as the total memory that is installed.
3 Paper settings. This section lists information about the media type for each tray and about the type settings for
4 Page counts. This section lists the total number of pages printed, the number of color pages printed, and
5 DC controller version. This section lists the DC controller version.
6 USB settings. This section contains information for the USB setting options.
7 Extended print modes enabled. The following list contains the options for enabling extended print modes.
8 Status log. This section contains information about printer errors, including an error log code and the page count
9 Paper types. This section contains information about paper types that can be configured by the user. The default
10 Network settings. This section contains the following network information about the printer.
all the media that the printer supports.
information about paper jams.
Ŷ U=0 Hi speed
Ŷ U=4 Full speed
Ŷ U=5 Full speed auto switched from hi speed
Ŷ DM=0 Default setting
Ŷ DM=1 Extended print mode enabled
at which the error occurred. For a list of status log messages, see Table 6-5 Status log messages.
settings are Plain.
Ŷ Host name
Ŷ Hardware address
Ŷ LInk settings
Ŷ IP address information
Ŷ IP subnet mask
Ŷ IP default gateway
Ŷ WINS configuration information
Ŷ DHCP server and lease time information
Ŷ Preferred WINS server information
Ŷ mDNS name
11 Product settings. This section lists the following information that is gathered during software installation:
Ŷ Language
Ŷ Company name
Ŷ Jam recovery settings (if set to ON, the last page will reprint if there is a paper jam)
Ŷ I/O timeout information (default is 120 seconds)
www.partshere.com Partshere Troubleshootingwww.partshere.com Partshere Troubleshooting
Page 35

NOTE The color bars on the sides of the Configuration page represent 100%, 75%, 50%,
and 25% coverage.
Event log
Information for the last five events is available on the Configuration page under the Status log
section. For more information, see
Configuration page.
For a list of messages that only appear in the event log, see Status log only messages.
Supplies Status page
The Supplies Status page lists the remaining life of the HP print cartridges. It also lists the estimated
pages remaining, number of pages printed, and other supplies information. You can print a Supplies
Status page from the device or HP Toolbox. To print from the device, complete the following steps.
1
Press the
2
Press (S
3
Use the
4
Press (S
(L
EFT ARROW
ELECT
).
(L
EFT ARROW
ELECT
) button to print the Supplies Status page.
) or the (R
) or the (R
IGHT ARROW
IGHT ARROW
) buttons to select the Reports.
) buttons to select Supplies Status.
Table 6-11 Supplies Status page
1 Print cartridge area
2 Ordering information
3 Return and recycling information
www.partshere.com Partshere Troubleshootingwww.partshere.com Partshere Troubleshooting
Page 36

Fuser cleaning page
For information about fuser cleaning pages, see Cleaning page and To clean the fuser using
HP Toolbox.
Print quality troubleshooting pages
For more information about print quality troubleshooting pages, see HP Toolbox.
Control panel messages (error codes)
The majority of the control-panel messages are intended to guide the user through typical operation.
The control-panel messages indicate the status of the current operation, and include a page count on
the second line of the display, if appropriate. When the device is printing data, control-panel
messages indicate this status. In addition, alert messages, warning messages, and critical error
messages indicate situations that might require some action.
Alert and warning messages
Control panel message Description Recommended action
Device error
Press
Door open The printer door is open. The door must be closed before printing
Engine comm.
error
Invalid driver You are using the incorrect printer driver. Reselect the printer driver appropriate for
Invalid entry Invalid data or response. Correct the entry.
Jam in
tray 2
Jam in
tray 3
Jam in
print paper path
Jam in
Cartridge area
An internal error occurred in the device.
The device experienced an internal
communication error.
A paper jam has occurred in Tray 2.
A paper jam has occurred in Tray 3.
A paper jam has occurred in the print path. Open the door and clear the jam. Then
A paper jam has occurred in the print path. Open the door and clear the jam. Then
Press (S
can continue.
This is a warning message only. Job output
might be affected.
your device.
Clear the jam, and then press the
(S
) button on the control panel.
ELECT
Clear the jam, and then press the
ELECT
(S
) button on the control panel.
press the (S
panel.
press the (S
panel.
) to resume the job.
ELECT
) button on the control
ELECT
ELECT
) button on the control
Jam in
Output bin
Load paper The HP Color LaserJet 2600n printer is out
Load Tray X
[TYPE] [SIZE]
A paper jam has occurred in the output area.
of paper.
The printer is processing job, but the tray
indicated is empty.
Clear the jam, and then press the
ELECT
(S
) button on the control panel.
Please load specified paper type into the
tray indicated.
Please load specified paper type and size
into the tray indicated.
www.partshere.com Partshere Troubleshootingwww.partshere.com Partshere Troubleshooting
Page 37

Control panel message Description Recommended action
Manual feed
Press
Memory is low
Press
Misprint
Press
No paper pickup
Press
Unexpected size
in tray X
Critical error messages
The printer is waiting for paper in the tray
indicated.
The device memory has been almost
completely filled.
The printed pages have been incorrectly
placed on the paper.
The print engine has failed to pick up a
piece of media.
Unexpected paper size error. The media
size loaded in the tray does not match the
media size configured for the tray.
Load the paper as indicated.
Allow the device to finish the job, or press
ELECT
(S
) to cancel the job.
Break the job into smaller jobs that contain
fewer pages.
To continue, press the (S
ELECT
) button
on the control panel.
In Tray 1, verify that the media was inserted
far enough into the tray. In Tray 2 or
optional Tray 3, verify that the paper-length
guide is in the correct position for the media
size that you are using.
Reload the media in the input tray and
(S
) to continue the job.
press
ELECT
Verify that the print settings are set to the
specified media in the tray.
Control panel message Description Recommended action
50.1 Fuser Error
The device has experienced an internal
hardware error.
Turn off the device, wait at least
25 minutes, and then turn on the device.
50.2 Fuser Error
50.3 Fuser Error
50.1 Fuser Error—low temperature
50.3 Fuser Error—slow fuser
If a surge protector is being used, remove
it. Plug the device directly into the wall
socket. Use the power switch to turn on the
device.
50.2 Fuser Error—high temperature
If this does not clear the error, replace the
fuser.
51.20 Error
51.21 Error
The device has experienced an internal
hardware error.
51.20 Error—black scanner error
Turn off the power by using the power
switch, wait at least 30 seconds, and then
turn on the power and wait for the device to
initialize.
51.22 Error
51.23 Error
51.21 Error—cyan scanner error
51.22 Error—magenta scanner error
51.23 Error—yellow scanner error
If a surge protector is being used, remove
it. Plug the device directly into the wall
socket. Use the power switch to turn the
device on.
Laser scanners are not replaceable.
Replace the engine.
55.1 Error DC controller error. The device has
experienced an internal hardware error.
Turn off the power by using the power
switch, wait at least 30 seconds, and then
turn on the power and wait for the device to
initialize.
www.partshere.com Partshere Troubleshootingwww.partshere.com Partshere Troubleshooting
Page 38

Control panel message Description Recommended action
If a surge protector is being used, remove
it. Plug the device directly into the wall
socket. Use the power switch to turn the
device on.
Check the engine (DCC) firmware version.
Update if needed. Replace the DCC if a
firmware upgrade does not resolve the issue.
57 Fan Error
Turn off then on
The device has experienced a problem with
its internal fan.
Turn off the power by using the power
switch, wait at least 30 seconds, and then
turn on the power and wait for the device to
initialize.
The fan is not replaceable. Replace the
engine.
Supplies messages
Control panel message Description Recommended action
10.000x Supply error E-label cannot be read or print cartridge is
10.100x Supply error
alternates with
Reinstall
not properly installed.
10.0000 = Black print cartridge
10.0001 = Cyan print cartridge
10.0002 = Magenta print cartridge
10.0003 = Yellow print cartridge
A print cartridge is missing.
10.1000 = Black print cartridge
10.1001 = Cyan print cartridge
1 Reinstall print cartridge.
2 Power cycle device.
3 If the problem is not solved, replace the
cartridge.
Install the correct print cartridge.
The supplies gauge will display the
consumption levels of print cartridges.
HP supplies
installed
One of the following messages may display:
Incorrect black
Incorrect cyan
Incorrect magenta
Incorrect yellow
One of the following messages may display:
Install black cartridge
Install cyan cartridge
10.1002 = Magenta print cartridge
10.1003 = Yellow print cartridge
The printer transitioned from having one or
more non-HP supplies to having all HP
supplies installed.
The <color> print cartridge not installed
correctly.
The out threshold has been reached. The supply must be replaced before
No action required.
Reinstall the <color> print cartridge.
printing can continue.
www.partshere.com Partshere Troubleshootingwww.partshere.com Partshere Troubleshooting
Page 39

Control panel message Description Recommended action
Install magenta cartridge
Install yellow cartridge
The supplies gauge will display the
consumption levels of print cartridges.
Install supplies
The supplies gauge will display the
consumption levels of print cartridges.
One of the following messages may display:
Non HP black
installed
Non HP cyan
installed
Non HP magenta
installed
Non HP yellow
installed
alternates with
To accept
Press
Non HP supply
in use
alternates with
Ready
The supplies gauge will display the
consumption levels of print cartridges.
Multiple supplies are not installed. Install correct print cartridges.
A non-HP <color> cartridge is installed.
NOTE Any printer repair required
as a result of using a non-HP or
unauthorized supply is not covered
under warranty.
To use this cartridge, override by pressing
(S
) button on the control panel.
ELECT
A non-HP (cloned or refilled) supply has
been installed that is not made by HP and
was overridden.
the
If you believe you purchased an HP supply,
please call the HP fraud hotline at
1-877-219-3183 or go to the HP anticounterfeit website at http://www.hp.com/go/
anticounterfeit. Service or repairs required
as a result of using non-HP supplies is not
covered under HP warranty.
One of the following messages may display:
Order black
The <color> print cartridge low threshold
has been reached.
For more information go to the HP Color
LaserJet 2600n toolbox and click Supplies
Status. To order supplies online, click
Order Supplies.
cartridge,
Order cyan
cartridge,
Order magenta
cartridge, or
Order yellow
cartridge
www.partshere.com Partshere Troubleshootingwww.partshere.com Partshere Troubleshooting
Page 40

Control panel message Description Recommended action
alternates with
Ready
The supplies gauge will display the
consumption levels of print cartridges.
ORDER SUPPLIES
alternates with
Ready
The supplies gauge will display the
consumption levels of print cartridges.
One of the following messages may display:
Replace black cartridge
Replace cyan cartridge
Replace magenta cartridge
Replace yellow cartridge
Replace Supplies
The supplies gauge will display the
consumption levels of print cartridges.
Replace supplies
Override in use
alternates with
Ready
Multiple supplies are low. For more information go to the HP Color
The out threshold has been reached. The supply must be replaced before
The out threshold has been reached. The supply must be replaced before
Supply override in use. The user has
decided to continue printing beyond the out
point. A supply is low and using Override
may result in unsatisfactory print quality.
LaserJet 2600n toolbox and click Supplies
Status. To order supplies online, click
Order Supplies.
printing can continue.
printing can continue.
Replace the supply that is low.
The supplies gauge will display the
consumption levels of print cartridges.
Replace supply.
Override in use
alternates with
Ready
The supplies gauge will display the
consumption levels of print cartridges.
Supply override in use. The user has
decided to continue printing beyond the out
point. A supply is low and using Override
may result in unsatisfactory print quality.
Replace the supply that is low.
www.partshere.com Partshere Troubleshootingwww.partshere.com Partshere Troubleshooting
Page 41

Control panel message Description Recommended action
Unauthorized
supply in use
alternates with
Ready
The supplies gauge will display the
consumption levels of print cartridges.
One of the following messages may display:
Unauthorized yellow
Unauthorized magenta
Unauthorized cyan
Unauthorized black
A new supply has been installed that is not
made by HP and was overridden.
A new supply has been installed that is not
made by HP. One of these four messages
is displayed until an HP supply is installed
or
(S
) is pressed.
ELECT
If you believe you purchased an HP supply,
please call the HP fraud hotline at
1-877-219-3183. Service or repairs
required as a result of using non-HP
supplies is not covered under HP warranty.
If you believe you purchased an HP supply,
please call the HP fraud hotline at
1-877-219-3183. Service or repairs
required as a result of using non-HP
supplies is not covered under HP warranty.
To continue printing, press
Status messages
Status messages are used to inform the user of the current state of the system. Status messages do
not require user action or acknowledgement, and are for information only.
Control panel message Description Recommended action
(S
ELECT
).
Calibrating... The printer is calibrating. No action is required.
Cleaning... The printer is in cleaning mode. No action is required.
Status log only messages
The following messages are not displayed on the control panel. They are printed on the Status log.
Table 6-12 Status log only messages
Error log code Description
54.06 Color density sensor error
54.10 Color plane registration sensor(s) error
54.11 Yellow density out of range
54.12 Magenta density out of range
54.13 Cyan density out of range
54.14 Black density out of range
Service menu
Use the control-panel Service menu to troubleshoot device problems.
www.partshere.com Partshere Troubleshootingwww.partshere.com Partshere Troubleshooting
Page 42

Restoring the factory-set defaults
Restoring the factory-set defaults returns all of the settings to the factory defaults.
To restore the factory-set defaults
1
Use the
(S
2
Use the
press (S
ELECT
).
EFT ARROW
(L
(L
EFT ARROW
ELECT
).
) or the (R
) or the (R
IGHT ARROW
IGHT ARROW
) button to select Service, and then press
) button to select Restore defaults, and then
The device automatically restarts.
General print quality issues
The following examples depict letter-size paper that has passed through the device short edge first.
These examples illustrate problems that would affect all of the pages that you print, whether you print
in color or in black only. The topics that follow list the typical cause and solution for each of these
examples.
Table 6-13 General print quality issues
Problem Cause Solution
Print is light or faded.
The media might not meet
HP specifications.
One or more print cartridges might be
low. If you are using non-HP print
cartridges, no messages appear on the
device control panel or in the
HP Toolbox.
Use media that meets HP specifications.
Replace any low print cartridges.
If none of the print cartridges is low or
empty, remove the print cartridges one
at a time and inspect the toner roller in
each to see if the roller is damaged. If
so, replace the print cartridge.
Toner specks appear.
Dropouts appear. A single sheet of print media might be
The media might not meet HP
specifications.
The paper path might need cleaning. Clean the paper path. See the
defective.
The moisture content of the paper is
uneven or the paper has moist spots
on its surface.
Print the Supplies Status page to check
the remaining life.
Use media that meets HP specifications.
HP Toolbox online Help.
Try reprinting the job.
Try different paper, such as highquality paper that is intended for color
laser printers.
www.partshere.com Partshere Troubleshootingwww.partshere.com Partshere Troubleshooting
Page 43

Table 6-13 General print quality issues (continued)
Problem Cause Solution
Vertical streaks or bands appear on the
page.
The amount of background toner
shading becomes unacceptable.
The paper lot is flawed. The
manufacturing processes can cause
some areas to reject toner.
One or more print cartridges might be
low or defective. If you are using nonHP print cartridges, no messages
appear on the device control panel or
in the HP Toolbox.
The media might not meet HP
specifications.
Try different paper, such as highquality paper that is intended for color
laser printers.
Replace any low print cartridges.
Use a different paper with a lighter
basis weight.
Toner smears appear on the media.
The toner smears easily when touched.
Very dry (low humidity) conditions can
increase the amount of background
shading.
One or more print cartridges might be
low. If you are using non-HP print
cartridges, no messages appear on the
device control panel or in the
HP Toolbox.
The media might not meet HP
specifications.
If toner smears appear on the leading
edge of the paper, the media guides
are dirty, or debris has accumulated in
the print path.
The device is not set to print on the
type of media on which you want to
print.
Check the device environment.
Replace any low print cartridges.
Use media that meets HP specifications.
Clean the media guides and the paper
path.
In the printer driver, select the Paper
tab and set Type is to match the type
of media on which you are printing.
Print speed might be slower if you are
using heavy paper.
The media might not meet HP
specifications.
Use media that meets HP specifications.
www.partshere.com Partshere Troubleshootingwww.partshere.com Partshere Troubleshooting
Page 44

Table 6-13 General print quality issues (continued)
Problem Cause Solution
The paper path might need cleaning. Clean the device.
Marks repeatedly appear at even
intervals on the printed side of the page.
Marks repeatedly appear at even
intervals on the unprinted side of the
page.
a
Aa
The device is not set to print on the
type of media on which you want to
print.
Internal parts might have toner on them. The problem typically corrects itself
The paper path might need cleaning. Clean the device.
The fuser might be damaged or dirty. Clean using instructions in HP Toolbox.
A print cartridge may have a problem. To determine which cartridge has a
Internal parts might have toner on them. The problem typically corrects itself
The paper path might need cleaning. Clean the device.
The fuser might be damaged or dirty. Clean using instructions in HP Toolbox.
In the printer driver, select the Paper
tab and set Type is to match the type
of paper on which you are printing.
Print speed might be slower if you are
using heavy paper.
For more information, see
image defect ruler.
after a few more pages.
problem, print the PQ diagnostics page
from HP Toolbox.
after a few more pages.
For more information, see
image defect ruler.
Repetitive
Repetitive
The printed page contains misformed
characters.
The media might not meet HP
specifications.
If characters are incorrectly formed so
that they produce a wavy effect, the
laser scanner might need service.
Use a different paper, such as highquality paper that is intended for color
laser printers.
Verify that the problem also occurs on
the Configuration page.
www.partshere.com Partshere Troubleshootingwww.partshere.com Partshere Troubleshooting
Page 45

Table 6-13 General print quality issues (continued)
Problem Cause Solution
The printed page is curled or wavy.
Text or graphics are skewed on the
printed page.
The device is not set to print on the
type of media on which you want to
print.
The media might not meet HP
specifications.
Both high temperature and humidity
can cause paper curl.
The media might be loaded incorrectly. Make sure that the paper or other print
The media might not meet HP
specifications.
In the printer driver, select the Paper
tab and set Type is to match the type
of paper on which you are printing.
Print speed might be slower if you are
using heavy paper.
Use a different paper, such as highquality paper that is intended for color
laser printers.
Check the device environment.
media is loaded correctly and that the
media guides are not too tight or too
loose against the stack.
Use a different paper, such as highquality paper that is intended for color
laser printers.
The printed page contains wrinkles or
creases.
Toner appears around the printed
characters.
The media might be loaded incorrectly. Verify that the media is loaded
The media might not meet HP
specifications.
The media might be loaded incorrectly. Turn over the stack of paper in the tray.
If large amounts of toner have
scattered around the characters, the
paper might have high resistivity.
correctly and that the media guides are
not too tight or too loose against the
stack.
Turn over the stack of paper in the
input tray, or try rotating the paper 180°
in the input tray.
Use a different paper, such as highquality paper that is intended for color
laser printers.
Use a different paper, such as highquality paper that is intended for color
laser printers.
www.partshere.com Partshere Troubleshootingwww.partshere.com Partshere Troubleshooting
Page 46

Table 6-13 General print quality issues (continued)
Problem Cause Solution
An image that appears at the top of the
page (in solid black) repeats farther
down the page (in a gray field).
Software settings might affect image
printing.
The order of images printed might
affect printing.
A power surge might have affected the
device.
In your software program, change the
tone (darkness) of the field in which the
repeated image appears.
In your software program, rotate the
whole page 180° to print the lighter
image first.
Change the order in which the images
are printed. For example, have the
lighter image at the top of the page,
and the darker image farther down the
page.
If the defect occurs later in a print job,
turn the device off for 10 minutes, and
then turn on the device to restart the
print job.
Solving issues with color documents
This section describes issues that can occur when you print in color.
Table 6-14 Color document issues
Problem Cause Solution
Only black is printing when the
document should be printing in color.
One or more colors are not printing, or
are inaccurate.
Color mode is not selected in your
program or printer driver.
The correct printer driver might not be
selected in the program.
The device might not be correctly
configured.
Sealing tape might be on the print
cartridges.
The media might not meet HP
specifications.
The device might be operating in
excessively humid conditions.
One or more print cartridges might be
low. If you are using non-HP print
cartridges, no messages appear on the
device control panel or in the
HP Toolbox.
Select color mode instead of grayscale
mode.
Select the correct printer driver.
Print a Configuration page.
Verify that the sealing tape has been
completely removed from the print
cartridges.
Use a different paper, such as highquality paper that is intended for color
laser printers.
Verify that the device environment is
within humidity specifications.
Replace any low print cartridges.
The control panel is set for override. Replace low or empty print cartridges.
www.partshere.com Partshere Troubleshootingwww.partshere.com Partshere Troubleshooting
Page 47

Table 6-14 Color document issues (continued)
Problem Cause Solution
A color is printing inconsistently after
you load a new print cartridge.
AaBbCc
AaBbCc
AaBbCc
AaBbCc
AaBbCc
The colors on the printed page do not
match the colors as they appear on the
screen.
AaBbCc
AaBbCc
AaBbCc
AaBbCc
AaBbCc
Another print cartridge might be low. If
you are using a non-HP print cartridge,
it might be low or empty but you will
receive no indication.
The control panel is set for override. Replace low or empty print cartridges.
The colors on your computer monitor
might differ from the device output.
If extremely light colors or extremely
dark colors on screen are not printing,
your software program might interpret
extremely light colors as white or
extremely dark colors as black.
The media might not meet HP
specifications.
Remove the print cartridge for the color
that is printing inconsistently and
reinstall it.
Select Screen Match in the Color tab
of the printer driver.
If possible, avoid using extremely light
or extremely dark colors.
Use a different paper, such as highquality paper that is intended for color
laser printers.
The finish on the printed color page is
inconsistent.
The media might be too rough. Use a smooth paper or print media,
such as a high-quality paper that is
made for color laser printers.
Generally, smoother media produces
better results.
www.partshere.com Partshere Troubleshootingwww.partshere.com Partshere Troubleshooting
Page 48

HP Toolbox
HP Toolbox
HP Toolbox is a Web application that you can use for troubleshooting tasks.
To view HP Toolbox
Open HP Toolbox in one of these ways:
Ŷ On the Windows desktop, double-click the HP Toolbox icon.
Ŷ On the Windows Start menu, click Programs (All Programs in Windows XP), click HP, click
HP Color LaserJet 2600n, and then click HP Color LaserJet 2600n toolbox.
Troubleshooting tab
HP Toolbox includes a Troubleshooting tab that contains links to the following main pages:
Ŷ Clearing Jams. View information about locating and clearing jams.
Ŷ Print Problems. View Help topics that can help you solve print problems.
Ŷ Troubleshooting Tools. Employ such troubleshooting tools as a cleaning page or a color
troubleshooting page to maintain the device.
Ŷ Animated Demonstrations. View animated Help demonstrations for the device.
NOTE Other tabs on HP Toolbox might be helpful in troubleshooting device problems.
Print quality troubleshooting pages
The following features are available from the HP Toolbox.
Printer calibration
Calibrations are performed at regular intervals. For best print quality, a calibration can be performed
from the control panel. For information about calibrating the printer at the control panel, see
calibration.
Calibrating the printer using HP Toolbox
Use the following steps to calibrate the printer using HP Toolbox.
1 Open the HP Toolbox.
2 On the Troubleshooting tab, click Calibrate now.
Printer
Cleaning page
The device features a special cleaning mode to clean the paper path.
www.partshere.com Partshere Troubleshootingwww.partshere.com Partshere Troubleshooting
Page 49

NOTE If you have access to HP Toolbox, HP recommends cleaning the paper path by using
HP Toolbox.
1 Make sure that the printer is turned on and in the Ready state.
2 Open the HP Toolbox.
3 On the Troubleshooting tab, click Troubleshooting Tools, and then click Print. A page with a
pattern prints from the printer.
4 At the printer, remove any print media in Tray 2 or optional Tray 3.
5 Remove the page that printed and load it face-down into Tray 2 or optional Tray 3.
6 At the computer, press the Clean button.
Configuration page
The Configuration page lists the current settings and properties of the printer. You can print a
Configuration page from the printer or HP Toolbox. To print the Configuration page from the printer,
Configuration page.
see
www.partshere.com Partshere Troubleshootingwww.partshere.com Partshere Troubleshooting
Page 50

Diagnostic resources
Reports menu
The Reports menu contains the following diagnostic tools:
Ŷ Demo page
Ŷ Menu structure report
Ŷ Configuration report
Ŷ Color supplies status
For a more detailed description about the diagnostic tools available from the Reports menu, see
Reports menu in the Print problems section.
Network/Web diagnostics tools
For information on available network and Web diagnostic tools, go to http://www.hp.com/support/
clj2600n.
www.partshere.com Partshere Troubleshootingwww.partshere.com Partshere Troubleshooting
Page 51

Repetitive image defect ruler
Use a repetitive image defect ruler to measure occurrences of repetitive image defects to help solve
image quality problems. Place the ruler next to the first occurrence of the defect on the page. Find
the distance between identical defects and see the
identify the component that is causing the defect.
Table 6-15 Repetitive image defects
Measurement Component
24.7 mm (0.97 inch) Developer sleeve
26.7 mm (1.05 inches) Charge roller
32.9 mm (1.3 inches) RS roller
37.7 mm (1.48 inches) Transfer roller
54.5 mm (2.15 inches) ETB rollers
56.6 mm (2.22 inches) Fuser sleeve
62.8 mm (2.47 inches) Pressure roller
75.4 mm (2.97 inches) OPC
Table 6-15 Repetitive image defects table to
www.partshere.com Partshere Troubleshootingwww.partshere.com Partshere Troubleshooting
Page 52

Firmware and software updates
Use the following procedure to periodically check for firmware and software updates.
1 Go to
2 Select Download drivers and software and then select the appropriate operating system for
3 Follow the instructions provided on the download pages.
http://www.hp.com/support/clj2600n.
you computer.
www.partshere.com Partshere Troubleshootingwww.partshere.com Partshere Troubleshooting
 Loading...