


RGB745WEA3WW
wwwoGEAppfiances.com
_!_ Safety Instntdions ....... 9-7
Operating IndrucCions
'Aluminum Foil ........... ]3
(;lock and Timer ....... 15, 16
()\'e n ................ 10-31
Baking and Roasting ...... 13
Broiling, Broiling Guide . .. 14
()yen Control ........ l 0, l l
Power Outag> ........ 12, 16
Preheating .............. 13
Sabbath Feature ...... 19, 90
Self-Cleaning ......... 92, 93
Special Features ......... 18
Thermostat Adjusunent ...91
Timed Baking
and Roasting ............ 17
Smt_ace Cooking ......... 8, 9
Care and Cleaning
Broiler Pan and Grid ...... 28
Burner Assemhlv ....... 24-26
Burner Grams ............ 27
Control Panel and I{mohs ...30
Cookmp SurtZace .......... 27
Door Removal ............ 28
Kick Panel ............... 29
Lift-up Cookmp ........... 29
Oven Bouom ............. 28
Oven Light Replacement ...31
()yen Vents .............. 30
Self-Cleaning .......... 22, 23
Shelx_s .................. 31
Stainless Steel SnrPaces ..... 27
Storag_ Drawer . .......... 29
Inslallation
Instructions ........... 32-43
Air Adjustment ........... 42
Ai_ti-Tip Device ........ 35, 43
Checking Burner Ignition...41
Connecting tile Rang>
to Gas ............... 36-39
Dimensions and Clearances .34
Electrical Connections . .40, 41
Le_>ling tile Rang> ........ 42
Location ................. 35
LP ...................... 43
Troubleshooting
Tips ................. 44-47
Accessories .............. 53
Consumer Support
Consumer
Support .......... Back Coxer
Product Registration .... 49, 50
_'arrantv for Customers
in Canada ............... 55
¼'arrantv tbr Customers
in tile U.S.A .............. 54
JGBP2 4
JGBP26
jc, P2s
J(;BP32
R(;B 740
R(;B 745
RGB746
RGB790
Write the model and serial
numbers here:
Model #
Serial #
You can find them on a label on
the fl_ont of the range behind the
storage drawer or kick panel.
18308MOP162 49_85075 04-04Jfl

IMPORTANTSAFETYINFORMATION.
READALLINSTRUCTIONSBEFOREUSING.
WARNING!
For your safe_ the information in this manual must be followed to minimize the risk of fire or explosion,
electric shock, or to prevent property damage, personal injury, or loss of life.
®
WARNING!
ANTI-TIPDEVICE
, ALL RANGES CAN TIP
INJURY TO PERSONS
COULD RESULT
INSTALL AN_ tiP
DEVICES PACKED WITH
RANGE
SEE INSTALLATION
INSTRUCtiONS
WARNING:If the information
in this manual is not followed exactly,
a fire or explosion may result causing
property damage, personal injury
or death.
-- Do not store or use gasoline or other
flammable vapors and liquids in the
vicinity of this or any other appliance.
- WHATTODOIF YOU
SMELLGAS
Do not try to light any appliance.
Do not touch any electrical switch;
do not use any phone in your
building.
Immediately call your gas supplier
from a neighbor's phone. Follow the
gas supplier's instructions.
If you cannot reach your gas supplier,
call the fire department.
-- Installation and service must be
performed by a qualified installer,
service agency or the gas supplier.
ANTI-TIPDEVICE
All rangescan tip and injury could result.
Toprevent accidental tipping of the range, attach it to the wall by installing the Anti--tip device supplied.
If the Anti--tip device supplied with the range does not fit this application, use the universal Anti--17p
device WB2X7909.
Tocheck if the device is installed and engaged properly, carefully tip the range forward. TheAnti--tip
device should engage and prevent the range from tipping over.
If you pull the range otlt tiom tile wall for any reason, make stlre file device is properly engag>d
when you push the range back against the wall. If it is not, flmre is a possible risk of file rang>
tipping ox>r and causing i,)ju_ T if you or a child stand, sit or lean on an open door
Please refer to the And-Tip device infollnadon in fills manual. Failure m take fills precaution
could result in tipping of tile rang_ and iI)jtlI>
www.GEAppliances.com
WARNING!
IMPORTANTSAFETYNOTICE
The California Safe Drinking Water and Toxic Enforcement Act requires the Governor of California to
publish a list of substances known to the state to cause birth defects or other reproductive harm, and
requires businesses to warn customers of potential exposure to such substances.
Gasappliances can cause minor exposure tofour of these substances, namely benzene, carbon
monoxide, formaldehyde and soot, caused primarily by the incomplete combustion of natural gas or
LP fuels. Properly adjusted burners, indicated by a bluish rather than a yeflow flame, will minimize
incomplete combustion. Exposure to these substances can be minimized by venting with an open
window or using a ventilation fan or hood.
SAFETYPRECAUTIONS
Have the installer show you the location of the range gas shut-off valve and how to shut it off if necessary.
Hate your rang_ installed and properly Plug your rang_ into a 190_\_lt grounded
grounded 1)y a qualified installer, in
accordance with the Installation Insuucfions.
Any adjustment and service should be
performed only 1)yqualified gas rang_
installers or service technicians.
Do not attempt to repair or replace any
part of your range unless it is specifically
recommended in this manual. All other
service should be refened to a qna]ified
technician,
outlet only. Do not remove the round
grounding prong from dm ping. If in doubt
about the grounding of the home electrical
system, it is your personal responsibility and
obligation to haxe an ungrounded outlet
replaced wifll a properly grounded,
d_tee-prong outlet in accordance with
the National Electrical Code. Do not use
an exmnsion cord with this appliance.
3

IMPORTANTSAFETYINFORMATION.
READALLINSTRUCTIONSBEFOREUSING.
4
SAFETYPRECAUTIONS
Locam the range, out of kitchen traffic paflt
arrd out of drafty locations to prex'ent poor
air citvulafion.
Be sure all packaging materials are remox.ed
flom the rang.e before operaOng it to
prevent rite. or smoke damage, should the
packaging material ignite.
Be sure your range, is correctly adjusted by
a qualified service technician or installer for
the type of gas (naun_al or LP) that is to be
used. Your rang.e can be corwermd for use
with either type of gas. See the Installation
of the range section.
WARNING: teseadjnstmentsmnst
be made by a qualified service technician
in accordance with the manuthcturer's
irrsmtcfions arrd all codes arrd requirements
of the authority havingjnrisdicoon. Failure
m follow these irrstructions could _esult in
serious ir_jmT or property damage.. The
qualified agenQ' performing this work
assumes responsibility for tire conversion.
After prolonged use of a range., high floor
mmperaun_es m W result and many floor
cox.>rings will not wiflrstand this kind of use.
Ne_.er irrsmll dre range, ox.er viwl die or
linoleunr that cannot withstand such type
of use. Nex.er irrstall it directly ox.er irrtelJor
kitchen carpeOng.
Do not lem.e childlen alone or unatwnded
where a range, is hot or in operaOon. They
could be seriously burned.
Do not allow anyone to climb, stand or hang
on the ox.en door; storage, drawe_; wamfing
drawer or cooktop. They could damage, the
range, and even tip it ove_; causing sex.ere
persona] irljnly'.
CAUTION: temsofinterestto
children should not be stated in cabinets
abox.e a range, or on tire backsplash of a
range--<:hildten climl)ing on tire range.
m reach items could be selJously injured.
,& WARNING:NEVERusethis
appliance as a space heater to heat or
warm tire room. Doing so may result
iracarbon monoxide poisoning arrd
ox.edteadng of the oven.
Nexer wear loose fitting or hanging garments
while using the appliance. Be car>rid when
reaching for items stored in cabinets over the
range.. Flammable mamrial could be ignimd
if brought in corrtact with flame or hot ox.en
sniP, tces arid may cause se\.ere bnlTrS.
Do not store flammable mamrials in an
oven, a range, storage drawel; a wanning
drawer or near a cookmp.
Do not store or use combustible mamrials,
gasoline or other flammable vapors and
liquids in the vicinity of this or arp¢ other
appliance.
Do not let cooking gxease or other
flammable materials accumulam in or
near tire range..
Do not rise water on grease fires. Nex.er pick
up a flaming pan. Turn fire corm-ols off:
Smother a flaming pan on a surface burner
by cox.>ring the pan completely with a
well-fitting lid, cookie sheet or fiat uay.
Use a multi-puq)ose dr T chemical or
foam-type fire extinguisher
Flaming grease outside a pan can be put
out by co\.e_-ing it with baMng soda at;
if available, 1)y using a multi-purpose di T
chemical or foam-type fire exting-uishen
Flame in the oven can be smothered
completely by closing the ox.en door arrd
turning tire corrtrol to off or by using a
nmlti-purpose dU chemical or foam-type
fire exfinguishen
i,et rite burner grates and other surfaces
cool before ranching them or leaving fltem
where childlen can teach them.
Never block tire \.ents (air openings) of the
range.. They provide tire air inlet arrd outlet
that are necessa U for rite range, to operate
I)ioperly with conect combnstion. Air
opening_ ate. locamd at fire rear of the
cooktop, at fit> mp arrd bottom of the oven
door; and at the bottom of the range, under
fit> kick panel or storage, drawer
Large. scrawhes or impacts to glass doors can
lead to broken or shatteied glass.

www.GEAppliances.com
WARNING!
SURFACEBURNERS
Use proper pan size--avoid pans that are unstable or easily tipped. Select cookware having fiat bottoms
large enough to cover burner grates. To avoid spi//overs, make sure cookware is large enough to contain
the food properly. This will both save cleaning time andprevent hazardous accumulations of food, since
heavy spattering or spi/Iovers left on range can ignite. Usepans wi£hhandles that can be easily grasped
and remain cool,
Always use the LITE position when igniting
file top burners and make sure the burners
hme ignited.
Nexer leave fl_e sur]Bace burners unattended
at higt_ flame setdng:s. Boiloxers cause
smoking and greasy spilloxers that may
catch on fire.
Adjust the top burner flame size so it
does not exmnd beyond the edge of the
cookwaie. Excessixe flame is hazardous.
Use only dU pot holders--moist or damp
pot holders on hot snrfaces may resnlt in
bums from steam. Do not let pot holders
come near open flames when lifting
cookware. Do not use a towel oi" other
bulky c]ofll in place of a pot holder.
XA]mn using gtass cookware, make sure it
is designed for top-of-range cooking.
To minimize the possibility of bums,
ignition of flammable materials and spillage,
turn cookware handles toward the side or
back of fl_e range without extending oxer
adjacent burners.
Careflllly watch tbods being flied at a high
flame setting.
Always heat flit slowly, and watch as it heats.
Do not leme any imms on the cooktop. The
hot air from the xent m W ignim flammable
items and will increase pressure in closed
containers, which may cause diem to burst.
If a combinaoon of oils or fiatswill be used in
flTing, stir together befoie heating or as fats
meh slowly
Use a deep fat thermometer whene\er
possible to prexent ovedleadng fiat beyond
the smoking point.
Use fl_e least possible amount of ]Batfor
effective shallow or deep-fat flTing. Filling
the pan too dill of ]Batcan cause spillovers
when food is added.
'_A'hei1 flaming foods are under d_e hood,
Um_ the ]Ban off. The ]Ban, if operating, may
spread the flames.
Do not use a wok on the cooking surface
if the wok has a round metal ring that is
placed oxer the bm_er gTate to support
the wok. This Iing acts as a heat trap,
which may damage file burner grate and
burner head. Also, it may cause fl_e burner
to work improperly. This may cause a
carhon monoxide lexel aboxe that
allowed by CUlTent standards, resulting
in a health hazard.
Foods for fiTing should be as dU as possible.
Frost on fiozen foods or moisture on flesh
foods can cause hot ]Batto bubble up and
oxer the sides of the pan.
Ne_er try to mo_e a pan of hot ]Bat,especially
a deep fat flTer _A'aituntil the fat is cool.
Do not leme plastic imms on the cooktop--
flley m W meh if left too close to file xent.
Kee I) all plastics aw W flom the sur]Bace
burners.
To ax_id the possibility of a hurn, always be
certain that the controls for all burners are
at the OFF position and all grates are cool
before attenlpting to remo\e diem.
If range is located near a windo_, do not
hang long curtains that could blow oxer file
surface burners and cream a die hazard.
If you smell gas, turn off the gas to the range
and call a qualified service technician. Ne_er
use an open flame to locam a leak.
Alwws turn the sur]Bace burner conuols off
before removing cookware.
Do not lift the cooktop on sealed burner
models. I,ifting the cooktop can lead
to damage and improper operation of
the range.
IMPORTANTSAFETYINFORMATION.
READALLINSTRUCTIONSBEFOREUSING.
COOKMEATANDPOULTRYTHOROUGHLY...
Cook meat and poultry thoroughly--meat to at leastan INTERNALtemperature of 16001:and poultry to
at least an INTERNAL temperature of 180°ECooking to these temperatures usually protects against
foodbome illness.
OVEN
Stand away from the range when opening the door of a hot oven. Thehot air and steam that escape
can cause bums to hands, face and eyes.
Do not use tim oven for a storage area.
Imms stored in the oxen can ignim.
Kee I) the oven free flom glease buildup.
Place the oxen shehes in the desired
position while the oxen is cool.
Pulling out the shelf to the stop-lock is a
comenience in lifting heaxy' foods. It is also
a p_ecaufion agvdnst bu_s flom touching
hot surfaces of file door or oxen walls. The
lowest position is not designed to slide.
Do not heat unopened food containers.
Pressure could build up and the container
could burst, causing an i[_nl-y.
WARNING:NEVERcover
any slots, holes or passages in the oven
bottom or coxer an entire rack with
materials such as aluminum foil. Doing
so blocks air flow througil the oxen and
m W cause carbon monoxide poisoning.
Aluminum foil linings may also trap
heat, causing a fire hazard.
Do not use aluminum foil anywhere in the
oxen except as described in this manual.
Misuse could result in a fire hazard or
damage to the range.
XA]len using cooking or roasting bags in the
oxen, follow the manufacturer's directions.
Do not use your oxen to dlT newspapers.
If oxerheated, they can catch fire.
Use only glass cool<ware fllat is
recommended for use in gv_soxens.
Always remoxe the broiler pan flom range
as soon as you finish broiling. Grease left in
the pan can catch fire if oxen is used without
removing the grease flom the broiler pan.
When broiling, if meat is too close to the
flame, the fi_t may ignim. Trim excess {_t to
prexent excessive flareqlps.
Make sine the broiler pan is in place
con_ecflv m ieduce the possibility of
g_ease fires.
If you should haxe a grease fi_e in the broiler
pan, much the CLEAR/OFFpad,and kee I)
file oven door closed to contain fixe und]
it burns out,
For safety and proper cooking perfommnce,
always bake and broil with the oxen door
closed.

vvww.GEAppliances.com
SELF-CLEANINGOVEN
Be sure to wipe off excess spillag_ be%re
self-cleaning operation.
Before self-vleaning the o_n, remove
tile shelx_s, broiler pan, gxid and other
cookware.
Do not clean fl_e door gasket. Tile door
gasket is essential for a g_od seal. Care
should be taken not to rub, damag_ or
mow tile g'asket.
Clean only parts lismd in this Owner's
Manual.
If the self-cleaning mode malflmctions,
turn tile oxen off and disconnect file power
supply. Haxe it serviced by a qualified
technician.
Do not use oxen cleaners. No commercial
oxen cleaner or oxen liner of aW kind
should be used in or around any part of
the oxen. Residue from oxen cleaners will
damage the inside of the oxen when tile
self-clean cycle is used.
READANDFOLLOWTHISSAFETYINFORMATIONCAREFULLY.
SAVETHESEINSTRUCTIONS
Usingthe gas surfaceburners.
Throughout this manual, features and appearance may vary from your model,
Before Lighting a Gas Burner
Drip pans are supplied with your range;
they should be used at all times.
Make sure all burners are in place.
Make sm'e all grates on the range are
properly placed befin'e using any bm'ne_:
After Lighting a Gas Burner
Do not operate tile burner fin" an
extended period ot time without
cookware on tile grate. Tile finish on
the grate may chip without cookware
to absorb tile heat.
Be sm'e tile bm'ne_s and grates are cool
before you place yore" hand, a pot holder;
cleaning cloths or other mamfials
on thelIl.
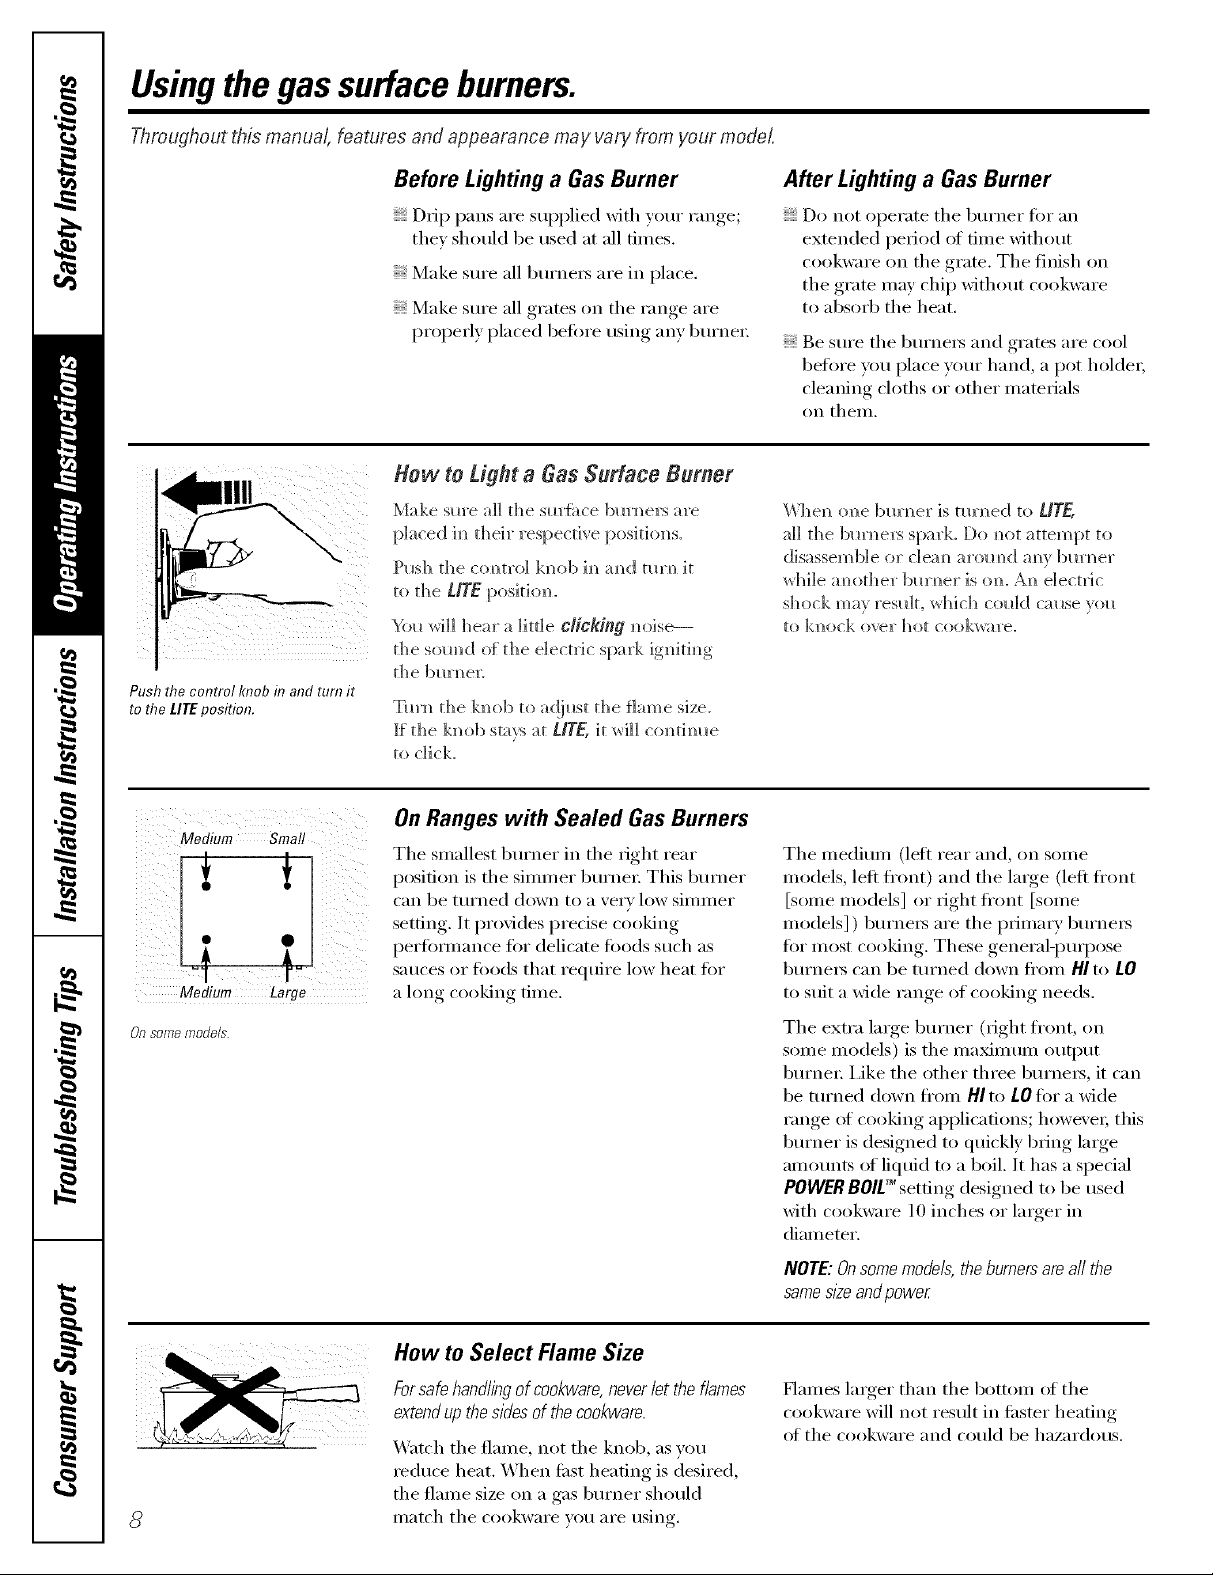
Push the control knob in and turn it
to the Life position.
How to Light a Gas Surface Burner
Make slate a]] d_e sm'fi_ce bm'm_ers are
placed h_ their respective posithms.
Pmh the commo] knob im_amid mm it
t/_ t]_e UTE poskhm.
the som]d of the electric spark ignidm_g
t]_e bm'N_ e_:
Turn d_e ]mob U> ad}ust die flame size.
ff the knob sta):s at/gE, it _i]] com_thme
to dick
\_l_e]_ o]_e bm'N_er is tin'ned to LITE,
a]] the bm'N_ers spark. Do m_ot attempt to
disassemble or c]em/aromM aNw gilt,let
_d_i]e ;mother bm'N_er is o]_. A]_ electric
shock ma} result, _hich coldd came yol_
to kl/ock ovel" hot coo],d_are.
Medium Smal!
Medium Large
Of? SOma mode/s
On Ranges with Sealed Gas Burners
Tile smallest burner in tile fight rear
position is tile simmer bm'ne_: This brinier
can be turned down to a ve_ T low simmer
setting. It provides predse cooking
pertkwmance for delicate toods such as
sauces or tbods that require low heat fin.
a long cooking time.
Tile medimn (left rear and, on some
models, left fi'ont) and the large (left fi'ont
[some models] or right front [some
models] ) burnels are tile pfilnary burnels
fi)r most cooking. These general-puq)ose
burners can be turned down fl'om HI to LO
to suit a wide range of cooking needs.
Tile extra lmge buI'neF (right ti'ont, on
some models) is tile ma_mum Otltptlt
burne_: i,ike tile other three burne_, it can
be turned down fl'Oln HI to tO tot a wide
range of cooking applications; howevex, this
bm'ner is designed to quickly bring large
amounts of liquid to a boil. It has a special
POWERBOlE_setting designed to be used
with cookware 10 inches or huger in
diameter.
NOTE:Onsomemodels,theburnersareall the
samesizeandpower
How to Select Flame Size
Forsafehandlingof cookware,neverlettheflames
extendupthesidesof thecookware.
Watch tile flame, not tile knob, as you
reduce heat. When filst heating is desired,
tile flame size on a gas burner should
I/latch tile cookware VO/I aI'e rising.
Haines larger than tile bottom of tile
cookware will not result in filster heating
of tile cookware and could be hazardous.
www.GEAppliances.com
Top-of-Range Cookware
Aluminum: Medium-weight cookware is
recon/mended because it heats quickly
and evenly. Most fi)o(ls brown evenly in an
ahmfinum skillet. Use saucepans with tight-
fitting lids when cooking with minimmn
}lIllO/XntN ()f watex:
Cast-Iron: If heated slowly, most skillets will
give satistactorv results.
Enamelware: Under some conditions,
tile exlax/lel of SOIlle ('ookw;IYe Xll}lV x/xelt.
Follow cookware illan/i][ilctHi'ei"s
recommendations fin" cooking methods.
Glass: There are two types of glass
cookwax'e--those fi)r ovexl txse only and
those t0r u)i>of-range cooking (saucepans,
coffee and teapots). Glass conducts heat
vex_' slowly.
Heatproef Glass Ceramic: Can be used for
either surti_ce or oven cooking. It conducts
heat vex'}'slowly and cools vex_' slowly: Check
cookware i/l_lnHlilCttll'ei"s directions to be
sm'e it can be used on gas ranges.
Stainless Steel'. This metal alone has poor
heating properties and is usually combined
with coppex; ahmfinum or other metals fin.
improved heat distribution. Combination
metal skillets usually work satisfi_ctorilv if
they are used with medium heat as the
IIl_l Ill Ilil ct [ lI'eI" I'eCOI//IIlends.
i
t
5
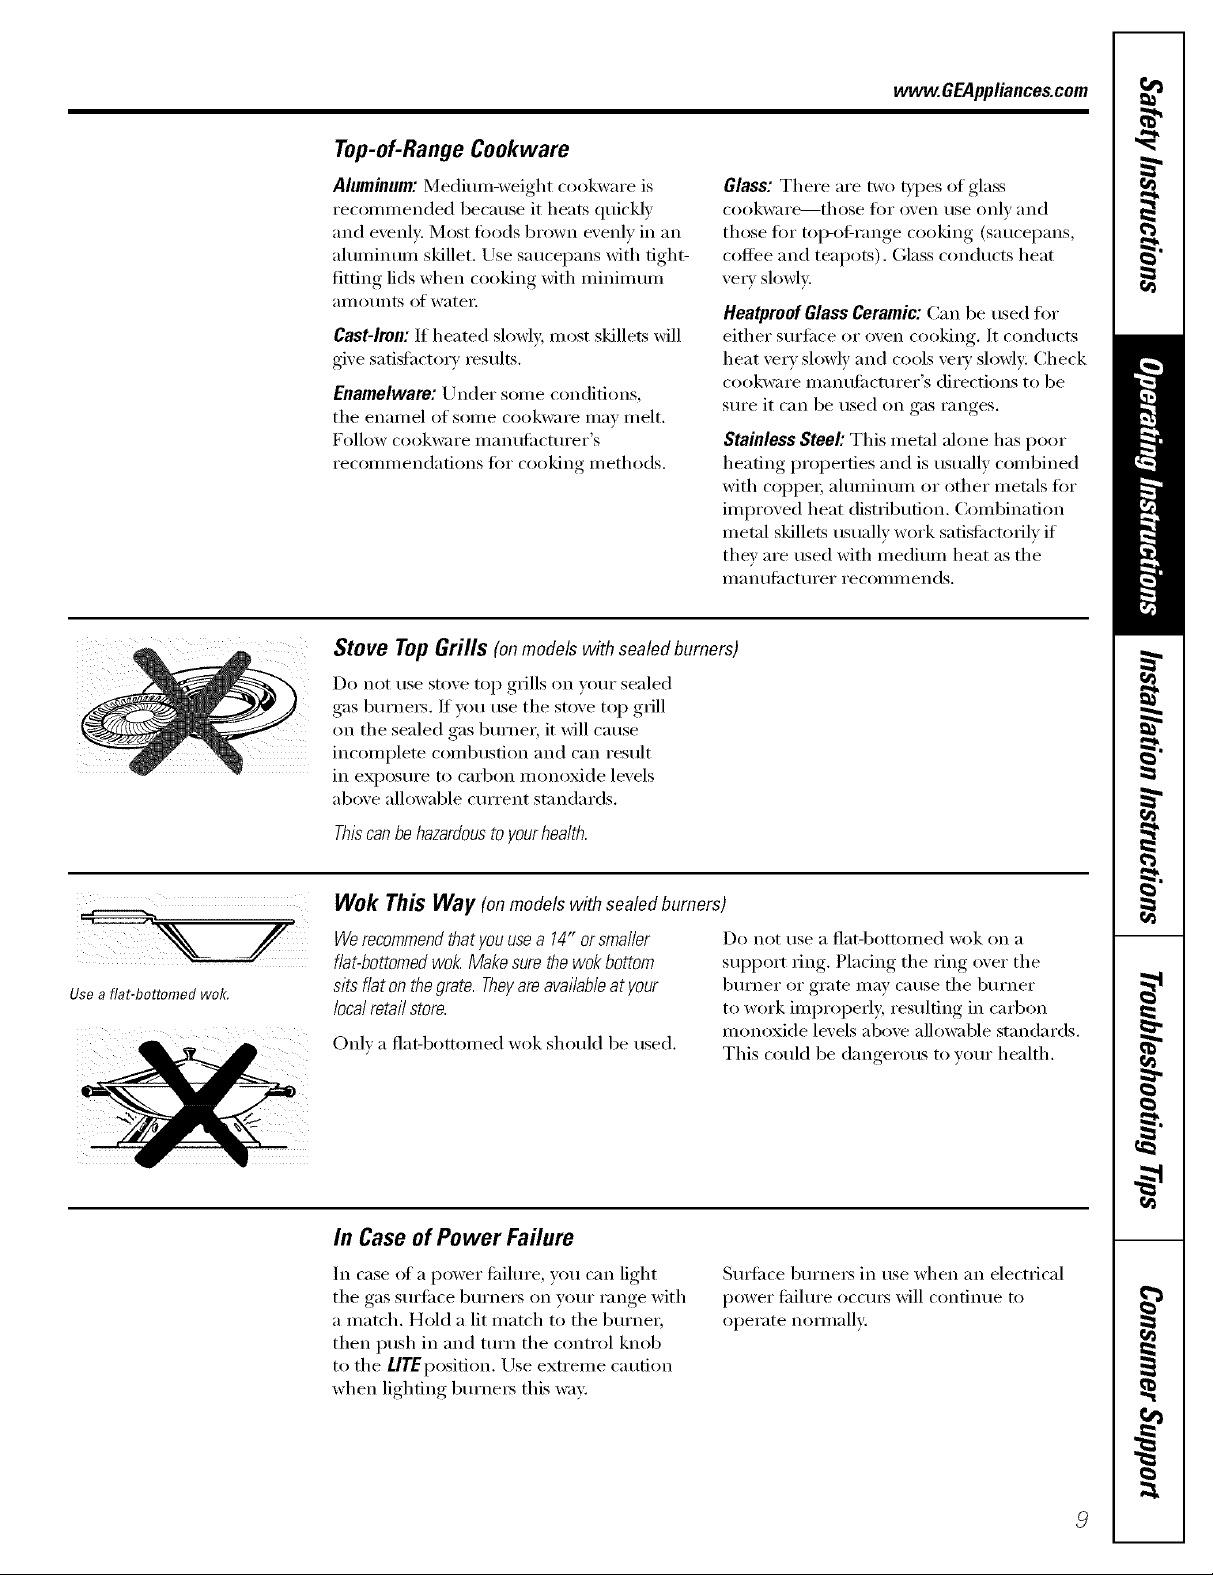
Stove Top Grills (onmodelswithsealedburners)
Do not use stove top grills on yore" sealed
gas btu'nexs. It you use tile stove top grill
on the sealed gas bm'ner, it will cause
incomplete combustion and can result
ill expos/ll'e to Cal'bon ii/onoxide levels
above allowable cmTent standards.
Thbcanhehazardoustoyourhealth.
Use a flat-bottomed wo£
Wok This Way (on models with sealed burners)
Werecommend thatyou usea 14" orsmaller Do not rise a fiat-bottomed wok on a
flat-bottomedwo/< Make sure the wok bottom support ring. Pladng tile ring oxer tile
sits flat on thegrate. Theyareavailableat your burner or grate may ca use tile burner
local retail store, to work improperly, resulting in carbon
monoxide levels above allowable standards.
Only a fiat-bottomed wok should be used.
This could be dangerous to yore" health.
In Case of Power Failure
In case (ff a power fifilure, you can light
tile gas sm'fi_ce burnex_ on veto" range with
a match. Hold a lit match to tile burner,
then push in and turn tile control knob
to tile LlTEposition. Use extreme caution
when lighting bm'nex_ this way.
Sm_i_ce burnex5 in use when an electrical
power fifilm'e occtu_ will contintle to
operate nmmally:
Usingthe ovencontrols.
Throughout this manual, features and appearance may vary from your model.
OVEN CONTROLS
,-%
ONTROLS
OvenControl,ClockandTimerFeaturesandSettings
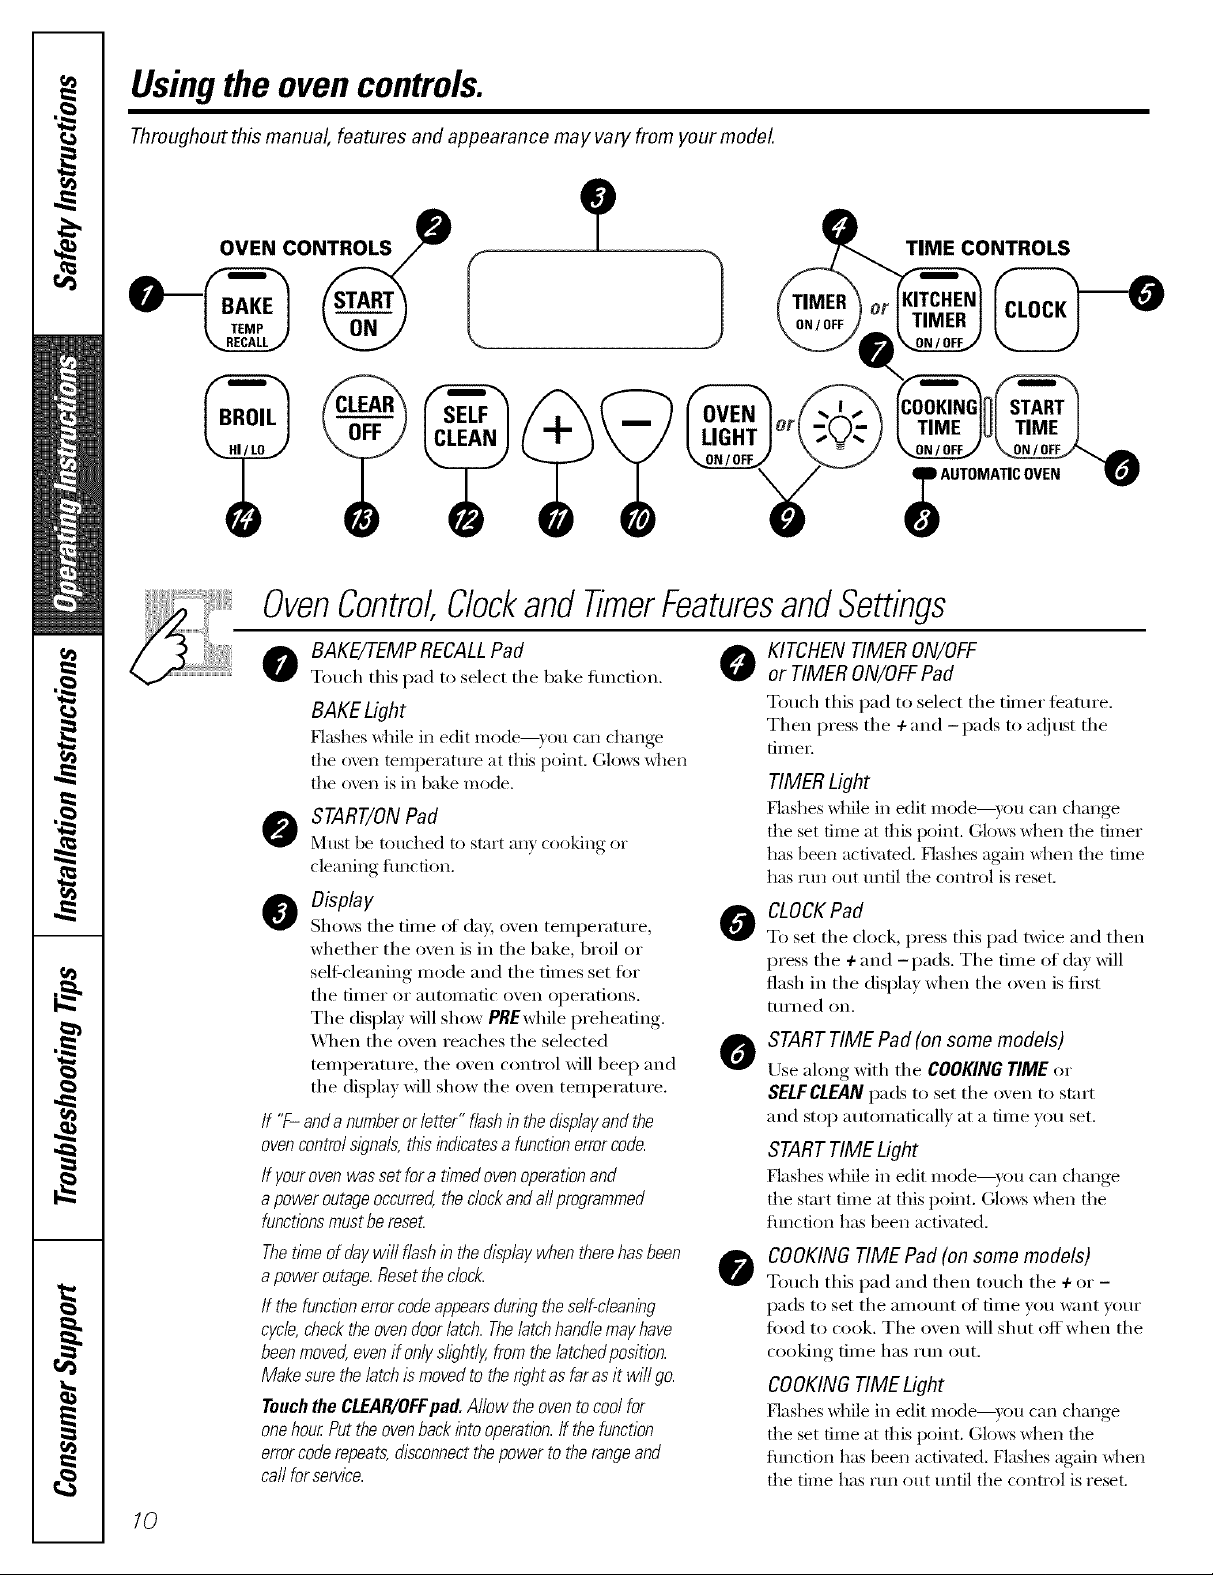
0 8AKErrEMPRECALLPad O KITCHENTIMERON/OFF
Touch this pad to select tile bake function, or TIMERON/OFFPad
BAKE Light
[qashes _tlile ill edit mode--} ou can change
tile oven temperature at this point. (;lo_:s _dlen
the oven is ill bake mode.
O START/ON Pad
Must be touched to start an} cooking or
cleaning function,
O Display
Sl/o_:s tile tillle ol da}; oven tellll)ei'attti'e ,
wl/etl/er tile oven is ill tile bake, broil or
self:cleaning mode and tile times set for
tile [ii/ler or atltoillatic ()veil opei'ations.
The display will show PREwl/ile preheating.
\4lien the oven reacl/es the selected
temperature, tile oven control will beep and
tile display will sl/ow tile oven teml)erature.
If "f- anda numberor letter" flash in the displayand the
ovencontrolsl)na& this indicatesa function errorcode.
/f youroven was set for a t/Ynedovenoperationand
apower outageoccurred the clockand aftprogrammed
functionsmustbe reseL
0
0
Touch this pad to select tile timer teature.
Then press tile + and -pads to ac!itlst tile
[Jill el i
TIMER Light
[qashes while ill edit mode--}ou can change
the set time at this point. Gkm:s _tlen the timer
has been activated, [qashes again _hen the time
has run out until tile control is reset.
CLOCK Pad
To set tile clock, press this pad twice and then
press tile +and -pads. Tile time of day will
flasl/ill the display when the oven is fiI_t
[tlYned on.
STARTTIME Pad (on some models)
Use along will/tile COOKING TIME or
SELFCLEAN pads to set tile (well to start
and stop autonmtically at a time vou set.
STARTTIME Light
Flashes x_hile iI1edit Illode--yotl (-all c}lange
the start time at this point. Glows when the
flmcfion has been activated,
ThetlYneofdaywill flashinthedisplaywhentherehasbeen
apoweroutage.Resetthedock.
If thefunctionerrorcodeappearsduringtheself-cleaning
cycle,checktheovendoorlatch.Thelatchhandlemayhave
beenmovedevenif onlyslightly,fromthe/atchedposition.
Makesurethelatchismovedto thenghtasfarasit wi//go.
TouchtheCLEAR/OFFpad. Allowtheoventocoolfor
onehourPuttheovenbackintooperation,ff thefunction
errorcoderepeats,disconnectthepowertotherangeand
ca//forservice.
0
COOKING TIME Pad (on some models)
Touch this pad and then toucl/tile + or -
pads to set tile alllOtlnt ot [iil/e vo/i w;tnt vo/tI"
tood to cook. The oven will shill off when the
cooking tiIl/e l/as Yun o/it.
COOKINGTIME Light
Flashes x_]lile iI1 edit Illode--}Otl (-all change
the set time at this Ix)int. (;lo_:s _hen the
fimction has been activated. Flashes again _dlen
the time has run out until the control is reset.
10
www.GEApptiances.coln
OvenControlClockandTimerFeaturesandSettings
0
0
0
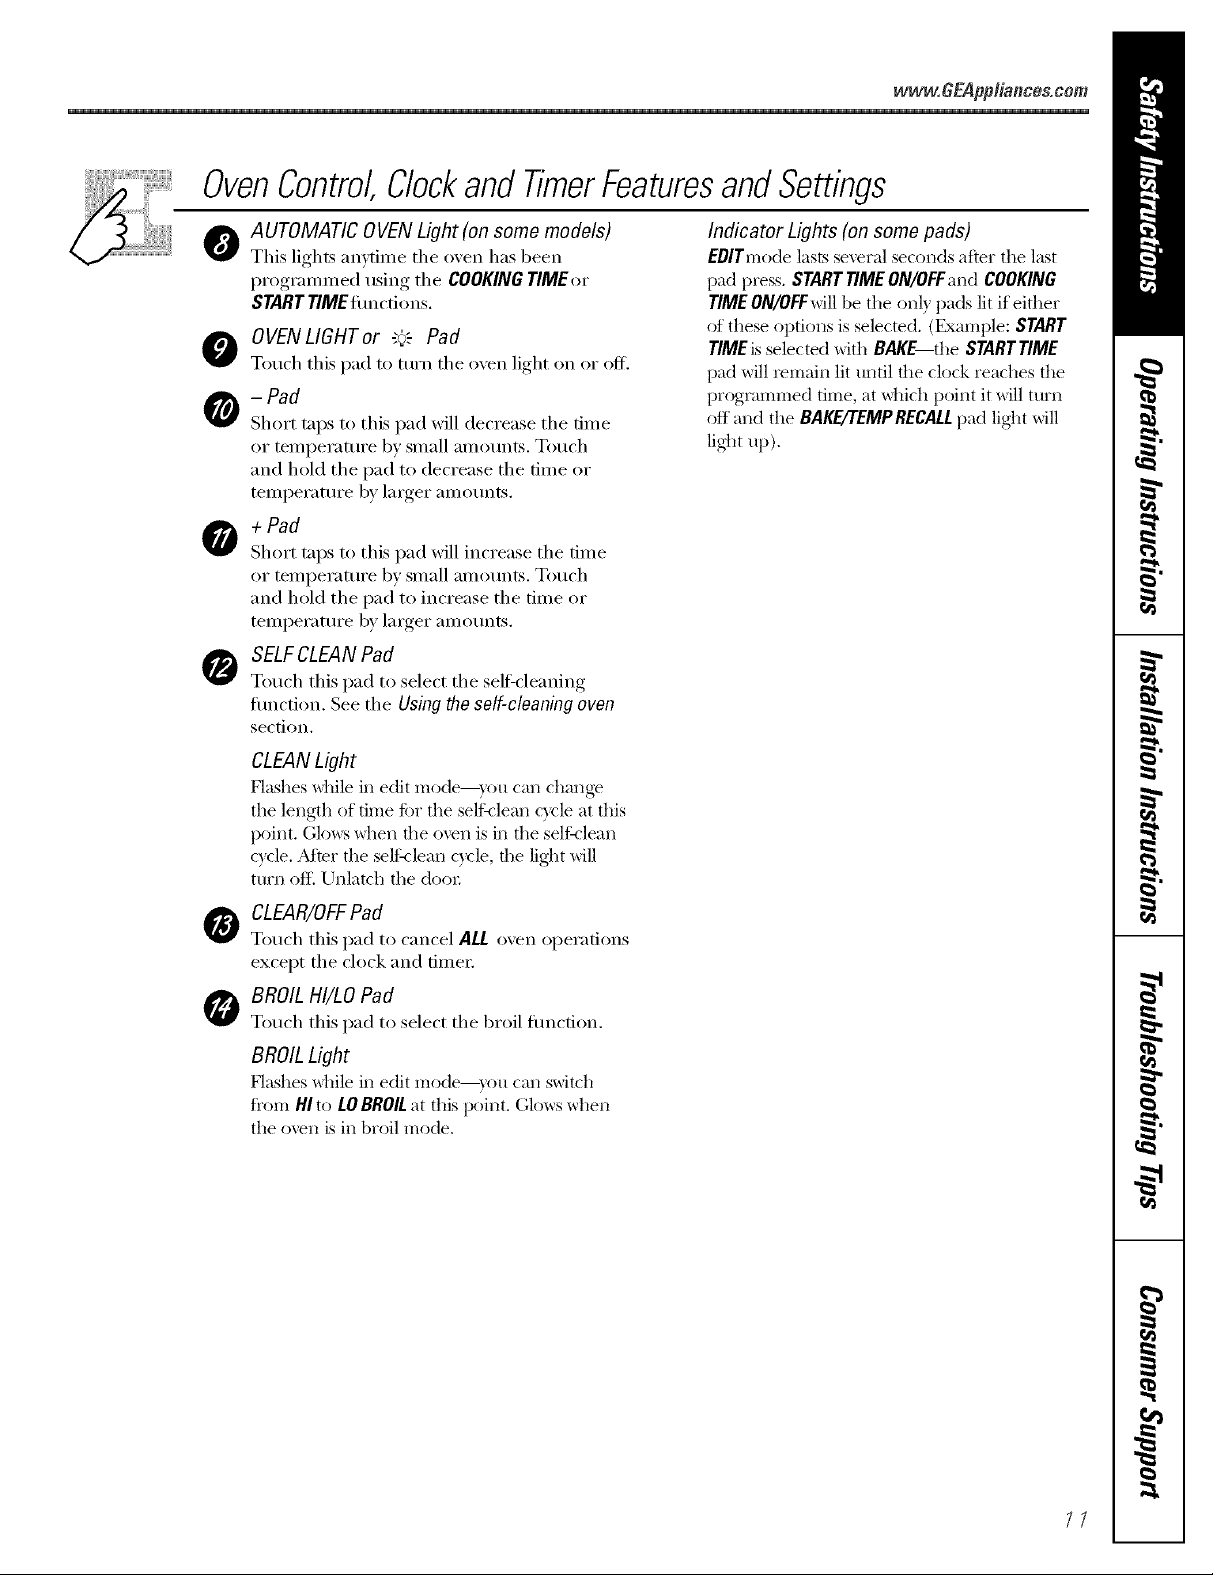
AUTOMATIC OVEN Light (on some models)
This lights mwtime the oven has been
programn_ed using the COOKINGTIMEor
START riME timcti,ms.
OVENLIGHT or "+'_ Pad
Touch this pad to mrn the oven light on or ofl_
-Pad
Short taps to this pad will decrease the time
or temperature by small amounts. Touch
and hold the pad to decrease the time or
temperature by larger amounts.
Indicator Lights (on some pads)
EBlTmode lasts several seconds after the last
pad press. SNRT TIMEON/OFfand COOKING
TIMEON/OFFwill be the on b pads lit if either
of these options is selected. (Example: START
TIMEis selected with BAKE the SNRTTIME
pad will remain lit until the clock reaches the
programmed time, at _hich point it will turn
off and the BAKE/TEMPRECALLpad lig]_t will
lig]_t up),
+ Pad
Short taps to this pad will increase the time
or temperature by small amounts. Touch
and hold the pad to increase the time or
temperature by larger amounts.
SELFCLEAN Pad
Touch this pad to select the self'cleaning
flmction. See the Using the so/f-c/oaning ovon
section.
CLEANLight
Flashes while in edit mode--you can change
the length of time ti)r the selt_lean cycle at this
point. Glows when the ()\'el1 is ill the self:<lean
c) cle. Adter the selthlean cycle, the lig]_t will
turn ofE Unlatch the docn;
CLEAR/OFFPad
Touch this pad to cancel ALL oven operations
except the clock and fimei;
BROIL HI/LO Pad
Touch this pad to select the broil fimction.
BROIL Light
Flashes _dfile ill edit mode--you can switch
fi'om HI to LOBROILat this point. Glows when
the oven is ill broil mode,
//
Usingthe oven.
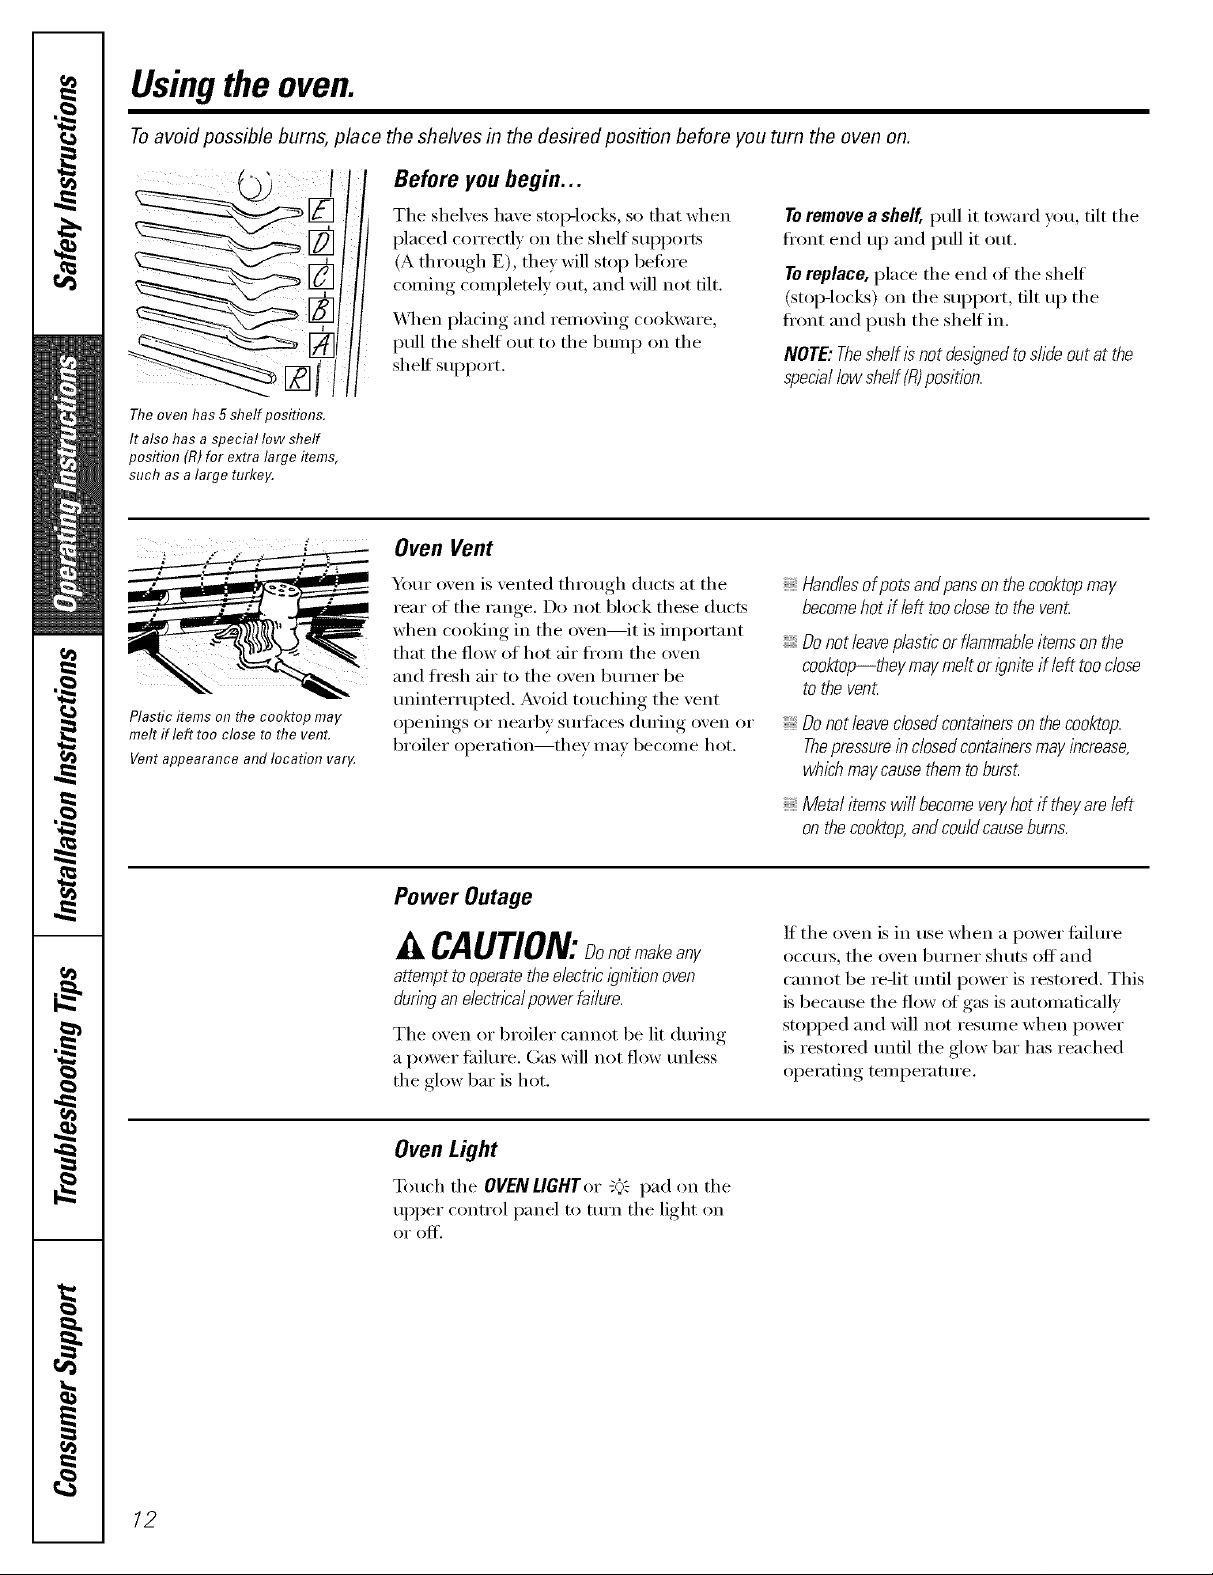
Toavoid possible bums, place the shelves in the desired position before you turn the oven on.
Before you begin...
Tile shelves have stoic-locks, so that when
I)laced correctly on tile shelf supports
(A through E), they will stop beflwe
coming completely out, and will not tilt.
\,\]/en placing and removing cookware,
pull tile shelf out to tile bum l) on tile
sheff SUl)po_t.
Toremove a shelf, pull it toward you, tilt tile
ti'ont end up and pull it out.
TOreplace, i)lace the end ot the shelf
(stopqocks) on the sui)port, tilt up the
front and push the shelf in.
NOTE: Theshelf/s not designed to slide out at the
special low shelf (R)position.
Ttieoven has 5 shelf positions.
It also has a special low shelf
position (R)for extra large items,
such as a large turkey.
Plastic items on ttie cooktop may
melt if left too close to ttie venL
Vent appearance and location var_
Oven Vent
xa)ur oven is vented through ducts at tile
rear of tile range. Do not block these ducts
when cooking in the oven--it is important
that tile flow of hot air fl'om tile oven
and fl'esh air to tile oven burner be
tminterrui)ted. Avoid touching tile vent
openings or nea_q_y stu_hces (hu'ing oven or
broiler operation--they may become hot.
Handlesofpotsandpansonthecooktopmay
becomehotif left tooclosetothevenL
Donotleave plastic or flammableitems on the
cooktop--they maymelt or ignite if left too close
to the venL
Donot/eave closedcontainerson the cooktop.
Thepressurein closedcontainersmay increase,
whichmay causethem to burs_
Metal items will becomeveryhot if theyare left
on thecooktop,andcould causeburns.
Power Outage
k, CAUTION:Donotmakeany
attempt tooperate the electric ignitionoven
during an e/ectncalpower failure.
Tile oven or broiler cannot be lit during
a power fifihu'e. Gas will not flow unless
the glow bar is hot.
If tile oven is in use when a power tifilure
occuls, tile oven b/lI'neI" shtlts off and
cannot be re-lit until power is restored. This
is because tile flow of gas is automatically
stopped and will not resume when power
is restored until tile glow bar has reached
operating temperature.
Oven Light
Touch tile OVENLIGHTor "_" pad on tile
ul)per control panel to turn tile light on
of o_',
12
www, GEAppliances,coln
Donot lock the oven door with the latch during baking or roasting. Thelatch is used for serf-cleaning only,
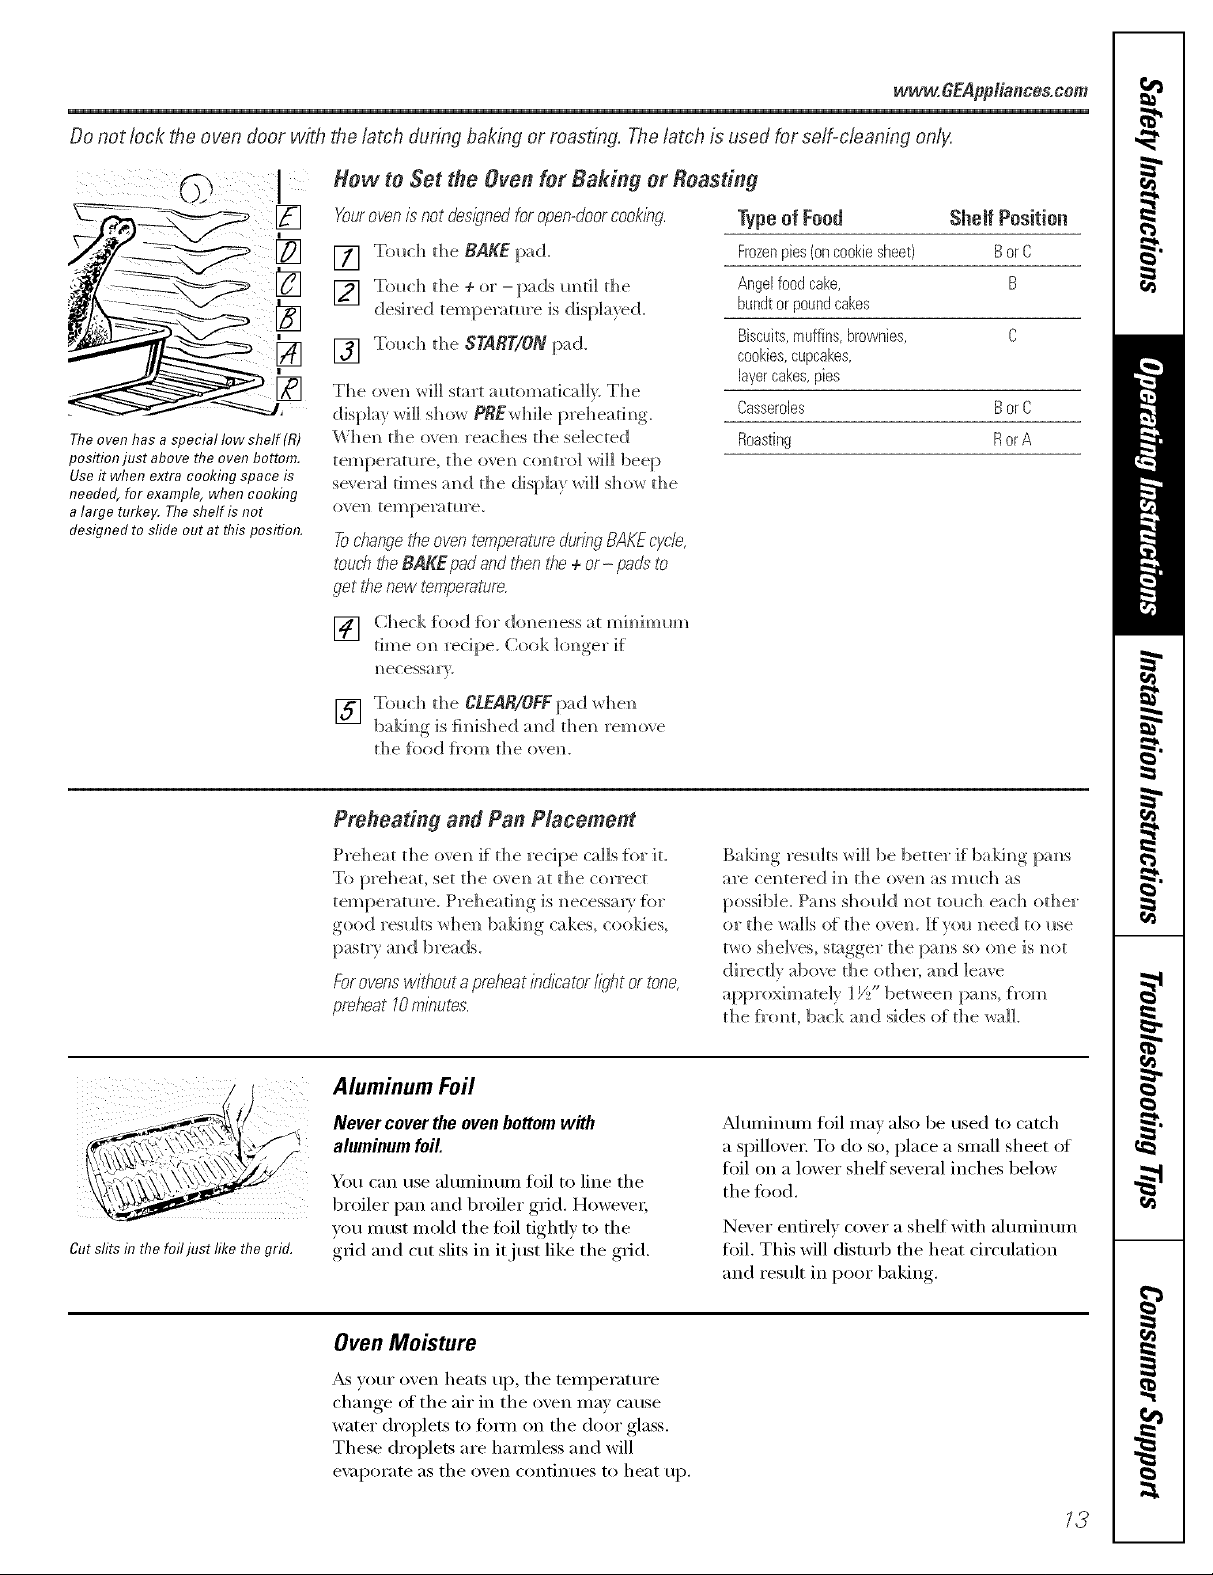
The oven has a special low shelf (R)
position just above the oven bottom.
Use it when extra cooking space is
needed, for example, when cooking
a large turkey. The shelf is not
designed to sfide out at this position.
Yourovenis not designedfor open-doorcook/?_g.
Typeof Feed SheJf PesRiea
Frozenpies(oncookiesheet) EtorC
Angelfoodcake, B
bundtorpoundcakes
Biscuits,muffins,brownies, C
cookies,cupcakes,
layercakes,pies
Casseroles BorC
Roasting RorA
Tochangethe oven temperatureduring BAKEcycl<
touchthe BAKE pad and then dte+ or- pads to
get thenew temperature.
[] .
tm_e (m recipe. Cook ](roger if"
m?ecessa l'v.
[] Tol_ch the CLEAR/OFFpad whe_
bakim]g is fimshed amidtl_e]_ remove
the ti_d f_'om the ov e_.
Preheating and Pan P/acement
Preheat the ovem_if the recipe calls {iw it.
To preheat, set the o_em_at tile correct
temper:irate. Pre]]eafim_g is m_ecessarv for
good results whe]_ ba]dm_g cakes, coo]des,
Forovenswiff}out a preheat/ndicator I/ght or tone,
preheat 10m/7_utes.
Balding resll]ts will be better if balding pm_s
are ce]?tered i_? the o_e_? as milch as
possible. Pm_s sho_]d _ot to_ch each other
or the _a]]s o{ die ove]/. If you ]/eed to _lse
t_o s]]e]ves, stagger the [xms so (me is _/ot
dilecdv above the other; m_d leave
approximately ] _/_,"bet_ee_] jlxms, {_'om
the f_'(mt, back m_d sides of the _a]].
Cutslitsinthe foiljust likethegrid.
Aluminum Foil
Never cover the oven bottom with
aluminum foil
You can use alunfinun] foil t(i line the
broiler i)an and br(>iler giid. Howexei;
xou nmst nlold the f0il tighfl) to the
giid and cut slits in it just like the giid.
_unlinuin flfil inav also be used to catch
a spillovei: To do so, place a snlall sheet ot
toil on a lower shelf several inches below
the tood.
Never entirely cover a shelf with ahul]inun]
fiIil, This will distuI4) the heat circulation
and result in poor baking.
Oven Moisture
_s vour oven heats up, the tenlperature
change of the air in the ()veil nlay cause
water droplets to titan on the door glass.
These droplets are haimless and will
e\;q)oi'ate as tile ()veil contintles to heat Ill).
13
Usingthe oven.
Donot lock the oven door with the latch during broiling. The latch is used for self-cleaning only.
i¸/f_,,rx,_,
-. ,,i
Always use the broiler pan and grid
that came with your oven. It is
designed to mh#mize smokhTgand
spattering by trapphTgjuices h7the
shielded lower part of thepan.
How toSet the OvenforBroiling
[] Place the meat or fish on the broiler
grid in the broiler pan.
[] Follow suggested shelf positions in the
Broiling Guide.
[] The oxen door must be closed during
br(filing
[] Touch the BROILHI/LO pad once fi)r
HI Broil.
To change, to LOBroil, touch the
BROIL HI/LO pad again.
[] Touch the START/ON pad.
[] _Ahen broiling is finished, touch the
CLEAR/OFFpad.
Serve the lood immediatel}; and leave the
pan outside the oven to cool during the
meal fi)r easiest cleaning.
Use LO Broil to cook fi_ods such as poult U
or thick (tits ot nleat thoroughly without
()x'e>browning tit era.
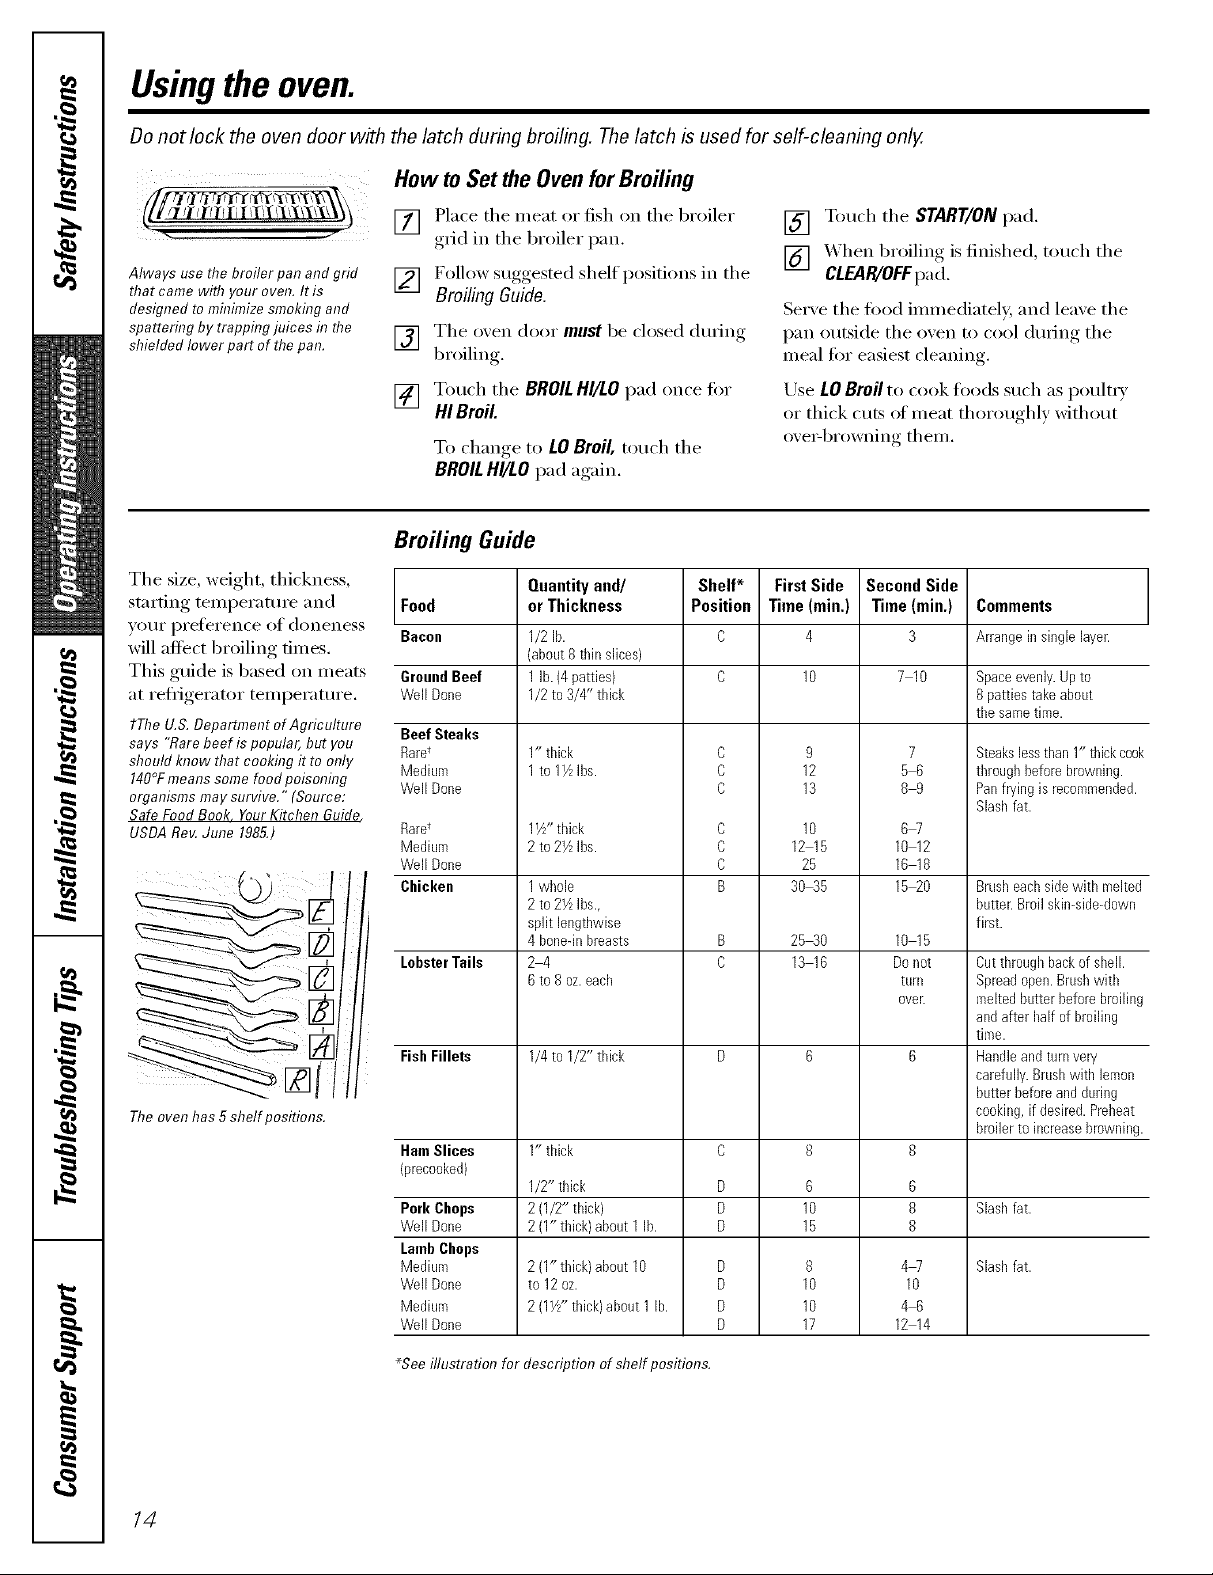
Broiling Guide
The size, weight, thickness,
starting temperature and Food
youi prelerellce ol aloneness Bacon
will affect broiling times.
This guide is based on meats Ground Beef
at refl-igerator temperature. WeltDone
tThe U.& Department of Agriculture Beef Steaks
says "Rare beef ispopula6 but you RarU
should know that cooking it to only Medium
140°Fmeans some food poisoning WellDone
organisms may survive." (Source:
Safe Food Book Your Kitchen Guide
USDARev. June 1985.)
Theoven has 5shelf positimTs.
Rare t
Medium
WellDone
Chicken
LobsterToils
FishFillets
HamSlices
"_recooked)
Pork Chops
WellDone
LambChops
Medium
WellDone
Medium
WellDone
Quantityand/
orThickness
1/2 lb.
(about8thin slices)
1lb. (4patties)
1/2to 3/4" thick
1" thick
1to 1VzIbs.
1W' thick
2 to 2YzIbs.
1whole
2 to 2VzIbs.,
split lengthwise
4 bone-inbreasts
24
6to 8 oz.each
1/4to I/2" thick
1" thick
1/2" thick
2(1/2" thick)
2(1"thick} about 1 lb.
2 (1" thick/about 10
to 12 oz.
2 (11//'thick)about 1 lb.
Shelf*
Position
C
C
C
C
C
C
B
D
D
D
D
D
D
D
First Side
Time (rain.)
4
9
12
13
10
12 15
25
3045
253O
1316
6
10
15
8
10
10
17
Second Side
Time (rain.)
3
7 10
7
56
89
6W
1012
1018
15_0
1015
Donot
turll
ovelt
6
8
8
4W
10
46
12 14
Comments
Arrangein single layer.
Space evenly. Up to
8 patties take about
ti_e same time.
Steakslessthan 1" thickcook
throughbeforebrowning.
Panfryingis recommended.
Slashfat.
Brusheachsidewith melted
butter.Broilskin-side-down
first.
Cutthroughbackof shell.
Spreadopen.Brushwith
meltedbutterbeforebroiling
andafter half of broiling
time.
Handleandturnvery
carefully.Brushwith lemon
butterbeforeand during
cooking,ifdesired. Preheat
broilerto increasebrowning.
Slashfat.
Slashfat.
_Seeillustration for description of shelf positions.
14
Usingthe clock andtimer, vvww.GEAppliances.com
Not all features are on all models.
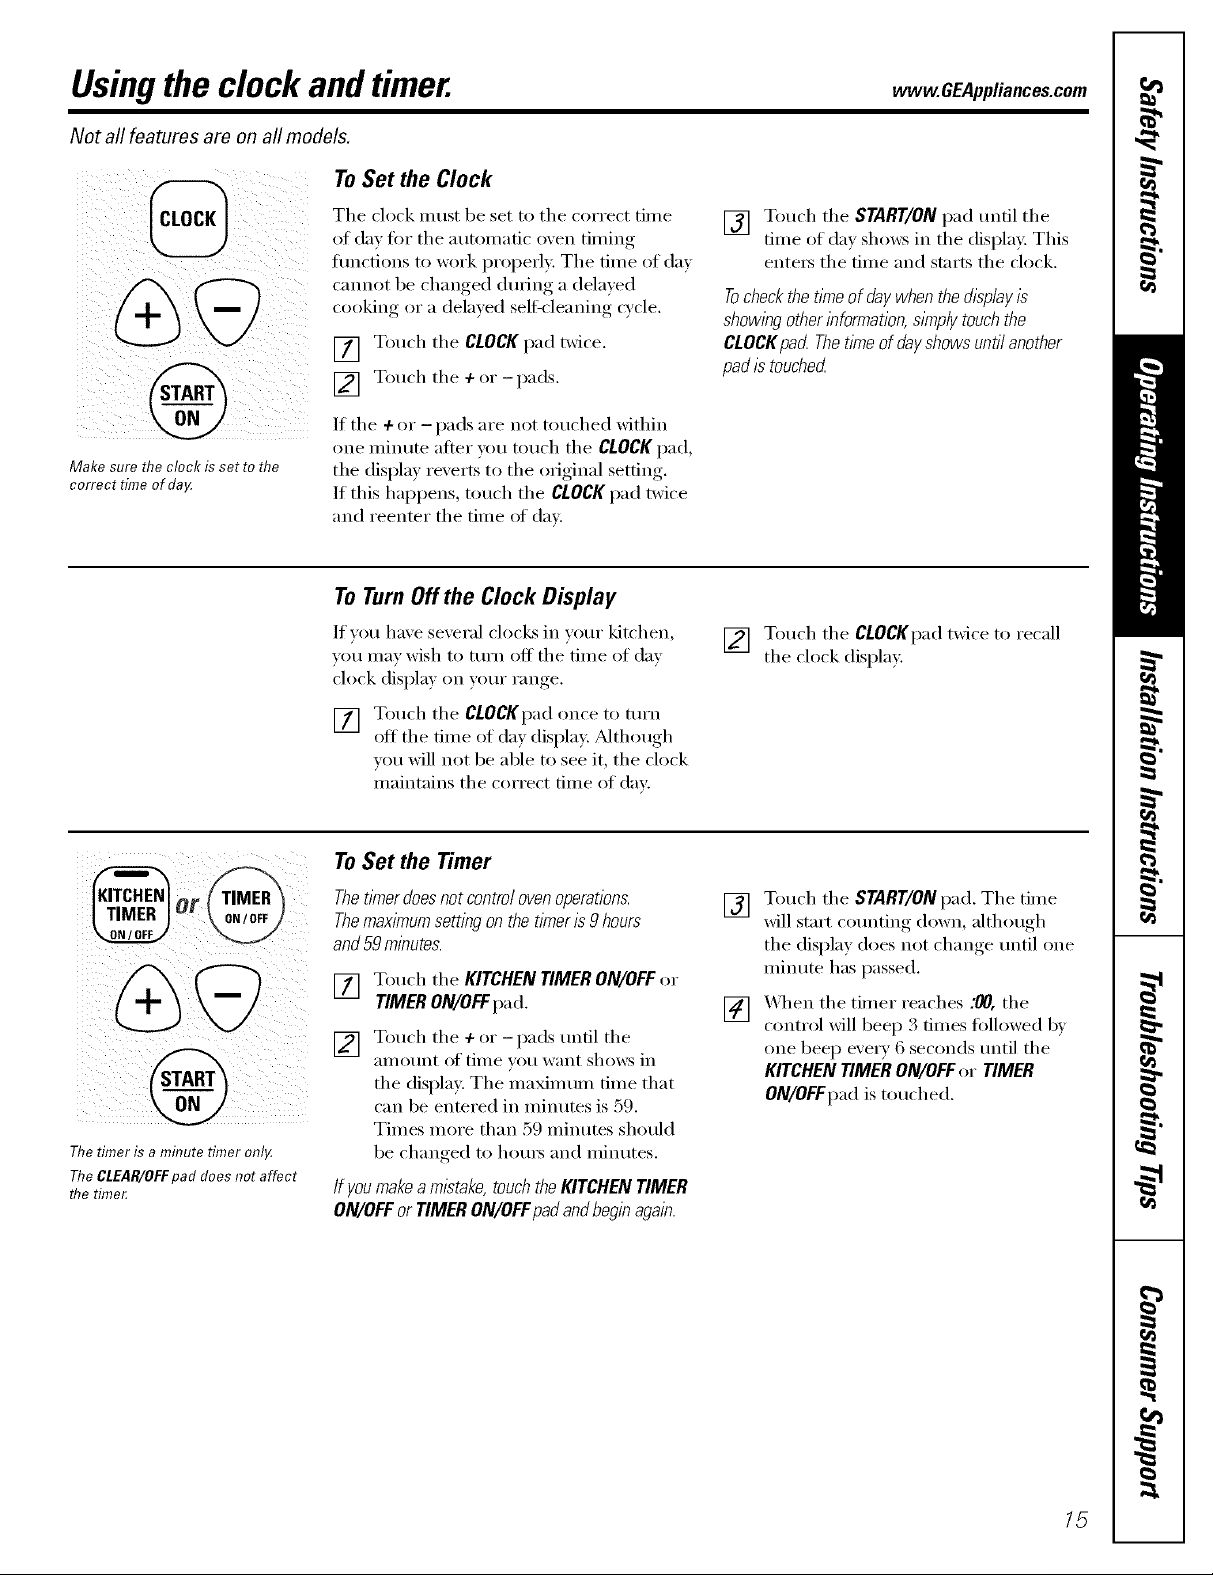
@
Make sure the clock isset re me
correct time of daF
ToSet the Clock
The clock must be set to tile correct time
ot (la_ fin" tile auton/afic oven timin_
functions to work properly: Tile time of day
emmet be chan_ed durin_ a delayed
cookin_ or a delayed selfk'leanin_ cycle.
[] Tl>uch tile CLOCKpad i_vice,
] T(>uch tile ÷ (>r - pads.
/f tile ÷ or - pads are not touched within
one minute atter w)u touch tile CLOCKpad.
the display reverts to the i)fi_inal setting.
/f this happens, touch the CLOCK pad twice
and reenter tile time of day.
[] Touch the START/ON pad until the
time of day shows in the display. This
entet_ the time and starts the clock.
Tocheckthetitheof daywhenthedisplayis
showingotherinformation,sl_nplytouchthe
CLOCKpa_ Thetimeofdayshowsuntilanother
padistouched
ToTurnOffthe Clock Display
If you have several ('lock_ in veto" kitchen,
you may wish to mrn off the time of day
clock display on veto" range.
[] Touch the CLOCKpad once to turn
off the time of day display. _Mthough
you will not be able to see it, the clock
maintains the correct time of da_:
[] Touch the CLOCKpad twice to recall
the clock display.
Thetimer is a minute timer onI,A
TheCLEAR/OFFpad does not affect
flTetime_
To Set the Timer
Thet_Ynerdoesnot control ovenoperations.
Themaximumsetting on the timeris 9hours
and59 minutes.
_] Touch the KITCHENTIMERON/OFFor
TIMERON/OFFpad.
[] Touch the + or-pads tmtil the
aillotlnt of tiI/le _()tl want shows in
the display. The maxim um time that
can be entered in minutes is 59.
Times more than 59 minutes should
be changed to hom_ and mimKes.
If youmakeamistake,touchtheKITCHENTIMER
ON/OFFor TIMERON/OFFpadandbeginagain.
[] Touch the START/ON pad, The time
will start counting down, although
the display does not change until one
minute has passed.
[] X4q_en the timer reaches :00, the
control will 1)eep 3 times followed b_
one beep e\'e_ T 6 seclmds tmtil the
KITCHEN TIMER ON/OFF or TIMER
ON/OFFpad is touched.
15

Usingthe clock andtimer.
Not all features are on all models.
To Reset the Timer
If tile display is st.ill showing tile time
remaining, you may change it by touching
tile KITCHEN TIMER ON/OFFor TIMER
ON/OFFpad, then touch tile + or-pads
until tile time y(m want appea_ in tile
display:
If tile remaining time is not in tile display
(clock, start time or cooking time are in
the display), recall the remaining time by
touching the KITCHEN TIMER ON/OFF or
TIMER ON/OFFpad and then touching the
-kOI"--pads to entei" tile new tillle vi)tl want.
ToCancel the Timer
Touch tile KITCHEN TIMER ON/OFF
or TIMER ON/OFFpad twice.
@
#£
OT
@
End of Cycle Tones (onsomemodels)
Clear tile tones by pressing tile pad of tile
flmcfion wm are using.
Power Outage
If a flashingt/Yneis in thedisplay,youhave
experiencedapowerfailure.Resetthedock
To reset tile clock, touch tile CLOCKpad.
Enter tile correct time ot day by touching
tile + or-pads. Touch tile START/ONpad.
16
Usingthe timedbakingandmasting features, www.GEAppliances.com
Donot lock the oven door with the latch during timed cooking• The latch is used for self-cleaning only.
NOTE."Foods that spoil easilyISUCh as milk, eggs, fish, stuffings, poultry and porkIShould not be allowed to s# for
more than 1hour before or after cooking. Room temperature promotes the growth of harmful bacteria. Be sure that
the oven light is off because heat from the bulb will speed harmful bacteria growth.
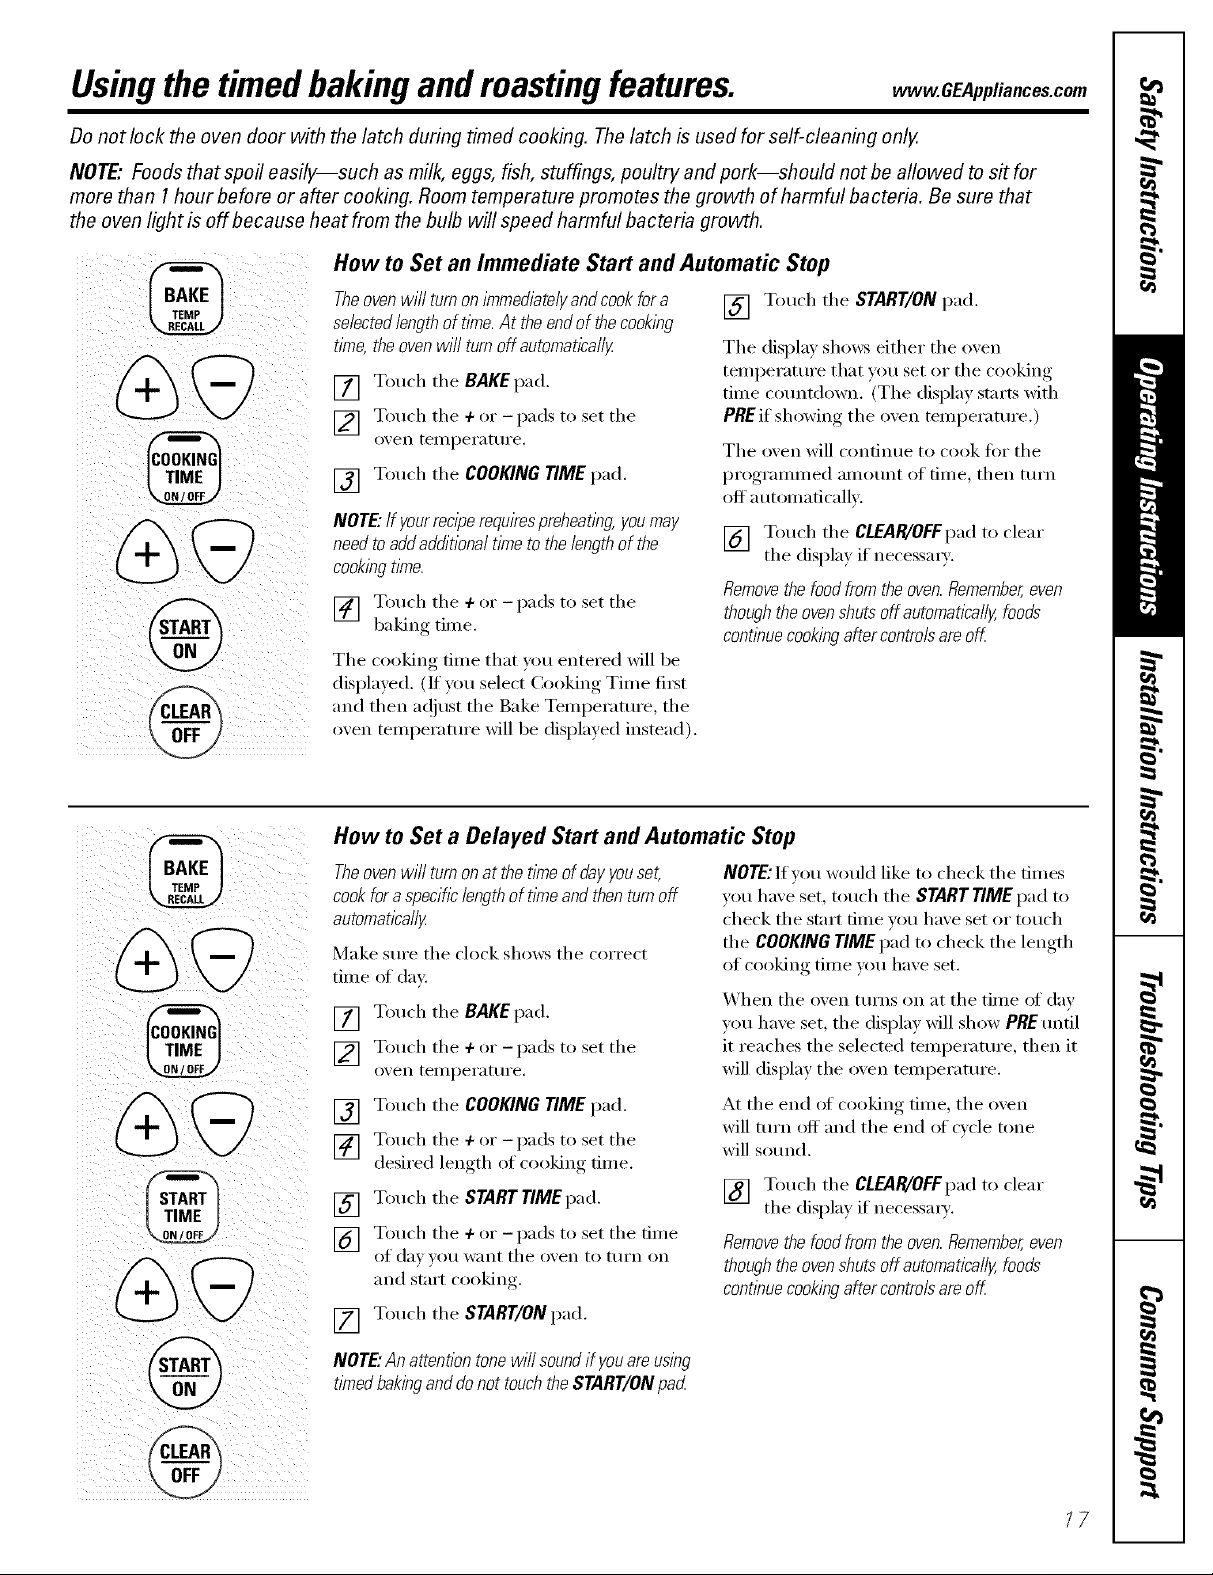
How to Set an Immediate Start and Automatic Stop
Theoven wi// turn on immediatelyand cookfor a [] Touch tile START/ON pad.
selectedlength of tl_ne.At the end of the cooking
time,the ovenwill turn off automatlcal/y Tile displa) shows either the oxen
[] Touch tile BAKE pad.
] Touch the + or -pads to set the
o_,en [eI/l pei'at/li'e.
[] Touch tile COOKING TIME pad.
NOTE."If your reciperequirespreheating youmay
need to addadditional time to the length of the
cookingtime.
] Touch the + or _ l)ads to set the
• r "
baking tune.
The cooking time that )ou entered will be
displayed. (If you, select Cooking, Time fi_st
and then a@_st the Bake Temperatm'e, the
oxen teml)eratm'e will be displayed instead).
temperatm'e that you set or tile cooking
time co/mtdown. (Tile display starts with
PREif showing tile oxen temperature.)
Tile oxen will continue to cook fin" tile
programmed am(lunt of dine, then turn
off automaticallv.
[] Touch tile CLEAR/OFFpad to clear
tile displa) if necessax_'.
Removethe food from the oven. Remember,even
thoughthe oven shuts off automatically,foods
continue cookingafter controls areoK
%
@
@
@
How to Set a Delayed Start and Automatic Stop
Theoven wi// turn on at the time of dayyouset,
cook for a specihclength of time and then turn off
automatically
Make sm'e tile clock sho_:s tile correct
time oI day:
[] Touch tile BAKE pad.
] Touch tile + or -pads to set tile
oven telllpei'att ii'e.
[] Touch tile COOKING TIME pad.
] Touch tile + or -pads to set tile
desired length of cooking time.
[] Touch tile START TIMEpad.
] Touch tile + or -pads to set tile time
(If (la_ _()/I want tile ()_eil to ttlI'n on
and start cooking.
[] Touch tile START/ON pad.
NOTE:If vou would like to check tile times
vou have set, touch tile START TIME pad to
check tile start time vou have set or touch
tile COOKINGTIME pad to check tile length
of cooking time you have set.
When tile oven ttlrns (in at tile time ot day
you have set, the display will show PBE tmfil
it reaches tile selected temperature, then it
will display tile oven teml)erature.
At tile end of cooking time, tile oven
will turn oH and the end of cycle tone
will so/md.
[] Touch tile CIEAB/OFFpad to clear
tile displa) if necessax_'.
Removethe food from the oven. Remember,even
thoughthe oven shuts off automatically,foods
continue cookingafter controisareoff.
NOTE."Anattentiontonewi//soundif youareusing
tknedbakinganddonot touchtheSTART/ONpad
/7
 Loading...