

Quick Check® 890
Bar Code Verifier
Quick Check® ImageData
™
User’s Guide

Disclaimer
Hand Held Products, Inc. (“Hand Held Products”) reserves the right to make
changes in specifications and other information contained in this document
without prior notice, and the reader should in all cases consult Hand Held
Products to determine whether any such changes have been made. The
information in this publication does not represent a commitment on the part of
Hand Held Products.
Hand Held Products shall not be liable for technical or editorial errors or
omissions contained herein; nor for incidental or consequential damages
resulting from the furnishing, performance, or use of this material.
This document contains proprietary information that is protected by copyright. All
rights are reserved. No part of this document may be photocopied, reproduced,
or translated into another language without the prior written consent of Hand
Held Products.
©2006 Hand Held Products, Inc. All rights reserved.
Web Address: www.handheld.com
®
Quick Check
Microsoft, Windows, Windows Mobile, Windows NT, Windows 2000, Windows
ME, Windows XP, ActiveSync, Outlook, and the Windows logo are trademarks
or registered trademarks of Microsoft Corporation.
The Bluetooth
Note: Software screens included in this document are in English only and are
is a registered trademark of Hand Held Products, Inc.
®
word mark and logos are owned by Bluetooth SIG, Inc.
included for reference only. They may be different from the screen that
displays on your terminal.

Table of Contents
Chapter 1 - Getting Started
Introduction........................................................................... 1-1
Unpacking the QC890 Verifier............................................. 1-1
QC890 Verifier Features....................................................... 1-1
Using the QC890 Verifier..................................................... 1-2
Scan Button........................................................................... 1-2
Scan Button LEDs.......................................................... 1-2
User LED Indications..................................................... 1-3
Physical Connections............................................................ 1-3
Specifications........................................................................ 1-4
Internal Battery ..................................................................... 1-4
Charging the Battery ...................................................... 1-4
Powering On the QC890 Verifier .................................. 1-4
Chapter 2 - Quick Check ImageData
Quick Check ImageData....................................................... 2-1
Installation of Quick Check ImageData ............................... 2-1
Communication Interfaces.................................................... 2-1
USB Communication Interface ...................................... 2-1
USB COM Port Emulation............................................. 2-2
RS-232 Serial Communication Interface ....................... 2-3
RS-232 Selections .......................................................... 2-3
Bluetooth............................................................................... 2-3
Using the QC890 Verifier with Bluetooth Devices ....... 2-4
Enabling Your Device for Bluetooth.................................... 2-5
Enabling QCID for Bluetooth............................................... 2-7
Using Quick Check ImageData ............................................ 2-8
Help System.......................................................................... 2-9
Chapter 3 - Using the Quick Check 890 Verifier System
Scanning a Bar Code Symbol Using the QC890 Verifier .... 3-1
Scanning a Bar Code Symbol Using
Quick Check ImageData .................................................... 3-1
i

Calibrating the QC890 Verifier ............................................ 3-2
Scanning Properly Using a Pen/Mouse Wand...................... 3-3
Calibrating an External Pen/Mouse Wand ........................... 3-4
Scanning Properly Using the QC3800V Linear Imager:...... 3-5
Calibration Log..................................................................... 3-6
Reflectometer Mode ............................................................. 3-7
Chapter 4 - Maintenance
Cleaning the External Devices.............................................. 4-1
QC890 Verifier ..................................................................... 4-1
Recertification....................................................................... 4-1
Chapter 5 - Customer Support
Product Service and Repair .................................................. 5-1
Online Product Service and Repair Assistance.............. 5-2
Technical Assistance ............................................................ 5-2
Online Technical Assistance .......................................... 5-3
Limited Warranty.................................................................. 5-3
Chapter A - Apertures
Pen/Mouse Wand Aperture Selection...................................A-1
Chapter B - Menu Setting Bar Codes
Resetting the Standard Product Defaults ..............................B-1
Illumination Timer................................................................ B-1
Chapter C - Symbology Defaults - Operation
ii

1
Getting Started
Introduction
The Quick Check® 890 Verifier System (QC890) is a professional quality control
system for verifying the readability and standards compliance of printed linear
bar code symbols. This verification system implements an integrated approach
that consists of the QC890 Verifier unit and the Quick Check® ImageData
(QCID) software.
The QC890 system offers ease of use, stability and repeatability, flexibility,
increased user features and control, and quality testing of the most common
industry applications and symbologies.
Unpacking the QC890 Verifier
After you open the shipping carton containing the product, take the following
steps:
• Check for damage during shipment. Report damage immediately to the
carrier who delivered the carton.
• Make sure the items in the carton match your order.
• Save the shipping container for later storage or shipping.
The standard accessories that should be included in your kit are:
• Quick Start Guide
• CD with QCID software and this User’s Guide
• DC power supply with cord (includes adapters for different countries)
• Interface cables (USB and RS-232)
• Plastic gauge
•Metal ruler
• Reference test symbols
• Calibration bar code page
QC890 Verifier Features
The QC890 Verifier is a full-featured bar code verification system compatible with
all major linear bar code symbologies. It is both a quick and easy-to-use pass/
fail analyzer of bar code symbols and a powerful measuring tool for detailed
testing of bar code symbols.
The QC890 Verifier provides all of the information you need to interpret overall
symbol quality.
Quick Check® 890 User’s Guide 1 - 1

The verifier tests the following symbologies:
Codabar Interleaved 2 of 5
Code 11 MSI
Code 16K PDF417
Code 39 Reduced Space Symbology (RSS-14,
RSS Limited, RSS Expanded)
Code 49 Regular 2 of 5
Code 93 Telepen
Code 128 UPC/EAN
IATA 2 of 5
Using the QC890 Verifier
The QC890 Verifier offers a choice of Automatic, 5, 6, and 10 mil aperture
settings. External devices (i.e., mouse wands, pen wands, and linear imagers)
are available with apertures designed to match the most common X dimensions.
Wands are available with apertures of 3 (Mouse Wand only), 5, 6, 10, and 20
(Mouse Wand only) mil. These aperture sizes correspond to those specified in
ISO/IEC 15416 Bar Code Print Quality Test Specification - Linear Symbols. The
proper aperture should be selected based on the X dimension range shown in
the table in the Pen/Mouse Wand Aperture Selection (page A-1) section.
Choosing an inappropriate scanning aperture results in inaccurate quality
measures. Too small an aperture may detect reflectance non-uniformities (spots
and voids) that would not affect scanning with a "normal" aperture size. Too large
an aperture will not be able to resolve individual elements of the symbol.
Scan Button
The scan button on top of the unit wakes the unit from power down. A first press
of the button turns on illumination and a second press activates reading
capabilities.
Scan Button LEDs
• Red LED - error conditions
• Green LED - good symbols and configuration changes
1 - 2 Quick Check® 890 User’s Guide

User LED Indications
LED Indication Cause
Green Solid Charging
Green Flash Good read
Red Flashing Low battery
Audio Sound
An audio signal (default ON) provides a quick indication if a scan passes or fails
the current test. After a scan, one short, high pitch beep indicates that the
symbol passes an appropriate group of tests, while one long, low pitch beep
indicates that it fails.
Special Features
The QC890 Verifier supports the Reflectometer mode. In the Reflectometer
mode, the unit operates as a free-running reflectometer. See "Reflectometer
Mode" on page 3-7 for additional information.
Physical Connections
A DC power barrel on the back of the unit connects to a power supply for external
power and battery charging.
The DB9 port on the unit connects to the pen wand, mouse wand, or customized
imager. Refer to "Scanning Properly Using the QC3800V Linear Imager:" on
page 3-5. If you are using any of these devices, refer to "Scanning Properly
Using a Pen/Mouse Wand" on page 3-3 for additional information.
The RJ45 ten pin connector provides the USB or RS-232 serial interface to the
host. Refer to "USB Communication Interface" on page 2-1 and "RS-232 Serial
Communication Interface" on page 2-3 for details on connecting your unit.
Quick Check® 890 User’s Guide 1 - 3

Specifications
Item Specification
Dimensions 7” (18cm)W x 6”(15.cm)H x 5.4” (14cm)D
Weight 1 lb 8 oz (680 grams)
Temperature Storage: -20° to 70°C
Operational: 0° to 50°C
Humidity 20% to 95% RH non condensing
Battery Built-in factory - Lithium Ion rechargeable
Internal Battery
Note: The battery is factory replaceable only. You must return your unit to Hand
Held Products for replacement (see Product Service and Repair on page
5-1).
Charging the Battery
Note: The battery may be in an unknown charge state at delivery. We
recommend that you charge the battery for at least 2 hours prior to use.
You may use the unit while charging the battery.
To charge the battery:
1. Plug the power supply into the port on the back of the unit.
2. Plug in the power supply to the AC main source.
The QC890 Verifier uses a rechargeable battery. The QC890 Verifier can be
operated from the battery or power supply. With a properly charged battery, the
unit operates for a minimum of 8 hours. When not in use, you can leave the unit
connected to the charger.
Powering On the QC890 Verifier
• If the power supply is attached and plugged into an AC source, the QC890
Verifier is on.
• If the QC890 Verifier is attached to the USB host with power on, the verifier
is on.
• If the QC890 Verifier is operating using the battery, it shuts itself off after 15
minutes of inactivity to conserve battery power. Pressing the scan button on
top of the unit one time powers up the unit from the power down mode.
1 - 4 Quick Check® 890 User’s Guide

2
Quick Check ImageData
Quick Check ImageData
The Quick Check ImageData (QCID) program was designed for use in
conjunction with the QC890 Verifier. Use of any other hardware devices with this
program is not supported. Installation of the QCID software for your appropriate
operating system is included on the CD-ROM that accompanied your verifier.
The QCID is the graphical interface to the Quick Check 890 Verifier. The
verification results can be saved for later reference.
Installation of Quick Check ImageData
To install the Quick Check ImageData, insert the CD and follow the instructions
that display.
Communication Interfaces
The QC890 Verifier system supports the following interfaces: USB, RS-232, and
Bluetooth
®
.
USB Communication Interface
For the USB interface, the Hand Held Products CDC-ACM driver must be
installed prior to using the QC890 Verifier. This driver is copied to the following
directory during install:
<install location>\Drivers\USBCOMPortEmulation/hhpcdc.inf
The default <install location> is C:\Program Files\Hand Held Products\Quick
Check ImageData\drivers\USBCOMPortEmulation.
Quick Check® 890 User’s Guide 2 - 1
Note: Please review the file, readme.rtf, in the install location prior to running the
QCID.
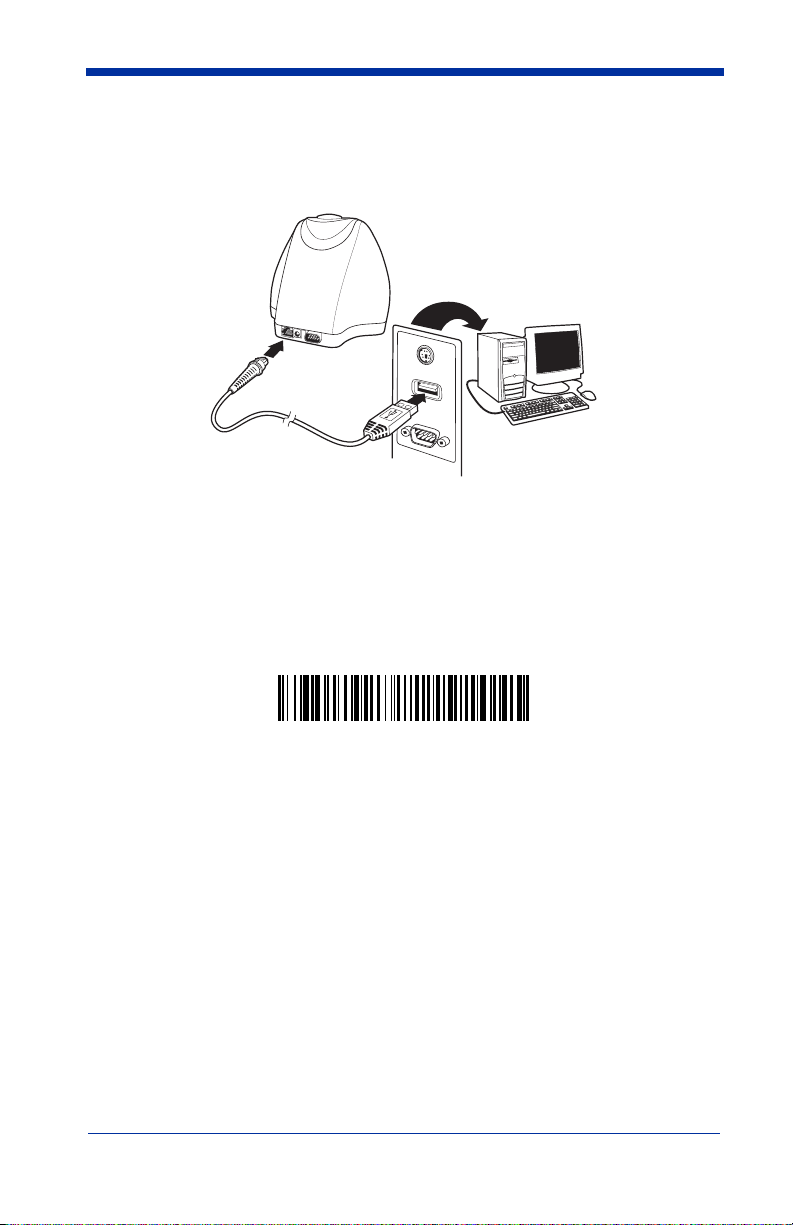
Connect the QC890 Verifier to the host as shown in the illustration below.
1
2
USB COM Port Emulation
Scan the following bar code to program the QC890 Verifier to emulate an RS232-based COM Port. After connecting the QC890 Verifier and upon successful
installation of the USB driver, the driver will use the next available COM Port.
Any QC890 Verifier that has been configured for USB COM Port emulation use
this host assigned port number. USB COM Port Emulation is the default
interface for the QC890 Verifier.
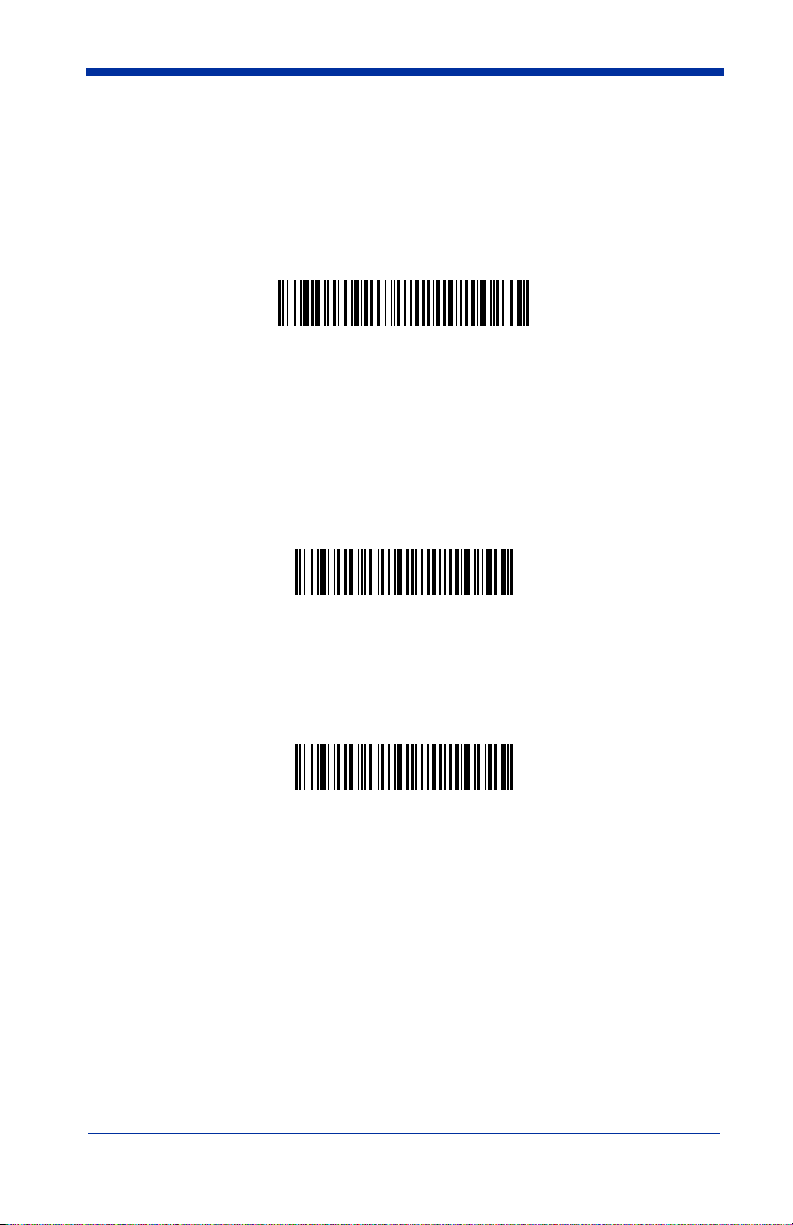
* USB COM Port Emulation
Note: No additional configuration (e.g., baud rate) is necessary.
2 - 2 Quick Check® 890 User’s Guide
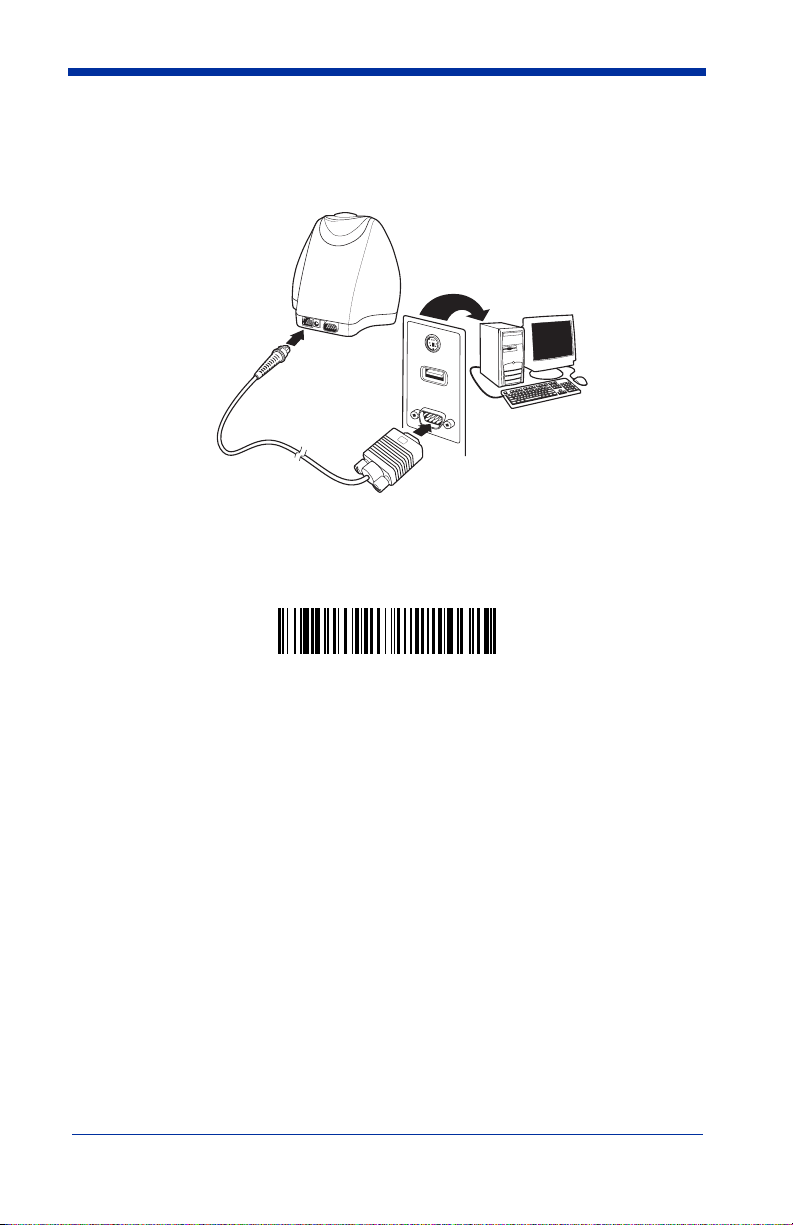
RS-232 Serial Communication Interface
An RS-232 interface requires no additional drivers. Connect the QC890 Verifier
to the host as shown in the illustration below.
RS-232 Selections
Scan the following bar code to select RS-232 communications.
RS-232 Communication
The RS-232 settings supported are:
Baud Rate: 115,200
Parity: None
Data Bits: 8
Stop Bits: 1
Flow Control: None
Bluetooth
The Bluetooth implementation uses the SPP (Serial Port Profile) profile to
connect the QC890 Verifier to the host system. The QC890 SPP profile is a
standard Bluetooth profile implementation. This allows the QC890 system to be
compatible with most Bluetooth hardware. The QC890 unit can be used with
existing Bluetooth radios built into laptops, PCs, or PDAs.
Quick Check® 890 User’s Guide 2 - 3
Using the QC890 Verifier with Bluetooth Devices
Note: If you chose to use the USB or RS-232 interfaces, the Bluetooth
communication interface automatically turns off.
The QC890 Verifier may be used with Bluetooth devices (e.g., laptop, PC, PDA,
etc.). Scanning the Bluetooth bar code below turns the Bluetooth option on in the
QC890 Verifier.
Note: If you turn the Bluetooth option on, scan the appropriate bar code that
follows to connect to a PC/Laptop or PDA/Mobility Systems device.
To establish a Bluetooth connection to a PC/Laptop, scan the bar code below,
follow the instructions supplied with your Bluetooth device to locate the QC890
Verifier, and connect to it. If you go out of range with your QC890 Verifier, the
QC890 Verifier automatically reconnects to the Bluetooth device once you come
back in range.
Laptop.
To establish a Bluetooth connection to a PDA or Hand Held Products Mobility
Systems device, scan the bar code below, follow the instructions supplied with
your Bluetooth device to locate the QC890 Verifier, and connect to it. If you go
out of range with your QC890 Verifier, the QC890 Verifier will not re-connect. It
will be up to the host device to re-connect to the QC890 Verifier.
Default = Off.
Bluetooth On
When Bluetooth communication is enabled, the default is PC/
* Bluetooth Connection - PC/Laptop
Bluetooth Connection - PDA/Mobility Systems Device
2 - 4 Quick Check® 890 User’s Guide
 Loading...