

Page 1
Part # PPRF
POWER PRESENTER RF
Instruction Manual
The POWER PRESENTER RF remote is a handy, compact presentation too l. It allows you to control slides
in any presentation or slide show software. The Power Presenter RF remote includes a built in laser pointer.
The kit includes: a remote with laser pointer (battery included), a receiver, a USB cable and a nylon
carrying case. The POWER PRESENTER RF uses radio frequency technology, so you don’t have to point
the remote at the receiver to control your slides. The maximum operating distance between the remote and
the receiver is 150 feet, depending upon operating environment.
System Requirements
The only system requirement is USB co mpatibility. The POWER PRESENTE R RF is “plug and play”
compatible with MAC OS 8 or higher and Windows 98, NT, 2000, XP or higher.
Connecting the Receiver to the Computer
For maximum range, the receiver should be placed as far away as possible from any electronic devices.
Using a USB connection (MAC OS 8 or higher and Windows 98, NT, 2000 or higher)
1) Turn on your computer and let it fully boot-up.
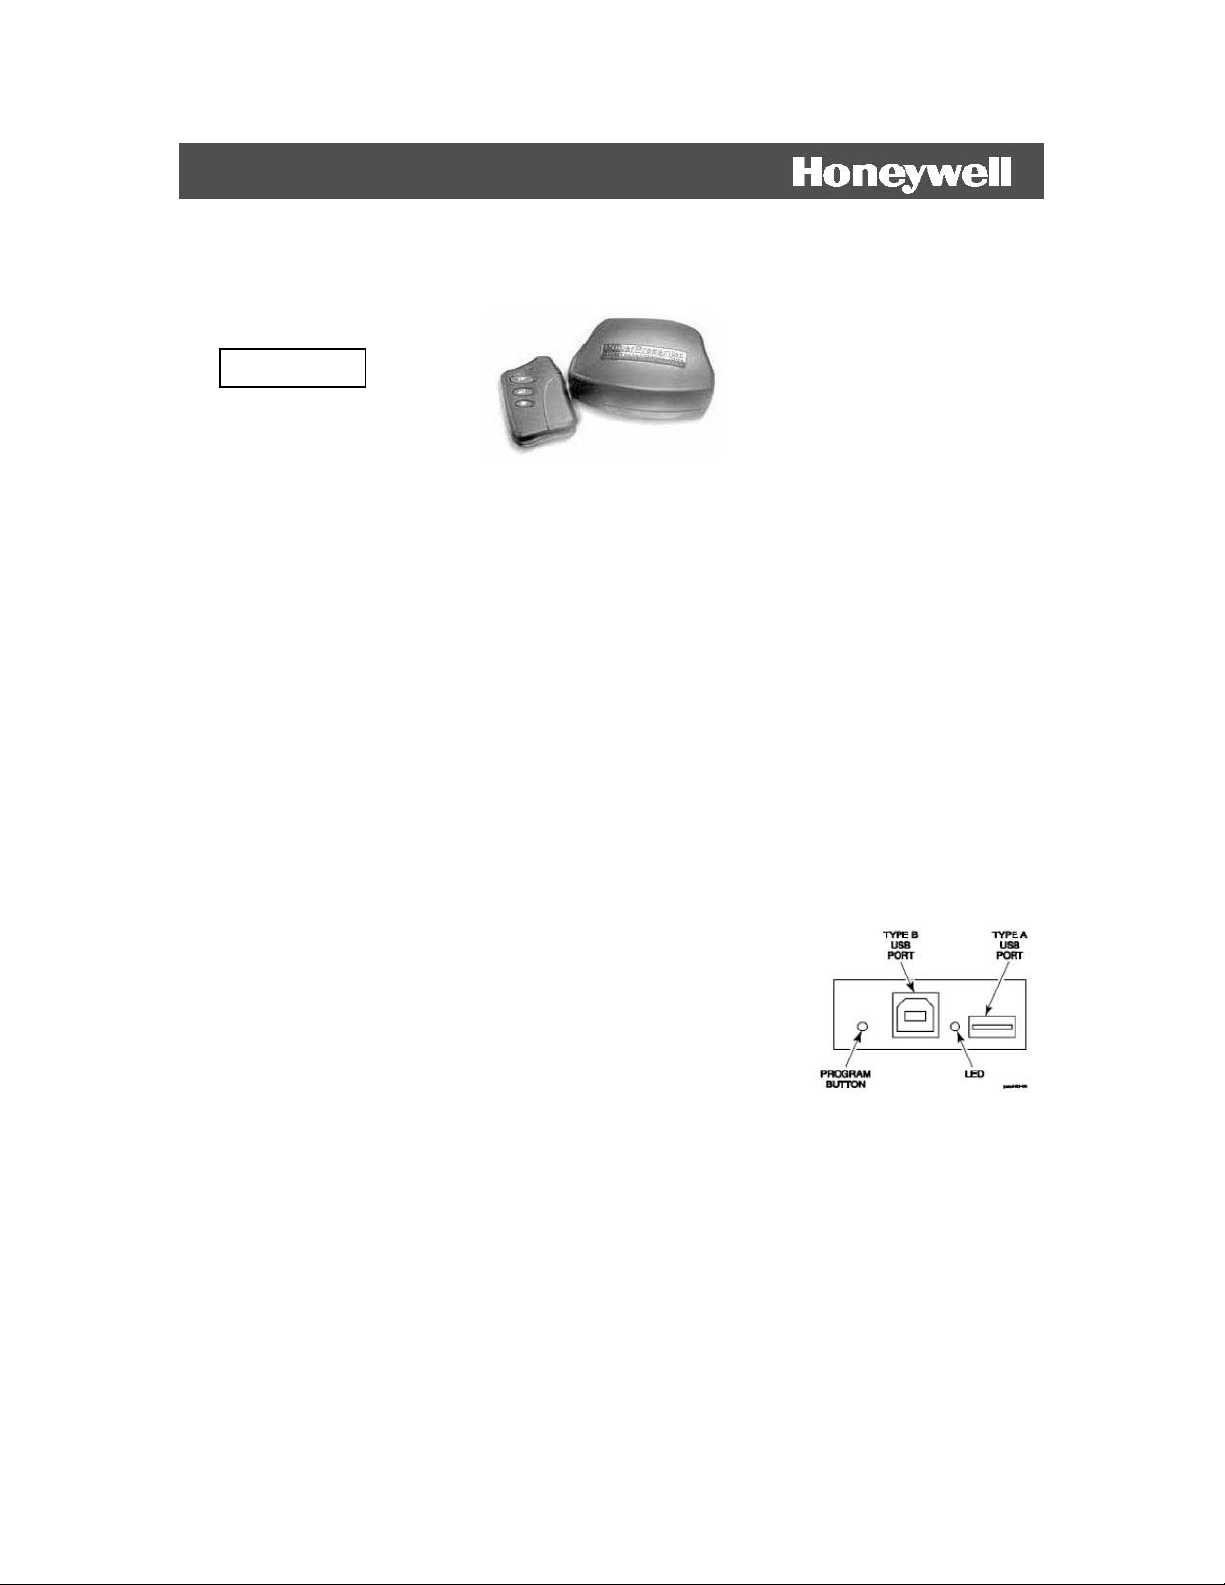
2) Plug Type-A end of the USB cable into the USB port on your computer.
3) Plug Type-B end of the USB cable into the USB port on the receiver.
Note: The Type-A USB port on the receiver is used for connecting additional USB devices
To your computer through your Power Presenter receiver unit.
4) The computer should automatically recognize the receiver as a new
hardware after about 5 to 15 seconds, depending on the computer.
Follow the instructions for installing new hardware (you may need to
load the necessary USB driver from your operating system disk). Once
your computer has installed the receiver as new hardware it will not need
to run through the same steps again. Next time you plug the receiver into
the same computer, it will take about 5 to 10 seconds to recognize the receiver. During the 5 to 10 seconds
there may be little or no indication that t he c omputer is communicating with t he r e c e iver .
Connecting Another USB Device
The USB T ype-A, female port (rectangular shaped Usb female connector) on your POWER PRESENTER
RF receiver is connected to an internal USB hub port. This port will allow you to c onnect other USB
devices to your computer through your POWER PRESENTER RF receiver unit. To use this port, simply
connect a USB device with a Type-A, connector into the port.
Note: USB 2.0 devices will work at USB 1.1 speeds when connected to this port as the POWER
PRESENTER RF is a USB 1.1 compatible device.
Page 2

Training the Remote to the Receiver
The remote has been trained into the receiver at the factory. The receiver can support up to 7 total remotes.
To train a new remote, or re-train an existing remote, into the receiver:
1) Press and release the program button on the receiver (the LED lights solid).
2) Press the advance button (the largest button) on the remot e three times. On the thir d press, the LED will
turn off, indicating the remote has been successfully trained.
To delete all of the remotes from the receiver:
1) Press and hold the program button. The LED will light for 3 seconds then go out.
2) Release the program button.
Using the Remote
After connecting the receiver properly, simply start
your presentation or slide show so ftware, put it in
slide show mode, and press the larger advance button
to advance the slides and the smaller reverse button to
go back to the previous slide. The advance button
mimics the p age down button on the keyboard and the
reverse butt on mimics t he page up b ut ton.
Press the smallest button to activate the laser pointer.
Changing the Remote Keystrokes
1) Turn on your computer and let it fully boot-up.
2) Plug the US B cable into the back of your computer.
3) Plug the o ther end of the USB port on the rece iver.
4) Launch a text editing software application (i.e. word)
5) Open a blank document and display it on the front window of your monitor.
6) On the back of the Base/Receiver, press the Program Button three (3) times.
7) Keyboard commands will begin appearing on your open text window. When the command required for
your softwa re appears, press the button on your remote that you wish to match to tha t keystroke.
a) For Power Point the normal commands are;
• Page Down- Top Button
• Page Up – Middle Button
• b (blank screen) – Top and Middle Buttons pressed together
b) For Media Shout the normal commands are;
• F10 – Top Button
• F9 – Middle Button
• F6 (blank screen) – Top and Middle Buttons pressed together
8) When a command is recognized, the LED on the Base/Receiver will flash and the scrolling text will
pause. The scrolling will continue u ntil all three button command options (to p, middle, both) are
programmed.
9) If you do not wish to use all three keystroke commands, simply unplug your Base/R eceiver from the
cable to stop the process.
10) Close your text editing software application.
11) Test your remote to confirm the commands you have selected.
Page 3

Changing the Batt e ry in the Remote
1) There are two “alignment dots” on the back of the remote
case and one “alignment dot” on the battery cover. Insert a
quarter into the slot on the battery cover and turn counter
clockwise until the dot on the battery co ver is lined up wit h
the LEFT dot on the remote case. The battery cover will release.
2) Pull the battery out of the holder. Dispose of the battery in
an environ mentally proper manner .
3) Insert the new battery with the positive side facing you. The
lithium 3.0 volt battery number is CR2032.
4) Make sure that the “alignment dot” on the battery cover is lined
up with the LEFT “alignment dot” on the remote case as you replace
the battery cover. Then turn clockwise until the dot on the battery
It is recommended that you always carry a spare battery.
Product Specifications
Transmitter:
• Range: Up to 150 feet, depending upon operating environment
• Dimension: 2.6” (66mm)L x 1.5”(38mm)W x 0.5”(13mm)H
• Weight: 1 oz (24 g) with batteries
• Radio Frequency: 433 MHz
• Laser: Diode Laser, 5mW max output at 650NM, Class IIIa
• Power: CR2032 battery
• Battery life: 1 year under normal operation
Receiver:
• Interface: USB port
• Dimensions: 2.6”(66mm)L x 3.4” (86mm)W x 1.2” (31mm)H
• Weight: 2 oz (59g) excluding cable
Cables:
• 3ft USB cable (A/B)
General:
• Warranty: 1 year, limited
• Compliance: FCC part 15; Class B for U.S., Industry Canada RSS-210,
FDA 21 CFR 1040
Laser Pointer Information
Due to the potential of radiation exposure from the laser, the Food and Drug
Administration (FDA) requires that any user of this product report and return
a defective unit to the manufacturer. DO NOT point the laser light directly into
the eye area or attempt to open or disassemble this product for any reason.
Tampering with the laser product may be hazardous and will automatically
VOID the manufacturer’s warranty.
This product fully complies with FDA 21 CFR 1040.10 and 1040.11.
Troubleshooting
“I’m pressing the advance button but the slides are not advancing.”
1) Check the cable connections.
2) Verify that t he LED on the remote comes on solid when the ad vance or reverse button is pushed and that
the laser pointer is at full brightness when the laser button is pushed. If not, repla c e the battery.
3) Verify that the transmitter has be e n tra ined to the receiver. Follow the instructions under “Training the
Remote to “the Receiver”.
Page 4

4) If using USB, verify tha t the correct operating system driver is loaded on your computer. Try reloading
the driver, or try unplugging the receiver, wa i ting 10 seconds, and then plugging it back in .
“The LED on the remote flashes or does not turn on when I push the advance or reverse button, or
the laser pointer is dim or does not work when the la ser button is pushed.”
1) The battery is dead. Replace the battery.
Limited Warranty
Street Smart Technologies, a Division of Honeywell Home and Building Control, (“Seller”), 13475
Danielson St. Suite#120, Poway California 92064, warrants its product to be in conformance with its own
plans and specifications and to be free from defects in material and workmanship under normal use and
service for 12 months from the date of original purchase.
Seller’s obligation shall be li mited to repairing or replacing, at its option, free of charge for materials or
labor, any product that is proved not in compliance with Seller’s specifications or proves defective in
materials or workmanship under normal use and service. Seller shall have no obligation under this Limited
Warranty or otherwise if the product is altered or improperly repaired or serviced by anyone other than
Street Smart Technologies. When returning a product, a Return Material Authorization number (RMA#) is
required and must be obtained from Street Smart Technologies. The RMA# must be clearly displayed on
the outside of the shipping carton and the product must be accompanied by documentation that explains the
problem and provides proof of date of purchase.
FCC Statement
This device complies with part 15 of the FCC rules. Operation is subject to the following two conditions:
(1) this device may not cause harmful interference, and (2) this device must accept any interference
received, including interferences that may cause undesired operation.
FCC ID: Transmitter: KFR-LSRTS Receiver: KRF-LSRRS
Federal Communications C ommission (FCC) Statement
This equipment has been tested to FCC requirements and has been found acceptable for use.
The FCC req ui res the following statement for your information:
This equipment generates and uses radio freq uency energy and if not installed and used properly, that is, in
strict accordance with the manufacturer’s instructions, may cause interference to radio and television
reception. It has been type tested and found to comply with the limits for a Class B computing device in
accordance with the specifications in Part 15 of FCC Rules, which are designed to provide reasonable
protection against such interference in a residential installation. However, there is no guarantee that
interference will not occur in a particular installation. If this equipment does cause interferences to radio or
television reception, which can be determined by turning the equipment off and on, the user is encouraged
to try to correct the interference by one or more of the following measures:
• If using an indoor ante nna, have a quality outdoor antenna installed.
• Reorient the receiving antenna until interference is reduced or eliminated
• Move the receiver away from the control/communicator.
• Move the antenna leads away from any wire runs to the control/communicator.
• Plug the control/communicator into a different outlet so that it and the receiver are on different branch
circuits. If necessary, the user should consult the dealer or an experienced radio/television technician for
additional suggestions. The user or installer may find the following booklets prepared by the Federal
Communications Commission helpful:
“Interference Handbook” This booklet is available from the U.S. Government Printing Office, Washington,
DC 20402 . The user shall not make an y changes or modifications to the equipment unless authorized by the
installation instructions or User’s Manual. Unauthorized change s o r modifications could void the user’s
authority to operate the equipment.
Honeywell
13475 Danielson St. Suite#120
Poway, CA 92064
(858) 513-6391
www.powerremote.com
 Loading...