

Page 1
HBL26BVB
Page 2

Important!
It is essential that you read the instructions in this manual before assembling,
operating, and maintaining the product.
Subject to technical modifications.
Page 3

Original instructions | English
Safety, performance, and dependability have
been given top priority in the design of your
blower/vacuum.
INTENDED USE
The blower/vacuum is only intended for
use outdoors in dry and well-illuminated
conditions.
The product is not intended to be used by
children or persons with reduced physical,
mental, or sensory capabilities.
The product is designed for blowing or
vacuuming light debris, such as leaves, grass,
and other garden refuse.
The product is not designed to suck in water
or other liquids.
Do not use the product for any other purpose.
GENERAL SAFETY WARNINGS
WARNING
Read all safety warnings and all
instructions. Failure to follow the warnings
and instructions may result in electric shock,
re, and/or serious injury. Save all warnings
and instructions for future reference.
WARNING
Never allow children or people unfamiliar
with these instructions to use the product.
Local regulations may restrict the age of the
operator.
■ Some regions have regulations that restrict
the use of the product. Check with your
local authority for advice.
■ Do not allow children or untrained
individuals to use the product.
■ Ensure before each use that all controls
and safety devices function correctly. Do
not use the product if the off switch does
not stop the engine.
■ Never start or run the engine in a closed or
poorly ventilated area; breathing exhaust
fumes can kill.
■ Clear the work area before each use.
Remove all objects such as rocks, broken
glass, nails, wire, or string that can be
blown a considerable distance by high
velocity air.
■ Wear hearing protection at all times while
operating the product. The product is noisy,
and permanent hearing injury may result if
precautions to limit your exposure, reduce
noise, and wear hearing protection are not
strictly adhered to.
■ Wear full eye protection at all times while
operating the product. The manufacturer
strongly suggests a full face mask or fully
enclosed goggles. Normal spectacles or
sunglasses are not adequate protection.
Objects can be thrown at high speed by
the powerful air jet at any time and may
rebound from hard surfaces toward the
operator.
■ While operating the product, always wear
substantial footwear and long trousers.
Do not operate the product when barefoot
or wearing open sandals. Avoid wearing
clothing with loose fitting or that has
hanging cords or ties.
■ Do not wear loose clothing or jewellery that
can be drawn into the air inlet. Secure long
hair so it is above shoulder level to prevent
entanglement in moving parts.
■ Beware of thrown objects; keep all
bystanders, children, and pets at least 15
m away from the work area.
■ Operate the product only at reasonable
hours – not early in the morning or late at
night when people might be disturbed.
■ Use rakes or brooms to loosen debris
before operating the product.
■ Never operate the product in an explosive
1
Page 4

Original instructions | English
atmosphere.
■ Never use the product when you are tired,
ill, or under the influence of alcohol, drugs,
or medicine.
■ Before each use, ensure that all controls
and safety devices function correctly.
■ Operate the product in a recommended
position and only on a firm and level
surface.
■ Do not operate the product on a paved
or gravel surface where ejected material
could cause injury.
■ Before each use, always inspect the
housing for damage. Ensure that guards
and handles are in place and properly
secured. Replace worn or damaged
components in sets to preserve balance.
Replace damaged or unreadable labels.
■ Keep all cooling air inlets clear of debris.
■ Never operate the product while people,
especially children, or pets are nearby.
■ Avoid using the product in bad weather
conditions especially when there is a risk
of lightning.
■ Do not operate in poor lighting. The
operator requires a clear view of the work
area to identify potential hazards.
■ Operating similar tools nearby increases
both the risk of hearing injury and the
potential for other persons to enter your
working area.
■ Always be sure of your footing on slopes.
Walk, never run.
■ Keep proper footing and balance. Do not
overreach. Overreaching can result in loss
of balance.
■ Do not use on a ladder, rooftop, tree, or
other unstable support. Stable footing on a
solid surface enables better control of the
blower in unexpected situations.
■ Never use the product with defective
guards or shields, or without safety devices
in place.
■ Do not modify the product in any way or
use parts and accessories that are not
recommended by the manufacturer.
WARNING
Before using the product in vacuum mode,
you must assemble the upper and lower
vacuum tubes together. This is a one-time
operation only. Never operate the vacuum
with only the upper vacuum tube tted.
The risk of personal injury is signicantly
increased if you fail to follow this warning.
WARNING
If the product is dropped, suffers heavy
impact or begins to vibrate abnormally,
immediately stop the product and inspect
for damage or identify the cause of the
vibration. Any damage should be properly
repaired or replaced by an authorised
service centre.
■ Do not touch the area around the silencer
or engine of the product. These parts get
hot during operation.
■ Stop the engine and allow the product to
cool down before refuelling.
■ For refuelling and fuel mixing, chose an
area that is well-ventilated, and is away
from ignition sources, such as sparks or
flames, and flammable materials.
■ Remember to securely refit the fuel tank
filler cap. Do not smoke when mixing fuel
or filling the fuel tank.
■ Mix and store fuel in a container approved
for fuel. Keep an appropriate type of fire
extinguisher nearby for dealing with fuel
fires.
■ Remember to securely refit the fuel tank
2
Page 5

Original instructions | English
cap before starting the engine.
■ Wipe away any fuel spillage. Move 9 m
away from refuelling site before starting
engine.
■ To reduce the risk of injury associated with
contacting rotating parts, always stop the
engine, and make sure all moving parts
have come to a complete stop before:
– leaving the product unattended
– clearing blockages or unclogging
chute
– checking, cleaning, or working on the
product
– inspecting the product after striking a
foreign object
■ Immediately stop the engine in an event
of accident or breakdown. Do not operate
the product again until it has been fully
checked by an authorised service centre.
■ The product is not intended for frequent
use. It is for occasional use for general
applications, such as blowing leaves,
lawn clippings, etc. It is not intended for
prolonged use. Prolonged periods of
operation can cause circulatory problems
to your hands due to vibration. For use in
prolonged period, it is appropriate to use
the product with an anti-vibration feature.
BLOWER SAFETY WARNINGS
■ Wear a face filter mask in dusty conditions
to reduce the risk of injury associated with
the inhalation of dust.
■ Slightly dampen surfaces in dusty
conditions.
■ Do not use the product near open windows.
■ Use the full blower nozzle extension so that
the air stream can work close to the ground
and perform effectively.
■ Do not point the blower nozzle in the
direction of people or pets.
■ Never place objects inside the blower
tubes.
■ Do not place the product on top of or near
loose debris. Debris can be sucked into the
intake vent, resulting in possible damage
to the product.
VACUUM SAFETY WARNINGS
WARNING
Never operate the vacuum with only the
upper vacuum tube tted. Failure to follow
this warning increases the risk of personal
injury.
NOTE: Without the lower vacuum tube tted,
it is much easier to reach up inside the tube.
■ Do not operate the vacuum without the
debris collector bag assembly installed.
Flying debris could cause serious injury.
Make sure that the debris collector bag is
in good condition and completely closed
before operating the product.
■ Move the vacuum from side to side along
the outer edge of the debris. To avoid
clogging, do not place the vacuum tube
directly into the debris pile.
■ Hold the engine higher than the inlet end of
the vacuum tube.
■ To avoid serious injury to the operator
or damage to the product, do not try to
vacuum up rocks, broken glass, bottles, or
similar objects.
■ Avoid situations that could cause fire in
the debris collector bag. Do not operate
the product near an open flame. Do not
vacuum up warm ash from fireplaces and
barbecue pits. Do not vacuum up discarded
cigars or cigarettes unless the cinders are
completely cool.
■ Keep all parts of your body away from any
moving part. Rotating fan blades can cause
3
Page 6

Original instructions | English
severe injury. Stop the engine and ensure
that fan blades have stopped rotating
before opening the vacuum door, installing
or changing tubes, or opening or removing
debris bag.
■ When feeding material into the product,
make sure that the pieces of metal, rocks,
bottles, cans, or other foreign objects are
not included.
■ Do not allow processed material to build
up in the discharge zone. This may prevent
proper discharge and can result in kickback
of material through the intake opening.
■ If the product becomes clogged, stop the
engine before cleaning the debris.
TRANSPORTATION AND STORAGE
■ Stop the engine and allow the product to
cool down before storing or transporting.
■ Clean all foreign material from the product.
■ Drain all fuel from the tank into a container
approved for petrol. Remember to properly
replace and tighten the fuel cap.
■ Run the engine until it stops. This will
remove all fuel that could become stale and
leave varnish and gum in the fuel system.
■ Store the product in a cool, dry, and
well-ventilated place that is inaccessible
to children. Keep away from corrosive
agents, such as garden chemicals and deicing salts.
■ Do not store outdoors.
■ When transporting the product in a vehicle,
secure it against movement or falling to
prevent injury to persons or damage to the
product.
■ Abide by all government and local
regulations for the safe storage and
handling of petrol.
Short term (less than 1 month)
■ Stop the engine and allow the product to
cool down before storing or transporting.
■ Clean all foreign material from the product.
■ Store the product in a cool, dry, and well-
ventilated place that is inaccessible to
children.
■ Keep away from corrosive agents such as
garden chemicals and de-icing salts.
■ Do not store outdoors.
MAINTENANCE
WARNING
Use only original manufacturer’s
replacement parts, accessories, and
attachments. Failure to do so can cause
possible injury and poor performance, and
may void your warranty.
WARNING
Servicing requires extreme care and
knowledge and should be performed only
by a qualied service technician. Have the
product serviced by an authorised service
centre only. When servicing, use only
original replacement parts.
■ Stop the engine, allow the product to cool
down, and make sure all moving parts
have come to a complete stop.
■ You may make adjustments and repairs
described in this manual. For other repairs,
contact an authorised service centre.
■ After each use, clean the product with a
soft, dry cloth.
■ Check all nuts, bolts, and screws at
frequent intervals for proper tightness to
ensure that the product is in safe working
condition. Any part that is damaged should
be properly repaired or replaced by an
4
Page 7

Original instructions | English
authorised service centre.
■ Have the product serviced by an authorised
service centre to replace damaged or
unreadable labels.
CLEARING A BLOCKAGE
■ To reduce the risk of injury associated with
contacting rotating parts, always stop the
engine, and make sure all moving parts
have come to a complete stop.
■ Remove the blower/vacuum tubes to
inspect for blockage. Clear the tubes if
required.
■ Remove the vacuum bag. Check that the
bag adaptor is free from obstruction.
■ Inspect the opening to the fan enclosure
and the tube to the vacuum bag for
evidence of a blockage. Keep fingers away
from the fan at all times.
■ Do not attempt to remove the fan. If it is
necessary to remove the fan, have the
product serviced by an authorised service
centre.
■ Reinstall the tubes and the vacuum bag
before starting the product.
RESIDUAL RISKS
Even when the product is used as prescribed,
it is still impossible to completely eliminate
certain residual risk factors. The following
hazards may arise in use and the operator
should pay special attention to avoid the
following:
■ Injury caused by vibration.
– Always use the right tool for the job. Use
designated handles and restrict working
time and exposure.
■ Hearing damage caused by exposure to
noise.
– Wear ear protection and limit exposure.
■ Injury from flying objects from the blow tube
airflow
– Wear eye protection at all times.
RISK REDUCTION
It has been reported that vibrations
from handheld tools may contribute to a
condition called Raynaud’s Syndrome in
certain individuals. Symptoms may include
tingling, numbness, and blanching of the
ngers, usually apparent upon exposure to
cold. Hereditary factors, exposure to cold
and dampness, diet, smoking and work
practices are all thought to contribute to the
development of these symptoms. There are
measures that can be taken by the operator to
possibly reduce the effects of vibration:
■ Keep your body warm in cold weather.
When operating the product wear gloves
to keep the hands and wrists warm. It is
reported that cold weather is a major factor
contributing to Raynaud’s Syndrome.
■ After each period of operation, exercise to
increase blood circulation.
■ Take frequent work breaks. Limit the
amount of exposure per day.
If you experience any of the symptoms of this
condition, immediately discontinue use and
see your physician.
WARNING
Injuries may be caused, or aggravated, by
prolonged use of a tool. When using any
tool for prolonged periods, ensure you take
regular breaks.
FEATURES
KNOW YOUR BLOWER/VACUUM
See page 14.
The safe use of the product requires an
understanding of the information on the
product and in this operator’s manual as
well as knowledge of the project you are
attempting to do. Before use of the product,
familiarise yourself with all operating features
and safety rules.
5
Page 8

Original instructions | English
BLOWER TUBE AND NOZZLES
The blower tube can be installed on the blower
without using any tools.
POSITIVE SWITCHES
The product has positive switches at the
blowing and vacuuming opening sides. The
unit will only run if both the metal contacts
are inserted into the positive switches. When
running the unit in blower mode, the metal
contact on the blow tube and the door must be
inserted into their respective positive switches.
When running the unit in vacuuming mode,
the metal contact on the adaptor tube and
the vacuum tube must be inserted into their
respective positive switches. This reduces the
risk of accidental contact with rotating parts.
TWO ENGINE KILL SWITCHES
There are two ON/OFF switches, blower and
vacuum mode switches, in the top handle,
so that the engine can be stopped easily by
pressing either switch. Both switches should
be set to “I“ (ON) to run the engine.
ENGINE
The blower has a powerful 26 cc engine with
sufcient power to handle tough blowing and
vacuuming jobs.
THROTTLE TRIGGER
The blower can be operated at any speed
between idle and full throttle.
VACUUM
Converting the blower to a vacuum is
simple and can be done using a cross head
screwdriver.
VACUUM BAG
The vacuum bag attaches to the blower easily
by using the vacuum bag adaptor.
VACUUM HANDLE
This feature allows the user to perform
vacuuming duties comfortably.
VACUUM TUBES
The vacuum tubes can be installed on the
blower using a cross head screw driver.
ASSEMBLY
UNPACKING
The product requires assembly.
■ Carefully remove the product and any
accessories from the box. Make sure that
all items listed in the “What’s in the box”
section are included.
WHAT’S IN THE BOX
See page 14.
■ Blower/Vacuum x 1
■ Blower tube/nozzle x 1
■ Upper vacuum tube x 1
■ Lower vacuum tube x 1
■ Adaptor installed in vacuum bag x 1
■ Lubricating oil x 1
■ Operator’s manual x 1
TOOLS NEEDED
The following tools are not included in the
package but are needed for the assembly:
■ Socket wrench
■ Phillips head screwdriver
■ Flat head screwdriver
WARNING
Do not use the product if any parts in the
“What’s in the box” section are already
assembled when you rst open the box.
The parts on the list are not assembled
by the manufacturer and require customer
installation. Use of a product that may have
been improperly assembled could result in
serious personal injury.
6
Page 9

Original instructions | English
■ Carefully inspect the product to make sure
no breakage or damage occurred during
shipping.
■ Do not discard the packing material
until you have carefully inspected and
satisfactorily operated the product.
■ If any parts are damaged or missing,
please call your HOMELITE service centre
for assistance.
WARNING
If any parts are damaged or missing, do
not operate the product until the parts are
replaced. Use of the product with damaged
or missing parts could result in serious
personal injury.
WARNING
Do not attempt to modify the product or
create accessories not recommended for
use with the product. Any such alteration
or modication is misuse and could result
in a hazardous condition leading to possible
serious personal injury.
WARNING
Rotating impeller blades can cause severe
injury. Always stop the engine and ensure
impeller blades have stopped rotating
before opening the vacuum door or
installing/changing tubes. Do not put hands
or any other object into the vacuum tubes
while they are installed on the unit.
OPERATION
WARNING
Do not allow familiarity with tools to make
you careless. Remember that a careless
fraction of a second is sufcient to inict
serious injury.
WARNING
Always wear eye protection with side
shields marked to comply with standards,
along with hearing protection. Failure to do
so could result in serious injuries such as
objects being thrown into your eyes.
MIXING THE FUEL
The product is powered by a 2-stroke engine
and requires premixing petrol and 2-stroke oil.
The mixture should be at a 50:1 ratio.
NOTE: We recommend you use RYOBI
synthetic 2-stroke lubricant. Only use a quality
synthetic 2-stroke lubricant in the product to
ensure top performance and engine longevity.
NOTE: If using similar containers for different
fuels, label the container with its contents and
the date it was added.
To mix the fuel:
■ Pre-mix unleaded petrol and 2-stroke
engine lubricant in a clean container
approved for petrol.
■ The engine of the product is certified to
operate on unleaded petrol intended for
automotive use with an octane rating of 91
or higher.
■ Do not use any type of pre-mixed petrol/
lubricant from fuel service stations; this
includes the pre-mixed petrol/lubricant
intended for use in mopeds, motorcycles,
etc.
■ Avoid using ethanol fuels or fuels containing
ethanol. The use of ethanol fuels may result
in damage to the engine of the product.
■ Use only synthetic 2-stroke lubricant. Do
not use automotive lubricant or 2-stroke
outboard lubricant.
■ Mix 2% synthetic 2-stroke lubricant into the
petrol. This is a 50:1 ratio.
■ Mix the fuel thoroughly and also each time
7
Page 10

Original instructions | English
before fuelling.
■ Mix in small quantities. Do not mix quantities
larger than usable in a 30-day period. A
synthetic 2-stroke lubricant containing a
fuel stabiliser is recommended.
1 L + 20 mL =
2 L + 40 mL =
3 L + 60 mL = 50:1 (2%)
4 L + 80 mL =
5 L + 100 mL =
FILLING THE TANK
WARNING
Petrol is extremely ammable and explosive.
A re or explosion from petrol will burn you
and others. Always shut off engine before
fuelling. Never add fuel to a machine with
a running or hot engine. Move at least 9 m
from refuelling site before starting engine.
Do not smoke and stay away from open
ames and sparks. Failure to safely handle
fuel could result in serious personal injury.
1. Clean the surface around the fuel cap to
prevent contamination.
2. Loosen the fuel cap slowly.
3. Pour the fuel mixture carefully into the tank.
4. Clean and inspect the fuel cap gasket
before replacing the fuel cap.
5. Replace the fuel cap and tighten it. Do not
cross thread the fuel cap.
6. Wipe spilled fuel from the product.
7. Move at least 9m away from refuelling area
before starting the product.
NOTE: It is normal for smoke to be emitted
from a new engine during rst use.
WARNING
Check for fuel leaks. A leaking fuel cap
is a re hazard and must be replaced
immediately. If you nd any leaks, correct
the problem before using the product.
Failure to do so could result in a re that
could cause serious personal injury.
OXYGENATED FUELS
Do not use E85 fuel. It will void your warranty.
NOTE: Fuel system damage or performance
problems resulting from the use of an
oxygenated fuel containing more than the
percentages of oxygenates stated previously
are not covered under warranty.
Petrol containing up to 10% ethanol by volume
(commonly referred to as E10) or 15% ethanol
by volume (commonly referred to as E15) are
acceptable. Do not use E85 fuel.
USING THE BLOWER
See page 25.
■ To keep from scattering debris, blow
around the outer edges of a debris pile.
Never blow directly into the center of a pile.
■ Operate power equipment at reasonable
hours only - not early in the morning or late
at night when people might be disturbed.
Comply with the times listed in local
ordinances.
■ To reduce sound levels, limit the number of
pieces of equipment used at any one time
and operate blower at the lowest possible
throttle speed to do the job. This may also
reduce vibration levels.
■ Conserve water by using power blowers
instead of hoses for many lawn and
garden applications, including areas such
as screens, patios, grills, porches, and
gardens.
■ Check your equipment before operation,
especially the silencer, air intakes, and air
8
Page 11

Original instructions | English
filters.
■ Use rakes and brooms to loosen debris
before blowing.
■ In dusty conditions, slightly dampen
surfaces when water is available.
■ After using blowers or other equipment,
clean up. Dispose of debris properly.
WARNING
Never run the product without the blower/
vacuum tube installed. Failure to follow
these steps could result in possible serious
injuries.
WARNING
Always hold the blower/vacuum away
from your body with the handle in your
right hand when operating as a blower,
keeping clearance between your body and
the product. The mufer side of the blower
should be away from your body. Any
contact with the housing can result in burns
and/or other serious personal injury.
WARNING
Do not place blower on top of or near loose
debris or gravel. Debris may be sucked
into blower intake vent resulting in possible
damage to the product and could result in
serious personal injury.
WARNING
Watch out for children, pets, open windows,
or freshly washed cars, and blow debris
safely away.
USING THE VACUUM
See page 26.
WARNING
Keep the silencer and all hot surfaces of
the blower/ vacuum away from your body.
Failure to do so could result in possible
serious personal injury.
■ Place the vacuum bag strap over your right
shoulder. Hold the upper handle in your left
hand and the vacuum handle in your right
hand.
■ Move the blower/vacuum from side to side
along outer edge of the debris. To avoid
clogging, do not place the vacuum tube
directly into the debris pile.
■ Hold the engine higher than the inlet end of
the vacuum tube.
■ Always point vacuum tube downhill when
working on a hillside.
■ To avoid serious injury to the operator or
damage to the unit, do not pick up rocks,
broken glass, bottles, or other similar
objects.
■ If the vacuum tubes should clog, stop
the engine, ensure impeller blades have
stopped spinning, and disconnect the
spark plug wire before cleaning out the
obstruction.
■ Remove the vacuum tubes and clear
the debris from the blower fan housing.
Remove the bag and clear the tube. A
small rod or stick may be required to clear
the entire tube length. Ensure that all debris
has been cleared before reassembling the
vacuum tubes.
9
Page 12
Original instructions | English
GENERAL MAINTENACE
CLEANING THE AIR FILTER
See page 29.
A wet or dirty air lter causes starting difculty,
loss of performance, and shorten the life span
of the engine. The air lter should be checked
and cleaned after 5 hours of operation.
Inspect and clean more frequently if used in
dusty dirty conditions.
For best performance, the air lter should be
replaced every 25 hours or yearly.
CLEANING THE EXHAUST PORT, MUFFLER, AND SPARK ARRESTOR
NOTE: Depending on the type of fuel used,
the type and amount of lubricant used, and/
or your operating conditions, the exhaust
port, mufer, and/or spark arrestor screen
may become blocked with carbon deposits.
If you notice a power loss with your petrolpowered product, you may need to remove
these deposits to restore performance. We
highly recommend that only qualied service
technicians perform this service.
The mufer must be replaced every 50 hours
or yearly to ensure proper performance of
your product.
CLEANING THE VACUUM BAG
See page 30.
A dirt bag will reduce performance. To clean
the bag, turn it inside out and shake. Wash the
bag in soapy water at least once a year.
REPLACING THE SPARK PLUG
See page 28.
The engine uses a HOMELITE AC00160,
Champion RCJ-6Y or NGK BPMR7A spark
plug with .025 in. electrode gap. Use an exact
replacement and replace annually.
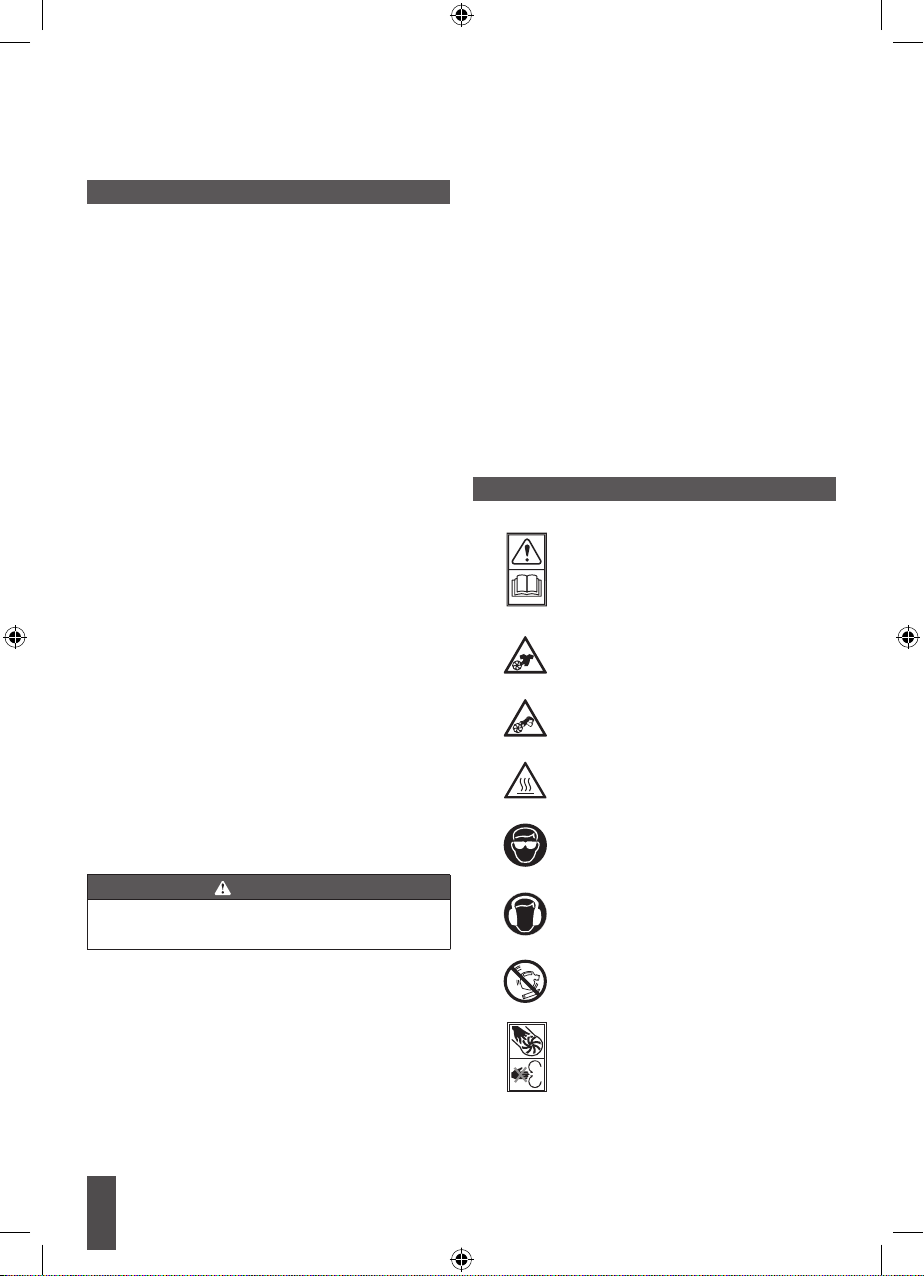
SYMBOLS ON THE PRODUCT
Read and understand
all instructions before
operating the product, follow
all warnings and safety
instructions.
Risk of loose clothing being
drawn into air intake.
Risk of long hair being drawn
into air inlet.
Warning! Hot surface.
FUEL CAP
WARNING
A leaking fuel cap is a re hazard and must
be replaced immediately.
The fuel cap contains a non-serviceable
lter and a check valve. A clogged fuel
lter will cause poor engine performance. If
performance improves when the fuel cap is
loosened, check valve may be faulty or lter
clogged. Replace fuel cap if required.
10
Wear eye protection.
Wear ear protection.
Do not run unit without tubes
in place.
Beware of rotating fans.
Keep hands and feet out of
openings while the product is
running.
Page 13

Original instructions | English
Beware of thrown or ying
objects. Keep all bystanders,
especially children and pets,
at least 15 m away from the
operating area.
To reduce the risk of injury or
damage, avoid contact with
any hot surface.
The measured sound power
level is 112 dB(A).
Use unleaded petrol intended
for motor vehicle use with an
octane rating of 91 or higher.
Use 2-stroke oil for air cooled
engines.
Mix the fuel mix thoroughly
and also each time before
refuelling.
Run position
Set the choke lever to “HALF”
choke position.
Waste electrical products
should not be disposed of
with household waste. Please
recycle where facilities exist.
Check with your local authority
or retailer for recycling advice.
The following signal words and meanings
are intended to explain the levels of risk
associated with this product.
DANGER
Indicates an imminently hazardous
situation, which, if not avoided, will result in
death or serious injury.
WARNING
Indicates a potentially hazardous situation,
which, if not avoided, could result in death
or serious injury.
CAUTION
Indicates a potentially hazardous situation,
which, if not avoided, may result in minor or
moderate injury.
CAUTION
Without safety alert symbol
Indicates a situation that may result in
property damage.
SYMBOLS IN THIS MANUAL
Set the choke lever to “FULL”
choke position.
Starting a cold engine
Starting a warm engine
Regulatory Compliance
Mark (RCM). The product
meets applicable regulatory
requirements.
Note
Warning
Parts or accessories are sold
separately
11
Page 14

Original instructions | English
TROUBLESHOOTING
Problem Possible causes Solution
Engine fails to
start.
Engine hard to
start.
Engine lacks
power.
Engine
overheats.
No fuel in tank. Fill tank.
Spark plug shorted or
fouled.
Spark plug is broken
(cracked porcelain or
electrodes broken).
Ignition lead wire shorted,
broken, or disconnected
from spark plug.
Ignition inoperative.
Check and make sure
the switches engaged
ready to work and the on/
off switches are in the run
(I) position.
Water in petrol or stale
fuel mixture.
Water in petrol or stale
fuel mixture.
Engine is under or over
choked.
Weak spark at spark
plug.
Air lter clogged. Clean air lter. Refer to the “Cleaning the Air
Insufcient lubricant in
fuel mixture.
Replace spark plug.
Replace spark plug.
Contact authorised service centre.
Contact authorised service centre.
Drain entire system and rell with fresh fuel.
Drain and rell with correct mixture.
Adjust choke as necessary.
Contact authorised service centre.
Filter” section in this manual.
Mix fuel as described in starting instructions.
12
Page 15

Original instructions | English
13
Page 16

x 1x 1
x 1
14
x 1
x 1
x 1
x 1
Page 17

1. ON/OFF switch
for blower mode
2. Top handle
3. ON/OFF switch
for vacuum mode
4. Starter grip
5. Fuel cap
6. Vacuum grip handle
18
7. Choke lever
8. Primer bulb
9. Positive switch at
vacuuming side
10. Vacuum inlet door
11. Vacuum bag adaptor
12. Vacuum bag
13. Lower vacuum tube
2 3
1
14. Upper vacuum tube
15. Blower tube
16. Positive switch at
blowing side
17. Spark plug
18. Throttle trigger
4
17
16
15
12 111314
5
6
7
8
9
10
15
Page 18

1 2
(50 : 1)
Wear full eye and ear protection, substantial footwear, and
long trousers at all times while operating the product. Do
not operate the product when barefoot or wearing open
sandals.
Pre-mix 2-stroke engine lubricant and unleaded petrol in a
clean container approved for petrol at a 50:1 ratio.
B3 B4
Open the vacuum inlet door. Align the raised locking tabs of the lower vacuum tube with
the matching orice on the upper vacuum tube to secure
the vacuum tubes together.
16
Page 19

A B
3 A1
1
3
3
2
2
A2
B1
B2
A. Attach the blower tube. B. Attach the vacuum tubes.
B5
2
1
1. Align raised tabs on upper blower tube with the slots on
blower housing outlet. 2. Attach and tighten securely by
turning clockwise until it clicks into place.
Press slider plate into positive switch’s slot.
NOTE: Ensure to attach the blower tube securely to the
blower/vacuum housing.
3
2
1
1. Align the raised slots on the vacuum bag adaptor with
the raised locking tabs on the blower housing outlet; push
the bag adaptor onto the housing. 2. Twist to lock into
place. 3. Press the slider plate into the positive switch slot
to make sure the switch is engaged and ready to operate.
4
1
2
1. Depress door tab using a at head screwdriver.
2. Loosen the screw on the door to open vacuum inlet door.
1. Align tabs on housing with the vacuum tube assembly. 2. Tighten screws on upper vacuum tube to secure to blower
housing.
NOTE: Ensure to attach the vacuum tubes securely to the
blower/vacuum housing.
A. Hold the blower with the upper handle in your right hand.
Place the vacuum bag strap over your right shoulder. Hold
the upper handle in your left hand and the vacuum handle
in your right hand.
To stop the engine, toggle either the blower or vacuum
switch to the “STOP” position.
17
Page 20

18
Page 21

Cold start engine Warm start engine
p.21
p.23
Using the blower Using the vacuum
p.25
p.26
19
Page 22

Replacing the spark plug
Cleaning the air filter
Cleaning the vacuum bag
p.28 p.29
p.30
Cleaning the blower/vacuum
20
p.31
Storing the blower/vacuum
p.32
Page 23

1
STARTING A COLD ENGINE
1. Loosen the fuel cap slowly by turning it
counterclockwise. Remove the fuel cap.
Pour the fuel mixture carefully into the
tank. Replace and tighten the fuel cap.
2. Set the 2 switches to “I“ (ON) position.
3. Press the primer bulb 10 times. Set the
choke lever to “FULL“ position.
4. Squeeze the throttle trigger. Pull the
starter grip until the engine attempts to
start. Do not pull the starter grip more
than 8 times.
2
1
3
2
3
1010
1
2
4
2
1
8
21
Page 24

5. Set the choke lever to the “HALF“ choke
position.
6. Squeeze the throttle trigger. Pull the
starter grip until the engine attempts to
start. Do not pull the starter grip more
than 6 times.
7. When engine starts, wait for 10 seconds.
8. Set the choke lever to the “RUN”
position.
5
6
2
1
6
7
8
22
Page 25

NOTE: Hold blower as shown, so the
air stream can work close to the ground.
9. To stop the engine, toggle either the
blower or vacuum switch to the
“STOP" position.
9
23
Page 26

STARTING A WARM ENGINE
1. Toggle the 2 switches to the “I“ (ON)
position.
2. Press the primer bulb 10 times. Set the
choke lever to “RUN“ position.
3. Squeeze the throttle trigger. Pull the
starter grip until the engine starts. Do not
pull the starter grip more than 6 times.
4. To stop the engine, toggle either the
blower or vacuum switch to the “STOP“
position.
1
2
1010
1
2
3
24
2
1
6
4
Page 27

USING THE BLOWER
1. Attach the blower tube to the blower.
Refer to the “Getting Started” section for
the procedure.
2. Start the blower. Refer to the “Starting a
cold engine” or “Starting a warm engine”
section for the procedure.
3. Squeeze the throttle trigger to start the
blower. Hold the blower with the handle
in your right hand.
NOTE: Hold blower as shown, so the air
stream can work close to the ground.
1
2
1
2
3
25
Page 28

USING THE VACUUM
1. Align the raised slots on the vacuum bag
adaptor with the raised locking tabs on
the blower housing outlet; push the bag
adaptor onto the housing.
2. Twist to lock into place.
3. Press the metal contact into the positive
switch slot to make sure the switch is
engaged and ready to operate.
4. Loosen the screw on the door to open
vacuum inlet door.
1
2
3
26
4
1
2
Page 29

5. Open the vacuum inlet door.
6. Align the raised locking tabs with the
matching orice on the upper vacuum
tube to secure the upper and lower
vacuum tubes together. An audible click
can be heard to indicate that the blower
tubes are secured.
7. Align tabs on housing with vacuum
tube assembly. Tighten screws on
upper vacuum tube to secure to blower
housing.
8. Start the blower. Refer to the “Starting a
cold engine” or “Starting a warm engine”
section for the procedure. Squeeze the
throttle trigger to start the vacuum.
NOTE: Place the vacuum bag strap
over your right shoulder. Hold the upper
handle in your left hand and the vacuum
handle in your right hand.
5
6
7
3
2
1
3
2
8
1
2
27
Page 30

REPLACING THE SPARK PLUG
1. To stop the engine, toggle either the
blower or vacuum switch to the “STOP”
position.
2. Disconnect the lead wire from the
spark plug. Using a socket wrench with
an extension and spark plug socket,
loosen the spark plug by turning it
counterclockwise.
3. Remove the old spark plug and dispose
properly.
4. Using the socket wrench, install the
new spark plug and tighten by turning it
clockwise. Connect the lead wire to the
spark plug.
1
2
2
1
3
28
4
4
3
1
2
Page 31

CLEANING THE AIR FILTER
1. To stop the engine, toggle either the
blower or vacuum switch to the “STOP”
position.
2. Press the air filter cover tab to open the
air filter cover. Open the air filter cover.
3. Lift the edge of the air filter carefully
and peel it out. Clean the air filter with
a brush.
4. To reinstall the air filter cover, insert the
tabs into the notches and lock into place.
NOTE: Make sure the filter is seated
properly inside the cover. Installing the
filter incorrectly will allow dirt to enter the
engine, causing rapid engine wear.
1
2
1
2
3
4
2
1
29
Page 32

1
CLEANING THE VACUUM BAG
1. To stop the engine, toggle either the
blower or vacuum switch to the “STOP”
position.
2. To remove the vacuum bag and adaptor,
pull off the metal contact, twist the
adaptor counterclockwise, and then
remove the vacuum bag and adaptor
from the blower housing outlet.
3. Unzip the vacuum bag and dispose
debris properly.
2
3
1
2
3
30
Page 33

CLEANING THE BLOWER/VACUUM
1. To stop the engine, toggle either the
blower or vacuum switch to the “STOP”
position.
2. Clean the blower/vacuum using a brush.
WARNING: Avoid using solvents when
cleaning plastic parts. Most plastics are
susceptible to damage from various
types of commercial solvents and may
be damaged by their use. Use clean
cloths or brush to remove dirt, dust,
lubricant, grease, etc.
1
2
3
31
Page 34

1
CLEANING THE BLOWER/VACUUM
1. To stop the engine, toggle either the
blower or vacuum switch to the “STOP”
position.
A1.To remove the blower tube, twist and
remove the tube from the blower
housing outlet.
B1.To remove the vacuum tube assembly,
loosen the screws that secure the tube
assembly to the inlet cover.
B2.Press on the raised locking tab, and then
detach the upper vacuum tube from the
lower vacuum tube.
A1
B1
B2
1
2
3
1
2
3
1
1
32
2
Page 35

B3. Close the vacuum inlet door and secure
with the securing screw.
B4. To remove the vacuum bag and adaptor,
pull off the metal contact, twist the
adaptor counterclockwise, and then
remove the vacuum bag and adaptor
from the blower housing outlet.
2. Loosen the fuel cap slowly by turning
counterclockwise, and then drain all fuel
from the tank into a container approved
for fuel. After draining all the fuel, replace
the fuel cap and tighten by turning it
clockwise.
3. Store blower/vacuum and its parts in a
cool dry and well-ventilated place that is
inaccessible to children.
B3
B4
2
2
3
1
1
3
2
4
20180328v1d8
2
3
1
3
33
Page 36

PRODUCT SPECIFICATIONS
Blower/Vacuum
Model HBL26BVB
Rated power 0.65 kW
Engine displacement 26 cc
Engine speed (max) 8500/min
Engine speed (idle) 2800 - 3400/min
Air velocity 320 km/h
Air volume 11 m3/hr
Weight (without fuel) 5.2 kg
Vibration
Blower mode
Idling 6.2 m/s
Racing 31.3 m/s
Equivalent vibration total value 29.1 m/s
Sound
Blower mode
Idling 89.4 dB
Racing 109.4 dB
2
2
2
ACCESSORY
Vacuum bag HAC302
WARNING
The declared vibration value has been
measured with a standard test method
and may be used to compare one tool with
another.
The declared vibration value may be used in
a preliminary assessment of exposure.
The vibration emission during actual use of
power tool can differ from the declared total
value depending on the ways in which the
tool is used.
Identify safety measures to protect yourself
based on an estimation of exposure in the
actual conditions of use, taking account
of all parts of the operating cycle such as
the times when the tool is switched off and
when it is running idle in addition to the
trigger time.
Page 37

Page 38

Page 39

Page 40

Imported by:
Techtronic Industries Australia Pty. Ltd.
31 Gilby Road, Mount Waverly, VIC 3149,
Melbourne, Australia
Techtronic Industries NZ Limited
2 Landing Drive, Mangere,
Auckland, 2022 , New Zealand
960704016-01
 Loading...