

Hilti PX 10T, PX 10R Operating Instructions Manual

PX 10
Bedienungsanleitung de
Operating instructions en
Mode d’emploi fr
Manual de instrucciones es
Istruzioni d’uso it
Gebruiksaanwijzing nl
Brugsanvisning da
Bruksanvisning no
Bruksanvisning sv
Käyttöohje fi
Manual de instruções pt
Οδηγιες χρησεως el
Használati utasítás hu
Návod k obsluze cs
Návod na obsluhu sk
Instrukcja obsługi pl
Upute za uporabu hr
Navodila za uporabo sl
Ръководство за обслужване bg
Инструкция по зксплуатации ru
Instrucţiuni de utilizare ro
Lietošanas pamācība lv
Instrukcija lt
Kasutusjuhend et
Kulllanma Talimatı tr
ja
ko
zh
Printed: 07.07.2013 | Doc-Nr: PUB / 5136621 / 000 / 00
PX 10TPX 10T
PX 10RPX 10R
cm
9
0
°
9
0
°
4
0
°
8
0°
70°
6
0°
50°
4
0°
1
23
4
7
+}
"±
"“
"“
"“
+#
+Ç
9
8+[ +≠ +±+“
4
4
6
5
+|
"≠
+{
"#
"Ç
+]
PXA 70
PX 10R
PX 10T
PUA 91
PUA 92
1
Printed: 07.07.2013 | Doc-Nr: PUB / 5136621 / 000 / 00

PX 10RPX 10T
2
PX 10R
PX 10T
3
90˚
PX 10R
PX 10R
PX 10TPX 10T
90˚
4
4
0
50
6
0
70
80
90
a = ?
PX 10T
PX 10R
6
4
0
50
60
7
0
8
0
9
0
8
4
0
50
6
0
70
80
90
70˚
PX 10T
PX 10R
?
5
7
4
0
50
6
0
7
0
8
0
90
Printed: 07.07.2013 | Doc-Nr: PUB / 5136621 / 000 / 00
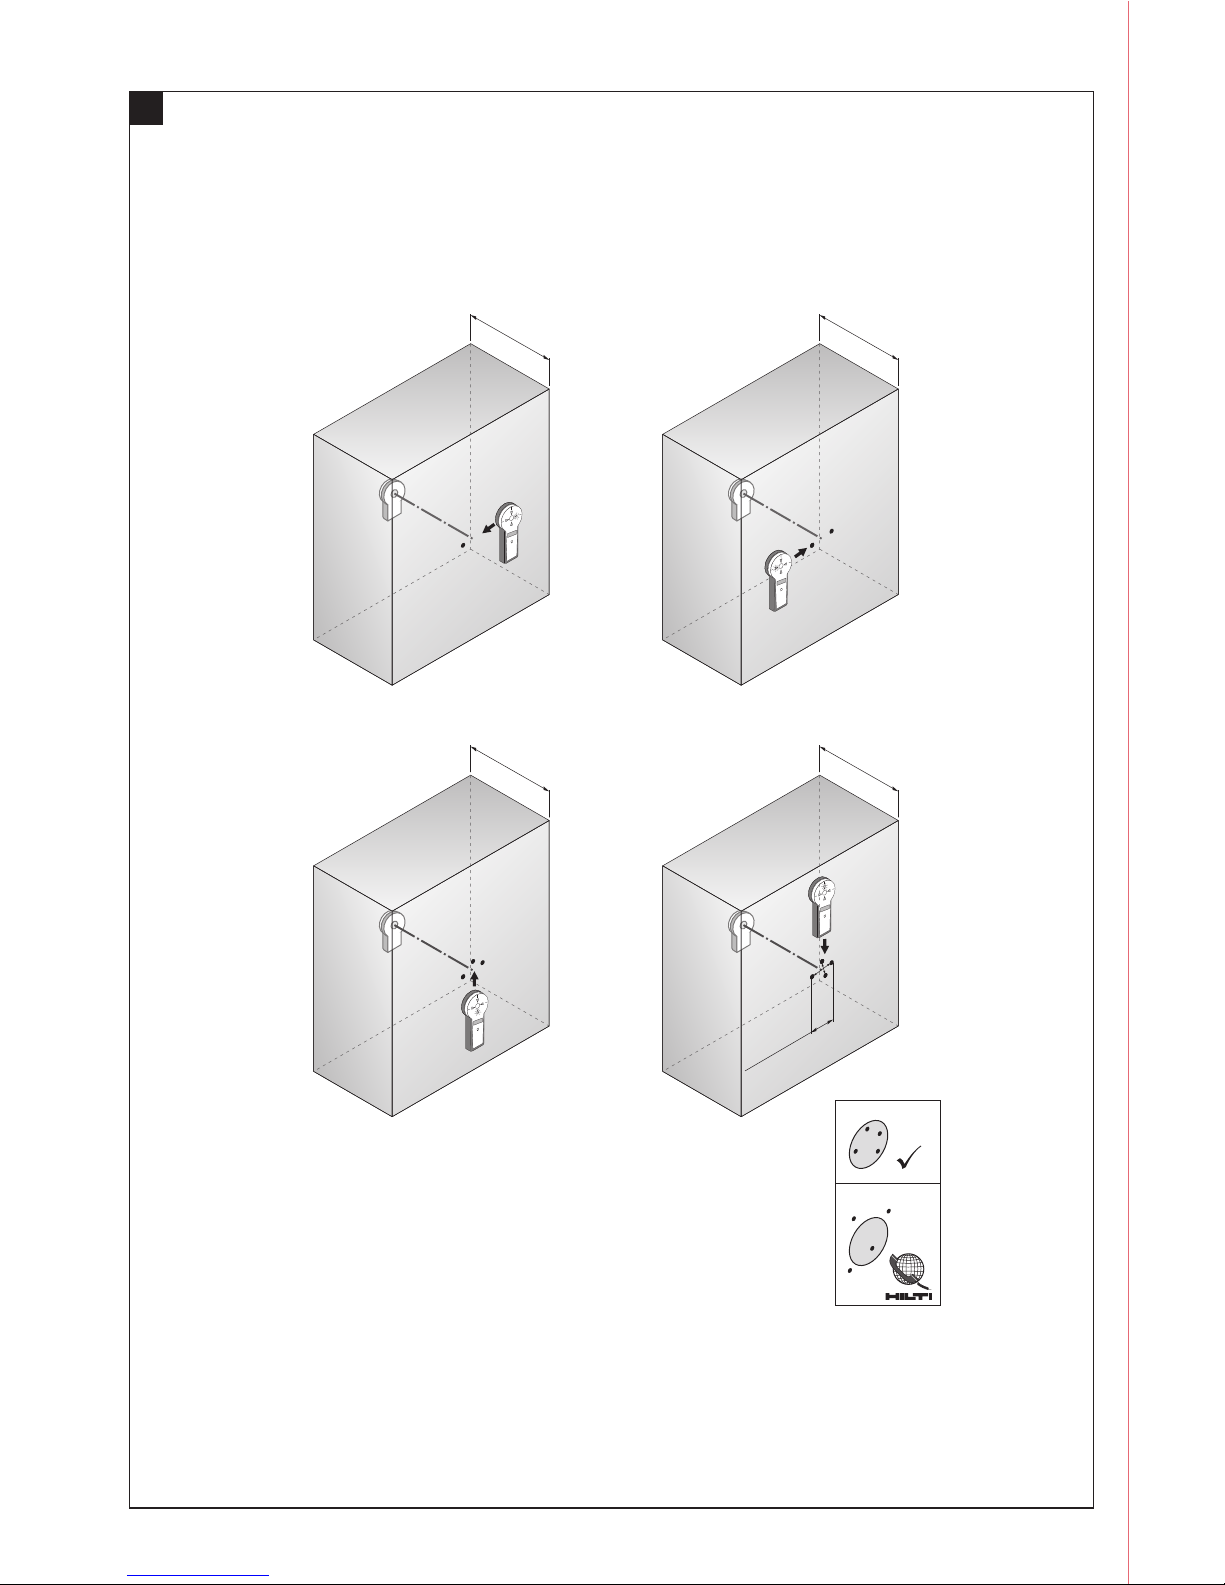
500 mm
[
1.64 ft
]
1
500 mm
[
1.64 ft
]
500 mm
[
1.64 ft
]
500 mm
[
1.64 ft
]
2
3
1
1
3
3
2
2
4
4
4
max. 6 mm
[
max. 0.24 inc
h
]
9
Printed: 07.07.2013 | Doc-Nr: PUB / 5136621 / 000 / 00

ORIGINAL OPERATING INSTRUCTIONS
PX 10 transpointer
It is essential that the operating instructions
are read before the tool is operated for the
en
first time.
Always keep these operating instructions together with the tool.
Ensure that the operating instructions are
with the tool when it is given to other persons.
Contents Page
1 General information 10
2Description 11
3Consumables 12
4 Technical data 12
5 Safety instructions 13
6Beforeuse 14
7 Operation 14
8 Care and maintenance 16
9 Troubleshooting 16
10 Disposal 17
11 Manufacturer’s warranty - tools 18
12 EC declaration of conformity (original) 18
1 These numbers refer to the corresponding illustrations. The illustrations can be found on the fold-out cover
pages. Keep these pages open while studying the operating instructions.
In these operating instructions, the designation “PX 10
transpointer” refers to the system consisting of two com-
ponents: the PX 10T (referred to as “the transmitter”)
and the PX 10R (referred to as “the receiver”). In these
operating instructions, the designation “the tool” always
refers to the PX 10 transpointer.
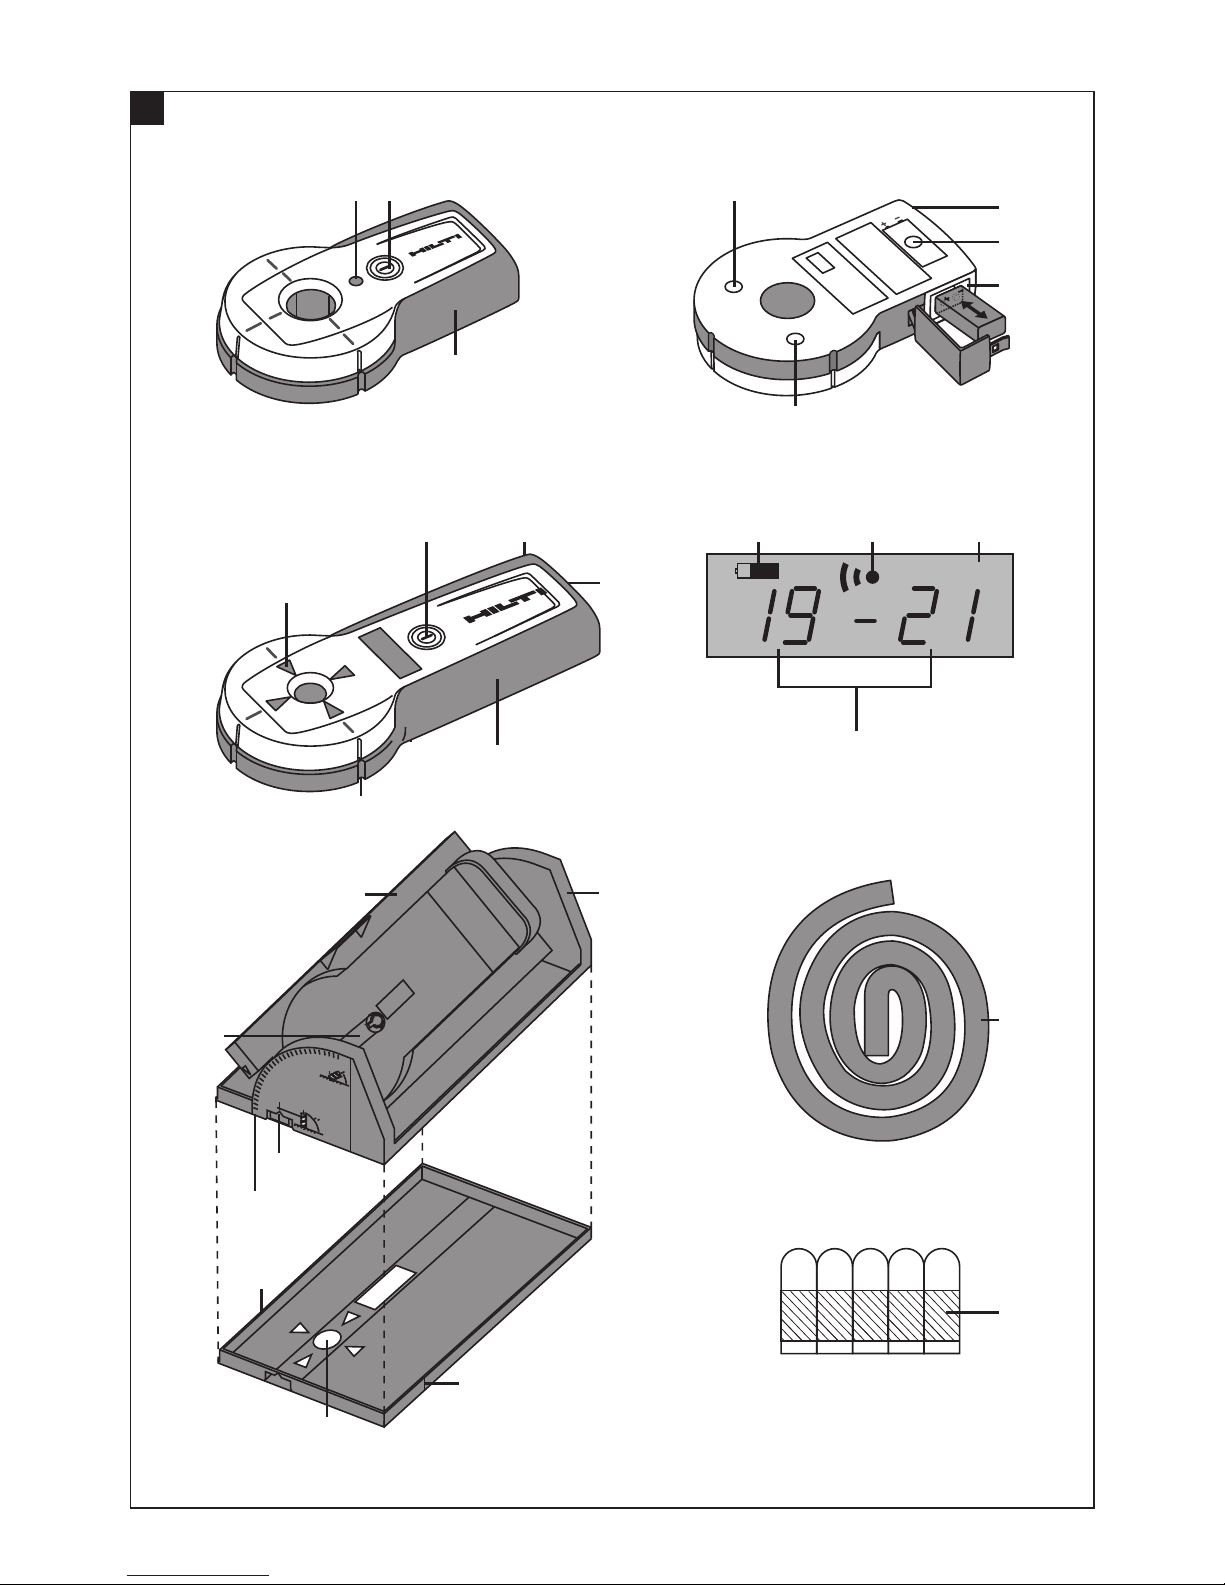
Operating controls and indicators 1
PX 10T transmitter
@
On/off button
;
Status indicator
=
Indentations foradhesiveputty
%
Battery compartment
&
Eye for hand strap
(
PX 10R receiver
)
On/off button
+
Direction arrows
§
Battery status
/
Signal status
:
Units
·
Distance
$
Marking notch
£
Battery compartment
|
Eye for hand strap
¡
PXA 70 slope adapter
Q
Holder for PX 10R
W
Scale showing angle of measurement
E
Tilting plate
R
Marking hole
T
Marking notch
Z
PUA 91 adhesive putty
U
PUA 92 adhesive strips
I
1 General information
1.1 Safety notices and their meaning
DANGER
Draws attention to imminent danger that will lead to
seriousbodilyinjuryorfatality.
WARNING
Draws attention to a potentially dangerous situation that
could lead to serious personal injury or fatality.
CAUTION
Draws attention to a potentially dangerous situation that
could lead to slight personal injury or damage to the
equipment or other property.
10
NOTE
Draws attention to an instruction or other useful information.
1.2 Explanation of the pictograms and other
information
Warning signs
General
warning
 Loading...