

Page 1
L
•DC520 (d).qx 11/6/96 12:02 Page 1
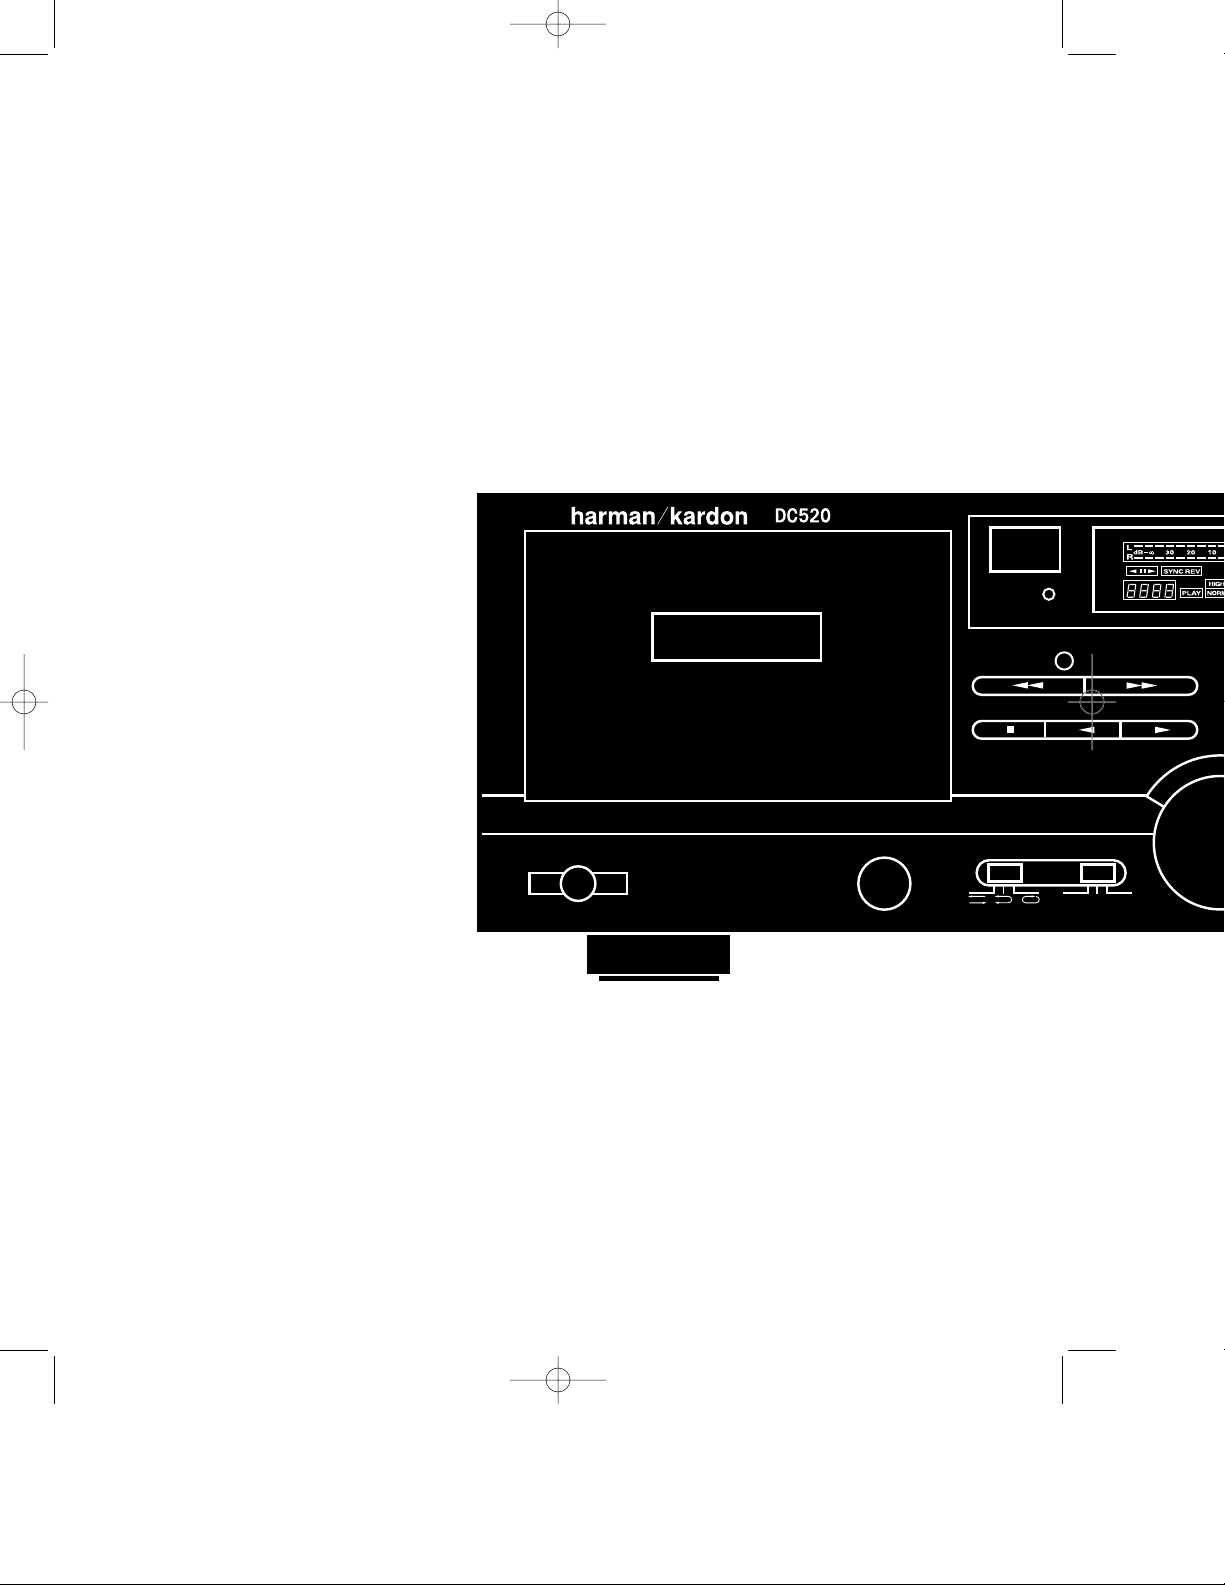
SECONDARY T ransport
Auto T ape Selector
Power
PLAY
Dual Auto Reverse
Eject
Reset
Direction Mode
Cont Play
Sync Rev
Input
Dolby NR
Off B C
DC520 – 8•16•96 ver (D) – (Back Cover)
Printed in Taiwan
Part #1111-DC520
Page 2
•DC520 (d).qx 11/6/96 12:02 Page 2
Harman Kardon DC520
Dual Cassette Deck
Reset
n Mode
Cont Play
Sync Rev
Dolby NR
Off B C
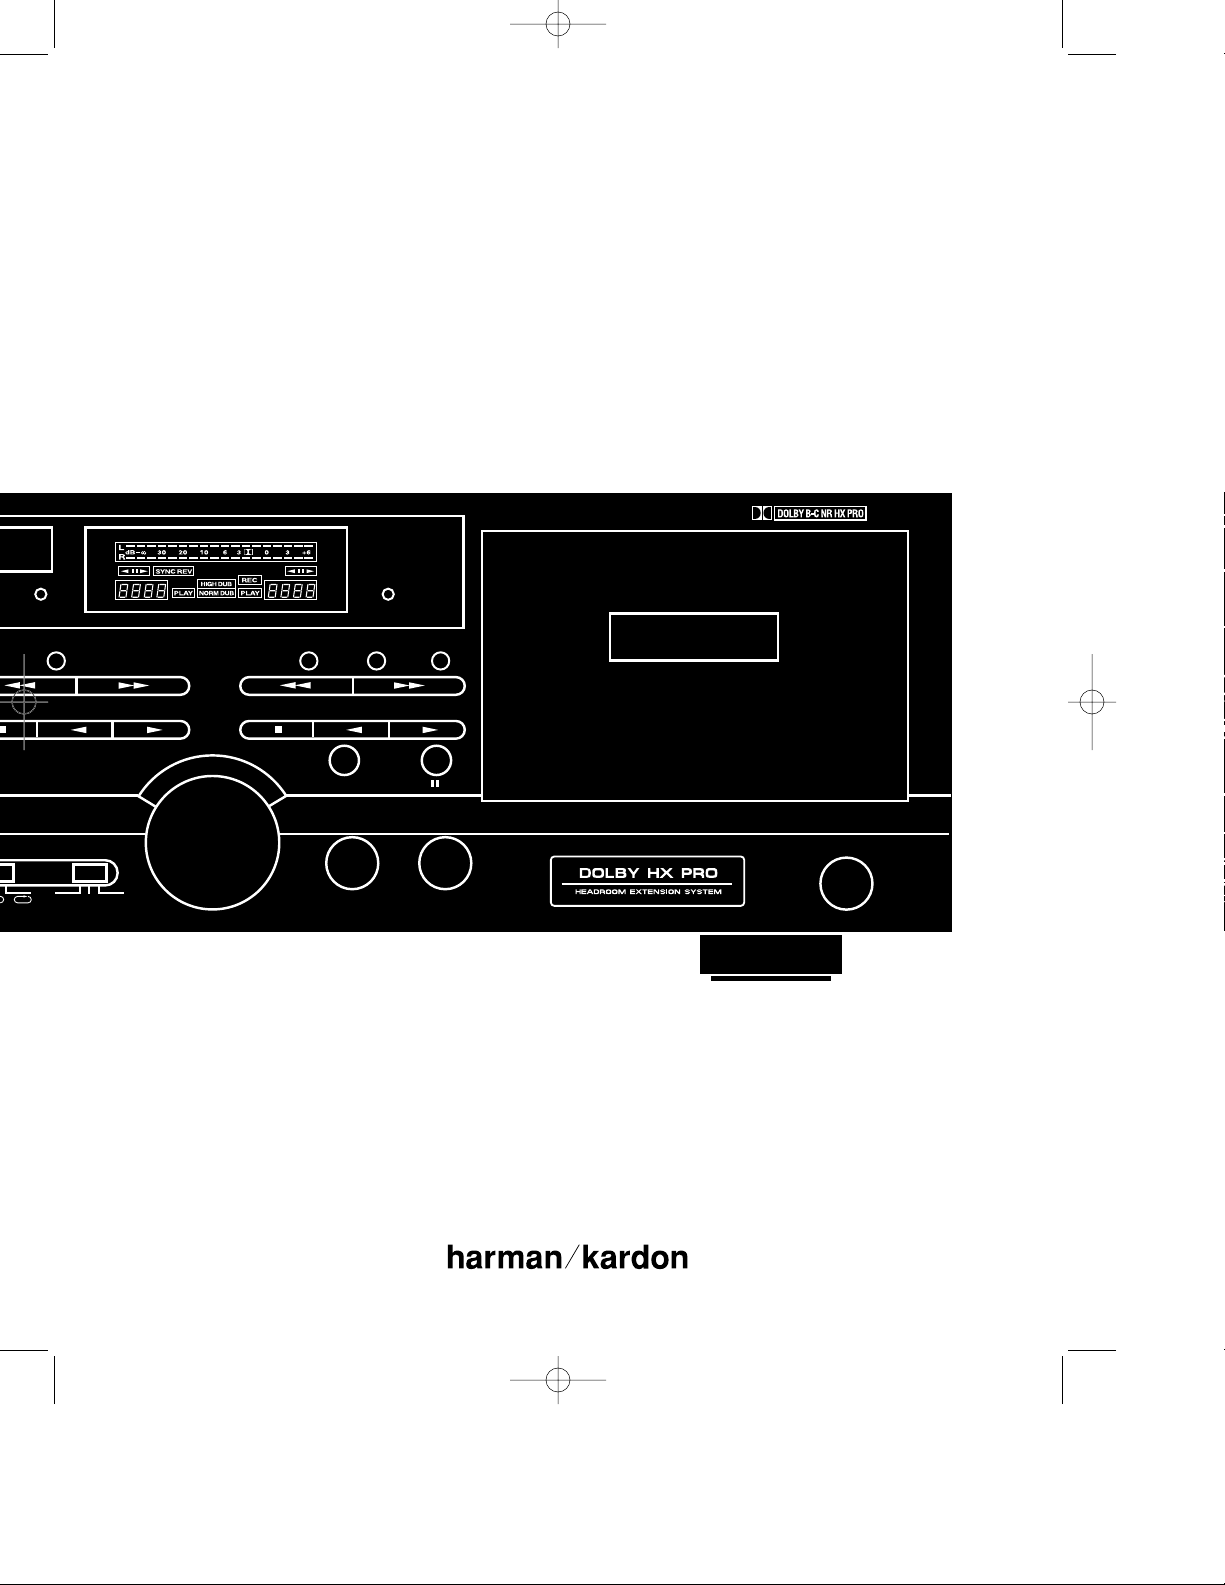
Input Level
Reset
Copy
High Speed Copy
Record
Input Balance Headphones
Owner’s Manual
Rec Mute
PRIMARY T ransport
Auto T ape Selector Dual Auto Reverse
REC/PLAY
Eject
DC520 – 8•16•96 ver (D) – (Front Cover)
Page 3
•DC520 (d).qx 11/6/96 12:02 Page 3
DC520 Dual Cassette Deck
Introduction and Safety Information . . . . . . . . . . . . . . . . . . . . 1–2
Front Panel Controls . . . . . . . . . . . . . . . . . . . . . . . . . . . . . . . . . . . . 3
Front Panel Display . . . . . . . . . . . . . . . . . . . . . . . . . . . . . . . . . . . . . 4
Installation . . . . . . . . . . . . . . . . . . . . . . . . . . . . . . . . . . . . . . . . . . . 4
Operation . . . . . . . . . . . . . . . . . . . . . . . . . . . . . . . . . . . . . . . . . . 4–8
Specifications . . . . . . . . . . . . . . . . . . . . . . . . . . . . . . . . . . . . . . . . . . 8
Troubleshooting Guide . . . . . . . . . . . . . . . . . . . . . . . . . . . . . . . . . . 9
Owner’s Manual
Table of Contents
CAUTION
RISK OF ELECTRICAL SHOCK
DO NOT OPEN
CAUTION:
presence of uninsulated “dangerous voltage”
within the product’s enclosure that may be of
sufficient magnitude to consittute a risk of
electric shock to persons.
CAUTION:
EXTENSION CORD THAT DOES NOT HAVE AGROUNDING PLUG PROVIDED.
LAME LA PLUS LARGE DE LA FICHE DANS LA BORNE CORRESPONDANTE DE
TO REDUCE THE RISK OF ELECTRIC SHOCK, DO NOT REMOVE
COVER (OR BACK). NO USER-SERVICEABLE PARTS INSIDE. REFER
SERVICING TO QUALIFIED SERVICE PERSONNEL.
The lightning flash with arrowhead
symbol, within an equalateral triangle,
is intended to alert the user to the
WARNING:
GROUNDING PLUG ON THE POWER CORD, OR USE ANY PLUG OR
ATTENTION:
MAKE CERTAIN THAT THE AC OUTLET IS PROPERLY GROUNDED.
TO REDUCE THE RISK OF FIRE OR ELECTRIC SHOCK,
DO NOT EXPOSE THIS APPLIANCE TO RAIN OR MOISTURE.
TO PREVENT ELECTRIC SHOCK, DO NOT REMOVE THE
CAUTION:
DO NOT USE AN ADAPTER PLUG WITH THIS PRODUCT.
TO PREVENT ELECTRIC SHOCK, MATCH WIDE
BLADE OF PLUG TO WIDE SLOT, FULLY INSERT.
POUR EVITER LES CHOCS ELECTRIQUES, INRODUIRE LA
LA PRISE ET POUSSER JUSQU'AU FOND.
The exclamation point within an
equalateral triangle is intended
to alert the user to the presence
of important operating and maintenance
(servicing) instructions in the literature
accompanying the appliance.
80 Crossways Park West
Woodbury, NY 11797
©1996 Harman Kardon, Incorporated
DC520 – 8•14•96 ver (B) Inside Front Cover
Page 4

•DC520 (d).qx 11/6/96 12:02 Page 4
Introduction and Safety Information
1
Thank you for choosing the Harman
Kardon DC520 dual cassette deck. The
DC520 is an exceptionally well engineered product that offers high performance and ease of use.
We ask that you take a few minutes to
read through this Owner’s Manual to
familiarize yourself with the controls and
functions. This brief investment of time
will yield dividends in the form of years
of listening pleasure.
If you have any questions about this product, its installation or operation, please
contact the retailer or custom installer
who sold you the product. They are your
best source for local information.
Description and Features
■
Dual Mode Copying for high quality
dubs in either “real time” or at “high
speed.”
■
Auto Tape Sensor automatically
recognizes the type of tape in use and
sets the bias/equalization circuits
accordingly.
■
Dolby*B-type and C-type noise
reduction for recordings that are
virtually free of noise and hiss.
■
Dolby HX Pro provides more accurate
recording of high frequencies without
sacrificing signal to noise ratio or
causing distortion.
■
Sync Reverse Dubbing programs the
record system to compensate for record
and playback tapes of unequal length.
■
Dual Auto Reverse with multiple playback modes for extended uninterrupted
listening.
Important Safety Information
Verify Line Voltage Before Use
Your DC520 has been designed for use in
North America with 120 volt AC current.
Connection to a line voltage other than
that for which it is intended can create a
safety and fire hazard, and may damage
the unit.
If you have any questions about the voltage requirements for your specific model,
or about the line voltage in your area,
contact your selling dealer before plugging the unit into a wall outlet.
Do Not Use Extension Cords
To avoid safety hazards, use only the
power cord supplied with your unit. If a
replacement cord is used, make certain
that it is of similar gauge. We do not
recommend that extension cords be used
with this product. As with all electrical
devices, do not run power cords under
rugs or carpets or place heavy objects on
them. Damaged power cords should be
replaced immediately with cords meeting
factory specifications.
Handle the AC Power Cord Gently
When disconnecting the power cord from
an AC outlet, always pull the plug, never
pull the cord. If you do not intend to use
the unit for any considerable length of
time, disconnect the plug from the AC
outlet.
Do Not Open The Cabinet
There are no user serviceable components inside this product. Opening the
cabinet may present a shock hazard, and
any modification to the product will void
your guarantee. If water or any metal
object such as a paper clip, wire or a staple accidentally falls inside the unit, disconnect it from the AC power source
immediately, and consult an authorized
service station.
Installation Location
■
To assure proper operation, and to
avoid the potential for safety hazards,
place the unit on a firm and level
surface. When placing the unit on a
shelf, be certain that the shelf and
any mounting hardware can support
the weight of the product.
■
Make certain that proper space is provided both above and below the unit
for ventilation. If this product will be
installed in a cabinet or other enclosed
area, make certain that there is sufficient air movement within the cabinet.
■
Do not place the unit directly on a
carpeted surface.
■
Avoid installation in extremely hot or
cold locations, or an area that is
exposed to direct sunlight or heating
equipment.
■
Avoid moist or humid locations.
■
Do not obstruct or cover any ventilation slots.
Cleaning
When the unit gets dirty, wipe it with a
clean, soft dry cloth. If necessary, wipe it
with a soft cloth dampened with mild
soapy water, then a fresh cloth with clean
water. Wipe dry immediately with a dry
cloth. NEVER use benzene, thinner, alcohol or any other volatile cleaning agent.
Do not use abrasive cleaners, as they may
damage the finish of metal parts. Avoid
spraying insecticide near the unit.
Moving The Unit
Before moving the unit, be certain to
disconnect any interconnection cords
with other components, and make
certain that you disconnect the unit
from the AC outlet.
*Dolby is a trademark of Dolby Laboratories
DC520 – 8•16•96 ver (D)
Page 5

•DC520 (d).qx 11/6/96 12:02 Page 5
Introduction and Safety Information
2
Important Information
for the User
Note: This equipment has been tested
and found to comply with the limits for a
Class B digital device, pursuant to Part 15
of the FCC Rules. The limits are designed
to provide reasonable protection against
harmful interference in a residential
installation. This equipment generates,
uses and can radiate radio frequency
energy and, if not installed and used in
accordance with the instructions, may
cause harmful interference to radio
communication. However, there is no
guarantee that harmful interference will
not occur in a particular installation. If
this equipment does cause harmful interference to radio or television reception,
which can be determined by tuning the
equipment off and on, the user is encouraged to try to correct the interference by
one or more of the following measures:
• Reorient or relocate the receiving
antenna.
• Increase the separation between this
unit and the receiver being interfered
with.
• Connect this unit into an outlet on a
circuit different from that to which the
receiver is connected.
• Consult the dealer or an experienced
radio/TV technician for help.
This device complies with Part 15 of the
FCC Rules. Operation is subject to the
following two conditions: (1) this device
may not cause harmful interference, and
(2) this device must accept interference
received, including interference that may
cause undesired operation.
Unpacking and Installation
The carton and shipping materials used
to protect your new DC520 during shipment were specially designed to cushion
it from shock and vibration. We suggest
that you save the carton and packing
materials for use in shipping if you move
or should the unit ever need repair.
To minimize the size of the carton in
storage, you may wish to flatten it. This
is done by carefully slitting the tape
seams on the bottom and collapsing the
carton down to a more two dimensional
appearance. Other cardboard inserts may
be stored in the same manner. Packing
materials that cannot be collapsed
should be saved along with the carton in
a plastic bag.
If you do not wish to save the packaging
materials, please note that the carton
and other sections of the shipping protection are recyclable. Please respect the
environment and discard those materials
at a local recycling center.
When positioning your DC520 in its final
location, make certain that any shelf or
stand is capable of supporting it’s weight,
and that there is adequate ventilation on
all sides, as well as on the top and bottom. Do not place CDs, record jackets,
owner’s manuals, or other paper on top
of, or beneath the unit. This will block
air flow and create a potential fire hazard. If the unit is to be enclosed in a cabinet or rack, make certain that there is
adequate air circulation, with a means
provided for hot air to exit, and for cool
air to be brought in.
CONVENTIONS
In order to help you use this manual and
make the proper system connections, certain conventions appear throughout the
manual.
EXAMPLE – (bold type) indicates a
specific front panel button
EXAMPLE – (OCR type) indicates a
message that is visible in the front panel
display
A – (number in a circle) indicates a
specific front panel control
– (number in a square) indicates an
1
indicator in the front panel display
Note: Changes or modifications may
cause this unit to fail to comply with Part
15 of the FCC Rules and may void the
user’s authority to operate the equipment.
DC520 – 8•16•96 ver (D)
Page 6

•DC520 (d).qx 11/6/96 12:02 Page 6
Front Panel Controls
3
SECONDARY Transport
Auto Tape Selector
Power
Dual Auto Reverse
Eject
A Power Switch – Press this
switch once to turn it on. Press it
again to turn the unit off. An indicator around the switch turns green
when the unit is turned on.
B Secondary Transport – This
is the secondary, playback only,
transport. Use it for tapes that will be
the source material during dubbing
operation.
C Remote Sensor – The remote
sensor behind this area is compatible with the commands from many
Harman Kardon remote controls.
Keep this area clear if you wish to
use the DC520 with a remote control.
(not included)
D Secondary Counter Reset –
Press this button to reset the counter
for the secondary transport to “0000”
E Sync Reverse – This button
activates circuitry that compensates
for record and playback tapes of
unequal length.
F Information Display – This
display provides detail about the
operation of the DC520. See the
separate explanation of each indicator on page 4.
G Copy Button – Press this button
to activate normal speed dubbing
H Primary Counter Reset –
Press this button to reset the counter
for the primary transport to “0000”.
Reset
Sync Rev
PLAY
Dolby NR
Direction Mode
Off B C
Cont Play
Input Level
I High Speed Copy – Press this
button to activate high speed dubbing.
J Record Mute – Press this button
during recording to momentarily mute
the input and insert blank space.
K Primary Transport – Insert
tapes here for recording or playback. This transport should always
contain the record tape during dubbing.
L Primary Transport Eject –
Press this button to open the primary
transport door.
M Primary Transport Fast
Forward – Press this button to
rapidly advance the primary tape.
N Primary Transport Rewind –
Press this button to rewind the primary tape.
O Primary Transport Forward
Play – Press this button to play the
primary tape.
P Primary Transport Reverse
Play – Press this button to play the
primary tape in a reverse direction.
Q Primary Transport Stop –
Press this button to stop the primary
transport.
R Pause – Press this button to
pause the transport in use.
S Record – Press this button to
place the unit in the record ready
mode. Press it simultaneously with a
play button OP to start a recording.
Reset
Copy
High Speed Copy
Record
Input Balance Headphones
Rec Mute
PRIMARY Transport
Auto Tape Selector Dual Auto Reverse
T Headphone Jack – Insert
stereo headphones here for private
listening or record monitoring.
U Input Balance – This control
adjusts the left/right record balance.
V Input Level – This knob controls
the input level during recordings.
W Secondary Transport
Fast Forward – Press this button
to rapidly advance the secondary
tape.
X Secondary Transport
Rewind – Press this button to
rewind the secondary tape.
Y Secondary Transport
Forward Play – Press this button
to play the secondary tape.
Z Secondary Transport
Reverse Play – Press this button
to play the secondary tape in a
reverse direction.
a Secondary Transport Stop –
Press this button to stop the secondary transport.
b Dolby NR Selector – This
switch selects which type of Dolby
Noise Reduction, if any, is in use.
c Direction Mode Selector –
This switch selects the playback/auto
reverse mode for the tape in use.
d Secondary Transport Eject –
Press this button to open the
secondary transport door.
REC/PLAY
Eject
DC520 – 8•16•96 ver (D)
Page 7

•DC520 (d).qx 11/6/96 12:02 Page 7
Front Panel Display
4
1 Peak Level Meter – Segments
of this dual horizontal bar will illuminate to indicate the input level for
recording or the output level on playback. The meter will “hold” the average constant level and flash to
indicate momentary peaks.
2 Secondary Transport –
Directional Indicators: These indicators display the movement of the
secondary tape transport.
3 Secondary Transport
Counter – This four digit display
provides a relative indication of the
tape position of the secondary transport.
Installation
Connecting the DC520 to your audio system is simple. Using standard RCA to
RCA audio interconnect cords, connect
the left and right OUTPUT jacks on the
rear panel to the TAPE INPUTjacks of
your receiver or preamplifier. Connect the
INPUT jacks on the DC520 to the TAPE
OUTPUT jacks of your receiver or
pre-amp.
Connect the power to a non-switched AC
wall output, or to the accessory outlet on
the rear of another audio device in your
system and you are ready to go!
NOTE: When using the accessory outlet
on another product to power the DC520
make certain that it has the ability to
power a device that draws at least 14
watts of current in addition to the
requirements of other devices that may
4 Sync Rev – This indicator lights
when the unit is programmed so that
both decks reverse at the same time
during dubbing.
5 Secondary Transport Play –
The indicator lights when the secondary transport is in the Play mode.
6 High Dub – This indicator lights
when the unit is in the high speed
(twice normal time) dub mode.
7 Norm Dub – These indicators
light during a dub recording to display the tape speed.
8 Rec – This indicator lights when
a dub or recording is in progress.
Installation & Operation
be plugged into the accessory outlets.
If you use a “switched” outlet it is
important to remember that the host
product must be turned on in order for
the DC520 to operate.
Single Deck Playback
The DC520 may be used as a conventional auto reverse audio cassette deck, playing back tapes from either transport.
1. Check the tape for excessive slack
before use. If necessary, take up the slack
by inserting a pencil into one of the cassette hubs and rotate the pencil to take
up the slack.
2. Press the EJECT Ld button for the
transport you wish to use.
3. Insert the tape with the open edge
facing down.
4. Gently press the door of the cassette
compartment BQ closed.
9 Play – This indicator lights when
the unit is in a playback mode.
When it lights in tandem with the
REC indicator 8, a recording or dub
is in process.
) Primary Transport Counter –
This four digit display provides a relative indication of the tape position
of the Primary transport.
! Primary Transport
Directional Indicators – These
indicators display the movement of
the Primary tape transport.
5. Select the appropriate type of Dolby
Noise Reduction, if any, using the
DOLBY NR switch b. This informa-
tion is typically displayed on the label of
prerecorded cassettes.
6. If you wish to clear the counter before
playback, press the RESET button next
to the transport you will be using.DH
7. Press the PLAY/5 or 6 button for
the transport that willbe used. Play can be
in either the forwarddirection OY,
which will play the“A” side of the tape,or
reverse PZ
to play the “B”side of the tape.
8. When the unit is in the play mode,
tape movement may be momentarily
stopped using the PAUSEbutton R.
Press the PAUSEbutton again to
resume operation.
DC520 – 8•16•96 ver (D)
Page 8

•DC520 (d).qx 11/6/96 12:02 Page 8
Operation
5
9. When the unit isin the play mode it
will continue to run untilthe unit is manually stopped Qa, oruntil the end of
the tape is reached. Usingthe Auto Reverse system, playback may continue
through the second side ofa tape, or it
may run continuously. For information
on Auto Reverse Functions, seepages 5–6.
Recording
To make a recording follow the instructions listed above for inserting the tape in
the unit. Recordings may only be made
using the Primary Transport on the right
side of the unit.
NOTE: The DC520 will automatically
sense the type of tape in use (conventional, chromium dioxide or metal) and
make the necessary internal adjustments.
No switch settings are required to indicate the tape type.
Once a tape has been inserted, follow
these steps to make a recording:
1. Select the type of Dolby Noise
Reduction desired, if any, using the
DOLBY NR switch b.
2. Press the RECORDbutton S to place
the unit in the “Record Ready”mode
and observe that the LEVELMETER 1
will begin to react to theincoming audio
source. Adjust the INPUT LEVEL
CONTROL V so that the barson the
INPUT METER briefly reach the red
“0 db” point when normal orchrome
tapes are in use, or thered “+3dB”
mark when metal tapes are used.
3. Adjust the INPUT BALANCE CON-
TROL U so that the left/right signal
level inputs appear equal, if required.
4. Press the 5 or 6 button OP cor-
responding to the direction in which you
wish to record. Recordings may be made
in either the forward direction O which
will record on the “A” side of the tape, or
reverse P which will record on the “B”
side of the tape.
5. To pause the tape transport during a
recording, press PAUSER. Press the
button again to resume recording.
6. Once a recording is started, it will continue until the end of the tape, or until
the unit is manually stopped Q. Using
the Auto Reverse system, recordings may
continue through the second side of a
tape. For information on Auto Reverse
Functions, see pages 5–6.
NOTE: When the unit is in the RECORD
mode, any material previously recorded
on the tape will be erased.
Record Muting
The REC MUTE feature enables you to
place blank spaces on tapes during
recording. These spaces are useful in separating different portions of the program
material, and the four second space is
used to trigger the automatic program
search systems found in many automotive and home cassette units.
Automatic Muting During a Recording
If you wish to insert a four second blank
space during a recording, or to end a
recording, press the REC MUTE button
J. The REC indicator 8 will flash and
a four second blank space will be placed
on the tape. Once the blank space is
recorded the unit will stop and go into a
Pause mode. Press the PAUSEbutton
R to restart the recording.
To place a blank space longer than four
seconds, press and hold the REC MUTE
button J for the length of time the
blank space is desired. When the button
is released the unit will automatically go
into the Pause mode. Press the PAUSE
button R to resume recording.
Automatic Spacing Insert on a
Stopped Tape
If you wish to insert a four second blank
space before starting a recording, first
press the RECORD button S to place
the unit in the “Record Ready” mode.
Press the REC MUTE button J and
note that the transport will start and run
for four seconds and then return to the
pause mode.
Automatic Spacing Insert without
Stopping the Tape
To place a blank space of less than four
seconds on the tape without stopping
tape motion press the REC MUTE J
button once. Press the button a second
time before four seconds elapse to place a
blank space on the tape without stopping
machine. Remember that the machine
will go into a pause mode if the REC
MUTE button is not pressed within 3
1
⁄2
seconds.
Auto Reverse Operation
The DC520 features Dual Auto Reverse
operation, allowing a wide range of auto
reverse functions that allow for automated, continuous playback and recording.
Tape direction and auto reverse functions
is set by the DIRECTION MODE switch
c. Operation of the unit will vary
according to the switch setting, if one
or both transports is in use, and if the
unit is in playback or record.
Single Side Playback or Recording
To play or record only one side of a tape,
place the DIRECTION MODE switch
c in the left position, over the
icon. With the switch in this mode, the
DC520 will play or record in whichever
direction is selected and then stop at the
end of one side of the tape.
Auto Reverse Playback or Recording
For uninterrupted playback of both sides
of a tape, place the DIRECTION MODE
4
DC520 – 8•16•96 ver (D)
Page 9

•DC520 (d).qx 11/6/96 12:02 Page 9
Operation
6
c switch in the center position, over the
3
icon. With the switch in this mode,
the playback and recording will continue
through the full length of the first side of
the tape. At the end of the first side of the
tape, the unit will automatically switch
directions and continue for the full
length of the second side. At the end of
the second side the unit will automatically stop.
Note: In playback this operation will
function with either transport, depending
on which PLAY button OPYZ is
pressed to start operation. Auto reverse
recording is only possible using the
Primary Transport.
Continuous Playback
with One Transport
For continuous playback of a tape in
either the Primary Transport or the
Secondary Transport, but not both, place
a tape only in the desired transport. Set
the DIRECTION MODE switch c in
the far right position, over the
2
“Cont Play” icon.
Press either the forward or reverse play
button on the transport to start the playback. The unit will play the entire first
side of the cassette and automatically
switch to the second side of the cassette.
When both sides have played through
once, the DC520 will automatically
repeat the process so that each side is
played a total of five times without interruption. At the conclusion of five cycles
the unit will stop.
Continuous Playback
with Both Transports
For maximum playback time, place a
tape in both the Primary and Secondary
Transports. Set the DIRECTION MODE
c switch in the far right position, over
2
the
“Cont Play” icon. Press any of
the FORWARDor REVERSE PLAY
buttons to start the playback.
Once playback is started, the DC520 will
first play the entire first side of the transport where the PLAY button was pressed.
At the end of the first side, the unit will
automatically play the second side of the
tape. After the first tape has been played
completely through, the unit will switch
to the other transport, and play the first
side, and then the second side of the tape
in that transport.
This cycle will repeat five times, playing
both sides of each cassette in succession.
After five full cycles the unit will stop.
NOTE: Any of the Auto Reverse modes
may be stopped at any time by pressing
the STOP button Qa.
Counter Operation
Each transport has a separate tape
counter 3) that indicates the motion
of the transport and the relative amount
of tape used. When in the normal or fast
forward mode the numbers will increase.
When the unit is in a reverse mode the
numbers will decrease.
To reset either counter press the appropriate RESET button. DH.
Tape Dubbing
The DC520 is capable of both normal
and high speed dubbing for ease in making cassette copies. The steps for making
a dub are slightly different from those
used to make normal recordings, so
please make note of the following steps:
1. Turn the DC520 on using the
POWER switch A.
2. Open the transport doors by pressing
both EJECT buttons Ld.
3. Place a blank tape in the Primary
Transport K and the tape to be copied
in the Secondary Transport B.
4. Press the TRANSPORT REWIND
buttons NX so that both tapes are in
their fully rewound position.
5. Select the tape direction mode using
the DIRECTION MODE switch c.
• To dub only one side of a tape, place
the switch in the far left position under
4
the
icon.
• To dub both sides of a tape, place the
switch in the center position, under the
3
icon.
6. Make certain that both transports are
in the forward direction, as indicated by
the 6 arrow 2! above each tape
counter display. If one transport is in the
incorrect direction briefly press the
appropriate FORWARD PLAYbutton
OY and then immediately press the
STOP button Qa.
7. Press either the COPY button G or
the HIGH SPEED COPY button I to
start the dubbing process.
• High speed dubbing runs both transports at double speed, so that tapes are
copied in half their normal running
time. Note, however, that the high speed
mode may produce a slightly lower quality copy. In addition, the High Speed
mode is susceptible to interference from
the horizontal scanning frequency of
television sets. If your DC520 is located
close to a TV set you may wish to use the
normal speed Copy Mode.
• “Copy” starts a dub in “real time”,
where the dub takes the same time as the
length of the cassette. This mode will
produce a better quality dub, but without
the time saving of High Speed.
8. When the dubbing is completed, both
transports will stop, based on the setting
of the DIRECTION MODE switch.
DC520 – 8•16•96 ver (D)
Page 10

•DC520 (d).qx 11/6/96 12:02 Page 10
Operation
7
9. To stop the dubbing at any time, press
either STOP button Qa.
Manual Editing During Dubbing
When making dubs in the “Copy”
(Normal Speed) dub mode it is possible
to skip some of the material on original
tape.
To delete material from the original tape,
press the PAUSEbutton R while the
unwanted material is playing. The
Primary Transport (record cassette) will
stop while the Secondary Transport
(playback cassette) will continue to play.
Listen to the output of the DC520 using
either the tape monitor mode on your
audio system or the front panel headphone jack T. When you wish to
resume the recording, press the PAUSE
button R again.
To insert blank space on a dub (copy)
tape instead of unwanted material, press
the REC MUTE button J. The
Secondary (playback) Transport will
continue to play, but the Primary
(record) Transport will record four seconds of blank tape and then go into the
pause mode. When you wish to resume
normal dub recording, press the PAUSE
button R.
NOTES:
• All transport function controls except
for STOP, PAUSE and REC MUTE
are inoperable during dubbing.
• The INPUT LEVEL control is not
operable during dubbing. The DC520
will automatically set proper audio
levels.
• The DOLBY NR circuits are not used
during dubbing.
• Since the audio quality of any dub is
slightly less than the original tape, it is
recommended that all copies be made
from original tapes, not from other
copies.
• During dubbing the RECORD
LEVEL INDICATORwill show the level
from the playback (original) tape in the
Secondary Transport.
Synchro Reverse Dubbing
The Sync Reverse mode allows both
transports to be reversed at exactly the
same time during dubbing operations.
This is particularly convenient when
using tapes with different lengths, as it
permits copies with the same contents as
the original. Follow these steps to start
Sync Reverse dubbing:
1. Prepare the unit for dubbing as
described on page 6. Make certain both
decks are set to the Forward direction by
checking to see that the 6indicator
2! is illuminated for each transport.
2. Place the DIRECTION MODE switch
c in the center position, over the
icon.
3. Press the SYNC REV button E. Note
that the SYNC REV indicator 4 will
illuminate.
4. Press either the Copy G or High Speed
Copy I button to start the dub process.
The tapes will follow one of the two following modes, depending on the relationship of the length of the original tape
to the copy tape:
• If the original tape (in the Secondary
Transport forplayback) is shorter than
the record tape (in the Primary
Transport), thedub will start by recording until the end of the first side ofthe
original. When the original tape’s first
side has been dubbed the Secondary
(playback) Transportwill stop, while the
Primary (Record) Transport will continue in a “no signal” mode, recording
blank material. When the Primary
Transport cassettereaches the end of its
first side, both tapes will reverse, and the
3
dub will continue with the second side of
the original being dubbed to the beginning of the copy tape. The recording will
continue until the playback tape ends. At
that time both transports will stop simultaneously.
• If the original tape (in the Secondary
Transport for playback) is longer than
the record tape (in the Primary
Transport), the dub will start by recording through the end of the (recording)
tape in the Primary Transport. At the end
of the (recording) Primary tape, the
Primary Transport will stop, and the
Secondary Transport will continue playback. At the end of the Secondary cassette, both tapes will reverse direction and
the recording process will resume. The
recording will continue until the Primary
(record) tape ends. At that time both
transports will stop simultaneously.
NOTE: When playback tape is longer
than the record tape, as described above,
some of the material at the end of each
side of the playback tape will not be
recorded on the dub.
Remote Control Operation
The DC520 features a built in remote
sensor that enables certain functions of
the Primary Transport to be controlled
with the system remote supplied with
many Harman Kardon products. The
DC520 is also compatible with the
“Harman Kardon Codes” available in
many preprogrammed remote controls.
Consult the instructions supplied with
your receiver or the remote control for
information on any programming that
may be required to operate the DC520.
When using a remote control remember
to point the remote at the DC520’s front
panel sensor C.
Note: The DC520 will only respond to
remote commands for transport func-
DC520 – 8•16•96 ver (D)
Page 11

•DC520 (d).qx 11/6/96 12:02 Page 11
Operation
8
tions. Power On/Off is NOT controlled via
the remote system.
Maintenance
Cleaning the Tape Heads
Tape heads should be cleaned periodically to remove tape particles which gradually build up on the heads during
normal use. This dirt will impair sound
quality and may cause increase tape
head wear. Tape heads may be cleaned in
one of two ways:
1. Use a commercial tape cleaning cassette. A wide variety of these products is
available from your dealer. Carefully follow the instructions in the cleaning kit to
avoid damage to your DC520.
2. Remove the cassette from the transport
to be cleaned. Slightly dampen a cotton
swab with isopropyl alcohol or the tape
head cleaning solution available from
many dealers. Gently rub the exposed
surfaces of each head. Use a second
moistened swab to clean other metal surfaces that may be coated with tape
residue such as guide pins. Be careful to
keep the swab away from rubber rollers
unless you are using a cleaning liquid
that is specifically approved for use on
rubber rollers.
Demagnetization
Tape heads and other internal parts will
gradually pick up magnetic fields that
may add noise to your recordings or possibly cause partial erasure of recorded
tapes. To prevent this problem, tape
heads should periodically be demagnetized using either of two devices:
1. A battery powered demagnetizer is easiest to use. In the shape of a tape cassette,
it simply needs to be inserted into the
transport. Carefully follow the manufacturer’s instructions to insure proper
results.
2. Hand held, AC powered,demagnetizers
are more effective as theygenerate
stronger fields. Consult your dealerfor
information on this type ofunit and be
certain to follow the instructionscarefully.
When using this type ofunit be certain to
keep it away from prerecordedtapes when
it is turned on, asit may erase them.
Care of Tapes
1. Store cassettes in their cases, in a location away from direct sunlight, excessive
heat and high humidity.
2. Avoid placing a tape near a television
set or loudspeaker. Their magnetic fields
may partially erase the material on a
recorded tape.
3. To avoid accidental erasure of the
material on a cassette, remove the two
small square tabs located on the top
edges of the cassette. When these tabs are
removed the tape may not be used for
recording. To record on a tape that has
previously had the protection tabs
removed, carefully cover the small holes
with adhesive tape.
4. Do not use old cassettes whose internal
tape reels no longer move smoothly. If
you hear unusual noises during tape
motion it is wise to discard the tape to
prevent jams or damage to your
machine.
Specifications
Track System: 4 Track, 2 Channel Stereo
Tape Speed: Normal Play/Record: 17⁄8 ips (4.76 cm/sec)
High Speed Copy: 33⁄4 ips (9.5 cm/sec)
Wow and Flutter (WRMS): 0.06%
Frequency Response (Overall, –20 dB)
Metal Tape: 25Hz –19Khz
Chrome Tape: 25Hz –18Khz
Normal Tape: 25Hz –17Khz
Signal to Noise Ratio (Overall):
Dolby C on: 79 dB
Dolby B on: 69 dB
NR Off, 3% THD: 59 dB
DC520 – 8•16•96 ver (D)
Fast Wind Time: 110 seconds for C-60
Line Input: 97 mV, 50K ohms
Line Output: 0.52 V for 50K ohm load
Headphone Impedance: 8 ohms
Dimensions (W x H x D) 17.4 x 5.8 x 11.2 inches
442 x 147 x 284 mm
Weight 10.14 lbs / 4.6 kg.
Power Requirement 120 VAC / 60 Hz
Power Consumption 14 Watts
Page 12

•DC520 (d).qx 11/6/96 12:02 Page 12
The DC520 is designed for trouble free operation. However, like any mechanical device it may occasionally malfunction. In most
cases the trouble can be resolved simply by finding the problem from the list below and following the steps outlined. If a problem persists, contact your dealer or an authorized Harman Kardon Service Center.
Troubleshooting
9
PROBLEM
The unit does not turn on when the
power switch is pressed.
No sound is heard when PLAY is
pressed.
The cassette does not record.
Cassette dub does not record.
Newly recorded tapes have
distorted sound.
CAUSE
• No AC Power.
• Tape may be blank.
• Improper settings at receiver or
preamp.
• Interconnect cables connected
to wrong jacks.
• Record protection tabs removed.
• Record Level knob set to low.
• No source signal feeding
recorder.
• Interconnect cables connected
to wrong jacks.
• Tapes in wrong transport.
• Input level too high.
• Mismatched Dolby NR modes.
• Tape is worn.
SOLUTION
• Make certain AC power cord is firmly plugged
into a live outlet.
• Check to see if outlet is switch controlled.
• Check to see if level indicators do not move.
This confirms a blank tape.
• Check switch settings at receiver. Make certain
that Tape Monitor or correct input is selected.
• Make certain that the OUTPUT of the DC520 is
connected to the TAPE IN jack of your receiver
or preamp.
• Place tape over record protection holes.
• Increase input level.
• Check Tape Monitor and Source Selection on
receiver to make sure the proper source is selected.
• Make certain that the DC520 INPUT jacks
are connected to the TAPE OUT jacks on your
receiver or preamp.
• Make certain that source tape is in Secondary
Transport and blank (record) tape is in Primary
Transport.
• Reduce input level so that record level display
peaks at “0” to “+3”.
• Make certain that Dolby NR mode used for
playback is identical to mode used in recording.
• Replace cassette with new, high quality tape.
Playback sound is muffled, distorted
or has reduced high frequencies.
All specifications are subject to change without notice.
Dolby and HX Pro are registered trademarks of Dolby Laboratories Licensing Corp.
• Mismatched Dolby NR modes.
• Tape heads are dirty.
• Tape heads have become
magnetized.
• Make certain that Dolby NR mode used for
• Clean tape heads.
• Demagnetize tape heads.
DC520 – 8•16•96 ver (D) Inside Back Cover
playback is identical to mode used in recording.
 Loading...