

Page 1

ALGIZ XRW
Quick Start Guide
Page 2
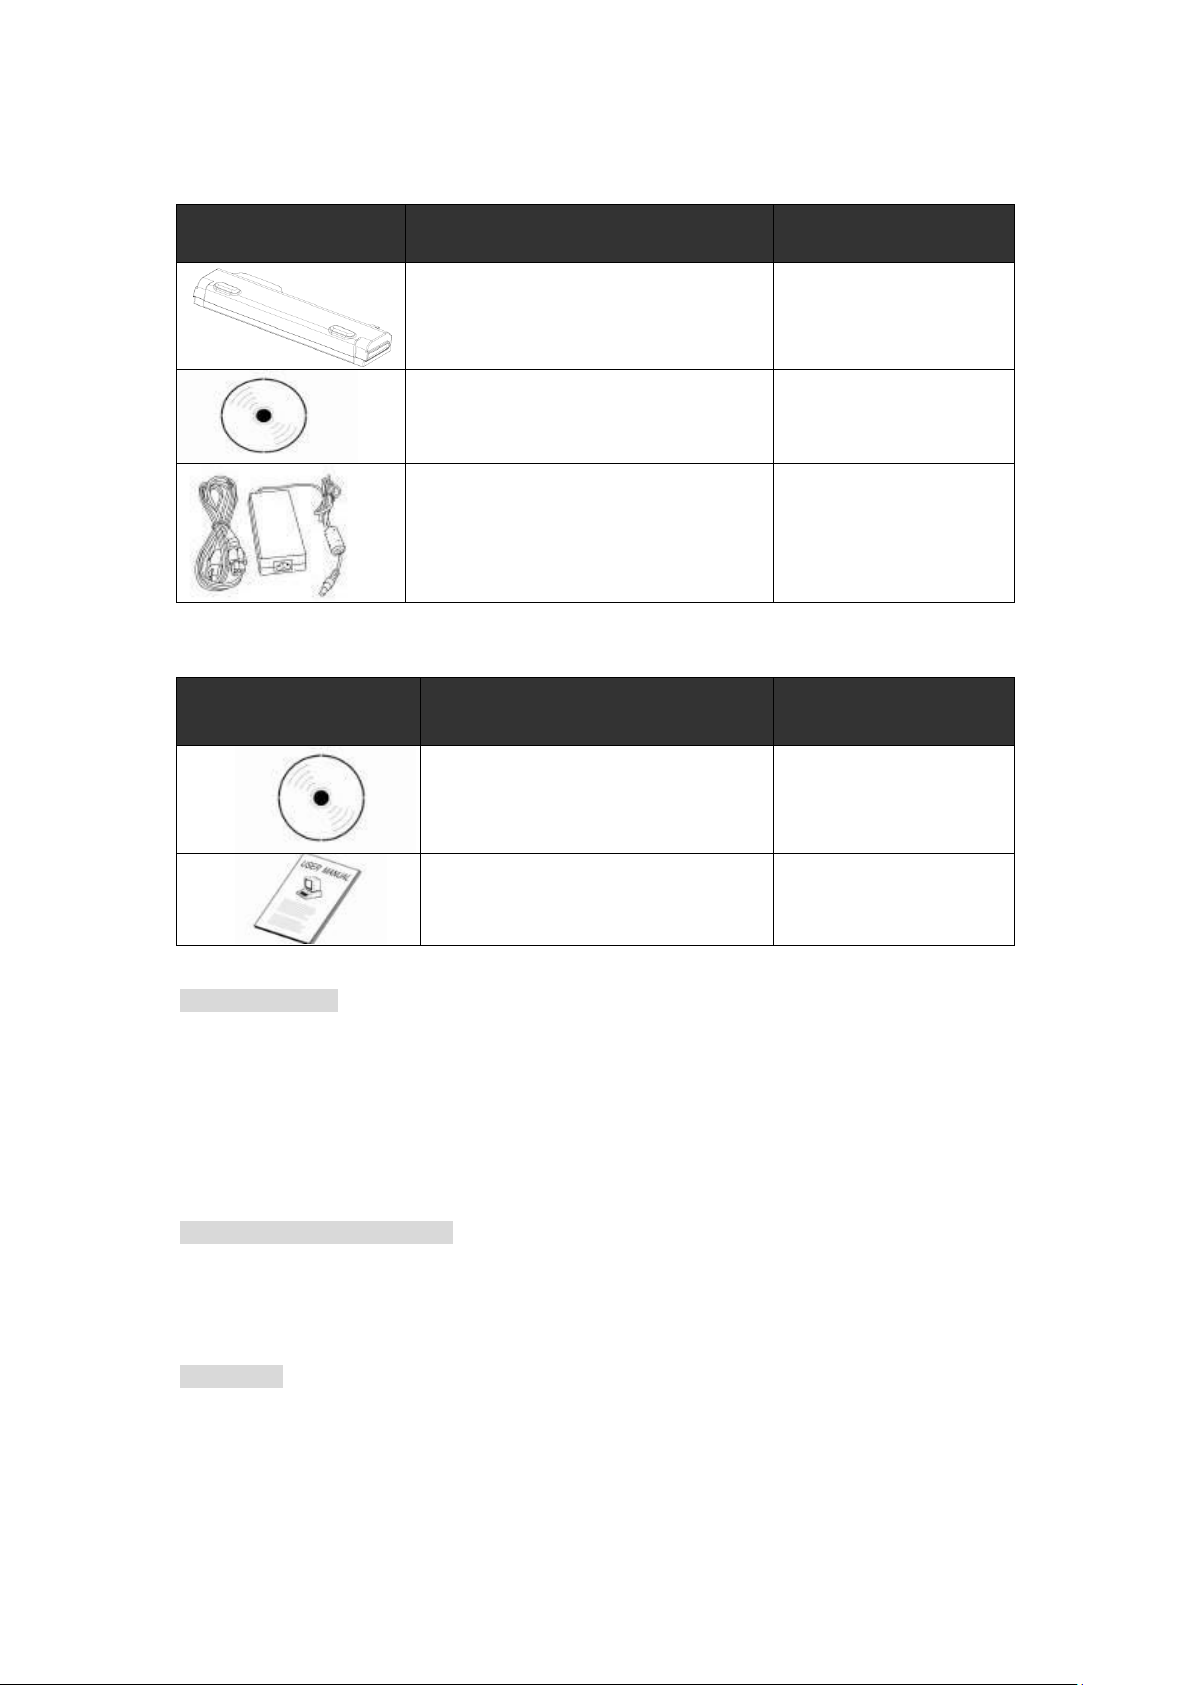
Accessories
Item
Description
Note
1 Li-Ion Battery Pack
1 CD for System Driver Utility.
Windows 7 Ultimate
1 19V Adapter w/ Standard Power
Cord. Euro / U.S. Std type, 1.8M
Item
Description
Note
1 CD for Recovery CD for Operation
System.
Windows 7 Ultimate
1 User’s Guide.
Operation System Packing List
Copyright Notice
Copyright © 2010 Handheld Group AB, ALL RIGHTS RESERVED. No part of this document
may be reproduced, copied, translated, or transmitted in any form or by any electronic or
mechanical means, for any purposes without the permission of the original manufacturer in
advance.
Trademark Acknowledgement
Brand and product names are trademarks or registered trademarks of their respective
owners.
Disclaimer
Handheld Group AB reserves the right to make any product changes without notice,
including circuits and/or software described or contained in this manual in order to improve
product design and/or performance. Handheld Group AB assumes no responsibility or
liability for the use of the described product(s), conveys no license or title under any patent,
Page 3

copyright, or mask- work rights to these products, and makes no representations or
warranties that these products are free from patent, copyright, or mask work right
infringement, unless otherwise specified. Applications that are described in this manual are
for illustration purposes only. Handheld Group AB makes no representation or warranty that
such application will be suitable for the specified use without further testing or modification.
Warranty
Handheld Group AB guarantees that all Handheld products will be free from material and
workmanship defects for one year from the invoice date. If the customer discovers any
defects, Handheld will, at its option, repair or replace the defective product without any
charge to the customer, and ship the returned product with prepaid transportation charges
during the warranty time of one year. The returned product must be properly packaged in its
original packaging to qualify for warranty service.
Customer Service
1. Visit the Handheld website www.handheldgroup.com to get the updated product
information.
2. Contact your distributor, sales representative, or our customer service center for
technical support if you need further assistance. You must have the following
information ready before you make the phone call:
Product serial number
Peripheral attachments
Software (OS, version, application software, etc.)
Detailed description of problem(s)
The exact wording or print screen images of any error messages
In addition, free technical support is available at Handheld during every business day. We
are always ready to provide guidance in terms of application requirements or specific
information in terms of installation and operation of all our products. Please feel free to call or
email us.
Manufacturer:Handheld Group AB
Address:Handheld Group AB, Kinnegatan 17 A, S-531 33 Lidköping, Sweden
Phone:+46 (0) 510-54 71 70
FAX:+46 (0) 510-282 05
URL: www.handheldgroup.com
Email: info@handheldgroup.com
Page 4
Safety Precautions
Power Adapter
Manufacturer: EDAC Power Electronics Co Ltd
Model: FSP065-AAB
Input rated: 100-240Vac, 1.8A, 50-60Hz.
Output rated: DC 19V, 3.42A.
Battery Pack
Manufacturer: JHT energy International Co Ltd
Model: ALGX-08A
Rated: 5200mAh, DC 11.1V
Warning!
Always disconnect the power cord from the device before you
open the device and work on the hardware. . Only authorized service
personnel are allowed to open the mechanical housing.
Caution!
Always ground yourself to remove any static charge before touching
SIM Cards. The device is very sensitive to static electricity. For safety,
please use a grounding wrist strap at all times. Place all electronic
components on a static-dissipative surface or in static-shielded bag
when they are removed from the chassis.
UL Safety Announcement
UL Classification: Class I mark: with respect to electronic shock; Fire and
hazardous material only in accordance with UL-60950 and CAN/CSA C22.2 No. 601.1
regulations.
Power Supply Announcement
The Handheld Rugged Netbook Power is supplied by a Power Adapter and Battery Pack, the
power rating declaration and manufacturer information are listed as below.
Please notice that the power code of the adapter needs to be connected to the ground (earth).
Please push the power button down for at least 4 seconds to enter sleep mode (See Chapter
2. 1 Starting and Stopping the Tablet PC).
Page 5

System
Processor
Intel® Atom™ Z550
BIOS
AMI System BIOS
Chipset
Intel® US15W
Memory
1 x SODIMM, DDR2 667 2GB
LAN Controller
Broadcom BCM57780 Gigabit-LAN
Storage
PATA interface support Mini-PCIe interface SSD 64GB
Audio
Audio-out for headset, Audio-in to send in audio signal, Micro-in for
microphone jack,1.5W Speaker (Internal)
Display Specifications
Size
10.1” (16:9)
Resolution
1366 x 768
Brightness
600+ cd/m2 (typ.), MaxView® enhanced
Glass
Heat-Enhanced Anti-Reflective Glass
I/O Connectors
Left I/O Port
2x USB, 1x Giga LAN, 1x DC Power Jack
Right I/O Port
1x VGA, 1x RS232
Front I/O Port
1x Micro-In, 1x Audio Out, 1x Audio out, 1x SD card slot, 1x Power
button slide
Bottom I/O Port
1x Pogo-pin for Docking, 1x Service Window
Buttons and Indicators
Control Button
3 LED indicators (Number Lock/ CAP Lock/ Scroll Lock) and 5
buttons (Volume down / Volume up / WLAN/ Brightness down /
Brightness up)
LED indicators
Power / Hard Disk/ WLAN/ Bluetooth/Battery Status
Chapter 1 – Specifications
ALGIZ XRW is an ultra-rugged notebook designed for use in various challenging environments,
e.g., field work, outdoor activities and construction sites. With its rugged design the ALGIZ
XRW is able to sustain shock, vibration, high humidity as well as high and low temperatures.
1. System Specifications
Page 6

Chapter 2 – Hardware Components
Ref.
Item
Description
1
Webcam + Microphone
2 megapixels Webcam with Microphone is used for
picture taking, video recording as well as any other
possible interactive activities.
2
LED Display
High brightness LED panel with MaxView
3
Keyboard/ Quick Launch
Buttons
The built-in keyboard has all the functions of a
full-sized keyboard including Hot Keys (Fn) whose
definitions will be described later.
4
Touch Pad with left and right
keys
A touch pad with left and right keys serves as a
regular mouse of a desktop PC.
5
LED Indicator
Indicates the status of Power/ Hard Disk/ WLAN/
Bluetooth/Battery
6
Control buttons
Includes 3 LED indicators (Number Lock/ CAP Lock/
Scroll Lock) and 5 buttons (Volume down / Volume up
/ WLAN/ Brightness down / Brightness up)
7
Stereo Speakers
1.5W stereo speakers
8
SD Card Slot
Accepts Secure Card (SD)
10
9 7 7
8 1 2 3 4 5 6
1. Front Side
Page 7

9
Audio in/
Audio out/
Microphone in
Audio out: connects with external audio line out
devices such as headphones or external speakers
Audio in: allows users to send audio signal to the
laptop for processing or recording
Microphone in: used to connect Microphone
10
Power Switch
Slide the switch to boot up the laptop
Ref.
Item
Description
11
DC Power Jack
Plug in DC plug to power up the device
12
Ethernet(RJ45) Port
Connect to a Ethernet 10/100/1000 based network
13
USB 2.0 Port x 2
Can be connected with any USB-interface peripherals
14
RS232
Accepts an external connection to a RS232 interface (D-sub
9 pins)
15
VGA
For connection with external displays devices such as
monitors and projectors
13
12
11
15
14
2. Left and Right Side
Page 8
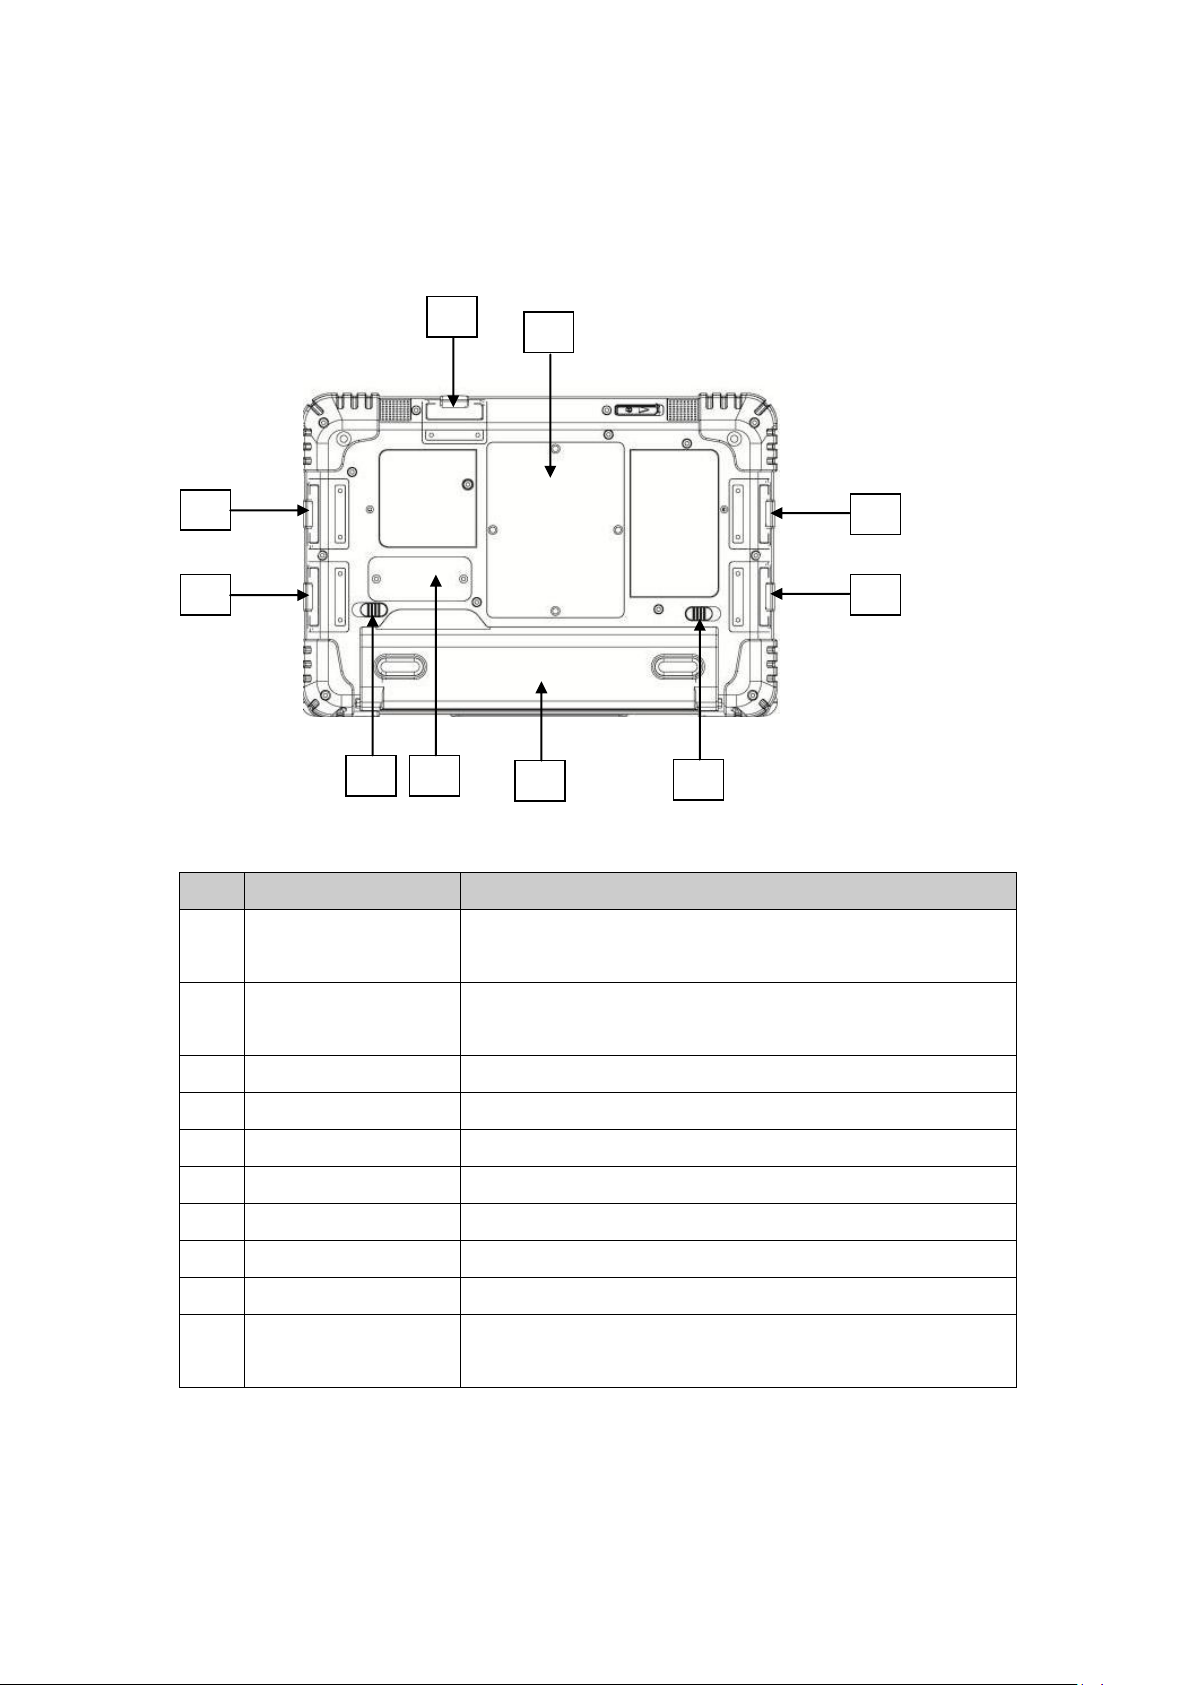
3. Bottom side
Ref.
Item
Description
16
SD card & Audio
Cover
Open the cover to use the SD card slot and Audio jacks
17
Service Window
Unscrew to install/uninstall SSD/ 3G & WiMAX module and
SIM card
18
VGA Cover
Open the cover to plug in the VGA cable
19
RS232 Cover
Open the cover to plug in the RS232 cable
20
Battery Lock
Used to fasten the battery
21
Battery
Please secure battery latch before use
22
Pogo Pins
Pogo pins for docking station
23
Battery Latch
Sliding latches to fasten or release the battery
24
USB Cover
Open the cover to plug in any USB 2.0 interfaced devices
25
DC Jack & Ethernet
Port Cover
Open the cover to plug in a DC Power Plug and RJ-45 LAN
cable
17
21
16
25
24
18
19
20
23
22
Page 9

Chapter 3 – Buttons and Indicators
Hot Key
Function
Icon
Description
Fn+F1
Sleep mode
Enters the sleep mode
Fn+F2
GPS
Enable/ Disable the GPS function
GPS can be found at COM9
Fn+F3
WLAN/ Wi-Fi
Enable/ Disable the Wireless LAN function
Fn+F4
3G Enable/ Disable the Optional 3G function
Fn+F5
Bluetooth
Enable/ Disable the Bluetooth function
Fn+F6
Touchpad
Enable/ Disable the touchpad
Fn+F7
Volume down
Decrease the volume
Fn+F8
Volume up
Increase the volume
Fn+F9
Mute
Muffle the audio sound
Fn+F10
Brightness down
Decrease the display brightness
Fn+F11
Brightness up
Increase the display brightness
Fn+F12
LCD/ External
Monitor switch
Switch signal between laptop display and
external connected monitor or both
Fn+Esc
Webcam
Enable/ Disable the webcam function
Fn+ ~
WiMAX
For future functions
Fn+1
Keyboard Auxiliary
Light
Turn on/off the keyboard auxiliary light
Press to cycle intensity and Turn off
Fn+2
Stealth mode
Enable/ Disable all LED indicators and screen.
1. Function Keys
Page 10
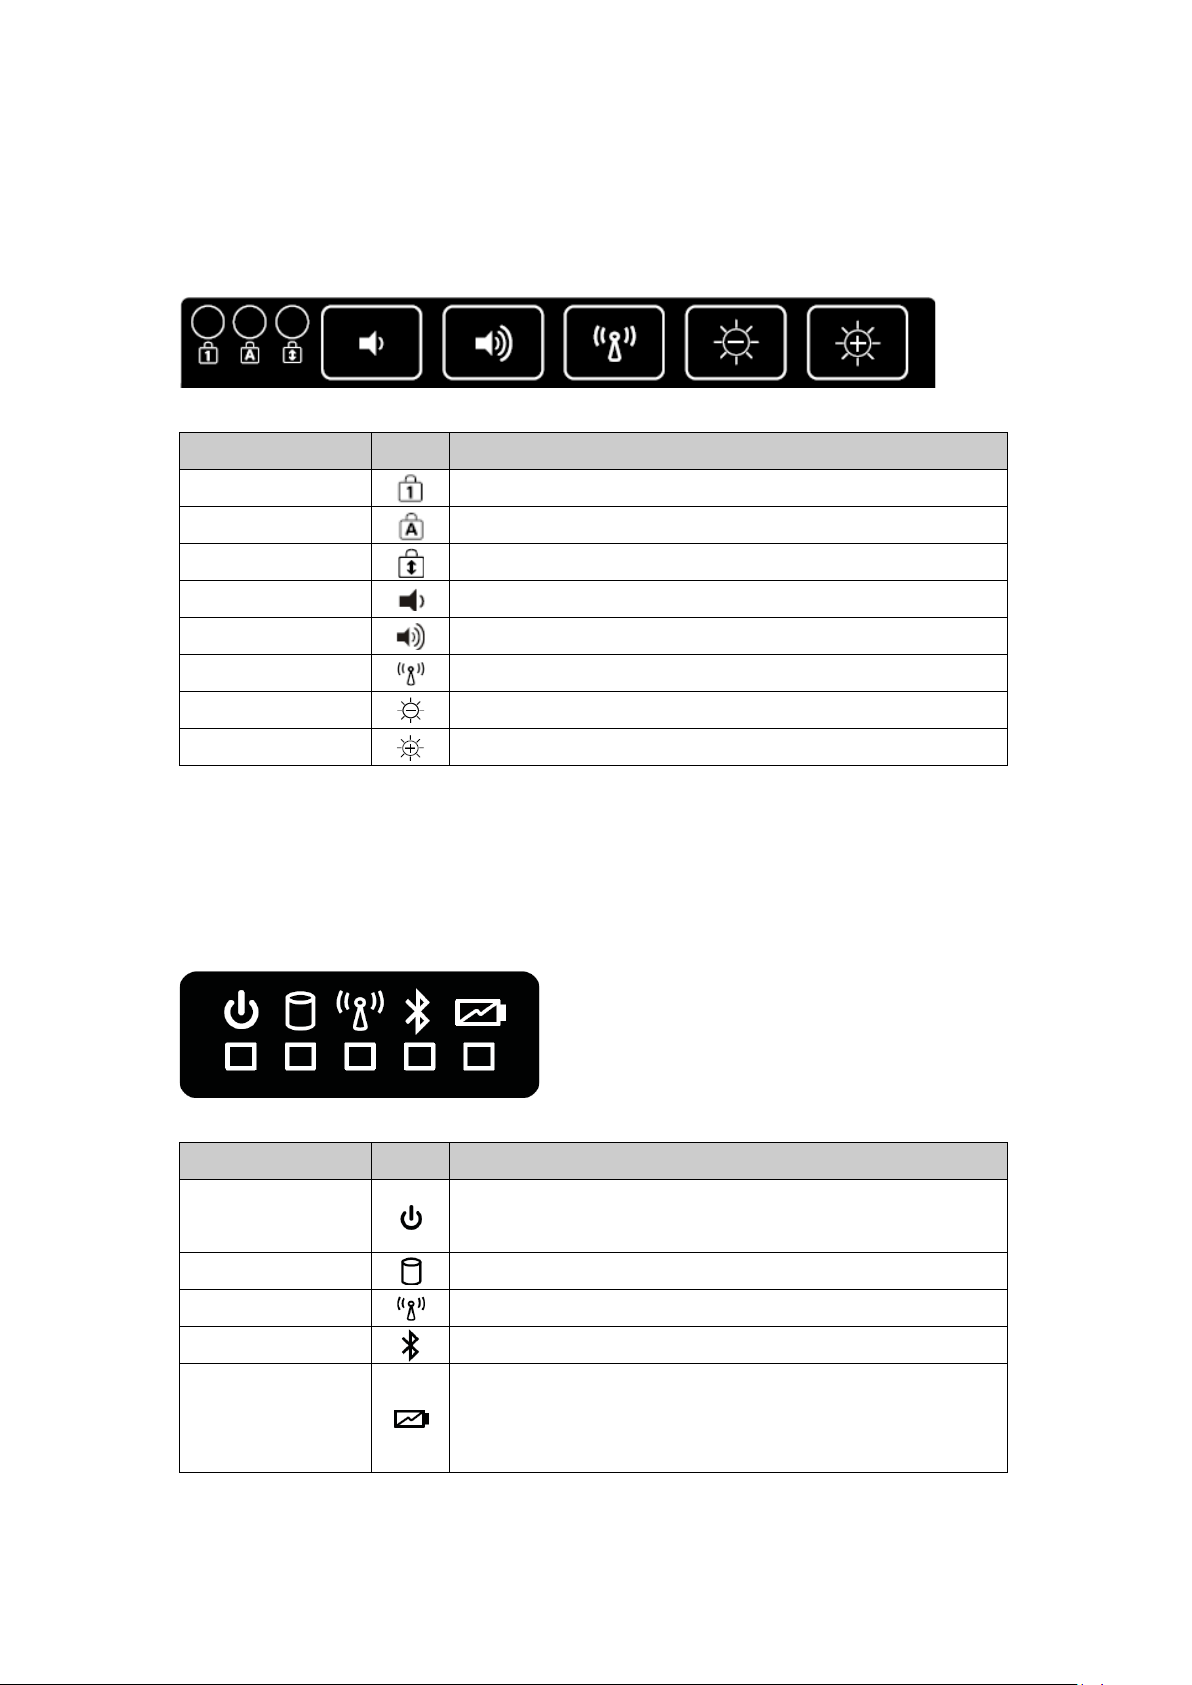
2. On Screen Display Hot Keys
Function
Icon
Description
Numeric lock
Enable/ disable the numeric keypad
Caps lock
Enable/ disable the caps lock
Scroll lock
Enable/ disable the scroll lock
Volume down
Decrease volume
Volume up
Increase volume
WLAN
Enable/ disable the WLAN
Brightness down
Decrease brightness
Brightness up
Increase brightness
Function
Icon
Description
Power Status
Green light – Power on
Orange light – Sleep mode
HDD Status
Green light – System is accessing the hard disk drive
Wi-Fi Status
Green light – Wi-Fi on
Bluetooth Status
Green light – Bluetooth on
Battery Status
Red light – Low Battery
Green light – Full Battery
Yellow light – Charging
3. LED Indicators
Page 11

Chapter 4 – Getting Your Device Ready
Caution
Before you use your Algiz XRW, you will have to charge the battery pack. Please
fully charge the battery prior to using Algiz XRW. The new battery packs must
be 100% charged before Algiz XRW is disconnected from the external power
source. It takes a few hours to fully charge the battery when Algiz XRW is
turned off.
1
1. Make sure that your device is either connected to AC power or a battery that still has
power.
2. Press the power button to turn on your ALGIZ XRW.
1. Plug in the AC Power
2. Plug the DC power cord of the AC
adapter into the power connector of the
device
3. Plug the female end of the AC power
cord into the AC adapter and the male
end into an electrical outlet
4. Slide the power switch to boot the
system
1. Installing a Battery Pack
1. Push the latches aside to install / release the
battery to the battery compartment
Page 12
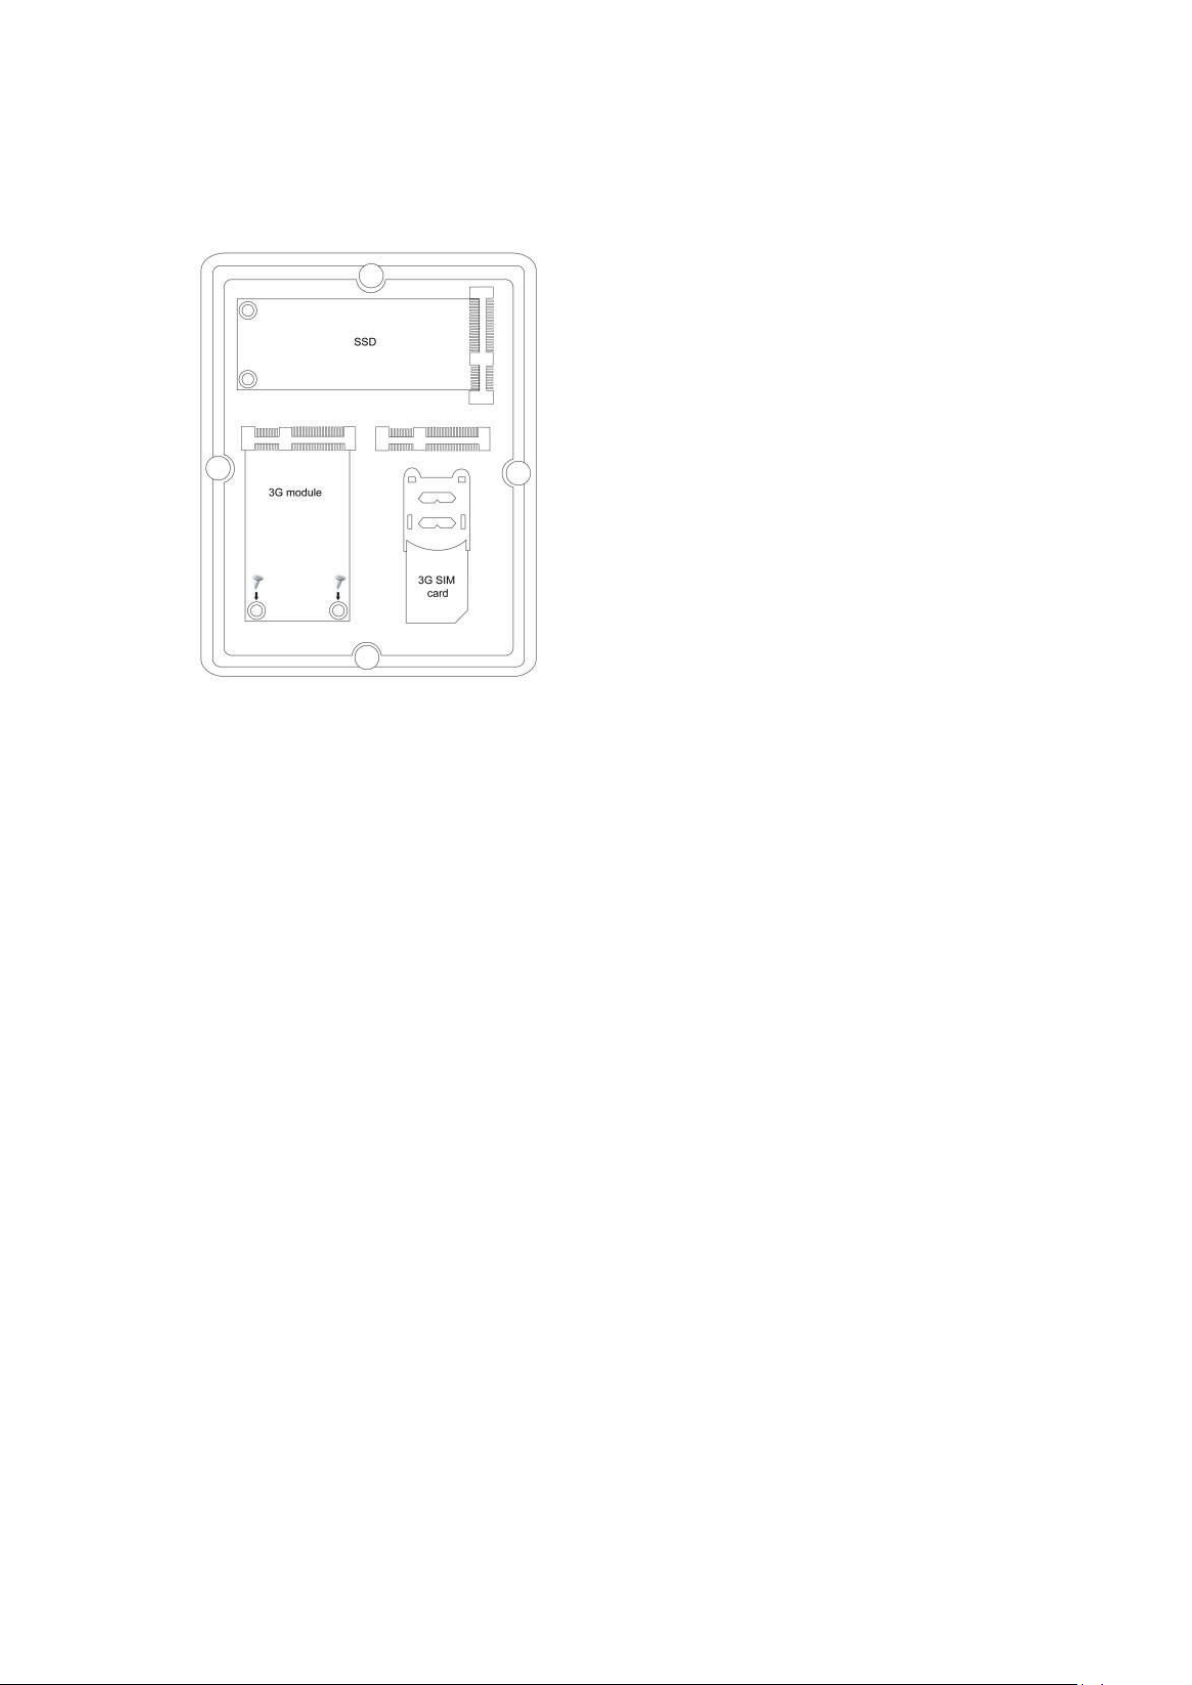
2. Installing 3G SIM Card
1. Plug in the 3G module into the mini PCIe
slot and fasten the module onto the
motherboard
2. Lift the SIM card socket up to insert the 3G
SIM card.
 Loading...