

Page 1
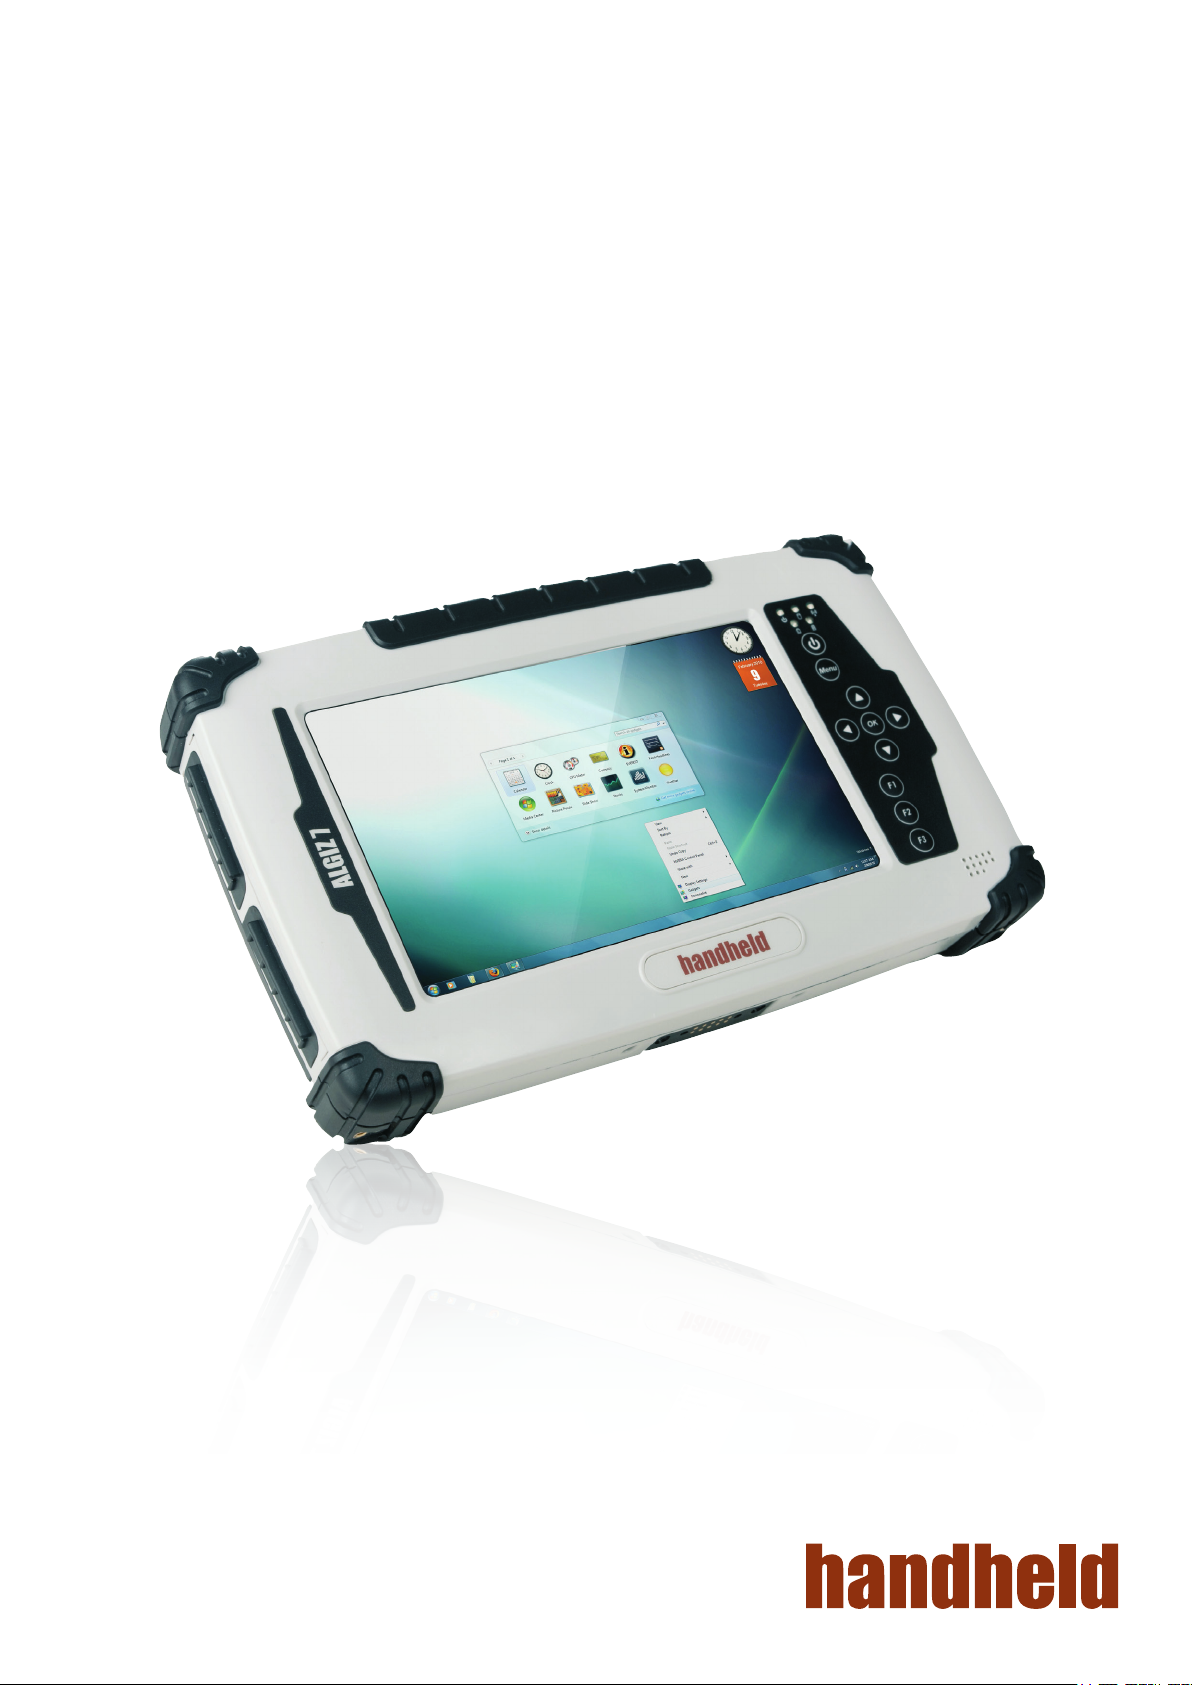
ALGIZ 7
Manual
Page 2

ALGIZ 7 Manual
Accessories
Item Description Note
2 Cell Li-Polymer Battery Packs
1 CD for System Driver Utility.
1 12V Adapter w/ Standard Power Cord.
Euro / U.S. Std type, 1.8m
Hot-swappable for
battery change
Item Description Note
1 Recovery DVD for the Operating System
(Windows 7).
1 Windows 7 Recovery User’s Guide.
2
Page 3

ALGIZ 7 Manual
Copyright Notice
Copyright © 2010 Handheld Group AB, ALL RIGHTS RESERVED. No part of this document may be reproduced, copied,
translated, or transmitted in any form or by any means, electronic or mechanical, for any purpose, without the prior written
permission of the original manufacturer.
Trademark Acknowledgement
Brand and product names are trademarks or registered trademarks of their respective owners.
Disclaimer
Handheld Group AB reserves the right to make any product changes without notice, including circuits and/or software
described or contained in this manual in order to improve design and/or performance. Handheld Group AB assumes no
responsibility or liability for the use of the described product(s), conveys no license or title under any patent, copyright, or
masks work rights to these products, and makes no representations or warranties that these products are free from patent,
copyright, or mask work right infringement, unless otherwise specified. Applications that are described in this manual are for
illustration purposes only. Handheld Group AB makes no representation or warranty that such application will be suitable for
the specified use without further testing or modification.
Standard Warranty & Limitations
This product is limited warranted against defects in materials and workmanship for twelve (12) months from the original date
of purchase. Accessories and peripherals are limited warranted against defects in materials and workmanship for ninety (90)
days from the original date of purchase. If notice is received of such defects during the limited warranty period, the proven
defective product(s) will either be repaired or replaced, at the manufacturer’s option. Replacement products may be either
new or like new.
Handheld does not warrant that the operation of the products will be uninterrupted or error free. If the product is not, within
a reasonable time, repaired or replaced to a condition as limited warranted, the customer will be entitled to a refund of the
purchase price upon prompt return of the product.
Limited warranty does not apply to defects resulting from (a) improper or inadequate maintenance or calibration, (b) software,
interfacing, parts, or supplies not supplied by Handheld, (c) unauthorized modification, or misuse, (d) operation outside of the
published environmental specifications for the product, or (e) physical damage due to external causes, including accident,
abuse, misuse or problems with electrical power. Removal of the back case voids the limited warranty.
To the extent allowed by local law, the above limited warranties are exclusive and no other warranty or condition, whether
written or oral, is expressed or implied, specifically disclaiming any implied warranties or conditions of merchantability,
satisfactory quality, and fitness for a particular purpose.
To the extent allowed by local law, the remedies in this limited warranty statement are the customer’s sole and exclusive
remedies. Except as indicated above, in no event will the manufacturer or its suppliers be liable for loss of data or for direct,
special, incidental, consequential (including lost profit or data), or other damage, whether based in contract, tort,
or otherwise.
3
Page 4

ALGIZ 7 Manual
Customer Service
Support for most of the problems are provided as per the following steps:First, visit our website at www.handheldgroup.
com to find updated information about the product. Secondly, contact your distributor, sales representative, or our customer
service center for technical support if you need additional assistance. You might need to have the following information ready
before you call:
• Product’s serial number
• Peripheral attachments
• Software (OS, version, application software, etc.)
• Description of complete problem
• The exact wording of any error messages with print screen images
In addition, free technical support is available from our engineers during working hours. We are always ready to give advice
on application requirements or specific information on the installation and operation of any of our products. Please do not
hesitate to call or e-mail us.
Manufacturer: Handheld Group AB
Address: Handheld Group AB, Kinnegatan 17 A, S-531 33, Lidköping, Sweden
TEL: +46 (0) 510-54 71 70
FAX: +46 (0) 510-282 05
4
Page 5

Safety Precautions
Warning!
Always disconnect the power cord from the unit whenever you work with the hardware. Do not plug
the device into the power socket when the device’s power is on. Sensitive electronic components can
be damaged by sudden power surges. Only experienced personnel should open the unit’s mechanical
housing.
Cauiton!
Always ground yourself to remove any static charge before touching the CPU card. The electronic
devices are very sensitive to static electricity. As a safety precaution, use a grounding wrist strap all the
time. Place all the electronic components in a static-dissipative surface or static-shielded bag when they
are not in the chassis.
ALGIZ 7 Manual
5
Page 6

ALGIZ 7 Manual
UL Safety Approved
Power Supply Announcement
The Handheld Rugged Tablet PC Power Supplies include Power Adapter and Battery Pack. The power rating and manufacturer
information is listed as below.
Power Adapter Manufacture: EDAC Power Electronics Co Ltd
UL Classification: Class I mark: with respect to electronic shock; Fire and hazardous
material conforms to the requirements of UL-60950 and CAN/CSA C22.2 No.
601.1.
Model: EA1050C-120
Input Rated: 100-240Vac, 1.8A, 50-60Hz.
Output Rated: DC 12V,4.16A.
Battery Pack Manufacture: JHT energy International Co Ltd
Power Notice!
Battery Notice!
Model: RTB-1
Rated: 2600mAh DC 7.4V
(1) The power ecord of the adapter should be earthed.
(2) Power Standby mode:Push the power button for at least 4 seconds to go to
standby. (See Chapter 2.1 Turning the Tablet PC On and Off)
WARNING:
Do not repair or replace battery, it may cause explosion! Only use the specied battery by
following the manufacturer’s instruction.
6
Page 7

Content
CHAPTER 1 - SPECIFICATION
1.1 SYSTEM SPECIFICATION ........................................................................................................ 9
1.2 HOW TO USE THE TABLET PC .............................................................................................. 10
1.3 LED INDICATOR ...................................................................................................................... 11
1.4 USING THE BATTERY PACKS...........................................................................................12-14
1.5 THE BATTERY LIGHT SIGNAL INSTRUCTION ......................................................................15
1.5.1 Battery Charging Mechanism: ...........................................................................................15
1.5.2 Battery Discharging Mechanism:..................................................................................16-17
CHAPTER 2 - USING THE SOFTWARE
2.1 TURNING THE TABLET PC ON AND OFF ............................................................................. 19
2.1.1 Turning on the Tablet PC ...................................................................................................19
2.1.2 Turning off the Tablet PC ................................................................................................... 19
2.2 HOW TO USE THE SOFTWARE .............................................................................................20
2.3 HOT TAB SOFTWARE UTILITY FUNCTIONS ...................................................................21-25
2.4 GPS SETUP .............................................................................................................................26
2.5 SIM INSTALLATION GUIDE ...............................................................................................27-28
2.6 WAN SOFTWARE .................................................................................................................... 29
CHAPTER 3 - REGULATORY
3.1 FCC REGULATORY ................................................................................................................31
3.1.1 FCC Compliance Statement ............................................................................................ 31
3.1.2 FCC Warning .................................................................................................................... 31
3.1.3 FCC RF Radiation Exposure Statement ...........................................................................31
3.1.4 CE Declaration of Conformity ............................................................................................ 31
3.2 CARING FOR YOUR UNIT / SAFE USE ................................................................................. 32
3.2.1 Maintenance ......................................................................................................................32
3.2.2 Battery Safety Instructions ................................................................................................32
3.2.3 Cleaning ............................................................................................................................33
ALGIZ 7 Manual
7
Page 8
ALGIZ 7 Manual
Chapter 1
Specification
This User Manual describes the use of an Algiz 7 with Microsoft Windows 7 OS,
but other operating systems can also be used. Please contact your supplier for
further information.
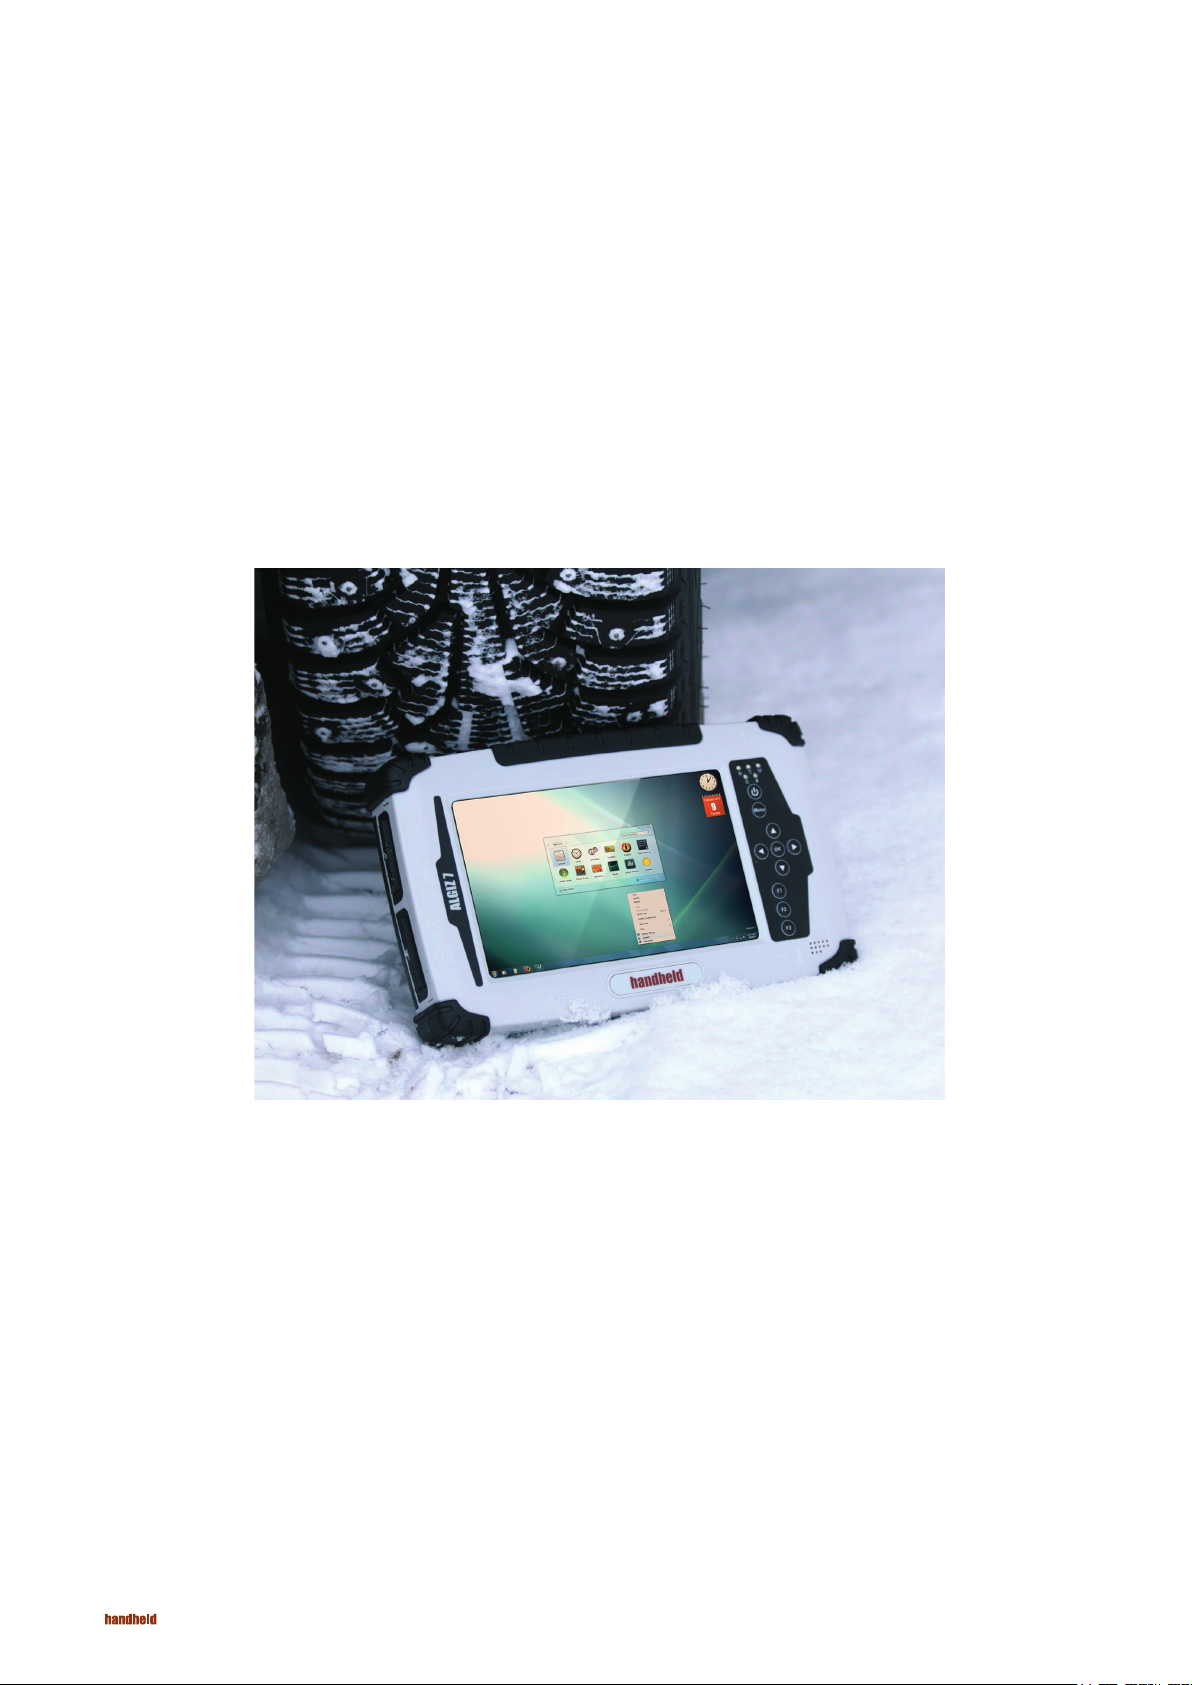
The Algiz 7 is a compact high performance, low weight rugged Tablet PC designed for outdoor & fieldwork usage. The Algiz 7 can withstand
severe environmental conditions including vibration, shock, moisture and temperature variations. The Algiz 7 is suitable for use in harsh
environments such as construction sites, warehouses, military, manufacturing andfield service. The Algiz 7 tablet pc is delivered with two batteries
and an AC power adapter.
This Chapter details the specification for the 7” Handheld Tablet PC Aligiz 7.
8
Page 9

ALGIZ 7 Manual - Chapter 1
1.1 System Specification
System
Processor Intel® ATOM™ Z530
BIOS AMI System BIOS
Chipset Intel US15W
Memory 1 x SODIMM, Max 2GB DDR2 400/533 (Default 2GB)
LAN Controller Realtek RTL811B Chipset, 10/100/1000 Mbps
Storage PATA interface support Mini-PCIe interface SSD (Default 64GB)
Audio Audio out for headset, Micro-in for microphone jack,1.5W Speaker (Internal)
I/O Connectors
Left I/O Port 1x Micro-In, 1x Audio Out,1x Giga LAN, 1x USB, 1x DC Power Jack
Right I/O Port 1x RS232, 1x USB (IP67 Sealed)
In Front Control
Control Button
LED indicator 1x Power Status, 1x HDD Status, 2x Battery Status, 1x Wireless Status
1x Power On/Off, 1x Menu, 1x Up, 1x Down, 1x Left, 1x Right
3x Programmable Hotkeys
Display Specication
Size 7” (16:9)
Resolution 1024x600
Brightness 600 nit Maxview Technology
Touch 4 Wire Resistive Touch
Power Management
Power Input 12 V DC @ 4.16A
Power Consumption 6-9W
Battery Li-Polymer 7.4V 2S1P, 2600mAh
Adapter 100-240V, 50-60Hz, 12VDC
9
Page 10
ALGIZ 7 Manual - Chapter 1
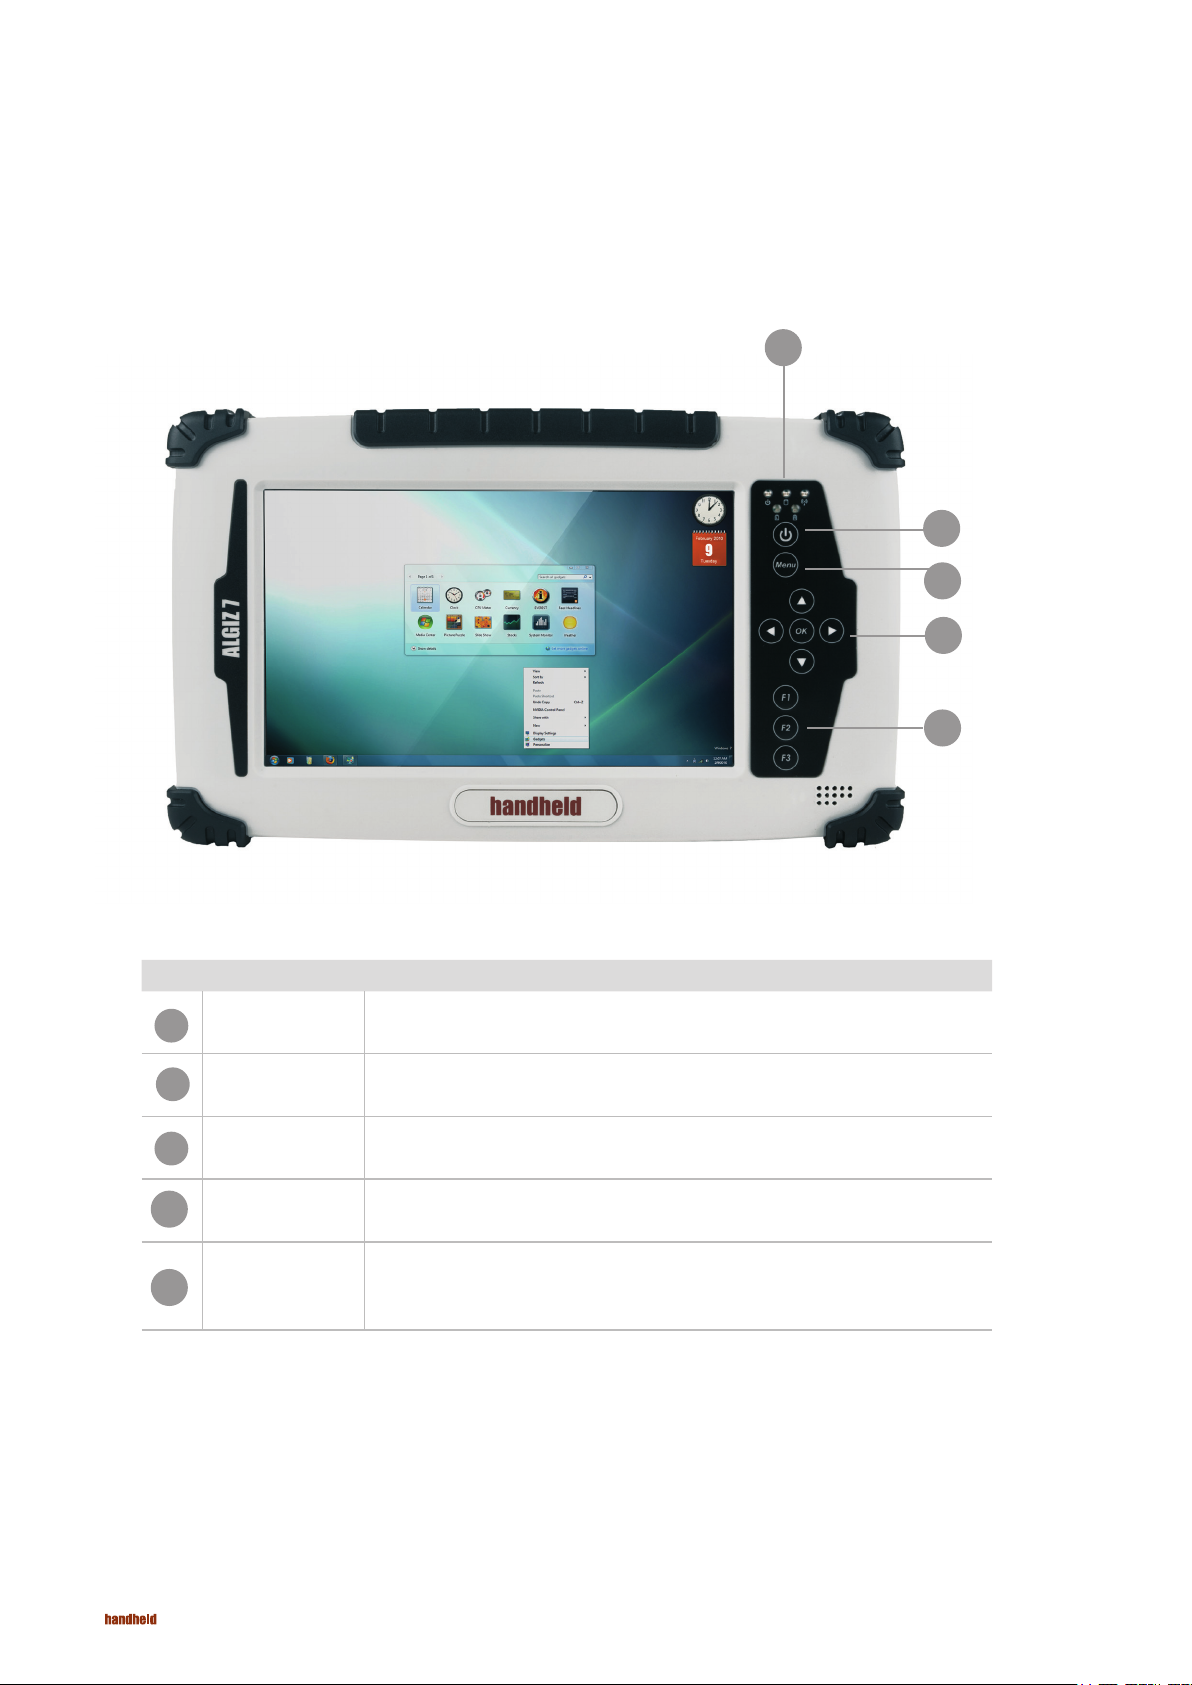
1.2 How to Use the Tablet PC
This section describes how to use the Tablet PC.
2
1
3
5
Ref Component Description
1
LED Indicator
2
3
F1 – F3 Hotkey
4
Left/ Right/OK
5
Power On
Button
Menu
Up/Down/
Button
PUSH for 4 seconds to turn on the tablet pc
Shows the Power Status, HDD Status, Left and Right Battery Status, and Wireless Status
Push Menu to show Brightness, Volume,Battery status and Wireless Enable/Disable.
6 programmable Hot-key functions for user to dene by application, default rst short push key
(F1 short) will turn-on help Menu
Use the UP, DOWN, LEFT, RIGHT and ENTER keys to navigate.
4
10
Page 11

1.3 LED Indicator
LED Term Indicator Status Description
Power mode
Battery Status
Storage Status
Wi status
Green: System is On.
No Light : System is Off
No Light: fully charged or power on with AC adapter
Orange Light: on charging
Red Light: Low Battery warning < 3% , or dead battery.
No Light: fully charged or power on with AC adapter
Blinking green Light: HDD is reading/writing data
Green Light blinking: Wi is using
No Light: Wi is not working
ALGIZ 7 Manual - Chapter 1
11
Page 12

ALGIZ 7 Manual - Chapter 1
1.4 Using the Battery Packs
This section describes the charging the battery pack.
Charging the Battery Pack
Before you use your Handheld tablet PC, you need to charge the battery pack. The battery pack begins to charge as soon as the
Handheld tablet PC is connected to the external power source. Please fully charge the batteries before using them for the first time. The
new battery packs must be fully charged before the tablet PC is disconnected from the external power source. The battery pack is fully
charged when the battery light indicator turns OFF. It takes about a couple of hours to fully charge the battery when the Handheld tablet
PC is turned OFF.
Battery Care
The Handheld tablet battery pack, like all rechargeable batteries, has a limit on the number of times it can be fully recharged. Fully
draining and charging the battery once a day will make the batteries last over a year, but rechargeable time limits are based on your
environmental temperature, humidity, and how your tablet PC is used. The ideal environment temperature range is between 10°C and
29°C (50°F and 85°F).
Battery Power System
This tablet PC is designed to work with two removable battery packs placed inside the battery pack compartment. The fully charged
battery packs will provide several hours of battery life, which can further be extended by using power management features through the
BIOS setup. The system includes a power management software which allows the battery to accurately report the amount of charge
percentage left in the battery.
Charging the Battery Pack
You can charge the battery pack by using the power adapter. When the power adapter is plugged in, the inserted battery packs
automatically recharges whether your tablet PC is in the ON or OFF mode. It takes about a couple of hours for the battery to be fully
charged when the power is OFF but takes twice as long when the tablet PC is in use. When the red charger LED indicator indicates
orange, charging is required. The battery is charging when the red LED is solid. When the LED is turned OFF, the battery pack is fully
charged.
12
Page 13

Insert the battery pack
ALGIZ 7 Manual - Chapter 1
1
Insert the battery pack into the battery slot.
2
Press down the compression lock into the tablet
pc.
3
Press the latch down to fasten the battery on
the tablet PC
13
Page 14

ALGIZ 7 Manual - Chapter 1
To remove the Battery
1
Slidethe latch up to release the battery
cover
2
Push up the lock from the tablet pc.
3
Take out the battery pack from the
battery slot.
14
Page 15

ALGIZ 7 Manual - Chapter 1
1.5 The Battery Light Signal Instruction
Charging procedure for the two battery packs. When the tablet pc is connected to the power source, the battery packs start charging.
Battery Light Signal
1.5.1 Battery Charging Mechanism:
Balance of Battery Charging Mode:
Both the battery packs are at a low power level which is about 5%
a. If the rst battery’s power level is 5% more than the second battery , the PC will charge the lower power battery rst.
b. If the rst battery’s power level is more than the second battery by less than 5%, the PC will charge both the batteries.
Dual Battery Charging Mode:
Both the battery packs are at a low power level which is about 10%
c. If both the batteries’ power level is below 10%, the PC will charge both the batteries together.
d. If both the batteries’ power level is more than 10%, the PC will change the charging mode to the balance charging mode.
e. If one battery is fully charged, the other is at a low power level, the PC will charge the battery which is at a low power level.
f. If both the batteries are fully charged, the PC will switch off the charging current.
15
Page 16

ALGIZ 7 Manual - Chapter 1
1.5.2. Battery Discharging Mechanism:
Battery discharging mechanism is showed as following:
a. Left Battery / Right Battery are locatedat the rear side.
Left Battery Right Battery
Touch Pen
b. The left battery status shows as discharged and the OSD indicator shows the discharging status as shown in the
following pictures.
16
Page 17

1.5.2. Battery Discharging Mechanism:
c. Give a long push to the <F3 > button to switch the
discharging status between left and right battery
d. The discharging status of the right battery is shown on
both the screen and the OSD indicator.
ALGIZ 7 Manual - Chapter 1
e. Critical battery level: 3% below
The system is not allowed to switch the discharge status
between left & right battery.
f. The left battery is discharging and the right battery is in
the critical battery status.
g. The right battery is discharging and the left battery is in
the critical battery status.
(L: red / R: green)
h. Both the left right batteries are in the critical battery status.
(L/R: both red)
17
Page 18

ALGIZ 7 Manual - Chapter 2
Using the Software
This Chapter will guide you how to operate the Tablet PC, including starting / shutting down
the PC, and how to use the menu function including basic hardware function adjustment
and the Hot Tab hotkey utility software that is very easy & helpful for operating the
Chapter 2
computer.
18
Page 19

2.1 Turning the Tablet PC On and Off
2.1.1 Turning on the Tablet PC
a. Place your tablet PC on a at and stable surface or hold the tablet PC in your hand.
ALGIZ 7 Manual - Chapter 2
Power On/Off
b. Make sure the tablet PC is either connected with the AC power adapter or the batteries are charged up.
c. Press the power button for at least 4 seconds to turn it on.
2.1.2 Turning off the Tablet PC
Turn off the tablet PC by using the “Shut Down” command of your operating system.
CAUTION: If you have to turn the tablet PC on again immediately after turning it off, please wait for at
least ve seconds. Turning the tablet PC off and on in rapid succession can damage the whole device.
19
Page 20

ALGIZ 7 Manual - Chapter 2
2.2 How to use the software
Hot-Tab Hotkey Function
PUSH
Menu Button
1st Time Show Current Brightness Click “Left/ Down”
2nd Time Show current Volume
3rd Time Show current Battery Usage and Battery status for both the batteries
4th Time Show the status of the Wireless communication function Use the touch button to select the
5th Time Show the software version of
Function Description Function Adjustment
button to increase
brightness (Or
Drag by Touch)
Click ”OK” to save
the changes and
exit UI.
wireless communication. Then select
Enable/ Disable
a. Hot TAB Utility version
b. BIOS / EC version
Click “Right/
Up” to decrease
brightness(Or Drag
by Touch)
Click ”OK” to save
the changes and
exit UI.
PRESS for 4 sec Lock/Unlock buttons
Press for 4 seconds to Lock buttons**(not including Touch)
Press for 4 seconds to Unlock buttons
20
Page 21

2.3 Hot TAB Software Utility Functions
F1 Hot TAB functions shows four functions
a. The rst is a virtual mouse
ALGIZ 7 Manual - Chapter 2
b. Screen rotation
21
Page 22

ALGIZ 7 Manual - Chapter 2
2.3 Hot TAB Software Utility Functions
c. Onscreen Keyboard
d. F2 andF3 hotkeys
You can use “browse” and select the desired program le.
22
Page 23
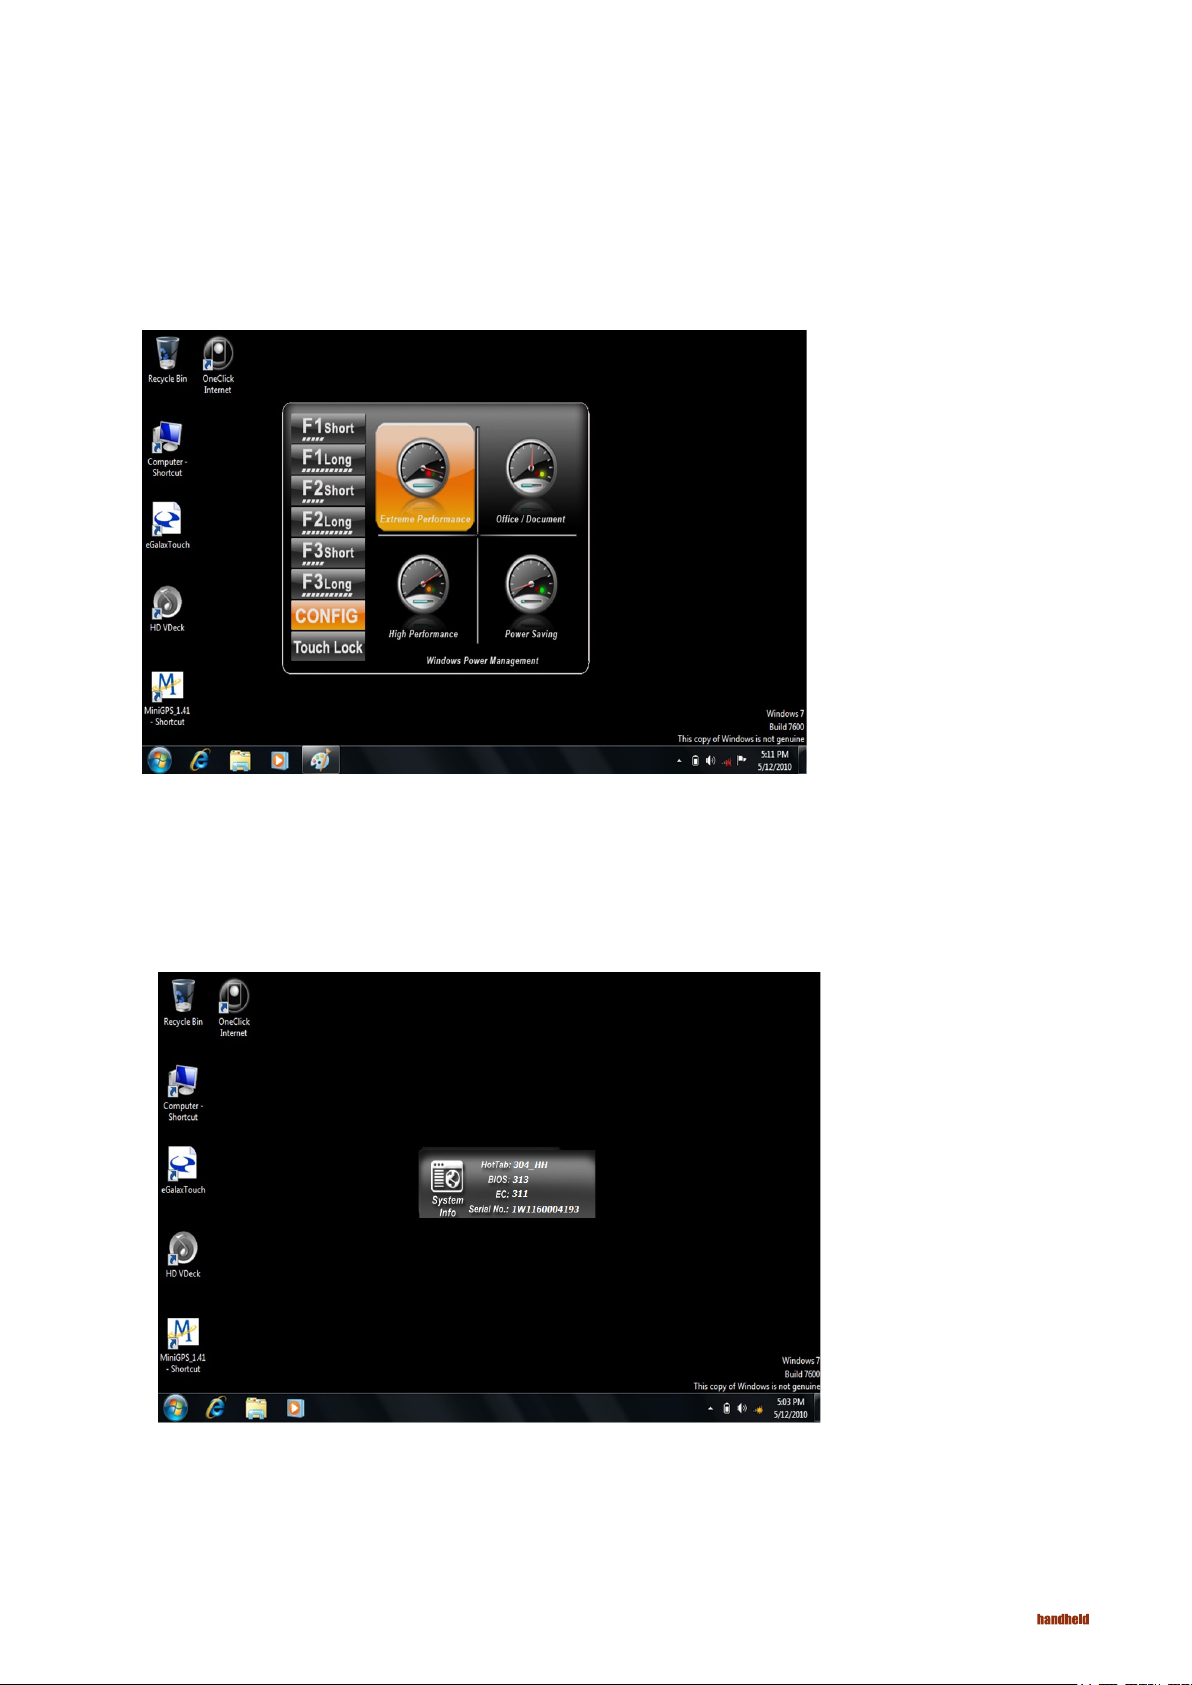
2.3 Hot TAB Software Utility Functions
e. Power Management Display System Information
ALGIZ 7 Manual - Chapter 2
f. System Information
When you press menu for the 3rd time, you can see the system information.
23
Page 24

ALGIZ 7 Manual - Chapter 2
2.3 Hot TAB Software Utility Functions
g. Touch Lock:
Select the touch lock icon to lock the touchscreen. Use the onscreen slide to unlock.
h. Low battery warning notice:
24
Page 25

2.3 Hot TAB Software Utility Functions
i. Camera Setup
The easiest way to reach the camera is through the function keys. Press F1 to assign functions.
Default for Webcam application is short press on F3 key.
ALGIZ 7 Manual - Chapter 2
The icons at the top of the window:
• Video icon – starts lming a movie
• Camera icon – takes the shot
• Flash icon – toggles the LED light on/off
• File management icon – shows where you’ll save the images. You should set this up before you start
taking pictures or video, then once you take a shot it is automatically saved in that location.
• Return arrow icon – closes the camera application
25
Page 26

ALGIZ 7 Manual - Chapter 2
2.4 GPS Setup
a) Click on “Menu” four times on the right keypad of the Algiz 7 and make sure that the “GPS” box is checked.
b) Click on U-center – Shortcut on your desktop.
c) Set the COM port to COM 3 and the baud rate to 9600.
d) Done
Note! Only valid for Algiz 7 units with S/N starting at: 1W1170014211
26
Page 27

2.5 SIM Installation guide
ALGIZ 7 Manual - Chapter 2
a) Start by unscrewing the 4 screws on the back as described above, using a screwdriver.
b) Gently open the right SIM card holder and insert your SIM card..
27
Page 28

ALGIZ 7 Manual - Chapter 2
2.5 SIM Installation guide
c) Place the cover back in its original position and tighten the 4 screws and you are
done.
28
Page 29

2.6 WAN Software
ALGIZ 7 Manual - Chapter 2
a) Insert the SIM card before proceeding.
b) Click on “Menu” four times on the right
keypad of the Algiz 7 and make sure
that the box “3G” is checked.
c) Once the modem has been activated,
click on “OneClick Internet” shortcut
on your desktop.
d) Press connect and the software will
automatically load the required settings,
please hold until it indicates connected.
e) You are now connected and can use
Internet Explorer to access the internet. ‘
f) If it does not load the correct settings,
press on the button “Settings” and select the
correct settings manually.
g) Save the prole and connect again.
29
Page 30

ALGIZ 7 Manual - Chapter 3
Chapter 3
Regulatory
30
Page 31

ALGIZ 7 Manual - Chapter 3
3.1 Regulatory
3.1.1 FCC Compliance Statement
This device complies with part 15 of the FCC Rules. Operation is subject to the following two conditions:
1. This device may not cause harmful interference, and
2. This device must accept any interference received, including interference that may cause undesired operation.
3.1.2 FCC Warning
This equipment has been tested and found to comply with the limits for a Class B digital device, pursuant to Part 15 of the FCC Rules.
These limits are designed to provide reasonable protection against harmful interference in a residential installation. This equipment
generates, uses and can radiate radio frequency energy and, if not installed and used in accordance with the instructions, may cause
harmful interference to radio communications. However, there is no guarantee that interference will not occur in a particular installation.
If this equipment does cause harmful interference to radio or television reception, which can be determined by turning the equipment off
and on, the user is encouraged to try to correct the interference by one or more of the following measures:
• Reorient or relocate the receiving antenna.
• Increase the separation between the equipment and the receiver.
• Connect the equipment into an outlet different from that to which the receiver is connected.
• Consult the dealer or an experienced radio/TV technician for help.
Caution:
To comply with the limits for an FCC Class B computing device, always use the shielded signal cord supplied with this unit. The Federal
Communications Commission warns that change or modifications of the unit not expressly approved by the party responsible for
compliance could void the user’s authority to operate the equipment.
3.1.3 FCC RF Radiation Exposure
This equipment complies with FCC RF radiation exposure limits set forth for an uncontrolled environment. This device and its antenna
must not be co-located or operating in conjunction with any other antenna or transmitter. To comply with FCC RF exposure compliance
requirements, the antenna used for this transmitter must be installed to provide a separation distance of at least 20 cm from all persons
and must not be co-located or operating in conjunction with any other antenna or transmitter.
3.1.4 CE Declaration of Conformity
This equipment is herewith confirmed to comply with the requirements set out in the Council Directive on the Approximation of the Laws
of the Member States relating to Electromagnetic Compatibility (89/336/EEC), Low-voltage Directive (73/23/EEC) and the Amendment
Directive (93/68/EEC), the procedures given in European Council Directive99/5/EC and 89/3360EEC
31
Page 32

ALGIZ 7 Manual - Chapter 3
3.2 Caring for your unit / Safe use
This chapter provides troubleshooting guidelines, including cleaning instructions and storage advice for your handheld product.
3.2.1 Maintenance
Please follow the instructions below for trouble-free use of the device:
• Take care to protect the screen from scratches. Only use a plastic pen designed for touchscreens or the stylus
provided. Never use pens, pencils or other sharp objects on the screen.
• It is recommended that the screen is protected using protective film (one sheet of protective film is supplied
with the product). Advantages of using protective film include the following:
• Protects the screen from scratches and grooves.
• More realistic feel when writing and touching
• Protects the screen from damage caused by abrasion and foreign bodies.
• Extends the lifespan of the touch screen.
• Your handheld product screen is made from glass. Do not apply excessive force to the screen.
• Protect your handheld product from severe temperature changes. When the temperature is high, do not
leave the device on the dashboard of the vehicle and keep well away from any heat sources.
• Do not use or store your handheld product in dirty, humid or wet conditions that are beyond the product
specifications.
• Use a soft cloth (e.g. cloth designed for lens cleaning) for cleaning your handheld product. If the screen
surface gets dirty, clean using soapy water and a damp cloth.
• To maximize battery life and performance, replace the battery periodically. The battery life depends on use.
3.2.2 Battery Safety Instructions
• No debris, combustibles or chemicals should be allowed near the battery while charging. Extra caution is
required when charging the battery in non-commercial conditions.
• The battery should only be used in accordance with the instructions for use, storage and recharge as set out by
this manual.
• Improper use of the battery may result in fire or explosion. The charging temperature of the battery ranges
from 0°C to 40°C (32°F ~ 104°F).
• Do not use incompatible batteries or chargers. The use of incompatible batteries or chargers may result in
risks such as fire, explosion, leaks, etc. If you have any question about batteries or the charger,
contact Handheld.
• Do not attempt to disassemble, open, bend, modify, puncture, or smash the product or the battery.
• If you drop the device on a solid surface hard, the battery may overheat.
• Extra care must be taken to avoid short circuiting, contact a metal conductor to the battery terminals.
• Special attention must be paid to avoid modification, restoration, inserting foreign bodies into the battery,
exposing the battery to water or other liquids, fire, explosion, and other risks.
• Do not allow children to handle the battery unsupervised. .
• Used batteries must be disposed of in accordance with local regulations.
• Do not burn the battery.
• If the battery has been swallowed, immediately contact a doctor.
• If the battery leaks, be careful not to allow the fluid to come into contact with skin or eyes. If battery fluid
comes into contact with skin or eyes, rinse using plenty of water and seek immediate medical advice.
• If you suspect damage to the device or the battery, contact Handheld.
32
Page 33

ALGIZ 7 Manual - Chapter 3
3.2.3 Cleaning
Cleaning the exterior
Use only detergents or cleaners dedicated for computers.
Screen
Use only detergents or cleaners dedicated for computers. Take care not to allow any excess liquid to enter the gaps around the screen.
To avoid scratches, wipe using a non-abrasive dry cloth.
Scanner Window
Clean regularly using a lens cleaner.Clean regularly using a lens cleaner.
Connectors
1. Remove the battery
2. Soak the end of a swab with isopropyl alcohol and rub across the connector pins.
3. Be careful as to not leave any residue on the connectors.
4. This process should be repeated approximately three times.
Note: If isopropyl alcohol is not available, use computer cleaning detergent or a pencil eraser (rubber) taking care not to leave any
foreign bodies at the pins.
Cradle
1. Remove the power cable from the cradle.
2. Soak the end of a swab with isopropyl alcohol and rub across the connector pins.
3. Be careful as to not leave any residue on the connectors.
4. Rub the connectors carefully ensuring that both sides of the connectors are fully cleaned; repeat three times.
5. Remove any foreign bodies inside the cradle using compressed air or similar.
6. Clean the exterior using computer cleaning detergents.
Contamination levels may vary depending on the users' operational environment; it is recommended that the device be cleaned
regularly.
33
 Loading...