

Page 1

A540 IP
You can find the most up to date user manual at
www.gigaset.com/manuals
Page 2

Page 3

Gigaset A540 IP – your high-quality accessory
Gigaset A540 IP – your high-quality accessory
Congratulations on your purchase of this latest generation Gigaset.
Your Gigaset can do a lot more than just make calls:
It's easy to configure your Gigaset thanks to the wizards
They help you to configure the VoIP connections for your phone and to assign the receive and
send connections to the registered handsets.
You can perform the configuration with wizards on a handset or PC using the web configurator of your phone.
Your Gigaset is a real multi-line phone (it works like a PABX)
You can register up to six handsets. Assign each handset its own phone number.
Ethernet port
Connect your Gigaset to the Internet and your PC via Ethernet. Use your public directory on
the Internet (
simultaneously.
Directory for 150 entries
Save phone numbers and names to the directory (¢ page 63). You can designate important
entries as VIPs (Very Important Persons). VIP calls are then recognised by their ringtone and
their background colour (
If you don't (always) want it to ring
Use time control for calls (¢ page 103) or ensure that all calls from a withheld number are
not signalled (
¢ page 66). Update the directory on your Gigaset and your directory on the PC
¢ page 64).
¢ page 103).
Other practical information
Transfer the directory from an existing Gigaset handset (¢ page 65), use the shortcut func-
¢ page 65) and adjust the background colour and contrast of the display to your
tion (
requirements (
¢ page 100).
Protecting our environment
Gigaset Green Home – be environmentally aware when using your phone. For details of our
ECO DECT products, visit www.gigaset.com/service
For more information about your phone, visit
www.gigaset.com
After purchasing your Gigaset phone, please register it at
www.gigaset.com/service
vices you request are dealt with even faster!
If you have any questions about using your phone, please read the tips on troubleshooting
¢ page 145) or contact our Customer Care team (¢ page 145).
(
.
– this will ensure that any questions you may have or warranty ser-
.
Have fun using your new Gigaset phone!
1
Page 4

Contents
Contents
Gigaset A540 IP – your high-quality accessory . . . . . . . . . . . . . . . . . . . . . . 1
Overview . . . . . . . . . . . . . . . . . . . . . . . . . . . . . . . . . . . . . . . . . . . . . . . . . . . . . . . . . 6
Display icons . . . . . . . . . . . . . . . . . . . . . . . . . . . . . . . . . . . . . . . . . . . . . . . . . . . . . . 7
Display keys . . . . . . . . . . . . . . . . . . . . . . . . . . . . . . . . . . . . . . . . . . . . . . . . . . . . . . . 8
Main menu icons . . . . . . . . . . . . . . . . . . . . . . . . . . . . . . . . . . . . . . . . . . . . . . . . . . 8
The base at a glance . . . . . . . . . . . . . . . . . . . . . . . . . . . . . . . . . . . . . . . . . . . . . . . 9
Safety precautions . . . . . . . . . . . . . . . . . . . . . . . . . . . . . . . . . . . . . . . . . . . . . . . . 10
First steps . . . . . . . . . . . . . . . . . . . . . . . . . . . . . . . . . . . . . . . . . . . . . . . . . . . . . . . . 11
Checking the package contents . . . . . . . . . . . . . . . . . . . . . . . . . . . . . . . . . . . . . . . . . . . . . . 11
Setting up the handset for use . . . . . . . . . . . . . . . . . . . . . . . . . . . . . . . . . . . . . . . . . . . . . . . 12
Changing the display language . . . . . . . . . . . . . . . . . . . . . . . . . . . . . . . . . . . . . . . . . . . . . . 16
Installing the base station . . . . . . . . . . . . . . . . . . . . . . . . . . . . . . . . . . . . . . . . . . . . . . . . . . . . 17
Connecting the base . . . . . . . . . . . . . . . . . . . . . . . . . . . . . . . . . . . . . . . . . . . . . . . . . . . . . . . . . 18
Setting up the phone – installation wizard . . . . . . . . . . . . . . . . . . . . . . . . . . . . . . . . . . . . 23
Date/time . . . . . . . . . . . . . . . . . . . . . . . . . . . . . . . . . . . . . . . . . . . . . . . . . . . . . . . . . . . . . . . . . . . 34
Proceeding . . . . . . . . . . . . . . . . . . . . . . . . . . . . . . . . . . . . . . . . . . . . . . . . . . . . . . . . . . . . . . . . . . 35
Using the phone . . . . . . . . . . . . . . . . . . . . . . . . . . . . . . . . . . . . . . . . . . . . . . . . . . 36
Control key . . . . . . . . . . . . . . . . . . . . . . . . . . . . . . . . . . . . . . . . . . . . . . . . . . . . . . . . . . . . . . . . . . 36
Keys on the keypad . . . . . . . . . . . . . . . . . . . . . . . . . . . . . . . . . . . . . . . . . . . . . . . . . . . . . . . . . . 36
Correcting incorrect entries . . . . . . . . . . . . . . . . . . . . . . . . . . . . . . . . . . . . . . . . . . . . . . . . . . 36
Menu guidance . . . . . . . . . . . . . . . . . . . . . . . . . . . . . . . . . . . . . . . . . . . . . . . . . . . . . . . . . . . . . . 37
Activating/deactivating the handset . . . . . . . . . . . . . . . . . . . . . . . . . . . . . . . . . . . . . . . . . . 38
Activating/deactivating the keypad lock . . . . . . . . . . . . . . . . . . . . . . . . . . . . . . . . . . . . . . 38
Understanding the operating steps . . . . . . . . . . . . . . . . . . . . . . . . . . . . . . . . . . . . . . . . . . . 39
Menu tree . . . . . . . . . . . . . . . . . . . . . . . . . . . . . . . . . . . . . . . . . . . . . . . . . . . . . . . . 41
Making calls . . . . . . . . . . . . . . . . . . . . . . . . . . . . . . . . . . . . . . . . . . . . . . . . . . . . . . 44
Making an external call . . . . . . . . . . . . . . . . . . . . . . . . . . . . . . . . . . . . . . . . . . . . . . . . . . . . . . 44
Ending a call . . . . . . . . . . . . . . . . . . . . . . . . . . . . . . . . . . . . . . . . . . . . . . . . . . . . . . . . . . . . . . . . . 46
Accepting a call . . . . . . . . . . . . . . . . . . . . . . . . . . . . . . . . . . . . . . . . . . . . . . . . . . . . . . . . . . . . . . 47
Calling line identification . . . . . . . . . . . . . . . . . . . . . . . . . . . . . . . . . . . . . . . . . . . . . . . . . . . . . 47
Notes on phone number display (CLIP) . . . . . . . . . . . . . . . . . . . . . . . . . . . . . . . . . . . . . . . 49
VoIP telephony via Gigaset.net . . . . . . . . . . . . . . . . . . . . . . . . . . . . . . . . . . . . . . . . . . . . . . . 50
Gigaset HDSP – telephony with brilliant sound quality . . . . . . . . . . . . . . . . . . . . . . . . 51
Activating/deactivating handsfree mode . . . . . . . . . . . . . . . . . . . . . . . . . . . . . . . . . . . . . 52
Muting the handset . . . . . . . . . . . . . . . . . . . . . . . . . . . . . . . . . . . . . . . . . . . . . . . . . . . . . . . . . . 52
Making calls using select services . . . . . . . . . . . . . . . . . . . . . . . . . . . . . . . . . 53
Configuring general settings for all calls . . . . . . . . . . . . . . . . . . . . . . . . . . . . . . . . . . . . . . 53
Configuring settings for the next call . . . . . . . . . . . . . . . . . . . . . . . . . . . . . . . . . . . . . . . . . 56
Actions during an external call . . . . . . . . . . . . . . . . . . . . . . . . . . . . . . . . . . . . . . . . . . . . . . . 56
2
Page 5

Contents
Using lists . . . . . . . . . . . . . . . . . . . . . . . . . . . . . . . . . . . . . . . . . . . . . . . . . . . . . . . . 59
Redial list . . . . . . . . . . . . . . . . . . . . . . . . . . . . . . . . . . . . . . . . . . . . . . . . . . . . . . . . . . . . . . . . . . . . 59
Function of the message key . . . . . . . . . . . . . . . . . . . . . . . . . . . . . . . . . . . . . . . . . . . . . . . . . 60
SMS inbox . . . . . . . . . . . . . . . . . . . . . . . . . . . . . . . . . . . . . . . . . . . . . . . . . . . . . . . . . . . . . . . . . . . 61
Call list . . . . . . . . . . . . . . . . . . . . . . . . . . . . . . . . . . . . . . . . . . . . . . . . . . . . . . . . . . . . . . . . . . . . . . 61
Using directories . . . . . . . . . . . . . . . . . . . . . . . . . . . . . . . . . . . . . . . . . . . . . . . . . 63
Local directory . . . . . . . . . . . . . . . . . . . . . . . . . . . . . . . . . . . . . . . . . . . . . . . . . . . . . . . . . . . . . . . 63
Using online directories . . . . . . . . . . . . . . . . . . . . . . . . . . . . . . . . . . . . . . . . . . . . . . . . . . . . . . 66
Using the Gigaset.net directory . . . . . . . . . . . . . . . . . . . . . . . . . . . . . . . . . . . . . . . . . . . . . . . 70
SMS (text messages) . . . . . . . . . . . . . . . . . . . . . . . . . . . . . . . . . . . . . . . . . . . . . . 74
Writing/sending SMS . . . . . . . . . . . . . . . . . . . . . . . . . . . . . . . . . . . . . . . . . . . . . . . . . . . . . . . . 74
Receiving SMS . . . . . . . . . . . . . . . . . . . . . . . . . . . . . . . . . . . . . . . . . . . . . . . . . . . . . . . . . . . . . . . 77
Receiving notifications via SMS . . . . . . . . . . . . . . . . . . . . . . . . . . . . . . . . . . . . . . . . . . . . . . . 79
Setting the SMS service centre/defining the send line . . . . . . . . . . . . . . . . . . . . . . . . . 80
SMS on a PABX . . . . . . . . . . . . . . . . . . . . . . . . . . . . . . . . . . . . . . . . . . . . . . . . . . . . . . . . . . . . . . . 81
Activating/deactivating SMS function . . . . . . . . . . . . . . . . . . . . . . . . . . . . . . . . . . . . . . . . 82
SMS troubleshooting . . . . . . . . . . . . . . . . . . . . . . . . . . . . . . . . . . . . . . . . . . . . . . . . . . . . . . . . 83
E-mail notifications . . . . . . . . . . . . . . . . . . . . . . . . . . . . . . . . . . . . . . . . . . . . . . . 84
Opening the incoming e-mail list . . . . . . . . . . . . . . . . . . . . . . . . . . . . . . . . . . . . . . . . . . . . . 85
View the message header of an e-mail . . . . . . . . . . . . . . . . . . . . . . . . . . . . . . . . . . . . . . . . 87
Viewing e-mail sender's address . . . . . . . . . . . . . . . . . . . . . . . . . . . . . . . . . . . . . . . . . . . . . . 87
Deleting e-mail messages . . . . . . . . . . . . . . . . . . . . . . . . . . . . . . . . . . . . . . . . . . . . . . . . . . . . 87
Using the network mailbox . . . . . . . . . . . . . . . . . . . . . . . . . . . . . . . . . . . . . . . 88
Activating/deactivating network mailboxes, entering numbers . . . . . . . . . . . . . . . . 88
Configuring a network mailbox for fast access . . . . . . . . . . . . . . . . . . . . . . . . . . . . . . . . 89
ECO DECT . . . . . . . . . . . . . . . . . . . . . . . . . . . . . . . . . . . . . . . . . . . . . . . . . . . . . . . 91
Reduced transmission power (radiation) . . . . . . . . . . . . . . . . . . . . . . . . . . . . . . . . . . . . . . 91
Using the handset as an alarm clock . . . . . . . . . . . . . . . . . . . . . . . . . . . . . . . 93
Using multiple handsets . . . . . . . . . . . . . . . . . . . . . . . . . . . . . . . . . . . . . . . . . . 94
Registering handsets . . . . . . . . . . . . . . . . . . . . . . . . . . . . . . . . . . . . . . . . . . . . . . . . . . . . . . . . . 94
De-registering handsets . . . . . . . . . . . . . . . . . . . . . . . . . . . . . . . . . . . . . . . . . . . . . . . . . . . . . . 94
Locating a handset ("paging") . . . . . . . . . . . . . . . . . . . . . . . . . . . . . . . . . . . . . . . . . . . . . . . . 95
Making internal calls . . . . . . . . . . . . . . . . . . . . . . . . . . . . . . . . . . . . . . . . . . . . . . . . . . . . . . . . . 95
Changing the name of a handset . . . . . . . . . . . . . . . . . . . . . . . . . . . . . . . . . . . . . . . . . . . . . 97
Changing a handset's internal number . . . . . . . . . . . . . . . . . . . . . . . . . . . . . . . . . . . . . . . 98
Handset settings . . . . . . . . . . . . . . . . . . . . . . . . . . . . . . . . . . . . . . . . . . . . . . . . . 99
Changing the display language . . . . . . . . . . . . . . . . . . . . . . . . . . . . . . . . . . . . . . . . . . . . . . 99
Setting the display/screensaver . . . . . . . . . . . . . . . . . . . . . . . . . . . . . . . . . . . . . . . . . . . . . . 99
Configuring the display/colour and contrast . . . . . . . . . . . . . . . . . . . . . . . . . . . . . . . . . 100
Quickly accessing functions . . . . . . . . . . . . . . . . . . . . . . . . . . . . . . . . . . . . . . . . . . . . . . . . . 100
Activating/deactivating auto answer . . . . . . . . . . . . . . . . . . . . . . . . . . . . . . . . . . . . . . . . 101
Changing the handsfree/earpiece volume . . . . . . . . . . . . . . . . . . . . . . . . . . . . . . . . . . . 101
Changing ringtones . . . . . . . . . . . . . . . . . . . . . . . . . . . . . . . . . . . . . . . . . . . . . . . . . . . . . . . . . 102
Restoring the handset default settings . . . . . . . . . . . . . . . . . . . . . . . . . . . . . . . . . . . . . . . 104
Setting the base . . . . . . . . . . . . . . . . . . . . . . . . . . . . . . . . . . . . . . . . . . . . . . . . 105
3
Page 6

Contents
Setting the date/time . . . . . . . . . . . . . . . . . . . . . . . . . . . . . . . . . . . . . . . . . . . . . . . . . . . . . . . 105
Protecting the telephone from unauthorised access . . . . . . . . . . . . . . . . . . . . . . . . . 105
Activating/deactivating music on hold . . . . . . . . . . . . . . . . . . . . . . . . . . . . . . . . . . . . . . 106
Setting the base's IP address in the LAN . . . . . . . . . . . . . . . . . . . . . . . . . . . . . . . . . . . . . 106
Configuring VoIP connections, assigning send and receive
connections . . . . . . . . . . . . . . . . . . . . . . . . . . . . . . . . . . . . . . . . . . . . . . . . . . . . . . . . . . . . . . . . 108
Automatic update for the VoIP provider settings . . . . . . . . . . . . . . . . . . . . . . . . . . . . . 109
Updating the phone firmware . . . . . . . . . . . . . . . . . . . . . . . . . . . . . . . . . . . . . . . . . . . . . . . 109
Operating a repeater . . . . . . . . . . . . . . . . . . . . . . . . . . . . . . . . . . . . . . . . . . . 111
Restarting the base . . . . . . . . . . . . . . . . . . . . . . . . . . . . . . . . . . . . . . . . . . . . . . . . . . . . . . . . . 112
Resetting the base to the default settings . . . . . . . . . . . . . . . . . . . . . . . . . . . . . . . . . . . . 112
Checking the base MAC address . . . . . . . . . . . . . . . . . . . . . . . . . . . . . . . . . . . . . . . . . . . . . 113
Connecting the base station to the PABX . . . . . . . . . . . . . . . . . . . . . . . . 114
Recall (fixed line) . . . . . . . . . . . . . . . . . . . . . . . . . . . . . . . . . . . . . . . . . . . . . . . . . . . . . . . . . . . . 114
Saving an access code (outside line code) . . . . . . . . . . . . . . . . . . . . . . . . . . . . . . . . . . . . 114
Setting pauses . . . . . . . . . . . . . . . . . . . . . . . . . . . . . . . . . . . . . . . . . . . . . . . . . . . . . . . . . . . . . . 115
Switching temporarily to tone dialling (DTMF) . . . . . . . . . . . . . . . . . . . . . . . . . . . . . . . 116
Configuring the phone via the Web configurator . . . . . . . . . . . . . . . . . 117
Connecting the PC with the telephone's Web configurator . . . . . . . . . . . . . . . . . . . 118
Logging into/off the Web configurator . . . . . . . . . . . . . . . . . . . . . . . . . . . . . . . . . . . . . . 120
Understanding the structure of the Web configurator pages . . . . . . . . . . . . . . . . . 122
Web configurator menu . . . . . . . . . . . . . . . . . . . . . . . . . . . . . . . . . . . . . . . . . . . . . . . . . . . . . 126
Functions of the Web configurator . . . . . . . . . . . . . . . . . . . . . . . . . . . . . . . . . . . . . . . . . . 127
Customer Service & Assistance . . . . . . . . . . . . . . . . . . . . . . . . . . . . . . . . . . 144
Questions and answers . . . . . . . . . . . . . . . . . . . . . . . . . . . . . . . . . . . . . . . . . . . . . . . . . . . . . 145
Information on operating Gigaset VoIP telephones with routers with
Network Address Translation (NAT) . . . . . . . . . . . . . . . . . . . . . . . . . . . . . . . . . . . . . . . . . . 147
VoIP status codes . . . . . . . . . . . . . . . . . . . . . . . . . . . . . . . . . . . . . . . . . . . . . . . . . . . . . . . . . . . 149
Checking service information . . . . . . . . . . . . . . . . . . . . . . . . . . . . . . . . . . . . . . . . . . . . . . . 152
Authorisation . . . . . . . . . . . . . . . . . . . . . . . . . . . . . . . . . . . . . . . . . . . . . . . . . . . . . . . . . . . . . . . 153
Exclusion of liability . . . . . . . . . . . . . . . . . . . . . . . . . . . . . . . . . . . . . . . . . . . . . . . . . . . . . . . . . 153
Environment . . . . . . . . . . . . . . . . . . . . . . . . . . . . . . . . . . . . . . . . . . . . . . . . . . . 154
Appendix . . . . . . . . . . . . . . . . . . . . . . . . . . . . . . . . . . . . . . . . . . . . . . . . . . . . . . 155
Caring for your telephone . . . . . . . . . . . . . . . . . . . . . . . . . . . . . . . . . . . . . . . . . . . . . . . . . . . 155
Contact with liquid . . . . . . . . . . . . . . . . . . . . . . . . . . . . . . . . . . . . . . . . . . . . . . . . . . . . . . . . . 155
Specifications . . . . . . . . . . . . . . . . . . . . . . . . . . . . . . . . . . . . . . . . . . . . . . . . . . . . . . . . . . . . . . . 155
Writing and editing text . . . . . . . . . . . . . . . . . . . . . . . . . . . . . . . . . . . . . . . . . . . . . . . . . . . . . 157
Open Source Software . . . . . . . . . . . . . . . . . . . . . . . . . . . . . . . . . . . . . . . . . . 159
General . . . . . . . . . . . . . . . . . . . . . . . . . . . . . . . . . . . . . . . . . . . . . . . . . . . . . . . . . . . . . . . . . . . . . 159
Licence and copyright information . . . . . . . . . . . . . . . . . . . . . . . . . . . . . . . . . . . . . . . . . . 159
Glossary . . . . . . . . . . . . . . . . . . . . . . . . . . . . . . . . . . . . . . . . . . . . . . . . . . . . . . . 164
Accessories . . . . . . . . . . . . . . . . . . . . . . . . . . . . . . . . . . . . . . . . . . . . . . . . . . . . . 177
Mounting the base on the wall . . . . . . . . . . . . . . . . . . . . . . . . . . . . . . . . . . 178
4
Page 7

Contents
Mounting the charger on the wall . . . . . . . . . . . . . . . . . . . . . . . . . . . . . . . 178
Index . . . . . . . . . . . . . . . . . . . . . . . . . . . . . . . . . . . . . . . . . . . . . . . . . . . . . . . . . . . 179
5
Page 8

Overview
13
11
9
10
8
2
7
3
1
4
5
6
12
Ð
U
INT 1
23.04. 10:53
Redial Menu
Overview
1 Signal strength (¢ page 34)
Icon changes when No Radiation is activated
¢ page 91)
(
2 Control key (
Mute microphone (
3 Tal k/Han dsfree key
Flashing: incoming call;
Lights up: handsfree mode activated; accept
call; in idle status: open redial list (press
briefly);
open connection list (press and hold;
¢ page 36)
¢ page 52)
¢ page 44);
When writing an SMS: send SMS
During a call: Switch from earpiece to handsfree mode (
4 Key 1
Dial network mailbox (press and hold)
5 Star key
Ringtones on/off (press and hold);
With an open connection: switch from pulse
dialling to tone dialling (press briefly)
6 Message key (
Access to calls and message lists;
Flashing: new message or new call
7 Microphone
8 Recall key
- Consultation call (flash)
- Insert a dialling pause (press and hold)
9 Hash key
Keypad lock on/off (press and hold in idle status);
toggles between upper/lower case and digits
10 End call key, On/Off key
End call; cancel function; go back one menu
level (press briefly); back to idle status (press
and hold); activate/deactivate handset (press
and hold in idle status)
11 Display keys (
12 Display in idle status
13 Charge status of the batteries (
¢ page 52)
¢ page 60)
¢ page 8)
¢ page 34)
Please note
To change the display language, proceed as
described on page 16 and page 99.
6
Page 9

Display icons
—
1234567890
00:00:53
ExtCall
Menu
Ð
Ø
ó
U
INT 1
23.04. 10:53
Redial
U
Menu
à ™
Ë
03 01 01
INT 1
ë
12:0
10:53
Display during external call:
IP
01
VoIP connection established (— for fixed line connection)
For VoIP connections: number of VoIP line (01 – 06)
Number (or name) of caller
Call duration
Display key (¢ page 8)
u Consulting an external call (¢ page 57)
u Set call volume (¢ page 101)
u Access service information
Batteries are charged (¢ page 34)
Charge status of the batteries (
¢ page 34)
Name of the handset (
¢ page 97)
Current day/current time (¢page 34)
Alarm clock switched on and wake-up time set
(¢ page 93)
Number of new messages:
u à On the network mailbox (¢ page 60)
u ™ In the missed calls list (¢ page 60)
u Ë In the SMS list (¢ page 63), e-mail list (¢ page 85)
Signal strength ¨ (
¢ page 34)
or Eco Mode + icon ¼ (
¢ page 91)
Keypad locked (
¢ page 38)
Ringtone switched off (¢ page 103)
Display keys (¢ page 8)
Display icons
The following icons are displayed depending on the settings and the operating status of your
telephone:
7
Page 10

Other display icons:
¶
Û
À
μ
Ð
Ø Ü Ú
Ø ì Ú
z —
˜
Ø å Ú
Information
Query
Please wait...
Action failed
Action complete
Establishing a connection
External call (
¢ page 47) Alarm call (¢ page 93)
Connection established
Connection cannot be
established or connection
interrupted
Internal call (¢ page 95)
Redial
Menu
1
Current display key function
2
Display keys
1
2
1
2
Redial
MenuOKDel.
Back
ì
Alarm Clock
Back
V
OK
Display keys
Display keys
The functions of the display keys change
depending on the operating situation.
Example:
Important display keys:
Open redial list.
Open a menu for further func-
tions.
Confirm selection.
Delete key: delete one character
at a time from right to left.
Skip back one menu level or
cancel operation.
Main menu icons
Ë
Ç
Â
ì
Ì
Ï
Information on using the menus
¢ page 37
Menu overview
SMS
Select Services
Online Contacts
Alarm Clock
Voice Mail (Network mailbox)
Settings
¢ page 41
8
Page 11

The base at a glance
1
The base at a glance
Base key
1 Paging key
Lights up:
Network connection active (e.g. phone is connected to LAN/internet)
Flashes:
Data transfer is active (e.g. with router/provider
server)
Press briefly:
Start paging, display IP address on handset
Press and hold:
Set base to registration mode
9
Page 12
Safety precautions
Safety precautions
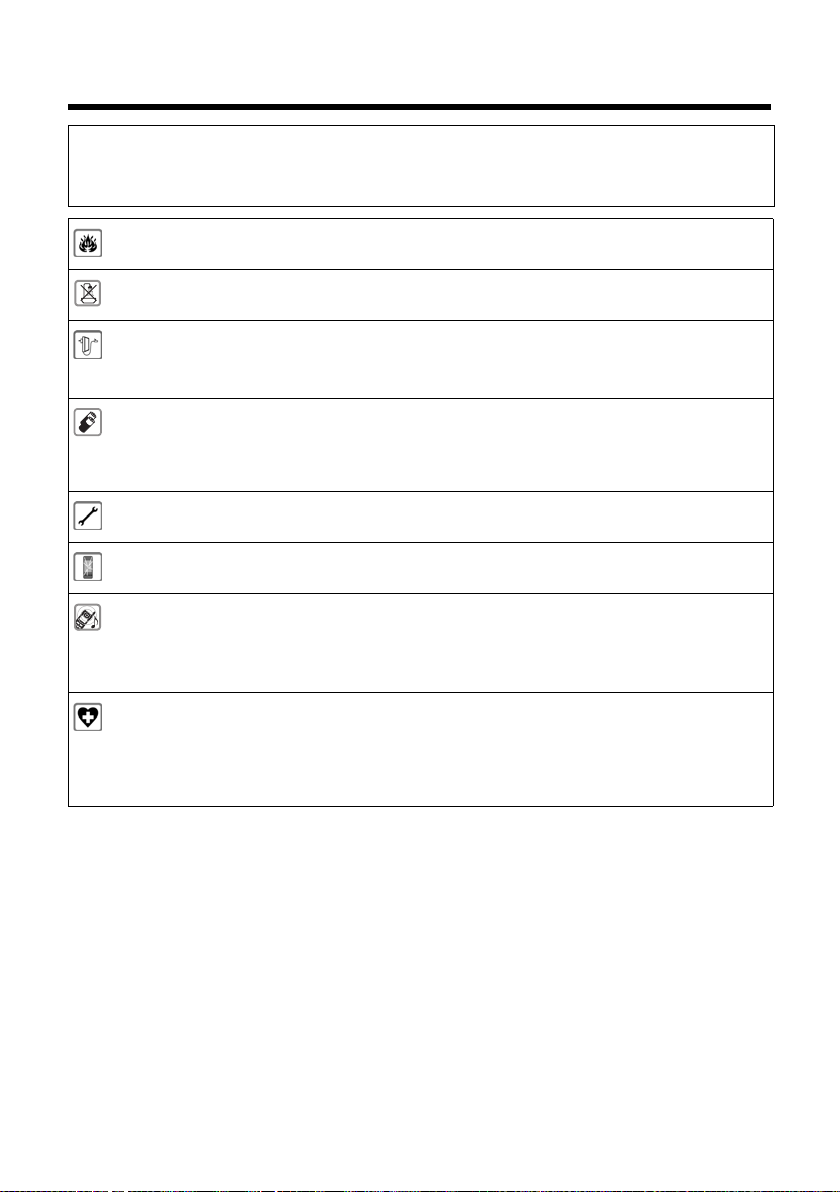
Read the safety precautions and the user guide before use.
a
The device cannot be used in the event of a power failure. In case of a power failure it is
also not possible to make emergency calls.
Do not use the devices in environments with a potential explosion hazard
(e.g. paint shops).
The devices are not splashproof. For this reason do not install them in a damp environment such as bathrooms or shower rooms.
Use only the power adapter indicated on the device.
Use only the cable supplied for LAN connection and connect it to the intended ports
only.
Use only rechargeable batteries that correspond to the specification (see "Specifications"). Never use a conventional (non-rechargeable) battery or other battery types as
this could result in significant health risks and personal injury. Rechargeable batteries,
which are noticeably damaged, must be replaced.
Remove faulty devices from use or have them repaired by our Service team, as these
could interfere with other wireless services.
Do not use the device if the display is cracked or broken. Broken glass or plastic can cause
injury to hands and face. Send the device to our Service department to be repaired.
Do not hold the rear of the handset to your ear when it is ringing or when speaker mode
is activated. Otherwise you risk serious and permanent damage to your hearing.
The phone may cause interference in analogue hearing aids (humming or whistling) or
cause them to overload. If you require assistance, please contact the hearing aid supplier.
Using your telephone may affect nearby medical equipment. Be aware of the technical
conditions in your particular environment, e.g. doctor's surgery. If you use a medical
device (e.g. a pacemaker), please contact the device manufacturer. They will be able to
advise you regarding the susceptibility of the device to external sources of high frequency energy (for the specifications of your Gigaset product see "Specifications").
10
Page 13

First steps
10
3a
21
5
6
7
3b
or
9
4
8
Checking the package contents
First steps
1 One Gigaset A540 IP base
2 One power adapter for connecting the base to the mains power supply
3 One phone cable to connect the base to the analogue fixed line (RJ11 6-pole;
flattened cable) 3a or 3b, depending on the country/provider.
4 One Ethernet cable (Cat 5 with 2 RJ45 modular plug) for connecting the base to
the LAN/internet
5 One Gigaset A540H handset
6 Two batteries for the handset (uncharged)
7 One battery cover for the handset
8 One handset charger
9 One power adapter for connecting the charger to the mains power supply
10 One quick guide
11
Page 14

First steps
Firmware updates
Whenever there are new or improved functions for your Gigaset, firmware
updates are made available for you to download to your base (
If this results in operational changes when using your phone, a new version of
this user manual or the necessary amendments will be published on the
Internet at
www.gigaset.com
Information on the firmware currently loaded ¢ page 152.
.
Setting up the handset for use
The display is protected by a plastic film.
Please remove the protective film!
Inserting the batteries and closing the battery cover
Warning
Use only rechargeable batteries (¢ page 155) recommended by Gigaset
Communications GmbH i.e., never use a conventional (non-rechargeable)
battery, as this could result in significant health risks and personal injury. For
example, the outer casing of the batteries could be damaged or the batteries
could explode. The phone could also malfunction or be damaged as a result of
using batteries that are not of the recommended type.
¢ page 109).
12
Page 15

¤ Insert the batteries with the
polarity in the correct direction.
The polarity is indicated in the
battery compartment.
¤ First insert the battery
cover at the top a.
¤ Then press the cover b
until it clicks into place.
To open the battery cover, for
instance to replace the batteries,
insert a coin into the cavity on the
casing, then pull the battery cover
in an upward direction.
a
b
First steps
13
Page 16

First steps
¤ Plug the power adapter into the
mains power socket 2.
¤ Connect the flat plug from the
power adapter 1.
1
2
3
4
If you have to remove the plug from the charger again:
¤ Disconnect the power adapter from the mains
power supply.
¤ Then press the release button 3 and disconnect
the plug 4.
Connecting the charging cradle
Placing the handset in the charger
¤ Place the handset in the charger with its display facing forward.
Each handset is registered with the base at the factory. You do not need to register
the handsets again. If you wish to use your handset with a different base or use
additional handsets with your base, you have to register the handset manually
¢ page 94.
To charge the batteries, leave the handset in the charger.
Please note
Only place the handset in the charger that is intended for it.
14
Page 17
First steps
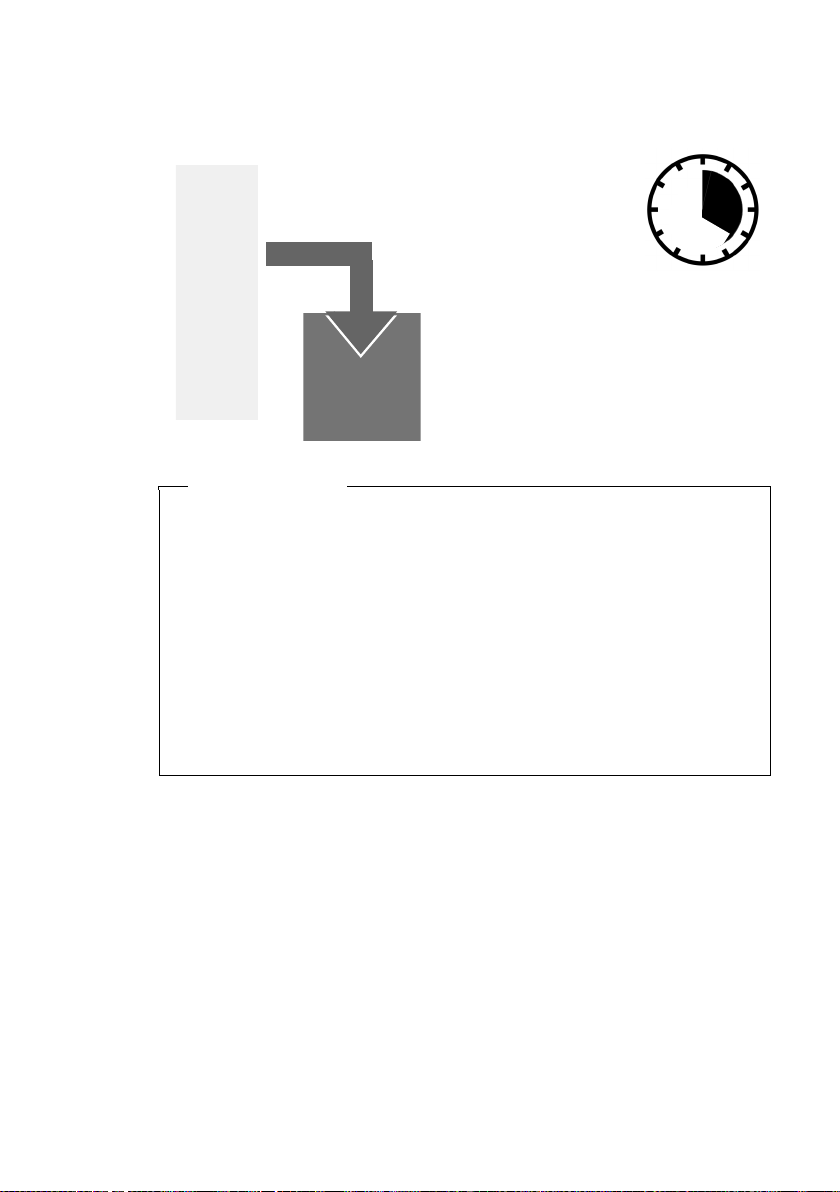
¤ Charge the handset for 4 hours in the
charger.
¤ Then remove the handset from the
charger and do not replace it until the
batteries are fully discharged.
4 h
Initial charging and discharging of the batteries
The correct charge level can only be displayed if the batteries are first fully charged
and discharged.
Please note
u The handset is pre-registered with the base. If you have purchased a model
with multiple handsets, all handsets will already be registered with the
base. You do not need to register the handsets again. However, if a handset
is not registered with the base (Register handset flashes on the display), register the handset manually
u After the first battery charge and discharge, you may place your handset in
the charger after every call.
u Always repeat the charging and discharging procedure if you remove the
batteries from the handset and reinsert them.
u The batteries may warm up during charging. This is not dangerous.
u After a while, the charge capacity of the batteries will decrease for technical
reasons.
¢ page 94.
15
Page 18

First steps
Francais
Back
U
U
OK
´
L4
English
³
English
³
Francais
³
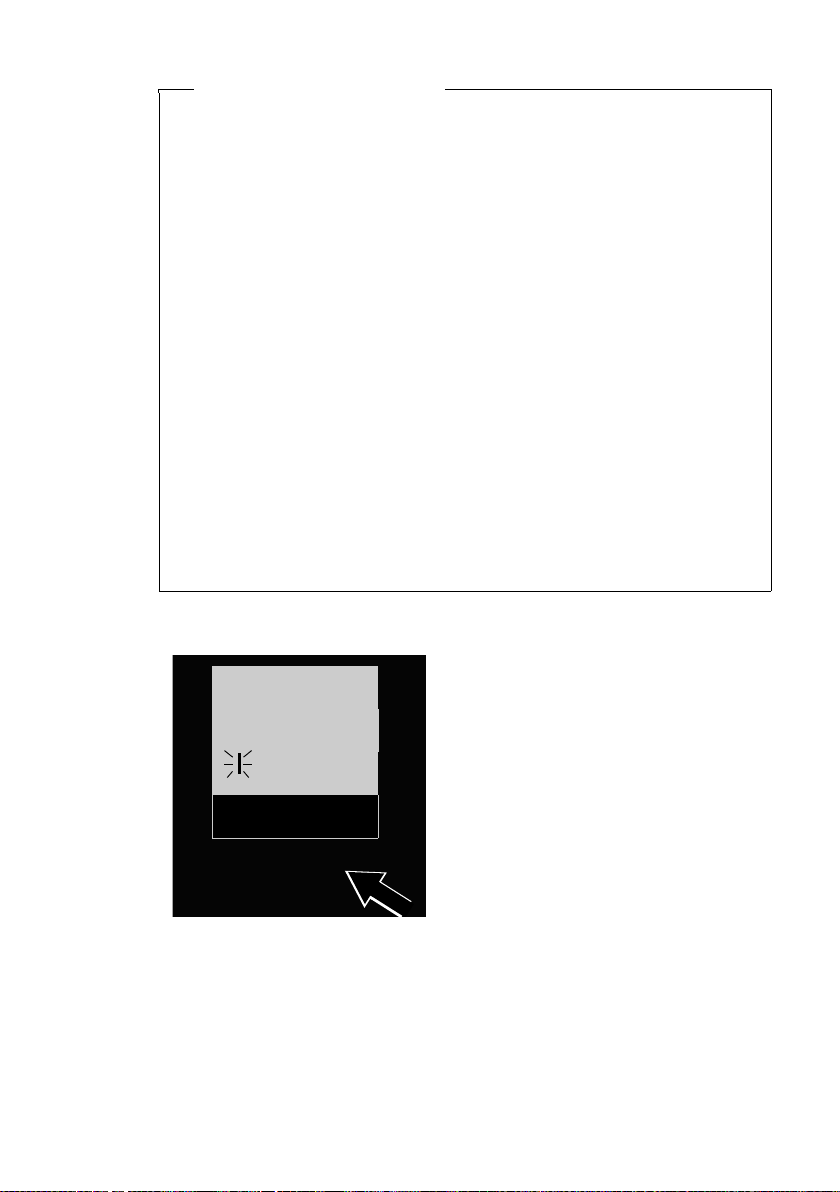
¤ Press right on the control key.
¤ Press the keys L and 4 slowly one
after the other.
The display for setting languages appears
and the current language (e.g., English) is
selected.
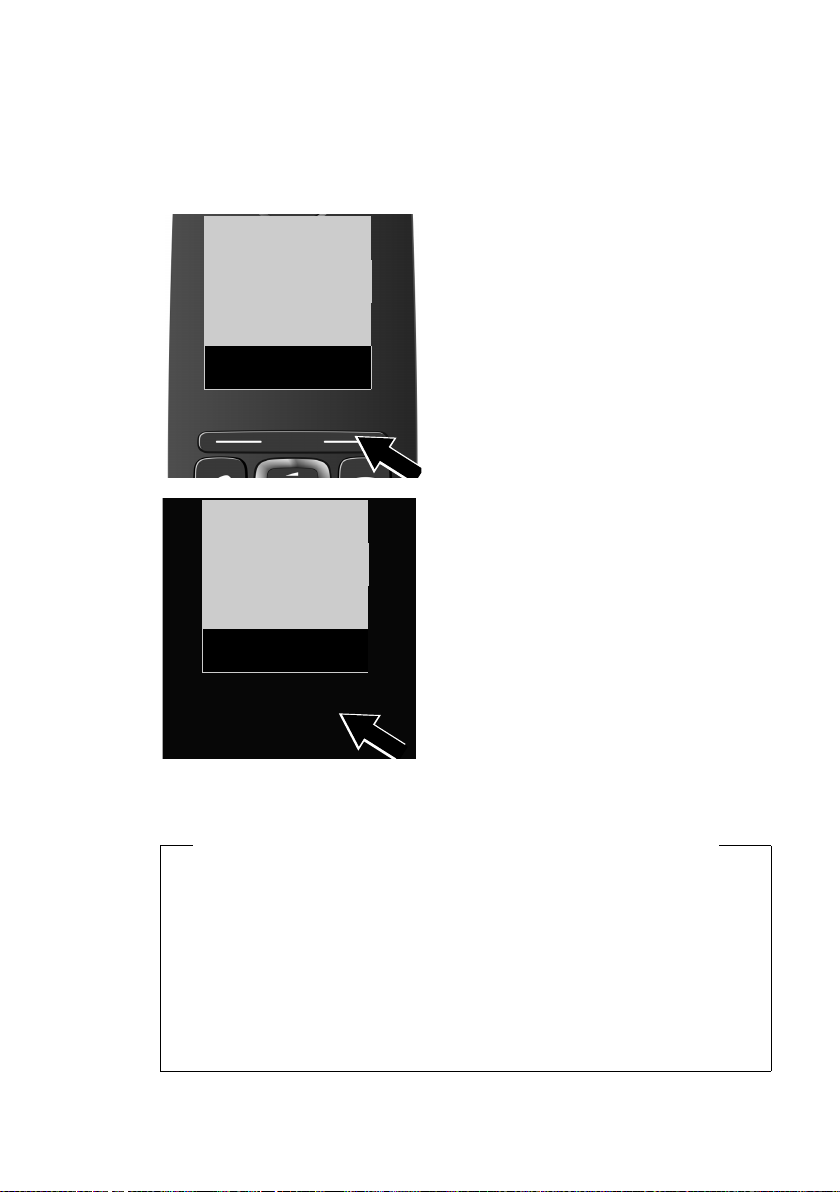
¤ Press down on the control key
s
...
... until the language you wish to use is
displayed e.g., French.
¤ Press the key below §OK§ to select this
language.
The selection is marked with ³.
Changing the display language
Change the display language if you do not understand the language currently set.
16
¤ Press and hold the end call key a to return to idle status.
Page 19

Installing the base station
The base station is designed for use in dry rooms in a temperature range of +5°C to
+45°C.
¤ Set up the base at a central point in the building.
Please note
Pay attention to the range of the base. This is up to 300 m in unobstructed outdoor areas and up to 50 m inside buildings. The range is reduced when Maxi-
mum Range is activated (
The phone's feet do not usually leave any marks on surfaces. However, due to the
multitude of different varnishes and polishes used on today's furnishings, the
occurrence of marks on the surfaces cannot be completely ruled out.
Warning
u Never expose the telephone to any of the following: heat sources, direct sun-
light or other electrical appliances.
u Protect your Gigaset from moisture, dust, corrosive liquids and fumes.
First steps
¢ page 91).
17
Page 20

First steps
1
2
3
4
1
2
3
4
Connecting the base
The following diagram is an overview of all connections for your base.
The individual connections are described in detail below. In order for you to make
calls on your phone via the fixed line and VoIP, you need to connect the base to the
fixed line and Internet (see diagram below).
Follow the steps in the order given below:
Connect the phone and power cables to the base.
Connect the base to the telephone network and the mains power supply.
Connect the base to the router for accessing the Internet (via router and mo-
dem or via router with integrated modem) and for configuring the base via the
Web configurator.
Connect the PC to the router.
18
Page 21
First steps
3
2
1
3
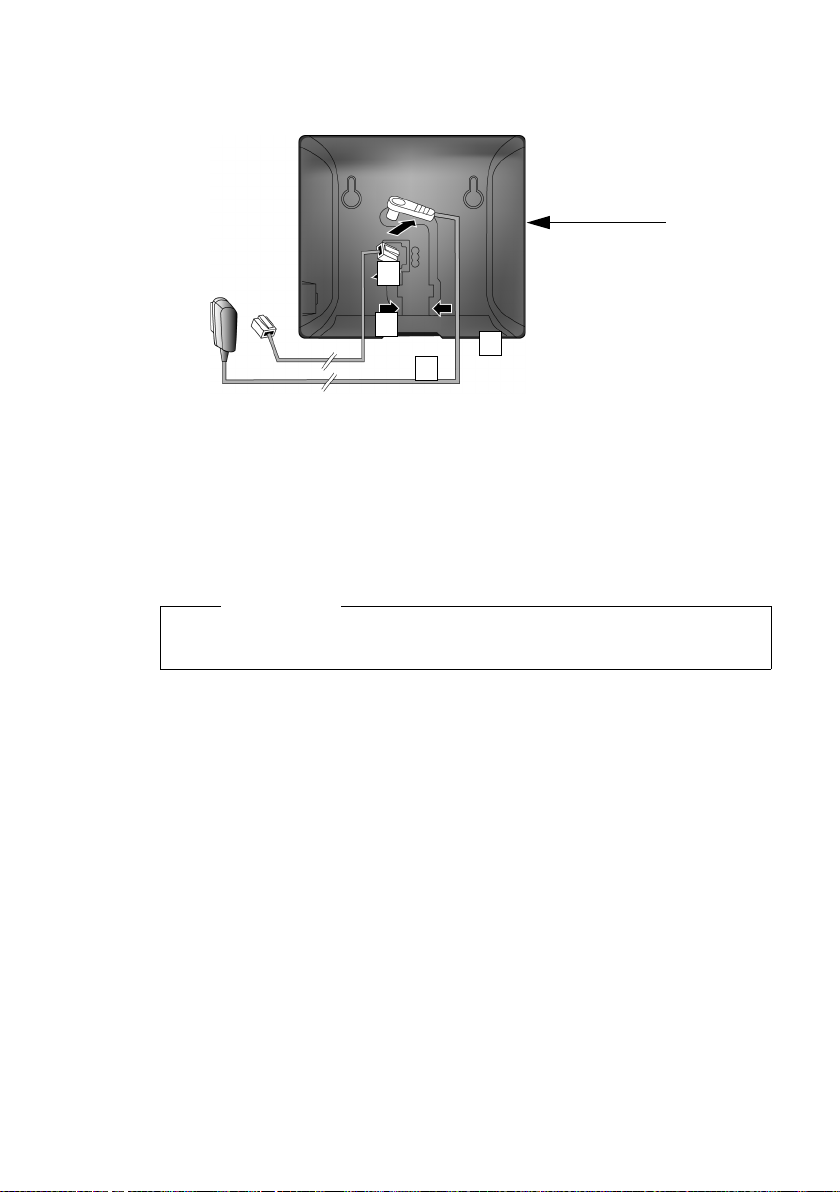
Back panel
of the base
1. Connecting the phone and power cables to the base
1 Insert the phone cable (connection cable with RJ11 plugs) into the lower con-
nection socket at the rear of the base.
2 Insert the power cable of the power adapter into the upper connection socket
at the rear of the base.
3 Push both cables into the appropriate cable channels.
Warning
Use only the power and telephone cables supplied. Pin connections on telephone cables can vary (pin connections
¢ page 156).
19
Page 22

First steps
1
2
Back panel
of the base
2. Connecting the base to the fixed line and the mains power
supply
1 Insert the phone cable into the fixed line connection socket.
2 Then insert the power adapter into the mains socket.
Warning
Keep the power cable plugged in at all times for operation, as the phone does
not work without a mains connection.
You can now use your phone to make calls via the fixed line and can be reached
on your
20
fixed line number.
Page 23

First steps
3. Connecting the base to a router (Internet)
Data protection notice
When the device is connected to the router, it automatically contacts the
Gigaset support server to make it easier for you to configure the devices and to
enable communication with the Internet services.
For this purpose, every device sends the following device-specific information
once every day:
u Serial number/item number
u MAC address
u Private IP address for the Gigaset in the LAN/its port numbers
u Device name
u Software version
On the support server, this information is linked to the existing device-specific
information:
u Gigaset.net phone number
u System-related/device-specific passwords
Further information about the Gigaset.net service data saved can be found at:
www.gigaset.net/privacy-policy
Your base features a LAN connection that you can use to connect the base to a
router.
Connection to a router is required for Internet telephony VoIP (Voice over Internet
Protocol). You can set up and configure up to six accounts (VoIP phone numbers)
from one or more VoIP provider(s) of your choice on the phone.
You also need a connection to the router for the following features on your phone:
u If you want to be notified as soon as new software is available for your phone on
the Internet.
u If you want the date and time on your phone to be updated by a time server on
the Internet.
u I f you want to us e info se rvice s (e. g., weath er fo reca sts) and/or o nlin e direct orie s
on your phone.
You can also connect a PC to the router if you want to set your phone via its Web
configurator.
For Internet access you need a router connected to the Internet via a modem (this
may be integrated in the router).
21
Page 24

First steps
1
2
Back panel
of the base
Please note
For telephony via the Internet, you need a broadband Internet connection (e.g.,
DSL) with flat rate (recommended) or volume rate and a router that connects
your phone to the Internet. You can find a list of recommended routers on the
Internet at:
www.gigaset.com/service
From here, go to the FAQ page and select your Gigaset IP telephone. Search for
"Router", for example.
22
1 Insert a plug from the Ethernet cable supplied (Cat 5 with 2 RJ45 Western mod-
ular plugs) into the LAN connection socket at the side of the base.
2 Then insert the second Ethernet cable plug into a LAN socket on the router.
As soon as the cable connecting the phone and router is plugged in and
the router is switched on, the button lights up on the front of the base
(paging button).
You are now able to establish VoIP connections within Gigaset.net
(
¢ page 50).
Page 25

Setting up the phone – installation wizard
Auto configuration:
The configuration process for VoIP connections is automated for some VoIP providers. The provider creates a configuration file with all required VoIP access data
(the general VoIP provider data and your personal account data). This file is placed
on a configuration server on the Internet for downloading to your phone.
Your provider gives you a configuration code.
The installation wizard on your phone (
code at the relevant point. All the required VoIP data is then downloaded automatically onto your phone.
The configuration file is only transferred via a secure connection (TLS authentication). If the TLS authentication fails, the message key f flashes. Press the message key to display the message Certificate error Please check certificates in the
web configurator. Press the right display key to confirm the message.
Log in to the Web configurator (
The Web page Security (
not be established and what you can do.
If the configuration file fails to download (e.g., because the configuration server is
not available), the phone keeps trying to establish a connection until the file is
downloaded successfully to the phone.
If no VoIP connections have been generated on the phone yet and the wizard has
not been started, you can start the installation wizard. The wizard allows you to
make all necessary settings for your phone.
Two individual wizards are combined to form the installation wizard:
1VoIP wizard
2 Connection wizard
¢ page 128) tells you why the secure connection could
¢ page 24) prompts you to enter the
¢ page 120).
First steps
23
Page 26

First steps
¶
Start IP
wizard?
No Yes
Launching the installation wizard
As soon as the handset battery is sufficiently
charged, the message key f on the handset
will flash (approx. 20 minutes after you have
put the handset in the charger).
¤ Press the message key f.
1. VoIP wizard – making VoIP settings
You will see the following display:
Before you can use VoIP to phone any other numbers over the Internet, the fixed
line or the mobile network, you need the services of a VoIP provider which supports
the VoIP SIP standard.
Prerequisite: You have registered with a VoIP provider (e.g., via your PC) and set up
at least one VoIP account (IP account).
To use VoIP, you now need to enter the access data for your VoIP account. You will
receive all the necessary data from your VoIP provider. This will include:
24
Either:
u Your user name
(if required by the VoIP provider).
This is the user name of your IP account (caller ID), frequently identical to your
phone number.
u Your authentication name or user ID
u The (login) password registered with the VoIP provider
u General settings for your VoIP provider (server addresses etc.)
Or:
u An auto configuration code (activation code)
Your Gigaset phone's VoIP wizard can help you make these entries.
Page 27
First steps
The IP wizard
helps you to
configure an IP
V
OK
IP 1
³
Back
V
OK
Please note
You can configure up to six VoIP connections. When you get started with the
phone, you can initially only configure one VoIP connection. You can configure
additional VoIP connections later with the VoIP wizard (
Web configurator.
Starting the VoIP assistant
Prerequisite: The phone is connected to the router. The router is connected to the
Internet (
¢ page 21).
¢ page 108) or the
¤ Press the right display key §Yes§ to launch the VoIP wizard.
Information about the VoIP wizard appears in
the display.
¤ Press the bottom of the control key s to
scroll down.
¤ Press the §OK§ display key to continue.
The configurable IP connections are shown in
the following displays (IP 1 to IP 6). VoIP connections that are already configured are
marked with
³.
¤ If necessary, press down on the control key
s to select a connection.
¤ Press the §OK§ display key to continue.
25
Page 28

First steps
¶
Do you have
auto conf code?
No Yes
¤
You will see the following display:
Your VoIP provider has supplied you
with an authentication name/pass-
word and, where applicable, a user
name:
¤ Press the key below §No§ on the dis-
play screen.
¤ For further information, please see
"Downloading VoIP provider
¢ page 28.
data"
You hav e received an auto configuration code (activation code) from your
VoIP provider:
¤ Press the key below §Yes§ on the
display screen.
¤ For further information, please see
"Entering the auto configuration
¢ page 27.
code"
26
Page 29
First steps
Enter auto
conf. code:
5
Del. OK
No Internet connection:
The phone requires an Internet connection for you to register your telephone
with a VoIP provider. If a connection cannot be made, one of the following messages is displayed:
u If the phone cannot establish a connection to the router, the message IP
address not available is displayed.
Check the plug connection between the router and the base and check the
settings on the router.
Your phone is preconfigured for dynamic assignment of the IP address. In
order for your router to "recognise" the phone, dynamic IP address assignment must also be activated on the router, i.e., the router's DHCP server must
be activated. If the DHCP server cannot or should not be activated, you must
assign a fixed IP address to the phone (
u If the phone cannot establish a connection to the Internet, the message
Internet conn. not available is displayed.
The IP server may be temporarily unavailable. In this case, try to make a con-
nection again later.
Otherwise, check the plug connection between the router and the modem
or DSL connection and check the settings on the router.
¢ page 106).
¤ Press §OK§ to close the VoIP wizard.
You will then need to call up the wizard later via the menu to configure the IP
connection.
Entering the auto configuration code
All data required for VoIP telephony is loaded directly from the Internet to your
phone.
When all the data has been successfully loaded onto your phone, IP account is reg-
istered appears on the display.
¤ For further information, please see "2. Connection wizard", page 31.
¤ Using the keypad, enter the auto configu-
ration code you received from the provider (max. 32 characters).
If you enter an incorrect character, you
can delete it by pressing the left display
key.
¤ Press the key below §OK§ on the display
screen.
27
Page 30
First steps
Select Country:
Germany
Back
V
OK
Select Provider:
Provider 2
Back
U
OK
Downloading VoIP provider data
The connection wizard establishes a connection with the Gigaset configuration
server on the Internet. Various profiles with general access data for different VoIP
providers can be downloaded here.
After a brief period you will see the following display:
A list of countries is loaded.
¤ Press up or down on the control key q
repeatedly until the country in which you
want to use the phone and for which the
telephone is permitted is selected in the
display.
¤ Press the key below §OK§ on the display
screen to confirm your selection.
A list of the VoIP providers for which a profile
with the general access data is available on
the configuration server is loaded.
¤ Press up or down on the control key
q repeatedly until your VoIP provider is
shown in the display.
The general access data for your VoIP provider will be downloaded and saved on
the phone.
28
¤ Press the key below §OK§ on the display
screen to confirm your selection.
You have not been able to download your provider's data
If your VoIP provider does not appear in the list, i.e., its general data is not provided for download, you must cancel the VoIP wizard:
¤ Briefly press the end call key a repeatedly until End wizard? appears in the
display and then press the display key
You must then make the required VoIP provider and IP account settings using
the Web configurator. You receive the general provider data from your VoIP provider.
You can change the assignment of the VoIP connection as send/receive connection at a later time via the Web configurator.
§Yes§.
Page 31

First steps
Provider Data
User ID:
Back OK
Provider Data
Password:
Back OK
Entering user data for your VoIP account
You are now prompted to enter your personal access data for your VoIP account.
The following are provider-dependent:
u User ID (authentication name), Password, User Name
Please note ...
... when entering access data, it is case sensitive.
To switch between upper and lower case and digits, press the # key (several
times if necessary). You can see briefly in the display whether upper case, lower
case or digit input is selected.
Characters entered incorrectly can be deleted using the left display key below
§Del.§. The character to the left of the cursor is deleted.
You can navigate within the input field using the control key r (left/right).
¤ Using the keypad, enter the user ID that
you received from your VoIP provider.
¤ Press the key under §OK§ on the display
screen.
¤ Use the keypad to enter your password.
¤ Press the key under §OK§ on the display
screen.
29
Page 32

First steps
Provider Data
User Name:
Back OK
Û
Registering
at provider ...
¤ Using the keypad, enter the username
that you received from your VoIP provider.
¤ Press the key under §OK§ on the display
screen.
Once you have made all the necessary
entries, the VoIP wizard will try to register the
phone with the VoIP provider.
After successful registration, the message "IP account is registered" appears in the
display.
The connection wizard starts.
30
Page 33

First steps
¶
Assign connect.
to INT1?
No Yes
INT 1
receiv. calls for
Fixed Line
Change
V
OK
2. Connection wizard
The connection wizard enables you to assign previously configured connections
(fixed line connection, Gigaset.net and VoIP connections,
¢ page 50 and
¢ page 24) to the registered handsets as receive and, if applicable, as send con-
nections.
u Receive connections are the phone numbers (connections) on which you can
be called. Incoming calls are only forwarded to the handsets for which the rele-
vant connection is assigned as receive connection.
u Send connections are the connections that you use to conduct external calls.
The network provider calculates charges based on the send connections. You
can assign a connection to each handset as a send connection permanently.
u Each connection (number) of your phone can be both a send as well as a receive
connection. You can assign each connection to several internal parties as a send
and/or receive connection.
Default assignment
All configured connections are assigned to the handsets as receive connections
and the fixed line connection as send connection at registration/start-up.
Launching the connection wizard
a.
¤ Press the display key §Yes§ if you wish to
change the setting for the send and
receive connections of the handset
with the internal name INT 1.
b.
¤ Press the display key §No§ if you do not
wish to change the setting for this
handset.
The receive connections currently
assigned to the handset are displayed.
You have to press down on the control
key s to scroll through the list.
¤ Press the display key §Change§ if you
wish to change the receive connection setting.
¤ Press the display key §OK§ if you do not
wish to change assignment of the
receive connections.
31
Page 34

First steps
Receiv.calls for:
IP1
f
Yes
g
Back
V
OK
Receiv.calls for:
Fixed Line
f
Yes
g
Back
V
OK
INT 1
sends calls via:
Fixed Line
Change OK
If you press §OK§, proceed to £e.
Press §Change§ to display the following:
c.
If no calls to the VoIP connection IP1 are
to be signalled on the handset:
¤ Press right (or left) on the control key
v to set to No.
d.
The updated list of receive connections is displayed one more time for you to
check.
Press the display key
e.
¤ Press down on the control key s to
switch to the next connection. Select
either Yes or No as described above.
¤ Repeat the steps for each connection.
¤ Press the display key §OK§ once you
have finished configuring the settings
for the handset.
§OK§ to confirm the assignment.
The send connection currently set for the
handset is displayed: Fixed Line.
¤ Press the display key §OK§ if you do not
wish to change the setting. Skip the
following step.
¤ To change the setting, press the dis-
play key
§Change§.
32
Page 35

First steps
INT 1
sends calls via:
f
IP1
g
Back OK
μ
Connec. assign.
completed
f.
If the handset is to make calls via a different connection/phone number:
¤ Press right on the control key v
repeatedly, until the required connection is displayed (in the example, IP1).
¤ Press the display key §OK§ to save the
settings.
The connection selected here is used as the standard send connection on this
handset if you briefly press the talk key c after entering the number.
You always have the option of selecting another connection to set up a call. If you
press and hold the talk key c, a list with all available connections is displayed for
selection (
Instead of a specific standard send connection, you can also assign Flexible Choice
to the handset. Each time you make a call, you then have to select the connection
you wish to use on this handset (
If other handsets are already registered to the base, you are requested to assign
send and receive connections for the handsets. The following is shown in the display:
Assign connect. to INT1?
¢ page 44).
¢ page 45).
¤ Perform steps a. to f. for each registered handset.
After successfully configuring the settings, you will briefly see the following display:
Completing the installation
If you have started the wizard using the message key f, the handset switches to
idle status (an example for the display in idle status):
33
Page 36

First steps
Ð
U
INT 1
12.09. 10:53
Redial
Menu
Screen display
u Reception between the base and the handset:
– Good to poor:
–No reception: ¥
If No Radiation (page 91) is activated, ¼ is dis-
played.
u Charge status of the batteries:
– U Charged over 66%
– V Charged between 34% and 66%
– e Charged between 11% and 33%
– = Charged below 11%
– = Flashes: battery almost empty (less than 10 minutes talktime)
– = e V V Illuminated: batteries charging
u INT 1
Internal name of the handset (page 97)
Ш§¦
Please note
To protect your phone and its system settings from unauthorised access, you
can define a 4-digit number code (system PIN) known only to yourself. This code
must be entered before you can register/de-register handsets or alter your
phone's VoIP or LAN settings.
The default system PIN is 0000 (4 x zero).
For instructions on changing the PIN
¢ page 106.
Date/time
There are two methods of setting the date and time:
u By default, your phone is configured so that the date and time are transferred
u You can also set the date and time manually via the menu of one of the regis-
To ensure you have the correct time, for example, for incoming calls, in the call lists
and other lists and to use the alarm clock, the date and time must be set.
34
from a time server on the Internet, provided it is connected to the Internet.
You can activate/deactivate the synchronisation with a time server via the Web
configurator (
tered handsets (
¢ page 139).
¢ page 105).
Page 37

Proceeding
ggg
g
g
ggg
g
Now you have successfully set up your phone, you'll want to adapt it to your personal requirements. Use the following guide to quickly locate the most important
subjects.
If you are unfamiliar with menu-driven devices such as other Gigaset telephones,
read the section entitled "Using the phone"
Information on ... ... is located here.
Making external calls and accepting calls page 44
Setting the ringtone melody and volume page 102
Setting Maximum Range page 91
Preparing the telephone for SMS reception page 74
First steps
¢ page 36 first.
Registering available Gigaset handsets to the
base and transferring their directory entries to
the new handset
Using online directories page 66
Entering additional VoIP accounts page 108
Operating the telephone on a PABX page 114
Configuring the phone via the Web
configurator
page 94
page 65
page 117
35
Page 38

Using the phone
Using the phone
Control key
In the description below, the side of the control key (up, down,
right, left) that you have to press in the different operating situations is marked in black e.g., v for "press right on the control key".
The control key has a number of different functions:
When the handset is in idle status
v Open the main menu.
s Press briefly to open the handset directory.
Press and hold to open the list of selected online directories.
u Open the list of handsets.
t Call up the menu for setting the handset's call volume (
In menus and lists
t/s Scroll up/down line by line.
In input fields
You can use the control key to move the cursor up t, down s, right v or left u.
During an external call
v Mute the microphone.
s Open the directory.
u Initiate an internal consultation call.
t Adjust the loudspeaker volume for earpiece and handsfree mode.
¢ page 101).
Keys on the keypad
c/Q/P etc.
Press the corresponding key on the handset.
~ Enter digits or letters.
Correcting incorrect entries
You can correct incorrect characters in the input fields by navigating to the incorrect entry using the control key. You can then:
u Delete the character to the left of the cursor with the display key §Del.§
u Insert characters at the cursor position
u Overwrite the highlighted (flashing) character, e.g., when entering time and
date
36
Page 39

Menu guidance
Ï
Settings
Back
W
OK
Your telephone's functions are accessed via a menu consisting of several levels
(menu overview
Main menu (first menu level)
¤ With the handset in idle status, press the display key §Menu§ or right on the control
key v to open the main menu.
The functions in the main menu are displayed in the
form of a list with names and icons (example on the
right).
Selecting a function
¤ You can scroll between functions using the control
key q. The selectable function is shown in the dis-
play.
¤ Press the display key §OK§ or right on the control key
v to select the displayed function. This opens the
corresponding submenu and the first entry is dis-
played.
If you press the display key
returns to idle status.
Submenus
The functions in the submenu are displayed with the corresponding names.
Using the phone
¢ page 41).
§Back§ or briefly press the end call key a, the display
Selecting a function
¤ You can scroll between functions using the control key q. The relevant function
is shown in the display.
¤ Press the display key §OK§ to select the displayed function. This opens the corre-
sponding submenu and the first entry is displayed.
Briefly press the display key
menu level or cancel the operation.
Any settings you have not confirmed by pressing
§Back§ or the end call key a to return to the previous
§OK§ will be discarded.
Returning to idle status
From any point in the menu:
¤ Press and hold the end call key a or
¤ Do not press any key: after 2 minutes, the display will automatically revert to
idle status.
An example of the display in idle status is shown on page 34.
37
Page 40

Using the phone
Activating/deactivating the handset
a With the phone in idle status, press and hold the end call key (confir-
mation tone) to deactivate the handset.
Press and hold the end call key again to reactivate the handset.
Activating/deactivating the keypad lock
The keypad lock prevents any inadvertent use of the phone.
# Press and hold the hash key in idle status to activate or deactivate the
keypad lock. You will hear the confirmation tone.
If the keypad lock is activated, you will see a message when you press a key.
The keypad lock deactivates automatically when you receive a call. It is reactivated
when the call is finished.
Please note
When the key lock is active, you cannot call emergency numbers.
38
Page 41

Understanding the operating steps
Ï
Settings
Back
W
OK
Redial Menu
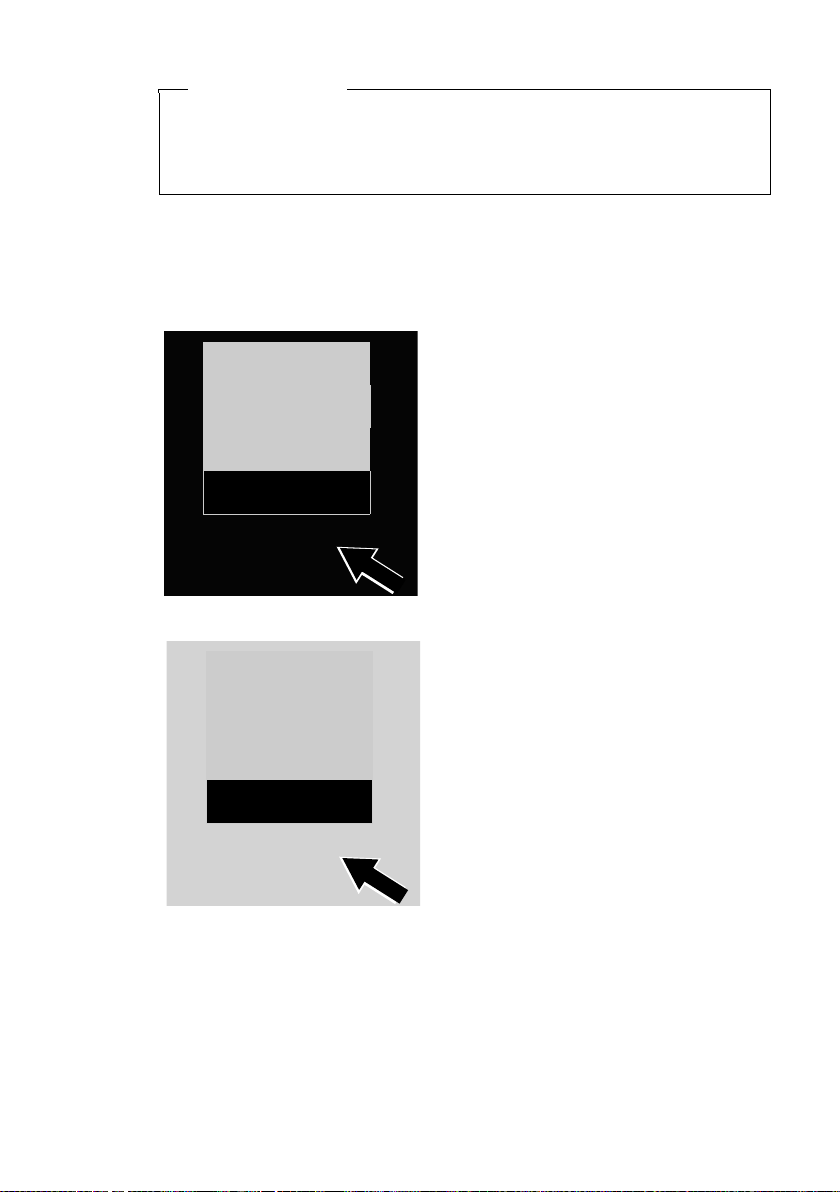
¤ Press the key below §Menu§ on the dis-
play screen to open the main menu.
¤ Press down on the control key
s
...
¤ Press the key below §OK§ on the display
screen to confirm your selection.
... until the Settings menu item
appears.
¤ Press down on the control key
s
...
The operating steps are shown in abbreviated form, for example:
§Menu§ ¤ Settings ¤ No Radiation (³ =on)
¤ This means you should proceed as follows:
Using the phone
39
Page 42

Using the phone
No Radiation
Back
W
OK
³
... until the No Radiation menu item
appears.
¤ Press the key below §OK§ on the display
screen to switch the function on or off
(³ =on).
¤ Press the key below §Back§ on the display screen to jump back to the previous
menu level.
or
Press and hold the end call key a to return to idle status.
40
Page 43

Menu tree
Menu tree
The menu entries are divided into sections. The page numbers refer to the relevant description in the user guide.
To open the main menu: press the §Menu§ display key when the phone is in idle mode.
Ë SMS
Write Message ¢ page 74
Incoming
Outgoing
Settings Service Centres
¢ page 78
¢ page 75
¢ page 80
Status Report
Notification
Select Services
Ç
Withhold No. Next Call ¢ page 56
Call Divert Int
Fixed Line
IP1 The VoIP connections
IP2
:
IP6
Call Waiting
Withhold No. All Calls
Transfer (E CT )
configured on the
phone are displayed.
 Online Contacts
Gigaset.net ¢ page 70
Online Directory ¢ page 66
Yel low Pages
Alarm Clock
ì
Activation ¢ page 93
Wake up time
¢ page 75
¢ page 79
¢ page 55
¢ page 53
¢ page 58
¢ page 66
¢ page 93
41
Page 44

Menu tree
Voice Mail
Ì
Play Messages Net AM : Fixed Line ¢ page 90
Net AM : IP1
:
Net AM : IP6
Network Mailboxes Net AM : Fixed Line
Net AM : IP1
:
Net AM : IP6
Set Key 1 Net AM : Fixed Line
Net AM : IP1
:
Net AM : IP6
Settings
Ï
Date/Time ¢ page 105
Audio Settings Call Volume
Ringer Volume
Advisory Tones
Battery Low
Ringtones (Handset)
Display Screensaver
¢ page 88
¢ page 88
¢ page 89
¢ page 101
¢ page 102
¢ page 104
¢ page 104
¢ page 102
¢ page 99
Colour Schemes
Contrast
Language
Registration Register Handset
De-register Handset
Telephony Auto Answer
VoIP Wizard
Calls List Type
Recall
Access Code
Music on hold
42
¢ page 100
¢ page 100
¢ page 99
¢ page 94
¢ page 94
¢ page 101
¢ page 108
¢ page 61
¢ page 114
¢ page 114
¢ page 106
Page 45

Menu tree
System Reset Handset ¢ page 104
Base Reset
Base Restart
Encryption
Local Network
Base Update
System PIN
Maximum Range
No Radiation
eMail eMail 1 ... eMail 6
¢ page 112
¢ page 112
¢ page 111
¢ page 106
¢ page 109
¢ page 106
¢ page 91
¢ page 91
¢ page 84
43
Page 46

Making calls
z
IP2
12345678
End Menu
Making calls
Please note
You can conduct up to three external calls on your base in parallel — two via
VoIP and one via the fixed line.
Making an external call
External calls are calls made via the public telephone network (fixed line) or via the
Internet (VoIP).
To make an external call, you have to select one of the phone connections as a send
connection. You have the following options:
u Assign a connection to the handset as a send connection permanently.
u As standard, you can select a send connection each time you make a call. Press
and hold the talk key c to open a list with all available send connections for the
phone.
Permanently assigned send connection
Prerequisite:
A specific connection (fixed line or VoIP connection) is assigned to the handset as a
send connection.
~c Enter the number and briefly press the talk key. If there is no dialling
plan for the selected number (
the send connection of the handset. If there is a dialling plan, the num-
ber is dialled via the connection defined in the dialling plan. If the
phone number is blocked by a dialling plan, it will not be dialled.
Not possible! is displayed.
Or:
cq Press and hold the talk key and select the connection.
§Dial§ Press the display key.
~ Enter the number. The number is dialled approximately 3.5 seconds
after the last digit is entered.
The dialled numbers and the send connection used are
shown in the display (e.g., IP2). The connection name
you have assigned is displayed where available. Otherwise, the standard name is used.
After a VoIP connection has been set up, the number of
the VoIP connection used is shown in the top right of
the display (for IP2 02).
¢ page 133), the number is dialled via
44
Page 47

Making calls
Please note
u If you use VoIP to make a call to the fixed line, you may also have to dial the
area code for local calls (depending on the provider). You can avoid having
to dial your own area code by entering it in the configuration and activating
the Predial area code for local calls via VoIP option (see Web configurator).
u If you have activated the Automatic fallback to fixed line option with the
Web configurator and the attempt to connection via VoIP fails, the system
automatically tries to set up the connection via the fixed line.
u Gigaset.net numbers ending with the suffix #9 are automatically dialled via
the Gigaset.net connection. The calls are free of charge (
¢ page 50).
Selecting a line for each call
Prerequisite: The "Flexible Choice" option has been assigned to the handset
instead of a send connection.
~c Enter the number and press the talk key. The list of all the phone's con-
nections is displayed.
q Select a line.
§Dial§ Press the display key.
If a dialling plan has been defined for the dialled phone number (¢ page 133),
then the send connection specified in the dialling plan is used.
Please note
u You can cancel the dialling process with the end call key a.
u You are shown the duration of the call while the call is in progress.
u Dialling with the directory (page 63) or call and redial list (page 59) saves
you from repeatedly keying in phone numbers.
Using the connection list on the display key
Prerequisite: You have assigned the list with all configured connections to a display
¢ page 100).
key (
§Sel.Cn.§ q Press the display key and select the connection.
c/§Dial§ Press the talk key or display key.
~ Enter a number. The number is dialled approximately 3.5 seconds after
the last digit is entered.
Any dialling plan that has been defined for the dialled phone number is ignored.
Exception: If a block is set in the dialling plan, this takes effect for VoIP connections
(but not fixed line connections).
45
Page 48

Making calls
Calling an IP address (provider-dependent)
You can also dial an IP address instead of a phone number using VoIP.
¤ Press the star key P to separate the sections of the IP address
(e.g., 149*246*122*28).
¤ If necessary, press the hash # key to attach the SIP port number of the person
you are calling to the IP address (e.g., 149*246*122*28#5060).
If your VoIP provider does not support the dialling of IP addresses, each part of the
address will be interpreted as a normal phone number.
Dialling emergency numbers
If no dialling plans for emergency numbers are preset on your telephone, you
should set dialling plans yourself. Assign them to a connection that you know supports emergency numbers. Calls to emergency numbers are always supported by
fixed lines.
Please note: If no dialling plans are defined for emergency numbers and you have
programmed an automatic local area code, the code will also be prefixed to emergency numbers as soon as they are dialled via a VoIP connection.
Displaying the phone number you are calling (COLP)
Prerequisites:
u Your network provider supports COLP (Connected Line Identification Presenta-
tion). You may need to activate COLP with the provider (ask your provider about
this).
u The called party has not activated COLR (Connected Line Identification Restric-
tion).
For outgoing calls, the phone number of the connection on which the call is
received is displayed on the handset.
The displayed number may differ from the number you have dialled. Examples:
u The called party has activated call divert.
u The call is answered by another connection within a PABX system.
If there is an entry in the directory for this phone number, the corresponding name
will be displayed.
u The actual number of the connection you have reached (or the assigned
u When the phone number is copied to the directory and the redial list, the
Ending a call
a Press the end call key.
46
Please note
name) is displayed instead of the called number during call swapping, conference calls and consultation calls.
dialled number (not the displayed number) is copied.
Page 49

Accepting a call
An incoming call is indicated in three ways: By ringing, by a display on the screen
and by the flashing talk key d.
Please note
Only calls to the receive connections assigned to the handset are signalled.
The following applies in particular if VoIP connections are configured on your
base:
u If you have not explicitly assigned the receive connections on your phone, all
incoming calls are signalled on all registered handsets. As standard all available connections are assigned to all handsets as receive connections.
u If you have performed an explicit assignment between handsets and receive
connections but not assigned one connection to any handset as the receive
connection, calls on this connection will not be signalled on any handset.
u If a call cannot be assigned to any connection on the phone, this call is sig-
nalled on all handsets (e.g., a connection established via an IP address).
You can answer the call by:
¤ Pressing the talk key c.
¤ If the handset is in the charger and the Auto Answer function is activated
¢ page 101), the handset automatically accepts the call when you remove it
(
from the charger.
¤ For a call to the fixed line connection: press the §Accept§ display key.
To deactivate the ringtone, press the §Silence§ display key. You can accept the call as
long as it is displayed on the screen.
If you press the end call key a or the
is rejected. If you press the end call key a for a call to the fixed line connection, the
ringtone is merely deactivated, as for
Making calls
§Reject§ display key, a call to a VoIP connection
§Silence§.
Calling line identification
When you receive a call, the caller's number is displayed on the screen if the following prerequisites are met.
u Your network provider supports CLIP, CLI.
– CLI (Calling Line Identification): the caller's number is transmitted.
– CLIP (Calling Line Identification Presentation): the caller's number is dis-
played.
u You have requested CLIP from your network provider.
u The caller has requested CLI from the network provider.
Call display
If the number of the caller is stored in your directory, the number is replaced by the
corresponding directory entry.
You can use the display to see which receive connection the call is directed to.
47
Page 50

Making calls
Ø
IP
Ú
0251667788
for IP2
Reject Silence
1
2
Call to a VoIP connection
3
Ø
Ù
Ú
0251667788
for Fixed Line
Accept Silence
1
2
Call to the fixed line connection
3
Example of display:
1 Ringtone icon (background colour changes for a VIP group assigned, ¢ page 64)
2 Number or name of caller
3 Receive connection: Indicates which of your phone numbers the caller has dialled.
The name you set when configuring the phone or the default name is displayed (Fixed
Line or IP1 to IP6).
"for Gigaset" is displayed for calls from Gigaset.net.
The following is displayed instead of the number:
u External Call, if no number is transmitted.
u Withheld, if the caller has withheld Calling Line Identification (page 53).
u Unavailable, if the caller has not arranged Calling Line Identification.
Adopting the name from the online directory
Instead of the phone number appearing in the call display, you can display the
name under which the caller is saved in an online directory.
Prerequisites:
u Via the Web configurator you have selected an online directory for the „Auto-
matic look-up of caller's name“ function .
u The caller has authorised Calling Line Identification and has not suppressed the
function.
u Your telephone is connected to the Internet.
u The caller's number is not saved in the handset's local directory.
48
Page 51

Notes on phone number display (CLIP)
By default, the number of the caller is shown in the display of your Gigaset telephone. You do not have to make any other settings on your Gigaset telephone.
However, if the caller's number is not displayed, this can be due to the
following:
u You have not requested CLIP from your provider
u Your telephone is connected via a PABX or a router with an integrated PABX
(gateway) that does not transmit all information.
Is your telephone connected via a PABX/gateway?
You can establish this by checking for an additional device connected between
your telephone and home connection, e.g., a PABX, gateway etc. In most cases, simply resetting this device will remedy the situation:
¤ Briefly disconnect the PABX power plug. Re-insert the plug and wait for the
device to restart.
If the caller number is still not displayed:
¤ Check the CLIP (phone number display) settings of your PABX and activate this
function if necessary. In the user manual for the device, search for the term
"CLIP" (or an alternative term such as "calling line identification", "phone number
identification", "caller ID" etc.). If necessary, contact the device manufacturer.
If this does not resolve the problem, it is possible that your network provider does
not provide the CLIP service for this number.
Making calls
Have you requested the phone number display service from your
network provider?
¤ Check whether your provider supports phone number display (CLIP) and that
the function has been activated for you. If necessary, contact your provider.
Additional information on this subject can be found on the Gigaset website at:
www.gigaset.com/service
49
Page 52

Making calls
VoIP telephony via Gigaset.net
You can use Gigaset.net to make free phone calls via the Internet directly to other
Gigaset.net users (e.g., other persons, friends and family members who have a
Gigaset IP phone) without having to set up an account with a VoIP provider or make
any further settings. You simply have to connect your phone to the power supply
and the Internet connection and, if necessary, enter yourself in the Gigaset.net
online directory under a name of your choice (
Gigaset.net is a VoIP service provided by Gigaset Communications GmbH to which
all users of a Gigaset VoIP device can subscribe.
You can call other subscribers to Gigaset.net free of charge i.e., there are no telephone charges other than the costs for your Internet connection. Connections to/
from other networks are not possible.
Numbers ending with the suffix #9 are automatically dialled via the Gigaset.net
connection.
Please note
Gigaset.net supports broadband telephony: Gigaset.net calls that you make
from your phone with a different broadband-capable terminal have brilliant
sound quality (e.g., High Definition Sound Performance,
Every Gigaset VoIP device is assigned a Gigaset.net phone number by default
¢ page 152).
(
All registered subscribers are included in the Gigaset.net directory, which you are
able to access.
An echo service is available for you to check your VoIP connection.
The echo service is available in six languages:
u 12341#9 (English)
u 12342#9 (Dutch)
u 12343#9 (Italian)
u 12344#9 (French)
u 12345#9 (German)
u 12346#9 (Spanish)
After an announcement, the echo service immediately sends back the voice data
you have received in the form of an echo.
¢ page 72).
¢ page 51).
50
Exclusion of liability
Gigaset.net is a voluntary service provided by Gigaset Communications GmbH
with no liability or guarantee for the availability of the network and the performance.
Page 53

Please note
If you do not use your Gigaset.net connection for six months, it is automatically
disabled. You cannot be reached for calls from Gigaset.net.
The connection is reactivated:
u As soon as you start a search in the Gigaset.net directory (¢ page 72) or
u Make a call via Gigaset.net (dial a number with #9 at the end) or
u Activate the connection via the Web configurator
Gigaset HDSP – telephony with brilliant sound quality
Your Gigaset telephone supports the broadband codec
G.722. You can therefore use it to make calls with brilliant
sound quality (High Definition Sound Performance) via VoIP.
If you register broadband-capable handsets with your base,
internal calls between these handsets will also be made via
broadband.
The following are prerequisites for broadband connections on your telephone:
u For internal calls:
The handsets involved are broadband-capable, i.e., they support codec G.722.
u For external calls via VoIP:
– You make the call from a broadband-capable handset.
– You have selected codec G.722 for outgoing calls.
– Your VoIP provider supports broadband connections.
– The recipient's phone supports codec G.722 and accepts the establishment
of a broadband connection.
Making calls
Please note
The VoIP service Gigaset.net (¢ page 50) supports broadband connections.
51
Page 54

Making calls
Activating/deactivating handsfree mode
In handsfree mode, instead of holding the handset to your ear you can put it down,
for example on the table in front of you. For example, this allows others to participate in the call.
Please note
Inform your caller before you use handsfree mode so that they know a third
party may be listening.
During a call, activate or deactivate handsfree mode:
d Press the handsfree key.
Each key press switches between earpiece and handsfree mode. If
handsfree mode is activated, the key is lit up.
If you wish to place the handset in the charger during a call:
¤ Press and hold the handsfree key d while placing the handset in the charger
and for a further 2 seconds.
For instructions on adjusting the loudspeaker volume, see
Muting the handset
You can deactivate the handset's microphone during an external call (including
during a conference or when call swapping). the other parties cannot hear you, but
you can still hear the other party.
Prerequisite: you are conducting an external call.
v Press right on the control key to mute the handset. The display shows
Microphone is switched off.
Press the v key again to unmute the microphone.
If a second call (call waiting) is received in mute mode, this is signalled acoustically
as usual. However, it is only shown on the display once the microphone has been
unmuted.
¢ page 101.
52
Please note
In mute mode, all keys on the handset are deactivated with the exception of the:
u The upper side of the control key, that you can use to adjust the loudspeaker
volume for earpiece and handsfree mode
u The right side of the control key (unmute microphone)
u End call key a, that you can use to end the call
u Talk key c, that you can use to activate/deactivate handsfree mode
Page 55

Making calls using select services
Select services are functions that your network provider makes available to you.
Please note:
u The Select Services menu cannot be open on two handsets simultaneously. If
this is the case, you will hear a negative acknowledge tone.
u Some select services may only be used if you have requested them from your
fixed line provider (there may be an extra charge).
¤ If you require assistance, please contact your network provider.
Configuring general settings for all calls
Anonymous calling – withholding caller ID (CLIR)
You can make anonymous calls (CLIR = Calling Line Identification Restriction). Your
phone number will not be displayed when you make outgoing calls. You are calling
anonymously.
Prerequisites:
u For anonymous calls via your fixed line connection, you need to have requested
the relevant service (feature) from your network provider.
u Anonymous calls are only possible via VoIP connections through providers that
support the "anonymous calling" function. You may have to ask your VoIP provider to activate this function.
Making calls using select services
Activating/deactivating "anonymous calling" for all calls permanently
When this function is activated, the phone number is withheld for all fixed line calls
and for all calls via VoIP connections. Anonymous calling is activated for all registered handsets.
§Menu§ ¤ Ç Select Services ¤ Withhold No. All Calls
Select and press
For instructions on withholding your number temporarily for the next call see
§OK§ (³ =on).
¢ page 56.
General call divert (CD)
A distinction is made between
u Diverting calls internally and
u Diverting calls to an external phone number
Diverting calls to an external connection
With call divert the call is diverted to another external connection. Your call divert
settings can be specific to a particular connection, i.e., for every connection (fixed
line number and VoIP connection) that is assigned to the handset as a receive connection.
Prerequisite: The VoIP provider supports call divert.
53
Page 56

Making calls using select services
§Menu§ ¤ Ç Select Services ¤ Call Divert
A list containing the configured and activated receive connections for your phone
and Int is displayed.
¤ Select the receive connection for which you want to activate or deactivate call
divert, and press
§OK§.
¤ You can enter data in the following fields:
Status
Press right/left on the control key to activate/deactivate call divert.
Phone number
Enter the number to which the call is to be diverted. You can specify a different
fixed line, VoIP or mobile number for every connection.
When
Select All Calls/No Answer/When Busy.
All Calls: Calls are diverted immediately i.e., no more calls to this connection are
signalled on your phone.
No Answer: Calls are diverted if no one accepts the call within several rings (VoIP
only).
When Busy: Calls are diverted when your line is busy (VoIP only).
§Send§ Press the display key.
For diverting calls from the fixed line:
A connection is established to the telephone network to activate/deactivate call
divert.
¤ After confirmation from the fixed line, press the end call key a.
54
Please note
Diverting calls to your phone numbers can result in additional costs. Please
consult your provider.
Diverting calls internally
You can divert the signalling of all incoming external calls for your handset to
another handset.
§Menu§ ¤ Ç Select Services ¤ Call Divert
Int Select and press §OK§.
¤ You can enter data in the following fields:
Status
Press right/left on the control key to activate/deactivate call divert.
To handset
Press right/left on the control key to select the target handset.
No HS is displayed if internal call divert has not been set previously or if the pre-
viously set handset is no longer registered.
Ring delay
If you prefer to have a delay before the call is diverted, select the length of the
delay at this point (None, 10 sec., 20 sec. or 30 sec.). If you select None, the call
is not signalled on the handset and is diverted immediately.
Page 57

Making calls using select services
§OK§ Press the display key.
Internal call divert is only single-stage i.e., if calls for the handset are diverted to a
different handset (e.g., MT1) on which a call divert is also active (e.g., to MT2), this
second call divert is not executed. The calls are signalled on handset MT1.
Please note
u Any call for the handset that has been diverted is entered in the call lists.
u If a call to a receive connection that is only assigned to the handset is
diverted to a handset that is not available (e.g., the handset is deactivated),
the call is rejected after a short time.
Activating/deactivating call waiting for external calls
If the function is activated, during an external call you will hear a call waiting tone
to signal that another external caller is trying to get through. If you have CLIP, the
number of the waiting caller or the corresponding directory entry is shown in the
display. The caller will hear the ringing tone.
When call waiting is deactivated, the caller will hear the busy tone if you are already
making a call and you are the only party assigned to this connection.
Activating/deactivating call waiting
Prerequisite for calls via VoIP: Parallel VoIP connections are permitted on your tel-
ephone (default setting; setting can be changed via the Web configurator).
§Menu§ ¤ Ç Select Services ¤ Call Waiting
r Select On/Off to activate/deactivate call waiting.
¤ Press the display key §Send§.
Call waiting is activated/deactivated for all connections to the telephone and all
registered handsets.
To activate/deactivate the function for the fixed line connection, the phone establishes a connection to the exchange to send the relevant code.
¤ After confirmation from the fixed line, press the end call key a.
Activating/deactivating call transfer – ECT (Explicit Call Transfer – VoIP)
If the function is activated, you can connect two externalcallers on a VoIP connection with each other by pressing the end call key a (
that you are making an external call via one of your VoIP connections and start an
external consultation call.
You can activate/deactivate this function via your handset.
§Menu§ ¤ Ç Select Services
Transfer (ECT)
Select and press
§OK§ (³ =on).
Please note
You can use the Web configurator to change further settings for the call transfer
on a VoIP connection (
¢ page 136).
¢ page 57). This assumes
55
Page 58

Making calls using select services
Configuring settings for the next call
Activating "anonymous calling" for the next call (VoIP)
You can withhold your phone number for the next call (CLIR = Calling Line Identification Restriction). The setting applies to all the phone's connections.
In idle status:
§Menu§ ¤ Ç Select Services ¤ Withhold No. Next Call
Select and press
~ Enter the number or copy from the directory.
§Dial§ Press the display key. The number is dialled.
Generally speaking, you can withhold your number for all calls ¢ page 53.
§OK§.
Actions during an external call
Please note
For VoIP telephony, the services described below are only available if parallel IP
connections are permitted.
Accepting a waiting call (VoIP)
You are making an external call and hear the call waiting tone.
With Calling Line Identification:
§Accept§ Press the display key.
Without Calling Line Identification (fixed line):
§Menu§ ¤ Accept Call Waiting
Once you have accepted the waiting call, you can switch between the two callers
("Call swapping (VoIP)" ¢ page 57) or speak to both at the same time ("Confer-
ence calling"
¢ page 58).
56
Please note
u Without CLIP, a waiting call is only announced with a signal tone.
u An internal waiting call is shown on the display. You can neither accept the
internal call nor reject it.
u For instructions on accepting a waiting external call during an internal call
¢ page 96.
Page 59

Making calls using select services
Rejecting a waiting call (VoIP)
You can hear the call waiting tone but do not want to speak to the caller.
§Reject§ Press the display key.
The waiting caller hears the busy tone.
Please note
You can also press the end call key a to end the current call, and then press the
talk key c again to accept the second call.
Consulting an external call
You can call a second external caller. The first call is placed on hold.
During an external call:
§ExtCall§ Press the display key.
The previous call is placed on hold. The caller hears an announcement
or music on hold.
~ Enter the second participant's telephone number.
The phone number is dialled. You are connected to the second participant.
If the participant does not answer or you want to end the call to the second partic-
ipant, press the
The consultation call is established via the same send connection as the first call.
Please note
You can also select the second participant's phone number from the directory,
redial list or a call list on the handset.
§End§ display key to switch back to the first participant.
Ending a consultation call (VoIP)
§Menu§ ¤ End Active Call
You are reconnected to the first call participant.
You can also end a consultation call by pressing the end call key a. The connection
is briefly interrupted and you will receive a recall. As soon as the call is accepted, you
are reconnected to the first call participant. Prerequisite for VoIP connections:
Transfer Call by On-Hook is not activated ("ECT"
transfer via VoIP"
¢ page 136).
¢ page 55 and "Configuring call
Call swapping (VoIP)
You can speak to two callers one at a time (call swap).
Prerequisite: You are conducting an external call and have called a second partici-
pant (consultation call) or have accepted a waiting call.
¤ Use q to swap between the participants.
The caller you are currently speaking to is marked with the > icon.
Ending a currently active call
§Menu§ ¤ End Active Call
You are re-connected to the waiting caller.
57
Page 60

Making calls using select services
Conference calling
You can speak to two participants simultaneously.
Prerequisite: You are conducting an external call and have called a second partici-
pant (internal or external consultation call) or have accepted a waiting external call.
¤ Press the display key §Conf.§.
You and the two other callers (both marked by the > icon) can hear and speak to
each other simultaneously.
Ending a conference (VoIP)
¤ Press the display key §EndCon§.
You return to "call swap" status. You are reconnected to the caller with whom you
started the conference.
Or:
a Press the end call key to end the call with both participants.
Each of the callers can end their participation in the conference call by pressing the
end call key and terminating the call.
Transferring calls
Transferring a call to an internal party
You are making an external call and would like to transfer it to another handset.
¤ Set up an internal consultation call (¢ page 57).
a Press the end call key (even before the other party has answered) to
transfer the call.
58
Transferring a call to an external number (VoIP) – ECT (Explicit Call
Tra nsfer )
You are making an external call via a VoIP connection and wish to transfer the call
to another external party.
Prerequisite: The feature is supported by the relevant network provider.
If you have activated the Transfer call by on-hook function for VoIP using the Web
configurator ("Configuring call transfer via VoIP"
a Press the end call key (even before the other party has answered) to
transfer the call.
¢ page 136).
Page 61

Using lists
The options are:
u Redial list
u Incoming message list
u Call lists
u Network mailbox
Redial list
The redial list contains the ten numbers last dialled with the handset (max. 32 numbers). If one of the numbers is in the directory, the corresponding name will be displayed.
Manual redial
c Press the talk key briefly
§Redial§ Press the display key.
s Select entry.
c Press the talk key. The number is dialled.
Managing entries in the redial list
c Press the talk key briefly
§Redial§ Press the display key.
s Select entry.
§Menu§ Open menu.
The following functions can be selected with q:
Use Number
(As in the directory,
Copy to Directory (¢ Storing a number in the directory, page 63)
Delete Entry
Delete selected entry.
Delete List
Delete all entries in the redial list.
Using lists
or
or
¢ page 64)
59
Page 62

Using lists
à ™
Ë
13 1 2
Calls List:
002+003
Back
W
OK
2
1
Function of the message key
Opening lists
Use the message key f to open the following lists:
u Network mailbox, if your network provider supports this function and fast
access is set for the network mailbox (
u Incoming message list (¢ page 78)
u E-mail lists (¢ page 85)
u Call list
An advisory tone sounds as soon as a new entry arrives in a list.
Depending on the type of the new entry, an icon appears in the display while in idle
status:
Icon New message ...
Ã
™
Ë
The number of new entries is displayed under the corresponding icon.
... on the network mailbox
... in the missed calls list
... in the SMS list or an e-mail list
¢ page 89).
60
Please note
If calls are saved on the network mailbox, you will receive a message if the list
type has been set accordingly (see your network provider user guide).
After pressing the message key f, you can see all lists containing messages and
the network mailbox list.
The list is displayed with the number of new entries (1) and the number of old, read
entries (2). For the call list, the second number is the total number of old calls in all
lists (example):
Select a list with q. To open, press
§OK§.
Page 63

Activating/deactivating flashing message key
With the Web configuration, you can set the type of new messages for which the
message key f should flash.
SMS inbox
All received SMS messages are saved in the incoming message list ¢ page 78.
Call list
Prerequisite: Calling Line Identification Presentation (CLIP, page 47)
In the call list, the base saves entries for:
u Accepted calls
u Missed calls
u Outgoing calls
The lists of accepted and missed calls contains the last 30 entries for each. The list
of outgoing calls contains the last 60 entries.
On your handset, you can also display the list of missed calls or all calls, divided into
four individual lists.
Setting the call list type
§Menu§ ¤ Ï Settings ¤ Te le ph o ny ¤ Calls List Type
Missed Calls / All Calls
a Press and hold (idle status).
The call list entries are retained when you change the list type.
Select and press
Using lists
§OK§ (³ =on).
Opening the call list
In idle status, you can open the call list by pressing the message key f.
For list type Missed Calls:
f ¤ Missed Calls
For list type All Calls:
f ¤ Calls List ¤ All Calls / Outgoing Calls / Accepted Calls / Missed Calls
61
Page 64

Using lists
New Call 02
1234567890
28.06. 08:34
View
W
Menu
List entry
Example of list entries:
u Status of entry
– New Call: New missed call
– Old Call: Entry already read
– Call recv.: Call was answered
– Outgoing: Outgoing calls
u Entry number
u Number or name of caller
u Call date and time (if set, ¢ page 34).
¤ If you press the §View§ display key, further information is displayed for the entry,
e.g., for missed calls the receive connection on which the call was received.
¤ Use the §Menu§ display key to select the following options:
Copy to Directory
(¢ Storing a number in the directory, page 63)
SMS Enquiry
Send the number of the entry to SMS information to determine the name of the
caller.
Delete Entry
Delete selected entry.
Delete List
Delete all entries in the list.
¤ Press the talk key c to call the selected caller back. Following options are avail-
able:
¤ Briefly press the talk key c, the number is dialled via the send connection of
the handset.
Or:
¤ You want to call back on the connection, on which the call was received
(this connection is displayed if you press the
Press and hold the talk key c. Select the connection from the list. Press
§Dial§ display key.
the
After exiting the call lists, all viewed entries are assigned the status "old".
§View§ display key).
62
Page 65

Using directories
The options are:
u Your local handset directory
u Public net directories and Yellow Pages (¢ page 66)
u Gigaset.net directory (¢ page 70)
Local directory
You can save a total of 150 entries in the directory.
You can create a personalised directory for your own individual handset. You can
also send lists/entries to other handsets (page 65).
Please note
u The directory already contains entries for the Gigaset.net directory and the
configured online directories.
u To quickly access a number from the directory (shortcut), you can assign the
number to a key (
In the directory, you can save
u Numbers and corresponding names
u VIP ringtones and colours.
Open the directory in idle status or during an external call with the s key.
Using directories
¢ Using shortcut keys, page 65).
Length of the entries
Number: max. 32 digits
Name: max. 16 characters
Storing a number in the directory
s ¤ §Menu§ ¤ New Entry
~ Enter the number and press §OK§.
~ Enter the name and press §OK§.
Order of directory entries
Directory entries are generally sorted alphabetically by surname. Spaces and digits
take first priority.
The sort order is as follows:
1Space
2 Digits (0–9)
3 Letters (alphabetical)
4 Other characters
To work round the alphabetical order of entries, insert a space or a digit before the
first letter of the name. These entries will then move to the beginning of the directory.
63
Page 66

Using directories
Selecting directory entries
s Open the directory.
You have the following options:
u Use s to scroll through the entries until the required name is selected.
u Enter the first character of the name, if necessary scroll to the entry with the s
key.
Dialling with the directory
s ¤ s (Select entry)
c Press the talk key.
Or during a call:
§OK§ Press the display key.
Managing directory entries
s ¤ s (Select entry)
§Menu§ Press the display key.
The following functions can be selected with q:
New Entry
Create a new entry (¢Storing a number in the directory, page 63).
VIP Caller Melody
Mark a directory entry as a VIP (Very Important Person) by assigning a specific
ringtone to it. The entry is flagged with the Æ icon in the directory. You recognise VIP calls by the ringtone.
VIP Caller Colour
Mark a directory entry as a VIP (Very Important Person) by assigning a specific
background colour to it. The entry is displayed with this background colour in
the address book and marked with the Æ icon. VIP calls are then recognised by
their background colour.
Edit Entry
Edit the number if required and press
Edit the name if required and press
Use Number
Edit or add to a saved number and then use c to dial the number or save the
number as a new entry;
To do so, display the number and press:
§Menu§ ¤ Copy to Directory ¤ §OK§
§OK§.
§OK§.
64
Please note
When dialling, you can use this function to link several numbers from the
directory (e.g., a call-by-call number to a telephone number,).
Delete Entry
Delete selected entry.
Send Entry
Page 67

Using directories
Send a single entry to a handset (¢Transferring the directory to another
handset, page 65).
Delete List
Delete all directory entries.
Send List
Send the entire directory to a handset (
another handset, page 65).
Shortcut
Assign the current entry as a shortcut to a selected key (
page 65).
¢ Transferring the directory to
¢ Using shortcut keys,
Using shortcut keys
You can assign directory entries to the keys Q and 2–O:
s ¤ q (select entry) ¤ §Menu§ ¤ Shortcut ¤ ~ (press the key you want to assign
the number to)
To dial, press and hold the relevant shortcut key.
Transferring the directory to another handset
You can transfer directory entries from other handsets to your new handset — even
entries from old handsets.
Prerequisites:
u The sending and receiving handsets must both be registered to the same base.
u The other handset and the base can send and receive directory entries.
s
¤ s (Select entry) ¤ §Menu§ (Open menu)
Send Entry / Send List
Select and press
s Select the internal number of the receiving handset and press §OK§.
You can transfer several individual entries one after the other by responding to the
Entry copied. Next entry? prompt with
A message appears on the display to confirm a successful transfer. You will hear the
confirmation tone.
§OK§.
§OK§.
Please note:
u Entries with identical numbers are not overwritten on the receiving handset.
u The transfer is cancelled if the phone rings or if the memory of the receiving
handset is full.
u VIP melodies and colours assigned to entries are not transferred.
Receiving directory entries from a handset
Prerequisite: The handset is in idle status.
¤ Start the transfer of directory entries on the handset as described in the handset
user guide.
If the data has been transferred successfully, the display on your handset will indicate the number of entries received (so far).
65
Page 68

Using directories
Adding a displayed number to the directory
You can copy numbers displayed in a list, e.g., the call list or redial list, to the directory.
A number is displayed:
§Menu§ ¤ Copy to Directory
¤ Complete the entry (¢ Storing a number in the directory, page 63).
Copying a number from the directory
In some operating situations, you can open the directory to copy a number (e.g.,
during an external call or in pre-dialling mode). Your handset need not be in idle
status.
s Open the directory.
q Select an entry and press
Using online directories
You can use public online directories (online directories, e.g., "White Pages", and
classified directories e.g., "Yellow Pages") depending on your provider.
You can select the online directories you wish to use via the Web configurator
¢ page 138).
(
Exclusion of liability
This service is country-specific. Gigaset Communications GmbH therefore
assumes no guarantee or liability for the availability of this service. The service
may be discontinued at any time.
§OK§.
66
Opening an net directory/Yellow Pages
Prerequisite: The handset is in idle status.
s Press and hold.
Or:
§Menu§ ¤ Â Online Contacts
This opens the list of online directories. Provider-specific names appear in the
display.
q Select a directory (net directory or Yellow Pages) from the list and
§OK§.
press
This establishes a connection to the net directory or the Yellow Pages.
If there is only one net directory available, a connection is immediately established
if you press and hold down the control key s.
Please note
Calls to a net directory are always free of charge.
Page 69

Using directories
Searching for an entry
Prerequisite: You have opened a net directory/Yellow Pages.
¤ You can enter data in the following fields:
Surname: (Net directory) or
Category/name: (Yellow Pages)
Enter the name, part of a name or the category (max. 30 characters).
City: Enter the name of the city/location in which the party you are search-
ing for lives (max. 30 characters).
Or:
Enter number:Enter the number (max. 30 characters).
¤ Press the display key §OK§ to start the search.
You must make an entry in Surname or Category/name and in City or in Enter
number. Searching by number is only possible if supported by the net directory
you have selected.
Please note
General instructions for entering text on your handset are set out in the handset
user manual.
A list of the cities/locations found is displayed if the search returns more than one
result:
q Select city.
If the name of a city/location is longer than one line, it is abbreviated.
§View§ to view the complete name.
Select
If no matching city is found: press
The entries for Category/name and City are copied and you can
change them.
§OK§ Press the display key to continue the search.
A corresponding message will appear on the display if no party is found to match
the search criteria. You have the following options:
§Change§ to change the search criteria.
¤ Press the display key §New§ to start a new search.
Or
¤ Press the display key §Change§ to change the search criteria. The name and city/
location are copied over and you can change them.
No hits are displayed if the list of hits is too large. A message to this effect is displayed.
¤ Press the display key §Refine§ to start a more detailed search (¢ page 69).
Or
¤ Depending on the provider, you can view the list if the number of hits is shown
on the display. Press the display key
§View§.
67
Page 70

Using directories
1
2
2/ 50
Sand, Marie Elis ...
0012-3456789
View
U
Menu
Search result (hit list)
The search result is shown as a list on the display. Examples:
1. 1/50: Consecutive number/total number of hits (only the consecutive number is dis-
2. Two lines containing the name, industry sector, phone number (shortened if necessary).
You have the following options:
¤ You can scroll through the list with q.
¤ Press the display key §View§. Displays the full details of the entry (name, category
where applicable, address, telephone numbers). You can scroll through the
entry with q.
Use
Refine Search
Refine search criteria and restrict hit list (
New Search
Start a new search.
Copy to Directory
Copy an entry to the local directory. If an entry contains several numbers, they
are displayed in a selection list. A new entry is created for the selected number.
The surname is transferred to the Surname field of the local directory.
played if the total number of hits >99).
If a fixed line number is not available, the mobile number (if available) is displayed.
§Menu§ to access the following options:
¢ page 69).
68
Page 71

Using directories
Calling subscribers
Prerequisite: A hit list is displayed.
¤ Select the entry and press the talk key c.
If the entry only contains one phone number, this is the one that is dialled.
A list of numbers appears if there is more than one number.
¤ Using q, select a number and press the §Dial§ display key.
Starting a refined search
You can use the search options available in the refined search (first name and/or
street) to limit the number of hits returned by a previous search.
Prerequisite: A search result is displayed (hit list with multiple entries or a message
indicating too many hits).
§Refine§ Press the display key.
Or
§Menu§ ¤ Refine Search
Select and press
The search criteria from the previous search are copied and entered in the corre-
sponding fields.
Surname: (Net directory) or
Category/name: (Yellow Pages)
If necessary, change the name/category or extend the partial name.
City: Name of the city from the previous search is shown (cannot be
changed).
Street: If necessary, change the name of the street (max. 30 characters).
First Name: (only in the net directory)
If necessary, enter the first name (max. 30 characters).
§OK§ Start detailed search.
§OK§.
69
Page 72

Using directories
1
2
1/ 05
Anna
View
V
Menu
Using the Gigaset.net directory
The handset is in idle status.
s Press and hold.
Or:
§Menu§ ¤ Â Online Contacts
This opens the list of online directories.
Gigaset.net
Select and press §OK§.
The Gigaset.net directory opens.
Please note
u Calls to the Gigaset.net directory are always free of charge.
u You can also open the Gigaset.net directory by dialling 1188#9 (phone num-
ber of the Gigaset.net directory) and pressing the talk key c.
u Creating an entry in the Gigaset.net directory for your phone, ¢ page 72.
If a connection cannot be established with the Gigaset.net directory, an error message is sent and the handset will return to idle status.
Searching for subscribers in the Gigaset.net directory
Once the connection to the Gigaset.net directory has been established, you are
asked to enter a name that you want to search for.
Enter name:
Enter the name or part of a name (max. 25 characters).
§Menu§ ¤ Search
Start the search.
If the search has been successful, a hit list is displayed containing all the names that
begin with the specified character string.
Examples:
70
1. 1/5: Entry number/number of hits
2. Name of an entry, possibly abbreviated
You can scroll through the hit list with q.
If no matching entry is found, a corresponding message is displayed. You have the
following options:
Page 73

Using directories
¤ Press the display key §New§ to start a new search.
Or
¤ Press the §Change§ display key to change the search criteria. The name you previ-
ously entered in the search field is used as search criterion. You can then expand
or edit as required.
If there are too many matching entries in the Gigaset.net directory, the message
Too many entries found is displayed instead of a hit list.
¤ Press the §Refine§ display key to start a refined search. The previously entered
name is copied and you can edit/expand it.
Calling subscribers
qc Select the subscriber from the hit list and press the talk key.
Viewing the subscriber's number
q Select the subscriber from the hit list.
§View§ Press the display key.
q Display the subscriber's name and number.
Please note
u Connections to Gigaset.net are always established via the Internet. This is
regardless of the send connection configured/selected on your handset.
u You can open the Gigaset.net directory and establish connections, even if
you have not entered yourself in the Gigaset.net directory.
Using other functions
Prerequisite: The hit list is displayed.
q (Select entry) ¤ §Menu§
The following functions can be selected with q:
Copy to Directory
Copy the number to the handset directory. The number and name (abbreviated
if necessary) are copied to the local directory.
¤ Edit and save the entry where necessary.
The hit list is displayed again.
New Search
Start a search with a new name (¢ page 70).
Refine Search
Start a refined search. The name previously searched for is copied and you can
edit/expand it.
Own Details
¢ "Entering, editing and deleting own entry" on page 72.
Please note
If you select a Gigaset.net number from the local directory, the connection is
automatically established via Gigaset.net (Internet).
71
Page 74

Using directories
Entering, editing and deleting own entry
You have the following options:
u Edit the name of your entry in the Gigaset.net directory.
u Delete your entry from the Gigaset.net directory.
Viewing your own entry
You are connected to the Gigaset.net directory and have performed a search. A hit
list is displayed:
¤ §Menu§ ¤ Select Own Details and press §OK§.
Your Gigaset.net number and, where applicable, your current name are displayed.
Entering/editing a name
§Edit§ Press the display key.
~ Edit the name or enter a new name (max. 25 characters) and press §OK§.
If you enter a nickname at this point, it is stored on a central Gigaset server. The
nickname appears in the Gigaset.net directory, and other subscribers that use
the Gigaset.net service can call you using this nickname.
By entering your data, you agree to having your data saved. If you do not wish
this to happen, you can cancel the operation at this point.
Cancel operation:
¤ Do not enter a name (or delete the name currently entered) and press the
Or:
¤ Press and hold the end call key to return to the hitlist.
Further information about the Gigaset.net service data saved can be found at:
www.gigaset.net/privacy-policy
You can delete the name with
Data protection notice
display key
§OK§. You return to the hit list.
§Del.§.
72
Page 75

Using directories
If there is no existing entry with this name in the Gigaset.net directory, the name is
saved. A message to this effect is displayed. The handset switches to idle status.
If there is already an entry with this name, or the entered name contains impermissible characters, you are requested to enter a different name.
If an entry was created successfully in the Gigaset.net directory, the message
"Saved" is displayed.
Please note
u If you delete the name, your entry is deleted from the directory. You are no
longer "visible" to other Gigaset.net subscribers. However, you can still be
reached via your Gigaset.net number. For instructions on displaying the
number,
u You can also enter/edit your Gigaset.net name via the Web configurator.
¢ page 152.
Calling a Gigaset.net subscriber
You can call a Gigaset.net subscriber directly via the Gigaset.net directory (see
above) or via their Gigaset. net number:
~ /s Enter the Gigaset.net number (including the #9) or select it from the
local directory.
c Press the talk key.
Every number ending with #9 is dialled via Gigaset.net.
73
Page 76

SMS (text messages)
SMS (text messages)
You can use your telephone to send and receive SMS messages via the fixed line
and VoIP.
You must specify the line via which SMS are sent. You can receive SMS messages
(abbreviation: SMS) via all of your phone's connections except for Gigaset.net.
Your telephone is delivered ready to send SMS messages as soon as the phone is
connected to the fixed line. If you do not specify any settings the SMS messages are
sent via the fixed line.
Prerequisites:
u Calling Line Identification is enabled for your fixed line connection. Calling Line
Identification must not be withheld (
u Your network provider supports the SMS service (information on this is available
from your network provider).
u You are registered with your service provider to send and receive SMS.
u To receive SMS messages, you must be registered with your service provider.
This happens automatically when you send your first SMS.
Please note
If your phone is connected to a PABX, please read ¢ page 81.
Writing/sending SMS
¢ page 53).
74
Writing an SMS
§Menu§ ¤ Ë SMS ¤ Write Message
~ Write SMS.
Please note
u For instructions on entering text and special characters, please see
page 157.
u An SMS may contain up to 160 characters.
Sending an SMS
§Menu§ Press the display key.
Send Text Select and press §OK§.
SMS Select and press §OK§.
s / ~ Select number with area code (even if you are in that area) from the
directory or enter directly.
§OK§ Press the display key. The SMS is sent.
Page 77

SMS (text messages)
Please note
u If you are interrupted by an external call while writing an SMS, the text is
automatically saved in the draft list.
u If the memory is full, or if the SMS function on the base is being used by
another handset, the operation is cancelled. A corresponding message
appears in the display. Delete SMS messages you no longer require or send
the SMS later.
SMS status report
Prerequisite: Your network provider supports this feature.
If you have activated the status report, you will receive an SMS with a confirmation
message after sending.
Activating/deactivating a status report
§Menu§ ¤ Ë SMS ¤ Settings
Status Report
Select and press
§OK§ ( ³ =on).
Reading/deleting status report/saving number to directory
¤ Open the incoming message list (¢ page 78) and then:
q Select SMS with State OK or State NOK status.
§Read§ Press the display key.
u Delete:
§Menu§ ¤ Delete Entry ¤ §OK§.
u Copy to directory:
§Menu§ ¤ Copy to Directory ¤ §OK§.
u Delete entire list:
§Menu§ ¤ Delete List ¤ §OK§.
Draft list
You can save an SMS in the draft list and edit and send it later.
Saving an SMS in the draft list
¤ You are writing an SMS (¢ page 74).
§Menu§ Press the display key.
Save Text Select and press §OK§.
After saving, the SMS editor will be displayed again with your SMS. You can con-
tinue writing the text and save it again. The SMS that was saved previously will be
overwritten.
75
Page 78

SMS (text messages)
Saved
01
28.06. 08:34
Read
W
Menu
Opening the draft list
§Menu§ ¤ Ë SMS ¤ Outgoing
The first list entry is displayed, for example:
Reading or deleting SMS messages
¤ Open the draft list and then:
q Select SMS.
§Read§ Press the display key to read the SMS message. Scroll through the SMS
Or delete the SMS with
§Menu§ ¤ Delete Entry ¤ §OK§.
Writing/changing an SMS
¤ You are reading an SMS in the draft list.
§Menu§ Open menu.
You have the following options:
Write Message
Write and then send or save a new SMS.
Use text
Edit the text of the saved SMS and then send it (page 74).
Character Set
Display text in the selected character set. The setting only applies to the current
SMS.
messages using q.
76
Deleting the draft list
¤ Open the draft list and then:
§Menu§ Open menu.
Delete List Select, press §OK§ and confirm with §OK§. The list is deleted.
Page 79

SMS (text messages)
Sending SMS messages to an e-mail address
If your service provider supports the SMS as e-mail feature, you can also send your
SMS messages to e-mail addresses.
The e-mail address must be at the beginning of the text. You must send the SMS to
your SMS service centre's e-mail service.
§Menu§ ¤ Ë SMS ¤ Write Message
~ Enter the e-mail address. End the entry with a space or colon (depend-
ing on the service provider).
~ Enter the SMS text.
§Menu§ Press the display key.
Send Text Select and press §OK§.
eMail Select and press §OK§. If the number of the e-mail service is not entered
¢ page 80), enter the number of the e-mail service.
(
§OK§ Press the display key.
Sending SMS messages as a fax
You can also send an SMS to a fax machine.
Prerequisite: Your network provider supports this feature.
¤ You are writing an SMS (¢ page 74).
§Menu§ Press the display key.
Send Text Select and press §OK§.
Fax Select and press §OK§.
s/~ Select number from the directory or enter it manually. Enter the num-
ber with area code (even if you are in the same area).
§OK§ Press the display key.
Receiving SMS
All received SMS messages are saved in the SMS inbox. If this is too long or is not
transferred completely, it is split into individual messages. Since an SMS remains in
the list even after it has been read, you should regularly delete SMS messages
from the list.
The display tells you if the SMS memory is full.
Activating/deactivating first ringtone muting
Each incoming SMS on the fixed line connection is signalled by a single ring (ringtone as for external calls). If you accept the "call", the SMS is lost. To prevent this, suppress the first ring for all external calls.
77
Page 80

SMS (text messages)
SMS:
002+003
Back
U
OK
2
1
New 02
1234567890
28.06. 08:34
Read
U
Menu
§Menu§ Open main menu.
P#Q5#1O
§OK§ Make the first ringer audible.
Q
Or:
§OK§ Suppress the first ringer.
1
Incoming list
The SMS inbox contains:
u All received SMS messages regardless of the connection it was intended for. All
received SMS messages are displayed on all handsets.
u SMS messages that could not be sent due to an error.
New SMS messages are signalled on all Gigaset handsets by the Ë icon (on the display) and an advisory tone.
Opening the incoming list with the f key
f Press the message key.
The incoming list is displayed with the number of new entries (1) and the number
of old, read entries (2) (example):
Press keys.
78
Open list with
new) and the date of receipt (example):
§OK§. An entry in the list is displayed with the number, status (old or
Opening the incoming list via the SMS menu
§Menu§ ¤ Ë SMS ¤ Incoming
Page 81

SMS (text messages)
Reading or deleting SMS messages
¤ Open the incoming list, then:
q Select SMS.
§Read§ Press the display key to read the SMS message. Scroll through the SMS
messages using q.
After you have read a new SMS, its status changes to "old".
Or delete the SMS with
§Menu§ ¤ Delete Entry ¤ §OK§.
Changing the character set
¤ Reading an SMS
§Menu§ Press the display key.
Character Set
Text is shown in the selected character set.
Deleting the incoming list
¤ Open the incoming list.
§Menu§ Open menu.
Delete List
Select, press
in the list are deleted.
§OK§ and confirm with §OK§. All new and old SMS messages
Replying to or forwarding SMS messages
¤ Reading an SMS
§Menu§ Press the display key.
You have the following options:
Reply
Write and send a new SMS to the sender (page 74).
Use text
Edit the text in the SMS and return it to the sender (page 74).
Send Text
Forward the SMS to another number (page 74).
Copying the number to the directory
Copying the sender's number
¤ Open the incoming list and select the SMS (page 78).
§Menu§ ¤ Copy to Directory
¤ Complete the entry ¢ page 66.
Receiving notifications via SMS
You can arrange to be notified about missed calls by SMS.
Prerequisite: The caller's number (CLI) must have been transmitted in the missed
call.
79
Page 82

SMS (text messages)
Notification is sent to your mobile phone or another phone with SMS functionality.
You only need to save the telephone number to which you wish the notification to
be sent.
Please note
Your provider will usually charge for SMS notifications.
§Menu§ ¤ Ë SMS ¤ Settings ¤Notification
¤ You can enter data in the following fields:
Dest.call no.:
Enter the number (including area code) to which the SMS is to be sent.
Missed calls:
Select On if you require SMS notification.
§OK§ Press the display key.
Warning
Do not enter your own network number for the notification of missed calls. This
can lead to chargeable endless looping.
Setting the SMS service centre/defining the send line
SMS messages are exchanged between SMS service centres operated by service
providers. You must enter the SMS service centre through which you wish to send
and receive SMS messages into your phone. You can receive SMS messages from
every SMS service centre that is entered, provided you have registered with your
service provider. This happens automatically when you send the first SMS via the
relevant service centre.
Your SMS messages are sent via the SMS service centre that is entered as the active
send centre. However, you can activate any other SMS centre as the active send service centre to send a current message (
If no SMS service centre is entered, the submenu only consists of the entry Settings.
Enter an SMS Service Centre (
¢ page 80).
¢ page 80).
80
Entering/changing SMS service centres
¤ Find out about the services and special functions offered by your service pro-
vider before you make a new application and/or before you delete pre-configured numbers.
§Menu§ ¤ Ë SMS ¤ Settings ¤ Service Centres
s Select SMS service centre (e.g., Service Centre 1) and press §OK§.
¤ You can enter data in the following fields:
Active Send Serv. Centre:
Select Yes if SMS should be sent via the SMS service centre. For the SMS centres
2 to 4, the setting only applies to the next SMS.
SMS centre #:
Enter the number of the SMS service.
Page 83

Email Centre:
Enter the number of the e-mail service.
Send via:
Select the fixed line or VoIP connection that you want to use to send the SMS
messages.
§OK§ Press the display key.
Please note
u If you have selected a VoIP connection and the attempt to transmit the SMS
messages fails, the SMS is stored in the incoming message list with error status. Even if you have activated the Automatic fallback to fixed line option
¢ Web configurator, page 133), your telephone will not attempt to send
(
the SMS via the fixed line.
u If the selected send connection is deleted from the configuration, the fixed
line connection in the configuration is used.
Sending an SMS via another SMS service centre
¤ Activate the SMS service centre (2, 3 or 4) as the active send service centre.
¤ Send the SMS.
This setting only applies to the next SMS to be sent. Thereafter, the setting returns
to Service Centre 1.
SMS on a PABX
u You can only receive an SMS when Calling Line Identification is forwarded to
the extension of the PABX (CLIP). The CLIP of the phone number for the SMS centre is evaluated in your Gigaset.
u Depending on your PABX, you may have to add the access code (outside line
code) before the number of the SMS centre.
If in doubt, test your PABX, e.g., by sending an SMS to your own number: Once
with the access code and once without.
For dialling access code in front of the SMS service centre numbers automati-
¢ page 115.
cally
u When you send SMS messages, your sender number may be sent without your
extension number. In this case the recipient cannot reply to you directly.
Sending and receiving SMS on ISDN PABXs is only possible via the MSN number
assigned to your base.
SMS (text messages)
81
Page 84

SMS (text messages)
Activating/deactivating SMS function
If you deactivate the SMS function, you cannot send or receive any further SMS
messages with your phone.
The settings you have made for sending and receiving SMS messages (e.g., the
numbers of the SMS service centres) and the entries in the inbox and draft lists are
saved even after deactivation.
§Menu§ Open main menu.
P#Q5#2L
Enter the digits.
§OK§ Deactivate the SMS function.
Q
Or:
1 §OK§ Activate the SMS function (default setting).
82
Page 85

SMS troubleshooting
Error codes when sending
E0 Calling Line Identification permanently restricted (CLIR) or Calling Line Identification
not activated.
FE Error occurred during SMS transfer.
FD Connection to SMS centre failed, see self-help.
Self-help with errors
The following table lists error situations, possible causes and advice on troubleshooting.
You cannot send messages.
1. You have not requested the CLIP service (Calling Line Identification Presentation).
¥ Ask your service provider to enable this service.
2. SMS transmission has been interrupted (e.g., by a call).
¥ Re-send the text message.
3. The network provider does not support this feature.
4. No number or an invalid number is entered for the SMS service centre set as the active
send centre.
¥ Enter the number (page 80).
You receive an incomplete SMS.
1. Your phone's memory is full.
¥ Delete old SMS messages (page 76).
2. The service provider has not yet sent the rest of the SMS.
The SMS message is played back.
1. The "display call number" service is not activated.
¥ Ask your service provider to activate this function (chargeable).
2. No agreement is in place between your mobile operator and your fixed line SMS service
provider.
¥ Obtain information from your fixed line SMS service provider.
3. Your terminal has been recorded by your SMS provider as having no fixed line SMS functionality i.e., you are not registered with the provider.
¥ Send any SMS to automatically register your telephone to receive SMS.
Messages are only received during the day.
The terminal is recorded in your SMS provider's database as having no fixed line SMS functionality i.e., you are not registered with the provider.
¥ Obtain information from your fixed line SMS service provider.
¥ Send any SMS to automatically register your telephone to receive SMS.
SMS (text messages)
83
Page 86

E-mail notifications
E-mail notifications
Your phone will notify you when new e-mail messages have been received on your
incoming e-mail server (i.e., POP3 server).
The prerequisite for displaying the e-mail messages on the handset is that you have
used the Web configurator to save the name of the POP3 server (e.g., Yahoo, Gmail)
and your personal access data (account name, password) in the phone
¢ page 138). You can save access data for six different e-mail accounts on differ-
(
ent POP3 servers on your phone. You can assign the e-mail accounts to different
handsets.
You can set your phone to periodically connect to the POP3 servers and check
whether you have new messages.
The receipt of a new e-mail message is displayed on the handsets assigned to the
related e-mail account. An advisory tone sounds and the
idle display.
Please note
The Ë symbol is also displayed when you have new SMS messages.
You can display the sender, date/time of receipt and the subject for each e-mail in
the incoming e-mail list (
Please note
If you have also activated the authentication of the phone with a POP3 server
via a secure connection in the Web configurator (TLS authentication) and this
fails, the e-mail messages are not downloaded to your phone.
In this case, pressing the flashing message key f will display the message
Certificate error Please check certificates in the web configurator.
¤ Press the display key §OK§ to confirm the message.
¤ Log in to the Web configurator (¢ page 120). The Web page Security
¢ page 128) tells you why the secure connection could not be established
(
and what you can do.
Ë icon is displayed on the
¢ page 85).
84
Page 87

Opening the incoming e-mail list
New 01
Maria@wla.de
12.08. 10:25
Read
V
Del.
1
2
3
Prerequisites:
u The e-mail account is assigned to the handset.
u The incoming e-mail server uses the POP3 protocol.
u The name of the POP3 server and your personal access data (account name,
password) are stored in the phone.
On the handset:
§Menu§ ¤ Ï Settings ¤ eMail ¤ E-mail 1 / .../E-mail 6
Or, if there are new e-mail messages:
f ¤ E-mail 1 / .../E-mail 6
Please note
Only the e-mail lists E-mail 1 / .../E-mail 6 of the e-mail accounts assigned to the
handset are displayed.
The phone establishes a connection to the POP3 server. A list of e-mail messages
that are stored there is displayed.
New unread messages appear above old read messages. The most recent entry
appears at the head of the list.
The following details are displayed for each e-mail: name or e-mail address of the
sender (one line, abbreviated if necessary) and date and time (date and time will
only display correct values if sender and recipient are located in the same time
zone).
Example display:
E-mail notifications
1 Status of the message and sequential number.
All e-mail messages that were not present in the incoming e-mail server when the inbox
was last opened are identified as New. All other e-mails are Old, regardless of whether or
not they have been read.
2 E-mail address or name transmitted by the sender (abbreviated if necessary)
3 Date and time of receipt of e-mail message
If the inbox on the POP3 server is empty, No entries will appear in the display.
85
Page 88

E-mail notifications
Many e-mail providers activate spam protection measures by default. E-mail
messages classified as spam are stored in a separate folder and are therefore not
shown in the incoming mail list.
Some e-mail providers allow you to deactivate spam protection or show spam
e-mails in the incoming mail list.
Other e-mail providers may send a message to the inbox when a new spam email is received. This is to inform you that a suspected spam e-mail has been
received.
The date and sender of this mail are repeatedly updated, so that it is always displayed as a new message.
Messages when establishing a connection
The following problems may occur when connecting to the POP3 server. The messages are shown in the display for a few seconds.
Server not accessible
The connection to the POP3 server could not be established. This may have the
following causes:
– Incorrect entry for the name of the POP3 server (
– Temporary problems with the POP3 server (server is down or is not con-
¤ Check settings in the Web configurator.
¤ Try again later.
Not possible!
The resources your phone requires to make the connection are busy, e.g.:
– One of the registered handsets is currently connected to the POP3 server.
¤ Try again later.
Login failed
Error when logging in to the POP3 server. This may have the following cause:
– Incorrect entries for name of POP3 server, username and/or password.
¤ Check settings ( ¢ Web configurator).
Parameters incomplete
Incomplete entries for name of POP3 server, username and/or password.
¤ Check/add to settings ( ¢ Web configurator).
Please note
¢ Web configurator,
page 138).
nected to the Internet).
86
Page 89

View the message header of an e-mail
Subject:
Invitation
Back Menu
Prerequisite: You have opened an incoming mail list (¢ page 85).
q Select an e-mail entry.
§Read§ Press the display key.
The subject of the e-mail message (maximum 120 characters) is displayed.
Example for the display on the handset:
Back§ Press the display key to return to the incoming message list.
Viewing e-mail sender's address
Prerequisite: You have opened the e-mail notification to read it (¢ page 87).
§Menu§ ¤ From
Select and press
The sender's e-mail address is displayed, over several lines if necessary
(maximum 60 characters).
§Back§ Press the display key to return to the e-mail message.
§OK§.
E-mail notifications
Deleting e-mail messages
Prerequisite: You have opened the incoming e-mail list (¢ page 85) or the header
or sender's address for an e-mail is displayed (
§Del.§ Press the display key.
Or:
§Menu§ ¤ Delete
§OK§ Press the display key to confirm the security prompt.
The e-mail is deleted from the POP3 server.
Select and press
¢ page 87):
§OK§.
87
Page 90

Using the network mailbox
Using the network mailbox
Some providers offer answering machines on the network – network mailboxes.
You should set up network mailboxes for your fixed line connection and for each of
your VoIP connections.
You must save the phone number for these network mailboxes in your phone.
You need to request the network mailbox for your fixed line connection from your
network provider.
You can activate/deactivate the network mailboxes for your VoIP connections using
the handset or the Web configurator.
Activating/deactivating network mailboxes, entering numbers
On the handset, you can manage the network mailboxes that are assigned to one
of its receive connections.
Ì
§Menu§ ¤
The list of connections (VoIP and fixed line) that are assigned to the handset as
receive connections is displayed. Net AM : xxx is displayed, where xxx is replaced
by the respective standard name of the connection (Net AM : IP1 to Net AM : IP6,
Net AM : Fixed Line).
s If several receive connections are assigned to the handset, select con-
You have selected a VoIP connection:
¤ You can enter data in the following fields:
Status
Use r to select On/Off for activating/deactivating the network mailbox.
Network Mailb.
The number that is currently stored for the network mailbox is displayed.
Enter or change the phone number for the network mailbox if necessary.
With some VoIP providers your network mailbox phone number is downloaded
together with the general VoIP provider data, saved to your base and displayed
under Network Mailb..
¤ Press the display key §OK§.
Voice Mail
nection and press
¤ Network Mailboxes
§OK§.
88
You have selected the fixed line network connection:
~ Enter or change the phone number for the network mailbox if neces-
sary.
§OK§ Press the display key.
You cannot activate/deactivate the network mailbox for the fixed line network connection via the handset. For instructions on activating/deactivating the network
mailbox, see the information provided by the network provider.
Page 91

Using the network mailbox
Configuring a network mailbox for fast access
With fast access you can dial a network mailbox directly.
Assigning key 1, changing assignment
Fast access settings are handset-specific. You can assign a different network mailbox to key 1 on each registered handset.
No network mailbox is preconfigured for fast access in the default settings.
1 Press and hold key 1.
Or:
§Menu§ ¤
The list of VoIP connections and the fixed line connection assigned to the handset
as receive connections is displayed. Net AM : Fixed Line is displayed for the fixed
line and Net AM : IP1 to Net AM : IP6 for the VoIP connections.
s Select entry and press
If a number is already stored for this network mailbox, fast access is activated
immediately.
a Press and hold the end call key (idle status).
If no number is saved for the network mailbox, you are asked to enter the number
of the network mailbox.
~ Enter the number for the network mailbox.
§OK§ Press the display key.
a Press and hold the end call key (idle status).
Fast access is activated.
Ì
Voice Mail ¤ Set Key 1
§OK§ (³ =on).
Calling the network mailbox via fast access
1 Press and hold.
If you have set a network mailbox for fast access, you are connected directly to this
network mailbox. Handsfree mode is activated.
d If necessary, deactivate handsfree mode.
You hear the network mailbox announcement.
Displaying new messages in the handset's idle display
If a new message is present on one of the network mailboxes assigned to the handset via its receive connection, the à icon and the number of new messages are
generally shown on the idle display.
89
Page 92

Using the network mailbox
Calling the network mailbox
With the message key f
Under the message key f you will find a list for each network mailbox that fulfils
the following prerequisites:
u The corresponding connections are assigned to the handset as receive connec-
tions.
u The network mailbox phone number is saved on the phone.
You can use the list to call the network mailboxes directly and listen to the messages.
f Press the message key.
Mailbox IP 1 / .../ Mailbox IP 6 / Mailbox
Select the network mailbox entry and press
Via the menu
Prerequisite: The network mailbox phone number is saved on the phone.
§Menu§ ¤
Net AM : IP1 / .../ Net AM : IP6 / Net AM : Fixed Line
In both cases you are connected directly to the network mailbox and hear its
announcement. Messages can generally be played back using your handset keypad
(digit codes). Listen to the announcement.
Ì
Voice Mail ¤ Play Messages
Select the network mailbox entry and press
§OK§.
§OK§.
90
Please note
u The network mailbox is automatically called via the corresponding connec-
tion. An automatic area code specific to your phone is not prefixed.
u Network mailbox messages can generally be played back using your phone's
keypad (digit codes). For VoIP, you need to define how the digit codes should
be converted to DTMF signals and transmitted (
Ask your VoIP provider which type of DTMF transmission it supports.
¢ page 136).
Page 93

ECO DECT
ECO DECT indicates low energy consumption and reduced transmission power.
Reduced transmission power (radiation)
In normal operation mode (factory setting):
On delivery, the device is set to maximum range. This guarantees optimised wireless management. The handset does not emit a signal in idle status (no radiation).
Only the base ensures contact with the handset is maintained through lowstrength wireless signals. During a call the strength of the wireless signal is adapted
automatically to the distance between the handset and base. The smaller the distance between the handset and base, the lower the transmission power.
You can further reduce the transmission power as follows:
1) Reducing the range to decrease transmission power by up to 80%
Many apartments, business premises, offices, etc., do not need the maximum
range. If you deactivate the Maximum Range setting, transmission power during a
call is reduced to 80% at half the range.
§Menu§ ¤ Settings ¤ Maximum Range
§OK§ Press the display key (³ = range reduced).
Display icon for reduced range ¢ page 34.
ECO DECT
2) Deactivating the DECT wireless module in idle status (Eco mode+)
You can deactivate the wireless signal output from the base completely in idle status via the No Radiation setting.
§Menu§ ¤ Settings ¤ No Radiation
§OK§ Press display key (³ =no radiation).
When the wireless module is deactivated the idle display shows the ¼ icon instead
of the signal strength icon.
91
Page 94

ECO DECT
Please note
u To benefit from No Radiation, all registered handsets must support this func-
tion.
u The wireless connection is established automatically for incoming or outgo-
ing calls only. This causes a connection delay of approx. 2 seconds.
u Handsets need to "listen in" to the base, i.e., scan the surrounding area, on a
regular basis to enable them to establish a connection to the base quickly in
the event of an incoming call. This increases power consumption and therefore reduces the handset’s standby time and talktime.
u When No Radiation is activated (no radiation) the handset does not display
a range indicator/range warning. You can check availability by calling a line:
Press and hold the talk key
u If a handset registered on a base in No Radiation does not support this fea-
ture, Eco mode+ is automatically deactivated (range indicator
vated on handsets). As soon as the incompatible handset is de-registered
again, No Radiation is reactivated automatically.
c. You hear the dial tone.
Ð is acti-
92
Page 95

Using the handset as an alarm clock
Using the handset as an alarm clock
Prerequisite: The date and time have already been set (page 34).
Activating/deactivating the alarm clock
§Menu§ ¤ Alarm Clock ¤ Activation (³ =on)
After you activate the alarm clock, the menu for setting the wake-up time opens
automatically.
The ¼ icon and wake up time are shown on the display.
A wake up call is signalled on the display (
volume and melody (page 102). The wake up call sounds for 60 seconds. If no key
is pressed, the wake up call is repeated twice at five minute intervals and then
switched off.
During a call, the wake-up call is only signalled by a short tone.
Setting the wake-up time
§Menu§ ¤ Alarm Clock ¤ Wake up time
~ Enter the wake up time in hours and minutes, then press §OK§.
Deactivating the wake-up call/repeating after a pause (snooze mode)
Prerequisite: A wake-up call is sounding.
§Off§ Press the display key. The wake-up call is deactivated.
Or
§Snooze§ Press the display key or any key. The wake-up call is deactivated and
then repeated after 5 minutes. After the second repetition the wake-up
call is deactivated completely.
¢ page 7), with the selected ringtone
93
Page 96

Using multiple handsets
Using multiple handsets
Registering handsets
You can register up to six handsets to your base. You must initiate registration of the
handset on both the base and on the handset. Both must occur within 60 seconds.
¤ On the base: Press and hold (at least 3 seconds) the registration/paging key.
¤ On the A540H handset (for other handsets see "Notes"):
¤ Press the display key Regist
or
§Menu§ ¤ Settings ¤ Registration ¤ Register Handset
¤ Enter the system PIN (the default is 0000) and press §OK§.
This creates a connection to the base, but it may take some time.
Successful registration is shown on the display. Adjust the handset's setting using
the ÏSettings menu item (
Please note
u If six handsets are already registered with the base (all internal numbers
occupied), then the registered handset with internal number 6 (INT 6) is
replaced by the new handset. If this attempt is not successful, e.g., because
the handset INT 6 has an active connection to the base (e. g. a call or a menu
access), a corresponding message is displayed.
u You should start the registration procedure for other Gigaset handsets and
handsets of other GAP-enabled devices in accordance with the respective
operating instructions.
u To make available the Gigaset.net directory to the other Gigaset handsets,
the base transfers an entry with the name Gigaset.net to the local directory
of the new handset during registration
¢ page 24).
De-registering handsets
You can de-register all other registered handsets from each of the registered
Gigaset handsets.
§Menu§ ¤ Settings ¤ Registration ¤ De-register Handset
s Select the handset you wish to de-register and press §OK§.
(The handset you are currently using is highlighted with <).
~ Enter the system PIN if necessary and press
§OK§ Press the display key.
94
§OK§.
Page 97

Locating a handset ("paging")
¤ Briefly press the registration/paging button on the base (¢ page 9).
All registered handsets will ring at the same time ("paging"), even if the ringtones
are switched off.
The current (local) IP address for the base appears in the handset displays.
Ending the search
¤ On the base: Press the registration/paging key briefly, or
¤ On the handset: Press the talk key c or end call key a or the display key
§Silence§, or
¤ No action: After approx. 30 seconds, the paging call will end automatically.
Please note
u An incoming external call will not interrupt the paging process.
u If there are already two internal connections between the handsets, then
paging is not possible.
u A paging call is also signalled acoustically on handsets where the ringtone is
permanently deactivated.
Making internal calls
If you have multiple handsets registered to the base, you can make internal calls
free of charge.
Using multiple handsets
Calling a specific handset
u Initiate internal call.
~ Enter the number of the handset.
Or:
u Initiate internal call.
s Select handset.
c Press the talk key.
Calling all handsets ("group call")
u Press and hold.
Or:
u Initiate internal call.
P Press the star key.
Or:
u Initiate internal call.
Call All Select
c Press the talk key.
All handsets are called.
95
Page 98

Using multiple handsets
Ending a call
a Press the end call key.
Transferring a call to another handset/making an internal consultation call
You are talking to an external participant and can call an internal participant at the
same time to forward the call or to consult.
u Open the list of handsets.
s Select a handset or Call All and press
When the internal participant does not answer:
§End§ Press the display key. You are reconnected with the external partici-
When the internal participant answers:
¤ If necessary, announce the external call.
Either
a Press the end call key. The external call is transferred to the other hand-
or
§Menu§ Open menu.
End Active Call
When transferring a call, you can also press the end call key a before the internal
participant answers.
If the internal participant does not answer or the line is busy, the call will automatically return to you.
The external participant is put on hold.
pant.
set.
Select and press
pant.
§OK§. You are reconnected with the external partici-
§OK§.
96
Accepting a waiting call
If you receive an external call during an internal call, you will hear the call waiting
tone (short tone). With Calling Line Identification, the caller's number will appear
in the display.
Ignoring the external call
§Reject§ Press the display key.
The call waiting tone is turned off. You remain connected with the internal participant.
For calls to a VoIP connection: the external caller hears the busy tone or a corresponding announcement (provider-specific).
For calls to the fixed line connection:
The call continues to be signalled on the other registered handsets.
Page 99

Using multiple handsets
Accepting an external call/putting an internal party on hold
§Accept§ / c Press the display key or the talk key.
You are connected to the external caller. The internal call is placed on hold.
Internal call waiting during an internal/external call
If an internal party attempts to call you while you are involved in an external or
internal call, this call is shown on the display (internal call waiting). You can either
accept or reject this call.
Press any key to make this prompt disappear from the display.
You must end the current call to accept the internal call. Then the internal call is sig-
nalled as per usual. You can accept the call.
Setting up a conference call
You are conducting a call with an external participant and have set up an internal
conference call, or during an internal call you have accepted an external waiting
call.
You have the following options:
u Swap between both participants:
¤ Use q to switch between the participants (call swapping).
u Set up a conference call:
¤ Press the display key §Conf.§ to establish the conference call.
u Ending a conference call
¤ Press the §EndCon§ display key to return to call swap mode.
Or:
¤ If an internal participant presses the end call key a, the other handset
remains connected to the external participant.
Changing the name of a handset
The names "INT 1", " INT 2" etc. are assigned automatically on registration. You can
change these names. The name must be no longer than 10 characters. The changed
name is displayed in every handset's list.
u Open the list of handsets. Your own handset is indicated by <.
s Select handset.
§Menu§ Open menu.
Rename Select and press §OK§.
~
§OK§ Press the display key.
Enter the name.
97
Page 100

Using multiple handsets
Changing a handset's internal number
A handset is automatically assigned the lowest free internal number from 1–6 during registration. If all numbers are in use, then the number 6 is overwritten as long
as this handset is in idle status. You can change the internal numbers of all registered handsets (1–6).
u Open the list of handsets. Your own handset is indicated by <.
§Menu§ Open menu.
Assign Handset No.
Select and press
q Select the handset, if necessary.
r /~ Select or enter the internal number.
q r Switch to another handset, if necessary, and select the number etc.
§OK§ Press the display key to save the entry (³ =saved).
You will hear the error tone if an internal number has been assigned twice.
§OK§.
¤ Repeat the procedure with a free number.
98
 Loading...