

Geemarc Amplipower60+ User Manual

2
Caution: This telephone product is specifically designed for people with hearing difficulties and is provided
with a handset earpiece volume control for individual requirements. Due care must be taken by all users
that the handset earpiece volume control is set to the lowest level acceptable by each respective user.
Care should therefore be exercised to ensure that any new users are familiar with this requirement.
Attention: Ce telephone peut etre destine aux personnes ayant des problemes d’audition. Il possede un
ecouteur a volume variable. A la premiere utilisation, assurez vous que le bouton de reglage du volume
soit positionne sur la position volume minimum. Les personnes malentendantes pourront par la suite
augmenter le volume pour l’adapter a leur audition.
Precaución: Este producto telefónico ha sido específicamente diseñado para personas con dificultades
de audición, y lleva un control de volumen a la altura del auricular para adaptarlo a las necesidades
individuales. Habrá que tener un cuidado especial de ajustar el control de volumen al nivel mínimo
aceptable por cada usuario respectivo. Deberá asegurarse de que todos los nuevos usuarios se
familiarizan con este requisito.

3
INSTRUCTIONS 4
DESCRIPTION 5
SETTING UP
- Connecting the telephone 6
- Alarm and ring options 6
- Ringer settings 6
- Tone/Pulse switch (T/P) 7
- Time break recall switch (600/100) 7
- Hotel message waiting switch 7
- Wall mounting 8
USING THE PHONE
- Answering incoming calls 9
- Volume and tone receiving 9
- Making a call 10
- Last number redial 11
- Recall, * & # buttons 11
- Mute button 11
- Storing telephone numbers 12
- Dialling stored numbers 12
REGULATORY COMPLIANCE 13
GUARANTEE 15
CONTENTS

4
IMPORTANT SAFETY INSTRUCTIONS
When using your telephone equipment, basic safety precautions should
always be followed to reduce the risk of fire, electric shock and injury to
persons, including the following:
1.
Do not use this product near water, for example, near a bath tub, wash
bowl,kitchen sink or laundry tub, in a wet basement or near a swimming pool.
2. Avoid using a telephone (other than a cordless type) during an electrical
storm. There may be a remote risk of electric shock from lightning.
3. Do not use the telephone to report a gas leak in the vicinity of the leak.
4. Use only the power cord and batteries indicated in this manual. Do not
dispose of batteries in a fire. They may explode. Check with local codes for
possible special disposal instructions.
SAVE THESE INSTRUCTIONS!
Congratulations on purchasing your Geemarc AMPLIPOWER60+™ telephone. This is a multifunction telephone which offers features such as
hands free use, phone book, caller display* and voice announcing.
Its is important that you read the instructions below in order to use your
Geemarc telephone to its full potential. Keep this user guide in a safe place
for future reference.
This guide explains how to use the following telephone:
AMPLIPOWER60+
™
*To use the caller display facility, you must subscribe to your network
provider’s caller display service.
Unpacking the Telephone
When unpacking the telephone, you should find the following in the box:
• 1 AMPLIPOWER60+™ unit
• 1 AMPLIPOWER60+™ handset with curly cord
• 1 Mains power adaptor
• 1 Telephone line cord
• 1 User Guide
INSTRUCTIONS

5
Hotel message switch
Shaker socket (*)
Tone reception
adjustment
Speaker
volume
adjustment
Volume
reception
adjustment
Speaker
Last number
redial
Time break
recall button
Memory
storing key
Flashing incoming
ring indicator
(camera flash)
Key to activate tone
and volume
adjustment function
Tone and volume
adjustment automatically
activated each time you
hang-up the phone
Handsfree /
Headset button
Ringer select
mode
Mute button
Direct memory
buttons
Ringer level
adjustment
3 priority numbers
Line socket
12 V DC adaptor socket
Headset socket (*)
(*) : For these optionals accessories, consult the retailer ( see contact details at the end of this manual)
Caution: Repeated incremental exposure to amplification levels greater than 18dB may be
harmful to individuals without hearing disabilities. Therefore, do not remove the warning label
attached to the back of the handset. If it is likely that a visually impaired person will use the
telephone, securely attach the provided warning printed in Braille to the back of the handset.
Note: In standard use, the amplifier turns off whenever you hang up the telephone. This is
a useful feature if many people use the phone. If you want the amplifier to always remain
on, slide the Volume Reset Override switch on the back of the phone to ON.
DESCRIPTION
6
1 - CONNECTING THE TELEPHONE
- Connect the handset cord
- Open the battery door by unscrewing the retaining screw. Insert 4 x
AAA alkaline batteries. Snap the battery door in place.
In case of power failure, batteries are required for the ring.
- Connect the line cord .
- Connect the PTT plug to the wall socket.
- Connect the 12V DC adaptor cord to the telephone.
- Connect the 12V DC adaptor to your wall socket (**).
(**) Classified “hazardous voltage” according to EN60950 standard.
2 - ALARM AND RINGER OPTIONS
A 3 position switch located on the right side of the phone allows the settings
below:
-
0
: Only the ringer is activated.
-
: Ringer and shaker are activated.
-
: Ringer and strobe flash are activated.
3 - RINGER SETTINGS
A switch located on right side allows the ringer to be switched
HI,LOW,OFF:
: Off, : Low, : Hi
Your phone comes with the ringer switched to «High» and the melody set
to «6».
SETTING UP

7
Low Middle High
Melody 1 1 2 3
Melody 2 4 5 6 (by default)
Melody 3 7 8 9
If you don’t like the ringer melody,you can choose a new one by changing
the settings as follow:
- Lift the handset.
- Press PROG button.
- Press
# button.
- Press any button 1 to 9.
Ringer will be activated on next call.
4 - TONE/PULSE SWITCH (T/P)
The Tone/Pulse switch is factory pre-set to Tone position (T). In the US,all
telephone exchanges now use Tone dialling.If your phone does not dial out,
it is probably being used from an older private switch- board (PBX). In this
case,theTone/Pulse switch must be moved to Pulse.
5 - TIME BREAK RECALL SWITCH (600/100)
For the US, the TBR switch is factory pre-set to 600ms. It can be switched
to 100ms for other locations or PBX’s.
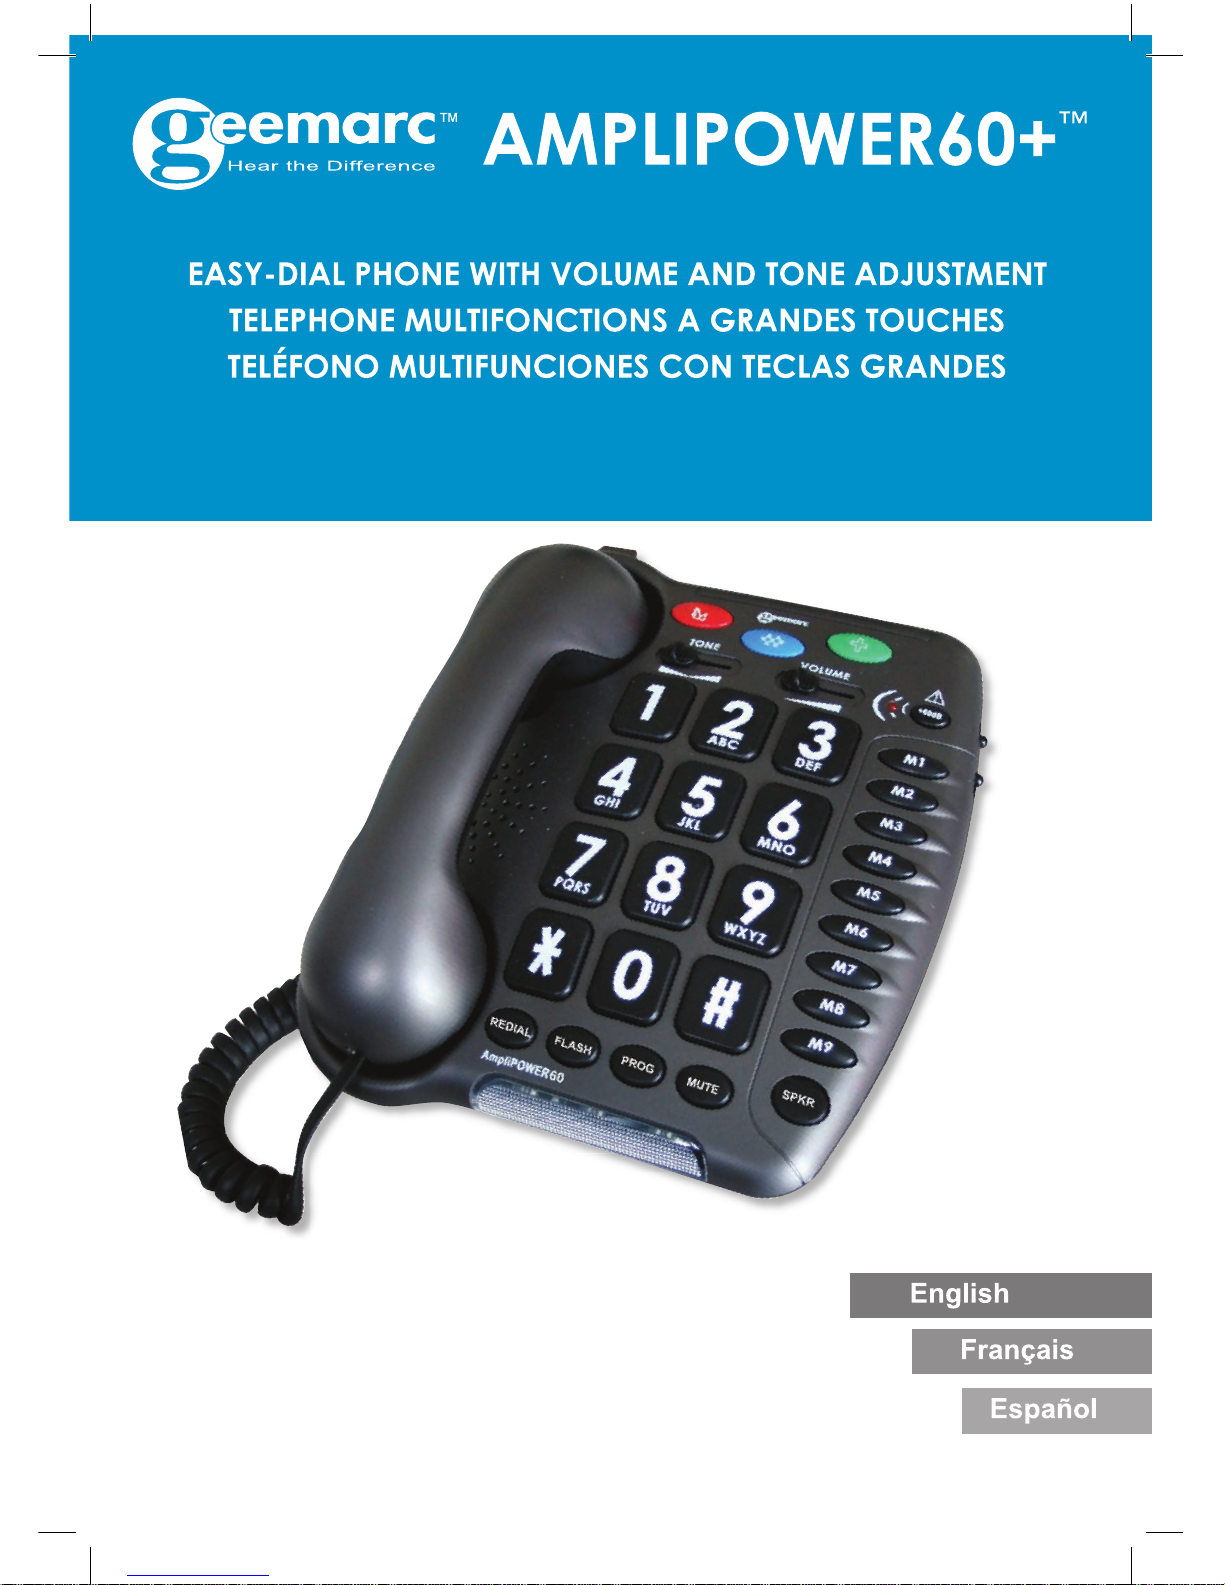
6 - HOTEL MESSAGE WAITING SWITCH
These are used with the new services provided on hotel network.
A switch located behind your phone allows to set ON the hotel message
waiting function.
When the switch is setting ON and when you receive a message, the red
light
is lit to inform you that you have a message on phone .
SETTING UP

8
7 - WALL MOUNTING
To wall-mount your telephone,slide out the clip, turn around and slide back
into the wall mounting position (located in the base unit, just below the ear
piece).This will ensure that the handset stays firmly in position. Make 2
holes in the wall 80mm apart, insert the wall plugs and the wall mounting
screws. The screws should protrude from the wall by 6-7 mm. Place the
phone onto the screw-heads and slide down to secure.
If you are using this telephone with a hearing aid, set your hearing aid
to the “T” setting.
SETTING UP

9
1 - ANSWERING INCOMING CALL
Without headset:
- When an incoming call is received, the phone will ring, to answer the call
lift the handset and speak.
- On completion of the call, carefully replace the handset in the cradle to
release the line.
With headset (option):
- When an incoming call is received, and if you wish to answer the call with
the headset, press the SPKR button and speak.
- On completion of the call, press the SPKR
button again to release the
line.
In handsfree mode:
- When an incoming call is received, the phone will ring, to answer the call
press the SPKR button.
- On completion of the call, press the SPKR button to release the line.
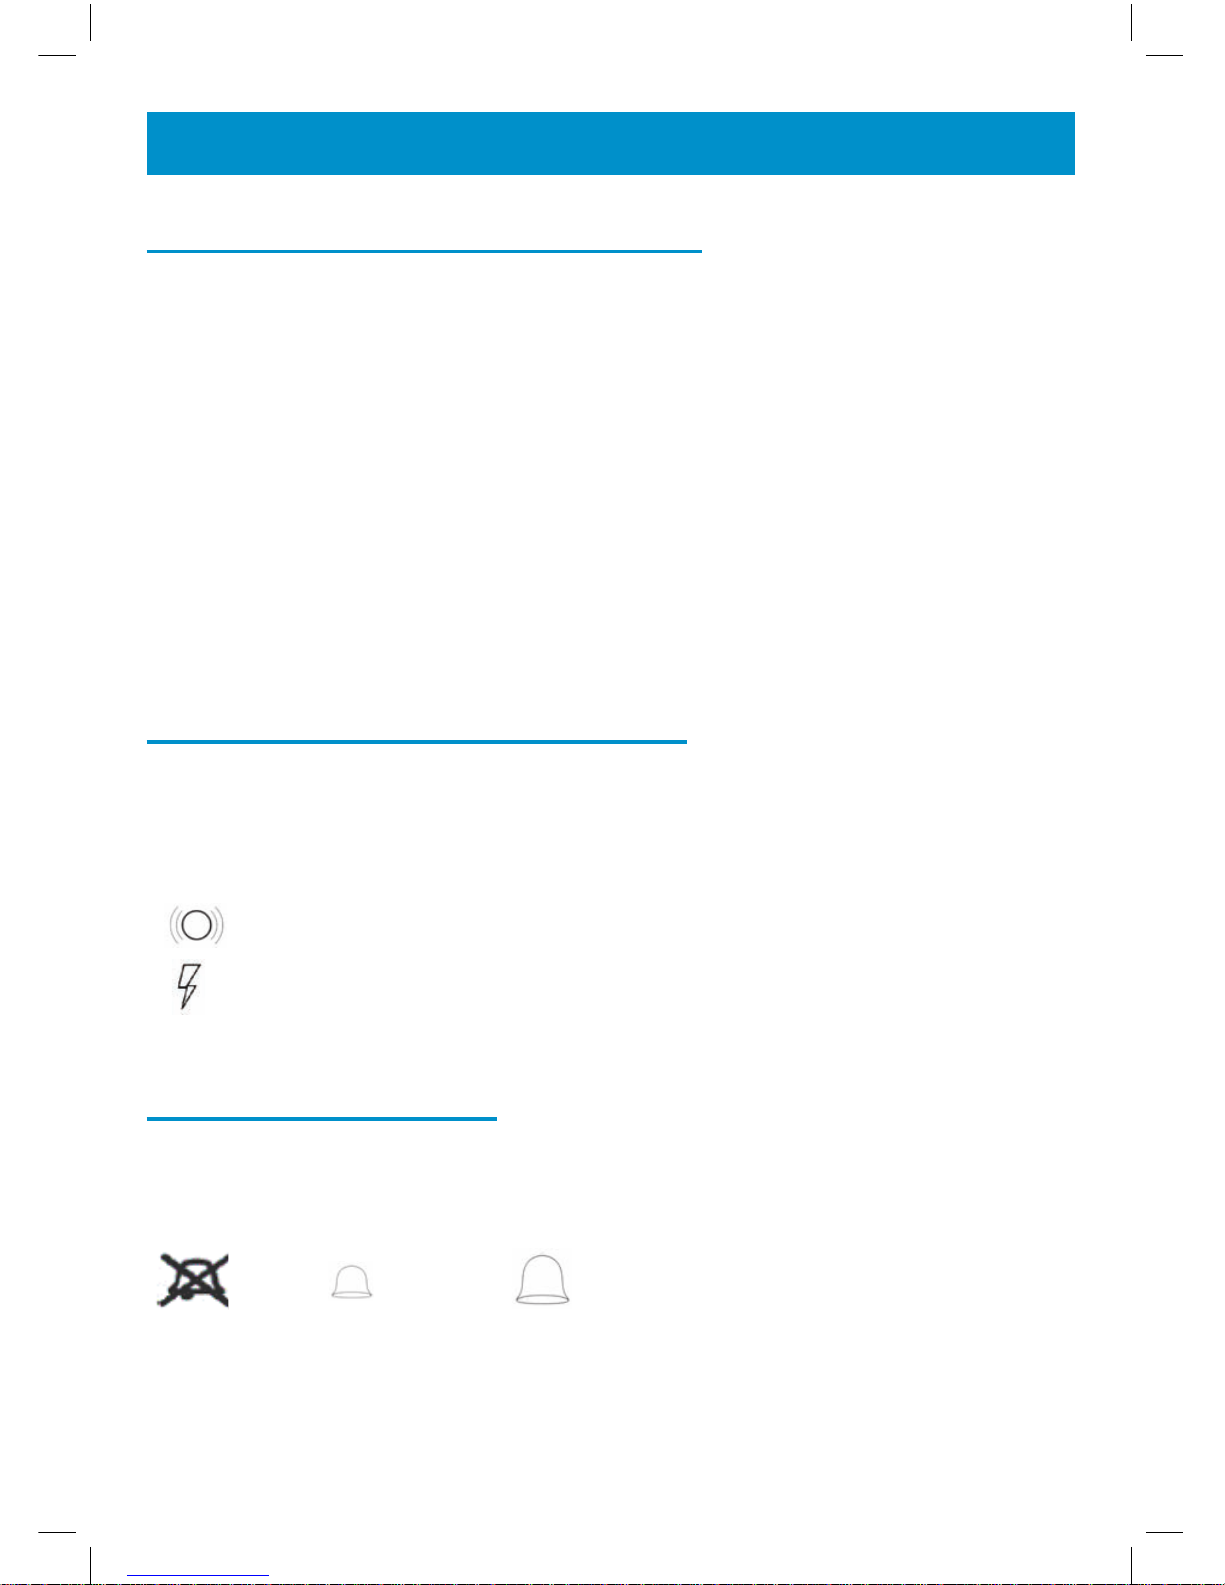
2 - VOLUME AND TONE RECEIVING ADJUSTMENT
You can increase the volume and adjust the receiving tone according to
your own hearing requirements. The button +60dB allows extra-receiving
and tone functions to be activated or not during the conversation. When
the function is activated, the red light of extra receiving and tone function
located near the button +60dB is lit. Adjust the TONE and VOLUME buttons
to remove.
Note:
When the switch located behind the phone is ON, the extra-receiving and tone functions are automatically activated each time you use the phone. When the switch is
switched OFF, you will need to activate the function by pressing the button +60dB.
Tone and volume adjustment 30dB to 60dB is only activated when the button
ON.
USING THE PHONE
10
When this button is set to OFF only the volume can be adjusted from 0dB
to 20dB.
3 - MAKING A CALL
Without headset:
- Lift the handset.
- Await the dial tone and dial required number.
- On completion of the call,carefully replace the handset in the cradle.
With headset (option):
- Press the SPKR button.
- Await the dial tone and dial required number.
- On completion of the call, press the SPKR button again to clear the line.
Tone
Bass
+10dB max
Treble
+10dB max
Normal
Normal
0dB
20dB
AMPLIPOWER60+
™
Volume
* press button +60dB
20dB
60dB
*
USING THE PHONE

11
In handsfree mode
- Press the SPKR button.
- Await the dial tone and dial required number.
- On completion of the call, press the SPKR button to release the line.
- If your correspondent doesn’t answer your call, press the SPKR button
again to release the line.
Note:
- To deactivate the handsfree function during a call, lift the handset.
To activate the handsfree function during a call, press the SPKR button and
place the handset on the cradle.
- During a call in handsfree, you can adjust the speaker volume to a desir
able level.
Simply use the slide control VOLUME located on the left of the unit.
4 - LAST NUMBER REDIAL
- Lift the handset.
- Await the dial tone and press REDIAL button.
-The previously dialled number will be automatically redialled (not in use for
memory numbers).
5 - FLASH, * & # BUTTONS
These are used with the new services provided on digital exchanges.For
details please contact your network operator.
6 - MUTE BUTTON
If you wish to speak privately to someone else in the room without your
caller overhearing, press and hold the button MUTE.You will still be able
to hear the callers but they cannot hear you during the mute operation.To
resume normal conversation, release the MUTE button.
USING THE PHONE

12
7 - STORING TELEPHONE NUMBER
Your phone can store 12 direct memories including 3 priorities numbers
(21 digits maximum for each memory).
For example, the 3 priority
memories allow you to store the 3
numbers below:
- Local,Police station,
- Your doctor
- Family
To store a number please follow instructions below:
- Lift the handset.
- Press PROG button .
- Press M1, M2, ..., or M9 or one of 3 priorities numbers to store
your number.
- Dial the number.
- Press PROG button again.
Numbers will be lost after a few hours if you disconnect your phone. Entering
a new number in memory will automatically erase the previous number.
Note: To dial an international number there should be a pause between
the country code and the rest of the number. To enter a pause, press the
REDIAL button.
8 - DIALLING STORED NUMBER
- Lift the handset and await the dial tone.
- Press appropriate button M1, M2, ..., or M9 or one of the 3 priorities
numbers , the stored number will be dialled automatically.
To register your stored phone numbers,use the index card located under
the base.
It is recommended to
store these numbers
during installation
USING THE PHONE

13
- This equipment complies with Part 68 of the FCC rules and the requirements adopted by the ACTA. On the bottom of this equipment is a label
that contains, among other information, a product identifier in the format
US:AAAEQ##TXXXX. If requested, this number must be provided to the
telephone company.
- All applicable certification jacks Universal Service Order Codes (USOC)
for the equipment is provided (i.e. RJ11C) in the package with each piece
of approved terminal equipment.
-
A plug and jack used to connect this equipment to the premises wiring and
telephone network must comply with the applicable FCC Part 68 rules and requirement adopted by the ACTA. A compliant telephone cord and modular plug
is provided with this product. It is designed to be connected to a compatible
modular jack that is also compliant. See installation instructions for details.
- The REN is useful to determine the quantity of devices you may connect
to your telephone line and still have all of those devices ring when your telephone number is called. In most, but not all areas, the sum of the REN’s of
all devices connected to one line should not exceed five (5.0). To be certain
of the number of devices you may connect to your line, as determined by
the REN, you should contact your local telephone company to determine
the maximum REN for your calling area.
-
If this equipment causes harm to the telephone network, the telephone
company will notify you in advance that temporary discontinuance of service
may be required. But if advance notice isn’t practical, the telephone company
will notify the customer as soon as possible. Also, you will be advised of your
rights to file a complaint with the FCC if you believe it is necessary.
- The telephone company may make changes in its facilities, equipment,
operation or procedures that could affect the operation of the equipment. If
this happens the telephone company will provide advance notice in order for
you to make necessary modifications to maintain uninterrupted service.
- This equipment may not be used on coin service provided by the telephone company. Connection to party lines is subject to state tariffs. This
equipment is hearing aid compatible.
Warning: Changes or modifications to this unit not expressly approved
by the party responsible for compliance could void the user’s authority to
operate the equipment.
REGULATORY COMPLIANCE

14
NOTE: This equipment has been tested and found to comply with the limits for
a Class B digital device, pursuant to Part 15 of the FCC Rules. These limits
are designed to provide reasonable protection against harmful interference in
a residential installation. Some cordless telephones operate at frequencies that
may cause interference to nearby TV’s and VCR’s; to minimize or prevent such
interference, the base of the cordless telephone should not be placed near or
on top of a TV or VCR; and, if interference is experienced, moving the cordless
telephone farther away from the TV or VCR will often reduce or eliminate the
interference. However, there is no guarantee that interference will not occur in a
particular installation. If this equipment does cause harmful interference to radio
or television reception, which can be determined by turning the equipment off
and on, the user is encouraged to try to correct the interference by one or more
of the following measures:
• Reorient or relocate the receiving antenna.
• Increase the separation between the equipment and receiver.
• Connect the equipment into an outlet on a circuit different from that
to which the receiver is connected.
• Consult the dealer or an experienced radio TV technician for help.
- If trouble is experienced with this equipment, for repair or warranty information, please contact our customer service staff at: 248-577-5400
If the equipment is causing harm to the telephone network, the telephone company
may request that you disconnect the equipment until the problem is resolved.
- Please follow instructions for repairing if any; otherwise do not alter or
repair any part of device except as specified.
Opening the equipment or any attempt to perform repairs will void the
warranty. For service or repairs, call 248-577-5400
-
Connection to party line service is subject to state tariffs. Contact the state public
utility commission, public service commission or corporation for information.
- If your home has specially wired alarm equipment connected to the telephone line, ensure the installation of this telephone equipment does not
disable your alarm equipment. If you have questions about what will disable
alarm equipment, consult your telephone company or a qualified installer.
- This equipment is hearing aid compatible.
REGULATORY COMPLIANCE
 Loading...