

Page 1
A
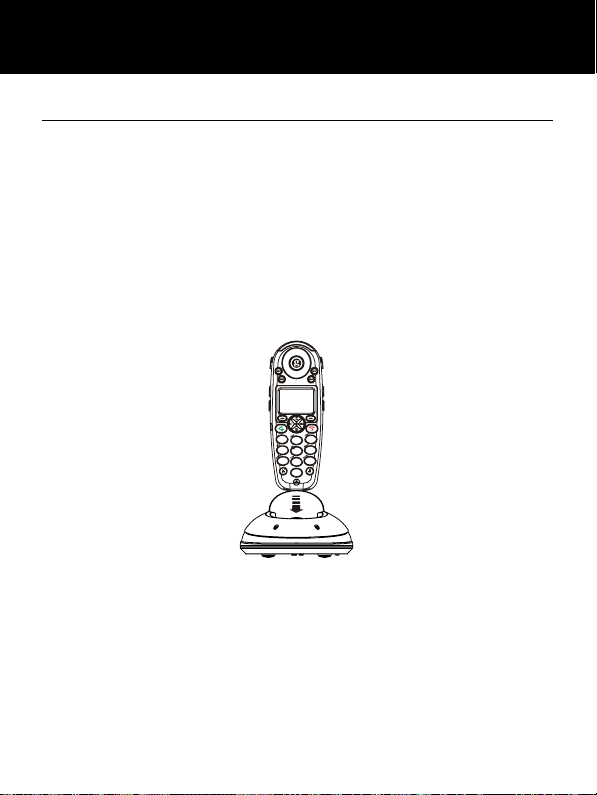
Amplified Cordless Telephone
mplidect350
English
0
Page 2

CONTENTS
CONTENTS 1
INTRODUCTION 4
Unpacking 5
DESCRIPTION 6
General Description 6
Keys Description 11
LCD Window Icons Description 14
INSTALLATION 15
Connecting Lines 15
Installing Batteries 16
Charging Handset 18
Using Handset Carrying Clip 19
Using Headset (optional) 20
Base Ringer Volume Switch 20
HANDSET SETTINGS 21
Turning Handset On/Off 21
BASIC FUNCTIONS 23
Making a call 23
1
Page 3

CONTENTS
Receiving a call 24
Muting the Microphone 25
Amplification Function 26
Menu Navigation 27
Menu Map 28
Handset Ringer Setting 29
Last Number Redial 30
CID Book 32
Flashlight 35
Key Lock 35
Auto Answer 36
Selecting a Language 37
HS Name 38
Range Alarm 39
Paging 40
Dial Mode 41
Handsfree 42
Flash Signal 43
ADVANCED FUNCTIONS 44
Phone Book 44
One-Touch Memories 49
HS Settings 51
2
Page 4

CONTENTS
BS Settings 59
Registration 62
Calling with more than one Handset 63
Caller ID on call waiting 65
FEATURE LIST 66
TROUBLESHOOTING 68
TECHNICAL SPECIFICATIONS 69
SAFETY INFORMATION 71
REGULATORY COMPLIANCE 73
GUARANTEE 78
3
Page 5
INTRODUCTION
Congratulations on purchasing your Geemarc
Amplidect350 telephone. This telephone offers all the
advantages of cordless technology (compliant with
Digitally Enhanced Cordless Telecommunications-DECT
standard) together with an easy to see big button keypad,
ideal for those who suffer with poor sight. This telephone
is also hearing aid compatible.
Its is important that you read the instructions below in
order to use your Geemarc telephone to its full potential.
Keep this user guide in a safe place for future reference.
This guide explains how to use the following telephone:
Amplidect350
4
Page 6

INTRODUCTION
Unpacking
When unpacking the telephone, you should find the
following in the box:
y 1 Amplidect350 handset
y 1 Amplidect350 base
y 1 Mains power adaptor
y 3 AAA Ni-MH Batteries rechargeable type
y 1 Telephone line cord
y 1 Carrying clip
y 1 User Guide
* The shape of the plugs can vary according to each country’s
specification.
Sonic Alert Warranty Center
1081 West Innovation Dr.
Kearney, MO 64060
Sales: 248-577-5400 Fax: 248-577-5433
Customer Service & Warranty: 1-888-864-2446
5
Page 7
DESCRIPTION
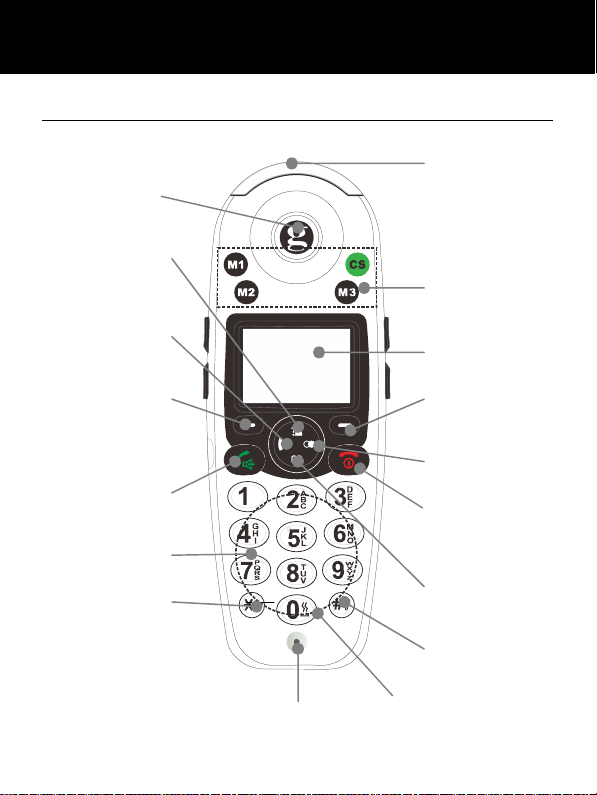
General Description
Handset Description (front)
Earpiece
Visual ringer
Up/CID key
Int key
Left soft key
Dial/
Speaker key
Alphanumeric
keys
key
*
Keypad
locked
function
Microphone
6
One-touch
Memories
M1, M2, CS
& M4
Display
Right soft key
Redial key
End key
Down
/Phonebook
key
# key
Flashlight
Vibrator
Function
Page 8
DESCRIPTION
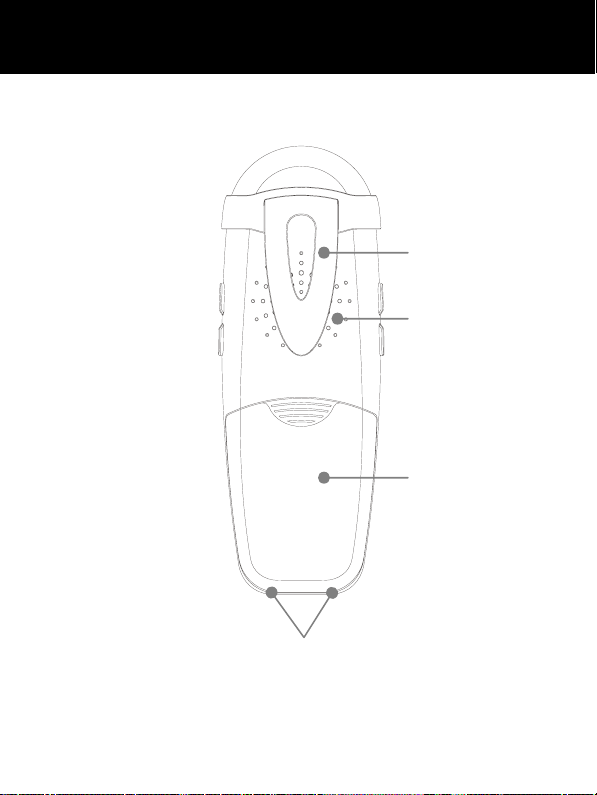
Handset Description (Rear)
Charging contacts
Carrying clip
Speaker
Battery
compartment
cover
7
Page 9
DESCRIPTION
PRIOR TO USE
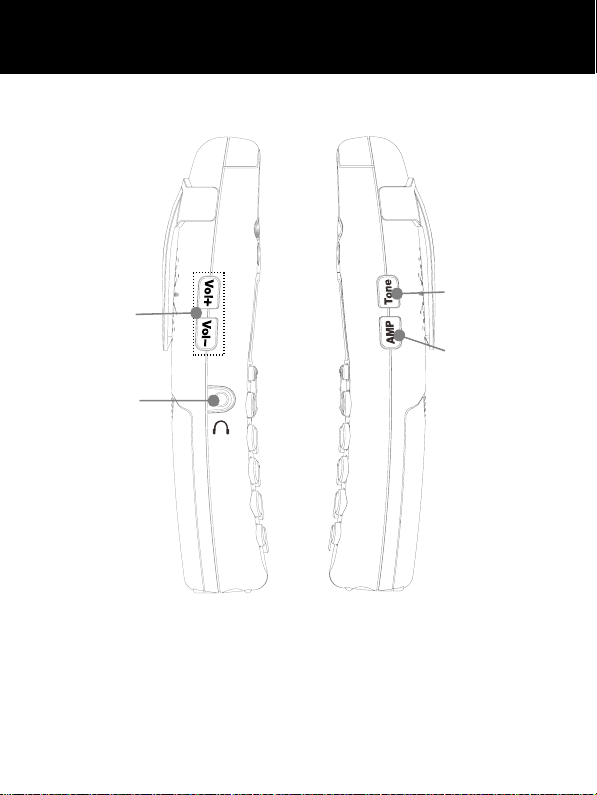
Handset Description (Side)
Volume
Control
Headset
Jack
Tone Control
Amplify
(AMP)
Button
8
Page 10
DESCRIPTION
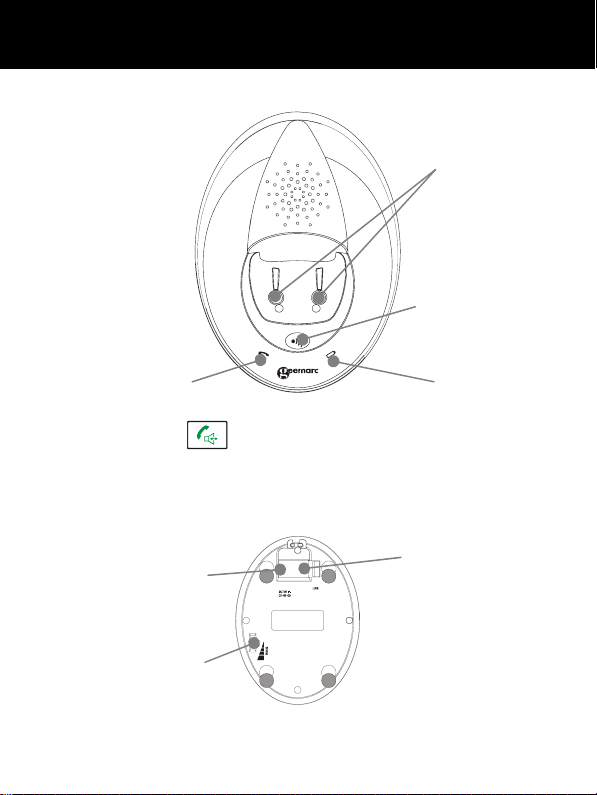
Base Description (Top) : Amplidect350
In use indicator flashes when
you press
It also flashes when you page
the handset.
Base Description (Base)
the key.
Mains
power
adaptor
Ringer
volume
switch
Charge indicator
lights steadily
while the handset
is charging.
9
Charge pins
Page
button
Phone
Line
Jack
Page 11
DESCRIPTION
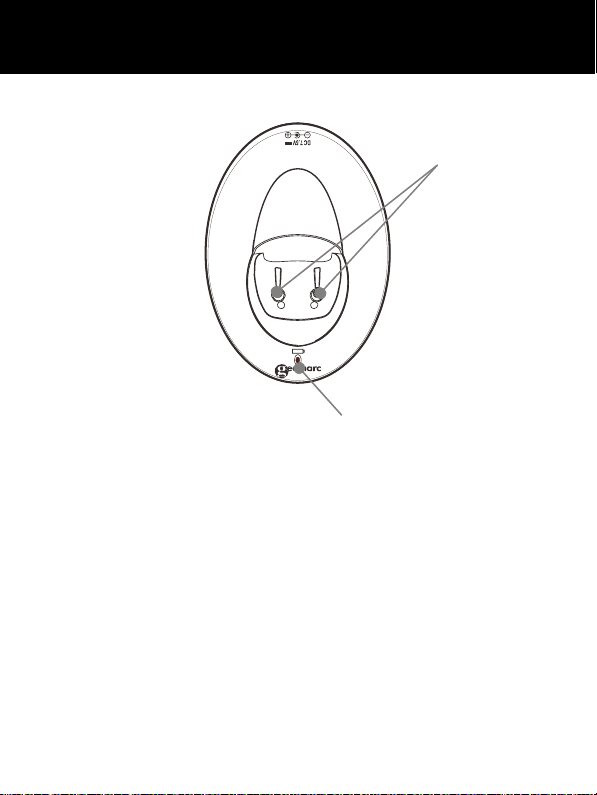
Base Description (Top) : Amplidect350 HS
Charge pins
Charge indicator
lights steadily
while the handset
is charging.
10
Page 12
DESCRIPTION
Keys Description
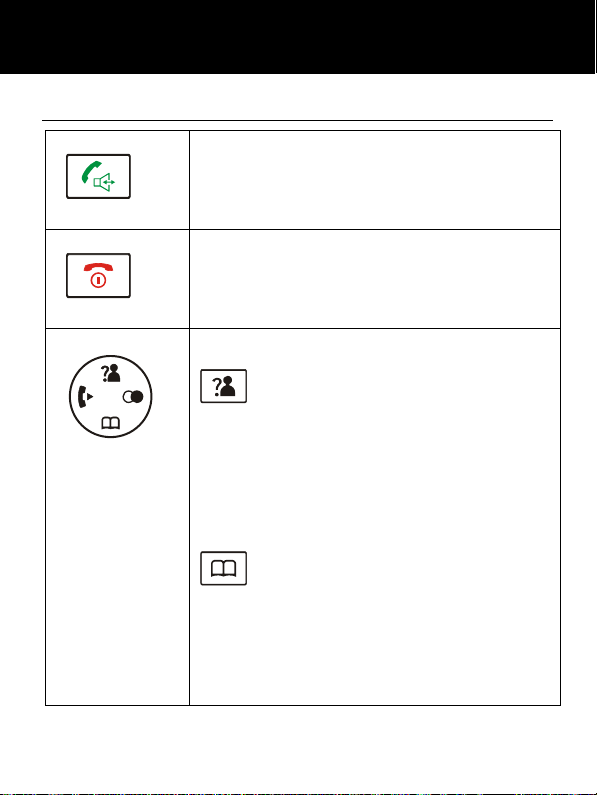
Dial/Speaker key
Make/Answer a call.
Activates the speakerphone if pressed
during a call, as described in page 41.
End key
End a call.
Long press to activate power on/off, as
described in page 20.
Navigation key:
Up/CID key
Scroll up through lists and menu
options.
Increase the earpiece/speakerphone
volume during a call.
Enter the CID book, as described in
page 31.
Down/Phonebook key
Scroll down through lists and menu
Decrease the earpiece/speakerphone
volume during a call.
Enter the Phonebook, as described in
page 44.
11
Page 13

DESCRIPTION
DESCRIPTION
Int key
Set up an internal call to another handset.
Transfer an incoming call to another
handset.
Set up a conference call with an
external line and an internal handset.
Redial key
Enter the redial book, as described in
page 29.
Insert a pause when pre-dialing a number.
Left/Right soft key
Perform the functions indicated by the
text immediately over it (on the bottom
line of the display) which changes time
by time.
key
Press and hold to turn on/off keypad
lock function.
Set up a conference call, as described
in page 63.
One-touch memories
You can store up to 4 numbers in
One-touch memories (M1,M2,CS & M4).
12
Page 14
DESCRIPTION
key
In standby mode press and hold this
key until the
activate the shaker and visual ringer
function. Press and hold this key again
until the icon disappears to deactivate
it.
icon appears to
13
Page 15
DESCRIPTION
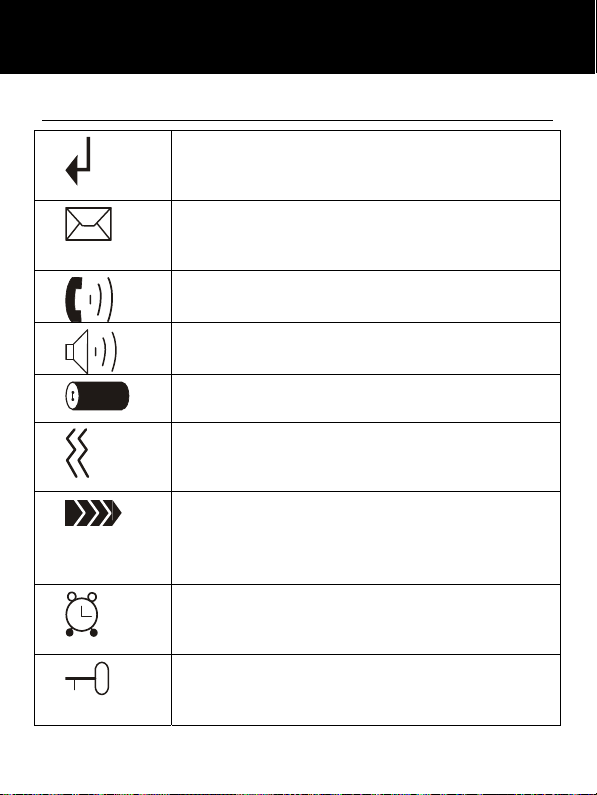
LCD Window Icons Description
New Call
Indicates you have missed one or more
calls.
MSG Waiting
Indicates you have one or more voice
messages.
Off Hook
Indicates the line is engaged.
Hands-free
Indicates the handsfree function is enabled.
Battery Icon
Indicates battery charge level.
Shaker Icon
Indicates the shaker and visual ringer is
enabled.
Signal Icon
Indicates whether the current signal
exists or not. If the handset is too far from
the base, this icon will blink on the LCD.
Alarm Icon
This icon appears when you set an alarm
to ring at a specified time.
Keypad Lock
This icon appears when the keypad is
locked.
14
Page 16
INSTALLATION
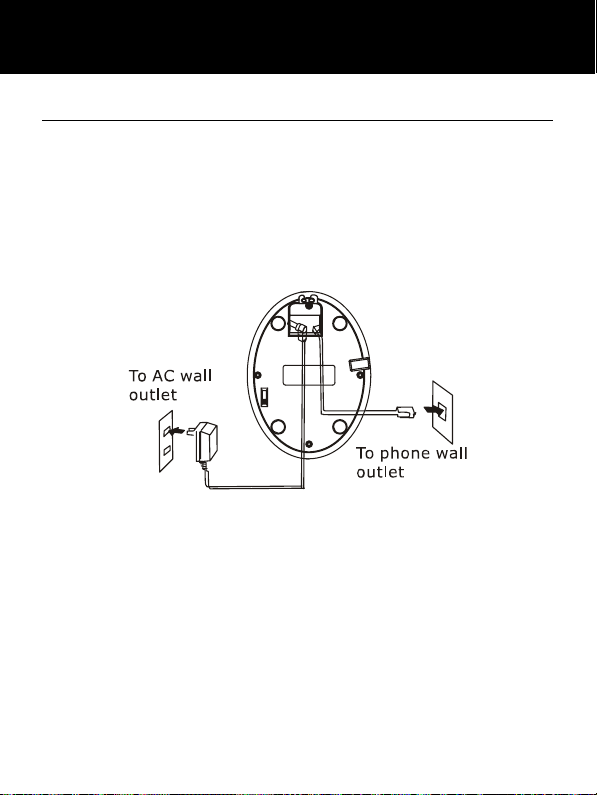
Connecting Lines
1. Connect one end of the phone line cord to the phone
line jack of the base, and the other end to a standard
phone wall outlet.
2. Connect the modular end of the AC power adapter to
the power jack of the base, then plug the AC adapter into
a standard AC wall outlet.
CAUTION : During a mains power failure there is no
manner to receive or make any calls; including the SOS
call number (112 )
15
Page 17
INSTALLATION
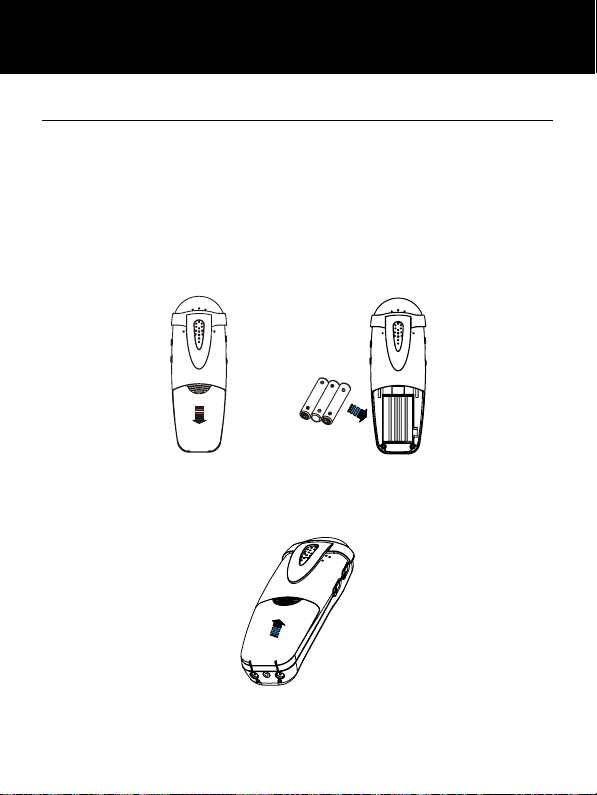
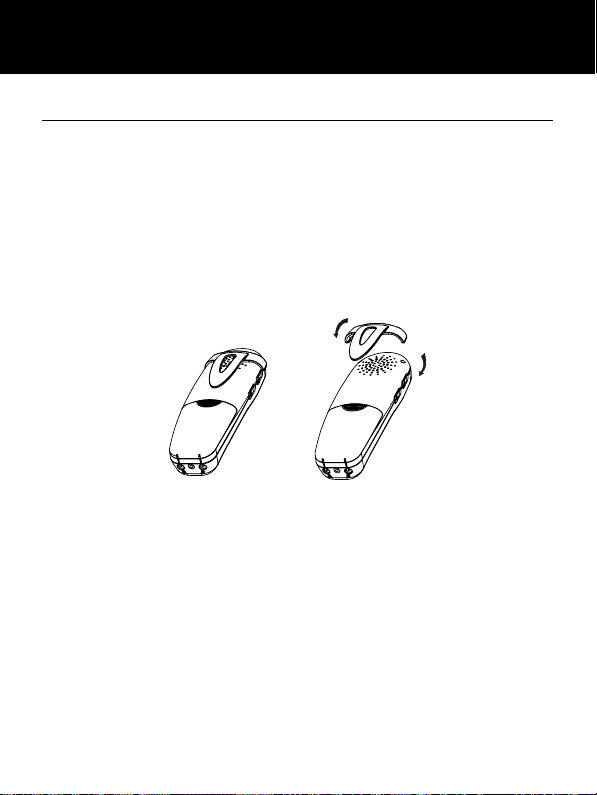
Installing Batteries
The rechargeable Ni-MH batteries (AAA size) come with
your phone. Install the battery before using your phone.
1. Slide the battery cover in the direction of the arrow and
pull it out.
2. Insert new batteries as indicated, matching correct
polarity (+,-).
Note: Reversing the polarity may damage the handset.
3. To replace the battery cover, slide the cover up until it
snaps in place.
16
Page 18

INSTALLATION
Notes:
The batteries need to be replaced if they do not recover
their full storage capacities after recharging.
When replacing the batteries, always use good quality
Ni-MH re-chargeable batteries. Never use other batteries
or conventional alkaline batteries.
17
Page 19
INSTALLATION
Charging Handset
! Important Note: Before initial operation, YOU
SHOULD FULLY CHARGE THE HANDSET for about 15
hours.
To charge the handset, you should place it on the base.
Result: When you place the handset on the base, the
handset automatically turns on and the Charge indicator
lights during the charge.
123
6
4
5
7
9
8
0
18
Page 20
INSTALLATION
Using Handset Carrying Clip
The supplied handset carrying clip allows you to
conveniently carry the handset with you. It clips easily to
your belt, waist band, or shirt pocket.
If you want to remove the carrying clip:
Insert a screw driver along the edge of one of its arms
and release the clip. Then lift it off.
19
Page 21
INSTALLATION
p
p
p
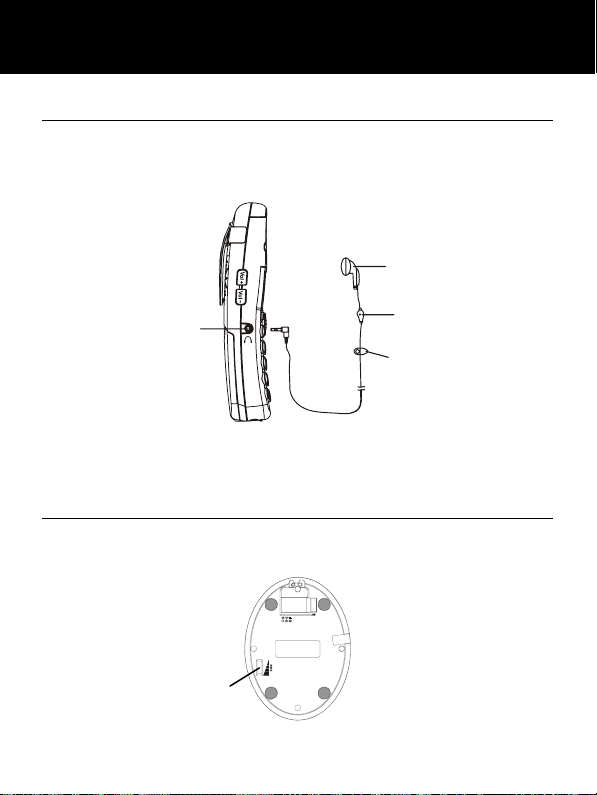
Using Headset (optional)
The headset jack is located on the left side of the handset
and is a 2.5mm standard plug. Simply plug the headset
into this jack and the headset will be activated.
hone
Ear
Headset Jack
Note: When the headset is plugged into the headset jack
the microphone on the handset will be deactivated.
Micro
Cli
hone
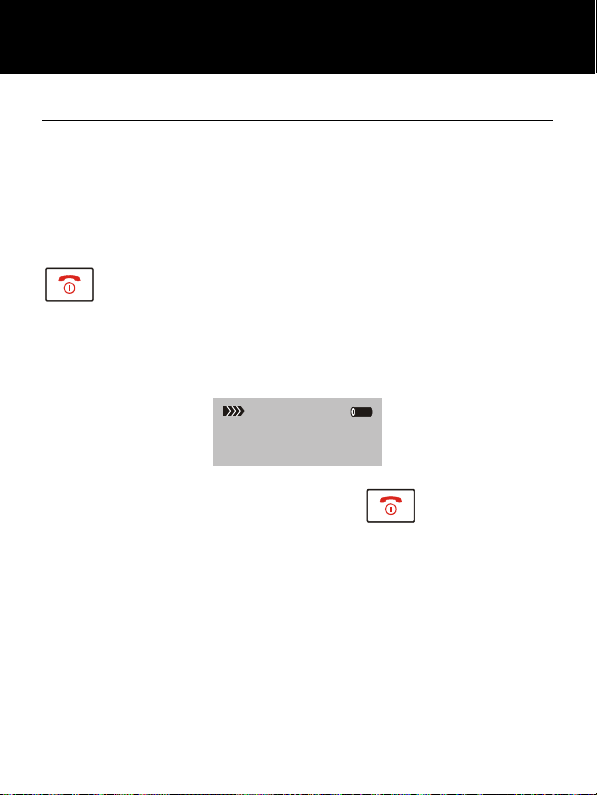
Base Ringer Volume Switch
The switch located on the bottom of the base unit allows
the ringer to be switched to High, Medium, Low or Off.
Ringer
volume
switch
20
Page 22
HANDSET SETTINGS
Turning Handset On/Off
If the handset is in power off mode, when you place the
handset on the base, it automatically turns on. To turn
the handset on or off in standby mode, follow these
steps:
1. To turn on the handset when it's off, press and hold the
key until you switch the display on. On power up,
the handset will enter subscription mode and search for a
registered base. A message as shown below will be
displayed to the user, and the signal icon will flash.
Searching...
2. To turn off the handset, keep the
until the display disappears.
If the handset is successful in finding a base, the handset
will enter the standby mode, the display will show
handset number and the handset name (if you have one
saved as described on page 37), signal icon, battery icon
and current time. If the handset is unsuccessful in finding
a base, the handset will behave according to the Out of
Range condition.
21
key pressed
Page 23

HANDSET SETTINGS
Note:
When battery power is very low, if you place the handset
on the base, the display will show as below. YOU
SHOULD FULLY CHARGE THE HANDSET BEFORE
USING.
Charging...
22
Page 24
BASIC FUNCTIONS
All descriptions in this manual assume that the handset is
in standby mode. Set the telephone to standby mode by
pressing the
key.
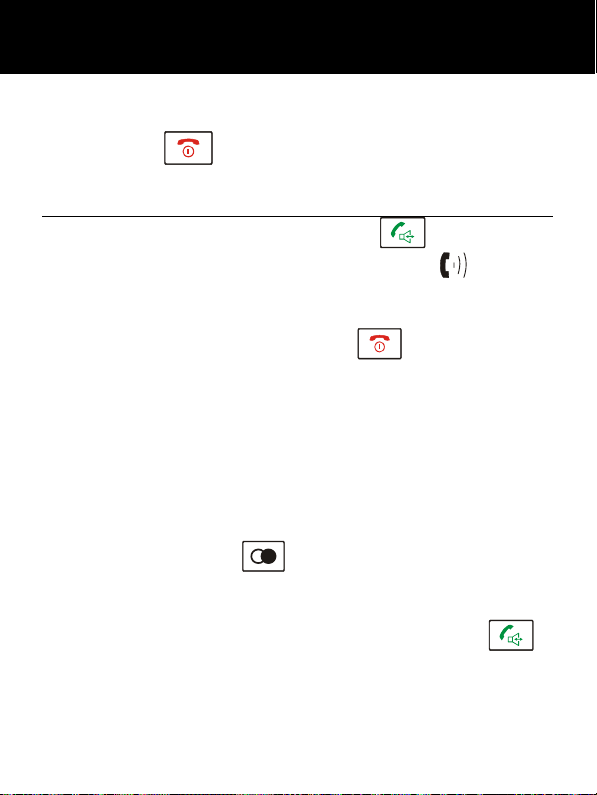
Making a Call
1. Pick up the handset and press the key.
Result: The In use indicator flashes and the
appears on the LCD.
2. Dial a telephone number.
3. To end the call, either press the
the handset on the base.
Note: To make a call to the last number you dialed, use the
Redial feature. For details, see page 29.
You can enter the desired phone number in standby
mode, which allows you to make corrections before
dialing. Follow these steps:
1. Enter a telephone number (up to 32 digits). Check it.
You can also use the
Note: If you make a mistake while entering a number,
press the Erase soft key to clear the last digit.
2. When the number appears correctly, press the
key.
key to insert a pause.
23
key or replace
icon
Page 25
BASIC FUNCTIONS
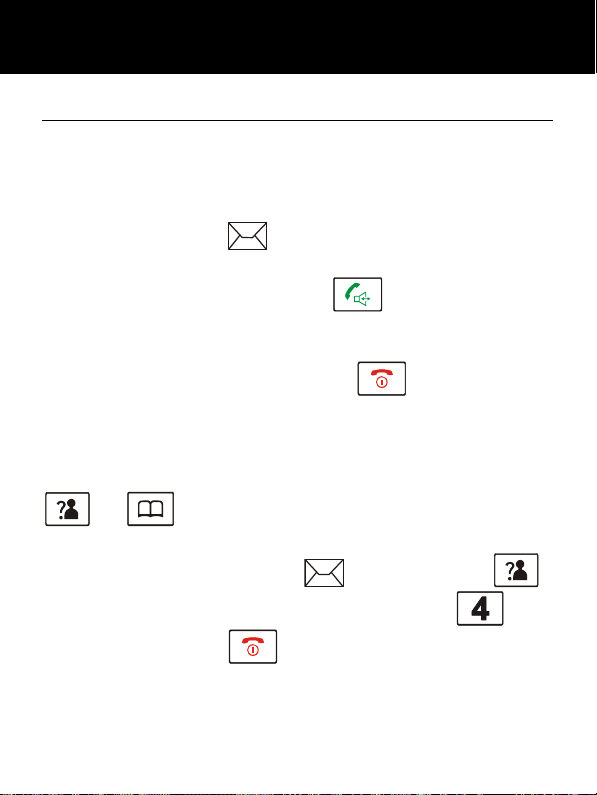
Receiving a Call
When a call is received, the New Call information will
appear. If the caller can be identified, the caller's phone
number is displayed. If the caller cannot be identified,
only the New Call information displays. If you have a
voice message, the
be shown on the LCD.
icon and "MSG WTG ON" will
1. To answer the call, press the
activated the Auto Answer function, when the handset is
on the base, simply lift it up to answer.
2. To end the call, either press the
the handset on the base.
Result: After you hang up the call, the LCD displays the
call duration.
Notes: You can select the ringer volume by using the
or key when the phone rings with an
incoming call.
If you want to deactivate the
key in standby mode, then press and hold the
After that, press the
(The handset must be registered to the base.)
key to return to standby mode.
24
key. If you have
key or replace
icon, press the
key.
Page 26

BASIC FUNCTIONS
If the polyphonic ring tone (Melody 8~10) is set, the ring
tone may continue for 4 seconds after the caller's
hang-up or after the parallel phone had answered the
call.
Muting the Microphone
During a conversation, you can temporarily switch your
phone's microphone off, so that the other party cannot
hear you.
Example: You want to say something to another person
in the room but do not want the other party to hear you.
To mute your microphone, press the Mute soft key during
the conversation. The "Call Muted" appears on the LCD.
To unmute the microphone, press the Mute soft key
again. You will return to your caller.
25
Page 27

BASIC FUNCTIONS
Amplification Function
CAUTION: This telephone can produce very high (loud)
sound levels. Repeated incremental exposure to
amplification levels greater than 18 dB may be harmful to
people without hearing loss. Always adjust the volume
control to the minimum setting after using the phone.
Your phone is equipped with a specialized amplification
function designed to fit your needs. During a
conversation you can adjust the Vol+ or Vol- control on
the left side of the handset and use the AMP key on the
right side. You can also adjust the Tone control to fit the
levels to your hearing requirements. The selected volume
will be displayed on the LCD.
When you press the AMP key in receiver mode during a
conversation, the Amplify indicator on the handset lights
up. If you press the AMP key again, the indicator will go
out.
You can also select the earpiece volume or the speaker
volume by the Audio Setup in Menu under HS Settings,
as described on page 51.
26
Page 28
BASIC FUNCTIONS
You can also use the Vol+ or Volcontrol in standby mode to adjust the
ringer volume. Menu Navigation
To access a menu option:
1. To display menu items, press the Menu soft key.
2. To scroll through menu options, press the
key repeatedly.
3. To select a menu, press the Select soft key when the
desired menu appears on the LCD.
4. Repeat if necessary.
or
To return to standby mode:
If you press the Back soft key from any menu, the phone
returns to the previous screen.
To return to standby mode, press the
Also, the phone will automatically return to standby mode,
from any menu if a key is not pressed within 40 seconds.
Note: In standby mode, you can press
switch the backlight on/off.
27
key.
key to
Page 29

BASIC FUNCTIONS
Menu Map
1. CID Book (see page 31)
2. Phonebook
New (see page 43)
Edit (see page 46)
Delete (see page 47)
Delete All (see page 47)
PB Status (see page 47)
3. BS Settings
Terminate HS (see page 59)
Dial Mode (see page 40)
Flash Time (see page 60)
Modify PIN (see page 60)
BS Reset (see page 61)
4. HS Settings
Alarm (see page 50)
Audio Setup (see page 51)
Ring Setup (see page 28)
Tone Setup (see page 52)
Language (see page 36)
HS Name (see page 37)
Auto Answer (see page 35)
LCD Contrast (see page 53)
Date & Time (see page 53)
Select Base (see page 55)
HS Reset (see page 56)
Amplified (see page 57)
5. Registration (see page 62)
28
Page 30
BASIC FUNCTIONS
Handset Ringer Setting
You can select your own external (from the telephone
Network) or internal (from other handsets registered to
the same base) ring tone and adjust the volume.
1.Press the Menu soft key.
2.Press
menu, then press the Select soft key.
3.Press
press the Select soft key.
4.Press the Select soft key to choose INT Ring or press
the
key.
5.Press
Volume, press the Select soft key.
Result: You can select the ring tone from Melody 1 to 10
or adjust the volume from Volume 1 to 5, or off. When
you adjust the ring tone or volume, the phone plays the
selected melody or sounds the selected loudness.
6.Press the Save soft key to confirm.
Notes: If you set the volume to "Off", when a call comes
in, only the New Call information appears on the LCD.
or key to choose HS Settings
or key to choose Ring Setup,
key to choose EXT Ring, press the Select soft
or key to choose Melody or
29
Page 31

BASIC FUNCTIONS
Last Number Redial
1. Press the key or the Redial soft key in standby
mode.
Result: The LCD displays the last number you dialed.
2. Press the
Your phone allows you to retrieve the last 10 numbers
you have dialed and recall them quickly.
key to dial out the number.
Search for and dial a number in Redial Book
1. Press the Redial soft key in standby mode.
2. If you want to scroll through the memory, press
or
you want to dial.
3. Press the
Notes: If no numbers are found, "Empty" is displayed.
When the redial book is full, each time you dial a new
number, the oldest number stored in the redial book is
automatically erased.
key repeatedly until you find out the number
key to dial out the number.
30
Page 32

BASIC FUNCTIONS
Use Redial Book options
Using the redial book options, you can add a number to
phone book or delete a number in the redial book.
1. Press the Redial soft key.
2. Scroll to the desired number by using the
key.
3. When the number appears on the display, press the
More soft key to choose the desired option:
Add to PB: allows you to add the number to the phone
book. Complete storing the entry by starting from step 4
described in part."Adding the Phone Book Entries"
(obviously, you will find the number already entered in
the appropriate field).
Delete: allows you to delete the selected number.
Delete All: allows you to delete the whole redial book.
4. To return to standby mode, press the
Note: At step 3, when you select Delete or Delete All
options, a message "Confirm ?" will further ask you to
confirm the deletion. To confirm press the Del or Del All
soft key, to escape press the Cancel soft key.
31
or
key.
Page 33

BASIC FUNCTIONS
CID Book
When you receive a call, if the caller's information is
transmitted from the network on which the call was made
(and the caller doesn't hide it), the caller's phone number
is displayed. Moreover, if you missed one or more calls,
the
icon will appear on the LCD. If the CID memory is
full, the
Out Of Area - This message will display when someone
calls from an area where the telephone company is not
offering the caller identification services or is not yet
providing number delivery to your area.
Private - If the caller has exercised the option to prevent
his name and number from being sent, the message will
show on the LCD.
icon will flash on the LCD.
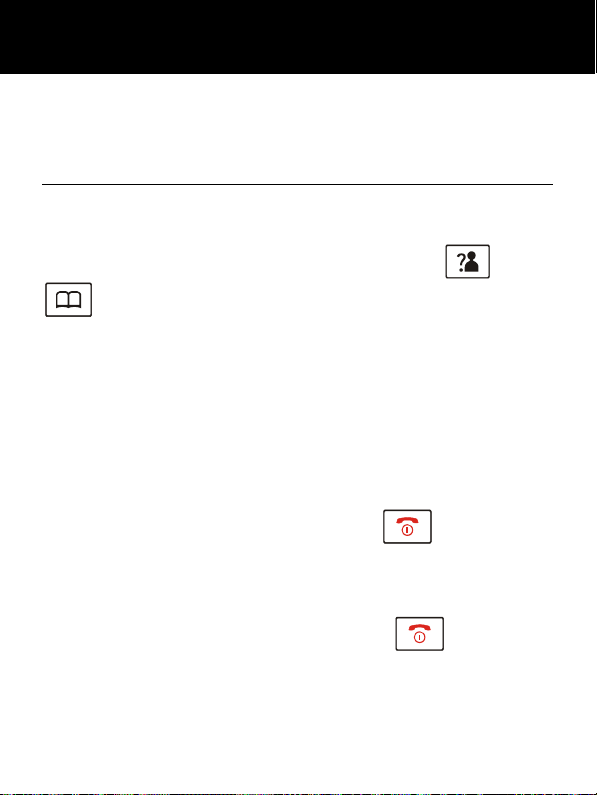
View and dial any of the CID numbers
1. Press the Menu soft key.
2. Use the Select soft key to choose the CID Book, and
if available, the numbers are displayed. (You can
also access the CID book directly by pressing the
key in standby mode.)
32
Page 34

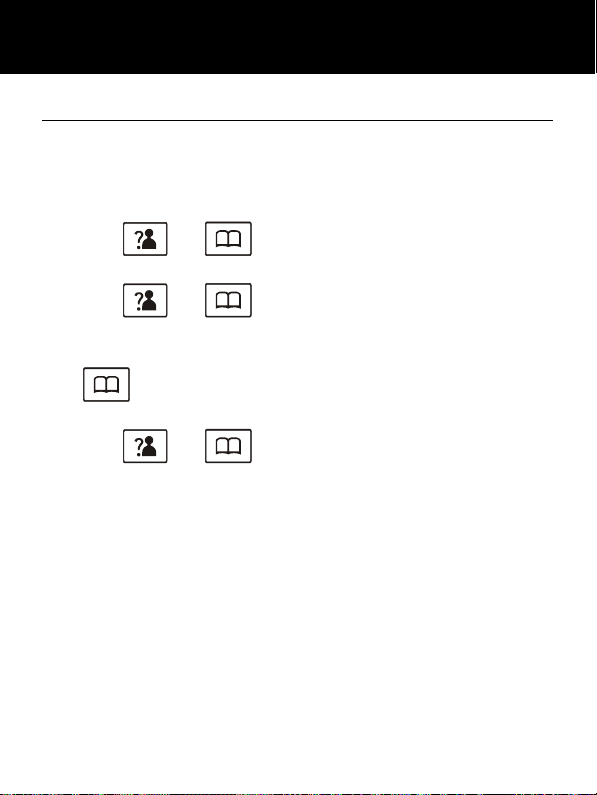
BASIC FUNCTIONS
3. Use or key to view the numbers, you
can make a call by pressing the
also add the entry to the phonebook.
Note: At step 3, each item of the incoming list is marked
with the
icon if the call hasn't been reviewed yet.
icon if the call has been reviewed or with the
key. You can
Add CID Number to Phone Book
1. Press the Menu soft key.
2. Use the Select soft key to choose the CID Book.
3. Use
the desired number displays on the LCD, press the More
soft key to enter Add to PB menu.
4. Press the Select soft key, you are prompted to enter
the name.
5. Enter the name and press the Next soft key, then you
can modify the number you want to store.
6. Press the Next soft key, you are able to select the ring
tone from Melody 1 to Melody 10, press the Save soft
key to confirm and exit, you will hear a beep to confirm.
or key to view the numbers, when
33
Page 35

BASIC FUNCTIONS
Delete a number in the CID Book
1. Press the Menu soft key.
2. Use the Select soft key to choose the CID Book.
3. Scroll to the number you want to delete by using
or
4. When the desired number appears on the display,
press the More soft key.
5. Use
Select soft key. The display will show "Confirm ?". Press
the Del soft key to confirm, you will hear a beep and the
LCD shows the next number.
key.
or key to choose Delete, press the
Delete all numbers in the CID Book
1. Press the Menu soft key.
2. Use the Select soft key to choose the CID Book.
3. Press the More soft key and use the
key to choose Delete All menu, then press the Select
soft key.
4. The display shows "Confirm ?", press the Del All soft
key to confirm.
Result: You hear a beep and the phone returns to the
standby mode after clearing all the CID numbers.
34
or
Page 36

BASIC FUNCTIONS
Flashlight
If you turn this feature on, the visual ringer will light
steadily. You can use the phone as a torch.
To turn on this feature, in the Standby mode just keep the
key pressed till the visual ringer lights up.
To turn off this function, keep the
again till the visual ringer goes out.
key pressed
Key Lock
If you turn on this feature, all keys will be locked except
M1, M2, CS & M4. You can answer calls by using the
key. But when you hang up, the phone returns to
the locked mode. This feature is useful to avoid pressing
keys by mistake.
To lock the keys, in the standby mode just keep the
key pressed till the display shows "HS Locked",
then the
icon appears.
35
Page 37

BASIC FUNCTIONS
To unlock the keys, keep the key pressed again
till the key lock icon
Note: In locked mode, if you press any key, the phone
will generate a warning tone, and the "HS Locked"
message will be redisplayed.
disappears from the display.
Auto Answer
With this feature, you can answer a call by just picking up
the handset from the base without pressing any key.
1. Press the Menu soft key.
2. Press
Settings, press the Select key.
3. Use
then press the Select soft key.
4. Use the
enable/ disable the function, then press the Save soft key,
you will hear a beep to confirm.
or key repeatedly to choose HS
or key to choose Auto Answer,
or key to choose On/Off to
36
Page 38

BASIC FUNCTIONS
Selecting a Language
The handset supports up to 8 predefined languages:
English, French, Spanish, German, Italian, Dutch,
Russian and Polish. You can change the language used
to display the menu messages.
1. Press the Menu soft key.
2. Press
Settings, press the Select soft key.
3. Use
press the Select soft key.
4. The languages will be displayed. Use the
key to scroll through the options. Each language
will be displayed in its own native translation.
5. Press Save soft key to select the required language
and you will hear a beep to confirm.
or key repeatedly to choose HS
or key to choose Language, then
or
37
Page 39

BASIC FUNCTIONS
HS Name
Using this feature, you can define a name to the handset
in order to easily recognize your handset if you have
more than one registered to the same base, but when
you reset the handset, the handset name will be deleted.
1. Press the Menu soft key.
2. Press
Settings, press the Select soft key.
3. Use
press the Select soft key.
4. You can enter the handset name (up to 12 characters)
by using the alphanumeric keys (use the Erase soft key
to delete the incorrect characters), then press the Save
soft key to confirm and exit. The handset name will be
displayed above your handset number in standby mode.
or key repeatedly to choose HS
or key to choose HS Name, then
38
Page 40

BASIC FUNCTIONS
Range Alarm
A beep will sound when the handset is out of range of the
Base. You are able to select to enable/disable this
audible warning.
1. Press the Menu soft key.
2. Press
Settings, press the Select soft key.
3. Use
press the Select soft key.
4. Press the
press the Select soft key.
5. Use
enable/disable this audible warning, then press the Save
soft key, you will hear a confirm beep.
or key repeatedly to choose HS
or key to choose Tone Setup, then
key to choose Range Alarm, then
or key to choose On/Off to
39
Page 41

BASIC FUNCTIONS
Paging
You can page the handset from the base unit making it
ring with a special tone. It's useful to locate a lost
handset.
Press the key on the base unit (less than 5
seconds), all the handsets registered to the base will ring
for about 60 seconds.
To stop paging, press the key on the base again or
any key on the handset.
Note: On a long key press, more than or equal to 5
seconds, the base will enter subscription mode. For
details, see page 61.
40
Page 42

BASIC FUNCTIONS
Dial Mode
You can select to change the dial mode by the following
steps:
1. Press the Menu soft key.
2. Press
Settings, and press the Select soft key.
3. Press the
the Select soft key.
4. You can press
required dial mode options (Tone/Pulse) and press the
Save soft key. A confirm beep will be heard.
Note: If you are not sure which dialing mode to select,
please contact your local service provider.
or key repeatedly to choose BS
key to choose Dial Mode, then press
or key to select the
41
Page 43

BASIC FUNCTIONS
Handsfree
During a call, you may turn on the speakerphone built in
the handset. In this mode you can simply put your
handset on a surface (e.g. a desk) and enjoy the comfort
of the handsfree conversation.
To turn the feature on, press the
during a call (line engaged). The
the LCD.
To turn the feature off, and keep on talking in normal
mode, press the
disappear.
Notes: Before putting the handset near your ears, be
sure you have turned the speakerphone off.
To adjust the speakerphone volume,use volume controls
on side of phone.
key again. The icon will
42
key
icon appears on
Page 44

BASIC FUNCTIONS
Flash Signal
When the line is engaged, pressing the Flash soft key
sends the Flash signal. This key is used in conjunction
with special services (e.g. call waiting) which can be
available from your phone network. For further details
please contact your network telephone company.
To use the said special services, just press the Flash soft
key while the line is engaged: the display will show R.
43
Page 45

ADVANCED FUNCTIONS
Phone Book
The phonebook built in your cordless phone allows you to
store frequently used numbers so that you can easily
make a call without having to remember or enter the
phone number.
Character Map
To enter a specific alphanumeric character, press one or
more times the relevant key for the required character
according to the following table: once for the first
character, twice for the second and so on.
Key Characters in the displayed order
0 (spc) 0 ? & / . , !
1 1 @ _ + 2 A B C a b c 2
3 D E F d e f 3
4 G H I g h i 4
5 J K L j k l 5
6 M N O m n o 6
7 P Q R S p q r s 7
8 T U V t u v 8
9 W X Y Z w x y z 9
( ) %
"
44
Page 46

ADVANCED FUNCTIONS
Adding the Phone book Entries
1. Press the Menu soft key.
2. Press the
the Select soft key.
3. Press the Select soft key to choose New.
4. The display shows "Name ?". Enter the name you
want to use, then press the Next soft key to confirm. The
display shows "Number ?". Enter the desired number (up
to 20 digits), press the Next soft key.
5.*Use
associate with the number, press the Save soft key to
confirm.
6. Repeat if necessary.
* If you want to set a VIP number, you should select a
special ring tone for it. The ring tone should be different
from the external ring you have set. You can set up to 9
VIP ring tones associate with 9 VIP numbers/groups.
key to choose the Phonebook, press
or key to select the ring you like to
Note:
If you make a mistake while entering a name or a number,
use the Erase soft key to correct it. Each time you press
the key, the last character or digit is deleted.
45
Page 47

ADVANCED FUNCTIONS
Using a Pause
A pause is useful when you access an interactive voice
response system, such as an automated banking system.
A pause provides a delay of 3 seconds. If you want to
insert a pause when you dial a number in standby mode
or store a number in memory, press the
letter P will appear at the pause entry.
key. The
Viewing the Phone book Entries
1. In the standby mode, press the
2. Press
entry is displayed.
or key repeatedly until the desired
key.
Dialing a Number from Phone book
Find out the number you want to dial. Refer to "Viewing
the Phone book Entries". Then press the
Dial soft key.
46
key or
Page 48

ADVANCED FUNCTIONS
Editing the Phone book Entries
1. Press the Menu soft key.
2. Press the
the Select soft key.
3. Press the
Select soft key.
4. Press
you want to edit displays, press the Select soft key to
confirm.
5. If necessary, press the Erase soft key to clear the
digit(s) then enter the desired name and number, press
the Next soft key to save.
6. Use
associate with the number, press the Save soft key to
confirm.
key to choose the Phonebook, press
key to choose Edit menu. Press the
or key repeatedly until the entry
or key to select the ring you like to
47
Page 49

ADVANCED FUNCTIONS
Deleting the Phone book Entries
1. Press the Menu soft key.
2. Press the
the Select soft key.
3. Press
Select soft key.
4. Press
you want to delete displays, then press the Select soft
key. The display shows "Confirm ?". You can press the
Del soft key to delete it or press the Cancel key to exit.
5. At step 3, if you choose Delete All menu and press the
Select soft key, the display will show "Confirm ?". You
can press the Del All soft key to delete all the entries or
press the Cancel key to exit.
key to choose the Phonebook, press
or key to choose Delete. Press the
or key repeatedly until the name
PB Status
The PB Status shows the number of phone book entries
already stored. When the PB Status shows on the LCD,
press the Select soft key to enter it.
48
Page 50

ADVANCED FUNCTIONS
One-Touch Memories
You can store up to 4 numbers in direct memories. All the
numbers will be stored in the phone book.
Storing Memory Numbers
1. Press the memory key (M1, M2, CS & M4) in standby
mode.
2. The display shows "Number ?". Enter the desired
number (up to 20 digits), press the Next soft key.
3. Use
associate with the number, press the Save soft key to
confirm.
NOTE: CS Green Customer Service key at top has been
pre-programmed with our USA customer service number
1-888-864-2446. Press the CS key to direct dial for Sonic
Alert Customer Service or technical related help or
questions. Our customer service department is available
from 9Am-5Pm Monday through Friday Central time.
or key to select the ring you like to
Viewing Memory Numbers
1. In the standby mode, press the
2. Press
number is displayed.
or key repeatedly until the desired
49
key.
Page 51

ADVANCED FUNCTIONS
Dialing from One-touch Memories
In the standby mode, press M1, M2, CS & M4 to dial out
the corresponding number.
Editing Memory Numbers
Perform the steps of the “Editing the Phone book Entries”
paragraph. Please refer to page 46.
Note:
The memory default names are M1: to M4:, you can add
something following them but cannot delete the default
name. e.g. you can modify M1 to M1: home.
Deleting Memory Numbers
Perform the steps of the “Deleting the Phone book
Entries” paragraph. Please refer to page 47.
50
Page 52

ADVANCED FUNCTIONS
HS Settings
Setting Alarm
You are able to set the alarm on the handset and adjust
the alarm settings.
1. Press the Menu soft key.
2. Press
then press the Select soft key.
3. Press the Select soft key to choose Alarm menu.
4. The display shows the current time set. Use the
or
5. If you select On, the display
invites you to enter the time in HH:MM format. Use the
numeric keypad to enter.
6. Press the Next soft key, a beep sounds and the
display shows Snooze On/Off, you can press
key to enable or disable the snooze fu nction on the
alarm and press the Save soft key.
7. When the alarm sounds, press any key to switch it off.
or key to choose HS Settings,
key to select On/Off, press the Select soft key.
or
51
Page 53

ADVANCED FUNCTIONS
Notes:
At step 5 you need to enter the time in 24-Hour format.
If you press any key when the alarm rings, the alarm will
be silent.
If you choose Snooze On, the alarm will ring at regular
intervals of 11 minutes. If you press the
the alarm sounds, the option will be switched to Snooze
Off.
key when
Audio Setup
You can also use the menu to adjust the audio volume.
1. Press the Menu soft key.
2. Press
then press the Select soft key.
3. Press the
press the Select soft key.
4. Use
Earpiece V., press Select soft key.
5. The display shows the current setting. Use the
or
-Volume 5), press the Save soft key.
or key to choose HS Settings,
key to choose Audio Setup menu,
or key to choose Speaker V. or
key to choose the volume level (Volume 1
52
Page 54

ADVANCED FUNCTIONS
Key Tone
Every time you press a key, your handset acknowledges
it with a key tone. You can disable the key tones for a
silent use. In certain error conditions, a warning tone will
sound when an incorrect key is pressed.
1. Press the Menu soft key.
2. Press
then press the Select soft key.
3. Press
menu, press the Select soft key.
4. Press the Select soft key again to choose Key Tone.
5. You can use
to enable or disable the function.
6. Press the Save soft key.
Note:
For normal use, we recommend you leave the key tone
enabled. This makes the phone easier to use.
or key to choose HS Settings,
or key to choose Tone Setup
or key to choose On or Off
53
Page 55

ADVANCED FUNCTIONS
LCD Contrast Setting
The adjustment allows you to optimize the visibility of the
display by changing its contrast according to the
environment conditions.
1. Press the Menu soft key.
2. Press
then press the Select soft key.
3. Press
Contrast, then press the Select soft key.
4. Use
the 17 available contrast levels, then press the Save soft
key.
5. Press the
or key to choose HS Settings,
or key repeatedly to choose LCD
or key repeatedly to choose among
key to return to standby mode.
Setting Date & Time
Date & Time Format
1. Press the Menu soft key.
2. Press
then press the Select soft key.
3. Press
menu, press the Select soft key.
or key to choose HS Settings,
or key to choose Date & Time
54
Page 56

ADVANCED FUNCTIONS
4. Use or key to choose Date Format or
Time Format, press the Select soft key.
5. You can use
Format (DD-MM/MM-DD) or the Time Format
(12-Hour/24-Hour), press the Save soft key to save.
Setting date & time
1. Press the Menu soft key.
2. Press
then press the Select soft key.
3. Press
menu, press the Select soft key.
4. Press
Time menu, press the Select soft key.
5. Enter the current date/time by numeric keypad and
press the Save soft key to save and exit.
Notes:
If you select 12-Hour, AM/PM will appear on the right of
the time in standby mode.
At step 5 you need to enter the time in 24-Hour format.
or key to choose HS Settings,
or key to choose Date & Time
or key to choose Set Date or Set
or key to choose the Date
55
Page 57

ADVANCED FUNCTIONS
Selecting a Base
This function allows you to select a base from those
already registered to the handset. You can access the
options by scrolling the menu.
1. Press the Menu soft key.
2. Press
then press the Select soft key.
3. Press
menu, press the Select soft key.
4. You can use
you want, then press the Select soft key. If you select a
non-existent base, the handset will sound a warning
tone.
5. The display will show Selected BSX. Press the Select
soft key to confirm. A confirm tone will be heard.
or key to choose HS Settings,
or key to choose Select Base
or key to select the base
56
Page 58

ADVANCED FUNCTIONS
HS Reset
If you reset the handset, all the features under HS
Settings menu will be restored to the factory initial
setting: Alarm, Audio Setup, Ring Setup, Tone Setup,
Language, HS Name, Auto Answer and Date & Time. But
LCD Contrast can not be restored.
1. Press the Menu soft key.
2. Press
then press the Select soft key.
3. Press
menu, press the Select soft key. You will be prompted to
enter the PIN code.
4. Enter the PIN code (the default one is 0000), then
press the Reset soft key. If the PIN code is validated all
handset settings will return to the factory default,
otherwise a warning tone will be heard and the settings
will remain.
Result: After resetting, the handset will return to standby
mode.
or key to choose HS Settings,
or key to choose the HS Reset
57
Page 59

ADVANCED FUNCTIONS
Amplified
Your phone is equipped with a specialized amplification
function designed to fit your needs. If you switch this
function on, the handset receiver volume adjustment is
15-40dB. Otherwise the receiver volume adjustment is
0-15dB.
1. Press the Menu soft key.
2. Press
then press the Select soft key.
3. Press
menu, press the Select soft key.
4. You can use
to enable or disable the function.
5. Press the Save soft key.
or key to choose HS Settings,
or key to choose the Amplified
or key to choose On or Off
58
Page 60

ADVANCED FUNCTIONS
BS Settings
Terminate HS
This function allows you to delete a handset registration
from the base.
1. Press the Menu soft key.
2. Press
then press the Select soft key.
3. Press the Select soft key to choose the Terminate HS
menu. The display shows "PIN?" to prompt you to enter
the PIN Code (The default PIN Code is "0000"). Then
press the OK soft key.
4. Use
the Select soft key to confirm. Then the selected handset
will behave according to the unregistered condition. If
you select the current handset you are using or if you
select a non-existent handset, a warning tone will be
heard.
or key to choose BS Settings,
or key to select a handset, press
59
Page 61

ADVANCED FUNCTIONS
Flash Time
You can select to change the Flash time by the
following steps:
1. Press the Menu soft key.
2. Press
then press the Select soft key.
3. Use
Press the Select soft key.
4. The display shows the current setting. Use the
or
European countries) /Flash-2(300ms:France), press
the Save soft key.
or key to choose BS Settings,
or key to choose Flash Time menu.
key to select Flash-1(100ms:UK and
Modify PIN
This function allows you to change the PIN number of the
currently active Base. The default PIN is 0000.
1. Press the Menu soft key.
2. Press
then press the Select soft key.
3. Use
press the Select soft key.
or key to choose BS Settings,
or key to choose Modify PIN menu,
60
Page 62

ADVANCED FUNCTIONS
4. The display shows "PIN?". Enter the current PIN, then
press the Next key. If the old PIN code is correct, you will
be prompted to enter a new PIN code, otherwise a
warning beep will sound and the handset will return to the
Modify PIN menu.
5. Enter the new PIN, press the Next key. You will be
requested to confirm the PIN code. Enter the new PIN
again then press the Save soft key to confirm and exit.
BS Reset
If you reset the base, all the features under BS Settings
menu will be restored to the factory initial setting: Dial
Mode and Flash Time.
1. Press the Menu soft key.
2. Press
then press the Select soft key.
3. Press
press the Select soft key. You will be prompted to enter
the PIN code.
4. Enter the PIN code (the default PIN is 0000), then
press the Reset soft key. If the PIN code is validated all
Base settings will be reset to the factory default,
otherwise the settings will remain.
Result: After resetting, the handset will return to standby
mode.
or key to choose BS Settings,
or key to choose BS Reset menu,
61
Page 63

ADVANCED FUNCTIONS
Registration
The supplied handset is already registered with the
number 1. You can register up to 5 handsets to the same
base in order to share the same line with other people.
Before registering a handset to the base, you should
press and hold the
seconds then release it when you have eared an Beep.
1. Press the Menu soft key.
key on the base for about 5
2. Press
Registration, then press the Select soft key.
3. Use
names list, press the Select soft key to choose a base.
The handset will search for the requested base and the
relevant information will flash on the LCD.
4. If the base is found, you will be prompted to enter the
PIN code (the default one is 0000). Enter it then press the
Select soft key. If the PIN code is correct, the
Registration tone will sound and then the base assigns a
number to the handset, otherwise a warning tone will
sound, and then the handset returns to the previous
registration state.
5. If the base is not found, the handset will behave
according to the Out of Range condition.
or key repeatedly to choose the
or key to scroll through the Base
62
Page 64

ADVANCED FUNCTIONS
Calling with more than one Handset
If you have more than one handset registered to the
same base, you can make internal calls and transfer an
external call between the registered handsets.
Making an internal call
1. Press the
then input the number of the handset you want to call.
2. If the destination handset is not available, the handset
will return to standby mode. If the handset entered is
valid, the called handset will ring and display HSX
Calling. The handset user can press the
answer the internal call.
3. At the end of your conversation, press the
Note:
During the internal call, if an external call comes in, the
LCD will show the caller's number. You should press the
key to end the internal call first then press the
key to answer the call.
key, the LCD displays as follows,
key to
key.
63
Page 65

ADVANCED FUNCTIONS
Call transfer between handsets
You can transfer an external call between the handsets
that are registered to the same base.
1. During an external call, press the
the number of the handset you want to transfer the call
to.
2. If the called party can answer your call, he/she can
press the
inform him/her of the incoming call.
3. When the called party answers, press the
key or replace the handset to the base to complete the
transfer.
key to talk with you. At this time you can
key then input
Setting up a 3-way conference call
When you have both an external call and an intercom call
in progress, you can set up a three-way conference call,
like this:
1. During an external call, press the
input the number of the handset you want to join the
3-way call.
2. The called party press
3. The calling party can press the
3-way call.
key to answer.
64
key and then
key to start the
Page 66

ADVANCED FUNCTIONS
4. Either of the two internal handsets can press the
key to leave the conference call at any time.
Note: If one of the handsets drops the conference call,
the remaining handsets will continue the conference.
Caller ID on call waiting
When you subscribe to Call Waiting service from your
local telephone company, the telephone will display the
name and number of the second caller while you are
having a conversation.
1.When you are on the line, the telephone will
automatically display the name and number of the
second caller.
2.Press the Flash soft key + 2 to answer the second
caller.
3.When you have finished, press the Flash soft key + 2
to continue with your conversation with the first caller.
Note: If you have transferred an external call to another
Handset, you cannot use the call waiting function via the
second handset
65
Page 67

FEATURE LIST
y DECT 6.0 technology
y 2.0" large LCD display (128 x 64 dots matrix display)
y Up to 5 handsets to one base
y Up to 4 bases to one handset
y LCD contrast adjustable
y Phonebook with up to 50 entries
y 9 VIP ring tones setting for phonebook entries
y Redial book with up to 10 entries
y 10 handset ring tones and volume selectable (5
levels+off)
y Base ringer volume switch (3 levels+off)
y Vibrating loud ring signaler
y Headset compatible
y 4 one-touch memory speed dial buttons
y Full handsfree speakerphone
y Internal call
y Call transfer
y 3-way conference call
y Audio volume & tone adjustable
y PIN protection
y Redial, Flash, Pause, Mute
y TONE/PULSE dialing mode selectable
y FLASH time selectable
y Call duration display
y Real time clock (set time)
y Keypad lock
y 8 languages selectable
66
Page 68

FEATURE LIST
y Auto answer ON/OFF selectable
y Alarm clocks include snooze option
y Handset Name setting
y Backlit LCD screen and keypad
y Low radiation (optional)
Caller ID
y FSK and DTMF dual system Caller ID
y Caller ID / Call Waiting
y Caller ID list with up to 40 entries
y Incoming calls can be called back/added to
phonebook/deleted
y New call indicator
y Message waiting
67
Page 69

TROUBLESHOOTING
Symptom Check & Remedy
No operation y Check that the power adapter is properly
connected.
y Check that the telephone line cord is
properly connected.
y Check that the handset batteries have full
power.
y Check that the handset batteries are
installed properly.
No dial tone y Check that the telephone line cord is
properly connected.
y Check that the power adapter is properly
connected.
Nothing
appears
on the display
Handset
seems
to have very
short
battery life
Caller’s
number
is not
displayed
y Check that the handset batteries are
installed properly.
y Check that the handset batteries have full
power.
y Check that the handset is on.
y Check the char ge contacts.
y Consistentl y short battery life may indicate
that replacement of the batteries is
necessary.
y Make sure the correct batteries are used.
y Make sure you have subscribed to a Caller
ID service via your network provider.
y The caller may have withheld their details.
y Let the phone r ing a couple of times as
there may be a delay in receiving the
Caller ID information.
68
Page 70

TECHNICAL SPECIFICATIONS
Frequency Range 1.92~1.93GHz
Channels 5 frequency channels
Modulation GFSK
Charging time 15 hours
Ambient
temperature
Humidity 0%~90%
Dimensions (mm) Base: 136 x 100 x 59; Handset:
Power Supply Base input: 7.5V, 500mA; Handset
Design and specifications are subject to change without
notice.
Normal: 15°C ~ 35°C, Extreme:
0°C ~ 40°C
160 x 58 x 38
input: Ni-MH: 1.2V x 3, 600mAh
69
Page 71

TECHNICAL SPECIFICATIONS
If you subscribe to a DSL service
Please attach a noise filter (contact your DSL provider) to
the telephone line between the base unit and the
telephone line jack in the event of the following:
- Noise is heard during conversations.
- Caller ID features do not function properly.
70
Page 72

SAFETY INFORMATION
General
Only use the power supply included with the product.
Only use the approved rechargeable batteries supplied.
Do not open the handset (except to replace the handset
batteries) or base. Contact the helpline for all repairs.
Never dispose of batteries in a fire. There is a serious risk
of explosion and/ or the release of toxic chemicals.
Do not place objects on the line cord or power cable that
may cause damage.
If you are sure you are not going to use the telephone for
over a month, remove the batteries.
Cleaning
Unplug the telephone. Clean the telephone with a soft
cloth. Keep the base and handset charging contacts
clean. Never use polishes or cleaning agents - they could
damage the finish or the electrics inside.
71
Page 73

SAFETY INFORMATION
Environmental
Do not expose to direct sunlight.
Always ensure there is a free flow of air over the surfaces
of the telephone.
Do not place any part of your product in water and do not
use it in damp or humid conditions e.g. bathrooms.
Do not expose your product to fire or other hazardous
conditions.
Unplug your phone from the telephone socket during
thunderstorms because it could damage your telephone.
Your guarantee does not cover thunderstorm damage.
The telephone is designed for working within a
temperature range of 0°C to 40°C.
72
Page 74

REGULATORY COMPLIANCE
Part 68 of FCC rules information
This product meets the applicable Industry Canada
technical specifications.
The Ringer Equivalence Number is an indication of the
maximum number of terminals allowed to be connected
to a telephone interface. The termination on an interface
may consist of any combination of devices subject only to
the requirement that the sum of the Ringer Equivalence
Numbers of all the devices does not exceed five.
- This equipment complies with Part 68 of the FCC rules
and the requirements adopted by the ACTA. On the
bottom of this equipment is a label that contains, among
other information, a product identifier in the format US:
AAAEQ##TXXXX.
If requested, this number must be provided to the
telephone company.
- All applicable certification jacks Universal Service Order
Codes (USOC) for the equipment is provided (i.e. RJ11C)
in the package with each piece of approved terminal
equipment.
- A plug and jack used to connect this equipment to the
premises wiring and telephone network must comply with
the applicable FCC Part 68 rules and requirement
adopted by the ACTA. A compliant telephone cord and
modular plug is provided with this product. It is designed
to be connected to a compatible modular jack that is also
compliant. See installation instructions for details.
73
Page 75

REGULATORY COMPLIANCE
- The REN is used to determine the number of devices
that may be connected to the telephone line. Excessive
RENs on a telephone line may result in the devices not
ringing in response to an incoming call. In most but not all
areas, the sum of RENs should not exceed five (5.00). To
be certain of the number of devices that may be
connected to a line, as determined by the total RENs,
contact the local telephone company. For products
approved after July 23, 2001, the REN for this product is
part of the product identifier that has the format
US:AAAEQ##TXXXX.
The digits represented by ## are the REN without a
decimal point (e.g., 03 is a REN of 0.3).
For earlier products, the REN is separately shown on the
label.
- If this equipment causes harm to the telephone network,
the telephone company will notify you in advance that
temporary discontinuance of service may be required.
But if advance notice isn’t practical, the telephone
company will notify the customer as soon as possible.
Also, you will be advised of your rights to file a complaint
with the FCC if you believe it is necessary.
- The telephone company may make changes in its
facilities, equipment, operation or procedures that could
affect the operation of the equipment. If this happens the
telephone company will provide advance notice in order
for you to make necessary modifications to maintain
74
Page 76

REGULATORY COMPLIANCE
uninterrupted service.
- If trouble is experienced with this equipment, for repair
or warranty information, please contact our customer
service staff at: 1-888-864-2446 or press the green CS
quick dial memory key.
Warning: Changes or modifications to this equipment
not expressly approved by the party responsible for
compliance could void the user’s authority to operate the
equipment.
If the equipment is causing harm to the telephone
network, the telephone company may request that you
disconnect the equipment until the problem is resolved.
- Please follow instructions for repairing if any; otherwise
do not alter or repair any part of device except as
specified.
Opening the equipment or any attempt to perform
repairs will void the warranty.
For service or repairs, call 1-888-864-2446 or press
the green CS quick dial memory key.
- Connection to party line service is subject to state tariffs.
Contact the state public utility commission, public service
commission or corporation for information.
If your home has specially wired alarm equipment
connected to the telephone line, ensure the installation of
this telephone equipment does not disable your alarm
equipment. If you have questions about what will disable
alarm equipment, consult your telephone company or a
75
Page 77

REGULATORY COMPLIANCE
qualified installer.
- This equipment is hearing aid compatible.
- Privacy of communications may not be ensured when
using this telephone.
NOTE: This equipment has been tested and found to
comply with the limits for a Class B digital device,
pursuant to Part 15 of the FCC Rules. These limits are
designed to provide reasonable protection against
harmful interference in a residential installation. This
equipment generates, uses and can radiate radio
frequency energy and, if not installed and used in
accordance with the instructions, may cause harmful
interference to radio communications.
However, there is no guarantee that interference will not
occur in a particular installation. If this equipment does
cause harmful interference to radio or television
reception, which can be determined by turning the
equipment off and on, the user is encouraged to try to
correct the interference by one or more of the following
measures:
• Reorient or relocate the receiving antenna.
• Increase the separation between the equipment and
receiver.
• Connect the equipment into an outlet on a circuit
different from that to which the receiver is connected.
• Consult the dealer or an experienced radio/TV
technician for help.
76
Page 78

REGULATORY COMPLIANCE
Caution: To maintain the compliance with the FCC’s RF
exposure guideline, place the base unit at least 20 cm
from nearby persons.
For body worn operation, this handset has been tested
and meets the FCC RF exposure guidelines when used
with the (Geemarc Telecom) accessories supplied or
designated for this product. Use of other accessories
may not ensure compliance with FCC RF exposure
guidelines.
77
Page 79

GUARANTEE
Sonic Alert warrants the phone against any defect in
materials or workmanship for the period of one year from
the date of purchase.
Should you experience a problem, contact our customer
service department.
Be sure to save your sales receipt as proof of purchase
date should you need warranty service.
Within a period of one year from purchase date, Sonic
Alert will repair or replace (our discretion) your phone at
no cost, if a defect in materials or workmanship is found.
If we elect to replace your phone, we may replace it with
a new or reconditioned product of the same or similar
design.
Repair or replacement will be warranted for a period of
90 days or the original time on the original warranty,
whichever is longer.
The warranty does not cover accidents, negligence or
breakage to any parts. This includes shipping damage,
failure to follow instructions, misuse, fire, floods, use of
incompatible accessories, Acts of God or failure in your
phone service carrier’s line service. The product must not
be tampered with or taken apart by anyone who is not an
authorized Sonic Alert representative. Tampering with
the phone will void any written or implied warranties
Sonic Alert shall not be responsible for loss of time,
inconvenience, property damage caused by your phone
or any other accidental or consequential damages
78
Page 80

GUARANTEE
Warranty service is available only with proof of purchase.
Simply send the Amplidect350 (postpaid) and a copy of
your sales slip as proof of purchase to:
Sonic Alert Warranty Center 1081 West Innovation Dr.
Kearney, MO 64060
CS Green Customer Service key at top has been
pre-programmed with our USA customer service number.
Press the CS key to direct dial for any Customer Service
or technical related help or questions. Our customer
service department is available from 9Am-5Pm Monday
through Friday Central time.
IMPORTANT : YOUR RECEIPT IS PART OF YOUR
WARRANTY AND MUST BE RETAINED AND
PRODUCED IN THE EVENT OF A WARRANTY CLAIM
Sonic Alert Warranty Center
1081 West Innovation Dr.
Kearney, MO 64060
Sales: 248-577-5400 Fax: 248-577-5433
Customer Service & Warranty: 1-888-864-2446
or press the green CS quick dial memory key.
UGAmplidect350_US_En_v1.3
79
Page 81

A
mplidect350
Téléphone Sans Fil Amplifié
0
Français
Page 82

SOMMAIRE
SOMMAIRE 1
INTRODUCTION 4
Découverte de l'appareil 5
DESCRIPTION 6
Vue d'ensemble 6
Description des touches 11
Description des icônes de l'écran LCD 14
INSTALLATION 15
Branchements 15
Mise en place des batteries 16
Mise en charge du combiné 18
Utilisation du clip ceinture pour Combiné 19
Utilisation du casque (en option) 20
Réglage du volume de sonnerie sur la Base 20
RÉGLAGES du COMBINÉ 21
Activer/Désactiver le Combiné 21
FONCTIONS DE BASE 23
Passer un appel 23
1
Page 83

SOMMAIRE
Recevoir un appel 24
Couper le microphone 25
Utiliser l'amplification 26
Naviguer dans les menus 27
Détail des menus 28
Réglage de la Sonnerie sur le Combiné 29
Rappel du dernier numéro 30
Journal des appels 32
Lampe torche 35
Verrouillage du clavier 36
Décrochage automatique 37
Choisir un langage 38
Nommer le combiné 39
Alerte de portée 40
Localisation du combiné 41
Mode de numérotation 42
Mode mains libres 43
Fonction Rappel d’Enregistreur 44
FONCTIONS AVANCÉES 45
Répertoire Téléphonique 45
Touches-mémoires 50
Réglages du combiné 52
2
Page 84

SOMMAIRE
Réglages de la base 60
Enregistrer le combiné 63
Utiliser plusieurs combinés 64
Identifier l'Appelant lors
d'un Appel en attente 67
Liste des fonctionnalités 68
DÉPANNAGE 70
CARACTERISTIQUES TECHNIQUES 71
SECURITE 73
DECLARATION DE CONFORMITE 75
GARANTIE 79
3
Page 85

INTRODUCTION
Vous venez de faire l'acquisition d'un téléphone
Geemarc Amplidect350. Félicitations! Cet appareil réunit
tous les avantages de la technologie sans fil (compatible
standard DECT (GAP), télécommunications numériques
européennes sans fil) dans un combiné facile à utiliser et
doté d'un clavier grandes touches vraiment pratique pour
les malvoyants. Ce téléphone est également compatible
avec l'utilisation d'un appareil auditif.
Pour utiliser au mieux les fonctionnalités de votre
téléphone Geemarc, nous vous conseillons de lire
attentivement cette notice. Conservez ce document pour
pouvoir le consulter à nouveau ultérieurement.
Cette notice vous explique comment utiliser le téléphone:
Amplidect350
4
Page 86

INTRODUCTION
Découverte de l'appareil
En ouvrant la boîte de l’appareil pour la première fois,
vérifiez que vous y trouvez bien tous les éléments
suivants :
y 1 combiné Amplidect350
y 1 base Amplidect350
y 1 adaptateur secteur
y 3 piles rechargeables AAA Ni-MH
y 1 cordon de ligne
y 1 clip ceinture
y 1 notice d'utilisation
Sonic Alert Warranty Center
1081 West Innovation Dr.
Kearney, MO 64060
Sales: 248-577-5400 Fax: 248-577-5433
Customer Service & Warranty: 1-888-864-2446
ou appuyez sur la touche de raccourci verte CS
5
Page 87

DESCRIPTION
pp
Vue d'ensemble
Combiné (avant de l'appareil)
Écouteur
Touche de
défilement
haut/journaldes
appels
Touche
d'appel
interne
Touche de
fonction
gauche
Touche de
numérotation/
haut-parleur
Clavier
numérique
Touche *
Verrouillage
du clavier
Microphone
6
Sonnerie
lumineuse
Touche Service
clientèle
Touches
mémoires
M1/M2/M4
Écran
Touche de
Fonction droite
Touche
de recomposition
automatique
Touche de
fin d’a
Touche de
défilement bas
/répertoire
touche #
Fonction
lampe torche
Vibreur
el
Page 88

DESCRIPTION
Combiné (arrière de l'appareil)
Contacts de recharge
Clip ceinture
Haut-parleur
Couvercle
du logement
des piles
7
Page 89

DESCRIPTION
Combiné (côtés de l'appareil)
Réglage
volume
Prise
casque
Réglage
tonalité
Touche
d'amplification
(AMP)
8
Page 90

DESCRIPTION
Base (partie supérieure) : Amplidect350
Broches de recharge
Le voyant d'utilisation clignote quand
vous appuyez sur la touche . Il
clignote également lorsque vous
localisez le combiné.
Base (partie inférieure)
Adaptateur
secteur
Le voyant de charge
reste allumé
pendant la recharge
du combiné.
Touche de
localisation
Prise du
Cordon de ligne
Réglage du
Volu me de
sonnerie
9
Page 91

DESCRIPTION
Base (partie supérieure) : Amplidect350 HS
Le voyant de charge
reste allumé
pendant la recharge
du combiné.
Broches de recharge
10
Page 92

DESCRIPTION
Description des touches
Touche d’appel/ Haut-parleur
Appeler/Répondre à un appel.
Active le haut-parleur pendant une
conversation, voir page 39.
Touche Fin d'appel
Mettre fin à un appel.
Une pression longue allume ou met en
veille le combiné, voir page 20.
Touche de navigation:
Défilement haut/Liste
d’appels
Fait défiler vers le haut les listes et les
options de menu.
Augmente le volume de l'écouteur/du
haut-parleur pendant une conversation.
Accès au journal des appels, voir page
29.
Défilement bas /Répertoire
Fait défiler vers le bas les listes et les
options de menu.
Diminue le volume de l'écouteur/du
haut-parleur pendant une conversation.
Accès au répertoire, voir page 44.
11
Page 93

DESCRIPTION
Appel interne
Déclenche un appel interne vers un
autre combiné.
Transfère un appel entrant vers un
autre combiné.
Etablit une conférence à trois avec un
appelant extérieur et un autre
combiné.
Affiche la liste de recomposition, voir
page 27.
Insère une pause pendant la
prénumérotation.
Touche de fonction gauche/droite
Exécute la fonction indiquée par le
texte affiché juste au-dessus (sur la
ligne du bas de l'écran.
Touche
Maintenez cette touche enfoncée pour
verrouiller /déverrouiller le clavier.
Mettre en place une conférence
téléphonique, voir page 64.
Recomposition automatique
12
Page 94

DESCRIPTION
Touches mémoires
Vous pouvez associer jusqu'à 4
numéros aux touches mémoires
(M1-M4).
Touche
À partir de l'écran de veille, maintenez
cette touche enfoncée jusqu'à ce que
le symbole
le vibreur et la fonction sonnerie
lumineuse. Pour désactiver la
fonction, appuyez de nouveau sur
cette touche en la maintenant
enfoncée jusqu'à ce que le symbole
disparaisse.
apparaisse pour activer
13
Page 95

DESCRIPTION
Description des icônes de l'écran LCD
Nouvel appel
Indique que vous avez manqué un ou
plusieurs appels.
MSG en attente
Signale que vous avez un ou plusieurs
messages sur votre répondeur.
Combiné décroché
Signale que la ligne est occupée.
Mains libres
Le mode mains libres est activé.
Icône batterie
Indique le niveau de charge des piles.
Icône vibreur
Signale que le vibreur et la sonnerie
lumineuse sont activés.
Icône signal
Indique la réception ou non du signal de
la base. Si le combiné est trop éloigné de
la base, cette icône clignotera à l'écran.
Icône réveil
Cette icône apparaît lorsque vous avez
programmé l'heure de sonnerie du réveil.
Verrouillage du clavier
Cette icône apparaît lorsque le clavier est
verrouillé.
14
Page 96

INSTALLATION
Branchements
1. Raccordez une extrémité du cordon de ligne à la prise
de ligne de la base, et branchez l'autre extrémité à une
prise téléphonique murale.
2. Raccordez l'embout de l'adaptateur secteur à la prise
d'alimentation de la base, puis brancher le à une prise de
courant murale.
Prise électrique
murale
Prise téléphonique
murale
ATTENTION : Lors d’une panne secteur , il n’est pas
possible de recevoir un appel ou d’appeler quelqu’un ; Y
compris les n° appels d’urgences ( 112 , 12, 15, 17, 18…)
15
Page 97

INSTALLATION
Mise en place des batteries
Votre téléphone est fourni avec 3 batteries rechargeables
Ni-MH (taille AAA). Placez les batteries dans leur
logement avant d'utiliser le téléphone.
1. Faites coulisser le couvercle du compartiment des
batteries dans le sens de la flèche, jusqu'à ce qu'il soit
complètement dégagé.
2. Insérez les batteries neuves en respectant les
polarités (+, -) indiquées.
Remarque: L'inversion des polarités pourrait
endommager le combiné.
3. Pour remettre en place le couvercle des batteries,
faites coulisser le couvercle dans son logement jusqu'au
clic.
16
Page 98

INSTALLATION
Remarque:
Il faut remplacer les batteries lorsque la recharge ne suffit
pas à leur redonner toute leur puissance.
Lorsque vous remplacez les batteries d'origines, utilisez
toujours des batteries rechargeables Ni-MH de bonne
qualité. N’utilisez jamais un autre type de batterie
rechargeable, ni des piles alcalines classiques.
17
Page 99

INSTALLATION
Mise en charge du combiné
Attention : Il est important de recharger
complètement le combiné pendant environ 15 heures
avant de l'utiliser pour la première fois.
Pour charger le combiné, posez-le simplement sur la
base.
Le combiné est automatiquement activé lorsque vous le
posez sur la base. Le voyant de charge reste allumé
pendant toute la durée de la recharge.
123
6
4
5
7
9
8
0
18
Page 100

INSTALLATION
Utilisation du clip ceinture pour
combiné
Le clip de fixation vous permet de conserver le combiné
sur vous. Il s'attache facilement à votre ceinture, à la
taille de votre pantalon, à la poche de votre chemise...
Pour détacher le clip ceinture:
Insérez un tournevis le long du bord de l'un des bras du
clip, et déclipsez-le. Ensuite, soulevez-le.
19
 Loading...