


GE WWA9890R, WWA9850R User Manual
UseandCareGuidel
Washer
Safe* Instructions ....................3,4
Problem
More questions
GE Answer
Operating Instructions, Tips
Bleach Dispenser ............................................8
Controls Setting Guide ........................14, 15
Cycle Settings .............................................6, 7
Energy-Saving Tips. . . . . . . . . . . . . . . . . . . . . . . . . . . . . . . . . . . . . . . . . 9
Fabric Softener
Filter-Flo@ Pan..........5,
Mini-Basket
Mini-Quick Cycle . . . . . . . . . . . . . . . . . . . . . . . . . . . . . . . . . . . . . . . . . . 11
Operating the
Spotscrubber Cycle . . . . . . . . . . . . . . . . . . . . . . . 12, 13,23
Dispenser............................8
TM
8, 10, 12, 13, 17,30
Tub.............................5,
Washer.......................,....5-l
10-13
5
Care and Cleaning
Agitator . . . . . . . . . . . . . . . . . . . . . . . . . . . . . . . . . . . . . . . . . .
Limestone Buildup ...............................1 9,30
Storage
User Maintenance instructions ................3O
and
Vacation Tips ........................30
.
................30
Preparation
Detergents, Other Additives . . . . . . . . . . . . . . 18-22
Hard Water . . . . . . . . . . . . . . . . . . . . . . . . . . . . . . . . . . . . . . . . . . . . . .
Loading the Washer............................,...5, 17
Pretreating...........................,.....,.....
Sorting Clothes
Stains . . . . 12, 23
Stain Removal Guide...................................24
Consumer Services
Appliance Registration ..................................2
Model and Serial Numbers
Repair Service
Warranty ........................................Back Cover
Solver.......,...............25-29
?...call
Center@
800.626.2000
.
,.21
15, 16, 22
.........................,..............5,
16
....,...,..........3l
.....................,....2
.......................................,..,.....,2
GE Appliances
Models:
WA9850R WA9890R
~LP
US
~LP
YOU...
Read this book carefully.
It is intended to help you
operate and maintain your
new washer properly.
Keep it handy for answers to
your questions.
If you don’t understand something
or need more help, write (include
your phone number) damaged washer...
Consumer Affairs
GE Appliances, Appliance Park
Louisville, KY 40225
To obtain a Spanish language
version of this book, call
GE Answer
800.626.2000
consumer information service.
WA~~G:
the risk of
Center@
For your safety the information in this manual must be
fire
or explosion or to prevent property damage,
Save time and money.
Before you request service . . .
check the Problem Solver
section. It lists causes of minor
operating problems that you can
correct yourself.
If you received a
Immediately contact the dealer (or
builder) that sold you the washer.
Para
obtener
espafiol
GE Answer
informaci6n
te16fono
la
versi6n
de
este
manual, name a
Center@, servicio
para el
800.626.2000.
en Serial Number
consumidor,
Write down the model
and serial numbers.
You’ll find them on a label on
the lower left side near the front.
These numbers are also on the
Consumer Product Ownership
Registration Card that came with
your washer. Before sending in
this card, please write these
numbers here:
Model Number
de
persoti i~ury
Use these numbers in any
correspondence or service
calls concerning your washer.
fo~owed
to minimize
or loss of
Me.
—Do
not store or w gasoline or other
flammable vapors
vicinity of this or
—W~T
c
●
TO DO ~ YOU
Do not try to
Do not touch any elwtricd switch;
and
liquids in the
any
other appliance. instructions.
S~LL
tight
any appliance.
GAS
do not use any phone in your btiding.
Q
Clear the room, building or area of all
●
tiediately M
neighbor’s phone.
●
H
you cannot reach your gas supplier,
d
the
—titilation and sertice
by a
qud~ed instier,
the gas
supptier.
occupants.
All washing instruction terms in this book conform to the Care
Labeling Rule established by the Federal Trade Commission, January 1984.
If You Need Service
To obtain service, see the
Consumer Services page
in the back of this book.
We’re proud of our service and
want you to be pleased. If for some
reason you are not happy with the
service you receive, here are three
steps to follow for further help.
First, contact the people who
serviced your appliance. Explain
why you are not pleased. In most
cases, this will solve the problem.
NEXT, if you are
write all the details—including Chicago, IL 60606
your phone number—to:
Manager, Consumer Relations
GE Appliances, Appliance Park
Louisville, KY 40225
still
not pleased,
your gas
fire
department.
FINALLY, if your problem
is still not resolved, write:
Major Appliance Consumer
20 North
supptier
FOOOW
the gas
from a
suppfier’s
must be performed
service agency or
Action
Panel
Wacker
Drive
2
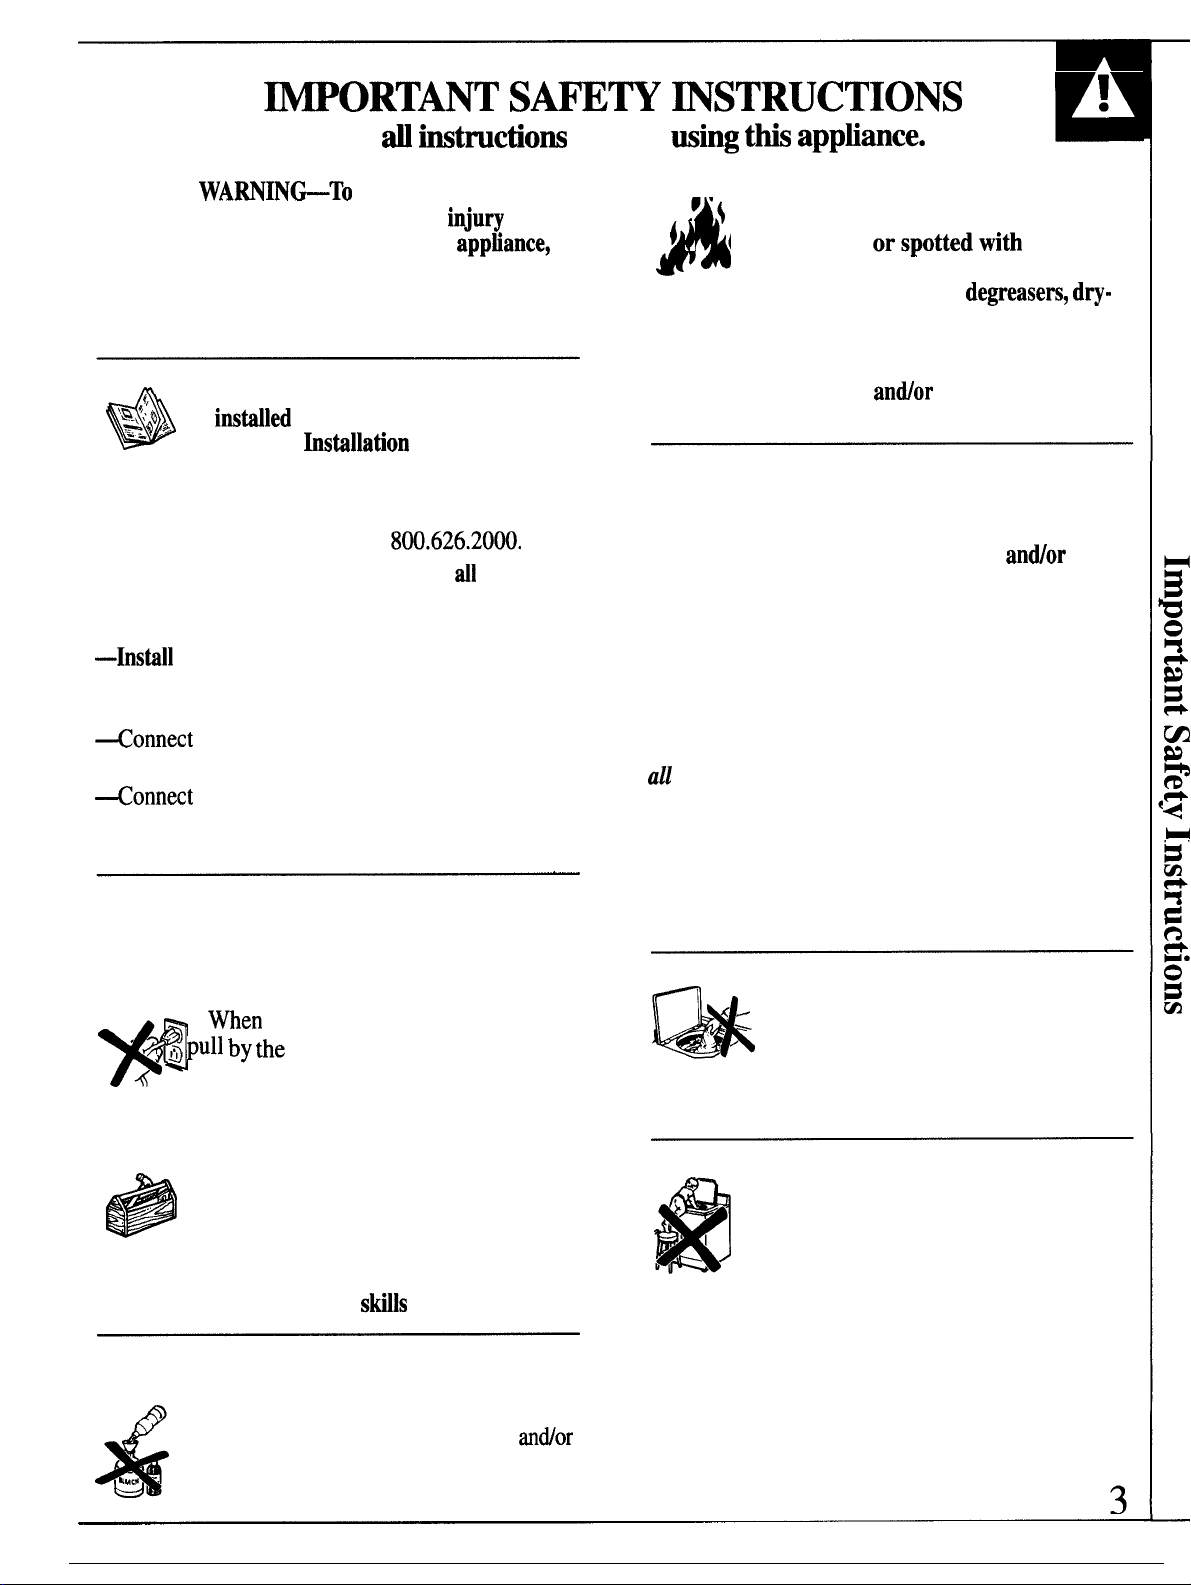
WORTANT SAmW ~STRUCTIONS
Read d
instmctions
before wing
ttis apptiance.
L
1
●
WARN~&To
of fire, electric shock, or
A
follow basic precautions, including the following:
●
Use this appliance only for its intended purpose
as described in this Use and Care Book.
‘Q.,{(~
~-+ $
o
before it is used.
Installation Instructions sheet with your
washer, you can obtain one by calling, toll
free, the GE Answer Center”,
—Properly ground to conform with
governing codes and ordinances. Follow
details in Installation Instructions.
—Instill
to temperatures below freezing or exposed
to the weather.
<onnect
power supply circuit to avoid electrical overload.
<onnect
facilities as described in the Installation
Instructions.
●
Turn off water faucets when the washer is not in
use to relieve pressure on hoses and valves, and
to minimize leakage if a hose or valve should
break or rupture.
w
is located so that it will not be stepped on, tripped
over or otherwise subjected to damage or stress.
recommended in this Use and Care Book or
in published user-repair instructions that you
understand and have the
persons when using your
●
This washer must be properly
instiled
with the
or store where it will not be exposed
to a properly rated, protected and sized
to adequate plumbing and drain
●
men
~
PU1l by the
avoid damage to the cord or junction of
cord and plug. Make sure that the cord
●
Do not repair or replace any part
of the appliance or attempt any
servicing unless specifically
and located in accordance
If you did not receive an
disconnecting this appliance
plug rather than the cord to
reduce the risk
hstallation
Instructions
8N.626.2W.
SMIS
to carry out.
injury
to
apptiance,
dl
To minimize the possibility of injury:
●
4’\
~ /
soaked in,
h
(such as wax, paint, gasoline,
cleaning solvents, kerosene, etc.) which may
ignite or explode. Do not add these substances
to the wash water. Do not use these substances
around your washer
operation.
A
can accumulate in the water heater
pipes if hot water has not been used for a period
of two weeks or longer. HYDROGEN GAS CAN
BE EXPLOSIVE UNDER THESE
CIRCUMSTANCES. So to prevent the
possibility of damage or injury, if you have not
used hot water for two weeks or more, or move
into a residence in which the hot water system
may not have been used for some time, turn on
all
hot water faucets and allow them to run for
several minutes before using any electrical
appliance which is connected to the hot water
system. This will allow any hydrogen gas to
escape. Since the gas is flammable, do not
smoke or use an open flame or appliance
during this process.
wait until the machine has completely stopped
before opening the lid.
appliance. Dispose of discarded appliances and
shipping or packing materials properly. Before
discarding a washer, or removing from service,
remove the washer lid.
Do not wash or dry articles that
have been cleaned in, washed in,
orspottedwith
combustible or explosive substances
degreasers, dry-
andor
dryer during
WARNING-HYDROGEN GAS
is produced by the chemical action
within your water heater and the gas
antior
water
●
Never reach into washer while it is
moving. Before loading, unloading
or adding clothes, push in the Cycle
Selector knob to OFF position, then
. Close supervision is necessary if
this appliance is used by or near
children. Do not allow children
to play inside, on, or with this
appliance or any discarded
-C* -.
&
●
Do not mix chlorine bleach with
ammonia or acids such as vinegar an~or
rust remover. Mixing can produce a
toxic gas which may cause death.
(continued next page)
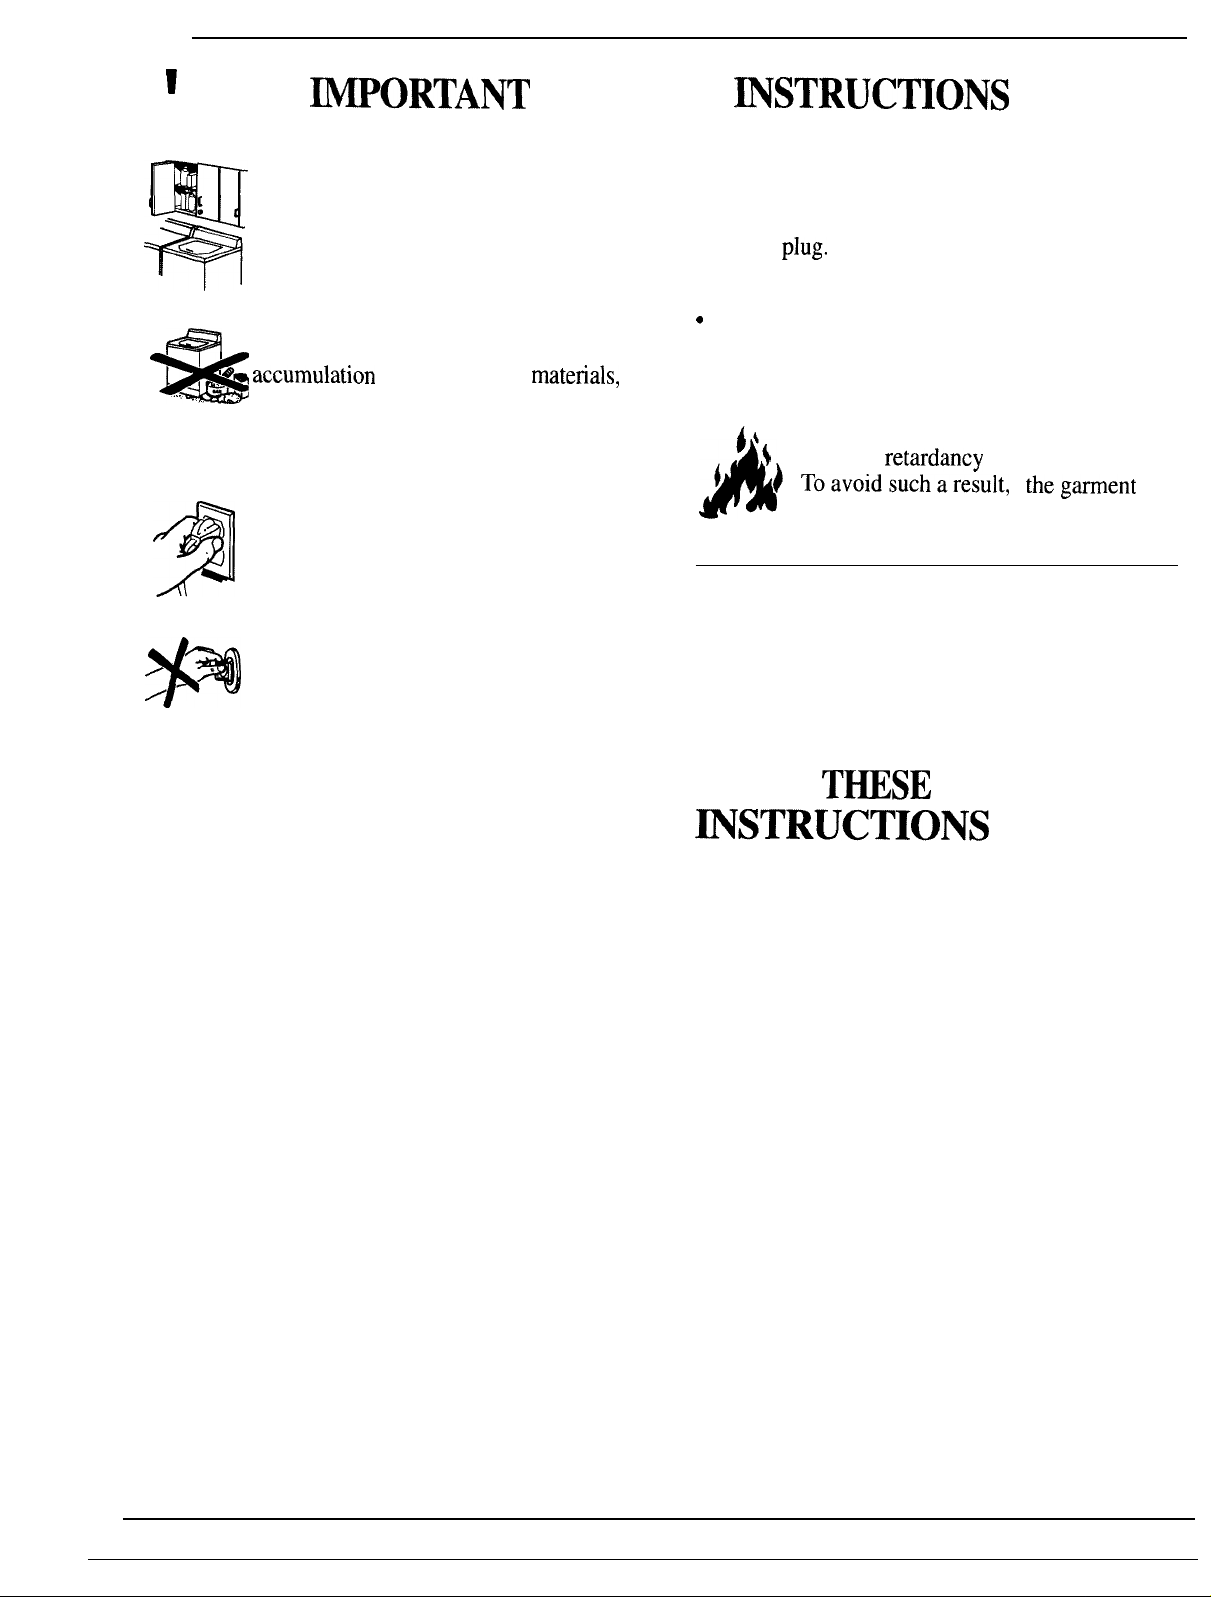
!
●
WORTANT
SAFETY
~STRUCTIONS
(continued)
. Keep all laundry aids (such as
detergents, bleaches, fabric softeners,
etc.) out of the reach of children,
preferably in a locked cabinet.
Observe all warnings on container
labels to avoid personal injury.
●
Keep the area around and underneath
*
[.
. . . .
.,, .
x
●
Keep the floor around your appliances clean and
dry to reduce the possibility of slipping.
Y.
$3
/“
your appliances free from the
‘~m accumulation
such as lint, paper, rags, chemicals, etc.
. To minimize the possibility of electric
shock, unplug this appliance from the
power supply before attempting any
maintenance or cleaning (except the
removal and cleaning of the lint filter).
NOTE: Turning the Cycle Selector
knob to an OFF position does NOT
disconnect the appliance from the
power supply.
of combustible
matetials,
●
Do not operate this appliance if it is damaged,
malfunctioning, partially disassembled, or has
missing or broken parts, including a damaged
cord or
●
Never climb on or stand on the washer top,
c
Do not wash fiberglass articles in your washer.
Skin irritation could result from the remaining
particles that may be picked up by clothing
during subsequent washer use.
,
h
plug.
●
1’
The laundry process can reduce
\ the flame
/
Toavoidsucharesult, thegarrnent
manufacturer’s care instructions
should be followed very carefully.
retardancy
of fabrics.
For washer operation
●
Do not leave washer lid up during cycle.
This will stop the wash and spin action and
prevent completion of the cycle.
●
Do not tamper with controls.
SAVE
T~SE
~STRUCTIONS
4
HOW TO OPERATE YOUR CLOTHES WASHER
w
WARNING—To reduce the risk of fire, electric shock, or injury to persons when using your
appliance, read the IMPORTANT SAFETY INSTRUCTIONS before operating this appliance.
Sorting and Loading
● Sort clothes carefully by fabric
type, weight, color
and
amount
of’ soil, according to instructions
in How to Sort Clothes section.
● Remove the
Filter-Flo pan
and MiniBasket tub.
The underside
of the lid is
a
good place to put the pan while
loading or unloading clothes.
Do not use the Mini-Basket tub
when washing regular loads.
You’ll find complete details on
how and when to use it in How to
Use the Mini-Basket Tub section.
●
Add measured amount of
detergent. See Detergents, Other
Additives section for information
on detergents and other laundry
additives.
●
Load clothes into wash basket,
being careful not to overload.
Clothes should be below retaining
ring. See How to Load Your
Washer section for more
information.
●
Position the Filter-Flo pan on
the agitator. Lint will collect in
the pan for easy removal when
the wash is finished.
Do not use the Filter-Flo pan
as a wash basket.
Do not put
any items to be washed in the
Filter-Flo pan.
● See How to Use Bleach
Dispenser section for information
on the Bleach Dispenser.
● See How to Use Fabric Softener
Dispenser section for more
information on the Fabric
Softener Dispenser.
● For information on bleaches
and fabric softeners, see Other
Laundry Products section.
●
Close the lid. Washer will
fill
but not agitate or spin with the
lid
open.
Setting the Controls
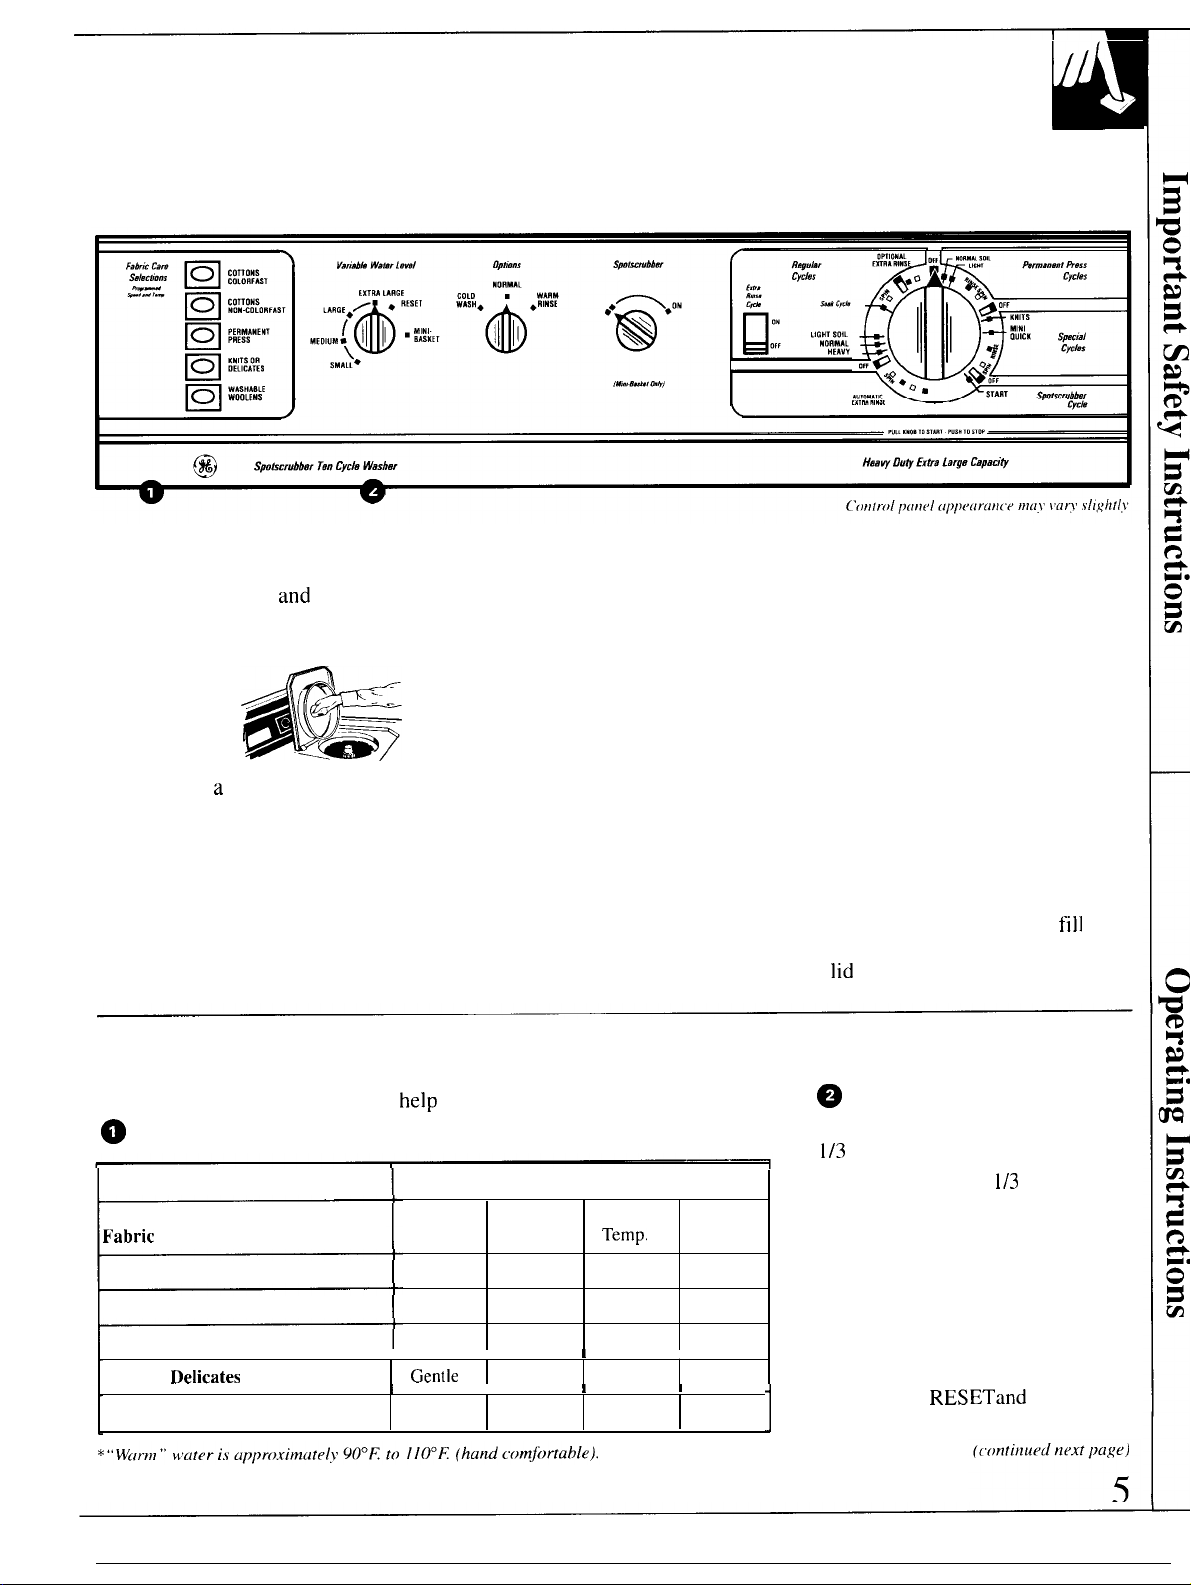
Use the Controls Setting Guide to
~
Select a Fabric Care program.
E’abric
Care Selections
Cottons Colorfast
Cottons Non-Colorfast
Permanent Press
Knits or Delicates
Washable Woolens
help
you make the proper selections.
Automatically Programmed
I
I
Wash
Temp.
*Warm
*Warm
*Warm
*Warm
Wash Spin
Speed Speed
Normal Normal
Normal Normal
I
I
Normal
Gentle
Gentle
I
I
Gentle
Gentle
Normal
Hot
1
I
Rinse
Temp.
Cold
Cold
Cold
Cold
Cold
~
Select Water Level.
SMALL: Washer is less than
1/3
full of clothes.
MEDIUM: Between
1/3
LARGE: Between 1/2 and 2/3 full.
EXTRA LARGE: Over 2/3 full.
MINI-BASKET: Not used for
regular loads. See the How to Use
the Mini-Basket Tub section.
If you wish to increase the water
level after you’ve made a selection,
1
turn knob to
new level.
RESETand select
and 1/2 full.
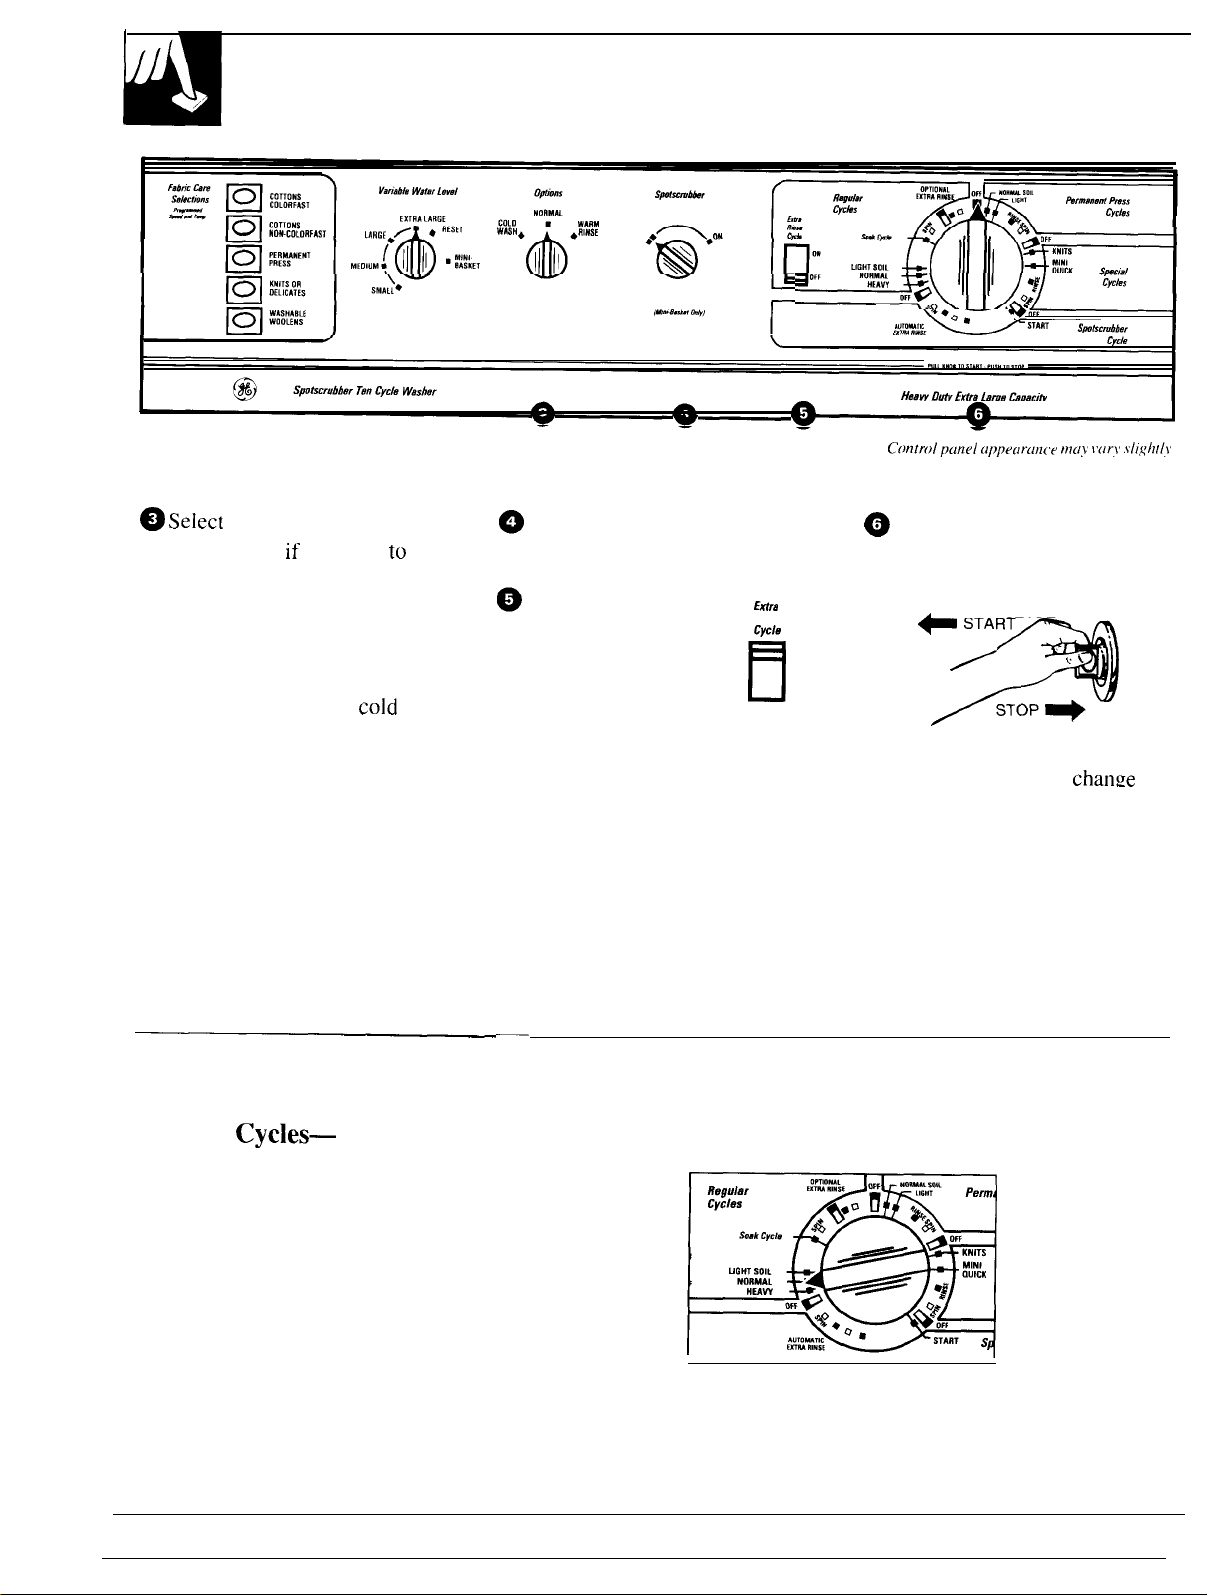
HOW TO OPERATE YOUR CLOTHES WASHER
Setting the Controls
@
Select
Options.
Use this control
change the water temperatures that
are automatically programmed by
the Fabric Care Selections control.
NORMAL–Leaves the
temperatures as programmed.
COLD WASH–Provides
wash and rinse water in all cycles.
WARM RINSE–Leaves the
wash temperature as programmed
but provides warm rinse water in
Regular and
cycles.
To minimize setting of
wrinkles, cold rinse is automatically
provided in Permanent Press and
Special cycles.
if
you wish
cold
SPOTSCRUBBER
to
(continued)
Leave SPOTSCRUBBER
control at the double square
position.
Select Extra Rinse,
if desired. Sliding
Etira
Rinse
cycle
control to ON will
provide a second
deep rinse in the
E
Regular Cycle. If no
Extra Rinse is desired,
slide control to OFF.
ON
OFF
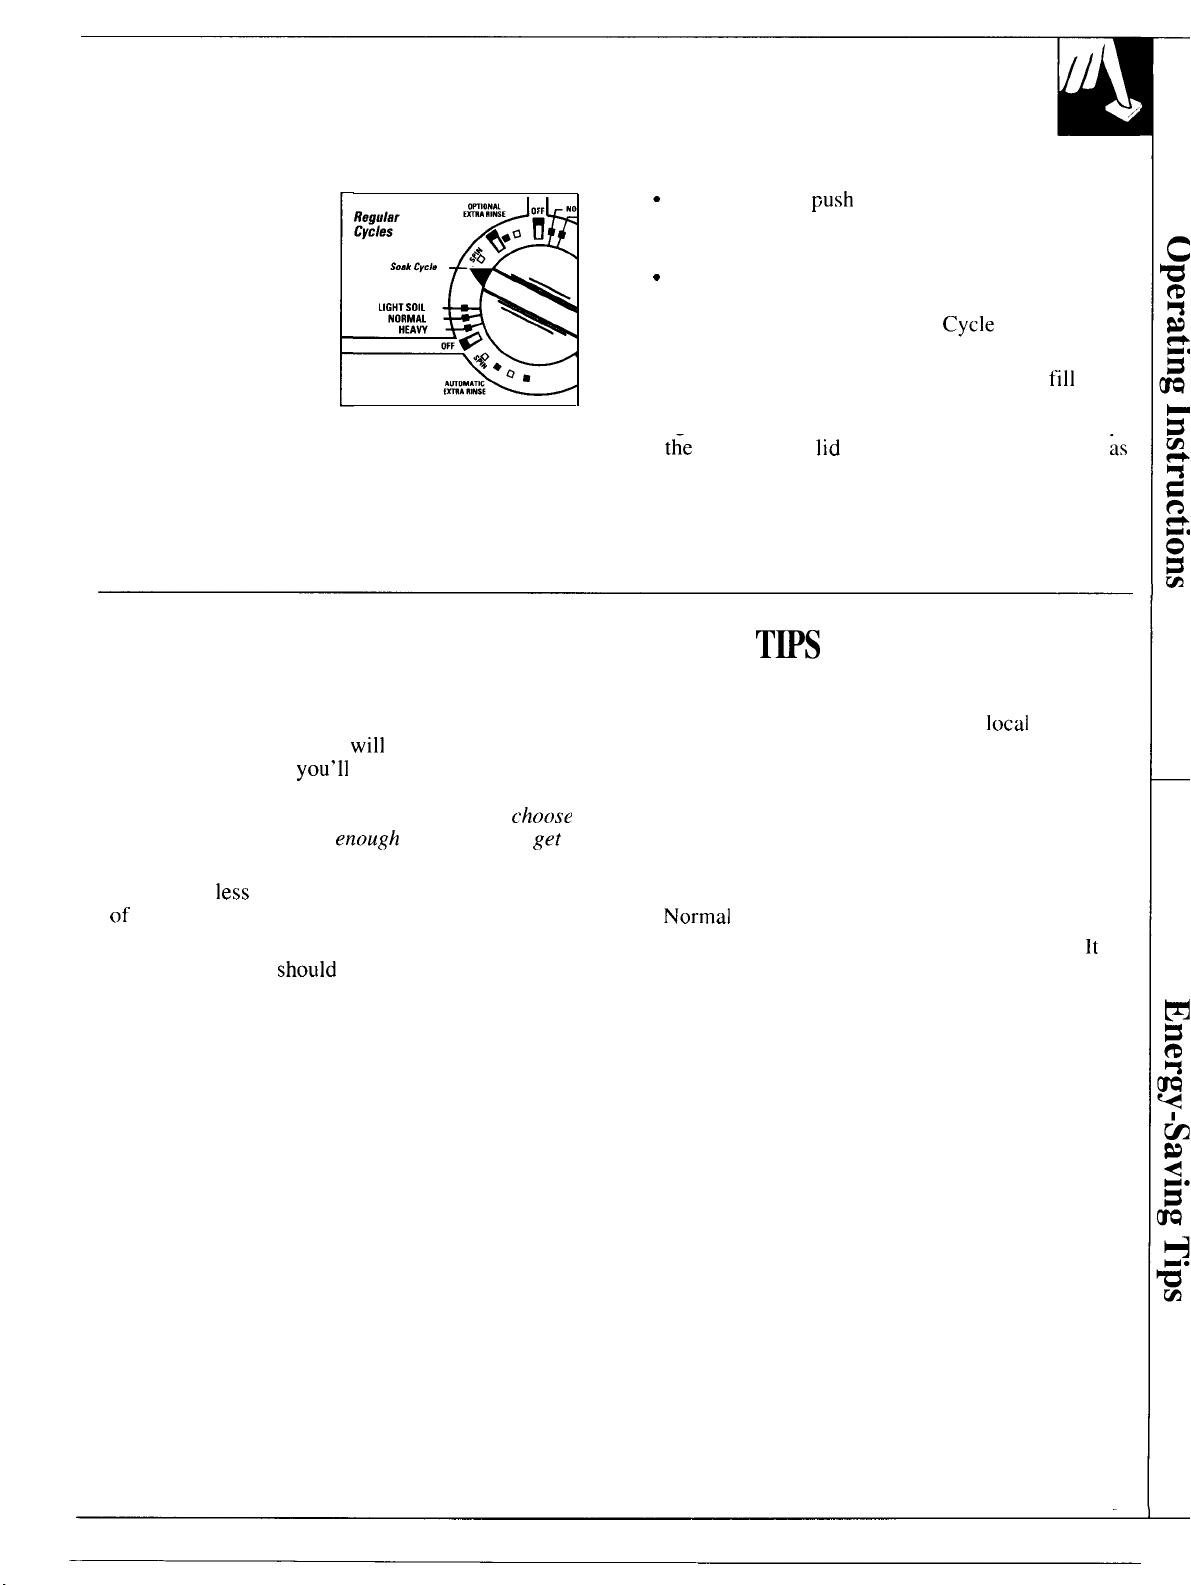
C[~ntrolpune[ Clppe<]rcirzce 117(1> L[lr) .\li~ll/[\
@
Push Cycle Selector knob
in and turn clockwise to
your selected wash setting.
~
START ,
/’
3
STOP
v (
@
Pull Cycle Selector knob to
start the washer. To
change
setting after washer has
started, push Cycle Selector
knob in to stop washer and
reset to new position. Setting
can be changed at any time.
NOTE: To use the
SPOTSCRUBBER and MINIQUICK cycles, see MINI-QUICK
and SPOTSCRUBBER sections.
Tips to Help Select Settings for Regular Wash Loads
Regular
For most cottons, linens, and work and play clothes.
Longer wash times plus an extra deep rinse, spray
rinse and spin provide thorough washing and
detergent removal.
Cycles—
6
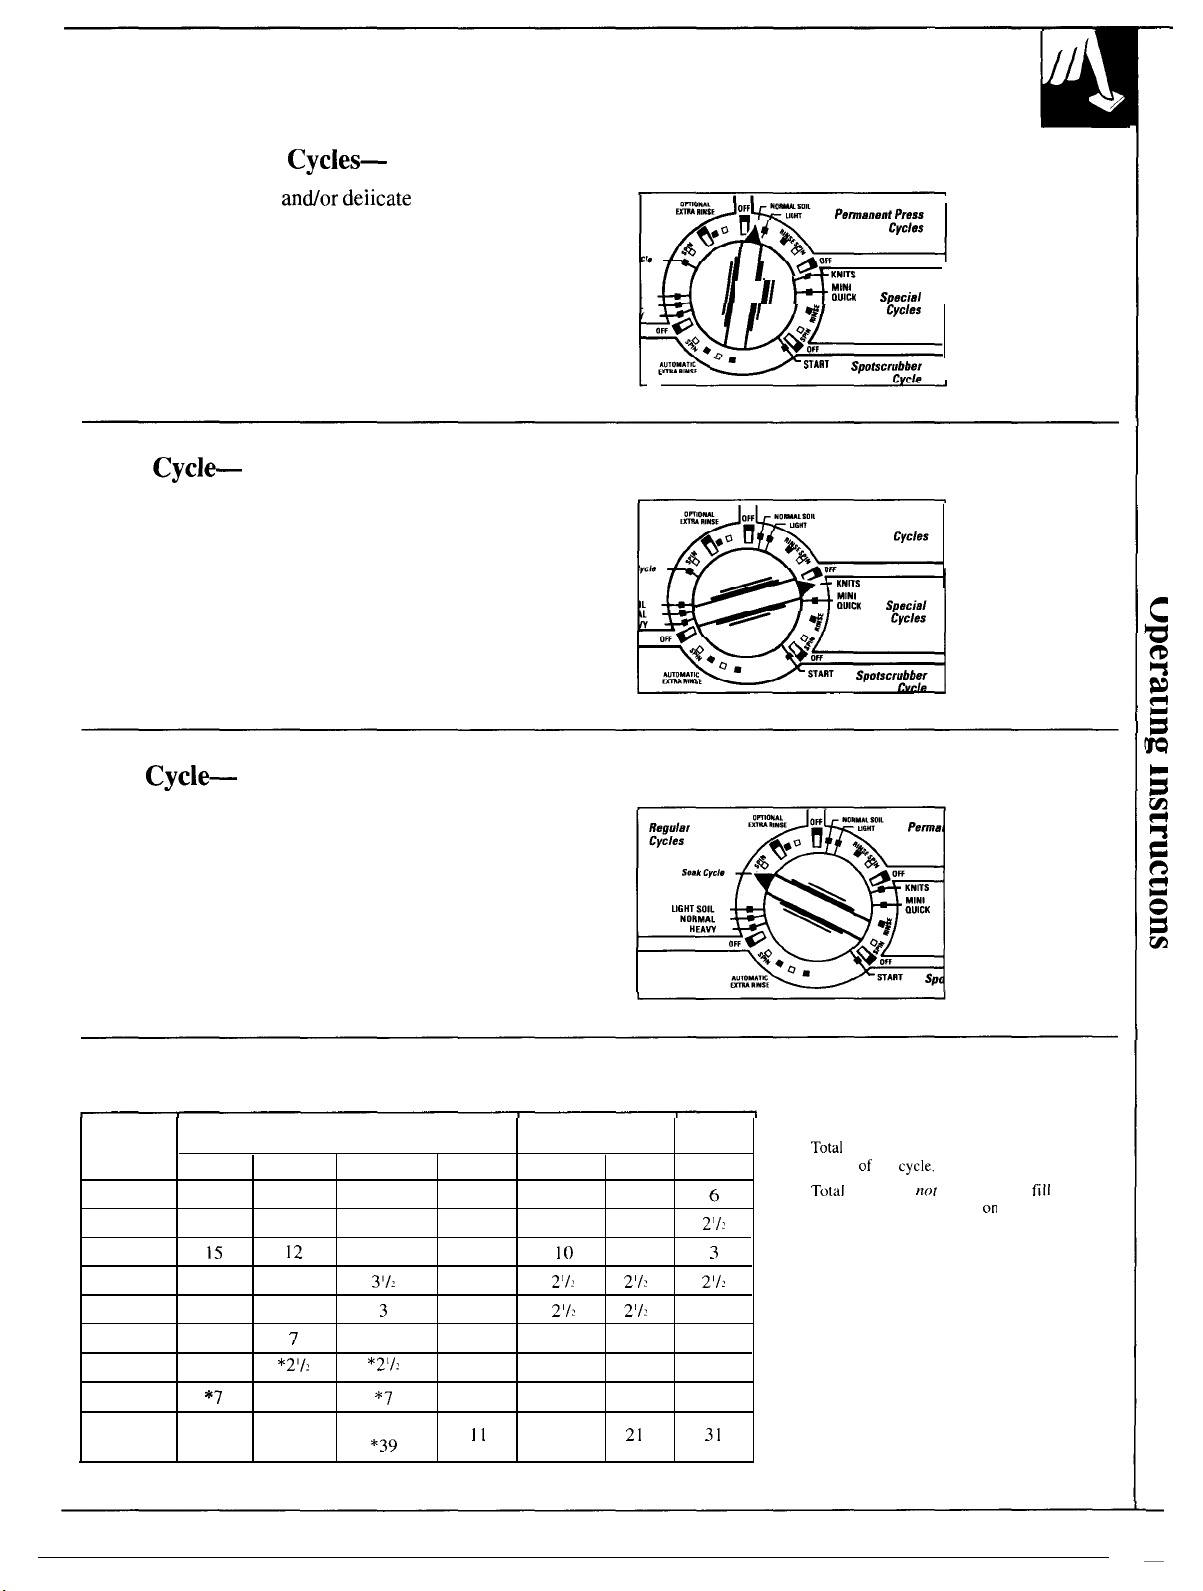
Permanent Press
Cycles—
For loads of synthetic
andor deiicate
fabrics. A cold
water cool-down helps prevent set-in wrinkles in
permanent press shirts, blouses, dresses and similar
apparel with normal soil.
Knits
Cycle
A combination of agitation and soak provides effective
polyester knits laundering. An early and long spray
rinse cools down fabrics before the washer reaches
maximum spin speed to help prevent wrinkle setting.
—
. . .
I
KNITS
‘
//
Hiiii
~ART
Spec;al
SpOficr;~:::
Permanent Press
I
I
I
Soak
Cycle—
Clothes activate in a soaking agent for a short time,
then the water spins out. Washer turns off at end of
Soak Cycle—must be reset for desired wash cycle.
What Happens in Each Setting (Approximate Minutes)
Cycle
Selector
Settings
Wash
Soak
Wash
Spin
Rinse
Spin
2nd Rinse
Spin
Total
Time
*When Extra Rinse control is turned to ON.
Heavy Normal
15 12
3’12 3’12
3 3
7
*21/
*7 *7
37
*49 *46 *39
2
Regular Cycles
Light Soil
3’/2
7
*2112
34
*2J/z
*7
25
6
3
7
Permanent Press
Soak Normal
10
2’/?
3
7
II
2’1?
4’12 4’1?
26
Light Knits
2’1?
2’/?
21
Special
6
2’/2
6
3
2’/2
2’/:
4’1?
31
NOTES:
.
Total
time includes pauses between each
of
the
phase
●
Total
Fill times vary depending on household water
pressure and your selected water level.
cycle.
time does
nor
include water fill times.
7
OPEMTmG ~STRUCTIONS
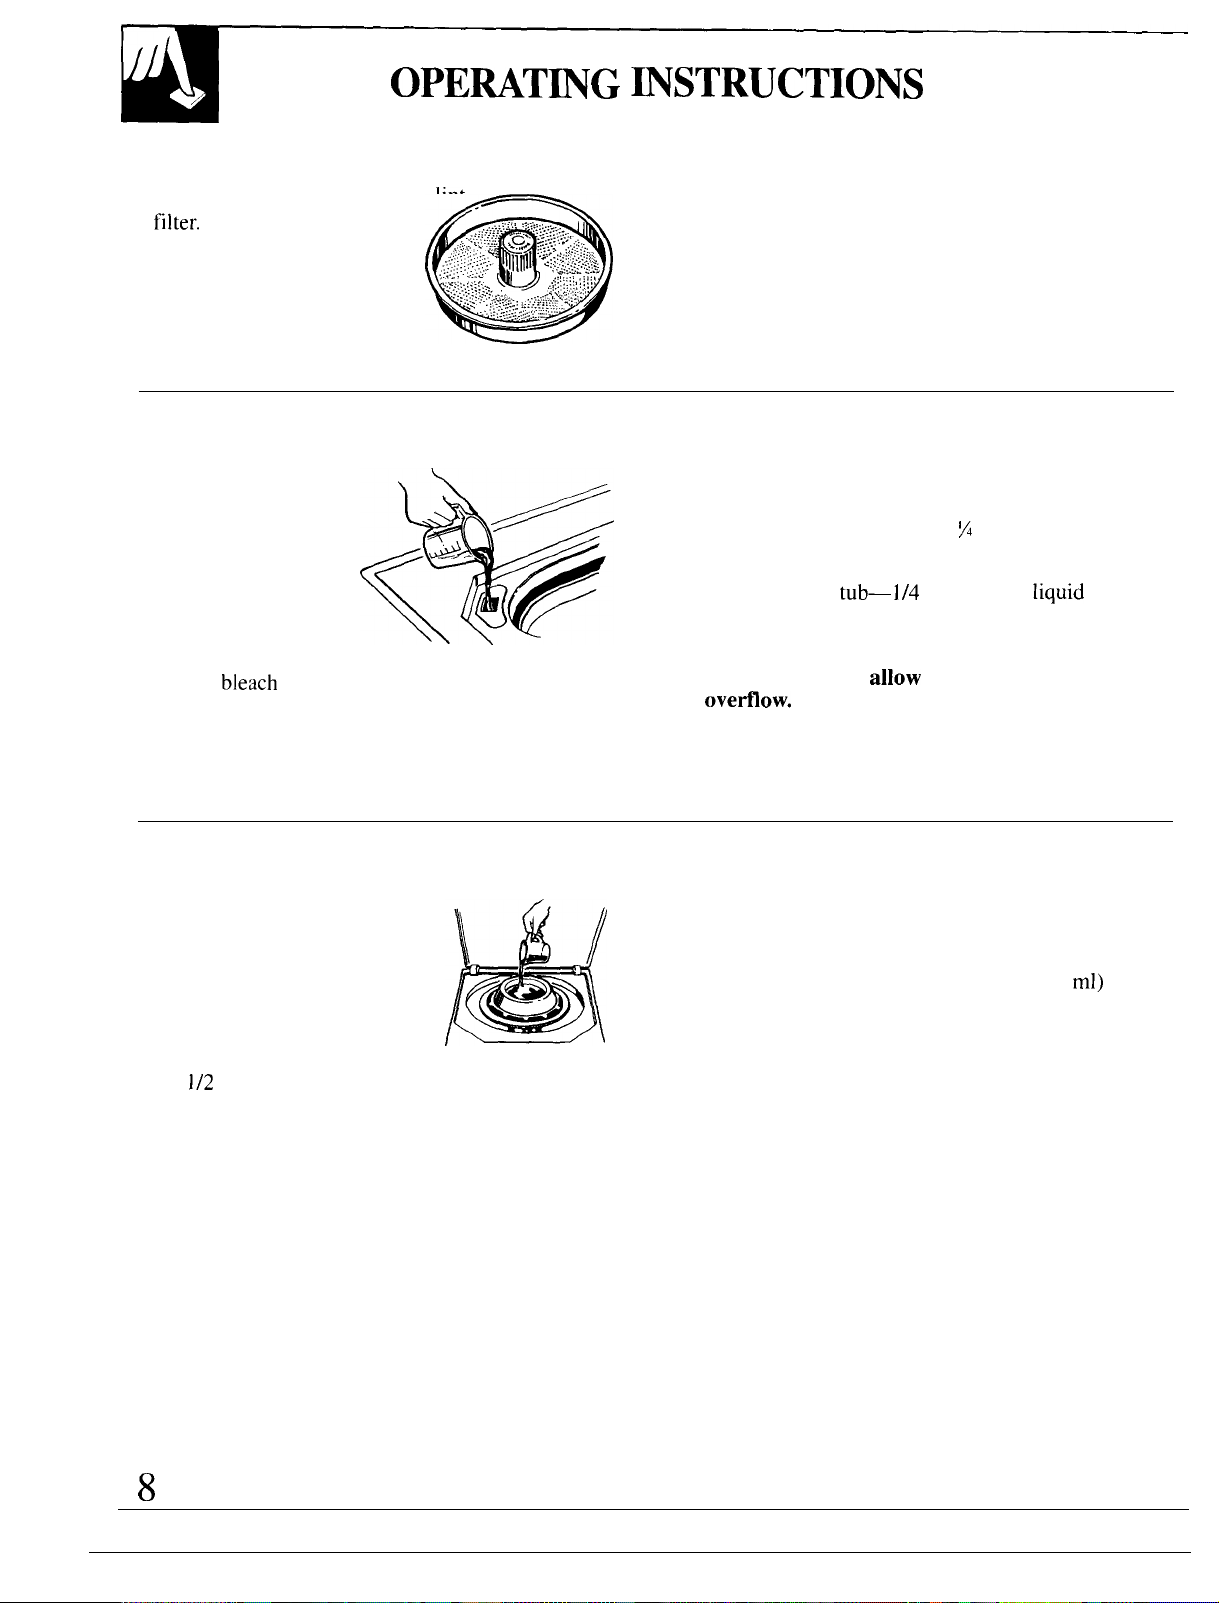
How to Use the Filter-Flo Pan
(continued)
● The Filter-Flo pan is the
filter.
Position the Filter-Flo
pan on the agitator after
loading clothes into the
washer. Lint is easily seen
and removed after the wash
is finished.
lint
.
.:,,::.::”’’C::::;:;::;;,.:,
-i::;:.’:~’:~’
:<~:;;~ ‘i~j~~~<~<~:
,~:;;::;~ ~
. . . .
. . .. . .
.
g
. . .
. .. . .
. .
. . . . .
. . . . . .
. .. : : :
Q
How to Use the Bleach Dispenser
● Use this dispenser with
liquid bleach only.
If you prefer to
use powdered
bleach, pour it
into the wash
basket along with
your detergent. Do
%%
not pour powdered bleach
into the
bleach
dispenser.
d..
/
.,: . ., .: :, : ....,
-
.::..:..::::....:,:....;
,:,:;;;:::!:~:;,
. : .
...
::;. !..:-:. ;~: :.,.
.....,..:: .-,,..,.
..,,,:..,
:..... .,,.
:...:.
NOTE: Do not use the Filter-Flo pan as a wash
basket. Do not put items to be washed in the
Filter-Flo pan. Do not place detergent packets
in the Filter-Flo pan.
The Filter-Flo pan also serves as a lid for the
Mini-Basket tub. See How to Use the Mini-Basket
Tub section.
● Measure bleach carefully.
Here are some recommended amounts:
LARGE WATER LEVEL—1
M
cup(310 ml) liquid
SMALL WATER LEVEL—2/3 cup (170 ml) liquid
MINI-BASKET
● Pour measured amount of liquid bleach directly into
tu&l/4
cup (60 ml)
liquid
bleach dispenser.
● Do not overfill or
ovefiow.
Avoid splashing. Undiluted bleach
allow
dispenser to
can cause fabric damage.
● Never pour undiluted liquid bleach directly onto
clothes or into the wash basket or Mini-Basket tub.
How to Use the Fabric Softener Dispenser
● Position the Fabric Softener
Dispenser on the Filter-Flo pan.
● Pour manufacturer’s
recommended amount
of fabric softener into
a standard measuring cup.
● Add enough water to fill the
cup
1/2
full.
● Pour the diluted softener into the dispenser.
● The fabric softener will automatically be dispensed
at the proper time.
● Do not stop the washer during the first spin.
This will cause the dispenser to empty too soon.
When using Fabric Softener Dispenser with the
Mini-Basket tub, use one (1) teaspoon (5
ml)
of
concentrated softener or one ( 1 ) tablespoon
(15 ml) of diluted softener.
● Do not use the Fabric Softener Dispenser with
the Soak Cycle.
●
If the dispenser gets clogged, soak it in a solution
of 1 cup (240 ml) water and 1 cup (240 ml) alcohol.
8
How to Use the Soak Cycle
● Push any Fabric Care
Selection button and
turn the Cycle Selector
knob to SOAK CYCLE.
● Be sure Extra Rinse
control is set at OFF.
● For a cold soak,
set Options control
to NORMAL.
● For a warm soak,
push any Fabric Care Selection button except
COTTONS/COLORFAST and turn Cycle Selector
knob to NORMAL in the Regular Cycle.
ENERGY-SAVING
If your clothes and household items don’t look clean
and fresh after washing, you
them.. and that means
to sort your clothes carefully, and load them properly,
select correct cycles, use enough detergent and
a water temperature warm
rid of soil.
● Try to wash
less
often. Save articles of the same type
of fabric until you have a full load.
● If you must wash smaller loads, adjust the amount of
water. Small loads
● Always rinse in cold water. The temperature of the
should
rinse does not affect cleaning.
will
probably rewash
you’ll
waste energy. Remember
enough
to release and
have lower water levels.
choose
get
“
For a hot soak,
push
the COTTONS/COLORFAST
Fabric Care Selection button and turn the Cycle
Selector knob to NORMAL in the Regular Cycle.
“
Start the washer. After washer fills and begins to
agitate, push in the Cycle Selector knob and turn
to SOAK CYCLE. Pull out the
Cycle
Selector knob
to complete the cycle.
● For an extended soak allow the washer to
fill
and
agitate for a few minutes to dissolve the soaking
agent. Then push in the Cycle Selector knob to stop
tfie
washer (keep
lid
close-d) and allow to soak for
long as desired. After desired soak period, pull out
the Cycle Selector knob to complete the cycle.
● Do not use the Fabric Softener Dispenser or the
Mini-Basket tub with the Soak Cycle.
T~S
● Wash in off-peak utility hours. Your
tell you which are the off-peak hours.
● Use your washer’s Normal Spin. This will remove
more water during spin, which will shorten drying
cycle to save more energy. Switch to any of the
Fabric Care Programs that indicate a Normal Spin.
(See Setting the Controls section.) The dryer will
remove any wrinkles which may result from the
Normal
● Use your Mini-Basket tub for very small loads.
Spin.
uses less water than the small water level in the big
tub on this washer. You will also save on detergent
and energy.
local
utility can
It
is
9
HOW TO USE THE
MINI-BAS~T
TUB
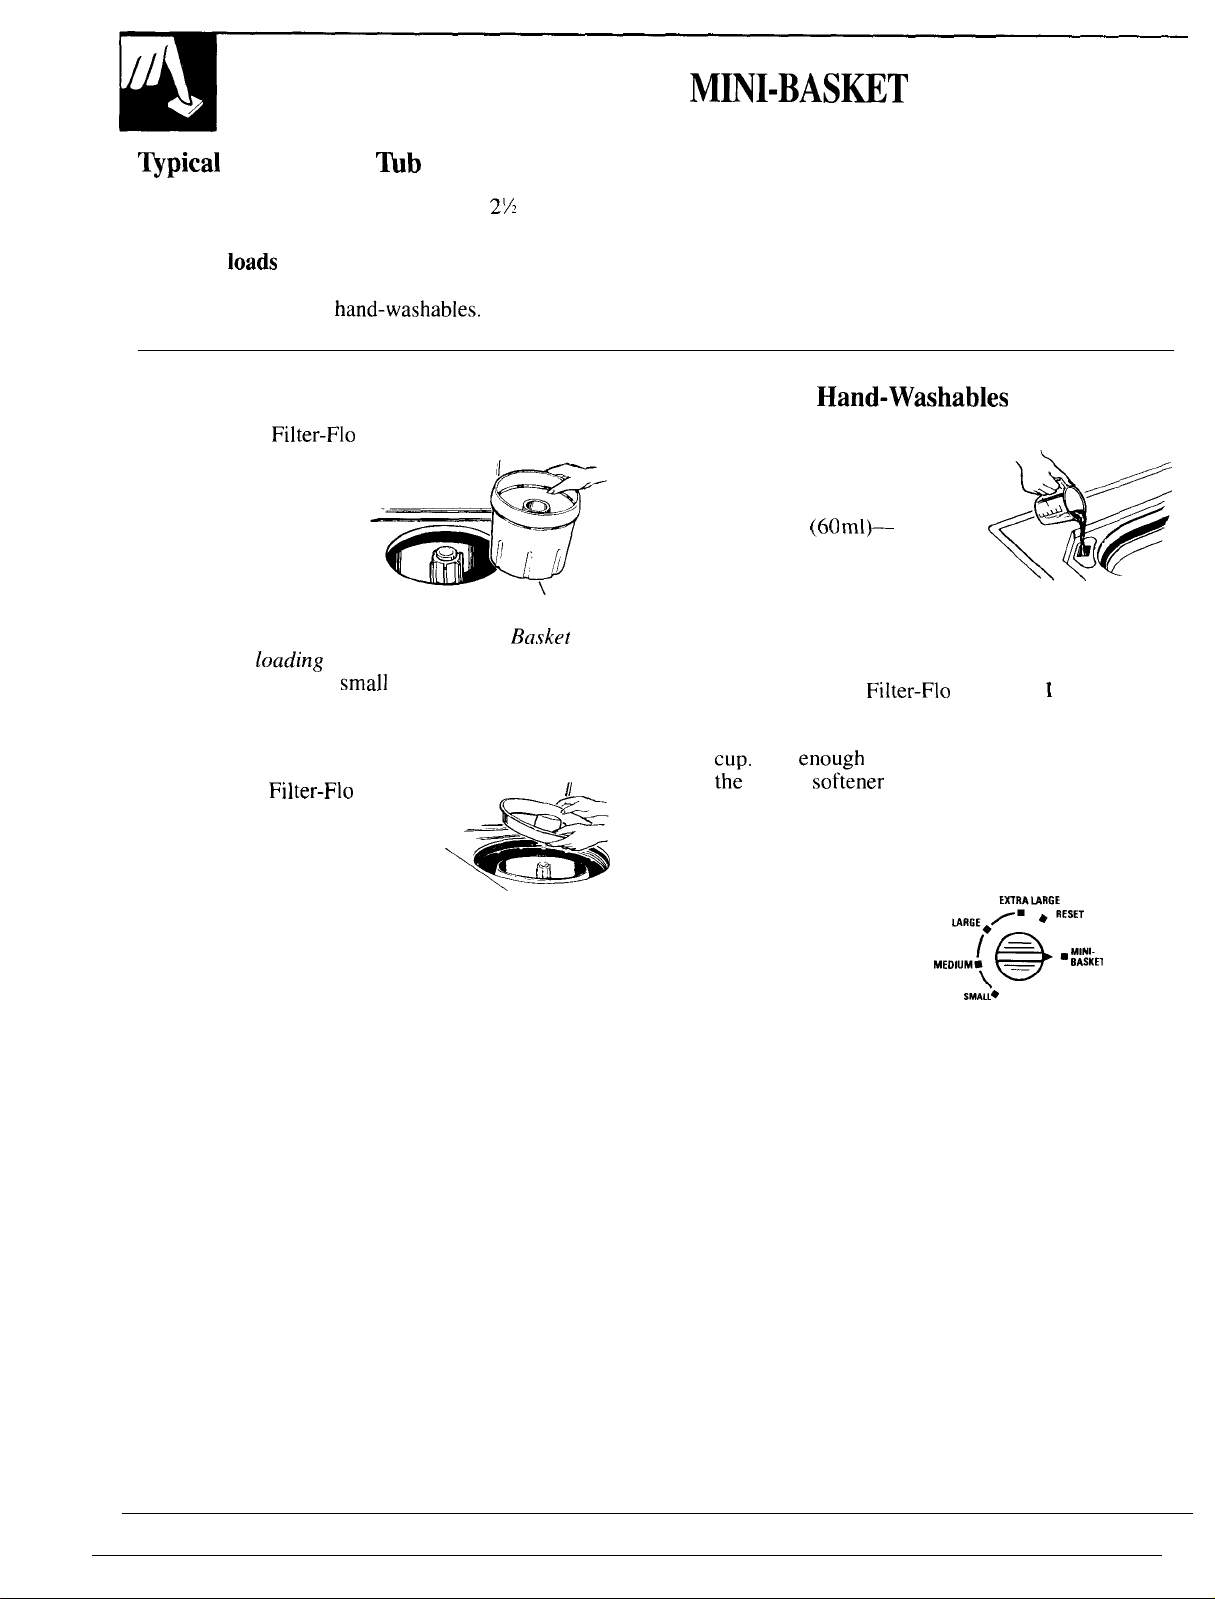
~pical
● Small loads of regular fabrics (up to
(1. 125 kg).
● Delicate
blouses, sweaters, socks, shirts, baby clothes and
other small, delicate
How
1. Remove the
2. Place Mini-Basket
3.
4. Load clothes in the Mini-Basket tub.
5. Replace the
Mini-Basket ~b Wash Loads
21\~
loads
such as lingerie, panty hose, girdles,
hand-washables.
pounds)
● Stuffed toys.
● Tennis shoes.
to Wash a Small Load of Regular Fabrics or Delicate
Filter-Flo
tub on agitator.
Pull the agitator
toward the front
of the machine for
easier installation and
removal of Mini-Basket tub.
Put detergent in the bottom of the Mini-
tub before
you would use for a
basket). See the How Much Detergent Should You
Use section, for more information.
It serves as a lid to keep the
clothes in the Mini-Basket tub.
loading
Filter-Flo
pan.
Ba,vket
clothes (about the same amount
small
load in the regular wash
pan.
~
<s
II
6.
7. Add fabric softener, if desired (but not for
8. Close washer lid and
—Set Water Level to
—Select desired
9. Pull Cycle Selector knob out to start washer.
Hand-Washables
Add bleach,
Measure carefully and
pour recommended
amount of liquid bleach
— 1/4 cup
directly into the bleach
dispenser. See the How
to Use the Bleach
Dispenser section, for more information.
the Mini-Quick cycle). Place the fabric softener
dispenser on the
(5 ml) of concentrated softener or 1 tablespoon (15
ml) of diluted softener into a standard measuring
CUD.
Add
th;
diluted
to Use the Fabric Softener Dispenser section, for
more information.
controls as follows:
MINI-BASKET
position.
Fabric Care program
and the cycle. See Operating Instructions section.
if desired.
(60
ml)—
enough
sof&ner
/
d..
%*
Filter-Flo
water to fill the cup 1/2 full. Pour
into the dispenser. See the How
pan. Pour 1 teaspoon
set
Variable Water Level
SMALL+
10
 Loading...