

Page 1
Careand Clea@ng
I
adrrii=
12,13
I
Ccmmunerservices
I
Important Phone Numbers 55
55 She@s
I
Features
I
Installation In8&tacti0n8 *5O TIM+rn ostat Adjustment-
I
Air Adjustm@
Flooring Undp Range 36
Leveling
LP Conversion
Model
oven 14-27
and Se@ Numbers 2
Baking
6,7
42
43
44--50
16-19
RcM@ng/-
se eanin
~H
I
Powe+
Probl+mSohrer
!kf~ Instructions
Surfa+e Cooking
Outa~e
I
1
1
I+(IU Yourself 20
I
I
r
Bux+ers 8-1o I
I
Cor
trol settings
Coc#top Comparison
I
Co@ware
“ Guide 21,22
Tiips
25-27
15,16
13
51,52
3-5
8-1o
8,9
10
H
II
II
H
II
I
I
SEV
Wm
I
I
8
I
Broilinjz/Bmilinjz Guide 23,24
ContmI SettixW 11
Door Removal 31
L
de%ie
L@wingInstructions
w
-@Y
I
Use and Care & Installation
9 of YourGas Range
1
Back Cover
9
I
8
{
.
.,
! ,,
m“4@w
Page 2
HELP US HELP YOU...
r
Read this guidq C4Wdki&.
It is intended to help you operate and maintain your
new range properly.
Keep it handy for *were to your questions.
If you don’t understand something or need more help,
write (include your @honenumber):
Consumer Affairs
Appliance Park
Iaisville, KY 4(1225
W~G: If the information in this
guide is notfollowed exactly,a fim or
explosion may result causing
property
-% Pm iqjury ordeath.
—Donotstore orusegasolin e or other
flammable vapors andliquids in the
vicinity of thisor any other appIiance.
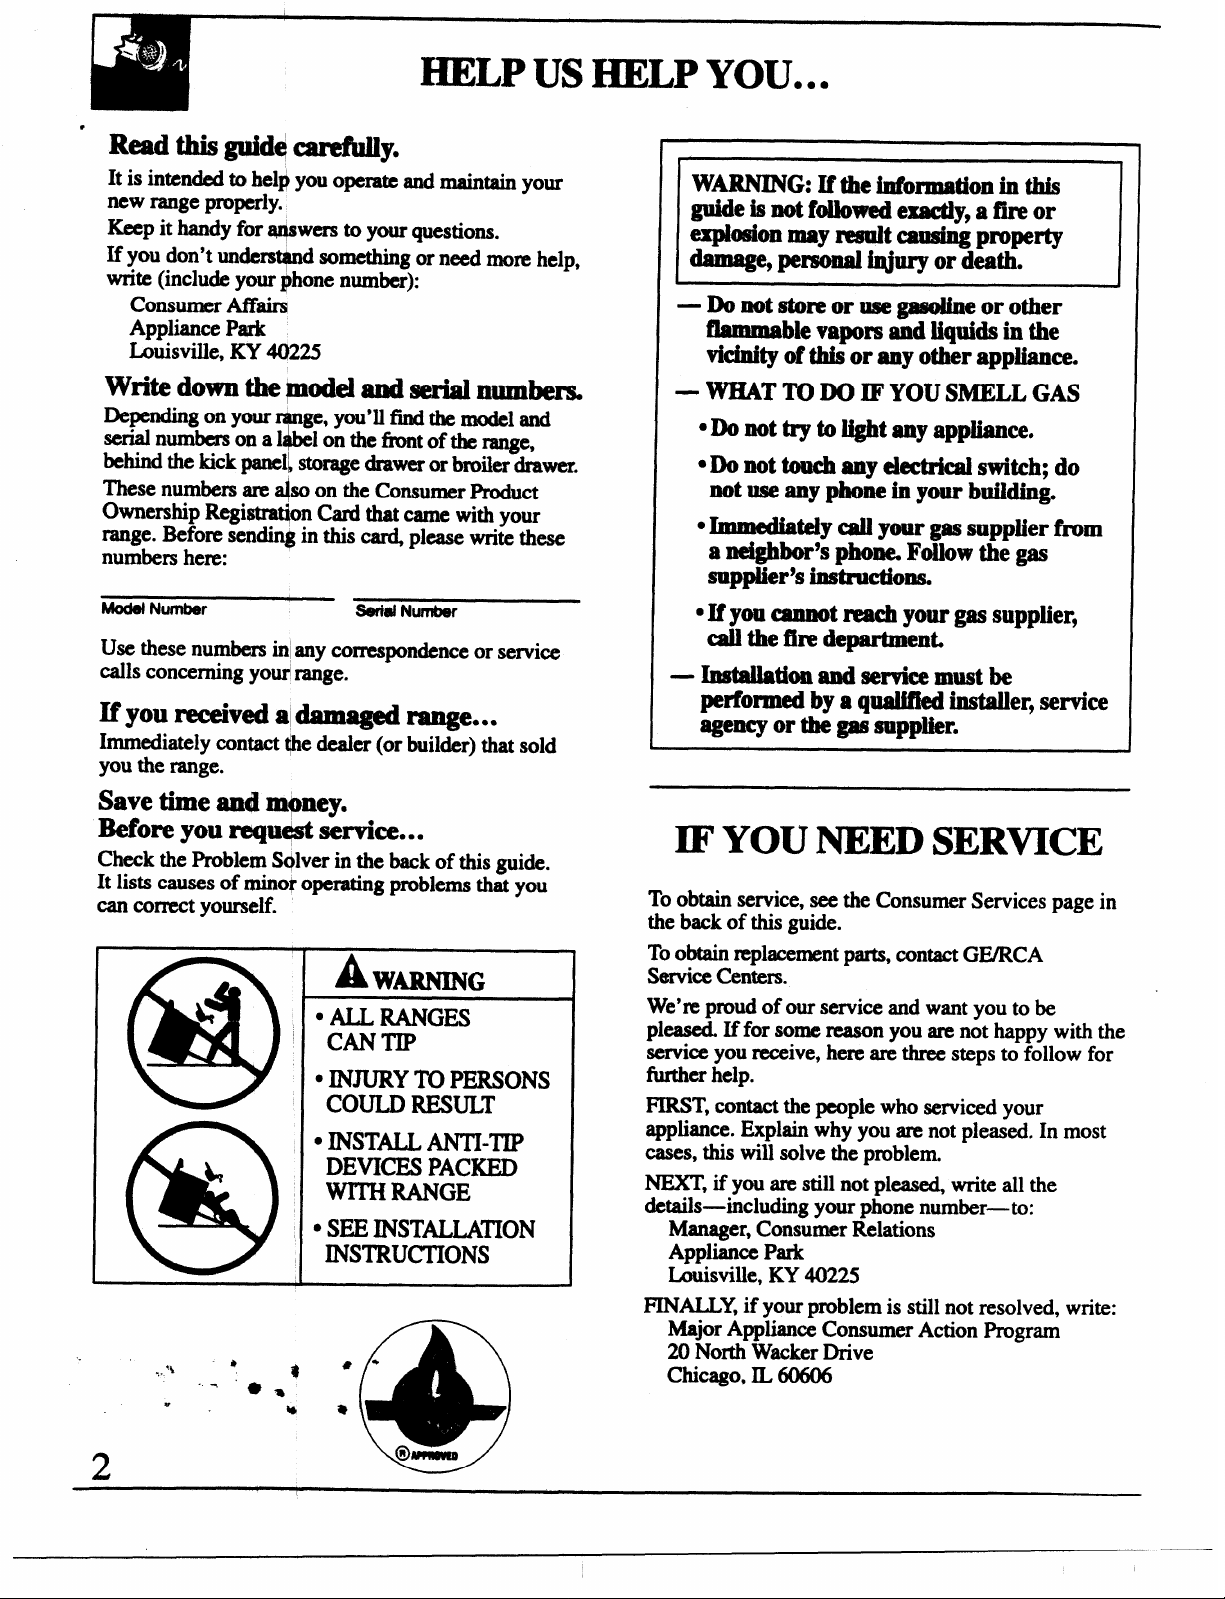
Write dwn the pdel and serial numbers
Depending on your
serial numbers onal
behind the kick panelkstorage drawer or broiler drawer.
These numbers are ~so on the Consumer Product
Ownership Registra@m Card that came with your
range. Before sending in this@ please write these
numbers hem:
ModBlMJmtJer
Use these numbers k any comespondence or service
calls concerning yoti range.
If
you received aldamaged range...
Immediately contact @edealer (or builder) that sold
you the range.
ge, you’ll find the model and
Ionthefnmtoftiqe,
%
SerialNumber
Save time and mfmey.
Before you NMpMjstservice...
Check the Problem S@verin the back of this guide.
It lists causes of mino~operating problems that you
can
correctyourself.
— WHATTODO IF YOUSMELL GAS
● Do not try to light anyappliance.
● h not touchillly electrkai switch; do
not use anyphone in your buiidingo
● Immediately call your gassupplier fmm
a neighbor’sphone, Follow the gas
supplier’sinstruction
. If you cannotmwh your gas supplier9
call the fire department.
— Installationand service must be
performed bya qualifkd installer,service
agency or the gas supplier.
.
IF YOU NEED SERVICE
To obtain service, see the Consumer Services page in
the back of this guide.
Toobtain replacement parts, contact GWRCA
Service Centers.
We’re proud of our service and want you to be
pkased If for some reason you are not happy with the
service you receive, here are three steps to follow for
fhrther help.
FIRST, contact the people who serviced your
~pfimce. Explainwhy you are not pleased. In most
cases, this will solve the problem.
NEXT, if you am still not pleas~ write all the
details-including your phone number-to:
Manager, Consumer Relations
Appliance Park
Louisville, KY 40225
FINALLY, if your problem is still not resolved, write:
Major Appliance Consumer Action Program
20 North W~ker Drive
Chicago, IL 60606
Page 3
3he
Q!!!
raiqp 6efomx@3mtingit topreventfire or
SmokeCiamag@ah6uldthepackingmaterkdignite.
topublishdist bf &Manees
~--;
harnUndrpqu4eS
ofpotentialkxp&mretosuchsubstances.
●*
-%;
modelhas
acceding * 10Castateandf- codes.
birthdefECtsOmther
● businesses towarn -
tbulWmhafWyvldveSOll
+
8xmtaiKlInercury.Ify
f-s, theymustbe I13eycl
whenYoaqtYour Ramge
● &ve f&
a
ifnecesmry.
ShoWyouthelodonof
valvead how toshut it
r
or
~IBesure your&&e is eozmctiy@@sW
_ t@mkian or installer for the
=- (natmdorU9 that is to be used.
Yourrangecan
reconverted forusewitheither
&p of ~. %M.lEIXMtdMonInstructions.
w-a Tksea@usmen
.
@l&d*~iIl~~~&e
manuf”s instructions and all codes and
4@==@$
of the authority having jurisdiction.
Failure tofo~owthesehS@UCtiOIIS couki msdt in
seriousinjury ~propatydamag
- @-h Wr’kassumesresponsibility
ibrtheconversion.
● -r
,
prO1On@weofa ran&+high fi4mr
tenqeratums may tit and many floor
Coveringswmmotwithstmdt iwof=.
Neverinstalltherangeovervinyl tile
thatcannotwithstandsuchtypeof use.Never
installit directlyoverinteriorkitchencarpeting.
by a
tsmustbemadebya
e.Ilw qualified
orlinoleum
@
0 Have pm
=&b a q-
z
andserdmI
gasrangei&s
•~~
your
intids semieingshOuMben!?fi43cd
a>.~a
toaquaMi@
●lUgymU
outlet only.
*
imtalbdandproperiy
in
●OII Instructions. Any adjus t
dbeperfbrmmionly byq “ ed
rs orservicetechnicians.
%
‘v
toretpairormpiaceany part
itia
hniciaw
tito
a U&wit gmundtd
not
removetheround
P&&~: Ug.xhtiti
‘cd sym it is your
&
-w++~~~ve~
outletrep-~with a properlygroUnde4~-
prongoutkt in
Electrical
electricali~
CaMdian
cordwith
●-
andout
imtage (q pilotmodels) and poor
air
2
s
amdanee withtheNational
c
.In Gna&Jheappliancem@be
inaccordaneewiththe
“Cdcode.mnotusean*
+
this *plianee.
outafkMentra6cpath ,
iocatkmtoprevws tpikk
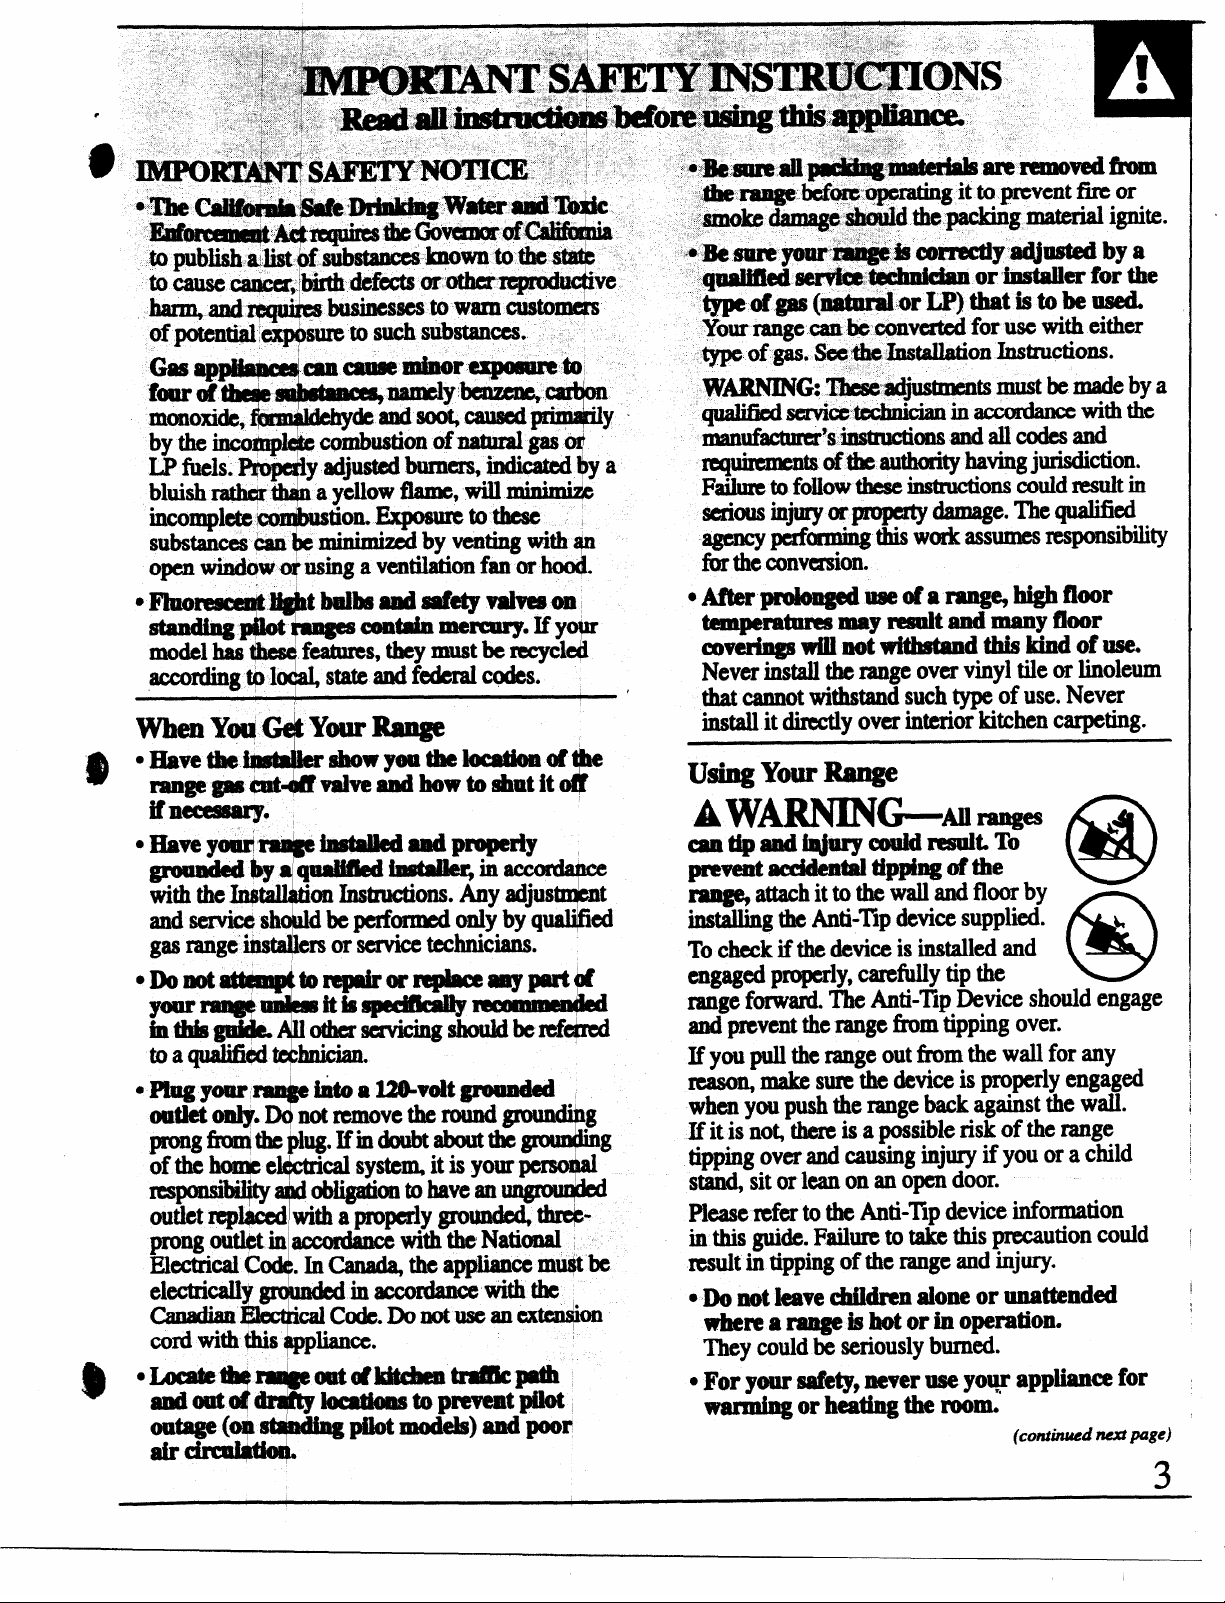
instig theAnti-TipdeviceSU@kCi. ~
Tocheckif thedeviceis installedand
=W@ P*y,
Ca’1’efuytipthe
rangefwani. TheAnti-TipDeviceshouldengage
andpreventtherangefimn tippingover.
If youpulltherangeoutfromthe wall
reasow make sure the device is properly engaged
for any
whenYou Pushtherangebackagainstthewall.
If itis”nog-thereis ap&sibleriskof therange I
tipphg OVfXand causing iqjury if you ora child I
stand,sitor leanonanopendoor.
Pleaserefmtothe Anti-Tipdeviceinformation
inthis guide.Failuretotakethis precautioncould (
msukin tippingoftherangeandinjury.
● ~ ~ ~ve M-n ~OIWor unat@ndd
whew a range is hot or in operation.
couldbe seriouslyburned.
They
● For your safety,never use yo~ appliance for
warming orheatingtherocm
(Cmtinuediwupqe)
3
I
$
Page 4
●Donotusewatpropgrea$efires.Nev=Pw
a
-P-l’%
flamingpanonp
coxndetelviti a well-fittixu litL cddc sheet
win
‘&flattriiy.U&lam ti-purposeJ& chemicalor
foam-type@
FiaminggreasePu@’eapancanbeputoutby
coveringit with
&
usinga multifn extinguished
Flamein theov+nc+nbesmothemdcompletelyby
-, =– –—– ._.= -r_–___,_
•~~~
•~N~ST()
MATERIALS,G
FLAMMABv
THEVI
J!!?
APPLIANCE.
●4Hlotletcooqag
---~=-= ‘
●VhencOoking ~folk)w tbedirectiCmsexactly
andalwaysc
of atleast 17
%
possibilitythattic “
itwillbe W~
Surface Coo@qig,
● ~ways heat fk$tij?iy, and watchaait heat&
4
the controlsoff.Smothera
unitbyC(W- the
ace
w
~Xth ●sher.
L
W& or, if mdabk, by
drychemicalor foam-type
turningthe ovenoffor
drychemicalorfoam-
nmtddsktam~a
drawemrmaracooktop.
R USE COMBUSTIBLE
LINEOROTEER
RSANDLIQm IN
THIS(MMNYOI!HER
thc$neattoaIlinte31A@lpem@e
assurestha@th@rc4nOtE
Inaybepmsentinthem
~
meatwillbe safetoeat.
w
41w8yst uMd Hul%cei MlrMrs tooffbefore “
removing Cookware
Wamdhliywatchf oodsbeingf kiedatahigh
thmeseiting ~
● Never b~ ~ ~~ (~
-
~eY Pvi* ~ * *t ad ou~~ttitm
Opedngs)ofthe ‘ -x
;.*
necesmg for therangetooperateproperlywith
correctcombustion.Airopeningsarelocatedatthe
rearof thecooktop,atthetop andbottomofthe
ovendoor,andatthebottomoftherangeunderthe
broilerdrawer.
over the burner grate to suppoti-the wok;This
ringactsas
aheattrap,whichmay damagethe
burnergrateandburnerhead.Also,it maycause
theburnerto
carbon
work improperly. This may causea
monoxide levelabovethatallowedby
cumnt standds, resultingin a healthhazard.
sFoo&f~f&@_~~&y~
podbk?LFrost
oniixmmfdormoistum onikshf~cancause
hotfhttobubbleup andoverthe sklesofthepan.
o.U= ~ ~ _
amount of M for effbctive
8h@0wordeep4Mfryingo Fiigthepant00fW
off~ cancausespilioverswhenfd is added.
ou~~~~~
preventOverhatmg
}
● Never try tomove a panof hotf@ especiallya
deep fat @cr. Wtit untilthefat is cool.
•~~*_q*e sure itis
“ fatbeyondthesmokingpoinL
wheneverpossibleto
designedfortop-of-rangecooking.
Page 5
.
J
,, ./,, ~,.
‘ .~>.”:;. ,
,,
,.,. ~
•~:a
anstabieor
flatbottoms enoughto
andspilloversandlarge {
canbeeasily
● Keepall
●
●
●
~awayfhulthetopb urnerso
properlycontainf
.>= ~ ~vm.ti+ greasebuikhp.
‘/
‘i. mmdenceinMfthgk~f~Ittitia
emouMw&MmheddfWop isa
again$tbm!nsfkmntouching hot
4&fkce$Ofthe d4MHwroven walk. me lowest
position%3sian@&si@ed to
*~~~
cmddbuikiupandtiwmdnercoddbarst+
e’~~t~
except as descdbdin this guide.
unopsM&food4xMabm. I?reMmm
ablmhmm foil anywhere
resultinaf~hazardordamag
•~n~
ov~ followthe manufhctum’sdirections.
● theOldyglass
cooking orxwastingbags inthe
cookwme that is recommended
fmuse in gasovals.
QAlwaymanovetheb roilerpanfrom ~eas
soon as youl!hdshbroiling. Greaseleft m thepan
can catch fire if oven is used without removing
the grease fkom the broiier pan.
●Vhembroilh @meatistooc losetotheflame,
the f~ may ignite. Trimexcessfat toprevent
excessive flare-ups.
SMakesure the broiler panistnplacecorrectly
reducethepossibilityofgreasefins.
to
dfyoushmkhweagrea$efkein thebroikp%
turnoff oven contm~andkep broiler drawer and
ovendoorclosedtocontainfireuntilitbumsout
dide.
in the oven
Misuse could
e totherange.
●rangeis
long ●
andcreatea
●-a
<%
youwillde tafaintodorof
torelightth pil Whenreli
makesure
follow“
and
?$
●If you
pilotsadit on
gast#Mhe
Neveruse
B-h
3
oi&g and Raasting
•~n~t~
Items
●lacetheo $h4!lve$Mhede4dredpo$itloq
whiletheo $seool.
9
● s-d am
door of a
escapes can cau e burns to
41’
f
nearawindow, donothan
COukiblow
OVCr the tOp bUIII
oat&nstmCkng“ pikltmodels,
T
G
controlsareinthe off
CtiOIIS in thiS bookto reli@t.
andyou have alreadymades
● gpilotmodels), tumdf
callaqudfiedservice “●
flametolocateakako
Y
venfbrastozqparem
intheovencanignk
theralB@whenopedng*
en. Thehotairand steam that
T
hands,fwe andeye$.
as yoursi
● gthepiloc
positioq,
J
$%
J
Se!wcleaning oven
● ~ ~t ~ door ~eL Thedoorgasketis
essentialfora goodseal.Careshouldbe takennot
torub,damag
•DO~WOWHICkmgmLNO commerdoven
cleaner or oven liner protective coating
e ormovethe gasket.
ofanykind
shouldbeusedin oraroundnyprtofti oven.
Residuefim ovencleanerswilldamagetheinside
ofthe ovenwhentheself-cleancycleisused.
● ~o~ ~
shei~ the broiler pan and gridand other
.Mluretowipeupexc esl$spiilage before
-*@-
•~**
theovenoffanddkmnect
Have
-dean@ the ov~ remove the
qleratiom
+4e4mhgmode
it serviced by aqualifiedtechnician.
mdfiwtions, turn
the power supply.
SAW THESE
INSTRUCTIONS
5
—
Page 6
I
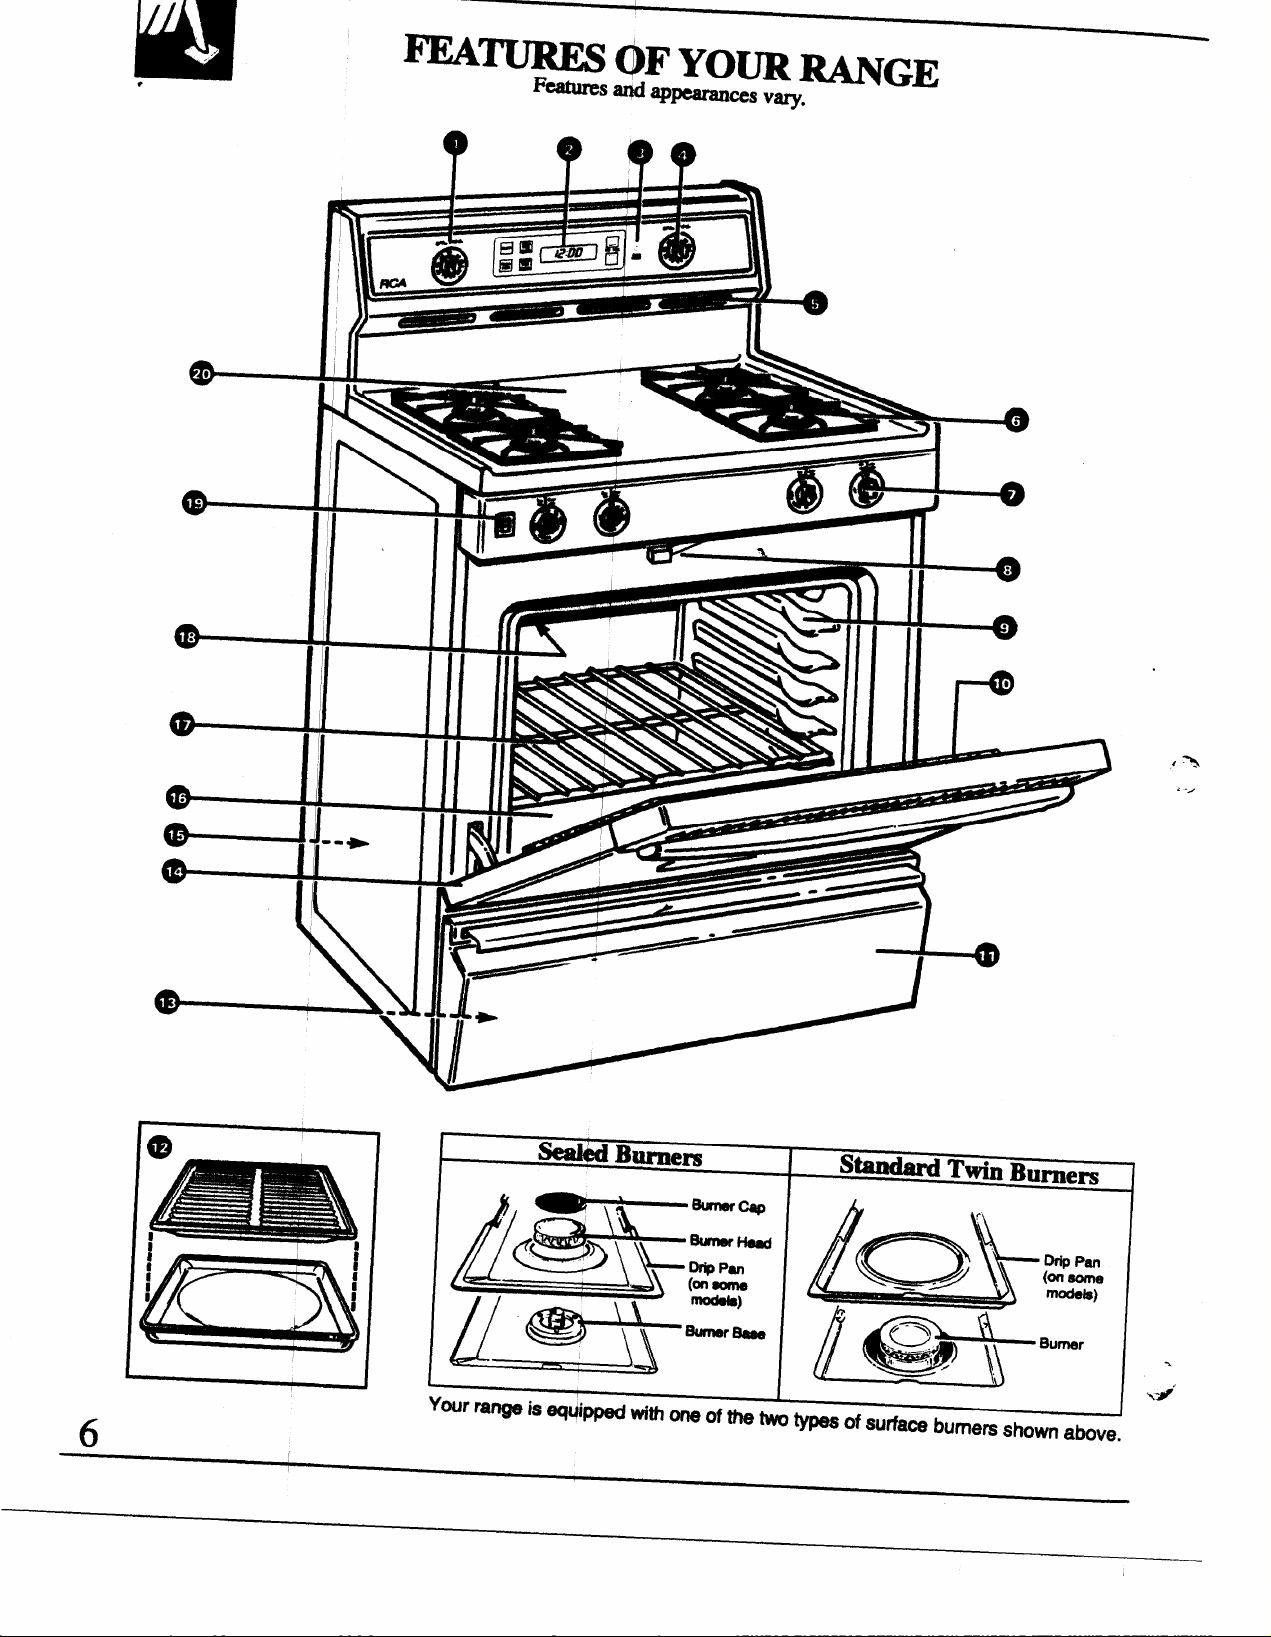
=-cm Yom ~GE
Ratllres Wd ap-es vary.
:
d
-1
●
0--1
*9
*
I
.
6
z=a’ 22
ZL
I
Your range k eqqippd w“th one of the two Wes of surface bumem shoti above.
I
1
~z
a
’4’
Page 7
“$
●
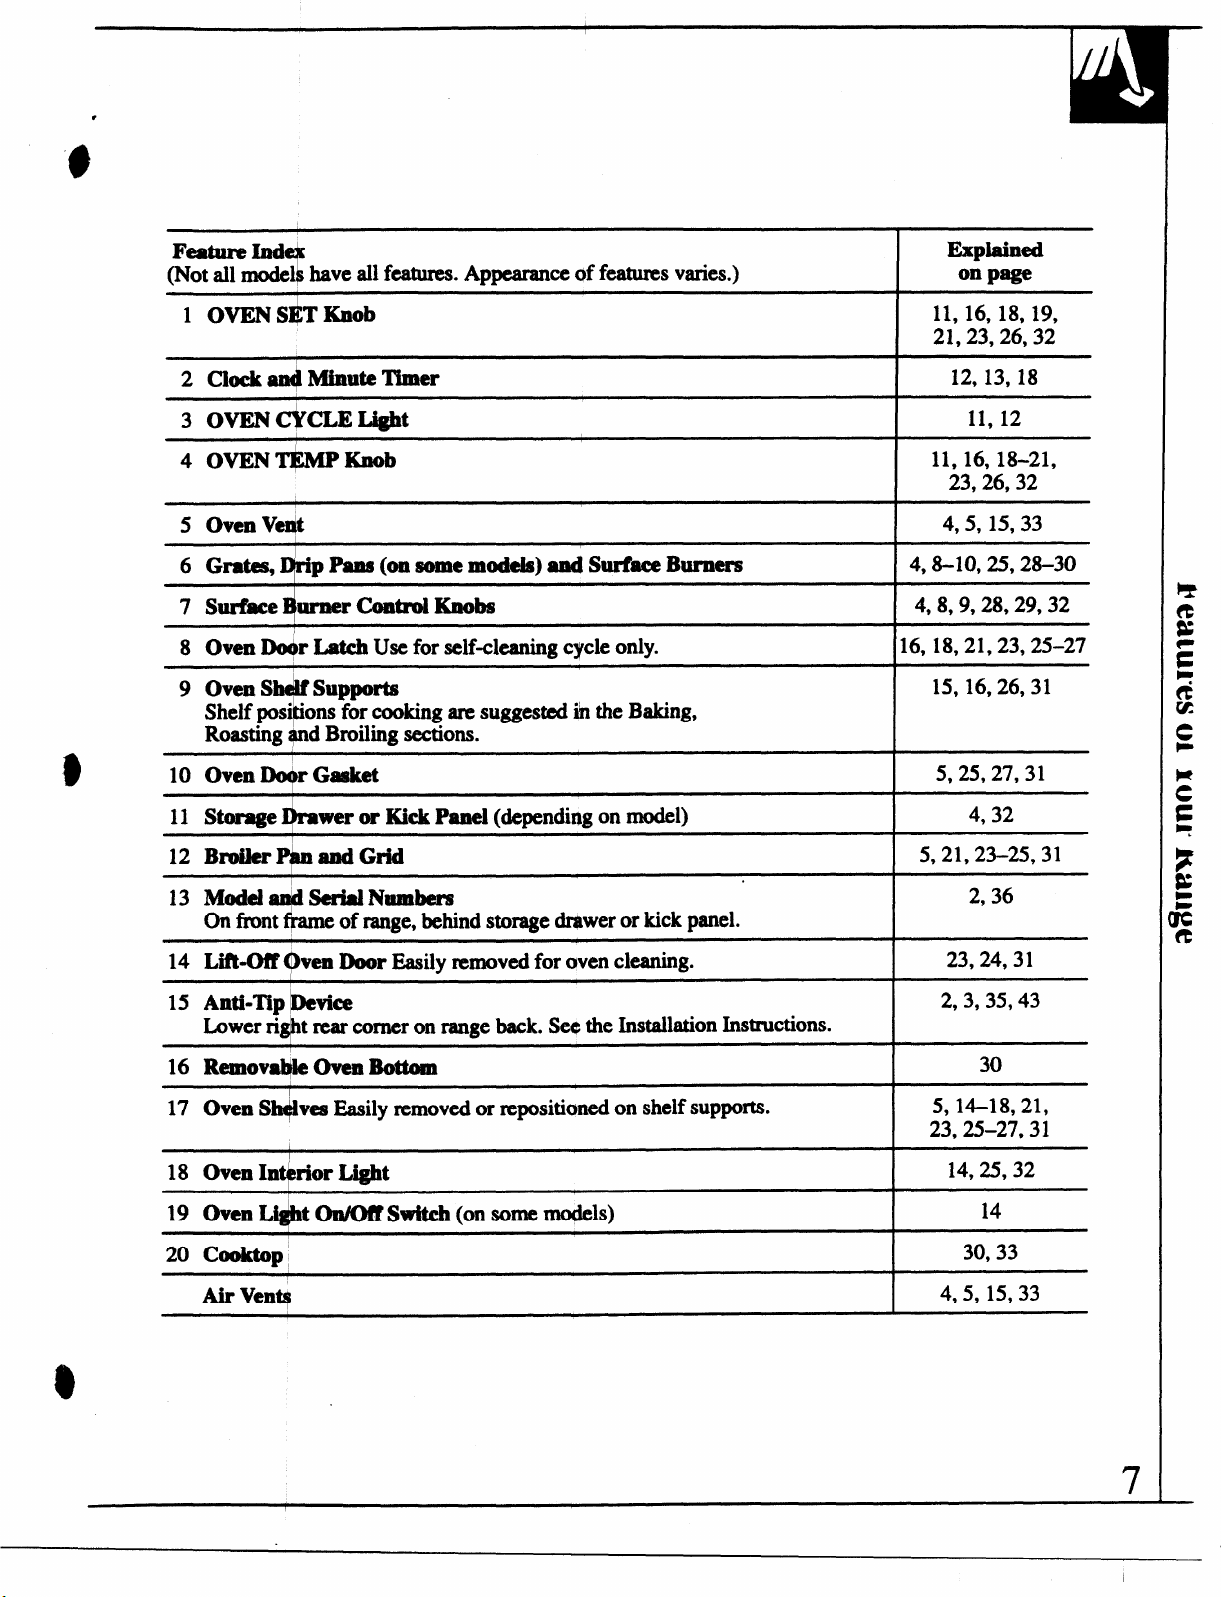
FeatureInd
(Not all model have all features. Appearance of features varies.)
1 OVEN SI$T Knob
2 Clock amllkfimltel%mer
3 OVEN
4
OVEN* KDOI)
5
Oven V+
6 Gram ~p Pares (on some modeh) andSti’ Burners
7
Sur!beI$lrnerc4wwrOIKnobs
8 Oven
9 Oven S
Shelf posi “ensfor cooking am suggested in the Baking,
Roasting @d Broiling sections.
10
OvenDo+rGasket
11 Storage @raweror Kick Panel (dependi~g on model)
‘1
C@E Light
Dw$rLatchUse for self-cleaning cycle only.
supports
T
Expiained
onp8ge
11, 16, 18, 19,
21,23,26,32
12, 13, 18
11, 12
11,16,18-21,
23,26,32
4,5, 15,33
4,8-10,25,28-30
4,8,9,28,29,32
[6, 18,21,23,25-27
15, 16,26,31
5,25,27,31
4,32
12 BmMe+mandGdd
13 Model
on fillnt of range, behind storage d.mweror kick pnel.
14 LMMM @mi
15
Anti-Tip~vice
Lower ri@ rear corner on range back. S* the Installation Instructions.
16 Renmvd$e oven ~
17
Oven SWves Easily removed or repositkmed on shelf supports.
18 Oven In@ior Light
19
Oven Li$M On/OiY Switch (on some models)
20
CooMop
Air Ve@
Serial Nmnbem
+
Door Easily removed for aven cleaning.
I
5,21,23-25,31
2,36
23,24,31
2,3,35,43
30
5,14-18,21,
23,25-27,31
14,25,32
14
30,33
4,5, 15,33
7
Page 8
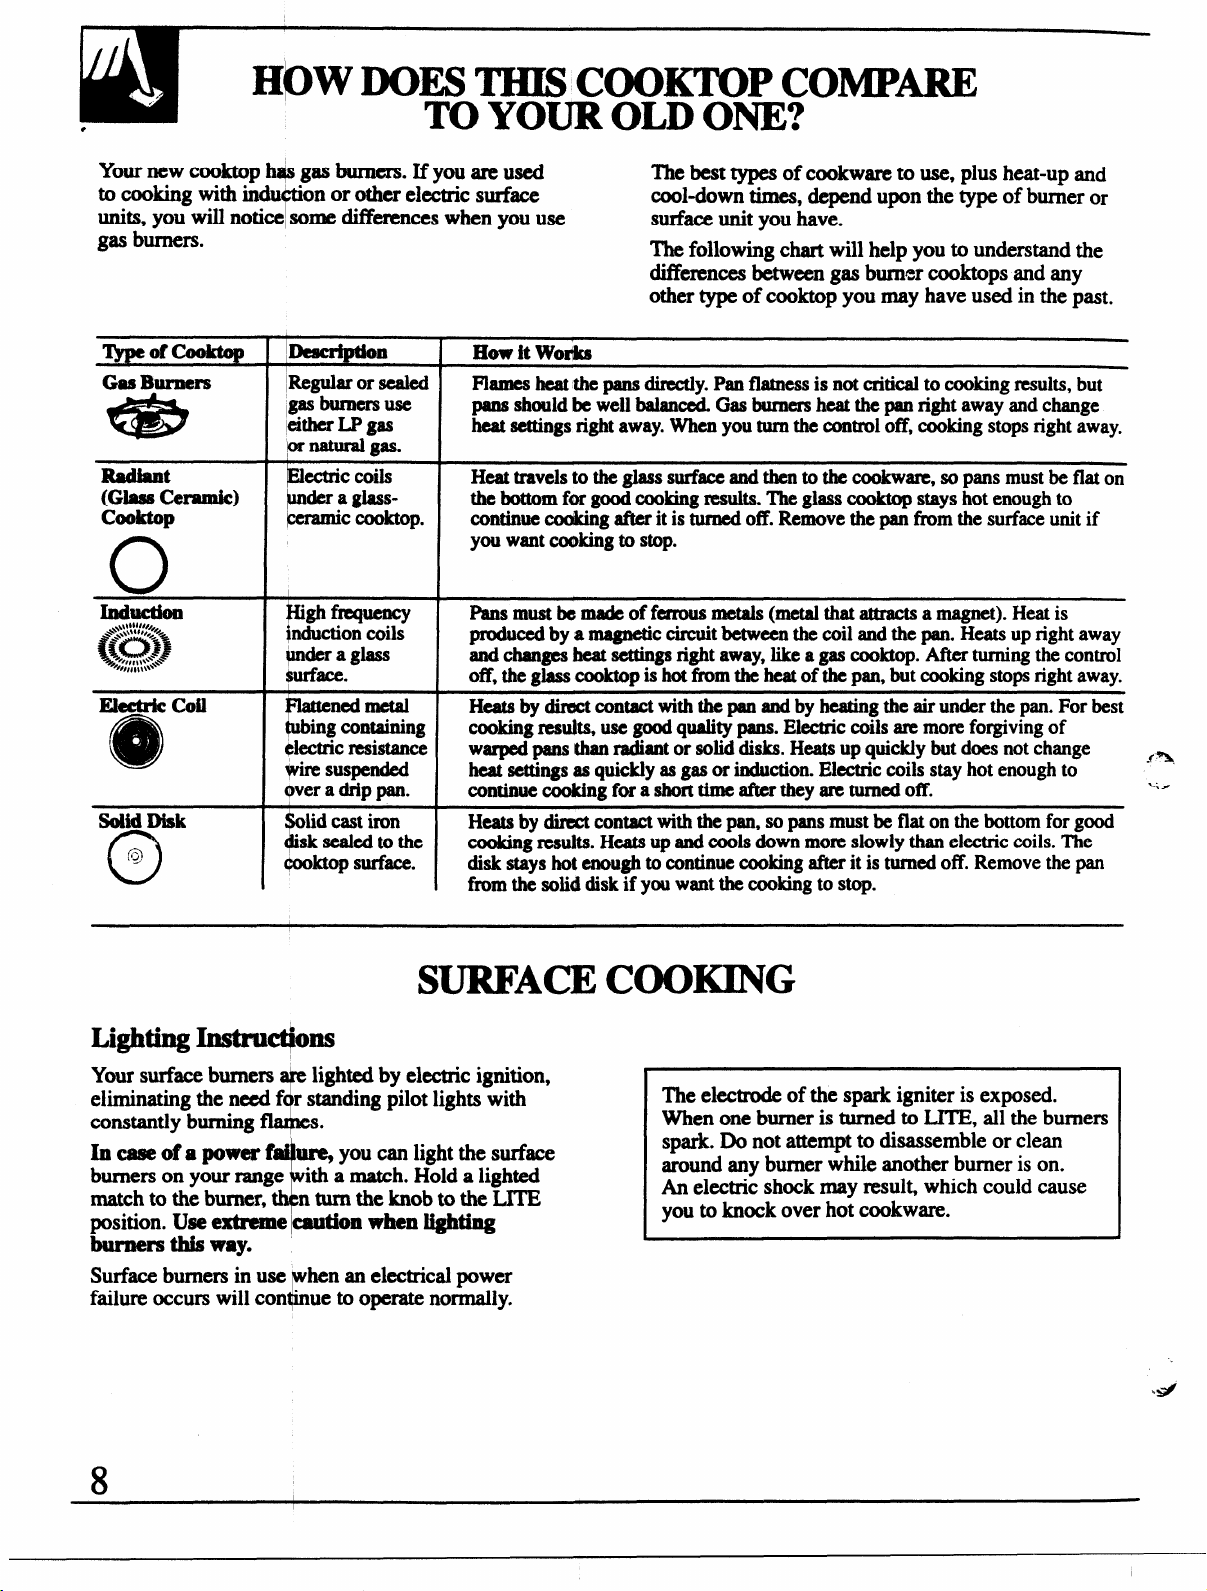
HOW DOES THIS COOKTOP COMP!!
●
Ywnewcooktop hqsgasburners. Ifyouareused
to
cooking with indu “onor other electric surface
units, you wiIl noti=l some dii%rences when you use
gas burners.
‘IypeOfcooktop
Gas Burners
QSJ
Radiant @ctric coils
gmhtiearnic)
o
IndducJion
*#
~B{l
-... @hwtioncoils
.
~.,,,,,\.*;\.*
~#,,,,,,\\\~
P
! ~
~Wguk orsealed
,gasburners use
IdtherLP gas
or naturalgas.
bier a giass-
-C Cooktop.
I
mmm-
pnderaglass
$urface.
metriccoil
1111111
So&l
Disk lidcastiron
I@
o
~-c resistance
$&3 suspended
overa drippan.
“sksealed to the
@oktopsurface.
TO YOUR OLD ONE?
n
Howit Wodks
I
FJamesheatthe pansdirectly.Pan flatnessis not criticalto cooking
pans should be
heat settingsrightaway.Whenyouturn the controloff,cookingstopsright away,
Heattravelsto the glasssurfaceandthento thecookware,so pans mustbeflaton
thebottomf~ goodcookingresults.Theglasscooktopstays hot enoughto
continuecockingafterit is turnedoff.Removethe pan fromthe surface
you wantcookingto stop.
Pansmustbe madeofferrous metals(metalthatat&actsamagnet). Heatis
producedby a magneticcircuitbetweenthe coilandthe pan. Heatsup right away
andchangesheatsettingsrightaway,likea gas cooktop.Afterturningthecontrol
off,theglasscooktopishot fromtheheatofthepan,but cookingstopsrightaway.
Heatsbydirectcontactwiththepan andby heatingthe air underthe pan.For best
cookingremits, usegmd qualitypans.Electriccoilsaremoreforgivingof
warpedpans thanradiantor soliddisks.Heatsup quicklybut
heat settings as
continuecookingf~ a shorttime aftertheyareturnedoff.
Heatsbydirectcontactwiththepan,so pansmust be flaton the bottomforgood
cooking results.
disk stayshot enoughtocontinuecookingafterit isturnedoff.Removethe pan
fmm the soliddiskif youwantthe cookingto stop.
The best types of cookware to use, plus heat-up and
cool-down times, depend upon the type of burner or
surface unit you have.
The following chart will help you to understand the
differences between gas burner cooktops and any
other type of cooktop you may have used in the past.
results, but
wellbalanced Gasburnersheatthe panright awayandchange
unit if
does not change
quicklyasgas or induction.Electriccoils stayhot enoughto
Heatsupandcods downmore slowlythan electriccoils.The
.f%%
~.*
SURFACE COOKING
Your surface burners&lighted by ekctric ignition,
eliminating the need f r standing pilot lights with
constantly burning .
In ease of a power f~uxu+ you can light the surface
burners on your range ith a match. Hold a lighted
match to the burner,
position. Use extreme
burnm thisway.
Surface burners in use hen an electrical power
failure occurs will con “ ue to ox normally.
ntumtheknob tothe LITE
4
Imtion when_
&
8
The electrode of the spark igniter is exposed.
When one burner is turned to LITE, all the burners
spark. Do not attempt to disassemble or clean
around any burner while another burner is on.
An electric shock may result which could cause
you to knock over hot cookware.
+’
Page 9
●
I
“ ‘rheknobsthat
located on the con 1panel in fkontof the bumem.
The two knobs on e left control the left front and
left rear burners.
the right tint and “ght~ b~erso
the surfaceburners on and off are
%
two knobs on the right control
+
On ranges with sealed burn==
● The smaller burner (right rear position) will give
the best simmer results. It offers precise cooking
perfo~ce for delica@fti, such as sauces or
foods which need to cmk over low heat for a
long time. It can be turned down to a very low
simmer setting.
● The right front burner is higher powered than the
others and will bring liquids to a boil quicker
(natural gas instiltions only).
Before Li@@u a Burner
.
. If drip pans are upplied with your range,
they should be sed at all times.
● Make sum M @es on the range are in place
/
before using an$ burner.
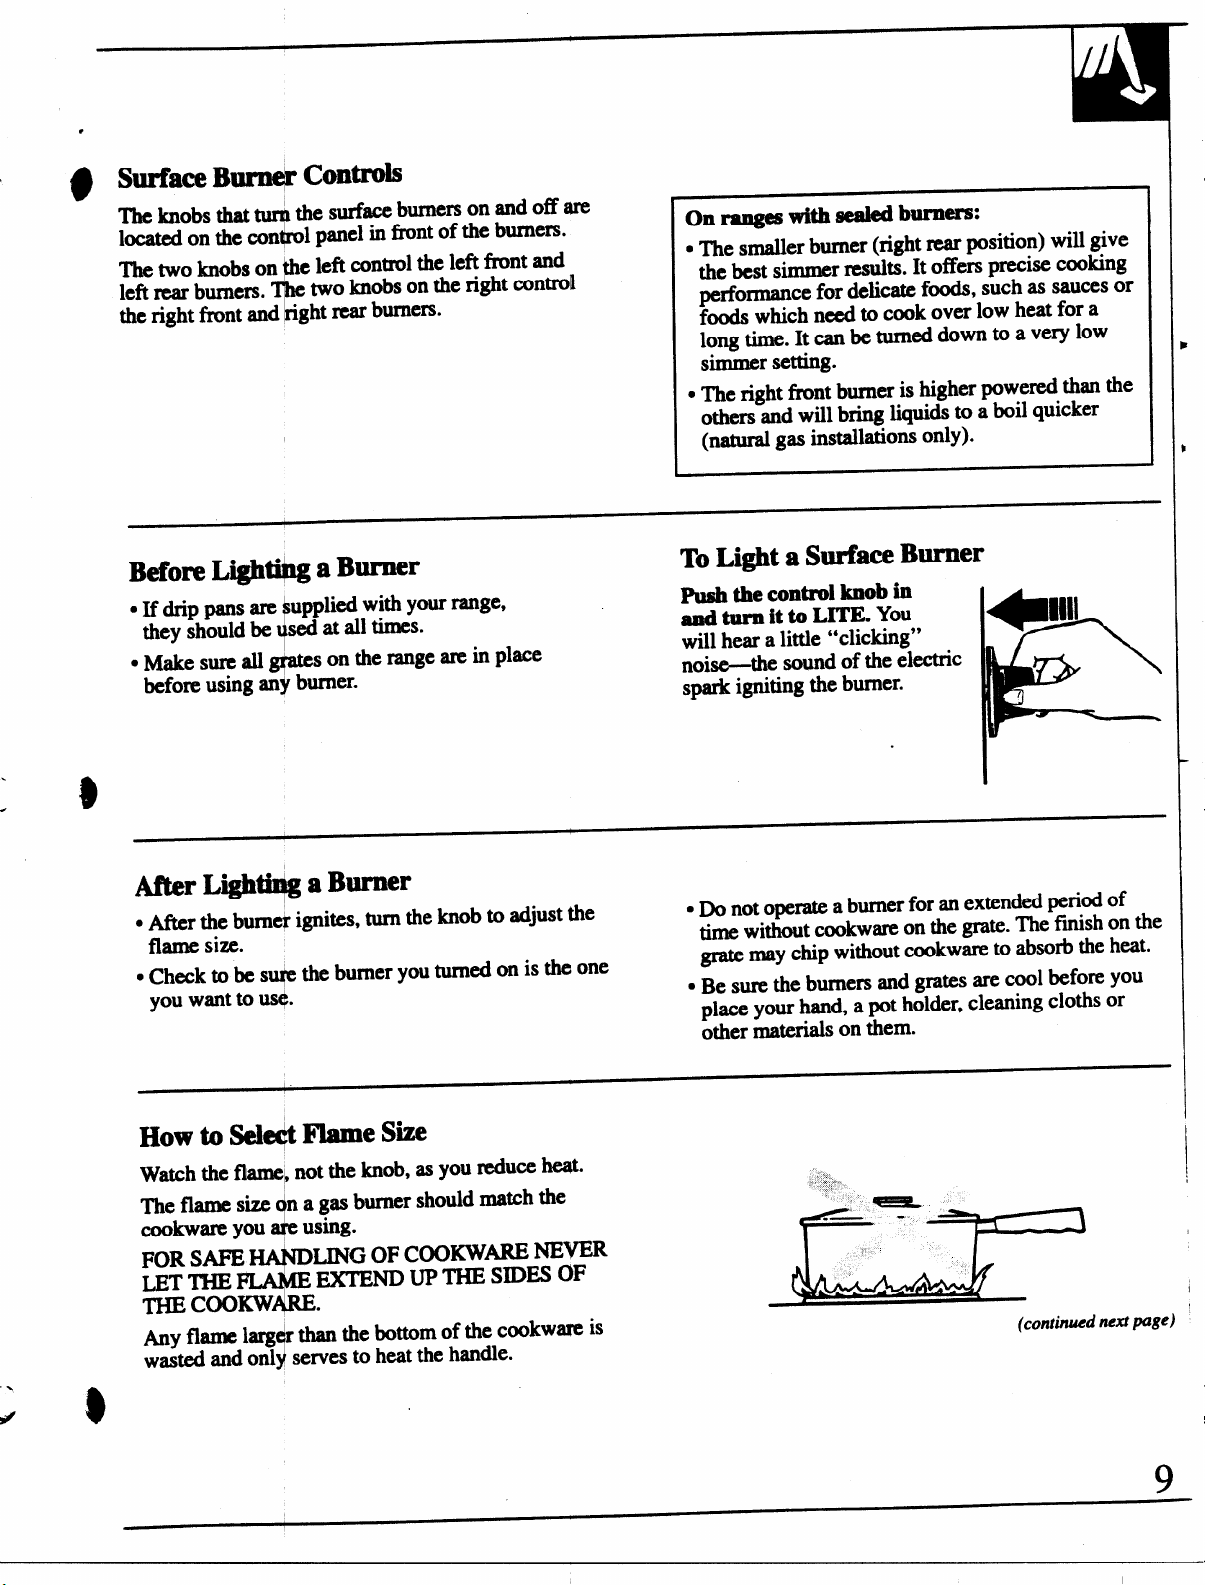
To Light a Surface Burner
IWsh the
twtiiturn
controlknobin
itto LITE. YOU
-.
will hear a litie “clicking”
noise-tie sound of the ekwtric
spark igniting the burner.
.
.
.
8
After Lighth$ga Burner
● After the bumc$ ignites, turn the knob to adjust the
flame size.
● Check to be S* the burner you turned on is the one
you want to us+.
How toSale+Flame Si
Watch the flame) not the knob, as you reduce heat.
The flaIXE size n a gas burner should match the
cookware you using.
FOR SAFE
LET TI=IE
THE
COOKW ●
Any fltUIMlarg r than the bottom of the cookwm is
wasted
$
LING OF COOKw~ NEVER
EXTEND UP THE STDESOF
%
and onl serves to heat the handle.
$
. Do not operate a burner for anextended period of
time without cookwm on the grate. The ftish on the
grate may chip without cookw~ to absorb the heat.
● Be sure the burners and grates are cool before you
placc your hand, a pot holder, cleaning cloths or
other materials on them.
. “.’.
,,.
(continued neti pqw)
t
I
9
Page 10
Tipof-Range Coo~ware
SURFACE!COOKING
(Cominued)
Aluminum: Medium-w ight cookware is
recommended because i heats quickly and evenly.
Most foods brown even yin an aluminum skillet.
Use saucepans with tigh -fitting lids when cooking
with minimum amounts Iofwater.
Cast-Iron: If heated slowly, most skillets will give
Satisfilctoryresults.
EMudwlu’e:
sonw cookware may me Follow cookware
manufacturer’s R?comm+dations for cooking rmXhods.
underso
r
\
conditions, the enamel of
?
Glass: There are two
for oven use only and those for top-of-range cooking
(saucepans, coffee and teapots). Glass conducts heat
very slowly.
Heatproof GhmmCeramic Canbe used for either
surfkceor oven cooking. It conducts heat very slowly
and cools very slowly. Check cookware manufactumr’s
directions to be sum it can be used on gas ranges.
Stainless Sttek
prop@es and is usually combined with copper,
ahumnum or other metals for improved heat
distribution. Combination metal skillets usually work
satisfactorily if they arc used with medium heat as the
manufacturer recommends.
typesof glass cookware-those
This metal alone has poor heating
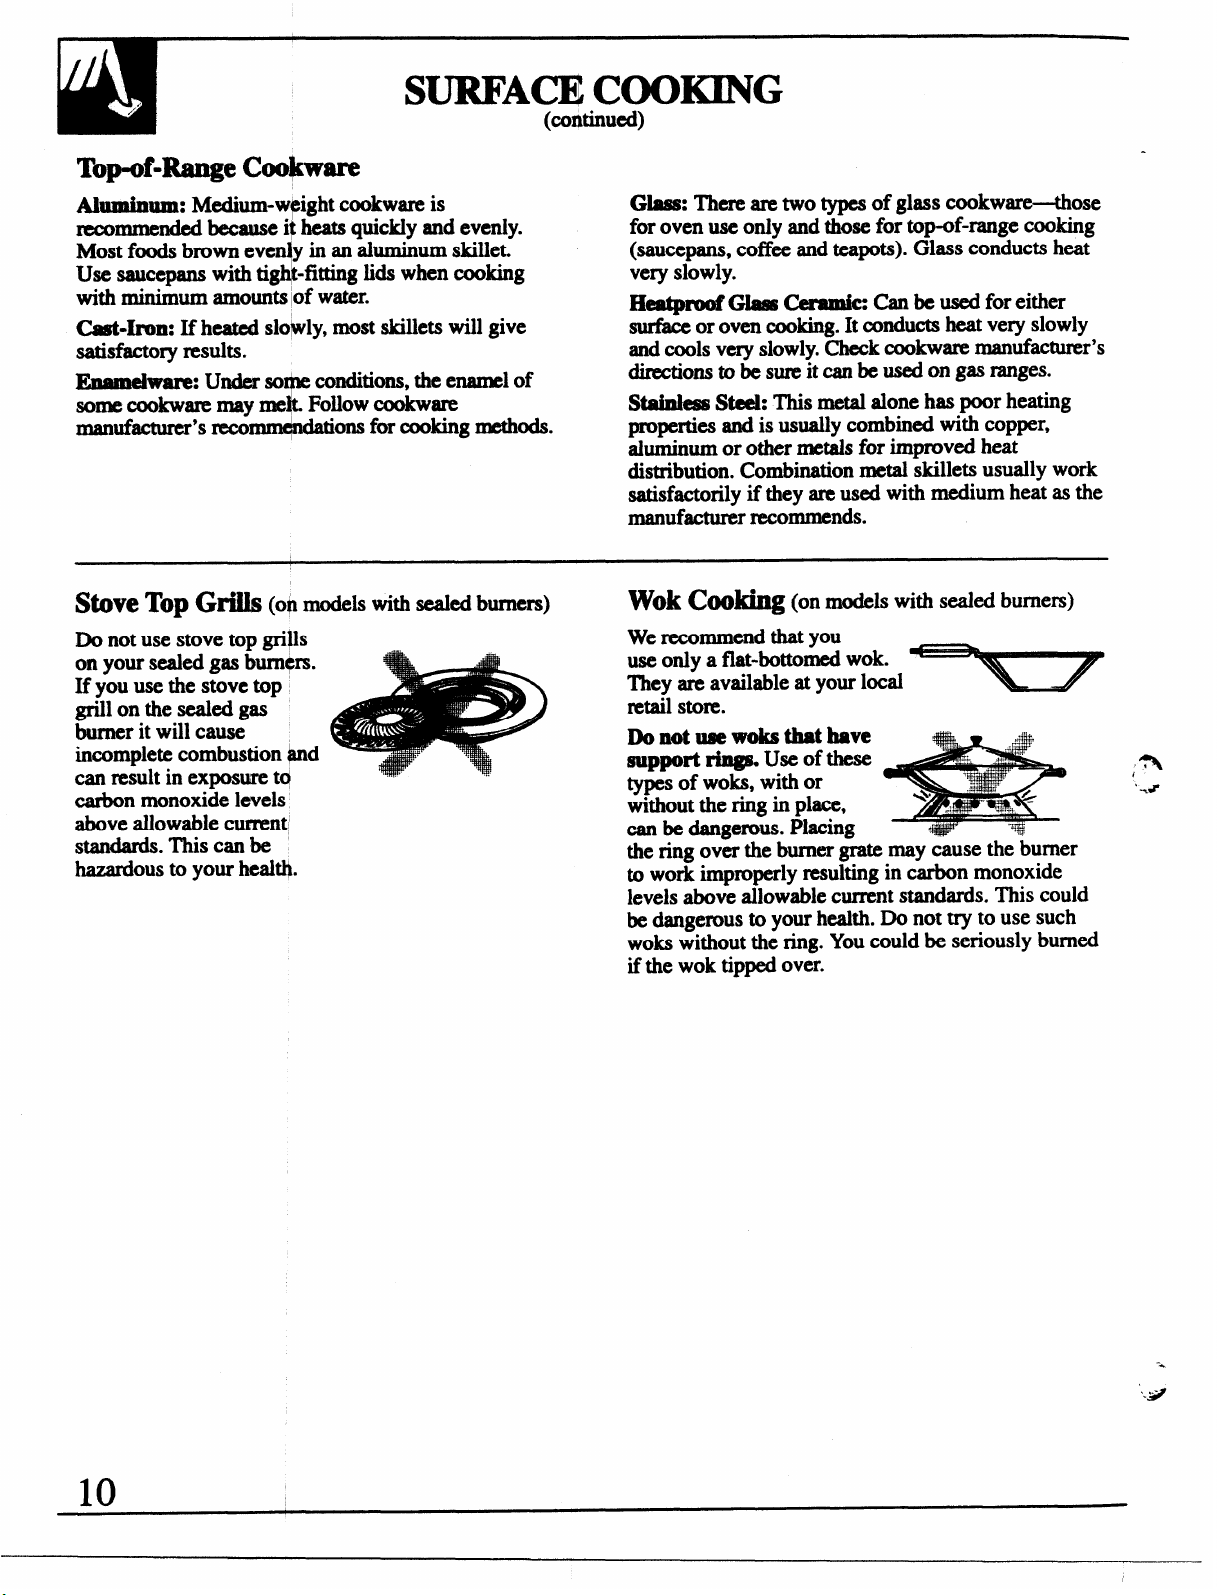
Stove Top Griils (OPmodels with seakxi burners) WokCdhg (on models with sealed burners)
Do not use stove top grills
on your sealed gas bum@s.
If you use the stove top
grill on the sealed gas retail store.
burner it will cause
incomplete combustion ~d
can result in exposure t~
carbon monoxide levels
above allowabie cument
standards. This can be
bZdOUS tOyOUrhealtl$.
We recommend that you
use only a flat-bottomed wok.
They are available at your local
Donotuse woksthdhave
support~ useof these
types of woks, with or
without the ring in place,
can be dangerous. Piacing
the ring over the burner grate may cause the burner
to work improperly resulting in carbon monoxide
leveis above al~owablecurrent standards. This could
be dangerous to your health. Do not try to use such
woks without the ring. Youcould be seriously burned
if the wok tipped over.
;*
‘Y*
‘.9
-+
Page 11
●
~TURES OF lfOUR OVEN CONTROLS
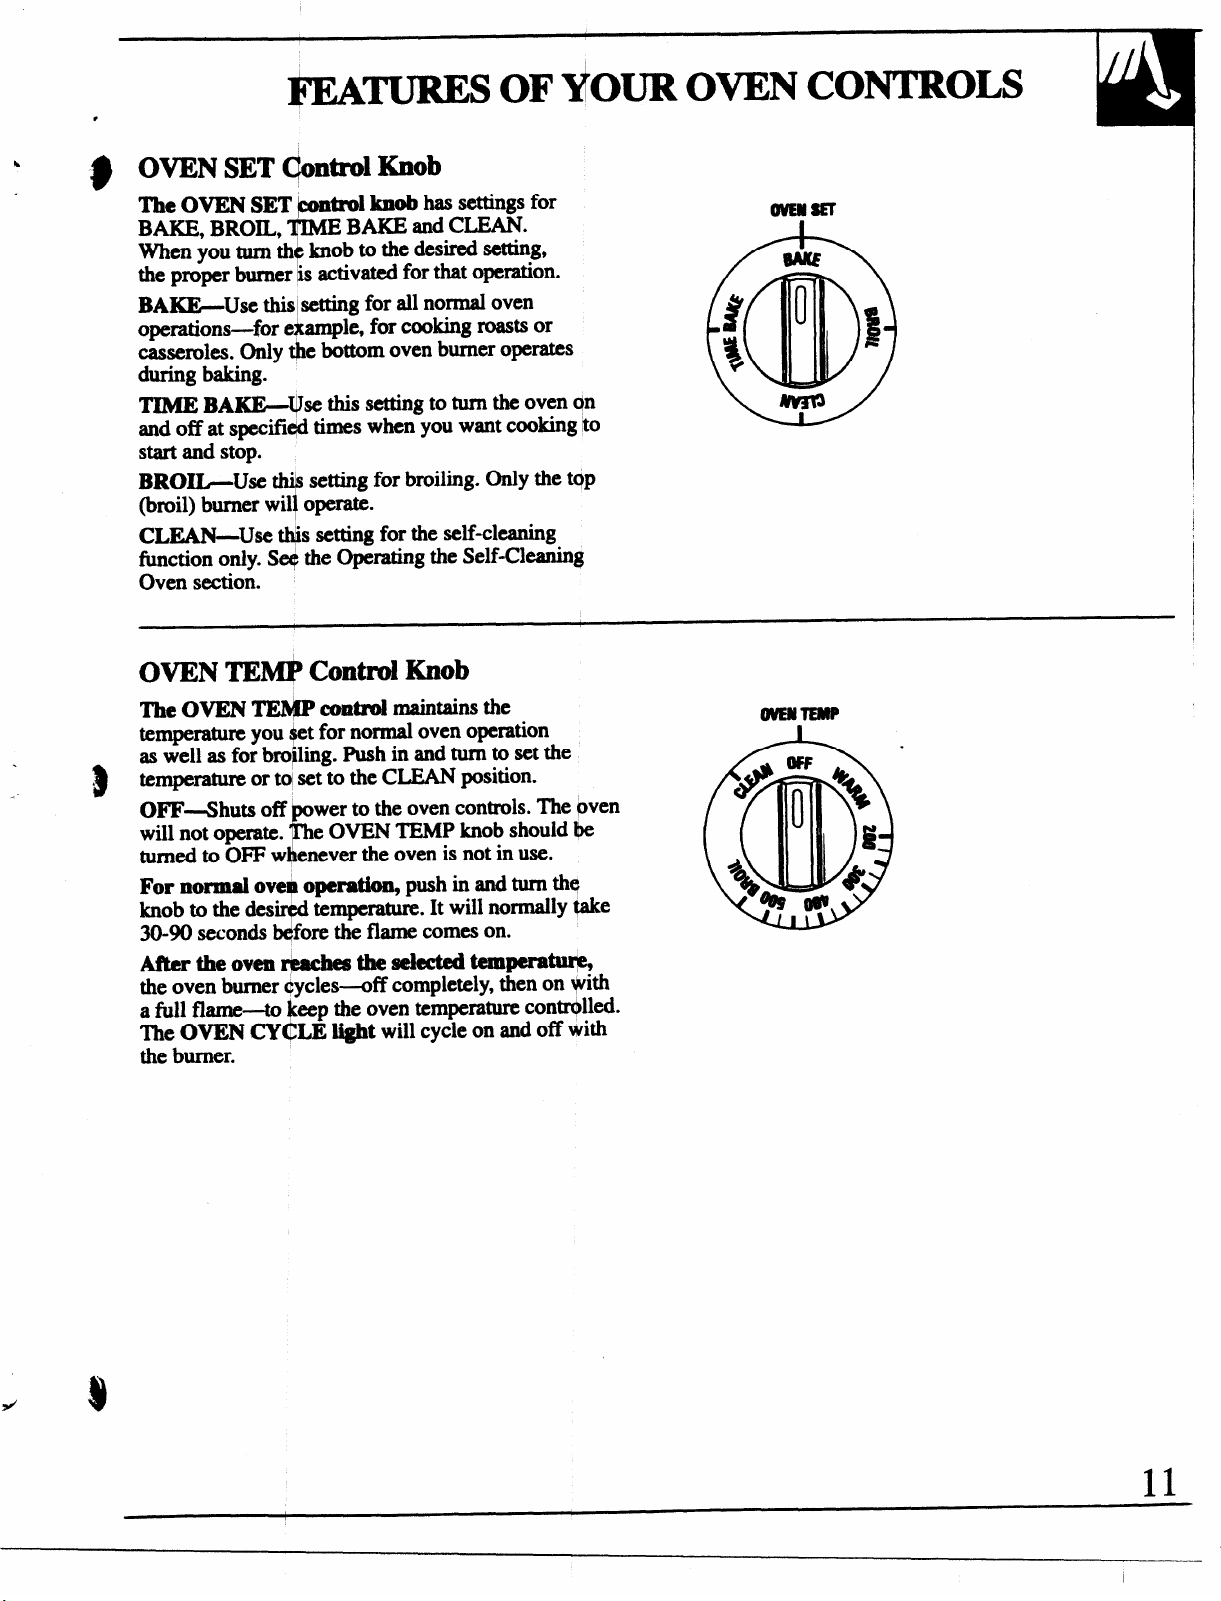
$ OVENSET Qontd Knob
TheOVENSET
BAKE, BROIL,
When you tum th knob to the desired setting,
the proper burner ksactivated for that operation.
BAKE-Use thkj setting for all normal oven
operations-for eiample, for cooking roasts or
casseroles. Only $e bottom oven burner operates
during baking.
TIME BAqse this setting to tum the oven qn
and off at specifie@times when you want cooking ito
S@’tand stop.
BROIL-Use
(broil) burner wil operate.
CLEAN-Use @is setting for the self-cleaning
fimction only. Sex?the Operating the Self-Cleanin~
Oven section.
F
“ setting for broiling. Only the t~p
7
1knob has settings for
BAKE and CLEAN.
ovEasEl
W!!!&”
The OVEN W contd maintains the
temperature you t for normal oven operation
as well as for bro ling. Push in and turn to set the
temperature or tolset to the CLEAN position.
OFF-Shuts off wer to the oven controls. The pven
will not operate.
turned to OFF w enever the oven is not in use.
For nomnal oveqhoperatkm push in d tLUTIthq
knob to the ales”
seconds fore the flame comes on.
30-90
After the oven - the S@kdd -P*
theoven burner ftycles+ff completely, then on *ith
a fill flame-to eep the oven temperature contrc)lled.
The OVEN CY LE
the burner.
r
e OVEN TEMP knob shouid W
F
temperature. It will
?
Ii@ will cycle on and off with
J
nodly take
I
11
Page 12
I
1
FE&TURES OF YO OVEN CONTROLS,
*
??
CLOCK
CLOCK TIMER
n
TIMER
Orvoff
m
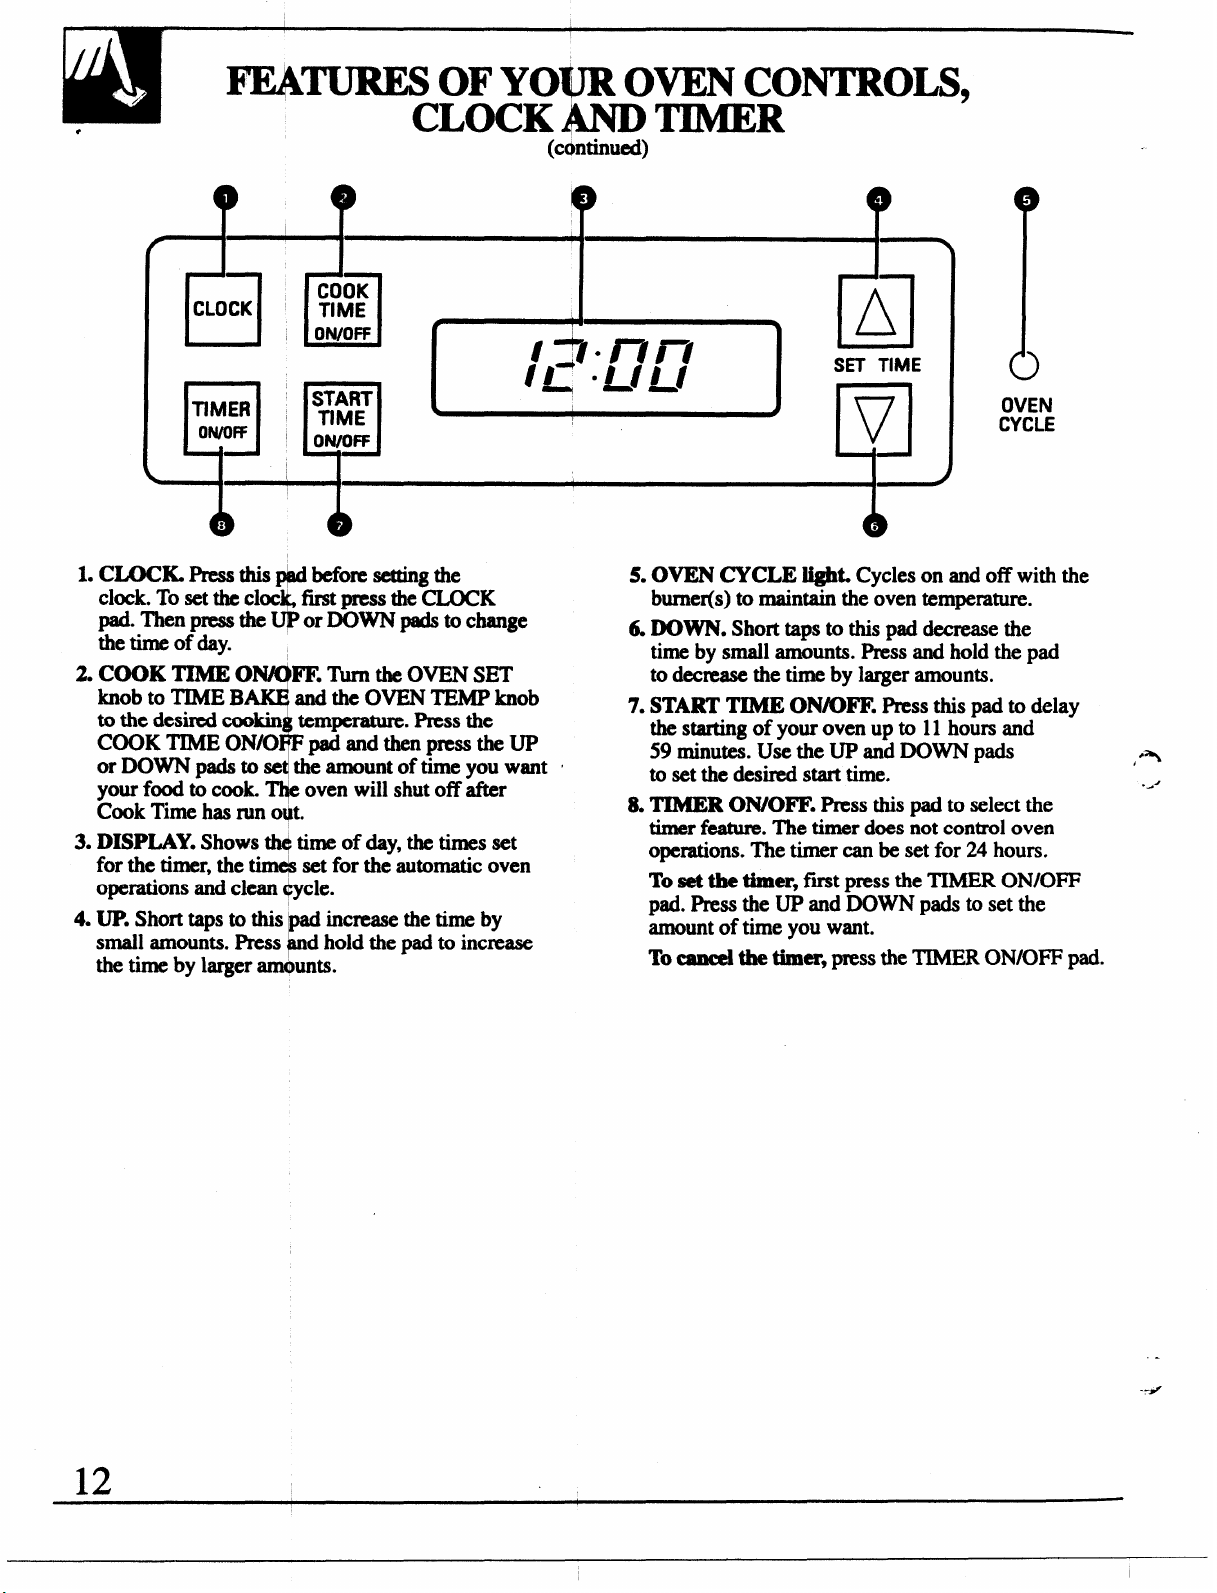
1. CLOCK Pressthis* before settingthe
clock. To set the C1OC first press the CLOCK
pad. Then press the
the time of day.
2. COOK TIMEO FE. Turn the OVEN SET
knob
to TIME B andtheovENTEMPknob
to
the desired ctxhkin temperature. Press the
COOK TIME ON/O padandthen press the UP
or DOWN pads to se the amount of time you want ‘
your fd to cook ~ oven will shut off after
Cook Time has mn o$t.
3. DISPLAY. Shows ~ time of (@t,the tiRNXset
for the timer, the timc# set for the automatic oven
operations and clean ~ycle.
4. ~. Short tZlpSto thiS
small amounts. Press d hold the pad to increase
the time by larger am@mts.
or DOWN @s to change
$
?
increase the time by
P
Ii%)
(c@Xinued)
5. OVEN CYCLE MgWCycles on and off with the
4 DOWN. Short taps to this pad decrease
7.
& TIMER
El
SET TIME
OVEN
CYCLE
a
burner(s) to maintain the oven temperature.
the
by small amounts. Press and hold the pad
time
to decrease the time by larger amounts.
START TIME ON/OFF. Press this pad to delay
the starting of your oven up to 11 hours and
59 minutes. Use the UP and DOWN pads
to set the desired start time.
ON/OFF. Press thispad to select the
timer f-. The timer does not control oven
operations. The timer can be set for 24 hours.
To set the timeE, first press the TIMER ON/OFF
pad. Press the UP and DOWN pads to set the
amount of time you want.
To cancel the timer., press the TIMER ON/OFF pad.
12
I
Page 13
1
●
OWN CONTROL$, CLOCK AND TIMER
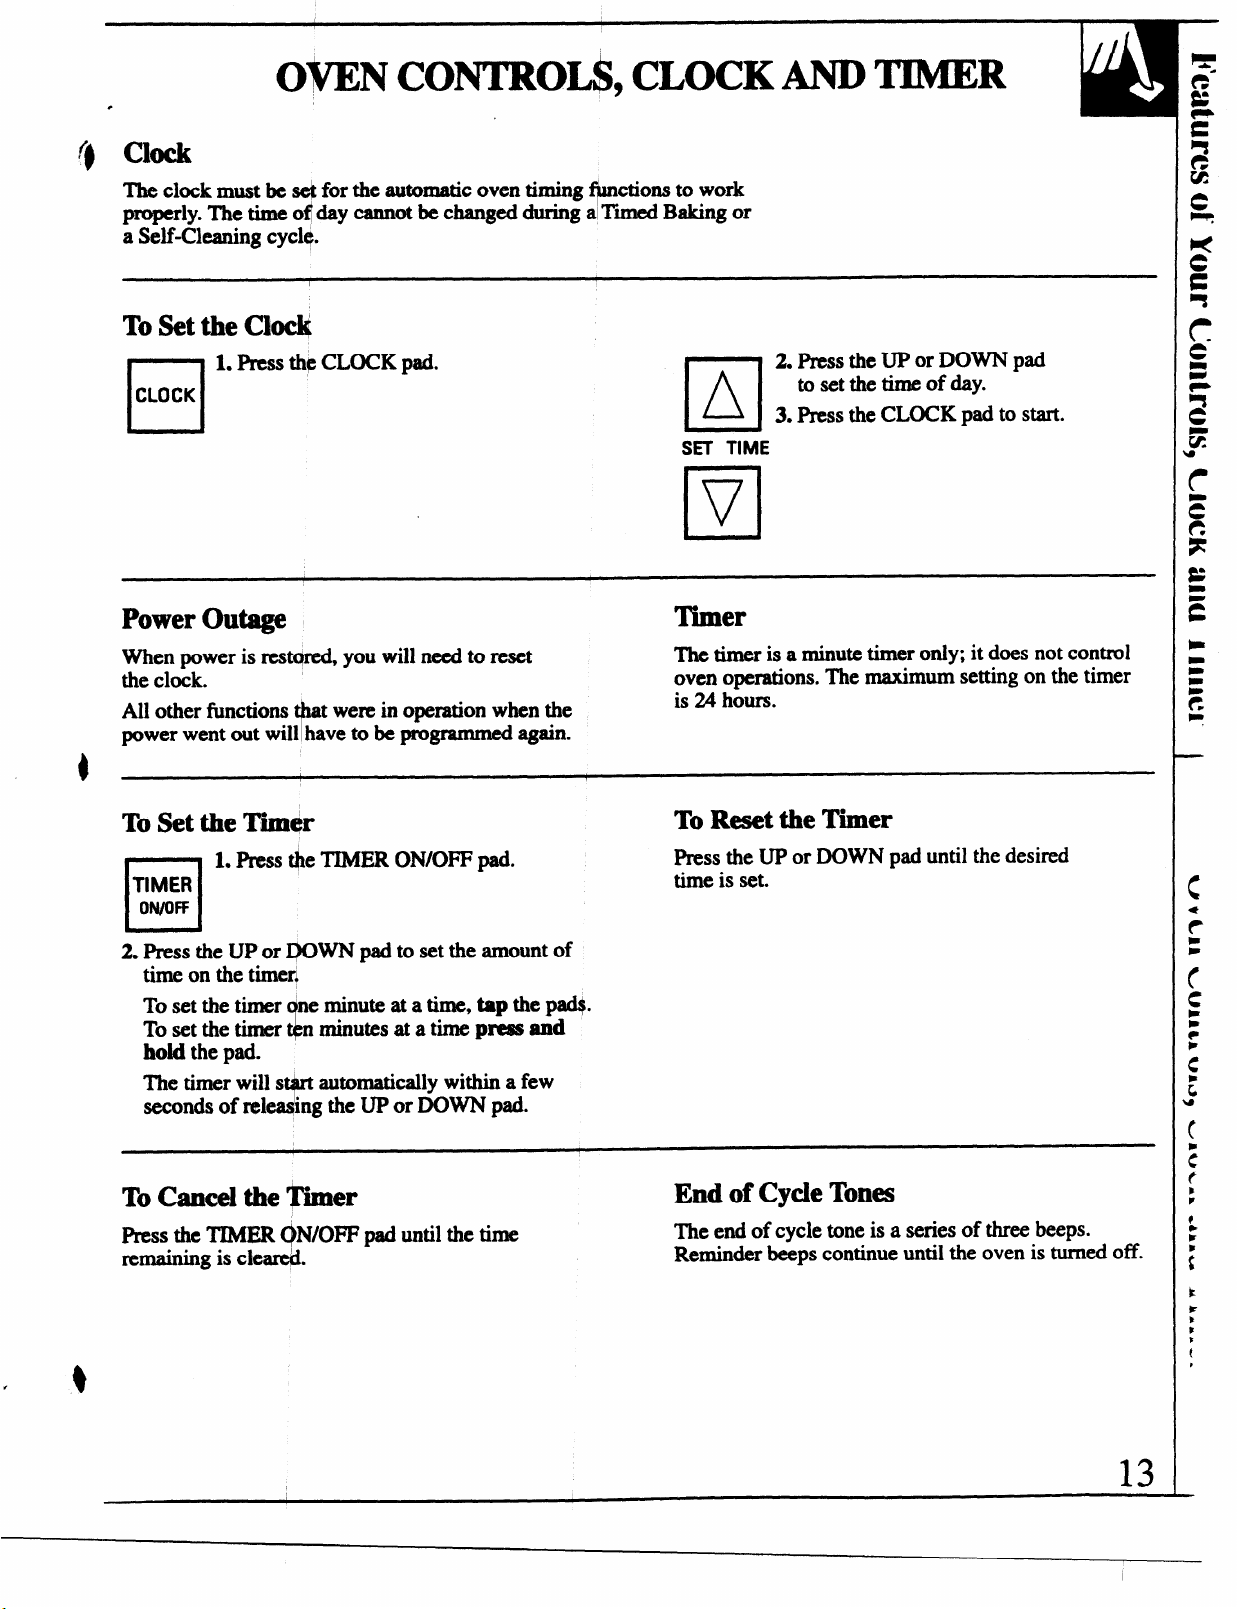
$ Ckck
The clock must be ~ for the automatic oven timing $nctions to work
~rly. The* oil’~y -ot be changed during alTimed
a Self-Cleaning cyck$.
To Set the Ck@
1. press th~CLOCK pad.
CLOCK
c1
Power Outage
When power is restc@ed,you will need to reset
the clock. ‘
All other fimctions
power went out will have to be programmed again.
t were in operation when the
r
Baking Or
2. Press the UP or DOWN pad
to set the time of day.
ZI
3. Press the CLOCK pad to start.
Timer
The timer is a minute timer only; it does not control
oven operations. The maximum setting on the timer
is 24 hours.
\
TO Set the Tinw
1. Pressde TIMERON/OFFpad.
TIMER
Owoff
❑
Press the UP or Q(3WN pad to set the amount
2
time on the timerl
To set the timer ne minute at a time, tap the pad$
Tosetthetimer nminutesat atimep~=d
hoid the pad.
The timer wills
seconds of ml ing the UP or DOWN pad.
ToCancel the ~er
Press the TIMER ~N/OFF pad until the time
remaining is cleart$.
$
automatically within a few
$
To Reset the Timer
Press the UP or DOWN pad until the desired
time is set.
of
End of Cycle Tones
The end of cycle tone is a series of three beeps.
Reminder beeps continue until the oven is turned off.
13
Page 14

USING YOUR OVEN
●
Before Wing Y~urOven
Be sure you undcrst@ how to set the controls
Prop=iy” Practic@re
while the oven is c 1.Read the information and tips
on the following pag . Keep thiSguide handy WhCm
you can refer to i~ es
using your new rang+
Electric Ignition
Theovenburner+bm)il bumerm~Wby
electric ignitiom
To light either b
the desired oven o “onand the OVEN TEMP
knob to the desired te@eratum. The burner should
ignite within 30-90 ~onds.
Mlkr the oven mache$ the selected tempemtum, the
oven burner cyck+d!f completely, then on with a
fill flame-to keep the oven temperature controlled.
ving and replacing the shelves
“allyduring the first weeks of
t
, turnthe OVEN SET knob to
x
Power Outage
CAUTION: Do not make any attempt to operate
the electric ignition oven during an electrical
power failure.
The oven or broiler cannot be lit during a power
ftilure. Gas will not flow unless the glow bar is hot.
If the oven is in use when a power failure occurs,
the oven burner shuts off and cannot be m-lit until
power is restored.
Oven Light
Use the switch on the fontrol panel to turn the oven light on or off.
Oven Moisture
As your oven heats up~the temperature change of the
air in the oven may
door glass. These drop ets are harmless and will
evaporate as the oven +ontinues to heat up.
.
e water droplets to form on the
7
-.
14
->
Page 15

●
The oven is vented fhrough duct openings at the rear
of the
cooktop. See ~e Features section. Do not block
these openings wh7cooking in the oven—it is
important that the fl w of hot air tirn the oven and
fresh air to the oven burners be unintmupted.
● The vent
become hot, Do n@t
touch them*
● Do not leave plastic
itOmsonthemoktql-
they may melt if 1* too
vm~Wullum&nlVq
close to the v4W
Oven Shelves
The shelves am
Pkedeomectlyo theshelfsupport4@leywul
stop
b4!fOl”e cOm@ COI@ddy OUt Of the OV@?Band
will not tilt when y al’eremovin gfdfhomthem
orpiacingfoodon m.
When placing cook are on a shelf, pull the shelf out
b
to the bump on thes elf support. Place the cookware
i
on the shelf, then sli$lethe shelf back into the oven.
This will eliminate rpaching into the hot oven.
To remove a shelf f@m the oven, pull it toward you,
tilt the front end up~ard and pull the shelf out.
To replace place@ shelf on the shelf support with
the stop-locks (curw$dextension of the shelf) facing
up and toward the repr of the oven. ‘131tup the front
and push the shelf ~ward the back of the oven until it
goes past the bump @ the shelf support. Then lower
the front of the shelfiand push it all the way back.
d with stop-locks so when
T
T
●Handles ofpotsand panson thecooktop may
become hot if left too dose to the vent.
●Metal items will become very hotiftheyareieft
on the (50&top and could cause burns.
● Do not leave any items on the cooktop. The hot air
from the vent may ignite flammable items and will
increase pressure in closed containers, which may
cause them to burst.
Burnt)
Shelf Positions
The oven has five sh@fsupports for baking,
roasting and baling i&ntified in this illustration
as A (bottom), B, C, D and E (top). It also has a
special low shelf po “tion(R) for roasting extra
large items, such as large turkey-the shelf is not
designed to slide out at this position. Shelf positions
for cooking am sugg ted in the Baking, Roasting
and Broiling section$.
!
L
15
Page 16
BAKING
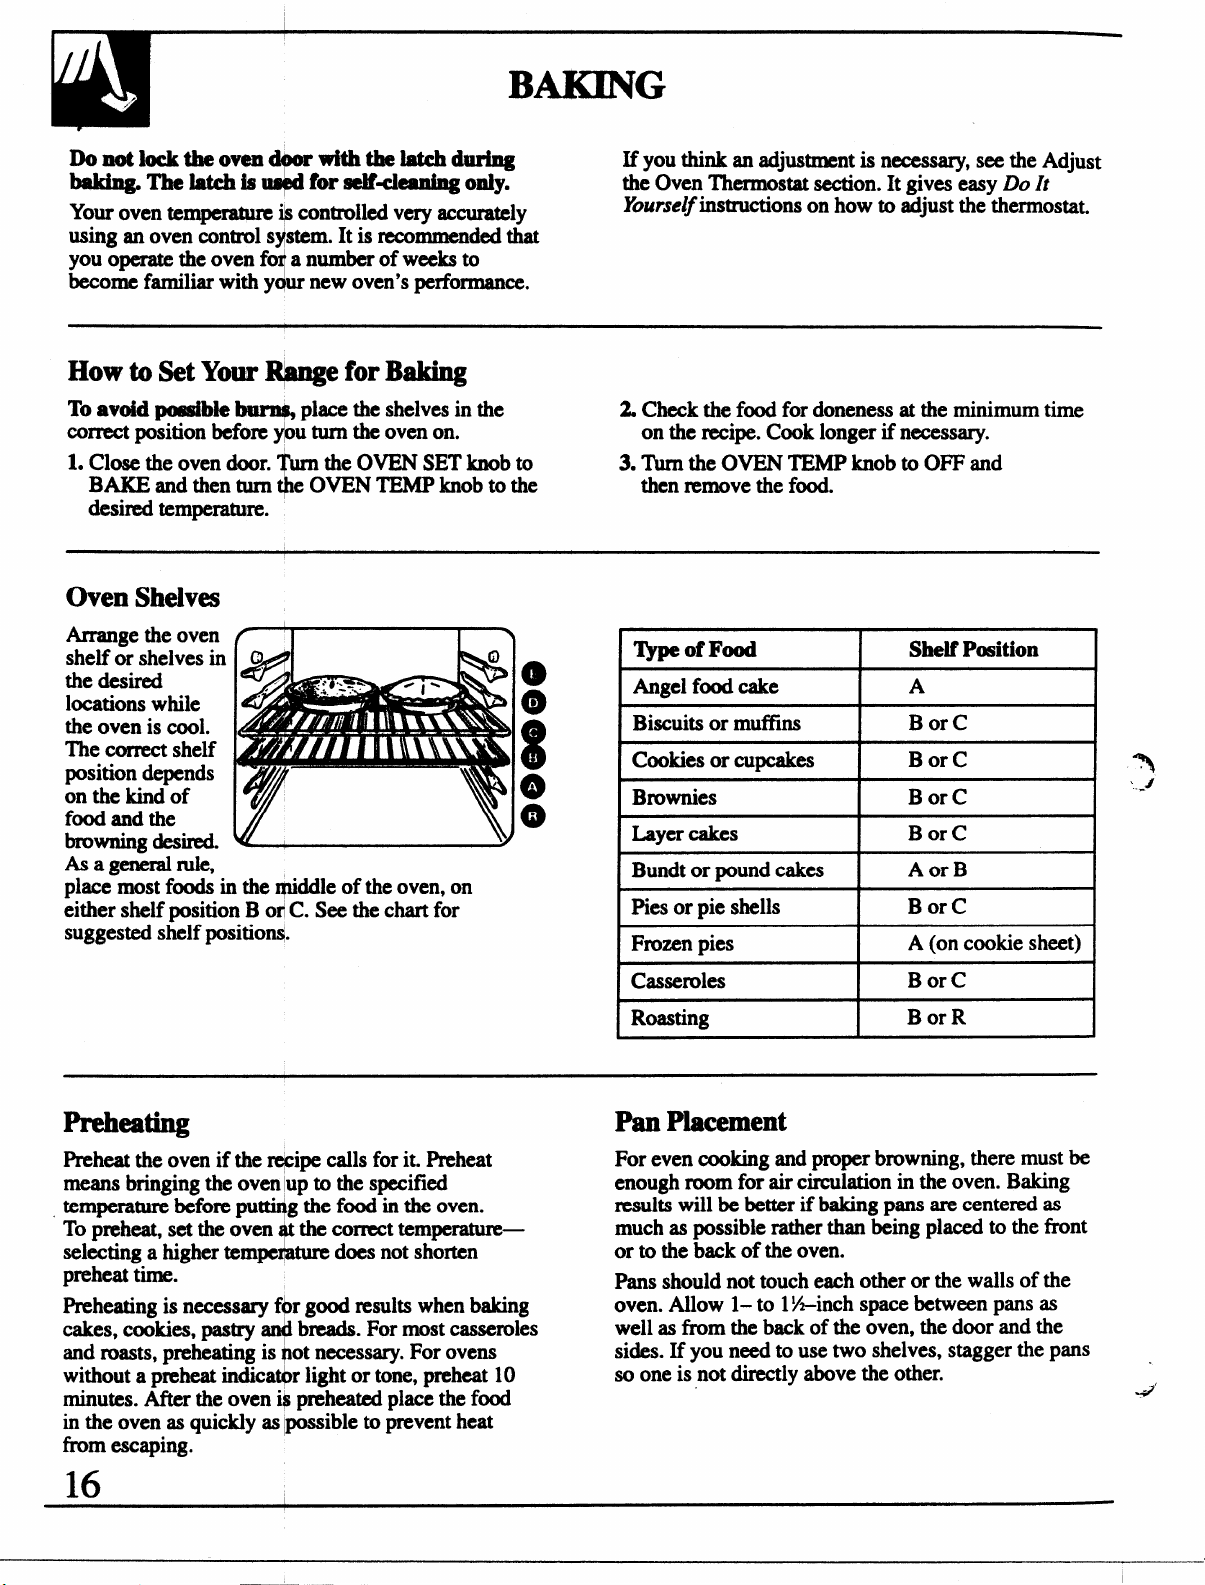
Donotiocktheoven
linking. mlatehkl
Your oven tempaatwe * controlled very
using an oven control s~stem. It is recommended that
you operate the oven f a number of weeks to
become familiar with y ur new oven’s performance.
Withthelatchduring
for selkleaxdng only.
*
1
accurately
How to Set Y- R@ge for Baking
To avoid poasilie Q place the shelves in the
conect position before fiu turn the oven on.
1. Close the
BAKE and then turn e OVEN TEMP knob to the
desired temperature.
oven door. urn the OVEN SET knob to
&
Oven Shelves
An=angethe oven
shelf or shelves in
the desired
locations while
the oven is cool.
The correct shelf
position depends
on the kind of
food and the
browning desired.
As a general rule,
tke-most fti in the tiddle of the oven. on
~ither shelf position B OXPC. See the chart for
suggested siielf positio~.
----- -
If you think an adjustment is necessary, see the Adjust
the Oven Thermostat section. It gives easy
lixmse~instructions on how to adjust the thermostat.
2 Check the food for doneness at the minimum time
on the recipe. Cook longer if necessary.
3. Tum the OVEN TEMP knob to OFF and
then remove the food.
I‘&peofFood
I Shelf Position I
Do It
IAngel food cake I A
I Biscuits or muffins I BorC
I Cookies or cupcakes I B orC
Brownies
s
Bor C
I
ILayer cakes I BorC
I Bundt or pound cakes I A or B
i
I Pies or pie shells
Frozen pies
1
I BorC
A (on cookie sheet)
I
I
1%
I
I
I
I
I
‘##
Casseroles
I
Roasting Bor R
Bor C
Preheating Pan Placement
Preheat the oven if the Wipe calls for it. Preheat For even cooking and proper browning, there must be
means bringing the oven Iupto the specified
temperature before pu~g the fd in the oven.
To preheat, set the oven the correct temperature—
selecting a higher tempe tum does not shorten
preheat time.
Preheating is necessary f~r good results when baking
cakes, cmkies, pastry ~ breads. For most casseroles
and masts, preheating is pot necessary. For ovens
without a preheat indica~r light or tone, preheat 10 so one is not directly above the other.
minutes. After the oven ip preheated place the food
in the oven as quickly as l~ible to prevent heat
from escaping.
16
$
I
enough room for air circulation in the oven. Baking
results will be better if baking pans are centered as
much as possible rather than being placed to the front
or to the back of the oven.
Pans should not touch each other or the walls of the
oven. Allow 1-to 1Yi-inchspace between pans as
well as ffom the back of the oven, the door and the
sides. If you need to use two shelves, stagger the pans
&
Page 17

When using pmpan@ baking mixes, follow package recipe or
instructions fa besi baking ~SUltS.
cookies
When baking cooki~,
flat cookie sheets
(without sides)
produce better-kd@ing
cookies. Cookies
baked in a jelly roll
P (short sides all
around) may have
darker edges and p#e vt
or light browning r#y occur.
Donotusea
thewallsorthed roftheovem
For best results, usq only one cookie sheet in the oven
at a time.
%
sheet sokrgethat ittouches
Pies
For best results, we pies in dark, rough or dull pans
to produce a bro~r, crisper crust. Frozen pies in foil
pans should be pw on an aluminum cookie sheet
for baking since th@shiny foil pan reflects heat away
from the pie crust; the cookie sheet hcips retain i~
~
Aluminum Foil
Never entirely cover
a shelf with aluminum
f@. This will disturb
the heat circulation and
result in poor baking.
A smaller sheet of foil
may beusedtocatcha
spillover by placing it
on a lower shelf several
inches below the food.
cakes
When baking cakes, warped or bent pans will cause
uneven baking results and poorly shaped products.
A cake baked in a pan larger than the recipe
recommends will usually be crisper, thinner and drier
than it should be. If baked in a pan smaller than
recommended, it maybe undercooked and batter may
ovefflow. Check the recipe to make sure the pan size
used is the one recommended.
Baking Pans
Use the proper bal@g pan. The type of ftih on
the pan determines the amount of browning that
will occur.
cDark, rough or d~ll pans absorb heat resulting in a
browner, crisper trust. Use this type for pies.
● Shiny, bright and smooth pans reflect hex resulting
in a lighter, mor+elicate browning. Cakes and
cookies require @is type of pan.
● Glass baking dis es AJOabsorb heat. When baking
in glass baking shes, the temperature may need to
be lXXhlCedby 25 F.
4
Don’t Peek
Set the timer for the estimated cooking time and do
not open the door to look at your food. Most recipes
provide minimum and maximum baking times such
as “bake 30-40 minutes.”
DO NOT open the door to check until the minimum
time. Opening the oven door fkquently during
cooking allows heat to escape and makes baking times
longer. Yu baking results may also be affected.
17
I
Page 18

●
How to Time B@ce
TIMED BAKING
Automatic Oven Tmr
Donotkcktheovqd oorwiththelatehd _~~q.~eWkfifor~-
eieaning only.
oven can be set to tum on and off automatically.
Your
NOTE: Before be+ng, make sure the oven clock
shows the comect ti@e of day.
How to Set
Tbavoid possible b-, place the shelves in the
correct position before you turn the oven on.
The oven will turn oq immediately and
selected length of thqle.At the end of Cook Tii the
oven will turn off aut&natically.
mm
1. Turn the OVEN S~ knob to TIME BAKE.
2. Turn the OVEN ‘@VIP knob to the desired
temperature.
COOK 3. Press the COOK TiME ON/OFF pad.
TIME
n
E!u!El
ml
hnqdiate Start and Automatic stop
cook for a
mlsw
4. Set the clesired
using th$ UP and DOWN pads.
amount of cooking time
Toset the cl-
CLOCK
c1
5. The oven will tum on. The display will show the
Cook Tii remaining. When the oven reaches the
set temperature, atone sounds. The oven will
continue to cook fa the progmmmed amount of
time up to 11hours and 50 minutes, then shut off
automatically.
6 When the oven automatically turns off, the
oven control will signal. Tbrn the oven off
to stop the signal.
7. Remove the food fivm the oven. Remember, “
fti that am left in the oven continue cooking
after the controls are off.
NOTE: Foods that spoil easily such as milk, eggs,
fish, stuffings, poultry and pork should not be allowed .-..
to sit for more than one hour before or after cooking.
Room temperature promotes the growth of harmful
bacteria. Be sure that oven light is off because heat
from the bulb will speed harmfid bacteria growth.
CLOCK pad. Press the UP or DOWN pad
until correct time of day is displayed. Press
the CLOCK pad again to start.
firstpress the
*
SET TIME
El
18
Page 19

.
E!!
I
‘-4
●
How to Set My Start and Automatic Stop
(@M Remind@
1. TurntheOVEN SET knob to TIME BAKE.
2. Turnthe OVEN TEMPknobtothe
desired temperature.
3. Press the COOK TIME ON1OFF pad.
4. Press the UPor DOWNpadtosetthe
desired length ~f cooking time.
5. Press the ST@T TIME ONIOFF pad.
6. Pmssthe UPo~DOWN padto setthe
time of day yw want cooking to start*
To
avoidpodble - place the shelves in the
correct position befm you program the oven.
You can set the oveq control to turn the oven on
automatically, cook for a specific length of time and
turn off automatica.1~.
For example Let’s payit’s 2:00 and dinner time is
shortly after 7:00, ~ recipe suggests 3 hours baking
time at 32S°F. Here’s how:
1. Turn the OVEN SP knob to TIME BAKE.
2. Turn the OVEN ‘lEMP knob to the desiti
temperature (in tl$s exampie 32S°F).
m
TIME
ON/OFF
u
3. Press the COOK TIME ON/OFF pd.
4. For 3 hours of cooking time,
press the UP pad until “3:00”
❑
STA~ 5. Press the ST~T TIME ON/OFF pad.
TIME
ON/OFF
n
6. PresstheUP pad until “4:00” appears in the
display. The timer is now set to start baking in
2 hours, at 4:00.
Once the oven begins cooking, the Cook Time
remaining will be displayed.
At the end of the 3 hour cooking time (7:00),
the oven will automatically turn off.
7. When the oven automatically turns off, the oven
control will signal. Turn the OVEN TEMP knob
to OFF to stop the signal. Remove the food from
the oven. Remember, even though the oven shuts
off automatically, foods continue cooking after the
controls are off.
NOTE:
. The
IOW temperature zone of this range (between
150°F and 200°F) is available to keep hot cooked
foods warm. Food kept in the oven longer than two
hours at these low temperatures may spoil.
● Foods that spoil easily such as milk, eggs, fish,
stufhgs, poultry and pork should not be allowed
to sit out for more than one hour before or after
cooking. Room temperature promotes the growth
of harmful bacteria. Be sure the oven light is off
because heat from the bulb will speed harmfbl
bacteria growth.
appears in the display.
Questions and Answers
Q. CanI use the minute timer during oven
cddng?
A. The minute timer can be used during my
cooking function+
Q.Can1changethe timeof day on the clock while
I’m Time Baking in the oven?
A. The time of day on the clock should not be
changed during any program that uses the oven
timer. You must either stop those programs or wait
until they are finished before changing the time.
19
Page 20

MZJUST THE OVEN THERMOSTAT—
I
DO IT YOURSEW!
Ya may fled that yoqr new oven Cooksdiihllently
tbantheone itre@ac@wc recommendthatyou
use your new oven for@fewweeks to become more
ftiiar with ib following the times given in your
recipes as a guide.
Ifyouthinkyour neWoveniatoohot ortooeoi&
you can adjust the
it is too hot, adjustthe
If you thinkit is too coOl,adjust the thermostat to
make it hotter.
We do not mcommei@ the use of inexpwive
thermomete~ such* those
to check the tern- setting of your new oven.
These thermometers my vary 2040 degrees.
Front ofthe OVEN TEMP knob
tyour$elf.lfyou think
rmostatto makeit coder.
found in grocery stores,
ToA~ust the Therm@at:
Notethepositionofthe
before making the adjustment.
Cooler
(~
Pullthe OVEN TEMPknoboffthe range andlook
atthebackskk
To make adjustmen~ loosen (approximately one turn),
but do not completely remove, the two screws on the
back of the knob. With the back of the knob facing
you, hold the outer edge of the knob with one hand
and turn the tint of the knob with the other hand. “
To raise the oven temperature, move the top screw
toward the right. You’ll hear a click for each notch
you move the knob. To lower the temperature, move
the top screw toward the left. Each click will change
the oven temperature ap~ximatdy 10*F.(Range is ‘4
plus or minus 60”F. from the arrow.)
We suggest that you make the adjustment one click
fkomt& original setting and chtik oven performance
before making any additional adjustments.
Afkr the adjustment is made, retighten screws so they
are snug, but be carefhl not to overtighten. Reinstall
the knob on the range and check performance.
pointer to the sorew
Hotter
may vary)
:%
20
Page 21

.
ROASTING
Roasting is co
pukry can be
Roasting terrq
S@tldy,keep S]
The oven has
low shelf (R) I
just above the
bottom. Use it
extra cmking
needed, for ex
when roasting
turkey. The sh
designed to slj
this position.
1. Position the
at shelf(B)
for small si:
(3 to 5 Ibs.)
(R) positior
larger roast
I
mqadoorwiththe latehduring
~ ia used for self-ckmdng only.
king by dry heat. Tender meat or
uastbd uncovered in your oven.
riltui=, which should be low and
ktt.@lg”to
Sptwial
>sitiOn
wen
Vheq
paceis
Ulpkt,
~large
ifis hot
eoutat
wen
osition
:roa$t
nd ~
For
a minimurm
I
Roasting is really a baking procedure used for meats.
Therefore the oven controls am set for Baking or
Tii Baking. (Ya may hear a slight clicking sound
indicating the oven is working properly.) ‘IImed
Baking will turn the oven on and off automatically.
Most meats continue to cook slightly while standing
after being removed from the oven. Recommended
standing time for roasts is 10 to 20 minutes. This
allows roasts to firm up and makes them easier to
carve. The internal temperature will rise about 5° to
10”F.If you wish to compensate for the temperature
rise, remove the roast fkom the oven when its internal
temperature is 5° to 10”F.less than the temperature
shown in the Roasting Guide.
Remember that fd will continue to cook in the hot
oven and therefore should be removed when the
&sired internal temperature has been reached.
3. Turnthe OVEN SETknob to BAKE and the
OVEN TEMP knob to the desired temperature.
See the Roasting Guide for temperatures and
~proxti* cooking times.
4. When roasting is finished, turn the OVEN
TEMP knob to OFF and then remove the food
from the oven.
I
1
2 Check the v
fat-side-up t
roasting gri
baste the mt
meat as pos
good pan fo
Dud Shelf
This allows m
sametime.FOI
turkey
equipped) ma]
Scalloped pots
Calculate the t
to complete cc
minutes of*
on shel
:ighi of the roast. Place the meat
rthelpoultry breast-side-upon the
in a shallow pan. The melting fat will
~~Select a pan as close to the size of
ble. (The broiler pan with grid is a
this.)
ttllanone foodtobecoo=titie
mrpple: While roasting a 2(Mb.
position ~ a second shelf (if so
beadded on position D so that
mmnbecooked atthes~time.
M cmking time to enable both dishes
king at the same time. Allow 15-20
tionidcooking time for thee.
I
Use of Aluminum Foil
You can use aluminum foil to line the broiler pan.
This makes clean-up easier when using the pan for
. .
marmatmg, cooking with fruits, cooking heavily
cured meats or basting fd during cooking. Press
the foil tightly around the inside of the
pan.
(continued nextpage)
I
21
I
—
Page 22

I
r
I
Qmslions + Answers
ROASTING
(continued)
Q. Isitnemssarytoe@k fordone=witha
meat therm r?
A. Checking thei“sh$dinternaltemperature at the
completion of kihg time is recommended.
Temperatums sh~wn in Roasting Guide. For
roasts over 8 lb ., c@ck with thermometer at halfhour intervals
Q.
Why ismy
carve it?
A. Roasts are easie to$liceif allowed to cool 10 to
20 minutes afte re~ving from oven. Be sum to
cut across the
4
ltalfthe time has passed.
~b~wkItryto
T
“ of the meat.
+
ROASTING GUIDE
Frozen Roasts I
Frozen roasts of
without thawing, b all~w 15 to 25 minutes per pound
additional time (15 “nu~s per pound for roasts under
5 pounds, mom ti for lqer roasts.)
Meat
Tender
tip, rump or top rou *
Lamb leg or bone-in houkied
Veal shoulder, leg or in*
Pork loin, rib or shou H
Ham, meeooked
Poultry
Chicken or Duck
Chicken pieces
‘Ihrkey
cuts; rib, high q@ty sirloin
I
f, ~ Iamb, etc.,canbe started Make sure poultry is thawed before roasting.
1
1
oven
i
F
Ternpemtum
I
325°
325°
325°
325°
325°
325°
350”
325°
DonelM!lMl
Rare:
Medium:
Well Done:
Rare
Medium:
Well Done:
Well Done:
Well Done:
To Warm
Well Done:
Well Done:
Well Done:
Q.m Inedtopmheatmy oveneachtime Icook
a roast or poultry?
A. It is not necessary to preheat your oven.
Q. When buying
that would hdp me cook it mom evenly?
A. Ym. Buy a roast as even in thickness as possible,
or buy rolled roasts.
Q. Can I seal the sides of my foil ‘tint” when
_ a
A. Sealing the foil will steam the meat. Leaving
it unsealed allows the air to circulate and brown
the meat.
Unthawed poultry often does not cmk evenly.
some co
successfully without thaw-kg. Follow directions
given on ptickage label. -
Appmtite Masting Time
in Minutespa Pound
3t051hss
24-35
35-39
3945
21-25
25-30 24-28
30-35
35-45
35-45 30-40
18-23
3to!511M0 Over5 lh
35-40 30-35
35-40
rnrnercial hzen poultry can be cooked
millUtCSperpound(my weight)
14)to1sNJ&
1622
a roa@are thereany spdd tips
turkey?
Internal
Temperature“F.
6t081h&
18–25
25-31
31-33
20-23
28-33
30-40
Over 1!$lk
12–19
140°-1500t
150°-1600
1700-185°
1400-1 500-t
1500-160°
1700-185°
1700-180°
1700-180°
115°-1250
185°-1900
185°-1900
lntbigk
185°-1900
/.~
*For boneless rolled
~The U.S. Dqmtment of A@mkure says “Rare beef is popular, but you should know that cooking it to only 140°F. means
some food poisoning rgartisms may smive.” (Source:
22
@Over6 inches thick, add 5 to 10 minutes per pound to times given above.
+
1’
~XBKJ@&D GuW USDA Rev.
I
I
I
JUIW1985.)
>d
Page 23

I
I
I
.
BROILING
~“Do not leek
b-The
Broiling is
fd. Most
broiled. Follo the$e directions to keep spattering and
srnokingtoa “ ‘ .
The
oven ahauldbeclosedduring broilkg.
Ovmdoorwith thelatehduring
+@
isused
“ fti by direct heat fkornabove the
and tender cuts of meat can be
for self-ehning ody.
5
1. If the meat
vertical slas s @rough both about 2“ apart. If
desired, the at *y be trimmed, leaving a layer
about 118” “ck.
2, Place the
which come witi the range. Always use the grid
so fat drips” to ~ broiler pm, othewise the juices
XllilybeCO hot enough to catch fire.
3. Position the helf on the recommended shelf
position as ggmted in Broiling Guide.
f* or gristle around the edge, cut
f
oh the broiler grid in the broiler pan
T
+
the food only once
Tim
during cooking. Time the
fti for the tit side
according to the Broiling
Guide.
‘hrnthef~thenuse
the times given for the
second side as a guide to
the preferred doneness.
4. Close the oven door but do not latch it. If the door
latch is moved to the right during a broil
operation the door may lock and you may not be
able to open it until tl.e oven cmls.
!5.Turn the OVEN SET knob and the OVEN TEMP
knob to BROIL.
& When broiling is ftih~ turn OVEN TEMP knob
to OFF. Remove the broiler pan fkom the range and
serve food immediately. Leave the pan outside the
range to cool.
Use of N+@n F@
Youcan use al
broiler grid. H evm, you must mold the foil tightly
to the grid and cut @itsin it just like the grid.
Without the sli , the foil will prevent fat and meat
juices from
could become ot mough to catch on fm. If you do
not cut the sli , yo~ am-@ing, not broiling.
“ ~foiltoline your broiipanand
F
“ in$ to the broiler pan. The juices
+
1
Questions ~d Answers
Q. W&m broi
gridinthe
A. Yes. Using e grid suspends the meat over the
pan. As the me@cooks, the juices fall into the pan,
thus keepin @t drier. Juices are protected by the
grid and S
spatter and mo~g.
#
*
Q. Should I
A. No. salt
evaporate.
meat with t rigs; piercing the meat with a fork also
allows juic s to escape. When broiling poultry or
fish, brush
4
1
isitneceswq toaiwqsusea Q. Why are my meab not turning out as brown as
$?
co@er,thus preventing excessive
J
the meat befbre broiling?
ws @ the juices and allows them to
w~ys salt after cooking. Thrn the
h side often with butter.
they should?
A. Check to see if you are using the recommended
shelf position. Broil for the longest period of time
indicated in the Broiling Guide. Turn the food only
once during broiling.
(continued next page)
I
23
—
Page 24

,/
kiiir
●
The oven door ❑
● Always use the 1
your range. It is
spattming by tra
part of the pan.
●
I%rsteaksandct
outside edges
through the outet
meat. use tongs 1
piercing the meal
Food
Bacon
Groud Beef
Beefsteaks
Medium
Well Done
Medium
Well Done
Chicken 1whole
B8keryProducts
Bread (’I&@) or
Toaster Pastries
English Muffins
LobsterTails
Hamslices
precooked
Pork chops
Well Done
Lamb~0~
Medium
Well Done
Medium
Well Done
Wieners
similar precooked
sausages, bmtwurst
stbmiosedduringbroiiing.
oil$r pan and grid that comes with
%i@ed to minimize smoking and
Iingjuices in the shielded lower
F, pmh thefatevenly aroundthe
e~ To slash, cut crosswise
of
mts@acejust totheedgeofthe
turZI the meatover toprevent
nd kxhg the juices.
Q4-w ~m
1/2lb. (about 8
thir!
1lb. (4 patties)
l/2to 3/4 inch thick
1 ixh thick
(1 to 1%lbs.)
1
(2to 2ZIbs.)
(2 to 2Mlb~),
spli! lengthwise
2to 4 slices
1
2,*lit
2t04
(6to8 OZ. each)
l-lb. fillets
1/4m 1/2 inch thick
1indh thick
2(1/2 inch thick)
2(1 inch thick),
-1 lb.
2(1 @chthick),
but
?(1Minch thick),
ibotq 1 lb. B
l-lb.pkg. (10)
slices)
inchthick
pqg.(2)
lo to 120Z.
BROILING GUIDE
•~-~
Or brush with barbecuesauce last 5 to 10 minutes only.
● When amanging food on the pan, do not let fatty
edges hang over the sides because dripping fat could
soil the oven.
● Broiler compartment does not need to be preheated.
However, for very thin foods, or to increase
browning, preheat if desired.
. Fm~n S* ~ be broiled by positioning the shelf
at next lowest shelf position and increasing cooking
time given in this guide 1Xtimes per side.
ht
Sbdf
Posit&m
c
side md side
Minwtes Minutes Comilsents
Arrange in single layer.
3M131
c
I
B
B
B
B
B
B
B
c
c
c
B 5
c
B
B
B
B
B
c
10-11
9
12
13
10
12-15
25
30-35 25-30
2-3
3-5
13-16 Do not
8
10
13
8
10
10
17
6 1-2
4-5
I
7
5-6
8-9
6-7
10-12
16-18
1/’2-1
turnover.
5
8 Increase
I
4-5
9-12
4-7
10
12-14
Spaceevenly.
about same time.
I
Steakskm than 1inch thick cook
through bef~ browning. Pan frying
is recommended.
slashfat
Reduce times about 5 to 10minutes per
side for cut-up chicken. Brush each side
with melted butter. Broil skin-side-down first.
I
Space evenly. Place English muffins cutside-up and brush with butter if desired.
Cut through back of shell and spread open.
Brush with reeked butter before broiling and
after half of time.
Handle and turn very carefully. Brush with lemon
butter
desired. Preheat broiler to increase browning.
for 1%inch thick or home cured.
I
Slash fat.
Slash fat
If desired, split sausages in half
lengthwise; cut into 5-to 6-inch pieces. J
meatsorchicken before broiling.
Up to 8 patties take
beforebroiling and during broiiing if
time 5 to 10 minutes per side
.
‘-%
.’
24
Page 25

I?EIL4TING THE SELF-CLEANING OVEN
b
NormalCleaningThne: 3 hours
w
.“Befolwtcl
We recommen
or using a verx
self-clean Cycl
1. Remove the
and iit’lydw
withstand tl
NOTE: Tai
you begin d
~ W@ Up hei
use soap, ril
to prevent i
oven
light
Area A
outside in
gasket ga
m Cycle
Venqingwith an open window
atiorkfan or hood during the first
milespan,broiler gri~ all cookware
inuq foil fkom the oven-they cannot
high cleaning temperatures.
the $helves out of the oven before
self+cleancycle.
y Soflon the oven bottom. If you
BtlMrm@dy before self’
-.
I
a oven door
k
id
gasket
3. Clean spatters or spills on the oven front fkame,
and the oven door outside the gasket with a
dampened cloth. The oven tint frame and the
oven door outside the gasket do not get cleaned by
the self-clean cycle. On these areas use detergent
and hot water or a soap-ffled steel wool pad. Rinse
well with a vinegar and water solution. This will
help prevent a brown residue ikom forming when
the oven is heatd Btithese areas with a dry
cloth. Do not clean the gasket.
Clean the top, sides and outside tint of the oven
door with soap and water. Do not use abrasives or
oven cleaners.
Make sure the oven light bulb cover is in place.
Donotmborclean thedoorgasket—
thefiberglass materialof thegasket has an
extremely low resistance to abrasion. An intact
and well-fitting oven door gasket is essential for
energy-efficient oven operation and good baking
results. If vou notice the gasket becoming worn,
fkayed or damaged in any way or if it has become
displaced on the door, you should have it replaced.
4. Close the door and make sure the oven light is
off. If the oven light is not turned off, the life
of the bulb will be shortened or it may bum out
immediately.
CAUTION: The grates and drip pans (on
some models) should never be cleaned in the
self-cieaning oven.
Do not use commemial oven cleaners or oven
~~ h or near the self-cleaning oven.
A combination of any of these products plus the high
clean cycle temperatures may damage the porcelain
ftish of the oven.
(continued nextpage)
25
I
Page 26

0
/
O lilRATING THE SELF-CL
k
(continued)
E.ANING OVEN
How toset th
l.’IhmtheovENs
knobtoCLEAN.
positionwhenthe
2. Slide thelatch b
as faras it will g(
How toA((just
The clean cycle is n
the clean time to an
depending on the at
1. Turn the OVEN!
to CLEAN. Slide
as it will go.
Men for Cleaning
eJ
Never force the door Iateh handk Forcing the
handle may damage the door lock mechadsm.
The oven will now be set to clean
for its normal time of three hours.
3. When the clean cycle is complete,
you will be able to slide the door
latch handle to the left as far as it will
rrknobandtheovm’mntm
he fxmtrolswillsnapintothefinal
* locationis -~
dk
tothe right
~
go and open thedoor.
Never force the door htteh handk If you cannot
slide the latch easily to unlock the door, allow
additiomd time for_
‘hrnthe OVEN TEMPlcnobto OFF.
heAmount ofCleaning Time
rn@ly 3 hours.YW canchange 2, Pressthe UPor DOWN pad to set the desired
@betwexm2and4hours
mrlt of soil in your oven.
?Tknob and OVEN TEMP knob
he hitch handle to the right as far
cleaning time.
You have one minute to change your clean time after
the normal cleaning time of 3 hours is displayed.
To Stop a Clew
Turn the OVEN TE
cleaning cycle but y
below the locking u
After a Clean (
After a clean cycle
the oven. Just wi]
in
If WMte
filled steel wool p=
with a vinegar and ~
are usually a salt re!
the clean cycle.
Iftheovenisnotel
may be repeated.
spots I’enM
Cycle
P knob to the OPF position. This will stop the
u will not be able to open the door until the oven cools
npqatum.
de
youmay notice some white ash
:it up with a damp cloth.
~ @move them with a soap-
Be sure to rinse thoroughly
@r mixture. These deposits
he that cannot be removed by
Ianafter one eye@ thecycle
NOTE:
● While the oven is self-cleaning, you can press the
CLOCK pad to display the time of day. To return to
the clean countdown, press the COOK TIME
ON/Ol?F pd.
● You cannot set the oven for cmking until the oven is
cool enough for the door to be unlatched.
I
‘d
26
I
I
Page 27

How to
You will ve one minute to set a delayed start.
1. Turn OVEN SET knob and the OVEN TEMP
knob t CLEAN. Slide the latch handle to the right
as far it will go.
2. If you ant to change the normal cleaning time,
press e UPorDOWNpaduntilthedesired
amoun of clean time is reached.
DelJay
f
{
startof Cleaning
Qmstk+s@d Answem
Q. If my ven,cloekbtiti@tie~tie
of day camI still self-clean my oven?
t
A. If the lock is not set to the correct time of day,
you w 1not be able to set a delay clean to end
at as if%time.
$
Q.Can I
of my If+leaning oven?
A. No cl ers or coatings should be used around
any
not ughly rinse the oven with water, wiping it
absdu ly clean afterwti the residue Cm= the
ovens
the ov n is automatically cleaned.
$
Q. Can I ~ the woven-et aroundthe
oven
A. No,
and C must be taken not to rub, damage or move
this g ket.
Q. What @d I do if excessive smoking occw
d Clemling?
#
A. This is caw@ by excessive soil, and you should
turnth O~NTEMPknob to OFF. ~tie
windo s tq rid the room of smoke. Allow the
oven t cool for at least one hour before opening
the d r. W@ up the excess soil and reset the
clean dycle+
qommerchd oven cleanem on
k
of this oven. If you do use them and do
we and damage metal parts the next time
r?
L
g~ket is essential for a good oven seal,
%
1
-y m
3. Press the START TIME ON/OFF pad.
4. Press the UP or DOWN pad to set the time you
want cleaning to start.
Q. Is the “craclding” or ‘@pping” sound I hear
during cleaning normal?
A. Y6s.This is the metal heating and cooling during
both the cooking and cleaning functions.
Q. Should there be any odor during the cleaning?
A. Yes,therewill be a slight odor during the first few
cleanings. Failure to wipe out excessive soil might
also cause an odor when cleaning.
What at- the hair-like lines on the enamel
Q.
surface of my
A. This is a normal condition resulting from heating
and cooling during cleaning. They do not affect
how your oven performs.
Q. Why do I have ash left in my oven after
Ckaning?
A. Some types of soil will leave a deposi~ which is
ash. It can be removed with a damp sponge or cloth
Q. Can I cook food on the cooktop while the oven
is self-cbning?
A. Yes. While the oven is self-cleaning, you can use
the cmktop just as you normally do. However, be
careful when standing in front of the range~ven
becomes very hot while self-cleaning.
oven?
27
Page 28

●
I I
and satisfactory
help assure safe
BE SURE E
CLEANING AN
?
CAUTION:
(IF SO EQ
1
CARE AND CLEANING
are importantso your range will give you efficient
“q. Follow these
PI= *-cc.
CAL POWER IS DISCONNECTED BEFORE
VPUT OF YOUR RANGE.
NqT OPERATE THE BURNER WITHOUT ALL BURNER PUTS AND DRIP PANS
cbctions camfiIUy in caringfor it to
Sk&d B- -bli= (on some models)
!
(hte
ButTnBrmse
mmaueontlds FF befoxl!removingburner
- ad driP P (Mm equipped).
spark.
Do not
disassemble or cl
another burner is
which could
.
$
~und any burner while
. Anelectric shock may result
you to knock over hot cookware.
Burner Heads (on sealedburners only)
The holes in the burners of your range, and the spark
electrodes, must be kept clean at all times for proper
ignition and an even, unhampered flame.
Ym8hoakickntheburner ~ cleanb
- ~Y9 -Y
after H spilkwe~ which
cuuld clog these holes.
W@eoff ‘tier heads. If heavy spillover occurs,
remove burner heads from range.
Remove the burner grate. Then lift the burner head
straight Up.
To get rid of burneckm f- soak the burner head
upside-down in a solution of mild liquid detergent and ~~”
hot water. Soak the burner head for 20 to 30 minutes.
If the fd doesn’t rinse off completely, scrub it with
soap and water and a soft brush or plastic scouring pad.
For more stubborn _ use a cleanser like Soft
Scrub” brapd or Bon Amie brand. Rinse well to
remove any traces of the ciemwer
the burner openings. Do
it will clog the burner openings and scratch the
burners. If the holes become clogged, clean them with
a sewing needle or twist tie.
Before putting the
excess
warm oven for 30 minutes. Then place it back in the
range, making sure the pin in the burner base goes in
the hole in the burner head, and that the burner heads
are propxly seated and level.
water and dry it thoroughly by setting it in a
burner hexl back, shake out
-$:~y
thatmight clog
notuse steel wool because
.
Lifi off when cool. ash burner
caps in hot, soapy ater and rinse
with clean water. If deskd, soak
up to 30 minutes
a plastic scouring p to remove
burned-on food p
oven or with a CIO
28
scour with
“cles.Dry them in a warm
~n’t reassemble them wet.
i-
I
The burner base (the part of the
burner fastened to the cooktop) may
be cleaned with a soft brush and a
mild cleanser. Clean all food residues
from around spark electrode. Do not
use steel wool; small bits of steel wool
will short out the electrode. Rinse well.
Page 29

v
On models wit
Cooktoplifts u]
‘nun till
lmntn
partsanddrip
burner gm
The
w(wmq~
easy to clean.
The holes in th
burners of your
must be kept cl~
times for propel
and an even,
unhampered fla
Y-
should de
sux%ee burnei
routinely, esjm
after bad spiik
which could cla
holes.
h hMWS (on some models)
6ml? bdbm? removingburner
Mi@i (ho qlipp).
tes@ap@urnerwanddrip
pd) canbelifted06,
nlrface
ange
In*all
@nition
le.
Ilthe
dy
‘e~b
makingthem
W@e off stiw burners. If heavy spillover occurs,
remove the surface burners from the range. Burners
lift out for ckaning. Lift up the cooktop and then lift
out the surface burners.
To remove burned-on fd, soak the surfaceburner
in a solution of mild liquid detergent and hot water.
Soak the surface burner for 20 to 30 minutes. For
more stubborn stains, use a cleanser like Soft Scruba
brand or Bon Ami” brand. Rinse well to remove any
trams of the cleanser that might clog the surface
burner openings. Do notuse steel wool because it
will clog the surface burner openings and scratch the
surface burners. If the holes become clogged, clean
them with a sewing needle or twist tie.
Before putting the surfhce burner back, shakeout
excess water and then dry it thoroughly by setting it in
a warm oven for 30 minutes. Then place it back in the
range, making sure it is properly seated and level.
.
Drip Pans (a
Removethegn
Drip pans can lx
Togetridofbu
con-tiner (or pk
loosen the soil.’
pad if necessary
t’
“e
some models)
es*liftout tbedrippan&
cl- in adishwasher or by hand.
ne+on f- place them in a covered
ticbag) with 1/4cup ammonia to
~enscrub with a soap-filled scouring
I
I
CAUTION:
not clean the
Do
drip pans in the
self-cleaning oven.
~_a~
-“~
,
.
(continued nextpage)
29
I
Page 30

CARE AND CLEANING
I
I
Burner Gra~
Lift out when%1.@ates should be washed mguhdy
@of course,
soapy water
dry them thorou y by putting them in a warm oven
for a few minu
range while the are wet. When replacing the grates,
be sure they’re sitkmed securely over the burners.
To prevent
coating of coo “ g oil on the bottom of the grates.
Togetridofb~-onf ~placethe~sina
coveredconta@r (or piasticbag) with 1/4 cup
ammoniato km n @esoil. Thenscrubwith a
soap-filled sco
*
Cooktop Su#ace
$piih@=. Washthem in hot,
rinse with clean water. After cleaning,
. IMn’t put the grates back on the
L
on east iron ~ apply a light
● g pad if necessary.
$
(continued)
Although they’re durable, the grates will gradually
lose their shine, regadless of the best cam you can
give them. This is due to their continual exposure to
high temperatures.
Do not operate
time without cookware on the grate. The finish on
the grate may chip without cookware to absorb the heat.,
CAUTION Do not clean the grates in the self-
cleaning oven
a burner for an extended period of
To avoid
of the m=tb prevent it fiwn beaming
da clean ups “11sright away. Foods with a lot of
acid (tomatoes, ~ue~u~ fruit juices, etc.) or fti
with high sugar dxmtentcould cause a dull spot if
allowed to set.
When the surfs@ has cool~ wash and rinse. For
other spills such ~ fat smatterings,etc., wash with
soap and water qhce the surface has cooled. Then
rinse and polish kith a dry cloth.
Do not stem
~~~ti=e
r
==.s:==::ia=
Xnateriais,7“new otherflammabievaporsand
liquids in the ‘cinity of this or any other appliance.
Oven 130tto4
The oven
To make cleanin eas~er,protect the oven bottom
fkomexcessives ilkwers by placing a cookie sheet
on the shelf belo the shelf you are cooking on. You
can use aluminu foil if you do not cover the whole
shelf. This is p
fruit pie or other @ with a high acid content. Hot
w
-a~~dH”
“cuktrlyimportant when baking a
/
fruit fillings or other foods that are highly acidic
(such as milk, tomatoes or sauerkraut, and sauces with
vinegar or lemon juice) may cause pitting and damage
to the porcelain enamel surface and should be wiped
up immediately. To cleanup spillovers, use soap and
water, an abrasive cleaner or scouring pad. Rinse well
to remove any soap before self-cleaning.
30
Page 31

●
Lift-Off(MenDoor
o
The oven doo is ~movable,
but it is hea
nmoving and repl@.ng the door.
To remove
inches to the
thatwill
firmly on eac side and lift the door
straight up
NOTE: Be
between the
frame as the ge could snap back and pinch
To replaee
special stop
of the doorsq
doorslowly
time. If the hin
pull them back
TO CLEAN’I
(Do not”
. Because the
the self clean cycle, you do not need to clean this
by hand. Any
stains when t!Roven is heated.
&
~ .~~~a
lmmer~ethe door in water.)
YolJmay need help
i
door, open it a few
id
stopposition
hold e &or open. Grasp
off the lunges.
fblmtipl=.bds?
“ ge and the oven door
t
dodr, makesurethe hinges am inthe
itionoPosition the slots in the bottom
ly overthe hinges. Then lowerthe
evenly over both hinges atthe same
ges @ap back against the oven frame,
out.
WE mR.
insi& the gasket is cleaned during
soap left on the liner causes additional
the gasket can be cleaned with
%1
4
~
ngers.
● Do not mb or clesn the door gasket-the
fiberglassmaterialof the gasket has an extremely
low resistance to abrasion. An intact and wellfitting oven door gasket is essential for energy-
efficient oven operation and good baking results.
If you notice the gasket becoming worn, flayed or
damaged in any way or if it has become displaced
on the door, you should have it replaced.
hide Gasket
Gasket
OutsideGasket
outside of the door:
● Use soap and water to thoroughly clean the top,
sides and front of the oven door. Rinse well. You
may also use a glass cleaner to clean the glass on
the outside of the door.
● Spillage of marinades, fkuitjuices, tomato sauces
and basting materials containing acids may cause
discoloration and should be wiped up immediately.
When the surface is cool, clean and rinse.
● DO not use oven cl~ cleansing powders or
harsh abrasives on the outside of the door.
Broiler Pm IUIClGrid
After bro~ nxnove the
broiler pan fro the oven.
Remove the gri froin the pan.
Carefidly pour t_ from
the pan into a
Wmh and rinse e &oiler pan
andgridinhot atexwithasoap
filled or plastic
If fdhas
while hot and c er with wet paper toweis or a
dishcloth.
s
per container.
wingpad.
i
~ sprinklethegrid with detergent
“g thepanwill
7
I
remove burnedon f-.
Oven Sheiv
Cletmtheshd eswBh
an abrasive
.
steel wool. A
‘“ rinse the shelve with cl&n
water and dry ‘tha clean cloth.
&~
4
or
cle@ing,
Both the broiler pan and grid can also be cleaned
in the dishwasher.
Do not store a soiled broiler pan and grid anywhere
in the range.
Do not dean the broiler pan or grid in the
self-cleaning oven.
NOTE: Take the shelves out of the oven before you
begin the self-clean cycle.
(continued next page)
31
I
Page 32

CARE AND CLEANING
ovaLi@t RW--t (on some models)
CAUTION: ~O+X!
dkmmecttheel--= totherangeatthe
maimfixseorcirqitb
the light cover +i b b cool completely.
The oven light (b b) it+covered with a removable
glass cover that is eld in place with a bail-shaped
wire. Remove the ven door, if desired, to reach
cover easily.
To remove:
1. Hold a hand un& the
cover so it does ‘tf@
when released. h
fingers of the
hand, fidy
the wire cover lder.
Lift off the co+r.
r
1
h Lwwk
$
yilllr oven light bulb,
erpanel.llesu retolet
Wire coveftmlder
(continued)
DO NOT REMOVE ANY SCREWS TO
REMOVE COVER.
2. Do not touch hot bulb with a wet cloth. Replace
bulb with a 40-watt household appliance bulb.
To IW$p-
1. Placeit into the groove of the light receptacle. Pull
the wire fonwird to the center of the cover until it
snaps into place. When in place, the wire holds the
cover f~y. Be certain the wire is in the
depression in the center of the cover.
2. Connect electrical power to the range.
COVH’:
control Panel
It’s a good idea to ipe the control panel after each
use of the oven. C
vinegar and water, rins~ with clean water and polish
dry with a soft clo~.
Do not use abrasivb ckansers, strong liquid cleaners,
plastic scouring p@s or oven cleaners on the control
panel-they will d
of vinegar and hot
d Knobs
tvith mild soap and water or
F
me the finish. A 50/50 solution
wat$r works well.
I
I
Removable S@~e Drawer (onsomemodels)
The storage drawer is a good place to store cookware
and bakeware. Do not store plastics and flammable
material in the drapier.
Do not overload t@ sttlrage drawer. If the drawer is
too heavy, it may $lip off the track when opened.
The
storage drawer mqybe removed for cleaning
under the range. Clean the storage drawer with a
damp cloth or sponge. Never use harsh abrasives or
scouring pads.
The control knobs may —
be mnoved for easier
cleaning. To remove knob,
pull it straight off the stern.
Wash the knobs in soap and ~
water or a vinegar and hot
water solution but do not soak
Metal parts can be cleaned with soap and water.
Do not use steel wool, abrasives, ammonia acids
or commercial oven cleaners. Dry with a soft cloth.
To remove the storage drawer:
1. Pull the drawer straight
out until it stops.
2. Tilt the tint of the
drawer up and free of
the range.
To replace the storage drawer:
1. Set the stops on the back of the drawer over the
stops in the range.
2. Slide the drawer evenly and straight back, so that
the rails in the range are engaged.
F
\
-+
32
Page 33

Iiiitl
-.
..:<
.......,
.......
.,
...
●
I
Oven Air Vimts
8
Never bkxktheventa (air opeminp)oftberanga
They provi& the* inlet andoutletthatarenecessary
for the range to optrate properly with correct
combustion. Air openings am located at the rear of the
cooktop, at the top and bottom of the oven door, and at
the bottom of the ~ge, under the kick panel, storage
drawer or broiler dmwer (depending on the model).
M-UP C-p (on models withstandardtwin burners)
Clean the ama under the cooktop ofken.Built-up soil,
especially grease, may catch on fire.
To make cleaning easier, the moktop may be lifted up.
To rdse the eook~p:
1. Be surethe bunwrsareturnedoff.
Z Remove the grates.
3. Grasp the two front burner wells and lift up.
Removable Kid Pad (on some models)
The kick panel may be removed for cleaning under
the range.
To remove lift up the
bottom of the panel slightly
to disengage the panel fmm
the tabs at the base of the
range. Pull the bottum of the
panel forward until the spring
clips are rekased at the top of
the panel.
Ventappearanceand locationvary
Some models have dual
support rods that will hold
the cooktop up while you
clean underneath it.
After cleming under the
coolctop with ho~ soapy
water and a clean cloth,
lower the cooktop. Be
careful not to pinch your fingers.
.
To re~ insert the two
slots at the bottom of the panel
onto the two tabs at the base
of the range and push the top
of the panel fonvard to engage
the spring clips.
Removabie Broiler Drawer (onsomemaids)
To remove:
1. When the broiler is cool, remove the rack and pan.
2. Puil the broiler @wer out until it stops, then push
it back in about one inch.
3. Grasp the handle, lift and pull the broiler drawer
out. Clean the broiler drawer with hot soapy water.
To X7?pkX?:
Hold the broiler drawer in the raised position as you
slide it partway into the range. Then lower the hwer
and push it completely closd
33
Page 34

FoRYotMtsiAfqTY
lfyousmdlgaw
1. open windows.
2. l)~$t touchqkctricd switches.
3. ‘
Extinguishmy openflame.
4 Immediate&@ your gas supplier.
FoRYomwatY
Donotstmxxx~cOmk@i&
matedak!l,
in tie vicini#y d MS
or any other_
- You mm
M these in@XwtioM COm@3tX!?&and
IMPORilN’E h these kS$lWCtiOIIS
for the localeledricd inspedds use.
mJsrALLElk Le#Uetheseinstructions
withthe
comple .
CONSUMER ~ thisUse andCare
Guideand theImddMmn
fir futureuse.
lhisappkcen mustbepmper?ygmunded
Eanceafterinstallationis
s
ce.
“ Instrudions
flammable
.-%
MRP@u’rAnT
)
Remove dl’packingmaterial and
literature fiwm oven More connecting
gas and electriail supply to range.
~AnB~
Provideadequateclearancesbetweenthe range
andadjacentcombustiblesurfhces.
7..
●
Wmllw
Improperin@dl@ion,
alteration,servke or maintenancecan
=~2E%r a@sistmceor
infiwmdon, con@dta
service -,
the ~ suppher.
Do notWtempttp opemtetheovenof
lhisrange durin@apuwer* (Ekdric
Ignitionmodels on&).
34
● *
or property
madktumr (dealer) or
adjustmen~
%=”
quaiified intier,
I&
H
Page 35

ibo
lawomur Mm”lr ~
IMta@imoftbisQmu8tamlocdcode&
oq’inthe~dlocal de8,
with the N-FM Gas bale, ANSI
z223.l,MleatMiiiiOmIn~~
mustcOI@$rm w?ithtile
~~ We, CAN/CG&B149.l or the
=,?*F.=”&%
‘II& range has @ixm
eul’mmt NutulM Gas
design+xtiti bythe
AmericanGasAlwociatkmaccordingtoANSI
2!21.1,latest editkm and Candian Gas Assdaticm
aCCOd@ @ C.AN/CGA-l.l latest edition. As with
my m~ce !* p and generating heati
there are ce saf~ precautions you should
follow. You @ d these precautions in the
Important S@@ Instructions in the tint of this
guide. Read them carefully.
● Have yow - instaUed by a qualified
installer or service technician.
● Your range must be eledridly grounded in
accordance tvith
3
I1OCXJcodes or,inthe absence
ofbed codes, inaccordancewiththe Nationd
Electrid Cdde
@NS1/NFl?A 70, latestedition).
In Cana& ekwhlicalgroundingmustbe in
accordancewith@MurrentCSACz.1~
,,
S
ElectricalCmieFart
1and/or localcodes.See
ElectricalQmm@ionsinthis section.
● Beforeins-your mnge on Knob or
anyothersyMhe#cfloorcovering, makesure
the floorcov@ngcanwithstand180°1?
Shrinkhg,warpixigordiscoloring.
Donot install
the range overaKpetkg unless asheet of
thick plywood or similar insulator is placed
between the rangp and carpeting.
. Make sure the wall coverings around the
- ~ Witi-d heat generated by the
range up to ZOO”Il
● Amid lacipg @iiets above the range. To
reduce e @at-cl caused by reaching over the
open flames qf o- bume~ inWtll a
ventilation hqod dver the
tixward at let@ 5“beyond tie nt ofthe cabinets.
QThe ventila@
above the cO@op with a clearance of not less
than 1/4” tiee~ the hood and the underside
of the Combutibk? material or metal cabiie~
me hood mu@ bq at least as wide as the
appliance and centered over-the appliance.
Clearance be~~ the coo
.
VenMon hood
LllSS’fllAN24 CllE2L
‘<
EXCEP’IXON: In@lation of a listed microwave
oven or cooconform to the ins ation instructions packed
with that appliance.
J
that projects
T
hoodmust be constructedof
fsheet metalnot as than
%
%
O.Ol& thick Install
surlitee and the
faeew NEVIZl?BE
liance over the cooktop shall
%
without
1/4”
● If cabinetsare placedabovethe range, aIIowa
minimum ckarance of W between the cooking
surfke
● Ifa 30” clearancebetweencookingsurface
andthe bottomofunprotectedcabinets.
andoverheadcombustiblematerialor metal
cabinetscannotbemaintained,protectthe
underside
notless than
with sheet metal not less than 0.0122” thick
● Clearance between the cooking surface and
protected cabinets MUSI’ NEVER BE JXX3
llZAN 24 INCHES. The vertical distance from
the plane of the cooking surface to the bottom of
-t overhead cabiiets extending closer than
1“ ti the plane of the range sides must not be
less than 18”. (See Dimensions and Clearances
illustrationinthis section.)
● CAUIIONhItemsofinterestto chikken should
not be stored in cabiits above a range or on the
mm of a
_ tOa items could be seriously injured.
ofthe cabinetsabove the cooktopwith
1/4” insulating millboard covered
~h.ikh=en climbing on the
Wmnllle
AUrangescan
remd~ To prevent accidental tipping
@
@
lMi-Tii device should engage and prevent the
range ikom tipping over.
If you pull the range out horn the wall for any
reason, make sure the Anti-Tip device is engaged
when you push the range back against the wall.
c For your safety, never use your range for
warming or heating the room. Your oven and
cooktop are not designed to heat your kitchen.
Top burners should not be operated without
cookware on the grate. Such abuse could result
in fire and damage to your range and will void
your warranty.
● Do not store or use combustible materials,
gasoline or other flammable vapors and liquids
in tie vicinity ofthis or any other appliance.
Explosions or fires could result
● Do not use oven for a storage area. Items
storedin theoven canignite.
● Do not let cooking grease or other flammable
materials accumulate in or near the range.
of the range, attach an approved
Anti-Tip device to the wall. (See
IxMtaUingthe Anti-Tip Device in this
section.) To check if the device is
installed and engaged properly,
carefully tip the range forward. The
tip and injury could
(continued next page)
I
35
Page 36

● SeeDimensions apdClearancesinthis section
forallrough-ii @d_ dimensions.These
dimensionsmustbe4@ibr safkuseofyourrange.
Thelocationof~e
(see GasPipea$d
be adjustedtonieet Bpecificrequirements.
● The be lacedwith W’ck?arance
(fkwh)=e=~ andsidewalls oftherange.
UUATIOH
Do notlocate the rqge where itmaybe subject
tostro &afts.An$openingsktheflOororti
~e~d~e ranqk@uld be sealed. Makesure
@und the base oftie
r~
supp fi=es =Ifor combustionandven
are notobstructed
MOT6CT Y@tR @LO-
Yourrange,like manyother Iwusdokl items, is
heavyandcan @q uko softfloorcoverings
such as cushio ed v!inylorcarpeting.Use care
when moving e
Itis recommenced
inexpensive instic$ions be fbIlow to protect
yourfloor.
Theran
&(or si “ Xnat@d)
at thej%ontof W nwpge,the area thatthe range
willrest
the same leveldr
‘Ibiswillallow@e
●
4ycqMing or woodwo&
4
%
*oul@beinstaRedonasheetof_
. Wen tke@orcovw”~ cads
onshotdd~ builtup withplywoodto
her than the floorcovering.
%
OUtkt andpipeOJIC!Il@
OutletLocations)may
tion
%“
;ge~oype offlooring.
simpleand
’73
tobemovedforckaning
or servicing.
Toou You Wnitll ICMD
● Phillipsand flat-bladescmwdrw
● Pencilandruler
s TWOpipewrenches (one for
“ers
backup)
. lye open~nd or adjustable wrench
● Nut drivers or wrenches 3/16” and 1/4”
ADmnenu m?musvou MAY MEED
● Gasline shutdf valve
● Pipejoiit sealantor Unapprovedpipethread
tapewithTalon* that resists actionofnatural
and~ -S
● Flexiblemetalapplianceconnector (1/% I.D.)
A5400tlengthis recommendedfor ease
of
installation but other lengths are acceptable.
Never use an
oldconnectorwhen installinga
new range.
● Flareunionadapterfor comection togas
supp~ line (3/4” or 1/2” ~
● Flare unionadapterforconnection topressure
x UP I. D.)
regulatoronrange (1/2” IWTx 1/2” I.D.)
%fIoxr Registered trademark of DuPont
?mMltATlon
c Removealltape andpackaging.Liftup the
cooktop (onmodels@h standardtwinburners)
andremove anypacking
materialunderit Make
surethe standardtwinburnersare properly
seated andlevel.
● Removeplasticiilmthatcovers some chrome
IXU@(~und oven door,side trim).
● Take the accessory packoutof theoven.
● Checkto be surethatno rangepartshave
come loose duringshipping.
r
~)
36
.
../
Page 37

●
,
lil?MmDE
Your nuqp is designed to operateata fn=essure
of4“of waterqokmmonnatumlgasoqtides@ned
forW gas rOpaneorbutane),10’”ofwater
Cohunn.
withthe typeQf
~ is
W,
tiyou d de touse this rangeon a different
~ ofm, cO@xwaiona4@stments
madeb a ser+ice technicianorotherqualified
person
@@QuAT8 $a8SmP?lT
& sum!youam supplyingyour
forwhichit isdesigned. “S
Iefir use
r
on naturalor propane
x
7
mustbe
L re @temptingto operatethe rangeon
Thhareaauow!3
forflushrange
immlatimwith
through-uwwau
mnnactionof@psi
Stub/ahutdf valve
andrearwall
Izovoutlet.
d ,
thatgas.
Forproperopmation,thepressure ofnaturalgas
suppliedtothe regdator mustbe betw~n 4“and
13”ofwaterco@nn. ForLP
su pliedmust@ between 1 and 13”ofwater
f
co umn.Whenchecking forproperoperationof
the regulator,#e inletpressure
, thepressure
F
mustbeat least
fmrntladpipe
Iltublooatioflto
—r
1“-than theopemting(manifbki)
en above.‘I’hepressure re
rZ einletoftie
the supplyline
s ofwhethernaturalor
LPgas is beii used. Aflexiblemetalappliance
connectorudIto connect the rangeto thegas
supplyline
\
#
5feetinlen@hfbrease of~n. h_
flexibleconnect@smustbe singlewallmetal
@
connectors
sho@dhaveanLD.of 1/2” andbe
no longerthan6feet in length.
Thi8araaaltowsfor
flushranuO
k-
-lit-off valve.
htallation
$nMpoand h8w&ouMludodor
ab&J8Equippdwitb
s#9mludtwin8urna%
ElcWl=m-mw
Shutoffthe @gas supplyvalvebefore
discoMecti@ ~e oldrangeandleave itoff until
new hook-up
been completed.Don’tforget
L
to relightthe pilbton othergas applianceswhen
youturnthe gas backon.
Because hardpi ing restrictsmovementof the
use o anJLG&xwtiiied flexible
!range, the
metalappliance$onnectoris recommended
unlesslocalcode requireabdpiped connection.
Never use anoldcmuwtor when instalhng
new range.Iftlw hardpipingmethodis Uda,
you must
caref@y alignthe pi~ the range
cannotbe moved afterthe connectionis made.
To preventgas ]qaks,putp~ joiit compound
on, orwrappipethreadtapewithTalon*
around,dl male (external)pipethreads.
Teflon Registeredtmielllax’kofDuPont
‘4
iEEii?l/
----~
Connecm of pipe
StUbhhut-offvalve
rearwall
and
12(Noutlet.
/ 151i!!Ei
Thisarea allows
installationwith
(continued next page)
37
Page 38

lconn9Bct6rl
38
.-
<.
Page 39

,>
●
lmwmmm-mw(mnti.ed)
1. Installa man@ P lineshut~ff~e inthe
gaslineinan
the range. Mike sure
range
supplyto the ran~.
2. Installmale 1/2” flareunionadapter to
knows where ad howto shutoff e gas
1/2’”H interd thread elbowatreletof
regulator.(h namiela
burners, ins~ tie malepipethread
the l/2’’ flare unionadaptertothe 1/2” NPT
internalthreadatinlet ofpressureregdator.
Use a backupwrtmchonthe regulatorfitting
to avoiddamage.
~;:~sg~~m~,~:on
3. Installmale 1/2” or3/4” flareuniona
to the NPTinter@ threadofthe manual ut~
offvalve,taking@m toback-upthe shutdf
valveto keep itfromturning.
4. Connectflexiue metalap lianceconnector
to permitcomec(ion atthe shutmffvalve.
5. When allconfections havebeen made,make
suredl range co@ols areinthe offpositionand
turnon the main
leak det@nr at joiits andcomections to
check forleaks inthe system
CAUTION: DO N(YI’USE A FIAME TO
CIIECK IOR GAS LEAKS.
I
Whenusing test
to pressuretest e gas supplysystem ofthe
residence, disco@wctthe rangeandindividual
shutaff valvefromthe gas supply@ping.When
usingtest pressutes of 1/2 pwg
gas
supplysystem simplyisolatethe rangetim
the gas supplysy$temby
shutdf valve.
* -s4
supplyvalve.Use a liquid
r
r
locationoutside of
everyoneope “ the
T
the
~willldual
endof
.
Y
Ftothe adapteronthe range. ositionrange
Umsgreaterthan
1/2 psig
orless totest the
dosing the individual
~ ~ (on some models)
•l
Electrical RH@reln
120-vol$60Hertz,
circuitprotectedbya
breaker or time delay fuse.
~on cod Cmltiolls
Because of potential safety hazards associated
with certain conditions, we strongly recommend
-st the use of an extension cord. However,
ti you still elect to use an extension cord, it is
absolutely necessary that it be a ULlisted,
3-wire grounding-type appliance extension cord
and that the current camying rating of the cord
in amperes be equivalent to, or greater than,
the branch circuk rating.
3.MPORT~-(Plame
FOR PERSONAL SAFETY, THIS APPLTANCE
MUSI’ BE PROPERLY GROUNDED.
The power cord of this appliance is equipped
with a tlweeprong (grounding) plug which
mates with a standard three-prong grounding
~RSD z mm
I
VP
qualified electrician to make sure the receptacle
is properly grounded.
Where a standard-prong wall receptacle is
encounte~ it is the personal responsibility and
obligation ofthe customer to have it replaced with
propedy grounded three-prong wall receptacle.
~ NOT, UNDER ANY CIRCUMSI’ANCES,
CUT OR REMOVE THE lllIllD (GROUND)
PRONG FROM Tll13 POWER CORD.
Ensureproper
$roundexists
beforeuse
ents
properlygrounded b~ch
lwp or 20amp circuit
a camfdly)
wall receptacle
to minimize the
possibility of
9’
0
Y
n
electric shock
hazard from
this appliance.
The customer
shouldhavethe
~;ll:tacle
checked by a
(continued next page)
A
.
w
39
Page 40

GiliilCww##l#Bl#Bb&*
Anadaptermaybe used onlyon a l%mp
circuit
circuit where 1
-O-y NNIWllON maybe
madeto a properlygrounded two-prongwall
‘Zy&b:~ ‘= ‘f a~li$ted adapter,
z%%tzr%s%%z
p~per v~ty in the comection ofthe
powercord.
TEMPORARY
METHOD
(-f plugsm
permittedin
Donot USC
_
ona 20-amp
codespermig a
?s
s~res. ~e larger
/-- -
Canada)
AlignlugP
pfongmotis
Q
< /.
~w -A
&
= “E~m
CAUTION Atta@ing the adapter gmmd
tenninaltothewdl
does notgroundbe app
%“~z?i%over
screwis mea andnotin- ~d fie ~
receptacleis grmtndedthroughthe house
wiring.‘Rzecusto. er shouldhavethecircuit
checkedby aq
ed electricianto makesure
&
the receptacleis IX-Operlygrounded.
1(
m
/
proper
gfoundand
firmconnection
beforeuse
riilufgit——s
=
*Appliance Power
Frequent&.
Do notuse anadapterpluginthese situations
because discomecting of the power cord
places unduestrainonthe adapterandleads to
eventualfailureof theadaptergroundterminal.
‘I’hecustomer shouldhavethe two-prong
wailreceptaclereplacedwithathreeprong
@u@@ receptacle
bya qualifiedelectrician
befbreusing the appliance.
The installationof appliancesdesigned for
mobilehome installationmustconformwith
the Manufktured HomeConstructionand
SafetyStandard,‘Iltle24 Cm Part3280
(fbrmerlythe FederalStandardforMobile
Home ConstructionandSafety,TMe24, HUD,
Part280) or,when such standardis not
applicable,theStandardforManufiwtured
Home Installations,latestedition (Wnut%ctured
Home Sites,CommunitiesandSet-Ups),ANSI
A225.1,latestedition,orwithlocal codes. In
C_ mobdehome installationmust be in
accordancewiththe currentCAWCW
Z240/MH MobileHome InstallationCode.
EIOd#ltB&amult
1. Locatedisconnectplug onthe rangeback.
2. Pinchsides ofconnector andpullout of
rangeback.
Vawfllbawm$
—--Ok
%
%
-’
When disconn “
adapter,ah hol the adapterwithone hand.
Ifthis is not one, $e a~ter groundterminal
T
r
the powercordfromthe
is very likelyto b
thishap~@O~;%TA=~=::
proper ground has _ been established.
40
Page 41

e
lmBALTw8@PemMis
sealanyopenings the wall behind the range
andin thefloorun er the rangewhen hookups
arecompkted.
Izl-f--mwsumimm-
t
Q9dlvy@wlH@s
The combustionqualityofburnerflames needs
to be determinedvisually
(A) Yellow flamesCallfor service
sudaDBulnr~
Operationofallco@topand ovenburners
shouldbe checkedafterthe rangc~~~d~
sup lylineshaveMen carddly
r
for eaks.
Electric Qnitiml Models
Selectatop burner knoband simultaneously
PtlSh in andturn to ~ pOSitiOIL YOU- hear
a snapping sound Mdicating proper operation
ofthe sparkmodule.Once the airhas been
. rged hornthe supply lines, bume~ should
twithin4 seco ds. Afterburner ts,
&
rotateknobout of e IJTEposition. ry each
burnerin successi@ untilallburnershave
been checked.
‘,4
.
2’
&
on
Ifburner flameslooklike
(B) Y-tips
OWer mmesNormal
(C’)Soft blue fkunesNormalfornaturalgas
(A),callforservice.
forLPgas
Normalburner flamesshouldlooklike (B)or
(C), depending on the type of gas you use.
T
With LP gas,
cones is normal.
some yellowtippingon outer
•nEcK~ofmmER
Youroven is designed tooperatequietlyand
automatically.Toopemtetheoven,turnthe OVEN
S~ knob toBAKEandthe OVENTEMPknob
to asetting aboveWIeI?After30-90seconds, the
ovenburnerwillignite and bum untilthe set
temperatureis reached.The oven burnerwill
continueto cycle on andoff asnecessary to
.
mamtamthe ovenatthetemperatureindicatedby
the OVENTEMPknob.
To check
OVENSli%%ob to BROILandthe OVEN
TEMPknob toBROILAfter3090 seconds, the
broilburnerwillignite.
Electric ignition modelsrequireelectrical
powerto operate.Incase ofa poweroutage, the
ovenburners onthese modelscannotbe lit
manuallywitha match.Gaswillnot flow unless
the glowbaris hot
Ifthe oven is inuse when a poweroutage occurs,
the burnerwillshut offandcannotbe relit until
poweris restored.
● lion of thebroilburner,turnthe
(continued next page)
41
Page 42

&&.tments tters forthe topandbottom
reguM3%
The airadjustmen$shutterforthe top
(broil)burneris in the centerof therear
wallof the oven.
e flowofair tothe flames.
To determineifthe bottomburnerflames are
burning roperly,removethe ovenbottom.
Flames ouldhave approximate 1“blue
shouldburnwith noyellow tipping.~lth most
LPgas, smallyellow tipsatthe end ofouter
cones arenormal.)Flamesshould notliftoff
burnerports. Iflifling is observed, gmdually
reduce airshutteropeninguntilflamesare
stabilized.
oven
To -- the own bottom:
1. Remove the knurled
ofthe oven bottom
2. Graspthe ovenbottomatfinger slotson
each side.
3. Liftthe rearofthe oven bottomenough to
clearthe lipofthe range frame,then pullout
&
screws
Kcones and,ifrange is suppliedwi mturalgas,
holdingdown rear
.
The shutterfix the bottom (oven)burneris
nearthe backwall$ehind the sto e draweror
kickpanel.Removathe panel.See e Careand
Cleaningsection inthis guide.
Toead st the flowdfairto eitherburner,loosen
●PShead EMIIWWandrotatethe shutter
Pi%ll
towardopen orclo$edpositionas needed.
3
The flamesforthe @p(broil)burner shouldbe
steadywith~ lyl“lhe conesandshould
notextendoutoverthe
edgesoftheburner baffle.
42
/
.-
Page 43

1. Remove the stcmge
drawer, broilerdr$weror
kickpane?L
Usea 3/16” open-d
2.
orsocketwrench@ back
outbothrearlev@ng legs
approximatelytwoturns.
3. Use a 1%”open+endor
adjustablewrenchto back
outthe tiont level@ legs
twoturns.
40 Installthe oven shelves
inthe oven and~$ition
the range
wher6itwillbe installed.
5. Checkforleveh$essbyplacinga spiritlevel or
acup, W- find tith water,on one ofthe
oven racks.If
u* a spirit leve~taketwo
readings-with thcllevelplaceddiagonallytit
inone directionand thenthe other
6. Adjustthelevelixtglegs untiltherangeis leveL
7. litter the range@level, slidethe rangemay
fromthe wallso thti theAnti-’Ilpdevice canbe
installed.
AntI-Tip
I
Devkel
I
~L
,/+
Wallp!ate[
‘
,/
‘ Marl(ed
I
Edge1 ~)f ,/
of Range
L-W \
‘%’
Appfox.
2~
2/
2. Locatethe outsideedge ofthe device 2%”
towardthe center ofthe rangefromthe marked
edge ofthe range.
3. Using the deviceas a template,markthe
positionof thehole forthe screw.
4. Forwoodconstruction,drilla pilothole at an
angle of20 degrees fromthe hotintal. A nail
orawlmaybe used ifa drillis notavailable.
Mountthe Anti-’I3pdevicewiththe screw
provided.
Forcement orconcrete construction,you
willneed a 1/4” x 1%”lagboltanda 1/2” O.D.
sleeve anchor,whicharenot provided.Drill
the recommendedsize hole forthe hardware.
Installthe sleeve anchorintothe drilledhole
andthen installthe lag boltthroughthe device.
me boltsmustbe properlytightened as
recommendedforthe hardware.
w~G
● Ran e must b securedwithan approved
Anti-#p device.
● Unless properlyinstall~ the range could
be tippedbyyou ora childstanding,sitting
orleaningon anopen door.
● AfterinstallingtheAnti-13pdevice, verify
thatitis in p~e bymy attemptingto
tiltthe rangeforward.
_ ‘rl’liS
recognize indu@rytipstandardsforall
normalconditions.
● ‘Ihe use of thisdevice does notpreclude
tippingofthe rangewhen not properly
installed.
● Ifthe Anti-Tip@vice su pliedwiththe
rangedoes not@this app” “on,use the
universalAnti-’Ilfidevice WB02XW19.
1. Mark the@ wheretheRIGHTEDGEofthe
is to be located. Be suretoallowforthe
range
‘*
countertopoverhangifyouintendtoinstallthe
rangenexttocabinets.
I
ehasbeen des@nedtomeetall
T
b
..
5. Slidethe
forproperins
e againstthe wall,andcheck
“onbygraspingthe front
%Xltl
edges ofthe rearsurfiweunitopenings and
carefullyattemptingto tiltthe rangeforward.
WWEHAufUHMu?sARE~Mk
nWW$UQWAcO#VBUM
AU LEFTM THE
on ms8’noa*
lWtMUEET8WLOWOF~AWD
~mmmme~
43
Page 44

●
This range leaves thelfactoryset foruse withnatural
gas. Ifyou convertto LPgas, keep these instructions
andorifices incase y@ wantto convertbackto
naturalgas.
‘Ihe conversion sho~d be donebya qualitied
technician orinstallet.
-mumm
Adjustablewrench
1/2” and 3/4” ope~d wrench
Flatblade smwdrlver (small)
Nut driversor~ches 7- 5/16” or a small
adjustable(dependingon the size ofthe spuds)
T-10Torxdriver
(l) Turn Off@&Mqlppiyatth ewall.
(2)1’iu-n Offtheqketrical pawertotherange.
If range
orifflexible comedtionwasmade,rangemaybe
pulledoutfromthe wallto makeconversion
has notyet beenconnectedto gas supply,
easier.
lAlsfmsTIi&lbgdmn
1. Use anadjustablewrenchto removethe
nuttim the pressure regulator.
NAT w
Apply sidewardfingerpressureto remove
2.
the plasticpinfromthe nut
HINR To removethe pin,placethe nuton
aflat@kce andpress the pinsidewayswith
yourfingers.
3. Push down
pinin thenut
NAT
&
I
I
I
@
4. Reiisert the assembly intothe regulator.
onthe disc edges to replace the
v
e
. .>
EmemR’tm~uEwwm
W~G Donot removethe pressure
regulatirfiom the range.
1. Removethe broflerdrawerandlocate the
pressure regulatoratthe rearofthe range.
‘==~-~~
Onsome models,you mayhaveto removean
access cover also.
2. Follow the directionsin box
matchyourregulatprtype.
1
❑ or ❑that
4
wlf8Mm&R9gddu3
1. Unscrewthe plastic-protectedhex-nut ~my
capfromthe regulator.
2. Carefullyprythe protectiveplasticcapoff
the threadedmetalcap.Gentlypullthe plastic
washeroffthe threadson the otherside ofthe
metalcap.
3. Pushthe plasticcap ontothe end ofthe metal
capdisplayingthe typeof gas youare converting
to.Ress the attachedplasticwasher ontothe
threadson the otherside of the metalcap.
4. Screwthe h=-nut capbackintothe regulator. ...
Do notovertighten.
\
44
Page 45

●
ml
~stmmBmmRs
‘-”~
1. Removegrates, burnercapsandburnerheads.
2. Using the torMriver,removethe burnerbases
byUnscrewing
IMtheburnti_t~
DO N~ discommctthewires
bases unless thelcooktopneeds tobe mised.
3. Removethe brasso~ce spudundereach
burnerbase by qn
witha7rnn45/lfi”or as
(dependingon thesize ofyourspuds). Apply a
3/4” Wr@ncht@leh@xonti**~
as a back-up
the ahwnhmn
4. Install orifi~
the following
gas or naturaiga$,dependingonwhichyouare
convertingto.
the3smallscrews in~h-.
from the burner
dfromfitting
adjustablewrench
en rem- spud to prevent
lioxn
-s (seeKl
-.
spudsaccordingto oneof
or Ill), forLP
Izlaiadpdsfor
LPorifu spudsarein asmall
with this Use and Care guide. LP orifice srmds
havea 2-digitnumber~d the letter “L”ofi one
side. Eachorificespudwillalso have 1or2
grooves on one side,denotingthe locationon the
rangewhere itis to be installedas shownbelow.
Natural~ orificespudshave a3digit number
onone side. EachoritlcespudwiIlalsohave 1,2
or3grooves on one side, withthe letter‘N”
underneathdenotingthe locationon the range
where itis to be installedas shown below.
CnvmhgmlP6am
●
(#@
●
.—
plastic bag packed
——
QQ
OfFtange
-:2’
w
(continued nextpage)
45
Page 46

, make sure the orifice
spudsare
wzewed intothe gas inlet
~ch to
holdthe inlettube
hex toprevent itmm twisting.
6. Put oldorifm spudsbackinthe bagto save
forposd%lefuture@reversion.
N-: UanOIifiC@spud
is accidentally
dropped,the cooktOp
clips
bkidescrewdm
DO NCYI’attemptto raisethe cooktopwithout
removing all4 burnerbases.
Ifwires were discorPnected
cooktop.
the
overthe clips.
“–er.
toremove the
burnerelectrode
sure notto bendthe
owaBumu’
1. Removeoven door,storage drawerorbroiler
drawer,oven bottomandburnerbaffle (onsome
models). l%elowerburnerofice spudis
locatedbehindthe storage drawer,broiler
drawerorkickpanel. (Onsome models, ametal
shield mustbe removedto access the orifice.)
2oToc0mmrtti W@M,
use a 1/2”wrenchto
turnthe lowerburner
orificespudclockwise.
Tiihten the spudonly
untilit is snug.To
preventdamage,do not
ove~hten the
Tocanmrt tonatural @m,
loosen the spudabout2 turns.
~ h (onsome models)
spud. -
46
To convert to LP ~, use a 1/2” wrench to
turn the upper burner orilice spud cloclwvise.
Tighten spud only until it is snug with the base.
To prevent damage, do not overtighten spud.
convert to natural gas, loosen the spud
To
about 2 turns.
Page 47

Eb’wm9R~~
For U ~, loosen the
PhiIlipsheadscrew and
rotatethe shuttertothe
fullopenposition.WXth
AirShutter
baffleinplace,flames
shouldhaveapproximately
l-iich blue cones and
shouldnot extendbeyond
the edges ofthe b~er baffle.After30-:$
ofburner o-.o~ check forflames
burner ports. Ifhftxpg
reduce airshuttero~ning untilflamesare
stabilized.
For natural gas, @e
1/2” or about3/4 ofthe wayopen.
k observed,-U y
shutter shouldbe open
9
lmmcKFmsuts
Whenallconnections havebeen made, make sure
allrange controls m
on the main
detectorat jointsandcomections to check for
leaks inthe system
CAUIION: DO N(YI’USE A IWWIE 70
CHECK
I
When using test re$sures greater than 1/2 psig
to pressure tit e gas supply system ofthe
residence, disconne@ the range and individual
shutdf valve fi-omtie gas su@y piping. When
using test pressures of 1/2 pmg or less to test the
gas supply syste~ sjmply isolate the range fforn
the gas suppiy systi by closing the individual
shutdf valve.
r
FORGASIEAKS.
inthe off position and turn
supplyvalve.Use aliquidleak
i
❑_LOwWHm
NUIIE:Onlyvalveswith these
types ofknobsareadjustable.
1. Turn allofthe topburnersto ~
Iow.
2. Remove allfourknobs.
3. Wkh a small flat blade
screwdriver,turnthe
valveset screws
clockwiseto decrease
the flamesize,
counterclockwiseto
hwreasethe flame
size.Adjustuntiltheflame is aboutthe same
height asthe topofthe burner.
4. Replacethe knobs.
5. Checkforflameoutage byopening and
closing theoven doorseveraltimes. Ifthe flame
goes out increasethe flamesize.
llcuRcKQMLllYOWLMB
The combustionqualityofburnerflamesneeds
tobe determinedvisually.
I
S*
%
A Yellow flarnes-
$)all forservice
(B) Yellow tips on
cones+Normal forLP gas
(C) Soft blue fiamesNormal for naturalgas
*
e ●
‘**
@
I
L
r
outer
z
●
Ifbumer flames look like (A), call for service.
Normal burner flames should look like (B) or
(C), depending on the type of gas you use.
~nlh~, some yellow tipping on outer cones
The conversion forsealedburner modelsis
nowcomplete.
I
I
47
Page 48

●
U!!!!!!!
WOWTO-AST!TWIH
wlmERUlulumbuusRwlTIll?woR
mlml as
This rangeleaves th~fktory set foruse withnatural
gas. Ifyou convert@ U gas, keep these instructions
andofices in case youwantto convertbackto
.The co-n shouldbe done bya
*$
quaM technician orinstaller.
TwLs
Mjustable wrench
1/2” open-end~h
Flatblade
Nutdrivers 7- 5/16” or asd adjustable
(dependingon the size ofthe spuds)
R8Qumm
wmwMver (small)
m-~~-~
(l) Turnoff gammpp&atthewaile
(2) ’M=noHthe&ctrical puwertithen9nge.
Ifrange
or inflexible eonne@ion was made, range maybe
pulled out from the wall to make conversion easier.
has not yet been comected to gas supply,
❑fDwllkMgdu#ut
-W&f!n!n
1. Unscrewthe plastic-protectedhex-nutcap
fromthe regulator.
2. Carefullyprythe protectiveplasticcapoff
the threadedmetalcap. Gentlypullthe plastic
washeroffthe threadsonthe otherside of the
metalcap.
3. Pushthe plasticcap ontothe end ofthe metal
capdisplayingthe typeofgas you are converting .
to. Press theattachedplasticwasher ontothe
threadson the otherside ofthe metalcap.
4. Screwthe hex-nutcapbackintothe regulator.
Do notovertighten.
fi?!
As8anbly
uilCswv9mmm$smE~Tau
WARNING Du
regulator from the range.
1. Removethe coaktopandlocatethe pressure
regulatorat right @arofthe range.
2. Followthe dire@onsinbox
matchyour regulatortype.
notremove the pressure
❑, ❑or ❑ that
❑ffl?HMsR@@d9r#
1. Use a coin torelnovethe capfromthe
pressure regulator.
2. Turn the capoverandhook itintothe slots.
The typeof
onthe top o thecap.
—
48
to beused shouldnowbe visible
Y
IIlmsmmagddm
1. Use anadjustable
wrenchto removethe
nutfromthe pressure
regulator.
2. Applysideward
T
fingerpressureto
removethe plasticpin
fromthe nut
~ To remove the
/
(Standingpilotmodelsdo
nothave a gas shut-off
valveon the regulator.)
3. Push downonthe disc edges
pin in the nut
NAT
q
f
I
I
@
63
pin,placethe nuton
aflatsurf%ceandpress
the pinsideways with
yourfingers.
to replace the
4. Reinsert the
assembly intothe
LP
w
I
1
v
regulator.
Page 49

Mturd Gas
J!fi
LP(Propane)l #6@B3fJIM8JIlkfddlfkr
hA?!md8ciiiHiaia4!Jrotatethe-
-totheMl opea position. —
%Rthh#!flek@ace?tlames -- ‘ - “1
!sh@uklhweappr==@
kh & COM~* ~~d not
burner_ AfterWseconds of burner
~ check forfknes liftingoffburner
~. ~- is~, graduallyreduce air
~u- _ untilflamesare stabilized.
FW ~ ~,
1/% or about3/4 ofthe my open.
beyondtheedgesofthe
theshuttershould be open
y 1-
?kitbr
--’.4
(continued next page)
49
Page 50

0s
s[apouIxwnq u~ p.n?p~s JOJ UO!SNAU03 aq-&
‘ay)~dwo~MOU S!
c=-.
Page 51

●
.
‘@
PROBLEM
QUESTIONS?
USE THIS PROBLEM SOLWR
POSM13LE CAUSE
c
OVEN WILL NOT WORK
*Plug on range is not compkly inserted in the ekctrical outlet.
●Thecircuit brea&inyourhouse has beentri~orafusehas been blown.
I
TOPBURNERS DO NOT
LIGHT OR DO NOT
I
BURN
BURNER FLAMES VERY
LARGEOR YELLOW
SURFACEBURNERS
LIGHT BUT OVEN
DOES NOT
EVENLY
● Oven controls not ~p@y set.
● Door left in locked position afkr cleaning.
● Make sure electrical plug is plugged into a live power outle~
s Burner holes on the side or mound the top of burner may be clogged. Remove
burners (on models with standad twin burners) or burner heads (on models
with sealed burners) or burner caps on spiI1-proofmodels, and clean them
with a sewing needle or twist tie. Make sure you do not enlarge the holes. On
spill-proof models, check electrode area for burned-on fd or grease.
s If range is connected to LP gas, check all steps in the Installation Instructions.
● The oven gas shutoff valve may have accidentally been moved during
cleaning or moving.
To check the oven gas shut off valve on standard twin burner models, raise
the cooktop and look for the gas shutoff lever at the extreme right rear comer.
(Standing pilot models do not have a gas shut-off valve on the regulator.)
Follow the directions in box A or B that match your regulator type.
I
m 1
H
[Stsn&rd TwinBurnsr MocMs
To check the oven gas shutoff valve on sealed burner models, remove
the storage drawer, broiler drawer or kick panel and look for the gas shut
off lever at the back of the range. On some models you may have to
remove an access cover also.
Follow the directions inbox A or B that match your regulator type.
Stsndsrd TwinBurnsr Modsls
H
w
So8M Burnsr Moct8i-
I
51
Page 52

PROBLEM SOLVER
(continued)
● cmkw~ ~-nots-for bdhlg.
● Mnninum fail used on the broiler pan grid has not been fitted properly
and slit as recommended.
. Oven bottom ~t ~~ly seated in position.
FOOD DOES NOT ROAST
OR BAW PROPERLY
CLOCK DOES NOT WORK
OVEN LIGHT DOES NOT I
cOME ON
STRONG ODOR
OVENWILL Iwr
SELF CLEAN
OVEN DOOR WILL
NOT UNLOCK
● Oven controls not properly set Seethe Baking or Roast@ section.
. Shelf position is not correct.
. Incomect cookware or cooinvare of improper size is being used.
I
● Clock not set correcdy.
. Oven thermostat needs adjustment. See the Adjust the Oven Thermostat—
Do 12Youxse~section.
● Aluminum foil used improperly in the oven.
● oven bottom ~t =wly seated ill position.
.
~ge e~~~ plug mustbe securely Mxl@dk a Uvepower outletoCh=k ‘or
blown fhse or tripped circuit breab’.
● Bulb maybe loose or burned ou~
● Electrical plug must be plugged into alive power outlet
. Improper air/gas ratio in oven. Adjust oven burner air shutter.
● An odor from the insulation around the oven liner is normal for the firstfew
times oven is used. This is tempo~.
● Oven temperature is too high to set self-elm operation. Allow the range to cool
to room te~ and reset the controls.
. M latch handle not moved all the way to the right.
● Oven must cool below locking tempma Do not lock the doorwiti
*&@
when using sdkkan f- or the oven may lock
-m
‘ii@
OVEN NOT CLEAN AFI’ER
ELEANCYCLE
OVENTEMP~
‘1’00 HOT OR TOO COLD
OVEN DOOR
● Oven controls not sel properly. Review Operat@ the Self-Cl_g Oven section.
I QHeavily soiledovenqtis 3%to4houofcltig time.
● H~vy-spillovem should bCcl- up kfo~ s-g cle~ CYCICO
● ~c OVENTEMP Wb needs adjustment. Seethe Adjust the Oven
Thermostat-ti It Yourse~tion
. Turn the OVEN SET knob to OFF. Allow the oven to cool and
ACCIDElfTfiY LOCKED I then unlatch the door.
WHILE BAKING
I
52
.
Page 53

Page 54

NOTES
●
54
Page 55

I
h?’
CuwbmemWti
---
8W8334U!2
bnsumem with impaired hearing or speech who have
xcess to a TDD or a conventional teletypewriter may
800-TDD-GEAc@oo-83M322) torequest
call
information or service.
You can have the secure
after your RCA product warranty expires. Pumhase a GE contract while your
warranty is AU in efkct and you’ll receive a substantial discount. With a
multipbyear contract, you’re assured of future service at today’s prices.
xldividual8-to-
can have parts
their home. Our parts systemprovides accessto over
47,000
&nted. VISA,
areaccepted.
.
.
Genuine RenewalPiu-ts...add arefidlY service wmormeL Caution must be exereised. since
or accessoriessent directly to
f=ling that GE Consumer Service will still be there
theirmvnapplbx9 use.rm8iBlteMncebtrudms
MasterCard and Discover cakis
CovGfproldumintcndedt obeperformedb yaqwer.
--+CinggeQeayshmddberefen’edtoquaEfied
+-
Conminedint hisguide
may cause unsafe operation.
Page 56

I
 Loading...