

Gaylord ELX Installation Manual
Installation Manual
ELX Hood w/ Capture Wall
Use for ELX Models Incorporation
Gaylord Patented Capture wall…
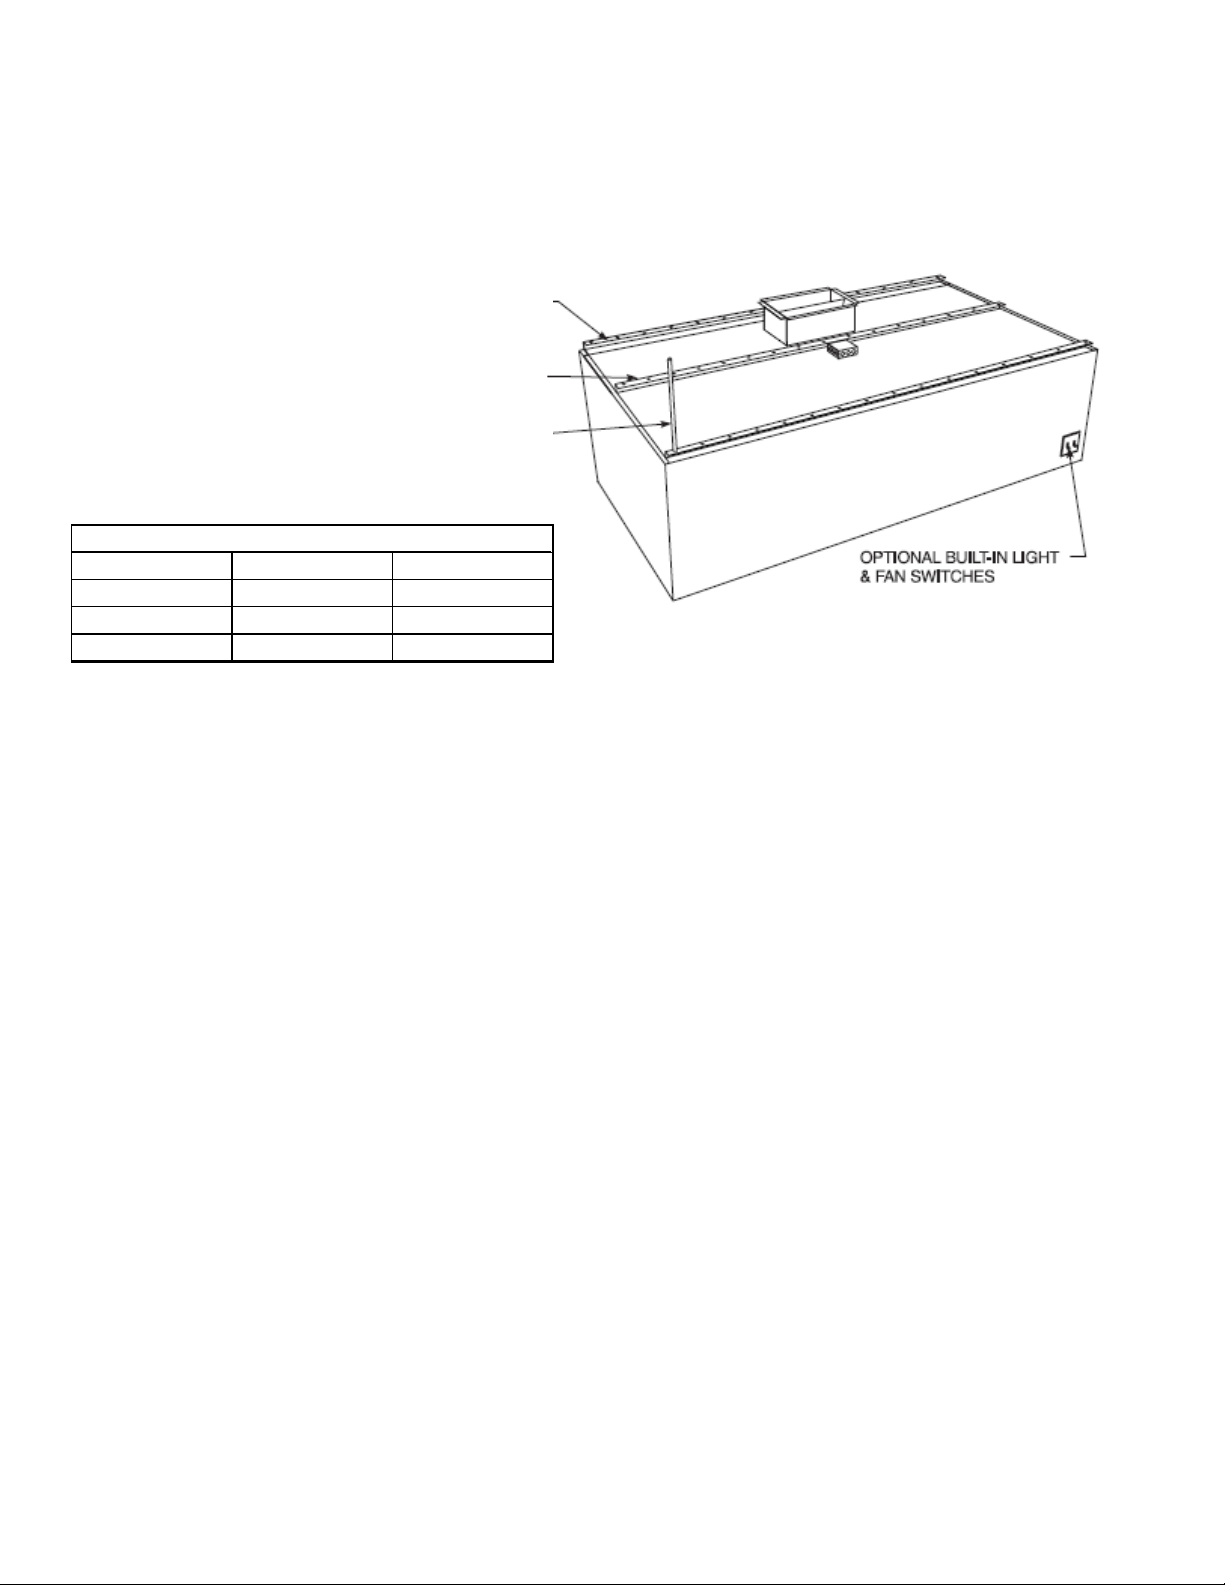
1) Hood Installation Procedure:
(By Others)
From Overhead.
RECOMMENDED MINIMUM MOUNTING DEVICES
Continuous Hanging Flange
with holes every 12”
Section Length Hanging Rods Bracket Bolts
Less that 6 ft. 2 2
6 ft. to 12 ft. 3 3
12 ft. or longer 4 4
Full Length Angle
Bracket for Bolting to
Wall and/or Hanging
Hanging Rods
Fig. 1, ELX Hood Installation Instructions
1.
(Hood Canopy)
is to be supported by 5/16 inch minimum thickness All-Thread
or equivalent type hanging rods within one foot of each corner. Additional rods
must be added as necessary with no greater than 6 ft. spacing’s between any one
support on the same hanging bracket.
2. Wall Mounted Hoods are to be bolted / screwed to the structural wall no less than
2 times on hood sections less than 7 ft., and 3 times minimum on hoods greater
than 7ft. Screw / bolt penetrations are to occur at the full length angle bracket
shown above in fig. 1.
2) Capture Wall Installation Procedure:
1. Once the canopy has been successfully installed, plumb, square, and level, remove
the shipping block, noted below in fig.3.
2. Move the Capture Wall into place under its mating hood section, and secure with
the provided screws through the holes provided, see fig.3, and P3 & P,4.
3. Verify the wall fits into place well, and forms a tight seal with the bottom of hood.
If it does not loosen the screws and re-adjust the hood into place.
4. Fasten the bottom of the Capture wall to the structural wall. Use a minimum of a
#10 pan or truss head screw or equivalent; on a maximum of 32” centers, see fig.4
2

and P5 (picture 5). Note screw lengths must be adequate sized to produce a secure
connection at each attachment point.
5. Verify all joints are tight and flat. Note: Inconsistencies in the walls surface can
cause the misalignments, shim behind the hood and wall as needed to properly
align all surfaces.
6. Caulk the seam between the hood and Capture Wall with an NSF listed / Title 24-
CFR compliant silicone sealant.
7. Move on to the next section. Note: Hoods need to be properly leveled to prevent
wedge shaped gaps from appearing between the hood’s capture walls. Be sure to
properly adjust the walls and canopies to form a tight section to section fit.
Afterward fill the joint with an NSF listed / Title 24-CFR compliant silicone
sealant.
3
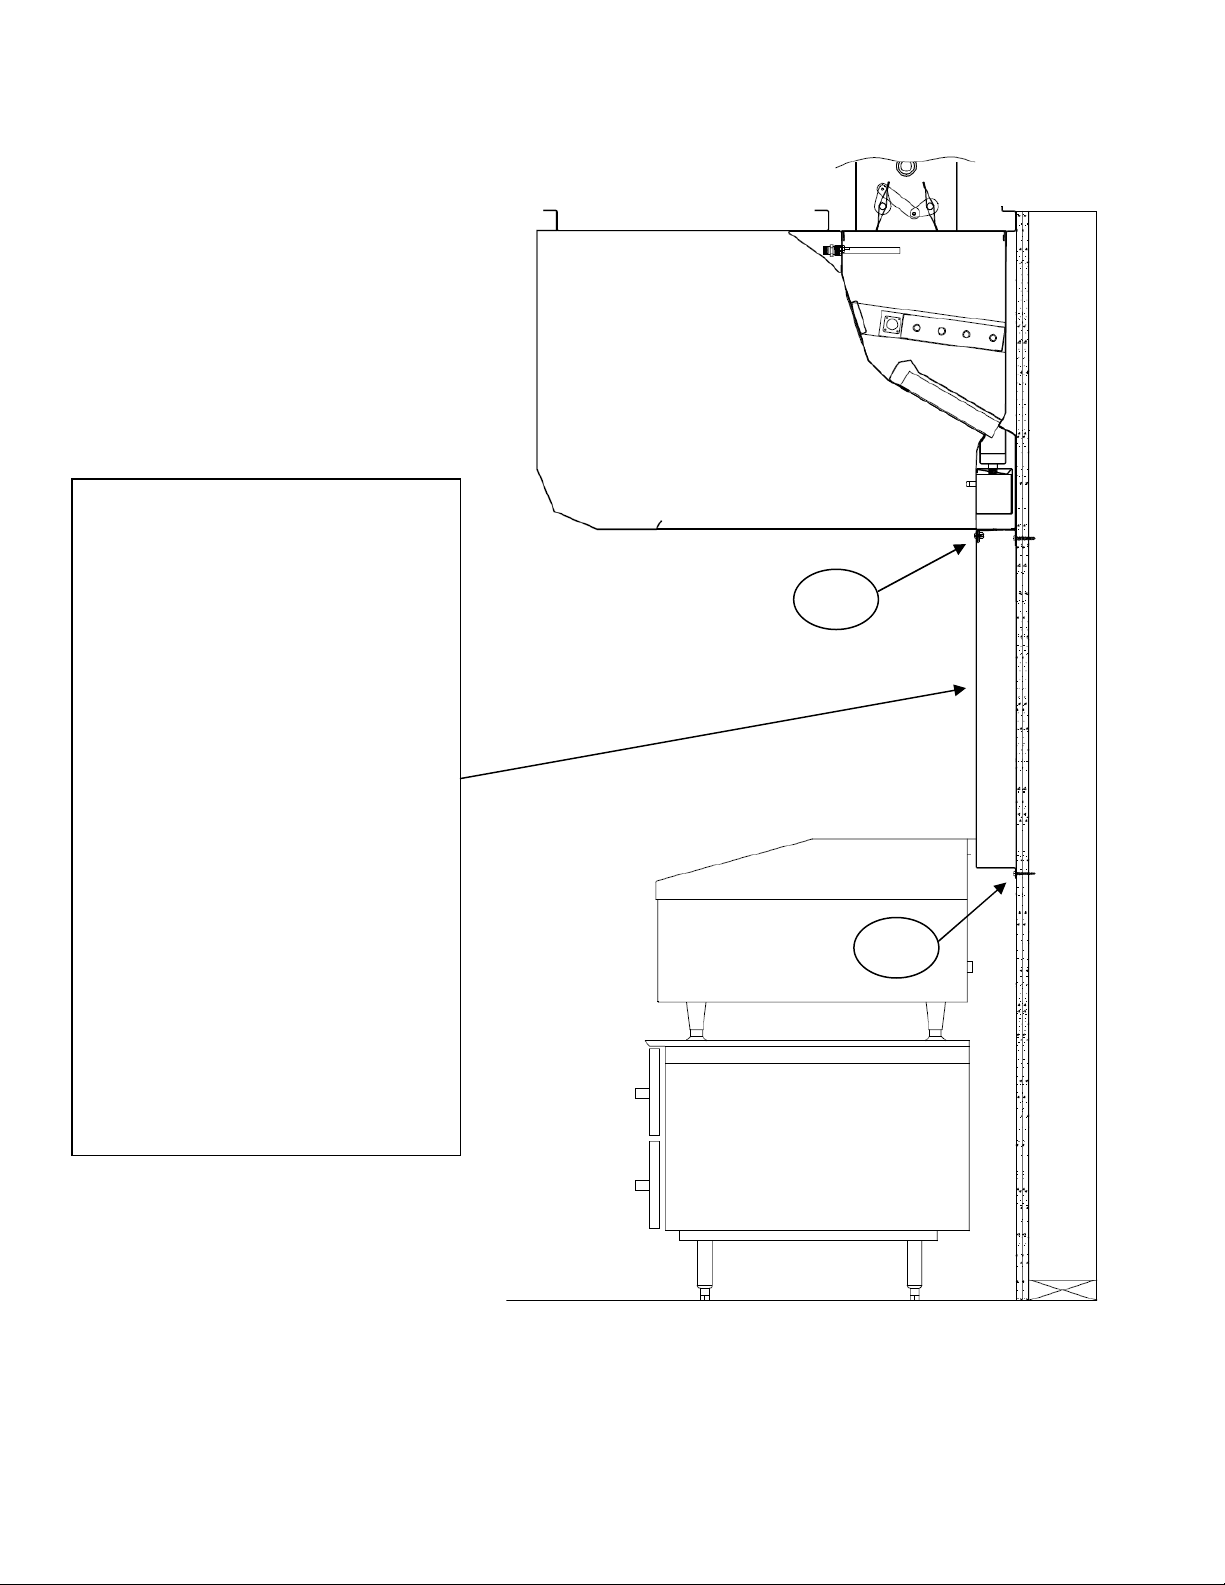
Capture Wall
– Additional
Equipment being mounted to
the Capture Wall must be
fastened directly under any
mounting screw. Each screw,
shown in P1, denotes a vertical
1 ½” stainless steel stud
intended to stiffen the Capture
Wall and support shelves or
additional equipment such as
salamanders, and/or cheesemelters. Failure to attach
shelving or equipment to those
vertical studs will cause
warping of the Capture Wall in
the affected area, and cannot be
guaranteed to carry the load.
Be sure to attach only under
each screw on the Capture
Wall.
Fig. 2, ELX Installed Capture Wall…
4
 Loading...