

Garmin fenix, Foretrex 301, Foretrex 401, 110, 310XT Instruction Manual
...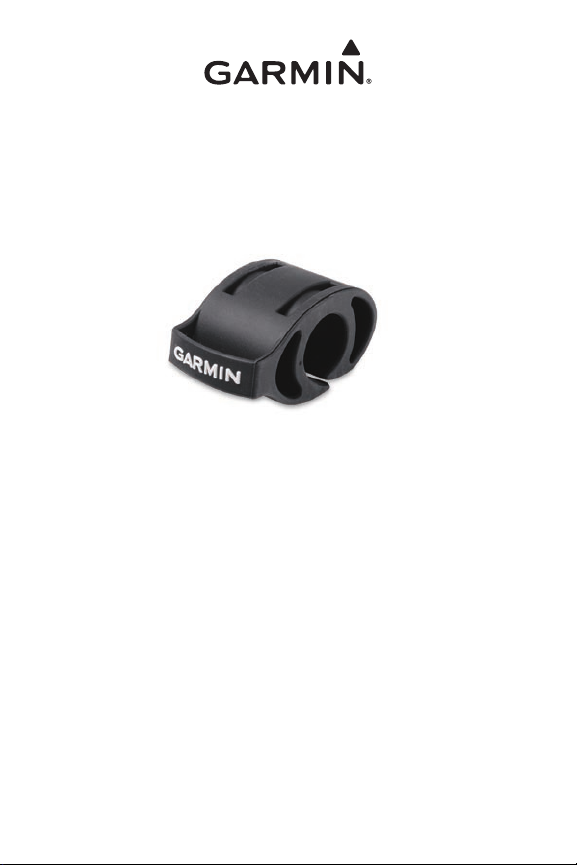
Forerunner® Foretrex
Bike Mount
instructions (EN)
instructions (FR)
istruzioni (IT)
anweisungen (DE)
instrucciones (ES)
instruções (PT)
instructies (NL)
instruktioner (DA)
ohjeet (FI)
instruksjoner (NO)
instruktioner (SV)
®
© 2009 Garmin Ltd. or its subsidiaries
September 2009 Part Number 190-00839-08 Rev. C Printed in Taiwan
See the Important Safety and Product Information guide in
the product box for product warnings and other important
information.
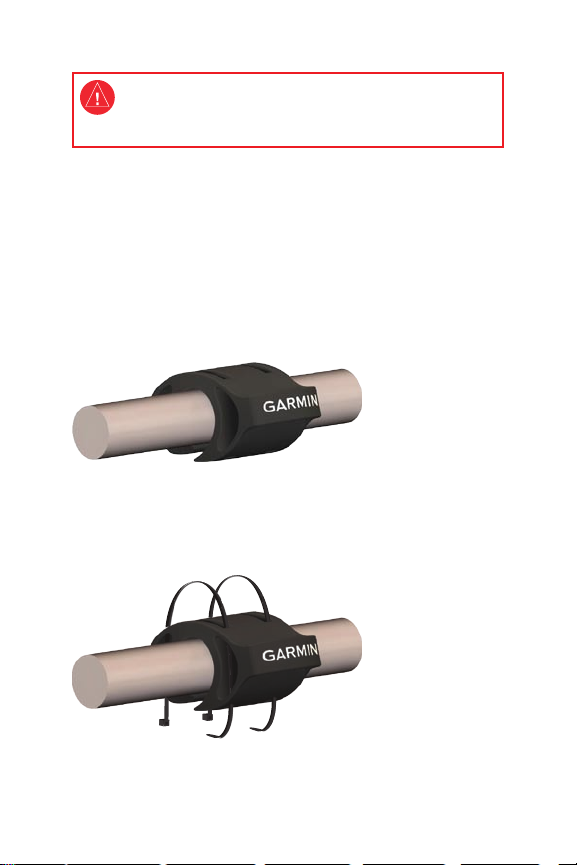
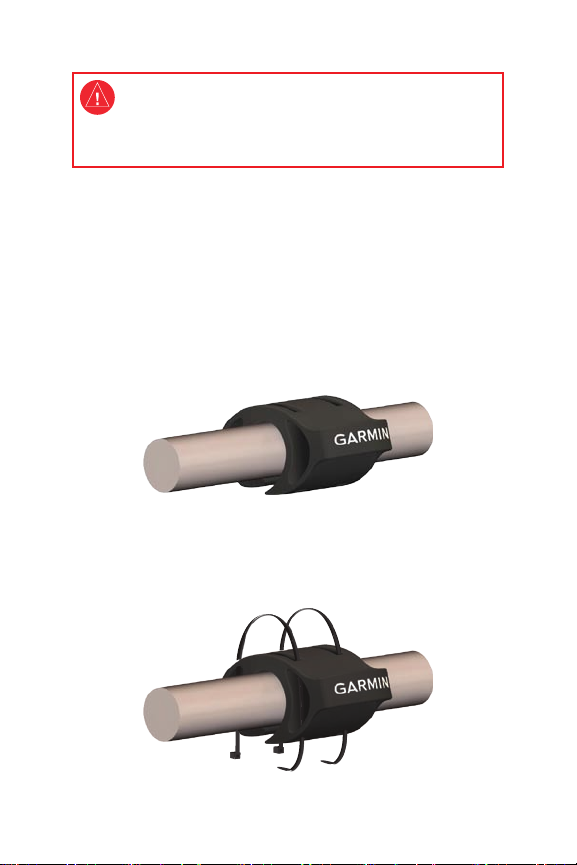
Bike Mount Kit
Bike mount
•
Cable ties (2)
•
Installation
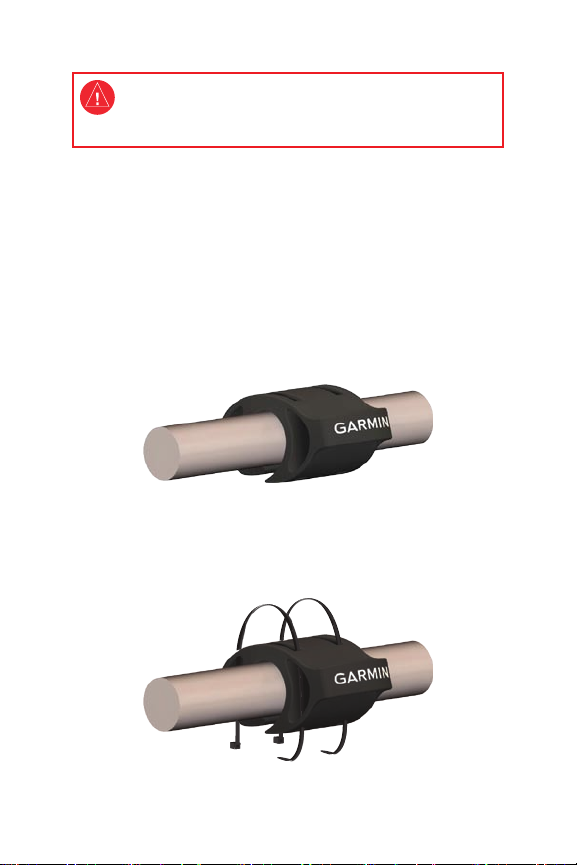
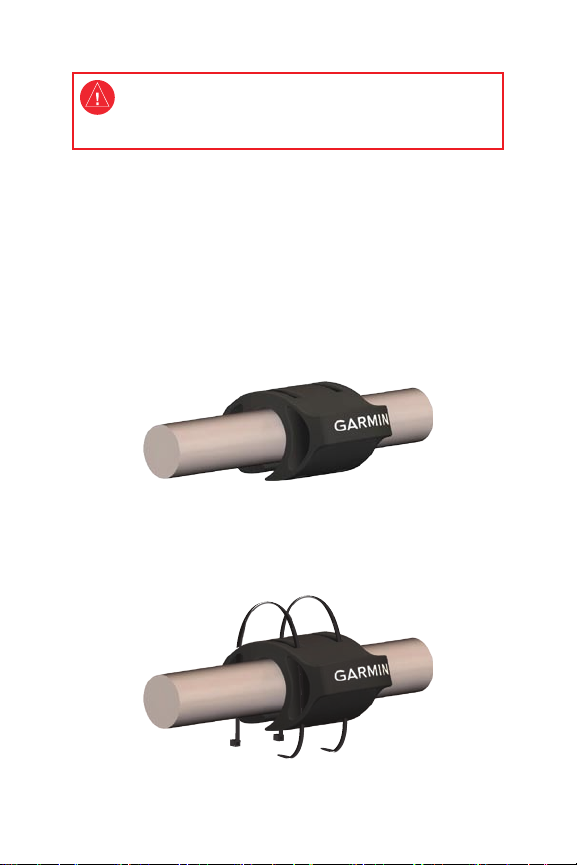
You can install the bike mount on a horizontal part of your handlebars.
Choose a location that does not interfere with the bike controls.
1. Place the bike mount on your handlebars. The Garmin logo should
be facing toward the front of the bike.
2. (Optional) Attach the bike mount securely using two cable ties.
Without cable ties, the bike mount can be easily moved to another
bike. NOTE: Secure the bike mount using cable ties or the
Forerunner before riding.
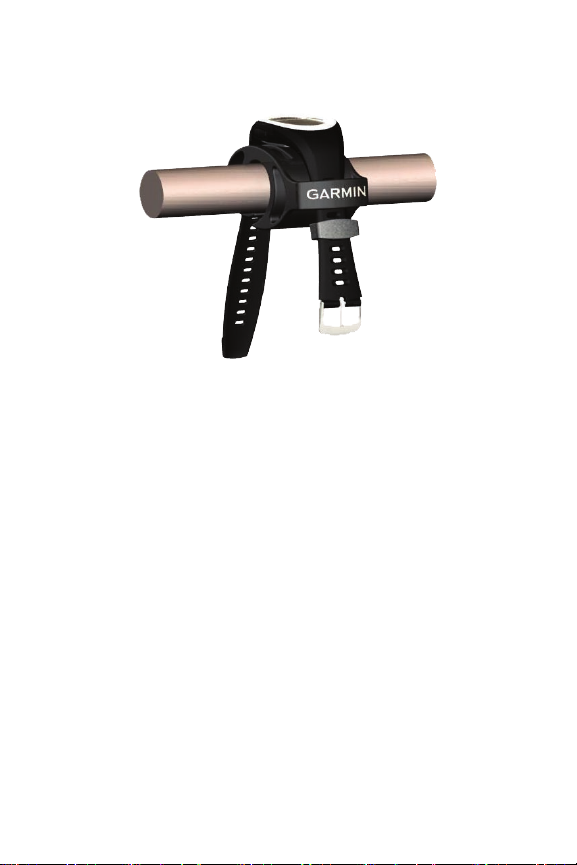
3. Place the wristband around the bike mount. Make sure the screen
is positioned for easy viewing.
EN–2

4. Buckle the wristband securely.
Technical Specications
Physical size: 1.6 × 1.6 × 2.8 in. (40 × 40 × 72 mm); ts
•
handlebars with a diameter of 0.87 in. to 1.26 in.
(22 mm to 32 mm).
Weight: 1.9 oz. (55 g)
•
Limited Warranty
Garmin’s standard limited warranty applies to this accessory. For
more information, see the Important Safety and Product Information
in the Garmin product box.
EN–3
Consultez le guide Informations importantes sur le produit et
la sécurité inclus dans l’emballage du produit, pour prendre
connaissance des avertissements et autres informations sur
le produit.
Kit de support bicyclette
Support bicyclette
•
Attaches de câbles (2)
•
Installation
Vous pouvez installer votre support sur la partie horizontale du
guidon. Choisissez un emplacement qui n’entrave pas l’utilisation du
guidon.
1. Placez le support sur le guidon. Le logo Garmin doit être placé vers
l’avant de la bicyclette.
2. (Facultatif) Attachez solidement le support bicyclette à l’aide
des deux attaches de câble. Sans attaches de câble, le support
bicyclette peut facilement être placé sur une autre bicyclette.
REMARQUE: xez le support pour vélo à l’aide des attaches de
câbles ou du bracelet avant de partir.
FR–4
3. Placez le bracelet autour du support pour vélo. Assurez-vous que
l’écran est visible.
4. Attachez solidement le poignet.
Caractéristiques techniques
Dimensions: 40 x 40 x 72 mm. Peut être monté sur un guidon
•
d’un diamètre entre 22 et 32 mm.
Poids: 55 g
•
Garantie limitée
La garantie limitée standard de Garmin s’applique à cet accessoire.
Pour plus d’informations, consultez le guide Informations importantes
sur le produit et la sécurité inclus dans l’emballage de votre produit
Garmin.
FR–5
Per avvisi sul prodotto e altre informazioni importanti,
vedere la guida Informazioni importanti sul prodotto e sulla
sicurezza inclusa nella confezione.
Kit di supporto per bicicletta
Supporto per bicicletta
•
2 fascette
•
Installazione
È possibile installare il supporto per bicicletta nella parte orizzontale
del manubrio. Scegliere una posizione che non ostacoli i comandi
della bicicletta.
1. Posizionare il supporto per bicicletta sul manubrio. Il logo di Garmin
deve essere rivolto verso la parte anteriore della bicicletta.
2. Collegare saldamente il supporto mediante le due fascette
(opzionale). Rimuovendo le fascette, il supporto può essere
semplicemente spostato su un’altra bicicletta. NOTA: ssare la
staffa per bicicletta mediante le fascette o il polsino prima di iniziare
qualsiasi attività.
IT–6

3. Posizionare il polsino attorno alla staffa per bicicletta. Vericare
che lo schermo sia posizionato in modo tale da essere facilmente
visualizzato.
4. Allacciare saldamente il polsino.
Speciche tecniche
Dimensioni siche: 40 × 40 × 72 mm; compatibile con manubri
•
di diametro compreso tra 22 e 32 mm.
Peso: 55 g
•
Garanzia limitata
Il presente accessorio è soggetto alla garanzia limitata standard di
Garmin. Per ulteriori informazioni, vedere Informazioni importanti sul
prodotto e sulla sicurezza nella confezione del prodotto Garmin.
IT–7
Lesen Sie alle Produktwarnungen und sonstigen wichtigen
Informationen in der Anleitung Wichtige Sicherheits- und
Produktinformationen, die dem Produkt beiliegt.
Fahrradhalterungssatz
Fahrradhalterung
•
Kabelbinder (2)
•
Installation
Sie können die Fahrradhalterung an einer horizontalen Stelle der
Lenkstange montieren. Wählen Sie eine Stelle aus, die sich nicht
unmittelbar in der Nähe der Bremsen/Gangschaltung bendet.
1. Befestigen Sie die Fahrradhalterung an der Lenkstange. Das
Garmin-Logo sollte zur Vorderseite des Fahrrades zeigen.
2. (Optional) Befestigen Sie die Fahrradhalterung mit zwei
Kabelbindern. Ohne Kabelbinder kann die Fahrradhalterung ganz
leicht an einem anderen Fahrrad montiert werden.
HINWEIS: Montieren Sie die Fahrradhalterung vor der Fahrt mit
den Kabelbindern oder mit dem Armband.
DE–8
 Loading...