

Page 1

F4XRGT00
DRAFT
WARNING
See the Important Safety and Product Information guide in
the GPS device product box for product warnings and other
important information.
Always consult your physician before you begin or modify
any exercise program.
Getting Started
When using your device for the first time, you must
complete these tasks to set up the device and learn about
the basic features.
Charge the device (page 10).
1
Put on the optional monitor (page 11).
2
Use the device
3
Upload to Garmin Connect™ (page 6).
4
Register your device (page 15).
5
Get more information (page 16).
6
(page 3).
Page 2
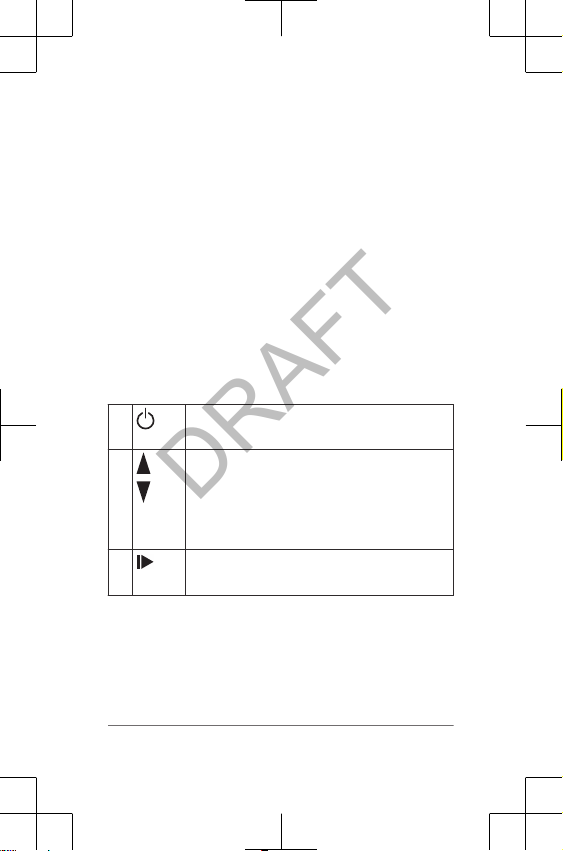
Keys
À
Select to turn the backlight on and off.
Hold to turn the device on and off.
Á
Select to scroll through activity profiles,
menus, summary details, and settings.
Hold to scroll quickly through the settings.
Select to scroll through training pages during
an activity.
Â
ENTER
Select to start and stop the timer.
DRAFT
Page 3

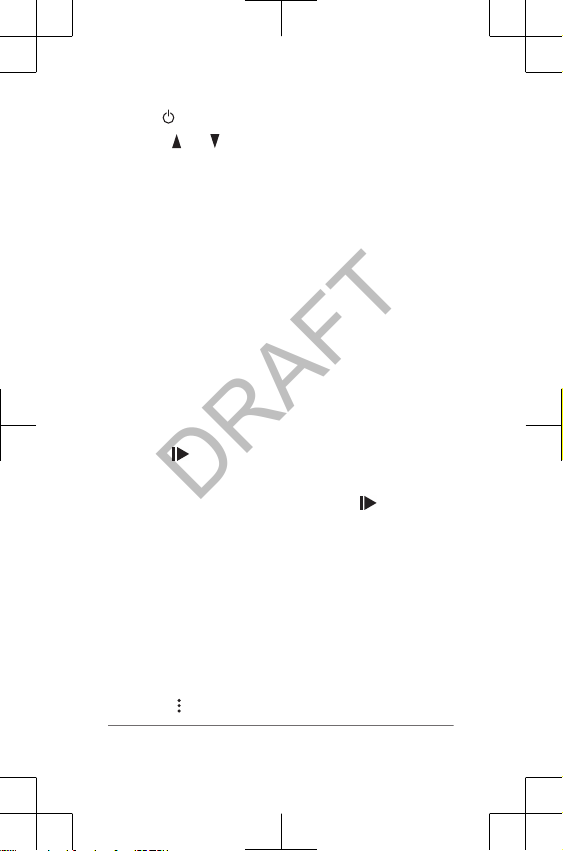
Ã
DRAFT
Ä
Status Icons
Icons appear at the top of the activity profile and training
screens. A flashing icon means the device is searching for
a signal. A solid icon means the signal was found or the
sensor is connected.
Select to mark a new lap.
Select to return to the previous screen.
BACK
Hold to return to the time of day screen and
lock the device.
Select to switch between the activity screen,
main menu, and timer screen.
Hold to send your activity to Garmin
Connect.
GPS status
Transmitter technology status
Transmitter technology status
Sensor status
Sensor status
Sensor status
Power status
Using the device
The first fitness activity you record on your device can be a
any outdoor activity. The device comes
partially charged. You may need to charge the device
(page 10) before using.
Page 4
Hold to turn on the device.
DRAFT
1
Select and to view the activity profiles.
2
Select ENTER.
3
The activity profile is active, and the timer page
appears.
Go outside, and wait while the device locates satellites.
4
It may take a few minutes to locate satellite signals.
The satellite bars turn green.
Select to start the timer.
5
Start your activity.
6
After you complete your activity, select to stop the
7
timer.
Select Save to save the activity and reset the timer. A
8
summary appears.
NOTE: You can upload your activity to Garmin
Connect (page 6).
Training
When you participate in training, you can use the
training activity profile to quickly transition to each
segment.
Select > Training.
1
Page 5

Select to start the timer.
DRAFT
2
Select at the beginning and end of each transition.
3
After you complete your activity, select > Save.
4
You can record your data including distance, pace,
stroke count, and stroke type.
Select > m.
1
Select to start the timer.
2
Select at the beginning and end of each event.
3
After you complete your activity, select > Save.
4
Page 6

Garmin Connect
DRAFT
You can connect with your friends on Garmin Connect.
Garmin Connect gives you the tools to track, analyze,
share, and encourage each other. Record the events of
your device. To sign up for a free account,
go to www.garminconnect.com/start.
Store your activities
activity with your device, you can upload that activity to
Garmin Connect and keep it as long as you want.
: After you complete and save an
Page 7

Connect the device to your computer using the USB
DRAFT
1
cable.
Go to www.garminconnect.com
2
Follow the on-screen instructions.
3
/start.
Page 8

Your device attempts to upload your saved activity to
DRAFT
the Garmin Connect website following each activity.
You can also hold on your device to start uploading
your saved activities.
Charging the Device
WARNING
This device contains a lithium-ion battery. See the
Important Safety and Product Information guide in the
product box for product warnings and other important
information.
NOTICE
To prevent corrosion, thoroughly dry the contacts and the
surrounding area before charging or connecting to a
computer.
Plug the USB cable into a USB port on your computer.
1
Align the charger posts with the contacts on
2
the device, and connect the charging clip
securely to the device.
3 Charge the device completely.
4 Remove the charger.
À
Page 9

History
DRAFT
NOTE: When the device memory is full, your oldest data is
overwritten.
Viewing History
1
2
3
> History > Activities.
Select
Select an activity.
Select an option:
• Select Details to view additional information about
the activity.
• Select Laps to select a lap and view additional
information about each lap.
• Select Delete to delete the selected activity.
Troubleshooting
Support and Updates
Garmin Express provides easy access to these services for
Garmin devices.
• Product registration
• Product manuals
• Software updates
Page 10

Getting More Information
DRAFT
• Go to www.garmin.com/intosports.
• Go to www.garmin.com/learningcenter
• Go to http://buy.garmin.com, or contact your Garmin
dealer for information about optional accessories and
replacement parts.
Getting the Owner's Manual
You can get the latest owner's manual from the web.
Go to www.garmin.com/support.
1
Select Manuals.
2
Follow the on-screen instructions to select your
3
product.
Resetting the Device
If the device stops responding, you may need to reset it.
This does not erase any of your data or settings.
Hold
1
2
Clearing User Data
You can restore all of the device settings to the factory
default values.
NOTE: This deletes all user-entered information, but it
does not delete your history.
1
2
3
4
for 15 seconds.
The device turns off.
Hold for one second to turn on the device.
Hold .
Select Yes to turn off the device.
While holding , hold to turn on the device.
Select Yes.
.
Page 11

Temperature Specifications
DRAFT
2perating temperature range: From -20º to
60ºC (from -4º to 140ºF)
&harging temperature range: From 0º to
40ºC (from 32º to 104ºF)
Page 12

Garmin® and the Garmin logo are trademarks of Garmin
© 2014 Garmin Ltd. or its subsidiaries
www.garmin.com/support
July 2014
190-01765-01_01
Printed in Taiwan
DRAFT
Ltd. or its subsidiaries, registered in the USA and other countries.
Garmin Connect™, and Garmin Express™ are
trademarks of Garmin Ltd. or its subsidiaries. These trademarks may not
be used without the express permission of Garmin.
Other trademarks and trade names are those of their
respective owners.
 Loading...