

Garmin 02806, 02807 User Manual

Instructions....................................... 2
Instructions..................................... 12
Istruzioni......................................... 23
Anweisungen.................................. 33
Instrucciones
.................................. 44
Instruções....................................... 54
DRAFT
Instructions
DRAFT
Introduction
WARNING
See the Important Safety and Product
Information guide in the product box for product
warnings and other important information.
The device can improve situational awareness.
It is not a replacement for attentiveness
and good judgement. Always use your best
judgment, and operate in a safe
manner.
Getting Started
You can use the rear device with
the display unit or with your
compatible ® device. This list provides an
overview of the installation and setup tasks.
• Charge the device (page 11).
• Install the rear device
using one of the included mounts:
Install the universal mount (page 3).
◦
◦ Install the post mount (page 4).
• If you are using the display, install it on
your product (page 6).
NOTE: When you purchase the rear
and display devices together, they are
already paired.
• If you are using a compatible device,
pair the devices (page 9).
2 Instructions
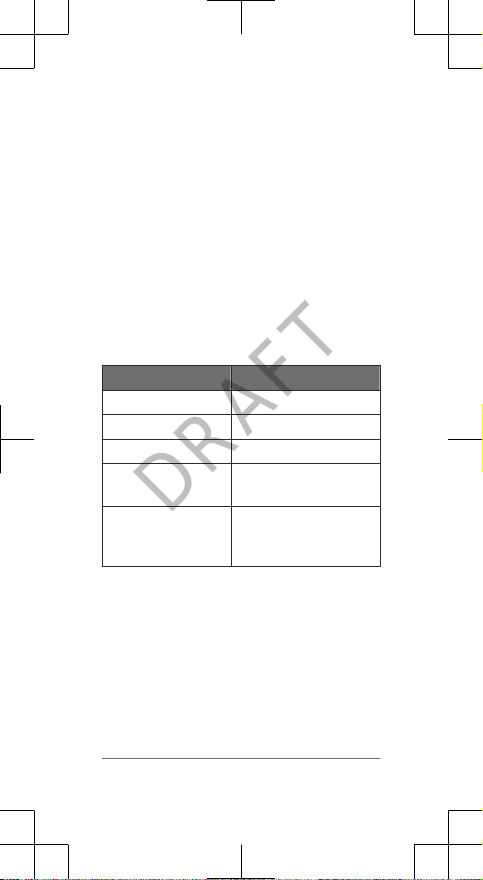
The rear LEDs
DRAFT
indicate the battery level. The status LED
indicates additional device information.
Â
Status LED
LED Activity Status
Flashing green The device is charging.
Solid green Charging is complete.
Flashing red The battery is low.
Solid red An error occurred while
8 rapid purple
flashes
Installing the display Device
NOTE: If you do not have a display device,
you can skip this task and use a compatible
device (page 9).
You can install the device on your product
.
Select a secure location to mount the
1
device where it does not interfere with the
safe operation of your product.
6 Instructions
fill horizontally to
Á
charging.
The device is uploading
a software update from
Garmin Express™.
 Loading...