

Page 1
GB Operating Instructions
Water Timer Electronic T 14 e
S Bruksanvisning
Bevattningstimer electronic T 14 e
NL Gebruiksaanwijzing
Elektronische watertimer T 14 e
D Gebrauchsanweisung
Bewässerungsuhr electronic T 14 e
FIN Käyttöohje
Elektroninen vesiajastin T 14 e
Art. 1820
GARDENA
®
Page 2
Page 3

54
GARDENA
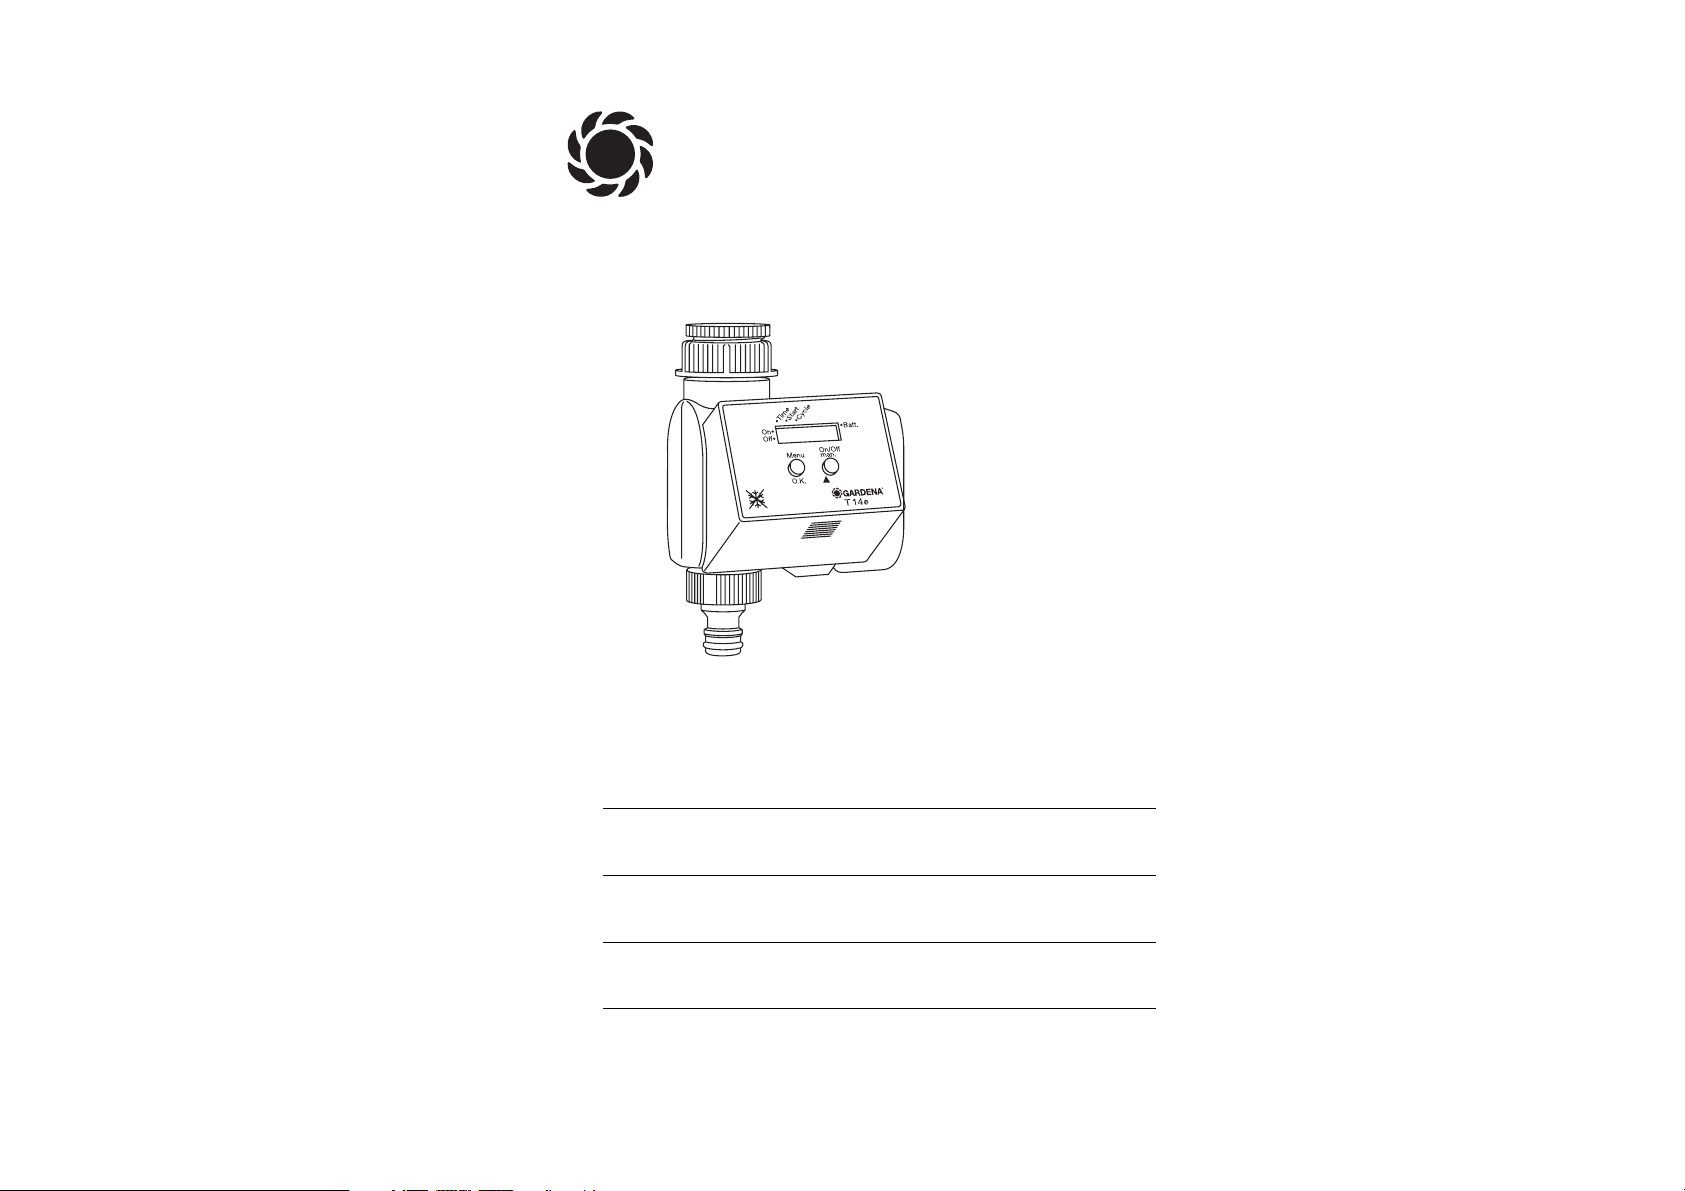
Water Timer Electronic T 14 e
1. Notes on these Operating Instructions
Please read these operating instructions carefully and observe the notes
given. Use these operating instructions to familiarise yourself with the
Water Timer, the unit’s features and proper use as well as with the notes
on safety.
A
For safety reasons, children and young people under 16 as well
as anyone who is not familiar with these operating instructions
may not use the Water Timer.
Keep these operating instructions in a safe place.
2. Proper Use
The GARDENA Water Timer Electronic T 14e is suitable and determinated
for private use in domestic and hobby gardens, exclusively for outdoor use,
to control sprinklers and watering systems.
A
The Water Timer must not be used for industrial purposes or
in conjunction with chemicals, foodstuffs, easily flammable
and explosive materials.
Compliance with the operating instructions provided by the manufacturer
is a prerequisite to ensure proper use of the GARDENA Water Timer
Electronic.
The operating instructions also contain operating, servicing and maintenance conditions.
3. Technical Data
Operating pressure: 1-12 bar
Flow medium: clean fresh water
Max. water temperature: 40 °C
Watering cycles: 14
Battery: 1 × 9 V alkali-manganese (alkaline)
type IEC 6LR61
Service life of the battery : approx. 1 year
G
4. How the Water Timer Electronic Works
This GARDENA Water Timer Electronic T 14e allows you to set different
watering cycles for different watering times independent of whether you
are using a sprinkler, a sprinkler system installation or a drip-head
watering system to water your garden.
Your Water Timer Electronic will water your garden completely automatically according to the program you choose.You can set the timer to water
your garden early in the morning or late at night when water evaporates
the least, or while you are on holiday.
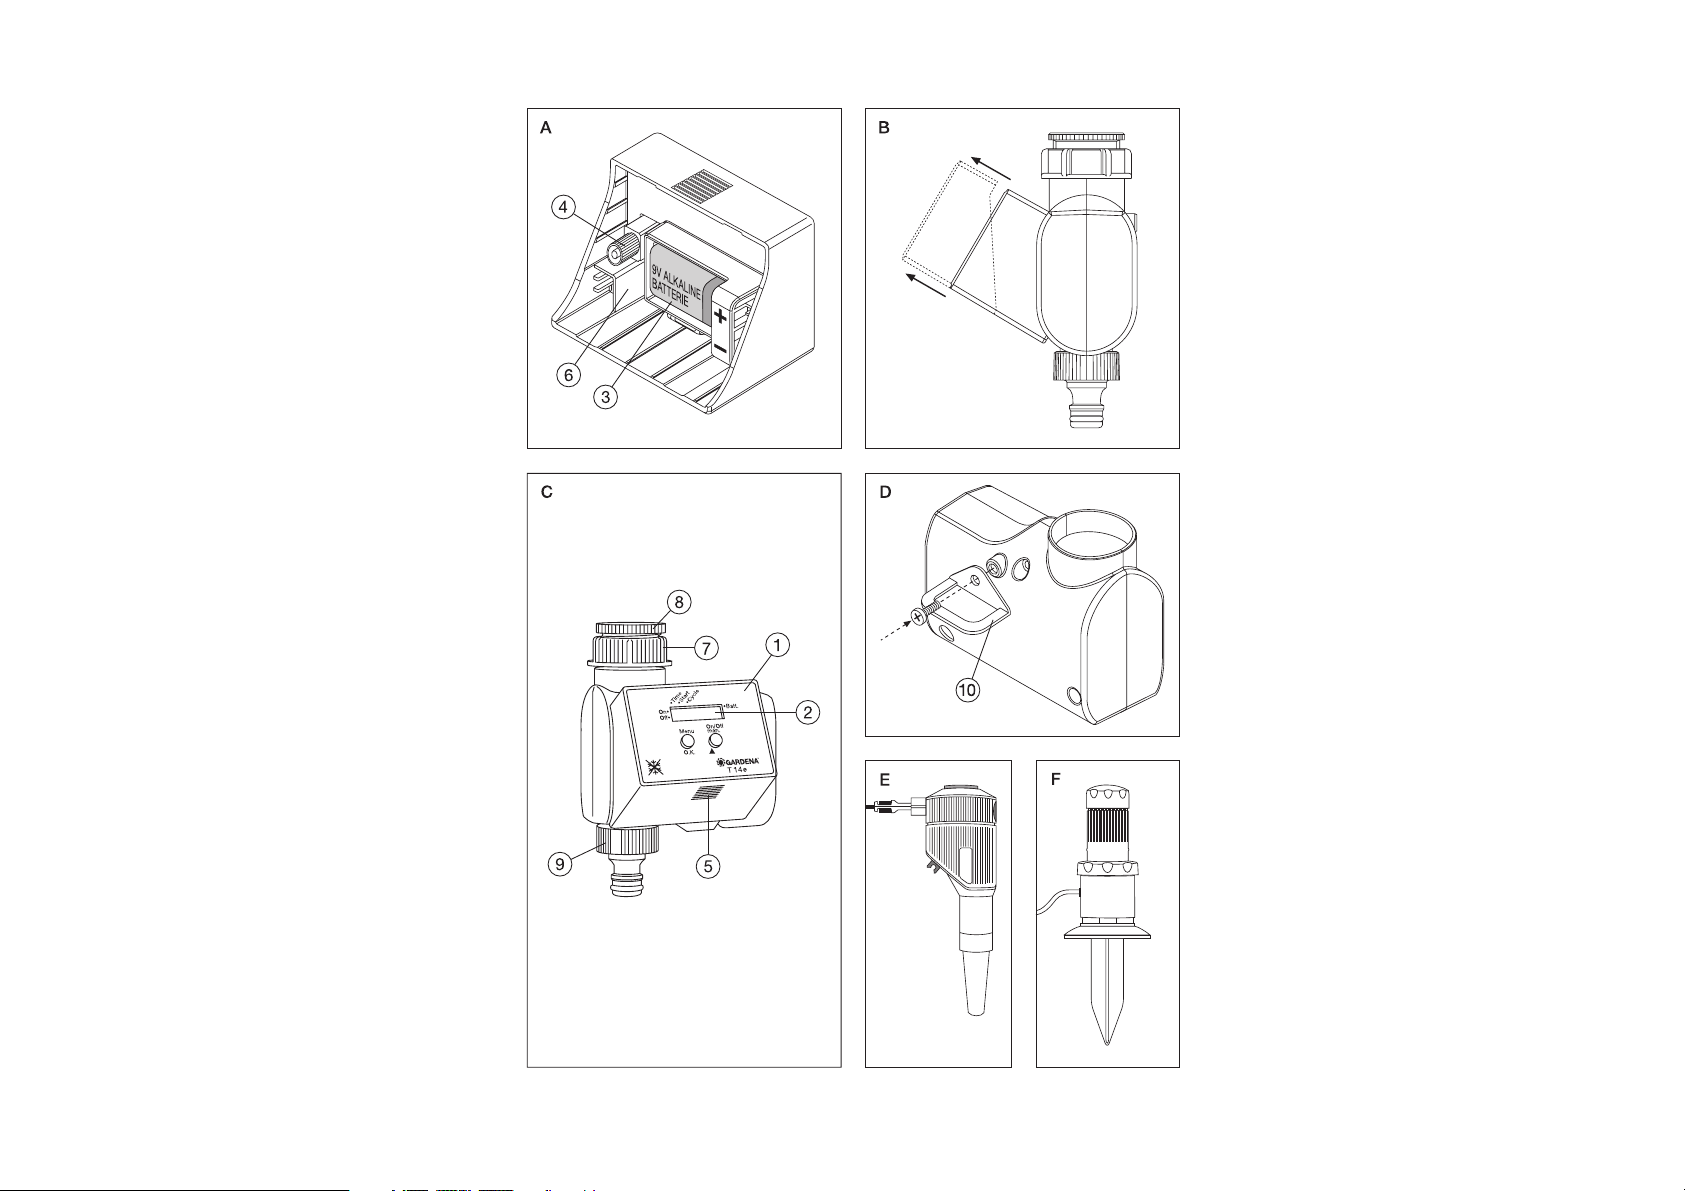
5. Operating Parts
1
Control unit Accompanying accessories
2
Display
8
G ¾ adaptor for sleeve nut
3
Battery compartment
9
GARDENA threaded tap
4
Connection plug for control unit connector
5
Release button for control unit
6
Connection for Soil Moisture
Sensor / Rain Sensor Option
7
Sleeve nut
0
Anti-theft protection
6. Preparation for Use
Before you use your Water Timer Electronic you must:
1. Insert the battery
2. Connect the Water Timer Electronic to the tap
3. Set the watering program
6.1 Inserting the Battery (Fig. A)
1. Remove the control unit
1
from the housing of the Water Timer by
pressing the release button 5(see Fig. B/ C).
2. Insert the battery (only use a 9 V alkaline battery) in the battery compartment (Fig. A).
Note: When inserting the battery pay attention to the + / – markings.
3. Reattach the control unit to the housing.
6.2 Connecting the Water Timer to the Tap (Fig. C)
The Water Timer is fitted with a sleeve nut for taps with a 33.3 mm (G1)
thread.
Page 4

76
Adaptor for G 3/4 thread (26.5 mm)
The adaptor supplied allows the Water Timer to be connected to taps with
a G 3/4 thread (26.5 mm). If you are using the adaptor, screw the adaptor
onto the tap before screwing the Water Timer onto the adaptor.
Warning! Attach and screw on manually. Do not use pliers!
6.3 Function Keys and Display (Fig. C)
Not
e: The Water Timer control unit 1can be removed (Fig. B). This allows
you to set the watering program somewhere other than where the Water
Timer is to be used.
Menu-O.K.
➔ Changes to the next stage of the program. Simultaneously accepts
and confirms the data you have entered using the man. key.
On/ Off-man.
➔ Used to change the individual data (e.g. counting hours, minutes, ...)
➔ To switch a connected watering system on and off manually.
LCD Display
Note:
.
In the entry mode the corresponding display flashes.
.
At high temperatures (over 60°C at the display) the LCD may extinguish.
This has no effect on the program sequence. Once the LCD display
cools down, the display will appear again.
On
Status display – The connected watering system is active.
Off
Status display – The connected watering system is inactive.
Time (current time)
➔ In the programming mode: Hours – Hours of the current time
Minutes – Minutes of the current time
Start
➔ Starting time; when the watering system becomes active.
Hours – Hour when devices become active
Minutes – Minutes when devices become active
Cycle
Displays selected program.
6.4 Programming
Entering the Current Data
1. Press the O.K. key
➔ the hours (Time) start flashing.
2. You can enter the time using the man. key, e.g. 9:00.
3. Use the O.K. key to confirm the hour you have entered and to allow
you to enter the minutes.
4. Select the minutes using the man. key, e.g. 23.
5. Confirm your entry by pressing the O.K. key and switch to the starting
time.
Entering the Starting Time
1. Use the man. key to enter the hours of the starting time, e.g. 7.
Then press the O.K. key to confirm your entry and to enter the minutes.
2. Once again, use the man. key to set the minutes of the starting time,
e.g. 30.
Confirm your entry by pressing the O.K. key. You can now choose your
program.
Active Program
1. Choose a program listed in the section “Program Overview”. Press the
man. key repeatedly until the program number you require appears on
the display.
Note: With the combination 00 (“Stand-by”) no program is active.
2. Confirm your selection by pressing the O.K. key.
➔ You have now successfully programmed your Water Timer. The current
time now appears on the display.
Note
.
You can jump to the next program level at any time during the programming sequence by pressing the O.K. key (current time, starting time,
program number). The set data is then simultaneously accepted.
.
If you do not enter data within 120 seconds, you automatically leave
the programming mode and the LCD shows the current time (normal
display). Any changes you have made previously are applied.
.
You have now successfully programmed your Water Timer. Your garden
will now be watered automatically at the programmed times.
Display During Active Time
Example:
.
The current time is 8:45 am
.
On is lit; this means watering is in progress (active)
.
The double dots between the hours and minutes of the time are flashing;
this means the clock is running.
Page 5

9
7. Changing the Battery
A
To ensure the Water Timer runs safely, only a 9 V alkalimanganese battery (alkaline) type IEC 6LR61 must be used.
If the battery voltage falls below a
certain level the Batt. indicator appears.
It is possible to initiate watering manually
even if the battery capacity is too low
(valve no longer opens), but programmed
watering times, however, are not initiated.
Even if the battery capacity is too low to run a program, if the valve is
open it will be closed.
The battery voltage is tested during the opening pulse. In this way you
can test the capability of the battery at any time. To do this, simply
press the On/ Off-man. key. If the valve opens and the Batt. indicator does
not appear then the battery does not have to be changed.
A
Previously set data is lost when replacing the battery.
Program the Water Timer subsequently again.
For notes on changing the battery see “Inserting the Battery”.
8. Notes on Safety and Operation
.
The minimum water output to ensure that the Water Computer
functions correctly is 20-30 l/ h.
For example, at least 10 x 2-litre Drip Heads are required to
control the Micro-Drip-System.
.
To prevent water penetrating the battery compartment the Water
Timer must only be mounted in a perpendicular position with
the sleeve nut pointing upwards.
.
Program the Water Timer with the tap turned off. In this way
you can avoid getting wet when trying out the manual On / Off
function. You can remove the control unit from the housing to
program the Water Timer.
.
The Water Timer must only be used outdoors.
Warning! The Water Timer must not be used indoors.
.
The Water Timer must be stored in a dry place away from frost
before the frosty season begins.
.
The max. temperature for the water flow is 40 ° C.
8
You can start or end the watering prematurely at any time by pressing the
man. key. The watering time is then 30 minutes.
Read /Change Program
To check the data, you can repeatedly press the O.K. key to run through
the program levels. The levels are selected and checked consecutively.
This does not interrupt the current program cycle.
To change the data, proceed as described above.
Program Overview
Program
Cycle Duration
number
00
No program active
01
6 hours (4 times daily) 3 minutes
02
12 hours (twice daily) 3 minutes
03
12 hours (twice daily) 15 minutes
04
24 hours (once a day) 3 minutes
05
24 hours (once a day) 5 minutes
06
24 hours (once a day) 30 minutes
07
24 hours (once a day) 1 hour
08
2 days 5 minutes
09
2 days 30 minutes
10
2 days 1 hour
11
3 days 30 minutes
12
3 days 1 hour
13
7 days 1 hour
14
7 days 2 hours
Manual, programming-independent On/ Off (man.)
Before and after entering data, you can operate the GARDENA Water
Timer electronic T14e manually, independent of the programmed data.
To do this, press the man. key.
Press the MAN key once to activate watering for a maximum of 30 minutes
(LCD : On). Press the man. key again to end watering.
·
Batt.
On
·
Off
·
28
.
.
883
·
Time
·
Start
·
Cycle
Page 6

1110
12. Faults
Fault Possible Cause Remedy
Not able to open the Battery power too low. Insert a new
Water Timer using alkaline battery.
the “On /Off-man.”
Tap turned off. Turn on tap.
function.
Watering not Battery power too low. Insert a new
initiated. alkaline battery.
Data input / changes Input data or make
made while the pro- changes before or
gram was starting or after the starting times
immediately before. you have chosen.
Tap turned off. Turn on tap.
Soil Moisture Sensor If dry, check setting /
or Rain Sensor indi- position of the Soil
cate sufficient moisture. Moisture Sensor or
Rain Sensor.
Battery flat after Not an alkaline Use an alkaline
working for a battery. battery.
short time.
If you have any problems with your Water Timer Electronic, please contact
our Customer Service or return the defective unit together with a short
description of the problem directly to one of the GARDENA Service
Centres listed on the back of this leaflet.
If covered under warranty, please include a copy of the receipt.
We expressly point out that, in accordance with the product liability
law, we are not liable for any damage caused by our units if it is due
to improper repair or if parts exchanged are not original GARDENA
parts or parts approved by us, and, if the repairs were not carried out
by a GARDENA Service Centre or an authorised specialist. The same
applies to spare parts and accessories.
.
The minimum operating pressure is 1 bar, the maximum operating
pressure is 12 bar.
.
Check the filter in the sleeve nut 7regularly and clean if necessary.
.
Avoid tensile strain. Do not pull the hose connected to the Water
Timer Electronic.
.
Only use clear fresh water.
9. Anti-Theft Protection (Fig. D)
To protect your Water Timer against theft, the GARDENA anti-theft
protection 0(1815 - 00 .791.00) is available at GARDENA Service.
The bracket on the anti-theft protection is fitted onto the back of the unit.
Note that the screw included cannot
be loosened once it has been
screwed in. The bracket can be used, for example, to attach a chain.
10. GARDENA Soil Moisture Sensor (Fig. E)
Together with the GARDENA Soil Moisture Sensor (Art. No. 1187) watering
is controlled considering the soil moisture.
Assembly
The Soil Moisture Sensor is connected to the connection socket
6
on
the back of the control unit (Fig. A).
How it works
If the connected Soil Moisture Sensor indicates there is sufficient moisture
then the watering program is either interrupted or not initiated.
Note: Manual watering (function On/Off-man.) is still possible.
11. GARDENA Rain Sensor (Fig. F)
Together with the GARDENA Rain Sensor (Art. No. 1189) watering is
controlled considering natural precipitation.
Assembly
The Rain Sensor, as an alternative to the Soil Moisture Sensor, can be
connected to the connection socket
6
on the back of the control unit
(Fig. A).
How it works
If the connected Rain Sensor indicates an appropriate amount of rain,
the watering program is interrupted or not initiated.
Note: Manual watering (function On/Off-man.) is still possible.
Page 7

12
EU Certificate of Conformity
The undersigned
GARDENA Kress + Kastner GmbH · Hans-Lorenser-Str. 40 · D-89079 Ulm
hereby certifies that, when leaving our factory, the unit indicated below is
in accordance with the harmonised EU guidelines, EU standards of safety
and product specific standards.
This certificate becomes void if the unit is modified without our approval.
Description of the unit:
Water Timer Electronic
Type: T14e
Art. No.: 1820
EU directives:
Electromagnetic Compatibility
89/336/EC
Directive 93/68/EC
Year of CE marking:
1999
Ulm, 01.09.1999
Thomas Heinl
Technical Dept. Manager
Page 8

50
G
Guarantee
GARDENA honours the guarantee
legally required for this product
(starting from the date of purchase). This guarantee covers all
serious defects of the unit that
can be proved to be material or
manufacturing faults. Under warranty we will either replace the
unit or repair it free of charge if
the following conditions apply:
.The unit must have been
handled properly and in keeping with the requirements of
the operating instructions.
.Neither the purchaser or a
non-authorised third party have
attempted to repair the unit.
.Defects in the Water Timer
attributable to batteries which
have been incorrectly installed
or are leaking are excluded
from the warranty provisions.
This manufacturer’s guarantee
does not affect the user’s existing
warranty claims against the dealer/
seller.
If you have any problems with
your Water Timer, please contact
our Customer Service or return
the defective unit together with
a short description of the problem
directly to one of the GARDENA
Service Centres listed on the
back of this leaflet.
S
Garanti
GARDENA lämnar den enligt
Europeisk lag gällande garantin
för denna produkt. Garantin gäller
från inköpsdatum. Garantin omfattar väsentliga fel på produkten
som beror på fabrikations- eller
materialfel och som påtalats oss
före garantitidens utgång.
Garantin innebär utbyte mot en
produkt med perfekt funktion eller
gratis reparation av den insända
produkten om följande villkor är
uppfyllda:
.Produkten har använts var-
samt och enligt bruksanvisningen.
.Köparen eller någon annan
får inte ha försökt reparera
produkten.
.Defekter på bevattningstimern
som uppstått genom fel insatta
eller förbrukade batterier omfattas inte av garantin.
Tillverkarens garanti gäller ej
särskilda överenskommelser mellan återförsäljare och köpare.
Vid störningar ber vi dig sända
in produkten tillsammans med
bevis för inköpet och en felbeskrivning till GARDENA Service.
Page 9

Deutschland
GARDENA
Kress + Kastner GmbH
Abt. Kundendienst
Hans-Lorenser-Str. 40
D-89079 Ulm
Produktfragen:
(0731) 490-246
Reparaturen:
(0731) 490-290
Argentina
Argensem S.A.
Venezuela 1075
(1618) El Talar Buenos Aires
Australia
NYLEX
Corporation Ltd.
25-29 Nepean
Highway
P.O. Box 68
Mentone, Victoria 3194
Austria
GARDENA Österreich
Gesellschaft m.b.H.
Stettnerweg 11-15
2100 Korneuburg
Belgium
MARKT (Belgium)
NV/ SA
Sterrebeekstraat 163
1930 Zaventem
Brazil
M. Cassab
Av. das Nações
Unidas, 20.882
Santo Amaro,
CEP 04795-000
São Paulo - S.P.
Bulgaria / България
ДЕНЕКС ООД
бул. „Черни връх“ 43
София 1407
Canada
GARDENA
Canada Ltd.
100 Summerlea Road
Brampton, Ontario
Canada L6T 4X3
Chile
Antonio Martinic
Y CIA. LTDA.
Gilberto Fuenzalida
185 Loc.
Las Condes Santiago de Chile
Costa Rica
Compania Exim
Euroiberoamericana
S.A.
350 Sur del
Automercado
Los Yoses
San Pedro
Cyprus
FARMOKIPIKI LTD
P.O. Box 7098
74, Digeni Akrita Ave.
1641 Nicosia
Czech Republic
GARDENA
spol. s.r.o.
Ripská 20
62700 Brno
Denmark
GARDENA
Danmark A/S
Naverland 8
2600 Glostrup
Finland
Habitec Oy
Martinkyläntie 52
01720 Vantaa
France
GARDENA France
Service Après-Vente
BP 50080
95948 ROISSY CDG
Cedex
Great Britain
GARDENA UK Ltd.
27- 28 Brenkley Way
Blezard Business Park
Seaton Burn
Newcastle upon Tyne
NE13 6DS
Greece
Agrokip
G. Psomadopoulos
& Co.
20, Lykourgou str.
Kallithea
Athens
Hungary
GARDENA
Magyarország Kft.
Késmárk utca 22
1158 Budapest
Iceland
Heimilistaeki hf
Saetun 8
P.O. Box 5340
125 Reykjavik
Republic of Ireland
Michael McLoughlin
& Sons
Hardware Limited
Long Mile Road
Dublin 12
Italy
GARDENA Italia S.r.l.
Via Donizetti 22
20020 Lainate (Mi)
Japan
KAKUDAI
Mfg. Co. Ltd.
1-4-4, Itachibori
Nishi-ku
Osaka 550
Luxembourg
Magasins
Jules Neuberg
Grand Rue 30
Case Postale No. 12
Luxembourg 2010
Netherlands
MARKT (Holland) BV
Postbus 219
1380 AE Weesp
Neth. Antilles
Jonka Enterprises N.V.
Sta. Rosa Weg 196
P.O. Box 8200
Curaçao
New Zealand
NYLEX
New Zealand Limited
Private Bag 94001
South Auckland
Mail Centre
10 Offenhauser Drive
East Tamaki, Manukau
Norway
GARDENA
Norge A/S
Postboks 214
2013 Skjetten
Poland
GARDENA
Polska Sp. z o.o.
Szymanów 9 d
05-532 Baniocha
Portugal
MARKT
(Portugal), Lda.
Recta da Granja
do Marquês
Edif. GARDENA
Algueirão
2725-596 Mem Martins
Russia / Россия
АО АМИДА ТТЦ
ул. Моcфилмовcкая 66
117330 Моcква
Singapore
Variware
Holland Road
Shopping Centre
227-A 1st Fl., Unit 29
Holland Avenue
Singapore 1027
Slowenia / Croatia
Silk d.o.o.Trgovina
Brodiљиe 15
1236 Trzin
South Africa
GARDENA
South Africa (Pty.) Ltd.
P.O. Box 11534
Vorna Valley 1686
Spain
ANMI
Andreu y Miriam S.A.
Calle Pere IV, 111
08018 Barcelona
Sweden
GARDENA
Svenska AB
Box 9003
20039 Malmö
Switzerland
GARDENA
Kress + Kastner AG
Bitziberg 1
8184 Bachenbülach
Ukraine / Украина
АОЗТ АЛЬЦЕСТ
ул. Гайдара 50
г. Киев 01033
Turkey
Dost Diþ Ticaret
Mümessillik A.Þ.
Yeþilbaðlar Mah. Baþkent
Cad. No. 26
Pendik - Ýstanbul
USA
GARDENA
3085 Shawnee Drive
Winchester VA 22604
1820-28.960.03/ 0011
GARDENA
Kress + Kastner GmbH
Postfach 27 47
D-89070 Ulm
http: //www.gardena.de
 Loading...