

Page 1
Page 2

TABLE OF CONTENTS
First Things First . . . . . . . . . . . . . . . . . . . . . . . . . . . . . . . . . . . . . . .3
Prepare to Get Soaked! . . . . . . . . . . . . . . . . . . . . . . . . . . . . . . . . .6
Menus and Loading Boxes . . . . . . . . . . . . . . . . . . . . . . . . . . . . . . .7
Changes to the In-game Interface . . . . . . . . . . . . . . . . . . . . . . . .7
Using the Added Features . . . . . . . . . . . . . . . . . . . . . . . . . . . . . .11
Other Surprises . . . . . . . . . . . . . . . . . . . . . . . . . . . . . . . . . . . . . . .16
Credits . . . . . . . . . . . . . . . . . . . . . . . . . . . . . . . . . . . . . . . . . . . . . .17
Atari Web Sites . . . . . . . . . . . . . . . . . . . . . . . . . . . . . . . . . . . . . . .20
Technical Support . . . . . . . . . . . . . . . . . . . . . . . . . . . . . . . . . . . . .21
End-User License Agreement . . . . . . . . . . . . . . . . . . . . . . . . . . .23
FIRST THINGS FIRST
The ReadMe File
The RollerCoaster Tycoon®3: Soaked!™CD-ROM game has a ReadMe file where you can view
both the License Agreement and updated information about the game.We strongly encourage
you to read this file in order to benefit from changes made after this manual went to print.
To view this file, double-click on it in the RollerCoaster Tycoon 3: Soaked! directory found on
your hard drive (usually C:\Program Files\Atari\RollerCoaster Tycoon 3 Soaked!).You can also
view the ReadMe file by first clicking on the Start button on your Windows®taskbar, then on
Programs, then on Atari, then on RollerCoaster Tycoon 3, and then on the ReadMe file.
System Requirements
Software RollerCoaster Tycoon®3 must be installed
Operating System Windows®98SE/Me/2000/XP (Windows®XP recommended)
Processor Pentium®III 933 MHz or compatible (Pentium®4 1.3 GHz or
Memory 256 MB RAM, 384 MB for XP (384 MB recommended,
Hard Disk Space 800 MB Free (assumes RollerCoaster Tycoon 3 is already installed)
CD–ROM Drive 8X Speed or faster
Video 64 MB Hardware T&L-compatible video card*
Sound Windows®98SE/Me/2000/XP-compatible 16-bit sound card
®
DirectX
* Systems with GeForce 2 GTS/MX, GeForce 4 MX or the Intel Extreme chipset family may exhibit
performance degradation or graphical irregularities and are not recommended.
If your PC does not meet the video hardware requirements above, this game will not run.
compatible recommended)
512 MB for XP recommended)
(PC audio solution containing Dolby Digital Live required for
Dolby Digital audio)
DirectX®version 9.0c (included)
Page 3
Setup and Installation
Note: You must have the original RollerCoaster Tycoon®3 CD-ROM game installed on your
computer in order to install and play RollerCoaster Tycoon 3: Soaked! We also recommend you
install all updates for RollerCoaster Tycoon 3 before starting the installation of this expansion
pack. Consult the manual for RollerCoaster Tycoon 3 for instructions on how to install updates.
1. Start Windows®98SE/Me/2000/XP.
2. Insert the RollerCoaster Tycoon 3: Soaked! CD–ROM game disc into your CD–ROM drive.
3. If AutoPlay is enabled, the RollerCoaster Tycoon 3: Soaked! launcher screen should appear. If
AutoPlay is not enabled, or the installation does not start automatically, click on the Start
button on your Windows®taskbar, then on Run.Type D:\Autorun.exe in the space provided
and click on OK. Note: If your CD-ROM drive is assigned to a letter other than D, substitute
that letter.
4. On the RollerCoaster Tycoon 3: Soaked! launcher screen, click the Install button and follow
the on–screen instructions to finish installing the RollerCoaster Tycoon 3: Soaked! CD-ROM
game.
5. After installing the game, we strongly recommend that you check for updates. Re-insert the
game disc into your CD-ROM drive and click on the Updates button on the launcher screen.
6. After RollerCoaster Tycoon 3: Soaked! is installed, you may launch the game either from the
launcher screen by clicking Play or by clicking on the Start button, then Programs > Atari >
RollerCoaster Tycoon 3 Soaked!> Play RollerCoaster Tycoon 3 Soaked! (for XP users, click on
the Start button, then on All Programs > Atari > RollerCoaster Tycoon 3 Soaked! > Play
RollerCoaster Tycoon 3 Soaked!).
Visit atari.com/rollercoastertycoon for the latest information about the game.
Note: You must have either the RollerCoaster Tycoon 3 game disc or the RollerCoaster
Tycoon 3: Soaked!
game disc in your CD-ROM drive to play.
Installation of DirectX
RollerCoaster Tycoon 3: Soaked! requires DirectX®9.0c or higher in order to run. If you do not
have DirectX®9.0c or higher installed on your computer, click “Yes” to accept the DirectX®9.0c
License Agreement.This will then launch the DirectX®9.0c Installer.
®
Page 4
PREPARE TO GET SOAKED!
Careen down a gigantic water slide to a thrilling splashdown in an Olympic size pool; or hang
ten in a halfpipe as you surf through the wave simulator. Choreograph your very own laser
light and dancing water shows; or add performing killer whales to entertain your park guests.
Treat your guests (and yourself!) to the latest rides and coasters, including the wet and wild
RollerSoaker! Now you can add a water park to your current RollerCoaster Tycoon 3 amusement parks, but be prepared! You will get wet on this ride!
RollerCoaster Tycoon 3: Soaked! also includes eight original drenching scenarios, two aquatic
design themes, a pool-building toolset, and an expanded version of the RCT3 MixMaster™that
allows you to create your own laser light shows, customize dolphin and killer whale performances, and choreograph dancing water shows. In addition, the scenarios feature added
challenges to give you more ways to play the game.
Finally, RollerCoaster Tycoon 3: Soaked! allows you to create tunnels for both footpaths and
trackrides. See "Creating Tunnels" on page 16.
Playing Rollercoaster Tycoon®3: Soaked!
RollerCoaster Tycoon 3: Soaked! uses the same controls as those for RollerCoaster Tycoon 3.
Please refer to the RollerCoaster Tycoon 3 player’s guide for instructions on how to use the
features of the core game.
MENUS AND LOADING BOXES
After you’ve installed RollerCoaster Tycoon 3: Soaked! the game’s menu screens will
also include a shark icon located in the lower-right corner of the screen.
After you select Career Mode, the game will display a menu allowing you to choose
to play scenarios from either RollerCoaster Tycoon 3, or RollerCoaster Tycoon 3: Soaked!
Finally, any time you open a load screen, saved games from RollerCoaster Tycoon 3:
Soaked! will be marked by a “soaked” graphic, indicating that the expansion pack is
required in order to load that game.
CHANGES TO THE IN-GAME INTERFACE
This section describes added features and changes to the game interface.
Mouse Wheel Support
You can now scroll all menus, lists and dialog boxes that include a vertical slider by using the
mouse wheel.
Shift Key Support for Building Structures
You can now use the Shift key to construct elevated elements while building structures. See
“Using the Control Key to Build Elevated Scenery and Structures” on page 11.
Game Options
Warning: Only make adjustments to game options if you know that your computer is capable
of running optimally with the settings you have selected. If, after adjusting some of the settings, your computer begins to show performance degradation, open Game Options > Graphic
Settings and click the Graphics Detail Level icon to reset the game back to its default settings
for your PC.
Page 5
Graphic Settings
Two controls have been added:
Refraction – When checked, all views through water will be affected by light refraction.
Laser Occlusion by Terrain and Scenery – When checked, laser shows will allow terrain and
scenery to block light beams.
Scenic Settings
One option has been added:
Use Environment Map On Flowing Water – When checked, adds additional properties to
bodies of flowing water so that the environment is reflected on the surface of flowing water.
Park Management
Staff
After you place an entertainer in your park, one of the uniforms available is
a shark costume.
Themes
Most of the object placement windows (such as rides, shops, and scenery) now
include selections for two themes, Atlantis and Paradise Island.
Pool Slides and Rides
A selection has been added to the Rides menu for selecting pool slides and rides.
Waterslides are assembled much the same way as track rides, except you should
place the ride entrance at an elevated platform, and the end of the ride must
empty into a swimming pool.
Scenery
Two scenery options have been added to the Scenery buttons.
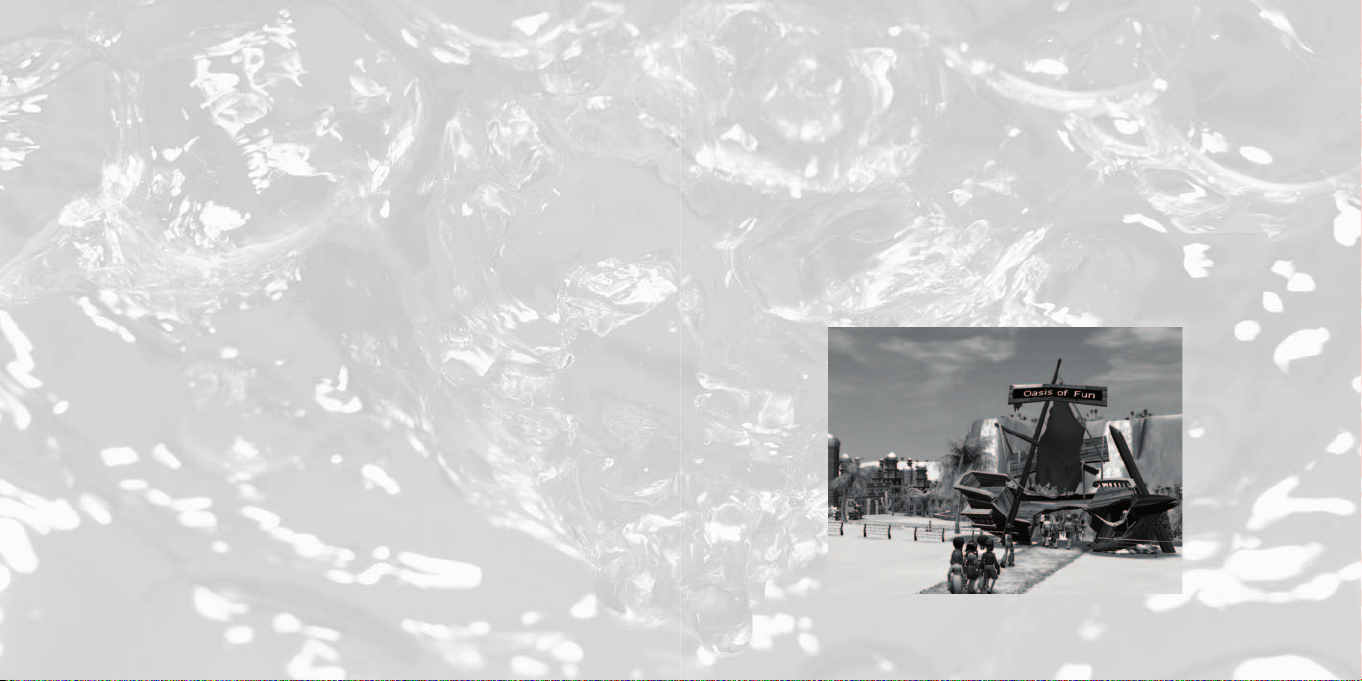
Terrain Surfaces
The Terrain Surfaces button allows you to add raised terrain in blocks, as well as
larger structures for marking the entrance to a themed area.
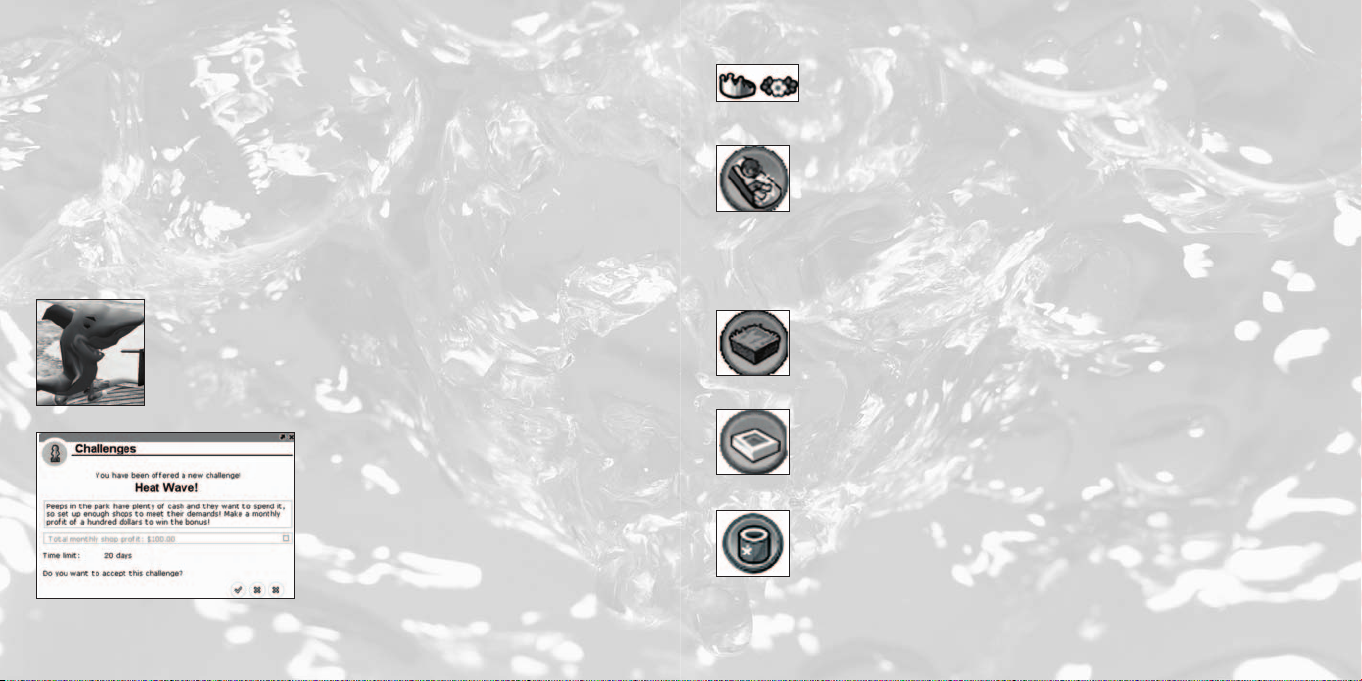
Challenges
Among the buttons under Park Management, is a
button for displaying Challenges.The challenges
window displays a special opportunity to take
advantage of a temporary condition that affects
your park and its guests. If you meet the challenge,
you’ll receive a special bonus.
Swimming Pools
The Swimming Pools button opens a suite of tools allowing you to create
swimming pools of any shape and size. See “Using the Swimming Pool Editor”
on page 13.
RCT3 MixMaster
The RCT3 MixMaster™has been expanded to include lasers, dancing water jets
and performing dolphin and killer whale shows as well as fireworks. See “Using
the Improved RCT3 MixMaster™” on page 11 for more details.
™
Page 6

Speaker Objects
Loud Speakers have been added to both the list of Path Extras and to the list of
Scenery Items. Speaker Objects can be used just like any other scenery element, except you may also assign a sound file to the object, adjust the volume
of the speaker, and turn it off or on. Adding speakers throughout the length of a
track ride, or along the path of a themed area allows you to give your park a
more immersive feel.
Passport Stations
Listed among the Path Extras is an element called Passport Stations. Peeps are
given a passport booklet as they enter the park. If peeps have their passport
booklet stamped by the required number of stations, they win a prize! You can
specify how many stations are required by using the Passport Station control
panel. The ideal strategy for using Passport Stations is to place them far apart at
the far reaches of your park, giving peeps a reason to visit all areas of your amusement park.
Terrain Tools
Waterfalls
Added to the Terrain Tools buttons is a selection for creating waterfalls. See
“Creating Waterfalls” on page 14.
USING THE ADDED FEATURES
Tutorials
RollerCoaster Tycoon 3: Soaked! provides tutorials for several of the added features. Tutorials
include how to construct Waterfalls, Basic Pools, and Advanced Pools; how to customize pool
facilities; how to create laser shows and whale shows; how to customize-design laser effects
and laser images. The tutorials can be found in the main menus of the game.
Using the Control Key to Build Elevated Scenery and
Structures
An improved method for building elevated portions buildings and
scenery (such as roofs) can now be accomplished using the Control
key. Use the following steps to learn how to do this.
After you’ve built the walls of a structure, build the roofline attached
to the top of the wall. This is accomplished in the same way as with
RollerCoaster Tycoon 3, where you first select a roof piece from the
Scenery Structures menu, and then position the pointer where you
mouse up until the piece is positioned correctly, and, finally, click to place it there. Now click
to place it there. To add another roof piece at the same height, move the pointer so it touches
the previously placed roof-piece, and then press the Control key.This action assigns that
height to the Control key so when you are placing any additional scenery items in your park
and hold down the Control key, it will be placed at that height. This is particularly useful for
building large expanses of roof and platforms.
Creating Shows with the Improved RCT3 MixMaster
The Fireworks MixMaster™from the original RollerCoaster Tycoon 3 has been expanded to
allow you to create water and laser shows among other things.The improved RCT3
MixMaster™allows you to add not just fireworks, but now also add water jets and lasers to the
want to place the roof piece, hold the Shift key and nudge the
™
Page 7

mix! You can also preview each effect now. In addition, you can customize the laser displays
and the water displays using the Advanced Designer, and then save these creations to be used
later or shared with the on-line RollerCoaster Tycoon community.
As with the fireworks shows, you’ll first need to add the kind of launchers to your park for the
type of effects (fireworks, water jet, laser) you want to use in your show, and then open a
show timeline to add these elements.
To add launchers, click the Scenery button, and then click RCT3
MixMaster™button to display the RCT3 MixMaster™console.
Next, click the MixMaster Bases button to see the launcher
bases for water jets and lasers as well as fireworks – click one
of these to choose it and then click the place in the park where
you want that launcher to reside.At any time, you can click on
a launcher located in your park to open the RCT3 MixMaster™interface.
Next, click the MixMaster Displays button to open a sequence timeline. In the same way fireworks shows were created, click the timeline where you want to add a show event, and
choose an event from the pop-up window to add it to the timeline.
Using the Swimming Pool Editor.
Click the Scenery button, and then click the Swimming Pools button at the bottom of the list.
This will open the Swimming Pool Construction toolbox.
First take a look at the interface and notice you can add the following:
• Pool paths (to add footbridges and to create elevated areas)
• Pool extras (to add ladders, lights, showers, and diving boards)
• Pools (swimming areas)
• Pool changing rooms (where peeps in your park enter and exit the pool area)
• Save (to save your pool designs).This option is present when the pool changing room
window is open.
Select the Pools button and then choose a pool edge-type, and then draw the
pool over a flat area in your park to add the pool. If you want an elevated pool,
click the toggle-snap icon and then adjust the number to indicate how high the
pool will be constructed.
Next, select the Place Tiles button to construct decking around the pool. As with pool construction, you can add raised decking by clicking on the
toggle-snap icon and adjusting the height value and then
drawing in the park to construct decking.
Add plenty of decking around a pool so you can add lounge
chairs, showers, diving boards and waterslides.
Page 8

To add a tall diving board, select the highdiving board from the Pool Extras, move
the pointer to the area where the diving board will be constructed, and then hold
the mouse button as you nudge the mouse upward.
To add a wave machine, choose the wave-machine item, move the pointer to the
edge of the pool and then click to add it to the pool edge.
To add a water slide that empties into your pool, build the water slide so
the slide’s end-piece connects to the edge of the pool decking, and then
make sure pool parts have been built around the water slide’s end-piece
to provide a splash zone.
To adjust the price of a pool area, and to perform other tasks like maintenance, click the changing room for that pool and make adjustment in the control panel that
appears there.
Creating Waterfalls
Waterfalls can only be constructed between two adjacent bodies of water where one is higher
than the other.
First, modify the terrain to create a raised area — for best results, use the
tool to create a mesa. Next, create a pit on the mesa and then add water
(consult the RollerCoaster Tycoon 3 manual for instructions on adding
water bodies). This higher water body must have a flat, straight edge over
which the water can flow. Then, create a pit at the base of the raised area
and add water there, too, ensuring that there is at least some water in
the lower body that is roughly underneath the edge over which you want the water the flow.
Finally, click the Waterfalls button (as seen on page 10) to activate the waterfall function, then
click the raised water body to select it, and then click the lower water body to select it. If the
terrain has been formed properly, a waterfall will be created automatically.The width of the
waterfall is selected based on the narrower of i) the length of the flat, straight edge on the
raised water body; and ii) the width of the lower water body underneath this edge into which
the waterfall will discharge. Use this information to create waterfalls of whatever height and
width you choose.
Using the RollerSoaker
One of the rides in RollerCoaster Tycoon 3: Soaked! is the RollerSoaker, which fea-
tures controls for riders to release several gallons of water, soaking the guests
walking below. While riding the RollerSoaker, find the button labeled “release
water” located in the coaster cam interface, and click the button to dump gallons
of the wet stuff.To get an optimal view of the RollerSoaker releasing water, position the
Coaster Cam to look backwards and then zoom out.
Creating Dolphin and killer whale Shows
Before you add a dolphin or killer whale show, you must first create a water body
using the terrain tools, and one that is deep enough to accept the show “object.”
See the RollerCoaster Tycoon 3 manual for instruction on creating bodies of water.
After you’ve finished building the water body, select either dolphin or killer whale show from
the Gentle Rides, position the ride in the water, and then click to add the attraction. If the
water is too shallow, the color of the attraction will remain red.The fastest way to adjust the
water body to the proper depth is to hold down the Alt key while the show is positioned over
the water – when the color of the attraction turns blue, click to add it there.
Finally, add an entrance and exit, connect them to your park’s path system and open the show
just like other attractions.
After you’ve placed the show, you can customize the
contents of the show by clicking the Aquatics MixMaster
button found in the attraction’s control panel.
When clicked, the RCT3 MixMaster™sequencer interface
will be displayed where you can add any of the choreo-
Page 9

graphed moves in any order you want by clicking in the timeline. In order to easily preview the
show while choreographing it, you can move the mouse backwards and forwards to “scrub”
through the show. Note: Dolphin and killer whale shows cannot be added to swimming pools.
Creating Tunnels
Now you can create tunnels for footpaths and track rides! The best way to learn how to do
this is to launch the Extras tutorial from the Tutorials Menu and follow the tutorial directions.
To create a tunnel, you must first raise a section of terrain so
that vertical surfaces are exposed. To do this, click the Terrain
Shaping button under the Terrain Tools, and then click Adjust
Terrain Tiles in the construction toolbox. Click the button for
Free-form Terrain Tile Shaping, and then point to an area of the terrain, hold down the mouse
button and drag the mouse up until the terrain is raised to the height you want.
Now, create a footpath leading toward the vertical surface of the
raised terrain.When the path encounters the vertical surface, a
tunnel will automatically be created and the terrain will become
translucent, allowing you to see through into the interior of the
raised terrain where your path is being created.
That's all there is to it! Placing path-extras on paths within tunnels is the same as before. In
addition, you can also create tunnels using any track ride, with one extra option;
you can select the color of the headlight by clicking on the Headlight button
found on the Vehicles page of the ride's control panel.
OTHER SURPRISES
As with RollerCoaster Tycoon 3, this expansion pack has many wonderful elements waiting to
be discovered.We recommend you play
Soaked! and uncover these yourself.
CREDITS
Atari
Ken Allen
Sr. Producer
Sr. John Billington
Brand Manager
Bob Welch
Executive Producer
Paul Hellier
Director of Technology
Stacey Clement
Public Relations Manager
Steve Martin
Director of Creative Services
Liz Mackney
Director of Editorial & Documentation Services
Erik Gerson
Sr. VP Marketing
Morgan Tomaiolo
Senior Graphic Designer
Kurt Carlson
Documentation Specialist
Paul Collin
Copywriter
Ezequiel “Chuck” Nunez
Manager of Publishing Support
Ken Ford
Director of IT and Web Strategies
Jimmie Lee
Technical Support Supervisor
Mike O’Shea
Q.A. Testing Supervisor
Jason Gates
Lead Testers
Randy Alfonso
Assistant Lead Tester
Kyle Brown
Daniel Burns
Quang Nguyen
Glad Papellero
Jonathan Passamonte
Joe Taylor
Testers
Dave Strang
Manager, Engineering Services and
Compatibility Lab
Ken Edwards
Engineering Services Specialist
Dan Burkhead
Eugene Lai
Engineering Services Technicians
Chris McQuinn
Senior Compatibility Analyst
Cuong Vu
Compatibility Test Lead
Page 10

Randy Buchholz
Patricia-Jean Cody
Tony Nguyen
Compatibility Analysts
Jon Nelson
Director, Global Web Services
Scott Lynch
Producer, Online
Richard Leighton
Senior Web Designer, Online
Sarah Pike
Online Marketing Manager
Todd Curtis
Vice President, Operations
Eddie Pritchard
Director of Manufacturing
Lisa Leon
Lead Senior Buyer
Gardnor Wong
Senior Buyer
Tara Moretti
Buyer
Janet Sieler
Materials Planner
Nichole Mackey
Process Planner
Special Thanks
Daniel Hains, Betsy LaCoe Hamm, Danielle
Peiffer and Cindy Farkas of Hershey Corp.
Frontier Developments
Chris Sawyer, David Braben
Executive Producers
Jonny Watts
Producer
Oscar Cooper
Lead Programmer
Sam Denney
Lead Artist
John Bichard
Ian Collinson
Andrew Fray
Andrew Gillett
Rick Griffiths
Matthew Halpin
Andrew Scott
Programming Team
Gary Bickmore
Simon Brewer
Marc Cox
Dariusz Drobnica
Stefan Scheffers
Dean Searle
Hayden Scott-Baron
Martin Squires
Art Team
Zafer Coban
Gerard Huke
Milan Medvec
Animation Team
David Scantlebury
Patrick Byrne
Tim Hughes
Jon Lewis
Peter Halpin
Game Engine Team
Felix Isley
Jonathan Pace
Andrew Thomas
Alex Smyth
Track Design Team
Charlie Bewsher
Stuart Fraser
Jonathan Pace
James Taylor
Level Design Team
Michael Brookes
QA Supervisor
Michael Michael
Tester
Alistair Lindsay
Music
Alistair Lindsay
Sound Effects
David Walsh
Managing Director
Marjacq Micro Ltd.
Representation
Page 11

ATARI WEB SITES
To get the most out of your new game, visit us at:
atari.com/rollercoastertycoon
If you would like to chat with other gamers, as well as developers, visit our Community Forum
area at:
ataricommunity.com
Kids, check with your parent or guardian before visiting any web site.
Chat Messages: Atari does not monitor, control, endorse, or accept responsibility for the content of chat
messages. You are strongly encouraged not to give out identity or other personal information through chat
message transmissions. Kids, check with your parent or guardian if you are concerned about any chat you
receive.
Use of Atari web sites is subject to terms and conditions, which you can access at:
atari.com/us/tos
TECHNICAL SUPPORT (U.S. & Canada)
Help Via the Internet
Up-to-the-minute technical information about Atari products is generally available 24 hours a
day, 7 days a week via the Internet at:
atarisupport.com
Through this site you’ll have access to our FAQ (Frequently Asked Questions) documents, our
FTP (File Transfer Protocol) area where you can download patches if needed, our Hints/Cheat
Codes if they’re available, and an Email area where you can get help and ask questions if you
do not find your answers within the FAQ.
Note: In the event we must send you a Hint Sheet, FAQ document, patch or update disc via
Email, we may require verifiable consent from a parent or guardian in order to protect children’s privacy and safety online. Consent Forms are available at the web site listed above.
Help Via Telephone in the United States & Canada
For phone assistance, call Atari Technical Support at (425) 951-7108. Our Interactive Voice
Response system is generally available 24/7, providing automated support solutions
immediately.
Great News! We’ve improved our Automated Systems so that you can get product-specific
Troubleshooting help more quickly. All you need to do is enter the product’s Part # when
prompted to do so. This will take you directly to all of our known issues and solutions for this
title. The product’s Part # is located in several places (on the CD label, package and/or plastic
disc case) and is usually identified by a number such as 04-12345.When prompted by the
Automated System, enter the last five digits of your product’s Part #. (For example, Part #
04-12345 would require that you enter the “12345” portion of the number for that product.)
Note: Some products simply feature a five-digit Part # without an “04-” prefix.
Page 12

Live support is generally available Monday through Friday, 8:00 AM until 6:00 PM (Pacific
Time). Note: We may be closed on major holidays.
Before making your call, we ask that you be at your computer, have the following information
available, and be ready to take notes:
• System Make and Model
• Processor Type
• Operating System, including version number if possible (such as Windows® 98SE;
Windows® Me)
• RAM (Memory)
• Video and sound card data and drivers
• Any screen or error messages you’ve encountered (and where)
Product Return Procedures in the United States & Canada
In the event our technicians at (425) 951-7108 determine that you need to forward materials directly to us, please include a brief letter explaining what is enclosed and why. Make sure
you include the Return Merchandise Authorization Number (RMA#) supplied to you by the
technician, and your telephone number in case we need to call you.You will receive the mailing address when the technician gives you the RMA#.Any materials not containing this RMA#
will be returned to you unprocessed.
Warranty Policy in the United States & Canada
If our technicians determine that the product storage medium is found to be defective within
ninety (90) days of original purchase, (unless otherwise provided by applicable law), Atari will
replace the item free of charge, to the original purchaser, if the item is accompanied b
original dated receipt and packaging.
y the
END-USER LICENSE AGREEMENT
IIMMPPOORRTTAANNTT —— RREEAADD CCAARREEFFUULLLLYY:
rights and restrictions described in this End-User License Agreement (“EULA”).
AGREEMENT
This document is an agreement between you and Atari, Inc. and its affiliated companies
(“Company”). The enclosed software game disc(s), cartridge or Game Pak (“Software”) and
any accompanying printed materials are licensed to you only on the condition that you accept
all of the terms contained in this EULA.
By opening this package and installing or otherwise using the Software you agree to be bound
by the terms of this EULA. If you do not agree to the terms of this EULA you may not install
or use the Software and within 15 days of purchase you must call the Tech Support telephone
number listed in the manual accompanying the Software (the “Manual”). Select the
Automated Phone System’s Main Menu option for Consumer Services and follow the prompts.
You will be given a Return Merchandise Authorization number (RMA #) by the technician. You
then have 15 days from the date of this contact to return the Software in its protective covering, the Manual and the original sales invoice to the address supplied to you.
If this is a PC product, when you install the Software you will be asked to review and either
accept or not accept the terms of the EULA by clicking the “I Accept” button. By clicking the
“I Accept” button you acknowledge that you have read the EULA, understand it and agree to
be bound by its terms and conditions.
COPYRIGHT
The Software is protected by copyright laws and international copyright treaties, as well as
other intellectual property laws and treaties. All title and copyrights in and to the Software
(including but not limited to any images, photographs, animations, video, music, text and
“applets” incorporated into the Software) and any printed materials accompanying the
Software are owned by the Company or its Licensors.
Please be sure to carefully read and understand all of the
:
Page 13

GRANT OF LICENSE
The Software is licensed and not sold to you and its use is subject to this EULA. The Company
grants you a limited, personal, non-exclusive license to use the Software in the manner
described in the user documentation. The Company reserves all rights not expressly granted
to you in this EULA.
PERMITTED USES
1. If the Software is configured for loading on a hard drive, you may install and use the
Software on a single computer.
2. You may make and maintain one copy of the Software for backup and archival purposes,
provided that the original and copy of the Software are kept in your possession.
3. You may permanently transfer all your rights under this EULA, provided you retain no
copies, you transfer all of the Software (including all component parts, the media and printed materials and any upgrades) and the recipient reads and accepts this EULA.
RESTRICTIONS
1. You may not delete or obscure any copyright, trademark or other proprietary notice on the
Software or accompanying printed materials.
2. You may not decompile, modify, reverse engineer, disassemble or otherwise reproduce the
Software.
3. You may not copy, rent, lease, sublicense, distribute, publicly display the Software, create
derivative works based on the Software (except to the extent expressly permitted in the
Editor and End-User Variation section of this Agreement or other documentation accompanying the Software) or otherwise commercially exploit the Software.
4. You may not electronically transmit the Software from one computer, console or other plat-
form to another or over a network.
5. You may not use any backup or archival copy of the Software for any purpose other than to
replace the original copy in the event it’s destroyed or becomes defective.
EDITOR AND END-USER VARIATIONS
If the Software includes a feature that allows you to modify the Software or to construct new
variations (an “Editor”), you may use such Editor to create modifications or enhancements to
the Software, including the construction of new levels (collectively the “Variations”), subject to
the following restrictions. Your Variations: (i) must only work with the full, registered copy of
the Software; (ii) must not contain modifications to any executable file; (iii) must not contain
any libelous, defamatory or other illegal material, material that is scandalous or invades the
rights of privacy or publicity of any third party; (iv) must not contain any trademarks, copyright-protected work or other property of third parties; and (v) may not be commercially
exploited by you, including but not limited to making such Variations available for sale or as
part of a pay-per-play or timesharing service.
TERMINATION
This EULA is effective until terminated. You may terminate this EULA at any time by destroying the Software. This EULA will terminate automatically without notice from the Company if
you fail to comply with any provisions of this EULA. All provisions of this EULA as to warranties, limitation of liability, remedies and damages will survive termination.
LIMITED WARRANTY AND DISCLAIMER OF WARRANTIES
You are aware and agree that use of the Software and the media on which is recorded is at
your sole risk. The Software and media are supplied “AS IS.” Unless otherwise provided by
applicable law, the Company warrants to the original purchaser of this product that the
Software storage medium will be free from defects in materials and workmanship under normal use for ninety (90) days from the date of purchase. The warranty is void if the defect has
arisen through accident, abuse, neglect or misapplication. If the Software fails to conform to
this warranty, you may at your sole and exclusive remedy, obtain a replacement free of charge
if you return the defective Software. Follow the Product Return Procedures described in the
Manual. The Company does not warrant that the Software or its operations or functions will
meet your requirements, or that the use of the Software will be without interruption or error.
Page 14

TTOO TTHHEEFFUULLLLEESSTT EEXXTTEENNTTPPEERRMMIISSSSIIBBLLEE UUNNDDEERR AAPPPPLLIICCAABBLLEE LLAAWW,, EEXXCCEEPPTT FFOORR TTHHE
EEXXPPRREESSSS WWAARRRRAANNTTYY SSEETT FFOORRTTHH AABBOOVVEE,, TTHHEE CCOOMMPPAANNYY DDIISSCCLLAAIIMMSS AALLLL WWAARRRRAANNTTIIEESS,
EEXXPPRREESSSS OORR IIMMPPLLIIEEDD,, IINNCCLLUUDDIINNGG AANNDD WWIITTHHOOUUTT LLIIMMIITTAATTIIOONN,, TTHHEE IIMMPPLLIIEEDD WWAARRRRAANNTTIIEES
OOFF MMEERRCCHHAANNTTAABBIILLIITTYY AANNDD FFIITTNNEESSSS FFOORR AA PPAARRTTIICCUULLAARR PPUURRPPOOSSEE AANNDD NNOONN--IINNFFRRIINNGGEE-
MMEENNTT.. EEXXCCEEPPTT FFOORR TTHHEE EEXXPPRREESSSS WWAARRRRAANNTTYY SSEETT FFOORRTTHH AABBOOVVEE,, TTHHEE CCOOMMPPAANNYY DDOOEES
NNOOTT WWAARRRRAANNTT,, GGUUAARRAANNTTEEEE OORR MMAAKKEE AANNYY RREEPPRREESSEENNTTAATTIIOONN RREEGGAARRDDIINNGG TTHHEE UUSSEE OOR
TTHHEE RREESSUULLTTSS OOFF TTHHEE UUSSEE OOFF TTHHEE SSOOFFTTWWAARREE IINN TTEERRMMSS OOFF IITTSS CCOORRRREECCTTNNEESSSS,, AACCCCUURRAACCYY,, RREELLIIAABBIILLIITTYY,, CCUURRRREENNTTNNEESSSS OORR OOTTHHEERRWWIISSEE.. SSOOMMEE JJUURRIISSDDIICCTTIIOONNSS DDOO NNOOTT AALLLLOOW
TTHHEE EEXXCCLLUUSSIIOONN OOFF OORR LLIIMMIITTAATTIIOONNSS OONN IIMMPPLLIIEEDD WWAARRRRAANNTTIIEESS,, SSOO TTHHEE AABBOOVVEE EEXXCCLLUUSSIIOONNSS AANNDD LLIIMMIITTAATTIIOONNSS MMAAYY NNOOTT AAPPPPLLYY TTOO YYOOUU.
.
E
,
-
S
R
W
-
LIMITATION OF LIABILITY
IINN NNOO EEVVEENNTT WWIILLLL TTHHEE CCOOMMPPAANNYY OORR IITTSS EEMMPPLLOOYYEEEESS OORR LLIICCEENNSSOORRSS BBEE LLIIAABBLLEE FFOORR AANNY
IINNCCIIDDEENNTTAALL,, IINNDDIIRREECCTT,, SSPPEECCIIAALL,, CCOONNSSEEQQUUEENNTTIIAALL OORR PPUUNNIITTIIVVEE DDAAMMAAGGEESS,, OORR AANNYY DDAAMM-
AAGGEESS WWHHAATTSSOOEEVVEERR ((IINNCCLLUUDDIINNGG,, WWIITTHHOOUUTT LLIIMMIITTAATTIIOONN,, DDAAMMAAGGEESS FFOORR IINNJJUURRYY TTOO PPEERRSSOONN OORR PPRROOPPEERRTTYY,, FFOORR LLOOSSSS OOFF PPRROOFFIITTSS,, BBUUSSIINNEESSSS IINNTTEERRRRUUPPTTIIOONN,, LLOOSSSS OOFF BBUUSSIINNEESSS
IINNFFOORRMMAATTIIOONN,, LLOOSSSS OOFF PPRRIIVVAACCYY,, FFAAIILLUURREE TTOO MMEEEETT AANNYY DDUUTTYY AANNDD NNEEGGLLIIGGEENNCCEE)) AARRIISSIINNGG OOUUTT OOFF OORR IINNAANNYY WWAAYY RREELLAATTEEDD TTOO TTHHEE UUSSEE OORR IINNAABBIILLIITTYY TTOO UUSSEE TTHHEE SSOOFFTT-
WWAARREE,, EEVVEENN IIFF TTHHEE CCOOMMPPAANNYY OORR AANN AAUUTTHHOORRIIZZEEDD RREEPPRREESSEENNTTAATTIIVVEE OOFF TTHHEE CCOOMMPPAANNY
HHAASS BBEEEENN AADDVVIISSEEDD OOFF TTHHEE PPOOSSSSIIBBIILLIITTYY OOFF SSUUCCHH DDAAMMAAGGEESS.. SSOOMMEE JJUURRIISSDDIICCTTIIOONNSS DDO
NNOOTT AALLLLOOWW TTHHEE EEXXCCLLUUSSIIOONN OOFF LLIIAABBIILLIITTYY FFOORR IINNCCIIDDEENNTTAALL OORR CCOONNSSEEQQUUEENNTTIIAALL DDAAMMAAGGEESS,, SSOO TTHHEE AABBOOVVEE EEXXCCLLUUSSIIOONN MMAAYY NNOOTT AAPPPPLLYY TTOO YYOOUU.
IINN NNOO EEVVEENNTT WWIILLLL TTHHEE LLIIAABBIILLIITTYY OOFF TTHHEE CCOOMMPPAANNYY FFOORR DDAAMMAAGGEESS WWIITTHH RREESSPPEECCTT TTO
TTHHEE SSOOFFTTWWAARREE EEXXCCEEEEDD TTHHEE AAMMOOUUNNTTSS AACCTTUUAALLLLYY PPAAIIDD BBYY YYOOUU FFOORR TTHHEE SSOOFFTTWWAARREE.
.
-
O
O
.
CHOICE OF LAW AND VENUE
This EULA is governed by the laws of the United States of America and the State of New York,
exclusive of its conflicts of law provisions. The exclusive venue for litigation regarding or arising from this EULA is New York County, New York and you agree to submit to the Jurisdiction
of the courts of New York County, New York for any such litigation.
MISCELLANEOUS
S
-
Y
-
-
S
-
Y
-
If any provision or portion of this EULA is found to be unlawful, void, or for any reason unenforceable, it will be severed from and in no way affect the validity or enforceability of the
remaining provisions of the EULA.
This EULA constitutes the entire agreement between you and the Company regarding the
Software and its use.
© 2005 Atari Interactive, Inc. All Rights Reserved.
RollerCoaster Tycoon® 3: Soaked! game © 2005 Chris Sawyer.
Programming © 2005 Frontier Developments Ltd. All Rights Reserved.
All trademarks are the property of their respective owners.
Developed by Frontier Developments Ltd.
The HERSHEY'S, REESE'S, and KISSES trademarks and trade dress are used under license.
Pentium is a trademark or registered trademark of Intel Corporation or its subsidiaries
in the United States and other countries.
Manufactured under license from Dolby Laboratories.
Windows and DirectX are either registered trademarks or trademarks of
Microsoft Corporation in the United States and/or other countries.
Portions utilize Microsoft Windows Media Technologies.
Copyright ©1999-2002 Microsoft Corporation. All Rights Reserved.
ATI and RADEON are trademarks and/or registered trademarks of ATI Technologies Inc.
05055
Page 15

 Loading...