

Page 1

Remember any fool can build a roller coaster with an impressive first drop, but
can you keep the fun and action going right through to the end of the ride?
When I designed Nemesis at Alton Towers, I wanted to ensure that there was
speed and exhilaration even right up to the last section of track before the
station so I dug a hole just in front of the station brakes and dropped the ride
down through a corkscrew below ground level. It comes as quite a shock when
you ride it. If the riders get off feeling that the ride has dulled-out halfway
through, they will be disappointed, but if they get off on an emotional high,
they’ll come back for more–and they’ll be more likely to buy an on-ride photo
of themselves. (Position the camera in the best place for good expressions on
riders’ faces to maximise sales).
Locate your big spectaculars towards the back of the park, to draw the guests
right through the park past as many “spending opportunities” (food kiosks,
etc.) as possible.
Once you’ve designed your coaster, you’ve got to operate it at maximum
efficiency. Should you wait till the train is full before you send it out of the
station? Keeping riders waiting is boring, and the more frequently the guests
walking around the park can see the ride running, the more attracted they’ll be
to ride it, but a full train is the most efficient way of running the machine. Even
the best-designed roller coaster won’t make money unless it is operated and
maintained efficiently.
It has taken me 25 years of hard work to gain my experience in the theme park
industry. With RollerCoaster Tycoon, you can get there in 25 minutes!
A plot of land is out there waiting…
…rides are available for you to design and build…
…and guests are ready to visit you and spend lots of money.
Good luck, and have fun.
John Wardley’s official job title is “Consultant Director, The Tussauds Group,
Ltd.” but he doesn’t mind being called simply a “Ride Designer”. He has
been involved with the design of many of the best European roller coasters,
including Nemesis and Oblivion at Alton Towers (England), Megafobia at
Oakwood (Wales), The Vampire at Chessington (England), Dragon Khan at
Port Aventura (Spain), and many others.
A WORD FROM JOHN WARDLEY
The world of theme parks is one of the most exciting businesses to be in.
Now, you too can be a roller coaster tycoon and make your fortune by
designing, building, and operating some of the biggest and most sensational
theme parks in the world.
There’s much more to a theme park than roller coasters, height, speed–
and making people feel sick! You are about to become a real-estate developer,
an engineer, an accountant, a landscape architect, a manager of people, and
an entertainer.
Your park must provide a fun day out for everybody, at a price they can afford.
They must be kept comfortable and happy, well fed and amused–but you have
bills to pay, advertising costs, wages and big problems ahead of you. You will
need to use all your skills to be successful.
Here are some tips. As a ride designer, think of yourself as an entertainer; you
can make your riders laugh or cry, you can amaze them, mystify them, scare
them, amuse them, or terrify them–it’s all under your control. Just think of the
power you have!
But entertainers need to understand their audience. Who are you trying
to entertain?
…families with young children?
…teenagers who want the ultimate in white-knuckle terror?
…or everyone who comes to your theme park, including grannies and
little kids?
Think of a ride on a roller coaster as a journey through an adventure. It must
have variation–not just its ups and downs, but also its surprises and shocks,
its gentle scenic sections to lull you into a false sense of security, and its wild
mean parts to scare the pants off you.
A ride should be impressive, yet fun to watch, and it should fit into the layout
and landscape of the park. Your guests must be able to see some of it from the
walkways, but keep some bits hidden so they come as a complete surprise
during the ride. An adventure journey must take your riders through an
exciting, disorientating, and spectacular environment. Position trees, tunnels,
and other obstructions so as to enhance the thrills.
Use water for effect, and create hills and valleys
through which your ride will race. All these elements
are at your fingertips, so use them.
2 3
Page 2

HOW TO GET HERE
No matter where you’re coming from, there’s only one way to get to RollerCoaster Tycoon. First,
let’s make sure you have what you need to enjoy your visit. After that are complete directions for
reaching the park safely.
Necessary Equipment
Before you can install RollerCoaster Tycoon and start playing, check this list to make sure that
your computer has everything you need:
• The processor has to be a 90 MHz Pentium® or better. For best performance, we recommend
at least a 200 MHz Pentium with MMX.
• Your operating system must be Windows® 95 (or newer).
• You must have at least 16 Mb (megabytes) of RAM. (If you’re running Windows 95, it’s a safe
bet you have 16 Mb or more.) For best performance, we recommend 32 Mb or more.
• You must have a 4x speed (or faster) CD-ROM drive.
• Since the installation program will copy parts of RollerCoaster Tycoon onto your hard disk,
you must have a lot of empty storage space on your hard drive. How much you need depends
on how much of the game you choose to install; the different amounts are calculated for you
by the installation program, and it shows you what you need versus what you have. The minimum
required is 45 Mb.
• Your computer must be capable of SVGA quality graphics, and your video card must have at
least 1 Mb of onboard memory.
• There must be a working mouse (or a device that fulfils the same function) attached
to the computer.
• You must have DirectX version 5.0 (or higher). If you don’t have this, you can install version
5.0 as part of the installation process.
• To hear the game sounds and music, you must have a working Windows 95 compatible sound
card–and the requisite drivers installed.
If you think you have all of these, but still have a problem running the game, please contact
Hasbro Interactive Customer Support for assistance.
Installation
If you have all of the required equipment, then it’s time to install the game. To do so, follow
these instructions:
• Turn on your computer.
• Open the CD-ROM drive, place the RollerCoaster Tycoon CD in it, and close the drive.
• RollerCoaster Tycoon is a Windows “AutoPlay” CD-ROM. That means that just putting the
disk in the drive for the first time starts up the installation program.
WELCOME!
Welcome to RollerCoaster Tycoon! We’re glad you could make it. You’re about to
enter the world of professional amusement–and you’re jumping in with both feet.
All over the world, not a year goes by that someone somewhere doesn’t open a
new park. Of course, some succeed and others fail. Your benefactors, a
secretive holding company located in the British Isles, have been buying up
unsuccessful parks for some time now. They’ve got quite a collection. Some
are empty lots where the designers never got started; others are partially
complete; still more are up and running, but contain flaws. Your job is to take
the reins of every one of these parks and, one by one, drive them to success.
In each case, the holding company has provided what resources they can, but
once you begin, you’re on your own. If you need cash, you’ll be forced to take
loans from local banks.
What constitutes success? That’s defined for you at the beginning of each
scenario. Early on, the challenges are not particularly difficult–relatively
speaking. (Don’t underestimate them.) As you prove yourself, however, you can
take on more complex and troublesome projects. Complete them all, and
you’ve earned the right to call yourself a roller coaster tycoon!
This guidebook, culled from the experience of others, contains everything you
need to know to succeed in the park business–except your own good sense and
shrewd entrepreneurial skills–and you’ll need a lot of both to do well. What you
won’t find in here are tedious lists of statistics about all the possible rides,
types of scenery, and other attractions you can build. Why? As you progress
through the scenarios, one of the things you should be doing is having your
researchers work to invent new things. Part of the fun is in the discovery–much
like your first visit to a new park–and in trying out something novel to see what
you can do with it.
4 5
Page 3

ENTERING THE PARK
When RollerCoaster Tycoon begins (after the title sequence, that is), you’re left looking at a
screen with four big buttons:
Start New Game lets you begin
a fresh game–a scenario
of your choosing.
Load Saved Game is what you
use to continue a game that
you saved previously.
Show Tutorial
runs the
beginner’s tutorial.
Exit shuts down the
game and returns
you to Windows.
Those of you who think you can figure it out for yourself, go ahead and
click Start New Game. For the rest of us, here’s a walk
through the tutorial.
If You Get Lost
If at any time you are unsure of what to do, or you run into something you do not understand,
please consult the Reference section of this guide. In it, there are point-by-point descriptions
of all the major parts of the game.
The Tutorial
The tutorial is a brief guide to how RollerCoaster Tycoon works. When you click the Show Tutorial
button, the game runs itself for a while. It starts one of the game scenarios, then goes through
the motions, step by step, of setting up a few rides and performing a few other important park
management tasks. You can learn a lot by watching this.
Note This!
You don’t have to just sit and watch if you don’t want to. While the tutorial is running, you can
click any mouse button or press any key on the keyboard to take over control. The only proviso
is that you can’t give control back to the tutorial. Once you take the reins, it’s your park.
As you watch the tutorial, you can follow along in this text; it’s written in the form of instructions
and their results, as if you were actually going to do the work yourself. If something the game
does in the tutorial is not clear, the chances are good that it’s
explained here. Let’s begin.
If Autoplay Doesn’t Work
If, for whatever reason, the Autoplay feature does not work when you put the CD in the drive,
here’s how to start the installation program yourself:
• Double-click your “My Computer” desktop icon.
• In the window that opens, double-click your CD-ROM drive (it’s usually the D drive).
• In the list that appears, find a file named setup.exe and double-click it.
The installation program should begin.
• As is usual in Windows installation procedures, there are two decisions you need to make
before the installation process can begin. The first decision is to what directory you want to
install the game. You can accept the default, type in a directory path, or use the Browse
button to seek out a directory. Click OK when you’re done.
• The second decision is what sort of installation you want to do. Pick one of the options presented:
Minimum - installs all of the files required to play the game, but leaves some of the larger files
on the CD. This type of installation strikes a balance between the needs of game speed (more
files copied) versus conserving hard disk space (less files copied).
Full - installs the entire game, including all of the larger files. If you have the hard disk space
to spare, doing a Full installation can make the game run faster.
• Click Install to continue. (If you change your mind at this point, click Exit.)
• RollerCoaster Tycoon will now copy the files you selected to your hard drive from the CD-ROM.
• After the game itself has been copied over, RollerCoaster T ycooninstalls a few necessary utility
programs. These include Microsoft’s DirectX drivers (version 5.0). Note that the space these
take up was not included in the total noted when you selected what type of installation to do.
Once the installation is complete, the game is ready to go.
To start playing now:
• Leave the RollerCoaster Tycoon CD-ROM in the drive.
• Click the Play button.
To play later:
• Make sure that the RollerCoaster Tycoon CD-ROM is in its drive.
• Open the Windows Start menu,select the Programs menu then open the Hasbro Interactive
menu, then open the RollerCoaster Tycoon sub-menu, and then click the RollerCoaster Tycoon
option.
OR
• When you put the CD in, you can wait for the Autoplay screen to pop up, then click the Play
button.
Have fun!
6 7
Page 4

• Position the Entrance square adjacent to the ride (leaving room for the Exit) and click to build it.
• Construct the Exit in the same way as you did the Entrance.
You now have a completed, but closed, Merry-Go-Round with the required Entrance and Exit, and
the Merry-Go-Round 1 window is open. Next, you must build a Queuing Line from the Entrance to
the existing path (otherwise, no one will be able to wait in line to board the ride, and that cuts
down on business). You also need a path from the Exit to the main Forest Frontiers path.
Click the Footpaths button.
The Path Construction
window opens.
Click the Queuing Line
button (the blue one
with people).
• Move the mouse pointer to the landscape square in front of the Entrance and click once.
The first stage of the Queuing Line is built, and the cost is deducted from your treasury.
• Move the pointer one square further away, and click again to add another piece.
You now need to connect the Exit and the Queuing Line to the existing path. For this, you’ll use
a tarmac footpath.
Click the Tarmac
Footpath button
(the grey one).
• Using the mouse pointer just as you did when building the Queuing Line, build a path from
the Exit to the main path. (Notice the money leaving your account each time.)
• Now, extend the main path to reach the Queuing Line.
Remember
If you make a mistake and build something in the wrong place, you can right-click on what
you built to remove it. You will not get all of the construction cost back, but there is usually
a refund of some sort. (Removing natural objects such as trees does not count as undoing
construction; for removal, there is a separate cost, no refund.)
Now, you have a completed Merry-Go-Round with paths and a waiting area, but it is still closed
(as you can see by the sign flashing on the Entrance).
• To open the ride, click the green light on the right side of the Merry-Go-Round 1 window. (If
the window isn’t open, click on the Entrance or the ride itself to open the window.)
Now you have an open ride, but the park is still closed.
• Hold the right mouse button down and move your cursor to “drag”
the landscape until the park entrance is in view. You see that the
main park entrance sign is still flashing a Closed message.
• Click on the entrance to open the Forest Frontiers window.
Click Start New Game. The tutorial skips
the menu of scenarios (different parks
in different situations) and goes directly
into the first scenario on the menu,
Forest Frontiers.
With the park landscape in the background, the first window shows what you need to do to
succeed in this scenario. Always read this carefully. In the Forest Frontiers tutorial, you have
until October of Year 1 to attract 250 guests into the park and build the park’s rating (a measure
of reputation and customer satisfaction) to at least 600.
Click the window close button to close this window.
Click the New Ride button. The Ride Selection window opens.
Select the sleepy looking face tab (Gentle Rides)
to see the available gentle rides.
• Select the Merry-Go-Round by clicking on the picture.
• Click the Build This button at the bottom right. The Ride Selection window closes and the
Merry-Go-Round Construction window opens.
At this point, the mouse pointer (when held over the landscape) controls where the ride will be
built. The landscape area needed to construct the ride is marked, and a yellow arrow indicates
the orientation of the ride (which is irrelevant for a Merry-Go-Round, but quite important for
many rides).
• Position the cursor between the existing path and the park border fence then click to build
the Merry-Go-Round. The cost of construction is deducted from your treasury, which is tracked
in a box at the bottom left of the screen. (It’s wise to remain aware of how much money you have
to spend.)
Now, you must build the Entrance and Exit for the ride. Once you have established the location
of the ride, you use the mouse pointer to choose positions for both. This is a very important step,
because every ride must have an Entrance and an Exit, and both must be positioned so that you
can build paths to and from the ride, or else your customers will never get there. Every Entrance
and every Exit takes up one landscape square. (Note that the
Entrance and Exit are free; they come as a package with
construction of the ride itself.)
8 9
Page 5

• Click on the picture of the track piece (as you did for the Station Platform) to add it to the design.
At this point, it might be helpful to know that, even though funds are coming out of your total,
you have not irretrievably spent any money yet. Until the roller coaster is completed and has
been opened, you can undo the design (one piece at a time) and recoup everything you’ve spent.
Once the ride’s been run, however, that is no longer true.
If you understand how you built that straight, inclined, chained section of track, then the rest
of the design and construction process should be clear to you. Curves, drops, and everything else
are built using exactly the same process–choose a direction, choose a grade, then build the
section. As we build this particular design, however, we run into a few of the limits on what we
can do. (This is not a complete list, but it covers the issues we run into during the tutorial.)
• In order to switch from a rising track to a dropping track, you must have at least one piece
of straight track in the middle.
• There is a limit to how high above the land you can safely raise track using supports. (If you
need to go higher, you can raise the land. That’s not covered in the tutorial.)
• You cannot build track underground unless you prepare the land for it.
• Track can be run under or over existing track, provided there is enough room (vertical
clearance) for the cars to pass through. However, it is a violation of the safety code to build
intersections, so you cannot have the track cross itself at the same level.
If you build yourself into a corner or decide to
make a change, you can use the Demolish button
(the bulldozer) to remove the previous section of track.
• The last piece of track must connect to the first piece (the Station Platform) to create
a closed loop. The height marks visible on every section of track help you to line things up.
Now that the track itself is complete, you must position and build an Entrance and an Exit for
Roller Coaster 1. Only you can decide when the design is done, so the Entrance button is not
activated for you (as it was when you built the Merry-Go-Round).
• Click on the Entrance button in the Roller Coaster Construction window.
• Position the Entrance square adjacent to the Station Platform (leaving room for the Exit)
and click to build it.
• The Exit button is selected for you when the Entrance is complete. Position the Exit square
adjacent to the Station Platform and click to build it. (The Roller Coaster 1 window opens.)
The design and construction of your roller coaster are complete, but you can’t be sure how well
it will work unless you test it. Testing also helps you determine how much to charge for it and
how popular the ride should be.
• In the Roller Coaster 1 window, click the amber light between the red (Close) and green (Open)
lights. The ride begins its test run.
Select the tab with the pocket watch.
This shows you the Measurements
and Test Data display.
At first, there is no information in this display. When the first test
run is complete, much of the missing data is filled in. We explain
what all this means later in the manual. For now, what’s important
is that the ride runs smoothly.
• Click the green light (just like the one that was in the ride window), and the park is
open for business.
• Close the Forest Frontiers window.
• Close the Merry-Go-Round 1 window.
You now have one ride working and the park open. It’ s time to build something a bit more ambitious.
Click the New Ride
button again.
Select the Rollercoasters
tab (the face flying downhill).
• Select the Steel Mini Roller Coaster picture, then click the Build This button. The Select Track
Design window opens.
At this point, you can choose to construct one of the pre-designed track layouts, or you can
choose to build a custom coaster. We’re being ambitious, so let’s go with the latter.
• Select Build Custom Design, and the Roller Coaster Construction window opens.
The Station Platform is pre-selected as the first item to be built. That’s because on the
completed ride, the Entrance and Exit must be adjacent to the station platform. Positioning the
station first is good planning.
• Move the mouse pointer over the landscape. The cursor is a white box with a yellow arrow
in it (like the Entrance cursor). The box marks where the first piece of Station Platform will
be built, and the arrow shows the direction the cars will travel.
• Click once to build the first piece of Station Platform.
• Now, move the mouse pointer back to the construction window and click on the Station
Platform picture in the window three times to build the remainder of the platform. The cursor
moves forward each time and continues flashing.
Next, we’re going to create the starting rise, the length of track in which a motorised chain pulls
the cars up an incline to set up the rest of the ride.
First, we determine the direction of the next piece
of track. Near the top of the construction window,
select the centre arrow (the Straight button).
Second, we set the grade (rise or drop) of the next piece
of track. Below the direction buttons, find and click on the
Mild Incline button (just to the right of centre).
Lastly, we add the pulling chain to this
section of track. Click on the Chain button
(to the right of the incline buttons).
You probably noticed that as you made your selections, some of the
choices in the other areas changed from available to unavailable or
vice versa. What you can do at any point in the design of a roller
coaster depends on the structural and functional limits–and the
safety regulations–appropriate to the type of track you’re designing.
10 11
Page 6
• Click the down arrow to open the Wait For box.
• Choose Wait For Any Load. Leave the Minimum Wait and Maximum Wait times as they are.
This sets the ride to begin when one of two things happens–either the ride has a load
of passengers or the cars have been sitting at the Station Platform for the Maximum Wait time.
(Even if the ride has a full load, the cars will not leave the station until the Minimum Wait time
has elapsed.)
Go to the View tab and close
the Roller Coaster 1 window.
You have now built your first rides in your first park! These rides might not be the most exciting
in the world, but you’ve learned the basic method for building rides that is the same for all rides
in RollerCoaster Tycoon.
Finally, we must consider the long term operation of the park and the safety of the guests. Every
ride is a mechanical device, and machines have a tendency to become worn and break down. We
need a Mechanic to perform regular inspections of each ride and repair those that do stop working.
Click the Staff button.
The Staff window opens.
Select the Mechanics
tab (the man in the
blue work uniform).
• Click the Hire New Mechanic button.
Now you have a Mechanic in your employ, but you need to get him into the park.
• Move the mouse pointer over the landscape and position the Mechanic (hanging from the
pincers) directly over one of the paths.
• Click to drop the Mechanic into the park.
Your new employee will wander the park, inspecting every ride on a set schedule (a schedule
you can control for each ride using an option on the Operation Options display). When any ride
breaks down, a radio call goes out to the nearest Mechanic, and he hurries to fix the ride.
That’s the tutorial! Now that you’ve watched it through, get in there and try a few things yourself.
Once you’ve got some practice under your belt, let’s move on to some more possibilities.
Select the View tab
(the video camera).
• Click the red light to shut the roller coaster down (stop the test runs).
• Close the Roller Coaster 1 window.
When you know the coaster works, it’s time to create the associated Queuing Line and other paths.
Click the Footpaths button.
The Path Construction
window opens.
Click the Queuing Line button.
• Move the mouse pointer to the landscape square in front of the
Entrance and click once.
• Move the pointer one square further away, and click again to
add another piece.
Click the Tarmac
Footpath button.
• Build a path from the Exit to the main path.
• Now, extend the main path to reach the Queuing Line.
Now, you have a completed, tested roller coaster with paths and a waiting area, but it’ s still closed.
• Click on the Entrance to open the Roller Coaster 1 window.
• Click the green light to open the ride.
Now that the new ride is open and functional, you need to set an admission price. This is
perhaps the most important decision you make for each ride. Not only does the price influence
how much money you make, it also affects the popularity of the ride and, therefore, the attitudes
of your guests.
Return to the Roller Coaster 1 window,
and click the Income and Costs tab
(the coin and ticket).
• Click the small up arrow several times to adjust the Admission Price to £2.00.
Lastly, let’s make sure that the roller coaster is operating in the most efficient manner. After all,
you don’t want your guests waiting too long for the ride to start.
Select the Operation Options
tab (the gears).
12 13
Page 7

The Scenarios
As soon as you click the Start New Game button, you’re on your way–but you’re not inside the
park yet. RollerCoaster Tycoon includes quite a number of park scenarios. What you see is the
Scenario Selection window.
The name of each available scenario is listed in black letters.
(Those you cannot yet reach are greyed out.) T ake a look at the
list, and pass the mouse pointer over each name, pausing long
enough for the Tips box to pop up. This gives you some
information about the situation in the park. When you know
which scenario you want to enter, just click on the name. (If
you change your mind and want to go back to the four buttons,
use the Close Window button in the upper right corner.)
When you have completed a scenario, your success and your score are noted along with the
name in the selection window. After you have succeeded at a few of the early scenarios, you can
move on to attempt more advanced (and more difficult) scenarios.
THE RIDES
It goes without saying that the main attractions in any park are the rides themselves. Scenery
and gardens, shops and stalls, and everything else are necessary to keep guests happy while
they’re in the park, but the rides are the reason they come. Variety is the keyword in building
rides in your park. After all, would you visit a park that had fifteen Merry-Go-Rounds and nothing
else? Probably not.
The entire procedure for constructing a new ride is covered in great detail in the tutorial. Briefly,
let’s review the necessary steps:
Click the New Ride
button to open the
Ride Selection window.
• Using the tabs, choose a type of ride.
• Select the specific ride by clicking the picture, then click the Build This button.
• Determine the location and direction of the ride, then build it. (For some rides, this is a very
simple process; for others, like custom designed roller coasters, it can take some time.)
• Place the Entrance and Exit for the ride.
• Create a queuing line to attach the Entrance to a path, and make sure that the Exit is
connected to a path.
• Test the ride, set an admission price, give the ride a name, and determine its colours and
other operating characteristics.
• Open the ride.
14
Removing Rides
After you’ve built an attraction, you can choose to demolish it (using the Construction button
in the Ride window). When you do so with a newly built ride or shop, you normally get a full
refund of the cost of building.
However, once you’ve opened the ride (or shop) and your guests have begun patronising it,
you can no longer recoup your entire investment. If you demolish a “used” attraction, your
refund is considerably less.
The rides are organised into several types, and each type includes many different rides. (Some
of these are not available for construction until your research staff have come up with a safe
design.) Each has its own benefits and drawbacks, and each appeals to a certain type of park
guest–its specific target audience. What draws a person to a ride depends on the proclivities of
that person. Some guests want an intense, thrilling, gut-wrenching experience, while others want
to relax and watch the scenery go by. Often, the decisions whether to visit a ride is driven by
price considerations. Even the distance between rides can matter; a guest who is tired from
walking is less likely to want to do anything, but if your rides are too close together, the park
might seem crowded. There are many things to think about when deciding what type of ride to
build.
Transport Rides
These are the mildest of the mild. (In fact, in some people’s eyes, they’re
not rides at all.) Transport rides carry guests along a fixed track through
scenic areas, and they provide a low-thrill experience suitable for even the
most squeamish guests. They also act as an alternative to walking. Any
transport ride can have multiple stations, and guests use the ride to travel
from one station to the other–and from one area of the park to another.
When you build a transport ride, it’s always a custom design. (Please refer to the Building a
Custom Ride section for the details on constructing one of these.) Make sure to read the
specifications of the ride in the Ride Selection window before you begin construction. For
example, some transport rides (like trains) run in only one direction and must travel a circuit,
while others (like a monorail) can move back and forth on a single line of track.
Design Tips
• A transport ride is a great way to ferry guests to and from a newly opened area of the park
to which you want to draw interest. As an added benefit, you can charge them to get there!
• Don’t be too ambitious too soon. A giant transport network connecting the entire park will
be expensive to build. Build it in sections, and let the completed sections run while you
save up funds to build the next one and, eventually, connect them all.
• Transport rides with covered cars are popular when it’s raining.
Mild Rides
Low-thrill attractions are the bread and butter
of travelling carnivals, but in a park like yours,
they often play second fiddle to the giant roller
coasters. That doesn’t mean you won’t see a
profit from these. Many guests have little
tolerance for intense rides, and prefer
something more calm.
15
Page 8
Most mild rides do not involve custom design, and they tend to take up less space than the more
intense attractions. They rarely make guests sick, so you can build them near food service stalls
without worry.
Design Tips
• Elevated rides allow your guests to see other rides and areas of the park, which can spark
interest in visiting them.
• Covered rides are more popular when it’s raining.
• Rides that provide music often add to the atmosphere of the park, cheering nearby guests.
Roller Coasters
It will come as no surprise to you that the roller coasters are the primary
attraction in most parks. Coasters come in many types, starting with the oldstyle wooden tracks and progressing through steel to the newer inverted,
hanging, standing, corkscrew, single rail, and many other bizarre
permutations. What all of them have in common is that they strive to provide
a hair-raising experience, but also walk that fine line between exhilaration
and discomfort (or terror). A ride that is too intense gets no riders.
For every different type of roller coaster, there is at least one standard design. You can also,
of course, create a custom coaster. (Please refer to the Building a Custom Ride section for
the details on constructing one of these.) Whichever you choose, be prepared to use quite a
lot of space and spend a significant amount of your funds constructing the track. Each roller
coaster is a big draw and will likely bring you profit in time, but you pay up front for the
opportunity to add it to your park. When using a standard design, you can watch the information
in the Construction window as you position the ride; the price of construction is constantly updated
to reflect the cost of building the coaster exactly where the footprint marker stands. (If there is
no price listed, you cannot build the ride at the present location.)
Coaster Design Previews
For all of the standard designs, you can take a look at what the completed roller coaster will
look like–before you build it. In the roller coaster Design Selection window, select one of the
standard designs, then click on the Show Track button (the camera) to see the preview.
Even though you can save your roller coaster designs, these saved construction plans do not have
preview pictures associated with them.
Because roller coasters are such popular rides, you should be prepared for crowds–especially
when you first open a new track. Build a longer queuing line than you would for a less thrilling
ride; it will fill up faster than you think.
Roller coasters are also complex pieces of machinery, and the more complex a ride is, the more
often it will break down. Make sure that you have Mechanics in your employ to inspect and repair
your coasters. If a ride begins to break down more often than you
like, you can schedule inspections more frequently. That usually
prevents problems, but as a roller coaster ages, it will deteriorate
gradually until it is no longer safe to operate.
16
Design Tips
• Roller coasters are very expensive, but provide good profit over a long period. Price them
high when new, then gradually decrease the admission over time to keep the ride
reasonably popular and profitable.
• Coasters are high-intensity, sometimes nausea-inducing rides. It’s not wise to build them
too near the food stalls, and providing benches and bathrooms near the Exit is always a
good idea.
• Riding less intense rides near a coaster can often help guests get up the nerve to ride the
more extreme attraction. Consider surrounding a roller coaster with less exciting rides.
• Scenery and theme items placed near the track can add to the intensity of a ride,
especially when you create the illusion of an impending collision. Tracks that cross over
or under other parts of your park–footpaths, terrain, other rides, and such–are also
more exciting.
• Dropped food is not the only threat to the tidiness of your park. Handymen also deal with
the after-effects of ride-induced nausea. Keep enough on staff, or your park paths could
become quite disgusting.
• Most roller coasters are not popular when it’s raining.
Thrill Rides
In the excitement department, this is next step up from mild rides. Despite
their name, “thrill” rides are generally far less intense than even the tamest
roller coasters. Still, these attractions offer a good medium
point–exhilarating enough for most guests without being extreme enough to
scare them.
Thrill rides generally do not involve custom design, and most of them take up relatively little space in
your park. On the down side, many thrill rides seem to lose their novelty more quickly than other types.
Design Tips
• Guests sometimes need to sit down somewhere after an exciting ride. Consider providing
benches on the path near the Exit from a thrill ride.
• Some of these rides have a significant nausea factor. Take that into consideration when
placing food stalls and toilets.
• When a ride loses its novelty and ceases to make a profit, try lowering the price or
advertising for the ride. If that doesn’t work (or seems too expensive to be worth the effort),
think about demolishing the ride. If you then build a similar ride in a different area of the
park, you can sometimes regain the interest of your guests.
Water Rides
The thrill of riding on fast moving water
predates even the earliest amusement parks.
Confined and controlled, rushing water can
provide your guests with a spine tingling, yet
totally safe experience. In hot weather, they also
get a welcome chance to cool off.
17
Page 9

• Determine the location of the shop, making sure that the front side is connected to a path
(or a place where you intend a path to be), then click to build it.
• In the Shop window, set the price for each thing the shop sells (or the admission price,
in the case of a toilet) and give the shop a name.
• Open the shop.
What types of shops and stalls you can build depends on the successes your researchers have
had. Each shop attracts guests according to the person’s needs. For example, if a guest is
hungry, he or she will keep an eye out for a food stall. That’s a clue to the method of success
with shops and stalls–spread them around the park so that your guests do not need to go far to
fulfil a particular urge. The wants that these facilities serve are the kind that can make a guest
physically uncomfortable, and that can seriously detract from their park experience.
Food and Drink
The majority of the shops and stalls you can add
to your park serve food–and because there is no
other food supply, the park makes quite a profit
from hungry visitors. As with rides, the key to
success in the park food business is variety.
Different guests have different tastes, and you
make the most people happy when you provide
for everyone.
The main drawback to providing food and drinks to your guests is the end result–rubbish.
Discarded drink cups, food wrappers, and the occasional thrown away meal add up pretty
quickly to a disgusting, messy park. Once you begin serving food, you must provide rubbish bins
for your guests to use and hire a Handyman or three to help keep the park tidy. Here are a few
tips to keep in mind when building food service areas:
• Drink stands are more popular when placed near food stalls that sell thirst-inducing
products–salty things like popcorn, for example.
• Many guests prefer to sit when they eat. Provide a good supply of benches conveniently
located near any collection of food stalls.
• Guests tend to eat near where they purchased the food. Rubbish bins positioned near food
service stalls are a good idea.
• Very few guests come off of an intense ride looking for a meal. There are better places for
your food stalls than near the exit from a roller coaster with a high nausea factor.
• The combination of food and thrilling rides is the primary cause of guests feeling sick. If you
have a problem with this in your park, consider moving the food stalls farther from the more
intense rides–much farther.
It doesn’t much matter whether you cluster all the food together in “food courts” (with plenty
of benches and rubbish bins) or spread the stalls liberally throughout the park–as long as no
hungry guest has a long walk to satisfy his or her need for a meal.
19
Water rides come in all types, from the mildest paddle-boats to flume rides that rival roller
coasters in intensity and excitement. Almost all of them allow–and some require–custom design.
In addition, you can often specify the design of the water craft used in the ride. Make sure to
read the ride information in the Ride Selection window before you begin construction.
Design Tips
• Water rides seem to be most popular in dry climates, but they’re welcome in any park.
• Most water rides have a theme. You can increase your guests’ satisfaction by providing
scenery near the ride that matches or compliments that theme.
• Like transport rides, well-designed mild water rides give guests a good view of the park,
which can increase their interest in visiting other rides.
• Be aware of a ride’s nausea factor, especially for those with spinning rafts and whirlpools.
That way, you know when to provide benches and toilets near the Exit.
SHOPS AND STALLS
Even though your guests all came to the park for the rides and other amusements, once they’re
inside, they expect to be kept comfortable, too. That means that you should supply drinks, a
variety of food, toilets, and other amenities. Of course, your guests expect to pay for most of
these things. That’s where shops and stalls come into the picture.
Building shops and stalls is even easier than building simple
rides. Unlike a ride, a little shop doesn’t need an Entrance or
Exit, and a queuing line is also unnecessary. The only absolute
necessity is this: almost all shops have a predetermined front
side with a built in access window, and that front side must be
positioned next to a path in order for the guests to be able to
use it. The only exception is the Information Kiosk, which has
access windows on all sides.
Let’s briefly review the necessary steps for building a shop
or a stall:
Click the New Ride
button to open the
Ride Selection window.
Select the last tab
(the eating face).
• Select the specific type of shop by clicking the picture,
then click the Build This button.
The yellow arrow in the location pointer indicates the
direction the shop will face (the front). Use the Rotate
button in the Construction window (the curved red arrow)
to spin the shop until it’s facing the right way.
18
Page 10

FOOTPATHS
A park filled with rides, shops, beautiful gardens, and other entertainment is utterly useless if
the guests cannot reach any of the attractions. To be successful, your park must have a system
of footpaths to guide visitors through the grounds. This is especially true of larger parks; the
more real estate there is to tour, the more vital it is that you provide an efficient, well designed
layout of trails.
The footpaths in your park should be more than just a random assemblage of trails that provide
access to every attraction. An intelligent park design incorporates a system that keeps your
guests moving smoothly from one ride to another (herds them along, if you will). An efficiently
laid out path complex provides cues–some subtle and some not–that indicate to a visitor walking
the path what direction he or she is meant to travel. You should design your paths to do all this
while, concurrently, leading your guests to remain in the park and spending money for as long
as possible. (A park, after all, is first and foremost a business enterprise.)
Before we get into the step-by-step guide to laying down footpaths, here are a few pointers
toward building an effective park-wide path system. Be forewarned that some of them are
a bit manipulative:
• Think of your path system not as tree-like (branches stemming from a central path), but more
akin to a flowing waterway. From the moment a guest enters the park, he or she should be
channelled along smoothly, and presented with moments of decision (branchings and
intersections) only infrequently. This minimises the risk of stalling and congestion.
• The path should loop back on itself so that guests do not often need to turn around and walk
back the way they came. This will help to minimise two-way traffic. However, unless you are
certain that they will be out of money by the time they reach it, do not provide a route that
leads guests back to the park entrance (the exit). Remember, the longer they stay, the more
they spend.
• Keep the distance between attractions short, so that no guest has the opportunity to become
bored or overly tired while walking from one to another. When a long walk is inevitable,
provide benches along the way, especially at the tops of hills.
• Provide transport rides from point to point (every point near a ride) around the park. This will
lighten the traffic load on your path system and give tired guests an alternative to walking.
• Make sure that all of your attractions are visible from the footpaths. A guest will not think to
patronise a ride he or she does not know exists.
• Avoid creating double-width pathways and large paved areas. These allow your guests to mill
around, and can lead to confusion.
• To prevent crowding, provide alternate routes through the busiest areas.
There are two surfaces on which you can lay a normal path (one that conforms to the surface of
the land):
horizontal,
flat ground, and
simple hills, those with
no irregularities in slope.
Info and Souvenirs
As you get more proficient in building rides, stalls, the paths
that connect them, and the scenery that decorates those paths,
even the most intelligently laid-out park will become large and
complex. That’s when your guests start to want a map of the park.
That’s when you need to build an Information Kiosk. (Hopefully, your
researchers have developed one by the time you need it.) Supplying park
maps helps to greatly decrease the number of
guests who get lost, too.
Another important function of the Information Kiosk is the sale of umbrellas. Rain is a serious
problem for most parks, and yours is probably no exception. Though guests will not simply
abandon the park when it starts to rain (especially if they paid a significant price to get in), they
will avoid certain types of rides (roller coasters, for example) and be drawn to other types
(covered ones, specifically). If umbrellas are available for sale, your guests become much less
uncomfortable–and therefore less unhappy–in the rain. You also reap a tidy profit selling an item
that, while the weather lasts, everyone wants.
Toilets
Even if your park does not yet include any food
or drink vendors, your guests will need toilet facilities
and places to wash their hands, change children’s
diapers, and that sort of thing. When your park does
sell food and drinks, these little buildings become
even more vital to preserving the happiness of your guests.
You build a Toilet just like you would any other shop or stall. Here are a few important
considerations to keep in mind:
• Make sure that the building is facing the right way. The doorway must be directly adjacent
to a footpath for guests to be able to enter (and leave).
• It’s a good idea to locate the rest rooms close to food service areas. You want them
convenient, visible, and easy to find.
• Sometimes, guests will need a toilet after a particularly intense ride. Consider the ride’s
nausea factor, too.
• Unless your park is quite centralised, spread these facilities out around the grounds. The
idea is to prevent a guest from having to walk too far to relieve any condition that could
cause dissatisfaction with your park.
Just like any other ride or service in the park, you can charge admission for use of the rest room.
As always, this is a trade off between making enough income to cover the maintenance costs of
the facility and keeping your guests satisfied that your park is a good value for their money.
20 21
Page 11

You should take a good hard look at the area you’re planning on putting paths through. Make a
plan in your mind before you begin construction. Even though you do get a refund whenever you
remove a path that you misplaced or changed your mind about, the return is never as much as
the price of paving (so you lose money on the deal). To build ground-hugging footpaths:
Click the Footpath button (on the Toolbar).
This opens the Path Construction window,
and the mouse pointer changes to
include a footpath icon.
• Next, select the type of paving you want to use. There are four options:
Tarmac is simple paving.
Stone is a fitted layer
of cobblestone.
Dirt is a tamped dirt footpath
(the least expensive option).
Tiled is a patterned path built
of decorative bricks in odd
shapes (“crazy paving”).
• Position the mouse pointer over the land square where you want to begin paving.
• Left click to pave the square. To pave over long trails in one fell swoop, you can hold down
the mouse button and move the mouse along the path you desire. Every square you pass over
is paved. Release the mouse when you’re finished.
• If you need to remove a section of path, right click on it. You get a partial refund of the cost
of paving.
Note that you can use the various paving options to repave an existing path in a different style.
This costs less than building new sections of footpath.
Crossing Paths
When you create two sections of footpath adjacent to one another, they are connected at an
intersection, but only when at least one of them is on horizontal, completely flat land.
Footpaths placed side by side on sloped land squares run parallel and do not connect. That
means you cannot create a path along the side of a hill
22
Queuing Lines
Queuing Lines are special footpaths that lead guests form the main path to a ride Entrance.
These lanes are also the area where guests who are patiently waiting their turn to get on a ride
do their waiting. Without a queuing line, a ride draws much less custom, because those guests
who cannot board when they reach the Entrance simply turn away. These paths include
distinctive blue and white paving tiles, along with convenient handrails to make their purpose
quite clear to your guests.
To build a Queuing Line, you follow exactly the same process as you do when paving footpaths.
(In effect, the Queue Line is simply a fifth type of paving.) There is only one difference:
Make sure to click
the Queuing Line
button as your
paving type selection.
There are a few concerns you might want to keep in mind when creating your queues. Some of
these might seem obvious, but others are not quite so self-evident.
• No matter how attractive you find the blue and white tiles, Queuing Line should not be placed
anywhere except as a passage to connect a ride Entrance to a footpath. The distinctive
appearance of queue paving alerts your guests to its function, and you do not profit from
confusing the visitors to your park.
• Be very careful how you place the sections of Queuing Line. The first one that you place
adjacent to an existing path becomes the entry spot for the queue, and it’s easy to
accidentally connect before you intend to. It’s often best to create the queue first, before you
run a footpath to meet it (and the ride).
• Build the queue for an attraction longer or shorter depending on the popularity, the load size,
and the wait time you expect for the ride. For example, a roller coaster will require a longer
queue area than a slide, because the more exciting ride is more popular, each train load
carries far more passengers than the slide’s maximum capacity, and the ride on the coaster
takes longer to complete. In general, the longer you expect your guests to be forced to wait
for a ride, the more queue area you should provide.
• You do not need to build a queue for any shops or stalls, only for rides.
Working the Line
If the wait for a particular ride is excessively long and there isn’t much you can do to relieve
the situation, your guests can become restless and unhappy in line. You can hire an
Entertainer and assign that person to “work the line”–patrol the queuing area regularly. This
tactic often relieves some of the tedium of standing in the queue, and can mollify your
stranded guests.
23
Page 12

Raised Paths and Tunnels
Footpaths that follow the contours of the land are nice, but unless you make major alterations to
the land in your park, you’re going to need raised paths–to cross over water, build docks and piers,
travel along the sides of hills, reach elevated ride Entrances and Exits, and many other uses. You
might also like to construct tunnels for your guests to walk through. With a little imagination, you
can make the footpaths through your park almost as entertaining as one of the rides.
Building raised footpaths and subterranean passages is a bit more complicated than placing paths
on flat land, but it’s less complex than designing track for a custom ride. We’ll get to the step-bystep instructions in a moment, but first, there are a few general rules you should understand.
• Paths that do not conform to the land, can rise (and fall) only on a certain slope. This is a
safety regulation meant to assure the maximum structural strength of your guest-carrying
platforms. What it means to you is that you should always plan ahead and know how many
sections–and therefore how much horizontal distance–it will take to reach as high (or as low)
as you want the path to go.
• When two paths meet, they must be at the same height to connect and allow guests to walk
between the two. The height marks are quite helpful for this; you can make them visible using
the Height Marks on Land option on the View Options menu (the eye button on the Toolbar).
Crossing Paths II
A raised footpath can cross over another path, but only if the clearance (the vertical distance)
between the two paths is enough that a guest can comfortably walk along both paths.
• Horizontally, raised paths and tunnels can extend indefinitely, but the same is not true of the
vertical plane. There are limits to the height and depth (distance from ground level) that the
available support structures can safely bear. Safety regulations prohibit any construction
beyond what is reasonable.
A footpath, like a track, can only lead underground through a vertical
land face that is at least two levels high. This rule applies to both the
path section tunnelling into the ground and the one emerging out of
the ground.
Once you begin building underground, the landscape switches into the Underground View. (If you
need to get into this view later, use the Underground View option on the View Options menu–the
eye button on the Toolbar.) Except for the sections where the footpath enters and exits the
subterranean world, you build underground paths in the same way as you do bridges and piers.
24
Crossing Paths III
A footpath in a tunnel can cross under any path that is at or above ground level.
A tunnel path can cross over or under another underground path, too, but only if the
clearance (the vertical distance) between the two paths is enough that a guest can
comfortably walk along both the upper and lower paths.
To build sections of these special types of footpaths:
Click the Footpath button to open
the Path Construction window.
• Select the type of paving you want to use. All four types and queuing line will work.
Click the Free Path button (near the bottom of the window).
When you return it to the landscape are, the mouse cursor
appears as a land square highlight with an arrow inside.
• Position the mouse pointer over the land square from which you want to build–not the place
you want the raised path built, but the square you want that path to lead away from.
• Carefully move the mouse until the arrow in the highlight points in the direction in which you
intend to build, then click to approve the setting. The next section of footpath to be built
(the potential next section) begins blinking.
Use the directional Arrows to choose
which way the section you intend to
build will go. You cannot build
diagonally; safety regulations
allow only right-angle turns.
Next, click one of the Slope buttons
to set the incline of the section. There
are only three options: flat, uphill, and downhill.
• At this point, if you do not see a blinking ‘next section’ of path (you see only the pointer
arrow), that means that you cannot build the section with the settings you have selected–that
slope, direction, and location. Change something.
When you’re satisfied with the blinking (potential)
‘next section’ of footpath, click the Add This button
to actually build it. Before you build, you might
want to check the cost of the section; it’s listed
at the bottom of the Add This button. In general,
the more support a section needs (the higher a
bridge or the lower a tunnel), the more expensive
it is to build.
25
Page 13

• You can continue building from the section you’ve just built (without selecting a new starting
point), just like you do when building custom tracks. When you’re done, click the Conform to
Ground button to go back to making normal, ground-hugging paths–or just close the Footpath
window if you’re finished constructing paths entirely.
If you’ve made a mistake or change your mind, you can remove the section
of bridge you just built–not the blinking section (which isn’t built yet) by
clicking the Demolish button. You can also use the right mouse button to
remove sections of any type of path, as well as any objects in your way.
You can use the various paving options normally to repave existing free-built paths.
PARK MAINTENANCE
Building a park is undeniably the part of the job that allows you to flex your creative muscles,
but it’s the day to day operations necessary to keep the park running smoothly that really
challenge your foresight and competence. You are responsible for the maintenance of quite a
few complex pieces of machinery that–if something goes terribly wrong–could maim or even kill
dozens of people. The park is overrun every day by hundreds of guests, and it’s your duty to
prevent the less civilised among them from making a mess, breaking things, and ruining the park
experience for the rest. It seems like quite a task, and it is, but with a little preparation and
some help, you’ll find it’s not as difficult as you might expect.
Safety and Repairs
Safety is perhaps the single most important concern in any park. Let’s face cold reality for a
moment; if one of your rides has an accident, it is entirely possible that some of your guests
could be hurt or even killed. You can imagine the effect on the popularity of your park (the Park
Rating), not to mention that no one in their right mind will pay to get on that ride again–ever.
There is no way to completely eliminate the threat of an accident, but there are steps you can
take to minimise the risk. As a bonus, the same procedure also ensures that your rides will break
down less often. That cuts ride down-time, thereby increasing your profits.
What is this magical procedure? Regular inspections by a trained Mechanic, that’s what. In the
ride window for every ride, there is a tab for Operation Options (the gears). One of the options on
this display is Inspection. Using this, you can determine how often one of your park Mechanics
takes a good look into the machinery of this attraction. The less time between inspections, the
better for your safety record–especially on the bigger, more complicated, more dangerous rides.
Of course, you must have Mechanics to perform the inspections. If you have none, here’s how
to get them:
Click the Staff button to
open the Staff window.
26
Select the Mechanic tab.
• Click the Hire New Mechanic button once for each Mechanic you think you need.
For every Mechanic you hire, a Worker window opens. Using the features in this little window,
you control that particular employee.
To determine where the Mechanic starts his rounds, use the Pincers button. Move
the mouse pointer over the landscape and position the Mechanic (hanging
from the pincers) directly over one of the paths, then click to drop him there.
If you want to limit this Mechanic to a certain area, you can do so using the
Patrol Area button. While this button is depressed, you can click on the landscape
to mark the area (in blocks of a predetermined size) the Mechanic should patrol.
Make sure that a Mechanic’s area includes the Exits from all the rides you expect
him to serve; the Exit is the route he uses to gain access to the mechanical works.
Your new employee will wander the park, inspecting rides as his schedules demand.
The other benefit of having Mechanics in your park is that they–and they alone–can repair a ride
that has broken down. When any ride stops working, a radio call goes out to the nearest
Mechanic, and he hurries to fix the ride. (Do not use the Pincers button to move a Mechanic to
a broken ride; using the pincers cancels a Mechanic’s current job order, which would delay or
prevent him from repairing the ride.)
Use the Orders tab to make sure that a Mechanic is assigned to the jobs
you want him doing. You can have a Mechanic perform inspections, only,
spend all his time on repairs, or work as a generalist, doing both.
One last thing–you must pay your Mechanics for their services. Each one you hire takes a certain
salary every month. Employee paydays are one of the standard, ongoing operating costs of the
park, and you are not notified when they occur. The wise park manager keeps an eye on the
finances and is aware of it.
Just a Hint
Rides age just like anything else, and the older they are, the more wear and tear they have
experienced–especially the more popular rides. As time goes on, you should consider having
the older rides inspected more often. This will help prevent the frequent breakdowns that
often accompany the inevitable deterioration of the machinery.
27
Page 14

Cleanliness
A dirty park is an empty park. The most successful attractions in history have been, by and large,
the best maintained and the cleanest. Your guests expect and deserve a pleasant time at your
park, but they won’t get it if the paths are a sticky mess awash in debris. Most of the rubbish
problem stems from discarded food containers and the occasional dropped meal, but even if you
have not yet begun serving food, intense rides sometimes generate their own special form of
detritus.
One way to cut down on the food service debris is the strategic placement of
Litter Bins. Where should bins be? The best places are the logical ones–near
food service areas, outside toilets, and at the exits from the rides with the
highest nausea factors. However, there is no wrong place to put a trash
receptacle. Spread them liberally around the park (they’re inexpensive); they
seem to work especially well at intersections. To place a bin:
Click the Scenery button.
Select the Path Accessories tab.
• Click on the picture of the Litter Bin to select it.
• Position the mouse pointer on the section of footpath where
you want to place bins, then click. Bins are placed at every
appropriate point on that section of path.
Of course, not everyone bothers to find a bin for their litter, and sooner or later, the bins are full
and begin to overflow onto your footpaths. That’s when you need clean-up staff–Handymen.
These sometimes under-appreciated workers carry out the all-important everyday maintenance
of the park grounds. Handymen sweep the messes from your footpaths, empty the Litter Bins,
mow the grass between and around your rides, and water the gardens and ornamental plants that
make your park so attractive to the eye. What’s better is that it only takes a few well placed men
to keep the park clean and tidy.
Here’s how to hire and assign a Handyman:
Click the Staff button
to open the Staff window.
Select the Handyman tab.
• Click the Hire New Handyman button once for each Handyman
you think you need.
For every new member of staff you hire, a Worker window opens. Using
the features in this little window, you control that particular employee.
28
To determine where the Handyman starts his wanderings, use the Pincers button.
Move the mouse pointer over the landscape and position the man (hanging from
the pincers) directly over one of the paths, then click to drop him there.
If you want to confine this Handyman’s attention to a certain area (a good
idea, as they do tend to wander off), you can do so using the Patrol Area button.
While this button is depressed, click on the landscape to mark the area (in blocks
of a predetermined size) this Handyman should patrol.
Your new employee will wander the park (or his patrol area), performing whatever clean-up tasks
he comes across. What jobs he looks for is under your control (in the Worker window, naturally).
Use the Orders tab to make sure that a Handyman is assigned to the jobs
you want him doing. You can give each one any mix of the four basic duties:
sweeping, emptying, watering, and mowing. The worker will ignore any task,
no matter how badly needed, which is not his responsibility.
Of course, you must pay your Handymen for their services. Each one you hire takes a certain
salary every month. Employee paydays are one of the standard, ongoing operating costs of the
park, and you are not notified when they occur. A wise park manager keeps an eye on the
finances and is aware of it.
Employee Relations
The cleaning staff you employ will make an honest effort to keep the park in good condition,
but if you don’t check up on them now and again, they’ll do a poor job at best. Without
guidance (or a set patrol area), a Handyman simply wanders the park and does any job he
happens to bump into. It’s your responsibility, as park manager, to be on the lookout for
trouble spots and direct your clean-up crew to them. Managing Handymen, you’ll make
frequent use of the Pincers button.
Security
It seems that a certain small amount of bad behaviour is endemic to public places. Your park is
no exception–misfits might break benches, kick over litterbins, and wreak other sorts of
nuisance. Of course, you can take steps to prevent such vandalism.
Patrolling Security Guards keep the wrongdoers at bay! Without a few guards, the wilful
destruction done by a few can get out of control, spoiling the park experience for other guests.
A committed security staff can predict and prevent the majority of the damage.
Here’s how to get Security Guards:
Click the Staff button
to open the Staff window.
Select the Security Guard tab.
• Click the Hire New Security Guard button once for each
patroller you think you need.
For every man you hire, a Worker window opens. Using the features
in this little window, you control that particular employee.
29
Page 15

To determine where the Security Guard begins his rounds, use the Pincers button.
Move the mouse pointer over the landscape and position the guard (hanging from
the pincers) directly over one of the paths, then click to drop him there.
If you want to limit this guard to patrolling a certain area, you can do so using the
Patrol Area button. While this button is depressed, you can click on the landscape
to mark the area (in blocks of a predetermined size) the Security Guard should patrol.
As is true of Mechanics and Handymen, you must pay the Security Guards for their time. Each
one you employ takes a paycheque once a month. Employee pay-days are one of the standard,
ongoing operating costs of the park, and you are not notified when they occur. Keep an eye on
your treasury, and you’ll see it happen.
Undoing Vandalism
When vandalism does occur, the best course of action is simply to remove and replace the
damaged elements of the park. You should do this as soon as possible. That way, you keep
your guests’ visit as pleasant as it is in your power to make it.
Lost Guests
It is possible that none of your park guests will ever get lost. In fact, if you design your park well
and manage it carefully, you should never need to retrieve a visitor who has strayed away from the
music and fun of the attractions you’ve built. However, until you get to be that competent at park
management, your guests might wander off the beaten path from time to time. Here’s what you
can do about it:
• Find your lost guests. One of the best ways to do this is to scan the Summary display of the
Guest Info window. When you find the “I’m Lost” entry, click on it.
• Click on a specific lost guest to open his or her Guest window.
• Select the Pincers button.
• Move the mouse pointer across the landscape until the visitor you’ve retrieved is over a
central footpath (preferably near rides).
• Click to drop the guest (gently) on the path.
How often guests become lost depends entirely on the system of footpaths in your park. Try to
avoid dead ends, complex routes, and long trails to nowhere. Your footpaths should be designed
to lead the visitors past the entrances to as many rides as possible (though without making the
rides seem like they’re crowded together too closely). In a well-thought-out park, there are few
if any paths that do not lead to attractions.
30
Park Maps
One of the benefits of the Information Kiosk is that it provides maps of
the park to your guests (at a price you control). If you can build these
stalls, do so. Having a map handy significantly reduces a guest’s chances of
getting lost.
PARK MANAGEMENT
By now you know that building the park is only the beginning. To be really successful in this sort
of endeavour, you must both maintain what you’ve built and manage the business of the park.
We’ve discussed maintenance already; this section is all about managing. Your responsibilities
and concerns as a park manager can be grouped into four broad categories: Finances, Handling
Guests, Marketing, and Trouble. Let’s take them one at a time.
Keeping Your Guests Happy
As we’ve said before, the satisfaction of your park guests is probably your most vital concern.
Happy visitors stay in the park, spend more of their money, and (through reputation and word of
mouth) draw other guests to your site. Unhappy guests leave.
How do you know what your visitors are thinking and feeling? As manager, you have access to
powerful polling and reporting tools that let you monitor the thoughts and actions of every guest
in your park. Here are a few of the most useful:
Guest Info The Guest Info window tracks the thoughts and actions of every visitor to your
park. (T o open this window, click on the Toolbar button with the crowd of faces
on it.) There are two display tabs in this window. The first lists the current
thought and action of each guest in the park; this can be useful for getting an
intuitive “feel” for their attitudes. The second tab summarises for you the
actions and thoughts of every guest, and presents them in descending order
of frequency. This is perhaps the most useful report for finding incipient
problems; if there’s a negative comment near the top of this listing, it’s a call
to arms for you to do something about the situation.
Guest Windows For a more detailed (but less complete) survey of visitor opinions, you can click
on any guest to open a Guest window. In it, you can see what the guest is doing,
what he or she has spent since entering the park (and on what), and the items
that visitor is carrying. More important, this window shows you how the guest is
feeling and what he or she is thinking about your park and the attractions in it.
Ride Info If you open the Ride Info window (using the button on the Toolbar), the default
display is the current status of every ride. However, that’ s not the only information
in this window. Using the Data Selector, you can see how your rides rate with your
guests for satisfaction, popularity, and other helpful measurements.
Park Rating Watch the Rating bar in the Status Box (in the
lower left-hand corner). Position the mouse
pointer over the bar to see the actual rating. This
number (between 0 and 1000) reflects your
guests’ overall impression–of ride design, park
layout, tidiness, value, efficiency, etc. This is a
great barometer of your park’s success or failure,
although the rating will never tell you what a
problem is, only that there is a problem.
31
Page 16
The guiding principles to guest happiness are twofold, and both can be traced back at least as far
as the legendary Mr. Barnum. First, give the customers what they want. If they’re hungry, supply
food; if they’re tired, give them a place to rest. Second, always leave them wanting more. Every
guest should stay until he or she has no money left, and then leave happy. More to the point, here
are some specific ways you can keep the general level of guest happiness high.
Keep the park tidy. No one enjoys walking in rubbish. Keep your park from becoming messy,
and you prevent your guests from being disgusted by it. (This is covered in more detail earlier,
under Cleanliness.)
Foresee and fill visitor’s needs. A little preparation goes a long way toward preventing
unhappiness. For example: If you serve food, your visitors will need toilets and litterbins; provide
them before there’s a problem. Salty foods make guests thirsty, so build drink stalls. Think about
causes and their effects, and you’ll be ahead of the game.
Don’t let guests stay lost. A visitor who wanders away from the main attractions is not having
fun. Maps of the park can prevent this, and a sharp-eyed park manager (you) can spot and
retrieve lost guests. (This is covered in more detail earlier, under Lost Guests.)
Provide something for everyone. Yes, roller coasters are the focus of the park, but not everyone
enjoys riding them–and even those who do want to ride something else now and again. Maintain
a balance of rides running the gamut from mild to intense, and you will maximise the number
of people you satisfy. Variety is the key if you want to appeal to a wide spectrum of
customers–and you do.
Keep the rides running. An attraction that is idle brings in no income and satisfies no guests.
Try to minimise the amount of time each ride sits waiting for repair–down time. (This is covered
in more detail earlier, under Safety and Repairs.)
Novelty is king. A ride that is newly built and opened attracts more custom than one that has
been running and available for a couple of years. Old rides just don’t excite your guests as much
as something fresh. Keep this in mind, and use human nature to your advantage. As time goes
on, you can generate business by opening a new ride every now and then. Pace yourself well,
and your park will never seem “stale” to your visitors. Be aware that you might be forced to
dismantle an ageing attraction that no one visits any longer.
Charge reasonable prices. There is no strict rule for pricing your rides and the park entrance fee,
but you should take into account that your guests have limited resources. They will not pay
insane amounts to enter the park, nor will they patronise over-priced attractions. In the long run,
a moderately priced ride that gets twice the business makes more profit than a premium
attraction that gets fewer riders. Here are a couple of general rules that should guide you in the
right direction: If the entrance fee is high, guests decide whether to enter based on the park
rating. Once in, they expect low or nonexistent fees for the individual rides. Conversely, if there
is no entrance fee, they’re willing to pay premium prices for each attraction. Also, everyone is
willing to pay more to experience a newly-built ride than they are for an ageing, “stale”
attraction. As a ride ages, you might be forced to lower the price of admission to maintain the
same level of popularity.
Avoid excess nausea. Everyone comes to your park hoping to
enjoy themselves. If they’re feeling sick, they are not having fun.
Though most guests will avoid rides that exceed their personal
capacity for motion sickness, some overestimate themselves. Try to
keep the nausea factor of your rides to reasonable levels. Provide
plenty of benches, on which disoriented visitors can sit and regain
their equilibrium. Consider placing food stalls far from the more
intense attractions.
32
Prevent crowding. When the paths and other public areas of your park become overcrowded, your
guests cannot avoid jostling each other, and they can become annoyed. It’s your duty to prevent
the situation from degrading into fisticuffs. Try to alleviate congestion by providing alternate
routes for greater freedom of movement throughout the park.
Be prepared for bad weather. No matter what climate your park seems to have, remember that
it’s strictly part of the atmosphere–the scenery. Every park is near a residential area ( handy
source of guests), and the weather in the area is moderate. Your park might look like it’s in a
desert, for example, but in reality, it was established in a sandy, dry area with dunes that
resembles a desert–which you can take advantage of by building a park with a desert theme. The
point of this discussion is that no matter where your park is, it occasionally rains there. Most of
your visitors do not like to get wet, and they will not ride intense or even mildly dangerous
attractions in the rain. T o prepare for this, you should make sure to provide rides that are popular
in the rain–covered rides and ones that are viewed as being perfectly safe.
Profit Tip
When it rains, all your guests want umbrellas, and the only place they can get them is at your
Information Kiosks.
Finances
Managing the park’s funds is much simpler than you’re likely to suspect. Most of the detail work
is done by reliable lower-level managers in your park and by an entirely trustworthy accounting
firm–none of whom take salaries or fees from your working capital. Having all that expertise at
your disposal does not, however, mean that you can just sit back and let the money take care of
itself. If you’re not watching the store, no one else will do it for you.
Here’s the set-up. In each scenario, the park comes “as is”–you need not purchase the existing
land and attractions, but you must pay upkeep where appropriate. You have borrowed a certain
amount from the bank to make improvements to the park under your management. This loan
constitutes your working capital, also called cash-on-hand (COH). That and whatever income you
derive from guest spending in the park are your only sources of funding. What you spend on
improvements, plus salaries and upkeep, are your expenditures.
Fiscal Reports
Park finances are not tricky–as long as you pay attention to where your money is going. Luckily
for you, there are a number of reports to help you do so. Let’s start with the most
informative–those in the Finances window.
Click this button (on the Toolbar) to open the Finances window. There are
five tabs in this window, each of which calls up a different display. All but
the rightmost (the Marketing tab, discussed later) provide financial reports.
• The first report is a detailed listing of your expenditure and income on a month by month
basis. This is the most in-depth of these reports; use it to track exactly where your money has
come from and where it has gone. Near the bottom, this report also lists:
1) The amount of your loan, over which you have limited control.
2) Your Cash-On-Hand (COH).
3) The value of your park (which is explained shortly).
4) Your Company Value–the Park Value, plus your COH, minus
the amount of your loan.
33
Page 17

• If customers complain that the ride is not good value or that they can’t afford to go on it
(or won’t pay that much), consider lowering the price of admission.
• Plenty of riders, but you’re still not making a profit? Maybe you should raise the price.
• If a ride is very old and breaks down frequently, you should decrease the time between
inspections and consider demolishing it and building a new one.
• Perhaps the wait for a ride is too long. Check the way this ride operates (number of trains,
cars per train, wait times, and so on). Maximise the efficiency of the attraction, and the lines
will flow more smoothly. If that’s not the source of the trouble, you can also consider building
a longer queue and raising the price (so that there are less people in line).
• If the price of an older ride is very low, but still no one will patronise it, then the ride has
probably lost its novelty. Consider a marketing campaign–or demolition.
• A brand new ride has no customers, and none of the guests in the park has any thoughts
about it. What’s wrong? Chances are your visitors can’t find it or get to it. Check your system
of footpaths and make absolutely sure that the ride is accessible. Next, make sure that the
ride is open.
Need Money?
If you need extra money, you can often (not always–the bank has certain rules) increase the
amount of your loan. To do this:
Click the Finances button to
open the Finances window.
Your loan is listed at the bottom of the default display
(the first tab). Click the up arrow next to the amount
to borrow more, in increments of one thousand per click.
Some park managers are uncomfortable with the idea of being in debt to the bank. (Then there
are the monthly interest payments to consider) At any time when you have enough cash on hand,
you can pay off a portion of your loan. Follow the instructions above, but use the down-arrow
instead of the up-arrow. Whatever amount of the loan you pay off is deducted from your COH.
• The Cash report is second in line. This is a graph of your COH, minus the total amount of your
loan from the bank, over time. The current total is noted at the top. Unless your COH exceeds
the amount of your loan, this number is red to indicate that it is negative.
• The third tab calls up your Park Value graph. This is a somewhat elusive number, calculated
by expert assessors to reflect what the park is worth in terms of the value of the land and
equipment owned, the quality and profitability of the rides and the park as a whole, plus the
park’s overall public reputation, as determined by the Park Rating.
• Lastly, the Weekly Profit report graphs your financial history on a weekly basis. This is the
most volatile of all the statistics presented here, because each data point reflects such a short
time period. The important datum here is the Current Profit, listed at the top. If this is a
negative number, you’re losing money right now, and chances are good that you need to
change something.
Sources of Income
How you create and maintain a safe, attractive park in which the rides are popular and the
guests stay happy are subjects that are covered elsewhere. What we have not yet discussed,
except in asides and brief notes, is the method of making sure that each ride is profitable. First
of all, you need a way to get information on which of your attractions is making money, which
is not, and why.
To survey your park’s financial health on a ride-by-ride basis:
• Click on an attraction to open its associated Ride window.
In that window, select the Income and Costs
tab to see a breakdown of this particular
attraction’s financial status.
For a summary of all your rides and shops:
click the Rides Info button
(on the Toolbar).
• In the window that opens, use the small arrow button to open
the list of Ride Data options.
• Select Profit from the list
• Click the nearby Sort button. The least profitable attractions
fall to the bottom of the list.
Once you’ve identified the places where you need to make adjustments, you should use these
same techniques to find out what’s wrong and what sort of changes you need to effect. Check
on the popularity of each attraction, the level of guest satisfaction, and the thoughts of your
visitors about each problem ride.
Many, many things can go wrong, but the good news is that most of
the potential trouble spots are under your control in some way. Of
course, in the park business as in all aspects of life, there are no
guaranteed sure-win procedures. There are, however, a few reliable
general strategies.
34 35
Page 18
Desperate Measures
You’re out of cash and the bank won’t give you any more funds. The end of the month is
approaching, and you can’t meet your payroll. What’s do you do?
• Wait. You can go into the red (negative numbers) for a short time, and your park keeps
running. As long as your rides are generating income, you should eventually rise out of the
depths of debt. (If not, make some changes!)
• Dismantle attractions, especially the less profitable ones. This generates immediate
income, though not as much as you might expect. It also relieves you of concern for the
demolished ride, and of whatever long-term profit it might have brought.
• Remove footpaths. At a few dollars a pop, this isn’t the most lucrative operation, but most
parks have pathways that they can run smoothly without.
• Raise prices. This works in the short term, but it might eventually cause dissatisfaction in
your guests. Of all the options, however, this is probably the safest overall.
Marketing
Word of mouth is the best advertising (so the rubric goes), and a high Park Rating is certain to
attract guests to your gate. However, reputation is not the only form of marketing, and you should
seriously consider making use of every public relations tool at your disposal.
First, click the Finances button
to open the Finances window.
Next, select the Marketing tab.
The options in this display allow you to launch professional campaigns with the intended result
of drawing greater numbers of visitors to your park. All you need to do is:
• Select one of the campaigns.
• If necessary, choose which of your attractions will be affected by the campaign.
• Use the tiny ‘up and down’ arrows to adjust the length of time you want the marketing effort
to run. The marketing agency charges by the week, so be careful of rising fees.
• Click the Begin This Campaign button that appears near the bottom of the display.
Here’s how the various campaigns are supposed to work:
Vouchers for free entry to the park allow guests to forego paying the park admission fee.
Obviously, this is of no benefit to them if you don’t charge for entry into the park, and thus it is
of no value to you. You do not collect the money for admission from guests bearing vouchers,
but those individuals are a little more willing to spend for attractions once inside the park.
Vouchers for free rides on a particular ride draw visitors by making
one of your rides free (you select which ride). You lose some income
due to guests not paying to get on that ride, but you’re sure to make
up the difference (and then some) through increased admissions to
the park and the other money the guests are likely to spend. This
is also an effective way to raise the popularity of a particular ride
or to get some benefit out of an older, less profitable attraction.
36
Vouchers for half-price entry to the park are similar in effect to the free entry vouchers, except
that these leave you some income from admissions. (Less ethical park managers raise the price
of admission to compensate.)
Vouchers for free food or drink work in much the same way as those for free rides. Food and
drink concessions are one of the mainstays of income in many parks. After all, your guests must
eat, and your stalls are the only source of food in the park.
Advertising the park, though more expensive than any of the voucher efforts, is also more
effective in attracting custom. Your marketing agency creates a media-based ad campaign (you
can rely on their expertise) and pursues it for as long as you choose. This costs you nothing in
terms of lost income, because you’re giving away nothing for free.
Advertising a particular ride works best when it’s a new attraction you’re touting. This campaign
draws public attention to one ride–if you’re wise, you’ll advertise a big-ticket item, a “headliner”
that you’ve located near the back of the park (so that guests must pass all the other tempting
attractions on the way to it). As with advertising the entire park, this is one of the more expensive
campaigns, but you lose nothing in income–and the added business should far exceed the cost
of advertising.
Marketing Theory
You can have any combination of campaigns–even all of them–going on at the same time. It’s
entirely up to you how you spend your money. Some claim that saturation is the most effective
tactic–throw advertisements at the public on every channel until they can’t take a breath
without thinking about your park. Others advise that you should generally avoid too much
overlap, for fear of competing with yourself and confusing your message–after all, people have
only so much attention to pay. Whatever theory you abide by, just remember that it’ s your park
development money you’re spending. Be prudent.
Troubleshooting
Some potential problems don’t easily fit into categories. That’s what this little section is all
about; it’s a catch-all for management issues you’re likely to run into sooner or later–and you
want to be prepared for anything in this business.
Ride Crashes
Old rides, intense rides, and those that are not inspected often enough have a tendency to break
down. Even worse, however, is when one crashes with guests onboard. This is a catastrophe–it
is possible for guests to die. Obviously, you want to prevent this. The only way to do so is to
schedule regular inspections of every ride, especially the more dangerous ones. Have enough
Mechanics in your employ to the cover schedule you’ve set.
Note
Some rides–the Hedge Maze is a good example–cannot crash.
Crashes are also extremely unlikely on mild rides such as the Merry-Go-Round.
Generally, if something is going to crash, it will be a roller coaster.
Assuming that you’ve done all that you can to prevent injuries, there
is still the small chance that a ride will crash, as an example of the
sheer perversity of the universe. You cannot recompense the victims
or their families, but you can repair the ride. Double-click on the red
light in the Ride window to reset the ride, then click the green light.
If the crash was the only problem, the ride reopens immediately. If
there was also a breakdown, the usual radio call goes out, and a
repairman comes to fix that problem. When he’s done, the attraction
reopens as usual.
37
Page 19
Buying Construction Rights
In RollerCoaster Tycoon, owning “Construction Rights” to a piece of land means that you do not
own the land, but you are allowed to build park attractions that extend under or over that land.
Why is this useful? Why not just buy the land outright? Well, there are a few reasons, but one
sticks out as the major motivation why you might prefer to buy construction rights rather than
purchasing the land itself–the land in question might not be for sale.
You could find yourself in a situation in which your park is bounded by a piece of land you cannot
own–a public road, for example. If there is available land on the other side of that road, and you
would like to buy and use that land, you have no other option but to purchase construction rights
for the land on which the road sits. Afterward, you can build footpath bridges, tunnels, and even
portions of rides that cross over and under the road. This tactic works any time two pieces of land
you own are separated by a parcel you cannot purchase.
To gain the rights to build over or under an area of land outside your park:
Click the Park Status button
or the Park Entrance to open
the Park window.
Select the Construction Rights
button from that window.
For a better view, use the Zoom Out button. Any parcel
of land (single square) for which construction rights
are available is marked with a tiny “For Sale” sign.
Click on any parcel to purchase the
rights to build above or below that land.
When you’re finished, click the button again
(or simply close the Park window) to remove
the signs and return to building your ride.
Now you can continue and finish building the ride.
Beyond the tragic loss of life and the grief of the families, there’s also your ongoing profit to
consider. You have quite a large investment in the attraction, but even after it’s been repaired,
inspected, and repainted, this ride is a pariah. Everyone who visits your park has heard about
the wreck, and no one is willing to get on the ride. What do you do?
You have two options: cut your losses and tear down the ride, or–wait. The public has a short
memory. Even a colossal tragedy in which hundreds of guests are sent to their death will,
eventually, be forgotten. Of course, lesser misfortunes are more quickly erased by time, and the
wait could be several months. This is, perhaps, one of the less attractive aspects of human nature,
but in this case, it works to your favour. If it makes you feel any better, you can rename the ride.
Out of Space
When the time comes to build a new ride or expand an existing one, one of the first things you
must do is find a place for it. What happens, however, when you can’t fit a ride into the area
where you want to put it? Worse, what can you do when the entire land area of your park is full?
Assuming for the moment that you don’t want to choose another location for the ride in question,
you have two options, each of which is more appropriate in certain situations.
Enlarging the Park
The more likely prospect when you wish to build outside the boundaries of your park is that you’ll
wish to simply extend those boundaries by purchasing parcels of the surrounding land. Among
other reasons, this ensures that you can add footpaths and scenery items to the newly-bought
land (which you cannot do if you purchase only construction rights).
To buy an area of land outside your park:
Click the Park Status
button or the Park
Entrance to open
the Park window.
Select the Buy Land
button from that window.
For a better view, use the Zoom Out button. Any parcel of land (single square) that is
offered for purchase is marked with a tiny “For Sale” sign.
Click on any parcel to buy the land outright.
When you’re finished, click the button again (or simply close the Park
window) to remove the signs and return to what you were doing.
38 39
Page 20

One last thing–you must pay your Entertainers for their time and effort. Each one you hire takes
a certain salary every month. Employee pay-days are one of the standard, ongoing operating
costs of the park, and you are not notified when they occur. A wise park manager keeps an eye
on the finances and is aware of it.
Landscaping
You can build a park on the land as you find it, around the bodies of water already in place,
using only the trees and other landscaping that nature and history have provided. You might even
create a successful park in that way. Stranger things have happened. However, you’ll find that
your job is much easier if you see the terrain and flora as raw materials to be worked and
moulded to your needs. You can change the environment, and in most cases in RollerCoaster
Tycoon, you would be wise to.
Landscaping includes not only planting decorative plants–flower beds, shrubbery, trees, and so
on–but also modification of the land and water itself. Sometimes, you’ll need to create flat land,
or a lake, or even hills. You might decide that a giant pit in the ground fits the atmosphere you’re
creating in your park. Whatever the need, the landscaping tools at your disposal can handle it.
Altering the Terrain
When you take over a park, you inherit the land formations that nature and history have
supplied–hills, lakes, cliffs, and so on. Only in rare cases will the lay of the land be completely
amenable to your intentions. You can use what’s there to your advantage, especially if you’re
inventive, but the time will come when you decide that you must make substantial changes.
Changing the land is an expensive process, so why do it? The foremost reason is necessity. It’s much
less expensive to build most rides and footpaths on flat land. It’s also easier. If your park does not
provide enough flat areas, you might decide that it’s best to make your own. The second, more
interesting reason, is to add to the excitement and visibility of your rides. Let’s let a few examples
explain this concept:
1) What’s easier to find and more exciting to ride, a Ferris Wheel in a valley or one on top of a
high hill?
2) If you’re racing on a Go-Kart track, does your heart beat faster rounding a hairpin turn at
ground level, or one that skims the edge of a sheer cliff?
3) When a roller coaster roars downhill, is it more exhilarating to be hurtling toward open air or
a rough stone wall before the car flashes into a tight turn at the last second?
Of course, in some cases, you can save money and make a ride interesting by building it to
conform to the natural landscape, but those opportunities come few and far between.
You have two powerful tools for “managing” the land inside your park boundaries. Together, the
Land and Water boxes give you the power to literally reshape the earth. Keep an eye on your
spending, though, when you’re using these tools–moving the earth is an expensive proposition.
Click the Land button to open the Land box. You’ll notice that your
mouse pointer changes to include a shovel icon. Pay attention to
the shape of the highlight on the ground as you move it.
When a whole land square is highlighted, you can click
and hold the mouse button down while you move the
mouse up to raise that square or down to lower it. This
does not introduce any incline to the square, but will
flatten a sloped area.
Words to the Wise
When buying land or construction rights, there are two considerations that any smart park
manager keeps uppermost in mind. Forget these at your own risk.
• Watch your funds. Land is expensive, and when you start buying parcels of it, you can run out
of money faster than you might think.
• Whenever possible, always buy from the fence outward. That is, don’t purchase land that
is not immediately adjacent to land you already own. Why not? Well, if you run out of
money part way through your intended purchase, any land that you can’t reach is useless
to you until you can buy the intervening property.
BUILDING A BETTER PARK
There are little hints and bits of advice on ways to make your park better spread all throughout
this guide, but we’ve not yet touched on three of the more effective tools you have. None of these
is absolutely necessary for creating a successful park, but they all can be useful–especially in
the more difficult scenarios. If you choose to ignore these, you’re making things tougher on
yourself, and why would you want to do that?
Entertainers
If you’ve ever been to an amusement park, you’ve probably seen giant animals walking about on
two legs. Of course, these are park employees in costume; hired Entertainers. These hardy souls
wander about the park in hot, stuffy, animal suits, spreading cheer and keeping the guests happy.
Your park, too, can have its share of frolicking big animals with enormous heads. Here’s how to
get them:
Click the Staff button
to open the Staff window.
Select the Entertainer tab.
• Click the Hire New Entertainer button once for each roving
performer you think you need.
For every Entertainer you hire, a Worker window opens. Using the
features in this little window, you control that particular employee.
Use the Orders tab to outfit the Entertainer in the animal suit of your
choice. It’s better to have a variety of costumes wandering your park;
if they’re all the same, the positive impact on your guests is less.
To determine where the performer starts his rounds, use the
Pincers button. Move the mouse pointer over the landscape
and position the Entertainer (hanging from the pincers)
directly over one of the paths, then click to drop him there.
If you want to limit this giant happy animal to a certain area,
you can do so using the Patrol Area button. While this button
is depressed, you can click on the landscape to mark the area
(in predetermined blocks) the Entertainer should patrol.
Entertainers rarely stray from the footpaths.
40 41
Page 21

The Water box is similar to the top portion of the Land box. It has the same Area
of Effect controls, which work in essentially the same way. (One exception is that
there is no slope feature for water.)
To create or modify water:
• Position the mouse pointer over the area you want to work with.
• Click and hold the mouse button down while you move the mouse up to raise
or down to lower the level of the water. Note that you can only fill an area with
water from the ground up. If you want water at or below ground level, you must
lower the land first.
• Release the mouse button when you’re done.
When you’re working with water above sloped land, notice that the water fills in the lowest
portion of each square first, following the slope. You can use this to your advantage to create
natural-looking borders on your pools and lakes.
Decoration
A park filled with attractions, paths, and all the things already covered in this guide is a good
park. Your guests will be happy with that. However, if you want to build a great park, you’ll have
to do more. You need scenery–decorative trees, hedges, shrubs, fences, walls, lighting, and
more. These are the final touches that make your park more than fun; they make it a pleasant
place in which to have fun.
Do not underestimate the effect of scenery. To take just one example, a cool path lined with
shady trees is much more pleasant on a summer day than a ribbon of melting asphalt baked
under direct sun. Also remember the exciting effect that strategically placed items can have
on your rides. You can drastically raise the excitement ratings of an attraction by judicious use
of nearby trees.
Here’s how to install scenery:
Click the Scenery button on the Toolbar to open the Scenery window.
This contains everything you need to landscape your park. Each of
the tabs in this window covers a different type of scenery. Research
can often add whole new tabs, too!
Use this tab to add
Trees of many kinds.
Shrubs & Bushes, including
topiary, are under this tab.
Click this one to place
Tropical Plants–palms,
cacti, and that sort of thing.
Pre-designed square
flower Gardens come
in a variety of colours.
43
When only a corner of the square is highlighted, you can click and hold the mouse button
down while you move the mouse up to raise or down to lower only that corner of the land. The
incline of the square changes to adapt to your modification.
You can use the Area of Effect controls to enlarge
the area of land you’re working with. The buttons
in the corners change the area, and the displayed
grid adjusts to keep track. You cannot adjust corners
when working with more than one land square.
Sloping
You can grab a single land square, raise it or lower it, and drag all the adjoining land along
with it. This is how you create sloped land formations–otherwise known as hills and valleys.
• When the Land box is open, click the Minus button to decrease the area of land you’re
working with one step smaller than the default single square.
• Position the mouse cursor to choose a square, just as usual.
• Click and drag to raise or lower that square, as usual.
• As you change the height of that centre square, the surrounding land is pulled along with it.
Remember that when you create a slope in this way, you are not only adjusting the height of
the selected land square. You pay for the change in all of the land you’re moving. This can
be extremely expensive if you’re not careful!
There are two other groups of buttons in the Land box. Each of these buttons toggles on and off,
but they are exclusive within each group–you can only activate one at a time. You use these to
change the appearance of the land formations as you work with them. Whichever of these you
have active is applied to any land square you click on as long as the Land box remains open.
That is, whenever you click on an area of land, you resurface it with the selected active textures,
regardless of whether or not you change the height of the land.
• The upper group controls the appearance of the land surface.
• The lower group changes the appearance of the exposed vertical edges of land formations–the
places where the slope of the land does not meet the surrounding ground.
If none of the appearance buttons is selected, whatever land you select and modify retains the
appearance it has; there is no change other than any height adjustment you make.
More Information
The tools in the Land box are formidable, and we really only touch on their potential in this brief
discussion. For more details, please read the Land subsection of The Toolbar, in Reference.
42
Page 22

Footpath Accessories include necessary items like benches, litter bins, and street
lamps. These are vital to your park’s efficiency and cleanliness, and to the comfort of
your guests. Accessories can only be built on footpaths–benches only on the flat
sections.
Walls, fences, and hedges fall into the category of Borders.
Using these, you can produce pleasant decorative boundaries
perfect for edging paths and scenic gardens.
Statuary includes many types of statues
and fountains. These can be expensive,
but add greatly to the beauty of your park.
• Once you’ve chosen the type of scenery you intend to install, click on the picture of the
specific item you want to add to your landscape.
Use the Rotate button to orient the object exactly the way you want it.
Note that for some things, there’s neither need nor opportunity for
rotation–fences and footpath accessories, for example.
• Move the mouse pointer to where you want the thing installed. You’ll notice that the cursor,
once it moves out of the Scenery window, reminds you what object you have selected. For
example, if you’re placing trees, the cursor includes a tree icon. Also, the highlight on the
land reflects the space needed to install the item you’ve chosen. Most items require one or
more complete squares, however, smaller items (like certain shrubs) need only a quarter of a
land square, and border items (fences and such) take up only the edge of a land square.
• Click when you’ve found the right location, and the scenery is installed. Any cost is deducted
from your treasury.
When you wish to remove an item, make sure that you’re in one of the construction modes (any
window that allows you to build something is open), place the cursor over the item, check the
Message Area to be sure you’re in the right place, and right-click. Your treasury is immediately
modified by any fee or refund.
Research
As we’ve mentioned a number of times already, novelty and variety are remarkably important to
the continued success of your park. When you begin any scenario, your options in terms of rides
and other attractions might seem rather limited. That’s because they are. At the start, you have
only the bare minimum needed to get underway. To discover more forms of guest entertainment,
you must do research.
You have at your disposal a research and development (R&D) team composed of experienced
designers and engineers–and a few safety experts. These highly trained people will invent
not only completely new rides, but also improvements to existing designs, ways of building
scenery that fits a certain theme, and new shops and stalls for your
guests’ convenience. With their research successes in your hands,
you can continually upgrade your park, thus keeping up the allimportant levels of novelty and variety and attracting greater
numbers of visitors.
44
The only catch is that you must pay for the research efforts–every month. Let’s look at how you
control your researchers.
Click the Research button on the Toolbar to open the Research window. What you see
is the Current Research display, which tells you what development your R&D team is
currently working on and when they expect to complete it. Below that is a summary
of their previous achievement (if any). This display is for information only.
Select the Research Funding tab to
take control of your efforts at invention.
• The Research Funding setting is what you use to determine the level of support you want to
give your researchers. The more you pay, the faster you’ll get results.
• Below that are the Research Priorities boxes. Clicking any of these controls whether that
particular category of research is included in your team’s efforts. (A check denotes an
included item.) When the R&D folks finish a job and start fishing around for their next
project, they will only look into the categories you’ve left open to them. Note that if you leave
no items selected, no research goes on, but you still pay for it.
Research Limits
If a particular research category is greyed out, that means that no further developments are
available in that area. Your expert team has exhausted the possibilities in that category.
The R&D prospects are different in each scenario–you cannot discover all the possible items
and improvements in every one. It’s up to your researchers to let you know what can and can’t
be discovered, then to invent it for you.
When your R&D team meets with success, a notice in the Message Area alerts you to their
findings. You can use the new discovery immediately (provided you have the space and funding).
Note that you cannot make improvements to an existing ride without first closing the ride.
Awards
By the time you get your park up and running, you’ve done a lot of work. The satisfaction of a
job well done is its own reward, of course, but if you’ve done well, there are others you might
earn. Several national organisations keep a watchful eye on parks like yours, and each year they
give out awards in a number of categories. For example, there are established awards for the
Tidiest Park in the nation, the Safest, and the Best Value, just to name a few.
You’ll be notified in the Message Area of any award you receive. These awards are stored (for a
time) under the Awards tab of the Park window. Any time you wish, you can go there and bask
in the evidence of your excellence.
45
Page 23
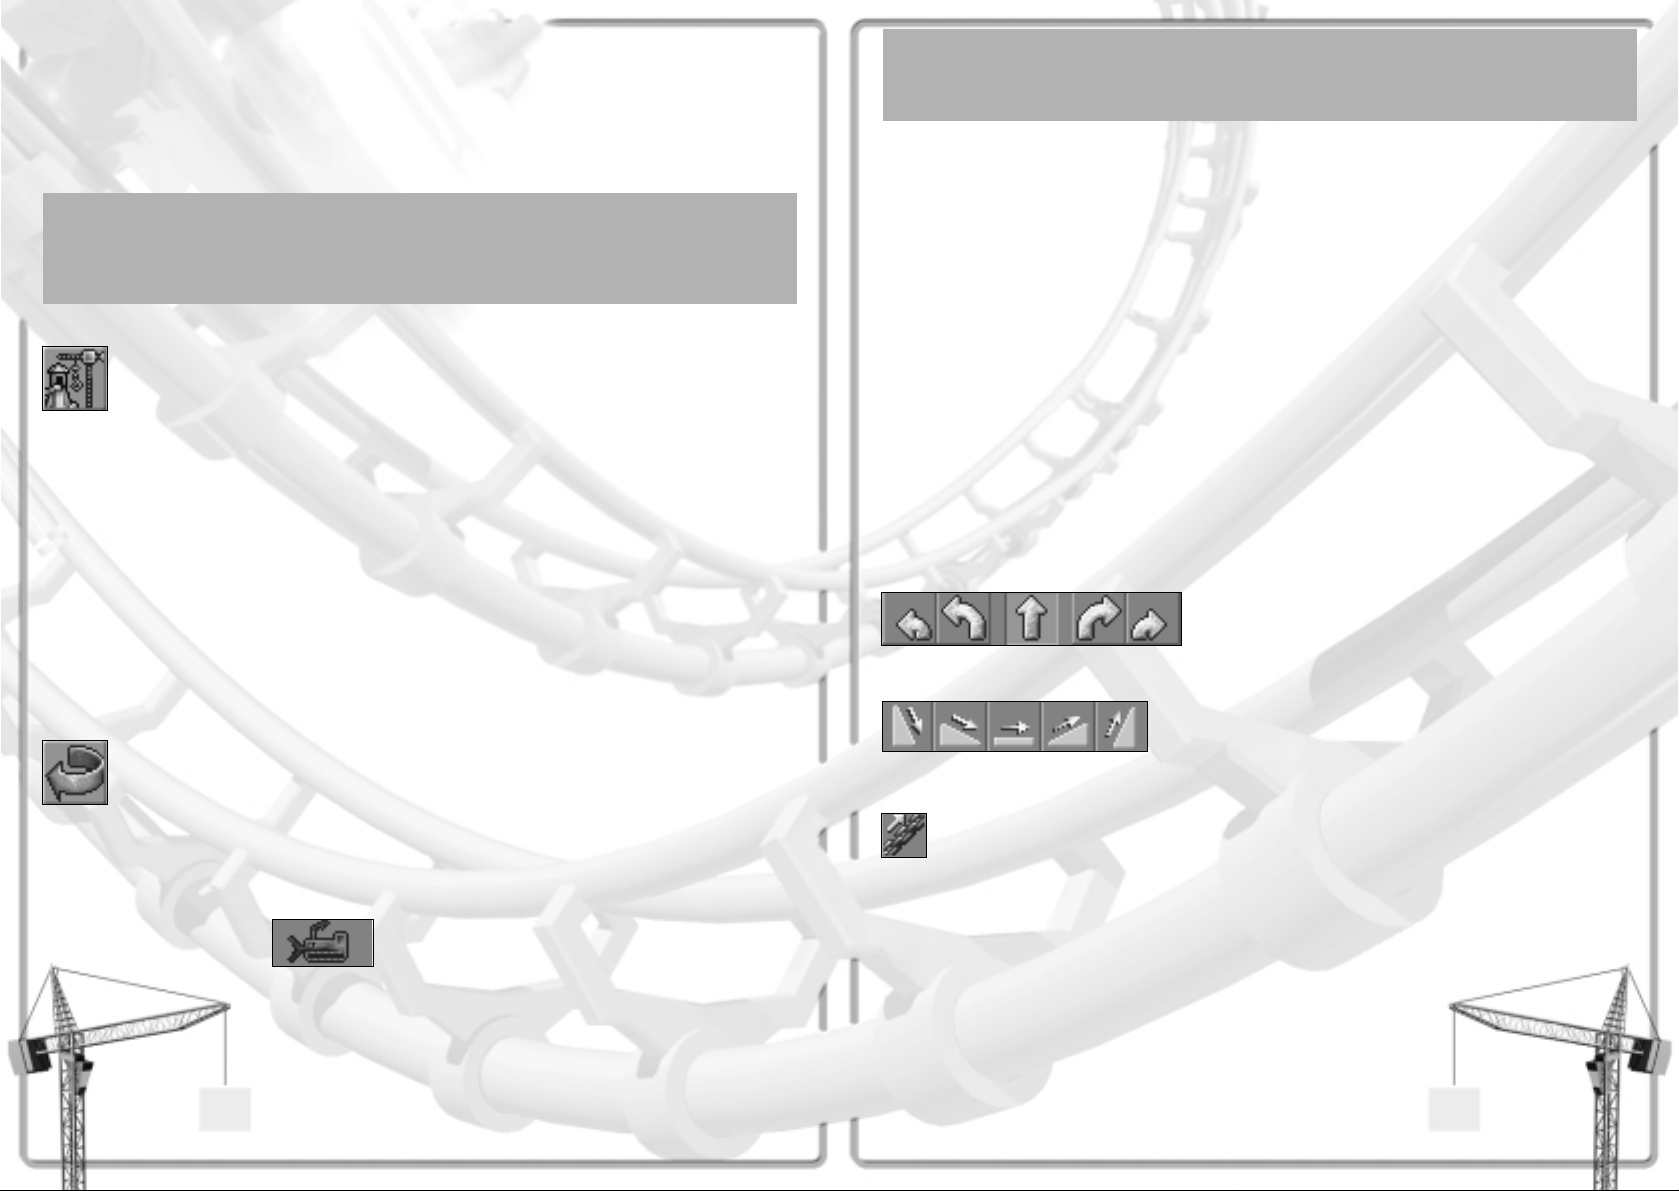
BUILDING A CUSTOM RIDE
The standard designs for tracked rides are good enough for a start, but the time will soon come
when you want to design and build your own exciting rides. In fact, you must custom-build all
transport rides, so it’s likely you’ll need this information in your very first park. The process is
not as complex as you might think it would be, so let’s get to it. (Those of you who have already
gone through the tutorial will find most of this rather familiar.)
What’s in a Name?
Please note that throughout this section, we use the word ‘track’ to mean whatever structure
determines the course of a ride–tube, rail, boat path, overhead wire, and anything else that
provides a fixed course for a ride.
The Stations
First of all, click the
New Ride button.
• Select the type of ride, then the specific ride you want to build.
• Click the Build This button.
• For most types of rides that you can customise, the Select Track Design window opens. Simply
click the Build Custom Design button. (If you’re building a transport ride, you skip this step.)
• The Construction window opens.
The Station Platform is pre-selected as the first item to be built. Every tracked ride must have at
least one station; some types allow as many as four. The stations are where passengers board and
disembark from the ride. On the completed ride, every station has an Entrance and Exit adjacent
to it. Positioning the station first is not imperative, but it’s certainly good planning.
• Move the mouse pointer over the landscape. The cursor is a one-square highlight with a
yellow arrow in it. The box marks where the first piece of Station Platform will be built, and
the arrow determines both the direction in which the ride will run and the one in which the
building process will proceed.
To change the orientation of this arrow (in quarter-turn increments), use the Rotate
button in the Construction window (not the one on the Toolbar). Unless otherwise
specified, all of the buttons you use during this process are in that window.
• When you’re satisfied with the location and orientation, click the Add This button. Note the
price you pay for adding this section of track. The first section is now built, and the potential
next section is shown in place, flashing.
• Continue clicking Add This until you have as many sections of station as you want.
If you change your mind about a section,
use the Demolish button to undo construction.
46
Selecting a Section
If you have a particular section of track in mind for a change, and it’s not the latest one you
built, you can get to the section you want.
• Use the Previous and Next buttons (the red arrows) to move along the track one section at
a time until you reach the one you want to change.
• Right click on any section of track to make it the currently highlighted section.
Station Platforms may only be built in a continuous, straight line. The length of your station
places a limit on the length of the vehicle trains you can run on this ride–after all, if the
passengers couldn’t reach them to get on, the extra cars on the train would be useless. A station
length of four to six sections suffices for most rides.
• At any time during the process of building the track, you can begin building another station
(if the ride specifications allow it) simply by clicking the Special button and selecting Station
Platform from the list. Remember that you must create an Entrance and Exit (and the
associated Queuing Line and footpaths) for every station on the line.
The Line
When your first station is complete, the logical next step is to start making tracks. You can
proceed in either direction, forward or backward along the course of the ride, but the procedure
is the same in either case. For the sake of clarity, this explanation assumes that you’re building
forward along the direction the cars will move.
For each section of track you build, there are a few decisions to make:
Use any one of the Curve Arrows, near the top of the
Construction window, to determine the direction of the
next piece of track. Your options might be limited
depending on the situation. If you do not want any of the
standard trackcurves, check under the Special button to
see if what you want is there.
You set the slope of the next piece of track by choosing one
of the Incline buttons. Once again, your options might be
limited depending on the situation.
If you’re placing the starting rise of a ride–the length of track in which a motorised chain
pulls the cars up an incline to set up the rest of a gravity ride–click the Chain button to
add the pulling chain to this section of track. Note that transport rides do not need and
cannot have starting rises, and roller coasters and other rides can be designed not to need
one. This option is not always available, depending on the situation.
47
Page 24

Powered Launch
Most gravity rides use a pulling chain to give the train the initial propulsion that carries it along
the rest of the track. Some types of ride also have a Powered Launch option (in the Operating
Options). To achieve this effect, the train is either catapulted out of the station by hidden
machinery or towed backward (via pulling chain) up an initial incline and then dropped.
Propelled Launch is not available for many rides, and you shouldn’t use it unless it’s the best
option for what you want to achieve. This form of propulsion has much higher operating costs
than the typical chain-gravity system, and is less reliable in the long run.
To give the next section of track a tilt to one side or the other, use the Roll and
Bank buttons. A bank or roll must begin on a straight piece of track before the
turn, so that the tilt is carried through the turn. Generally, you’ll use banked
turns to reduce the G forces and, therefore, the intensity of the ride. These
options are not always available, depending on the ride and the situation.
When you’re working on some types of water rides, there’s more than one
possible shape for the tubes your guests ride through. Use the Open button or
the Enclosed button to select the one you want for the next section of track.
You probably noticed that as you made your selections, some of the choices in the other areas
changed from available to unavailable or vice versa. What you can do at any point in the design
of a track depends on the structural limits–and the safety regulations–appropriate to the type of
ride you’re designing.
At this point, if you do not see a ‘blinking’ next section (you see only the pointer arrow), that
means that you cannot build the section with the settings you have selected. You must either
change your settings or remove the obstacle to your progress–destroy a tree, raise or lower the
land, or whatever is necessary.
• When you’re satisfied with the ‘blinking’ (potential) next section of track, click the Add This
button to actually build it. Again, check the cost before you build. In general, the more
complex a section is and the more support it needs, the more expensive it is to build.
If you change your mind about a section,
use the Demolish button to undo construction.
At this point, it might be helpful to know that, even though funds are coming out of your total,
you have not irretrievably spent any money yet. Until the ride is completed and has been opened,
you can undo the design (one piece at a time) and recoup everything you’ve spent. Once the
ride’s been run, however, that is no longer true.
48
Tunnelling
You can build track that goes underground, and it’s not too difficult to do. The key is to
prepare the land ahead of time, because tracks, like footpaths, can only lead underground
through a vertical land face that is at least two levels high. This rule applies to both the path
section tunnelling into the ground and the one emerging out of the ground.
When your track approaches a vertical face like this, simply continue building as if the wall
were not in the way; tunnelling take place automatically.
Once you begin building underground, the landscape switches into the Underground View. (If
you need to get into this view later, use the Underground View option on the View Options
menu–the eye button on the Toolbar.) Except for the sections where the track enters and exits
the subterranean world, you build underground sections of track in the same way as you
would any other.
Here are a few rules to keep in mind as you build your custom track. This is not a complete list,
but it covers the most common issues.
• You can only add track to existing track. That is, you cannot build in mid-air.
• In order to switch from a rising track to a dropping track, you must have at least one piece of
flat (usually straight) track in the middle.
• There is a limit to how high above the land you can safely raise track using supports. If you
need to go higher, you must raise the land beneath the track.
• There is also a limit to how deep you can safely go underground.
• Track can be run under or over existing track, provided there is enough room (vertical
clearance) for the cars to pass through. However, it is a violation of the safety code to build
intersections, so you cannot have the track cross itself at the same level.
• With the exception of rides that have a shuttle mode (they go back and forth between end
stations on a single line), every track must form a closed loop–the last section must connect
to the first section. The height marks visible on every section of track help you to line things
up. (If they’re not visible, use the Height Marks on Ride Tracks option on the View Options
menu to make them visible.)
Making Changes
When you modify an existing ride, you use essentially the same procedure as you do when
you’re creating a new ride, with the exception that you must first remove a few sections of
track, then replace them with your changes.
A ride must be closed before you can begin modifying its track.
49
Page 25

The Colour Scheme tab provides tools that let you customise the colours of all the parts
of the ride. As usual, the options depend on the characteristics of the specific ride.
The Income and Costs tab is where you set the price of admission to the ride and view
important financial data such as income, operating costs, and overall profit or loss.
Of course, some of this data is not available until the ride has been open for a while.
• Click the green light (in the View tab of the Ride window) when you’re ready to open the ride.
Characteristics of the Ride
After you’ve run a successful test of your ride, you can get a complete report on the important
characteristics of the experience. While most of these statistics are fairly clear and selfexplanatory, there are a few that might seem a bit subjective. The ratings that need explication
are among those with the greatest effect on your guests’ decisions whether or not to ride, so let’s
get to them.
Excitement The excitement factor of each ride is rated on a scale from 0 (the epitome of
tedium) to 10 (knocks your socks clean off). The higher this number, the more
you can successfully charge for admission to the ride, and the more popular
the ride will be with your guests. You can generate excitement by several
means. The type of ride sets the standard, and the design does the rest. The
overall speed of the ride, its pacing, and the look of it from the outside can
add to the excitement, as can nearby scenery (especially if it and the ride
share a consistent theme), the view from the ride, and the nearness of external
objects, including footpaths and other rides. The age of the ride is a factor,
too; novelty adds excitement.
Intensity Intensity appeals to some guests, but not all of them. This characteristic, too,
is on a scale from 0 (walk in the park) to 10 (white-knuckled terror). The
overall rating depends on all the forces, accelerations, changes of direction,
inversions, and speed experienced by a rider over the course of the track. You
can achieve intensity ratings over 10 through misguided design decisions, but
don’t be surprised when no one is willing to ride it, even for free!
Nausea Factor As with the others, the scale for this rating starts at 0 (safe even after a feast)
and proceeds up to 10 (don’t even stand close). This has a strong influence
on how your guests feel (physically) during and after the ride–and also on
whether or not they’ll choose to ride it in the first place. Spinning rides tend
to have high nausea ratings, and the more turns (especially sharp ones) and
inversions you include, the worse it gets.
Accessories
Once the track itself is complete, you must position and build an Entrance and an Exit, just as
for any other ride. Unlike other rides, however, only you can decide when a custom design is
finished. Therefore, the Entrance button is not activated for you as it is for placed rides.
• Click on the Entrance button (in the Construction window).
• Position the Entrance square adjacent to the Station Platform (leaving room for the Exit) and
click to build it.
• The Exit button is selected for you when the Entrance is complete. Position the Exit square
adjacent to the Station Platform and click to build it. (The Roller Coaster 1 window opens.)
• Build a Queuing Line to connect the Entrance with a main path.
• Make sure that the Exit is connected by footpath to a main path.
Remember that you must place both an Entrance and an Exit–and their associated paths–at
every station on the track.
Operations
When the design and construction of your custom ride are complete, it’s time for the moment
of truth–the test run. This “shakedown cruise” serves two purposes. First of all, it shows whether
or not the ride runs as it should. This is not a foregone conclusion for gravity rides; if you don’t
provide enough downhills to compensate for your uphills, the train can stall part of the way
through. The other purpose for testing is to determine the important characteristics of the
ride–excitement, intensity, and nausea factor. These are important clues that can tell you that
you need to modify the design or lead to a correct price for admission to the attraction.
• When you’ve finished the track and placed all of the necessary Entrances and Exits, the Ride
window for your custom ride opens.
• Click the amber light to begin the ride test run.
Select the tab with the pocket watch to see
the Measurements and Test Data display.
At first, there is no information in this display. When the test run is complete (assuming the train
makes it), the missing data is filled in. If the track design is functional and its running
characteristics are reasonable, your next step is to determine the way you want this attraction to
be run–the operating procedure. The features included under the various tabs in the Ride window
give you complete control over your new ride. (Note that not all of the tabs listed here appear
for every type of ride. You’ll see only the relevant ones.)
The Vehicle Options tab is where you control the “cars” (a general term that includes
all ride vehicles) on the ride. What options you have depends on the characteristics of
the specific ride, but you’re likely to be able to change the type of car on the ride (if
you have more than one option, that is), determine the number of cars or trains of
cars, and set the number of cars per train.
You determine exactly how the ride operates using the
Operation Options tab. What options and information are
provided depends on the type of ride you’ve built. Most of
the functions are toggling check-boxes with which you
simply turn features on and off. Others are pull-down boxes
in which you make one selection from the available choices.
One of the most important options controls how often the
track is to be inspected.
50 51
Page 26
Saving Your Design
When your design is complete and the ride is built and running, you can pat yourself on the
back. Not everyone has the know-how to build a successful roller coaster! To make your success
even sweeter, you can add your exciting track design to the standard tracks for the type of ride
you’ve built. (Note that you can only save a design if the track in question has been successfully
tested–made a complete circuit without crashing or stalling.) Here’s how:
• Open the Ride window for your custom-built attraction.
Click on the Game Options
button on the Toolbar.
• Select the Save Track Design option.
• Give your design a name. The file name is the name that will appear in the Select Track Design
window, so be sure to capitalise it as you see fit. You absolutely must not change the file
extension (the part after the full stop).
• Click the OK button.
The next time you choose to build a ride of that type and the Select Track Design window opens,
your design will be listed right up there with all the other standards. The only caveat is that there
will not be a picture of your track available through the View Track button.
REFERENCE
This section is a brief rundown of the most important screens, buttons, menus, windows, and
options in RollerCoaster Tycoon. It should be helpful when you’ve momentarily forgotten what a
certain thing is used for, or when you want to explore the game in a little more depth. Please
keep in mind that the explanations in this section do not always tell you why or in what
circumstances you might want to use a particular feature, only how to use it.
Hovering Tips
If you position the mouse pointer over any functional part of the screen–a button, information
display, or window tab, for example–and leave it there for a short period of time, a little box
opens up with text in it. These are Tips boxes. Each one provides more data; it tells you
something about the thing you’ve got the mouse cursor over. When you move the cursor away,
the box goes away on its own.
There are no Tips boxes for things in your park–guests, rides, scenery, and such. When
you position the cursor over them, watch the Message Area (at the bottom of the screen)
for information.
52
The Landscape
What you see when you’re running a park in one of the scenarios is called the Landscape.
The largest area of the screen is taken up by the Landscape Display.
This is where you see your park and everything in it. It’s also where
you’ll do most of your work, using the mouse. Position your cursor
over anything in the landscape, and a message (in the Message Area)
tells you what you can do with it.
If you want to see an area of the park that is not in the Landscape
Display, simply move the view by holding down the right mouse
button and moving the mouse. This is called “dragging the
landscape” and is very quick. If you are playing in full-screen mode, you can also move the
mouse cursor to the edge of the screen, and the entire view scrolls in the direction you specify.
As a third option, the arrow keys also shift the landscape around.
What happens when you right or left click on something depends entirely on the situation. When
none of the park building features is active (you’re not in the middle of any task), clicking on a
thing opens a window that gives you information about the item and some control over it (even
guests). Whenever you have a work window open, it is superimposed on the landscape. Rightclicking is used most often for removing things, but its function depends on the situation.
Whenever it’s relevant, the explanation of a feature includes the functions of the left and right
mouse buttons.
Moving Windows
Moving windows in RollerCoaster Tycoon, is just like moving them in Windows. Position the
mouse pointer on the title bar of the window. Click and hold the left mouse button down, then
drag the window where you want it. When you release the mouse button, the window stays
where you put it.
The Toolbar runs across the top of the landscape screen. There’s a lot to this, so it’s explained
in the next section, called (oddly enough) The Toolbar.
The Status Box keeps track of the three most important pieces of information regarding the
overall status of your park:
1) The amount of money you currently have in your treasury. (You can click this to open the
Finances window.)
2) The number of guests presently inside your park.
3) A bar graph of your park’s overall rating. (Click this to open the Park Rating display of
the Park window.)
Keep an eye on the Message Area for important notices about what’s happening in your park.
Rides breaking down, guest complaints, research completion, and other announcements appear
in this area as soon as you need to know about them. The notes are colour coded according to
content, as follows:
Red Urgent Problems
Yellow Warnings
Blue Research Reports
Green Notice of Guest Attitudes (and the actions of any guest
you are tracking)
Orange Awards
53
Page 27

Water allows you to create areas of water and adjust the
depth and bottom slope of any existing water tile (square)
in the park. (There’s more detail later in this section.)
Scenery is what you use to place gardens, statuary, benches,
shrubs, and other useful or decorative non-ride items in your
park. (There’s more detail later in this section.)
Footpaths is one you’ll use often. This button opens the feature with
which you create (and tear up) walking paths, queuing lines, ramps,
and bridges. (There’s more detail later in this section.)
New Ride opens the
Ride Selection window.
(There’s more detail later in this section.)
Finances opens the Finances window, in which you can study
and control (to some extent) your income, outlays, and other
financial matters. (There’s more detail later in this section.)
Research takes you to the R&D lab feature that allows you ton determine
how much money you spend on developing new rides and what you’re
developing. (There’s more detail later in this section.)
Rides Info presents a number of useful
overall reports on every ride in the park.
(There’s more detail later in this section.)
Park Status does the same thing
as clicking on the Park Entrance;
it opens the Park Status window.
Guest Info is a great
source of information
on every guest in the
park as an individual
and on all of your
guests taken as a group.
(There’s more detail later in this section.)
Staff opens the window in which you hire,
sack, and control your park employees.
(There’s more detail later in this section.)
Messages shows you recent messages you’ve received
since the scenario began. Note that any icons included
with a message are buttons you can click to take a more
detailed look at the source of the notice.
Some of these buttons need no more explanation than that, but let’s
take a closer look at the more complicated features.
Note that any icons included with a message are buttons you can click to take a more detailed
look at the source of the notice. If you miss a message, you can use the Messages button (on
the toolbar) to review past notices.
The Situation Box apprises you of the state of the natural world. It is updated constantly by your
friends in the local weather bureau, and double-checked by a small weather station installed
inside the park entrance. This box lists:
1) The current month and year. Note that a “year” in RollerCoaster Tycoon is measured as one
park season; that’s the eight months from March through October.
2) The present temperature in your park.
3) The weather at your park.
The Toolbar
The Toolbar is a group of buttons positioned across the top of the landscape screen. These
provide all of the functions you should need for building and running your park–and for
managing your game.
Pause stops time–pauses the game–until you click this button again
to restart time. Nothing happens in the park and you cannot build
anything while the game is paused.
Game Options opens a menu of basic functions
for things like saving a game and quitting.
(There’s more detail later in this section.)
Sound toggles the
game sound on
and off.
Zoom Out enlarges the amount of
the park you see in the landscape
view. This means that you see less detail.
Zoom In increases the amount of detail
you see in the landscape view. This means
that you see less area of the park.
Rotate turns the landscape a quarter turn (90 degrees)
clockwise. The result is as if you moved 90 degrees to
your right (counter-clockwise) around the park.
View Options opens a menu of visual functions–things
like making trees or rides temporarily transparent.
(There’s more detail later in this section.)
Map opens a map of the entire park area; this is a large
scale map with very little detail. Paths, rides, and guests
are marked on it, and land owned by the park is a lighter
shade than other land. Click anywhere on this map to
centre the landscape view there.
Land is the feature you use to adjust the height and slope
of any landscape tile (square) in the park. (There’s more
detail later in this section.)
54 55
Page 28

View Options
The View Options menu includes several features you’ll find helpful for viewing the landscape.
Use these to get a better look at the terrain while building structures. All of these options are
toggles–a click turns each one on or off (a check marks an activated option). You can have any
combination of these–or even all of them–activated at the same time.
View options fall into two groups. The first group includes those that make certain objects seethrough (mostly transparent) or temporarily invisible, thus providing a clearer view of other
objects and land formations.
Underground View Makes the land surface translucent and provides a view of the volume
beneath your park. This is necessary when building tunnels.
Underwater View Removes the water in lakes from view, giving you clearer sight of the
land contours on the bottom.
See-through Rides All your attractions (including shops and stalls) become invisible.
See-through Scenery The scenery (trees, bushes, walls, and so on) is put out of sight.
Invisible Supports The structural supports of your rides become invisible for a clearer view
of the areas beneath the ride.
Invisible People All guests and staff are removed from sight, which is quite helpful
when your visitors are roaming your park like swarms of bees,
obscuring everything.
The second group of options is helpful for determining the heights and positions of objects and
land formations. (These, too, are toggles.) The information these options provide comes in handy
when you’re trying to match up sections of footpaths or of track on complicated rides, and for
making the most efficient use of your landscape.
Gridlines on Land Gridlines mark the borders of every land square, and are especially
helpful for positioning rides and walkways. (By default, this option
is on when the game starts.)
Height Marks on Land Marks every parcel of land (square) with its height level relative to
the lowest point in the park.
Height Marks on Ride Tracks Shows the height level of each section of ride track, relative to the
lowest point in the park.
Height Marks on Paths Displays the height level of every section of footpath and queuing
line, relative to the lowest point in the park.
Game Options
The Game Options menu provides both essential game functions like saving and quitting and also
some convenient customisation features.
Load Game Opens a list of saved games so that you can load one and resume playing it.
Save Game Saves your current game in a file so that you can reload it later.
New Game Ends your current game (you have the option to save it) and takes you to
the first screen.
Screenshot T akes a snapshot of your screen and saves it in a file in the directory where
you installed RollerCoaster Tycoon.
Save Track Design Copies the design of an existing track into the list of standard designs for
that type of ride. You must supply a name for the design when you save it.
This option is only available when the ride window is open for a tracked
ride that has been successfully tested. (Click on the ride Entrance to open
the ride window.)
Options Opens the Options window, which includes a number of game settings you
can change to customise the way RollerCoaster Tycoon works for you.
Simply click on the arrow next to any setting to display a list of the
possibilities, then click on the one you want. You can:
• Choose the Sound Driver you want the game to use.
•Turn Stereo sound on and off.
• Turn the game Music on and off.
• Adjust the Sound Quality of the game (which can help it run faster).
• Set the type of Currency you wish to use.
• Determine what Distance Units the game measures.
• Decide which system of Temperature Units the game uses.
• Set the Display Mode you prefer. The game is designed to provide optimum performance in
full screen 640x480 mode. Only high-end systems can run the game effectively in a window
or in the higher resolutions without degradation in game speed or display quality.
• Customise Keys lets you change the keyboard shortcuts assigned to certain features.
(Please see Keyboard Shortcuts for the details.)
• Turn the mouse Scroll feature on and off.
About Presents the game credits.
Quit Game Ends your current game (you have the option to save it) and shuts down
RollerCoaster Tycoon entirely.
56 57
Page 29

Land
It’s inevitable; you will need to adjust land formations to better suit the rides
and attractions you want to build. The tools in the Land box allow you to do just
that–modify both the height and slope of the land in your park.
When you’re using the land adjustment features, the mouse cursor becomes a
source of information.
When you see the shovel
cursor, you’re able to raise
and lower areas of land.
If you hold the cursor near the centre of the area you want to modify,
the entire border of the square is highlighted. When this is the case,
you can click and hold the mouse button down while you move the
mouse up to raise or down to lower the entire area. Release the
mouse button when you’re done.
When you’re working with a single land square, you can adjust each
corner of the land separately. (This is how you affect slope.) If you
position the mouse pointer near a corner of the square, that corner is
highlighted. At this point, you can click and hold the mouse button
down while you move the mouse up to raise or down to lower only
that corner of the land. The slope of the square changes to adapt to
your modification. Release the mouse button when you’re done.
Digging Costs
Keep in mind that adjusting the land, especially large-scale projects, can
become costly very quickly. This is especially true because (unlike
footpaths), you do not receive money back for returning land to its original
form! You always pay for any alteration to the land, no matter what the
situation. Plan ahead before you start digging.
If you tire of adjusting land squares one at a time, you can use the Area of Effect
controls at the top of the Land box to enlarge the area of land you’re working
with. The size you’re presently working with is indicated by the span of the grid
in this little window. The buttons in the corners change this area, and the grid
adjusts to keep track.
Click the Plus button to increase the
size of the land area you’re adjusting.
You can enlarge the scope of your changes
to a 5x5 (25 squares) area.
The Minus button decreases the area you’re
working with. There’s one exception; if you click this button to
decrease the size below the default one-grid square, you get a
5x5 dotted grid with a highlighted square at its centre. This
special feature allows you to create sloped land formations.
Note that when you raise or lower a large area, the lowest parcels
rise (and the highest drop) first, until every square is on the same
level. Then, the area moves as a whole. Also keep in mind that
when you’re working with more than one land square at a time, you
cannot adjust corners.
58
The Slope Feature
You can grab a single land square, raise it or lower it, and drag all the adjoining land along
with it. This is how you create sloped land formations–otherwise known as hills and valleys.
• When the Land box is open, click the Minus button to decrease the area of land you’re
working with one step smaller than the default single square.
• Position the mouse cursor to choose a square, just as usual.
• Click and drag to raise or lower that square, as usual.
• As you change the height of that centre square, the surrounding land is pulled along with it.
Remember that when you create a slope in this way, you are not only adjusting the height of
the selected land square. You pay for the change in all of the land you’re moving. This can
be extremely expensive if you’re not careful!
There are two groups of buttons in the Land box. You use these to change the appearance of the
top surfaces and exposed vertical edges of the land formations you select. Each of these buttons
toggles on and off, but they are exclusive within each group–you can only activate one at a time
for each group. If none of the appearance buttons is selected, whatever land you select and modify
retains the appearance it has; there is no change other than any height adjustment you make.
The upper group controls the appearance of the land surface. Whichever of these textures you
have active is the “default” texture as long as the Land box remains open. Whenever you click
on an area of land, you resurface it with the active texture. This occurs whether or not you
change the height of the land.
Grass has your workmen place grassy sod on the selected land.
Sand orders the land covered with light sand.
Dirt leaves the dark brown dirt beneath the land showing.
Rock covers the surface with low, irregular, grey rock formations.
The lower group changes the appearance of the exposed vertical edges of land formations–the
places where the slope of the land does not meet the surrounding ground. These function in the
same way as the surface texture buttons.
Rock Edges produce chiselled brown rock bulwarks.
Brick Edge covers the gaps with brick-like dry stone barriers.
Rusty Iron Edge edges resemble aged iron breast-wall.
Wooden Edge builds wooden retaining walls.
The vertical edge buttons are also useful for changing the vertical
edge textures around pools of water.
59
Page 30
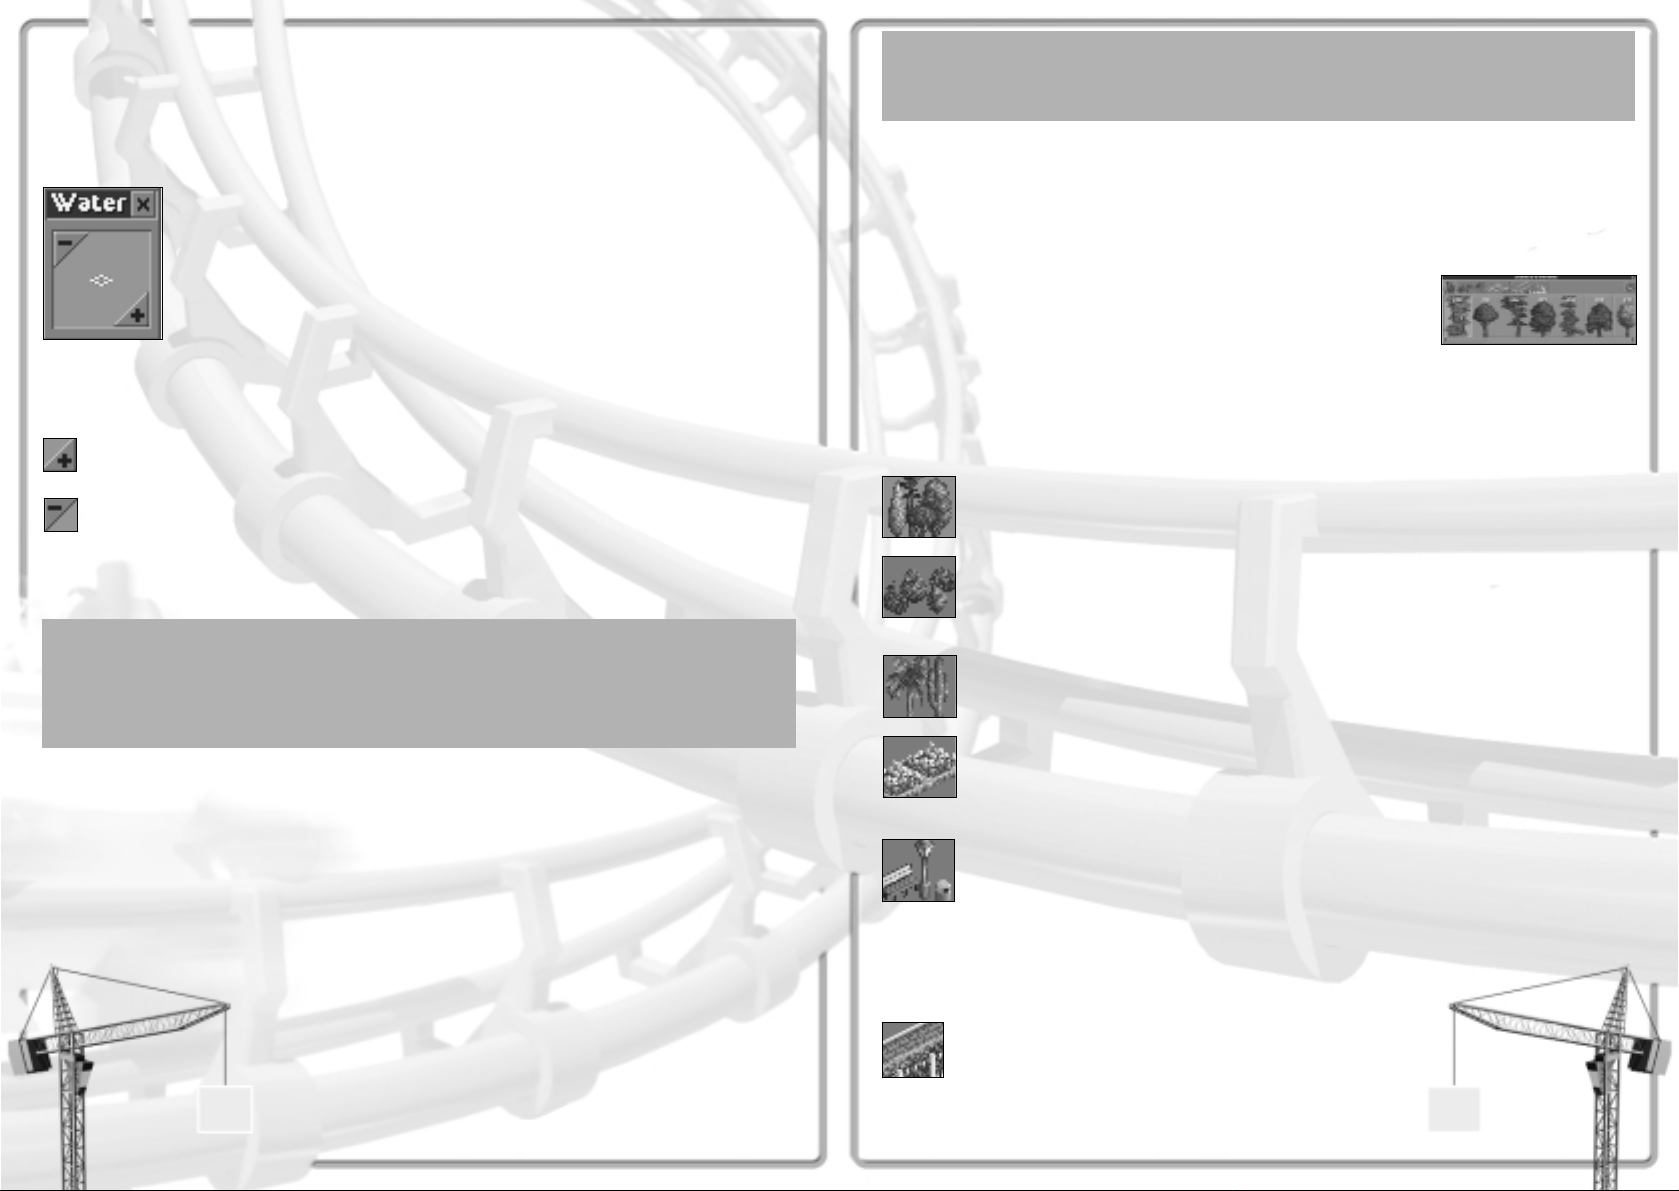
Just a Note
You cannot build a footpath directly on the surface of a body of on water. You must build a
bridge over the water or a tunnel under the land beneath it instead.
Scenery
Exciting rides and other attractions aren’t the only things that make an amusement park great.
Atmosphere is also tremendously important; you must provide carefully planned landscaping
and scenery to make your park guests happy. By creating a more appealing environment, you
significantly add to the enjoyment your guests derive from the park, and you can also add
intensity–raising the excitement ratings of your rides.
The Scenery window includes everything you need to do so. This
window has a number of tabs, each of which calls up a different
selection of scenery items. Which tabs you have available to you at any
time depends entirely on what you can currently build. If you’re not
satisfied with your choices, research new ones. Click each tab to view and use the items in the
corresponding display. (When not all of the items fit in the window, you can use the slider bar
at the bottom to move through and see the rest of them.)
You can only place scenery items on land, and then only in empty spaces. The types most
commonly available for you to build include:
A diversity of Trees are available to spruce
up your landscape. Once these are in place,
you must pay to have them removed.
Shrubs & Bushes come in many varieties, including topiary–bushes trimmed to
resemble animals and fanciful objects. How many you can place in each land
square depends on the size of the shrub; you might fit up to four. Once these are in
place, you must pay to have them removed.
Tropical Plants–palms, cacti, and so forth–are a must for certain decorative themes.
As with shrubs, depending on the size of the plant, you might fit up to four on a
single land square. Once these are in place, you must pay to have them removed.
Rock-bordered Gardens filled with flowers come in a variety of colours
and combinations. Each takes up one entire land square. Once these
are in place, you must pay to have them removed.
Footpath Accessories include such necessary things as benches, litter bins, and
street lamps. These are vital to your park’s efficiency and cleanliness, and to the
comfort of your guests. Accessories can only be built on footpaths–benches only on
the flat sections. Be careful when attempting to remove these things; you must be
sure to click the object, not the path. (Watch the Message Area for cues.)
Otherwise, you can easily remove the pathway by accident. You get no refund when
you dismantle these objects, but neither do you pay a fee.
Borders include walls, fences, and hedges with which you
can produce pleasant decorative boundaries. You have a
variety to choose from, and they’re perfect for edging paths,
rides, and scenic gardens. These are always placed on the
edge of a land square, and you can create double walls (or
fences) in adjacent squares. Note also that these do not fill
the square, so you can often place another item of scenery
quite close to a border. You get no refund when you remove
these objects, but neither do you pay a fee.
Water
You will find that, in many cases, lakes must be adjusted to better suit your needs and those of
the attractions you build. The tools in the Water box give you the power both to create water
where none exists and to adjust the height (or depth, if you prefer) of existing bodies of water.
Keep in mind that building and adjusting water money costs money. You are always charged for
altering water squares, even if changing them back to their original form.
When you open the Water box,
the mouse pointer changes to
the flowing water cursor.
This box resembles a smaller version of the Land box. It includes the same Area of Effect controls,
and the area of water you’re presently working with is indicated by the span of the grid in the
inner window. The buttons in the corners change this area, and the grid adjusts to keep track.
Click the Plus button to increase the size of the area you’re adjusting. You can
enlarge the scope of your changes to a 5x5 (25 squares) region.
The Minus button decreases the area you’re working with, to a minimum
of one square. (Note that there is no slope feature for water.)
Just as is the case for land, when you raise or lower a large area that includes water at different
levels, the lowest parcels rise (and the highest drop) first, until every square is on the same level.
Then, the area moves as a whole.
Breaking the Law
Please note that even though it might seem otherwise at times, the laws of physics and the
force of gravity do apply to the terrain and the water in your park. The contractors who do the
landscaping work for you are extraordinarily skilled, and they can build in retaining structures
that are capable of holding up under incredible stresses.
To create or modify water:
• Position the mouse pointer over the area you want to work with.
• Click and hold the mouse button down while you move the mouse up to raise or down to lower
the level of the water. Note that you can only fill an area with water from the ground up. If
you want water at or below ground level, you must lower the land first.
• Release the mouse button when you’re done.
When you’re working with water above sloped land formations,
you’ll notice that the water fills in the lowest portion of each square
first, following the slope. You can use this to your advantage to
create natural-looking lakes and pools.
Remember that you can control the appearance of any exposed
vertical edges (support barriers) using the tools in the Land box.
60 61
Page 31

Footpaths
Footpaths, including queue lines, are essential for your park
to run properly. Without them, your visitors will never find
your rides and other attractions. Don’t be careless when
placing footpaths in your park (even though you do get some
of your money back if you remove a section of path). Good
park design includes the systems of paths, and on your
ability to keep your guests moving smoothly from one
attraction to another.
The Footpath button opens the Path Construction window, and
changes the mouse pointer to include a footpath icon. (This
default cursor denotes the Conform to Ground footpath
setting.) The options in this window allow you to create
several different types of path, including Queuing Lines,
bridges, tunnels, and piers. The buttons in the upper part of
the window control the type of path surface you’re creating.
Queuing Line is what you use to connect a ride
Entrance to the main path. You should not use
this for any other purpose, as it might confuse
your guests. The first section of queue that you
place adjacent to an existing path becomes the
entry to the Queuing Line.
Tarmac is a simple,
flat, paved pathway.
Stone creates paths of
hard cobblestone.
Dirt is the least expensive
option, a dirt footpath.
Tiled lays down patterned
paths made of decorative
“crazy” bricks.
There are two different methods of footpath construction,
reflected in the buttons near the bottom of the window.
Conform to Ground is the default method. When
this is active, you can build footpaths on flat and
diagonally sloped land, but not on any irregular surface.
Position the mouse cursor where you want a new (or
differently paved) path, then click. Right click to
remove existing sections of footpath. For longer paths or
large sections of pavement, you can hold the mouse
button and drag the cursor over the terrain. Release the
mouse button when you’re finished.
The available Statuary, including many types
with built-in fountains, adds greatly to the beauty
of your park and, when strategically placed, to the
excitement of nearby rides. When you remove statuary,
you sell it off so as to recoup part of what you paid for it.
Remember
This list is not all-inclusive. Research can reward you with entirely new classes of
scenery–classical Roman architecture, for example, or Egyptian-theme decorative objects.
To build scenery, you simply:
• Click on the picture of the item you want to add to your landscape.
Use the Rotate button to orient the object exactly the way you
want it. (There is neither need nor opportunity to rotate some
items–fences, walls, and footpath accessories, for example.)
• Move the mouse pointer to where you want it installed. You’ll notice that the cursor, once it
moves out of the Scenery window, reminds you what object you have selected. For example,
if you’re placing trees, the cursor includes a tree icon. Also, the highlight on the land reflects
the space needed to install the item you’ve chosen. Most items require one or more complete
squares, however:
Smaller items, like certain shrubs, need only a quarter of a land square.
You can place up to four of these into a single parcel of land. (This can
be helpful if you’d like to create words or pictures with your scenery.)
Border items (fences, walls, hedges, and so on) take
up only the edge of a land square. This means that
you can build up to four per square, one on each side.
• Click when you’ve found the right location, and the scenery is installed. Any cost is deducted
from your treasury.
When you wish to remove an item, you place the cursor over it, check the Message Area to be
sure you’re in the right place, and right-click. Any fee is taken from your funds forthwith.
Scenery Defaults
Until you click on something else, the first (left-most) object pictured under each tab is the
selected item. Once you have selected some other item in a category, that object remains the
active object for the category–even if you close the window and reopen it later–until you select
something else under that tab.
62 63
Page 32

Transport Rides include miniature trains, monorails, cable cars, and the like. These are
generally used to transport guests from one section of the park to another, but some
guests also enjoy the sightseeing aspects of the ride. Multiple stations are allowed
(and sometimes required) as destination points.
Mild Rides consist of low- and no-thrill rides suitable
for all guests (especially children). The Ferris Wheel
and Merry-Go-Round are good examples of mild rides.
Roller Coasters are the big draw. Depending on the scenario and your research, you could
have access to any of several types of roller coaster technologies designed to twist the
lunch from your brave guests’ bellies–wooden and steel coasters are only the beginning.
Thrill Rides fill the intermediate range in intensity between the mild
rides and the coasters. This category can include attractions like
Swinging Ships, Dodgems (bumper cars), and Go-Karts.
Water Rides includes anything that threatens to get your
guests all wet–everything from rented rowboats to water
slides to H
2
O roller coasters.
Shops and Stalls covers all types
of vendors and facilities–food,
drink, information, and even toilets.
Within each category, you can click on the picture of each type of ride to get more information.
All the pertinent details on the attraction you select appear in the lower half of the Ride Selection
window. Among other important data, this readout always includes the approximate cost of
construction.
Once you’ve chosen what you wish to build, click the Build This button (in the bottom right-hand
corner). The Ride Selection window closes, and you proceed immediately to the Construction
window, which is described in detail in The Construction Window.
Finances
In this respect the park business is no different from any other enterprise–finances are vitally
important. Success is a matter of meeting your goals, and that means sensibly disbursing your
funds. The Finances window helps you do just that.
This window embodies five categories of key information and options
that allow you to both track and modify (within limits) your pecuniary
position. Using the reports under these tabs, you can find out where
your money is going and coming from and how it’s working for you.
You can also adjust the amount of your bank loan and give orders to
your marketing agency.
The Expenditures and Income tab tracks your outgoing and
incoming monies on a month by month basis. This chart
provides the most in-depth report of exactly where your
money has come from and where it has gone. Look to the
bottom of this category for the following information:
65
A Note on Slopes
Two adjacent sections of footpath connect to one another automatically, but only when at
least one of them is on horizontal, flat land. Footpaths placed side by side on sloped land
squares run parallel and do not connect.
The Free Path button allows you to construct supported paths that defy the slope of
the land. This is what you use for making raised paths, bridges, tunnels, and piers.
This is a bit more complicated than placing paths that conform to the land. (For
step by step instructions, please read the Footpaths section.)
While you are building a free, supported path, there are a number of buttons available for your
use that are not relevant for conforming footpaths.
The directional Arrows
determine which way the
next section you build
will go. To change the
direction of a path segment,
click the appropriate arrow button.
The three Slope buttons control the inclination of the next
section of path. To change the slope, click the button you
prefer. Note that if no next section of path appears (you see
only the pointer arrow), that means that you cannot build the
section with the slope you have selected in that location.
Add This builds the next
section of the footpath.
Before you build, check
the cost of the section; it’s
listed at the bottom of the Add This
button. The more support a section
needs (the higher a bridge or the lower
a tunnel), the more expensive it is to build.
Demolish removes the section of bridge you have just built–not the ‘blinking’
section (which isn’t built yet). You can also use the right mouse button to
remove sections of any type of path, as well as any objects in your way.
New Ride
As we’ve explained elsewhere, new rides are the cornerstone of any park’s popularity. When you
decide to build a new ride, you click the New Ride button. This opens the Ride Selection window,
which holds the tools you use to construct everything from toilets to roller coasters.
The tabs at the top of this window
correspond to the various categories of
rides and other attractions. Click on a
tab to see the specific possibilities in
each category. (If they don’t all fit in the
display at once, use the slider bar at the
bottom to see the rest.) Note that as you
complete research projects, new and
different choices might be added to
those already in each category.
64
Page 33

• Click the small arrow beside the Research Funding setting to adjust the level of expenditure
you want to go toward research. The larger the monthly stipend you apportion to research,
the more quickly you’ll get results.
• Each of the Research Priorities has a check-box associated with it. Clicking any of these
boxes toggles inclusion of that particular category in the research effort. (A check denotes
an included item.) You may include as few or as many as you wish–even all or none. If you
leave no items selected, no research goes on, but you still pay for it.
• If no further developments are available in a particular research category, it is greyed out.
The research possibilities are different for each scenario; not all items are available in every
one. It’s up to your R&D team to find out what can and can’t be discovered, then to invent
it for you.
Rides Info
The Rides Info window allows quick and easy access to an abundance
of data on all the rides, attractions, shops, and stalls in your park.
The busier and more crowded your park becomes, the more
important and useful this window becomes, as it provides a speedy
overview of park operations at one glance.
When you open this window, all the structures you’ve built are listed,
along with their current status. To view other information, simply
click the small arrow to find what you want to know.
• In most of the information listings, you can use the Sort button
to arrange the list. How they are sorted, of course, depends on
the type of information currently displayed.
• You can open or close all the rides and attractions in your park
by clicking on the green or red lights in the upper left corner
of the window.
Clicking on any attraction in the list opens the information window for that structure–the
corresponding Ride or Shop window.
Guest Info
The Guest Info window is a tool most park managers would love to
have. With a simple click, you can find out what your guests are
thinking, where they’ve been, what they’ve done, and where they’re
going, and how each one is feeling. Your guests came to your park to
have fun and spend money. Heed their needs; use this information
to adjust your park in order to keep them happy.
This window tracks the thoughts and actions of all your guests, both
individually and as a group.
The All Guests tab offers a constantly updated snapshot of each guest’s thoughts and
actions. You can switch between the two using the small arrow. The total number of
guests in your park appears below the tab. You can tell at
a glance how a guest feels by looking at his or her face
icon. For example, happy guests smile, but sick guests look
green. Use the scroll bars to move up and down the list and
to read the ends of long messages. Click on any guest in the
list to open the Guest window for that person.
1) The amount of your Loan. You can use the up and down arrows to borrow more or less
money, in increments of one thousand. Increase your debt in tight situations, and pay
it off when you’re swimming in profit. Remember, though, that the bank is not a
wellspring of infinite funding–you can only borrow so much.
2) Your Cash-on-Hand or operating capital (COH). This figure increases as guests spend
money (or you demolish attractions and footpaths), and decreases when you pay
expenses. COH also increases and decreases as you borrow from or pay off the bank.
3) Your Park Value, shows, obviously, how much money your park is worth. This value is
relative to the rides and attractions you’ve built, in addition to amassed revenue.
4) Your Company V alue is equal to the total of your Park Value added to your COH, minus
the amount of your loan.
Click the Cash tab to see a line graph of how your COH, minus the total
amount of your bank loan, has increased and decreased over time. The
current total is noted at the top, and unless your COH exceeds the amount
of your loan, this number is red to indicate that it is negative.
The third tab calls up a graph of your Park Value. This is a somewhat elusive number,
calculated by expert assessors to reflect what the park is worth in terms of land value
and equipment owned, the quality and profitability of the rides and the park as a
whole, and the park’s overall public reputation (as determined by the Park Rating).
The Weekly Profit graph tracks your financial history on a weekly basis. This
is the most volatile of all the statistics presented here, because each data
point reflects such a short time period. The important datum here is the Current
Profit, listed at the top. If this is a negative number, you’re losing money right
now, and chances are good that you need to change something.
Marketing features a number of professional campaigns you can undertake, each with
the intended result of drawing greater numbers of visitors to your park. The marketing
campaigns you currently have in operation appear at the top of this category, and a
list of the available marketing campaigns follows.
For details on the different campaigns and instructions on how to get one underway, please refer
to the Marketing section.
Research
In order to develop new rides, shops, and scenery, and to improve on
existing rides, you need to devote time and money to research.
Researching new amusement technologies will expand your options,
enabling you to build different rides and improve on your existing
rides, and novelty attracts more guests.
The Research window contains only two tabs.
Current Research shows what
new project your team is currently researching, when it’s
due to be completed, and (below all that) the most
recently finished development. Click the button in the
bottom left-hand corner to see details on the latest novelty
and to have the opportunity to build it into your park.
Research Funding is where you determine which types of
projects take priority and the amount of capital
funnelled each month to your R&D team.
66 67
Page 34

Look Here
The keys listed here are the default keyboard shortcuts. If you don’t like the way they’re set
up, you can change the key used for each function. To do so:
• Choose Options from the Game Options menu.
• Select Customise Keys.
• Click on the shortcut you wish to change, then press the new key you want to assign to
that particular function.
Be careful! Once you have clicked on a shortcut, the next key you press is assigned to that
feature–it does not have its usual function. If you make a mistake, just click on the shortcut
again to assign a different key to it.
The number keys toggle some of the most often used View Options on and off:
0 Height Marks on Paths
1 Underground View
2 Underwater View
3 Transparent Rides
4 Transparent Scenery
5 Invisible Supports
6 Invisible People
7 Gridlines
8 Height Marks on Land
9 Height Marks on Ride Tracks
The Summarised tab collects all the guests into a constantly updated display of trends
in their thoughts and actions. (Again, the small arrow lets you switch between the two.)
This is often more useful than the listing for individual guests, as it tells you what most
of your guests are thinking, and allows you to pinpoint the most troublesome problems.
Click on any group in this roster to return to the All Guests display, with only the guests
in that group listed.
Staff
Park staff must be monitored. No matter how specific the orders you’ve given each one, they
have a tendency to not do their jobs exactly as you had in mind. Just as you monitor your guests,
you should also oversee your park staff. One convenient way to do this is in the Staff window.
This window has four tabs, one for each type of worker you can hire.
Each display catalogues your employees of that particular type,
providing easy access to every staff member. The four displays are
different, but all of them include a Hire New button (with the worker’s
monthly salary listed below it). Click this button to add a worker of
that type to your staff.
Handymen have four possible jobs: sweeping footpaths, watering gardens
and ornamental plants, emptying litter bins, and mowing grass. You determine
which of these each man is responsible for. Use the small arrow to select
a uniform colour for all handymen.
A Mechanic both inspects and repairs rides, as needed, unless you choose
to limit him to one or the other duty. Use the small arrow to change the
vest colour of all mechanics.
The job of a Security Guard is to ward off trouble makers and keep order in the park.
His job is so simple that you need not and cannot give him any orders. Use the
small arrow to select a badge and belt colour for your Security Guards.
Hire an Entertainer to amuse park
guests. You can assign one of three
costumes to each Entertainer.
Simply click on any staff member in any of these lists to open the Worker window for that employee.
Keyboard Shortcuts
Though it’s possible to control the game using only the mouse, there are a number of keyboard
shortcuts that can speed things up.
68 69
Page 35

Other keys offer alternatives to many of the Toolbar buttons:
Pause p
Zoom Out u
Zoom In y
Rotate R
Map t
Land 1
Water 2
Scenery 3
Footpaths 4
New Ride 5
Finances f
Research d
Rides Info r
Park Status p
Guest Info g
Staff s
Messages m
Lastly, a few of the keyboard shortcuts just provide a quicker way to perform common,
useful functions:
B Close the Topmost Open Window
s+B Close All Open Windows
q Cancel Construction
z Rotate Ride
70
The Construction Window
No matter what type of ride you decide to build, you always use the Construction window to do
so. This window includes only the relevant features for the type of ride you’re constructing, but
whatever features you have at your disposal always work in the same way. With these tools, you
can build or adjust any ride, shop, or stall in your park, as well as produce custom designs for
any tracked ride.
The Construction window opens whenever you choose to build a
new ride or click the Construction button in a Ride window.
However, if you’re building a new attraction and it’s the sort for
which you can create a custom design (transport rides, roller
coasters, some water rides, and basically any ride with a track),
you must first decide whether to use one of the existing designs
or generate your own. You do this in the Select Track Design
window, which is really just the Construction window in disguise.
In this window, you have the option to build a
pre-designed track or your own custom track. If
you select Build Custom Design, you go
immediately to the full Construction window. If,
instead, you click on an existing design, two new
buttons appear near the bottom of the box.
Show Track gives you a preview of a
standard track design (there are no
preview pictures for your saved
designs). This is useful for examining
an unfamiliar track layout–especially
when deciding how to orient it in
relation to your existing paths.
Use the Rotate button to
establish in which direction
the ride will move.
Once you’ve selected one of the existing track designs, you can immediately place the ride on the
landscape just like any other. After you do so, the Construction window reverts to its typical format.
Saved Designs
If you have created and saved your own designs for the type of ride you selected, those
designs are included in the list of pre-designed tracks.
Following are brief descriptions of the function of the most common tools in the Construction
window. Which of these buttons is available to you at a given time depends entirely on which
are relevant to the type of ride you’re working on and what stage of
the process you’re in. It’s also important to note one other thing.
The availability of a specific feature is sometimes limited by the
structural and functional limits of what you’re building. So, if the
option you want has faded out, it means that what you wish to do is
beyond the limits of what is possible.
71
Page 36

The Rotate button establishes one of two things. For simple and pre-designed
structures, it controls in which direction the ride will face. (You must set this
direction before you place the thing on the landscape.) When you’re starting
construction on a custom designed ride, however, the Rotate button determines the
orientation of the first section of track, which sets the direction in which the ride will
move and the direction in which the building process will proceed.
• At the bottom is the Entrance button. Use this to position the Entrance to the attraction. While
this button is depressed, move the mouse pointer to an appropriate spot (adjacent to the
ride), and click to build there. All rides must have an Entrance and an Exit, but shops and
stalls do not need them and cannot have them.
• Also at the bottom of the window is the Exit button. Not surprisingly, this allows you to
position the Exit from the attraction. While this button is depressed, move the mouse pointer
to an appropriate spot (adjacent to the ride), and click to build there. All rides must have an
Entrance and an Exit, but shops and stalls do not need them and cannot have them.
If you would like more information, please look into The Tutorial and Building Custom Rides.
Hedge Mazes
One of the mildest attractions you can build, and the one with the longest lineage, is the Hedge
Maze. Folks have been building these labyrinths of shrubbery for hundreds of years, and the
better known among them are popular tourist sites. The standard designs are quite nice, but if
you prefer to build your own, you’ll need to know how the tools work.
When you choose to design a custom hedge maze, the Hedge Construct window opens. It
includes a small, but powerful group of features. At the top are the three mode controls, which
determine what happens when you first click on the landscape (to place the first section of
maze) and when you move the resulting hedge construction cursor.
When the hedge construction cursor is in Open Mode, you build paths through which your guests
can walk.
Move Mode prevents the cursor from
building. In this mode, the cursor simply
travels across the landscape, leaving no paths
or hedges in its wake.
Put the hedge construction cursor into Fill Mode to place
impassable bushes to stymie your guests. In place of the
familiar Add This button, you have four directional arrow buttons.
The Build Arrows are what
you use to move the cursor
on the landscape and build
the maze. Click on any one
of these to move in that direction,
building as you go (unless, of course, you are in Move Mode).
A Track by Any Other Name
Please note that we often use the word ‘track’ to mean whatever structure determines the course
of a ride. Thus, remember that the options for designing “track” are also relevant to tubes, rails,
boat paths, overhead wires, and anything else that provides a fixed course for a ride.
The Curve Arrows determine the
basic shape of the next section of track.
• The Special button, immediately below the curves, offers an assortment of track pieces with
specific functions, including Station Platforms, brakes, bends, helixes, and boosters. Only
those special track types appropriate to the ride you’re working on are available.
The Incline buttons control the slope
of the next section of track.
Occasionally, your cars will need a lift uphill–at the start of most roller
coasters, for example. The Chain button adds a chain lift device to the
next section of track. Note that including more than one chain lift on
a roller coaster adds significantly to the operating costs of that ride.
The Roll and Bank tools let you tilt the next section of track. (Generally, the
idea of a bank is to reduce the G forces experienced in a tight turn.) You
use this on a straight piece of track before a turn, and the bank (or roll)
carries through the curve.
When you’re working on some types of water rides, there’s more than one
possible shape for the tubes your guests ride through. Use the Open or
Enclosed button to select the one you want for the next section of track.
The Add This button keeps track of all
your choices and displays a picture of
the next section of track you’ve selected
to add. The cost of what you’ve chosen
is noted just beneath the picture. Click
on this button to actually go ahead and
build the designed section of track.
If an existing section of track is selected, the Demolish button removes it. If
you’re designing the next section, this button removes the previous section– the
one you just built. When you’re working with simple (non-custom) attractions,
this button destroys the entire structure, including any Entrance and Exit.
Click this button to move the highlight to the Previous
section of track. Continue clicking until you reach the
section you want to change. (You can also right-click on
any section of track to instantly move the highlight there.)
Use this arrow to move the highlight to the Next section
of track. Continue clicking until you reach the section you
want to change. (You can also right-click on any section
of track to instantly move the highlight there.)
72 73
Page 37

To rename your Park,
use the Name
Park button.
The Park Rating tab graphs your park’s approval rating
on a month by month basis. This display is for information
only; there’s nothing you can do here.
Number of Guests tracks how many people are visiting
your park each month. This display is for information
only; there’s nothing you can do here.
The Admission Price tab allows you to set the price each guest must pay to enter your
park. Use the arrows to raise or lower the price. This display also monitors the total
number of admissions paid to date and the income you’ve derived from guests entering.
The display of Park Statistics provides a survey of the size of your park, the number
of rides and attractions you have to manage, how many guests are currently in the
park, and your staff head-count. This display is for information only.
The objectives you must meet to succeed in this scenario are listed under the
Objectives tab. If this scenario has already run its course, but you opted to continue
running the park, your success or failure is also noted.
Under Awards, you can see what, if any, Park Recognition Awards
your park has won recently. (Winning awards is generally recognised
as a sign of superior performance.)
Ride Windows
Every ride has a corresponding Ride window, which you can open in several ways. The most
convenient is normally to click on the Entrance to the ride itself. This window gives you control
over the ride, and it includes a number of features for inspecting and enhancement.
When you build a new ride, the Ride window opens after you’ve
placed the Entrance and Exit. You can also invoke this window by
clicking on an attraction listed in the Rides Info window. Note that
there are many possible combinations of display tabs in this window;
what tabs you see depends entirely on the characteristics of the
specific ride. The following list includes all of the most commonly
encountered tabs.
The View tab is the default display. The viewing pane lets you monitor the ride, and
the red, amber, and green lights allow you to close, test, and open it as necessary.
You can click on the view to centre the source of sound
on the entrance, and double-clicking on the red light
resets a crashed or stuck ride. There are a few functional
buttons to the side of the view.
The Construction button lets you change both the location
and orientation of simple rides, modify the design of
tracked rides, and move the Entrance and Exit of any ride.
Rename a ride using the Name button.
There are a few commonsense rules for constructing viable, enjoyable hedge mazes:
• Make sure that there are open sections of maze adjacent to both the Entrance and Exit.
• There must be at least one unbroken path that leads from the Entrance to the Exit.
• If the maze is too complex, your guests will get lost or become discouraged (or both). You can
always fish them out (with the Pincers button), but they won’t be having fun.
Information Windows
Every ride, stall, shop, staff member, guest, and even the park itself has a window associated
with it. Collectively, these are referred to as the information windows, but they do more than just
provide info:
• In the Park window, you have access to a number of the more important park management tools.
• The functions in a Shop window give you control over prices and the fate of the shop or stall.
• The Worker windows allow you to give orders to your employees.
•A Guest window provides information on a specific guest’s actions and thoughts, and allows you
to return lost visitors to one of the park’s footpaths.
• The powerful Ride window features are what you use to determine every facet of the way a ride
works, from the paint colours to the price of admission.
As you build and manage your parks, you’ll use these windows almost constantly, so it pays to
know how they work and what they can do for you.
The Park Window
The Park window provides general information and an overall picture of your park’s status and
performance. Here, you can monitor things such as your Park Rating, total number of guests in
the park, the number of attractions you’ve built, awards you’ve won, and–most important–your
objectives for success in the scenario.
Click the Park Status button on the Toolbar or the Park Entrance (on
the landscape) to open this window. Within, there are seven tabs–and
thus seven displays–filled with data of substance and utility.
The View tab is the default display. This shows you the
Park Entrance, and the red and green lights allow you to
close and open your park as you please. You can click on
this view to centre the source of sound on the entrance.
There are a few functional buttons to the side of the view.
Click the Buy Land button to purchase more land for your park. (For more details,
please see Enlarging Your Park in the Troubleshooting section of Park Management.)
The Buy Construction Rights button allows you to buy the
rights to build over or under land not owned by the park.
(For more details, please see Enlarging Your Park in the
Troubleshooting section of Park Management.)
The Locate button centres
the landscape display on
the Park Entrance.
74 75
Page 38

Shop (and Stall) Windows
Shops and stalls, just like rides, require your occasional attention and adjustment to function
smoothly and profitably. The operations of these facilities are less complex than those of the
rides, so you’ll find that they generally need less care.
You open the Shop window for an establishment either by clicking on
the building itself –on the landscape) or by selecting it from a list in
the Rides Info window. There are normally only three tabs for
monitoring and controlling a shop.
The View tab is the default display. This shows a real-time
view of the place, and the red and green lights allow you
to close and open the facility as you please. You can click
on this view to centre the source of sound on the entrance.
There are a few functional buttons to the side of the view.
The Construction button lets you change both the
location and orientation of the building, in the event
you are dissatisfied with its placement.
You rename a shop
or stall using
the Name button.
The Locate button centres
the landscape display on
the selected shop.
Use the Demolish button to instantly remove the shop or stall from your
park. You receive cash back when you do so; how much depends on
whether the shop is newly built or has been opened and patronised.
Use the Income and Costs tab to set prices and
view important financial data such as total items
sold, operating costs, and overall profit or loss.
To get an overview of your guests’ reactions to this shop, click the Customers tab.
Here, you’ll find a run-down of how many guests have visited this shop, its overall
popularity, the number of units sold to date, and the age of the structure. There is one
handy button on this display.
Select the Thoughts button to open the Guest Info window,
with a listing in it of all the visitors who are currently
thinking about this particular facility.
The Locate button centres
the landscape display on
the selected attraction.
Use the Demolish button to instantly remove the entire ride from your park.
You receive cash back when you do so; how much depends on whether the
attraction is newly built or has been opened and patronised.
The Vehicle Options tab appears only for those rides which have passenger cars. This
handy displaygives you control over the “cars” (a general term that includes all ride
vehicles) on the ride. What options you have depends on the characteristics of the
specific ride, but you’re likely to be able to change the type of car on the ride (if you
have more than one option, that is), determine the number of cars or trains of cars,
and set the number of cars per train.
You determine how the ride operates using the Operation Options tab. What options
and information are provided depends on the characteristics of the specific ride.
Most of the functions are toggling check-boxes with which you simply turn ride
features on and off. Others are pull-down boxes in which you make one selection
from the available choices. One of the more important options here controls how
often the ride is scheduled for inspection.
The Colour Scheme tab provides tools that let you customise
the colours of all the parts of the ride. Your painting options
depend on the characteristics of the specific ride.
Select the Measurements and Test Data tab to see a run-down of the
information culled from a ride’s test run, including the consequential
excitement, intensity, and nausea ratings. Note that test results only
become available after the ride has run through a complete test sequence.
(Use the amber light on the View tab to start a test run.)
The Graphs display gives you a second by second tracking of the velocity, altitude,
vertical G’s and lateral G’s encountered during the ride’s most recent complete run.
Use the buttons at the bottom of the window choose which graph you wish to see.
The slider bar moves you along the graph horizontally.
The Income and Costs tab is where you set the price of admission to the ride
and view important financial data such as income, operating costs, and overall
profit or loss. For a few rides–the Slide is one example–there are other options
here. (They’re all quite simple and clearly described.)
For an overview of riders’ reactions to this attraction, click the Customers tab.
Here, you’ll find a run-down of how many guests have ridden, the ride’s overall
popularity, the age of the structure, and other data. There are three buttons on
this display that are useful for getting more information.
Select the Thoughts button to open the Guest Info window,
with a listing in it of all the visitors who are currently thinking
about this particular facility.
The Riders button also opens the Guest Info
window, but with a listing of all the guests
who are on the ride at this moment.
Lastly, the Queuing button opens the Guest Info window
and lists all your park visitors who are currently waiting in
line to board this attraction.
76 77
Page 39

Guest Windows
Knowledge of your guests’ opinions–what they want and how they’re reacting to your park and
the things in it–is some of the best information you can have when making decisions. There are
plenty of ways to get this data, and the Guest window associated with each of your visitors is one
of them. This window is also handy for corralling the occasional stray guest.
The simplest way to open a Guest window is to click on any one of your
park visitors (in the landscape display). The title bar shows the guest’s
identification number –unless you’ve given them names). There are six
tabs, each of which opens a different informative display.
View is the most useful display. This shows you the guest
and keeps you appraised of exactly what he or she is
doing. This window also has four useful buttons.
Click this to pick up the visitor and move
him or her to a specific place. This is the
fastest way to retrieve a lost guest.
You can name
a guestwith
this button.
This button centres the
main landscape view on
this guest’s current location.
You can have this particular guest’s activities tracked and reported to you in the
Message Area. This button turns that tracking feature on and off for each guest.
(If you track several guests at once, you tend to get far too many messages.)
Condition is a detailed analysis of the visitor’s physical
status and needs, plus information on his or her ride
intensity preference and nausea tolerance.
Statistics gives you interesting information
on what this person has been doing since
entering your park.
Funds details the
guest’s spending
while in the park.
Thoughts lists this visitor’s
most recent few thoughts
about your park.
Items shows you everything
the guest is currently carrying.
Worker Windows
Just as you monitor and control each of your rides in a Ride window,
you also oversee and direct your park staff–in Worker windows.
You can open a Worker window by clicking on one of your staff (in
the landscape display) or selecting him from the list in the Staff
window. The title bar shows the worker’s identification. There are
three tabs, each of which opens a useful display.
View is the most useful tab. This shows you the worker’s
activities and keeps you apprised of exactly what he’s doing.
This window also has four feature buttons.
Click this to pick up the worker and move him to a specific place. This is the fastest way
to get a Handyman to the scene of a mess, but it is not helpful for moving Mechanics
to broken rides; when you move a Mechanic, you cancel his current assignment.
You can confine an employee’s duties to a certain area of the park using the Patrol
Area button. While this button is depressed, click on the landscape to mark the area
(in predetermined blocks) the worker should stick to.
This button centres the
main landscape view on this
worker’s current location.
The Sack button terminates
the worker’s contract and ends
his employment with the park.
Orders gives you control over
what this staff member does:
• Handymen have four possible jobs: sweeping footpaths, watering gardens and ornamental
plants, emptying litter bins, and mowing grass. You determine which of these each man is
responsible for.
• A Mechanic both inspects and repairs rides, as needed, unless you choose to limit him to one
or the other duty.
• You can assign a particular costume to each Entertainer.
• The Security Guard’s job is so simple that you need not and cannot give him any orders.
Statistics gives you useful information on the
employee’s monthly wage and what he’s been
doing since you hired him.
78 79
Page 40

HASBRO INTERACTIVE’S WEB SITES
Roller Coaster Tycoon has an exciting, full and active web site dedicated to ensure you get the
most out of your new game. You can visit us at :
http://www.rollercoastertycoon.com
Visit and you will discover that Hasbro Interactive web sites contain :
Technical Support
Hints and Tips
Player Contact Information
Software Upgrades
Demos
Interaction
Interviews
Competitions
Player Pyramids
Chat and Community
Downloadable Themes
And much more
We are constantly updating our web sites so stop by and visit us frequently. With events planned
and additions being added, you won’t want to miss out.
FORTHCOMING AND EXISTING HASBRO INTERACTIVE PRODUCTS
For more information on forthcoming and other existing Hasbro Interactive products, please visit
our main web site:
http://www.hasbro-interactive.com
HOTLINE
If you have problems and require assistance you can telephone our Technical Support Hotline:
08705 745745 Monday to Friday 8am to 10pm.
Note: Phoning this number costs the same as a standard rate call no matter where you call from
in the UK. If you do telephone the Technical Support line, if possible please be sitting in-front
of your computer and have a pen and paper at the ready. Before contacting our Technical
Support Hotline, please try to have the following information ready so that we may help you more
efficiently:
The name of the game, the make & model of your PC, peripherals and graphics card, the amount
of memory and your hard disk size.
EMAIL
Alternatively you can email our Technical Support operators:
Email address: support@hiuk.com
To ensure a prompt reply please summarise your issues as concisely as you can, giving details,
as above, of the game, the problem or error, any circumstances that you feel relevant and your
particular computer system. We will endeavour to return your mail within the day.
Distributed in Australia by:
WOLF INTERACTIVE
(A division of Dataflow Computer Services Pty Ltd)
1 George Place
Artarmon
NSW 2064
Australia
HEAD OFFICE (02) 9417 9600
TECHNICAL SUPPORT (02) 9417 9771
CUSTOMER SERVICE (02) 9417 9710
FAX (02) 9417 9797
80 81
Page 41

CREDITS
Design and Programming
Chris Sawyer
Graphics
Simon Foster
Sound and Music
Allister Brimble
Additional Programming
FISH (UK) Ltd.
Representation by Jacqui Lyons at Marjacq Ltd.
Manual
John Possidente, Tim Beggs, Anton Lorton, and Alkis Alkiviades
Layout by Louis Saekow Design
Thanks To
Robb Alvey, Katie Brayshaw, Karen Cumming, Justin Garvanovic and the European Coaster Club,
Neil Jackson, Victoria Maclean, Martin Sawyer, Elizabeth Slater, Paul Slater, Graham Turner,
Ruth T urner, John Wardley, Melanie Warn, and Jim Wills for help with research and game testing
1.LICENCE
The software and all images, photography, animations, video, audio, music and text contained
on the enclosed CD-ROM and this manual, (together, 'the Product') are protected by copyright
and other intellectual property rights which are owned by or licensed to Hasbro Interactive
Limited of 2 Roundwood Avenue, Stockley Park, Uxbridge, UB11 1AZ ('Hasbro')
Hasbro grants to you as the original purchaser of this Product a non-transferable right to use the
Product for your own personal and private use and not in connection with any business activity.
Unless otherwise permitted by law, no part of this Product may be copied, reproduced,
translated, modified, decompiled or reduced into any electronic or other form without the prior
written consent of Hasbro. You may not rent or lease, or sell or transfer copies of the Product or
any part of it.
2.WARRANTY
Hasbro warrants to you only that for a period of ninety days from purchase the Product will
perform substantially in accordance with the specifications set out in this manual and that the
original CD-ROM disk itself will be free from defects in materials and workmanship.
During this period the Product, if defective, will be replaced free of charge if returned to Hasbro
at Caswell Way, Newport, Gwent, NP9 0YH, together with a dated proof of purchase, a brief
description of the defect and the address to which it is to be returned. Any replacement will be
warranted for a further 90 day period. This warranty does not affect your statutory rights in any
way.
This warranty does not apply to defects caused by misuse, neglect, incorrect installation,
damage, alteration, repair or excessive wear.
3. LIABILITY
Except as stated at 2 above, all conditions, warranties, terms, representations and undertakings
express or implied, statutory or otherwise, in respect of the Product are expressly excluded.
Hasbro's liability to you shall under no circumstances exceed the original retail price of the
Product and Hasbro does not accept liability for any indirect or consequential damage or loss
(even if it is aware that the possibility of such damage or loss) including lost profits or revenues,
or for any damages, costs or loss incurred as a result of loss of time or data or from any other
cause.
Nothing set out above shall limit or exclude the Hasbro's liability to you for death or personal
injury resulting from its own negligence or any other liability not capable of exclusion or
limitation by law.
If you do not agree to be bound by these terms, you should immediately return the Product to
Hasbro at Caswell Way, Newport, Gwent, NP9 OYH, together with a dated proof of purchase, for
a full refund.
82 83
 Loading...