

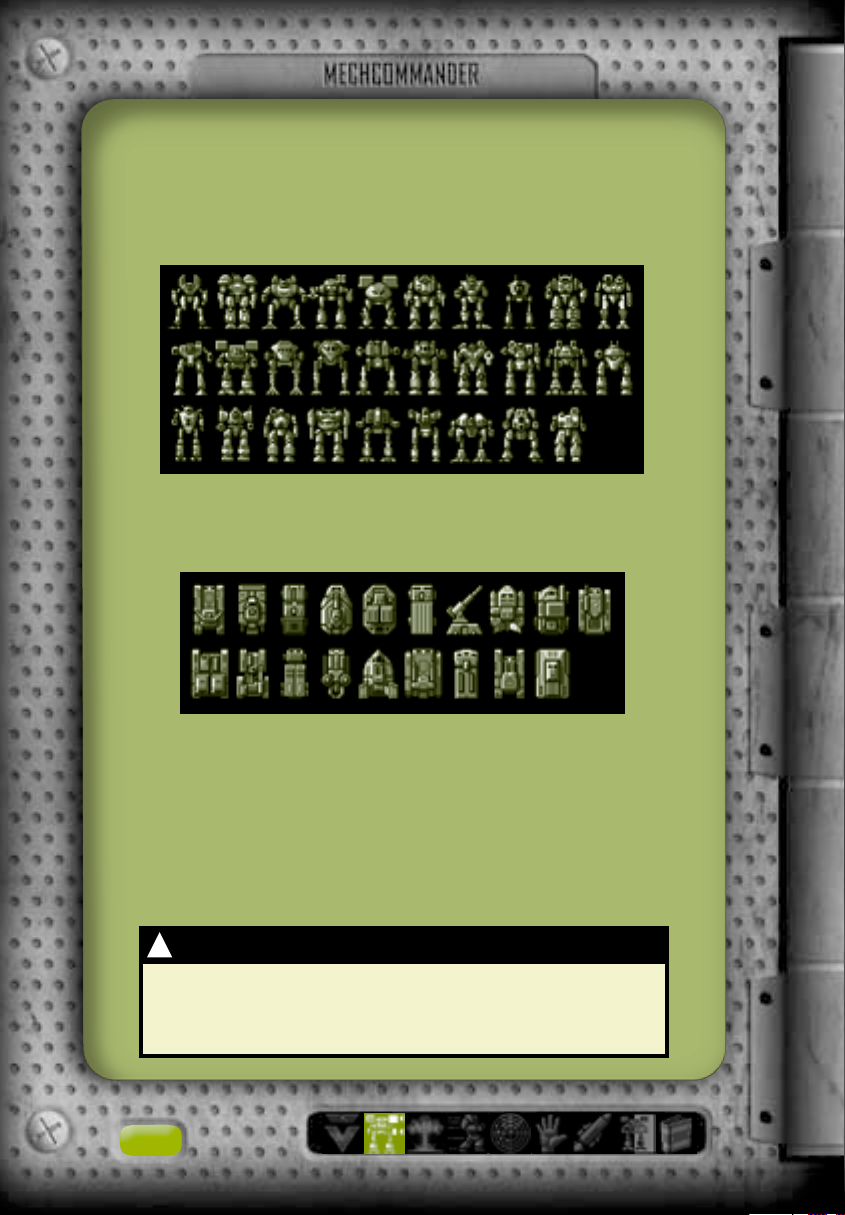
Page 1
Page 2

Information in this documen t, in cluding URL and other Internet Web site references, is
subject to change without notice. Unless otherwise noted, the example companies,
organizations, products, people and events depicted herein are fictitious and no
association with any real company, organization, product, person or event is intended or
should be inferred. Complying with all applicable copyright laws is the responsibility of the
user. Without limiting the rights under copyright, no part of this document may be
reproduced, stored in or introduced into a retrieval system, or transmitted in any form or
by any means (electronic, mechanical, photocopying, recording, or otherwise), or for any
purpose, without the express written permission of Microsoft Corporation.
Microsoft may have patents, patent applications, trademarks, copyrights, or other
intellectual property rights covering subject matter in this document. Except as expressly
provided in any written license agreement from Microsoft, the furnishing of this document
does not give you any license to these patents, trademarks, copyrights, or other
intellectual property.
& P 1999–2001 Microsoft Corporation. All rights reserved.
©
BattleMech, BattleTech, ’Mech, MechCommander and MechWarrior are trademarks or
registered trademarks of FASA Corporation and Microsoft Corporation in the U.S. and/or
other countries. Microsoft, Windows, DirectDraw, DirectPlay, DirectSound, DirectX, and MSN
are either registered trademarks or trademarks of Microsoft Corporation in the United States
and/or other countries/regions.
Uses Bink Video. Copyright © 1997–2001 by RAD Game Tools, Inc.
The names of actual companies and products mentioned herein may be the trademarks of
their respective owners.
Page 3
Commander,
As requested, the upgrade to our command-and-control software
has been downloaded to this clamshell Tactical Data Display (TDD).
The TDD’s tritium ion battery provides power for over three years.
The outer case is a carbon-fiber composite with titanium overlay
that electromagnetically seals its electronics. A tactical nuke could
go off near this thing and it’ll keep running. Just in case you do
manage to break it, though, I’ve scratched a list of essential
commands on the back for emergency reference.
Touch-sensitive menus and pop-up media supplement the text onscreen. Section icons, titles, and page numbers appear along the
bottom of the TDD.
Sergeant Cash obtained this TDD from his usual supplier. If anyone
asks you where it came from—say it fell off the back of an armored personnel carrier.
In my opinion, this upgraded data came just in time. If half the
reports about Carver V are true, we’ll need every advantage we can
lay our hands on. Between the bandits, House Steiner ... and who
knows what other factions are fighting over this rock, it’s going to
turn into a real furball.
I guess if it were any other way there’d be no reason for us to be
here. I mean, who wants a bunch of mercs around if there’s no
war?
Profit and honor for us all—Lieutenant D.C. Diaz
!
Alert
These alert windows contain a few last-minute tips and
reminders you might find useful.—Diaz
1
Page 4
Table of Contents
Strategic Overview ............... 3
MechCommand er 2 So ftware
Installation ............................. 3
Main Menu............................... 5
Encyclopedia............................ 7
Logistics............................... 8
Mission Selection...................... 8
Mission Briefing ......................10
’Mech Bay...............................12
’Mech Purchasing.....................14
’Mech Lab...............................16
Pilot Ready Area......................19
’Mech Salvage .........................21
Pilot Status ............................23
Combat Interface ................ 26
Multifunction al Display.............29
Deployment T eam Bar...............35
Command P alette.....................36
Mission Objectives ...................38
Mission Results .......................39
Command and Control ......... 40
Selecting Units........................40
Movement Ord ers .....................42
Attack Orders ..........................48
Support Orders ........................53
’Mech Function Or d ers ..............58
Situational Awareness ......... 60
Battlefield Viewscreen ..............60
Camera Control........................61
Sensor Contact ........................62
Line of Sight...........................63
’Mech Pilots ....................... 65
Rank......................................65
Core Skills ..............................65
Specialty Skills ........................66
Tactics and Strategies ......... 70
Intelligen t U se o f Logistics .......70
Using Resource Points ..............72
Scouting ................................73
Weapons Ran ges......................74
Assaulting a Fortified Position ...77
Defending a Fortified
Installation ............................78
Retreating ..............................79
Multiplayer and
Solo Missions ...................... 80
Multiplayer .............................80
Solo Missions ..........................90
Appendices and Index ........... 91
Credits...................................91
Glossary .................................93
Index.....................................95
2
Page 5
Strategic Overview
MechCommander 2 Software Installation
MechCommander™ 2 software requires a personal computer with
the following minimum requirements:
• 266 MHz or higher processor; 400 MHz processor with MMX or
3D Now if no hardware 3D acceleration (Intel Pentium/Celeron
family, AMD K6/Athlon/Duron family, or compatible processor).
• Super VGA (SVGA) 2D video card with 8 MB of video RAM.
• Microsoft® Windows® 98, Windows Me, or Windows 2000
operating system.
• 64 MB of system RAM.
• 400 MB of available hard disk space for a typical install;
additional 200 MB of hard disk space for a swap file.
• Quad speed or faster CD-ROM drive.
• DirectX® 8.0 or later API (included on the disc).
• SVGA 16-bit color monitor.
• 16-bit sound card compatible with DirectX 8.0 or later.
• Standard keyboard and mouse or compatible pointing device.
• Speakers or headphones for audio.
The following are additional minimum requirements for multiplayer
gameplay:
• 56-KBps modem or a local area network (LAN) with TCP/IP or
IPX protocol.
• Internet access for Internet play. Note: May require payment
of a separate fee to an Internet service provider. Local and
long-distance telephone toll charges may apply.
Strategic Overview
3
Page 6
To install MechCommander 2 automatically on your computer
1 Insert the MechCommander 2 disc into your CD-ROM drive.
2 When the main Setup screen appears, click Install, and then
follow the instructions that appear on the screen.
To install MechCommander 2 manually on your computer
If your computer does not automatically install MechCommander 2
after the disc is inserted into the CD-ROM drive, install it manually.
1 On the Windows taskbar, click Start, and then click Run.
2 Type x:\setup, where x is the letter of your CD-ROM drive.
For example, if your CD-ROM drive letter is D, type d:\setup
3 Click Install, and then follow the instructions that appear on
the screen.
When Setup is complete, you can view the Readme file or click
Play to start the game.
!
Video Cards
Update your video card driver s, Commander. Most
technical problems with our command-and-control
software are due to out-of-date video drivers.
4
Page 7
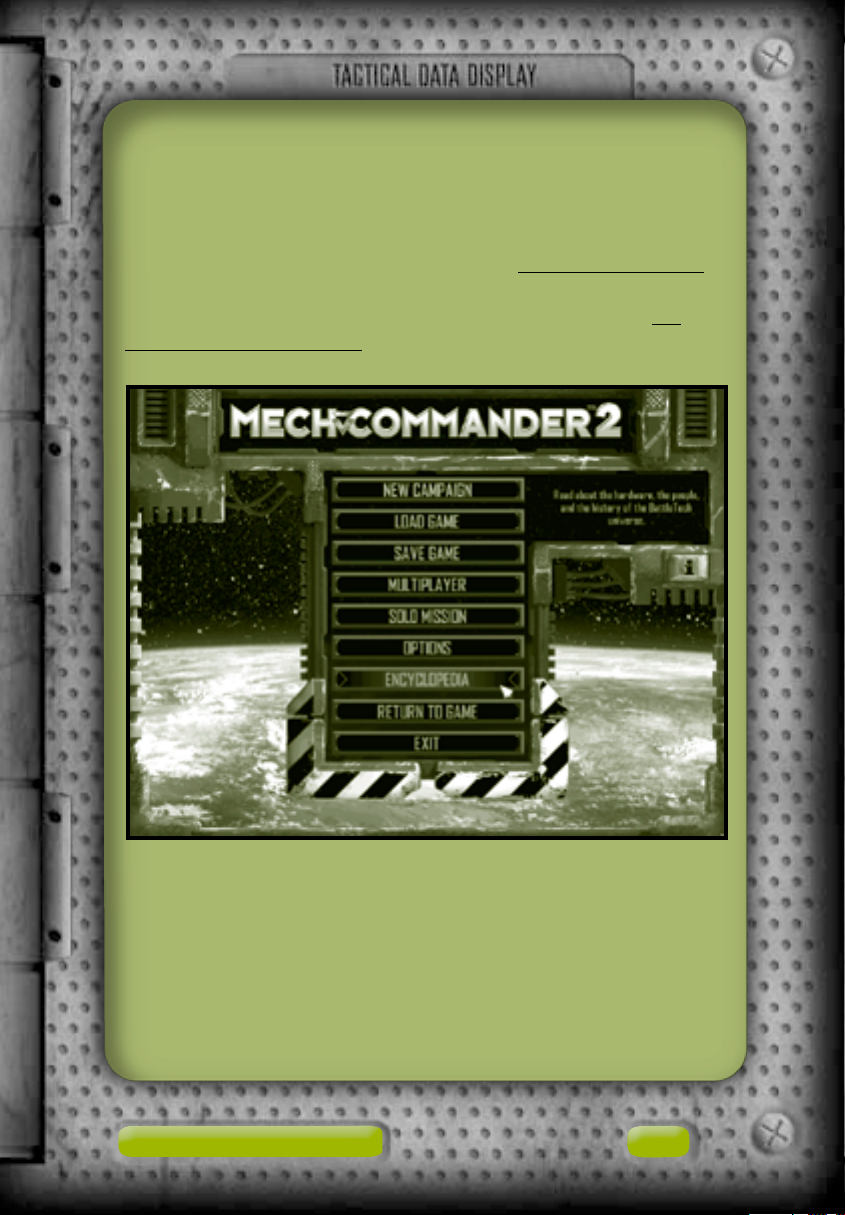
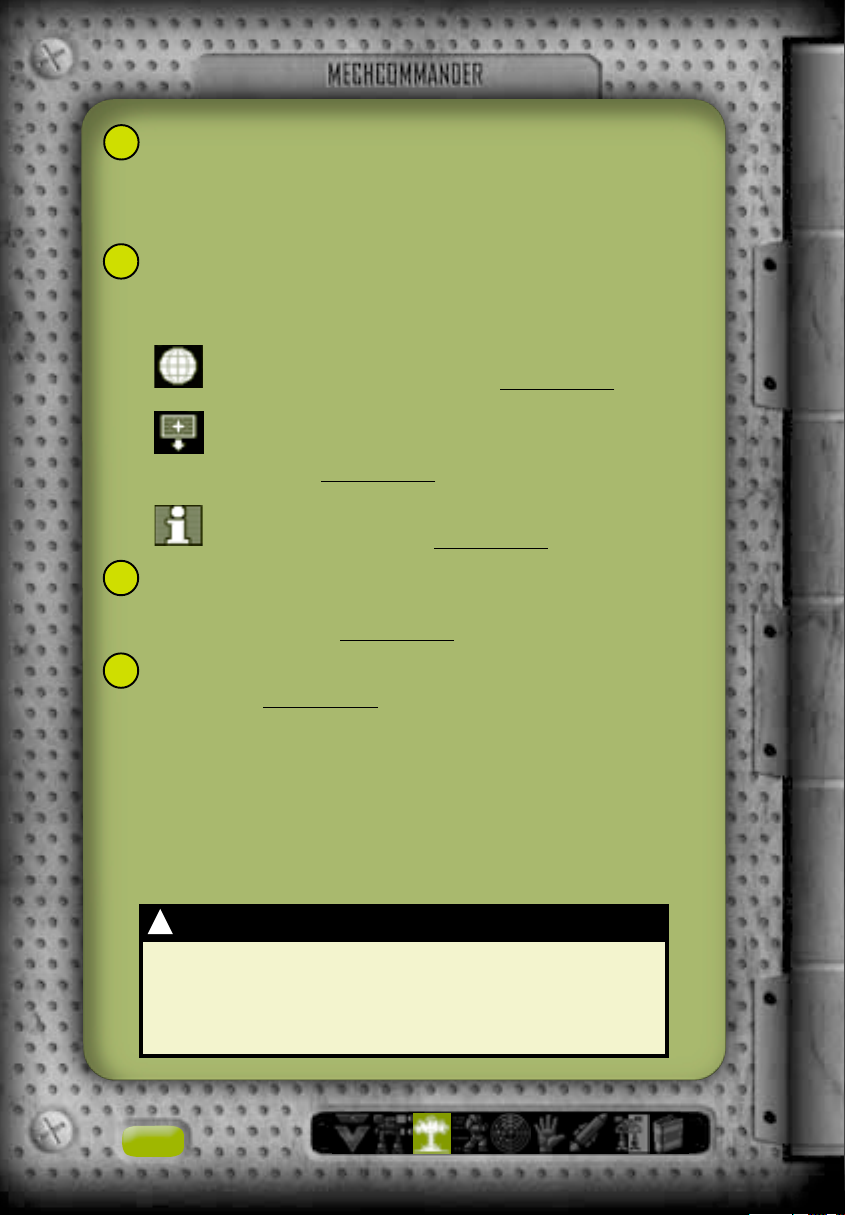
Main Menu
After the software has been installed and launched you will see
the Main Menu that accesses MechCommander 2. The Main Menu
can also be opened during mission preparation by clicking the
Main Menu button on any logistics screen (
A modified version of the Main Menu—the System Menu—may be
accessed during combat missions by pressing the ESC key (
page 26, Combat Interf ace).
see page 8, Logistics).
see
Strategic Overview
5
Page 8
New Campaign Either begin your first mission on Carver V or
select the learning missions—virtual reality simulations that
familiarize you with the new MechCommander 2 software.
Load Game Load a previously saved mission from the archives.
Each mission is listed with a snapshot of its mission map and its
current resource status. Saved missions may also be deleted here.
Save Game Save the current mission. Previously saved missions
may be deleted here. Note that games are automatically saved at
the end of every mission.
Multiplayer Interface with other MechCommanders for real-time
combat (
Solo Mission Launch a simulated battle exercise. Each completed
campaign mission is archived as a solo mission that can be
replayed. Solo missions can also be created or modified with the
MechCommander 2 Mission Editor. For more information, read the
Mission Editor documentation, located in the Editor folder where
you installed MechCommander 2 on your hard drive.
Options Customize MechCommander 2 graphics, audio, game, and
hotkey settings. Options such as ’Mech color schemes, limited or
unlimited ammunition, and difficulty levels can be selected.
see page 80, Multiplayer).
Encyclopedia Access a complete database of MechCommander 2
game information (
Return to Game Return to the previous screen.
Exit Terminate MechCommander 2 software. Mission data will be
lost if not previously saved.
i Access your product identification number.
!
Performance
You can increase your game performance and speed by
turning off graphics settings in the Options screen.
see page 7, Encyclopedia).
6
Page 9
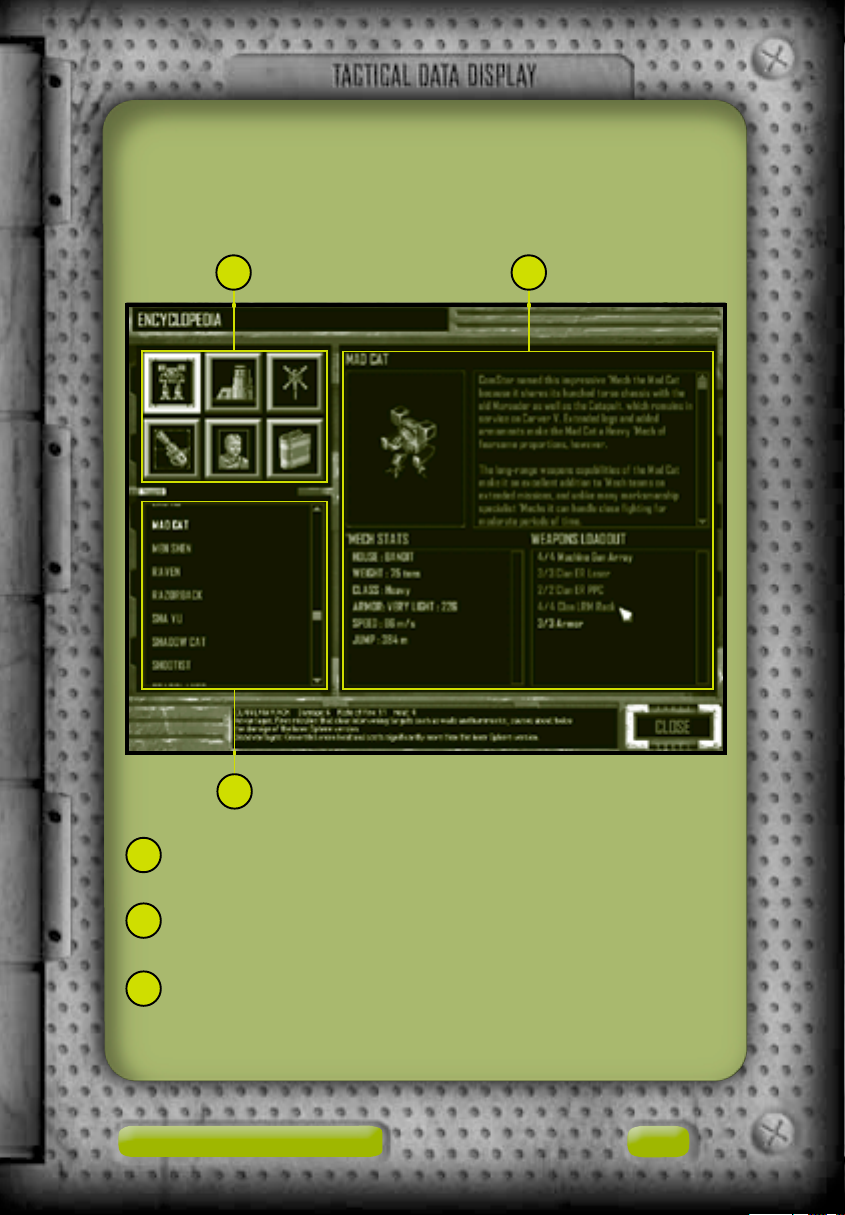
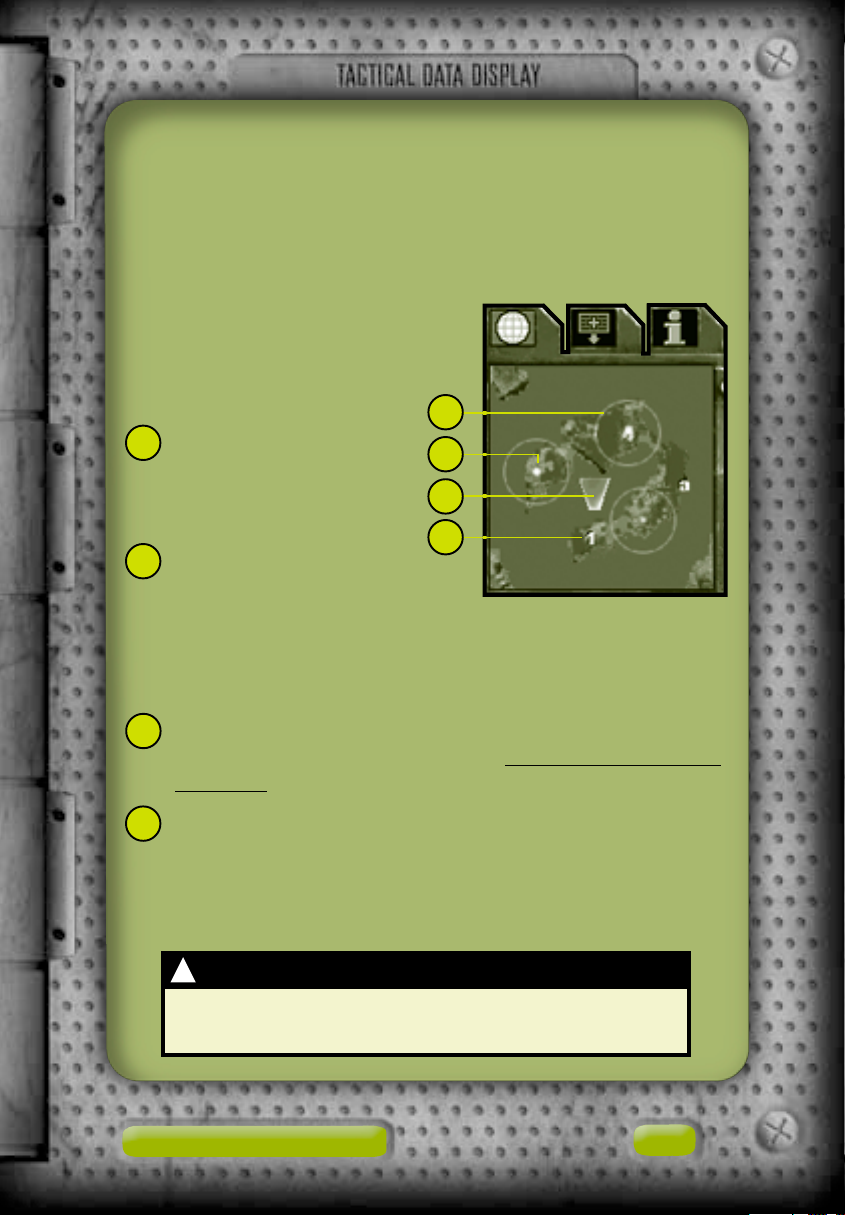
Encyclopedia
The encyclopedia has information on military units, equipment,
notable persons, and BattleTech® history.
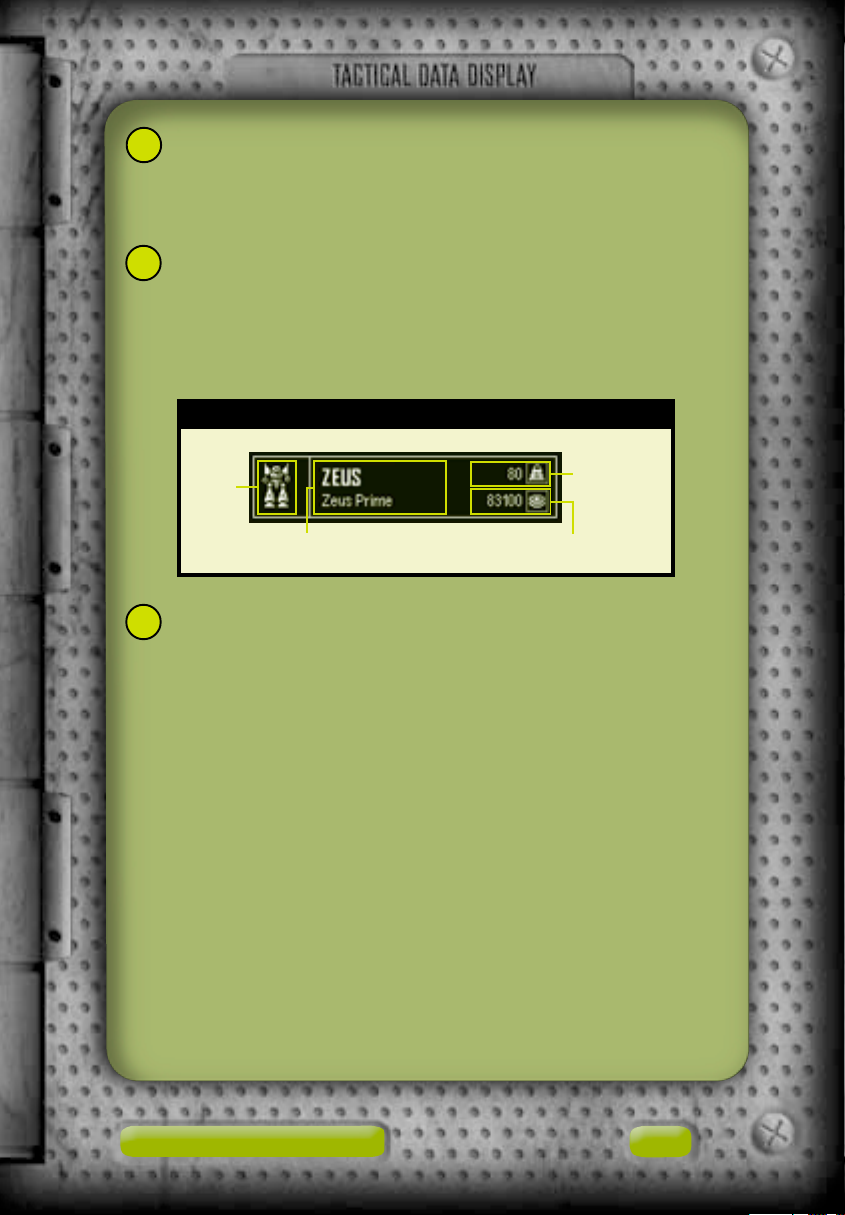
1 2
3
Chapters Click a button to view the individual entries of
1
each chapter in the encyclopedia.
Data Display An image of the selected entry as well as its
2
statistics and a summary.
Chapter Entries Click an entry to see its record in the data
3
display.
Strategic Overview
7
Page 10

Logistics
Logistics is the procurement, distribution, maintenance, and
replacement of military equipment and personnel. In the first two
logistics screens, you will gather intelligence on long-term campaign goals and immediate mission objectives.
Mission Selection
Review data on your contracted duties here in the Mission Selection screen, and then select which mission to carry out next. There
may be one or several missions available at any given time.
1 2
5
6
3
4
8
Page 11
VidCom A video briefing from your employer. Click the
1
controls along the right-hand side of the VidCom to play,
pause, and stop the video.
C-Bills The running total of cash available to purchase and
2
customize ’Mechs and equipment. You are paid at the end of
every successful mission. For more information,
Mission Results.
Campaign Missions A satellite image of the planetary
3
campaign map. Click a mission on the map to access that
mission’s video briefing and overview.
see page 39,
Main Menu Click this button to access the Main Menu (
4
page 5, Main Menu).
Mission Overview An overview of the mission briefing.
5
Rollover Help Text that explains the functions of command
6
surfaces as your cursor passes over them.
Click Next to proceed to a more detailed mission briefing.
!
Optional Missions
At certain points during the campaign, you may skip
some missions. It is advisable , however, to complete
every mission to maximize the number of C-bills earned
and increase the combat experience of your pilots.
see
Logistics
9
Page 12
Mission Briefing
Details of your selected mission appear in the Mission Briefing
screen.
1
2
3
10
Page 13
VidCom Mission Map A satellite reconnaissance photo
1
of the selected mission’s features and terrain. Numbered
objectives are displayed in conjunction with the VidCom
image. The MechCommander chevron indicates the mission
start point.
Mission Objectives A list of your objectives, followed by
2
your employer’s briefing and your tactical officer’s notes.
Mission objectives can be reviewed during a mission by
clicking the Objectives button on the Command Palette
see page 26, Combat Interface), by pressing the F9 key,
(
or by pressing the ESC key and then clicking Objectives on
the System Menu.
VidCom A 3D view of your mission objectives.
3
Click Next to proceed to the ’Mech Bay, where you may purchase
and modify ’Mechs for this mission.
!
Tactical Officer Notes
At the end of every briefing I’ll try to include any
available intelligence on enemies spotted in the area,
as well as suggestions on which ’Mechs and weapons to
take.—Diaz
Logistics
11
Page 14

In the next four logistics screens—’Mech Bay, ’Mech Purchasing,
’Mech Lab, and Pilot Ready Area—you will assemble your forces
for the current mission. Many believe victory on the battlefield
is largely determined here in these preparation phases.
’Mech Bay
In the ’Mech Bay, you select the ’Mechs to deploy on the mission.
1 2 3
4
5
6
12
Page 15

Deployment Team ’Mechs selected for the mission and
1
awaiting pilot assignment. To move a ’Mech from the Deployment Team area to ’Mech Storage, either double-click it, drag
it to ’Mech Storage, or click it and then click the Remove
’Mech button.
Team Weight Limit A display of the total weight of ’Mechs
2
in the Deployment Team area. You cannot add ’Mechs to
the deployment team if the total drop weight exceeds the
maximum. The maximum weight limit will vary from mission
to mission.
’Mech Storage An inventory of your ’Mechs. To move a
3
’Mech from ’Mech Storage to the Deployment Team area,
either double-click it, drag it to the Deployment Team area,
or click it and then click the Add ’Mech button.
’Mech Data A display of a selected ’Mech’s statistics—
4
tonnage, optimal weapons range, armor, speed, and jump
capability—as well as an image of the ’Mech and its current
weapons loadout with rollover descriptions.
Modify ’Mech Click this button to transfer a selected ’Mech
5
to the ’Mech Lab for customization (
see page 16, ’Mech Lab).
Buy/Sell ’Mechs Click this button to access the ’Mech
6
Purchasing screen, where ’Mechs may be sold from the
current inventory or bought and added to ’Mech Storage
see page 14, ’Mech Purchasing).
(
After you have selected and customized ’Mechs for the current
mission, click Next to proceed to the Pilot Ready Area (
page 19), where you will assign pilots to your ’Mechs.
Logistics
see
13
Page 16
’Mech Purchasing
Clicking the Buy/Sell ’Mechs button in the ’Mech Lab displays the
’Mech Purchasing screen. When you purchase or sell a ’Mech, your
C-bill total (located at the top of the screen) is adjusted accordingly. ’Mechs that you cannot afford will appear dimmed and
cannot be selected. There is no handling fee associated with
buying and selling ’Mechs; you get full resale value.
1
2
3
14
Page 17
’Mech Storage ’Mechs available in your inventory. To sell a
1
’Mech, either double-click it in ’Mech Storage, drag it to the
Available ’Mechs list, or click it and then click the Sell ’Mech
button. Your C-bill account will be credited.
Available ’Mechs A list of the ’Mechs ready for purchase.
2
To buy a ’Mech, either double-click it in the Available ’Mechs
list, drag it to ’Mech Storage, or click it and then click the
Buy ’Mech button. Its cost will be deducted from your C-bill
account.
Available ’Mech Summary
’Mech
icon
’Mech model/variant name
’Mech Data A display of a selected ’Mech’s statistics—
3
tonnage, optimal weapons range, armor, speed, and jump
capability—as well as an image of the ’Mech and its current
weapons loadout with rollover descriptions.
Click Cancel to erase all transactions, or click Accept to finalize
your transactions. Either button returns you to the ’Mech Bay.
Weight
(tons)
Cost (C-bills)
Logistics
15
Page 18
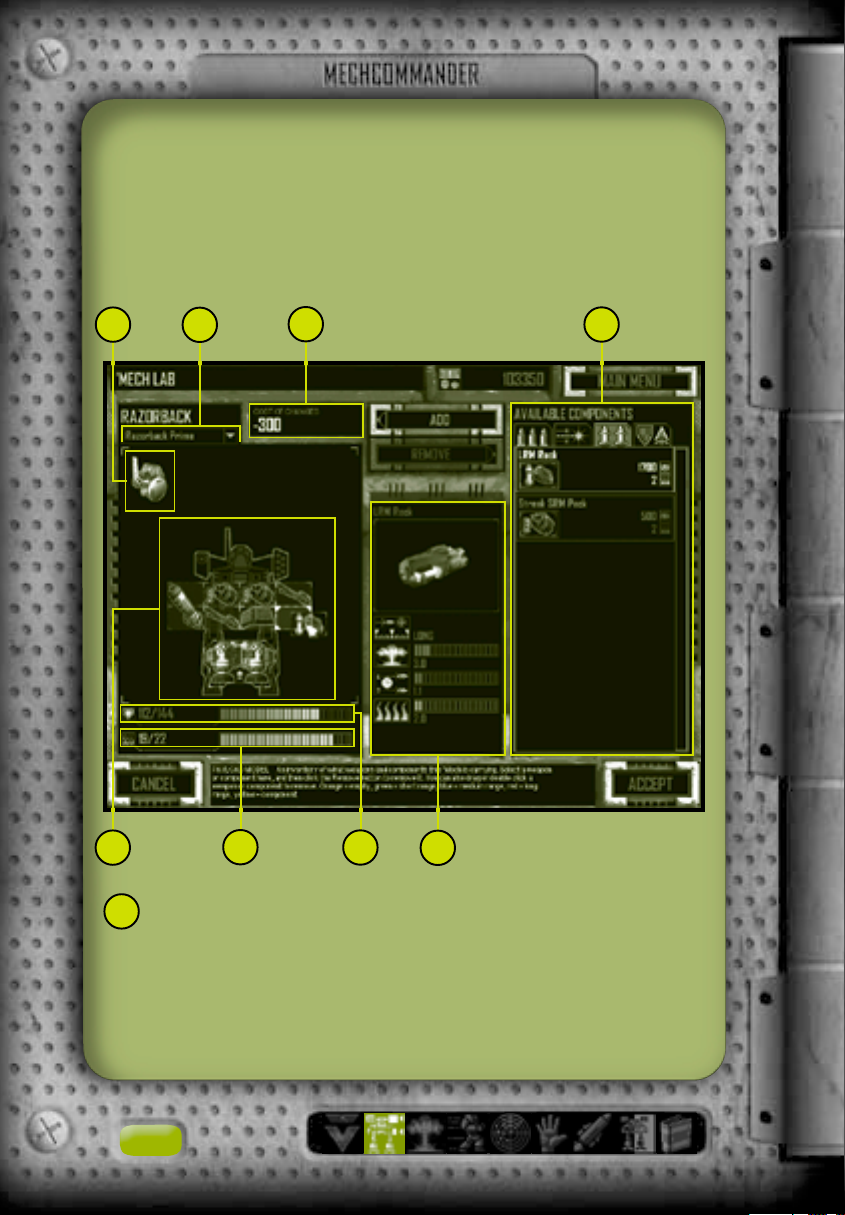
’Mech Lab
In the ’Mech Lab, you can modify any ’Mech in your inventory,
customizing its weapons, armor, and other equipment as you see
fit for the current mission. You may also design and save your
variants for future deployment.
1
5
2
6
3
7
8
4
Sensors A representation of the ’Mech’s sensors and elec-
1
tronic countermeasures (ECM). Although displayed in the
interactive Payload Model, these systems are integral to the
design of the ’Mech and cannot be added or removed. Only
some ’Mechs have sensors.
16
Page 19
Variants List A drop-down list of previously saved ’Mech
2
variants that can be applied to the ’Mech you are currently
modifying. Only variants for the model of ’Mech being
modified appear here. If, for example, a Mad Cat is being
altered, you cannot apply a Shadow Cat variant.
Cost of Changes The running total of refunds for removing
3
components and/or costs for adding components. These
refunds/costs are applied to your C-bill total only after you
click the Accept button.
Available Components Review and purchase weapons and
4
other components here. Click a tab along the top to access a
category: energy weapons; ballistic weapons; missiles; and
non-weapon components such as armor, heat sinks, and jump
jets. To add a component to a ’Mech, either double-click the
component in the Available Components box, drag it to the
Payload Model, or click it and then click the Add button.
Modifying components is restricted as follows:
• The Payload Model must have enough free space to house
an added component.
• The heat generated by an added component cannot
exceed the maximum heat capacity.
• Additional armor cannot exceed the maximum allowed
armor capacity.
• Heat sinks cannot be removed if doing so exceeds the
maximum heat capacity.
Payload Model A representation of the ’Mech’s weapons,
5
armor, heat sinks and, for some chassis, jump jets and
sensors. To remove a component from the ’Mech, either
double-click the component in the Payload Model, drag it
to the Available Components box, or click it and then click
the Remove button.
Logistics
17
Page 20
Heat Capacity Indicator The amount of heat generated by
6
the ’Mech’s weapons and the maximum amount of heat the
chassis can withstand.
Armor Indicator The ’Mech’s current armor value and the
7
maximum value its chassis can carry. Heavier ’Mechs have
correspondingly larger allowed maximum armor values.
Component Data A display of a selected component’s
8
statistics, such as range, damage, rate of fire, and heat
generated.
To finish modifying a ’Mech, click Accept. You must have enough
C-bills to pay for the modifications. You must then name and save
your design variant. To erase any changes and return to the ’Mech
Bay, click Cancel.
!
Jump Jets
Jump jets only fit onto ’Mech chassis designed for them.
Jump jets are represented in the Payload Model by
unique space-fitting icons that reflect this restriction.
18
Page 21
Pilot Ready Area
Review and assign pilots to the ’Mechs on your deployment team
in the Pilot Ready Area. Selecting the right pilot for the right
’Mech is the key to your success. ’Mech pilots have diverse abilities—one that excels in piloting a Heavy ’Mech loaded with
autocannons may not be the best choice to pilot a Light ’Mech
with energy weapons.
1
2
3
Logistics
19
Page 22

Deployment Team A list of ’Mechs ready to be launched on
1
the mission. Click an unmanned ’Mech to review its loadout.
To remove a pilot from a ’Mech, either double-click the ’Mech
in the Deployment Team area, drag the pilot to the Available
Pilots list, or click the ’Mech and then click the Remove
Pilot button.
Available Pilots A list of pilots ready to be assigned to the
2
’Mechs on the deployment team. To add a pilot to a ’Mech,
select a ’Mech in the Deployment Team area, and then either
double-click the pilot in the Available Pilots list or click the
pilot and then click the Add Pilot button. Alternatively,
simply drag the pilot to the desired ’Mech.
Pilot Record The military record of a selected pilot, includ-
3
ing rank, gunnery and piloting skills, number of kills, and
any specialty skills (
After you have selected pilots for all ’Mechs on your deployment
team, you may send your team on the mission by clicking Launch.
see page 65, ’Mech Pilots).
!
’Mech and Pilot Data
Click an empty ’Mech to display its data. Compare its
components and your pilots’ capabilities for the best
match of man and machine.
20
Page 23
After every successful mission, you will enter the recovery portion
of logistics. Here you will have an opportunity to salvage ’Mechs
from the battlefield and review your ’Mech pilots.
’Mech Salvage
In the ’Mech Salvage screen you may recover disabled ’Mechs. In
some instances, this is the only way to obtain newer ’Mechs not
available from your employer.
1
2
Logistics
21
Page 24
Salvage List A list of ’Mechs available for recovery. ’Mech
1
icons are color-coded to indicate the damage to each ’Mech
part: blue indicates undamaged, yellow moderately damaged,
red heavily damaged, and gray destroyed. Also shown are the
’Mech’s tonnage and the cost to recover it.
’Mech Data A display of a selected ’Mech’s statistics as well
2
as its current weapons loadout.
Click Done to proceed to the Pilot Status screen. Once you leave
the ’Mech Salvage screen, you cannot return to it.
!
Costs
I’ve negotiated an extra clause into our standard
mercenary contract. The repair costs for any damage
done to our ’Mechs or damage to salvaged units are
covered by our employer.—Diaz
22
Page 25
Pilot Status
On the Pilot Status screens, you review whether your pilots
increased their skills, received a promotion or commendation,
or were wounded or killed in action.
Pilot Review
The Pilot Review screen allows you to review your pilots’ performance during the previous mission. Pilot and gunnery skills are
displayed as well as any new medals awarded (
Pilots) and accumulated kill markers.
see page 65, ’Mech
Logistics
23
Page 26
Kill markers show the type and number of enemy units destroyed
or disabled over the course of successive missions. The following
are sample markers awarded to ’Mech pilots.
’Mech Awarded when the pilot destroys an enemy ’Mech.
Combat Vehicle Awarded when the pilot destroys an enemy
armed vehicle.
Click Done to proceed to the next mission briefing.
!
Pilot Recruitment
Unlike ’Mechs, new pilots can’t be purchased. However,
you may be able to win over new recruits during the
campaign.
24
Page 27
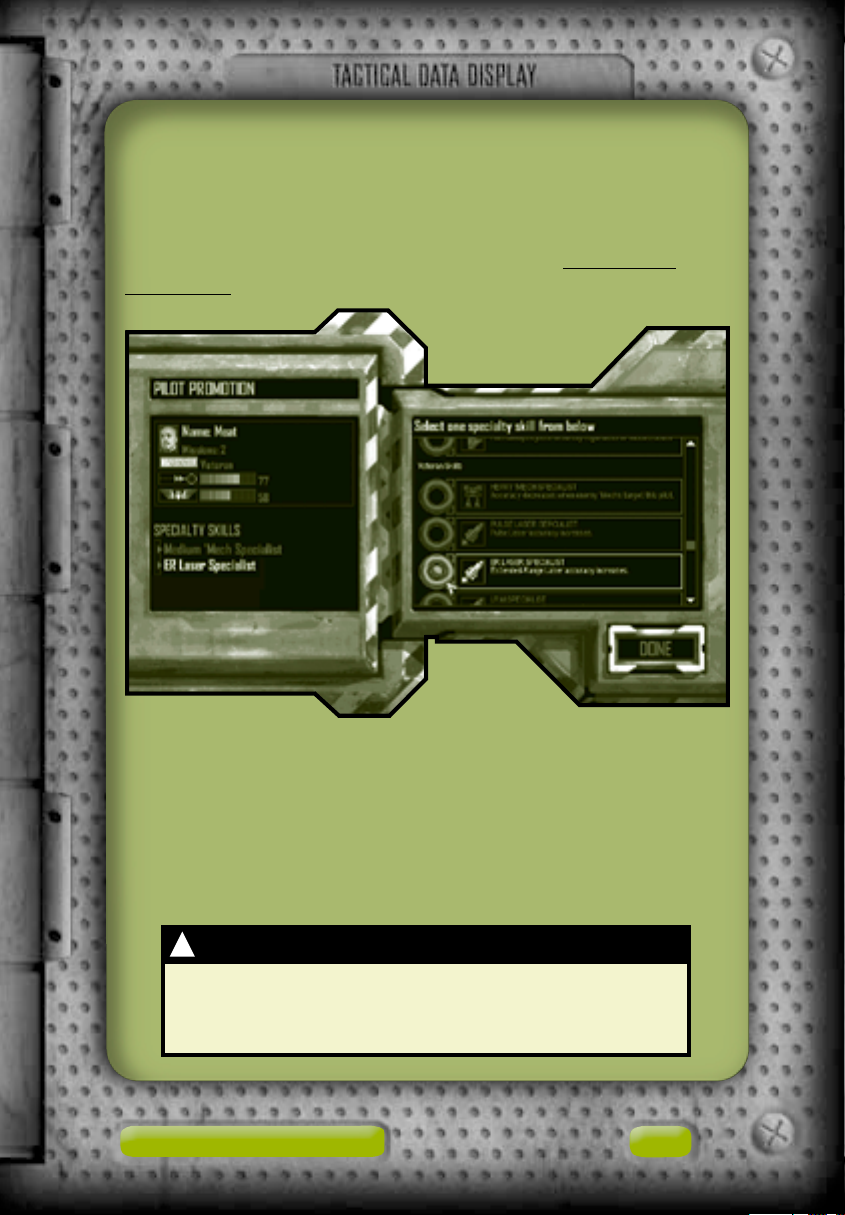
Pilot Promotion
Pilots on your deployment team who have done exceptionally
well and increased their piloting and gunnery skills may receive
a promotion to the next rank as well as obtain specialty skills
training. For details on rank and specialty skills,
’Mech Pilots.
see page 65,
After reviewing promotions and assigning specialty skills, click
Done to proceed to the Pilot Review screen.
!
Pilot Specialty Skill
Pilots receive only one specialty skill per rank
promotion. The choice is permanent. Think carefully
before choosing.
Logistics
25
Page 28
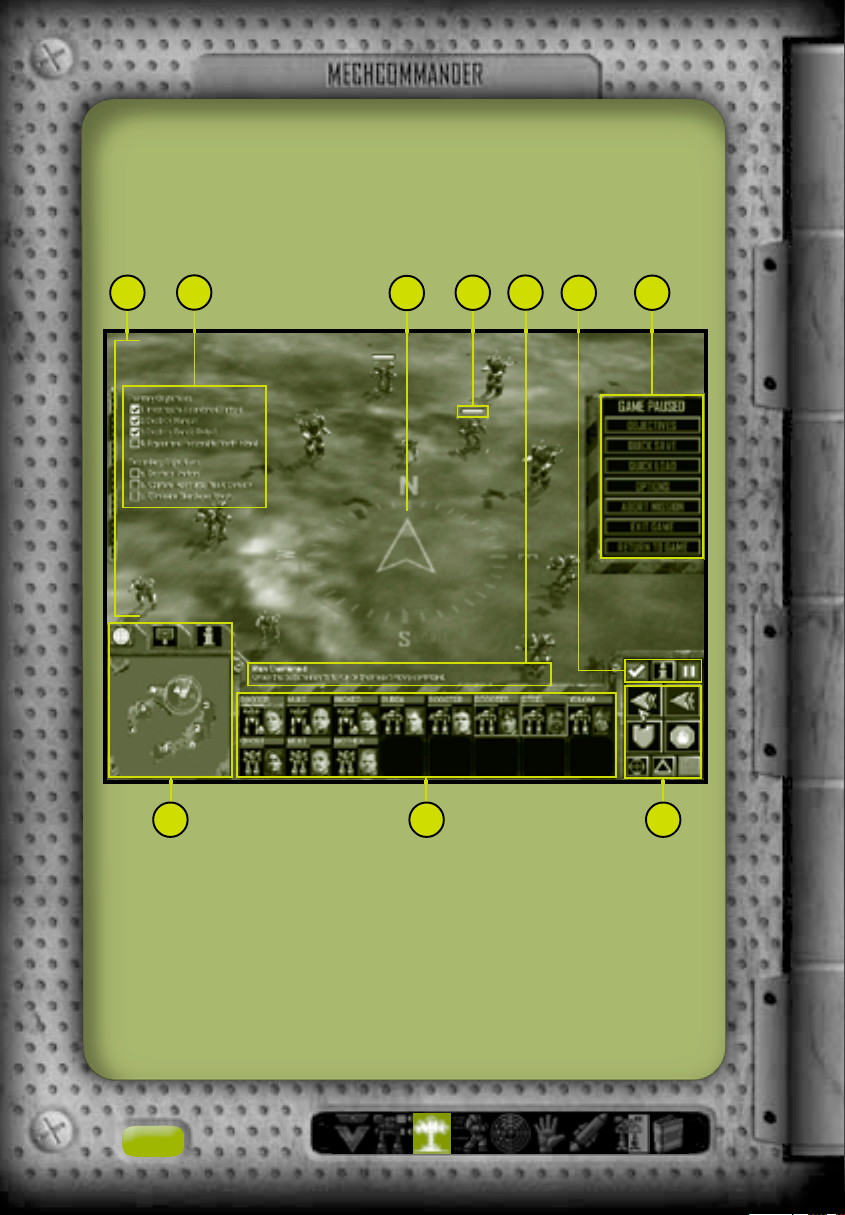
Combat Interface
The Combat Interface enables you to efficiently issue orders to
your deployment team.
1 5
2
8
4
9
6
73
10
26
Page 29
Battlefield A real-time satellite-relayed image of the
1
battlefield that also displays all sensor contacts. For information about how to alter the viewpoint and camera angles,
see page 60, Situational Awareness.
Mission Objectives The goals of the current mission. New
2
objectives may appear as the mission progresses, and objectives are checked off as they are successfully completed.
See page 38.
Compass A navigational orientation system. Toggle the
3
compass on and off by pressing the BACKSLASH (\) key.
Status Bar A bar that appears over every unit and building
4
as your cursor passes over them or over selected units and
buildings, indicating the object’s damage. As damage accumulates, the bar decreases until gone, at which point the
object is destroyed.
Rollover Help Text that explains the functions of command
5
surfaces as your cursor passes over them.
Command Buttons The button panel over the Command
6
Palette that allows the MechCommander to access global
software functions.
Objectives Click this button or press the F9 key
to toggle the mission objectives.
Information Click this button or hold down the
I key, and then click any unit to display its data
in the unit information display. See page 33.
System Menu/Pause Click this button or press
the ESC key to toggle the System Menu and pause
the battle.
See page 38.
Combat Interface 27
Page 30
System Menu/Pause Click a button to access mission
7
objectives, save or load a mission, customize game options,
or abort the current mission. When the System Menu appears,
the battle pauses.
Multifunctional Display An interactive display that shows
8
the tactical map, support palette, or unit information display, depending on the tab selected.
Tactical Map Click this tab to display a reconnaissance photo of the battle area.
Support Palette Click this tab to display artillery,
vehicle reinforcement, or other battlefield support
commands. See page 30.
Unit Information Click this tab to display information on a selected unit.
Deployment Team Bar A graphical representation of the
9
condition of every unit on your deployment team. Click units
here to select them. See page 35.
Command Palette Issue movement or fire commands from
10
this screen.
See page 36.
See page 33.
See page 29.
!
Pause
Although the battle itself may be paused, the
MechCommander can still survey the latest sensor
information and issue attack and movement orders
accordingly.
28
Page 31
Multifunctional Display
Select tabs along the top of the multifunctional display (MFD)
to show the tactical map, support palette, or information on a
selected unit. Alternatively, cycle through the displays by pressing
the TAB key.
Tactical Map
The tactical map displays a
compressed view of the entire
battlefield.
Sensor Range Circles
1
represent the sensor
range of ’Mechs, Sensor
Towers, or Sensor Probes.
1
2
3
4
Sensor Traces Green
2
dots represent units on
your deployment team,
blue dots represent allies, and red dots represent hostile
units. Selected units appear significantly brighter than
unselected units.
Camera Angle The yellow trapezoid shows the camera
3
angle on the battlefield viewscreen (
Awareness).
Mission Objectives Numbers indicate specific primary
4
mission objectives, while letters indicate secondary
objectives.
!
Tac Map View Command
To center the viewscreen on any location, click that
region on the tactical map.
see page 60, Situational
Combat Interface 29
Page 32

Support Palette
Use the support palette to summon support units and airstrikes
during a mission. Each support option, however, costs resource
points (RPs). RPs are a measurement of the tactical support your
employers provide for a specific mission. You can obtain additional
RPs by capturing resource buildings. If you do not have sufficient
RPs to purchase a support unit, its icon will appear dimmed and
cannot be selected.
4
321
30
6
5
8
7
Page 33

Airstrike Click this button or press
1
the NUMPAD ASTERISK (*) key on the
numeric keypad, and then click any
region on the battlefield to bomb that
area. After a delay (indicated by a
countdown timer), a Shilone bomber
will drop high-explosive charges in that
region, inflicting heavy damage on all units
and buildings within the area.
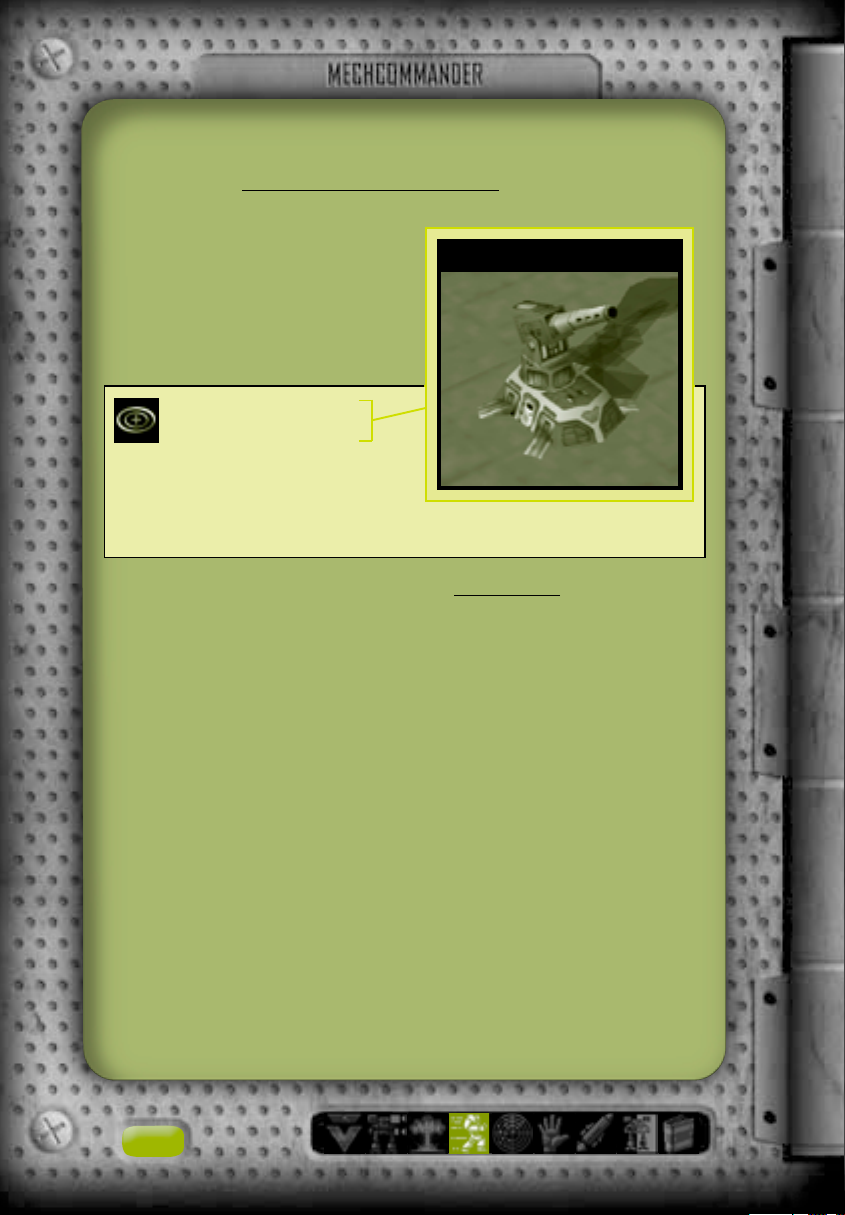
Fixed Artillery Click this button, and then click a location
2
on the battlefield to airdrop a stationary Long Tom artillery
platform. These Fixed Artillery pieces cannot be moved once
deployed. The artillery becomes a unit on your team. You
may command the artillery to fire like any other unit on your
deployment team, or you may issue a suppression fire command (
Sensor Probe Click this button or press the NUMPAD
3
FORWARD SLASH (/) key on the numeric keypad, and then
click any region on the battlefield to airdrop a non-mobile
sensor from high orbit. The probe can detect units otherwise
beyond normal sensor range. It has a limited battery life, and
its sensor range, which steadily decreases, is represented on
the tactical map as a green circle.
see page 56).
Shilone Bomber
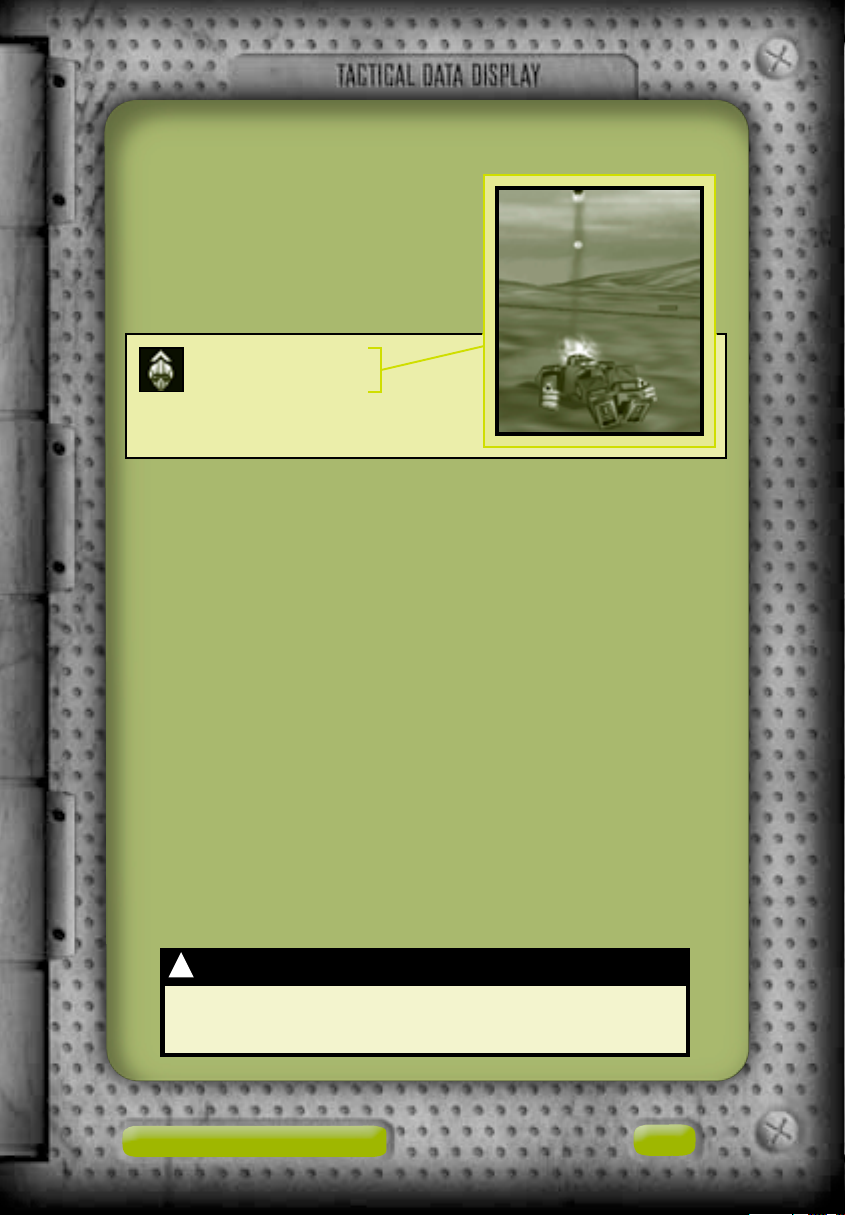
Repair Truck Click this button, and then click a location on
4
the battlefield to airdrop this vehicle. The Repair Truck can
repair and resupply ammunition to any ’Mech on your team
during the mission. The Repair Truck becomes a unit on your
deployment team.
See page 54, Repair.
Combat Interface 31
Page 34

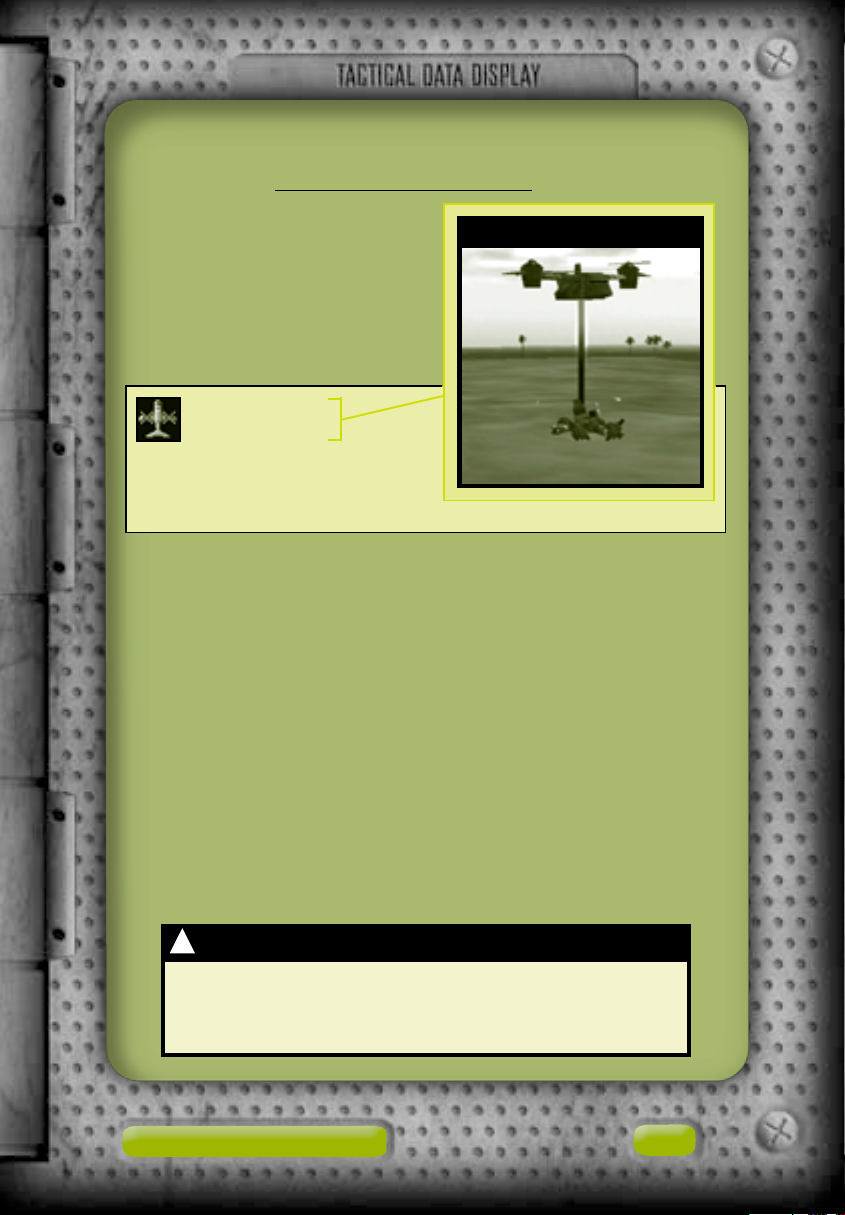
Scout ’Copter Click this button, and
5
then click a location on the battlefield
to dispatch this vehicle for aerial
reconnaissance. The Scout ’Copter
becomes a unit on your deployment
team. Scout ’Copters have no sensors
and rely on direct line of sight (
page 63) to spot enemies.
Minelayer Click this button, and then click a location on
6
the battlefield to airdrop a minelaying vehicle. The Minelayer
becomes a unit on your deployment team.
Lay Mines.
Salvage Craft Click this button, and then click any disabled
7
’Mech, even an enemy ’Mech, on the battlefield. The ’Mech
is restored to minimal functioning capacity and a pilot is
assigned to the unit.
Cancel Click this button to countermand the pending
8
support palette order. Once, however, support has been
ordered (by clicking the battlefield or a unit), that order
may not be rescinded nor are RPs refunded.
See page 57, Salvage.
see
Scout ’Copter
See page 55,
32
Page 35

Unit Information
The unit information display shows complete data on a selected
unit and, if applicable, on its pilot.
1
2
3
4
5
Basic Data The name of the unit, its tonnage, and whether
1
it is a ’Mech or a vehicle.
Status Bar A measurement of the unit’s damage. As damage
2
accumulates, the bar decreases until gone, at which point
the unit is destroyed.
Combat Interface 33
Page 36

Damage Display The front and back sections of the unit
3
and their color-coded damage states: blue indicates undamaged, yellow moderately damaged, red heavily damaged, and
gray destroyed. If a section containing weapons is sufficiently damaged, weapons housed within that section may be
ruined, ammunition can explode, and pilots can be wounded
or killed.
Payload The unit’s weapons organized by range, short to
4
long, as well as other equipment. If applicable, remaining
ammunition is shown.
Pilot Information The pilot’s photo, name, and rank, as
5
well as skills. If the pilot is dead or has ejected, this section
shows “No Pilot.”
!
Enemy and Disabled Unit Data
To display information on an enemy, click the Unit
Information button on the Command Palette or hold
down the I key, and then click an enemy unit. You can
also check disabled ’Mechs in this way to see if they
are worth salvaging.
34
Page 37

Deployment Team Bar
The Deployment Team Bar allows you to quickly assess the strength
of your deployment team and select or locate individual units.
Every ’Mech and vehicle on the deployment team is represented on
the Deployment Team Bar in individual unit cells. Video feed from
’Mech pilots appears within their cells.
Units acquired during a mission, such as a Repair Truck, a Minelayer, or a salvaged ’Mech, are added to the Deployment Team Bar.
If a Repair Truck exhausts its supplies, it is removed from the
Deployment Team Bar.
Pilot or Unit Name
1
Status Bar An
2
indicator of the unit’s
overall condition.
Armor Damage Level
3
The color-coded
diagram of the unit’s
armor sections: blue
indicates undamaged,
yellow moderately
damaged, red heavily
damaged, and gray destroyed.
Deployment Team Bar Unit Cell
1
3
2
4
5
Jump Jets An indicator showing whether or not the unit
4
has jump jets.
Pilot Photo
5
For information on selecting units or teams on the Deployment
Team Bar,
see page 40, Selecting Units.
Combat Interface 35
Page 38

Command Palette
The Command Palette contains buttons used to issue the most
common orders to your units.
1
3
5
Run Click this button to order the selected unit to move
1
at its fastest possible speed.
Jump Click this button to order the selected ’Mech
2
equipped with jump jets to jump.
Guard Click this button to order the selected unit to guard
3
an object or area.
See page 53.
6
7
See page 42.
See page 43.
2
4
36
Page 39

Stop/Hold Fire Click this button to countermand the
4
pending order.
Fire from Current Position Click this button to order the
5
selected unit to fire from its current location.
Hold Position Click this button to toggle the hold position
6
command on and off. When a selected unit is ordered to hold
position, it will not move from its current location unless
specifically given an order to do so.
Special Unit Command Click this button or press the V key
7
to order the selected special unit to execute its primary
function.
Lay Mines Click this button to order the selected
Minelayer to deposit mines.
Suppression Fire Click this button to order the
selected Fixed Artillery to commence suppression fire.
See page 56.
See page 49.
See page 50.
See page 44.
See page 55.
Combat Interface 37
Page 40

Mission Objectives
There are two types of mission objectives, primary and secondary.
Primary objectives must be completed to finish the mission. Your
employer pays you for all the completed primary goals. Secondary
objectives, listed beneath the primary objectives, are not required
to finish the mission. Your employer, however, will pay you extra
for every completed secondary objective.
Mission Objectives
38
Page 41

Mission Results
If all primary objectives are accomplished during a mission, the
mission ends and the Mission Results screen appears, overlaying
the Combat Interface.
Mission Results
Each successfully completed objective is paid in C-bills by your
employer. A running tally appears at the bottom of the objectives.
You can use these C-bills to customize your ’Mechs or buy new
’Mechs for your next mission.
After the results of your successful mission have been displayed,
you will be shown the ’Mech Salvage screen, where you may
recover disabled ’Mechs from the battlefield.
If, however, all your units are destroyed during the course of a
mission, you will fail the mission. The Mission Results screen does
not appear, no C-bills are rewarded, and you will return to the
Mission Briefing screen of the logistics interface to rethink your
plan of attack.
Combat Interface 39
Page 42
Command and Control
Orders are grouped into four categories: movement, attack, support,
and ’Mech function.
To give an order, select one or more units on your deployment team,
and then issue a command via the Command Palette or the keyboard. Generally, your units wait for orders, but if fired upon they
will defend themselves and even give chase to the enemy. At any
time you can rescind your orders by clicking the Stop/Hold Fire
button on the Command Palette or pressing the BA CKSPACE key.
Selecting Units
When a unit is selected, that unit appears on
the battlefield within corner brackets. Furthermore, if you move your mouse cursor over
a unit it is highlighted and its name appears.
If the unit is a member of your deployment
team, the pilot’s name appears below the unit
as well. All selected units a re color-coded:
green for friendly units, blue for allied units,
and red for enemy units.
Selecting a Single Unit
Use the following techniques to select a single unit.
• To directly select a unit, move your mouse cursor over the unit
to be selected on the battlefield, and then click it.
• To select a unit by dragging, move your mouse cursor near the
unit to be selected on the battlefield, hold down the left
mouse button, and then drag the mouse to draw a boundary
around the unit.
• To select a unit via the Deployment Team Bar, click its icon on
the bar (
see page 35).
Direct Selection
40
Page 43
Selecting Multiple Units
Use the following techniques to select more than one unit at
a time.
• To directly select multiple units, hold down the SHIFT key
while clicking each unit.
• To select multiple units by dragging, move your mouse cursor
near the units to be selected on the battlefield, hold down
the left mouse button, and then drag the mouse to draw a
boundary around the units.
• To select multiple units via the Deployment Team Bar, hold
down the SHIFT key while clicking each unit’s icon on the bar.
• To select all units on the deployment team, double-click any
unit on the Deployment Team Bar.
• To select all units in view on the battlefield, press the E key.
Any selected units not in view will be deselected.
Forming Task Groups
To save time selecting units, assign units on your deployment
team to task groups that may then be selected with a single key.
• To form a task group, select one or more units, and then press
CTRL+1 through 9.
The units in the task group may then be selected at any time
by pressing the number key assigned to them.
Deselecting Units
Units may be deselected by selecting any other unit. If you need
to deselect one unit from a group of selected units, hold down the
SHIFT key while clicking that unit on the battlefield or on the
Deployment Team Bar.
Command and Control 41
Page 44

Movement Orders
To move a unit, select it, click a movement order on the Command
Palette, and then click the destination on the battlefield.
Walk
Also known as a half-power move, the walk order is a midrange
throttle setting and the default movement for units on your team.
To issue a walk order
Select a unit, and then click th e d estin ati on on the battlefield.
If a walk order is issued to a ’Mech attacking another unit, that
’Mech will continue to fire as it proceeds to the new location.
Run
Also known as a full-power move, the run order commands units to
proceed to a location at maximum speed.
To issue a run order
Select a ’Mech, click th e Run button on the Command Palette or hold
down the SPACEBAR, and then click the destination on the battlefi eld .
If you hold down the SPACEBAR while issuing the following
orders—capture, repair, attack, and lay mines—your units will
execute these orders at full speed instead of the default walk
speed. For additional details,
page 53, Support Orders.
Not all ’Mechs have the same run speeds. If a movement order
is issued to a group, they may not arrive at the new location
together.
see page 48, Attack Orders, and
42
Page 45

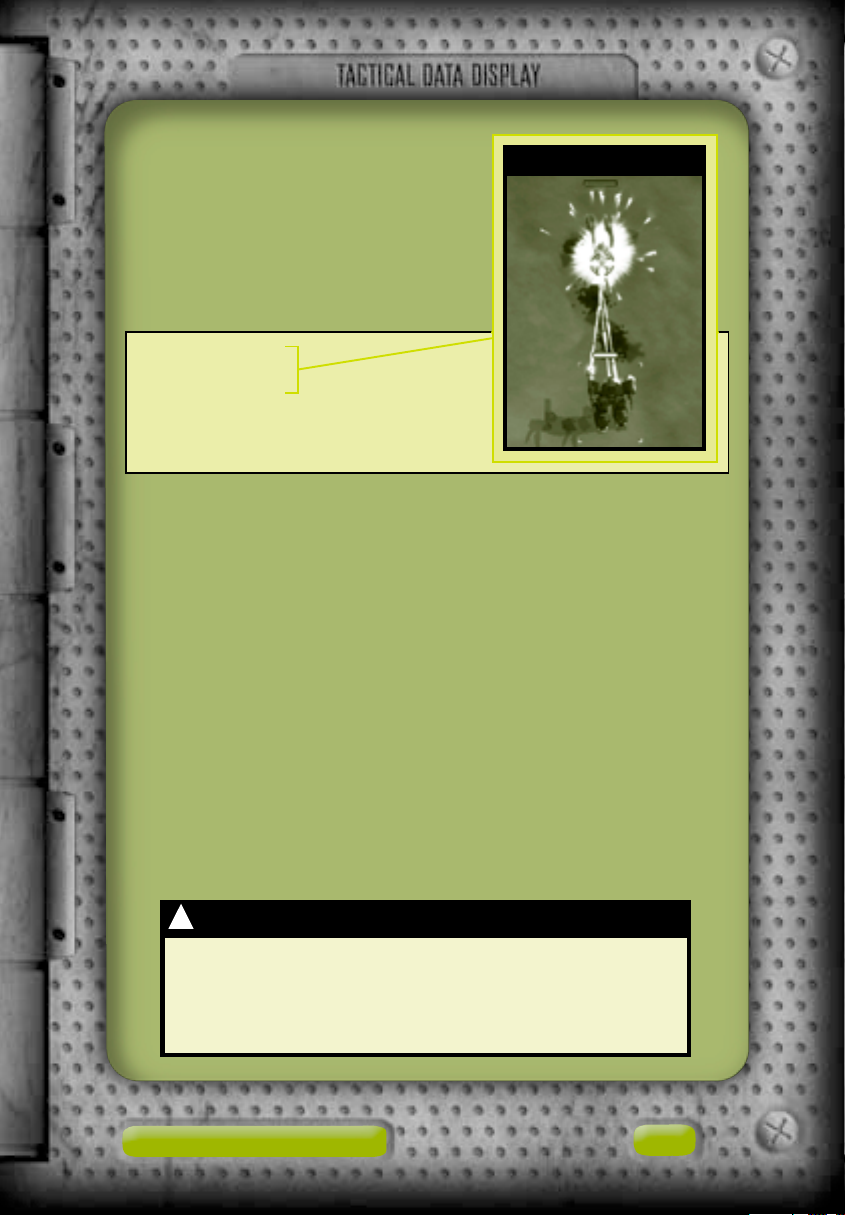
Jump
Jumping Highlander
Only ’Mechs equipped with
jump jets can perform the
jump maneuver.
To issue a jump order
Select a ’Mech, click the
Jump button on the
Command Palette or hold
down the J key, and then
click the destin ation on
the battlefield.
The jump order is only valid if the destination is within the ’Mech’s
jump range, as indicated by the appearance of the jump cursor.
If a jump order is issued to a group, then the ’Mechs’ jump range is
equal to the shortest jump range within the group. If one ’Mech in
a selected group does not have jump jets, then none of the ’Mechs
can jump.
Command and Control 43
Page 46

Hold Position
A unit ordered to hold position remains at
its current location until specifically
ordered to move.
To issue a hold position order
Select a unit, and then either cli ck th e Hold
Position button on the Command Palette or
press the H key.
Units holding position are denoted with a triangle above their
image on the battlefield. Unlike other orders, the hold position
order must be turned off; otherwise, the unit will hold its position
indefinitely.
To release a unit from the hold position order, select the unit, and
then click the Hold Position button or press the H key again.
If a movement or capture order is issued to a unit holding position, the unit will move to the new location and hold position
there. If a unit holding its position is ordered to attack another
unit, it will remain at its current location and fire its weapons if
the target is within range.
!
Ambush Formation
Arrange ’Mechs on three sides of approaching enemies
to generate firepower from several directions, and then
issue the hold position order to prevent your ’Mechs
from moving and disrupting this powerful formation.
44
Page 47

Set Waypoints
Waypoints are predetermined points through which your units
move. They are useful to direct units around difficult-to-navigate
or dangerous enemy-held areas that a typical movement order
would take units into.
Units may be ordered to walk, run, or jump from waypoint to
waypoint in any order. Up to 16 waypoints are allowed.
If there is an obstruction between two waypoints, your units will
go around it.
You may place waypoints in areas where you do not have sensor
contact or line of sight (for more details,
Awareness).
see page 60, Situational
To set a walk waypoint
Select one or more units, and then hold down the CTRL k ey while
clicking the terr ain.
To set a run waypoint
Select one or more units , and then hold down CTRL+SPACEBAR while
clicking the terr ain.
To set a jump waypoint
Select one or more units , and then hold down CTRL+J while cli ckin g
the terrain.
Your units will not begin their movement until the CTRL key is
released.
Command and Control 45
Page 48

To view a waypoint path
Select a unit navigating th e waypoints, and then hold down the
CTRL key.
Waypoint Path
To clear a waypoint path
Select the unit(s) navigatin g th e waypoin ts , and then either cli ck th e
Stop/Hold Fire button on the Command Palette, press the BACKSPACE
key, or issue any other movement ord er.
!
Controlling Movement
Units do not move exactly on waypoint paths; rather,
they take the shortest route to each waypoint. For
finer movement control, lay more waypoints.
46
Page 49

Patrol
A patrol path is a modified waypoint route on which a unit will
repeatedly travel.
To set a patrol path
To make a circular patrol path, select a ’M ech, lay d own a series of
waypoints, and th en connect the last waypoint to the first.
To make a linear patrol path, select a ’Mech, lay down a series of
waypoints, and th en cli ck th e selected ’Mech as the last waypoint.
To clear a patrol path
Select the unit(s) navigatin g the patr ol path, an d th en either click the
Stop/Hold Fire button on the Command Palette, press the BACKSPACE
key, or issue any other movement ord er.
Note that only individual units, not groups, may be placed on
patrol paths.
Command and Control 47
Page 50

Attack Orders
To order a ’Mech or group of ’Mechs to attack, select one or more
’Mechs, and then click a valid target on the battlefield. The mouse
cursor will change to a corresponding attack cursor when it passes
over any valid target. Valid targets are enemy ’Mechs, vehicles,
infantry, turrets, and buildings.
’Mechs continue to attack until their target is destroyed, they
receive new orders, or they are themselves destroyed.
’Mechs typically move toward targets using a half-powered move.
To override that speed and make them run toward targets, press
the SPACEBAR while clicking a valid target.
Ordering an Attack
!
Fire and Move
You may target an enemy and then order your ’Mechs
to a new position. Your ’Mechs will continue to fire as
they move.
48
Page 51

Default Attack
’Mech pilots given the default attack order move to a range where
their weapons can do the most damage.
To order an attack
Select a ’Mech, and then click a target on the battlefield. No command
buttons or keys are r equired to issue this order.
Stop/Hold Fire
The stop/hold fire command orders a ’Mech to cease firing immediately and halt its movement.
To issue a stop/hold fire order
Select a ’Mech, and then cli ck the Stop/Hold Fire button on the
Command P alette or press the BACKSPACE key.
The ’Mech will remain static until a new order is given or it is fired
upon, at which time it will move and defend itself.
Ammo Conservation
The ammo conservation command conserves missile and ballistic
ammunition by forcing ’Mechs to fire only their energy weapons.
To order ammo conservation
Select a ’Mech, and then hold down the A key while clickin g a
valid targ et.
Command and Control 49
Page 52

Fire from Current Position
When the fire from current position command is issued, a ’Mech
will stop moving and immediately fire from its current location.
To fire from current position
Select a ’Mech, click the Fir e from Current Position button on th e
Command P alette or hold down the C key, and then click a valid target.
The ’Mech will continue to fire from that location until the target
is destroyed or a new order is issued.
Short, Medium, or Long Range
A range command forces a ’Mech to fire from a specific distance.
’Mech pilots will attempt to maneuver to maintain the specified
range from the target.
To order a ranged attack
Select a ’Mech, hold down either the S (short range), M (m edium
range), or L ( long range) key, and then click a valid tar get.
!
Bogus Orders
Ordering ’Mech pilots to use short-range weapons when
they have none is suicide. They will be unable to
attack or defend themselves.
50
Page 53
Force Fire
The force fire order allows ’Mechs to
fire upon normally invalid targets
such as disabled ’Mechs, terrain,
unexposed camouflaged turrets,
bridges, and even friendly units.
To order forced fire
Select a ’Mech, hold down the F key, and
then click a targ et.
Disabled ’Mech Detonation
!
Disabled ’Mech Detonation
If a disabled ’Mech is destroyed, its fusion engine
detonates, acting as a small area-effect weapon on
nearby units. This action also prevents the destroyed
’Mech from being salvaged.
Command and Control 51
Page 54

Called Shots
’Mech pilots can manually aim for specific sections of an enemy
’Mech. Using called shots, however, reduces the chance to hit
successfully.
Selective targeting of a ’Mech’s head causes it to be disabled while
remaining mostly intact (which is particularly useful for in-mission
salvage). Targeting a ’Mech’s legs cripples the unit, significantly
reducing its movement rate.
Destruction of a ’Mech’s arms
Called Shots via NumPad
disables the weapon components housed therein.
8
To order a called shot
5
Select a ’Mech, make sur e
NUMLOCK is toggled on, hold
down NUMPAD 2, 5, or 8 on the
numeric k eypad, and then click an
enemy ’Mech.
2
52
Page 55

Support Orders
Support orders provide assistance and tactical support to your
team during a mission.
Guard
’Mechs can be ordered to guard buildings, sections of terrain,
vehicles, or other ’Mechs.
To issue a guard order
Select a ’Mech, click the Guard button on the Command Palette or hold
down the G key, and then click the object or terrain to guar d.
The guarding ’Mech moves a short distance away from the guarded
object. If the guarded object moves, then the ’Mech moves with it
to maintain its relative position.
If an enemy moves close enough to fire long-range weapons at
the object, the guarding ’Mech moves to engage and fires upon
the attacker. Once the threat is removed, the ’Mech returns to its
original guard position.
A guard order can be cleared by selecting the guarding ’Mech and
then clicking the Stop/Hold Fire button on the Command Palette,
pressing the BACKSPACE key, or issuing any other order.
Capture
’Mechs can capture certain enemy vehicles and buildings. If a unit
or building can be captured, the mouse cursor will change to a
capture cursor as it passes over the item.
To issue a capture order
Select a ’Mech, and then cli ck a vehi cle or buildin g wh en th e captur e
cursor appears.
Command and Control 53
Page 56

If an enemy unit is near a
building, it cannot be taken
and the capture cursor will
indicate this, becoming a
no-capture cursor.
The effect of capturing a
building varies. For more
information, see individual
encyclopedia entries on
specific buildings and
Using Resource Points.
Capturing buildings in enemy territory requires speed and stealth.
Remember to hold down the SPACEBAR while executing this order
so your ’Mechs move at full power.
Repair
Repair Trucks can be airdropped
onto the battlefield (
page 31, Support Palette ). They
supply ammunition and repair
a ’Mech’s armor. They cannot
replace destroyed weapons. The
Repair Truck appears as a unit
on your deployment team.
page 72,
see
No-Capture Cursor
Battlefield Repair and Resupply
To repair and resupply
a ’Mech
Select a Repair Truck, an d th en click a ’Mech.
’Mechs are powered down while being repaired (see page 58).
The Repair Truck has limited resupply capacity, as indicated by
its status bar. Once exhausted, the Repair Truck becomes nonfunctional.
54
Page 57

Lay Mines
Minelayers can be airdropped
onto the battlefield (
page 32, Support Palette).
The Minelayer appears as a
unit on the Deployment
Team Bar.
see
Minelayer
To lay mines
Select a Minelayer , cli ck th e
Lay Mines button on the Command Palette or press the V key, and
then click the terr ain.
Minelayers have a limited number of mines, as indicated by their
status bar. When a Minelayer has exhausted this supply, the unit
becomes nonfunctional but may still be used as a scout or decoy.
Mines are always visible. They damage any units, friendly or
enemy, if detonated. Units that weigh 35 tons or less will not set
off mines.
Command and Control 55
Page 58
Suppression Fire
Fixed Artillery (
other unit on your deployment team, or you may issue a suppression fire order. Suppression fire
is the continuous bombardment
of an area. The bombardment
lasts until the order is cleared,
a new order is given, or the
artillery runs out of ammunition.
see page 31, Support Palette) can be fired like any
Fixed Artillery
To order suppression fire
Select a Fixed Artillery piece , cli ck
the Suppression Fire button on
the Command Palette or press the
V key, and then click the terrain to be bombar ded.
Fixed Artillery must have line of sight (see page 63) with the area
to be bombarded. If line of sight is lost, then the suppression fire
order is cleared.
56
Page 59
Salvage
A salvage team (
disabled ’Mech on the battlefield
to minimum functionality. A
salvaged ’Mech becomes part of
your deployment team, and the
highest ranked pilot from your
reserves is inserted into the
recently restored ’Mech.
see page 32, Support Palette) can restore one
Karnov Salvage Aircraft
To salvage a ’Mech
Click the Salvage button on the
support palette, and then click a
disabled ’Mech on the battlefield .
A newly salvaged ’Mech may still have considerable damage. If you
plan to immediately use the ’Mech on the current mission, have a
Repair Truck standing by to repair and resupply it to full battle
worthiness.
!
System Repairs
A salvaged ’Mech has its sensors fully restored.
Destroyed weapons and lost limbs, however, cannot be
replaced on the battlefield—even by a Repair Truck.
Command and Control 57
Page 60

’Mech Function Orders
Power Down/Up
A ’Mech can power down its onboard
fusion reactor. Powered-down ’Mechs do
not appear as sensor contacts.
To power down a ’Mech
Select a ’Mech, and then press th e PAGE
DOWN key.
The ’Mech will go limp, and its unit cell will appear dimmed on the
Deployment Team Bar. If a powered-down ’Mech is hit by enemy
fire, the pilot will power up and return fire.
To power up a ’Mech
Select a powered-down ’Mech, and then press the PAGE UP key or issue
any order.
Powered Down
!
Power Down
A powered-down ’Mech cannot use its sensors and is
extremely vulnerable.
58
Page 61
Eject
Ejection is usually at the discretion
of the ’Mech pilot. If, however, the
situation is hopeless and the pilot is
too stubborn, it may become necessary to override his judgment to save
his life.
To issue an eject order
Hold down the END key, and then click
the ’Mech whose pilot you want to eject.
The pilot is immediately propelled from the cockpit and off the
battlefield to safety.
!
Human Resources
You can always buy a ‘Mech, but a good pilot is
irreplaceable.
Command and Control 59
Page 62
Situational Awareness
Knowing where you are and where your enemies are—this can be
more important at times than having a loaded gun or armor on
your ’Mech. Planning, tactics, and the perfect weapons loadout are
useless if you cannot orient yourself in foreign environments and
find your enemies … before they find you.
Battlefield Viewscreen
The main battlefield viewscreen is a real-time satellite-relayed
image. There are three ways to change the coordinates of this
display:
• You can move your mouse cursor to the edge of the screen to
scroll the viewscreen in that direction. Alternatively, you can
use the arrow keys on your keyboard to move the viewscreen in
the desired direction.
• You can reorient your viewpoint by clicking any location on
the tactical map. The viewscreen is instantly centered on that
location.
• You can also right-click any unit on the Deployment Team Bar
to center the viewscreen on that unit.
60
Page 63
Camera Control
In addition to changing the coordinates viewed on the battlefield,
you can also change the direction and elevation of the camera.
This field of view is always shown on the tactical map, represented
by the yellow-shaded trapezoid (
To move the camera right or left and up or down
Hold down the right mouse button while moving the mouse.
To pan the camera right or left
Hold down the SHIFT key while pressing the RIGHT ARROW or LEFT
ARROW key .
To tilt the camera up or down
Hold down the SHIFT k ey while pressing the DOWN ARRO W or UP
ARROW key .
To zoom in or zoom out
Roll the mouse wheel, or press the PLUS or MINUS key .
see page 29).
To reset your camera to its standard viewpoint
Press the mouse wheel button or the HOME key.
Camera angles and zoom levels
may be saved by pressing
CTRL+F2 through F5. Thereafter, pressing F2 through F5
will recall those saved settings.
Zoomed In and Out
Situational Awareness 61
Page 64

Sensor Contact
Intervening terrain and other environmental features may prevent
you from seeing enemy units. Sensors detect enemy units before
your pilots can visually sight them. The range of your sensors
depends on the electronic detection equipment on your ’Mech.
’Mechs such as the Raven and Cyclops have superior sensors with
correspondingly larger ranges. Sensor range is indicated on the
tactical map by the diameter of green circles around units containing sensors.
When minimal sensor contact occurs, a diamond-shaped wire frame
is displayed on the battlefield viewscreen, denoting a unit. No
information on the object will be available other than its location.
Pilots with special sensor training (
increase sensor contact quality as their rank increases. As contact
quality improves, the generic diamond-shaped frame becomes
either a cylinder, indicating a vehicle, or a cube, indicating a
’Mech. If the quality of sensor contact is further improved, the
object’s weight class (Light, Medium, Heavy, or Assault) can be
discerned and ultimately even the exact unit model.
Sensor Contact Types
!
Sensor Specialty Skill
Add a pilot with special sensor skills to your team.
Sensor specialization gives you more data.
see page 69) automatically
62
Page 65

Line of Sight
Even if an enemy unit is within visual range, it may be hidden by
intervening terrain or buildings. Line of sight, or LOS, refers to
direct visual contact of another unit (typically an enemy).
Units on your deployment team may be ordered to fire upon sensor
contacts, and they will move to intercept. These attacking units,
however, cannot fire upon enemy units until they have LOS.
No Line of Sight
Your command cursor indicates whether you have LOS in a particular region.
If you mouse over a region on the battlefield and the
command cursor is solid, then you have LOS there.
If you mouse over a region on the battlefield and the
command cursor is outlined, then you do not have LOS there.
All support vehicles must be airdropped where you have LOS.
Situational Awareness 63
Page 66

There is an exception to the LOS firing rule. If a ’Mech has an
enemy sighted, other units on its team can obtain LOS via this
“spotter” ’Mech. This allows units without LOS to use indirect-fire
weapons, such as missiles, on an otherwise hidden target.
’Mechs Without LOS
’Mechs With LOS
64
Page 67

’Mech Pilots
It is often said that picking the right pilot for the right ’Mech is
key to success on the battlefield. But where do the “right” pilots
come from? Qualified pilots are rare, and those with special
expertise, talent, and a knack for survival are rarer still. Green
recruits must be trained and promoted and given a chance to
develop latent talents before they are transformed into combathardened Elite ’Mech pilots.
Rank
Rank is a measure of a pilot’s combat experience. Specifically, it is
determined by a pilot’s core skills, which only increase by successfully using them in combat. Once a pilot attains sufficient skills
levels, promotions are automatically awarded. Ranks from lowest to
highest are Green, Regular, Veteran, and Elite.
Rank Insignia
Green
Veteran
Regular
Elite
Core Skills
A pilot’s core skills are gunnery (accuracy with a ’Mech’s weapons)
and piloting (adeptness at maneuvering a ’Mech). Every pilot has
these skills, and every pilot who successfully uses them on a
combat mission has a chance to increase in rank.
’Mech Pilots 65
Page 68

Specialty Skills
Specialty skills represent many hours of rigorous training for pilots
with the appropriate talents. A pilot is eligible for a new specialty
skill after completing a mission in which he is promoted in rank.
Green pilots have no specialty skills.
Pilots cannot train the same specialty skill twice. Certain advanced
skills require expensive training and are not available to lowranking pilots. Pilots of high rank, however, always have the
option to train a lower-rank skill.
There are four categories of specialty skills: Chassis, Weapons,
Range, and General.
Chassis Specialty Skills
Pilots with a Chassis specialty skill are experts in anticipating and evading enemy weapon fire, making them harder to
hit. This skill does not apply to airstrikes or exploding mines and
fuel tanks.
A pilot must learn this skill specifically for one weight class of
’Mech: Light (30–35 tons), Medium (40–55 tons), Heavy (60–75
tons), or Assault (80–100 tons). Pilots may become specialized
in more than one weight class.
Expertise varies by the weight class of the ’Mech piloted, but the
evasion bonus is generally higher with lighter ’Mechs.
66
Page 69

Weapons Specialty Skills
Pilots may specialize in a firing class of weapons, receiving
a bonus to hit with those weapons. Bonuses are cumulative with
the Range specialty skill (
see page 68).
Specialty Weapons Affected
Laser Laser , Lar ge Laser, Clan Heavy
Laser , Clan H eavy Lar ge Laser
Pulse Laser Pulse Laser , Large Pulse Laser,
Clan Pulse Laser , Clan Lar g e
Pulse Laser
Extended-Rang e (ER) Laser ER Laser, ER Large Laser, Clan
ER Laser , Clan ER Large Laser
Light Autocann on (A C) Light AC, Ultr a Li gh t AC, Clan
Ultra Light AC
Medium AC Medium AC, Ultra Med AC, Clan
Ultra Med A C
Heavy AC Heavy AC, Ultra H eavy AC ,
Clan Ultra Heavy AC
Long-rang e missile (LRM) LRM Rack, Clan LRM Rack,
Swarm LRM Rack
Short-rang e missile (SRM) Streak SRM Pack, Clan Streak
SRM Pack
Particle Projection Cannon PPC, ER PPC, Clan ER PPC
(PPC)
Small arms Machine Gun, Flamer Arr ay
’Mech Pilots 67
Page 70

Range Specialty Skills
Pilots may receive specialized training in a specific range
(short, medium, or long), resulting in a bonus to hit with any
weapon to targets in that range.
Short range is 0–60 meters, medium range is 31–121 meters, and
long range is 61–180 meters.
Pilots are permitted to specialize in more than one range category.
If a target is in the overlap of two ranges that the pilot has
specialized in, the bonuses to hit are cumulative. For example, if
a pilot has both the short- and medium-range specialty skills and
a target is 40 meters away, the pilot has double the bonus to hit
that target.
68
Page 71

General Specialty Skills
Specialized training is also available for pilots to enhance
scouting, sensors, jumping, and endurance.
Scouting Pilot is trained to spot enemies better at extreme
distances. Visual range is significantly extended.
Sensor Pilot receives advanced training in electronic detection
equipment, discerning more information from incoming sensor
signals than normal pilots. Sensor contact quality automatically
improves as the pilot is promoted in rank (
Jump Jet Pilot can maximize jump jet thrust and ’Mech frame
articulation to extend the normal range of jet-assisted jumps.
Toughness Pilot receives endurance training to withstand punishment that would kill any normal person. If a ’Mech is disabled or
destroyed with a pilot who has the toughness skill, that pilot has
a greater chance to eject safely.
see page 62).
!
MechWarriors
Rumors exist of pilots beyond the rank of Elite … as
well as a class of specialty skills that can be attained
by these superhuman men and women.
’Mech Pilots 69
Page 72

Tactics and Strategies
You are in command, and ultimately you are responsible for the
success or failure of a mission. Your pilots may instinctively react
to the dangers around them, but you must remain calm and make
the decisions that get the job done.
Veteran MechCommanders have one thing in common—they never
try to simply overpower their enemies … they strive to outthink
them.
Intelligent Use of Logistics
Logistics is not merely the bookkeeping that occurs between
battles. Within logistics are the clues and the secrets to success
on the battlefield. Learn to read between the lines of the mission
briefings. Study your enemies and your own forces.
Mission Briefings and Maps
What kind of enemies are you likely to face? Unorganized bandits?
Or the lethally swift ’Mechs of House Liao? Both require vastly
different preparation. Take notes during the briefing and refer to
them while assembling your deployment team.
If islands or walled fortresses populate the map, consider deploying a few jump jet–equipped ’Mechs should these regions be
inaccessible.
If the map indicates many hills or buildings, make sure you have
at least one ’Mech with sensor equipment to spot enemies. Also
make sure that your deployment team has adequate short-range
weapons for possible close-in fighting.
Conversely, if the terrain is flat and unobstructed, make sure your
’Mechs have adequate long-range weapons to disable your enemies
from a distance.
70
Page 73

’Mech Choice and Loadout
Should you select a handful of Assault ’Mechs or a platoon of
smaller ’Mechs for a mission? Never assume you have discovered
the “correct” formula for your deployment team in every situation.
You must constantly rebalance your forces. Some missions require a
highly specialized team, whereas others need a diverse set of skills
and equipment to be successful.
Customizing individual ’Mechs is an art form unto itself. Extra
armor may be required for long missions where resource points may
not be available for repairs. You may wish to make a ’Mech that
carries an exclusive array of short-range weapons to rush a larger
’Mech (
limited by your reserves of C-bills and your imagination.
’Mech Pilots
Choosing your pilots is perhaps the most critical selection to make
in logistics. Consider that on any mission there is the possibility of
losing a pilot. ’Mechs can be repaired, refitted, and salvaged from
heaps of smoldering metal—your pilots cannot.
Naturally you should strive to match a pilot’s specialty skills with
the appropriate ’Mech, but there is another factor to consider,
namely, the long-term development of your team. Mix green pilots
with veterans. If you constantly use the same pilots, your force
will grow exceptionally strong but at the expense of having a
diverse set of skills as well as adequate backup personnel.
see page 75, Rushing). Your choices and options are only
Tactics and Strategies 71
Page 74
Using Resource Points
Resource points (RPs) are a measurement of the tactical support
your employers provide for a mission. RPs cannot be saved from
mission to mission. If you run out of RPs during a mission, search
for enemy resource buildings to capture, which will supply additional RPs to your deployment team.
Repairs
If you dispatch a Repair Truck when your forces are in good
condition, it will have to follow your team—slowing them down
and possibly exposing the Repair Truck to enemy fire. Ideally, the
Repair Truck should be called when its capacity to provide repairs
is equal to the repairs required by your team’s ’Mechs.
Salvage
It costs the same RPs to salvage a tiny Fire Ant ’Mech as it does
to restore a behemoth Atlas ’Mech. Save your RPs until you find a
worthy ’Mech to add to your team. If, however, you are close to
successfully completing a mission, it may be wise to order the
salvage of a ’Mech from the support palette. RPs do not accumulate from mission to mission. If you wait to salvage a ’Mech until
after the mission (from the ’Mech Salvage screen), you will have
to spend your own C-bills rather than those of your employers.
72
Page 75
Scouting
A common yet often overlooked tactic,
scouting provides information on your
enemy’s position and strengths.
The ideal scout has the following qualities
and equipment: electronic countermeasures
(ECM) to confuse enemy sensors, advanced
sensors to detect units at extreme range,
speed, extra armor, at least one good longrange weapon, and a pilot with the sensor specialty skill as well
as a high core sensor skill rating. The Raven ’Mech is an especially
good choice, but a Sensor Probe can also be considered.
Once sensor contact is made, watch the enemy carefully to see if
they have spotted you as well. If so, be prepared to run out of
their sensor range. If they do not spot your scout, move along the
edge of their territory, noting the location of their units and any
weaknesses in their defenses.
You may also reveal your scout on purpose to lure enemies away
from sensitive areas. In the meantime, the balance of your deployment team can move in for an easy kill.
Raven
!
Unit Info Hotkey
You can gather information while MechCommander
software is paused—useful in the heat of combat or
during a chase. Hold down the I key, and then select
any unit.
Tactics and Strategies 73
Page 76

Weapons Ranges
Every weapon has a minimum and maximum range. Outside
that range, the weapon is ineffective and will not fire. Your pilots
automatically move to the range where they will be the most
effective. It may appear that a ’Mech ordered into combat is
“running away” from its target—it’s not. It is moving to a position
where it can maximize damage to that target.
Short range is 0–60 meters, medium range is 31–121 meters, and
long range is 61–180 meters.
Short
Medium
Long
0 30 60 90 120 150 180
Short-range weapons cannot fire at long distances. Long-range
weapons cannot fire at short distances. Medium-range weapons,
however, can fire into some short and long ranges.
In logistics, consider whether you need ’Mechs with weapons of
mixed ranges to handle all situations or ’Mechs specialized with
long-range weapons that can obliterate your enemies before they
reach you.
74
Page 77
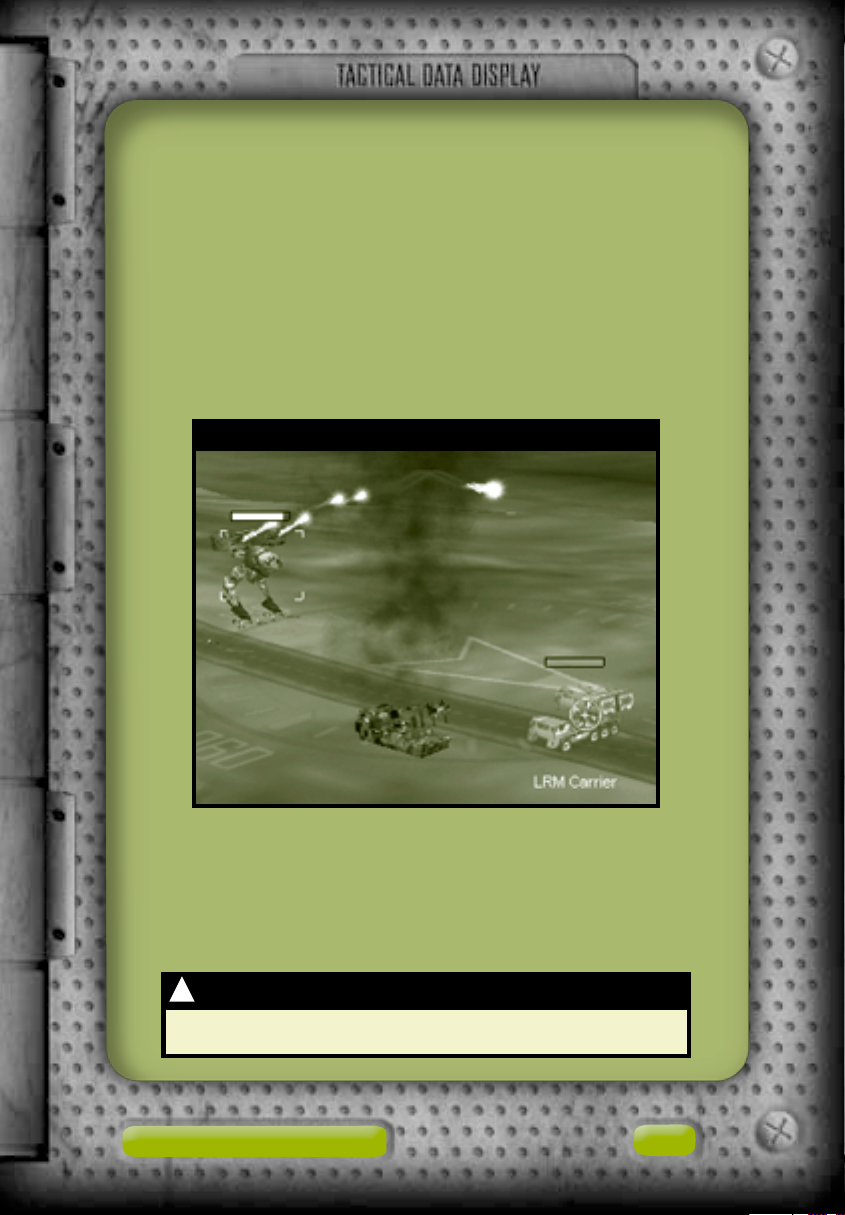
Rushing
While many ’Mechs are designed with a devastating array of longand medium-range weapons, this ironically leaves them vulnerable
to concentrated firepower at short range. If a ’Mech with shortrange weapons can rush inside an enemy’s minimum weapons
range, the enemy cannot return fire.
The ideal ’Mech for this “rushing” tactic has excellent short-range
firepower, extra armor to withstand attacks as it closes, and
adequate speed to maintain close range with the opponent.
Rushing ’Mech vs. LRM Carrier
!
Combat Range
Faster units determine the range of battle.
Tactics and Strategies 75
Page 78
Ambushing
An alternative to head-to-head confrontation with your enemy
(especially when they are entrenched in a fortified position or
have superior firepower) is to set an ambush.
An ambush can be set along an enemy’s patrol path or, if they
are not moving, they may have to be lured into the ambush. Fast
’Mechs suit this purpose best.
Ideally, position
your ’Mechs at the
longest range that
they can effectively
use their weapons.
You may have to
layer the ranges of
fire; that is, position
in front those ’Mechs
with effective shortrange weapons and
behind them those that have effective medium- and then longrange weapons. As enemy units are lured into range, short-,
medium-, and long-range weapons simultaneously fire for a
devastating alpha strike. To retain this formation you may want
to use the hold position command on your ’Mechs.
If you have several ’Mechs equipped with long-range missiles,
position them behind intervening terrain or a building, and use
the ’Mech luring your enemies as a line-of-sight spotter (
63, Line of Sight). When the enemy units are within missile range,
your ’Mechs can fire from relative safety.
Layered Range Attack
see page
76
Page 79

Assaulting a Fortified Position
On many missions, your objective will be to capture or destroy a
walled base or other fortified installation.
Gather intelligence first with scout ’Mechs, ’copters or Sensor
Probes. Adjust your camera angles and zoom in to inspect the
region in closer detail. You may not have line of sight, so consider
the possible locations of hidden enemies.
Fortified bases often have automated turrets. Move your mouse
cursor over turret control towers or turret power generators to
highlight all connected turrets. If the turrets are powerful longrange weapons, consider using an airstrike on their generator to
disable them. If the turrets are short-range weapons, you may
destroy them from long range or capture the turret control building
and then use these weapons against your enemies (
Capture).
Most fortified positions have walls and armored gates. Walls can
prevent line of sight and leave you vulnerable to indirect fire. To
get around walls, you may blast through them or send ’Mechs with
jump jets over the walls to capture the gate control building.
see page 53,
Tactics and Strategies 77
Page 80

Defending a Fortified Installation
Some missions require that you defend a fortified installation.
Such installations are walled and have automated gates and
weapon turrets to bolster their defense.
Prevent the capture of gate and turret control buildings. If they
fall into enemy hands, the installation’s automated systems will be
turned against you. Place a larger ’Mech next to turret and gate
controls to prevent their capture. These guarding ’Mechs should
have long-range weapons so they do not have to move to engage
targets.
If your mission requires that a specific object within the installation be defended, order a larger ’Mech to guard that object in case
enemy units slip past your defenses.
With larger, slower ’Mechs defending critical installations, keep
your lighter, faster ’Mechs free to intercept incoming enemies.
Use a Fixed Artillery piece’s supression fire on areas where enemy
units gather. If a section of the installation’s wall is destroyed,
call in an artillery piece to fill that breach. Your enemies will not
only have to destroy the artillery to pass, but they will also have
to face its tremendous firepower.
Mine regions in front of gates as well as places where attackers
may perceive a weakness in your defense—such as areas that have
no turrets. Note, however, that mines are indiscriminate; once
placed they will detonate when any ’Mech passes over them. If you
have heavily mined the parameter of your base, you may trap your
’Mechs inside.
78
Page 81

Retreating
When left on their own, your ’Mech pilots may chase enemies in
all directions. At best, this scatters their firepower; at worst, they
may be lured into an ambush. When your deployment team becomes dispersed, it is wise to select all units and issue a movement command to a central location (
Orders). Your units continue firing as they regroup and refocus
their firepower.
Retreat is also useful when you can fall back to a previously
captured fortified position (preferably with functional turrets and
intact walls). As enemy units pursue your retreating team, they
will find their own captured weapons firing at them.
The line-of-sight firing rules can be used to your advantage during
a retreat. Put buildings and other obstructions between your team
and the pursuing enemy so they lose LOS and cannot fire.
see page 42, Movement
!
Keeping Units Together
All ’Mechs have the same walk speed. Issuing a walk
command to several ’Mechs keeps those units grouped
together.
Tactics and Strategies 79
Page 82

Multiplayer and Solo Missions
Multiplayer
Engage others in friendly wargames or duels to the death. Up to 8
MechCommanders may participate. You may host a game, controlling the mission parameters, or you may choose to join a game. To
start, click Multiplayer on the Main Menu.
Connection Type
You must first choose a connection type for a multiplayer game:
the MSN™ Gaming Zone, a local area network, or the Internet.
Internet (Zone.com) Games are played on the Zone. If you
select this connection type, MechCommander 2 software will close
and your Internet browser will connect to the MechCommander 2
lobby on the Zone. You must have a Zone account, which is free.
Local Network Games are played over a local area network
(LAN). You must have a LAN adapter and be connected to a LAN.
You may either host a game or search for a game by clicking Go to
LAN Browser. The LAN browser can sort games by name, number of
players, map type, and ping (connection latency).
Internet (Direct TCP/IP) Games are played over the Internet.
You must be connected to the Internet through an Internet service
provider. To join a game, enter the specific Internet protocol (IP)
address of the host, or select an IP address in the drop-down list
of previous game addresses.
!
Internet Protocol Address
If you host an Internet game, make sure the joining
players know your IP address. Your IP address is
displayed in the Mission Parameters screen.
80
Page 83

Mission Parameters
If you click Host Game, you will be prompted to enter a game
name and then proceed to the Mission Parameters screen to
customize the game. Non-host players will see this screen, too,
but many functions are available only to the host.
1 2 3
5
6
7
8
4
9
Multiplayer and Solo Missions 81
Page 84

Player Section The list of players, their insignia, and their
1
unit names. Players may select a team in the drop-down list.
By default, players receive a team number in the order they
join the game. If a player joins a team, his base unit color is
replaced with the team’s color, but the player’s stripe color
and unit insignia do not change.
Factions are also selected in a drop-down list in the Player
section. Faction choice (Steiner, Davion, Liao, Clan) limits
the ’Mechs and equipment the player may purchase. If the
host selects All Tech, then all ’Mechs and equipment are
available to all players.
Also in this section, the host can alter the cash available for
each player.
When players are ready to start a game, they click the Ready
check box. When selected, all controls related to that player
are dimmed and cannot be changed. Deselecting the check
box restores the controls. If the host changes any parameters, all Ready check boxes become deselected.
Player Preferences Click this button to access the Player
2
Preferences screen.
See page 84.
Map Section To select a mission map from various sizes,
3
topographies, and mission types (
must click Load Map. Once selected, a tactical map of the
battlefield is displayed for the players. Data on the map and
mapmaker may be viewed by clicking Map Info.
Mission Parameters Controls that let the host set players’
4
drop weights, starting C-bills, and resource points, as well as
the mission’s time limit. Note that C-bills can be individually
customized, while resource points and drop weights must be
the same value for every player.
see page 88), the host
82
Page 85

Host Buttons Buttons that provide host control over
5
players.
Lock Game Allows the host to prevent others from
joining the game.
Remove Player Allows the host to remove the
selected player from the game. When a player is
removed, all Ready check boxes are deselected.
Host IP Address
6
Chat Window A function in multiplayer logistics that allows
7
communications among team members or with combatants.
See page 85.
Support Options Controls that let the host toggle support
8
palette features in the mission. The host may also enable
unlimited ammunition, allow or forbid variant ’Mechs to be
imported by players into logistics, and choose to have
resource buildings appear on the map. The RP for ’Mechs
option rewards players who destroy enemy ’Mechs with RPs
proportional to the tonnage of the ’Mech. The All Tech
option changes every player’s faction to All.
The Use Quickstart option accepts the default settings of
the mission map. This locks the support options and mission
parameters, as well as the factions and C-bills settings in the
Player section. Players will bypass logistics and use the
default ’Mechs assigned in the scenario.
Next/Launch Allows the host to start the game (only after
9
all players have selected their Ready check boxes). After the
host clicks this button, all players proceed to logistics or, for
a quickstart game, directly to the multiplayer mission.
Multiplayer and Solo Missions 83
Page 86

Player Preferences
1
2
3
4
Player Name Enter your name (up to 24 characters) or use
1
the drop-down list to select a previous name. If a previous
name is used, the unit name, unit insignia, and colors
change to match that name’s previous settings.
Unit Name The player’s mercenary unit name.
2
Unit Insignia A drop-down list where you select your
3
insignia from the available BattleTech house, Clan, and
Mercenary symbols. Insignia are automatically transferred
among all members in a multiplayer game. Custom unit
insignias must be in 32x32, 24-bit Targa (.tga) format and
placed in the /Data/Multiplayer/Insignia directory.
Player Colors Select your colors by clicking the Base Color
4
or Stripe Color tab and then clicking a color in the palette.
Your color selection is updated on the adjacent display. Only
one team can have a specific base color at a time. You
cannot change base colors once you have joined a team.
84
Page 87

Multiplayer Chat
The Chat window appears in the multiplayer screens.
1 2 3
4
Chat Display Text is preceded by the sender’s name, which
1
is color-coded to match his team color.
Chat
2
and rollover display.
Maximize
3
minimize the Chat display.
4
Text Entry Area Click this box or press ENTER, type your
message, and then press ENTER to send your message.
Team Only
5
chatting to only your teammates and all players. Chat to all
players appears as green text. Chat to only teammates
appears as white text.
In-Mission Chat
All chat text appears at the top of the main battlefield viewscreen.
To chat during a mission, press ENTER, type your message, and
then press ENTER again to send the text. To chat to only your
teammates, press SHIFT+ENTER, type your message, and then press
ENTER to send the text.
/ Help Toggle Click to toggle between the Chat
/ Minimize Toggle Click to maximize or
/All Toggle Click to toggle between
5
Multiplayer and Solo Missions 85
Page 88

Multiplayer Logistics
Multiplayer missions differ from campaign missions in several
ways.
Number of ’Mechs
For the maximum number of ’Mechs allowed in a multiplayer game,
refer to the Readme file.
Pilots
Pilots assigned in multiplayer logistics come with a variety of
ranks and core and specialty skills. Pilots do not advance in skills
or ranks after a successful multiplayer mission.
Launching from Logistics
After pilots have been hired, every player must click Launch. The
system then announces when each player is ready in the Chat
display. When the last player clicks Launch, the mission starts.
86
Page 89

Multiplayer Gameplay
Dropped Players
If a player loses his connection, his ’Mech pilots eject, leaving
their ’Mech salvageable by the remaining players. A system message will announce that the player has been dropped.
Losing All Units
If a player loses all of his units, all other units in the game are
revealed, and the dead player may look anywhere on the map and
follow the mission’s progress.
Pause
You cannot pause a multiplayer mission. Pressing the ESC key
displays the System Menu (with the save and load options
dimmed), but it does not actually pause the game.
Scoreboard
For some multiplayer missions, an in-game scoreboard replaces the
objectives list. Press the F9 key to display the scoreboard.
Multiplayer and Solo Missions 87
Page 90

Multiplayer Mission Types
Elimination
This is a deathmatch with a mercenary twist; every unit destroyed
gives its opponent its salvage value in C-bills. The winner is the
player or team with the most C-bills at the end of the mission.
King of the Hill
During the mission, the time each team controls an objective
building is recorded. The winning team has the most accumulated
time, even if all the units on that team are destroyed. If only one
team has units remaining, the game is over and the surviving team
automatically gets the time left on the clock.
Capture Base
Each team gets one Headquarters (HQ). When a team’s HQ is
captured, their pilots eject from their ’Mechs, leaving them for the
remaining players to salvage. The team with the most HQ captures
wins—even if that team has had their own HQ captured.
Territories
There are HQ buildings on the map that are not aligned with any
team. When a team captures an HQ, they get 1 point. If a team’s
HQ is captured away from them, they lose 1 point. HQs may be
repeatedly captured and recaptured. The team with the most
points at the end of mission time wins.
88
Page 91

Last Man Standing
The team with the most remaining units wins. Ties are possible.
Last Man on the Hill
This mission is won by controlling a Headquarters at the end of
the mission time limit. If no team has controlled the HQ building
at the end of the time limit, no one wins. If the HQ building is
destroyed, no one wins. This mission type must have a time limit.
Complex Mission
Although this mission type has many variations, generally there
are two teams: a defending team that protects structures from an
offensive team. The defensive team wins if they destroy all of the
offensive team’s units or if time runs out without the offensive
team capturing its objectives. The offensive team wins if it captures a specified number of structures or if it destroys all of the
defending team’s units.
Multiplayer and Solo Missions 89
Page 92

Solo Missions
A solo mission is a simulated battle. You may experiment with new
tactics and ’Mech variants so they don’t have to be tested when
the stakes are much higher. Note: No C-bills are awarded for
mission success, and pilots are not advanced in rank. To start a
solo mission, click Solo Mission on the Main Menu.
After you have selected a mission map, click Accept to proceed to
the logistics for this mission.
Load Map
The Load Map screen allows you to select a solo mission.
1 2 3
Map List The solo mission maps available, including every
1
campaign mission that you have completed. You may also
make solo mission maps with the MechCommander 2 Mission
Editor.
Mission Tactical Map and Name
2
Mission Notes A brief description of the mission.
3
90
Page 93

Credits
Producer
Mitch Gitelman
Development
Frank Savage—Lead
Glenn Doren
Heidi Gaertner
Mike Hsieh
Additional
Developers
Melody Litovkin
Mike Lyons
Design
Mike Lee—Lead
Derek Carroll
David Fung
Jeremy Hill
Jason Janicki
Erik Johnson
Michael Turner
Additional
Designer
Sage Merrill
Art
Leigh Kellogg—Lead
Steve Allen
Dorje Bellbrook
Adam Crockett
Charles Oines
Greg Onychuk
Steve Scott
Patrick W atje
Additional Artists
David Choi
Stuart Compton
Mark Forrer
Steve Hartley
Brennan Priest
Additional Video
Production
Vic Bonilla Carrillo
Todd Lubsen
Audio
Duane Decker—Lead &
Music
Sound Design
Soundelux DMG
Additional Sound
Design
Digital Arts, NYC
Pete Comley
Test
Kevin Fetters—Lead
Rob Baldwin
Mark Bartlett
Sean Kellogg
Steve Larson
Aaron Ueland
Marty Wright
Additional Testers
Paul Gradwohl (Confi g)
Jaime Pirnie
(Multiplayer)
Matthew Shimabuku
User Education
Eric Nylund—Lead
Tom Brush
Chris Burns
Jeannie Davison
Dana Fos
Robert Sillence
Localization
US Team
Jennifer Bixler—
Localization Program
Manager (US)
Kazuyuki Shibuya
Korea
Han Baek Choi
Kyoung Ho H an
Jin Yon g J eong
Ji Young Kim
In Goo Kwon
Joon Ho Lee
Ireland
Steve Belton
Niamh Butler
Darragh Canavan
Julian Duffy
Brian Fox
Cillian Gibbons
Cosmo Greco
Fionnuala K eegan
Sandro Magliocco
Jason Shirley
John O’Sullivan
Greg Wa rd
Taiwan
Dupre Deng
Christine Lin
Tahli a Lin
Andy Liu
Ming-I Peng
Japan
Yutaka Hasegawa
GameOS
Andy Glaister
Jim Reichert
The Zone
Matt Esget
Neal Hallgarth
EBU Setup
Chris Hadden
Randy Shedden
User Testing
Ramon Romero—Lead
Ken Bachman
Lance Davis
Kyle Drexel
Bill Fulton
Jerome Hagen
Kevin Keeker
Fred Northup
Randy P agulayan
Jeff Perini
Dina Suda
Beta Coordination
Matt Alderman
Technical Support
Steve Kastner
Product Planning
Jon Kimmich
Marketing
Rick Mehler—Produ ct
Manager
Steve Fowler
Andrew J enkins
Justin Kirby
Legal
Jama Cantrell
Sue Stickney
Judy Weston
Pilots
Voice
Eric Adams—W orm
Jennifer Allen—Shadow
Steve Allen—Hammer
Steve Alliston—Payback
Lisa Ambler—Longshot
Lang Beeck—Chopper
Robbie Booth—
Claymore
Erika Carlson—Jinx
Derek Carroll—Liao
Operative
Dana Fos—Wicked
Mitch Gitelman—Scout
’Copter
Robin Gitelman—
Dagger
Matt Gradwohl—Mother
Jeremy Hill—Ban dit
Leader
Jason Janicki—Liao
Elite Guard
Erik Johnson—Davion
Prisoner
Credits 91
Page 94
Lori Johnson—Flash
Matthew Johnson—
Partisan
Leigh Kellogg—Cobra
Sean Kellogg—Creep
Steve Lacey—Nuke
Sage Merrill—Rooster
Duane Molitor—Twitch
Mary Kay Omelina—
Ghost
Charlie Peterson—
Psycho
Mike Pondsmith—Steel
Steve Robinson—
Palerider
Steve Scott—Scooter
Tom Steinke—M eat
Michelle Gamboa
Stenson—Venom
Lex Story—Air Traffi c
Controller
Alison Stroll—Computer
Voice
Aaron Ueland—Bubba
Martin Wright—Stein er
Officer
Meiji Yugawa—Hacksaw
Video
Steve Allen—Hammer
Dorje Bellbrook—Worm
Robbie Booth—
Claymore
Melethia Campbell—
Flash
Erika Carlson—Jinx
Bob Crocco—Nuke
Brenda Di az—Shadow
Andrew Flavel—Psych o
Dana Fos—Wicked
Heidi Gaertner—Dagger
Matt Gradwohl—Mother
Mike Jones—Bubba
Joe Kelsay—Chopper
Brian Lemon—Twitch
Melody Litovkin—Ghost
James Mayo—Meat
James McDaniel—
Rooster
Mike Pondsmith—Steel
Ty Robert—Paleri de r
Steven Robinson—
Hacksaw
Prodipto Roy—Cobra
Steve Scott—Scooter
Jonathan Sposato—
Payback
Michelle Gamboa
Stenson—Ven om
Jeff Stevens—Creep
Yvette Wagn er—
Longshot
Bright Pictures—
In-Mission Cinemas
Tarquin Car don a—
Director
Rudy Callegari—
Producer
Bob Fagan—Producer
Linda Påhlman—Head
of Produ ction
Taylor Lawren ce—Line
Producer/AD
Tarquin Car don a—
Director of Photography
Gretchen Godd ard—
Production Manager
Toy Newkirk—
Coordinator
Susan Tyler—Casting
Vincent Pacier a—A.C.
Andy Rawson—Gaffer
Allen Compton—Best
Boy
Brad Boyer—Key Grip
Rod Farley—Best Boy
Eric Sedorovitz—Swin g
Doug Shulman—Sound
Peter Thor en—
Playback/VTR
Britta Martinez—Script
Sean Aldridge—
Telepromter
Michael Budge —
Production Desi gner
David Loitz—Prop
Master
Brad Morrison—Props
Shira Harten—Stylist
Sal Salamone—
Assistant Stylist
Miriam Vukich—Hair/
Make-up
Elif Girgin—Assistant
Hair/Make-up
Linda Påhlman—Second
Assistant Director
Shawn Carson—
Producti on Assistan t
Wic Coleman—
Producti on Assistan t
Clarence Elie—Craft
Service
Post-Production
Bob Fagan—Producer
Joel Avila—Sound
Engineer
Mix Magic Post Soun d —
Sound Mix Studio
Leo Collen—Editor
Arc Video—Edit House
Cast
Rick Deats—Colonel
Renard
Corinne Chooey—
Ambassador Yee
Marian Lee Stryker—
Mandrissa Cho
Derrick Blanton—
Captain Jason Cho
Trisha Kara—M ajor
Susan Kelly
Kenneth Dixon—Baxter
Trisha Mann—T acti cal
Officer Diaz
Joe Sabatino—W eapons
Officer Cash
Amanda Collins—
Archon Katrina Stein er
Peter Moore—
McLaughlin
Richard Ransbottom—
Barnes
Brett Stimely—
Commentator 1
Aashna Patel—
Commentator 2
Toy Newkirk—
Commentator 3
Jim Miller—Reporter 1
Rick Reardon—
Reporter 2
Sue Ulu—Reporter 3
Sheila Scott—
Reporter 4
Extras
Melanie Jayne
Ian Ellis Martin
Robert Carlson
Gretchen Godda rd
Taylor Lawr en ce
Kane Ng
William W. Ryan III
Joanna Tisell
Sita Verma
Linda Påhlman
Sal Salamone
Rudy Callegari
Management
Stuart Moulder—
General Manager
Matt Gradwohl (Test)
Craig Henry (Develop-
ment)
Douglas Herring
(Creative Content)
Yasmine Nelson
(Localization)
Eric Straub (Studi o X)
Jo Tyo (User Ed u cati on)
Edward Ven tura
(Business Development)
Joanne Williams (Prin t
Production)
Special Thanks
Randall Bills
Bryan Nystul
Jordan W eism an
Mort Weism an
Jule Zuccotti
Our Fans
92
Page 95
Glossary
C-bill The unit of money used in the BattleTech universe for the
purchase of ’Mech s, weapons, and equipment.
chassis The physical fr ame of a ’Mech.
Clans (C) A group of factions that challenged the Star League for
control of the Inner Sphere.
Combat Interface The overall M echCommander display that provides all
the controls and maps necessary to command a deployment team during a
mission.
core skills A pilot’s gunnery and piloting skills that, when combined,
determine a pilot’s rank.
Command Palette Located at th e lower-right of the Combat Interface,
this display provides th e controls for commanding a deploymen t team.
deployment team The group of pilots, their ’Mechs, and vehicles that
partake in a mission.
Deployment Team Bar The graphical r epresentation of the units on a
deployment team.
drop weight (aka team weight) The total weight of a deployment
team.
drop zone The area on the ground where a deployment team or other
equipment is dropped from the air.
electronic countermeasures (ECM) A system that jams enemy sensors.
extended-range (ER) A vari ant of the basic energy weapons with
increased firin g rang e .
extraction marker A specified location on the battlefield that si gn als
the completion o f th e missi on when units reach that location.
Inner Sphere (IS) A region of colonized solar systems, first ruled by the
Star League and now divid ed among facti on s.
Jump Jets The plasma-fueled componen ts on a ’Mech that enable it to
jump over terrain and objects.
line of sight (LOS) The line of vision from a person’s eye to the point
being viewed .
Glossary 93
Page 96

loadout The weapons and equipm en t configuration of a ’M ech or vehi cle.
logistics The procurem en t, distribution, maintenan ce, and replacement
of military equipment an d personn el.
long-range missiles (LRMs) Provided as a rack, missiles that fire
between 61 and 180 meters. With a spotter, these missiles can arc over
intervening terrain and hit tar g ets outside line of sight.
machine gun (MG) A short-range ballistic weapon that is inexpensive
and efficien t.
’Mech Bay The logistics screen wh ere ’Mechs are prepar ed f or a d eployment team.
’Mech Lab The logistics screen wh er e ’Mechs are customized with
weapons and equipmen t.
multifunctional display (MFD) Located at the lower-left of the Combat
Interface , this display pr ovi des the tactical map, the support palette, and
detailed unit informati on.
navigation marker A specified location on the battlefield that signals
the completion o f an objective when units reach that location.
Particle Projection Cannon (PPC) A weapon that fires high-energy
particle bolts.
resource point (RP) A unit of tactical support provided by an employer
to order artillery, vehicle, and other support.
short-range missiles (SRMs) Provid ed as a pack, missiles that fire
between 0 and 60 meters.
specialty skills Skills chosen by pilots upon being promoted in rank:
chassis, weapons, r an g e , an d g ener al.
spotter A unit that provides direct visual contact of a target for indir ect
firing weapons such as lon g-r an g e missiles .
support palette Located on the MFD, the display that pr ovides access
to artillery, vehicle, and other support commands .
tactical map (T acMap) Located on th e MFD, an in teractive reconnaissance photo of the battle area.
variant A customized ’Mech.
VidCom A display that shows campaign and missi on briefings from your
employer as well as satellite photos and maps.
94
Page 97

Index
Airstrikes, 31
ambushing, 44, 76
ammo conservation, 49
armor, 18
assaulting, 77
assigning pilots, 19
attack orders, 48
bases
assaulting, 77
defending, 78
battlefield
described, 26
viewscreen, 60
briefings
reviewing, 10
strategies, 70
buying ’Mechs, 14
called shots, 52
camera control, 61
canceling orders, 15
capture, 53
C-bills, earning, 38
chat, multiplayer, 85
Combat Interface, 26
Command Palette, 36
commands
compass, 27
components, selecting, 16
connection types, 80
core skills, 65
costs
See
orders
repair, 72
salvage, 22, 72
damage, viewing, 34, 35
defending, 78
deployment team
monitoring, 51
preparing, 13, 20
deselecting units, 41
drop weight, 13
dropped player, multiplayer, 87
ejecting, 59
encyclopedia, 7
fire from current position, 50
Fixed Artillery
deploying, 31
suppression fire, 56
Force Bar
described, 35
selecting units, 41
force fire, 51
forming a task group, 41
fortified positions
assaulting, 77
defending, 78
game speed, troubleshooting, 6
guard, 53
heat capacity, 18
hold position, 44
installing, 4
Internet, playing over the, 80
jump, 43
jump jets, 18
kill markers, 24
laying mines, 55
line of sight, 63
loading a game, 6
loadout
customizing, 16
strategies, 71
local area network, playing
over a, 80
logistics
defined, 8
multiplayer, 86
strategies, 70
Main Menu, 5
maps
multiplayer, 82
solo missions, 90
strategies, 70
tactical, 29
’Mech Bay, 12
’Mech Lab, 16
’Mechs
modifying, 16
powering down/up, 58
purchasing, 14
salvaging post-mission, 21
selecting, 40
viewing damage, 34
weight class, 66
Microsoft Product Support
Services, 97
Minelayer
deploying, 32
ordering, 55
mines, laying, 55
mission briefings
reviewing, 10
strategies, 70
mission objectives, 38
Index 95
Page 98

mission parameters,
multiplayer, 81
mission results, 39
mission types, multiplayer, 88
modifying ’Mechs, 16
movement orders, 42
MSN Gaming Zone, 80
multifunctional display, 29
options screen
in-mission, 28
pre-mission, 6
ordering support, 30
orders
ammo conservation, 49
attack, 49
called shots, 52
capture, 53
eject, 59
fire from current
position, 50
force fire, 51
guard, 53
hold position, 44
jump, 43
lay mines, 55
movement, 42
patrol, 47
power down/up, 58
range, 50
rescinding, 49
run, 42
stop/hold fire, 49
suppression fire, 56
walk, 42
waypoint, 45
panning the camera, 61
patrolling, 47
payload, customizing, 17
pilot performance, 23
pilot promotion, 25
pilots
assigning, 19
ejecting, 59
rank, 65
specialty skills, 66
strategies, 71
power down/up, 58
product support, 97
purchasing ’Mechs, 14
Quickstart, multiplayer, 83
range orders, 50
ranges
sensors, 16, 62
weapons, 74
rank, 65
Repair Truck
deploying, 31
ordering, 54
repairing
cost of, 72
’Mechs, 54
resetting the camera, 61
resource points, 72
resupplying, 54
retreating, 79
run, 42
rushing, 75
Salvage Craft
deploying, 32
ordering, 57
salvaging
cost of, 22, 72
in-mission, 57
post-mission, 21
saving a game, 6
scoreboard, multiplayer, 87
Scout ’Copter, deploying, 32
scouting, 73
selecting
components, 16
missions, 8
task groups, 41
units, 40
weapons, 16
sensor contact, 16, 62
Sensor Probe, deploying, 31
sensors, 16, 62
setting waypoints, 45
specialty skills, 66
stop/hold fire, 49
support palette, 30
suppression fire, 56
tactical map, 29
task groups, 41
team weight, 13
tilting the camera, 61
unit information, 33
units
monitoring, 33, 35
selecting, 40
variants, 17
video cards, troubleshooting, 4
viewscreen, 60
walk, 42
waypoints, 45
weapons
ranges, 74
selecting, 16
weight class, ‘Mechs, 66
Zone, the, 80
zooming the camera, 61
96
Page 99

Microsoft Product Support Services
The services and prices listed h er e are available in th e United States an d Can ada only. Support outside the United
States and Canada may vary. Microsoft’s support services are subject to Microso ft’s then-curre nt pri ces, term s, an d
conditions, whi ch are subject to chan g e without noti ce .
Self-Help Help yourself with Microso ft Person al Online Support—d esi gned specifi cally for hom e users an d
individu als! Go online and g et th e m ost up-to-date an swers. You can use simple self-help tools or search a variety of
technical information. If you still n eed help, P erson al Online Support pr ovid es an easy way to submit support inci de nts
directly to Microso ft via the W eb . Conn ect to Person al Online Support at h ttp://support.micr osoft.com/.
Assisted Support No-Charge Assisted P ersonal Support: If you acquired this product as a stand-alone retail
product, you are eli gible for unlimited no-char ge assisted P ersonal Support for this pr odu ct durin g regular business
hours. Y ou can r eceive no-char g e P ersonal Support vi a th e W eb or th e telephon e . Wh en submittin g inci d ents , be
prepared to provi de your Pr oduct ID (PID) number. For Applications, th e PID is a 20-di git n umber that you can find by
clicking the i button on the M ain M en u.
Paid Assisted Personal Support: If you need help after hours, or if you have used up or are not eligible for no-charge
Personal Support, you can use Pay-Per-Incident Support via the W eb on P erson al Online Support or th e teleph one .
Support fees are billed to your VISA, M asterCard , or Am erican Expr ess card . In th e U.S.: $35 U.S. per inci de nt. In
Canada: $45 CDN + tax per incid en t. Both are available 24 h ours a da y, 7 days a week, including holidays.
Note: If your Microsoft pr odu ct was prein stalled or distributed with your personal computer or dedi cated system
(Windows CE–based device), or provi ded by an In tern et service provi der (I SP), and your PID con tain s the letters “OEM”
after the first five digits, you ar e welcome to use th e m an y online no-char g e self-help or paid assisted support o fferin gs
provided by Mic rosoft. N o-charge assisted support f or OEM li censes is n ot provid ed by Mic rosoft. Con tact th e personal
computer manufacturer, device/system manufactur er, or ISP directly for more informati on regar ding their n o-charg e and
paid offerings f or support of your pr odu ct. Please ch eck the docum entati on that came with your person al computer or
check our list of man ufacturer pho ne numbers at http://support.mi crosoft.com/support/webr esponse/pid/oem.asp.
Retail versions of Mic rosoft so ftware ar e those stand-alon e packag ed produ cts purchased at r etail stores , mail-ord er
resellers, and online r esellers. Mi crosoft pr odu cts preinstalled or distributed with your person al computer or dedi cated
system (Windows CE–based device), pr ovid ed by an ISP, or purchased through a volume licensing pr ogr am such as
Select, Open, or License P acks receive all Mi croso ft support privileges , exclu ding n o-charge assisted support.
Getting Assisted Support When you contact Product Support Services , you should be at your computer an d have
the following inform ation at han d:
• The version of your Mi croso ft pro duct.
• The type of hardw are , in clu din g network har dwa re , if appli cable .
• The operating system (e.g., DOS, Windows 98, Windows NT , and so on).
• The exact wordin g of an y inform ation al or err or messag es that appeared on your scr een.
• A description of what happened an d what you were d oin g wh en th e pr oblem occurre d.
• A description of how you tri ed to solve th e pr oblem.
Via the W eb W eb-based support on Mi c roso ft’s Personal Online Support is available 24 hours a day, 7 d ays a week.
Via the Web , you can submit a n o-charg e or pai d in ci den t to a Mic roso ft Support Pr o fession al any tim e day or ni ght. You
will receive notification fr om Micr oso ft that your solution is available and your an swers ar e read y durin g regular
business hours. Connect to P ersonal Onlin e Support at http://support.mic rosoft.com/.
Via the Phone No-Charge In the U.S.: Games & Multim edia: (425) 637-9308. Regular busin ess hours for no-
charge assisted Person al Support ar e 5 AM to 9 PM Pacific time Mon d ay through Frid ay an d 9 AM to 3 PM Pacific time
Saturday, excluding holidays. This n umber is based in Redm on d, Washington, so your phone company may charge you
for your call. Contact your long-distance pr ovid er for r ate informati on.
In Canada: Games & Multimedia: (905) 568-3503. Regular busin ess hours f or n o-charg e assisted Person al Support ar e
8 AM to 11 PM Eastern time Monday through Fri day an d 10 AM to 6 PM Eastern tim e Saturd ay, excluding holidays. This
number is based in Mississauga, Ontario, so your pho ne compan y m ay charg e you f or your call. Contact your lon gdistance provider f or rate inform ation.
Via the Phone Paid In the U.S.: (800) 936-5700. A vailable 24 h ours a da y, 7 days a week, including holid ays .
In Canada: (800) 668-7975. Available 8 AM to 11 PM Mond ay through Fri d ay Eastern tim e an d 10 AM to 6 PM Eastern
time Saturday .
Text Telephone For the d eaf or har d-of-hearing using a TTY/TDD modem: (800) 892-5234.
97
Page 100

BASICSBASICS
BASICS
BASICSBASICS
ACCESS SYSTEM MENU
ACCESS OBJECTIVES
ACCESS HOTKEYS
CYCLE MFD
RESCIND ORDER
UNIT SELECTIONUNIT SELECTION
UNIT SELECTION
UNIT SELECTIONUNIT SELECTION
SELECT MULTIPLE UNITS
SELECT ALL UNITS ON-SCREEN
FORM TASK GROUP SELECT UNITS, THEN
SELECT TASK GROUP
ESCESC
ESC OR
ESCESC
FF
F
FF
FF
F
FF
TABTAB
TAB
TABTAB
BACKSPACEBACKSPACE
BACKSPACE
BACKSPACEBACKSPACE
SHIFTSHIFT
SHIFT
SHIFTSHIFT
EE
E
EE
11
1–
11
99
9
99
11
1
11
+
99
9
99
PAUSEPAUSE
PAUSE
PAUSEPAUSE
CLICK UNITS
CTRLCTRL
CTRL
CTRLCTRL
11
99
+
1–
9
11
99
MOVEMENT ORDERSMOVEMENT ORDERS
MOVEMENT ORDERS
MOVEMENT ORDERSMOVEMENT ORDERS
WALK CLICK DESTINATION
RUN
JUMP
HOLD POSITION (TOGGLE)
SET WAYPOINT
SET RUN WAYPOINT
SET JUMP WAYPOINT
ATTACK ORDERSATTACK ORDERS
ATTACK ORDERS
ATTACK ORDERSATTACK ORDERS
DEFAULT ATTACK CLICK TARGET
FIRE FROM CURRENT POSITION
SHORT-RANGE ATTACK
MEDIUM-RANGE ATTACK
LONG-RANGE ATTACK
FORCE FIRE
AMMO CONSERVATION
SUPPORT ORDERSSUPPORT ORDERS
SUPPORT ORDERS
SUPPORT ORDERSSUPPORT ORDERS
AIRSTRIKE
SENSOR PROBE
SITUATIONAL AWARENESSSITUATIONAL AWARENESS
SITUATIONAL AWARENESS
SITUATIONAL AWARENESSSITUATIONAL AWARENESS
ADJUST CAMERA RIGHT-CLICK
ZOOM
SET CAMERA SETTING
USE CAMERA SETTING
RESET CAMERA
TOGGLE COMPASS
SELECT UNITS THEN
SPACEBARSPACEBAR
SPACEBAR
SPACEBARSPACEBAR
JJ
J
+ CLICK DESTINATION
JJ
HH
H
HH
CTRLCTRL
CTRL
CTRLCTRL
CTRLCTRL
CTRL
CTRLCTRL
CTRLCTRL
CTRL
CTRLCTRL
SELECT UNITS THEN
CC
C
+ CLICK TARGET
CC
SS
S
+ CLICK TARGET
SS
MM
M
+ CLICK TARGET
MM
LL
L
+ CLICK TARGET
LL
FF
F
+ CLICK TARGET
FF
AA
A
+ CLICK TARGET
AA
NUMPAD ASTERISKNUMPAD ASTERISK
NUMPAD ASTERISK (
NUMPAD ASTERISKNUMPAD ASTERISK
NUMPAD FORWARD SLASH NUMPAD FORWARD SLASH
NUMPAD FORWARD SLASH (
NUMPAD FORWARD SLASH NUMPAD FORWARD SLASH
SHIFTSHIFT
SHIFT
SHIFTSHIFT
PLUSPLUS
PLUS/
PLUSPLUS
CTRLCTRL
CTRL
CTRLCTRL
FF
22
F
2–
FF
22
HOME HOME
HOME OR CLICK MOUSE WHEEL
HOME HOME
BACKSLASHBACKSLASH
BACKSLASH (
BACKSLASHBACKSLASH
+ CLICK DESTINATION
+ CLICK POINT
SPACEBARSPACEBAR
+
SPACEBAR
SPACEBARSPACEBAR
JJ
+
J
+ CLICK POINT
JJ
ARROWARROW
+
ARROW KEYS
ARROWARROW
MINUS MINUS
MINUS OR ROLL MOUSE WHEEL
MINUS MINUS
FF
22
+
F
2–
FF
22
FF
55
F
5
FF
55
+ CLICK POINT
+ MOVE MOUSE OR
FF
55
F
5
FF
55
\\
\)
\\
)
**
*
**
/)
//
//
X08-10906
M
 Loading...