

Page 1

Page 2

Ron Alpert
AArrtt DDiirreeccttoorr ffoorr SSppeecciiaall EEddiittiioonn
Darrin Horbal
PPrroodduuccttiioonn aanndd DDeevveellooppmmeenntt
AAssssiissttaannccee
Brett Levin
Alain de Leonardis
Hans Wang
Doug Gonya
Gerald (PapaJ) Jones
DDiiaalloogguuee EEddiittiinngg
Jennifer Wells
DDooccuummeennttaattiioonn
Wayne McCaul
John McAuley
Allison Lassieur
QQuuaalliittyy AAssssuurraannccee MMaannaaggeerr
Jon Payne
LLeeaadd TTeesstteerr
John McAuley
TTeesstteerrss
Ken Parker
Pete Santom
Greg Sheppard
Matt Williams
Hans Wang
CCrreeaattiivvee DDiirreeccttoorr
Chris Beatrice
DDeessiiggnneerrss
Jeff Fiske
Steve Serafino
Gregor Koomey
LLeeaadd PPrrooggrraammmmeerr
Mike Gingerich
PPrrooggrraammmmeerrss
Chris Gurski
Thanh Pham
Jason Benham
Dave LeCompte
Jim Solomon
Scott Delekta
SSoouunndd && VViiddeeoo
Ed Saltzman
MMuussiicc
Keith Zizza
AArrttiissttss
Heidi Mann
Mike Malone
Adam Carriuolo
Bob Curtis
Peter Crafts
Dennis Rose
3
CCrreeddiittss
CCrreeddiittss
Eduardo Flores
Gabriel Nanda
VVooiiccee TTaalleenntt
Fran Brill
Ralph Byers
Keith Charles
Thom Christopher
Frank Dolan
Raymond Dutch
Bob Feldman
Sam Freed
Edmund F. Gilbert
Jo Haden
Larry Keith
Willliam Lobley
Robert Tarlow
Karen Woodward
AAddddiittiioonnaall tteessttiinngg bbyy
Joseph (Chezni) Cherlin
Michael (Quarantine) Collins
Kevin Crowley
Philip (Wildzword) Daay
Tim (Lord Gek) Jordan
Charles B. Holden
Andrew (Syrneus) Kenney
Glen Lee
Cutter (ORK!) Matlock
Terry A. McKelvey
Doug McGetchin
Brian (Gilgamesh) Ott
Scott (furfoot) Schrank
Micki (Lady of Magic)
Simonds
Pete (WindWalker) Simonds
WWeebb DDeessiiggnneerr
Jeremy (Reed) Freyholtz
TThhaannkkss ttoo SSoonniiccss SSttuuddiiooss
SSppeecciiaall TThhaannkkss
Impressions Software and the
entire Lords of Magic team
would like to make a special
mention of the incredible
community that has developed in support of
Lords of Magic on the
impresionsgames.com message board. This is an unusual group, both in their dedication to the game but also in
their loyalty to each other as
members of the gaming community. The support of this
group has been a major driving force, helping us to bring
you this Special Edition. We
thank you from the bottom
of our hearts.
Page 3

TTaabbllee ooff CCoonntteennttss
TTaabbllee ooff CCoonntteennttss
IInnttrroodduuccttiioonn
Who Are You in the World? . . . . . . . . . . . . .8
Installation & Loading . . . . . . . . . . . . . . . . .9
Setup & Game Start Options . . . . . . . . . . . .10
Choosing a Difficulty Level . . . . . . . . . . . . .12
Quick Start . . . . . . . . . . . . . . . . . . . . . . . . . .15
Tutorials . . . . . . . . . . . . . . . . . . . . . . . . . . . .22
CChhaapptteerr 11::GGaammee OOvveerrvviieeww && SSeelleeccttiinngg YYoouurr LLoorrdd
Objectives . . . . . . . . . . . . . . . . . . . . . . . . . .42
Lord Types . . . . . . . . . . . . . . . . . . . . . . . . . .45
Faith Selection . . . . . . . . . . . . . . . . . . . . . . .47
CChhaapptteerr 22:: GGeettttiinngg AArroouunndd UUrraakk
Viewing the Map . . . . . . . . . . . . . . . . . . . . .56
Parties . . . . . . . . . . . . . . . . . . . . . . . . . . . . . .57
Selecting & Moving Parties . . . . . . . . . . . . .59
The Party Roster . . . . . . . . . . . . . . . . . . . . .63
Grouping Parties . . . . . . . . . . . . . . . . . . . . .64
Exploration . . . . . . . . . . . . . . . . . . . . . . . . . .65
Terrain and Movement . . . . . . . . . . . . . . . . .66
CChhaapptteerr 33:: BBuuiillddiinnggss
Capital: Pre-Stronghold . . . . . . . . . . . . . . . .70
Great Temples . . . . . . . . . . . . . . . . . . . . . . .71
Fame . . . . . . . . . . . . . . . . . . . . . . . . . . . . . . .73
Capitals: Post-Stronghold . . . . . . . . . . . . . .74
Capital Buildings . . . . . . . . . . . . . . . . . . . . .75
Military Buildings . . . . . . . . . . . . . . . . . . . . .78
Upgrading Buildings . . . . . . . . . . . . . . . . . .80
Resource Management . . . . . . . . . . . . . . . . .82
Villages . . . . . . . . . . . . . . . . . . . . . . . . . . . . .82
Guard Towers . . . . . . . . . . . . . . . . . . . . . . . .84
Great Temples: Revisited . . . . . . . . . . . . . . .85
Mysterious Places . . . . . . . . . . . . . . . . . . . . .87
Primary Structures . . . . . . . . . . . . . . . . . . . .88
5
CChhaapptteerr 44:: CCoommbbaatt
Experience . . . . . . . . . . . . . . . . . . . . . . . . . .92
Unit Selection & Information . . . . . . . . . . .93
Grouping Units . . . . . . . . . . . . . . . . . . . . . .94
Unit Hot Keys . . . . . . . . . . . . . . . . . . . . . . .94
Getting the Battle Started . . . . . . . . . . . . . .95
Giving Orders:
Using the Combat Interface . . . . . . . . . .97
Champions in Combat . . . . . . . . . . . . . . . . .101
Thieving Abilities . . . . . . . . . . . . . . . . . . . . .101
Outdoor Combat . . . . . . . . . . . . . . . . . . . . .102
Combat in Dungeons & Buildings . . . . . . .102
Combat in Capitals . . . . . . . . . . . . . . . . . . .103
Naval Units . . . . . . . . . . . . . . . . . . . . . . . . .103
Mob Rules, Flank and Rear Attacks . . . . . .104
After Combat Results . . . . . . . . . . . . . . . . .104
Rest and Recovery . . . . . . . . . . . . . . . . . . . .104
CChhaapptteerr 55:: MMaaggiicc
Spells . . . . . . . . . . . . . . . . . . . . . . . . . . . . . .108
Type of Spells . . . . . . . . . . . . . . . . . . . . . . .108
Selecting a Spell . . . . . . . . . . . . . . . . . . . . . .109
Casting Spells . . . . . . . . . . . . . . . . . . . . . . .110
Gaining Arcane Knowledge . . . . . . . . . . . .111
Magic Items . . . . . . . . . . . . . . . . . . . . . . . . .113
Magic Scrolls . . . . . . . . . . . . . . . . . . . . . . . .115
Potions . . . . . . . . . . . . . . . . . . . . . . . . . . . .116
Artifacts . . . . . . . . . . . . . . . . . . . . . . . . . . .116
CChhaapptteerr 66:: AAddvvaanncceedd FFeeaattuurreess
Intelligence &Reports . . . . . . . . . . . . . . . .120
Intelligence Report . . . . . . . . . . . . . . . . . . .120
Alliances &Political Opinions . . . . . . . . . .122
The Art of the Deal - Parley . . . . . . . . . . . .124
Barter Rules . . . . . . . . . . . . . . . . . . . . . . . . .126
Page 4

6
Thievery . . . . . . . . . . . . . . . . . . . . . . . . . . .129
Stealth . . . . . . . . . . . . . . . . . . . . . . . . . . . . .130
Spying . . . . . . . . . . . . . . . . . . . . . . . . . . . . .131
Prisoners . . . . . . . . . . . . . . . . . . . . . . . . . . .133
CChhaapptteerr 77:: MMuullttiippllaayyeerr
. . . . . . . . . . . . . . . . . . . . . . . . . . . . . . . .137
CChhaapptteerr 88:: LLeeggeennddss ooff UUrraakk -- TThhee QQuueessttss
. . . . . . . . . . . . . . . . . . . . . . . . . . . . . . . .147
CChhaapptteerr 99:: TThhee MMaapp EEddiittoorr
. . . . . . . . . . . . . . . . . . . . . . . . . . . . . . . .150
CChhaapptteerr 1100:: TThhee LLoorrdd EEddiittoorr
. . . . . . . . . . . . . . . . . . . . . . . . . . . . . . . .160
CChhaapptteerr 1111::TThhee SSttoorryy ooff UUrraakk
. . . . . . . . . . . . . . . . . . . . . . . . . . . . . . . .166
Of the Beliefs & Religions of Urak . . . . . . .184
Appendix
Strategy Hints & Tips . . . . . . . . . . . . . . . . .206
Designers Notes . . . . . . . . . . . . . . . . . . . .210
Technical Tips . . . . . . . . . . . . . . . . . . . . . . .212
Customer Service, Support, & Sales . . . . . .214
Technical Support . . . . . . . . . . . . . . . . . . . .216
Great Temple Annex Buildings . . . . . . . . . .218
Spell Index . . . . . . . . . . . . . . . . . . . . . . . . . .222
Artifact Index . . . . . . . . . . . . . . . . . . . . . . .226
Unit Index . . . . . . . . . . . . . . . . . . . . . . . . . .228
Index . . . . . . . . . . . . . . . . . . . . . . . . . . . . . .238
7
Page 5

Insert the Lords of Magic CD into your CDROM drive. If the Autoplay option on your
computer is enabled, a panel will automatically
appear on your screen. Click on the Install button and follow the onscreen instructions. If the
Autoplay feature is not active, click on your
Windows Start button and click Run then type
D:\setup (D being the letter of your CD Drive).
The installation program gives you three install
options: Standard, Full and Special. The
Standard install will install 190 MB and is recommended for P166mhz and up, with 32+ MB
RAM. The Full install will install everything to
your hard drive for maximum performance. This
install will take up 390 MB and is recommended
for P166mhz and up with 32+ MB RAM (you
will still be required to have the CD present to
play the game). The Special Install is recommended for machines with a P150mhz or less and
at least 16 MB RAM. This install requires 135
MB of hard drive space.
Once installed, you can launch Lords Of Magic
by clicking on your Start Button and selecting
Sierra - >Lords Of Magic.
If the Autoplay function is enabled, whenever
you load the CD, you will be given the option to
launch the game. You can also access the directory on your hard drive where you have installed
the game and double click on LOM.exe.
These are black days for Urak. Evil envelops the
land and the people cry out for a savior. Is there
no one who can stop Balkoth's march of death
and destruction?
For a thousand years, peace reigned on the pastoral lands of Urak. Then forces of darkness, led
by the evil sorcerer Balkoth, unleashed a nightmare of war and terrorism that destroyed the
people and laid waste to the land. Now the cities
are defenseless. The people are starving. The
Great Temples of the land, once the centers of
beauty and learning lie crumbling, overrun by
worshippers of Balkoth. The people pray for a
leader who can defeat Balkoth and end this nightmare.
Are you that leader? Do you and your adventurers have the courage to defeat the forces of tyranny and return Urak to its former glory? You have
the magic of the land and the loyalty of your
comrades to aid you in this quest. But it will not
be easy. The bloody road to victory will be strewn
with the bodies of the dead and the dying
Even as you claim small victories, the armies of
Darkness lie in wait. In dungeons, caverns, and
even in the light of day, these forces amass to
oppose you. Horrible battles lie ahead.
Can you save Urak from the fiendish hand of
Balkoth? Can you return to the people of Urak
their beautiful lands? Do you have the courage
and power it takes to lead an army into the darkness - with any hope of survival?
9
WWhhoo AArree YYoouu iinn tthhee WWoorrlldd??
IInnssttaallllaattiioonn && LLooaaddiinngg
Page 6

SSeettuupp && GGaammee SSttaarrtt OOppttiioonnss
SSeettuupp && GGaammee SSttaarrtt OOppttiioonnss
When you first run the game, an introductory
movie plays, followed by a message welcoming
you to Lords of Magic. After this screen you
arrive at the Start Options Panel:
Lords of Magic- Starts a new game from scratch.
Legends Of Urak- Allows you to play the spe-
cial Lords of Magic quests (see page 146). We recommend that you familiarize yourself with the
standard game of Lords of Magic before attempting one of these.
Last Save- This selection loads the last game that
was saved, including, the autosave feature that
automatically saves your game prior to entering a
non-autocalculated combat. If you're continuing
an epic campaign from your last outing in Urak,
just hit this button and you won't have to scroll
through a list of saved games. Likewise if you
were killed in a battle, you can restart at the point
just before the combat took place.
them with other Lords of Magic players.(See page
151).
Custom- Brings up a list of saved custom maps
for single player games on user-created maps.
Exit Game- Exits the Game to the Desktop.
SSttaarrttiinngg AA NNeeww GGaammee..
Click on Lords of Magic. This brings up the Lord
Selection Screen. Here you choose the profession, or class of the Lord you will play in Lords of
Magic. You can choose Warrior, Mage or Thief.
Each class has different strengths and weaknesses
that affect gameplay. By choosing one of these
11
Load Game- Brings up a list of saved games.
Among these are the tutorial files, used later. (See
page 22).
Multiplayer- Brings up the Multiplayer Options
Panel, where you can begin adventuring on-line
and with others.(See page 136).
Map Editor- Opens the World Map Editor.
Here you can make infinite new landscapes of
Urak and add whole new dimensions to Lords of
Magic. You can save these maps and exchange
Lord Class Selection Screen
Page 7

SSeettuupp && GGaammee SSttaarrtt OOppttiioonnssSSeettuupp && GGaammee SSttaarrtt OOppttiioonnss
12 13
classes, you are not limiting your entire party to
that particular class. Any party can be comprised
of a combination of these characters, but the
strategy of your Faith will be influenced by the
kind of Lord you choose to play.
At any time during the selection process, you can
click on Back in the lower left corner of the
screen to return to the previous screen.
Once you have chosen a class, you will be asked
to select the Faith that you will play. This is
another important decision since each Faith also
has its own strengths and weaknesses. The kind
of game you will play depends largely on this
choice. See the sections entitled Quick Start or
Selecting Your Lord for more information.
See page 45 for more information on Classes.
CChhoooossiinngg AA DDiiffffiiccuullttyy LLeevveell
EEaassyy
If you choose to play an Easy game, you start
with extra resources, while all of the other Faiths,
including Balkoth begin with less. When you
conquer a dungeon, you will receive more spoils
than normal. When other Faiths swear fealty to
you, you receive a larger percentage of their
standing army - units and resources - than on the
other difficulty levels. You may also find extra
scrolls throughout the world.
MMeeddiiuumm
Faith Selection Screen
This level is designed for players who are familiar
with the game and provides a good challenge for
a long time. In a Medium level game, you and the
other Faiths begin with fewer resources and experience than in Easy mode. In addition, Balkoth is
not at as much of a disadvantage as he is in an
Easy game. Dungeon spoils are even, and a normal amount of parties swear fealty to you when
another Faiths Great Temple is liberated.
Page 8

SSeettuupp && GGaammee SSttaarrtt OOppttiioonnss
14 15
HHaarrdd
This is, understandably, the most difficult level to
play. You and the other Faiths start with fewer
resources while Balkoth gains an extra
Champion. You'll find fewer dungeon spoils for
the same work, and there aren't as many scrolls in
the world. When an other Faith swear fealty to
you, you receive only a small percentage of its
standing army. This level is not for the shy or
inexperienced. Good luck.
SSeettttiinngg UUpp MMuullttiippllaayyeerr GGaammeess
See Chapter 7: Multiplayer Games.
QQuuiicckk SSttaarrtt
So you're chomping at the bit, ready to get out
there and slay a few enemies? Then pick up
your battleaxe and start hacking.
Many avid gamers want to get right to it - they
don't want to waste any precious game time
going through tutorials and manuals. Take heart,
we wrote this section just for you! Here you'll
find what you need to know to start adventuring
in Urak as fast as possible. If you need to know
more, we've added page numbers and references
directing you to more detailed information. If
you want to learn even more about playing the
game, then go to the tutorials on page 22.
CChhoooossee aa CChhaarraacctteerr
In Urak, you can be the adventurer you always
wanted to be. Start the game, after the introductory story is finished, select Lords of Magic and
read the descriptions of the Warrior, Mage and
Thief that appear on the screen. Select the class
that is closest to the character you wish to portray. Next, choose a Faith based on the descriptions and start conditions given on the screen.
You can always go back a step in the selection
process by clicking on the Back button in the
lower left corner of the screen. Finally, select the
difficulty level and begin.
See page 47 for more information on Faiths
See page 45 for more information on Champions.
Page 9

QQuuiicckk SSttaarrttQQuuiicckk SSttaarrtt
16 17
LLooookkiinngg AArroouunndd YYoouurr HHoommee
After loading, you will see your Lord and his or
her party in the wilderness of the land.
Somewhere close by will be the Capital of your
Faith. Surrounding this is a small cluster of
buildings: A Barracks, a Mage Tower with a Spell
Library and a Thieves Guild. You will use all of
these buildings to hire and train units of your
Faith to help you in your adventures.
Somewhere in the area is a large unique ornamental structure. This is your Great Temple, a key
facility that you will need to liberate from the
scourge of evil.
See page 74 for more information on city management.
See page 71 for more information on Great
Temples.
EExxpplloorraattiioonn
See page 59 for more information on Movement
and Interface.
See page 87 for more information on Caves,
Dungeons and Towers.
TTrraaddee RReessoouurrcceess && HHiirree aa UUnniitt
Take your leader into your Capital and visit the
Tavern, Temple, Magistrate, and Marketplace.
Clicking directly on the buildings will allow you
to conduct business with them. It is here that
you will be able to manage your resources over
time.
Exit the Capital and go to the Thieves Guild to
hire Mercenary Missile (ranged attack) units.
Now you are ready to attempt to conquer that
structure closest to you.
See page 75 for more information on Resource
Management.
To explore the darkened regions around your
Capital, move your Lord by left-clicking twice on
a destination - once to set the location and again
to execute the move. When you move, you'll see
more land and structures revealed as the shroud is
lifted. Move your cursor over these structures
and a highlight may appear, indicating that they
are objects that can be interacted with. If you
leave the cursor over a structure for a few seconds
you will see a description pop-up appear.
Keep in mind that these buildings, caves, statues,
and other mysterious objects represent potential
hiding places for your enemies.
CCoommbbaatt
Combat in Lords of Magic is similar to other
real-time strategy games. Select units and move
them into combat. However, Lords of Magic
allows you to pause the action by pressing the
space bar. In this way you can stop to take a
more tactical look around and issue orders to
units while the game is paused.
There are three ways to select units: by clicking
on them directly, by clicking on the unit icons at
the bottom of the screen, or by cycling through
them with the + and - keys. Once the unit is
Page 10

QQuuiicckk SSttaarrtt
QQuuiicckk SSttaarrtt
18
highlighted, you can issue orders in one of two
ways: By clicking on the physical destination or
target, or by using the buttons above the icons
and then clicking on the destinations or targets.
Champions take orders as individuals, but
Military Units (Infantry, Cavalry and Missile
Troops) all take orders in squads of three. You
can, if you wish, select individual Military Units
by holding down CTRL and clicking on the unit
on the map.
Once combat ends, the Combat Results panel
will appear. This shows unit losses and the spoils
that the victor receives.
In order to become a recognized Lord, you must
have a Stronghold built in your honor. This is
necessary to gain the resources required to wage
a successful campaign against Balkoth. In order
to have this Stronghold built for you, you must
gain enough strength, by conquering dungeons
and hiring Mercenaries, to remove the evil from
your Great Temple.
See Chapter 4 for more information on Combat.
At any time during the game while on the
Overland Map, you can change the game options.
Click on the disk icon on the left side of the
Interface Panel or hit the ESC key to bring up the
Options Panel. The Options Panel gives you control over the following options.
New Game:Quits the current game and brings
you back to the Startup Screen to begin another
game.
Last Save:Loads the last saved game or the last
point before you entered a non auto-calculated
combat.
Save Game:Saves the game in progress and
allows it to be loaded later.
Load Game:Allows you to load a game from a
list of previously saved games.
Sound:Clicking on this button brings up another panel from which you can adjust the volumes
for different game sounds.
19
Music:This allows you to change the volume of
the music that is played in the background.
Sound FX:The volume of all of the sounds made
by characters, such as walking, spells and combat
noises, can be controlled from here.
Speech:This alters the volume of the verbal
replies that characters give when you select them
and give them orders.
Page 11

21
QQuuiicckk SSttaarrtt
20
Ambience: This allows you to change the volume
of the background noises that make up the
atmosphere of the game such as wind blowing,
birds chirping and waves crashing.
Building Speech On/Off: Clicking this button
selects whether or not you want to hear the statements made whenever you enter a Capital or
Military buildings, such as the Barracks, Mage
Towers, Thieves Guilds.
Reset Help: When you first start playing Lords
of Magic you receive Help Text when certain
events occurs. You have the option to disable
each of these panels after you view them for the
first time. If, at some later date, you want to re enable them again, pressing this button will reset
all of the Help Text Panels.
Center Move On/Off: Toggle this button to
choose whether or not you want to have the
game screen constantly center on the currently
moving party. With this option turned on, the
screen will automatically center on any units that
are moving within any line of sight your parties
have. This is useful for tracking enemy movement that may otherwise go unnoticed. Turned
off, the screen will remain where you have left it
and not track any movement. This is a good
option to have on if you one have one party and
want to keep an eye on it. Leave this option
turned off if you have multiple parties and you
want to scroll around the map looking at them.
The last options that you can adjust are the
Game Speed and Combat Speed. Modifying the
Game Speed will change the speed in which
everything happens on the Overland Map while
changing the Combat Speed affects the speed at
which combat takes place. Clicking the Default
button will reset both speeds to their default values.
Finally, you have the options to either Quit or
Resume the game with your new options.
QQuuiicckk SSttaarrtt
Page 12

TTuuttoorriiaall
22 23
TTuuttoorriiaallss
HHiirriinngg MMeerrcceennaarriieess
At the main start screen, choose the LOAD
option. Click on the saved game called
MERC.SAV so that it appears in the box at the
top; now click on the word LOAD on the lower
left side of the pop-up. Follow the instructions as
described in the Tutorial below. If for some reason you encounter difficulty playing the tutorial
and you wish to restart the tutorial, click on the
gray diskette at the left side of the main interface
to access the OPTIONS MENU, click on the
LOAD button, and reload the saved game.
When the game begins, you do not have any followers (people willing to work for you) to train
as new units in your army. However, you do need
to increase your forces, so hiring Mercenaries
becomes your only option. Mercenaries are very
expensive to maintain, so you'll need to keep a
watchful eye on your treasury when you have
mercenaries in your ranks.
To hire a mercenary, first left-click on your party
to select it and then left-click twice on the
Barracks to move the party into the Barracks. If
you do not know which structure is the Barracks,
you can hold the cursor over buildings, and you
will see mouse help text appear above each structure. Find the structure marked "Archon
Barracks" and left-click twice to enter the building. You will be greeted by a voice welcoming you
to the Barracks. An adventurers' viewpoint of the
Military building that stands before your Lord
appears on a panel, with a description of the
building (note: it is always a good idea to carefully read the descriptions of any buildings or units
that you encounter as they give hints to what this
building is suited for and the strengths and weaknesses of the units found within). After reading
the description of the building, click on the
Footmen button to see a description of these disciplined foot soldiers.
You now have two options: Train and Hire Merc.
The resources that appear above the Train button
are the costs associated with training a follower,
whereas the resources above the Mercenary
(Hire) button pertain to a "pay as you play"
method used by the mercenaries. Notice that
training a Footman unit requires that you have at
least one follower (the little man raising his arm).
If the resource display at the bottom of your
screen on the lower right shows that you have no
followers available, the only way to acquire any
units is to hire a mercenary. Click on the Hire
Merc. button and you will see and hear that the
mercenary has been hired. Exit the barracks
screen. You now have a new unit to command,
and as you can see from your resource display in
the lower right, this mercenary is very costly,
requiring four gold and one ale for every day that
they are in your service.
Strategy note: Mercenaries are a temporary solution at best. It is vital that you do not pay them
to sit around idle. Hire them and go and kill
something! For more information on mercenaries and how to dismiss them, see pages 58-59.
This concludes the tutorial on hiring
Mercenaries. At this point you should go on to
the next tutorial.
Page 13
TTuuttoorriiaallTTuuttoorriiaall
24 25
LLiibbeerraattiinngg aa GGrreeaatt TTeemmppllee
At the main start screen, choose the LOAD
option. Click on the saved game called TEMPLE.SAV so that it appears in the box at the top;
now click on the word LOAD on the lower left
side of the pop-up. Follow the instructions as
described in the Tutorial below. If for some reason you encounter difficulty playing the tutorial
and you wish to restart the tutorial, click on the
gray diskette at the left side of the main interface
to access the OPTIONS MENU, click on the
LOAD button, and reload the saved game.
Taking a Great Temple is the single most important step that you can make in Lords of Magic,
short of slaying Balkoth. Freeing the Great
Temple provides you with a five-fold reward:
· When you defeat the creatures that infest your
Great Temple, your people build a Stronghold for
your Lord to use as his or her base of operations.
· You will receive an immediate reward of 10 followers in your Stronghold upon freeing the Great
Temple.
· The Great Temple remains as the focal point to
attract future followers to join your cause. After
visiting the Great Temple, new followers will
journey to your Stronghold every week (seven
turns).
· Mere possession of the Great Temple spreads
your name and increases your fame.
· The Great Temple will eventually allow you to
summon the most powerful creatures in Urak.
Select the party that is outside the Great Temple
by left-clicking on it. Left-click on the massive
statue adjacent to the party. enter the Great
Temple and prepare for battle. The battle has
been pre-arranged so that there should be little
challenge. Do not expect it to be this easy in the
actual game!
The Order Great Temple
Assuming you win the battle at the Great Temple,
a message appears describing the epic event.
Scroll the map to your Capital and you now see
the proud presence of a Stronghold waving a banner above the rooftops. Click the End Turn button. Notice that you were on your sixth turn, so
the next turn will be your seventh. At the end of
the week (seventh turn), another message
appears, informing you of the number of followers who have gathered in the Stronghold to join
you. Click on the Capital and you can now assign
these followers to do various jobs for you. Assign
followers to the Marketplace to work as merchants to earn gold, to the Tavern to brew ale, to
the Temple to enchant magic crystals, or to the
Magistrate to spread the word of your cause and
raise your fame (see page 82 for more informa-
tion on city and resource management).
Page 14

TTuuttoorriiaall
TTuuttoorriiaall
26
RReesseeaarrcchhiinngg aa SSppeellll
At the main start screen, choose the LOAD
option. Click on the saved game called
MAGIC.SAV so that it appears in the box at the
top; now click on the word LOAD on the lower
left side of the pop-up. Follow the instructions as
described in the Tutorial below. If for some reason you encounter difficulty playing the tutorial
and you wish to restart the tutorial, click on the
gray diskette at the left side of the main interface
to access the OPTIONS MENU, click on the
LOAD button, and reload the saved game.
The task of learning more powerful spells is handled by assigning Mages to research in the spell
Library. To assign a Mage to begin research on a
spell, select the party near the Mage Tower and
place the mouse cursor over the Library. If you
are not sure about which building this may be,
just leave the cursor over a building for a moment
and help text will appear above the structure
describing it to you. Once you find the Library,
left-click to enter. You will immediately be taken
to the Library interior where you will see your
Mage, sitting at a desk, hard at work.
Now you must choose which spell you wish to
research. There are four books on the shelf to
choose from, combat attack, combat defense,
overland spells, and general knowledge. Click on
the first book on the left (with the sword on the
spine) to open it, and you will see the first combat attack spell that your Mage can learn for you
(in fact you already know this spell). Left-click
on the right page to turn to the next spell, which
you do not know. The left page tells you how
many days (turns) it will take to complete
research on this spell. Exit the Library by clicking
on the doorway to the left of the screen and end
your turn. At the start of the next turn, enter the
Library again by left-clicking on the Enter
Building button above your Mage. You will now
see an open book on the bookstand that represents the spell being researched. Left-click on the
book and you will now see the report on the left
page giving you the current status of the spell
being researched. This page also tells you the
names and experience levels of the Mages currently researching in the library. Over time you
will notice that the runes on the bottom of the
right page become readable, signifying your
progress in the practical application of this spell.
CCoommbbaatt
At the main start screen, choose the LOAD
option. Click on the saved game called COMBAT.SAV so that it appears in the box at the top;
now click on the word LOAD on the lower left
side of the pop-up. Follow the instructions as
described in the Tutorial below. If for some reason you encounter difficulty playing the tutorial
27
Page 15

case, however, choose "Enter".
Now you are inside the Large Estate. Combat is
currently paused so take a moment to look
around. Using your mouse cursor, scroll to the
upper left portion of the screen - there you will
see your enemy. Rest your mouse cursor on one
of the enemy creatures; notice that the selected
enemy is now outlined in brown, and mouse help
appears giving the name and experience level
(approximate strength in the case of creatures) of
your vile enemy. The interface panel on the lower
left of your screen now provides more detailed
statistics on the abilities of any foe you highlight.
Just above the enemy are descending stairs. These
stairs indicate that this Large Estate contains
another level below the current battle level, with
more wretched inhabitants to oppose you. If you
wish to explore deeper into the next level, you
must ensure that you remain healthy enough to
continue your adventure.
You will also notice two colored flags planted in
the ground and waving above your Mage. To find
your Mage's location (or that of any other unit)
on the battle map, right-click on the Mage's icon
in the lower panel and you will automatically center on him. Hold the mouse cursor over the flags;
mouse help will appear indicating that this is a
"Flee Area". If you ever find yourself facing a
superior enemy and want to leave combat before
all your troops are exterminated, press the "Flee
From Combat" button (the picture of the person
running with upraised hands) located on the
lower right side of the interface panel. Giving this
order will cause all your troops to disengage from
29
and you wish to restart the tutorial, click on the
gray diskette at the left side of the main interface
to access the OPTIONS MENU, click on the
LOAD button, and reload the saved game.
Success or failure in combat is one of the most
important factors in any adventurer's journey
through Urak. This tutorial is designed to give
you a basic overview on the capabilities of the
various troops you will lead into battle. In this
tutorial, you command three champions: a Life
Mage, a Life Warrior, and a Life Thief as well as a
unit of Life Infantry and a unit of Life Missile
Troops. Note that the Champions are graphically
represented by only one figure at all times, while
Military units (Infantry, Cavalry & Missile
Troops) are represented by three figures in combat.
Directly above your party on the overland map is
a structure with a blue roof and a gray banner
waving over it. Rest the mouse cursor over it;
mouse help will appear indicating that this structure is called a "Large Estate". Double-click on
the Large Estate; a pop-up panel will appear that
describes the difficulty level (i.e. difficulty - level
1 is the easiest, level 11 is the most difficult) and
gives a brief description of who or what awaits to
battle your party within. There are also three buttons at the bottom of this pop-up: "Enter",
"Autocalc" and "Retreat". Enter will take your
party into battle, Autocalc lets the computer
determine the winner, and Retreat allows you
return to the overland map unscathed (although
what brave adventurer would ever contemplate
running away with his tail between legs?). In this
28
TTuuttoorriiaallTTuuttoorriiaall
Page 16

TTuuttoorriiaallTTuuttoorriiaall
30
combat and make their way to the flee point.
Troops who make it to the flee point will return
to overland map. Directly below the "Flee" button is the "Surrender" button. Giving an order to
surrender will kill all of your non-Champion
troops and make your Champions prisoners-ofwar. The other two buttons are the "Pause
Combat" button (the red/green light next to the
"Flee" button) and "Autocalc" (the button with
the computer on it).
Now right click on your Warrior (the guy riding
the green lizard). Notice that a new set of action
buttons appears above the unit icon panel. These
buttons give specific orders to the Warrior that
only he can carry out. These buttons are (from
left to right): Attack, Defend, Go Berserk and
Rally. Notice that each button has mouse- help
associated with it. Clicking on the Attack button
and then clicking on a particular enemy unit will
make the Warrior advance to that unit and attack
it. Click on the Defend button, and then click on
a location on the map or on a particular friendly
unit. Choosing to defend a location will cause the
Warrior to move to the specified area and wait for
the enemy to approach. If you choose to defend
a particular unit, the Warrior will move near to
the unit he has been ordered to protect, and
defend him if he comes under attack. If you order
the Warrior to defend himself, he will parry;
applying one half of his attack value to his
defense, and subsequently entirely forfeiting the
opportunity to attack. This is useful for infantry,
to stall the enemy's approach and hold him at bay,
while Mages or Missile Troops attack from afar.
Clicking on the Go Berserk button will cause
your Warrior's defense to drop to zero, but will
increase his attack by one half of his original
defense. This button is only really useful if you
either completely outclass your enemy or if your
enemy is so powerful that you have no other
alternative. Clicking on the Rally button will
cause your Warrior to issue a mighty war-cry and
will inspire your military units to fight at plus one
to attack and defense. (Military units are:
Infantry, Cavalry, and Missile Troops.)
The next Champion to right-click on is the Thief,
which causes a new set of action buttons to
appear above the unit icon panel. These buttons
are (from left to right): Subdue, Aimed Attack,
Stealth, and Detect Thief. Again, each button has
mouse-help associated with it. Subdue is used to
capture Champions of another faith. Click on the
Subdue button and then click on the enemy
Champion you want to capture. If your Thief
successfully subdues an enemy, he will become
your prisoner of war. See page 133 for further
information on POW options. Please note: subdue can only be used on Champions belonging to
another "player faith"; it cannot be used on wandering monster or renegade champions that live
in, or come from caves and dungeons, such as the
ones in this battle, and it can never be used on
non-champion units. Giving the order for an
Aimed Attack allows your Thief to cause greater
damage with her missile attacks, at the expense of
slowing down her rate of fire. Clicking on the
Stealth button turns your Thief invisible to all
enemy units, until detected. Detection is based
on the sneaking thief's level and distance from the
detecting parties. When a sneaking thief either
31
Page 17

TTuuttoorriiaallTTuuttoorriiaall
32
gets very close to her enemies, or when that
enemy is of higher level than she, the chance for
detection rises dramatically. The last action button: Detect Thief, allows your Thief to try to
detect any enemy Thieves that are in stealth
mode, and trying to sneak up on you. Though
again the ability of your thief to detect an enemy
thief in stealth mode depends on the relative levels of the thieves, this method of detection offers
your party the best chance at detecting enemy
thieves.
The final Champion to right-click on is the Mage.
Notice that two yellow spell buttons now appear
above the unit icon window. The left button rep-
resents combat attack spells, and the right combat defense spells. Move your cursor over these
buttons and notice that mouse help appears
describing the spell effects and the mana cost to
cast these spells. In the unit statistics area in the
left portion of the interface panel, the middle statistic box on the bottom row tells how much
mana your mage currently has. At the moment,
she has 17 mana at her disposal. As she casts
spells, the amount mana remaining decreases. See
page 110 for further information on mana and
spell casting. Now place your cursor over the
"Spirit Arrow" spell (the yellow button on left
with an arrow on it) and right click. Notice that a
pop-up box appears with a button for Spirit
Arrow and another button for a spell called
"Bless". As you learn new spells through research
in the Mage Library they will appear in this popup box area. A red outline appears around Spirit
Arrow because it had been selected spell. Leftclick on the button for "Bless" to select it - "Bless"
will now appear above the unit icon where the
Spirit Arrow button used to be. Right-click on
the button for "Bless" and observe that a red outline is now surrounding the button for "Bless".
Left-click on the button for "Spirit Arrow" to reselect it and notice that it again appears above the
unit icon panel. Left-click on the button for
"Spirit Arrow" once more; your cursor will now
turn into a white star to indicate that a spell has
beenreadied for casting. Scroll over to your
enemy and rest your cursor on one of the blue
"Sprites" creatures. The star cursor will begin to
animate and a red outline will appear around the
creature you have targeted. Left-click on the
creature to cast "Spirit Arrow" on this foul
enemy. Now unpause the game by hitting the
space bar and watch as your Mage casts "Spirit
Arrow" on your opponent. After the spell has hit
the targeted creature, notice that his health (represented by the gray bar above the creature) has
been reduced. Hit the space bar again to pause
the game and select another target on which to
cast "Spirit Arrow". If you want the game to continue in real-time but just want to slow things
down a bit, use the "," and "." keys to speed things
up or down until you find a speed suitable to you.
Notice that after you attack the creatures they
begin to move toward you. While the game is still
paused, issue orders to set up the positions of
your troops. It's best to place your Infantry units
in front of your Missile Troops to protect them
and allow them to fire without being attacked.
You can give your units orders by either selecting
them in the unit icon panel or left-clicking and
dragging a box around their figures on the map.
33
Page 18

TTuuttoorriiaallTTuuttoorriiaall
34
You can even select individual members of a
Military Unit by combining a left-click with the
<CNTL> key. You can give your units orders to
move (and attack) when the game is paused;
however, they will not execute these orders until
the game is unpaused. Move your troops so that
the Elven Staffmen are in front of the Elven
Archers and Thief Champion to protect them.
Continue to have your Mage cast "Spirit Arrow"
on the enemy creatures. Use the Rally button and
then move your Warrior up to attack any stray
enemies that might attempt to sneak through
your defenses.
Once you have dispatched your enemy, you
receive a pop-up informing you of the combat
results: who was killed, what spoils you received,
and any units that have increased in experience
level. In multi-level encounters, such as this, you
receive a panel informing you that you may now
manipulate artifacts and cast spells. This means
that if you had any potions or healing spells you
could now use them (see page 116 for details on
using potions). In this case you have neither, so
click on the "Close" button located on the lower
right side of the panel. You now have the option
to return to the overland map (by clicking on the
globe located on the lower right side of the
screen) or proceeding down to the next level of
the dungeon to clear out the evil inhabitants
located within. You also have the option of splitting up your party and sending any severely damaged unit back to the surface. This is done by first
sending your stronger units down to do battle
with creatures located below, and then clicking
on the flee button for the remaining troops to
leave . In this case, however, send all your units
down below by selecting them and giving them
an order to move to the descending staircase.
Once all the units have made it to the staircase,
you will be transported to the next level of the
dungeon with a whole new group of enemies that
oppose you. Using the knowledge you gained
from your previous battle, you should be able to
turn these creatures into dragon appetizers in no
time. You may notice that as you continue to
order your Mage to cast spells on the enemy that
the spell buttons gray and out and she can no
longer cast spells. This is because she has run out
of mana. Mana can be replenished either by using
a potion (see page 116 for details on using mana
potions) or by ending your turn (your Mage will
have full mana on the next day). Once victory is
yours, you receive another combat results report,
and your party returns to the overland map.
35
Page 19

right-click in an open portion of the overland
map to deselect it. Now place your cursor on the
Barracks and left-click to select the empty building. A pop-up options panel will appear; notice
that next to the "Experience Conferred to
Recruits" and "Next Turn" the numbers both indicate that zero experience will be conferred to any
units produced because no Champion is present
to instruct them. Click on the button labeled
"Elven Staffmen" in the middle of the upper row.
Another panel will appear that gives a brief
description of the Elven Staffmen as well as their
statistics (attack, defense, movement, etc.) and
their cost. Observe that their current experience(shown by the temperature bar underneath
the word "Level") indicates that if you produced
the unit now, it would appear with only Level 1
experience, and hence would be quite weak and
vulnerable in combat. Hit the "Cancel" button
and exit the Barracks. Now select your party by
left-clicking on it and order it to move into the
Barracks. You will now see that because you have
brought the appropriate Champion (a Warrior)
into the Barracks, he will confer 46 points of
experience onto any units produced in the next
turn. A new line also appeared: "Max With This
Champion", indicating that a unit produced while
using this Champion as Steward will receive a
maximum of 465 experience points if the
Champion remains as Steward for the longest
possible time.
Select the "Elven Staffmen" button again.
Observe that the temperature bar underneath the
word "Level" now contains two colors: green to
indicate the experience level that a unit will pos-
37
Notice that a gray banner no longer flies over the
large estate - all its evil denizens have been exterminated. If you had failed to defeat the creatures
within, a gray banner would continue to wave
above the estate.
CCoonnffeerrrriinngg EExxppeerriieennccee ttoo NNeeww UUnniittss
At the main start screen, choose the LOAD
option. Click on the saved game called EXPERIENCE.SAV so that it appears in the box at the
top; now click on the word LOAD on the lower
left side of the pop-up. Follow the instructions as
described in the Tutorial below. If for some reason you encounter difficulty playing the tutorial
and you wish to restart the tutorial, click on the
gray diskette at the left side of the main interface
to access the OPTIONS MENU, click on the
LOAD button, and reload the saved game.
Having your Champions confer some of their
experience to new units can be the easiest (not to
mention safest) way to acquire units with a higher experience level, without ever taking them into
battle. This tutorial will show you how to assign
Champions as stewards to your military buildings, to greatly enhance the strength of the
forces that your buildings produce for you to lead
into battle.
Find your Elven Barracks - it is to the left of your
party. You can find your various building by resting the cursor over them to receive mouse help..
Do not enter the Barracks with your party; if
your party is currently selected (i.e. it appears in
the unit icon panel at the bottom of the screen),
36
TTuuttoorriiaallTTuuttoorriiaall
Page 20

Staffmen have reached their maximum level of
experience (as indicated by a Level temperature
bar that is all yellow), click on the "Train Unit"
button and observe that the newly created unit
will posses Level 3 experience.
39
sess next turn, and blue for the maximum amount
of experience the unit will receive. Notice that a
blue "+1" appears below the number 2 on the
level temperature bar. This means that the maximum amount of experience the unit will possess
will advance him beyond experience Level 2. Hit
the Exit button to exit the Barracks and then
click on the end turn gem in the lower right corner to end your turn. At the beginning of your
next turn, go back into your Barracks and select
"Elven Staffmen" once again. The temperature bar
will now contain three colors: yellow to indicate
the current experience the Staffmen will possess
if produced on this turn, green to show how
much experience they will posses if produced the
following turn, and blue to show their maximum
experience. Keep on ending turn until no more
blue remains in the temperature bar, and the bar
is entirely yellow (10 turns). Notice that the
experience the unit will possess if produced on
this turn will put him just below experience Level
3. In addition to the experience of the Champion
who is residing as Steward, the upgrade level of
the Barracks (or Thieves Guild, or Mage Tower)
can affect the amount of experience conferred
upon new units produced as well. The top of the
first pop-up panel when you enter the Barracks
indicates that this structure is currently at
upgrade level 1. Click on the button labeled
"Upgrade" on the upper right of this panel. Now
click on the button for "Elven Staffmen" and
observe that the amount of experience the
Staffmen can possess will place them above experience Level 3. Remember that a military building cannot be upgraded higher than the level of
its corresponding Stronghold. Once the Elven
38
TTuuttoorriiaallTTuuttoorriiaall
Page 21

CChhaapptteerr 11::
GGaammee OOvveerrvviieeww &&
SSeelleeccttiinngg YYoouurr LLoorrdd
o you think you've got what it takes to
defeat Balkoth? Let me tell you some-
S
you. All of them are dead. I won't relate the manner of their deaths, but let us say that what little
remained of the bodies wouldn't feed a hungry
crow.
thing, my friend. Many have come before
- Balathustrius
Page 22
again, the people will sing your praise and build
you a Stronghold in your Capital, attracting
Followers who will work for you.
The resources necessary for maintaining your
parties and continuing your campaigns, are Gold,
Crystals, and Ale. These can be obtained by clearing local structures. While clearing out a cave or
dungeon will yield some instant resources, a
steady flow can be found by conquering and
maintaining control of a Gold Mine, Crystal
Mine, Brewery or Statue.
Much of your success in Urak hinges on your
reputation, or Fame. How famous you become
depends on your actions and your conquests during the course of the game. As your Fame grows,
numerous Followers from across Urak volunteer
to help in your campaign. These Followers appear
in your Stronghold and await your orders.
Followers can be assigned to the vital tasks of
brewing ale, running your Marketplace, spreading
the word of your campaign, and harvesting magic
crystals. Additionally, you can invest resources
into training Followers to create powerful units
in any of the Military buildings on the outskirts
of the Capital. Mercenaries, too, can be hired , at
a cost.
Live long enough, and your soldiers and
Champions become more experienced and much
more powerful in combat. Once your Lord has
gained a few levels of experience, you are ready to
venture out beyond the relative safety of your
own region and visit your neighbors.
OObbjjeeccttiivveess
When the game begins, it's just you and a few
loyal adventurers in a big, unexplored world.
To defeat Balkoth and restore Urak you will need
to build a force great enough to vanquish him.
There are many steps that you must take in order
to accomplish this goal.
First you need a base of operations where you can
build and train your forces. To do this, you will
need to prove yourself a worthy Lord to the good
people of the Faith you have chosen to lead. Your
people may support you and pray you are successful, but this does not mean that they will
work for you or lay down their lives for you. In
order for your people to support you in action,
not just in words, you must clear the poison that
Golgoth has summoned within your Great
Temple. When the Great Temple is free once
42 43
CChhaapptteerr 11:: GGaammee OOvveerrvviieeww && SSeelleeccttiinngg YYoouurr LLoorrddCChhaapptteerr 11:: GGaammee OOvveerrvviieeww && SSeelleeccttiinngg YYoouurr LLoorrdd
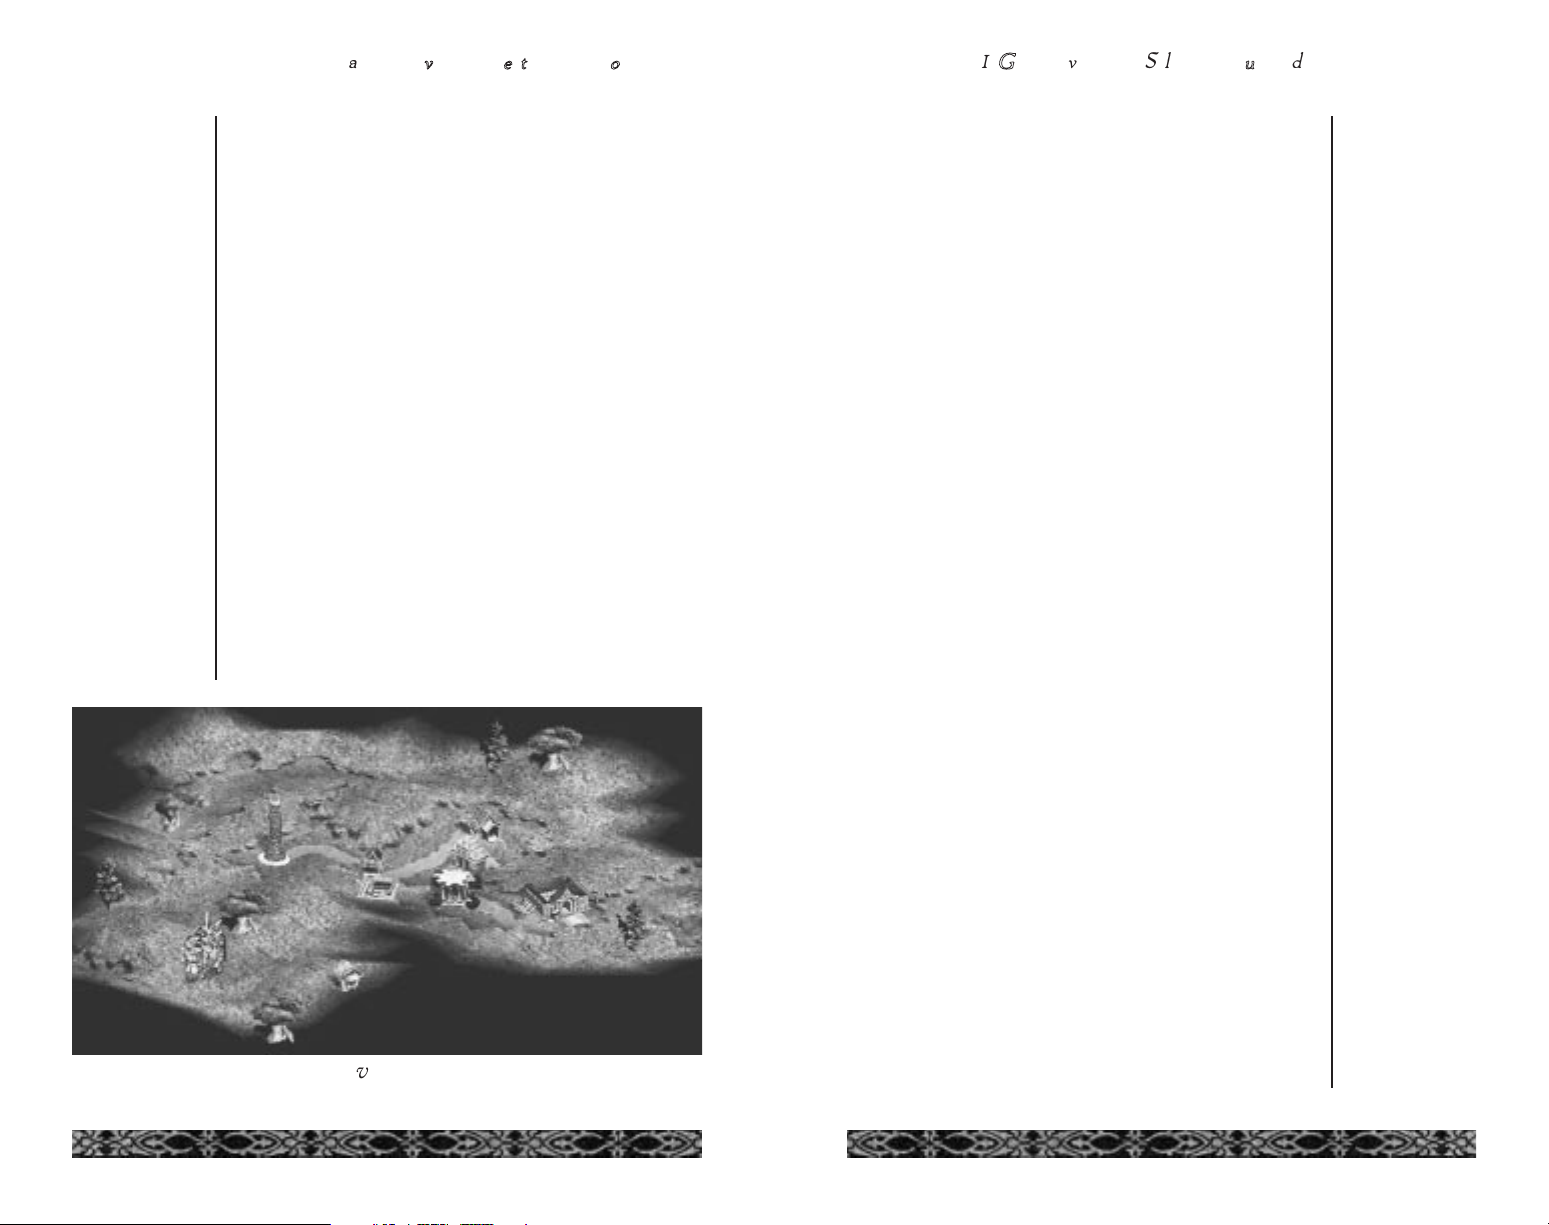
The Overland Map
Page 23

your campaigns will be run. An Order Mage
game is very different than a Water Thief game.
These two choices, Lord Type and Faith
Selection, are the most important decisions in the
game.
LLoorrdd TTyyppeess
A Warrior's life is one of loneliness and glory,
days spent in the thick of battle, nights alone
on the cold ground with a thin blanket and distant memories of home. The world of a Mage,
thick with the dust of spell books and heavy
with the perfume of potions, hints of mystery
and foreboding. The romance of a thief's life is
more myth than truth, for Thieves are sought
by all and trusted by none.
- Balathustrius
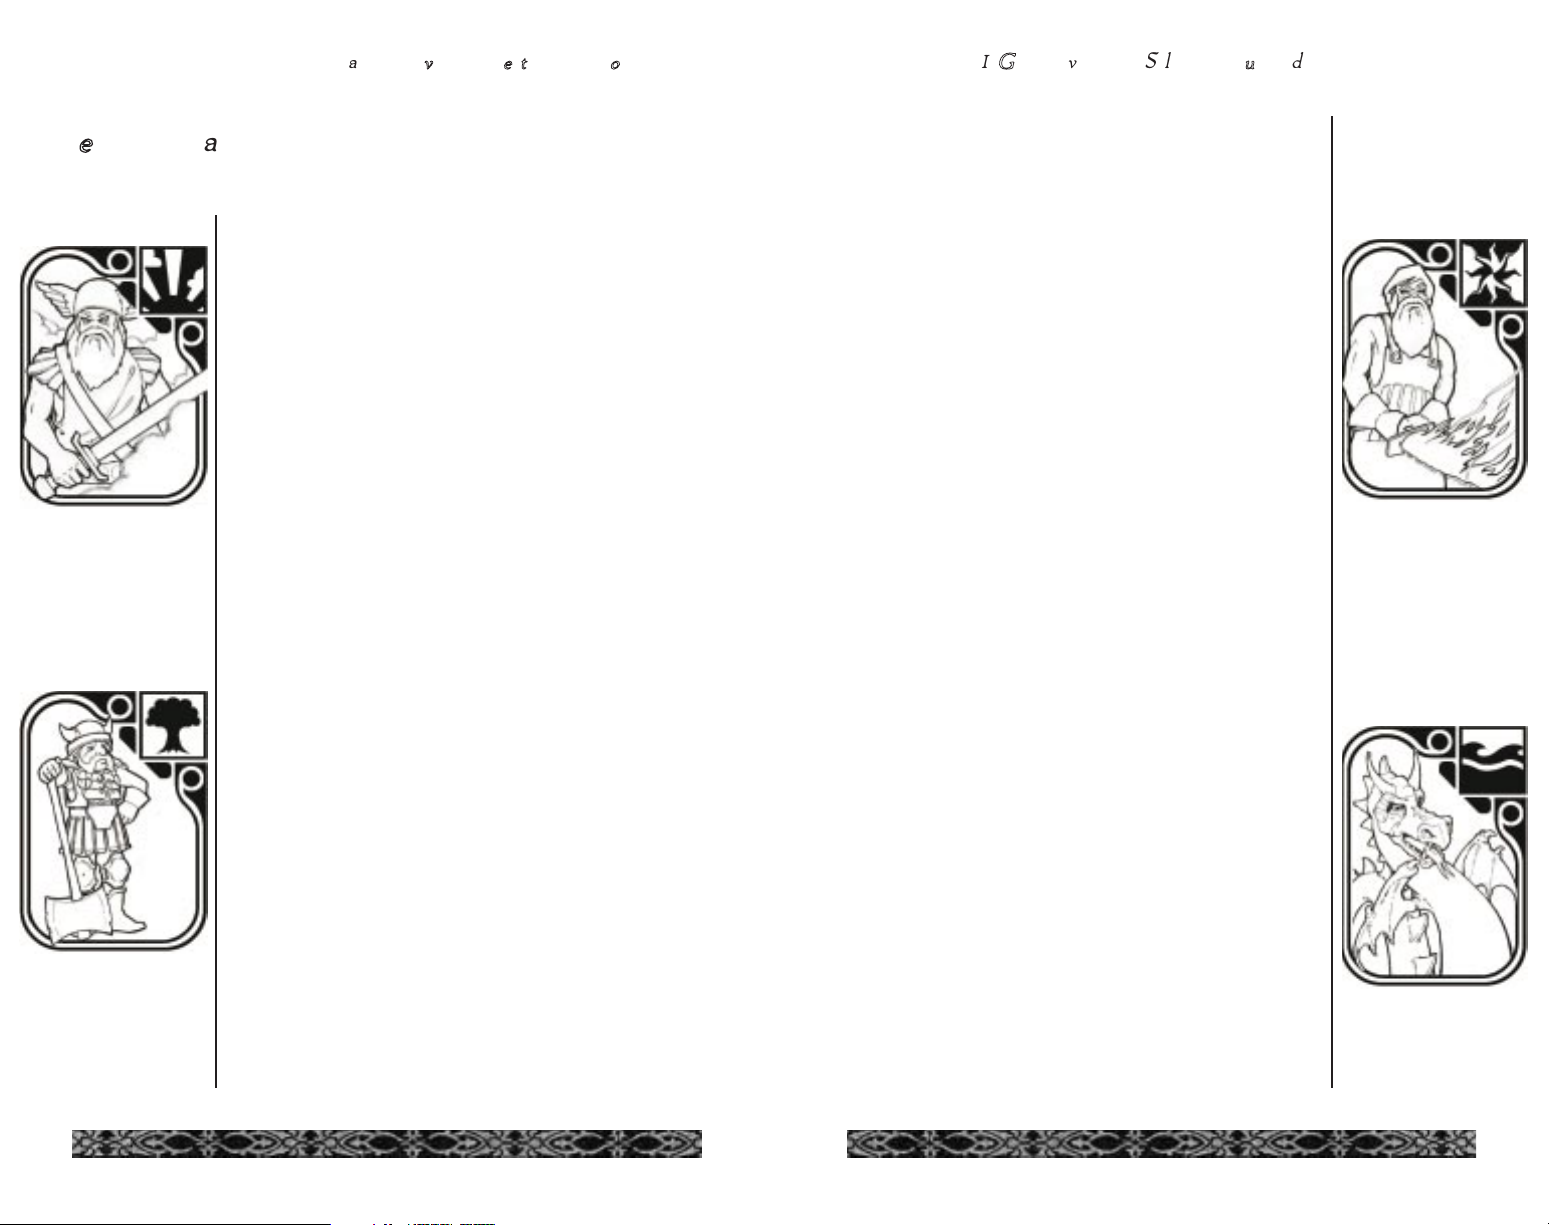
There are three Lord Types that you may choose
from: Warrior, Mage, and Thief.
Choose to become a Warrior and your talents lie
on the battlefield. Even the most inexperienced
Warriors have superior combat skills, and all
Warriors have a powerful charisma that can be
used to rally their troops during combat. Many
Warriors ride proud battle-mounts into combat.
Choose to study the mystic arts as a Mage, and
the magical abilities you possess can make you a
powerful, dangerous leader. It is true that novice
Mages starting a campaign are weak, with untried
skills and untested spells fresh from their books.
But as a Mage, you have the opportunity to learn
additional spells as the game progresses, making
you a force to be reckoned with (provided you
can stay alive long enough!).
A word about Bartering: As you encounter the
other Faiths in the game, you will meet some that
agree with your cause and some that support
Balkoth in the hopes of sharing the spoils of a
broken Urak. Depending on the political attitude
of your neighbors, they may seek your help.
People that you encounter who are sympathetic
to your cause can become permanent allies of
yours if you clear out the Great Temple in their
region. When this is done, the people are so
grateful that the Lord of that Faith swears fealty
to you, and his or her people come under your
rule, adding their resources to yours. Any Faith
that swears fealty to you provides you with an
Heir that will continue your campaigns if you
should die. Should you encounter hostile Faiths
whose opinions cannot be turned, you must conquer their Capital by force.
Consolidating the power of the peoples of Urak
in this way will undoubtedly give you the leverage
you need to face Balkoth. His power is unquestionably the strongest in Urak. But with perseverance, cunning, good leadership, and enough
allies fighting alongside you, you may just
become the savior this land so desperately needs.
SSeelleeccttiinngg YYoouurr LLoorrdd
Before you can lead your army against the darkness, you must choose what kind of Lord you
wish to become. Choosing the type of Lord that
you will play may seem like a simple process.
However, each decision affects the way in which
44 45
CChhaapptteerr 11:: GGaammee OOvveerrvviieeww && SSeelleeccttiinngg YYoouurr LLoorrddCChhaapptteerr 11:: GGaammee OOvveerrvviieeww && SSeelleeccttiinngg YYoouurr LLoorrdd
Page 24

ble-clicking a unit icon on the status bar) you
notice that Lords, unlike all other units, cost
nothing to maintain.
FFaaiitthh SSeelleeccttiioonn
...winning the battle against Dark. For it is that
when beliefs coalesce into one, Good will triumph and… the shadows will face banishment
forever to the depths of Urak.
- Fragment of a parchment from the
Prophesy of Urak, Volume 24.
As a Lord, you must choose to lead one of the
eight Faiths of Urak before you start your campaign. At the beginning of the game, you will see
the Circle of Life. Here is where you will choose
what Faith to worship. There are eight archways,
one for each Faith. Choose carefully, for this
decision affects everything that comes after it.
Each Faith has its own strengths and weaknesses
that distinguish it on the battlefield, and you
must choose a Faith that complements the campaign you wish to conduct.
Choose the life of a Thief and you choose to live
amongst the shadows. Thieves embrace an existence of cunning, deception and stealth. Good
Thieves can roam the world spying on enemies
without being detected.
In combat, a Thief has the ability to sneak up to
enemy Champions, subdue them and take them
prisoner.
Lords carry a double banner on the Overland
Map, enabling their party to stand out from the
others. As a Lord, you wear your personal colors,
which are different from those of other
Champions and your enemies. Also, if you look
at the Unit Information Panel (accessed by dou-
46 47
CChhaapptteerr 11:: GGaammee OOvveerrvviieeww && SSeelleeccttiinngg YYoouurr LLoorrddCChhaapptteerr 11:: GGaammee OOvveerrvviieeww && SSeelleeccttiinngg YYoouurr LLoorrdd
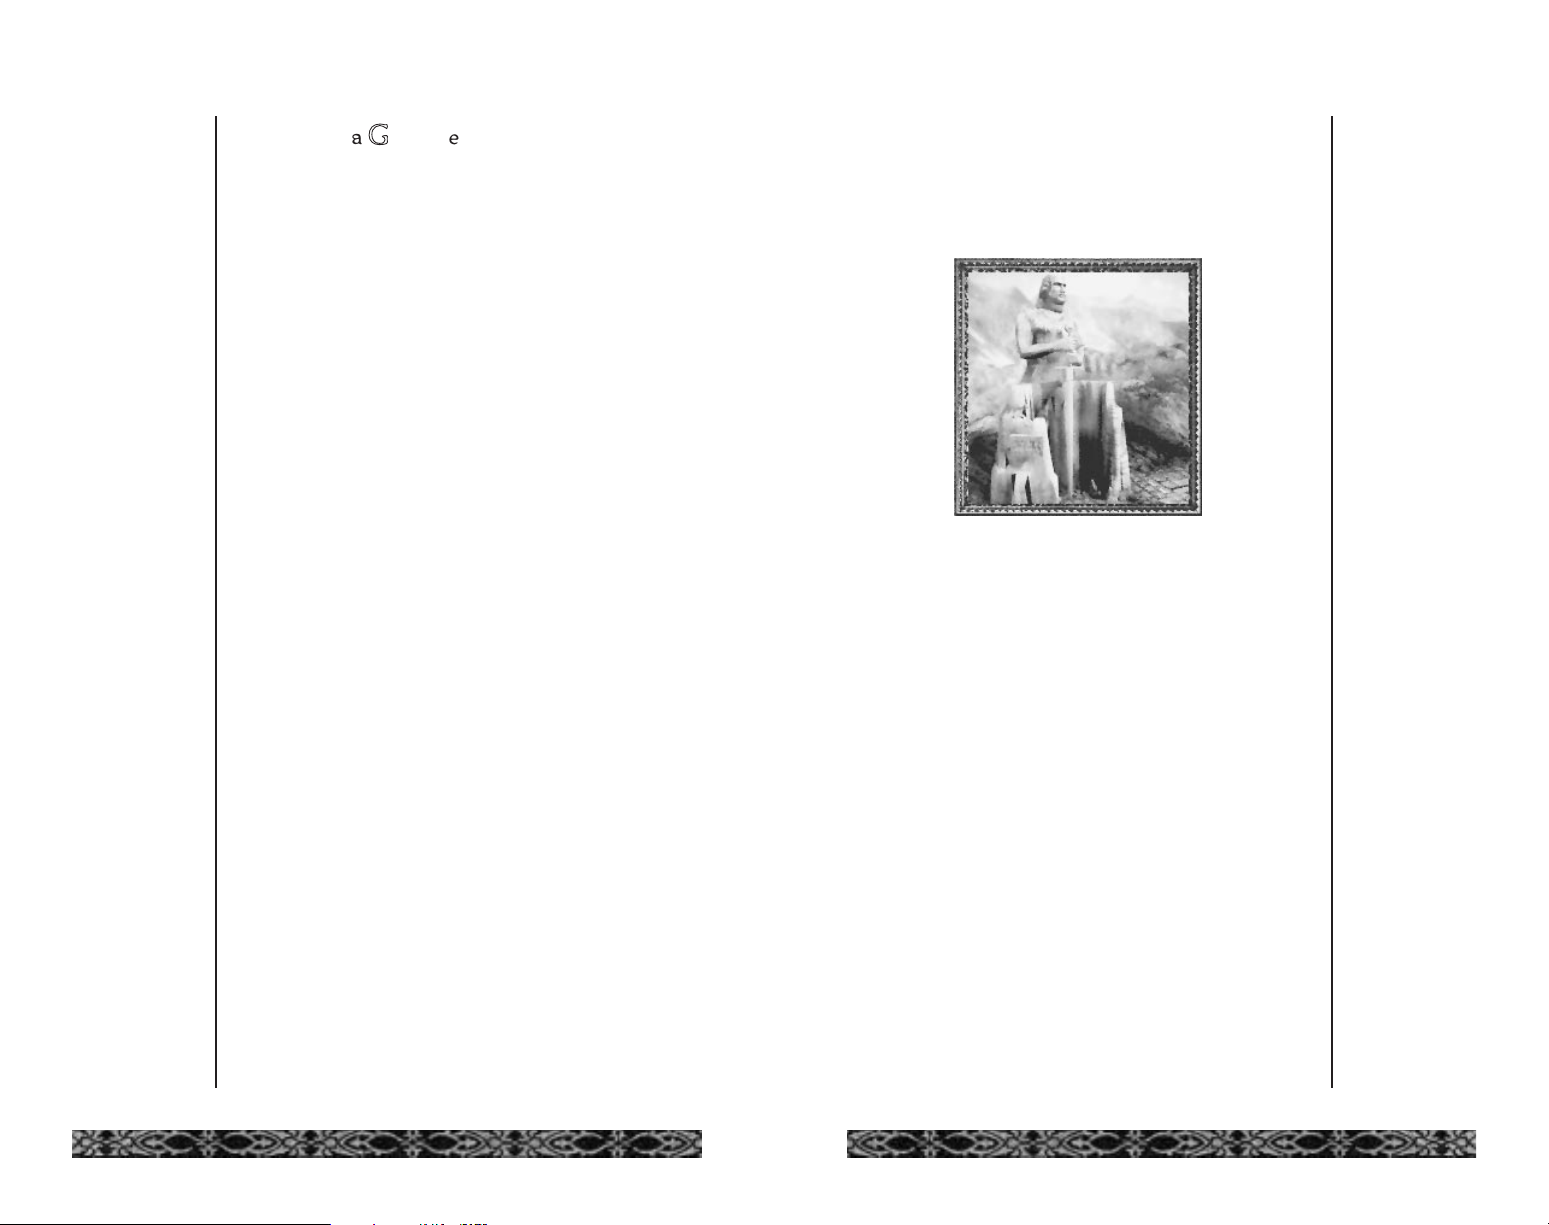
A Lord riding a trusty steed
Page 25
enemy units, but they make up for this with their
powerful attacks and impressive collection of
strong defensive spells.
FFiirree
I annoyed a Fire Giant once. I don't recommend it.
- Balathustrius
Worshippers of Fire are just akin to the worshippers of Chaos. They tend to be strong, and attack
with startling vehemence. Fire mages love
pyrotechnics, and their impressive array of spells
both look great and can ruin an opponent's day
from quite a distance. Their weaknesses are few
but serious, for Fire worshippers have little
defensive magic, fairly useless armor, and low hit
points. As a result, a typical strategy for Fire worshippers is to torch and run, so expect to see
them attack first.
WWaatteerr
If you're smart, you'll never board one of the
leaky tubs that pass for ships on Urak. Mark
me, the decision to tempt the creatures of
Water may be the last dry choice you make.
Not to mention that ship food ranks as the
foulest slop ever to curse a dinner table.
- Balathustrius
From the gentle foam that teases the western
coast to the crashing waves beneath the Cliffs of
Amshanan, the Water Faith has complete dominance of the oceans. Their sea monsters can
smash enemy ships and their land-based lizard
AAiirr
Damned Storm Giant mages. It never fails
...they always call the rain when I want to work
in my garden.
- Balathustrius
Air creatures soar above a battle, striking fast and
moving out quickly. Air creatures don't have
much in the way of armor, but their agility gives
them an edge against attack. Air Mages have an
exceptional library of offensive spells at their disposal, and these spellslingers can usually be found
at the rear of an army, throwing lightning bolts
from long distances (and keeping themselves well
out of the fray). Mages of the Air Faith are legendary for their ability to control the weather.
EEaarrtthh
I've always liked the Dwarves. They're slow
and stubborn, but honorable and good allies in
a clinch.
- Balathustrius
Earth followers move like the slow-growing
glimmer vines of Urak - you can't really see them
move, then all of a sudden they've covered your
garden. But don't mistake their lack of speed for
lack of brains. Earth creatures have a battle savvy
that comes with an intimate knowledge of the
terrain, and their superior armor and unmatched
endurance make them difficult to kill. Earth creatures can usually be out-maneuvered by faster
49
CChhaapptteerr 11:: GGaammee OOvveerrvviieeww && SSeelleeccttiinngg YYoouurr LLoorrddCChhaapptteerr 11:: GGaammee OOvveerrvviieeww && SSeelleeccttiinngg YYoouurr LLoorrdd
TThhee EElleemmeennttaall FFaaiitthhss
Page 26

OOrrddeerr
I've never been terribly impressed with the worshippers of Order. They're highly disciplined in
a way too serious for my taste.
- Balathustrius
To believe in Order is to believe in balance. Order
worshippers embrace the view that everything in
the universe has its place and every event happens
for a reason. On the battlefield, the soldiers of
Order are renowned for their balance of defense,
attack, movement, and hit points. Soldiers the
world over envy the troops of Order, for their
Mages are experts at spells that increase the fighting abilities of Warriors and that protect the lesser troops from whatever harm is flung their way.
LLiiffee
The Elves confuse me. On one hand, they're
worshippers of the eternal web of life on Urak.
On the other hand, when crossed they can be
frighteningly lethal opponents.
- Balathustrius
Elves are agile and quick, with an unmatched
long-range attack that enables them to inflict
serious amounts of damage from a distance. Life
Mages employ powerful healing spells that revive
wounded troops on the battlefield. Legends,
from long ago, speak of Life Mages resurrecting
their fallen comrades.
Unfortunately for the Elves, their melee skills
pale in comparison to their ranged prowess. Their
greatest weaknesses lie in their lack of closerange fighting skills and their distaste for wearing
armor. It's rare to see Life troops in hand-to-hand
men are fast and tough enough to make quick
work of the enemy. Water Mages begin as
extremely weak characters, but theirs is a profession that grows in strength as the game progresses. Over time, Water Mages gain the knowledge
and experience to learn extremely powerful
spells. They are the only Faith with the ability to
change water into land. In times of peace they use
the healing powers of water to restore hit points
to wounded creatures.
CChhaaooss
I've got no patience with Barbarians and their
ilk. They're big, they smell of stale ale and
horse droppings, and you never know which
side they'll end up fighting for during the battle.
- Balathustrius
Barbarians make great soldiers because they have
simple needs: warm food, enough ale to addle
their brains, and a dry place to sleep. They're
good in battle situations; they have relatively high
hit points and can perform devastating melee
attacks. They don't wear much armor though,
and they're not too good with projectile weapons.
Chaos Mages have some awe-inspiring spells at
their fingertips. It is rumored that they have the
power to transform themselves and their enemies
into other creatures. With this power comes turmoil, however, because magic of this type is highly unstable, and therefore unpredictable.
50 51
CChhaapptteerr 11:: GGaammee OOvveerrvviieeww && SSeelleeccttiinngg YYoouurr LLoorrddCChhaapptteerr 11:: GGaammee OOvveerrvviieeww && SSeelleeccttiinngg YYoouurr LLoorrdd
TThhee AArrccaannee FFaaiitthhss
Page 27

combat, and only foolish Leaders order Life
troops to the front lines of battle.
DDeeaatthh
No sane Urakian speaks aloud of the
Golgothan troops. The followers of Death lurk
in the scorched forests and dank caves of
Urak, and inhabit the nightmares of all that battle to simply live...
- Balathustrius
In order to play as Balkoth, you must first defeat
him in single play. The Death Faith is always available in Multiplayer games. The following information is still relevant to gameplay.
It is known that members of the Dark Faith wield
stunning powers, given to them by the fetid
princes of the nether regions. Death worshippers
are well armored and fast, possessing a superior
power in battle that destroys most of their enemies. Death troops tend to be equally skilled at
range and melee attacks. Their Mages overwhelm
their opponents with some of the most devastating spells known on Urak. These dark elves use
sorcery to raise the dead, replenishing their
troops as the battle rages around them. This
unspeakable act is a nightmare to see and an eternal terror for the pitiful souls who have the misfortune to be so reanimated. Death creatures
seem to drain the courage from their enemies;
they display such offensive might that it turns
opponents' hearts to jelly and keeps them from
attacking.
One should take care to be adequately prepared
when meeting Death on the battlefield.
52 53
CChhaapptteerr 11:: GGaammee OOvveerrvviieeww && SSeelleeccttiinngg YYoouurr LLoorrddCChhaapptteerr 11:: GGaammee OOvveerrvviieeww && SSeelleeccttiinngg YYoouurr LLoorrdd
Page 28

I
chose my three best soldiers - Gil Sarve,
Kildonan and Sarith - to explore the crumbling tower before us. They went gladly, as I
knew they would, filled with honor at being picked
by my hand. As their shadows disappeared in the
yawing mouth that was once the door, I wondered
if I should ever see them again. As their commander, I had to order someone to go inside. As their
comrade, my heart filled with worry for their safety.
But I can never let the troops see me hesitate.
- From the war journal of Arius,
first Champion of Order forces
CCHHAAPPTTEERR 22::
GGeettttiinngg AArroouunndd UUrraakk
Page 29

only the most powerful Champion (or, barring a
Champion, the most powerful unit) is displayed
in each party.
Capitals, Great Temples, Mage Towers, Thieves
Guilds, Barracks, Mines, Breweries, Statues, and
Crystal Mines will always fly the colors of the
Faiths that own them. Caves, Huts, Dungeons
and other mysterious places that have not been
explored have grey banners, indicating that they
are occupied by an unaffiliated or renegade party.
Once cleared out, they will have no flag, unless
occupied by an party, in which case they will display that party's banner..
PPaarrttiieess
My troops are a rowdy crew, for Order worshippers. They sometimes drink too much and
are overly fond of the dice. But when it's time
for battle, they face the enemy in deadly
earnest.
- From the war journal of Arius, first
Champion of Order forces
The portrait next to the magnifying glasses shows
the Leader of the currently selected party. To the
right of the portrait are windows that show
everyone in the party and bars indicating their
current health appear above their heads. A single
party can consist of up to 3 Champions and 9
Units. Parties on the Overland Map always carry
the faith-specific colored banners (i.e. Yellow for
Life, Blue for Water, Brown for Chaos, etc).
Lords carry a double banner. Parties are displayed
on the Interface Panel within Unit Windows
located at the center.
VViieewwiinngg tthhee MMaapp
The tools necessary to command your forces are
located in the Interface Panel at the bottom of
the screen. There are three zoom levels for viewing the scrolling map of Urak. Three magnifying
glasses located on the left of the Interface Panel
control the zoom levels. The largest one provides
the closest or "detailed view", the middle one
gives a "regional view", and the small magnifying
glass changes the view to a maximum zoom or
"World View." At the closest view - the biggest
glass - all troop types are displayed on the
scrolling map. At the medium and World View,
56 57
CChhaapptteerr 22:: GGeettttiinngg AArroouunndd UUrraakk
Magnifying
Glasses
The Overland Map
CChhaapptteerr 22:: GGeettttiinngg AArroouunndd UUrraakk
Page 30

CChhaapptteerr 22:: GGeettttiinngg AArroouunndd UUrraakkCChhaapptteerr 22:: GGeettttiinngg AArroouunndd UUrraakk
58 59
Champions always occupy the first slot in each
Unit Window, and there can only be one
Champion per Unit Window. If there is no
Champion, this slot will be left open. Three
Units may occupy the remaining area of the Unit
Window. Up to three Unit Windows will be displayed depending on the size of the party.
Experience levels are indicated by hash marks
beneath each unit icon. Any equipped artifacts
appear under the corresponding Champion (see
Artifacts on page 116). The current number of
living military unit members (normally three) is
indicated underneath that military unit. If you
want more information on a specific party member, double click directly on his or her icon. The
resulting popup tells everything you need to
know about that unit, including upkeep costs,
attack strength, his or her defensive skills, hit
points, movement, Mana supply, Experience, and
values on Strength, Dexterity, and Wisdom.
You will also see a Dismiss button here. It is represented by a unit with its back turned and a large
X. This allows you to send expensive mercenary
troops on their way, thus saving you some money.
SSeelleeccttiinngg aanndd MMoovviinngg PPaarrttiieess
Selecting which parties to move, deciding when
to move them, and choosing the places to explore
are the first steps in your adventure. To move a
party across the Overland world map, you must
first select it. Place the cursor over the party. A
faith-specific colored outline (i.e. Yellow for Life,
Blue for Water, etc) appears around the units in
the party.
Hold the cursor over the party and pop-up text
appears. If the party contains a Champion, a
name followed by the Faith will appear. If there is
no Champion, only the party's Faith will be displayed.
Left-click on one of your own parties and it
appears in the Unit Window(s) below. You are
now ready to move this party.
Click once on the map where you want the party
to move to. A series of Green Movement Beads
appears with a green X at the end. This tells you
the route the party will take to get to its destination. If the X and some of the beads are Grey, this
means that the destination is further than the
party can travel in one turn.
A pop-up tells how many turns away the destination is.
Click again on the X, confirming the movement
order, and the units will begin moving.
Movement that requires more than one turn
Movement
Beads
Page 31

CChhaapptteerr 22:: GGeettttiinngg AArroouunndd UUrraakk
CChhaapptteerr 22:: GGeettttiinngg AArroouunndd UUrraakk
Next/Previous
Party Arrows
60 61
MMoovveemmeenntt PPooiinnttss
All Units move at different individual rates across
the Overland Map. Grouping units into parties
forces the whole party to move at the rate of the
slowest unit. Furthermore, parties that do not
contain a Champion do not move quite as fast as
those parties that have a Champion present.
Once a party has moved its full movement, it is
still possible to separated units that still have
movement points remaining from the party to
continue on.
MMoovviinngg IInnttoo AA SSttrruuccttuurree
To move a party into a structure, select the party,
then move the cursor over the structure
Structures that you own have your faith-specific
colored outline. Structures that you do not own
always appear with a red outline. Click twice on
the structure and the units move into it if you
own it. A pop up gives other options if the structure is owned by someone else.
See Combat beginning on page 91.
LLooccaattiinngg PPaarrttiieess
There are several methods of locating parties on
the Overland map. The Next/Previous Parties
Arrows located at the top, center of the Interface
Panel bring up each party, re-centering the map
on their location. Likewise, using the plus and
minus keys ( + / - ) will cycle through the parties
in the same way. Another option is to bring up
the Party Roster screen (see page 63 for more
information on the Party Roster). From within
this panel, click on the partys unit icons, then
select Go To ->, the screen re-centers on the
party. Of course you can always just scroll
around the map until you come across what looks
like one of your guys
MMoovvee AAllll PPaarrttiieess BBuuttttoonn
Located next to the Fame counter, is a grey button that resembles a trail of footprints. As the
game progresses, you may find that you have
more parties to worry about and often you may
find that you will set destinations that will take
two or more turns to reach.
Because parties do not automatically proceed to
their destinations when it is your turn again, the
Move All Parties button will cause all of your parties with movement beads remaining (that is, parties that have not reached their destinations in
one turn), to move as far as possible to their destinations.
PPrreevviioouuss//NNeexxtt PPaarrttyy WWiitthh MMoovveemmeenntt
RReemmaaiinniinngg BBuuttttoonn
Left of the Move All Parties Button , are two
opposing arrows. Clicking on one of these will
cycle through your parties that still have movement points remaining. This is useful to locate a
party that may have reached its destination but
can still move, or rounding up troops that have
been idle and getting them moving, just in case
you've forgotten anyone.
JJooiinniinngg//SSpplliittttiinngg PPaarrttiieess
During the course of the game, you will have
many reasons to change the makeup of your parties around, such as adding archers to take on a
Move All Parties
Button
Parties With
Movement
Remaining
Arrows
Page 32

TThhee PPaarrttyy RRoosstteerr
In order to get an overview of what parties cost,
where they're located and what they're doing,
view the Party Roster screen. This screen displays
your entire army as it is currently divided. The
grey icons indicate what each party is currently
doing.
Footprints: This indicates that the party is outside on the Overland map.
Greyed Footprints with a Number: This indicates that the party is marching to a destination
that is not reachable in one turn. The number displays how many turns it will take for the party to
reach its destination.
House with Zzz: The party is currently resting
inside a structure. This could be a building or
cave.
House with R: This shows a Mage is Researching
a spell within a Spell Library.
House with TR: This is a Champion that's
Training new units within a structure such as
Barracks, Mage Tower or Thieves Guild.
Selected Party Upkeep: This tells you the cost
upkeep of the entire party that is currently selected.
Total Units: The total number of units under
your command.
pesky dragon, getting that Mage out of active service to go study spells, breaking the Thief off for
some stealthy reconnaissance.
Parties are limited to a maximum of 3 Champions
and 9 other units.
To Add Units:
Select the unit(s) you want to join.
Move the cursor over the party you wish to join
them to. The cursor will change from the hand to
two people with a plus sign. This is the join command.
Double click on the party, once to set the order
and again to execute the command, and your
units will walk up and join together.
To Split Units:
Select the party you want to separate unit(s)
from.
Either select an entire party, or in the Unit
Window, click on the icons of the unit(s) you
wish to separate. The units will then have a faithspecific color outline around them.
Move the cursor away from the party, to the location you want the separated units to move to.
Double click and the separated units will split off
from the party.
62 63
CChhaapptteerr 22:: GGeettttiinngg AArroouunndd UUrraakkCChhaapptteerr 22:: GGeettttiinngg AArroouunndd UUrraakk
Selecting an individual party member
The Party
Roster Button
Page 33

CChhaapptteerr 22:: GGeettttiinngg AArroouunndd UUrraakk
CChhaapptteerr 22:: GGeettttiinngg AArroouunndd UUrraakk
64 65
Expenses:This is the total number of Ale,
Crystals and Gold that you are currently spending on maintaining your parties.
Income:This is the total amount of incoming
Fame, Ale, Crystals and Gold that you receive
each turn.
Followers Arrive in X Turns:The number of
turns until the next batch of followers will be
available in your stronghold(s).
Next - Prev Party Member:Cycles through the
individual members of each party. Double clicking on the unit will bring up a unit information
panel.
GoTo->:Exits Party Roster and returns to the
Overland Map centered on the last party highlighted.
Exit:Exits the Party Roster and returns to the
Overland Map where you last left it.
your parties before going into combat to give
them the best starting positions. To do this, simply click and hold on the unit you wish to move
and drag it the new position. You may move any
unit to any other unit position. If the new position is currently occupied, the units will exchange
positions. You many not move Champions this
way. Moving a Champion, moves the entire window, and can therefore only be exchanged with
another Champion. This changes the leadership
of that party.
Units in the first Unit Window will always be
Unit Hot Key number One. This position tends
to find itself in more hazardous combat starting
locations.
EExxpplloorraattiioonn
In the distance we saw a single, crumbling column. A mist swirled behind it, looking for all the
world like the fetid breath of some legendary
Earth beast. Although my face remained calm,
inside my chest I felt the cold fingers of fear
GGrroouuppiinngg PPaarrttiieess
The Unit Windows display how parties are
grouped. When entering combat, Units that
occupy the same Window as a Champion will
start close to that Champion. Furthermore, all
occupants of a Unit Window will all have the
same Unit Hot Key, when combat begins (see
Combat on page 91) starting with the farthest
left being One, the middle is Two then Three on
the right.
While you can reassign numbers and move troops
around in combat, it can be easier to re-group
grip my heart.
- From the war journal of Arius, first
Champion of Order forces
SShhrroouudd
As no maps of Urak exist, unexplored areas of
the world are covered with a black shroud that is
only lifted after your troops have explored the
area. However, once your units no longer occupy
a place, the area becomes grey. You are allowed to
view the terrain, but you cannot see any units hat
may be there.
Page 34

that of their opposite Faith, will experience
extreme disdain for it. Although Fire Giants run
through lava, for example, they're not too keen
about ice. Life Warriors will move with caution
across the dark marshes of Death. Earth Dwarves
find scaling the mountains of Air more difficult
than most.
Units travel farthest on familiar terrain and suffer
no ill effects from traversing it
Terrain is a significant factor in movement.
Climbing mountains to cross the land will take
considerably more time than charging across an
open field.
Before the darkness came, each Faith agreed to
build roads to its neighbors to help further trade.
Travelling upon the remains of these roads significantly speeds up movement. Units will naturally
move towards roads when given long destinations.
Water is impassible to all but ships and flying
units. Exploring with a ship will reveal all coastal
areas. Each ship can carry a single sub-party consisting of up to one Champion and three other
units. Ship movement tends to be faster than
overland.
SSiigghhtt RRaaddiiuuss
Each unit has its own sight radius; the distance
around itself that a unit can see. The amount of
terrain revealed varies between units. Most Air
units have a wider sight radius than others. When
travelling across the Overland Map, parties use
the sight radius of their best member to see. The
sight radius can also be enhanced by magic.
SSccoouuttss
One of the best ways to explore Urak is with
scouts. When scouts act alone they can cover a
wider area and move faster than almost any unit.
They tend to be small and lack any appreciable
fighting skills, but they can locate the enemy
quickly, keeping an eye on troop movements or
even makeing first contact with a potential ally.
TTeerrrraaiinn aanndd MMoovveemmeenntt
We didn't expect that the Narrow Pass through
the Red Mountains would be choked with snow
this early in the season. Personally, I think a
Storm Giant Mage sent a blizzard in the pass
to slow us down. It took all my troops three
days to dig a path through that cold mess. By
then, all we cared for were warm beds and dry
clothes.
- From the war journal of Arius, first
Champion of Order forces
Every race of Urak is most comfortable travelling
lands similar to that of its homelands. Although
all Faiths and races can travel throughout Urak,
units travelling across enemy terrain, especially
66 67
CChhaapptteerr 22:: GGeettttiinngg AArroouunndd UUrraakkCChhaapptteerr 22:: GGeettttiinngg AArroouunndd UUrraakk
Page 35

A
s our defeated and wounded troops shuffled toward the Capital, I wondered if
many of them would make it. Then, as if
by some magical command, the gray clouds lifted
and a beam of late-afternoon sun struck the city
ahead of us. I've never seen a more beautiful sight
- the whitewashed walls shone, beckoning us forward. The change in the troops was instantaneous.
Their battered heads lifted, their steps quickened,
and soon they all had made it safely home.
- Ilysanth, Life Mage
CChhaapptteerr 33::
BBuuiillddiinnggss
Page 36

7170
CChhaapptteerr 33:: BBuuiillddiinnggss
CCaappiittaall:: PPrree--SSttrroonngghhoolldd
Every Lord begins the campaign near his or her
Faith's Capital. Each Capital contains four buildings: a Tavern, a Marketplace, a Magistrate, and a
Temple. Since you have not yet established yourself in the region, expect the inhabitants of the
Capital to be wary of doing business with you.
For now, all you can do is visit your Capital to
procure goods and services. Once you have established yourself in the region, you'll see that the
shopkeepers and businesspeople become much
friendlier toward you and your troops (and the
prices get a little better, too).
If you find yourself short on money, going to the
Market allows you to sell some of your supplies.
Here you can trade some of your Ale and
Crystals for Gold. The merchants can be under-
handed and shrewd, so don't expect to receive the
best price for your exchange.
By utilizing some of your Crystals, a Temple
priest can heal a wounded party member or even
exorcise a curse. They also possess the power to
transmute your Gold into Crystals.
The Tavern is the place to go to stock up on Ale.
Also, if you want to make a name for yourself,
you can hold a festival. Buying a round of drinks
never fails to make one popular.
If, through your escapades, you have nothing of
value left to trade with, you can always beg for
money at the local Magistrate. Be warned though,
beggars are seldom seen as glamorous, so doing
this will cost you some Fame.
GGrreeaatt TTeemmpplleess
No structures are more important to the people
of Urak than their ancient Great Temples. Their
desecration by Balkoth and the worshippers of
Golgoth has cast a pall of despair and hopelessness across the land. You must raise an army of
your own and defeat the heretics who have corrupted the Great Temple in your region.
When you have completed this task, your people
will rise up, embrace you as their Lord, and build
a Stronghold for you in the Capital. As news of
your victory travels across the land, the good
people of Urak will make pilgrimages to the
Great Temple to see for themselves that right has
triumphed. Their new-sprung hope in the future
Interior view of city without a Stronghold
CChhaapptteerr 33:: BBuuiillddiinnggss
Page 37

7372
CChhaapptteerr 33:: BBuuiillddiinnggssCChhaapptteerr 33:: BBuuiillddiinnggss
you have constructed them they can be used to
call forth a mythical being. These beings can only
be summoned once per game but are of such
incredible power that their presence can easily
turn the tide for any Faith that possesses them.
FFaammee
T reat Fame as you would a fickle lover--pursue
gently, handle carefully, watch it constantly,
and never forget that it can turn on you in the
blink of an eye.
- Inscription on the wall of
an Earth barracks
You may scorn the idea that what others think of
you determines your strength on the battlefields
of Urak, but do not underestimate the power of
Fame to your cause. Fame is a crucial factor in the
game of life and death on Urak, for it determines
the number of Followers who become inspired to
join you.
Each encounter has the potential to affect Fame,
no matter how insignificant that encounter may
seem at the time. When you achieve victory
against an enemy on the battlefield, the word of
your glory spreads quickly and your Fame
increases. Soon you'll find that Followers seek
you out to join your cause. These Followers will
perform certain tasks for you in the Capital or
train to fight alongside you. The greater your
Fame becomes, the more Followers join your
cause.
If you lose the day on the field of battle, you lose
(and faith in your strength) may fill them with
the desire to join your cause. If this happens, you
will discover that you have many loyal Followers
at the doorstep of your Stronghold, offering their
services to you.
After you have established yourself as a competent leader, you may use your Great Temple to
your benefit. When you have upgraded your
Mage Tower to level 3 your Mages will gain the
knowledge to summon a Great Creature at your
Great Temple. These creatures are powerful combatants that can greatly assist you in battle and
usually have resistance to certain types of magic.
As long as you control both the Great Temple
and the Stronghold of a region you will be able to
attract Followers and assign them to work for
you in the Capital. You can also build an addition
to your Great Temple. Doing this creates an
annexed structure that provides you with a powerful benefit that is determined by your Faith.
These buildings are the stuff of legend and once
Page 38

CChhaapptteerr 33:: BBuuiillddiinnggssCChhaapptteerr 33:: BBuuiillddiinnggss
more than a few soldiers. News of defeat travels
fast, and your Fame will plummet.
The amount of Fame that is gained or lost in a
battle is determined by the strength of your
opponent. Defeating a strong enemy will award
you with a lot of Fame while being overcome by
a weaker enemy will subtract a greater portion of
your Fame. However, Fame is not always based
on victory. If you are defeated by a more powerful foe but manage to inflict more damage to him
than he did to you then you will receive a certain
amount of additional Fame, so sometimes it's a
good idea to stand your ground against a greater
adversary.
CCaappiittaall:: PPoosstt--SSttrroonngghhoolldd
FFoolllloowweerrss
After you liberate your Great Temple, a
Stronghold is built in your honor. Once you have
this Stronghold, you'll notice that new Followers
flock to the Capital once per week (7 turns),
offering their services to you and your cause. At
the start of a turn, if your reputation in the land
is good enough, a message appears informing you
that your Fame has brought more Followers to
your side. At this point, it's a good idea to pay a
visit to the Capital, for it's up to you to decide
where to assign the new recruits. Enter the
Capital and view the buildings on the Capital
screen. A panel next to each building shows the
name of the building and how many Followers
have been assigned there. Click on the Up or
Down arrows on these panels to assign your
Followers to work as you desire.
RReessoouurrcceess
Keep in mind that each area of the Capital has
specific advantages for you and your Followers.
Those assigned to the Marketplace become shopkeepers, who enrich your war chests with Gold
by trading and selling supplies. Followers dedicated to the peace of Temple life learn to make
magic Crystals for you. Assign Followers to the
Tavern as brewmeisters to craft Ale for you.
Placing Followers in the Magistrate as deputies
earns you greater Fame by spreading the word
about your campaign against Balkoth. If you
decide to remove Followers from a particular
assignment, they will return to the Stronghold to
await further instructions and thereby also
become available for training in a Military
Building.
CCaappiittaall BBuuiillddiinnggss
SSttrroonngghhoolldd
Your Stronghold is your base of operations. It is
where your new Followers arrive at your Capital.
Clicking on your Stronghold provides you with a
report of what you possess and intelligence gathered on the other Faiths of Urak. For more infor-
mation on the Intelligence Report see page 118.
Once you have a Stronghold, you interact with
the Capital buildings in a different manner.
Instead of just going to them to shop and spend
your resources, these buildings now produce
resources for you and you can assign people to
each building to increase the amount of resources
being produced there.
7574
Page 39

7776
CChhaapptteerr 33:: BBuuiillddiinnggss
Ale
CChhaapptteerr 33:: BBuuiillddiinnggss
Crystals
a potent elixir and a valuable resource; never
underestimate its power to keep your people
happy. You may also hold a festival at your Tavern
to increase your Fame.
MMaaggiissttrraattee
Generating resources and providing for your
people are very important responsibilities, but
every leader needs representatives to maintain
law and order. The deputies you appoint will
ensure that all of your decrees are carried out, will
help to spread the good news of your adventures
and keep you in high standing with your citizens.
If your coffers should run low, you can have your
deputies collect money from your citizens. This
will, however, lower your popularity, so do this
sparingly.
MMiilliittaarryy BBuuiillddiinnggss
When you control a Capital you also control the
surrounding Military Buildings: a Barracks, a
Thieves Guild and a Mage Tower with its Library.
In these buildings you can hire Mercenaries or
conscript Followers to help you with your conquests. Hired Mercenaries are expensive and
require a steady salary but are readily available.
Conscripted Followers are much less expensive
and will fight out of loyalty to you rather than for
financial gains.
TTrraaiinniinngg UUnniittss
Loyal Champions come in quite handy once you
have a Stronghold. Champions can become
Stewards at any Military Building by simply
remaining inside. Stewards act as valuable teach-
MMaarrkkeett
The merchants in your Market serve a vital role
of providing your kingdom with the funds you
need to finance your exploits. And if you should
run low on Gold you can sell any surplus
resources. Entering the Market allows you to sell
Ale and Crystals for Gold.
TTeemmppllee
It is here where the truly faithful of your people
endeavor to spread spirituality to the citizens of
your kingdom. Through study and discipline,
Temple disciples have become proficient in the
art of healing the body, the mind and the soul.
Utilizing the magic that Crystals possess, Temple
Followers can heal an entire party or just individual members. To choose which members of the
party are to be healed, simply highlight them
before entering the Temple. Inside, you will be
informed as to how many Crystals it will require
to perform the healing ritual. Disciples are also
adept at the art of alchemy and you may have
them transform a portion of your Gold into
Crystals. If, through your encounters with other
Faiths, you or one of your troops should fall victim to another Mage's curse, you may have it
exorcised here.
TTaavveerrnn
Wherever people gather to work or live near each
other there will always arise a need for a place
where they can go to socialize with their neighbors. Especially in these dark times, your citizens
need a place to congregate so that they may forget their troubles and gladden their spirits. Ale is
Gold
Page 40

7978
CChhaapptteerr 33:: BBuuiillddiinnggssCChhaapptteerr 33:: BBuuiillddiinnggss
Chaos Barracks
Order Thieves
Guild
Water Mage
Tower and
Library
ers to the Followers who have joined your cause,
and to the Mercenaries that you hire at your
Military Buildings. By placing a Champion in a
building, his or her experience is gradually conferred to that building, and that building will
retain that experience even after the Champion
has left. Units who train in a Military Building
overseen by a skilled Steward start with some
knowledge imparted to them by their teacher.
The amount of knowledge passed from Steward
to student is dependent on the level of the
Steward as well as the level of the Military
Building. When you put a Champion in his or her
corresponding building you will see a display of
how much experience is being conferred to the
trainees inside. The top yellow number shows
how much experience a new adventurer produced
in the current turn will have. The middle green
number shows the experience an adventurer produced next turn will have (providing that the
residing Steward remains inside). The bottom
blue number shows the maximum experience that
a new adventurer can have, given the current
Steward and the level of the building.
The level of a building and the experience of the
Steward inside of it affect the experience of the
troops that are being trained. Stewards with
greater experience impart their knowledge to
their students and higher level buildings are better equipted to train recruits. Obviously, the
higher the levels of the Stewards and buildings,
the highter the levels of the troops being trained
within.
When you click on a particular unit, the
Train/Hire panel uses the same color-coded dis-
play within the level temperature bar. If an adventurer produced on a subsequent turn would have
experience exceeding the current range of the
temperature bar, the bar will show the appropriate color coded numbers preceded by a "+" plus
sign.
BBaarrrraacckkss
Military troops such as Warriors, Infantry, and
Cavalry train in the Barracks. Their specialty is in
the art of hand-to-hand combat and they serve as
the foundation for any army. This is also where
you can construct ships to explore the rivers and
oceans of Urak.
TThhiieevveess GGuuiilldd
Aspiring thieves and missile units, such as
archers, can be found in the Thieves Guild.
Missile troops are invaluable in battle. They can
damage enemy units before they even have a
chance to reach you. Reconnaissance units, also
known as scouts, reside here too. Use them, with
their ability to travel much longer distances than
other members of your army, to explore the
countryside for you.
MMaaggee TToowweerr
While not adept at combat, Mages have abilities
that are priceless to any campaign. No other
Champion can heal wounded Warriors, offer
magical protection or damage every enemy unit
with the mere utterance of a magic spell. Another
benefit provided by the Mage Tower is the creation of Magic Potions that can restore health
and mana.
Page 41

Every Mage Tower has a companion Library for
researching new spells. It's always wise to keep
one or more Mages in the Library to research
spells as your parties goes about their pursuits.
When a spell has been fully researched, Mages of
that spell's Faith will acquire the knowledge
immediately
UUppggrraaddiinngg BBuuiillddiinnggss
When I was a young man, I once chanced to
visit an Order Mage Tower. I swear to you,
even the dust on the shelves was arranged in
perfect stacks… gave me the shivers.
- Balathustrius
From time to time you will be able to afford to
upgrade any of your buildings. Clicking on the
Upgrade button will allow you to improve a
building if you have the means to pay for it, otherwise you will be presented with a panel explain-
ing which resources you lack. Consider spending
the money, because improvements allow you to
train more highly skilled Champions and other
adventurers. However, you can't upgrade a building to a level higher than that of your Stronghold.
A good strategy might be to upgrade the
Stronghold as soon as you get the opportunity,
then upgrade the buildings most suited to your
Lord type. For example, if you are a Warrior,
upgrade the Barracks before improving the
Thieves Guild or the Mage Tower. The Library
cannot be upgraded independent of the Mage
Tower, but it automatically receives benefits from
improvements made to the accompanying Mage
Tower.
Upgrading your Stronghold grants you many
more privileges. The most important advantage is
the ability to support more Followers inside your
Capital, which allows you to produce more
resources. Another benefit is stronger fortification from enemy attacks. For every level you
upgrade your Stronghold, you build a stronger
barrier around your Capital. Level 1 Capitals have
no wall around them at all. Level 2 Capitals have
a wall with an entryway, forcing enemies to attack
you from a centralized location and allowing you
to shoot at them from the city walls. Upgrading
to level 3 gives all the advantages of a level 2 wall
but with a sturdy gate blocking its entrance.
Enemies must break down this gate before they
can attack you, but you can still attack them from
atop the walls.
The final benefit of an upgraded Stronghold is
that the region's Capital receives at least one
Follower for every level of the Stronghold -
8180
CChhaapptteerr 33:: BBuuiillddiinnggssCChhaapptteerr 33:: BBuuiillddiinnggss
Interior view of city with a Stronghold
Page 42

regardless of which player controls the Great
Temple in the region.
While you obviously want all of your buildings to
be of the highest possible level, your enemies
would like just the opposite. To this endeavor, it
is possible for a building to be demolished by you
or your opponents. You can even destroy your
own buildings if you find it necessary. All
destroyed buildings are considered to be level 0
and lose any experience previously conferred to
them from a Steward. You must pay to rebuild a
structure back to level 1, so if the structure was
previously level 2 or 3, its destruction can be a
devastating blow.
RReessoouurrccee MMaannaaggeemmeenntt
The moment you are recognized as the rightful
Lord of your Faith and your people build you a
Stronghold, the nature of gameplay in Lords of
Magic changes. No longer are you an aspiring
adventurer risking your neck, obligated to no one
but yourself. You become a Lord with Followers
and all the responsibilities that go along with it.
What to do with all the Gold, Ale, and Crystal
you've worked so hard for is never an easy decision, nor should it be a hasty one. You must have
a plan for managing your lands as well as for
investing in an army.
VViillllaaggeess
The Village I was born in doesn't exist anymore. A party of Dark Elves made short work
of the place many years ago. Today, all that's
left is a black scar in a field where nothing
grows.
- Balathustrius
A Village is a fascinating blend of two cultures.
These quiet hamlets usually lie on the border of
two neighboring regions and are home to peoples
of both beliefs. Because of their distance from the
Capitals and Military Buildings of the land, they
are usually the first areas to be taken over by hostile forces. Liberating these communities will
help to alert you to enemy forces on the borders
of your region. When a Champion first enters a
liberated Village, the grateful villagers will ask if
the Champion wishes them to build a Military
Building appropriate to that Champion's class.
Additionally, the Champion must choose
between constructing a building dedicated to his
or her Faith or building a structure devoted to the
other Faith worshipped in the Village. For example, if a party that includes a Warrior, Mage and
Thief walked into a Village situated between
Water Amazons and Order Humans, this party
could opt to construct one of six different structures. This works strategically, for it allows a
weak military Faith (such as Life) to travel to the
border of a militarily strong Faith (such as Earth)
and construct a "foreign" Barracks there.
But like everything in life and war, it isn't always
that simple. A single Village can support only one
Military structure at a time (although a Library is
automatically constructed with a Mage Tower).
Like other Military Buildings, this structure can't
be upgraded higher than the Stronghold of the
neighboring Capital under your control. A nasty
maneuver that some may choose to do is to raze
Villages. This poisons the land, preventing any
Faiths from rebuilding on these locations again.
8382
CChhaapptteerr 33:: BBuuiillddiinnggssCChhaapptteerr 33:: BBuuiillddiinnggss
Page 43

8584
CChhaapptteerr 33:: BBuuiillddiinnggssCChhaapptteerr 33:: BBuuiillddiinnggss
This tactic does not affect Military Buildings
already constructed by villagers.
GGuuaarrdd TToowweerrss
When a Village has been liberated or conquered, a
Champion may construct a Guard Tower there.
These turrets tower high above the land allowing
the owner to see great distances without the need
to station units there. This is very useful for
detecting an enemy advancing on one of your
Strongholds. Guard Towers can be upgraded just
like any other building; each subsequent upgrade
extending the vision radius of the tower. The type
of Tower constructed is determined by the Faith
of the Village. For example, if the Village is a
Death Village on the border of Death and Earth,
the Tower must be a Death Guard Tower.
GGrreeaatt TTeemmpplleess:: RReevviissiitteedd
The damned dark soldiers. They desecrate
everything of beauty and laugh about it. What I
wouldn't give to see just one Great Temple
returned to its former glory before I die. Doubt
it will happen, though. T oo many have tried and
failed already.
- Balathustrius
Your Great Temple serves as a source of Fame for
you as well as being the ultimate source of magical power in your region. Once you upgrade your
Stronghold and your Mage Tower to level 3, you
will have the ability to use this mystical source of
power to summon great creatures of legend.
When a Great Temple is freed by any Faith in the
game, this action reverberates throughout Urak.
The word quickly spreads to all the Lords in the
land. You may occasionally receive messages
informing you that your fellow Lords are clearing
their Great Temples as well.
As you explore outside your home region, you
may find many Lords in your neighboring lands
paralyzed with fear and inactivity. They most
likely have not gathered the strength to clear out
their Great Temples, and their people are desperate for a hero they can look up to. If you can clear
the evil scourge from other Great Temples, their
people will embrace you as their true leader (as
long as these people have no cause to distrust
you), the Lord of that region swears fealty to you
and you gain an Heir. This means that if, at any
The Chaos Great Temple
Page 44

point in the game, your Lord happens to die, your
Heir swears to continue the cause for you and
you continue to play as that new character.
Swearing fealty to you also means that that Lord
converts to your Faith, you gain control of the
region and the people in it. You also acquire a percentage of their Gold and knowledge of some of
their spells. However, not all of the Champions
and other units of this Faith feel this way. Many
will not join you. The amount that do join your
cause is partially determined by your selection of
the Easy, Medium, or Hard difficulty level at the
start of the game.
Public opinion of you and your cause isn't shared
alike by all the people in Urak. You could be the
savior of one Faith yet reviled as a traitor by
another. If you decide to overtake a Great Temple
held by a Faith who distrusts you (or feels even
worse towards you), be prepared to face the consequences. Your enemies will take great offence at
your transgression and will vow to retaliate
against your Faith.
8786
CChhaapptteerr 33:: BBuuiillddiinnggssCChhaapptteerr 33:: BBuuiillddiinnggss
MMyysstteerriioouuss PPllaacceess
Me, explore a dungeon? I'd rather pick a fight
with a drunken Barbarian. Much more fun, and
I'd have a slightly better chance of coming out
of it alive.
- Balathustrius
No matter where on Urak your adventures take
you, you'll surely stumble upon these special
structures as you uncover new areas on the map.
No adventurer can resist exploring one of these
legendary locales - and for good reason. Rumor
and myth tell of great treasures and unsurpassed
rewards to the brave (some would say foolhardy)
souls who enter these places.
When you travel to one of these places, a message
appears on the screen indicating the reputation of
this locale. It's quite likely that many nasty surprises await you right inside the entrance, and the
occupants won't be too happy to see you. The
creatures that reside in these places are not controlled by another Lord, but are the independent
inhabitants of Urak; renegade parties and miscreants. Dungeons, caves, and towers pulse with
power, and the farther you get from civilization,
the more fierce the inhabitants become. Think
hard before you risk entry into any structure. You
can return another day, when your forces are
stronger and your abilities are greater.
Page 45

PPrriimmaarryy SSttrruuccttuurreess
In every territory there are basic structures that
are the foremost habitat for its citizens. These
can be things such as Caves, Shrines or Huts.
These occupied localities are the closest threats
to your kingdom and are usually the simplest to
conquer, making them a prime place to build up
your experience and improve your reputation.
MMiinneess && BBrreewweerriieess
Strewn throughout Urak are veins of precious
minerals that are the lifeblood of commerce and
trade. To get to these valuable resources one must
enter one of the many mines that are scattered
about the land. These mines are almost always
guarded by greedy renegade parties, eager to tap
their wealth for their own purposes. The same
can be said for the many breweries that produce
Ale for the residents of the kingdoms.
Conquering one of these structures will wrest
control away from the villains that overtook it
and will transfer its resources to your Faith.
SSttaattuueess
The land of Urak is rich with legend and many
statues have been built to commemorate the
deeds of past heroes. These statues are sources of
inspiration and pride, and their corruption has
dampened the spirits of the populace. Liberating
one of these sculptures will restore the people's
happiness and the tale of your achievement will
increase your Fame for as long as it remains free.
8988
CChhaapptteerr 33:: BBuuiillddiinnggssCChhaapptteerr 33:: BBuuiillddiinnggss
DDuunnggeeoonnss,, TToowweerrss && MMyysstteerriioouuss KKeeeeppss
Out beyond the relative safety of the established
kingdoms lie the wildernesses of Urak. Amid
these uninhabited stretches of land are strange
and dangerous edifices. Being so far from anyone
who might hinder their growth, the parties and
creatures who have taken up residence in these
buildings have grown strong and powerful. These
are among the most perilous places in all of Urak.
Conquering the enemies within requires a large
and experienced party, but the rewards can be
great. These powerful adversaries have usually
amassed great fortunes and it is not uncommon
for them to possess some great artifact...
MMuullttii--LLeevveell DDuunnggeeoonnss
The most dangerous structures in all of Urak may
very well be the dungeons that extend deeper into
the earth. These places present the adventurer
with an even greater challenge. The deeper the
level of a dungeon, the more menacing it
becomes and the farther your party travels from
the outside world and the resources that it provides. After defeating the inhabitants of the
uppermost level, you will be provided with the
choice to exit the dungeon or descend to the next
level. Not every member of your party needs to
go down to the lower level. You may instruct
some party members to go to the surface while
the rest move onward. You will remain in the current dungeon level until all party members have
either fled to the surface or proceeded to the
lower level. Before proceeding to the next level
you will have the opportunity to use and
rearrange any artifacts that you own or cast any
spells that you have access to.
Page 46

I
was not born with naked steel in my hand,
nor did I ever believe that I would someday
fell a two headed ogre with nary a scratch. I
did not achieve this feat by my strengths or my
wits, but because I had lived through my mistakes
and learned from them.
- From the war journal of Aruius,
first Champion of Order forces
CCHHAAPPTTEERR 44::
CCoommbbaatt
Page 47

at the Cathedral of Knighthood). Reconnaissance
units and all summoned creatures do not gain any
levels of experience, although they are assigned a
level of knowledge indicative of their level of
power and resistance to magic.
UUnniitt SSeelleeccttiioonn && IInnffoorrmmaattiioonn
Too long since you've bloodied the tip of your
sword? Your arrow points haven't been stained
by the slime of enemy guts in a while? Come to
the Stronghold and discover the thrill of unfettered and unrepentant combat.
- Recruitment poster seen on the
Barbarian barracks
Combat in Urak is a fairly simple process: when
you see an enemy party on the Overland Map
that you wish to confront, simply move one of
your parties to it. When your party reaches the
foreign party, a message appears, asking if you
want to Parley, Fight, or Cancel the engagement.
Click on Fight to immediately enter combat. You
may also choose to have the results of the battle
be instantly calculated automatically by selecting
Autocalc, if you feel that it is a sure win on your
part.
To give orders to your units in combat you must
first select them. Select an individual unit by
clicking on the small icon in the Unit Window, or
simply left-click on the unit figure on the combat
map. Selection of several units can be made by
"lasso-selecting" them, that is by left-clicking and
holding down the mouse button as you drag a
box around your units on the combat map. You
93
EExxppeerriieennccee
Every adventurer in Urak learns from victory on
the battlefield and eventually becomes more
powerful as a result. The amount of experience
gained from a victory in combat depends on the
difficulty of the encounter. Individual surviving
party members receive experience based on how
many of their comrades lived and how strong the
opposition was. For instance, if your group
defeats a much larger party and all of your units
survive, all members would share an equal portion of a large amount of experience. If only two
members survive, they would split the entire sum
of the experience between them.
Once a unit has gained enough experience, it
gains a level of proficiency. Additional Hit Points,
Strength, Wisdom, or Agility, depending on the
level and the type of unit, usually accompany this
change. These experience levels are also used to
determine relative success of special activities, for
example: when a fourth level Thief is trying to
sneak past a third level Warrior or when a fifth
level Mage is trying to turn a sixth level Thief into
a cow.
Lords can learn the most from their experience
and can gain up to twelve levels of knowledge,
whereas normal Champions cannot progress
above the tenth level. Military units gain more
fighting ability per experience level than
Champions, but progress more slowly and can
only learn a total of five skill levels. (The only
exception to this rule is that Knights (Order
Cavalry) can be made honorary 6th level Warriors
92
CChhaapptteerr 44:: CCoommbbaattCChhaapptteerr 44:: CCoommbbaatt
Page 48

her Retinue is automatically assigned to a group
in combat and be selected by the 1, 2 or 3 number keys. Units in the left Unit Window are in
group 1; units in the middle third are in group 2;
and units on the right are in group 3. To reassign
groups, press "Ctrl" with any number key and the
currently selected units will all be assigned to this
group regardless of their lotion in the Unit
Windows. Press that number key to select the
group, or press "Alt" plus the number key to
select and center on that group. Group numbers
appear above party members' health bars.
Holding down "Shift" while selecting units (using
either the number keys or the mouse) will add
units cumulatively to the current selection, without deselecting those already chosen.
When you enter combat with any Military Unit,
(Infantry, Cavalry, or Missile Units), in a
Champion's Retinue you will notice right away
that three members appear ready for combat for
each Military Unit that was present on the
scrolling map. In the Unit Window, below that
unit's portrait, are three icons representing each
unit; its health bar in the Unit Window represents the health of all three squad members as a
whole. These members are all given orders as one
group, but can fight independently.
GGeettttiinngg tthhee BBaattttllee SSttaarrtteedd
Combat begins in paused mode. This can be toggled on and off by hitting the space bar or by
clicking on the pause button on the lower right of
the panel. This is important, because in Lords of
Magic, orders can be given while the action is
95
will see a bar appear above the heads of the units
selected. This bar represents the percent of health
remaining for each unit. When the bar is empty,
the unit dies. Health information is also updated
in the Unit Window below. As your mouse cursor passes over both friendly and enemy units,
their combat statistics appear in the lower left of
your information panel.
GGrroouuppiinngg UUnniittss
Whenever you enter a combat, your units appear
on the Battle Map the way that they are grouped
in the Unit Windows. The party members that
are grouped with a given Champion are known as
a Sub-party or Retinue. Units in a given Retinue
will begin combat close to one another, which is
important for protecting your Champions.
Therefore, it's a good idea to group your party
members together before you begin a combat.
For instance, if a Mage is the only one in a Unit
Window before entering combat, that Mage will
appear on the Battle Map with no other units in
the immediate area; it would be wiser to include a
few melee units in that group to balance it out.
Group your party members together in a way
that will work the best in a combat situation.
UUnniitt HHoott KKeeyyss
When two parties clash, it can sometime be a little bit difficult to distinguish one unit from
another, or to select a unit that is in a crowded
area. To alleviate this, you can assign units to
numeric hot keys. Each Champion with his or
94
CChhaapptteerr 44:: CCoommbbaattCChhaapptteerr 44:: CCoommbbaatt
Page 49

you'd rather let the computer calculate the
results, click on the Autocalc button. If, on the
other hand, you foresee your troops losing this
battle, press the Flee button to make your escape
to the Flee Point, which is indicated by a waving
flag in your faith's color.
GGiivviinngg OOrrddeerrss:: UUssiinngg tthhee CCoommbbaatt IInntteerrffaaccee
As far as I'm concerned, soldiering is the worst
way to make a living. It's a life filled with long
stretches of mind-numbing boredom punctuated by moments of sheer terror. Yea, that's how
I like to spend my days.
- Balathustrius
Combat in Urak seems pretty simple: you decide
to attack an enemy (or the enemy attacks you)
and one side comes out alive at the end of the
engagement or runs away. But the details of combat are in constant flux; direction of attack,
spells, leadership, and plain good luck constantly
change the odds and can mean the difference
between a joyful victory or a crushing defeat.
Every member of your party has Combat Values,
which you should know before you enter into
any battle. These include Attack, Range and
Ranged Damage, Defense, and Health.
The action buttons above your Party change
depending on the units selected. These buttons
give you the ability to give complex orders with a
single click. Each unit has its own way of following orders. For instance, the order to Defend a
location means something slightly different to a
Missile Unit than to a Mage.
97
paused. If you find yourself frantic, or wanting
more time to peruse which spell to cast or which
bad guy to attack, just tap the space bar and you'll
have all the time that you require to decide your
next set of actions. Although actions will not
happen until the game is unpaused, the cursors do
indicate and confirm your orders. This system
allows players unaccustomed to the pace of RealTime combat to play Combat as a sort of Turn
Based/Real-Time hybrid.
Once you've begun the battle your primary concerns are attacking the enemy and defending your
own troops. If you feel that victory is certain and
96
CChhaapptteerr 44:: CCoommbbaattCChhaapptteerr 44:: CCoommbbaatt
Combat
Page 50

and attack them with everything that you've got.
This is what the Berserk command does.
Characters in Berserk mode ignore impending
danger, reducing their Defense to zero. Their
Attack, however, increases by half of their original Defense. This tactic is recommended when
you are completely outclassed by an opponent
and have no other option, or you want to make
quick work of an enemy.
PPaarrrryy
Use this command when you want your soldiers
to stand their ground. To use the Parry option,
click on the Defend button and move the shield
over the unit, thus ordering that unit to simply
defend itself. Parry reduces the unit's Attack and
increases its Defense by half of the Attack value.
When more than one unit is selected, your combat buttons will change to group-combat icons.
99
AAttttaacckk
Issuing the order to Attack will cause soldiers to
advance on an enemy and assail them with whatever weapon that they are proficient with.
Clicking on an area on the map will simply cause
your units to move to that area. Clicking on an
enemy unit will cause your troops to move to
that unit, following it if necessary, and engage it
in battle. Missile units will not go directly to the
enemy but will move within range and attack.
DDeeffeenndd
The shield button will give all selected units the
order to Defend a location or a fellow unit,
depending on what unit or place on the battlefield is targeted. Defending a location causes
units to move to that area to wait for the enemy
to come to them. Defending a unit will have your
troops guarding a particular unit against the
attacks of the enemy, adjusting their location if
necessary.
AAiimmeedd MMiissssiillee
This increases a Missile Unit's Attack damage by
half, but watch out, because the extra time it
takes to aim makes this method valuable only in
limited circumstances. When a Missile Unit tries
to hit a moving target, it will try to predict the
target's final destination, with a limited degree of
success.
BBeerrsseerrkk
Sometimes the best way to defeat an enemy is to
just charge them, ignoring any danger to yourself,
98
CChhaapptteerr 44:: CCoommbbaattCChhaapptteerr 44:: CCoommbbaatt
Berserk
Aimed Attack
Parry
Defend
Attack
Page 51

101
GGrroouupp AAttttaacckk
If you give this command, everyone selected
advances on the enemy with an all-out attack and
does what they must to defeat the enemy. Your
Military units go charge the enemy, your missile
units commence aimed attacks and so on
GGrroouupp DDeeffeenndd
This command simply tells all of the selected
units to defend a specific target unit or location.
GGrroouupp AAiimmeedd MMiissssiillee
Issue this command when you want all of your
Missile units to attack an enemy.
FFlleeee
When you give this command, you've lost all
hope of victory. All party members still alive will
run for their lives to the Flee Point.
GGrroouupp SSuurrrreennddeerr
This destroys all non-Champion units and hands
over your Champion units to the enemy as prisoners of war. Make sure that you don't surrender
your Lord without having an heir or else your
game will be over.
AAuuttoo--ccaallccuullaattee ((AAuuttooccaallcc))
When the outcome of a battle is a foregone conclusion and you just don't feel like asking your
soldiers to chase the enemy around the combat
area, use this option. Based on the strength of
100
your melee, missile, and spell casting troops compared with thoses of your opponent,the computer automatically calculates the results of the battle for you.
CChhaammppiioonnss iinn CCoommbbaatt
Champions have many more advantages than the
common soldier does. One important advantage
that they possess is the ability to wield magical
artifacts. Another privilege they enjoy are special
abilities that they use in combat. Selecting a
Champion brings up its own specialized Action
Buttons.
RRaallllyy
Once per day (turn) a Warrior may Rally the
troops, blowing a horn or howling a battle yell,
inspiring his or her immediate followers (the
three characters who comprise the Champion's
retinue) to redouble their efforts in battle.
SSppeellllss
Selecting a Mage will allow you to cast any one of
a number of spells. See Chapter Five: Spells for
more information on casting spells.
TThhiieevviinngg AAbbiilliittiieess
Thieves have several special abilities that make
them deadly opponents in combat. Thieves can
CChhaapptteerr 44:: CCoommbbaattCChhaapptteerr 44:: CCoommbbaatt
Group Surrender
Auto Calc
Flee
Rally
Group Defend
Group Missile
Group Attack
Page 52

CCoommbbaatt iinn aa CCaappiittaall
Combat in a Capital may at first appear the same
as overland combat - depending on the level of
the Stronghold. If it's a level one Stronghold, it
has no walls and is very much like outdoor combat. A Capital with a Stronghold at level two is
surrounded by a wall with an opening in the
front. This gives the defender a significant advantage, because the walls can't be destroyed. To get
to the enemy, the attacker must enter through a
narrow "kill zone" defended by the town's inhabitants. The defender can also put missile units on
the wall and rain terror on the attacker. With a
third level Stronghold, a town's defenses are
improved additionally by adding a gate to the
entrance in the Capital's walls. Now an attacker
must break down the gate before engaging the
inhabitants in melee combat. The defender has
the option to open the gates. To do this, simply
right click on the gates to open and close them.
This can be useful if you want to send some
troops outside of the gates to deal with the
invaders while your reserve troops wait inside.
NNaavvaall UUnniittss
All Faiths have access to at least one naval unit,
which allows them to explore the waterways of
Urak and transport troops. Ships are equipped
with weaponry that may be used to attack enemy
parties and sea creatures. If your ship is destroyed
during combat, all survivors will make their way
to the nearest shoreline. The Water Faith also has
their Kraken and Sea Serpent units to employ in
the water.
103
sneak around the battlefield undetected, and get
into a good position for ranged attacks from hiding. In the right circumstances, a Thief can
Subdue a Champion (with or without help from
others) by sneaking up and using the Subdue
Attack. Lastly, a Thief can stand still and try to
detect other Thieves. See Chapter Six: Advanced
Features for information on Thievery.
Combat can take place in a variety of locations.
While the rules of combat remain constant, different environments affect combat in slightly different ways.
OOuuttddoooorr CCoommbbaatt
When you fight your battles outdoors, the part of
the world occupied by your troops enlarges into
a close-up combat screen. Outdoor combat is the
most direct form of battle, with the two opposing
armies having little choice but to advance on one
another.
CCoommbbaatt iinn DDuunnggeeoonnss && BBuuiillddiinnggss
Fighting inside dungeons and buildings is different from outdoor combat in that interior settings
have a wide diversity of areas that can affect your
units' tactical advantage during the melee. There
are objects to obstruct missiles and terrain that
must be maneuvered around. Sometimes fighting
can become confined to small sections of the
combat area while other times you must negotiate choke points to reach the enemy.
102
CChhaapptteerr 44:: CCoommbbaattCChhaapptteerr 44:: CCoommbbaatt
Page 53

in the next combat. While resting in the wilderness will regain lost hit points, resting inside a
structure (building, mine, cave, etc.) will regain
more per turn. Strategically, resting in a structure
removes your party from the Overland Map. The
structure will fly your party's banner, but the size
and strength of your party will be unknown
unless directly confronted, thus affording you
some measure of secrecy. Your party may also
recover its strength through the use of spells,
scrolls and potions.
105
MMoobb RRuulleess,, FFllaannkk,, aanndd RReeaarr AAttttaacckkss
Flank and rear attacks usually do more damage,
so seriously consider flank moves as part of any
battle strategy. Thieves sneaking up from the rear
(even if armed only with bows and knives) have a
much greater chance of making a critical strike
and doing serious damage to the enemy. Keep in
mind that this goes for the enemy as well.
Ganging up on a single party member forces that
party member to either get hit or block every
attack. This interrupts the ability to strike back.
So a mighty Warrior who could handle fifty skeletons one at a time may wind up getting killed
when ten surround him. Gang attack is a good
tactic to use with fast, nimble units such as Elves
and Fairies.
AAfftteerr CCoommbbaatt RReessuullttss
When the fighting is over, you will be presented
with an Combat Results Report. This displays
the outcome of the battle: who won, which units
were killed and what spoils were won or lost. It
also shows which units advanced to another level.
RReesstt aanndd RReeccoovveerryy
When the dust settles it may be a good idea for
you to head for the nearest building or cave that
you control, or is otherwise unoccupied, to
regain your health. Generally, troops that do not
move take time to regain lost hit points. Troops
consistently on the march will have little time to
treat the wounded and will be that much weaker
104
Combat Results Screen
CChhaapptteerr 44:: CCoommbbaattCChhaapptteerr 44:: CCoommbbaatt
Page 54

CChhaapptteerr 55::
MMaaggiicc
pells are highly overrated. I mean, you
spend half your life shut up in a dusty
S
and for what? A few minutes of glory on the battlefield and a permanent case of eye strain.
tower pouring over unintelligible tomes,
- Balathustrius
Page 55

party's movement, increase the production of
resources in your Capital or even alter the landscape itself, terraforming it into the environment
that is preferred by your Faith. Some Overland
spells can even be used to attack other Faiths outside of combat. All Faiths share some of the same
General Knowledge spells which include, but are
not limited to: Teleport Artifact, Dispel Magic,
detecting their opposing Faith and increasing
their party's rate of healing.
SSeelleeccttiinngg AA SSppeellll
When you select a Mage, you'll see two Action
Buttons displayed above its Unit Icon. These are
your selected spells from those available in your
spell books. In combat situations the left button
will be your Attack Spells and the right one will
be your Defense Spells. On the Overland Map
the left button will be your Overland Spells while
the button on the right is for your General
Knowledge Spells.
109
SSppeellllss
There isn't an adventurer alive who isn't drawn to
the mystery and romance of a good spell well
thrown. Each Faith has its own Library of spells,
and the Mages of Urak have more than 160 spells
at their disposal - everything from the benign
Guardian Winds to the truly nasty Inferno.
Among the elite of Urak, however, only Mages
have the skill and knowledge to cast spells.
TTyyppeess ooff SSppeellllss
Magical spells are divided into four Spell Books:
Attack, Defense, Overland and General
Knowledge. These categories determine how
spells are researched, as well as when they can be
cast. Attack and Defense spells can only be used
in combat while Overland and General
Knowledge spells can only be used on the
Overland Map. A few spells fit into more than
one of these categories, like healing spells that
can aid both in and out of combat.
Attack and Defense spell books are accessible
during combat to defeat your enemies and prevent damage to your troops. Attack spells cause
damage to the opposing party. Defensive spells
can protect you in various ways: they can increase
a unit's hit points and/or armor, create barriers in
the landscape, shield the Mage from arrows, etc.
Overland and General Knowledge spell books are
available outside of combat to perform numerous
tasks. Overland spells can be used to extend your
108
CChhaapptteerr 55:: MMaaggiicc CChhaapptteerr 55:: MMaaggiicc
Cure Wounds
I
ce Bolt
Page 56

CChhaapptteerr 55:: MMaaggiiccCChhaapptteerr 55:: MMaaggiicc
110
To see what other spells the Mage has in his or
her repertoire, simply right-click on the spell buttons. All spells known for that category will be
displayed. Left-click on an icon to set it as your
selected spell.
To see a detailed description of a spell at any time
just rest the pointer on top of its icon for a
moment and a text description will automatically
be displayed.
CCaassttiinngg SSppeellllss
In order for any Mage to cast a spell, he or she
must have enough Mana for the particular spell.
Mana is the mystical energy that is the power
source for all magic. Every time a spell is cast, a
certain amount of Mana is expended. When a
Mage uses up his or her supply of Mana, he
or she can no longer cast any
more spells until the Mana
has been replenished. Mana is
completely restored at the
beginning of each day (turn)
and can also be restored through the
use of potions.
To cast a spell, first select a Mage. This
will bring up your selected spell book
icons. Any spell icon that is dark-
ened is known to you, but is
unavailable due to insufficient
Mana. Some spells require a target
while others will be cast automat-
ically. Spells that require a target
will have that information listed
in its text description. Once you have clicked on
your chosen spell and selected a target, the spell
will be cast. It's a good idea to be completely
familiar with all the spells that you have available
so that you can combat the enemy as effectively
as possible. For example, some spells do damage
to everyone on the battlefield including members
of your own party, while other spells increase
some attributes while decreasing others. Also, be
careful whom you select to be on the receiving
end of your sorcery. It's as possible to bestow a
beneficiary spell on an enemy as it is to inadvertantly attack your own units with your magic.
Aim carefully! Also, many creatures have some
form of magical resistance, so don't expect a
Dragon to fall lifeless from the sky if you shoot a
Fireball at it. When a unit comes under the effects
of a spell you will be able to see just which spell
was cast by resting your cursor on that unit,
bringing up a pop-up text. This text is helpful in
reminding you of which spells you have cast and
for discovering what spells an enemy has cast on
you.
GGaaiinniinngg AArrccaannee KKnnoowwlleeddggee
Most Mages are very protective of their knowledge, rarely sharing their secrets with any but
others of their own Faith. The only sure way to
learn the arcane arts is to assign one or more
Mage to the task of researching spells in your
Library. In order to do this, you must already
have a Stronghold in the corresponding region
before you can ask a Mage to research for you.
Libraries are automatically upgraded when the
corresponding Mage Tower is upgraded. The
111
Blades Of Fury
Chain Lightning
Page 57

one tower of the same Faith, make sure that they
are researching different spells, otherwise
your time will have been wasted.
MMaaggiiccaall IItteemmss
A mage down on his luck once tried to
sell me an Amulet of Protection. Good
thing I never bought it, because I
found out later that he'd gotten it off
a dead Halfling burglar.
- Balathustrius
Locking yourself in a library researching
spells is one way to learn the esoteric art of
magic, but for those who choose to pursue
other avenues there are alternatives.
Through the use of scrolls, potions and
artifacts a Champion can gain some of the
advantages of spells without the lengthy process
of learning magic.
Only Champions can use artifacts and may only
wield two at a time. A display located below a
Champion shows what artifacts he or she is
wielding. Double-click on the Champion to display the Unit Information Display, which shows
all artifacts in possession. To view a detailed
description of an item, double-click on its icon
from within your Champion's Unit Information
Display to bring up a screen that includes a picture of the magic item, icons representing the
various bonuses and statistics for the item, and a
description of what it does. It is wise to take a
look at this screen before you use an item, so you
don't accidentally turn one of your units into a
Goat!
113numbers of desks in a Library reflects the number
of Mages that can work in it.
Once your Mage gets to the Library, you must
decide which spells to work on. First, choose a
book from the bookshelf by clicking on it. Once
a book is open, you can look through it by clicking on each page. You'll see a brief description of
a spell on each page. Mages stationed in the
Library must research spells in order, within each
individual book-hierarchy.
When you've chosen a spell to research, click on
the Research button on the spell page to begin
the study. The book will not return to the shelf,
but will appear open on the bookstand, indicating
that a spell in it is being researched. As you
research the spells, the runic text begins to clear
and you'll learn what the precise effects of each
spell will be when it is cast. On the opposite page
you'll be informed of how your work is progressing, how many turns it will take to complete the
research and how fast your Mages are working.
The amount of time that it takes to research a
spell depends on the number of Mages you have
working on it and their experience levels. When a
player gains access to a spell (either by study or
utilizing an acquired scroll), all the Mages of that
Faith serving that player automatically know the
spell and can use it providing they have enough
Mana to cover the casting cost. The gemstones
on the side of the bookstand can be clicked on to
view the research in other Libraries that you control.
Note: it is possible, through the conquering of
villages, to build more than one Mage Tower of
he same Faith. If you have Mages in more than
112
CChhaapptteerr 55:: MMaaggiiccCChhaapptteerr 55:: MMaaggiicc
Curse
Possession
Page 58

double-click on the Champion carrying the artifact in the Unit Information Display. Then click
on the artifact icon and, while holding down the
mouse button, drag the artifact icon to another
Champion's open hand, in his or her Unit
Information Display.
MMaaggiiccaall SSccrroollllss
In days past, when a Mage wished to preserve a
spell to be used at a later date, he or she would
magically inscribe it onto a roll of parchment.
That scroll would be imbued with the very
essence of the incantation and could then be used
by any other Mage that possessed it. The art of
magical inscription has all but been lost, but there
still exist the odd enchanted scroll to be discovered by a fortunate conjurer. Magical scrolls can
be used by Mages of all Faiths without being
researched, which makes scrolls handy to have particularly during battle. Scrolls require the
same amount of Mana as the particular spell
would normally cost, so be sure that your caster
is up to the task before trying to use one. If the
spell on the scroll is of the same Faith as the Mage
who is carrying it, the spell becomes common
knowledge to the entire Faith after the Mage has
cast it. If the spell is of another Faith, the Mage
can still use it (and cast the spell as often as he or
she has the Mana to do so) but its secrets remain
hidden to the rest of the Faith.
115114
CChhaapptteerr 55:: MMaaggiicc
Ray Of Hope
Fireball
CChhaapptteerr 55:: MMaaggiicc
When you want a Champion to wield a magic
item, drag it into one of the hands at the bottom
of the panel. One caution: a Champion cannot
wield two magical weapons or two magical protective devices (such as magical suits of armor or
shields) at once, as all weapons can be wielded
only in the right hand and armor can be wielded
only in the left. Champions can wield rings and
amulets in either hand when they are ready to use
them.
Party members can trade and exchange items
among themselves. All units may carry artifacts
but only Champions may use them. To do this,
Page 59

limited to that Faith, but some artifacts are more
useful to specific Champions and have more
power when someone of the same Faith wields
them. For example, an Earth Warrior can brandish an Axe of Mauling with much more effectiveness than a Chaos Warrior can.
Some of the Greater Artifacts must be used by
someone of the appropriate class and Faith, and a
rare few artifacts will cause damage to someone
of the wrong Faith who tries to wield them. So
examine that strange sword you found before
you swing it at an enemy's back, otherwise you
might be the one who is surprised.
Some artifacts allow a Champion to cast a spell. If
you want a Champion to use an artifact spell,
click on the artifact spell button located above
the portraits on the interface panel. Champions
use artifacts the same way as spells.
117
PPoottiioonnss
Potions are enchanted concoctions permeated
with the magic force that is contained within
crystals. Using magic and alchemy, Mages produce these elixirs to replenish their energies, both
physical and magical.
There are two types of potions: Potions of
Healing and Potions of Mana, that can be
obtained at your Mage Towers. Potions are basically restorative items, and when purchasing
them you can select the amount of health or
Mana they rejuvenate. The cost is 1 crystal per
recovery point. But there is only so much magic
that can be contained in such a small vessel and
therefore no one potion can contain more than
12 points of restoration. Only Mages can use a
Potion of Mana but any Champion can use a
Potion of Healing. Potions can be used only once
for the full amount of recovery that they contain.
AArrttiiffaaccttss
Mages may be the only ones with the capability
for casting spells, but there are objects in Urak
which have their own magical properties that others can use. Most adventurers can find a magical
artifact or two during their exploration throughout Urak. Artifacts can be such things as special
weapons, armor, magical rings, amulets, staffs,
and chalices.
Each artifacts is aligned to both a class and a
Faith. This doesn't mean that its usefulness is
116
CChhaapptteerr 55:: MMaaggiicc
Knife of Life
Stealing
Amulet of
Indecision
CChhaapptteerr 55:: MMaaggiicc
Potions Button
Page 60

I
n this wretched world, my friend, never
underestimate the power of an enemy or the
potential treachery of a friend.
- Balathustrius
CChhaapptteerr 66::
AAddvvaanncceedd FFeeaattuurreess
Page 61

CChhaapptteerr 66:: AAddvvaanncceedd FFeeaattuurreess
CChhaapptteerr 66:: AAddvvaanncceedd FFeeaattuurreess
120
Intelligence
Report Button
IInntteelllliiggeennccee && RReeppoorrttss
It is vital to become knowledgeable of your
neighbors while you venture forth into the
unknown, encountering others, making both
friends and enemies. Whenever you encounter
the people of another Faith, your trusty scribes
record any information about its culture and
army that you may have learned. A wise Lord
evaluates his neighbors as soon as possible and
seeks to keep information current; thereby avoiding strategic blunders based on old information.
IInntteelllliiggeennccee RReeppoorrtt
This information can be accessed by clicking on
the Intelligence Report button on the interface,
or by clicking on the Stronghold in your Capital,
once your people have constructed one. Your
reports can give you a pretty good idea of your
enemies' strength, their current resources &
income, level of spell knowledge, and any artifacts that you know they possess. Perhaps the
most practical part of the Intelligence Report is
that it gives vital and up to date information
about your current opinion of all Faiths in the
game and their attitude toward you. Remember,
just because you like someone does not mean he
or she likes you. Not only can you access data
about the other seven Faiths in the game, but you
also get a very good overview of your own Faith.
goods that you wish to procure, you will want to
anticipate the needs of the Faith that you will be
Bartering with. Thus, if you have accurate economic or military information about a potential
trade partner you can anticipate his or her need
for a resource that you have in surplus. For more
information about Bartering, see The Art of the
Deal on page 124.
No matter how you get your information, it isn't
valid forever. The accuracy of information on this
panel is based on your latest encounter with a
particular Faith. Those other Faiths are constantly pursuing their own interests, so the longer you
121
This report is particularly useful to look at prior
to Bartering, as you will want to trade resources
you have in surplus for other resources that you
need. In order to ensure the acquisition of any
The Barter Panel
Page 62

The political conditions between each of the
eight Faiths are constantly in flux, ranging from
complete trust to mild annoyance to irrational
hatred. Although the information on the
Intelligence Report about Faith relations is
always accurate, this does not mean that the relationships will stay this way for long.
When you start a new game, all Faiths have attitudes about one another relevant to their beliefs.
In other words, all the "good" Faiths (Life, Order,
Air, and Water) start out at least neutral towards
one another, as do all of the "evil" Faiths (Death,
Chaos, Fire, and Earth) towards one another. As
the game progresses, expect tensions to rise and
players to fear and distrust others who wrong
them in some way. In the same fashion, Faiths
begin to build trust and empathy when they
begin to make trades that benefit both partners.
Generally, you fight on the same side as the
Faiths with whom you're allied, and it's a bad idea
to antagonize anyone who's fighting on your
side. For example, if you're fighting against
Balkoth, you don't want to annoy another Faith
that's also fighting him. In this war, as in all wars,
combining armies makes the whole much more
powerful than the sum of its parts.
Trade negotiations are another important aspect
of an alliance. Two allied Faiths that tend to have
good trade relations are likely to assist each other.
If an ally needs a certain artifact, resource, unit,
or spell, for example, it is in your best interests to
help him out. On the other side of that coin, be
wary of trading or Bartering with an enemy--
123
go without contact the more inaccurate your
information can become. One of the best ways to
keep tabs on your neighbors is to have a cloaked
Thief follow them and spy on them.
Accessing the Intelligence Report allows you to
see a summary of all of the Faiths, but always
starts with your own. The Intelligence Report
displays the level of your Stronghold, your
resources and how much you are currently
spending, what artifacts you possess, the spells
you know and your attitude towards the remaining Faiths. Click on the Faith Icon Buttons at the
top of the report to choose which Faith to display.
At the bottom of the report is a horizontal bar
showing military strength. Two vertical lines
bracket the potential range of Faith's military
power. The space between the two lines is based
on the accuracy of your information. The wider
the distance between them, the less sure you can
be of the information. The military power bar is
relevant to the most powerful Faith in the game,
meaning that the strongest army is always represented as a nearly full bar and all other Faiths'
strengths are shown relative to that.
AAlllliiaanncceess && PPoolliittiiccaall OOppiinniioonn
If you always remember that there is no such
thing as a true alliance anywhere on Urak, you
are less likely to be taken for a fool. Think of an
alliance as a fragile porcelain vessel, difficult to
make and easy to shatter.
- Balathustrius
122
CChhaapptteerr 66:: AAddvvaanncceedd FFeeaattuurreessCChhaapptteerr 66:: AAddvvaanncceedd FFeeaattuurreess
Page 63

party or compromise with an enemy. The primary element of Parley is Bartering, exchanging the
goods that you have for those you need. You can
Barter anything you possess. Remember that it's
a good idea to check your reports prior to Barter
to get an idea of what you want to Barter for.
Barter and Parley represent diplomatic negotiations between two Faiths. As a result of this concept, everything from units to spell knowledge is
up for negotiation. There is a lot of information
on the initial panels, but the functionality is quite
simple. Think of it as a big table in the middle of
your screen. Your Faith is represented at the bottom of the screen and your trading partner is represented opposite you. Whoever initiated the
Barter makes the first offer. Buttons representing
spells, units, buildings and artifacts on your side
of the table (the bottom) bring up portraits or
graphics of the items that you own. Click on
what you wish to offer in Barter and it jumps
onto the negotiation table. The same rules apply
for selecting what you want from the opposite
party. Look at the party sitting across the table
from you and you will see they have all of the
same categories for Barter that you do. Keep in
mind that information that appears in Barter is
based on your information about your trading
partner. Now click on anything that you wish to
receive and notice that it now also sits on the
negotiation table. To remove anything from the
table, just click on it.
When adding standard resources, such as gold, to
the table, click on it in your interface panel and a
flyout panel will offer you more precise numbers
to add to the table.
125
your own people might not like the act and the
enemy probably won't appreciate the gesture anyway, unless you were very generous.
If you must deal with the enemy, you have a few
options to consider that can minimize any political fallout. For example, offering a gift to appease
an enemy Faith may be a better move than
accepting a bad trade from them (see the next
section for more information). Your own people
would most likely understand the need for the
gift. However, you may have a revolt on your
hands if you trade an important resource or unit
for something you did not need.
Each time you act against an alliance, the ally
becomes wary of you and your enemies begin to
have new respect for you. Beware of playing both
sides of the political game, even if you think it's
in your best interest: if you spy on or steal from
an ally and get caught, your allies' political opinion you of will plummet. Your enemies, on the
other hand, won't really care - and they might
even drink a toast to your ineptitude.
TThhee AArrtt ooff tthhee DDeeaall -- PPaarrlleeyy
Talk is cheap. But if it keeps your belly full and
your grave empty, it's worth more than gold.
- Sign on a merchant stall near the
Great Temple of Fire
When your party encounters a party of a different Faith, you'll have a few options to consider:
Fight, Cancel the engagement, or Parley. Parley is
a good way to exchange resources with a friendly
124
CChhaapptteerr 66:: AAddvvaanncceedd FFeeaattuurreessCChhaapptteerr 66:: AAddvvaanncceedd FFeeaattuurreess
Page 64

RReeqquueesstt
A Request is akin to asking a friend for a loan;
and they had better be a friend or you will not
receive much. In addition, once the deal is done,
your friend might develop a bad taste in his
mouth. You yourself may even lose respect for
him as well. The best thing to do with Requests is
to use them sparingly and only on those whom
you know you can trust or repay.
GGiifftt
Most trading partners will almost always accept a
Gift unless they truly hate you. Only a fraction of
the true value of the Gift will go towards swaying
127
BBaarrtteerr rruulleess
Before you can swap that Ring of Protection for
a Fire Sword, you need to set the tone of the deal:
a plea, request, gift, trade, demand, or threat. This
tone puts the trade in context for the people of
that Faith, and modifies the chances of success
and the political ramifications of any successful
agreement.
Before you decide what type of context the negotiations are being governed by, you need to consider your current state of political relations.
Glance across the negotiating table, and check
the current political opinion: how that Faith feels
about your people. From worst to best, the states
of political opinion are: Loathing, Hatred,
Hostility, Aversion, Distaste, Neutral, Empathy,
Trust, Kinship, Pact and Devotion. These opinions are very important if you want to be a savvy
negotiator.
PPlleeaa
For those cases when you are absolutely desperate for something and you do not have the muscle to back it up, getting down on your knees just
might work. Don't expect your fellow Lords to
be generous; this option does not damage their
opinion of you too much, and your opinion of
them increases quite a lot. Thus if a neighbor
comes to you with a Plea for something, and you
give it to him, he will be very grateful to you;
much more so than if a normal Trade had taken
place.
126
CChhaapptteerr 66:: AAddvvaanncceedd FFeeaattuurreess
The Barter Panel
CChhaapptteerr 66:: AAddvvaanncceedd FFeeaattuurreess
Page 65

negotiable. Anyone on the receiving end of a
Barter may choose to Accept, Decline or
Renegotiate the transaction. Either side can also
enter combat at any point and you may elect to
fight it out or Autocalc the battle.
TThhiieevveerryy
Those who choose the life of a Thief should do
so with careful thought. Although Thieves have
many impressive skills and
talents, it's a chancy way to
make a living. I've never
met an old, stupid Thief.
- Balathustrius
Thieves stay alive not through
military prowess but because
they possess skills unique to their
chosen profession. Having a Thief around, or
adding one to a party, is always a good idea.
Information gathering techniques of all
types rank as the Thief's most valuable
asset. Thieves use a variety of tools to
glean information from an enemy: spying, torture, and interrogation. Lastly,
Thieves enjoy a good larceny once in
awhile. However, as all Thieves know,
stealing is a risky way to earn a living.
Getting caught rifling through the
pockets of a two-headed ogre can
lead to several unpleasant situations.
Thieves have better chances of success in all
Thievish endeavors the higher their experience is
compared to that of their target. These advan-
129
the public opinion if the two Faiths do not
respect one another. Do not offer a Gift and ask
for resources at the same time, however, as this
can cause a severe loss of face for you.
TTrraaddee
The success of this is partially based on the actual value of items being traded and the political
state that exists between the two parties. Once
both sides walk away from the table, if the deal
made was not all that fair, one side will lose
respect for the other, depending on the inequity
of the deal and the political state between the two
Faiths to begin with.
DDeemmaanndd
If you decide that you must have something that
another Lord (or player) has, you can Demand
that he give it to you. If you are bargaining from
a point of strength and he is not too attached to
the goods, he just might give you what you ask
for. Offering him something in return might help
to convince him to give you what you want, but
will not decrease the negative feelings that a
Demand will generate.
TThhrreeaatt
When you no longer need a player as an ally and
you want something from him you can try a
Threat. There is no better way of destroying a
relationship with a neighbor than by threatening
him, except killing him.
All of these rules apply to what is being offered.
Whether or not a Barter is accepted or declined is
128
CChhaapptteerr 66:: AAddvvaanncceedd FFeeaattuurreessCChhaapptteerr 66:: AAddvvaanncceedd FFeeaattuurreess
Page 66

other Thieves but must not be moving to do so.
To order your Thief to attempt to detect other
Thieves, click on the Detect Thief button. An Ear
will appear next to the Thief attempting to detect
others.
Every Faith in the game has a spell that detects all
units of a given opposite Faith in a radius around
the caster. If you try sneaking past a Mage, he or
she may know you are there - even if you can't be
seen.
Highly skilled Thieves can attempt to sneak
other party members around with them. When
trying this risky technique, don't get cocky, stick
to the smaller parties - stay away from anything
magical, big or on a horse.
More is definitely not merrier when it comes to
sneaking others about. The risk of getting caught
jumps with each member of a party that is added
to the sneaking party. In addition the nonThieves slow the Thief down; he or she can move
at only 75% of the speed of the slowest party
member.
SSppyyiinngg
Thieves make great spies. They're sneaky, quick,
and subtle. A good Thief can get a great deal of
vital information about the enemy by spying.
Any information gained while spying or performing other clandestine activities automatically
updates your Intelligence Report. To command a
Thief to do a little surveillance, your Thief must
be in stealth mode and sneak up on a party unde-
131
tages accelerate when two levels separate the thief
from the target. Thieves in general offer the best
protection against having your party robbed or
being spied on. Thieves are also good at detecting
other thieves.
SStteeaalltthh
Crafty Thieves tend to stay alive longer, and one
of a Thief's most useful skills is stealth. Using the
Stealth button hides a Thief's movements from all
other players in the game. Thieves using Stealth
in combat situations can surprise an enemy and
severely reduce the chance of the enemy drawing
any further breath.
When a Thief is cloaked, you see only its shadow
on the screen.
But using Stealth doesn't always guarantee success. Whether a Thief runs a higher risk of detection is based on many things, including the
Thief's personal stealthing abilities, experience,
how close he or she is to the enemy, how much
experience the enemy has and his or her race. If
you have been detected, or have detected another
Thief, the shadow will have a red target attached
to it. Unfortunately, if you are the one who is
detected on the Overland Map, you have no way
of knowing which enemy party has detected you.
When a player detects a Thief, the detection lasts
until the beginning of the Thief's next turn. After
that, the Thief goes back into Stealth mode.
Sneaking around is a skill that requires some trial
and error. The Fairy Air Thief is best at sneaking
around undetected and the Dwarven Fire Thief is
worst. Thieves have the best chance to detect
130
CChhaapptteerr 66:: AAddvvaanncceedd FFeeaattuurreessCChhaapptteerr 66:: AAddvvaanncceedd FFeeaattuurreess
Thief in Stealth
mode
Detect Thief
Button
Stealth Button
Page 67

ity during combat can knock enemy Champions
unconscious during the heat of battle. Choosing
the Subdue button for the Thief and selecting an
enemy Champion for a target, immediately puts
the Thief in Stealth mode. The Thief will then
attempt to sneak up on the Champion and knock
him out. A Champion getting knocked cold during combat can be fairly devastating to the enemy
morale - which you should quickly use to your
advantage. Whichever side wins the battle gains
the Champion. So, if the Thief's party wins the
battle, the Champion is now a prisoner.
Each Thief is limited to 3 prisoners and they must
all be of the same Faith. Thieves cannot take
Lords as prisoners. If you manage to subdue a
Lord and win the battle, that Faith is no longer in
the game. Likewise, you cannot take Renegade
champions as prisoners. Knocking them out and
winning the battle only nets you the normal
spoils of any battle (Gold, Ale, Crystals and
Fame).
PPrriissoonneerrss
Once a Thief has subdued a Champion, he or she
is then a Prisoner of that Thief. The unit's banner
will change to the color of the Thief and the unit
will trail the Thief, attached to, but not part of
the party. Clicking on the Prisoner unit brings up
the Prisoner Interface. These buttons will allow
your Thief to interact with the Prisoner. Your
options include: Knock Out, Execute,
Interrogate, Torture and Free This Prisoner.
133
tected. If your Thief is detected you will jump
right into combat.
If you do encounter a party undetected, a new
Spy Menu pop-up will appear with the following
choices: Steal, Spy, Parley, Fight and Cancel.
Steal: This option brings up a pop-up that contains the enemy portraits and three of the
resources: Gold, Ale and Crystals (you can't steal
fame). Each of these resources will have question
marks. Clicking on them will display the resource
and the amount you are attempting to steal.
Further clicking will increase the amount of
resources you are trying to pilfer, however if you
attempt to steal more than the party has, then
you will, undoubtedly, be caught.
Spy: A successful spying attempt will reveal the
partys Unit Window. This will allow you to view
all of the stats of the unit(s) as if they were your
own. Also displayed is the total amount of Gold,
Ale and Crystal that the party has, which can be
stolen. Spying will, sometimes, also reveal information on the enemy as a whole. The intelligence
gained and added to your report varies from artifacts possessed to military strength to amount of
the world explored.
Parley: This functions exactly like the Parley
option in the enter panel.
Fight: Enters combat with that party.
Cancel: Voids all actions.
Subdue: Thieves have another special ability:
subduing Champions. A Thief who uses this abil-
132
CChhaapptteerr 66:: AAddvvaanncceedd FFeeaattuurreessCChhaapptteerr 66:: AAddvvaanncceedd FFeeaattuurreess
Subdue Button
Page 68

change more in your favor.
When a Prisoner reveals information (such as the
location of an enemy Lord) or if a Thief successfully spies on an enemy, a text message appears on
the debriefing screen alerting you to the new
information. When a message appears informing
you that you know the location of an enemy
party or Lord, exit the screen and go to the
Overland Map. Look for a lighted area that is not
occupied by any of your units. This highlighted
area reveals the enemy location and maybe even
the Lord of that Faith. When the next turn
begins, this area greys out, hiding the exact location of the party from you once again. Spell
information and Military Power appear in your
Intelligence Report.
135
Knock Out: Knocks the Prisoner unconscious
and eliminates possible escape.
Execute: This kills the Prisoner instantly. Be
warned; when a Prisoner dies, all the Faiths will
learn of it and there will be political ramifications.
Sometimes it can be such a major opinion swing
that relations between two Faiths will be very difficult, or impossible, to repair.
Interrogate: This allows you to attempt to garner information from the Prisoner. The amount
of information gained (if any) varies, and sometimes takes more than one session to procure.
Military units will crack, spilling military strength
information, troop locations, where artifacts may
be found, and which areas have already been
explored. Mages can tell you what spells the Faith
knows or where to find some artifacts. Capturing
and Interrogating a Thief can yield economic
data, army information, and even where his or her
Lord might be located. Like Executing a prisoner,
a failed attempt at Interrogation can cause political ramifications.
Torture: This is a more violent form of interrogation. Thieves who use torture run the risk of
killing the Prisoner. As with Execute, a dead
Prisoner or failed attempt at Torture, will be
known to all Faiths and you're Fame and relations
may suffer.
Free This Prisoner: Lets the Prisoner go back to
its original Lord. Sometimes the a Lord will be so
grateful for the return of one of his prized heroes
that his Faith's political opinion of you will
134
Free This
Prisoner Button
Interrogate
Button
Torture Button
Knock Out
Button
Execute Button
Page 69

CChhaapptteerr 77::
MMuullttiippllaayyeerr
T
o battle against foes that are known is
easy. The known enemy can be expect-
ed to act as he always has, protect the
same things and attack with the same tried and
true forces. But the enemy that is unknown presents a real problem. A leader whos motives cannot be understood is likely to attack from a quarter
that you didn’t know existed and didn’t have
defended.
- Balathustrius
Page 70

139
Lords of Magic can be played by as many as 4
people connected through a IPX compatible network or over the Internet through Sierra's
WON.NET, or by 2 people connected by modem
or null modem cable. A single CD-ROM in the
host computer can support up to 3 other
spawned games. A spawned game is a game that
has been installed onto a computer but is played
without the CD inserted in the CD-ROM drive.
Spawned games can only play multiplayer games
as a guest player, which means that they cannot
host a game and therefore cannot choose any
stating options.
DDiirreecctt SSeerriiaall CCaabbllee
Select this option for a two-player game between
two computers connected by a null modem cable.
1. From the Main Menu Select Multiplay.
2. From the Multiplay Menu select Direct Cable.
3. Next you'll see the Create Or Join A Network
Game screen; there are two boxes here, the top
one displays the game that is being created or
selected, the bottom one is a list of all available
network games.
4. To create a game, type in the game's name in
the upper box and select Create.
5. To join a game, click on the name of the game
from bottom list and select Join.
MMooddeemm
A modem game connects two computers through
a modem and phone line.
1. From the Main Menu Select Multiplay.
2. From the Multiplay Menu select Modem.
3. Next you'll see the Create Or Join A Network
Game screen.
138
4. To create a game, select Create.
5. To join a game, type in the host's phone number and select Dial.
LLooccaall AArreeaa NNeettwwoorrkk ((LLAANN//IIPPXX NNeettwwoorrkk))
Up to 4 players can play over an IPX compatible
network.
1. From the Main Menu Select Multiplay.
2. From the Multiplay Menu select Local Area
Network.
3. Next you'll see the Create Or Join A Network
Game screen; there are two boxes here, the top
one displays the game that is being created or
selected, the bottom one is a list of all available
network games.
4. To create a game, type in the game's name in
the upper box and select Create.
5. To join a game, click on the name of the game
from bottom list and select Join.
WWOONN..NNEETT ((IInntteerrnneett))
You can play Lords of Magic over the Internet
using Sierra's World Opponent Network (WON)
with players from all over the world.
1. Make sure that your computer is connected to
the Internet.
2. Start Lords of Magic.
3. From the Main Menu Select Multiplay.
4. From the Multiplay Menu select WON.NET.
5. The game will minimize and the WON.NET
logon dialog box will appear. Type your name and
password and hit Enter. If you do not have a
WON.NET account, select Create Member and
complete the online form.
6. From WON.NET you can Create Game or
choose to Join Game.
CChhaapptteerr 77:: MMuullttiippllaayyeerrCChhaapptteerr 77:: MMuullttiippllaayyeerr
Page 71

screen. From this screen players can chat with
one another and the game's host can set several
start conditions.
At the top of the screen are panels where players'
Lords and names are displayed. Players are displayed in the order in which they joined the
game, so there may be some blank spaces until all
players have joined the game and selected their
Lord type.
Below this is the chat dialogue box, where players' chats with each other are displayed. To chat
with other players, left-click on the empty dialog
line in the middle of the page, type your message
and hit ENTER.
To the right of the chat dialogue box is the panel
where the host can elect to either load a previ-
141
After you have signed onto WON, you will see
the "Gaming Rooms" screen. Here you can chat
with other online players, join in a game or create
your own game. There are also links to other
Sierra web pages that contain hints and tips, discussion groups, technical help and much more. If
you want to play exclusively with a group of people you can create your own private gaming room
which can be secured with a password and other
variables.
CCoommppaattiibbiilliittyy IIssssuueess
WON requires a 32-bit Winsock in order to run.
If you have Windows 95, then most ISPs will use
its 32-bit Winsock to connect to the Internet.
Some ISPs use their own Winsock, however,
which may not be compatible with WON. If you
aren't using a 32-bit Winsock, then you'll get an
error message indicating that WON doesn't recognize your Internet connection. You can be sure
you're using the Windows '95 32-bit Winsock if
your ISP uses Windows 95's Dial Up Networking
feature to establish an Internet connection
WWOONN HHeellpp
For further information about WON visit the
WON Web page at http://www.won.net or visit
Sierra's Web page at http://www.sierra.com
MMuullttiippllaayyeerr OOppttiioonnss
When you have entered a multiplayer game you
will be presented with the Multiplayer Options
140
CChhaapptteerr 77:: MMuulliittppllaayyeerrCChhaapptteerr 77:: MMuullttiippllaayyeerr
Page 72

include only those things in the players' sight
radii. Leaving this box unchecked will allow players to see everything that happens on the
Overland Map. Take note, however, that the AI
players are also affected by the Shroud setting
and that turning it off will influence their behavior.
Resources (Gold, Crystals and Ale): The
amount of beginning resources for all players
may be selected, ranging from 0 to 1000, in increments of 50.
Turn Limit: This determines the time that any
one player has to perform actions. Times range
from Unlimited, 5 Minutes, 3 Minutes, 1 Minute
and 30 Seconds. Choosing Unlimited will allow
all players to take as much time as they want for
every turn. Selecting a time limit will display a
countdown timer during the last 30 seconds of a
player's turn. Time spent in combat is not counted against a player.
AI Players: Decides the number of AI players.
Regardless of the number chosen, all faiths will
exist in a game. For every number clicked on
here, one faith will be "active" and seek liberation
of their own Great Temple, as well as the destruction of their enemies.
Spells Known: The number of spells that all
Mages will have knowledge of, ranging from 0 to
20, can be selected here. The number of spells
that you have knowledge of will be given to every
Mage that you have of your Faith, whether your
Lord is a Mage, you rescue one, you hire a mer-
143
ously saved game or start a new game with a custom map. If a custom map is chosen, only custom
maps where all eight Faiths are present will be
displayed. Only eight-player maps are valid, and
the computer automatically assigns AI Lords to
the remaining 4-6 Faiths. If no custom map is
selected the game will start with its own default
map. If a saved game is loaded, all presets that can
be selected here (including the players' Lord
types, names and order) will be ignored and the
original conditions will be used. The name of the
map or saved game is displayed in the top righthand corner of the screen.
The bottom portion of the screen contains start
condition that the game's host may set.
Shroud: Checking this box will turn on the overland shroud, which limits the players' visibility to
142
CChhaapptteerr 77:: MMuulliittppllaayyeerrCChhaapptteerr 77:: MMuullttiippllaayyeerr
Page 73

this, sometimes information will reach some
computers at a different rate than others, and
players will see slight differences in characters'
positions or the speed in which gameplay takes
place. Lords of Magic is designed to handle these
small differences and usually all players will be
perfectly in sync at the start of every turn. If,
however, one computer falls too far behind, all
players will be notified of the divergence. Players
have the option to exit the game if they wish but
the host computer will have the option to re-sync
all of the computers. Re-syncing a game brings all
players back to the last point where everyone was
in perfect sync, usually the beginning of the turn.
145
cenary Mage or recruit one in your Mage Tower.
Any Mage of another Faith that you have access
to will not be affected by this start condition. If
you are playing as Death take note; Balkoth actually has 21 spells, selecting 20 Spells Known will
enable all 21 of Death's spells.
Stronghold: Checking this box will give all of the
players their Strongholds at the start of the game.
Your Stronghold will include 3 beginning
Followers. Reclaiming your Great Temple is not
necessary to receive your Stronghold; you will,
however, need to take over your Great Temple to
receive more Followers.
Combat: This allows you to select which battles
will be viewed by all players. Selecting Observe
All Combat will show every combat that is being
played out, including both player and AI combat.
Selecting Only Observe Player Combat will
show only those battles engaged in by the players
but not any by the AI. Selecting Always Autocalc
Combat will autocalc every battle that takes
place; you will not see or interact with the inside
of any of the dungeons.
Once all of the start conditions have been selected, the host starts the game by pressing the PLAY
button.
DDiivveerrggeenncceess
Sometimes connections between computers can
become unsynchronized due to various causes
such as phone line noise or large differences
between computer processing speeds. Because of
144
CChhaapptteerr 77:: MMuulliittppllaayyeerrCChhaapptteerr 77:: MMuullttiippllaayyeerr
Page 74

CChhaapptteerr 88::
LLeeggeennddss ooff UUrraakk -- TThhee QQuueessttss
W
h en I look around and see the state
that our world is in, I try to imagine
how it must have been in the days of
antiquity, back when our world was being shaped
and molded by the deeds of our ancestors.
Sometimes I wonder, if they had known that it
would all turn out like this, if they would have bothered to get out of bed at all.
- Balathustrius
Page 75

a quest, the Roster may be blank, or it might contain only one or two item. As you venture further
into the quest, additional items will be added to
the Roster. This will help to inform you of all of
the actions that you need to perform and which
ones have been completed. The key objectives of
a quest, called "adventures", can be anything, such
as recovering a lost item, defeating an opposing
character, gaining an ally's trust, and so on... For
the specific rules governing each quest, click on
the ? icon on the Adventure Roster Interface.
Completed adventures will be checked off from
the Roster. You also have the option to hide the
completed adventures by clicking on the Filter
check box. When a new adventure has been
assigned to you in the roster, the roster icon will
pulse on and off, indicating that you have not yet
viewed the latest addition to the list.
Also note that there are some characters and
items that exist in these quests that do not exist
in the Lords of Magic game proper. Plus, while it
is still possible to rename some of your party
members, many of the main characters can not be
renamed. Always remember that this is a legend,
enjoy the story-like qualities that it takes on and
pay attention to the plot as it unfolds
149
CChhaapptteerr 88:: LLeeggeennddss ooff UUrraakk -- TThhee QQuueessttss
The land of Urak is in itself a magical and legendary place, but even its denizens have legends
that inspire them. Tales of past glories, brave
leaders and amazing discoveries are the basis for
many of the beliefs and practices of today's citizens. Many a person would jump at the chance to
become one of those mythological characters. In
this section of the game, you now have that
chance.
When you play one of the quests of Urak you
will, for the most part, be playing the same type
of game that you are used to in Lords of Magic.
But this component of the game has its own
unique elements and style of play.
All of these quests take place in the ancient history of Urak, long before Balkoth tried to conquer the world. The goal of each quest is unique
and relies less on befriending or subjugating
other Faiths. You will take on the role of an
already established character who has his or her
own objectives in mind and therefore will be
somewhat constrained to that character's legendary actions. This may involve your only gaining access to certain parts of the world or limiting
your entry into particular buildings until after
you have performed a designated task. Also,
many of these quests will rely more on specific
actions than on fighting. You might, for example,
be called upon to find a certain item or contact a
particular person to gain information.
Each quest has an accompanying Adventure
Roster. This is a list of all of the key objectives
that you have uncovered so far. When you begin
CChhaapptteerr 88:: LLeeggeennddss ooff UUrraakk -- TThhee QQuueessttss
Page 76

CChhaapptteerr 99 ::
TThhee MMaapp EEddiittoorr
A
nd then the mountains will crash down,
the oceans will boil away and the land will
be torn asunder, creating, in the end, a
landscape foreign to all...
- Fragment of a parchment from the
Prophesy of Urak, Volume 8.
Page 77

world. The following is a list of the terrain types
and which Faiths are best suited to them.
Rough is the terrain where for the creatures of
the Earth Faith are most comfortable.
Water can be crossed using flying and seagoing
units. Land based units can be transported across
water on boats.
Desert is preferred by the Fire Giants. This terrain slows down units from the Life, Air and
Water races.
Mountain is favored by the Chaos Barbarians. It
slows down units from the Death, Order and
Water races.
Meadow is the choice of Life worshipping Eldren
and the Water worshipping Amazons. This terrain slows down units from the Death, Chaos and
Fire races.
Ice is the terrain for the Air Storm Giants. This
terrain slows down units from the Order and Fire
races.
Plains are enjoyed by the Order worshipping
Archons. This terrain slows down units from the
Chaos and Earth races.
Swamp is the land for the Death Race. This terrain slows down units from the Life, Earth and
Air races.
Lava slows down units from the Life, Death,
Order, Chaos, Water and Air races.
153
To create a new world, launch Lords of Magic and
choose Map Editor from the Start Options Panel.
The Map Editor displays a default barren world.
All Capitals, Great Temples and starting positions for Lords are placed in their default areas.
New - Clears the current map and creates a new
default map.
Load - Brings up the list of maps in the
LOM/MAP folder.
Save - Allows the user to save the current map.
All World Map files have the extension .SCN and
are saved in the LOM/MAP folder.
Exit - Exits the Map Editor back to the Start
Options Panel
TTeerrrraaiinn EEddiittoorr VVss SSpprriittee EEddiittoorr
Located on the far right are two buttons: Terrain
and Sprites. By clicking on each of these, you
place the Map Editor into different modes. The
Terrain Editor allows you to edit the terrain and
topography of the world map, creating whole
new worlds for Lords of Magic. The Sprite Editor
allows you to define and place combat encounters, Capitals, Great Temples, and Lords starting
locations in your world.
TThhee TTiillee SSeettss
In the center of the interface panel are 11 squares
of different textures. These are the terrain types
that make up the landscapes of Urak. By clicking
on one of these, you are ready to Paint or
Terraform the basic landscape into your own
CChhaapptteerr 99:: TThhee MMaapp EEddiittoorr CChhaapptteerr 99:: TThhee MMaapp EEddiittoorr
152
Page 78

PPaaiinnttiinngg
Painting Mode takes the currently selected tile
set and covers the surface of the map without
altering the terrains elevation. To enter Painting
Mode, click on the Terrain Button on the left side
of the interface. Then click on the PaintBrush
mountain in the center box, this puts the Terrain
Editor in Painting Mode.
Holding the Right or Left mouse button down,
will cause the terrain under the cursor to become
painted with the selected terrain type.
155
Impassable This terrain type is used to make land
impassable to all, except flying units.
Roads are specially designed to be connected to
each other in a line or zigzag patterns. Using
them as a mass terrain will create land that is a
patchwork of unconnected road tiles. Therefore,
they are unsuitable for widespread use.
TTeerrrraaffoorrmmiinngg
Terraforming is the act of elevating the landscape
to create hills and mountains, or lowering it to
create valleys or seas. In order to raise or lower
the terrain, you must be in Terraform Mode. To
enter Terraform Mode, click on the Terrain
Button on the left side of the interface, then click
on the WireMesh mountain in the center box.
This puts the Terrain Editor in Terraform Mode
(the Map Editor default starts in this mode).
Left-clicking with the mouse on the map will
cause the terrain under the cursor to raise elevation.
Right-clicking with the mouse will cause the terrain under the cursor to lower elevation.
The default map begins at just above sea-level.
Lowering the terrain beyond sea-level will create
water.
Located to the immediate left of the
Terraform/Paint modes, are the 11 terrain-type
tiles. By choosing a tile type, then raising/lowering terrain, you can create hills and mountains of
that particular terrain.
154
CChhaapptteerr 99:: TThhee MMaapp EEddiittoorrCChhaapptteerr 99:: TThhee MMaapp EEddiittoorr
The Map Editor in Terrain Mode
Page 79

in when entering the objects you place, removing
some of the randomness. This allows you a great
deal of control when creating your own worlds,
with a more deliberate feel and atmosphere.
To enter Sprite Mode, click on the Sprites button
located on the far left of the interface panel. Then
click on one of the following buttons to bring up
that sprite group.
Sprites - This group is composed of the regular
Terrain Sprites. Mountains, Icebergs, Bones and
other generic landmarks.
Special - This group comprises all of the Faiths,
Champions, Great Temples and Villages. These
Sprites are not editable and are used to establish
starting conditions.
Dungeon - This group consists of Dungeons,
Mines, Towers, Statues, Hamlets, Huts, etc.
The other buttons of importance here are:
Encounter - Sets the type of encounter to which
the sprite will lead.
Level - Sets the Difficulty Level of the encounter.
SSeettttiinngg SSpprriitteess
To place a sprite on the map, simply click on
sprite you wish to use in the center of the interface at the lower half of the screen. Then bring
the cursor over the map and left-click again, this
will plant the sprite on the map.
157
The default map is painted with the Rough terrain type.
SSpprriittee MMooddee
Sprites are the structures and objects that dot the
landscape of Urak. While some are dungeons,
mines, villages and areas that players can enter,
other are simply decoration. The Map Editor
allows you to decide which objects will contain
Encounters and which will not. Furthermore,
while in Sprite Mode, you are allowed to dictate
what kinds of Encounters the players will engage
156
CChhaapptteerr 99:: TThhee MMaapp EEddiittoorrCChhaapptteerr 99:: TThhee MMaapp EEddiittoorr
In Sprite Mode, Placing a Nasty Orc Encounter
Page 80

PPrrooppeerrttiieess
One other feature of the Map Editor is the ability to turn off the random dungeon generation.
By clicking on the Props (Properties) button,
you can disable the computer from placing any
additional Encounter that you have not set. This
means that only the Encounters that you have
created and set down will be placed. Great
Temples, Capitals and their buildings will be present.
SSaavviinngg aanndd PPllaayyiinngg YYoouurr MMaappss
To save your maps, choose the SAVE button. All
custom maps are saved to your LOM/MAP folder. Maps can be made with any number of Faiths,
however, Multiplayer maps must have all eight
Faiths present in order to be valid.
To play custom maps, from the Start Panel
Options choose the Custom button. This will
bring up a list of all maps located in the
LOM/MAP folder. Choose your map and click
OK. Lords Of Magic will then load normally, but
with your new map.
159
CChhaapptteerr 99 :: TThhee MMaapp EEddiittoorr
You can place as many of the same sprite as you
desire. However, the exceptions to this are the
Special Sprites. Among the Special Sprites, only
the Villages can be placed multiple times. The
Lords, Capitals and Great Temples are unique
items and cannot be placed multiple times.
Setting down one of these, per Faith, removes it
from its previous position.
The Lord sprites are the starting points for each
player, wherever you place them, that is where
that Faith - human or AI - will begin.
SSeettttiinngg EEnnccoouunntteerrss
To create an Encounter, click on the Encounter
button. From the list, choose the encounter type
you wish (i.e. Water Encounter, Orc Encounter,
etc) and click SET. Next, click on Level, this will
establish the Difficulty Level of the Encounter.
Choose the Difficulty Level you want the
Encounter to be, then click Set. The bottom of
the center interface displays the Encounter type
and Difficulty Level you have chosen (i.e. Water
Encounter - Level 8).
Now choose the object you want the Encounter
to take place in by left-clicking on the sprite in
the center of the interface. Left-click on the map
to place the sprite. You have just set an Encounter
of your choosing. Place the cursor over the sprite
and you will see that it is outlined in red, indicating it is an object that can be interacted with.
Note that all Encounters placed subsequently
will be of the same type and Difficulty Level
unless changed via the Encounter and Level buttons.
158
CChhaapptteerr 99 :: TThhee MMaapp EEddiittoorr
Page 81

CChhaapptteerr 1100 ::
TThhee LLoorrdd EEddiittoorr
W
hat are those fine qualities that make
the difference between the common
man and a Lord? Maybe it’s divine
intervention, maybe it’s wealth and charisma, or
maybe it’s sheer luck. I think being born of royal
blood tends to help.
- Balathustrius
Page 82

amount it will cost. Double-click on the unit to
bring up further information. Click and hold on
the unit you wish to purchase, then drag it to an
empty slot in the Units Purchased window.
Remember that you are limited to a total of 3
Champions and 9 Military Units in your starting
party.
AAddddiinngg SSppeellllss
Click on the Spells button to bring up a list of all
the spells in the game arranged according to
Faith. By running the cursor over them, a pop-up
will give a description of the spell and its cost.
Click and hold then drag the spell to the Spells
Purchased window in the center of the screen.
AAddddiinngg AArrttiiffaaccttss
To purchase Artifacts, click on the Artifact button at the lower left. Like Spells and Units, there
is a graphic list of all the artifacts in the game.
Running the cursor over the artifact will give a
pop-up description of it, and it's cost. Doubleclick on the Artifact to bring up a more detailed
description and illustration of it. To purchase an
item, click and hold then drag the Artifact to the
Artifacts Purchased window at the top. If your
Lord, or any Champion you have purchased, can
weild the Artifact, you can equip them as you
would in the game, by selecting the appropriate
character and placing it in his or her hands on the
left side of the screen.
163
CChhaapptteerr 1100 :: TThhee LLoorrdd EEddiittoorr
The Lord Editor is a useful tool for creating a
more personalized starting Lord and party. The
Lord Editor allows you to mix and match units
from all Faiths, change the amount of resources
you begin a game with, acquire spells and artifacts
and more. Edited Lord files are located in the
LOM/CUSTLDR folder.
To create a Lord and party, launch Lords of Magic
and choose Lords of Magic. Choose the Lord
Type and click on the Faith you wish to play. At
the Information Panel pop-up, click on the Edit
button located directly below the Lords Portrait.
This will bring you to the Lord Editor.
BBaarrtteerr VVaalluuee PPooiinnttss
Lord Editing is based on Barter Value Points.
Depending on what Faith, Lord type and level of
difficulty you choose to start with affects the
amount of points you are given. These points are
located at the top of the left-hand side. This is the
total amount that you can spend on spells, artifacts, units and everything else. Adding values to
units (purchasing spells, adding levels, etc.) will
be deducted from your Points' total, while subtracting values (lowering the amount of ale,
decreasing a level, etc.) will add Points to your
total.
AAddddiinngg UUnniittss
To add units to your party, click on the Units
button located to the lower right. This will bring
up a scrollable list of units arranged according to
Faith. Placing the cursor over the unit will reveal
a pop-up that gives the unit's name and the
CChhaapptteerr 1100 :: TThhee LLoorrdd EEddiittoorr
162
Page 83

modify the experience level of any unit. Clicking
on either the + or - under the Level Indicator
Bar, will slowly adjust the unit's experience.
Clicking on the level number itself will increase
or decrease the experience a whole level at a time.
With modifications to experience, changes in
Attack, Defense, Mana and Hit Points will automatically occur.
AAlltteerriinngg RReessoouurrcceess
The starting resources (Gold, Ale, Crystals and
Fame) are located at the bottom left, directly
beneath the character inventory box. To change
the starting resource values, click on the icon of
the resource you wish to change. A gold box will
surround the item you've chosen and it will
appear between the + and - keys. Then simply
add or subtract the amount you desire using the
+ and - keys.
TThhee SSttrroonngghhoolldd,, GGrreeaatt TTeemmppllee aanndd OOtthheerr
BBuuttttoonnss
Checking on these boxes will give your Lord
either, or both, of the buildings as a starting condition.
Clear: Clicking on Clear will reset the Lord to its
original stats and starting items.
Back: Will exit the editor and return to the Circle
of Life where you can choose a new Lord.
Continue: This will being a game of Lords of
Magic with your new Lord and party.
Save: Saves the Lord and party in the CUSTLDR
folder of LOM.
Load: Loads files from the CUSTLDR folder of
LOM
165
CChhaapptteerr 1100 :: TThhee LLoorrdd EEddiittoorr
RReemmoovviinngg IItteemmss
To remove any item you've purchased (Units,
Spells or Artifacts), right-click on the item and it
will be sent back. You will receive a full refund of
the items cost in Barter Points.
EEddiittiinngg YYoouurr LLoorrdd aanndd UUnniittss
To edit your Lord, or any unit, you must select
the unit by clicking on the it in the Units
Purchased window. The selected unit will be
hightlighted with a colored outline. Once highlighted, the unit's stats will appear on the left side,
under the Barter Points. Here, you can change
the name of your Lord or his Champions, and
164
CChhaapptteerr 1100 :: TThhee LLoorrdd EEddiittoorr
The Lord Editor
Page 84

CChhaapptteerr 1111::
TThhee SSttoorryy ooff UUrraakk
T
he past is just the present,
after it happens.
- Graffiti in the outhouse
behind Tarnak's Tavern
Page 85

HHiissttoorryy ooff UUrraakkHHiissttoorryy ooff UUrraakk
169
But after all of that, one thing shone through like a Water crystal on a
dewy morning: words are the only true power. The wisest monarchs
know this, the foolish and the cowardly fear it. The gods respect it, but
they, too, are not immune to the sting of a bitter truth well told. I do not
shun truth, no matter how base and unflattering it may be. This most
likely will someday get me killed, but for now I've avoided that fate.
So to the honor of words and to the worship of the gods I do dedicate
and offer this tome, my life's work and the truth of the History of Urak
as I understand it to be.
Balathustrius
TThhee BBeeggiinnnniinngg
The beginning was a void without light and breath. Swirling through
this void were the Timeless Ones, twisting and pulling at one another through the blackness. For centuries beyond count they struggled, dancing in a deadly, silent embrace. As the Timeless Ones
fought, their battles flung fire and light and energy into the void.
BBeeiinngg tthhee OOnnee aanndd TTrruuee AAccccoouunntt
ooff tthhee HHiissttoorryy ooff UUrraakk
These days, anyone with a steady hand and a love of comfort can call
himself a historian. They are the "wise" men, the consuls, and scribes,
driven by duty (and, if truth be told, boredom) to spend their lives
scratching ink into dry pages. Most of these sages know little of the
events they record and even less of those whose lives they chronicle. For
them, their jobs at the right hand of whatever powermonger happens to
wield the biggest sword is prestige enough. Every word that glorifies
their mortal gods means one day more in the circle of the power that
feeds their bellies and fills their purses. I chose this profession, the
recorder of events, chronicler of histories, long before it was common for
any sot off the street to take up a pen and get a job as a scribe. In these
sorry times, the greatest challenge for these imbeciles is whether to spell
"knight" with a "k." It was not this way before. Scribing was once a
respected profession, and we actually had to learn to spell before we
were hired. In those days, one sour word could mean the difference
between a life of luxury and the end of life itself.
I long ago ceased to fear the wrath of those whose pimply buttocks warm
the purple cushions of carved thrones, and believe me, it has gotten me
into much trouble. I have been honored, threatened, gifted, tortured,
comforted, imprisoned, rescued, and reviled by more monarchs in my
day than most knights can claim in winters they have seen as living
men. After writing a particularly glowing account of a minor duke's
prowess on the field, he gave me the warmest tower of Caer Dyonas for
my chambers. After recording his crushing defeat the next spring, I
found myself begging for coins on the cold, cobbled streets of Rak. Ah,
truth hurts and I've been the brunt of that pain more times than I care
to count.
168
Page 86

171
HHiissttoorryy ooff UUrraakk
and, with a shriek, disappeared into the abyss of darkness.
Below, the planet crackled and screeched, undulating like a serpent.
The surface twisted and rose into mountains of rock and earth.
Massive boulders of glowing hot rock fell from the infant mountains
like pebbles, thundering through valleys and cutting deep fissures
into the living stone. Miles of liquid stone oozed among newly
formed crags and flowed across the landscape, hardening into vast,
flat expanses. Through it all, a soup of gas, water, and shards of rock
spewed onto the planet surface. As the world cooled, the Timeless
Ones became trapped. Desperate to escape, but loathe to work
together to find a way out, they separated. Alone, and with their
strength spent from the battle with the Form, they fought madly to
break away.
The raging conflagrations deep within the belly of the new planet
claimed the first Timeless One. As it slid, defeated, into the depths of
the molten rock, its energy sparked and rose as the magic of Fire.
Above, the cooling rock entombed the second Timeless One, and its
energy spread and became the magic of Earth. Alongside Earth,
drowned in the soupy mess of the cold liquid that flowed over the sizzling rock, the third Timeless One disappeared and became the magic
of Water. The final Timeless One broke from the clutches of the evolving planet, only to be swallowed in the swirling gases of the sky. It created the magic of Air. The Timeless Ones were now one with the living essence of Urak, coalescing into four polar nexus of power that we
now know as the elemental magics: Fire, Earth, Water, and Air.
TThhee FFiirrsstt AAggee
Slowly, life lifted itself from the chaos. At a snail's crawl of countless
thousands years, this life gravitated toward the energies surrounding
these four polar powers: Earth, Air, Water, and Fire. This life evolved
into the Great Giant races. These Giants worshiped the four powers
170
HHiissttoorryy ooff UUrraakk
From this energy came planets, bare places of empty earth and poisoned skies that held no life within them. The black crackled with
the light from their rage, and this became the countless points of
light in the night sky.
Slowly, in countless thousands of years, a new force rose from this
chaos. The Timeless Ones, intent on their own rage, ignored this
force. They continued to hurl themselves through the void, ebbing
and flowing through the darkness like a great, invisible beast.
This force awoke into consciousness, becoming form where there
was no form, substance where there had been no substance. Within
this consciousness was born a wrath that burned hotter than the
fires of the struggles that beget it. This fury grew stronger as it swallowed the light and energy that the Timeless Ones flung from them
during their conflict. This Form followed the Timeless Ones and fed
on the anger and hatred that emanated from them.
For thousands of years the Form grew, feeding on energy and growing its hate. Then, with a howl that tore the very fabric of the void,
the Form burst forth and flew with a fury toward the Timeless Ones.
Too late they realized their terrible mistake in ignoring this Form.
For the first time, they stopped their struggle as the Form bore
down upon them with a speed that seemed to stretch time itself.
Breaking apart, the Timeless Ones turned to face this terrible thing
that attacked them.
The ensuing battle shattered planets and flung debris throughout
the void. The stars themselves, ripped from their orbits, tumbled
through the darkness in chaos. The universe moved, stretched, and
swayed, but did not break. In this fateful moment, when the universe itself shifted, Urak was spat from this cosmic upheaval. The
Form saw this orb of fire shoot from the center of the battle, and
with one stroke hurled the Timeless Ones into its churning surface.
Its work done, the Form turned from the glow of the infant planet
Page 87

173
HHiissttoorryy ooff UUrraakk
crafted Golem Giants, molded from the clay and stone of Urak.
These creatures had no life force within themselves, but were almost
indestructible in battle. The Water Giants filled the oceans with
monstrous creatures that swallowed entire ships and used their fins
and spikes to churn the seas.
The Giant mages also brought hundreds of lesser creatures to life.
All these new beings were linked to Urak with mortal bonds, but all
served a purpose for their creators in their struggle against one
another: halflings and humans from the Earth, elves from the Air,
kraken and serpents from the Water, and dwarves and gnomes from
the Fire.
During this time of endless unrest, a Fire Giant Prince, Jeriacor, rose
in the ranks of the Fire Armies. He became known for his courage
in battle and his ruthlessness with prisoners, especially those of the
Water faith, Fire's sworn enemies. Soon he achieved the rank of
Commander, a feat unheard of in one so young. Everyone of the
Fire faith adored him, and as his fame grew with each success, it
seemed that he could do no wrong.
But more famous than Jeriacor's valor on the battlefield was the
small circlet of red gold he wore on his brow. Set in the center of this
circlet was a Water crystal, simple and pure. Jeriacor never removed
this circlet, even when he slept. During battle, when the light of war
raged in Jeriacor's eyes, it was said that the crystal crackled with
color and energy. No one who had ever seen this sight lived to tell
of it.
No one knew where Jeriacor got this crystal, but there were many
rumors. Some said that it was from the first Water Giant he had
killed on the battlefield. Others insisted that it was a gift from a
great Fire mage, who had defeated a Water mage during the first
Battle long ago. But all agreed, it was a powerful and precious thing.
The truth of the Water crystal was more dangerous than any imag-
172
HHiissttoorryy ooff UUrraakk
and built magnificent temples dedicated to their chosen magics. On
secret sites, near the greatest concentration of power for each magic,
the Giants erected Grand Temples. These holiest of holy places,
where the power existed in its purest forms, served as a focus for the
believers.
Throughout this time, the magics of Urak lay in opposition. Their
followers, restless and at odds with one another, made war: Fire
against Water, Earth against Air. The cosmic struggle of the Timeless
Ones had moved to the sphere of mortal beings.
Through divination and worship, the Great Giant mages were given
the secrets to life itself. They disappeared into their temples and
worked to build new life, in their own images, to honor their masters and to feed the great war machines that were needed to defeat
their enemies.
The Fire Giant mages created the Lesser Fire Giants. These beings,
smaller than their creators, were made strong and quick for victory
on the battlefield. The Air Giants created the Storm Giants. These
beings had the power of hurling electric energy through the sky,
blinding their enemies with the lightning bolts. The Earth Giants
Page 88

175
HHiissttoorryy ooff UUrraakk
Sertof, fighting with his dwarven soldiers at the side of Jeriacor, felt
this breath of evil fill him with a terrible joy. Before anyone could
stop him, he turned and attacked Jeriacor with a mighty thrust of his
sword. In a rush, the dwarven soldiers fell upon the wounded
Jeriacor, tearing at his flesh with a wild anger that none had ever
seen.
It is said that Jeriacor, his eyes wide with surprise and pain, spoke
only one word before he died: "Vysantha." As his brother fell, Sertof
ripped the circlet from his brow and snapped the delicate gold band
in two. The Water crystal, which had been shining brilliantly,
cracked. Sertof dropped the now-brown and lifeless crystal onto
Jeriacor's bloody chest. With the heel of his muddy boot he crushed
it into Jeriacor's open heart.
All erupted into chaos. Suddenly, the battles that were once between
enemies became war among allies. Brother turned upon brother,
friend slew friend, and entire armies fell in battles fought with none
but their own kinsmen. A band of Fire cavalry who had seen the
murder quickly sliced the evil Sertof into pieces. Battlefields were
slick with blood, and carrion eaters grew fat with the bounty of
death. The mages of Earth, Fire, Air, and Water could not stop this
senseless slaughter and watched, helplessly, and this unseen evil decimated all who felt its icy touch.
And far away, in a white tower surrounded by Water magic, the
beautiful Vysantha lay dying. For the Water crystal was more than an
amulet given in love by a woman to a man. It held within it the
essence of Vysantha's soul. The powerful magic of the crystal had
served as an Amulet of Protection, keeping Jeriacor safe from his
enemies in battle. But it did not protect him from his friends.
Before she died, Vysantha confessed all to those gathered around
her. When the powers of Water realized what had happened, they
rushed to the battlefield in the hopes of stopping the carnage. But
174
HHiissttoorryy ooff UUrraakk
ined. For it was given to Jeriacor by Vysantha, his one true love and
the greatest Water mage that Urak had ever seen. The two had been
in love since childhood, secretly meeting at night, along the lava
rocks and near hidden streams of Urak. As they grew, their love
blossomed into a power that even their ancient rivalry couldn't
break. They were determined to marry one day, with the hope that
their joining would end the hatred and warfare for good.
During this time, unnoticed by all, a darkness descended upon the
battlefields of Fire, Water, Earth, and Air as they fought. It was like
a tingle of hatred, fanned by battle and stoked by anger until it burst
from within. Those with hatred in their bellies and anger in their
eyes fell victim to this unnamed blackness. One of these pitiful people was Sertof, Jeriacor's sworn Firebrother and second in command
of all the Fire armies. He alone knew the secret of the Water crystal
and Vysantha and for years had kept this secret close.
As the blackness enveloped his heart, he saw that if Jeriacor and
Vysantha ever declared their love, the wars would end. His black
ambition of becoming Fire King and defeating all the hated Water
enemies would be thwarted. Sertof opened his heart and embraced
the darkness, feeling a power and hatred fill him that he had never
known. With this power he called to him a group of dwarves, who
also had succumbed to the power of the dark. They spent many
moonless nights in the Fire army barracks, discussing what to do, as
Jeriacor slept unknowingly in the next room.
The evil that filled Sertof's soul with images of death had its own
plan. By day, it swirled around the battlefields, manifesting itself as
a chill wind that blew across the killing fields. Some swore they
heard a whispered laugh in their ears as they went about their bloody
business. "I am Golgoth," it said. "Your torment has begun."
On one unnamed day, a war day like any other, this wind changed.
Page 89

177
HHiissttoorryy ooff UUrraakk
TThhee SSeeccoonndd AAggee
With the defeat of Golgoth came the Second Age. After the battle had
been won, the Giants and the mortal beings they created set about the
task of rebuilding their home. It was difficult, for they were unused to
working together for a common goal. Only the shared experience of
defeating the minions of Golgoth united them in their task.
Years passed. The Giants soon lost touch with the mortal races they
created. They retreated to the temples and the holy places of their
elemental gods. It is said that the Great Fire Giants now stoke the
forges of the Inner World, joining with the Earth Giants beneath the
ground. When the Giants are angry, the ground shakes and liquid
rock spews from the mountaintops in a waterfall of fire. Legend also
says that the Giants of Water and Air rule the sea and sky, commanding the waves and the clouds to do their bidding. The clear
rivers, lakes, and streams flow as the Water Giants command, and
the sun obeys the wishes of the Giants of Air. Anger them, and the
waves will crash from the oceans in walls of deadly water, and the sun
and moon will disappear into the void, casting everything in darkness.
The mortal beings of Urak continued to worship the elemental magics. With the end of warfare among the Giants came ten thousand
years of peace. And with this peace came complacency...
TThhee TThhiirrdd AAggee
And so began the Third Age. The Great Giants gradually disappeared from living memory, becoming the stuff of legend and myth.
The mortal beings they created, conceived in alchemist's labs and
born in the fire of battle, abhorred the evil of warfare and worked to
live together in peace and harmony. Because they were made from
different elements, each race found its place in the web of Urakian
life.
176
HHiissttoorryy ooff UUrraakk
the elemental powers that lived within Urak seethed in anger at this
evil that had rocked the land. Those who lived through that day say
that at the moment Vysantha died, a wail that shook the earth rose
like a symphony from the very foundations of Urak. And with that
sound, the mages of Water, Fire, Earth, and Air did what they had
not been able to do before: they united in their hatred of Golgoth
and vowed to destroy it.
The Great War of Golgoth had begun. It ripped the very essence of
Urak and the universe that held it. The battle raged for centuries,
day and night, as the forces of Earth, Air, Fire, and Water attacked
the unearthly minions summoned by Golgoth. The dead piled up
like cordwood, and the living used the bodies as shelter from the
onslaught of the undead troops they fought. And underneath the
death and smoke and fire of battle, the Elemental powers joined,
mingling their energy for the first time. From them emanated a
force that penetrated Urak with a power that none could ever have
achieved alone. Their power, channeled through their Great
Temples throughout the land, enveloped their armies and gave them
strength and the will to live.
And with this power the Armies of Good, as they called themselves,
began winning the war. Their armies, imbued with a heat and passion
before unknown, decimated the ghastly troops before them. The
undead soldiers fell by the thousands and disappeared in a foulsmelling mist, which turned the battlefields to wastelands. When
Golgoth saw his minions defeated, his anger knew no limit. He
roared and swirled around Urak, covering the planet with a purplish
black smoke that no light could penetrate. The Great Giant mages,
summoning the last remnants of strength they could pull from the
elements, hurled Golgoth spinning into the universe. The Great War
was over.
Page 90

179
HHiissttoorryy ooff UUrraakk
Plains and became masters of cavalry combat. But they, like the
other mortals, preferred peace and enjoyed the warmth of a good
fire and the contentment of a happy home.
Halflings were created, well, for the gods know what. Halfling history says they provided support to the war machines in their treks
throughout Urak. I think that an Earth Mage fell asleep on the job
and just didn't finish a spell. But regardless of my personal distaste
for these creatures, they did manage to do something useful. Too
small to fight, halflings were master chefs, caretakers, and squires.
During warfare their purpose was to give what comfort they could
to the armies of the Timeless Ones, cooking meals and maintaining
the morale of the troops. They were master vintners and brewers,
and Halfling ale became a byword in camps throughout Urak.
During peace, halfling colonies sprung up in the quiet places of the
forest, and most of them found work as chefs and brewers throughout the land.
As the Third Age progressed, these mortal races mingled, creating
strong bonds of friendship and mutual respect. The races developed
an intricate trade network, buying and selling goods to one another
throughout Urak. Marriages brought alliances between households
and races, and mixed-race offspring were not uncommon in any part
of the world. The powerful households of each race - the barons, the
dukes, the kings and queens - lived in harmony with their brethren.
Although the occasional skirmish did erupt (usually between the
hot-tempered dwarves and some other faction) warfare was unheard
of, even feared, by all.
But beneath the contented lands of Urak lay an evil that no one
could see. With each petty squabble, each minor skirmish, the heat
of the evil passions fueled this blackness. This evil, part of the living
structure of Urak itself, spread insidiously through the land, stretch-
178
HHiissttoorryy ooff UUrraakk
The elves, sprung from the imaginations of the Air Giant mages,
made their homes high in the treetops. They traveled through the air
on gossamer wings. These people, light and willowy, revered the
wild places of Urak. They were the peacemakers, the counselors, and
their first instinct was always to solve a problem before it became a
war. But they were bred as warriors, and the skills of their archers
was legend throughout the land.
The dwarves and gnomes, born of Fire, were a sturdy lot prone to
hot tempers and loud brawling. They lived in caves near the mountains that oozed the liquid rock, building vast underground keeps
with the pliable molten stone. They were of medium height, smaller
than humans but taller than halflings, and with stout legs and arms.
The Fire Giant mages created them as laborers and infantrymen, and
gave them the skill to wield hammers and maces with deadly accuracy. The dwarves that had conspired with Sertof had been banished
from their homes, and their descendants even today wander Urak,
driven by hatred and death and a lust to destroy all in their paths.
The Water Giant mages molded the deadly kraken and serpents from
the living seas. These beings, unable to leave the safety of their
watery world, made their homes in the blue-black depths of the
oceans. It was said that at night, when the moon cast its shimmering
light onto the surface of the sea, these water beings rose from their
homes and writhed on the waves in an eerie waterdance. Their
sounds had the power to seem like beautiful music, luring unsuspecting sailors as they followed the music in a watery death.
From the Earth Giant mages came halflings and humans, the most
prolific (and the least useful, if truth be told) of the mortal creatures. Humans, built tall and lithe for speed, were simple creatures
with simple needs. They built their homes of stone and wood.
Humans were bred to be warlike and cruel, without remorse when
an enemy was to be slain. They tamed the wild beasts of the Ronak
Page 91

181
HHiissttoorryy ooff UUrraakk
For the followers of Life, their love of all creatures and respect for
the living world bound them together with a chain of friendship and
respect that none could break. Their god was Llanwylln, the spirit of
Light. The followers of Order believed in the purity of the world,
black and white, good and evil. For them, everything on Urak had a
purpose that no one could alter. Chaos worshippers lived for the
thrill of battle and the love of their kinsfolk. Their animal gods lived
in the forests and imbued their followers with power and skill on the
battlefield.
As the numbers of each new faith grew, they built their own holy
places in the most sacred lifegiving spots on Urak. Mortals from all
races flowed to these sanctuaries, combining their faiths in the
Elemental with their belief in the good.
TThhee RRiissee ooff tthhee DDaarrkk EEllvveess
One of the followers of Death was Balkoth, a minor lord of the
Elves. He lived more than five hundred years ago, born during the
Seventh Rising. There was a prophecy that a White creature would
turn Dark during this Rising, but of course it had been long forgotten by the time Balkoth came into this world.
The blackness had wrapped around his heart when he was but a
child. By the time he reached the Age of Sentience he had built a following of other elves who had been seduced by the terrible beauty
of the darkness. He yearned for power and control, and appealed to
Golgoth for help. He and his Dark Elf minions vowed their lives to
their god if he would but grant them the power to subjugate and
possess the world.
On a moonless night when the Air Giants spread gray, cloudy wisps
over the stars, the followers of Death gathered in their ebony temple. Thousands watched as hundreds of innocents were slaughtered
180
HHiissttoorryy ooff UUrraakk
ing tendrils of discontent into even the most remote places.
In forgotten thorn groves, in shallow pools of brackish water, in the
center of rotting trees, the discontented creatures from all races
began to gather. At first only a few would meet, bound by their
anger and uneasiness and finding kindred spirits in the dead places
of Urak. The blackness concentrated its powers in these places, and
these acolytes gradually formed into a new religion, Death. Their
god was Golgoth himself, reborn from the legends. As these religions grew, they pulled toward them others, those with grudges or
jealousies that the blackness fed and cherished.
Also rising at the same time were other beliefs followed by those
with purer hearts: Chaos, Life, and Order. These believers met in the
holiest of places on Urak: the mighty oak groves, atop white mountain peaks, and in the great sanctuaries devoted to the worship of the
Elements.
Page 92

183
HHiissttoorryy ooff UUrraakk
dozens of soldiers made fortunes selling their memoirs to a public
hungry for tales of victory. Tactics used by the armies of Urak
against Balkoth became standard military maneuvers, studied by
recruits the world over. The Amulet of Darkness was exhibited in
museums throughout Urak, then carefully packed away in a secret
chamber that none but the highest Elemental mages knew.
But all societies are doomed to repeat the past if they do not remember it, and it was the same for us poor sots of Urak. As the horrors
of the Battle of Golgoth and the War of Balkoth faded through the
centuries, Urak became ripe for another onslaught from the powers
of Darkness. Five hundred years have passed since Balkoth was cast
into the Amulet, but even that great stretch of time means nothing
to the powers of Evil.
I have read the ancient prophecies, and I knew that a great Darkness
would again come to Urak. But neither I nor anyone else understood what horrible evil was in store or that it would afflict our
world in my own lifetime. For Golgoth has returned, and following
in his putrid path is an army drawn from the dead of Urak.
Even worse, he has released Balkoth from his prison. Balkoth, wild
with dark joy and supported by all the power of Golgoth and his
minions, has captured the Great Temples of our land. He has killed
the caretakers and laid waste to every corner of Urak.
Now Urak is in dire need of help. Balkoth is free, the temples are
overwhelmed with the power of Darkness, and the land begs for a
savior to return it to its former glory. It is hard to imagine that any
one, mortal or god, can defeat the powers of Golgoth and Balkoth,
but that person must soon be found. Until that time, Urak will languish in despair, its people desperate and starving. Who will come
and gather the power of Urak to defeat this horrible pestilence that
has ravaged the world?
182
HHiissttoorryy ooff UUrraakk
in sacrifice to the Dread Demon god, Golgoth, Master of Death. In
the center of the chaos stood Balkoth, with his arms raised in worship toward his most unearthly god.
As each innocent was killed, its blood was poured onto the Dark Elf
until he was slick with the red lifeforce of every race. The followers
lifted their voices, moaning and wailing, while the screams of the
dying swirled around them. They writhed in an unearthly dance,
pulling power from the earth, the rock, the sky, the blood. The air
crackled with energy. Above the temple the sky began to move,
surging in waves of blackness. Balkoth lifted his face to the sky and
began to scream. A voice thundered in the temple, "You are Balkoth
the Destroyer. My power is yours, and you are mine."
Balkoth the Destroyer now began his campaign of death. He led the
Dark Elves and others who ascribed to the Black Religions against
the powers of Life and the Elements. Town after town shattered
under his onslaught, and the mortal beings who stood against him
fell by the thousands. But standing against him were the lords of
Urak. They battled Balkoth, and in a frenzy of death and destruction
trapped his soul inside the Great Amulet of Darkness.
EEppiilloogguuee
(written by my own hand and not paid for by any monarch)
I recorded the previous history, many decades ago, for Earl Merkot
Ravensonn. I was a young man then, fresh from Scribe School and
eager to earn my way in the world. The history that I wrote is truthful and accurate, but I am afraid it is now incomplete. Recent events
have changed the entire fabric of Urak and have shaken my faith to
the core of my being.
The story of Urak should have ended with the entrapment of
Balkoth. The final battle was recorded in hundreds of histories, and
Page 93

185
BBeelliieeffss aanndd RReelliiggiioonnss ooff UUrraakk
LLiiffee
Those who ascribe to the Life religion share one thing in common:
a healthy respect for Urak and all the living things she sustains. They
have a reverence for nature and for the web of life that connects all
living beings together in all ways. Most Life believers regard the
conception and nurturing of new life a top priority. This is why most
beings who worship this religion are especially good parents and
caretakers. You will also find them working in healing houses, in
nurseries, and tending to the beautiful gardens on the rolling castle
grounds of the elite of Urak.
Some of the less enlightened of our world mistakenly assume that
Life believers cannot be aggressive or seek glory in battle. Most of
these misguided sots are dead now. While it is true that most beings
who worship Life find warfare distasteful, they do not shun it outright. In their minds, the end justifies the means. If killing a few will
ensure that many will have life, they will kill. But the methods of
killing are usually quiet, swift - and effective. Few can match their
skill at archery and those foolish enough to confront them rarely get
close enough to inflict any damage. If they have any weakness it is
that, in their preference for living a more natural life, they shun the
wearing of any heavy armor. And while their elegance makes for
powerful long-range attacks, they are less adept at the art of handto-hand combat. Still, for the Warriors of Life that are injured in battle, the Mages of that Faith have some of the most powerful healing
spells ever known. So potent is their magic in this respect that it is
said that they actually possess the ability to resurrect their fallen
comrades. There are tales of Life worshippers creating items that can
heal those who possess them, as well as others. There are also
rumors that somewhere in their kingdom lies a shrine that will heal
all those who enter and rewards all those who fight for the cause of
Life and nature to heal themselves after battle.
Ah, religion. It is said that if the gods hadn't already been around,
we mortals would have invented them. I learned long ago that
religion isn't the sedative of the people, it's the crutch. And
believe me, there are a lot of cripples out there.
I've seen what beliefs can do to people - and it isn't pretty.
Religion has the power to sustain life, but it can also be the root
of unspeakable evil. There has been more blood and death in the
name of "religion" than in the name of any political agenda.
Sometimes it angers me. Most of the time, however, it frightens
me. One cannot reason with a zealot any more than a human
can win a game of dice with a dwarf. But it is the zealots of the
world - not the loud, angry ones, but the quiet, brooding ones that are the most perilous. I would prefer taking on a rabble of
disgruntled Terramages to spending fifteen minutes alone with a
Viantha in her study any day.
I learned long ago that the best way to get by in this world is to
"believe" whatever everyone else in the room seems to hold
dear. It keeps you alive and sometimes makes you richer in the
process. And if the popular wind changes? Smile a lot and run
like hell.
Most of what I know about the different Faiths of Urak come from
many sources. In some cases, I personally followed specific
beliefs during various stages of my life. Dear friends have told
me of others. Occasionally, an enemy provided me with a few
details. But mainly what I know (especially of the darker Faiths)
comes from rumor, innuendo, and speculation. So, brave reader,
take all you see with a grain of salt, and be sure and keep an
Amulet of Protection with you wherever you go.
- Balathustrius
OOff tthhee BBeelliieeffss aanndd RReelliiggiioonnss ooff UUrraakk
Page 94

187
BBeelliieeffss aanndd RReelliiggiioonnss ooff UUrraakk
mountain ranges, avoiding terrain such as desert or swamp. Of all
the beings of Urak, they are the closest to the life spirit of Urak, and
they consider themselves to be the caretakers of the planet.
Unicorns, pixies, and other citizens of the Elflands also follow the
teachings of Life. One or two stories have been told describing
Elven Warriors mounted on winged horses of incredible strength
and beauty while others speak of a magnificent bird that fights
fiercely and is reborn again and again. The worshippers of Life are
the natural foes of those who choose to serve Death and Life Mages
have spells that specifically target undead monsters.
DDeeaatthh
Followers of this Faith are a shadowy brood. They worship in the
dark corners of Urak - the dank swamps that no sunlight touches,
the rotting feast halls of long-abandoned castles, and in the basements of unnoticed buildings throughout the world. Their universe
is that of the dying and the dead. They have great disdain for areas
of the world covered with lush life and beauty.
Those who have tasted the dark joy of death worship seldom speak
of it to the living. Although there are thousands upon thousands of
Death worshippers, they stay hidden and silent. But when battle
rages in the land or when their god instructs them to, they rise like
a terrible black army to revel in a feast of turmoil and death. They
believe that it is only through Death that true redemption can be
found. The highest honor is for their souls to be cast into the ghastly, undead feast hall in the depths of Karnog with their dark god
Golgoth.
There are many legends of the beginning of the Death cult, so many
that no one knows what the real story is. Some believe that the evil
that begat this planet also spit out the god of Death in the fiery
chaos of creation. Others think that Golgoth is just the shadow of
186
BBeelliieeffss aanndd RReelliiggiioonnss ooff UUrraakk
Llanwylln rules as the Goddess of Life. Believers speak of her with
reverence and respect, for she nurtures the planet and creates the life
forces that sustain it. Most Life worshippers consider Llanwylln
(which, translated from the s'Nai dialect, means " life spirit of all")
to be the creator of all things - the ugly as well as the radiant. They
understand that without the balance of light and dark, good and evil,
life and death, there is nothing.
The origins of the Life Faith are shrouded in myth. Most believe
that Llanwylln has existed since the beginning of time, and a few
scholars are convinced that she was one of the Timeless Ones that
battled Golgoth so long ago. The Eri'th du Bonan (Book of Life)
explains it this way:
In the great light that was Urak after the Battle, an enormous creature rose from the living rock. This creature had no form, no energy of its own. But it glowed with a light not of this world, but from
the light of the universe, the lifelight discarded from countless planets and tossed to die on Urak.
This form, seeing that life struggled to be born on the surface of the
planet, coaxed and nurtured it until it burst forth in a symphony of
plants, animals, and beings. This creature was Llanwylln. She became
one with the land, still coaxing and gently guiding life from all that
exists here.
Some subcults of Life worship the Others, a group of Great Giants
who serve Llanwylln in specific duties. Brynith is the keeper of creatures and cares for the animals of the world. Mithander gives nature
its music and sounds. D'naian is the goddess of childbirth, and her
twin, D'hestan cares for newborns and children of all creatures.
Elves make up the majority of Life believers. These beings, the
Eldren, surround themselves with the beauty of nature an choose to
live in the depths of the forests and in the hollows and valleys of the
Page 95

189
BBeelliieeffss aanndd RReelliiggiioonnss ooff UUrraakk
The other cult of Death is known simply as the Shadow. Not quite
an organized cult, it is more of an army of skeletons, shades and
winged creatures that serve Golgoth and Balkoth in all ways.
Whispers of the dreaded vampire, a creature that grows steadily
stronger by sucking the life out of others, have given nightmares to
many. No one knows where these forms come from; some believe
that Golgoth himself calls forth the newly dead to serve him in his
work. Country folk believe that the delicate, silver blossoms of the
glimmer tree repel the body snatchers that lurk in the darkness,
stealing new recruits for Golgoth's ghastly army. This is why many
bodies are buried with a garland of glimmer leaves lovingly placed in
the coffin. I've never had the courage to tell them it doesn't work.
Facing an army of Death is enough to make a sane being's heart run
cold, and for good reason. Death is powerful in almost every aspect
of warfare and adorn themselves with thick armor and powerful
weapons. The minions of Golgoth have many potent spells at their
disposal. It is not uncommon for Death Mages to hurl body-withering curses upon their mortal enemies. And the most horrifying
power of all is their ability to raise the dead - thus increasing their
army in the field during battle. I cannot describe the fear that grips
your heart when you see a beloved friend, mangled and bloody, rise
from the battlefield and turn to attack you. But once an Undead is
destroyed, it is gone for good. No powers of Death can revive one
of these pitiful creatures. Death's understanding of life and vitality
is limited and no magical means to heal their wounded exists. In
order to be revived they must rest or visit their Temple to appease
their dark lord.
No other Faith in Urak is more mysterious and the frightening.
Myths and rumors that surround Death have found their way into
every corner of the world. The few that have returned from an
encounter with these dark foes report great armies led by powerful
Lords possessing artifacts of immense power. The mere mention of
the dreaded Soul Stealer or the Ring of Azz'Taruth are enough to
188
BBeelliieeffss aanndd RReelliiggiioonnss ooff UUrraakk
Llanwylln, her opposite and her nemesis. A smaller faction is rabid
in its belief that Balkoth is the true Master of Death, sent by
Golgoth to Urak to rule in his place. They are Balkoth's soldiers, the
minions who defend his terrible existence and will fight to a joyful
death anyone who tries to stop him.
There are no tomes that detail the beliefs of this most unholy religion. At least, none that I know of. But I do know that there are two
cults of Death that seem to wield some power. Although both of
these cults worship Death and Golgoth, they have their different
ways of practicing their beliefs.
The Bloodguard are the true believers of Death. Most Bloodguard
are mortal beings who have turned from their natural Faiths to worship at the feet of Golgoth. They believe that the only way to true
redemption is unshaking faith in their god and undying desire to
destroy all living things for his glory. Dark Elves are the most ferocious of the Bloodguard, exhibiting all of the speed and agility of
their race but with a dark intent. They are known as the
"Golgothans" for their unshaking faith in their god. They kill without remorse. The lucky few who have survived a Bloodguard attack
report that the Golgothans delight in the killing - even to the point
of lovingly cradling their prey before they throw the final death
blow. Unlike most Elves, the Dark Elves prefer edged weapons in
combat, such as knives and halberds. A few humans have also turned
to the darker Faiths, but they are rare. Usually Warriors, followers
of Order who have fallen from grace, become Bloodguard.
Oddly enough, however, most Dark Elves have a true respect for the
life they take. Life is a vital force in death - only the energy of the
living can feed the power of the dead - and they understand this balance. It doesn't stop them from killing, but they are known to be
merciful in their work. Death by torture is rare for an Elf. Humans
who worship Death, however, have no such compunction.
Page 96

191
BBeelliieeffss aanndd RReelliiggiioonnss ooff UUrraakk
with certainty. The world is good and evil, black and white, and
nothing can ever change the path of destiny that each living thing
follows.
Order followers tend to gather in large, organized groups, headed by
a knight or other important leader. They prefer to construct their
cities on the flat, orderly plains and avoid hectic landscapes such as
mountains and swamps. They have three gods, which they refer to
as the Triad, and whom they worship as one entity. I've never been
too clear on exactly which god was in charge of what; my theory is
that there is a god of time, one of energy, and the third of space. No
Order believer speaks of his or her gods, and no outsider has ever
participated in an Order service. These are very private, very small
affairs that occur away from the larger gatherings. All that is known
is that some are held at the Cathedral of Knighthood, where a chosen few are granted a higher level of power through a mysterious
ceremony.
Open Order meetings are usually sedate affairs, because the humans
who make up most of the Order followers tend to be serious to the
point of boredom. Humans are drawn to Order because that Faith
tends give them comfort and a sense that something outside of
themselves determines their destiny. Humans seem to need to be
cared for, I'm not sure why. At these gatherings the knights, soldiers,
cavalry, sailors, and Mages (along with the occasional Thief) argue
and discuss a course of action. When there are no wars to be fought,
these meetings usually degenerate into trifling debates. When war is
at hand, Order followers work together like a well-oiled balista to
prepare for battle.
A primary strength of Order is the intense and unquestioning loyalty of those who follow it and those who are in its presence. White
Stags, majestic creatures who normally disdain warfare, will serve
out of loyalty whenever trouble arises. Gargoyles will climb down
from their towers and precipices to assist in battles. And there are
stories of long dead warriors whose devotion and sense of duty is so
190
BBeelliieeffss aanndd RReelliiggiioonnss ooff UUrraakk
dissuade someone from entering Death territory. Balkoth is said to
own a magical weapon of such strength that one wave of his scythe
can cut down an entire army. And on the darkest nights, the citizens
of Urak fear that they might be stolen away and taken to Death's
notorious Altar of Sacrifice, where it is said that the living are
slaughtered for the amusement of Golgoth, bestowing the murderer with great strength. Some say that Death Mages will sometimes
voluntarily kill themselves, only to have their dead bodies raised.
These fearsome creatures possess the mortal powers of the Mage
with the added benefits of an undead body and are among the most
frightening monsters that one can imagine.
OOrrddeerr
Devotees of Order believe that everything in the universe has its
place, and there is nothing that gods or mortals can do to change it.
Events happen for a reason, beings act according to their preordained scripts, and the consequences of all actions can be foretold
Page 97

193
BBeelliieeffss aanndd RReelliiggiioonnss ooff UUrraakk
Residing in the precipices and crags of jagged mountains, far away
from the tranquility of the plains and forests, lies the most volatile
Faith of Urak, Chaos. Believers in Chaos are unpredictable, angry,
prone to argument, quick to laugh, and never to be trusted. Believers
in the Chaotic religions have only one thing in common: they revel
in confusion and delight in creating havoc wherever they go. They
can be formidable enemies and strong allies - if you can trust them.
Just about the only thing that assures the loyalty of a Chaotic is the
promise of glory in battle and the weight of mercenary coins in their
purses.
The roots of this religion lie in the very fabric of Urak. The planet
was born of chaos, forming from the battle between the Timeless
Ones and the Form. Followers of Chaos speak of this time as the
"Age of Beginning" when the stage was set for all future life. They
believe that all life forms - plant, animal, creature, beings - are part
of a cosmic puzzle that can never be completed. They believe that
life is random, death is unexpected, and the only glory comes from
following the gods into battle and in honoring their clan kin.
192
BBeelliieeffss aanndd RReelliiggiioonnss ooff UUrraakk
strong that their very spirits will make their way back to the mortal
realm to assist their Lords. Legend speaks of one of the finest
Warriors of Order who roams the land, performing good and defeating evil, and who has taken a oath to always return to his homeland
when trouble is at hand.
No other Faith has the discipline and organization that Order does
and these qualities naturally lend themselves to militaristic procedures. Order Warriors are especially powerful in battle. They are
strongest when in large numbers, for their energy feeds one another. They are proficient in every aspect of warfare and their weapons
and armor are made with the finest of skill. Such is the quality of
their work that some weapons and artifacts have gained legendary
status. Many a person has heard the tale of mythical Guardian, a
sword imbued with such fantastic power that the mere sight of its
blade has roused smaller armies into defeating larger foes and whose
sharp sting can kill an enemy with a single blow.
The Mages of Order have banded into their own sect, referring to
themselves as the Accord. Their skills lie in spells that protect and
inspire their armies. It is said that they can take possession of their
enemies and make them fight against their own kind. Others speak
of Order troops protected by a magic shield, making them almost
invulnerable to attack. Their skill in combat is relatively weak, so
during combat they tend to stay behind the lines, casting their powers from a safe area away from the bloodshed.
CChhaaooss
We revel in the disorder of formless matter and infinite space.
We live in a state of eternal upheaval, following nothing and
everything. Our gods existed before the ordered universe and
will remain long after Urak returns to its lifeless, dead form.
- Quote from Xithander, Hrothark of Discord
Page 98

195
BBeelliieeffss aanndd RReelliiggiioonnss ooff UUrraakk
think the battle is lost. When they are not fighting, most of these
creatures live far from the barbarian villages in their own small clans.
Some claim to have seen a peculiar type of dragon in Chaos' territory, one with many heads that can attack multiple enemies at once.
Most people have dismissed this rumor while others assume that the
observer must have seen a group of dragons, perhaps a nest of newly
born hatchlings.
Although Chaotics tend to shun high magic, they do call on the
magical powers of their animal gods for assistance during battle.
There are a few Mages in the Chaos Faith. Their Mages, whom they
call Hrothark, rely on animal magics in war. Animal magic is incredibly powerful, but highly unpredictable and even the most skilled
Hrothark is hard pressed to control it. Hrothark and other Chaotics
have the power to Polymorph themselves and others, which is an
arcane skill few can master and even the Mages can not predict what
form the recipient will take on. Offensive spells take precedence, as
Chaotics are prone to first attack during warfare. To attack a party
of Chaos followers with a Mage is throw yourself into an unpredictable situation. There are reports of entire parties suddenly
becoming confused, wandering aimlessly on the battlefield while
Chaos warriors butcher them one by one. Some speak of magical
blades that appear out of nowhere, cutting down entire sections of
an army in a great swirling mass. And while they possess great artifacts, there are few outside the Faith that would be willing to use
them for fear of becoming victim to their unpredictable nature.
Myths abound of unlucky adventurers who, upon wearing a Chaotic
amulet, found themselves transformed into cow or chicken!
A note on the Elemental Faiths
Little is known of the Faiths of Fire, Water, Earth, and Air. The
Elemental religions are of a distant past, part of Urak's history that
has fallen into myth and legend. Most of the followers of the
Elemental Faiths were the Giants and creatures of the Second Age,
194
BBeelliieeffss aanndd RReelliiggiioonnss ooff UUrraakk
Chaotics prefer to rely on the strength of their swords and their
muscle to assure victory in battle. They love confrontation and prefer hand-to-hand combat to projectile weapons, which they are
hardly expert at. They clothe themselves in furs and animal skins
which, while not providing the greatest of protection, allow the
greatest freedom of movement. They worship a wide variety of gods
and goddesses, all of whom are associated with various animals and
creatures of Urak. Most clans identify with a particular god or goddess and consider other clans who follow that totem to be their
blood relations. Thrith, the wolf god, has the most followers. Thrith
is worshiped by Warriors and weaponsmakers as the god of battle
and blood. Gwynned, his wife, is a battle goddess also worshiped by
Warriors. She is a fiery she-wolf, lusty for battle and deadly against
her enemies. Danu, the Crow, is worshiped as the god of death. He
appears on the battlefield in the form of a carrion crow, feeding on
the flesh of the dead. Other Chaotic gods include the cow goddess
Brigid, goddess of the hearth and home; and the bear god, Visoth,
the god of strength.
A vast majority of Chaotics are human, and most of them are barbarians. They are generally a brutish group who value combat and
freedom. They prefer the sureness of a blade and a good horn of ale
to the vagueness of magic. Strength is everything to the followers of
Chaos, a fact well exemplified by their Barbarian Arena, a theater of
war where participants fight each other (as well as the occasional
slave and prisoner of war) to determine the mightiest among them.
They highly prize personal honor, and their society is based on trust
among everyone. A promise and a handgrip are as binding as a document to them. Betrayal is punishable by death, and Chaotics know
many ways to make a dishonest kinsman suffer.
A few creatures follow the Chaotic Faiths - Goblins, two headed
Ogres, and Cyclops. They generally keep to themselves until they
are called to battle. These creatures are very volatile, however, and
have been known to turn on a fellow Chaotic during combat if they
Page 99

197
BBeelliieeffss aanndd RReelliiggiioonnss ooff UUrraakk
of Eternal Flame, where the most skilled blacksmiths use the searing heat of magically permeated lava and flame to reshape objects. It
is from this forge where many of Fire's most powerful artifacts have
been born, objects such as the fearsome Staff of Incineration and the
mysterious Spitfire. A blade marked with the symbol of a Red
Dwarf is highly prized. When battle is imminent, Red Dwarves
appear in great numbers, to barter their weapons in exchange for a
chance at glory on the field. These beings are also skilled Thieves
and legendary dice players. Anyone who can beat a dwarf at dice
(and come out alive) is truly a superior gambler.
Fire creatures also include dragons, imps, and balrogs. Do not scoff
at my mentioning these beings, reader. Although you may believe
that they are the stuff of bedtime stories, they are very real - and
quite deadly. Only the most powerful Fire Mages can control a dragon, and it is said that Golgoth himself raises Fire Dragons in preparation for his final onslaught on Urak. Many consider the realm of
Fire to be the birthplace of all dragons and say that deep in most
remote part of that kingdom the mother of all dragons has her layer,
a place rumored to contain fantastic treasures. Imps are the dark
cousins of the elves, hiding in hot springs and foul-smelling mudpots. Balrogs are among the most elusive of the Fire creatures. These
cruel, demonic creatures despise the world of mortals and can only
be pressed into service by blackmail or threat of death.
Followers of Fire wear relatively little metallic armor and are themselves not the hardiest of soldiers. Their actions on the field of combat are very much likened to fire itself: quick, explosive bursts of
attacks. While Fire Mages have relatively few defensive spells they
are some of the most powerful enemies on a field of battle. The magics at their fingertips make them especially deadly. They have the
ability to shoot fire from their staves, heat the metallic armor of an
enemy soldier or cause the entire battlefield to burst into flames,
roasting everyone in the area. Fire Warriors are also much better at
offense than defense, so they work to dispatch their foes quickly on
196
BBeelliieeffss aanndd RReelliiggiioonnss ooff UUrraakk
and precious little from that time has survived to this day. But there
are still those who follow the Faiths, their beliefs passed down
through the generations and guarded like precious gems. Elemental
creatures are rarely seen by the mortal beings who inhabit the world
now, and some people today doubt that they even exist. But I can
assure you that they do.
FFiirree
It is difficult to write of the Fire worshippers, because so little is
known of them. Mortals seldom see the followers of Fire, simply
because they rarely leave the depths of their volcanic caverns that lie
deep within the belly of the Red Mountains, having a strong dislike
of any temperate or frozen region. Their religion was born in the
flames, during the Beginning when Urak was but a ball of writhing
fire, air, water, and earth. As Urak cooled and became a ball of lifesustaining matter, the Timeless Ones who were caught in the flames
receded to the caverns and volcanoes of Urak. There they created
the Great Fire Giants, who in turn created the Lesser Fire Giants. It
is these smaller beings who now inhabit the Red Mountains and who
are the most powerful followers of Fire.
The Lesser Giants revere their creators, to whom they constantly
give offerings of blood and flesh. They believe that the only way to
be granted the powers of Flame is to offer members of their group
back to the Great Fire Giants of their past. Elaborate ceremonies
(one in spring and fall) last for weeks, and all participate. The highlight of the festivities is the Abnegation, when one Giant voluntarily agrees to join the Great Fire Giants and is sacrificed to the gods.
There are mortal followers of Fire, mostly Dwarves who live in the
warm roots of the volcanic mountains. Little is known of them, save
that they are legendary smiths and weaponsmakers. Their weapons
can be made greater still when they are tempered by the Great Forge
Page 100

199
BBeelliieeffss aanndd RReelliiggiioonnss ooff UUrraakk
believe that they are the helpmates of Earth and Air, and they work
in conjunction with one another to complete the cycle of life on
Urak.
There is only one Water goddess in their religion: Synora. She is
believed to be one of the Great Water Giants, created by the
Timeless Ones to govern the waters of Urak. According to the
beliefs, Synora is the last surviving Giant from a terrible First Age
battle between Water and Fire. After all her kinsfolk were destroyed,
Synora hid in the depths of the Sea of Arnak. For thousands of years
she lived there, gathering power from the water and creating the
mortal creatures who now populate the lakes and seas. It is said that
she remains there, a queen of the watery depths, controlling her
minions and, when angry, causing the waves to crash. Mortal sailors,
regardless of their beliefs, always give offerings to Synora as they ply
the seas in their flimsy wooden ships. Better to be safe than sorry.
Those that worship Synora are themselves unmatched when it
comes to sea travel and are famed for their oceanic expeditions.
As far as anyone can tell, most of Water's followers are the creatures
of the sea. Among the greatest of these is the Kraken, a horrifying
creature well-known for attacking ships and swallowing sailors alive.
During sea battles, a Water army can usually influence a Kraken long
enough for it to fight on their side. The Giant Serpents of the oceans
are the stuff of legend; no one has actually seen one. There is a story
that, once a year, on the longest day of Urak's summer, the Serpents
rise to the surface and writhe in an eerie dance. A few sailors claim
to have seen this, but I suspect that any mortal who sees this spectacle would not live long enough after to tell about it. Occasionally,
a mariner has spouted a tale or two about gigantic spiders that can
walk across water as easily as land and whose webs are death for anyone unfortunate to be caught in them.
The few humans who ascribe to the Water Faith align with Synora
and are known as Viantha. The Viantha are a matriarchal culture ded-
198
BBeelliieeffss aanndd RReelliiggiioonnss ooff UUrraakk
the field of battle - before their foes have a chance to fight back. If
the battle seems lost, a Fire Warrior will still fight to the death, preferring the glory of blood to the shame of capture. No Fire Giant,
Mage or creature has ever been caught alive.
WWaatteerr
Lurking by the streams, rivers, lakes, and even under the waves of
the Sea of Arnak are the followers of Water. This religion is indelibly linked to the creatures who need water to sustain life - unlike
other Faiths, who simply ascribe to a set of beliefs. Although those
who follow the Water Faiths are mortal, few have been glimpsed by
humans. A few humans follow Water, but for the most part this religion is not practiced by a great many beings of Urak.
Water was born in The Beginning, when Golgoth and the Timeless
Ones battled for control of the universe. When water formed on
Urak, the Timeless Ones infused it with life-giving powers that are
vital to the web of living creatures on the planet. The Water Faith
follows the ideals of this life-giving strength. The disciples of Water
 Loading...