


SKIES OF ARCADIA-LEGENDS

FRONT COVER
IMPORTANT SAFETY INFORMATION: READ THE FOLLOWING
WARNINGS BEFORE YOU OR YOUR CHILD PLAY VIDEO GAMES
WARNING - Seizures
Some people (about 1 in 4000) may have seizures or black outs triggered by light
flashes, such as while watching TV or playing video games, even if they have
never had a seizure before.
Anyone who has had a seizure, loss of awareness, or other symptom linked to an
epileptic condition should consult a doctor before playing a video game.
Parents should watch when their children play video games. Stop playing and
consult a doctor if you or your child have any of the following symptoms:
Convulsions Eye or muscle twitching Loss of awareness
Altered vision Involuntary movements Disorientation
To reduce the likelihood of a seizure when playing video games:
Sit or stand as far from the screen as possible.
Play video games on the smallest available television screen.
Do not play if you are tired or need sleep.
Play in a well-lit room.
Take a 10 to 15 minute break every hour.
Playing video games can make your muscles, joints or skin hurt after a few hours.
Follow these instructions to avoid problems such as Tendinitis, Carpal Tunnel
Syndrome or skin irritation:
Take a 10 to 15 minute break every hour, even if you don’t think you need it.
If your hands, wrists or arms become tired or sore while playing, stop and rest
them for several hours before playing again.
If you continue to have sore hands, wrists or arms during or after play, stop
playing and see a doctor.
WARNING - Repetitive Motion Injuries
WARNING: PLEASE CAREFULLY READ THE PRECAUTIONS
BOOKLET INCLUDED WITH THIS PRODUCT BEFORE USING
YOUR NINTENDO ® HARDWARE SYSTEM, GAME DISC OR
ACCESSORY. THIS BOOKLET CONTAINS IMPORTANT
SAFETY INFORMATION.
1.
2.
3.
4.
5.
To avoid electric shock when you use this system:
Use only the AC adapter that comes with your system.
Do not use the AC adapter if it has damaged, split or broken cords or wires.
Make sure that the AC adapter cord is fully inserted into the wall outlet or
extension cord.
Always carefully disconnect all plugs by pulling on the plug and not on the cord.
Make sure the Nintendo GameCube power switch is turned OFF before removing
the AC adapter cord from an outlet.
Playing video games can cause motion sickness. If you or your child feel dizzy or
nauseous when playing video games with this system, stop playing and rest. Do
not drive or engage in other demanding activity until you feel better.
The Nintendo GameCube is a Class 1 laser product. Do not attempt to
disassemble the Nintendo GameCube. Refer servicing to qualified personnel only.
Caution - Use of controls or adjustments or procedures other than those specified
herein may result in hazardous radiation exposure.
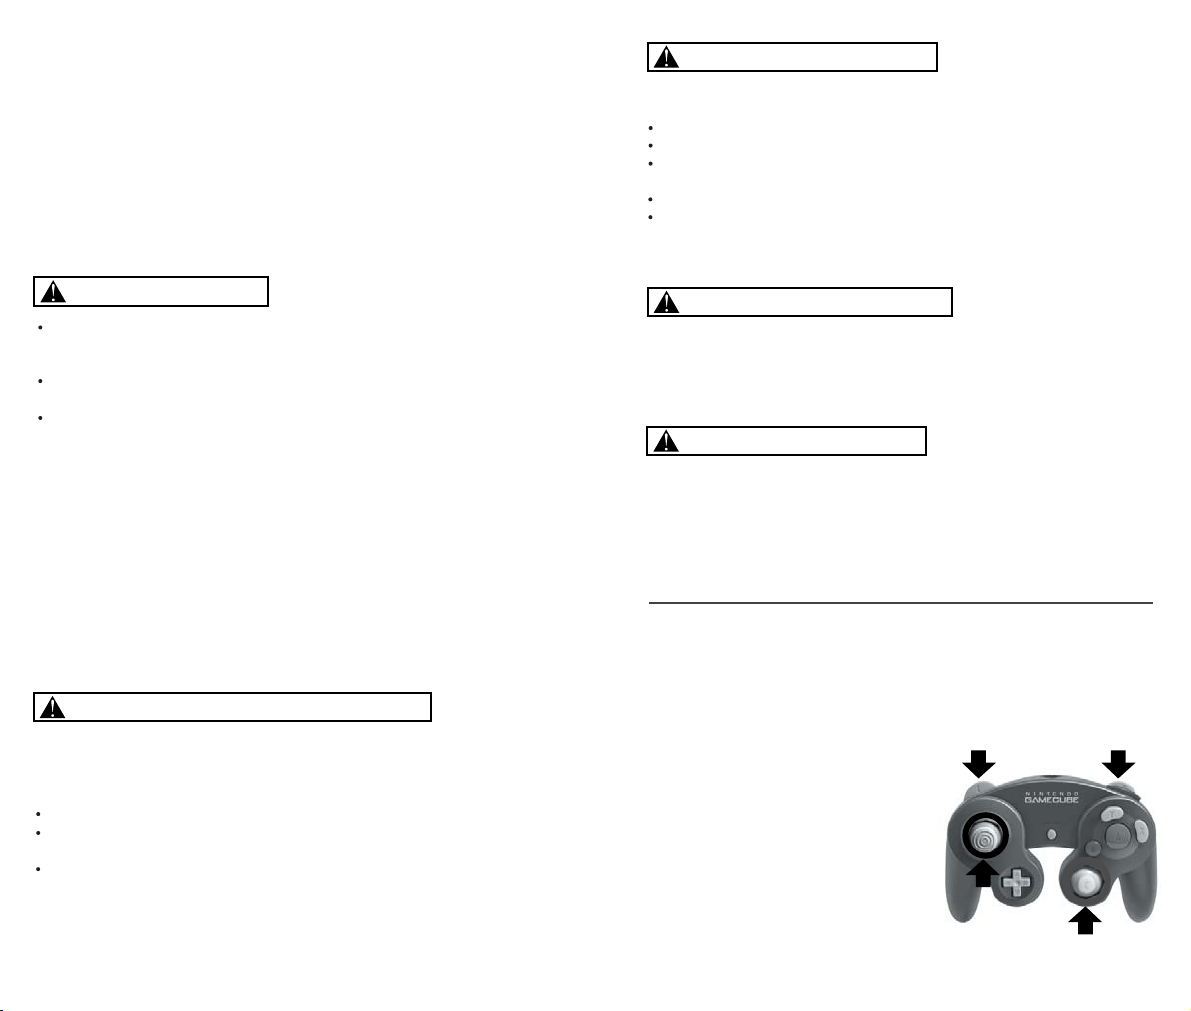
CONTROLLER NEUTRAL POSITION RESET
If the L or R Buttons are pressed or the Control Stick or C Stick are moved out of
neutral position when the power is turned ON, those positions will be set as the
neutral position, causing incorrect game control during game play.
To reset the controller, release all buttons
and sticks to allow them to return to the
correct neutral position, then hold down the
X, Y and START/PAUSE Buttons
simultaneously for 3 seconds.
WARNING - Electric Shock
CAUTION - Motion Sickness
CAUTION - Laser Device
L Button R Button
C Stick
Control
Stick
THIS PRODUCT HAS BEEN RATED BY THE
ENTERTAINMENT SOFTWARE RATING BOARD. FOR
INFORMATION ABOUT THE ESRB RATING, OR TO
COMMENT ABOUT THE APPROPRIATENESS OF THE
RATING, PLEASE CONTACT THE ESRB AT
1-800-771-3772, OR VISIT WWW.ESRB.ORG.
NINTENDO, NINTENDO GAMECUBE AND THE OFFICIAL SEAL ARE TRADEMARKS OF NINTENDO.
© 2001 NINTENDO. ALL RIGHTS RESERVED.
LICENSED BY
TEEN
THIS GAME REQUIRES A
MEMORY CARD FOR SAVING
GAME PROGRESS, SETTINGS
OR STATISTICS.
T
his official seal is your assurance that Nintendo has
reviewed this product and that it has met our standards for
excellence in workmanship, reliability and entertainment
value. Always look for this seal when
buying games and accessories to ensure
complete compatibility with your
Nintendo product.
All Nintendo products are licensed by sale for use only with other authorized
products bearing the Official Nintendo Seal of Quality.
®
Memory
Card
THIS GAME SUPPORTS
GAME PLAY USING ONE
PLAYER AND CONTROLLER.
1 Player
Mild Violence
Suggestive Themes
3
Thank you for purchasing Skies of Arcadia™ Legends. Please note that
this software is designed only for use with the Nintendo GameCube™.
Be sure to read this instruction booklet thoroughly before you start
playing.
CONTENTS
PROLOGUE . . . . . . . . . . . . . . . . . . . . . . . . . . . . . . . . . . . . . 4
SETTING UP . . . . . . . . . . . . . . . . . . . . . . . . . . . . . . . . . . . . . 5
CONTROLS . . . . . . . . . . . . . . . . . . . . . . . . . . . . . . . . . . . . . . 6
GAME STRUCTURE . . . . . . . . . . . . . . . . . . . . . . . . . . . . . . . . 8
SKIES (TRAVELING BY SHIP) . . . . . . . . . . . . . . . . . . . . . . . 10
VILLAGES & DUNGEONS . . . . . . . . . . . . . . . . . . . . . . . . . . 13
BATTLE MODES . . . . . . . . . . . . . . . . . . . . . . . . . . . . . . . . . . 20
STATUS MENU . . . . . . . . . . . . . . . . . . . . . . . . . . . . . . . . . . 30
CHARACTERS . . . . . . . . . . . . . . . . . . . . . . . . . . . . . . . . . . 36
THE WORLD . . . . . . . . . . . . . . . . . . . . . . . . . . . . . . . . . . . . 42
ITEMS, MAGICS & SUPER MOVES . . . . . . . . . . . . . . . . . . 46
KNOWLEDGE FOR THE AIR PIRATES . . . . . . . . . . . . . . . . 51
4
PROLOGUE
5
SETTING UP
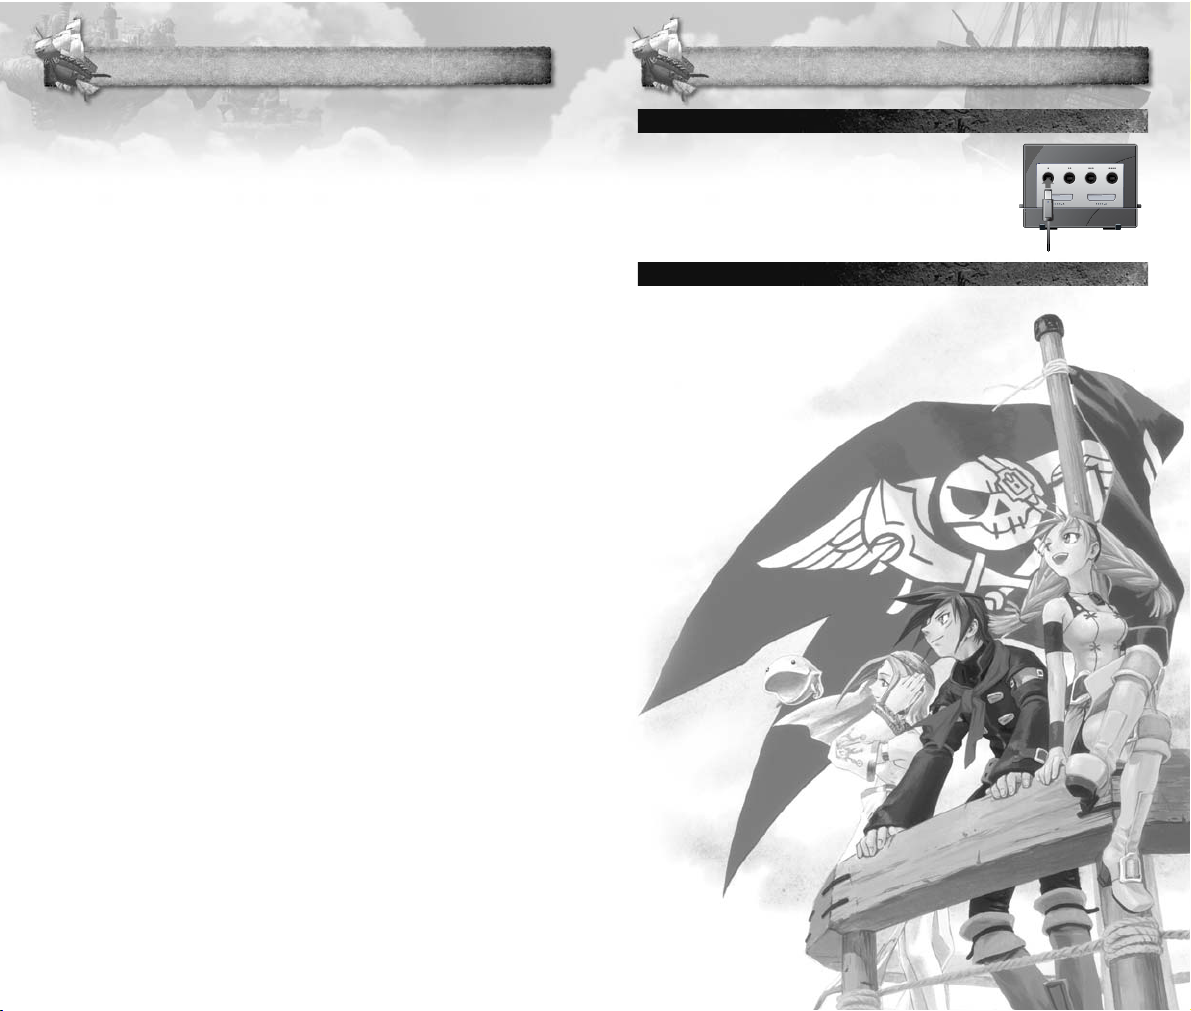
Skies of Arcadia Legends is a one player game.
Connect the Nintendo GameCube™ Controller to
Controller Socket 1.
HARDWARE SETUP
SAVE FILES
Skies of Arcadia Legends is a Nintendo GameCube™
Memory Card compatible game (Memory Card sold
separately). 3 blocks of free memory space are required
to create a save file, and up to 7 can be created, space
permitting. Never turn OFF the Nintendo GameCube™
power or remove the Memory Card while the game
data is being saved.
The skies that extend beyond limit.
People live on floating islands,
and fly their ships to the skies they have yet to see.
In this world, the “sky” is everything.
In the sky is where they live, trade, and battle.
The sounds of cannons roar in the sky,
and the emblem of the skull flutters.
Air Pirates — A band of armed folks
that display their belief in that flag,
search for uncharted worlds and stronger enemies,
and fly freely in the sky.
Young Air Pirate Vyse, together with his partner Aika,
attacks a battleship of the Valuan Empire.
The two meet a captive, a girl by the name of Fina.
Though she was rescued, she would not give anything
but her name...
Later, the Valuan Empire, the strongest military nation
in the world, sends a fleet to the Pirate Isle,
where young Vyse lives.
After a raid in midday, the Air Pirates are captured,
and Fina also was taken by the Empire.
Vyse and Aika, who escaped the raid,
vow to rescue their friends,
and head for the Valuan Empire.
There is an endless sky ahead of the two...
6
CONTROLS
7
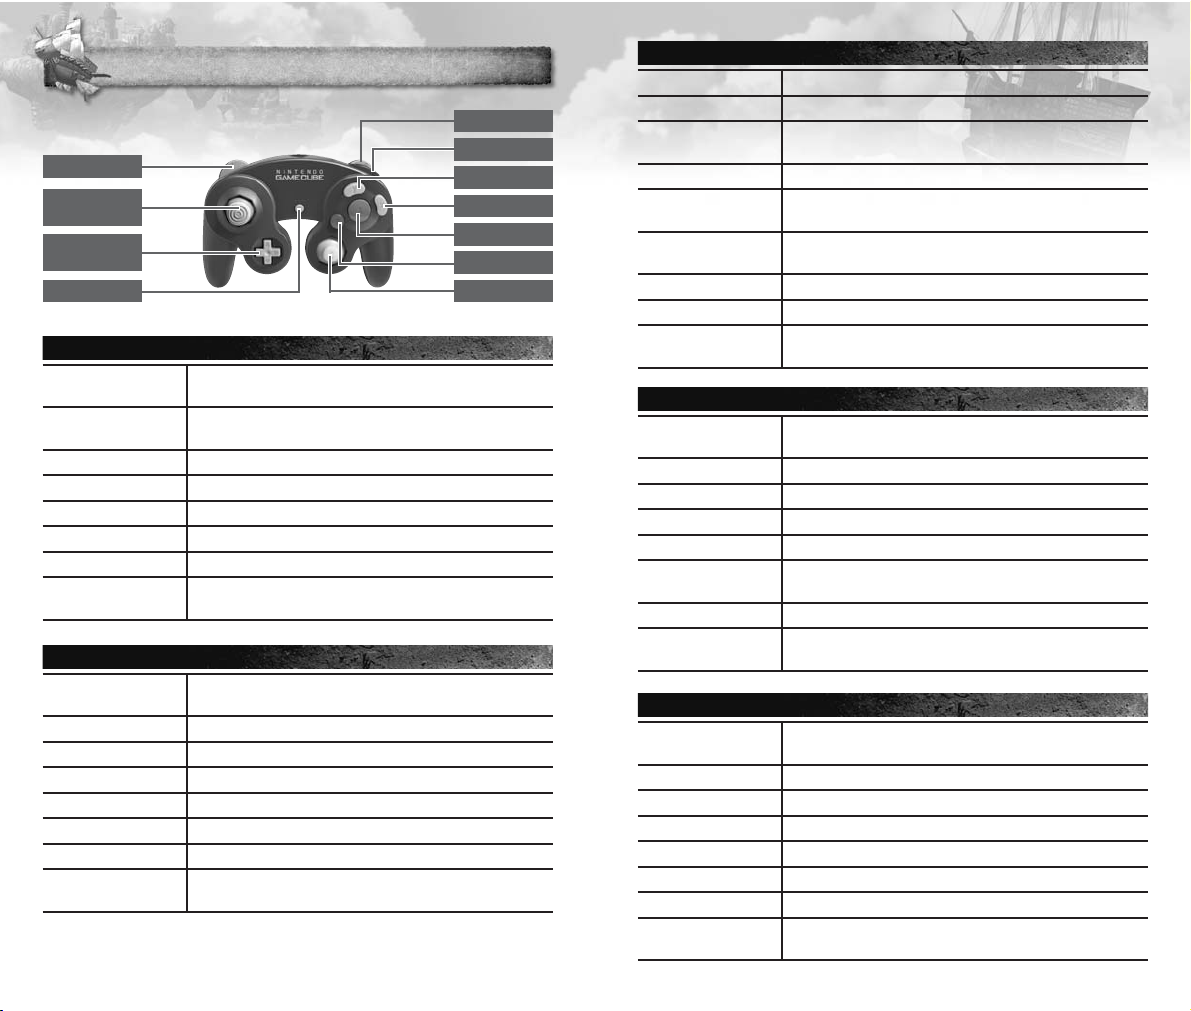
CONTROLS IN VILLAGES & DUNGEONS (NORMAL VIEW)
Control Stick or
+ Control Pad
Move the player character.
a Button
Inspect for items/Talk to people/Enter selection/
Read next line of text.
b Button
Cancel.
c Stick
Rotate camera angle.
l & r Buttons
Press simultaneously to reset camera position.
x Button
Display Status Menu Screen.
y Button
Change viewpoint to 1st person perspective.
z Button or
START/PAUSE
Show/hide Mini Map.
CONTROLS IN VILLAGES & DUNGEONS (1ST P. PERSPECTIVE)
Control Stick or
+ Control Pad
Change view angle.
a Button
Catch Moon Fish.
b Button
Not used.
c Stick
Not used.
l & r Buttons
Not used.
x Button
Not used.
y Button
Revert viewpoint to Normal View.
z Button or
START/PAUSE
Show/hide Mini Map.
CONTROLS IN THE AIR (MOVEMENT BY THE SHIP)
b Button
Cancel.
x Button
Display Status Menu Screen.
y Button
Display map.
z Button or
START/PAUSE
Display Menu.
Control Stick Move player’s ship.
+ Control Pad Change camera angle.
a Button
Inspect for items/Talk to other ship/Enter villages or
dungeons/Enter selection/Read next line of text.
l Button or
c Stick 2
Descend.
r Button or
c Stick 8
Ascend.
CONTROLS DURING NORMAL BATTLES
Control Stick or
+ Control Pad
Select command/Move cursor/Select target.
a Button
Enter selection.
b Button
Cancel.
x Button
Open Status Screen of the party members/
Display descriptions of items and magic.
y Button
Change Color Attribute of the weapon (p.24).
z Button or
START/PAUSE
Cancel animation of player’s Super Move
(only when pressed within the first few seconds).
CONTROLS DURING SHIP BATTLES
Control Stick or
+ Control Pad
Select command/Move cursor/Select target.
a Button
Enter selection.
b Button
Cancel.
c Stick
Not used.
l & r Buttons
Not used
x Button
Display descriptions of items, magic, and crews.
y Button
Not used.
z Button or
START/PAUSE
Not used.
c Stick
Rotate camera angle.
l & r Buttons
Press simultaneously to reset camera position.
Note: In this manual, unless indicated otherwise, the arrows
824 6
denote the direction of the Control Stick (and in most cases, + Control
Pad as well) pressed.
+
Control
Pad
Control
Stick
l
Button
START/PAUSE
c
Stick
b
Button
a
Button
x
Button
y
Button
z
Button
r
Button
8
GAME STRUCTURE
9
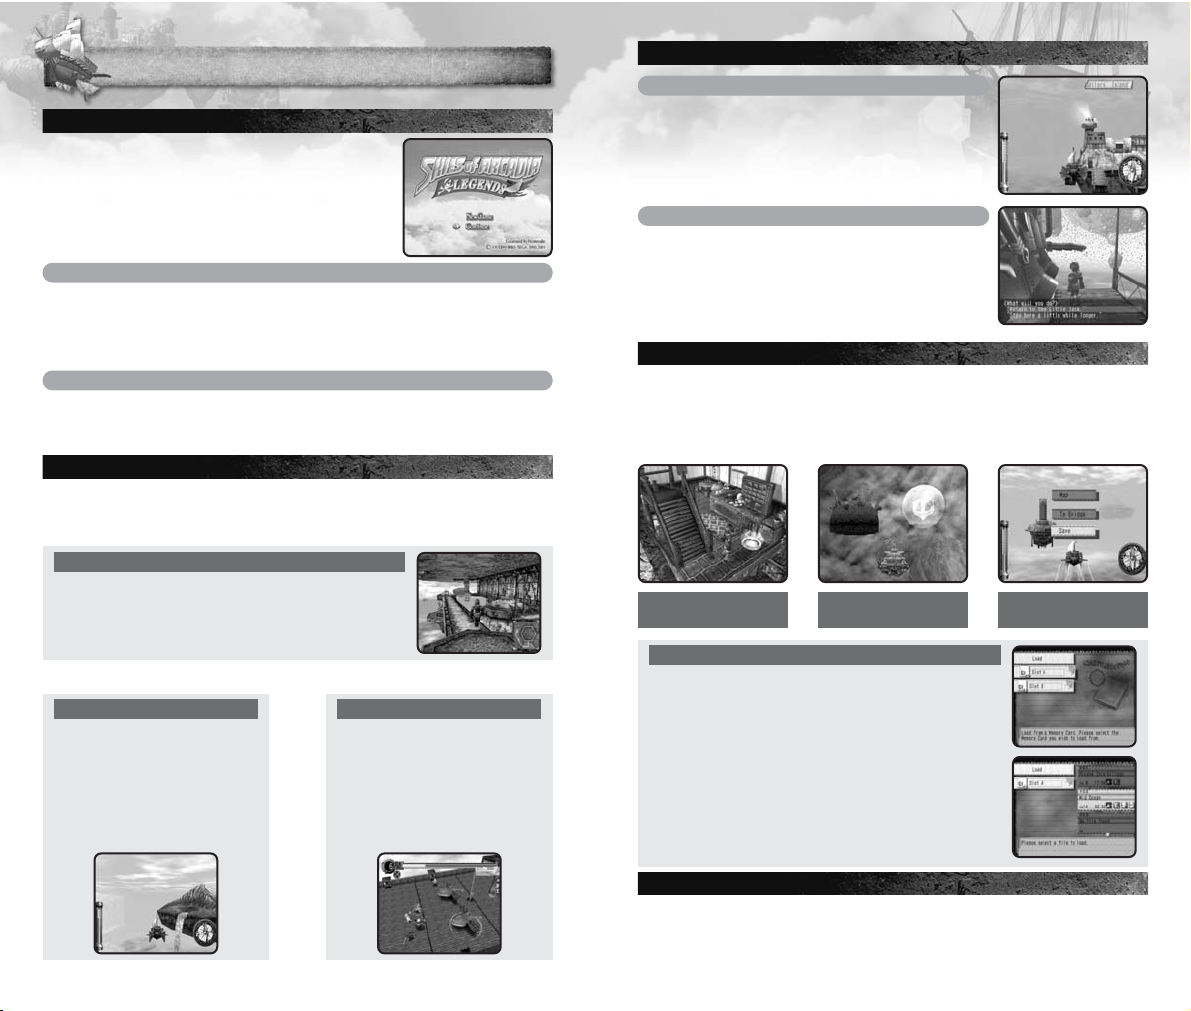
STARTING THE GAME
When the game is started, an opening demo will
play. After the demo, the Title Screen will be
displayed. Press START/PAUSE, and the Main
Menu will appear. Use 82 to select the menu
item, and press the a Button to enter your
selection.
New Game
Start the game from the beginning. You will also be asked whether to
enable the Rumble Feature of the Controller. Use
82 to select Enable
Rumble or Disable Rumble, and press the a Button. Afterwards, you
may modify this settings in the Options Menu (p.35).
Continue
Continue the game from previously saved location. You may select this
if you have a Memory Card with saved data inserted in either of the
Memory Card Slots.
RELATIONSHIP BETWEEN EACH MODE
Skies of Arcadia Legends is a game with skies and floating islands as its
main stage. Vyse, the main character, soars the skies with his aerial ship,
explores the villages and dungeons on foot, and engages in battle.
VILLAGES & DUNGEONS
In villages, buildings, and dungeons, Vyse walks
around on foot to explore and talk with other
characters (p.13).
SKIES BATTLE MODES
This is where Vyse travels
aboard the ship.
Depending on the size of
the ship and the
performance of the engine,
the area Vyse can explore
widens (p.10).
While exploring the
dungeons or traveling
aboard the ship, if Vyse
encounters enemies, a
battle begins. There are two
types of battles: Normal
Battles (p.20) and Ship
TRANSFERRING BETWEEN VILLAGES/DUNGEONS AND SKY
From the Sky to the Villages/Dungeons
Approach the island (village) or building with
your ship, and its name will be displayed. Press
the
a Button. If it is an island you can land on,
you will be transferred to the field within.
From the Villages/Dungeons to the Sky
If you are transferring from the village or dungeon
to the sky, approach the ship you will be boarding
(or exit from the village) and press the a Button.
A message appears to confirm that you wish to
return to your ship. Use 82 to select, and press
the a Button to enter.
SAVING THE GAME
GAME OVER
The game is over when the HPs of all characters in the party or the HP of
the ship drop to zero, and returns to the Title Screen. On battles against
bosses, however, you will be asked whether to continue the game or
not. Select either I never give up or I quit, and press the
a Button.
In the villages/dungeons and the dungeons for the ship, you may save
your progress only at the save points. Approach the save point, and
press the
a Button to switch to the Save Screen. During normal travel in
the sky, you may save anywhere. Press START/PAUSE to display the Menu,
and select Save to switch to the Save Screen.
Save Point in the
Village/Dungeon
Save Point
in the Sky
While traveling
by Ship
HOW TO SAVE/LOAD
First, use 82 to select the Memory Card, and
press the a Button. You may not, however, be
able to select if you only have one Memory
Card inserted in either of the Memory Card Slots.
Next, use 82 to select the file to save/load.
When saving, you will be asked to confirm
whether to save on this file, or to overwrite if the
previous data is present (the previous data will
be erased if overwritten). Select YES/NO, and
press the a Button to enter.
t y t y
i
u
10
SKIES (TRAVELING BY SHIP)
11
Aboard the ship, you will travel and explore the skies. The areas you
can travel to are limited with your first ship, but depending on the scale
of the ship, and with modifications, you can gradually increase the
areas in which you can travel. See p.7 for the controls of the ship.
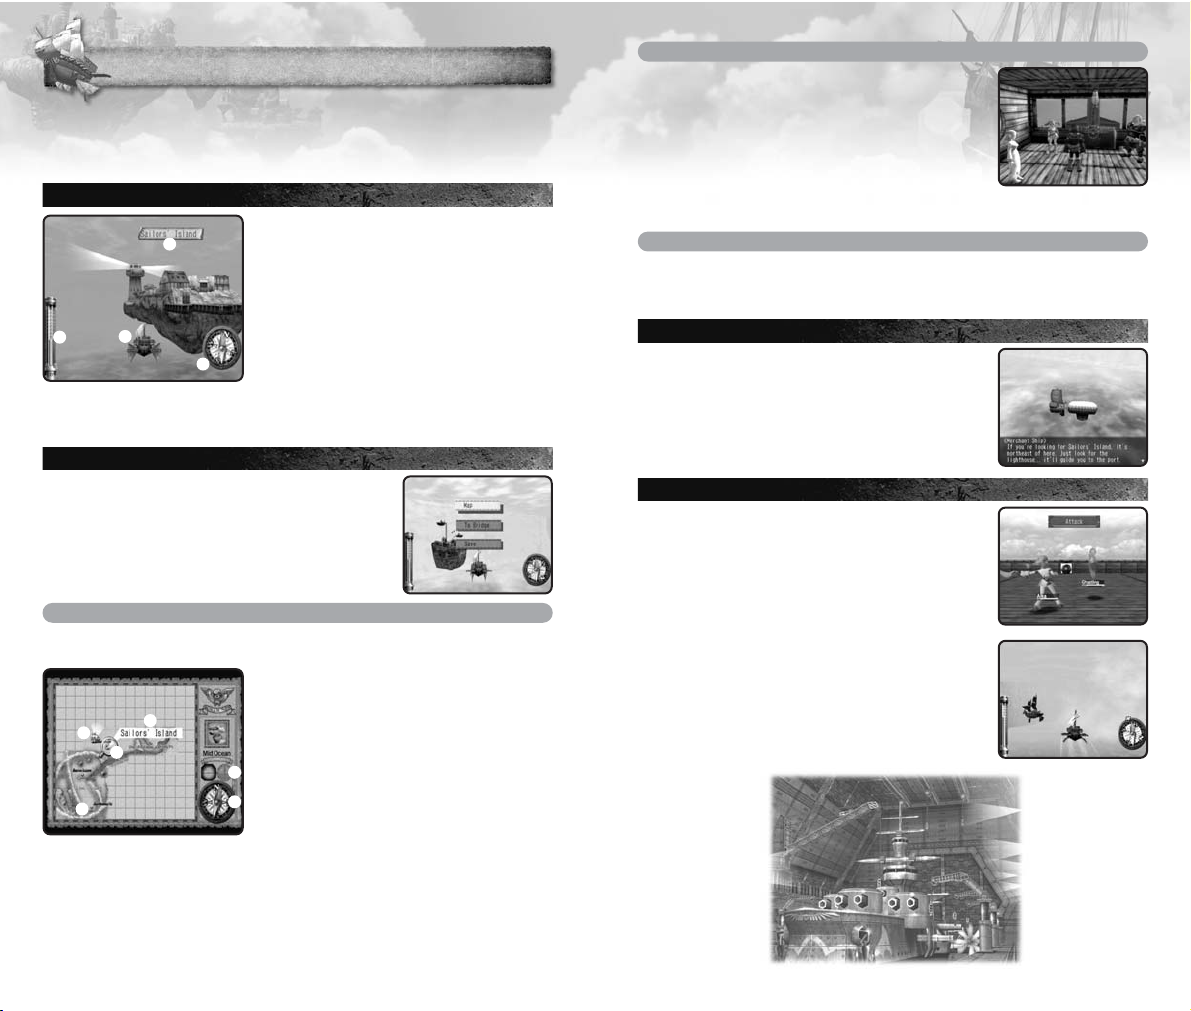
DISPLAY
1 NAME OF ISLAND/VILLAGE/BUILDING
If you approach an island, village, or
building you already know, its name will
be displayed. Press the a Button when
the name is displayed to land.
2 ALTIMETER
Displays the current altitude you are flying
at.
3 YOUR SHIP
The ship you are currently aboard. Your
ship changes as the story progresses.
4 COMPASS
Displays the direction you are flying.
MENU SCREEN
Aboard the ship, press START/PAUSE to display the
Menu. Use 82 to select the menu item, and
press the a Button to enter.
MAP
You can verify your location and the direction that you are flying. The
map shows only the areas you have already explored.
1 SHIP
Your current location on the map.
2 MAGNIFYING LENS
Use the Control Stick/+ Control Pad to
move the magnifying lens to locate and
verify the places you have visited.
3 NAME OF ISLAND/VILLAGE/BUILDING
Displays the name of the island/village or
the place the magnifying lens is showing.
4 ISLAND/VILLAGE/BUILDING
The islands, villages, and buildings you have already visited will be
indicated with red pins.
5 ALTIMETER
Indicates the altitude you are flying at.
6 COMPASS
Indicates the direction your ship is facing.
To Bridge
You can move inside the ship and talk to your
crew. (On some ships, you may not be able to
select this.) The conversation may contain
important hints, so use this as a reference. The
method of movements and conversing is the
same as in “VILLAGES AND DUNGEONS” (p.13).
Also, press the
x Button to display the Status
Menu. To return to the skies, examine the helm at
the bridge. You will be asked whether to depart
Save
You can save the progress of the game up to this point. Please see
“SAVING THE GAME” (p.9) on how to save. Note, however, that in certain
areas, you can only save at Save Points.
CONVERSATIONS WITH OTHER SHIPS
Up in the skies, there are several ships other than
the Air Pirates. With private and commercial
ships, approach and press the a Button to talk to
them. With the ships belonging to the Imperial
Armada or opposing pirates, however, you may
get into a battle.
ENCOUNTERING ENEMIES
If you encounter an enemy that dwells in the
area, the game enters the Battle Mode. The battle
occurs on the deck of the ship Vyse is aboard,
fighting in the same manner as the normal battles
inside the dungeons. Please see p.20 for how to
do battle.
When you encounter the ships belonging to the
Imperial Armada or opposing pirates, you will
engage in ship battle. There will be a warning
mark “!!” displayed on your compass when an
enemy ship is close by. Please see p.25 for how
to do battle.
1
1
2
3
4
2
3
4
5
6
12 13
VILLAGES & DUNGEONS
DISCOVERIES
In this long adventure, Vyse and friends travel to
various places in the world, including uncharted
skies and islands no one in this world has ever
explored before. You could discover legendary ruins
or new species of creatures. Guide your ship to new
areas, and examine places. If there is a Discovery, it
will be displayed. As the discoverer, Vyse and friends
will leave their names in the history of this world.
How to Make a Discovery
It is extremely difficult to make Discoveries if
you simply wander around in the vast skies.
Follow the basic steps below and try to
complete all Discoveries.
Step 1
Gather Information
To gather information on potential Discoveries, go to
Sailors’ Guild (p.15) at villages. Pay a certain amount of
money, and you can buy information. There are also
cases where you can earn information from villagers
and other sailors. Try talking to various people.
Step 2
Search and Discover
Based on information you gathered, search the
area. When there is potential Discovery, the
compass starts to turn rapidly. Press the a Button,
and the Discovery will be revealed.
Step 3
Sell Information
If you make a Discovery, go to the Sailors’ Guild and
sell information. Note that Vyse and friends are not
the only ones making Discoveries. If a rival explorer
sells the information before you do, your information
will be bought at a cheaper price.
View Discoveries in Your Journal
If you make a Discovery, it will be added to your
list of Discoveries in the Status Menu. You can
check this at any time. Please see p.34 for more
on the Journal.
MAKING DISCOVERIES TO EARN MONEY
When you sell information on your Discovery, you
will be paid according to its worth as well as on
quickness. It takes a lot of money to equip yourself
as well as to modify your ship/base. Use this as
your precious source to earn money.
Walk around in the village to collect information and shop for items, or
explore the dungeons. See p.6 for the controls in villages and dungeons.
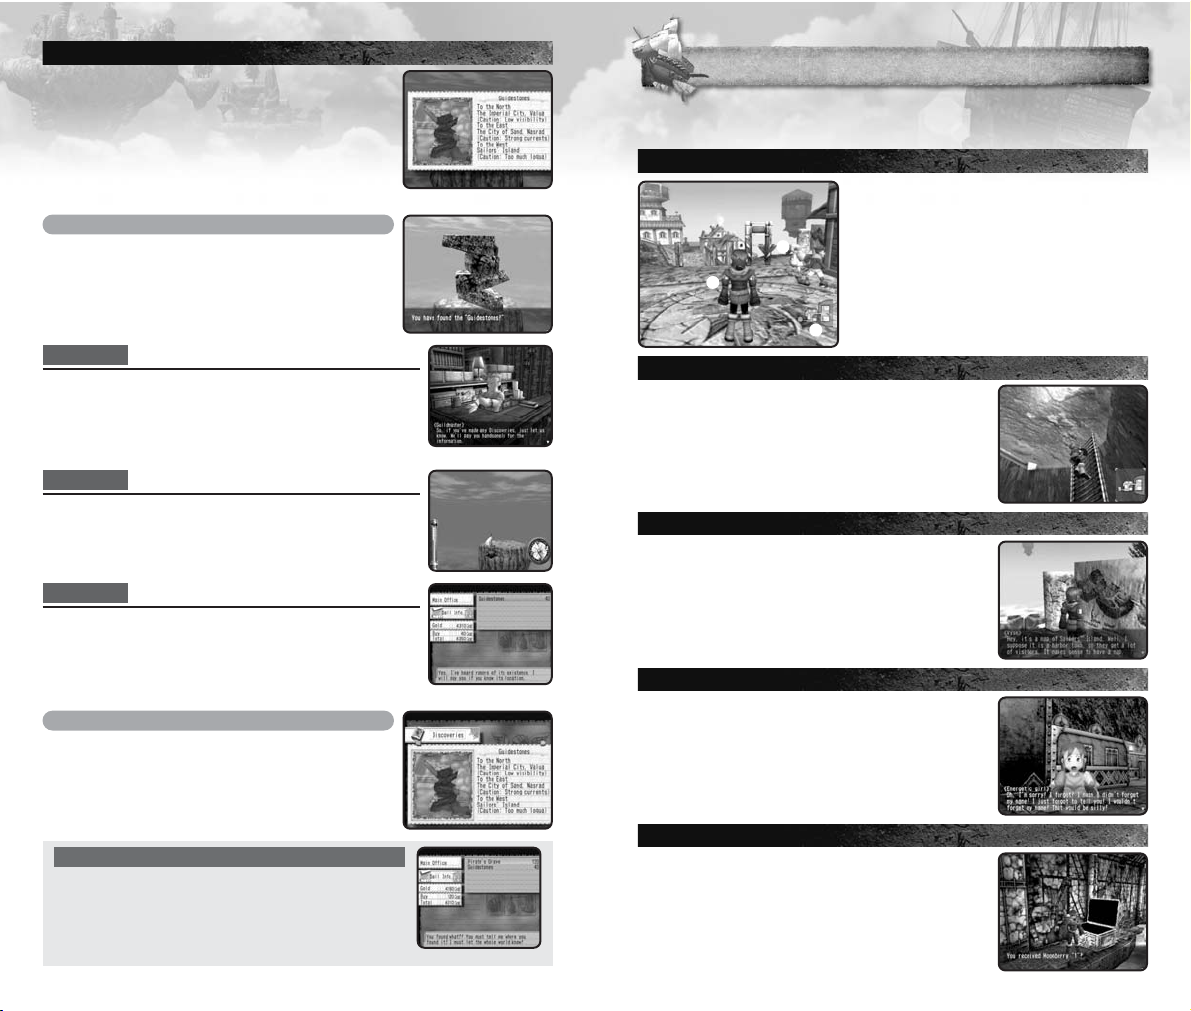
DISPLAY
1 PEOPLE IN THE VILLAGE
These are villagers and/or other sailors.
You can gather information from them.
2 VYSE
The player character you are controlling.
3 MINI MAP
The map of the field you are currently in.
The red ▲indicates the current location
and direction you are facing.
ASCENDING/DESCENDING ON LADDERS AND POLES
Press the a Button in front of a ladder or a
pole to grab onto it. In this state, use 82 to
ascend or descend. If you approach either
end of the ladder or the pole, Vyse dismounts
from it automatically.
EXAMINING
Press the a Button: in front of shop/room door to
open it and enter; in front of strange device to
activate it; or at such places as in front of
bookshelves, signs or other objects to examine
that area.
TALKING TO PEOPLE
In front of the characters you can talk to, press
the a Button to start conversations. There are
cases where, by talking, the character may join
you as a party member or as a crew member.
Also, there are cases where you may have to
select your replies.
OBTAINING ITEMS
In front of a treasure chest, press the a Button to
open it and obtain the item inside. However, if
the number of that item exceeds the maximum
number (99) you can hold, you will not be able
to obtain it.
1
2
3
14 15
SHOPPING
Go into the shops in the village, and you can
buy and sell weapons and items. In front of the
merchant, press the a Button to talk to him/her.
Use 82 to select the menu item, and press the
a Button to enter.
Buy and sell weapons/items/ship parts
You can buy and sell weapons, items, and ship
parts. Use
82 to select from Buy, Sell, and Exit,
and press the a Button to enter. Follow the steps
below to buy or sell items. In each step (except
3), press the b Button to return to the previous
step/menu.
Step 1
Select Item
Use 824 6 to select the item to buy/sell, and
press the
a Button to enter. If there are more items
than what are listed, use
46to change list. When
purchasing weapons or armors, a reference to who
can equip that item, and the amount of changes in
parameters when that item is equipped will be displayed. (Value of
increase will be displayed in green, decrease in red. Press the
x
Button to switch between the displays of the value differences, the
potential amount when it is equipped, and the data of items currently
equipped.) Use this as a guide to your purchase. Note also that, as the
story progresses, the list of available items may change.
Step 2
Select Amount
Select the number of items you wish to buy or sell. Use 82 to
increase/decrease the number by one, 46to increase/decrease by
ten, and press the a Button to buy/sell.
Step 3
Equip Item
After the purchase, you can immediately equip
weapons, armors, accessories, or ship parts. With
change in parameters as reference, use 82 to
select the character you wish to equip that item with
(in case of weapon, use 46to select its color
attribute), and press the a Button to enter. The items that character was
previously equipped with will not be lost.
Talk about various things
You can talk to the merchant. You can get
advice regarding the items or information that
can be useful in your adventure. There are also
cases where, by talking, you might be able to
obtain items that are not on the normal list.
Leave
Leave the shop.
TAKING A REST
At an inn, you can rest yourself. There is a Save
Point located inside the inn, so you can save
your progress there. To take a rest, approach the
innkeeper, and press the a Button to talk. Use
82 to select Stay the night/Leave, and press
the a Button to enter. By resting, the characters’
HP, MP, and the ship’s HP will be fully restored.
SAILORS’ GUILD
At Sailors’ Guilds, located in several villages in the
world, you can buy and sell information regarding
the Discoveries. To buy or sell information,
approach the Guildmaster and press the a Button
to talk to him. Use 82 to select Buy and sell
Discovery information/Talk about various
things/Leave and press the a Button to enter.
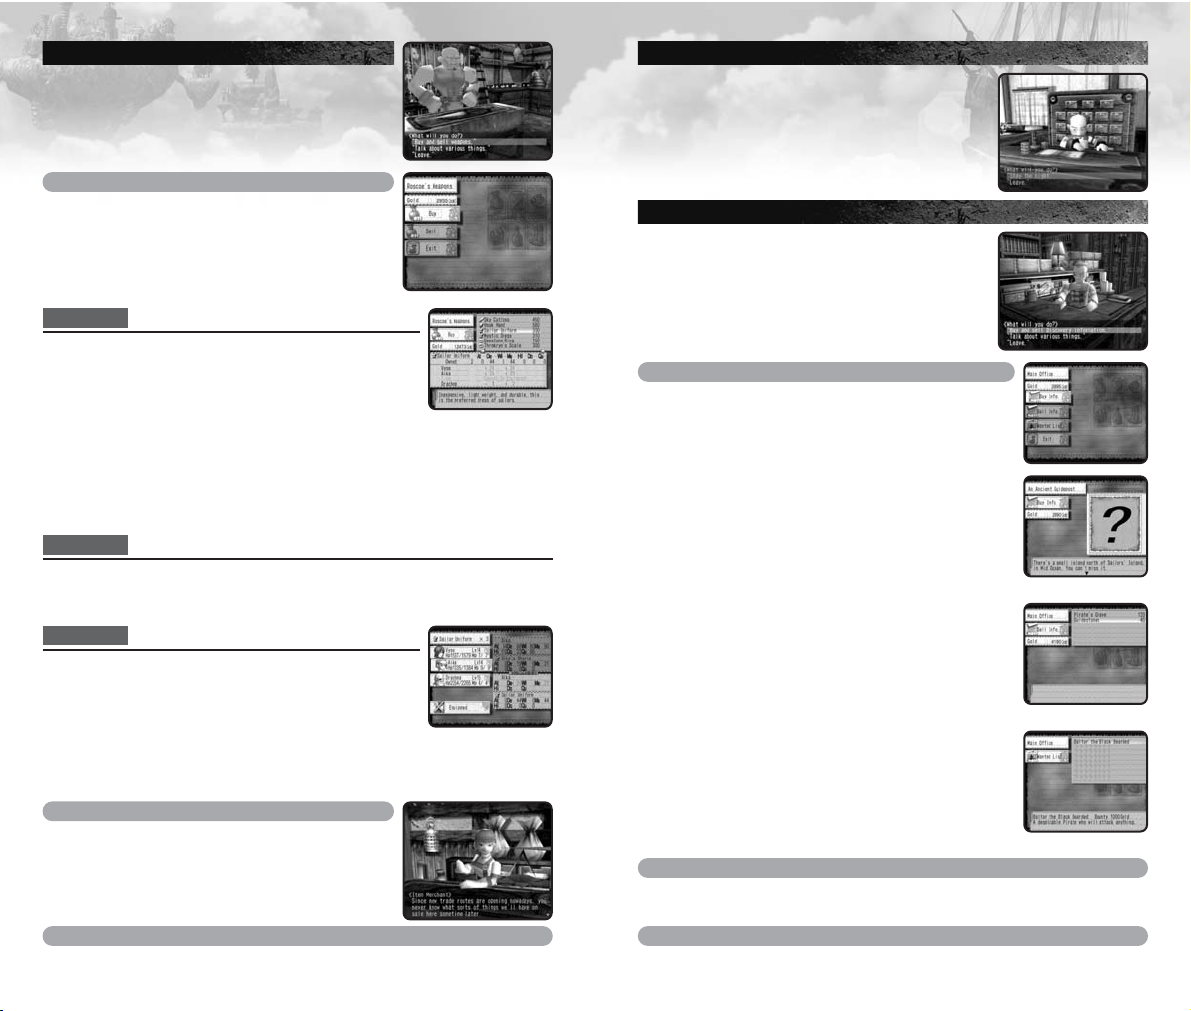
Buy and sell Discovery information
When this is selected, you will have the option to
select Buy Info., Sell Info., Wanted List and Exit.
Use
82 to select menu item and press the a
Button to enter.
Talk about various things
You can talk to the Guildmaster for information regarding the Guild.
You may at times gain information that can help you in your adventure.
Leave
Leave the Guild.
● Buy Info.
You can buy information regarding possible
Discoveries. Use
82 to select information you wish
to buy, and press the a Button to enter. If there is
more information than what is listed on the screen,
use 46to change the list. The detailed information
is expensive, but the rumors are cheap.
● Sell Info.
Use 82 to select the information you wish to sell, and
press the a Button to enter. If there is more information
than what is listed on the screen, use 46to change
the list. Note that the value of information will drop if
you were very late in discovering, or wasted a long
time before selling information.
● Wanted List
You can view a list of Black Pirates that have bounties
put out. Use 82 to select the Black Pirate, and press the
a Button to view his information. While the information
is displayed, use 46to display previous/next.
Note: To collect bounty, defeat the Black Pirate on
the list, and simply report it back to the Sailors’ Guild.
 Loading...