


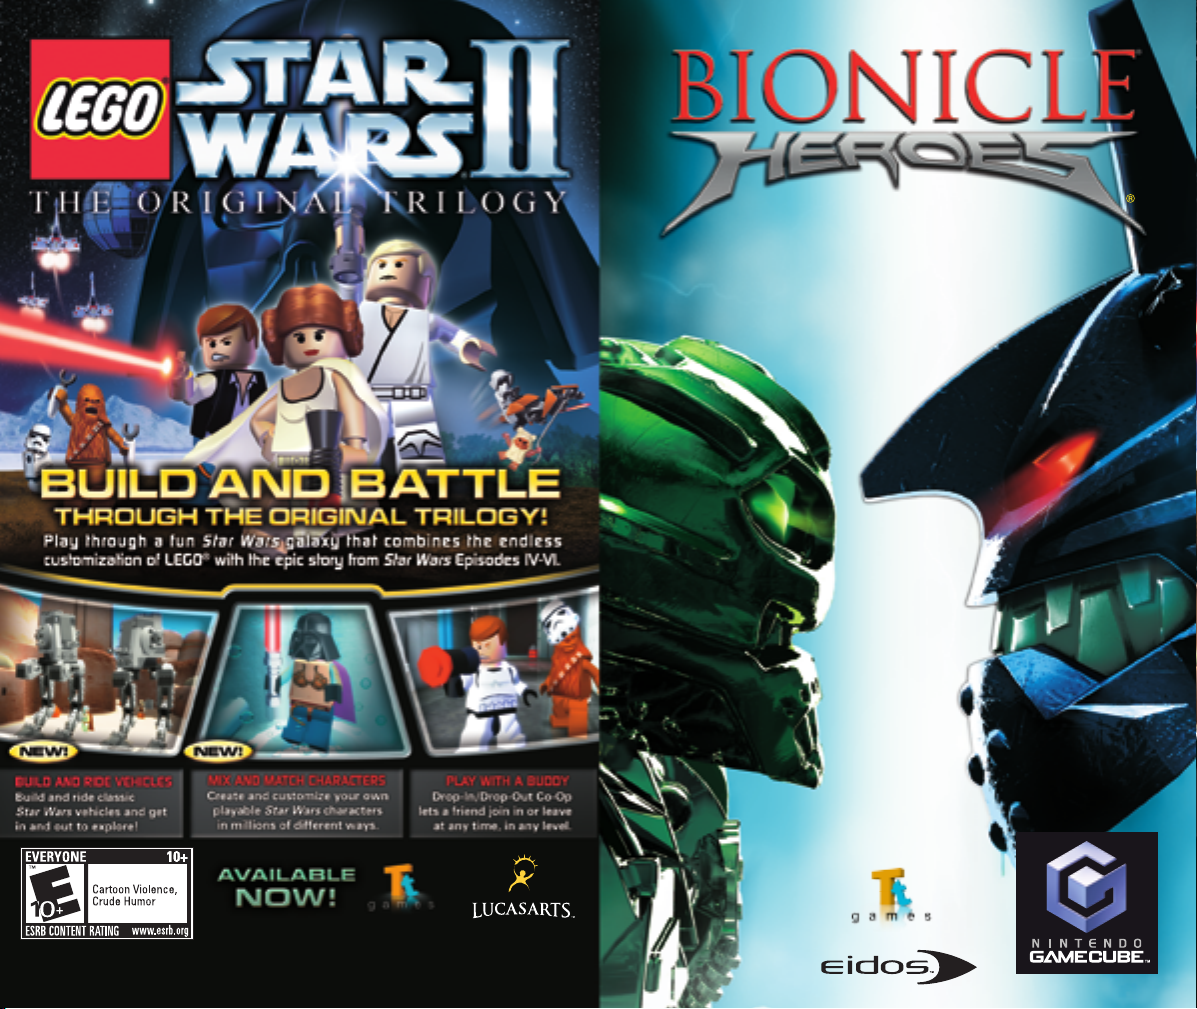
BIONICLE HEROES
PRINTED IN USA. LUCASARTS AND THE LUCASARTS LOGO ARE REGISTERED TRADEMARKS OF LUCASFILM LTD. © 2006
LUCASFILM ENTERTAINMENT COMPANY LTD. OR LUCASFILM LTD. AND ® OR TM AS INDICATED. ALL RIGHTS RESERVED. LEGO,
THE LEGO LOGO AND THE MINIFIGURE ARE TRADEMARKS OF THE LEGO GROUP. © 2006 THE LEGO GROUP.
PBIONGUS03 EIDOS Inc. 651 Brannan St., San Francisco, CA 94107.
INSTRUCTION BOOKLET
S
y
e
A
d
.
:
n
T
:
S
.
P
.
D
.
P
.
T
PLEASE CAREFULLY READ THE SEPARATE HEALTH AND
SAFETY PRECAUTIONS BOOKLET INCLUDED WITH THIS
PRODUCT BEFORE USING YOUR NINTENDO ® HARDWARE
SYSTEM, GAME DISC OR ACCESSORY. THIS BOOKLET
CONTAINS IMPORTANT HEALTH AND SAFETY INFORMATION.
IMPORTANT SAFETY INFORMATION: READ THE FOLLOWING
WARNINGS BEFORE YOU OR YOUR CHILD PLAY VIDEO GAMES
WARNING - Seizures
ome people (about 1 in 4000) may have seizures or blackouts triggered b
Some people (about 1 in 4000) may have seizures or blackouts triggered by
light flashes or patterns, such as while watching TV or playing video games,
light flashes or patterns, such as while watching TV or playing video games,
even if they have never had a seizure before.
ven if they have never had a seizure before.
Anyone who has had a seizure, loss of awareness, or other symptom linked
nyone who has had a seizure, loss of awareness, or other symptom linke
to an epileptic condition should consult a doctor before playing a video game
to an epileptic condition should consult a doctor before playing a video game.
Parents should watch when their children play video games. Stop playing
Parents should watch when their children play video games. Stop playing
and consult a doctor if you or your child have any of the following symptoms
and consult a doctor if you or your child have any of the following symptoms:
Convulsions Eye or muscle twitching Loss of awareness
Convulsions Eye or muscle twitching Loss of awareness
Altered vision Involuntary movements Disorientatio
Altered vision Involuntary movements Disorientation
o reduce the likelihood of a seizure when playing video games
To reduce the likelihood of a seizure when playing video games:
it or stand as far from the screen as possible
Sit or stand as far from the screen as possible.
lay video games on the smallest available television screen
Play video games on the smallest available television screen.
Do not play if you are tired or need sleep.
o not play if you are tired or need sleep
Play in a well-lit room.
lay in a well-lit room
Take a 10 to 15 minute break every hour.
ake a 10 to 15 minute break every hour.
WARNING -
Playing video games can make your muscles, joints, skin or eyes hurt after a
few hours. Follow these instructions to avoid problems such as tendinitis, carpal
tunnel syndrome, skin irritation or eyestrain:
Avoid excessive play. It is recommended that parents monitor their children for
appropriate play.
Take a 10 to 15 minute break every hour, even if you don't think you need it.
If your hands, wrists, arms or eyes become tired or sore while playing, stop and
rest them for several hours before playing again.
If you continue to have sore hands, wrists, arms or eyes during or after play, stop
playing and see a doctor.
Repetitive Motion Injuries and Eyestrain
WARNING - Electric Shock
To avoid electric shock when you use this system:
Do not use the Nintendo GameCube during a lightning storm. There may be a
risk of electric shock from lightning.
Use only the AC adapter that comes with your system.
Do not use the AC adapter if it has damaged, split or broken cords or wires.
Make sure that the AC adapter cord is fully inserted into the wall outlet or
extension cord.
Always carefully disconnect all plugs by pulling on the plug and not on the cord.
Make sure the Nintendo GameCube power switch is turned OFF before removing
the AC adapter cord from an outlet.
CAUTION - Motion Sickness
Playing video games can cause motion sickness. If you or your child feel dizzy or
nauseous when playing video games with this system, stop playing and rest. Do
not drive or engage in other demanding activity until you feel better.
CAUTION - Laser Device
The Nintendo GameCube is a Class I laser product. Do not attempt to
disassemble the Nintendo GameCube. Refer servicing to qualified personnel only.
Caution - Use of controls or adjustments or procedures other than those specified
herein may result in hazardous radiation exposure.
CONTROLLER NEUTRAL POSITION RESET
If the L or R Buttons are pressed or the Control Stick or C Stick are moved out of
neutral position when the power is turned ON, those positions will be set as the
neutral position, causing incorrect game control during game play.
To reset the controller, release all buttons and
sticks to allow them to return to the correct
neutral position, then hold down the X, Y and
START/PAUSE Buttons simultaneously for 3
seconds.
L Button R Button
Control
Stick
C Stick
T
IMPORTANT LEGAL INFORMATION
Copying of any video game for any Nintendo system is illegal and is strictly
prohibited by domestic and international intellectual property laws. “Back-up” or
“archival” copies are not authorized and are not necessary to protect your software.
Violators will be prosecuted.
This video game is not designed for use with any unauthorized copying device
or any unlicensed accessory. Use of any such device will invalidate your Nintendo
product warranty. Nintendo (and/or any Nintendo licensee or distributor) is not
responsible for any damage or loss caused by the use of any such device. If use
of such device causes your game to stop operating, disconnect the device carefully
to avoid damage and resume normal game play. If your game ceases to operate
and you have no device attached to it, please contact the game publisher’s
“Technical Support” or “Customer Service” department.
The contents of this notice do not interfere with your statutory rights.
This booklet and other printed materials accompanying this game are protected
by domestic and international intellectual property laws.
Welcome, Hero! 2
What YOU Have To Do 2
Controls 3
Menu Controls 3
In-Game Controls 3
Main Menu 4
Matoran Enclave 4
Zone/Level Select Chamber 5
Levels 5
Shop 6
Character Showcases 6
Defeated Piraka 7
Trophy Cave 7
Game Screen 8
LEGO Counter 8
Health Bar 9
Hero Mode Charge 9
TOA Masks 10
Scanner 10
The TOA 11
Jaller (Red) 11
Hahli (Blue) 11
Kongu (Green) 11
Matoro (White) 11
Hewkii (Brown) 12
Nuparu (Black) 12
TOA Upgrades 12
Combat 13
Enemy Health Bar 13
Auto-Target 13
Switching TOA 13
Pick-ups 14
LEGO Pieces 14
Hearts (Extra Health) 14
Unlockables 15
BIONICLE Collectibles 15
Canisters 15
More Information 15
Piraka 15
Free Play 15
Status Screen 16
Saving and Loading 16
Pausing the Action 16
Credits 17
he official seal is your assurance
that this product is licensed or
manufactured by Nintendo. Always
look for this seal when buying video
game systems, accessories, games
and related products.
Nintendo does not license the sale or use of products without the Official Nintendo Seal.
THIS GAME SUPPORTS
GAME PLAY WITH ONE
PLAYER AND CONTROLLER.
1 Player
THIS GAME REQUIRES A
MEMORY CARD FOR SAVING
Memory
GAME PROGRESS, SETTINGS
OR STATISTICS.
Card
Fantasy
Violence
LICENSED BY
NINTENDO, NINTENDO GAMECUBE AND THE OFFICIAL SEAL ARE TRADEMARKS OF NINTENDO.
© 2001 NINTENDO. ALL RIGHTS RESERVED.
32
Imagine the island of Voya Nui. You are on a beach at the foot of a
monstrous cliff. A line of meandering footprints leads you to a figure
collapsed on the sand. As you approach, a deep rumble of thunder
echoes in the distance. Exhausted, a Matoran looks up — at first
fearful — but then understanding,
“I know who you are. You are the Hero,” he says. You smile. With
this encouragement the Matoran tells you the story.
“This land has been invaded by the despicable Piraka. They have
stolen the Mask of Life! The Piraka do not know the Mask’s real
power, but in spite of that they have used it to take control of all the
creatures on the island.
“You are the Hero. You must track down and defeat the Piraka,
restore the Mask and bring peace back to Voya Nui. Here….”
The Matoran reaches into a large bag lying next to him and pulls
out an ornate TOA Inika Mask.
“Collect and use the powers that the TOA Inika Masks will grant
you to save Voya Nui. Hero, this is your quest!”
What YOU Have To Do
BIONICLE Heroes™lets you take on the guise of the heroic TOA
Inika and control their unique powers to overcome a host of different
enemies. Many dangerous, aggressive BIONICLE creatures, created by
the evil power of the Piraka, exist on the island. You must defeat
hordes of enemies in each of the six elemental Zones of the island
and then defeat the Piraka to win back the Mask of Life and return
the island to peace.
Your power (as the Hero) comes from the six different TOA Inika
Masks that you can find scattered throughout each level. Once you
put on a TOA Mask, you assume the powers and ability of that TOA.
Don’t worry — even if the task seems too difficult, you will not be
left without help. BIONICLE Heroes
™
will always prompt you
on the best course of action to take: either indicating which TOA
to use to make the most of a special ability, or pointing you
in the correct direction to get through a level.
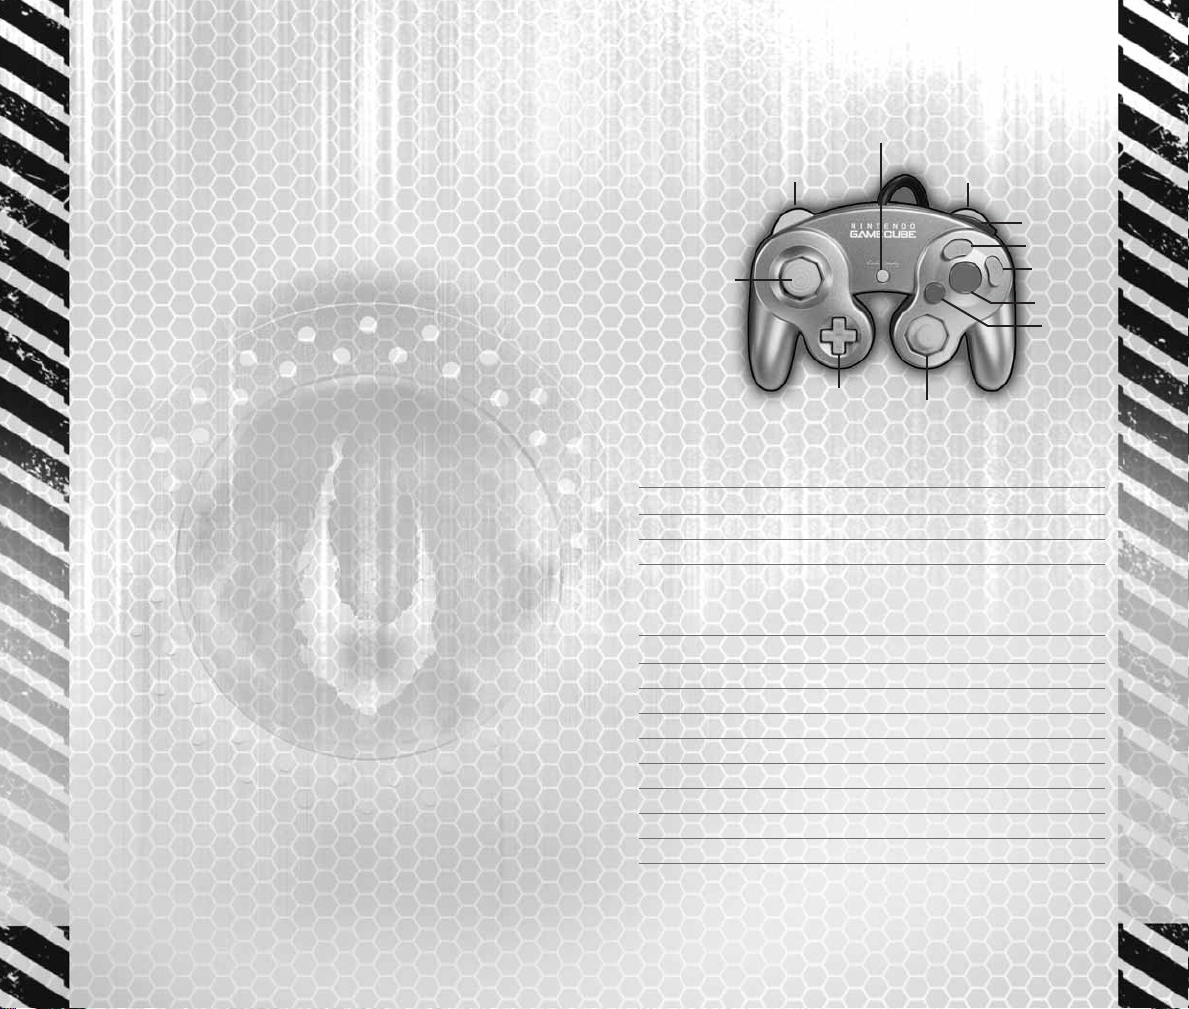
Welcome Hero! Controls
+Control Pad
Control Stick
L Button
START/PAUSE
R Button
Z Button
Y Button
X Button
A Button
B Button
C Stick
Menu Controls
Highlight option Control Stick / +Control Pad */@
Select A Button
Go back Y Button
In-game Controls
Move TOA Control Stick
Free Look C Stick
Fire weapon A Button
Strafe Z Button (hold)
Strafe (sidestep) left / right Control Stick (while firing)
Change TOA character Y Button
Cycle through TOA left / right L / R Buttons
Use TOA Elemental ability X Button
Pause Menu START/PAUSE
54
Once the game loads, you’ll see four options:
J
New Game — Start a new game of BIONICLE Heroes
™
. You’ll
progress first to the Save screen
(see page 16), and then on to
the Matoran Enclave
(see below).
J
Load Game — Continue a previously saved game. You will be
taken back to the Matoran Enclave.
J
Options — Adjust in-game options, including:
j
Invert Y Axis — On/Off
j
Effects Volume — 0 to 10
j
Music Volume — 0 to 10
j
Rumble — On/Off
j
Widescreen — On/Off
J
Extras — Check out the following:
j
Credits
j
LEGO
®
Star Wars™II: The Original Trilogy Trailer
Main Menu
You begin your adventure at the Matoran Enclave, a large
ceremonial clearing full of ancient structures, chambers, display
areas, a useful shop and a nearby beach.
You’ll also return here regularly to check on your achievements,
upgrade your TOA and review what you’ve collected and unlocked
in these adventures.
J
Select New Game from the Main Menu to enter the Matoran
Enclave.
Matoran Enclave
Zone/Level Select Chamber
Directly ahead of you and down a long staircase is the Zone/Level
Select Chamber. This has six doorways that conceal passages
to the portals that will take you to each part of the six elemental
Zones on Voya Nui.
To return to the Matoran Enclave from the Zone/Level Select
Chamber, face the stairway and move up the stairs.
The island of Voya Nui is divided into six distinct Zones:
J
Hakann’s Volcano — Based in and around the island’s volcanic
zone, where you can explore caves, caverns and volcanic plains.
J
Reidak’s Desert — Set in Voya Nui’s desert region, with the
action also based in and around the Island citadel.
J
Thok’s Mountain — Features a landscape of rocky outcrops,
cliffs, and icy mountain passes.
J
Vezok’s Coastline — Set in and around the shoreline of Voya Nui.
J
Zaktan’s Jungle — A tropical jungle bristling with dense jungle,
hidden temples, waterfalls and tree top villages.
J
Avak’s Stronghold — Set in and around the ominous Piraka
Stronghold.
TO BEGIN A NEW GAME:
1. Enter the Zone/Level Select Chamber. The entrance to Vezok’s
Coastline will open.
2. Enter this area, where you will find the four portals to the levels
of Vezok’s Coastline. Only Piraka Bluff is initially selectable.
3. Press the A Button to start this level.
Levels
A short introduction leads you into each level and gives you
an idea of whom (or what) you might encounter. Complete the three
levels within a Zone to enter the Boss level, where you battle
the Piraka who controls that Zone.
Initially, only one Zone is available, but as you progress,
other Zones open up. Levels must be completed in sequence
within a Zone, but you can play any completed level in Free Play
mode
(see page 15).
 Loading...