

Page 1

MANUAL COVER (FRONT)
Page 2
IMPORTANT SAFETY INFORMATION: READ THE FOLLOWING
WARNINGS BEFORE YOU OR YOUR CHILD PLAY VIDEO GAMES
WARNING - Seizures
Some people (about 1 in 4000) may have seizures or black outs triggered by light
flashes, such as while watching TV or playing video games, even if they have
never had a seizure before.
Anyone who has had a seizure, loss of awareness, or other symptom linked to an
epileptic condition should consult a doctor before playing a video game.
Parents should watch when their children play video games. Stop playing and
consult a doctor if you or your child have any of the following symptoms:
Convulsions Eye or muscle twitching Loss of awareness
Altered vision Involuntary movements Disorientation
To reduce the likelihood of a seizure when playing video games:
Sit or stand as far from the screen as possible.
Play video games on the smallest available television screen.
Do not play if you are tired or need sleep.
Play in a well-lit room.
Take a 10 to 15 minute break every hour.
Playing video games can make your muscles, joints or skin hurt after a few hours.
Follow these instructions to avoid problems such as Tendinitis, Carpal Tunnel
Syndrome or skin irritation:
Take a 10 to 15 minute break every hour, even if you don't think you need it.
If your hands, wrists or arms become tired or sore while playing, stop and rest
them for several hours before playing again.
If you continue to have sore hands, wrists or arms during or after play, stop
playing and see a doctor.
WARNING - Repetitive Motion Injuries
WARNING: PLEASE CAREFULLY READ THE PRECAUTIONS
BOOKLET INCLUDED WITH THIS PRODUCT BEFORE USING
YOUR NINTENDO ® HARDWARE SYSTEM, GAME DISC OR
ACCESSORY. THIS BOOKLET CONTAINS IMPORTANT
SAFETY INFORMATION.
1.
2.
3.
4.
5.
To avoid electric shock when you use this system:
Use only the AC adapter that comes with your system.
Do not use the AC adapter if it has damaged, split or broken cords or wires.
Make sure that the AC adapter cord is fully inserted into the wall outlet or
extension cord.
Always carefully disconnect all plugs by pulling on the plug and not on the cord.
Make sure the Nintendo GameCube power switch is turned OFF before removing
the AC adapter cord from an outlet.
Playing video games can cause motion sickness. If you or your child feel dizzy or
nauseous when playing video games with this system, stop playing and rest. Do
not drive or engage in other demanding activity until you feel better.
The Nintendo GameCube is a Class 1 laser product. Do not attempt to
disassemble the Nintendo GameCube. Refer servicing to qualified personnel only.
Caution - Use of controls or adjustments or procedures other than those specified
herein may result in hazardous radiation exposure.
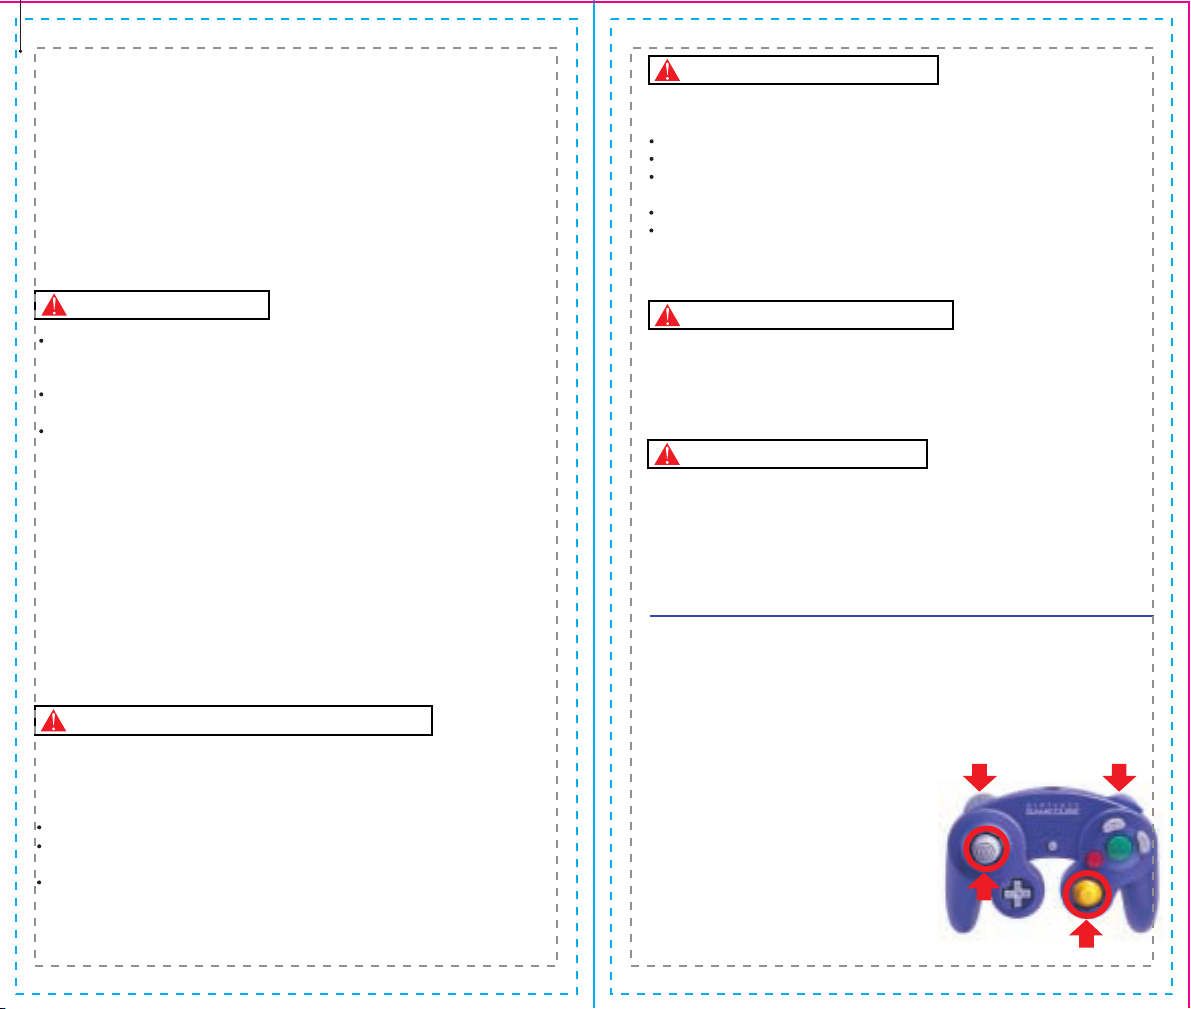
CONTROLLER NEUTRAL POSITION RESET
If the L or R Buttons are pressed or the Control Stick or C Stick are moved out of
neutral position when the power is turned ON, those positions will be set as the
neutral position, causing incorrect game control during game play.
To reset the controller, release all buttons
and sticks to allow them to return to the
correct neutral position, then hold down the
X, Y and START/PAUSE Buttons
simultaneously for 3 seconds.
WARNING - Electric Shock
CAUTION - Motion Sickness
CAUTION - Laser Device
L Button R Button
C Stick
Control
Stick
Page 3
Home Run KING™
3
Thank you for purchasing Home Run KING™. Please note that
this soft-
ware is designed only for use with Nintendo GameCube™. Be sure
to
read this instruction manual thoroughly before you start playing.
TABLE OF CONTENTS
SETTING UP . . . . . . . . . . . . . . 4
GAME DISPLAY . . . . . . . . . . . 5
HOW TO PLAY . . . . . . . . . . . . 6
EXHIBITION/QUICK START . 13
SEASON/PLAYOFFS . . . . . . . 15
HOME RUN DERBY™ . . . . . . 21
CUSTOMIZE . . . . . . . . . . . . . 24
PLAYER CREATE . . . . . . . . . . 26
OPTIONS . . . . . . . . . . . . . . . 29
THIS PRODUCT HAS BEEN RATED BY THE
ENTERTAINMENT SOFTWARE RATING BOARD. FOR
INFORMATION ABOUT THE ESRB RATING, OR TO
COMMENT ABOUT THE APPROPRIATENESS OF THE
RATING, PLEASE CONTACT THE ESRB AT
1-800-771-3772, OR VISIT WWW.ESRB.ORG.
NINTENDO, NINTENDO GAMECUBE AND THE OFFICIAL SEAL ARE TRADEMARKS OF NINTENDO.
© 2001 NINTENDO. ALL RIGHTS RESERVED.
LICENSED BY
THIS GAME REQUIRES A
MEMORY CARD FOR SAVING
GAME PROGRESS, SETTINGS
OR STATISTICS.
T
his official seal is your assurance that Nintendo has
reviewed this product and that it has met our standards for
excellence in workmanship, reliability and entertainment
value. Always look for this seal when
buying games and accessories to ensure
complete compatibility with your
Nintendo product.
All Nintendo products are licensed by sale for use only with other authorized
products bearing the Official Nintendo Seal of Quality.
®
THIS GAME SUPPORTS
SIMULTANEOUS GAME PLAY
WITH TWO PLAYERS AND
CONTROLLERS.
2 Player
Simultaneous
Memory
Card
Page 4

Home Run KING™
Home Run KING™
4 5
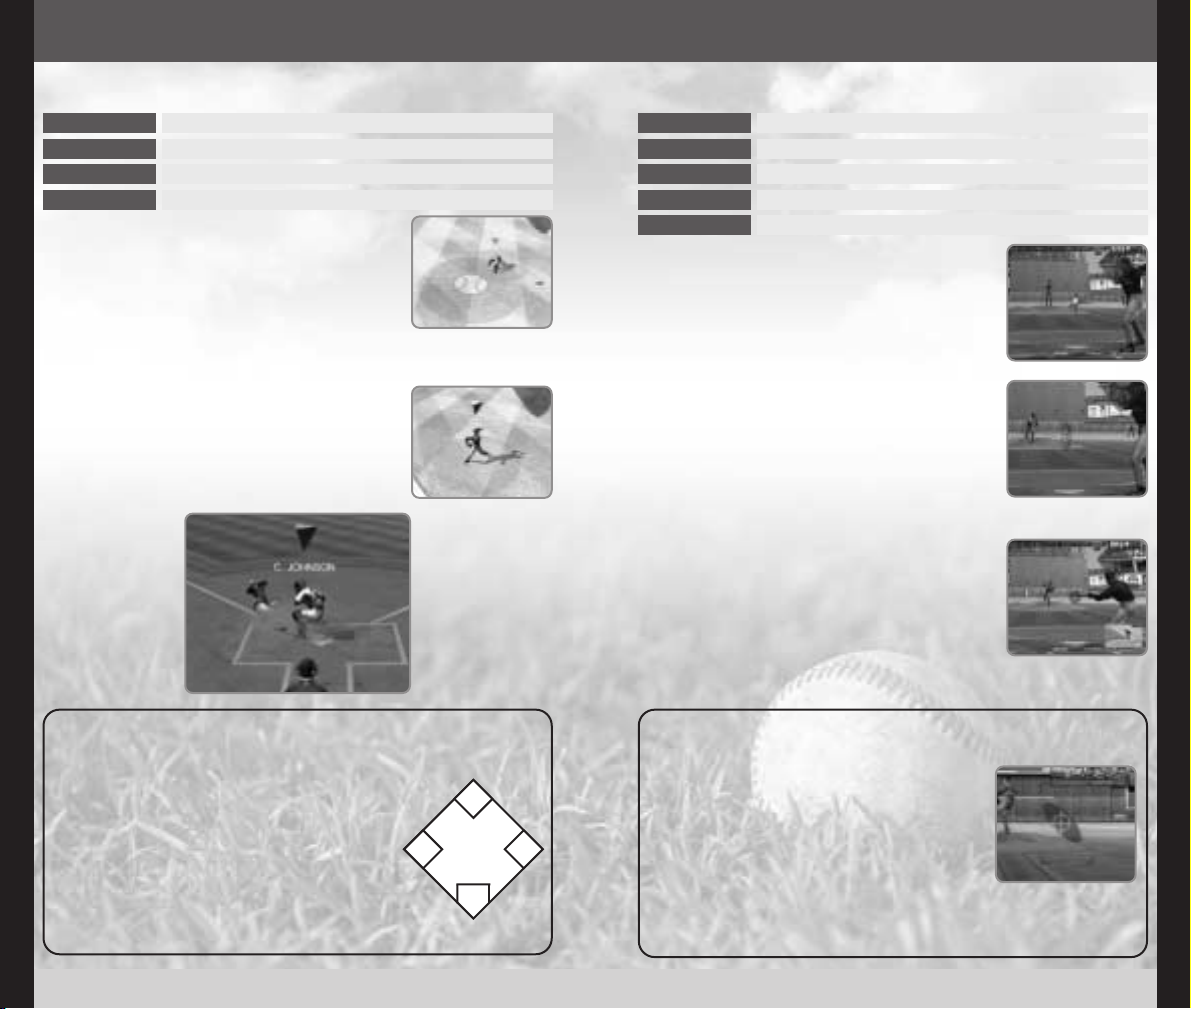
GAME DISPLAY
1 Field Map (indicates the posi-
tion of all players on the field).
2 Fielding Position.
3 Wind direction and speed.
4 Strike zone.
5 Pitch Type Selector (p.7)
6 Runner(s) on base (Since both
1st and 3rd base are off the
screen, these windows will be
displayed whenever there is a
runner on the respective base).
7 Points earned (1P’s, highest
record, 2P’s). For EXHIBITION
and QUICK START modes only.
8 Current score of the ballgame.
9 Current ball count.
0 Current out count.
q Current inning (▲ indicates
the top of the inning; ▼ the
bottom).
w Current runners on base
(bases occupied by runners
will be lit).
e Batting Cursor (p.9) r Timing Gauge (p.7)
BEFORE THE PITCH
WHEN THE PITCHER PITCHES
1
2
3
4
5
66
890qw
e
r
7
SETTING UP
HARDWARE SETUP
Home Run KING™ is a one to two player game.
Connect the Nintendo GameCube™ Controller to
either Controller Socket 1 or 2. The game cannot
be controlled by the controller connected to
Controller Socket 3 or 4.
This software is compatible with progressive scan video output, using
the Component Video Cable (sold separately). Please refer to the
instruction manual of Nintendo GameCube™ for the direction on how
to connect.
1 Connect your TV set and Nintendo GameCube™ with Component
Video Cable.
2 Place the Home Run KING™ disc inside the GameCube, close the
Disc Cover, and press the POWER Button.
3 After the Nintendo GameCube™ logo is displayed, press and hold
the B Button.
4 You will be asked whether to display in Progressive Mode. Select “Yes”
and the game will be displayed with Progressive Scan output.
Once the Progressive Mode is selected, unless the video cable is
changed, the Display Mode Select screen will be displayed each time
the power is turned on, without pressing the B Button. Also, depending
on the type of television set you are using, the horizontal/vertical ratio of
the screen may be changed.
USING PROGRESSIVE SCAN TV
SAVE FILES
Home Run KING™ is a Memory Card compatible game [Nintendo
GameCube™ Memory Card sold separately]. 34 blocks
are needed to
save game files.
To use the Memory Card, it must be inser ted into Memory Card Slot A.
The Memory Card inser ted into Memory Card Slot B will not be recognized. When you press the START/PAUSE during the title screen, the game
will automatically read the game data from the Memory Card. If no
Memory Card was found in the Memory Card Slot A, a warning message will be displayed. Inser t the Memory Card and select RETRY, or continue without the game being saved.
Never turn OFF the Nintendo GameCube™
power or remove the
Memory Card while the game data is being saved or loaded.
Page 5

SLIDER
SCREWBALL
PITCH TYPE
SELECTOR
TIMING GAUGE
FASTBALL
SINKER
CHANGE-UP,
FORKBALL, ETC.
CURVE
Control Stick
A Button
B Button
X Button
Y Button
Select the type of pitch/aim/select base to pick off
Throw a normal pitch
Pick-off throw
Throw a slow pitch
Throw a fast pitch
How to Pitch
First, you must select the type of pitch to throw. A
Pitch Type Selector will be displayed inside the
strike zone. The directions on the bar on the Pitch
Type Selector indicate the types of pitches the
pitcher can throw (the diagram to the right is for
right-handed pitchers; for left-handed pitchers, left
and right are reversed), and the length of each
graph indicates its effectiveness. Press the Control
Stick in the direction of the bar to select the type
of pitch.
Picking Off the Runner
After the pitcher comes set (after you have selected
the type of pitch to throw), press the B Button
simultaneously and the Control Stick to the selected
base (p.8) to pick-off base runners.
Once the pitch has been made, if a base runner
attempts to steal a base, you can control the
catcher and throw the ball similar to any fielder
(see FIELDING on p.8).
+ Control Pad
Select base to pick off
L Button
R Button
Shift infield position
Shift outfield position
Home Run KING™
Home Run KING™
6 7
PITCHING
Shifting Fielding Positions
Before throwing a pitch, you can order the fielders
to shift their fielding positions. Press the L Button to
shift the infielders, and R Button to shift the outfielders.
The selected fielding position will be displayed briefly
inside the Field Map.
R BUTTONL BUTTON
A BUTTON
B BUTTON
Y BUTTON
X BUTTON
+ CONTROL PAD
CONTROL STICK
C STICK
START/PAUSE
Control Stick
+ Control Pad
C Stick
Select menu item
START/PAUSE
A Button
Enter selection
B Button Return to previous screen
Z BUTTON
On the circular menu screen, use either the
Control Stick, + Control Pad or C Stick to select
from available menu items. Press either the
Start/Pause or the A Button to enter your selection.
Press the B Button to return to the previous screen.
Note:
With some menu screens, you can use the L/R
Buttons to select the menu item, rotating through the
selections in a counterclockwise/clockwise direction.
Control Stick
+ Control Pad
C Stick
START/PAUSE
A Button
82: Select option item
46: Change settings
Enter selection
B Button
Cancel
NINTENDO GAMECUBE™ CONTROLLER
MENU CONTROLS
CHANGING PARAMETERS
When changing the game
settings, use either the Control
Stick, + Control Pad or C Stick
82 to select the option items
(if any) and 46 to change
settings.
Enter selection (excluding the Options menu)
HOW TO PLAY
Next, press the A, X or Y Button to begin the pitching
delivery. The Pitch Type Selector will be replaced
by the Batting Cursor and the Timing Gauge will
appear next to the pitcher. Press the A , X or Y
Button at the right moment for better control,
veloc-
ity and movement on the ball. Use the Control
Stick
to select the location of the pitch, just before
releasing the ball.
Page 6
Home Run KING™
Home Run KING™
8 9
Batting Cursor
Control Stick
A Button
Move the batting cursor
Normal swing
B Button
X Button
Bunt (release to cancel bunt)
Contact swing
Y Button
Power swing
Batting
You can predict the type of pitch the pitcher may
throw by selecting from the Pitch Type Selector,
just as if you were pitching.
Bunting
As soon as the pitcher starts his delivery, press and
hold the B Button to show bunt. As the pitcher
releases the ball, use the Control Stick to move the
Batting Cursor to where the ball is being pitched.
You can cancel the bunt by releasing the B Button.
BATTING AND BUNTING
When the pitcher releases the ball, a batting cursor,
with a shape reflecting the pitch you predicted,
appears. Use the Control Stick to move the batting
cursor to where the ball is being pitched and press
the A, X or Y Button to hit the ball. (A for normal
swing, X to make contact, Y to hit with power).
FIELDING
Control Stick
Move the fielder; select a destination base
+ Control Pad
Select a destination base
A Button
B Button
Make a super play; throw the ball to selected base
Change the fielder to control; run to selected base
If the ball is hit, use the Control Stick to chase after
the ball. Press the B Button to change the fielder to
control if you feel that another fielder is in a better
position to catch the ball. You can also press the A
Button to make a super play, such as diving for the
ball.
When the ball is hit into the air, a ball icon will be
displayed on the ground to indicate where it will
land. Use this as a guide to chase and catch fly
balls or line drives.
When the fielder has the ball, select the destination
base and press the A Button to throw the ball, or
press the B Button to run towards the selected base.
You can also simply use the Control Stick to move
the fielder with the ball in any direction.
SELECTING A DESTINATION BASE
Whether you’re fielding or running the bases, you
will need to select a base to make the next play.
Use the Control Stick/+ Control Pad to select the
base (pressing simultaneously with the appropriate button for your action). The diagram to the
right shows the direction of the Control Stick/+
Control
Pad and the corresponding bases. If you’re
fielding
the ball, you will either throw the ball to or
run towards the destination base. If you’re running
the bases, you will order the base runner to
advance to or return to the destination base.
8
2
4
6
BATTING CURSOR
When you swing the bat, if the ball is within the
area of the Batting Cursor, you will hit the ball. The
pitcher has different kinds of pitches, and the batter must swing the bat in a manner that is suited
for specific pitches. When you predict the pitch,
the Batting Cursor changes shape for a better
chance of hitting the predicted type of pitch.
If the predicted pitch is correct, the color of the
Batting Cursor turns red. If you’re the batter, this is
your big chance. If you’re the pitcher, look out!
Batting Cursor
(expecting
curve ball)
Page 7

Home Run KING™
Home Run KING™
10 11
During the game, press START/PAUSE to pause the
game. You have the option to QUIT GAME or to
CANCEL (resume the game). You can also resume
the game by pressing START/PAUSE again. During
the Pitching/Batting screen, however, you have
additional functions in the Pause Menu. Depending
on the situation, some menu items may be disabled.
PAUSING THE GAME
START/PAUSE
Pause the game and open the Pause Menu
SELECTING PLAYERS
Control Stick
C Stick
A Button
B Button
Select player (from the left list)
Select player (from the right list)
Enter selection
Cancel selection
+ Control Pad
Use the Control Stick/+ Control Pad 82 to select a
player from the list. Except for the SEASON and
PLAYOFFS modes, if there are two lists displayed on
the screen, use the Control Stick/+ Control Pad for
the left list (road team), and the C Stick for the
right list (home team).
See next page for various situations during the ballgame where you are required to make player
selections.
CHANGE PLAYER . . Send in a pinch hitter/runner, relief pitcher, or make
other defensive changes.
CAMERA . . . . . . . . . Change the camera position during the
pitching/batting screen. [FRONT, INTERMEDIATE,
OBLIQUE, BACK]
Note:
BACK is available only with CPU vs CPU game.
POSITION CHANGE
Switch fielding positions of the players.
RUMBLE FEATURE . . Enable or disable the rumble feature. [ON, OFF]
OPTIONS . . . . . . . . . Change miscellaneous game settings. A separate
window with the following menu items will open.
WIND . . . . . . . . . . . Enable or disable wind. [ON, OFF]
ERROR . . . . . . . . . . Enable or disable errors. [ON, OFF]
AUTO REPLAY . . . Enable or disable automatic replays. [ON, OFF]
PLAYING AID . . . . Enable or disable aids to the control. [ON, OFF]
MANUAL REPLAY . . Manually replay the last play. See previous page for
controls.
QUIT GAME . . . . . . .
Quit the current game and return to the Main Menu.
CANCEL . . . . . . . . . . Resume the game.
Stealing
While you’re at bat, you can order the base runner
(if any) to increase/decrease his lead or steal.
Use
the + Control Pad to select the base runner, and
press the L Button (but not all the way in) to increase
his lead. Likewise, press the R Button to decrease his
lead. As soon as the pitcher starts his delivery,
click
the L Button all the way to attempt a steal.
Base Running
After the batter hits the ball, the base runner automatically runs the bases. You can also order the base
runner to advance or return to a base manually.
Select a destination base and press the L Button
to advance the runner, or the R Button to return
the runner. If no base is selected, all runners will
advance or return.
BASE RUNNING
Control Stick
+ Control Pad
L Button
Select a destination base (p.8)
Increase the lead; click all the way to steal/advance
R Button
Decrease the lead; click all the way to return to base
REPLAY CONTROLS
Control Stick
C Stick
A Button
L Button
R Button
Move the camera (cursor)
Rotate the camera around cursor
Play/Pause the replay
Rewind replay
Fast forward replay
+ Control Pad
X Button
Y Button
Zoom the camera in
Zoom the camera out
START/PAUSE
End replay and resume game
During the Manual Replay, you can manually pause
and move the camera. Use the Control Stick/+
Control
Pad
to move the camera (cursor—center
of attention), C Stick to rotate the camera around
the cursor, and X/Y Button to zoom the camera
in/out. Press the A Button to play the replay (press
again to pause replay), L Button to rewind replay,
and R Button to fast forward replay. When you are
done with the replay, press START/PAUSE. Note also
that when you move the cursor close to any man
(player or umpire) or even to the ball on the field,
the camera will lock onto him/it, following his/its
actions during the play.
Page 8

Home Run KING™
Home Run KING™
12 13
SELECTING STARTING LINEUPS
Before the actual ballgame starts, you will be
asked to set the Starting Lineup, beginning with
the Starting Pitcher. Use either the Control Stick
or the + Control Pad to select the Starting
Pitcher of the road (lef t) team, C Stick to select
the Starting Pitcher of the home (right) team,
and press the A Button.
Next, you will be asked to select the Starting
Lineup. Select a player and press the A Button
to highlight his name. Select another player
from the Starting Lineup to switch the batting
order between the two, or select a player from
the reserve list to replace a player. Select OK to
start the ballgame.
Note: The batting order of the pitcher can be
changed, but he cannot be replaced by a
player from the reserve list.
CHANGE PLAYER
Select this option from the Pause Menu during
the ballgame. You can substitute a pinch hitter/
runner if you’re batting, or make a defensive
change if you’re in the field. When selected, a
diamond with players you can change will be
displayed (batter and base runners if you’re
batting; pitcher and fielders if you’re in the
field). Select the player to change and press
the A Button. A list of reserve players will be displayed. Select the player to substitute and press
the A Button to make the switch.
Note: The pitcher must face at least one batter
before he can be relieved. Once the pitcher is
changed, the new pitcher cannot be replaced
until either the batter he is facing is retired or
gets on base, or you pick the runner off to end
the inning.
POSITION CHANGE
Select this from the Pause Menu during the ballgame. You can change the positions of the
fielders (except the pitcher). When the diagram
of the playing field is displayed, select a player
to highlight his name. Select another player to
switch positions between the two.
STAMINA METER
A green gauge displayed under each player’s
name indicates his stamina. If the gauge is full,
he is very effective. If the gauge is short, he is
getting tired and losing his effectiveness. Pay
attention to the Stamina Meter when you select
any player(s).
Play an Exhibition game against the CPU, or against another player.
When you select the EXHIBITION mode, the Settings
screen will be displayed. Select the menu item and
make appropriate changes for each setting. Select
PLAY when you are ready to play.
SETTINGS—EXHIBITION MODE
TEAM . . . . . . . . . . . . Select two teams out of 30 Major League teams
and American League/National League All-Star
teams to play in the game. Use the C Stick to select
the home team, and the Control Stick/+ Control
Pad to select the road team.
INNINGS . . . . . . . . . Change the number of innings to be played in the
game. The game will go into extra innings if the
score is tied after the selected number of innings.
[1~9]
BALLPARK . . . . . . . . Select the ballpark to be played in.
WEATHER . . . . . . . . . Change the weather conditions for the game.
[FINE, CLOUDY, RAIN, RANDOM]
DIFFICULTY . . . . . . . Change the game difficulty level.
[AMATEUR, ROOKIE, VETERAN, ALL-STAR, LEGEND]
TIME . . . . . . . . . . . . . Change the time of day for the game. [DAY, DUSK,
NIGHT, RANDOM]
OPTIONS . . . . . . . . . Change miscellaneous game settings. A separate
window with the following menu items will open.
AUTO REPLAY . . . Enable or disable automatic replays. [ON, OFF]
WIND . . . . . . . . . . . Enable or disable wind. [ON, OFF]
CAMERA . . . . . . . . Change the camera position during the
pitching/batting screen. [FRONT, INTERMEDIATE,
OBLIQUE]
RUMBLE FEATURE Enable or disable the rumble feature. [ON, OFF]
ERROR . . . . . . . . . . Enable or disable the errors in the game. [ON, OFF]
INJURY . . . . . . . . . Enable or disable the injuries to the players.
[ON, OFF]
STAMINA METER .
Manually adjust the Stamina Meter. [FIXED, RANDOM]
PLAYING AID . . . . Enable or disable aids to the control. [ON, OFF]
PLAY . . . . . . . . . . . . . Start the game.
After you select PLAY, you will be asked to select
the Starting Lineup for both teams (right list: home
team; left list: road team). Follow the guide described
on the previous page to set the Starting Lineups of
both teams.
EXHIBITION/QUICK START
1 TO 2 PLAYERS
Page 9

Home Run KING™
Home Run KING™
14 15
When the Menu screen of the SEASON/PLAYOFFS
mode is displayed, select NEW SEASON/NEW PLAYOFFS to start from the beginning, CONTINUE to
load the previously saved data and resume play,
RECORDS to view Champion Rings you collected
(see Champion Rings of RECORDS in OPTIONS,
p.31), or EXIT to return to the Main Menu screen.
If NEW SEASON/NEW PLAYOFFS is selected, you will
then set up the game settings. Select PLAY when
you are ready.
SETTINGS
In SEASON Mode, you will choose one of the 30 Major League teams
and play through an entire season with a chance to take your team to
the playoffs and, ultimately. the World Series®. In PLAYOFFS Mode, you
will only play the Playoffs. The flows of both modes are similar, so they
will be explained together here.
STARTING THE MODE
Selection of the team to be used differs
between the two modes. In SEASON mode, the
team is selected by selecting TEAM from the
Settings menu. With PL AYOFFS mode, however,
the team is selected after you select PLAY from
the Settings menu.
In PLAYOFFS mode, after you select PLAY, the
game will start the simulation of the regular
season, picking the Division Champions and
the Wild Card Teams (8 teams in all). Next, a
Playoff Tree will be displayed. If you are starting
with the League Championship Series, the game
will also simulate the Division Series, narrowing
the selections to 4 teams. Likewise, if you are
playing the World Series®only, the game will
then simulate the League Championship Series.
As soon as all simulations are completed, select
the team to use from the available selections.
SELECTING A TEAM
SEASON/PLAYOFFS
1 PLAYER
If you select QUICK START mode, you cannot
change any settings. The default parameters set
in OPTIONS (p.29) will be used, and the CPU will
randomly select two teams for play.
Note: Although the teams are selected randomly,
the same team will not be selected for both 1P and
2P sides. Also, All-Star teams will not be selected.
The game will be played in the home team’s ballpark. If the home team is from the American
League, the Designated Hitter rule will be in effect.
Conversely, if the home team is from the National
League, the pitchers will hit. The ace of the pitching
staff will automatically be selected as the starting
pitcher, and the teams’ default lineups will be
selected automatically.
QUICK START
At the end of the game, your performance in the
game is evaluated, and you are given points
based on the evaluation. If your points are either
among the top 10 or the best ever using the selected
team, you can enter your initials on the Records Screen.
SELECT THE TEAM TO CONTROL
Select the team you are going to control. For each
Nintendo GameCube™ Controller, use the Control
Stick/+ Control Pad/C Stick 46 to move the controller icon to select a team: home team (right) or
road team (left). Note that both players cannot
select the same team. The team not selected will
be controlled by the CPU. If no team is selected,
the CPU will play against another CPU opponent.
When everything is set, press either START/PAUSE or
the A Button to play ball.
EVALUATION OF YOUR PERFORMANCE
Page 10

Home Run KING™
Home Run KING™
16 17
During the SEASON/PLAYOFFS mode, a calendar of
the current month is displayed at the upper right of
the screen with a list of American League games
scheduled for the day displayed at the lower left
and a list of National League games scheduled
displayed at the lower right. If your team is scheduled to play on this day, it will be displayed at the
upper left of the screen. A menu of commands is
displayed at the lower center of the screen. Use
the Control Stick/+ Control Pad 82 to select the
menu item, and press either START/PAUSE or the A
Button to enter.
Select to have the CPU play all scheduled games
for the day.
If your team is scheduled to play, the result of your
team’s game will be displayed.
Select Result of Other Games to view scores of
other games played on this day (this will be displayed automatically if your team did not play on
this day).
Select Next to advance to next day’s game.
DURING THE SEASON/PLAYOFFS
Select to manually play today’s game.
Note: If your team is not scheduled to play on this
date, this selection is dimmed and disabled.
PLAY BALL
SIMULATE
Select to view the schedule for your team. A calendar of the current month will be displayed. With
SEASON mode, press the L/R Button to view the
schedule of the previous/next month.
SCHEDULE
TEAM . . . . . . . . . . . .
For SEASON Mode only. Select the team to use (p.15).
START SELECT . . . . . For PLAYOFFS Mode only. Select where to start the
Playoffs.
[FROM DIVISION SERIES, FROM LEAGUE
CHAMPIONSHIP
SERIES, ONLY WORLD SERIES
®
]
INNINGS . . . . . . . . . Change the number of innings to be played in the
game. The game will go into extra innings if the
score is tied after the selected number of innings.
[1~9]
INJURY . . . . . . . . . . . Enable or disable the injuries to the players. [ON,
OFF]
NO. OF GAMES . . . Select the number of games in a Season/Playoffs.
[SEASON Mode: 13/15, 26/30, 58, 110, 162]
[PLAYOFFS Mode: 1-1-1, 1-3-3, 3-5-5, 5-7-7]
Note: In SEASON Mode, the numbers 13 and 26 on
the selections 13/15 and 26/30 indicates the number
of games played for the American League teams,
and the numbers 15 and 30 indicates the number
of games for the National League teams. Also when
either 13/15 or 26/30 is selected for the number of
games, neither the All-Star Game™ nor Interleague
games will be played. For PLAYOFFS Mode, the
numbers, from left, indicate the number of games
for DIVISION SERIES, LEAGUE CHAMPIONSHIP SERIES
and WORLD SERIES®.
DIFFICULTY . . . . . . . Change the game difficulty level.
[AMATEUR, ROOKIE, VETERAN, ALL-STAR, LEGEND]
ALL-STAR BREAK . .
For SEASON Mode only. Enable or disable the All-Star
Game™ during the season. [ON/OFF]
Note: This option will be disabled if either 13/15 or
26/30 is selected for the number of games in a season.
OPTIONS . . . . . . . . . Change miscellaneous game settings. A separate
window with the following menu items will open.
AUTO REPLAY . . . Enable or disable automatic replays. [ON, OFF]
CAMERA . . . . . . . . Change the camera position during the
pitching/batting screen. [FRONT, INTERMEDIATE,
OBLIQUE]
RUMBLE FEATURE Enable or disable the rumble feature. [ON, OFF]
ERROR . . . . . . . . . . Enable or disable errors. [ON, OFF]
PLAYING AID . . . . Enable or disable aids to the control. [ON, OFF]
PLAY . . . . . . . . . . . . . Start the game.
Page 11

Home Run KING™
Home Run KING™
18 19
The Stats in the PLAYOFFS mode differ from the SEASON mode in that there are no Standings. You can
view the Playoff Tree, Post-Season Leaders and
Team Batting/Pitching Leaders.
STATS
(PLAYOFFS MODE)
PLAYOFF TREE
Displays the progress of the playoffs.
POST-SEASON LEADERS
Displays the list of leaders in individual statistics, for
batting or pitching, during the playoffs. Press the
L/R Button to switch between the categories.
In each statistic screen, use 82 to scroll through
the players on the list. The players belonging to the
team selected will be highlighted. Use 46 to
select the category, and press the Y Button to sort
in the selected category from top to bottom (press
again to sort from bottom to top).
TEAM BATTING/PITCHING LEADERS
Displays individual statistics, for batting and pitching, of the players on your team.
In each statistic screen, use 82 to scroll through
the players on the list. The players belonging to the
team selected will be highlighted. Use 46 to
select the category, and press the Y Button to sort
in the selected category from top to bottom (press
again to sort from bottom to top).
Press the L/R Button to view the statistics of other
teams.
You can view various statistics for the season. Use
the Control Stick/+ Control Pad to select the statistics you wish to view, and press either START/PAUSE
or the A Button to display the statistics.
STATS
(SEASON MODE)
STANDINGS
By default, the standings of the division to which
your team belongs will be displayed. You can view
the standings of a different division/league, or
where your team stands within all of MLB by pressing the L/R Button. Use the Control Stick/+ Control
Pad 46 to select the category and press the Y
Button to sort in the selected category from top to
bottom (press again to sort from bottom to top).
You can also change the team to view Team
Standings/Team Leaders by selecting with 82 and
pressing the A Button.
TEAM STANDINGS
You can view your team’s (or the team selected in
STANDINGS) record and performance against
opponents. You can also view the record of other
teams by pressing the L/R Button.
LEAGUE BATTING/PITCHING LEADERS
Displays the list of leaders in individual statistics, for
batting and pitching, in each league. Press the L/R
Button to switch between leagues.
In each statistic screen, use 82 to scroll through
the players on the list. Players belonging to the
team selected will be highlighted. Use 46 to
select the category, and press the Y Button to sort
in the selected category from top to bottom (press
again to sort from bottom to top).
TEAM BATTING/PITCHING LEADERS
Displays the individual statistics, batting and pitching, of the players on your team (or the team
selected in STANDINGS).
In each statistic screen, use 82 to scroll through
the players on the list. The players belonging to the
team selected will be highlighted. Use 46 to
select the category, and press the Y Button to sort
in the selected category from top to bottom (press
again to sort from bottom to top).
Press the L/R Button to view the statistics of other
teams.
Page 12

Home Run KING™
Home Run KING™
20 21
HOME RUN DERBY™
UP TO 20 PLAYERS*
After selecting HOME RUN DERBY™ mode in the
Main Menu screen, select HOME RUN DERBY™ to
advance to the Settings screen. Select RECORDS to
view HOME RUN DERBY™ records (see HOME RUN
DERBY™ RECORDS in OPTIONS, p.31).
Play against other people or the CPU in Home Run Derby™, using your
favorite players.
✻Although up to 20 players can play in this mode, only the Controllers
connected to Controller Sockets 1 and 2 can be used, and each
player takes turns to play.
STARTING THE MODE
You can change the settings of the game for
HOME RUN DERBY™ before you select PLAY.
SETTINGS
No.of BATTERS . . . . Select the number of batters par ticipating. [2, 4, 6,
8, 10, 12, 14, 16, 18, 20]
OUTS/ROUND . . . . . Select the number of outs (misses) allowed in a
round. [1, 5, 10, 15, 20]
BALLPARK . . . . . . . . Select the ballpark to play HOME RUN DERBY™ in.
WEATHER . . . . . . . . . Change the weather conditions for the game.
[FINE, CLOUDY, RAIN, RANDOM]
DIFFICULTY . . . . . . . Change the game difficulty level. [AMATEUR,
ROOKIE, VETERAN, ALL-STAR, LEGEND]
TIME . . . . . . . . . . . . . Change the time of day for the game. [DAY, DUSK,
NIGHT, RANDOM]
OPTIONS . . . . . . . . . Change miscellaneous game settings. A separate
window with the following menu items will open.
PITCHER THROW Select which hand the pitcher throws with. [LEFT,
RIGHT]
WIND . . . . . . . . . . . Enable or disable the wind during the game.
[ON, OFF]
CAMERA . . . . . . . . Change the camera position during the
pitching/batting screen. [FRONT, INTERMEDIATE,
OBLIQUE]
RUMBLE FEATURE Enable or disable the rumble feature. [ON, OFF]
PLAYING AID . . . . Enable or disable Batting Aid. [ON, OFF]
PLAY . . . . . . . . . . . . . Start the game.
Select to modify some of the Options settings.
Select to save the current game onto your
Nintendo GameCube™ Memory Card.
Select to quit and return to the Main Menu screen.
You will
be prompted whether to save the current
game or not.
OPTIONS
SAVE SEASON
(SEASON MODE)
/SAVE
(PLAYOFFS MODE)
QUIT
THE ROAD TO THE SERIES
Your basic routine in the SEASON and PLAYOFFS
modes is to advance the days by selecting either
PLAY BALL or SIMULATE.
At the end of the season, if you qualified for
the Playoffs as a Division Champion or a Wild
Card
team, your game will continue through
PLAYOFFS mode.
Your game will be over if you fail to qualify for the
Playoffs, or lose a series in the Playoffs.
CAMERA . . . . . . . . Change the camera position during the
pitching/batting screen. [FRONT, INTERMEDIATE,
OBLIQUE]
RUMBLE FEATURE Enable or disable the rumble feature. [ON, OFF]
AUTO REPLAY . . . Enable or disable automatic replays. [ON, OFF]
ERROR . . . . . . . . . . Enable or disable errors. [ON, OFF]
PLAYING AID . . . . Enable or disable aids to the control. [ON, OFF]
BACK . . . . . . . . . . . Return to the previous screen with changes.
Page 13

Home Run KING™
Home Run KING™
22 23
The game is played in three rounds (depending on
the number of batters, the game may start from the
Semi-Final or the Championship Round). Each batter
continues to hit the ball until he makes the preselected number of outs (misses).
RULES
The selected batters will compete against their
rivals. Four hitters (regardless of League affiliation)
with the highest number of home runs advance to
the Semi-Finals.
Tiebreaker
Should there be a tie among the players for
advancement to the Semi-Finals, the following tiebreakers will be used:
•
Player with the most home runs in the 2001 season.
•Player with the longest distance in the First Round.
FIRST ROUND
On each batter’s turn, select ADVANCE to hit the
ball yourself (or CPU if it was assigned for the current batter). Select SIMULATE to let the CPU simulate the turn without the batting scene. Select QUIT
to end the game without finishing.
Four players will be seeded in the order of number of
home runs hit in the First Round. The third-seeded player
faces the second-seeded player (and fourth-seeded
against top-seed) head-to-head in the Semi-Final
Round. Players with the most home runs in each SemiFinal battle advance to the Championship Round.
Tiebreaker
•Player with the most home runs in the First Round.
•
Player with the most home runs in the 2001 season.
•Player with the longest distance in both rounds.
SEMI-FINALS
Two players will battle head-to-head. The player
with the most home runs in the Championship
Round is declared the winner.
HOME RUN DERBY™ Showdown
If both players hit the same number of home runs,
HOME RUN DERBY™ Showdown will be played, with
the following rules:
•Each player gets one swing.
•If one hits a home run and the other makes an
out, the game is over.
•
If both hit home runs, or both make outs, the above
process will continue until the winner is decided.
THE CHAMPIONSHIP ROUND
After winning HOME RUN DERBY™, if your total number of home runs (or distance) is among the top
ten, you can enter your initials. You can view it by
selecting RECORDS in the HOME RUN DERBY™
menu. The records are recorded separately for the
number of outs. See RECORDS in OPTIONS (p.31)
for details.
Note: You must win HOME RUN DERBY™ to be eligi-
ble for the name entry.
RECORDS
In
HOME RUN DERBY™
, the same number of players
from each league will be selected (i.e. 5 from each
when 10 batters are selected in the settings). Two
lists of pre-selected players (one for each league)
in the actual batting order will be displayed.
Select two players to switch their batting order.
Note:
If
HOME RUN DERBY™
is held in the stadium
of
the AL team, the list of AL players will be displayed
on the right side and the NL players on the left,
and
vice versa if it is held in the stadium of the NL team.
If you wish to use a player who is not on the list, first
select the player you wish to replace. A menu item
“OTHER TEAM” will be added to the list. Select
OTHER TEAM, and a list of Major League teams
from the selected league will be displayed. Use
the Control Stick/+ Control Pad (for the left list and
the C Stick for the right list) 46 to select the team,
82 to select the player to use, and press the A
Button to replace. Press START/PAUSE to advance.
Next, select a batter to be controlled by each controller (i.e., 1P side, CPU, or 2P side).
Press START/PAUSE to begin HOME RUN DERBY™.
SELECTING PLAYERS
While waiting for the pitch, press the R Button to
display a Stadium Map with information on the
location
(and the distance) of each home run hit by
the
current batter of the current round. Press the A
Button
to advance to the next location, B Button to
retreat to
previous location, and L Button to view the
map of other rounds. Press
the R Button again to
resume
HOME RUN DERBY™
.
Page 14

Home Run KING™
Home Run KING™
24 25
Select Team Edit to customize the roster, the starting lineup and the
pitching staff.
TEAM EDIT
Select the team you wish to edit. Use the Control
Stick/+ Control Pad to select the team. You can
select all 30 Major League teams and two All-Star
teams.
TEAM
You can assign which pitchers will be the Starters,
Relievers, and Closers. Select a pitcher and press
the A Button to highlight his name. Select a second
pitcher and press the A Button to switch places
between the two.
PITCHING STAFF
There are 25 players (starting lineup and bench
players) on your active roster, and 5 non-roster
players. To make changes to your active roster
select a player and press the A Button to highlight
his name. Select a second player, and press the A
Button to switch places between the two.
ROSTER CHANGE
You can customize the starting lineups and the
fielding positions for games against right-handed
or left-handed pitchers, as well as games that are
played with or without the DH.
Use the L/R Button to change the category. When
selecting a batting order, select a player and press
the A Button to highlight his name. Select a second
player and press the A Button to switch the batting
order between the two (if both are already in the
Starting Lineup) or make substitutions. When
changing fielding positions, select two players in
the lineup (except the Starting Pitcher) to switch
the fielding positions between the two.
Note: “-STARTER-” indicates that the Starting Pitcher
you select before the game will bat at that spot in
the batting order. While you can change his place
in the batting order, “-STARTER-” cannot be
replaced by a reserve player.
STARTING LINEUP
When All-Star Edit is selected, two lists of players will
be displayed: the left list are the members of either
the AL or NL All-Star teams, and the right list are the
players on teams in the same league. Use the
Control Stick/+ Control Pad 46 to switch between
the AL All-Stars and NL All-Stars, and C Stick 46 to
select the teams in the same league.
Note:
The team on the right will automatically switch
to the team of the corresponding league whenever
the All-Star team is switched between AL and NL.
You can choose your own All-Star team, edit teams, and trade players
between teams.
ALL-STAR EDIT
Use the C Stick 82 to select the players you would
like to have on the All-Star team. Use the Control
Stick/+ Control Pad 82 to select the player you
wish to have replaced, and press the A Button to
make the replacement.
Continue the process until you have a team you
feel satisfied with. Press the B Button to end All-Star
Edit. You will be asked to save the team to the
Memory Card.
Trading is done exactly the same way you edit the
All-Star Team, except that the players selected will
be exchanged between two teams. Use the
Control Stick/+ Control Pad to select the team and
the player on the lef t list, and C Stick for the team
and the player on the right list. Press the A Button
to complete the trade.
TRADE
When you are done, press the B Button to conclude
trading. You will be asked to save the team to the
Memory Card.
CUSTOMIZE
Page 15

Home Run KING™
Home Run KING™
26 27
You can now edit the player’s appearance and
attributes. Use the L/R Button to switch the category to edit, the Control Stick/+ Control Pad 82
to select the menu item and 46 to toggle set-
tings. Select OK in any category to end editing.
EDITING
You can edit his face, build, and equipment. The
selections GLASSES, WRIST BAND and BATTING
GLOVE have additional settings, which will be
enabled if the setting other than NONE is selected.
APPEARANCE
FACE . . . . . . . . . . . . . Select from 30 available face types.
BEARD . . . . . . . . . . . Select from 3 available beard/moustache types.
BUILD . . . . . . . . . . . . Select from 5 available body types.
EYE BLACK . . . . . . . Select whether he uses eye black.
GLASSES . . . . . . . . . Select from 4 available glasses. You can also select
the frame and lens color (12 available).
NECK . . . . . . . . . . . . Select either a normal or turtle neck shirt.
SLEEVE . . . . . . . . . . . Select half-sleeve shirt, long-sleeve shirt, or none.
BAT COLOR . . . . . . . Select from 10 available bat colors.
ELBOW GUARD . . . Select whether he wears an elbow guard (from 7
different colors).
WRIST BAND . . . . . . Select whether he wears wrist bands (from 3 differ-
ent types). You can select from 10 different colors.
BATTING GLOVE . . Select whether he wears a batting glove on one
hand, both hands or none. You can select from 16
different color combinations.
MITT/GLOVE . . . . . . Select from 10 different colors/color combinations
for his mitt/glove.
SHIN GUARD . . . . . Select whether he wears a shin guard (from 7 differ-
ent colors).
SOCKS . . . . . . . . . . . Select from 5 different styles for how he wears his
socks.
SHOES . . . . . . . . . . . Select whether he wears low top or high top shoes.
You can create up to 40 original players to be used in the game.
First, use the Control Stick/+ Control Pad 82 to
select the player space. If the selected space is
empty, a temporary name and parameters will be
given. You will be asked whether to edit him or
clear his data. Select EDIT to edit his data, CLEAR
DATA to erase, or BACK to cancel.
NAMING YOUR PLAYER
Next, give him a number, first initial, last name (up
to 13 letters/spaces) and fielding position. Use the
Control Stick/+ Control Pad 46 to move the cur-
sor and 82 to change numbers/letters/fielding
positions. Press the A Button to advance.
When the players are created, they will be
added to the Free Agent pool.
Select TRADE in CUSTOMIZE Mode (p.24). The list
of Free Agents is one of the selections. Select
the player you created from the Free Agents list
to replace the player on the selected team.
HOW THE CREATED PLAYERS ARE USED
PLAYER CREATE
Page 16

Home Run KING™
Home Run KING™
28 29
You can adjust various settings in Options.
When SETTINGS is selected, you can change the
game settings. The option settings made become
the default value when you start the new game in
each mode.
Select SETTINGS to change various game settings,
SAVE to save the settings to the Memory Card,
LOAD to load the previously saved game settings,
and RECORDS to view various records you set in
the game.
CHANGING GAME SETTINGS
SOUND . . . . . . . . . Change the sound output of the game. [STEREO,
MONAURAL]
DIFFICULTY . . . . . .
Change the difficulty level. [AMATEUR, ROOKIE, VETERAN,
ALL-STAR, LEGEND]
INNINGS . . . . . . . . Change the number of innings to be played in the
game. The game will go into extra innings if the score
is tied after the selected number of innings. [1~9]
WEATHER . . . . . . . Change the weather conditions for the game.
[FINE, CLOUDY, RAIN, RANDOM]
TIME . . . . . . . . . . . . Change the time of day for the game. [DAY, DUSK,
NIGHT, RANDOM]
AUTO REPLAY . . . Enable or disable automatic replays. [ON, OFF]
WIND . . . . . . . . . . . Enable or disable wind during the game. [ON, OFF]
CAMERA . . . . . . . . Change the camera position during the
pitching/batting screen. [FRONT, INTERMEDIATE,
OBLIQUE]
RUMBLE FEATURE Enable or disable the rumble feature. [ON, OFF]
ERROR . . . . . . . . . . Enable or disable errors. [ON, OFF]
INJURY . . . . . . . . . Enable or disable injuries. [ON, OFF]
STAMINA METER . Manually adjust the stamina meter. [FIXED, RANDOM]
PLAYING AID . . . . Enable or disable aids to the control. [ON, OFF]
BACK . . . . . . . . . . . Return to the previous screen with changes.
OPTIONS
You can assign the player’s various batting/fielding
abilities.
THROWS . . . . . . . . . Which hand he throws with,
left or right.
BATS . . . . . . . . . . . . . Which hand he bats with, left,
right or both (switch hitter).
BATTING STANCE . Select how he stands in the
batter’s box, from the basic
stances to unique stances of
select major league players.
There are 35 available.
ATTRIBUTES
The gauges show his abilities. Distribute the parameters until the “remaining” gauge depletes.
contact . . . . . . . . . . How well he hits the ball.
power . . . . . . . . . . . His strength when hitting the
ball.
speed . . . . . . . . . . . How fast he runs the bases.
defense . . . . . . . . . . How well he fields.
arm . . . . . . . . . . . . . .
His arm strength when throwing
the ball.
If you select pitcher, you have additional attributes
to assign.
ATTRIBUTES (PIT)
PITCHING FORM . . Select how he pitches the ball,
from basic pitching deliveries
to unique pitching styles of
select major league pitchers.
There are 18 available.
The top gauges indicate his pitching abilities.
Distribute the parameters until the “remaining”
gauge depletes.
speed . . . . . . . . . . . How fast he pitches the ball.
control . . . . . . . . . . .
How well he controls his pitches.
power . . . . . . . . . . . How hard he pitches the ball.
breaking pitch . . . How well the ball breaks. The
amount affects the bottom
gauges.
SELECT STUFF . . . . .
Select the type of pitch for 2 on
the Pitch Type Selector (p.7).
The bottom gauges indicate how well he throws
each type of pitch. The length of the gauge is
reflected on the Pitch Type Selector. Distribute the
parameters until the “remaining” gauge depletes.
Page 17

Home Run KING™
Home Run KING™
30 31
You can view various records you set in the game.
RECORDS
You can view the Champion Rings you collected
in the past for winning the World Series®in either the
SEASON or PLAYOFFS modes. Press the L/R Button
to
switch between the leagues. Use the Control
Stick/+ Control Pad/C Stick to select a team, and
press the A Button or the START/PAUSE to view the ring.
CHAMPION RINGS
You can view records from HOME RUN DERBY™.
Press the L/R Button to view different categories.
HOME RUN DERBY™ RECORDS
You can view the record of game points you
received in either the EXHIBITION or QUICK START
modes: Overall Top 10 ranks and the highest points
using each team. Press the L/R Button to view different categories.
EXHIBITION RANKING
Select SAVE to save the Option Settings to the
Memory Card, and LOAD to load the settings from
the Memory Card.
SAVE/LOAD
You can change the Stamina Meters of the
players to RANDOM or FIXED. When FIXED is
selected, two gauges will appear on the menu.
Select the gauge and use the Control Stick/+
Control Pad to change the value for the road
team; use the C Stick to change the value for
the home team. The values will be reflected for
all players on the team. When RANDOM is
selected, the Stamina Meter for each player will
be decided randomly.
STAMINA METER
PLAYING AID
You can enable or disable the aid in the game
(ON/OFF). When ON is selected, gauges will
appear on the menu. You can change the
amount of aid for pitching, batting, and fielding
separately. Use the Control Stick/+ Control Pad
to change the value for player 1; use the C
Stick to change the value for player 2.
STAMINA METER
AND
PLAYING AID
During the close up view of the selected ring, you
can rotate the ring with the Control Stick and the C
Stick.
Page 18

*THIS LIMITED WARRANTY IS VALID FOR U.S. AND CANADIAN
NINTENDO GAMECUBE ™ PRODUCT MANUFACTURED FOR SALE IN AND
PURCHASED AND OPERATED IN THE UNITED STATES AND CANADA, ONLY!
Limited Warranty
Sega of America, Inc. warrants to the original consumer purchaser that the Nintendo
GameCube Product shall be free from defects in material and workmanship for a period of
90-days from the date of purchase. If a defect covered by this limited warranty occurs
during this 90-day warranty period, the defective Nintendo GameCube™ Game Disc or
component will be replaced free of charge. This limited warranty does not apply if the
defects have been caused by negligence, accident, unreasonable use, modification,
tampering or any other causes not related to defective materials or workmanship. Please
retain the original or a photocopy of your dated sales receipt to establish the date of
purchase for in-warranty replacement. For replacement, return the Game Disc, with its
original packaging and receipt, to the retailer from which the software was originally
purchased. In the event that you cannot obtain a replacement from the retailer, please
contact Sega to obtain support.
Obtaining technical support/service
To receive additional support, including troubleshooting assistance, please
contact Sega at:
* web site . . . . . . . . . . . http://www.sega.com
* e-mail . . . . . . . . . . . . . support@sega.com
* telephone . . . . . . . . . 1-716-650-6701
LIMITATIONS ON WARRANTY
ANY APPLICABLE IMPLIED WARRANTIES, INCLUDING WARRANTIES OF
MERCHANTABILITY AND FITNESS FOR A PARTICULAR PURPOSE, ARE HEREBY LIMITED TO
90-DAYS FROM THE DATE OF PURCHASE AND ARE SUBJECT TO THE CONDITIONS SET
FORTH HEREIN. IN NO EVENT SHALL SEGA OF AMERICA, INC., BE LIABLE FOR
CONSEQUENTIAL OR INCIDENTAL DAMAGES RESULTING FROM THE BREACH OF ANY
EXPRESS OR IMPLIED WARRANTIES. THE PROVISIONS OF THIS LIMITED WARRANTY ARE
VALID IN THE UNITED STATES ONLY. SOME STATES DO NOT ALLOW LIMITATIONS ON HOW
LONG AN IMPLIED WARRANTY LASTS, OR EXCLUSION OF CONSEQUENTIAL OR
INCIDENTAL DAMAGES, SO THE ABOVE LIMITATION OR EXCLUSION MAY NOT APPLY TO
YOU. THIS WARRANTY PROVIDES YOU WITH SPECIFIC LEGAL RIGHTS. YOU MAY HAVE
OTHER RIGHTS WHICH VARY FROM STATE TO STATE.
Sega is registered in the U.S. Patent and Trademark Office. Home Run KING™ is a registered
trademark or a trademark of Sega Corporation and its affiliates. All Rights Reserved. ©
WOW ENTERTAINMENT INC. / SEGA CORPORATION, 2002. © MLBP 2002 / MLBPA 2002.
Major League Baseball trademarks and copyrights are used with permission of Major
League Baseball Properties, Inc. Visit the official website at MLB.com. © MLBPA-Official
Licensee, Major League Baseball Players Association. Visit the Players Choice on the web
at www.bigleaguers.com. "TAKE ME OUT TO THE BALL GAME" written by ALBERT VON
TILZER / JACK NORWORTH. This game is licensed for use with The Nintendo GameCube
System only. Copying and/or transmission of this game is strictly prohibited. Unauthorized
rental or public performance of this game is a violation of applicable laws. Sega of America,
P.O. Box 7639, San Francisco, CA 94120. All Rights Reserved. www.sega.com. Programmed
in Japan. Made and printed in the USA.
Home Run KING™
32
NOTES
Page 19

MANUAL COVER (BACK)
 Loading...