

Page 1

MANUAL COVER (FRONT)
BeachSpikersGCmanualV03.qxp 6/13/02 11:49 AM Page 1
Page 2
BeachSpikersGCmanualV03.qxp 6/13/02 11:49 AM Page 2
WARNING: PLEASE CAREFULLY READ THE PRECAUTIONS
BOOKLET INCLUDED WITH THIS PRODUCT BEFORE USING
YOUR NINTENDO ® HARDWARE SYSTEM, GAME DISC OR
ACCESSORY. THIS BOOKLET CONTAINS IMPORTANT
SAFETY INFORMATION.
IMPORTANT SAFETY INFORMATION: READ THE FOLLOWING
WARNINGS BEFORE YOU OR YOUR CHILD PLAY VIDEO GAMES
WARNING - Seizures
Some people (about 1 in 4000) may have seizures or blackouts triggered by light
flashes, such as while watching TV or playing video games, even if they have
never had a seizure before.
Anyone who has had a seizure, loss of awareness, or other symptom linked to an
epileptic condition should consult a doctor before playing a video game.
Parents should watch when their children play video games. Stop playing and
consult a doctor if you or your child have any of the following symptoms:
Convulsions Eye or muscle twitching Loss of awareness
Altered vision Involuntary movements Disorientation
To reduce the likelihood of a seizure when playing video games:
1.
Sit or stand as far from the screen as possible.
2.
Play video games on the smallest available television screen.
3.
Do not play if you are tired or need sleep.
4.
Play in a well-lit room.
5.
Take a 10 to 15 minute break every hour.
WARNING - Repetitive Motion Injuries
Playing video games can make your muscles, joints or skin hurt after a few hours.
Follow these instructions to avoid problems such as Tendinitis, Carpal Tunnel
Syndrome or skin irritation:
Take a 10 to 15 minute break every hour, even if you don't think you need it.
If your hands, wrists or arms become tired or sore while playing, stop and rest
them for several hours before playing again.
If you continue to have sore hands, wrists or arms during or after play, stop
playing and see a doctor.
WARNING - Electric Shock
To avoid electric shock when you use this system:
Use only the AC adapter that comes with your system.
Do not use the AC adapter if it has damaged, split or broken cords or wires.
Make sure that the AC adapter cord is fully inserted into the wall outlet or
extension cord.
Always carefully disconnect all plugs by pulling on the plug and not on the cord.
Make sure the Nintendo GameCube power switch is turned OFF before removing
the AC adapter cord from an outlet.
CAUTION - Motion Sickness
Playing video games can cause motion sickness. If you or your child feel dizzy or
nauseous when playing video games with this system, stop playing and rest. Do
not drive or engage in other demanding activity until you feel better.
CAUTION - Laser Device
The Nintendo GameCube is a Class I laser product. Do not attempt to
disassemble the Nintendo GameCube. Refer servicing to qualified personnel only.
Caution - Use of controls or adjustments or procedures other than those specified
herein may result in hazardous radiation exposure.
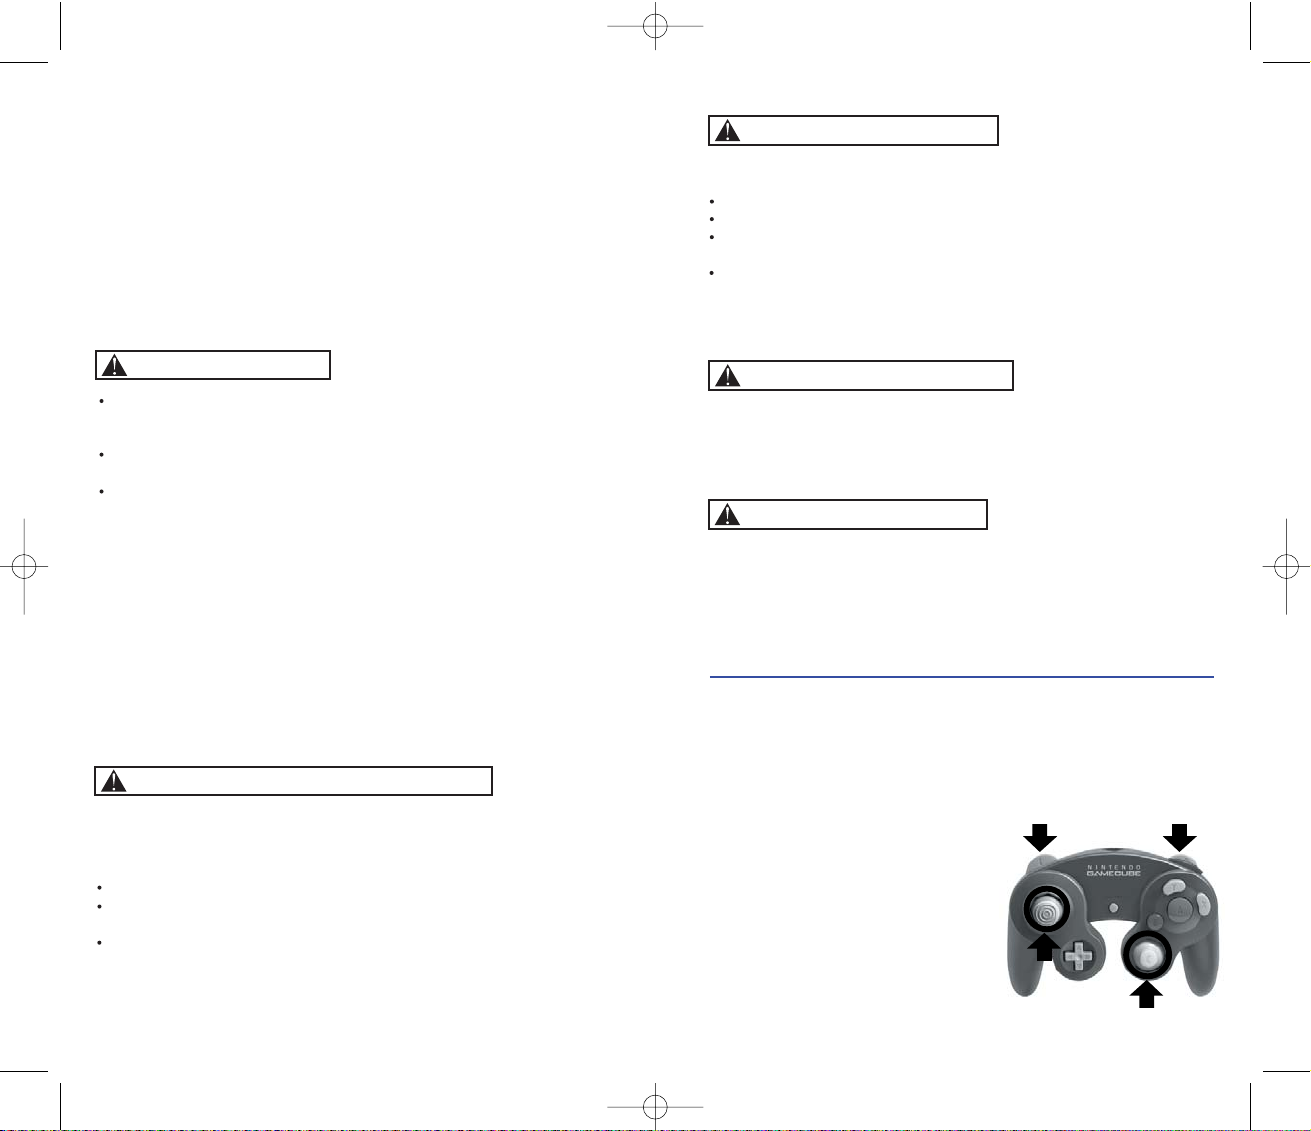
CONTROLLER NEUTRAL POSITION RESET
If the L or R Buttons are pressed or the Control Stick or C Stick are moved out of
neutral position when the power is turned ON, those positions will be set as the
neutral position, causing incorrect game control during game play.
To reset the controller, release all buttons
and sticks to allow them to return to the
correct neutral position, then hold down the
X, Y and START/PAUSE Buttons
simultaneously for 3 seconds.
L Button R Button
Control
Stick
C Stick
Page 3

3
SETTING UP . . . . . . . . 4
HOW TO PLAY . . . . . . 5
MODE SELECT . . . . . . 10
ARCADE . . . . . . . . . . 11
WORLD TOUR . . . . . . 14
VS MODE . . . . . . . . . . 20
TUTORIAL . . . . . . . . . 24
OPTIONS . . . . . . . . . . 25
ATHLETES . . . . . . . . . . . . .27
CREDITS . . . . . . . . . . . . . . .31
Thank you for purchasing Beach Spikers™. Please note that this software
is designed only for use with the Nintendo GameCube™. Be sure to read
this instruction booklet thoroughly before you start playing.
TABLE OF CONTENTS
BeachSpikersGCmanualV03.qxp 6/13/02 11:49 AM Page 2
T
his official seal is your assurance that Nintendo has
reviewed this product and that it has met our standards for
excellence in workmanship, reliability and entertainment
value. Always look for this seal when
buying games and accessories to ensure
complete compatibility with your
Nintendo product.
All Nintendo products are licensed by sale for use only with other authorized
products bearing the Official Nintendo Seal of Quality.
THIS GAME SUPPORTS
SIMULTANEOUS GAME PLAY
1-4 Player
Simultaneous
Memory
WITH ONE, TWO, THREE OR
FOUR PLAYERS AND
CONTROLLERS.
THIS GAME REQUIRES A
MEMORY CARD FOR SAVING
GAME PROGRESS, SETTINGS
OR STATISTICS.
Card
®
BEACH SPIKERS
THIS PRODUCT HAS BEEN RATED BY THE
ENTERTAINMENT SOFTWARE RATING BOARD. FOR
INFORMATION ABOUT THE ESRB RATING, OR TO
COMMENT ABOUT THE APPROPRIATENESS OF THE
RATING, PLEASE CONTACT THE ESRB AT
1-800-771-3772, OR VISIT WWW.ESRB.ORG.
LICENSED BY
NINTENDO, NINTENDO GAMECUBE AND THE OFFICIAL SEAL ARE TRADEMARKS OF NINTENDO.
© 2001 NINTENDO. ALL RIGHTS RESERVED.
Page 4
4
SETTING UP
5
HOW TO PLAY
Beach Spikers is a one to four player game (with
some modes, only up to two players). Connect the
Nintendo GameCube™ Controllers to the Nintendo
GameCube™ Controller Socket 1, 2, 3 and 4
(depending on the number of players participating).
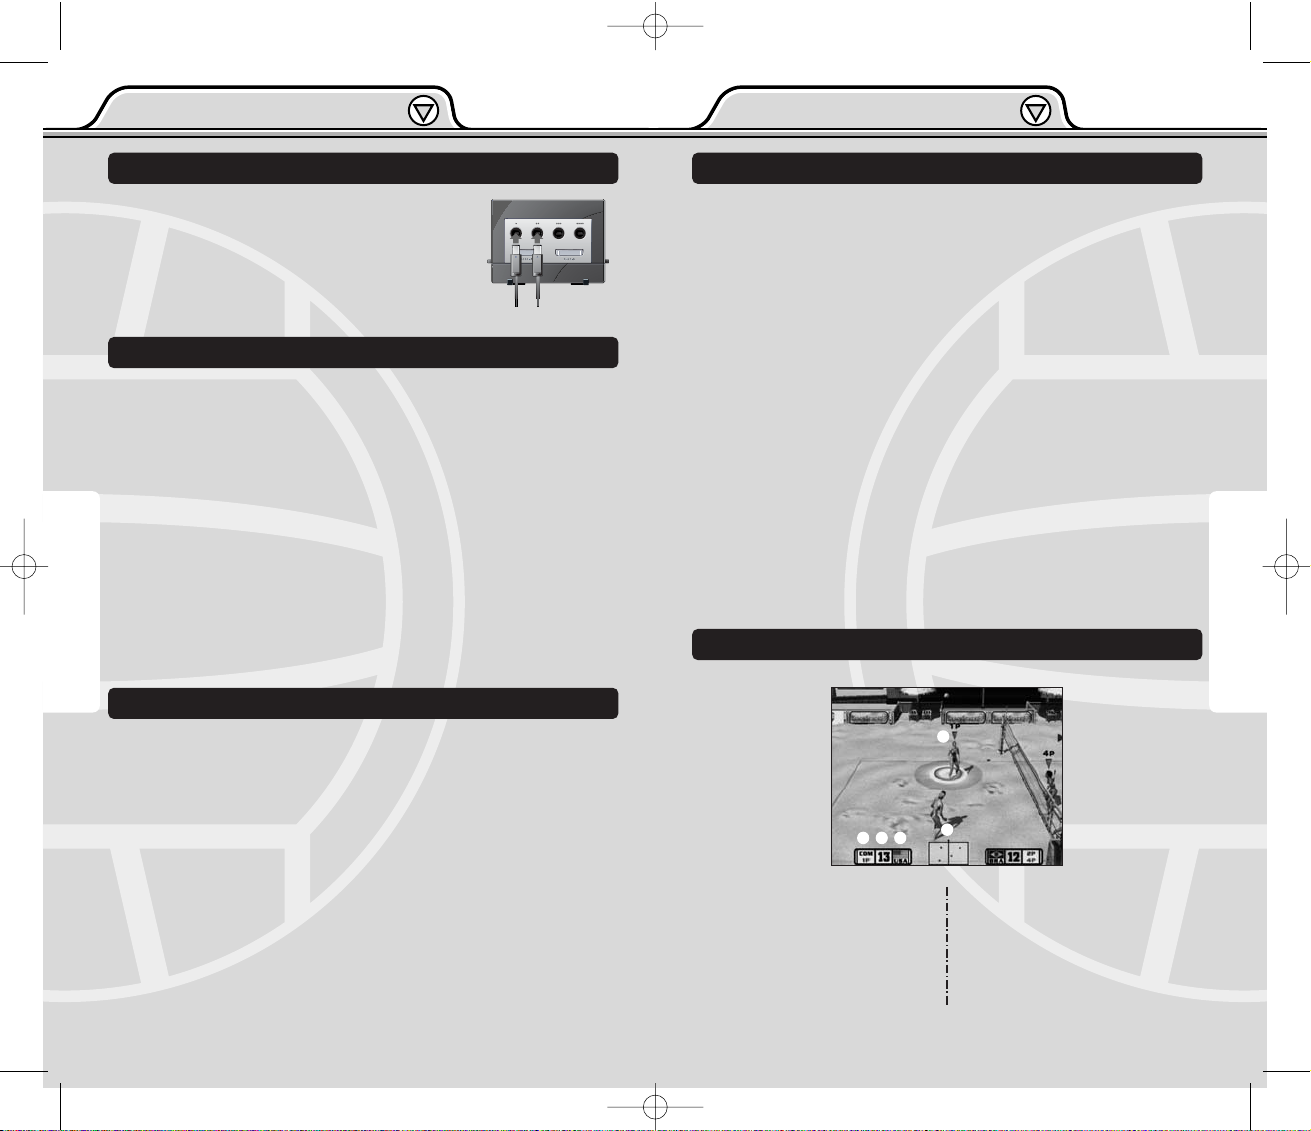
This software is compatible with progressive scan video output, using
the Component Cable (sold separately). Please refer to the instruction
manual of Nintendo GameCube™ for the direction on how to connect.
1 Connect your TV set and Nintendo GameCube™ with the
Component Cable.
2 Place the Beach Spikers Nintendo GameCube™ Game Disc inside
the GameCube, close the Disc Cover, and press the POWER Button.
3 After the Nintendo GameCube™ logo is displayed, press and hold
the B Button.
4 You will be asked whether to display in Progressive Mode. Select
“Yes” and the game will be displayed with Progressive Scan output.
Once the Progressive Mode is selected, unless the video cable is
changed, the Display Mode Select screen will be displayed each time
the power is turned on, without pressing the B Button. Also, depending
on the type of television set you are using, the horizontal/vertical ratio
of the screen may be changed.
Beach Spikers is a Nintendo GameCube™ Memory Card compatible
game [Nintendo GameCube™ Memory Card sold separately].
Although the game recognizes the Memory Card in either of the two
Memory Card Slots, it is recommended that you insert the Memory
Card into Memory Card Slot A. 3 blocks are needed to save a game
file.
When you start the game, the game will automatically look for the
game file. If the Memory Card does not contain a game file, the game
will ask you to create a game file. If there are no Memory Cards inserted,
the game will warn you and ask if you would like to Retry (insert the
Memory Card first) or Continue without saving. Follow the on-screen
instruction to start the game.
The game will automatically save game data during the game, and a
message will be displayed to notify that such action is taking place.
Never turn OFF the Nintendo GameCube™ power or remove the
Memory Card while the game data is being saved or loaded.
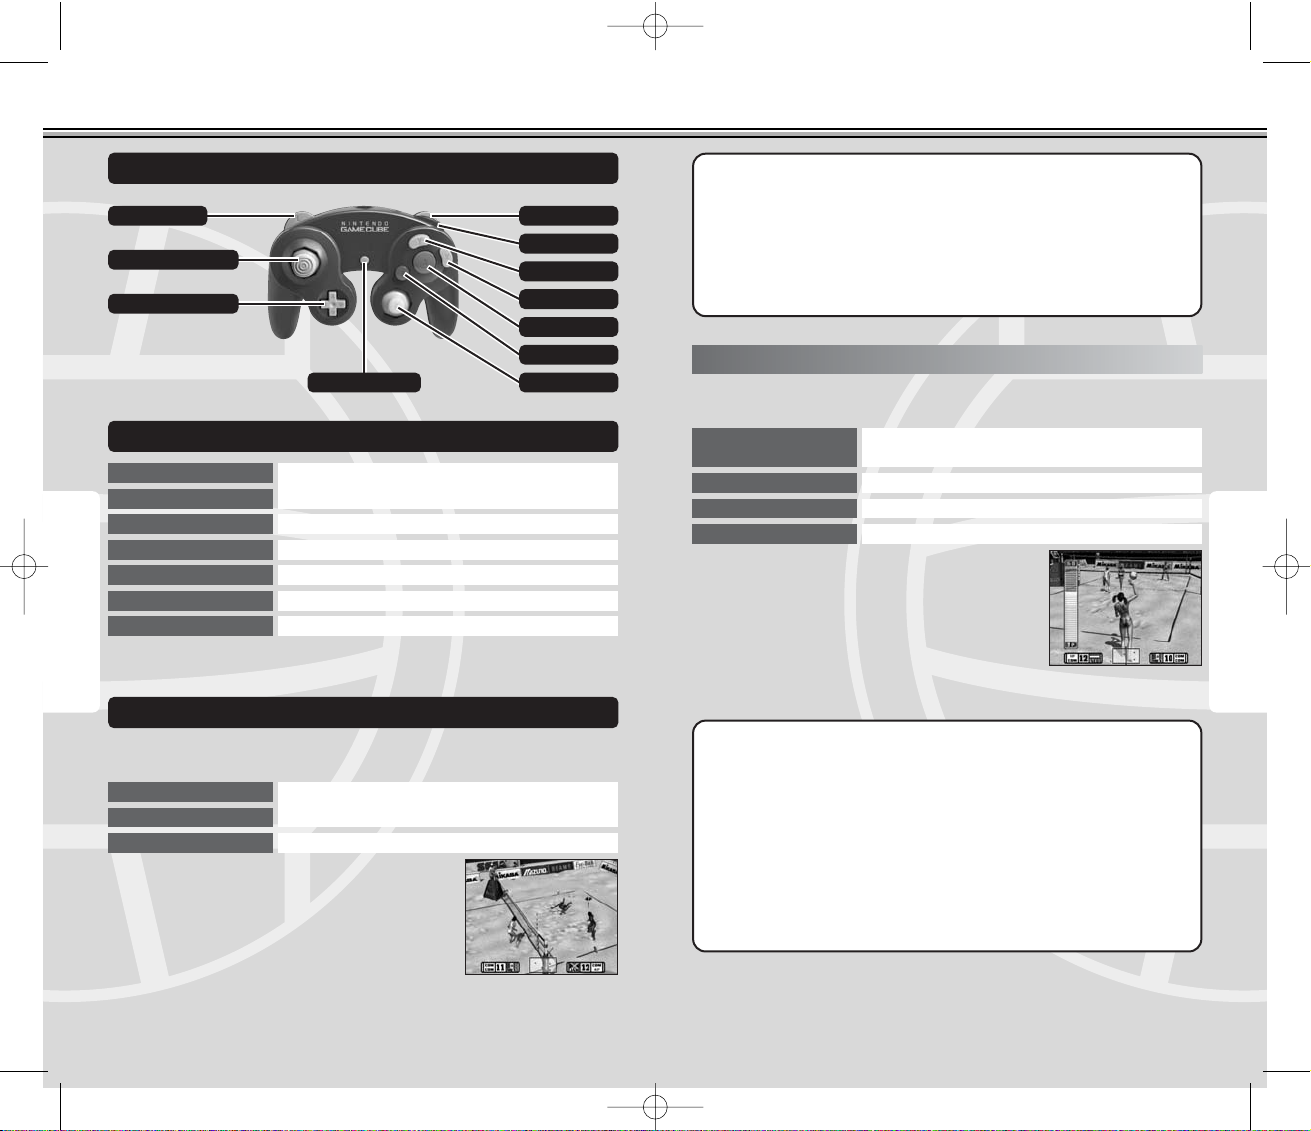
1 Player Marker
Indicates which player on the
field is being controlled.
1P: RED 2P: BLUE
3P: ORANGE 4P: GREEN
2 Indicates the players controlling
in the team.
3 Match Score
4 Country Representing the Team
5 Court Map
Indicates the position of
each player.
HARDWARE SETUP
USING PROGRESSIVE SCAN TV
In volleyball, each team must send the ball over the net to the opponent’s
side of the court and drop it on the ground. The team must also prevent
the ball from being grounded on its side of the court.
The game begins by serving the ball to the opponent’s side of the court.
Except for the first serve of the match, the team who scored the point
last has the right to serve.
The team is allowed three hits (or contacts) before returning the ball to
the opponent’s side of the court, but the same player may not hit the
ball twice in succession (please also see BLOCKING on p. 9 for the only
exception to this rule).
You score a point when you successfully ground the ball to the opponent’s
side of the court. Your opponent scores when you allow the ball to ground
on your side of the court, when you fail to send the ball back to the
opponent’s side in three hits, or when you ground the ball out of bounds
untouched by your opponent. In Beach Spikers, the first team to score
15 points, with at least a two-point advantage, wins the game. If the
score becomes 14-14 (deuce), the game will continue to a score of 20
or until one team takes the two-point advantage.
In this game, the Rally Point Scoring system is used, i.e. both the serving
and receiving teams can score a point. (In Sideout Scoring system, only
the serving team can score a point.)
BRIEF RULES ON VOLLEYBALL
GAME SCREEN
SAVE FILES
1
32 4
5
BeachSpikersGCmanualV03.qxp 6/13/02 11:49 AM Page 4
BEACH SPIKERS
BEACH SPIKERS
Page 5
6
HOW TO PLAY
7
HOW TO PLAY
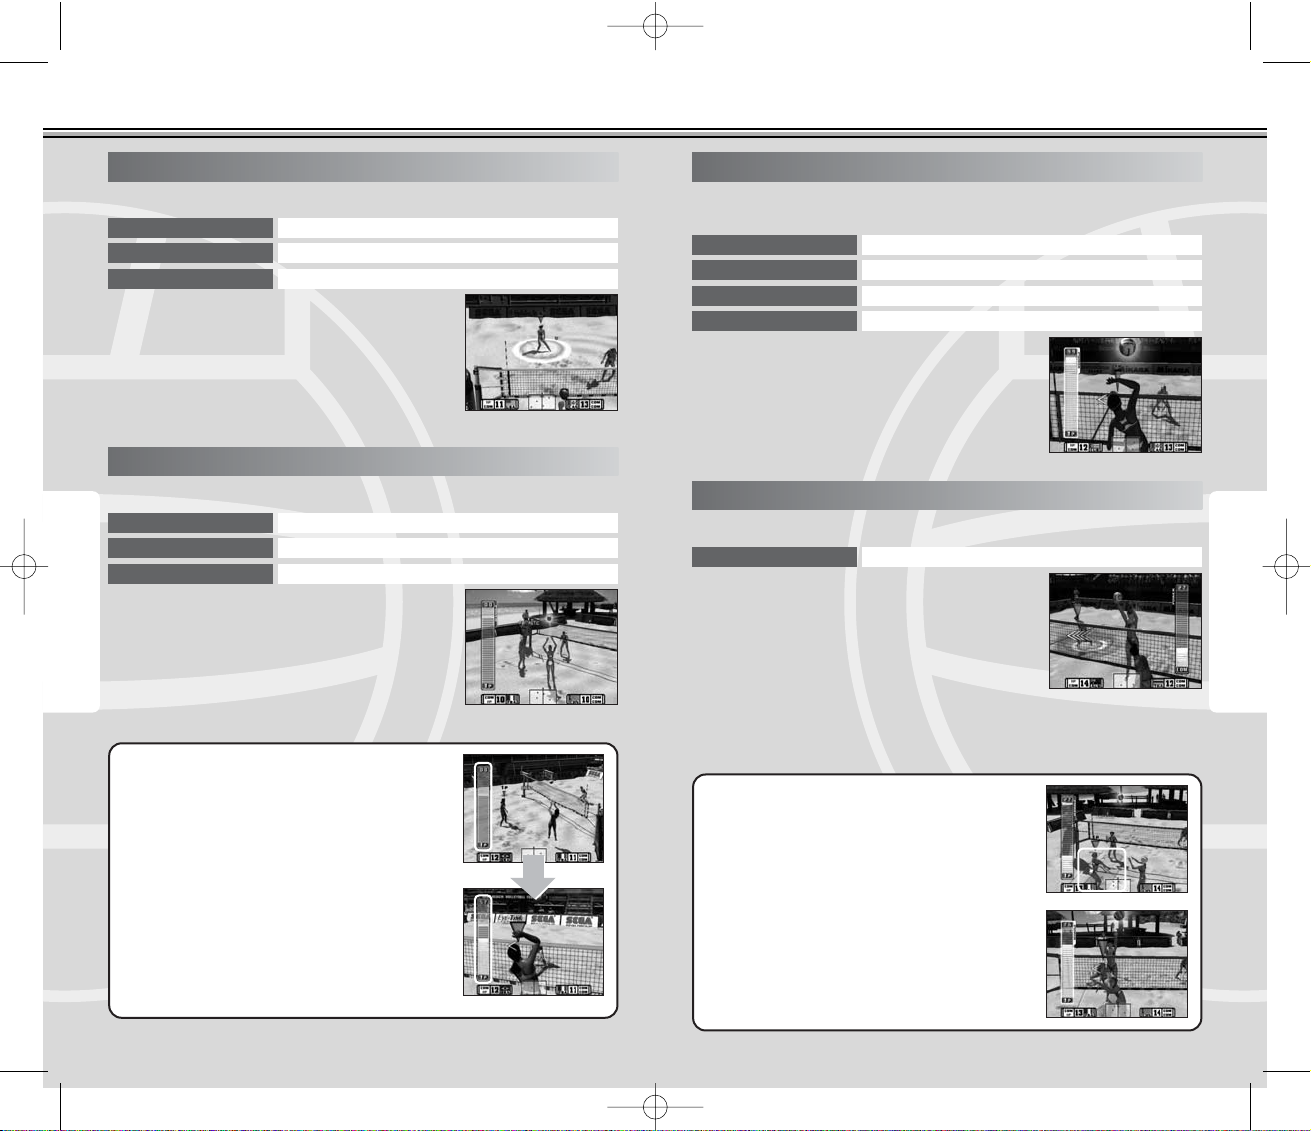
Control Stick
A Button
B Button
Select serving position; Select the course
to serve
Overhand serve
Underhand serve
SERVING
The first thing you need to do is serve the ball to the opponent’s side of
the court.
A Button + B Button
Jump serve
When you serve the ball, first you have an option
to change serving position. Use the Control Stick
46 to move the player.
The power gauge displayed to the left of the
screen indicates the power put into the service.
Press any serve button at the desired power level
to serve. Be careful though as you are required
to have at least the minimal amount of power to
make a successful Overhand and Jump serve.
Control Stick
+ Control Pad
Select menu item
(46to toggle menu settings, if any.)
A Button
Enter selection
B Button Return to previous screen
C Stick
Change camera angle*
L Button Zoom the Camera in*
R Button Zoom the Camera out*
* These are available only during the character edit of the World Tour
mode (p. 14).
Control Stick
Move the player around
While the ball is in play, use the Control Stick/+
Control Pad to move your player around
the court.
Except when an edited team is being selected
(Arcade Mode), the control will automatically
switch to the player on the field closest to the
ball receiving a serve/return, and switches to the
other player on the team after each action.
Naturally this will not be the case if two players
are teaming up.
+ Control Pad
START/PAUSE
Pause the game and prompt Pause Menu
For controls specific to particular mini-games of the VS MODE, please
see p. 22~23.
The Control Stick and the + Control Pad function in the same manner in this game, in the menu controls or during the game. Where it
is written Control Stick, it applies to the + Control Pad also.
Also, during the game, pressing either the X Button or the Y Button
has the same effect as pressing the A and B Buttons simultaneously.
Where it is written A Button + B Button, you may press either the X or
Y Button alone.
NOTES ON BUTTONS WITH SAME FUNCTIONS
NOTE: In Arcade mode, you serve in a different manner according to
the game style selected. See p. 13.
TYPES OF SERVE
Overhand Serve
The size of the area to aim is rather narrow, but you can hit a fast
ball if the power gauge is high.
Underhand Serve
It is rather low in power, but has wide area to aim. You will not make
a service error.
Jump Serve
The area to aim is very narrow, but your serve can hit with force. You
will also need to hit the power gauge at a higher level.
L Button R Button
START/PAUSE
Z Button
Y Button
X Button
A Button
B Button
C Stick
+ Control Pad
Control Stick
NINTENDO GAMECUBE™ CONTROLLER
MENU CONTROLS
CONTROLS IN THE GAME (GENERAL)
BeachSpikersGCmanualV03.qxp 6/13/02 11:49 AM Page 6
BEACH SPIKERS
BEACH SPIKERS
Page 6
8
HOW TO PLAY
9
HOW TO PLAY
Control Stick
A Button
B Button
A Button + B Button
Select the course to attack
Spike
Feint shot
Spike at blocker’s hands
ATTACKING
A Button
B Button
A Button + B Button
Normal toss
Quick toss
Two-Return
TOSSING
As with receiving, go under the marker and press
any receiving button.
You can also toss the ball to the opponent’s side
of the court (Two-Return — pressing both A and B
Buttons) to catch them off guard.
This is usually the second of three contacts, setting up for an attack.
This is usually the last of the three contacts, sending the ball to the
opponent’s side of the court.
When attacking, watch the power gauge to the
left side of the screen. Press the A Button, with the
gauge as high as possible, to spike the ball with
maximum force. Press the B Button to perform a
feint shot (send the ball over the blocker’s hands
or drop it near the net). Press both the A and B
Buttons to attempt to spike the ball at the blocker’s
hands for a one-touch out of bounds.
POWER GAUGE: SETTING UP FOR ATTACK
On the power gauge, there will also be an
indicator for potential maximum power for an
upcoming attack. The power gauge will appear
when you set up for an attack on your second
contact (or when you call for Two Attack). The
key to the attack is a good set-up, so go under
the ball quickly and press the toss button as
early as possible for a higher potential toss.
If the power gauge does not appear, this indicates that you were not in the position well
enough to set-up an attack. In this case, you
will not be able to attack on your third contact.
Press any tossing button to send the ball to the
opponent’s side.
A Button
Block
BLOCKING
Block and deflect your opponent’s attack.
When your opponent is about to attack, move in
front of the attacking player, and press the A
Button to attempt a block.
The block counts as a contact. If you attempt a
block and the ball stays on your team’s side of
the court (rather than bouncing back to the
opponent’s side), your team has only two contacts
left to send the ball back. However, the player
who attempted the block can immediately chase
and receive the ball and it will still count as the
first contact. This is the only time a “double-hit”
is allowed.
ATTACKING & BLOCKING: KNOW YOUR POSITION
When a player on the court (you or your opponent) attacks, there will be markers on the
ground, in front of the feet of both attacker
and potential blocker, indicating the left-right
position of the two.
When you’re blocking, try to exactly match
your position with that of the attacker.
If you’re attacking, watch the blocker’s position
and make the quick decision on whether to hit
the ball towards the open course, hit it over the
blocker’s hands or to spike it off of the blocker’s hands out-of-bounds.
A Button
B Button
A Button + B Button
Normal receive
Low receive
Call for Two Attack
RECEIVING
When the ball is in the air, there will be a marker
on the ground indicating the location where the
ball will drop. You can press any receiving button
around the marker, but try to receive in the center.
When you receive the ball by pressing both A
and B Buttons, the next player will perform an
attack (Two-Attack).
Receiving is usually the first of three contacts allowed in the game.
BeachSpikersGCmanualV03.qxp 6/13/02 11:49 AM Page 8
BEACH SPIKERS
BEACH SPIKERS
Page 7

10
MODE SELECT
11
ARCADE
On the Title Screen, press START/PAUSE to display
the Mode Select Screen. Use the Control Stick
82 to select a menu item, and press the A
Button to enter. Press the B Button to return to the
Demo Loop.
This is an 8-team tournament mode where you compete against the
teams from all over the world.
First select the team you are going to use. Use
the Control Stick to select a team, and press the
A Button to enter. If you are playing by yourself,
you will control both players on the team.
A tournament chart will be displayed, and the
match begins.
By default, the match in the Arcade Mode
begins with the game count at 10-10. The starting
count can be modified in Options (p. 25).
Play through Quarterfinals, Semifinals, and Finals
to win the tournament.
Press START/PAUSE during the game to pause the
game and display the Pause Menu. Use 82 to
select a menu item and press the A Button to
enter. Select BACK TO GAME (or simply press the
START/PAUSE again) to continue the game, or
QUIT GAME to quit the game and return to the
Mode Select screen.
ARCADE
WORLD TOUR
VS MODE
TUTORIAL
OPTIONS
In the game and in this instruction booklet, the player using the controller connected to the Controller Socket 1 will be referred to as 1P,
the player using the controller connected to the Controller Socket 2
will be referred to as 2P, and so forth
FLOW OF THE GAME
PAUSE MENU
Apart from scores of each match, total points
are calculated based on evaluations of your
play. At the end of the game, if your total points
are among the top 20, you can enter your name.
Use the Control Stick to select a letter, and press
the A Button to enter (select Del to delete a letter,
and Ent to end Name Entry). You may enter up to
3 letters.
TOTAL POINTS & NAME ENTRY
This is a conversion of the arcade game where
you participate in an 8-team tournament.
This is a mode where you create your original
team and participate in a series of tournaments.
Have your CPU-controlled partner develop skills,
and aim for the top in the world.
Play against the CPU or other players with various
settings. You can also compete in mini-games.
Learn the basic controls of “Beach Spikers.”
Adjust various game settings, or perform sound
tests. You can save and load game settings
as well.
ARCADE
WORLD TOUR
VS MODE
TUTORIAL
OPTIONS
BeachSpikersGCmanualV03.qxp 6/13/02 11:49 AM Page 10
BEACH SPIKERS
BEACH SPIKERS
Page 8

12
ARCADE
13
ARCADE
When a player joins in for a 2-player game, the
joining player has the option of selecting Team
Play (2 players cooperating on the same team)
or Match Play (the joining player selects his/her
team for a versus match). Use the Control Stick
46 to select, and press the A Button to enter.
The game automatically becomes a Match Play
if there are more than two players in the game.
Each player selects the player on the field to
control. Use the Control Stick to select the player
on the field, and press the A Button to enter.
With three players, one of the players must control
both players on the team. With four players, each
player controls an assigned player on the field.
With Team Play, as soon as you select the team
you wish to use, you will enter the tournament for
Team Play.
With Match Play, after selecting the teams to use,
you will select the stage to play in. Use the
Control Stick to select the stage, and press the A
Button to begin the match. Note that the stage
with “?” displayed cannot be played at this point.
These stages will be uncovered and will become
selectable as you progress in other modes.
In Arcade mode, there are two game styles that
can be applied. You can change this in Arcade
Rules of the Options (p. 25).
GAME STYLE
During the game, press START/PAUSE on any controller currently not in use to have another player
join in for Team Play or Match Play.
TEAM PLAY & MATCH PLAY
ORIGINAL
ARCADE
If you set the Game Style to ORIGINAL, each
team (country) will be ranked in four levels of
strength (SS, S, A, B). So there will be a difference
in abilities during the match.
If you set the Game Style to ARCADE, each
team will have an even strength. Also, rather
than using different buttons for different serves,
you will serve differently according to the level
of the power gauge. You will not make any
service errors.
ORIGINAL
ARCADE
When the match is over, the winner will play in
the tournament.
BeachSpikersGCmanualV03.qxp 6/13/02 11:49 AM Page 12
BEACH SPIKERS
BEACH SPIKERS
Page 9

14
WORLD TOUR
15
WORLD TOUR
Create a team and characters, and compete in a World Tour to aim for
the championship.
In each stage, you will compete in a 16-team
tournament. There are 8 tournaments in all,
and you will be ranked according to the overall points.
You control only one player on the team, as the
CPU controls your partner.
Depending on how you communicate with your
partner, the level of teamwork increases or
decreases. Also, by distributing ability points to
your partner’s attributes, you can help your partner
develop into a great athlete.
USING ORIGINAL TEAMS IN THE ARCADE & VS MODES
By selecting EDIT during the Team Select
screen of the Arcade and VS Modes, you can
play with your original team saved on your
Memory Card. Again, the CPU controls your
partner in either mode (unless two players are
playing on the same team). Try winning the
tournament with your original team.
NAME
COUNTRY
(NOT AVAILABLE WITH YOUR PARTNER)
HAIR
At the beginning of the World Tour mode, you
will be asked whether to start a New Game or to
Continue the previously saved game. Use the
Control Stick 82 to select, and press the A Button
to enter.
If you select CONTINUE, please see p. 18 for how
to load the previously saved game.
STARTING THE MODE
When you start a new game, you will create two
characters: a player’s character which you control,
and your partner which the CPU controls.
First, you
will edit the player-controlled character.
Use the Control Stick to select the menu item,
and press
the A Button to switch to the set-up
screen for each
setting. Select OK when you are
done in each setting.
You can also use the C Stick to change the camera
angle of the character displayed on the left
side of
the screen, and L/R Buttons to zoom the
camera in/out.
CREATING YOUR TEAM
NAME
Name your team’s character. Use the Control
Stick to select a letter (move cursor), press the A
Button to enter the selected letter, and the B
Button to delete a letter. You can enter up to 7
alphanumeric characters. When done, select OK
and press the A Button.
COUNTRY
(NOT AVAILABLE WITH YOUR PARTNER)
Select the country your characters will represent.
Use the Control Stick to select the country (flag),
and press the A Button to enter.
NOTE: This selection is not available when editing
your partner, since both characters play for the
same country.
HAIR
Edit your characters’ hair. Use the Control Stick
82 to select menu item, and 46 to select from
available hair styles or change hue/brightness of
the hair. When done, select OK and press the A
Button.
BeachSpikersGCmanualV03.qxp 6/13/02 11:49 AM Page 14
BEACH SPIKERS
BEACH SPIKERS
Page 10

17
WORLD TOUR
Before the game, you will assign ability points to
each attribute. Use the Control Stick 82 to select
the attribute, and 46 to distribute the desired
Ability Points.
Serve . . . . . . . . . Ability to serve with higher skill and greater power.
Receive . . . . . . Ability to receive powerful serves and attacks.
Attack . . . . . . . . Ability of attacking technique and decisiveness of
the course to attack.
Block . . . . . . . . . Ability to block, in terms of timing, positioning, and
accuracy.
Toss . . . . . . . . . . Ability to toss the ball accurately.
Power . . . . . . . . In relation with all actions, raise this to strengthen
each.
Response . . . . . In relation with all actions, raise this to respond
more alertly.
At the beginning of the game, you are given 5 ability points. After each
match, you are evaluated on the result of the match and on the
Teamwork percentage, and given ability points based on evaluation.
DISTRIBUTING ABILITY POINTS
START THE GAME
Select START GAME to start the World Tour. Afterwards, select NEXT GAME
to advance to the next match.
When you are finished with team creation, the World Tour Menu screen
will be displayed. Verify your team’s condition here, and develop
your partner.
WORLD TOUR MENU SCREEN
DISTRIBUTING ABILITY POINTS
START THE GAME
1 Current Teamwork Percentage
2 Your partner’s attribute values.
3 World Tour Menu
1
3
2
1616
WORLD TOUR
FACE
UNIFORM
(NOT AVAILABLE WITH YOUR PARTNER)
When you are done with your player-controlled
character, you will then edit your partner.
NOTE ON PLAYER/PARTNER PARTS
During the game, when certain requirements
are met, you will earn new parts that can be
used to create players, such as new hair styles,
sunglasses, faces and uniforms. Try your luck
with other modes as well.
FACE
Edit your characters’ face and skin color. Use the
Control Stick 82 to select menu item, and 46 to
select from available face styles and sunglasses
or change hue/brightness of the skin. When done,
select OK and press the A Button.
NOTE: The sunglasses are worn only with the
matches played during the daytime.
UNIFORM
(NOT AVAILABLE WITH YOUR PARTNER)
Select the uniform that your characters will wear.
Use the Control Stick 46 to select from the available uniforms.
NOTE: This selection is not available when editing
your partner.
BeachSpikersGCmanualV03.qxp 6/13/02 11:49 AM Page 16
BEACH SPIKERS
BEACH SPIKERS
Page 11

18
WORLD TOUR
19
WORLD TOUR
During the match, there will be a timeout during
every other court change. There you have a
choice of conversation with your partner.
Reflecting on your partner’s performance, use
the Control Stick 82 to select the type of conversation (Praise, Encourage, Reprimand, or Do
nothing), and press the A Button to enter.
Depending on your selection, the Teamwork percentage will increase or decrease. If the
Teamwork percentage is high, your partner can
perform her maximum. But if it is low, she will perform more erratic.
As a team, there are times when it is necessary
to reprimand. Choose your actions wisely.
During the World Tour Menu screen, select RANKING to view your current rank in the World Tour.
Use the Control Stick 82 to scroll the list. Press the
A Button to view the result of each stage.
During the World Tour Menu screen, select SAVE
to save the current game onto the Memory
Card. Select LOAD to load and continue the
saved game. Note that only the contents of
World Tour Modes are saved or loaded.
POINTS EARNED IN THE WORLD TOUR
On each tournament, your team earns points
depending on the rank of the tournament.
1st Place 20 pts.
2nd Place 15 pts.
3rd Place 10 pts.
4th Place 8 pts.
5th Place 5 pts.
7th Place 3 pts.
9th Place 2 pts.
13th Place 1 pt.
The player that receives becomes the attacker.
If you want to have your partner attack, then
distribute the Ability Points to improve her
receiving also.
On the other hand, if you want to attack, receive
the ball yourself. Your partner will then need to
improve on tossing.
Your partner can improve on serving, receiving,
tossing, attacking, or blocking in combination
with either power or response. Even if she has
higher skill to serve or to attack, she can’t hit a
powerful ball. Likewise, even with technique to
receive or to toss, it’s no use if she can’t reach
the ball. Furthermore, she will not be a powerful
partner, if you raise only her power or response.
Think balance.
To be successful on selecting either Praise or
Reprimand, think about these three points: the
current point differential, the contents of your
performance, and the contents of your partner’s
performance. Even if your team is leading in the
match, what if you’re making all the mistakes and
your partner is performing well... Praise, reprimand,
or do nothing... Think well before you select.
RAISING YOUR TEAMWORK PERCENTAGE
RANKING
SAVE/LOAD
EXIT
Select EXIT to quit the game and return to the Mode Select screen.
RAISING YOUR TEAMWORK PERCENTAGE
RANKING
SAVE/LOAD
EXIT
Having a good partner is the key to this mode. Equally, the Teamwork
Percentage affects your partner’s performances in the match. Here are
some tips on developing your partner.
FEW TIPS ON WORLD TOUR MODE
BeachSpikersGCmanualV03.qxp 6/13/02 11:49 AM Page 18
BEACH SPIKERS
BEACH SPIKERS
Page 12

20
VS MODE
21
VS MODE
RULES AND SETTINGS
START POINT
Select the starting game count, from 0 to 12.
LAST PLAY
Selects the maximum plays to be played after the deuce at 14-14
(i.e., if 3 is selected, regardless of the two-point advantage rule, the
team that scores 16 points automatically wins the match). Select
from the odd numbers of 3 to 19.
RALLY LEVEL
Select the level of balls going out of control on long rallies, from
EASY, NORMAL, and HARD. The ball rarely goes out of control on
EASY, but goes out of control early with HARD.
CPU LEVEL
Select the difficulty level of CPU, from EASY, NORMAL, HARD, and
VERY HARD.
BGM
Select the background music to be played during the game.
Play a free match, or in a mini-game.
During the VS Mode Menu screen, use the
Control Stick
82 to select the game to play,
and press the A Button to enter. There are four
games available.
Each game has its own rules and/or settings to
set up. Use the Control Stick 82 to select the
menu item, and 46 to modify the setting. Select
RESET and press the A Button to revert the game
settings back to default value. Select OK to
advance to the next screen.
Next, each player selects the position on the
court to play. Use the Control Stick to select the
position, and press the A Button. Additional player(s) can join in by pressing START/PAUSE of the
vacant controller connected.
When OK is highlighted, press the A Button to
advance to the next screen.
Now, select the team to use. Use the Control Stick
to select the team, and press the A Button to enter.
At the end of the game, the Retry Menu will be
displayed. Use the Control Stick 82 to select the
menu item, and press the A Button to enter.
Select RETRY to play the same game again with
the same conditions. Select QUIT GAME to return
to the VS Mode Menu screen.
Play a free match, alone or with up to four players.
BEACH SPIKERS
After the team to be used has been selected, the
Stage Select screen will be displayed. Use the
Control Stick to select the stage to be played on,
and press the A Button to start the game. As with
the Match Play of the Arcade mode, the stage
with “?” displayed cannot be played until they
are uncovered.
BeachSpikersGCmanualV03.qxp 6/13/02 11:49 AM Page 20
BEACH SPIKERS
BEACH SPIKERS
Page 13

22
VS MODE
23
VS MODE
There will be a counter on the bomb which you
will play with. On every contact, the counter will
decrease according to the button pressed: 1 point
for A Button, 2 points for B Button, and 3 points for
pressing both A & B Buttons simultaneously. Your
team has two contacts to return the bomb to your
opponent’s side of the court. The bomb explodes
when the counter reaches zero or when the bomb
drops on the ground, in which case that team will
lose the game.
Each player takes turns attacking the opponent’s
goal (court), while the other player defends it.
When attacking, the CPU will toss the ball, so watch
the power gauge and attack to drop the ball into
the opponent’s goal. When defending, try to keep
the ball from dropping within the goal by blocking
or receiving. The game is played in a
best of 5
rounds, but the game will continue into sudden
death rounds when the winner is not decided.
RULES AND SETTINGS
START POINT
Select the starting game count, from 0 to 12.
RANDOM RULE
When this rule is enabled, once in a while there will be a brief change
in the rules. The amount of points deducted from the counter may
be double (or even triple) the assigned amount, or fixed to certain
amount regardless of the button pressed. The counter may even
increase. The rule in effect will be displayed at the top of the screen.
CPU LEVEL
Select the difficulty level of CPU, from EASY, NORMAL, HARD, and VERY HARD.
BGM
Select the background music to be played during the game.
RULES AND SETTINGS
CPU LEVEL
Select the difficulty level of CPU, from EASY, NORMAL, HARD, and VERY HARD.
GOAL ZONE
Select the size (or type) of goals to defend.
BGM
Select the background music to be played during the game.
RULES AND SETTINGS
CPU LEVEL
Select the difficulty level of CPU, from EASY, NORMAL, HARD, and
VERY HARD.
BGM
Select the background music to be played during the game.
The object of the game is to grab the flag before
your opponent does. The players will first line up
on the ground. The player who selected
1 in the
Position Select will position herself at 1, 2 position
herself at 2, and so forth.
The game will be played in two rounds. In the
first round, the player at position 1 will compete
against the player at position 3, and 2 against
4. When the message “Heads Down” is displayed,
press and hold the Control Stick 2 to get ready.
With the signal “GO!,” release the Control Stick,
and tap on the A Button repeatedly to run. The
gauges at the top indicate the speed of each
player running. At the jump zone, press the B
Button at the correct time to jump (dive) and
grab the flag.
Two winners will advance to the second and
deciding round to compete with each other.
Play in a game of Beach Flags.
BEACH FLAGS
Play a rally with a bomb.
BEACH COUNTDOWN
Play in a P.K. Shootout, volleyball style. 1 or 2 players can play.
BEACH P.K.
2
1
3
4
4231
JUMP ZONE
JUMP ZONE
BeachSpikersGCmanualV03.qxp 6/13/02 11:49 AM Page 22
BEACH SPIKERS
BEACH SPIKERS
Page 14

24
TUTORIAL
25
OPTIONS
Change game settings and save/load game data.
Use the Control Stick
82 to select the menu item,
and press the A Button to enter.
GAME STYLE . . Select the Game Style to be
played (p. 13).
DIFFICULTY . . . Change the difficulty level of the
game from EASY, NORMAL,
HARD, and VERY HARD.
START POINT . . Change the starting point for the
matches to start with.
RANKING . . . . . View score ranking of the
Arcade mode. Use the Control
Stick
82 to scroll through the list,
and 46 to switch between SINGLE PLAY and TEAM PLAY modes.
Practice basic actions to hone your skills.
Each training menu contains 5 training programs
and TIPS TO WIN (a short demo). Use the Control
Stick
82 to select from the menu, and press the
A Button to begin your training.
Each training has a quota to clear. Practice to
clear all of the trainings.
There will be an OK mark next to the menu item
after you have cleared it.
First, select the team to be used in Tutorial mode,
and press the A Button to advance. Note that
edited teams cannot be selected in this mode.
TEAM SELECT
Here you can change settings for the ARCADE
mode. Use the Control Stick 82 to select the
menu item, and 46 (where applicable) to
change settings.
ARCADE RULES
AUDIO . . . . . . . .
Change audio output between
STEREO and MONAURAL.
BGM VOLUME . Change the volume level of
the background music during
the game.
SE VOLUME . . . . Change the volume level of the
sound effects during the game.
SOUND TEST . . . Listen to the selected back-
ground music. Press the A Button
to play.
Here you can change sound related settings or
listen to the background music used in the game.
SOUND
In Tutorial, you can practice the following: SERVE,
RECEIVE, TOSS, ATTACK and BLOCK. Use the
Control Stick 82 to select from the menu, and
press the A Button.
TRAINING SELECT
BeachSpikersGCmanualV03.qxp 6/13/02 11:49 AM Page 24
BEACH SPIKERS
BEACH SPIKERS
Page 15

26
OPTIONS
27
ATHLETES
You can enable/disable the rumble feature for
each controller separately. Use the Control Stick
82 to select the controller, and 46 to select
ON/OFF.
RUMBLE FEATURE
Select SAVE to save the current Option settings to
the Memory Card; select LOAD to load settings
from the Memory Card.
After either SAVE or LOAD is selected, use the
Control Stick 82 to select the Memory Card Slot
A or B (the slot without the Memory Card will be
dimmed and will not be selected), and press the
A Button to save or load.
Upon saving, if a save file already exists on the
selected Memory Card, you will be asked
whether to overwrite the existing data.
SAVE/LOAD
Select this and press the A Button to return all Options settings to their
default value.
INITIAL SETTING
UNITED STATES (USA)
Lisa
Mayer
Thelma
Garnett
BRAZIL (BRA)
Veronyca
Marques
Akasha
Costa
AUSTRALIA (AUS)
Mira
Joyce
Nicole
Fraser
SPAIN (ESP)
Gloria
Sanchez
Elena
Garcia
BeachSpikersGCmanualV03.qxp 6/13/02 11:49 AM Page 26
BEACH SPIKERS
BEACH SPIKERS
Page 16

28
ATHLETES
29
ATHLETES
JAPAN (JPN)
Naomi
Wakui
Hikaru
Sunaga
ITALY (ITA)
Irene
Fano
Loretta
Gilardi
FRANCE (FRA)
Carine
Lafont
Sophie
Rouch
CUBA (CUB)
Debra
Gomez
Petra
Fleta
CANADA (CAN)
Jullia
Quilico
Luca
Olvis
MEXICO (MEX)
Angela
Sandi
Jessica
Salinas
THAILAND (THA)
Pinjai
Tankul
Ratee
Savana
NETHERLANDS (NED)
Nel
Feilke
Manon
Renesse
BeachSpikersGCmanualV03.qxp 6/13/02 11:49 AM Page 28
BEACH SPIKERS
BEACH SPIKERS
Page 17

30
ATHLETES
31
CREDITS
SEGA-AM2
Director
Eigo Kasahara
Main Programmer
Hideya Shibazaki
Main Designer
Tatsuya Sato
Programmers
Shigenobu Iga
Takeshi Hisajima
Toshihiko Gouya
Masato Shimoyama
Junnichiro Matsuura
Designers
Mami Abe
Jinya Itoh
Miyuki Noda
Shigemi Ohmori
Erika Aihara
Planner
Tohru Murayama
Sound
Tatsutoshi Narita
Sachio Ogawa
Shinichi Goto
Fumio Ito
Megumi Takano
SEGA OF AMERICA
Associate Product Manager
Cord Smith
Senior Product Manager
Rob Alvarez
VP of Entertainment Marketing
Mike Fischer
SOA Creative Services
Robert Schonfisch
Erica Forte
Vicki Morawietz
Arianne McCarthy
VP of Product Development
Jin Shimazaki
Localization Manager
Osamu Shibamiya
Localization Producer
Jason Kuo
Test Lead
Nestor Protacio Jr.
Testers
Brian Matt
Patrick Sullivan
Paul Garcia
Anthony Taylor
Bruce Dumlao
MANUAL PRODUCTION
(SEGA OF JAPAN)
Text Editor
Masaru Kobayashi
Text Editor/Translator
Makoto Nishino
Designer
Satoru Ishigami
Supervisor
Yoshihiro Sakuta
Special Thanks
Peter Moore
Chris Gilbert
Kirsten Merit
Bryce Baer
Caroline McNiel
Teri Higgins
Stacey Kerr
Sirr Less
Koji Kuroki (SOJ)
Sega.com
CHINA (CHN)
Xiuhua
Lee
Ling
Cui
GERMANY (GER)
Anita
Erhart
Hilda
Wolff
ENGLAND (ENG)
Mary
Clare
Susan
Evans
JAMAICA (JAM)
Lynda
Howell
Irie
Coxe
BeachSpikersGCmanualV03.qxp 6/13/02 11:49 AM Page 30
BEACH SPIKERS
BEACH SPIKERS
Page 18

32
NOTES
t
t
BeachSpikersGCmanualV03.qxp 6/13/02 11:49 AM Page 32
*THIS LIMITED WARRANTY IS VALID FOR U.S. AND CANADIAN
NINTENDO GAMECUBE ™ GAME DISC MANUFACTURED FOR SALE IN AND
PURCHASED AND OPERATED IN THE UNITED STATES AND CANADA, ONLY!
Limited Warranty
Sega of America, Inc. warrants to the original consumer purchaser that the Nintendo
GameCube™ Game Disc shall be free from defects in material and workmanship for a period
of 90-days from the date of purchase. If a defect covered by this limited warranty occurs
during this 90-day warranty period, the defective Nintendo GameCube™ Game Disc or
component will be replaced free of charge. This limited warranty does not apply if the
defects have been caused by negligence, accident, unreasonable use, modification,
ampering or any other causes not related to defective materials or workmanship. Please
retain the original or a photocopy of your dated sales receipt to establish the date of
purchase for in-warranty replacement. For replacement, return the Game Disc, with its
original packaging and receipt, to the retailer from which the software was originally
purchased. In the event that you cannot obtain a replacement from the retailer, please
contact Sega to obtain support.
Obtaining technical support/service
To receive additional support, including troubleshooting assistance, please
contact Sega at:
* web site . . . . . . . . . . . http://www.sega.com
* e-mail . . . . . . . . . . . . . support@sega.com
* telephone . . . . . . . . . 1-716-650-6701
LIMITATIONS ON WARRANTY
ANY APPLICABLE IMPLIED WARRANTIES, INCLUDING WARRANTIES OF
MERCHANTABILITY AND FITNESS FOR A PARTICULAR PURPOSE, ARE HEREBY LIMITED TO
90-DAYS FROM THE DATE OF PURCHASE AND ARE SUBJECT TO THE CONDITIONS SET
FORTH HEREIN. IN NO EVENT SHALL SEGA OF AMERICA, DREAMCAST INC., BE LIABLE
FOR CONSEQUENTIAL OR INCIDENTAL DAMAGES RESULTING FROM THE BREACH OF ANY
EXPRESS OR IMPLIED WARRANTIES. THE PROVISIONS OF THIS LIMITED WARRANTY ARE
VALID IN THE UNITED STATES ONLY. SOME STATES DO NOT ALLOW LIMITATIONS ON HOW
BEACH SPIKERS
LONG AN IMPLIED WARRANTY LASTS, OR EXCLUSION OF CONSEQUENTIAL OR
INCIDENTAL DAMAGES, SO THE ABOVE LIMITATION OR EXCLUSION MAY NOT APPLY TO
YOU. THIS WARRANTY PROVIDES YOU WITH SPECIFIC LEGAL RIGHTS. YOU MAY HAVE
OTHER RIGHTS WHICH VARY FROM STATE TO STATE.
Sega is registered in the U.S. Patent and Trademark Office.Beach Spikers is a registered
rademark or a trademark of Sega Corporation and its affiliates. All Rights Reserved.
© SEGA-AM2 / SEGA, 2001, 2002. This game is licensed for use with The Nintendo
GameCube System only. Copying and/or transmission of this game is strictly prohibited.
Unauthorized rental or public performance of this game is a violation of applicable laws.
Sega of America Dreamcast, P.O. Box 7639, San Francisco, CA 94120. All Rights Reserved.
www.sega.com. Programmed in Japan. Made and printed in the USA.
Fonts used in this game are supported by FONTWORKS International Limited. FONTWORKS
product-names and FONTWORKS logos are registered trademarks or trademarks of
FONTWORKS International Limited. Copyright 1994-2002 FONTWORKS International Limited.
All rights reserved.
Page 19

MANUAL COVER (BACK)
BeachSpikersGCmanualV03.qxp 6/13/02 11:49 AM Page 34
 Loading...