

Page 1

OPERATOR'S MANUAL
INMARSAT FLEETBROADBAND
SHIP EARTH STATION
FELCOM250
Model
FELCOM500
www.furuno.com
Page 2

The paper used in this manual
9-52 Ashihara-cho,
A:AUG
2009
.
M1:NOV.13, 2013
Pub. No.
(
)
Nishinomiya, 662-8580, JAPAN
is elemental chlorine free.
・FURUNO Authorized Distributor/Dealer
All rights reserved.
TAHA
FELCOM500/250
Printed in Japan
OME-56660-M1
0 0 0 1 7 8 0 9 9 1 1
Page 3

IMPORTANT NOTICES
General
• This manual has been authored with simplified grammar, to meet the needs of international users.
• The operator of this equipment must read and follow the descriptions in this manual. Wrong operation or maintenance can cancel the warranty or cause injury.
• Do not copy any part of this manual without written permission from FURUNO.
• If this manual is lost or worn, contact your dealer about replacement.
• The contents of this manual and equipment specifications can change without notice.
• The example screens (or illustrations) shown in this manual can be different from the screens you
see on your display. The screens you see depend on your system configuration and equipment
settings.
• Save this manual for future reference.
• Any modification of the equipment (including software) by persons not authorized by FURUNO will
cancel the warranty.
• Windows, Internet Explorer, SmartScreen and Windows Media are either registered trademarks or
trademarks of the Microsoft Corporation in the United States and/or other countries.
• Quick Time is a trademark of Apple Inc.
• Mozilla and FireFox are registered trademarks or trademarks of Mozilla Foundation.
• Real Player is a registered trademark or trademark of RealNetworks, Inc.
• All brand and product names are registered trademarks, trademarks or service marks of their respective holders.
• “MV”, “Multi voice”, “MSISDN” and “MS-ISDN” require a contract with provider. See our FURUNO
web site (www.furuno.com) for details.
How to discard this product
Discard this product according to local regulations for the disposal of industrial waste. For disposal
in the USA, see the homepage of the Electronics Industries Alliance (http://www.eiae.org/) for the
correct method of disposal.
How to discard a used battery
Some FURUNO products have a battery(ies). To see if your product has a battery, see the chapter
on Maintenance. Follow the instructions below if a battery is used. Tape the + and - terminals of
battery before disposal to prevent fire, heat generation caused by short circuit.
In the European Union
The crossed-out trash can symbol indicates that all types of batteries
must not be discarded in standard trash, or at a trash site. Take the
used batteries to a battery collection site according to your national
legislation and the Batteries Directive 2006/66/EU.
In the USA
The Mobius loop symbol (three chasing arrows) indicates that Ni-Cd
and lead-acid rechargeable batteries must be recycled. Take the used
batteries to a battery collection site according to local laws.
In the other countries
Ni-Cd Pb
Cd
There are no international standards for the battery recycle symbol. The number of symbols can
increase when the other countries make their own recycle symbols in the future.
i
Page 4
SAFETY INSTRUCTIONS
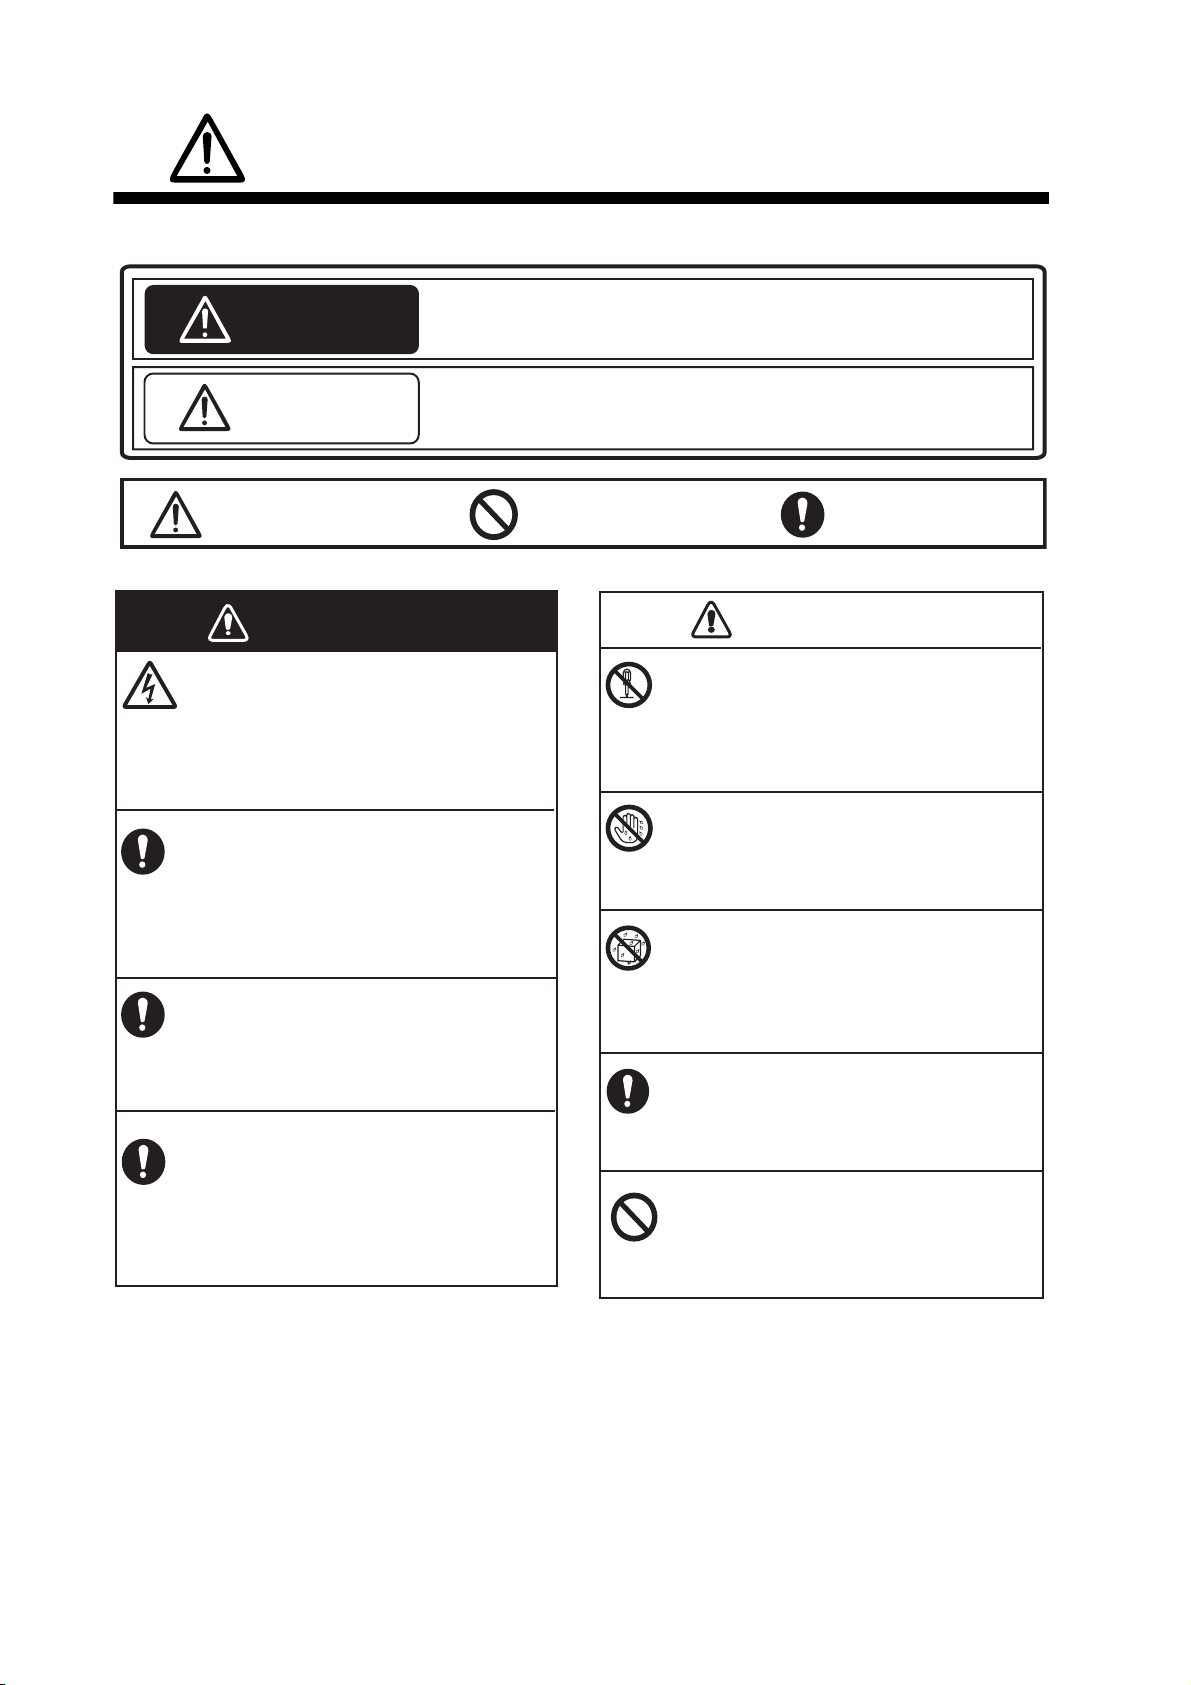
Read these safety instructions before you operate the equipment.
Indicates a condition that can cause death or serious injury if
WARNING
CAUTION
Warning, Caution
not avoided.
Indicates a condition that can cause minor or moderate injury if
not avoided.
Prohibitive Action
Mandatory Action
WARNING
Do not open the equipment.
This equipment uses high voltage that can
cause electrical shock.
Only qualified persons can work inside
the equipment.
Turn off power at switchboard if the
something is dropped inside the
equipment.
Fire or electrical shock can result if the
power remains on.
Turn off power at switchboard if the
equipment is emitting smoke or fire.
Fire or electrical shock can result if the
power remains on.
Turn off power at switchboard
immediately if you feel the equipment
is not working properly.
Fire or electrical shock can result if the
power remains on.
CAUTION
Do not dissasemble or modify the
equipment.
Fire, electrical shock or bodily injury
can result.
Do not operate the equipment with
wet hands.
Fire or electrical shock can result.
Keep the equipment away from rain,
water and water splash.
Fire or electrical shock can result if water
gets into the equipment.
Use the correct fuse.
Use of a wrong fuse can cause fire.
Do not place liquid-filled containers
on the top of the equipment.
For or electrical shock can result
ii
Page 5
SAFETY INSTRUCTIONS
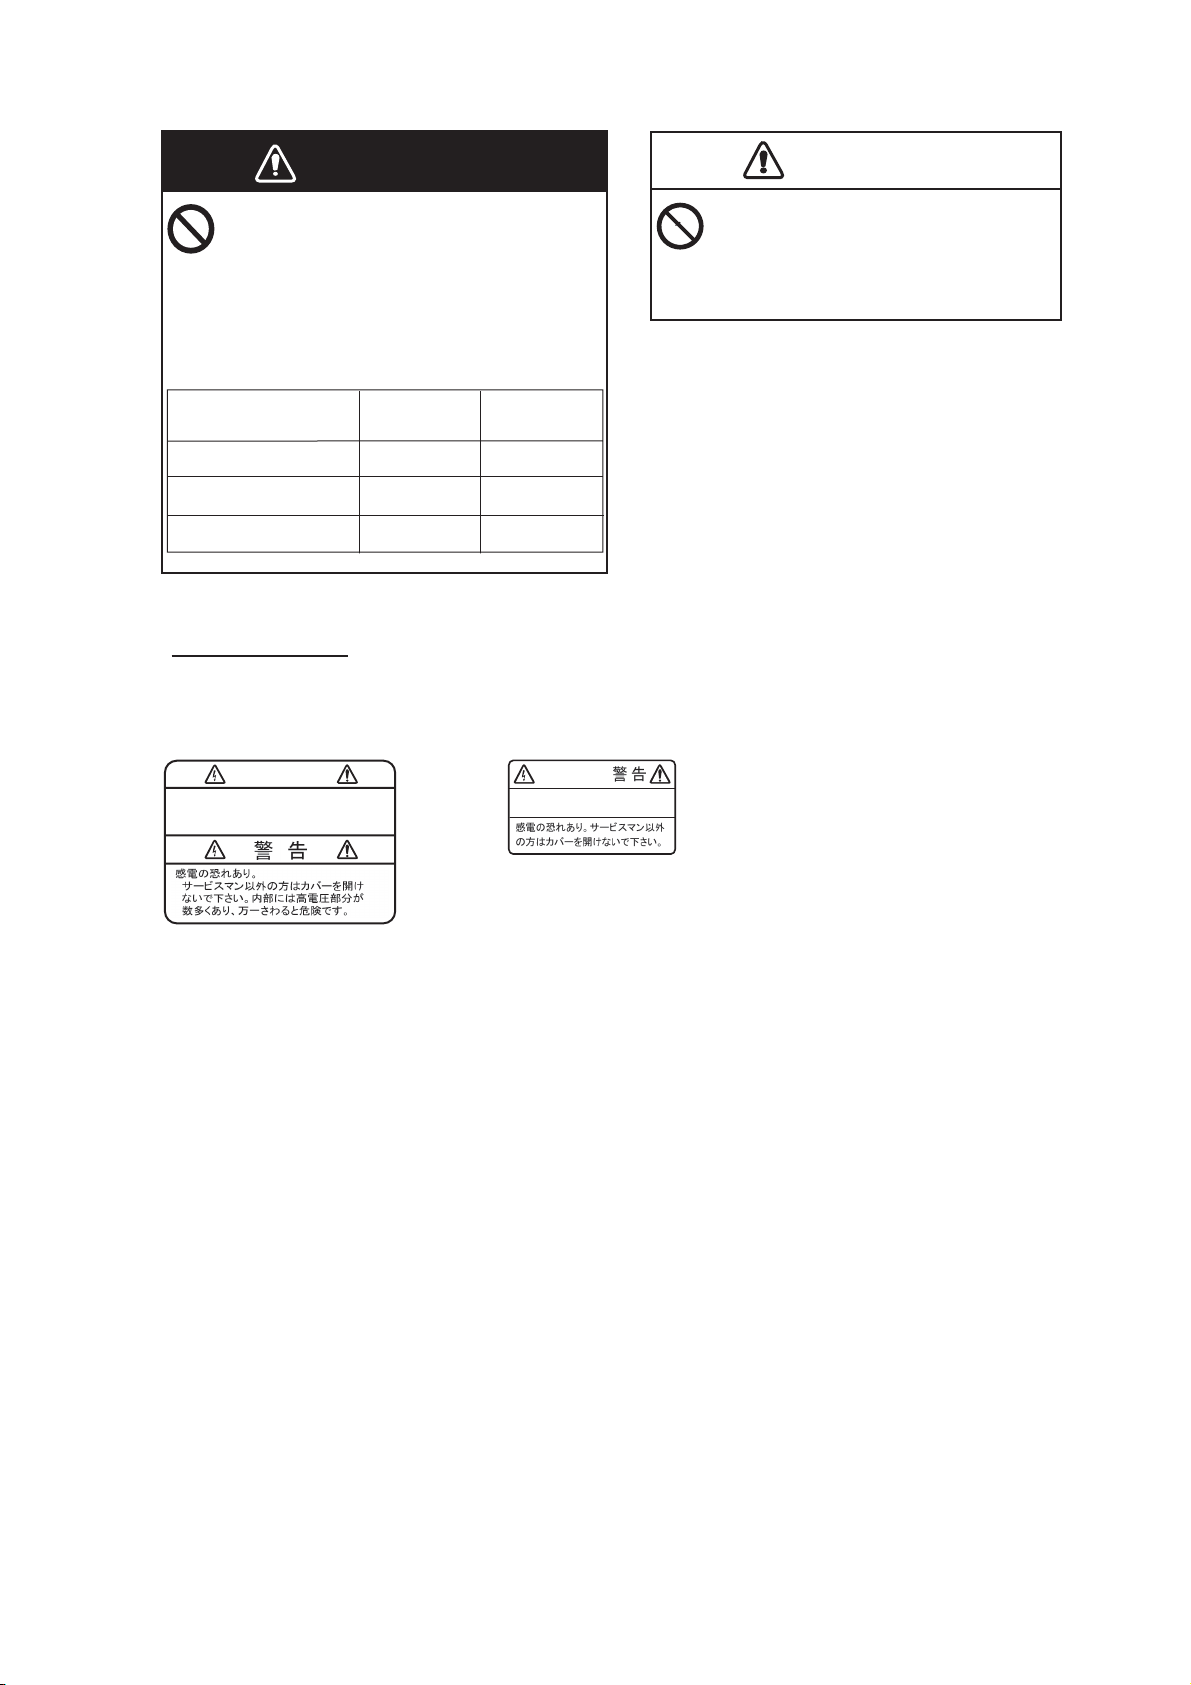
WARNING
Do not approach the radome closer
than 1.4 m (FELCOM 500) or 0.7 m
The glass of an LCD panel breaks
easily. Handle the LCD carefully.
CAUTION
(FELCOM 250) when it is transmitting.
The radome emits radio waves which
Injury can result if the glass breaks.
can be harmful to the human body,
particularly the eyes.
RF power dendity
on antenna aperture
100W/m
25W/m
10W/m
2
2
2
FELCOM500
distance
-
0.5 m
1.4 m
FELCOM250
distance
-
0.4 m
0.7 m
Warning Labels
Warning labels are attached to the equipment. Do not remove the labels. If a label is lost or damaged,
contact a FURUNO dealer abouit relplacement.
WARNING
To avoid electrical shock, do not
remove cover. No user-serviceable
parts inside.
Name: Warning Label (1)
Type: 86-003-1011-3
Code No.: 100-236-233-10
WARNING
To avoid electrical shock,
do not remove cover.
Name: Warning Label
Type: 6-021-3517-0
Code No.: 100-350-230-10
iii
Page 6
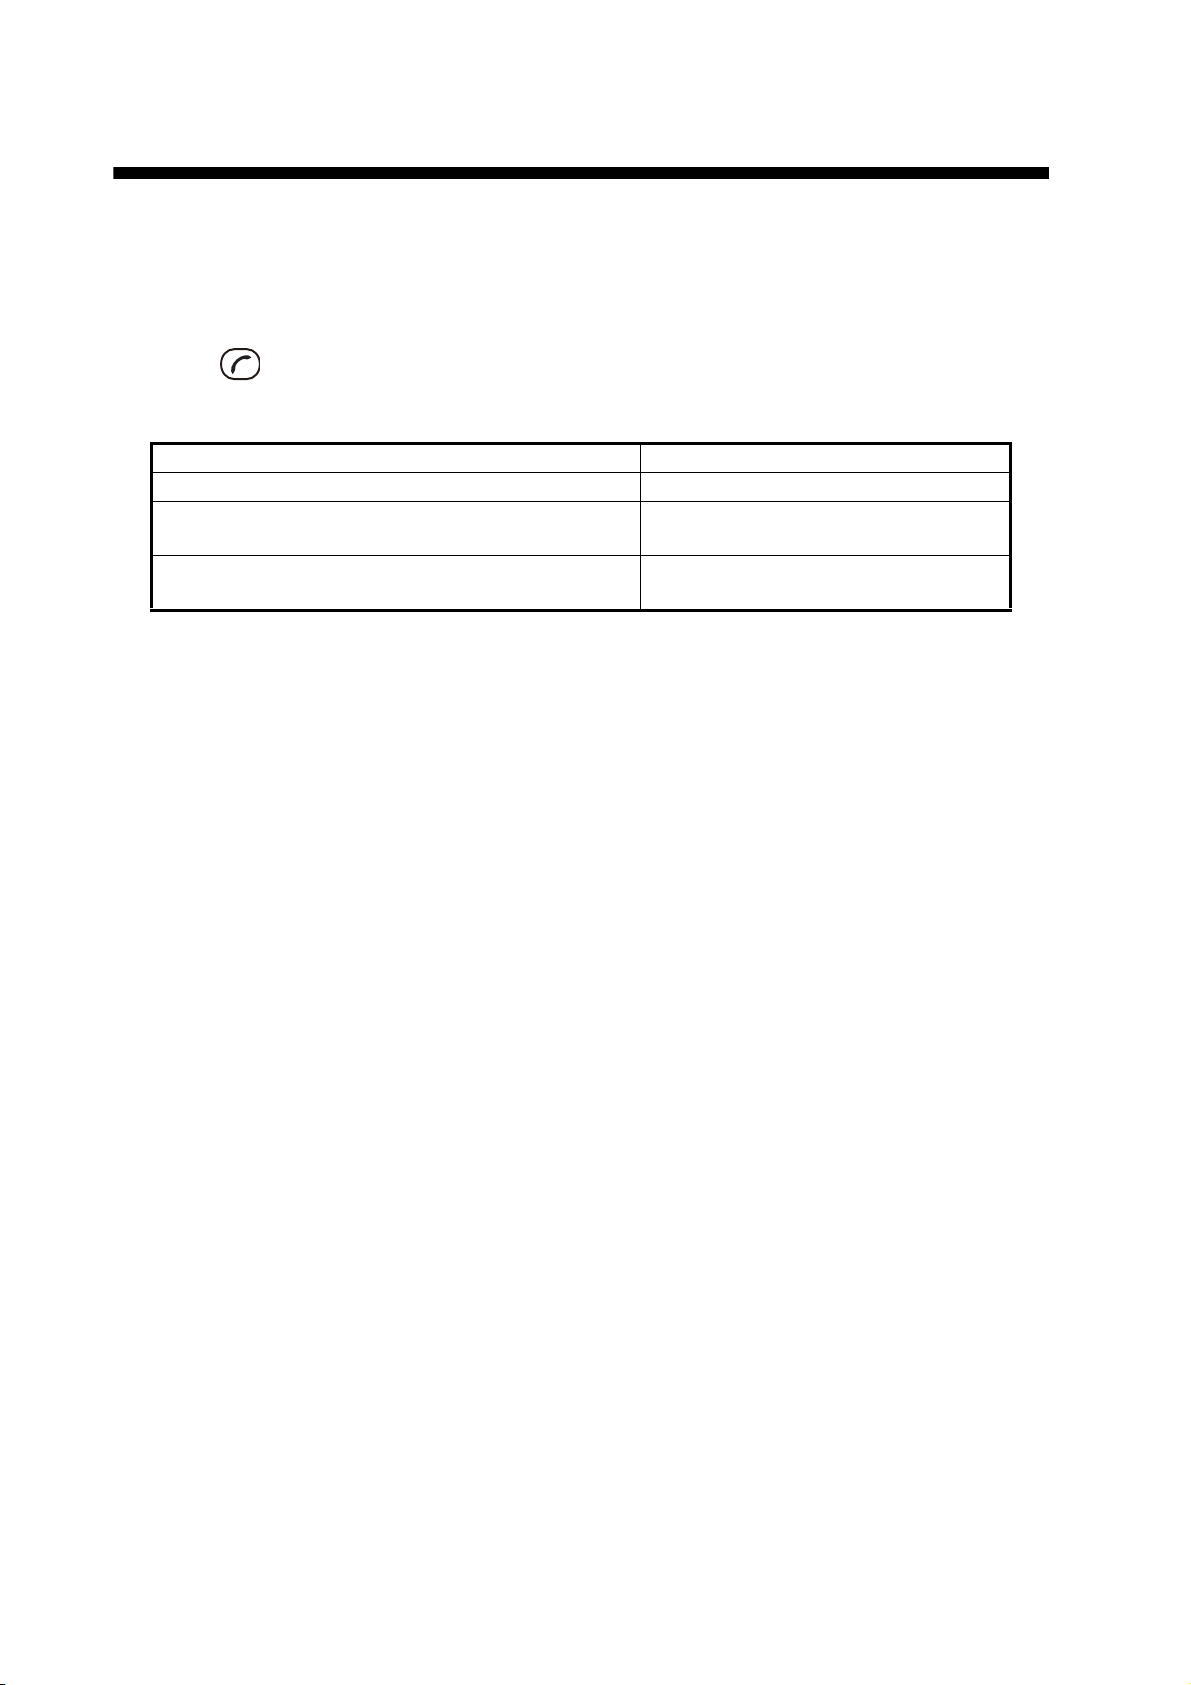
505 Emergency Call
In the event of an emergency, do the following to make an emergency call:
Note: 505 Emergency calling is an INMARSAT service and is not GMDSS compliant.
1. Remove the handset from the cradle, and dial [505] at the idle screen.
2. Press or [#] to call the number.
Corresponding to the satellite in use, you will be connected to one of the following RCC services.
Satellite RCC
EMEA (West Asia, Africa, Eastern Atlantic area) RCC Den Helder (Holland)
APAC (Western Pacific, Southeast Asia, Oceania
area)
AMER (Western Atlantic, Eastern Pacific, Conti-
nental America area)
For example, if using the above operation is performed in Japan, it is covered by the APAC
service area, and you will be connected to RCC Australia.
3. Once connected to RCC, speak slowly and clearly provide the following information:
RCC Australia (Canberra, Australia)
JRCC Norfolk (Norfolk, Virginia, USA)
• Who you are: Vessel name, telephone number and callsign.
• Where you are: Your position in latitude and longitude or a bearing and distance from a
known geographical point.
• What is wrong: Nature of emergency or difficulty.
• Type of assistance required.
• Number of persons on board.
iv
Page 7

TABLE OF CONTENTS
FOREWORD................................................................................................................. viii
SYSTEM CONFIGURATION ........................................................................................... x
1. BASIC OPERATION..............................................................................................1-1
1.1 Communication Unit and Handset overview...............................................................1-1
1.1.1 Communication unit........................................................................................1-1
1.1.2 Handset ..........................................................................................................1-1
1.2 SIM Card ....................................................................................................................1-3
1.3 Power On/Off..............................................................................................................1-4
1.4 Screen Layout ............................................................................................................1-6
1.5 Basic Operation of the Handset..................................................................................1-7
1.5.1 Main menu......................................................................................................1-7
1.5.2 How to input characters..................................................................................1-9
1.5.3 How to edit text.............................................................................................1-10
1.6 Data connection using Web software.......................................................................1-12
1.7 Password..................................................................................................................1-13
2. HANDSET OPERATIONS .....................................................................................2-1
2.1 Handset ......................................................................................................................2-1
2.1.1 How to make a call.........................................................................................2-1
2.1.2 Operation during communication ...................................................................2-5
2.1.3 How to receive a call ......................................................................................2-6
2.1.4 Call forwarding ...............................................................................................2-7
2.2 Contacts List...............................................................................................................2-8
2.2.1 How to add a new contact..............................................................................2-8
2.2.2 How to save a telephone number from History to Contacts ...........................2-9
2.2.3 How to search the Contacts list....................................................................2-10
2.2.4 How to edit a contact....................................................................................2-11
2.2.5 How to delete a contact................................................................................2-11
2.3 SMS..........................................................................................................................2-13
2.3.1 How to log in.................................................................................................2-13
2.3.2 How to send an SMS message....................................................................2-14
2.3.3 How to view a received message.................................................................2-15
2.3.4 Message boxes ............................................................................................2-16
2.3.5 How to use Received messages..................................................................2-20
2.3.6 How to use Sent messages..........................................................................2-22
2.3.7 How to use Draft messages .........................................................................2-23
2.3.8 How to use URL and phone numbers within messages...............................2-24
2.4 Web ..........................................................................................................................2-26
2.4.1 How to connect/disconnect to/from the Internet...........................................2-26
2.4.2 How to view a web page ..............................................................................2-27
2.4.3 Operations while viewing a web page..........................................................2-31
2.4.4 Favorite list ...................................................................................................2-32
3. SETTINGS FOR HANDSET ..................................................................................3-1
3.1 Sound Menu ...............................................................................................................3-1
3.1.1 Notification sound setting ...............................................................................3-1
3.1.2 How to turn on/off keypad tones.....................................................................3-2
3.1.3 How to adjust the volume for the microphone................................................3-3
3.2 Display Settings..........................................................................................................3-3
3.2.1 How to change the font size...........................................................................3-3
3.2.2 How to change LCD brightness and backlight ON time .................................3-4
v
Page 8

TABLE OF CONTENTS
3.2.3 How to adjust the keypad backlight................................................................ 3-5
3.3 SMS Settings ............................................................................................................. 3-6
3.3.1 How to set an SMS Signature........................................................................ 3-6
3.3.2 How to activate the SMS password ............................................................... 3-7
3.4 Web Settings..............................................................................................................3-7
3.4.1 How to change web browser font size ........................................................... 3-7
3.4.2 How to change web page display zoom......................................................... 3-8
3.4.3 How to change web display mode ................................................................. 3-8
3.4.4 Advanced settings..........................................................................................3-9
3.4.5 How to set time out ...................................................................................... 3-10
3.4.6 How to clear the cache................................................................................. 3-10
3.5 Individual Settings Menu..........................................................................................3-11
3.5.1 Basic settings............................................................................................... 3-11
3.5.2 Network settings........................................................................................... 3-14
3.5.3 SIP settings..................................................................................................3-17
3.5.4 How to change operation password for the handset.................................... 3-18
3.6 System Messages.................................................................................................... 3-18
3.7 Device List................................................................................................................ 3-19
3.8 How to Show TCP/IP, SIP and Software Version information .................................3-20
4. OPTIONAL DEVICES ............................................................................................4-1
4.1 Analog Telephone FC755D1...................................................................................... 4-1
4.2 Fax (FAX-2820/FAX-2840) ........................................................................................ 4-2
4.3 Incoming Indicator (FB-3000)..................................................................................... 4-2
5. WEB SOFTWARE..................................................................................................5-1
5.1 How to Open/Close the Web Software ...................................................................... 5-1
5.2 Screen Explanation....................................................................................................5-2
5.3 Status Monitor............................................................................................................5-4
5.4 Data Connection ........................................................................................................ 5-6
5.5 Contacts.....................................................................................................................5-9
5.5.1 How to register contacts to the Contacts list.................................................. 5-9
5.5.2 How to arrange the Contacts list.................................................................. 5-10
5.5.3 How to edit contacts..................................................................................... 5-11
5.5.4 How to delete data from contacts................................................................. 5-11
5.6 SMS (Short Message Service)................................................................................. 5-12
5.6.1 How to enter the SMS password.................................................................. 5-12
5.6.2 How to send an SMS message.................................................................... 5-13
5.6.3 How to review a received message ............................................................. 5-14
5.6.4 Message boxes............................................................................................5-15
5.6.5 How to use the Sent box..............................................................................5-17
5.6.6 How to use the Draft box.............................................................................. 5-18
5.6.7 How to set the signature and password.......................................................5-19
5.7 SIM Card Settings....................................................................................................5-20
5.8 Manual Satellite Search ........................................................................................... 5-21
5.9 Log Displays............................................................................................................. 5-22
5.9.1 How to login to a log with password............................................................. 5-22
5.9.2 How to view the Registration log..................................................................5-23
5.9.3 How to view the Voice call log...................................................................... 5-24
5.9.4 How to view the Data connection log...........................................................5-26
5.9.5 How to view the Event log............................................................................5-28
5.9.6 How to Download all logs............................................................................. 5-29
6. WEB FUNCTIONS ................................................................................................6-1
6.1 Communication Unit Settings..................................................................................... 6-1
6.1.1 Administrator login ......................................................................................... 6-1
vi
Page 9

TABLE OF CONTENTS
6.1.2 How to display the Information screen ...........................................................6-2
6.1.3 Extension number settings.............................................................................6-2
6.1.4 Group settings................................................................................................6-5
6.1.5 Access code settings......................................................................................6-6
6.1.6 PBX settings...................................................................................................6-8
6.1.7 How to set internal call routing .......................................................................6-9
6.1.8 LAN settings .................................................................................................6-10
6.1.9 WAN settings................................................................................................6-14
6.1.10 PPPoE settings ............................................................................................6-24
6.1.11 How to set the Bridge mode .........................................................................6-37
6.1.12 How to set the Remote access.....................................................................6-38
6.1.13 How to change the password .......................................................................6-39
6.1.14 How to forward the log to a PC ....................................................................6-40
6.2 Device List................................................................................................................6-41
6.2.1 How to detect devices automatically ............................................................6-41
6.2.2 How to change the link setting in the Device list ..........................................6-42
6.3 How to Save, Load Settings .....................................................................................6-44
6.3.1 How to save settings ....................................................................................6-44
6.3.2 How to load settings.....................................................................................6-44
7. MAINTENANCE AND TROUBLESHOOTING.......................................................7-1
7.1 Periodical Maintenance ..............................................................................................7-1
7.2 How to Change the Fuse............................................................................................7-2
7.3 Communication Unit (CU) LED Lamps.......................................................................7-3
7.4 Troubleshooting..........................................................................................................7-4
7.5 Self Test .....................................................................................................................7-6
7.5.1 Handset self test.............................................................................................7-6
7.5.2 Communication unit and antenna unit self test ..............................................7-7
7.6 Error/Warning Messages............................................................................................7-8
7.7 How to Restore Default Settings (Initialize)................................................................7-9
7.8 System Information...................................................................................................7-10
APPENDIX 1 MENU TREE .......................................................................................AP-1
APPENDIX 2 LIST OF TERMS AND ABBREVIATIONS .......................................AP-4
APPENDIX 3 PARTS LIST, ARRANGEMENT .........................................................AP-7
SPECIFICATIONS ..................................................................................................... SP-1
INDEX ......................................................................................................................... IN-1
vii
Page 10

FOREWORD
A Word to the Owner of the FURUNO FELCOM 250/500
Congratulations on your choice of the FURUNO FELCOM 250/500 Inmarsat Fleetbroadband Ship
Earth Station. We are confident you will see why the FURUNO name has become synonymous
with quality and reliability.
Since 1948, FURUNO Electric Company has enjoyed an enviable reputation for quality marine
electronics equipment. This dedication to excellence is furthered by our extensive global network
of agents and dealers.
This equipment is designed and constructed to meet the rigorous demands of the marine environment. However, no machine can perform its intended function unless operated and maintained
properly. Please carefully read and follow the recommended procedures for operation and maintenance.
We would appreciate hearing from you, the end-user, about whether we are achieving our purposes. Thank you for considering and purchasing FURUNO equipment.
Features
The FELCOM 250/500 consists of an antenna unit, communication unit, and a handset. The FELCOM 250/500 provides telephone, facsimile and data services.
The main features of the FELCOM 250/500 are:
• Conforms to the following standards: INMARSAT Fleetbroadband SDM, IEC 60945 (Ed. 4), IEC
60529 (Ed. 2), IEC 61162-1 (Ed. 2)
• SIM card based billing
• Voice communication: 4 kbps AMBE+2 or 3.1kHz Audio
• Facsimile: 3.1 kHz Audio
• 64kbps ISDN (UDI/RDI) transmission (FELCOM 500 only)
• Packet Communication
Packet FELCOM 250 FELCOM 500
Standard IP (best effort) Max. 284 kbps Max. 432 kbps
Streaming IP 8 kbps, 16 kbps, 32 kbps,
64 kbps, 128 kbps
• Simultaneous voice and data transmission
• SMS (Short Message Service) maximum 160 characters.
• Data packet billing-based internet connection
8 kbps, 16 kbps, 32 kbps,
64 kbps, 128 kbps, 256
kbps
Note: ISDN UDI/RDI data streaming and IP packet communication can incur high costs depending on communication time. Note that unexpectedly high costs could occur.
viii
Page 11
FOREWORD
Software Information
This product includes software to be licensed under the GNU General Public License (GPL),
GNU Lesser General Public License (LGPL), BSD, Apache, MIT and others. The program(s) is/are
free software(s), and you can copy it and/or redistribute it and/or modify it under the terms of the
GPL or LGPL as published by the Free Software Foundation. Please access to the following URL if
you need source codes: https://www.furuno.co.jp/contact/cnt_oss.html
This product uses the software module that was developed by the Independent JPEG Group.
France Telecom - TDF - Groupe des Ecoles des Telecommunications Turbo codes patents
license.
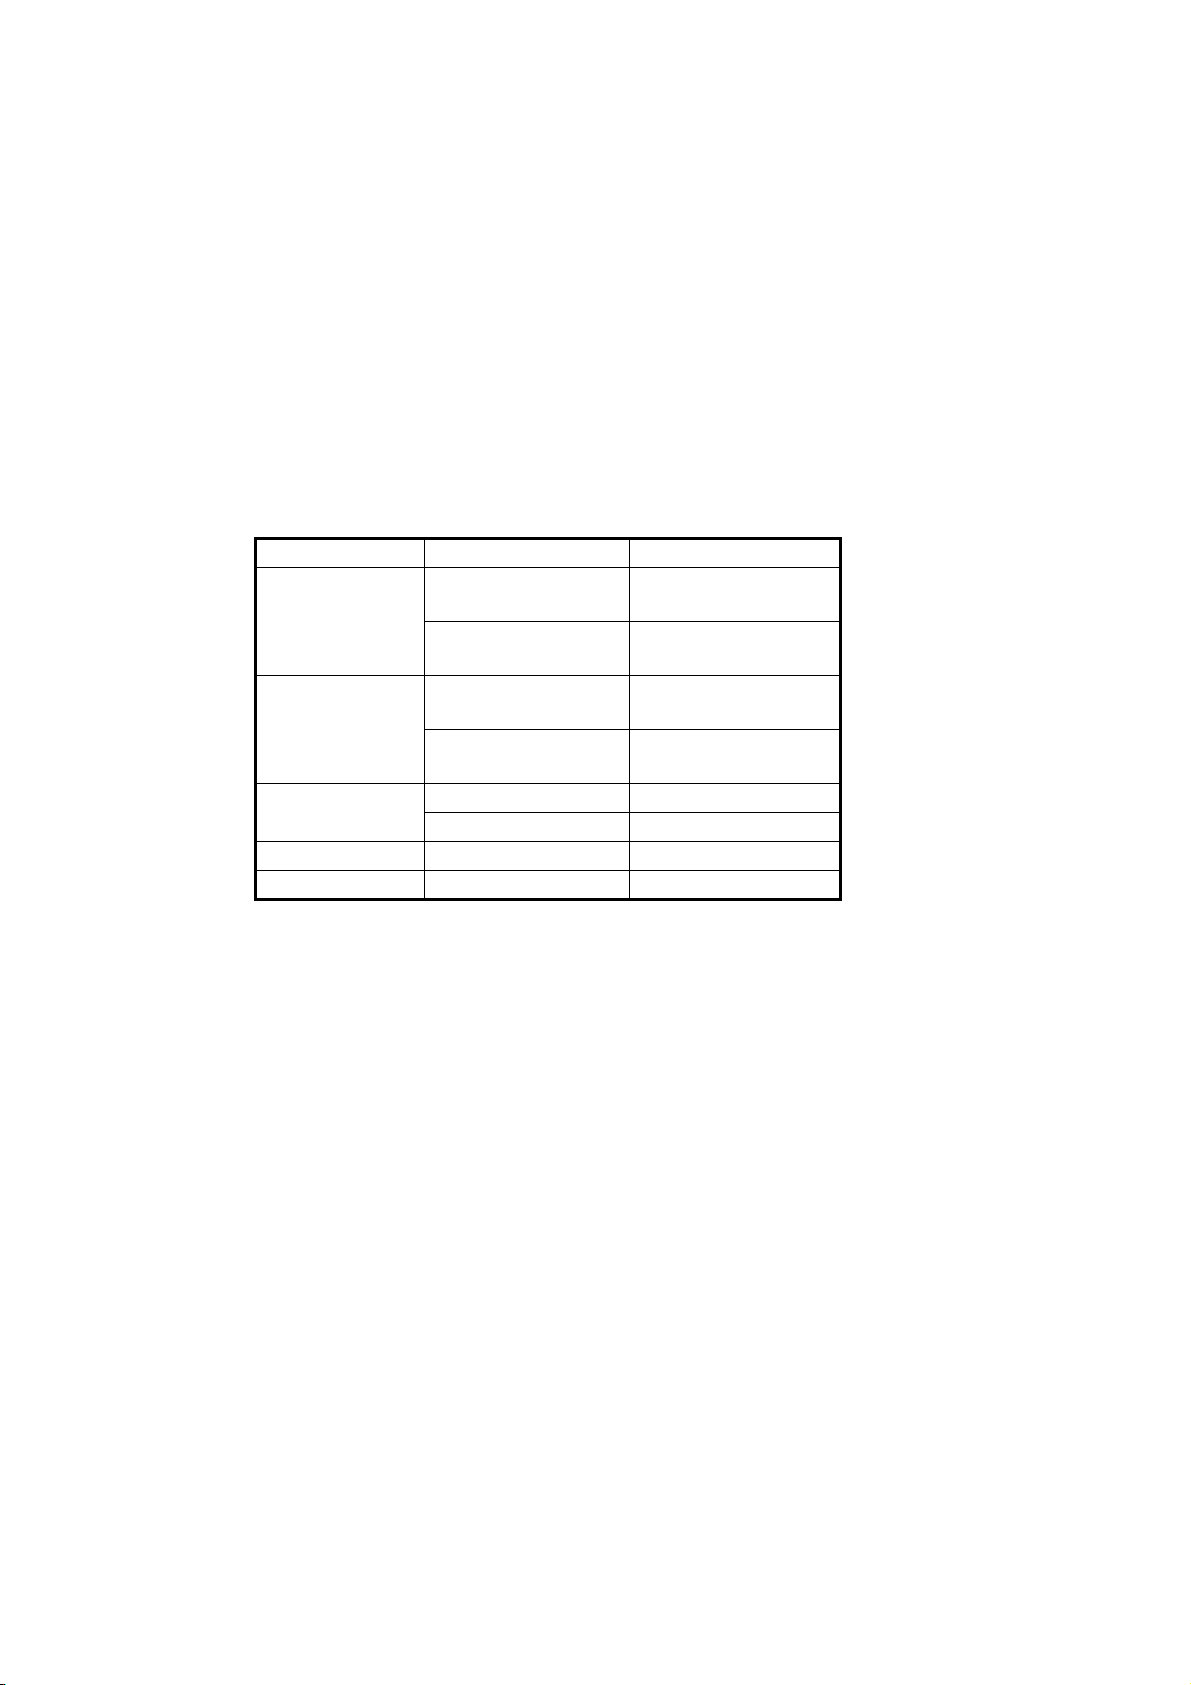
PROGRAM NUMBER
Unit Program Location Program Number
FB-1250
(FELCOM 250)
FB-1500
(FELCOM 500)
FB-2000 MODEM 1650207-08.XX
FB-8000 HANDSET 1650217-08.XX
FB-3000 INCOM. INDI 1650220-01.XX
XX: Minor alteration
ATB 1650227-01.XX
ATB SW v13
HPA 1650228-01.XX
HPA SW v08
ATB 1650223-01. XX
ATB SW v25
HPA 1650224-01.XX
HPA SW v08
HUB 1650213-08.XX
ix
Page 12

SYSTEM CONFIGURATION
A
Antenna unit
FB-1500 (FELCOM 500)
FB-1250 (FELCOM 250)
LAN(4)
IP Handset
FB-8000
Communication unit
FB-2000
Incoming indicator
12-24 VDC
C100-115/
200-230V
AC-DC
Power supply
PR-240
NMEA
Normal Close
RS-232C
Environmental Category
TEL(4)
FB-3000
PC
Network Equipment
(See Caution on next page.)
G3 facsimile
Analog telephone
Analog telephone
Analog telephone
Navigation equipment
External alarm
PC or Router
Antenna unit
Communication unit,
IP handset, etc.
To be installed in an exposed area
To be installed in a protected area
x
Page 13

SYSTEM CONFIGURATION
Caution when connecting shipboard network to FELCOM 250/500
If the FELCOM 250/500 is connected to a shipboard network that has a data monitoring system
or the like, the FELCOM 250/500 can become unstable when the equipment in the network transmits large volumes of broadcast packets. If this type of shipboard network is connected to the FELCOM 250/500, consultation with the network system manager is necessary to provide measures
to ensure the FELCOM 250/500 operates stably.
An example of a system that transmits and receives large volumes of broadcast data is a data
monitoring system which has equipment that transfers large data (images, etc.) in short intervals.
One remedy is to connect a router (that is capable of handling large volumes of data) between the
shipboard network and the FELCOM 250/500.
xi
Page 14

SYSTEM CONFIGURATION
This page is intentionally left blank.
xii
Page 15
1. BASIC OPERATION
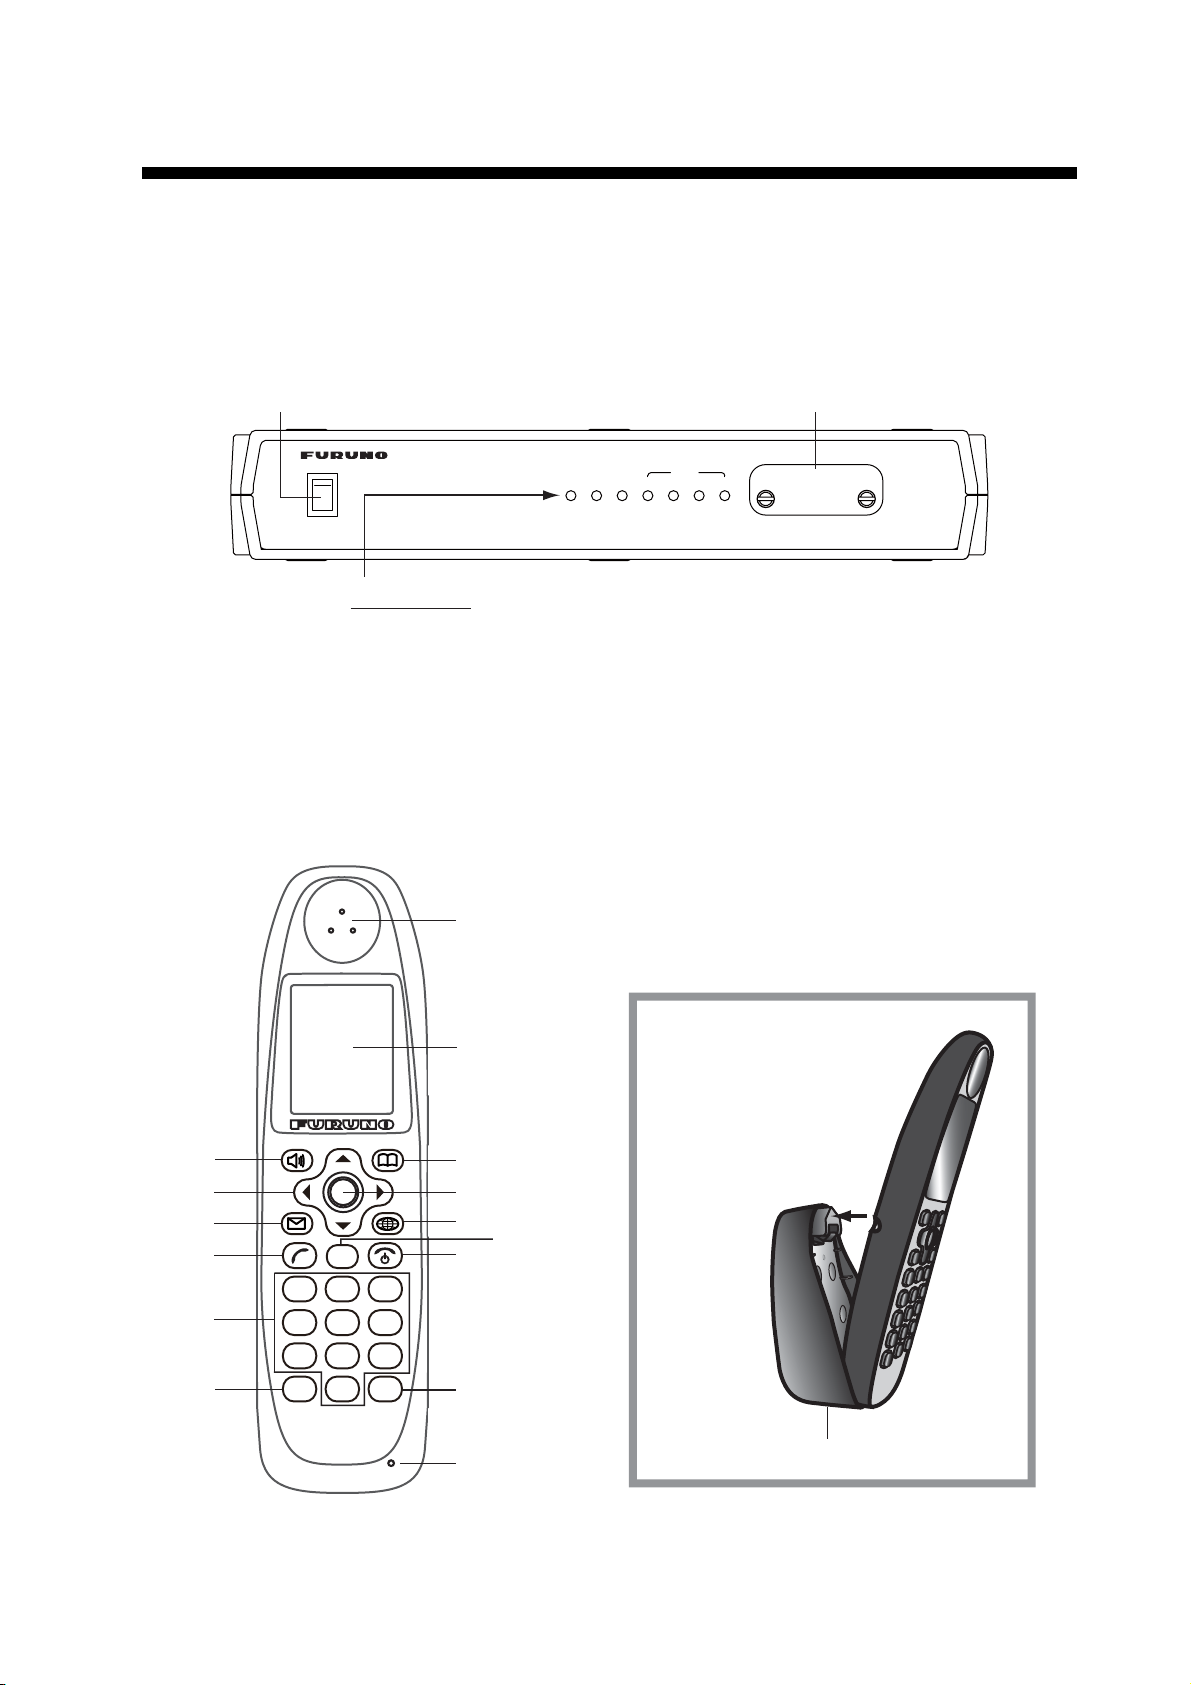
1.1 Communication Unit and Handset overview
1.1.1 Communication unit
Power switch
―
○
○
POWER
1.1.2 Handset
SIM card slot
Inmarsat FleetBroadband
I
POWER1TX
READY
STATUS
234
POWER OFF BEFORE INSERTING
OR REMOVING SIM
SIM CARD INSIDE
Status lamps
POWER: Lights green when power is on.
READY: Lights green when a satellite is being tracked.
(Voice/Data communication available)
TX: Lights green when transmitting.
STATUS (1 - 4): Lights green when operating correctly.
Speaker
10
Screen
Place the bottom of the
handset in the cradle and
push until it locks in place.
1
3
4
1
4
7
*
. @
GHI
PQRS
CLR
ABC
2
JKL
5
TUV
8
0
3
6
9
#
DEF
MNO
WXYZ
6
9
2
Enter
5
7
8
11
Microphone
Cradle (Base)
1-1
Page 16

1. BASIC OPERATION
Number Key Function
1 • Opens the [Sound] menu.
• Softkey (Lower left menu item button)
2 • Opens the Contacts screen.
• Softkey (Lower right menu item button)
3 S • Moves the cursor up.
• Increases the volume.
T • Moves the cursor down.
• Decreases the volume.
W • Moves the cursor left.
• Opens Incoming History.
X • Moves the cursor right
• Opens Outgoing History.
ENTER • When Information window is not displayed: Opens the Main Menu.
• When information window is displayed: Displays new information.
• Softkey: Execute content that appears at center bottom of screen.
4 Opens [SMS] menu.
5 Opens [Web top] menu.
6• Call
• Answers phone.
7 CLR • Returns to the previous menu.
• Erases a number or letter.
8 • Hangs up phone.
• Cancels operation.
• Long push: Restart handset.
9 1. @ • Selects item corresponding to number.
2ABC
3DEF
4GHI
5JKL
6MNO
7PORS
8TUV
9WXYZ
0 Enters phone number and text.
10 * • Press once for (*) and twice for (+) at the transmit screen.
11 # • Symbol (#)
• Enters phone number and text.
• Enters text.
• Enters text.
1-2
Page 17
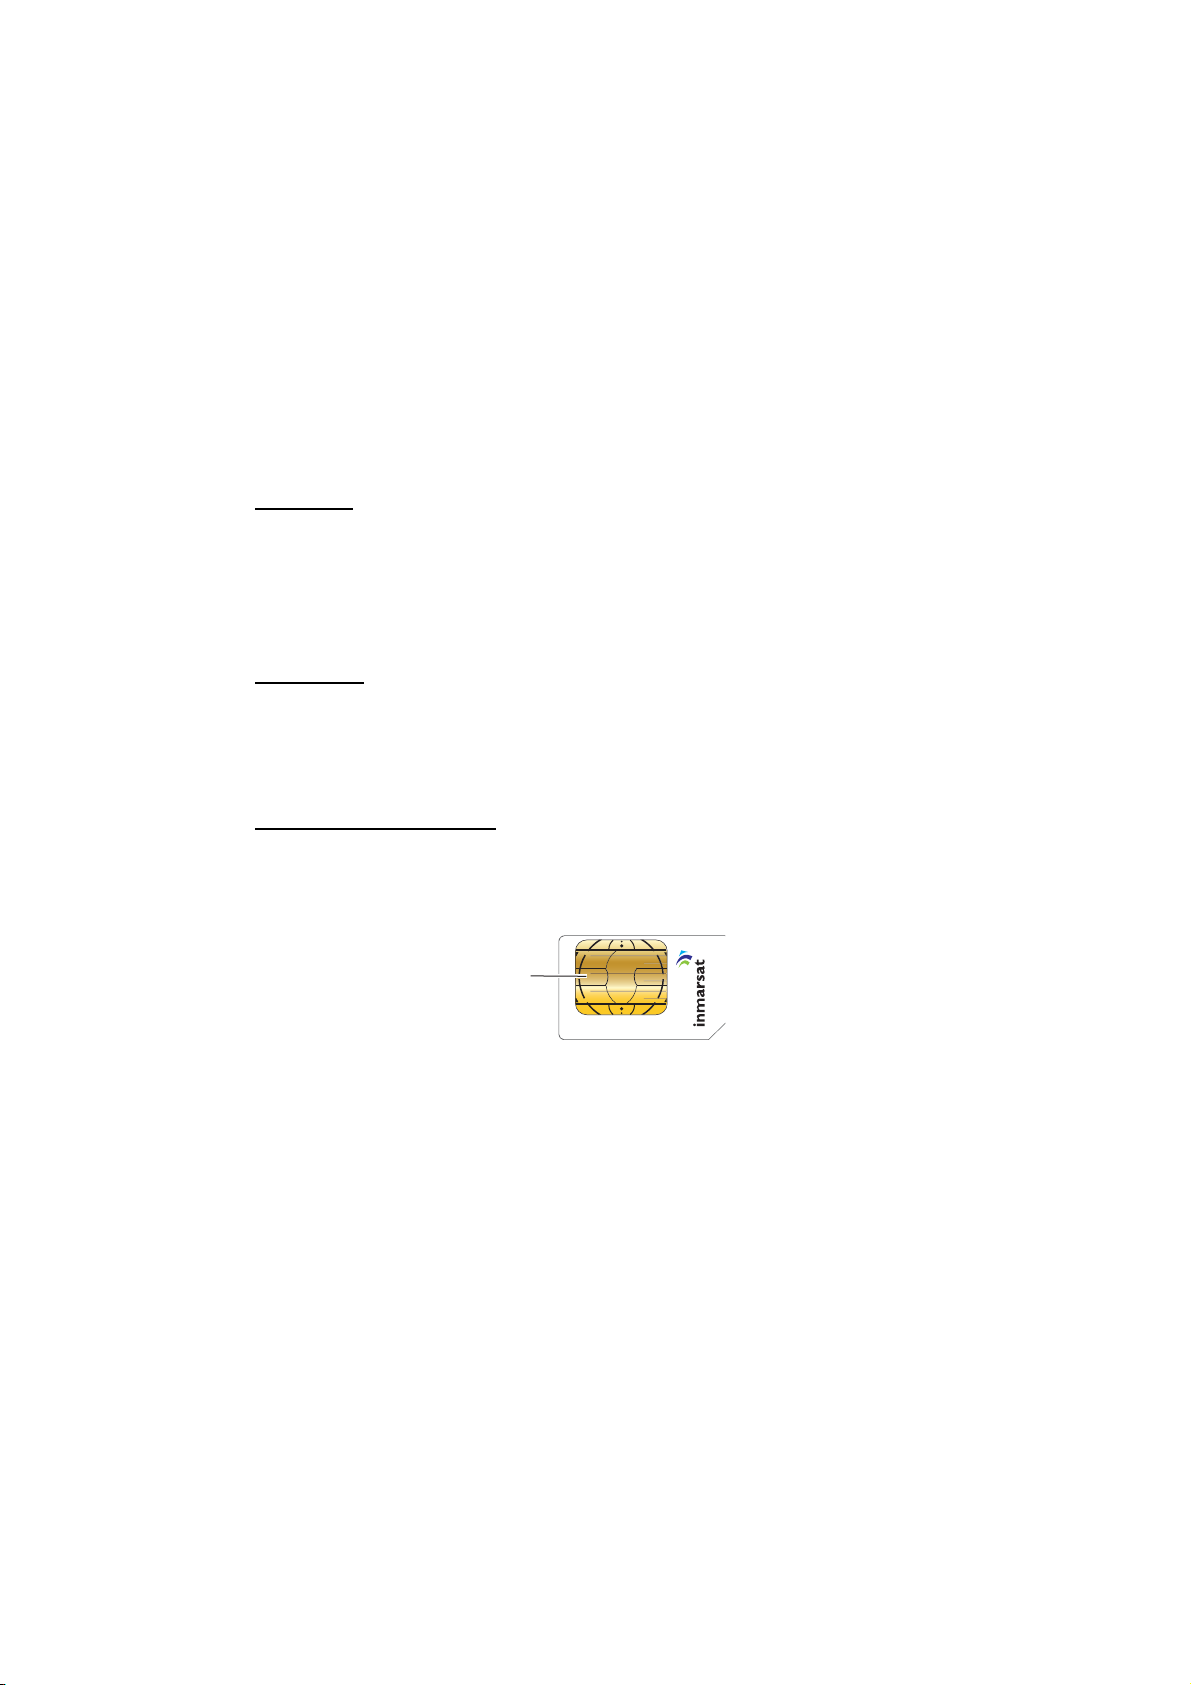
1.2 SIM Card
Note: The FELCOM 250/500 uses only Inmarsat Fleetbroadband compatible SIM
cards.
Individual user information is stored on the SIM card. The system reads information
when the SIM card is inserted. The user registration number is saved on the SIM card,
and it is possible to transmit with different SIM cards from one terminal. In this case,
the transmission fees are charged to the person registered to the SIM Card. Contact
addresses can be saved on the SIM card.
There are 4 registration codes on the SIM card, [PIN1], [PUK1], [PIN2], [PUK2]. This
unit does not use the code [PIN2] and [PUK2]. Be sure to carefully write down the
[PIN1] and [PUK1] code numbers and do not lose or forget them.
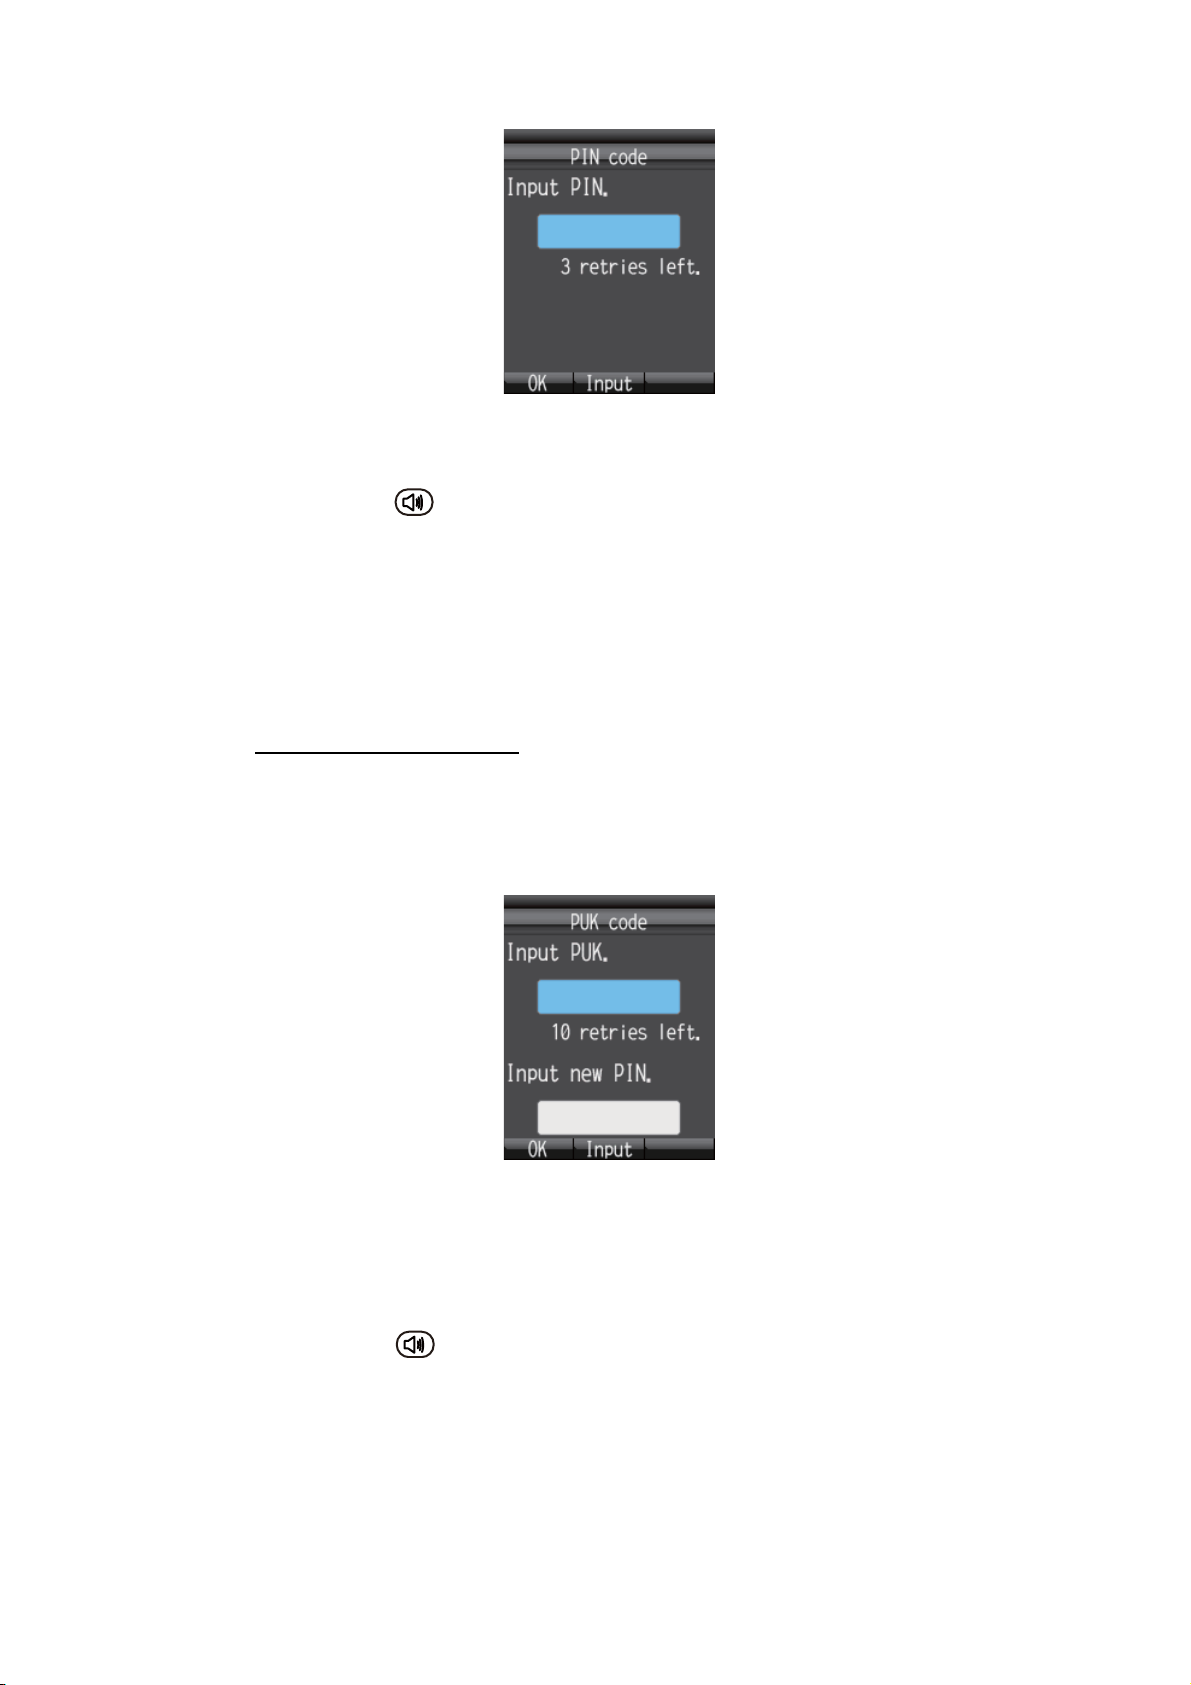
PIN code
To prevent unauthorized use by a third party, there is a 4-8 digit PIN (Personal Identification Number) code. When the unit is turned on, the user will be prompted to enter
the PIN code. Enter the [PIN1] code. If the wrong code is entered 3 times, the system
will lock and the Communication Unit cannot be used.
1. BASIC OPERATION
PUK code
If the system locks, use the 8-digit PUK (PIN Unblocked Key) code to unlock the system. Use the code [PUK1]. If the wrong PUK code is entered 10 times, the SIM card
will cease operating. If this happens, contact the retailer of the SIM card.
Handling the SIM card
• Ensure the power is off before inserting/removing the SIM card.
• Do not touch the IC part of the SIM card.
IC
(gold)
• Always remove the SIM card by hand.
1-3
Page 18
1. BASIC OPERATION
PUS
1.3 Power On/Off
How to turn on
The POWER switch on the front panel of the Communication Unit switches all units of
the FELCOM 250/500 terminal on/off:
• IP Handset
• Communication Unit
• Antenna Unit
• Incoming Indicator (option)
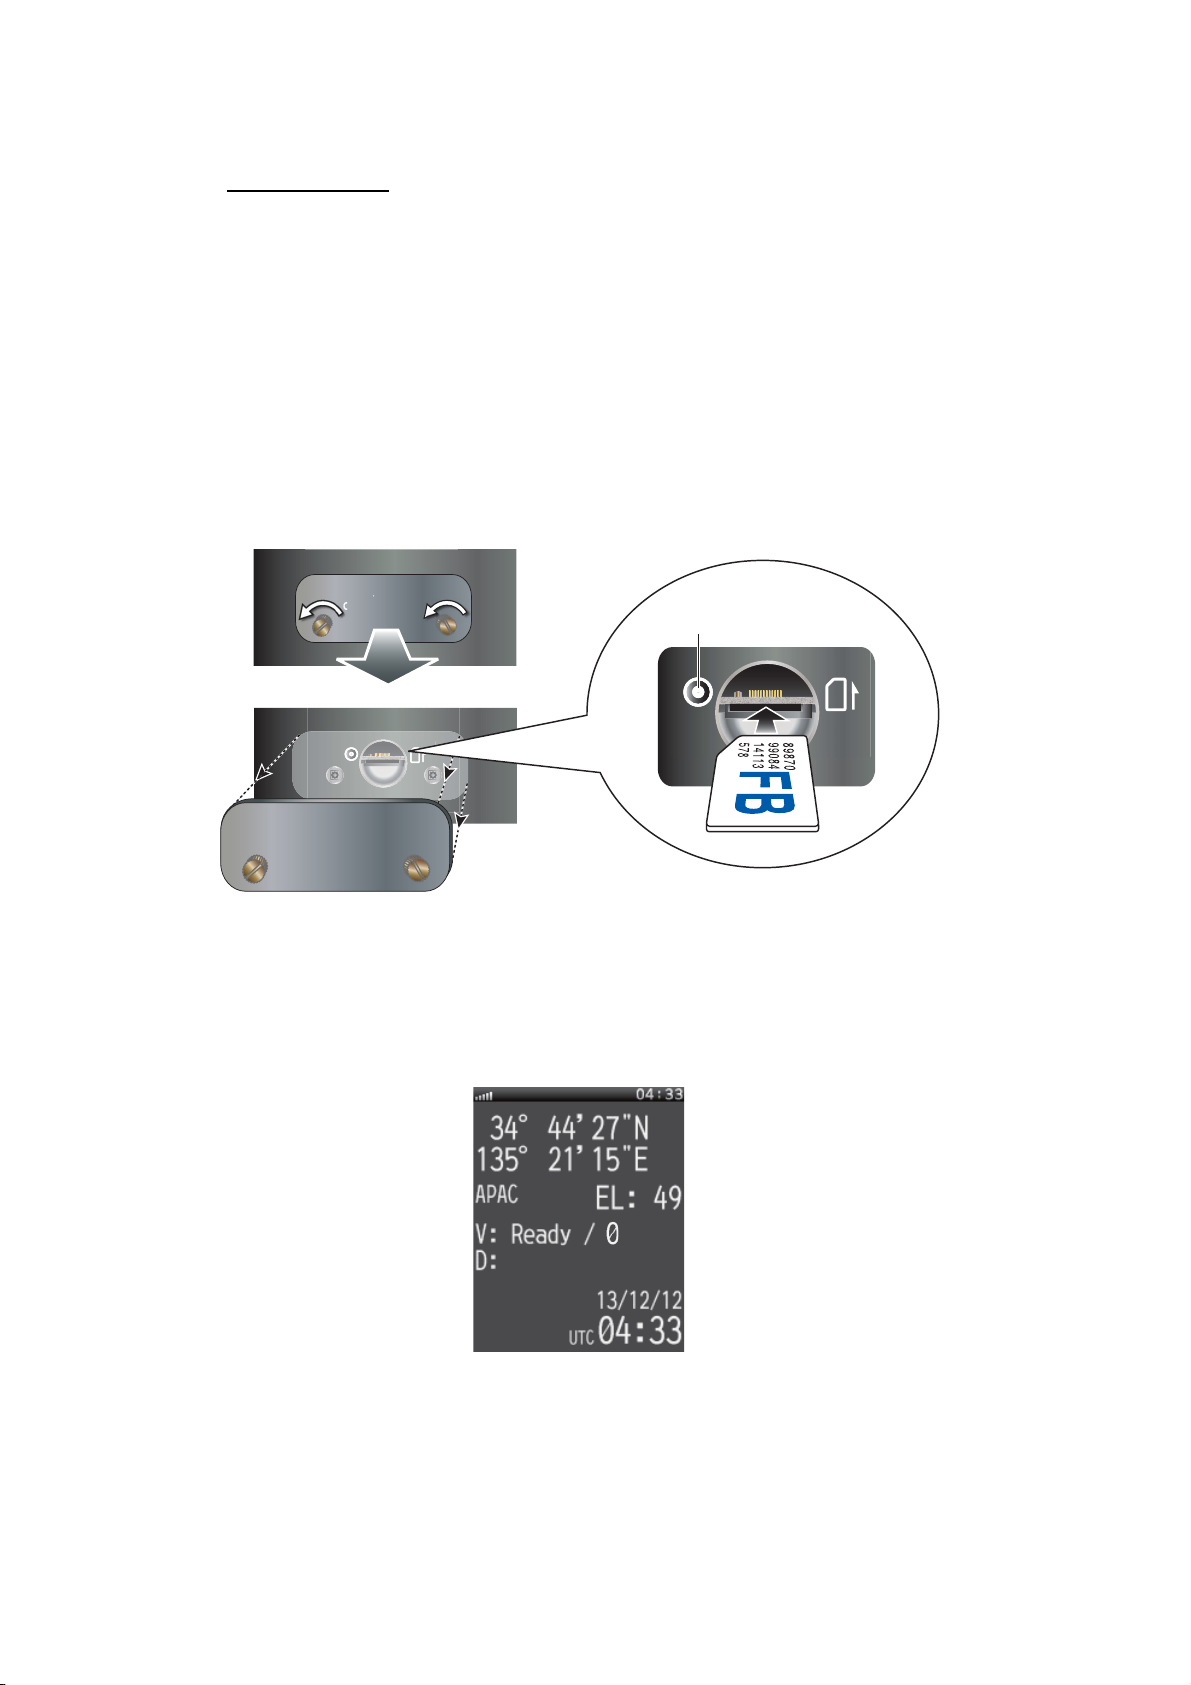
1. By hand, loosen the two screws near the insertion slot on the front of the Communication Unit and remove the cover plate. The SIM card port is found underneath.
2. Insert the SIM card IC face down into the card port.
POWER OFF BEFORE INSERTING
POWER OFF BEFORE INSERTING
OR REMOVING SIM
SIM CARD INSIDE
PUSH EJECT
OR REMOVING SIM
SIM CARD INSIDE
PUSH EJECT
H EJECT
Reset button
(Service use only)
PUSH EJEC
To eject the SIM card, push it in with your finger.
3. Replace the cover unfastened at step 1.
4. Turn on the power switch on the Communication Unit. When the following screen
displays "V: Ready / 0" and "D: Not connected*" on the handset, communication
is possible. Wait approx. three minutes for this screen to display.
* If the handset’s IP
address is not set by
Not Connected
web software, “D: No
Permission” is shown.
Idle screen
Note 1: Usually, about 3 minutes is required for the above screen to display. If
there are obstacles or interference in the path of the satellite, more time may be
required.
Note 2: You may be asked for PIN code depending on SIM card settings. If password is required, go to step 5.
1-4
Page 19
1. BASIC OPERATION
Emg
5. Press the Enter key to display the PIN code input screen.
6. Enter the 4- to 8-digit SIM PIN code, and press the Enter key.
7. Press the key.
If the PIN code is entered correctly, the idle screen appears on the handset. If entered wrong, the message “PIN code is invalid” appears.
8. To brighten the screen, press the S key while pressing the [0] key. To darken the
screen, press the T key while pressing the [0] key. The brilliance of the screen
can be adjusted from any screen.
Note: You call the 505 emergency calling with no PIN code.
If the PIN code is locked
If the wrong PIN code is entered three times consecutively, the current PIN number
becomes locked and the PUK screen looks like the one shown below. Do the procedure below to unlock the PIN code.
1. Press the Enter key to display the PUK code input screen.
2. Enter the SIM card PUK code. Press the Enter key.
3. Press T to select the [Input new PIN.] field then press the Enter key.
4. Enter the new PIN code then press the Enter key.
5. Press the key.
1-5
Page 20
1. BASIC OPERATION
Handset and web software operational ability
The following operations are possible using the handset and Web software:
Item Handset Web Software
Phone Yes No
Contacts Yes Yes
SMS (Short Message Service) Yes Yes
Internet Yes Yes
Handset settings Yes Yes (possible with SIP client setting, net-
Communication Unit settings No Yes
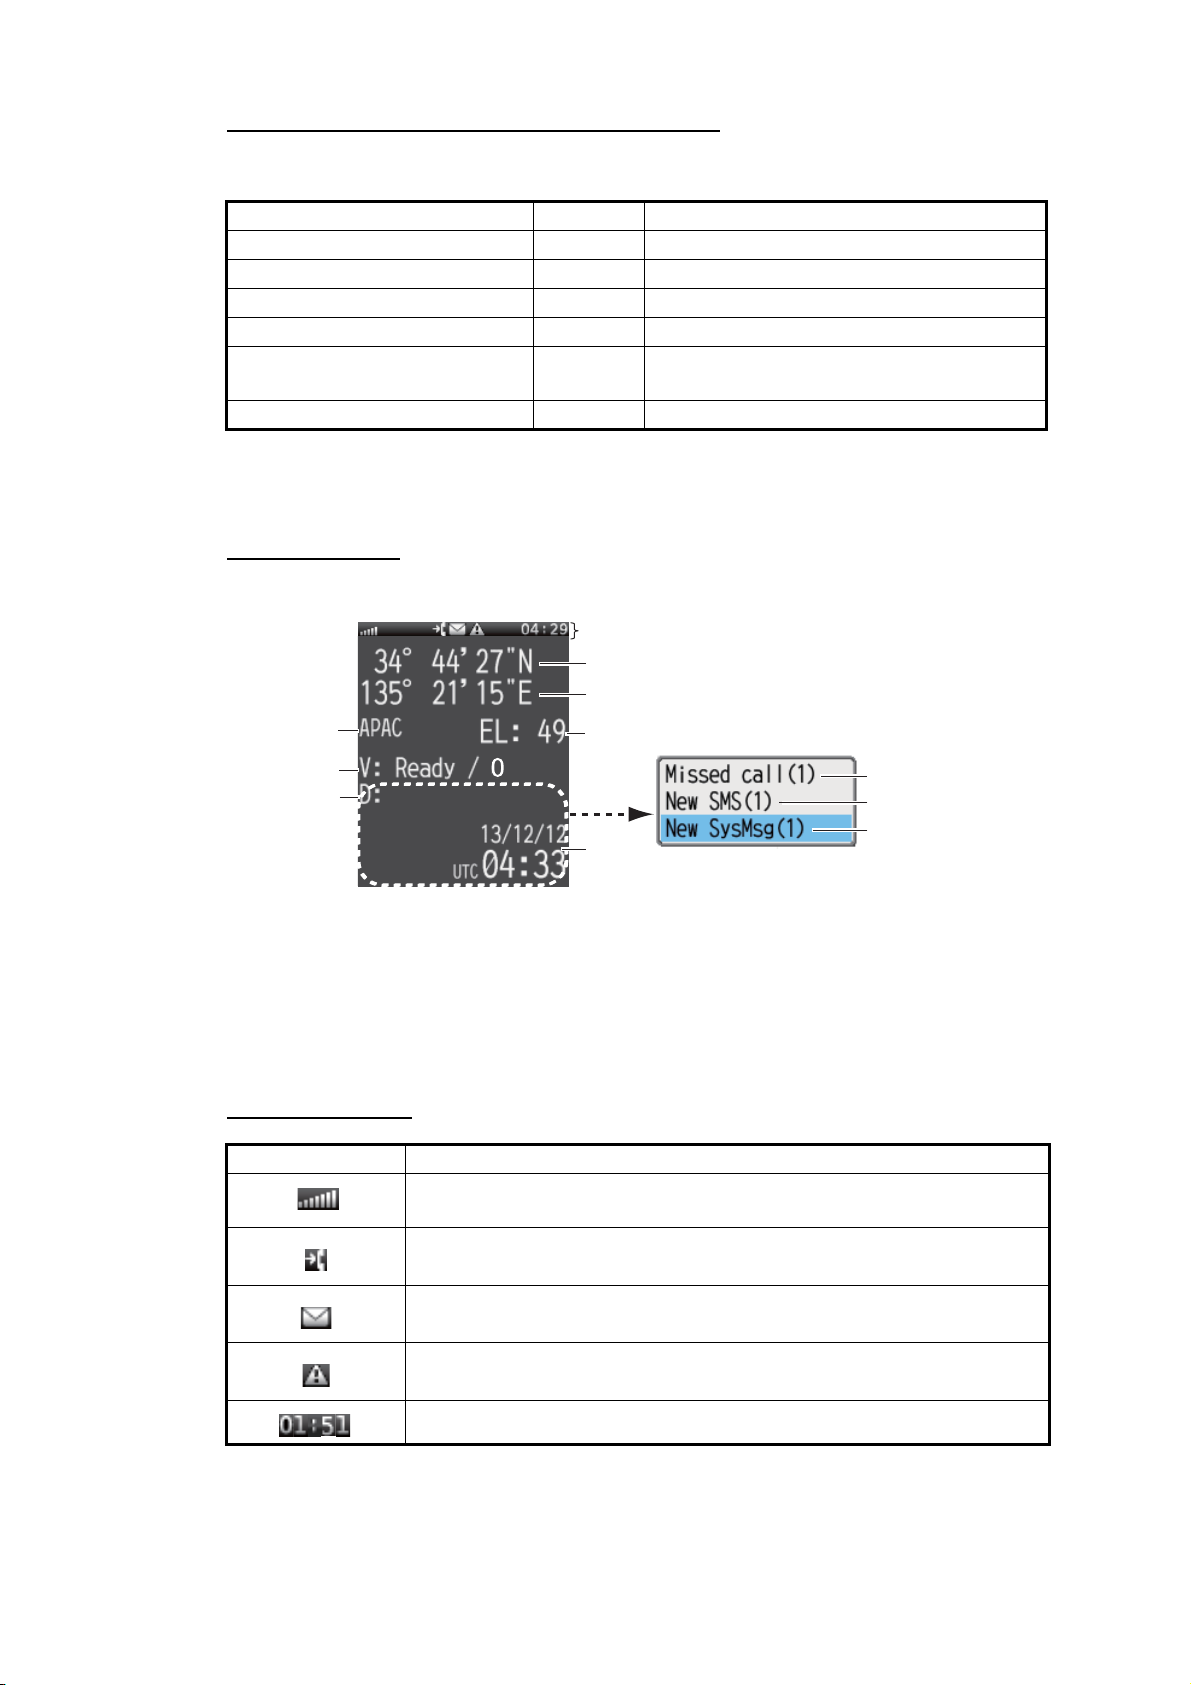
1.4 Screen Layout
Handset Screen
work setting only)
Status bar
Ship latitude
Ship longitude
Satellite in use
Voice status
Data status
*1: V: - - / 0 (Unavailable)
V: Ready / 0 (Ready)
V: Voice / 0 (Voice line busy)
V: Fax / 0 (Fax transmitting)
V: UDI / 0 (Using ISDN UDI) (FELCOM 500 only)
V: RDI / 0 (Using ISDN RDI) (FELCOM 500 only)
*1
*2
Not Connected
Status indication
Icon Definition
Reception strength: Satellite receive signal strength shown by 8
bars.
Missed call: Appears when incoming call is missed. (When the
missed call indication feature is activated.)
New Message: Displays when a new SMS message arrives. (When
the message arrival notification features is activated.)
Alarm: Appears when there is a trouble in the same network.
Buzzer sounds.
Shows the current UTC time.
Elevation
Missed call
New message
Time
Alert information window
(Above window appears when unread
information exists.
Number in parentheses is number of items.)
*2: D: - - (Unavailable)
D: Not connected (Data line disconnected)
D: Connected (Data line connected)
D: No permission (No connection permission)
New alert
1-6
Page 21
1.5 Basic Operation of the Handset
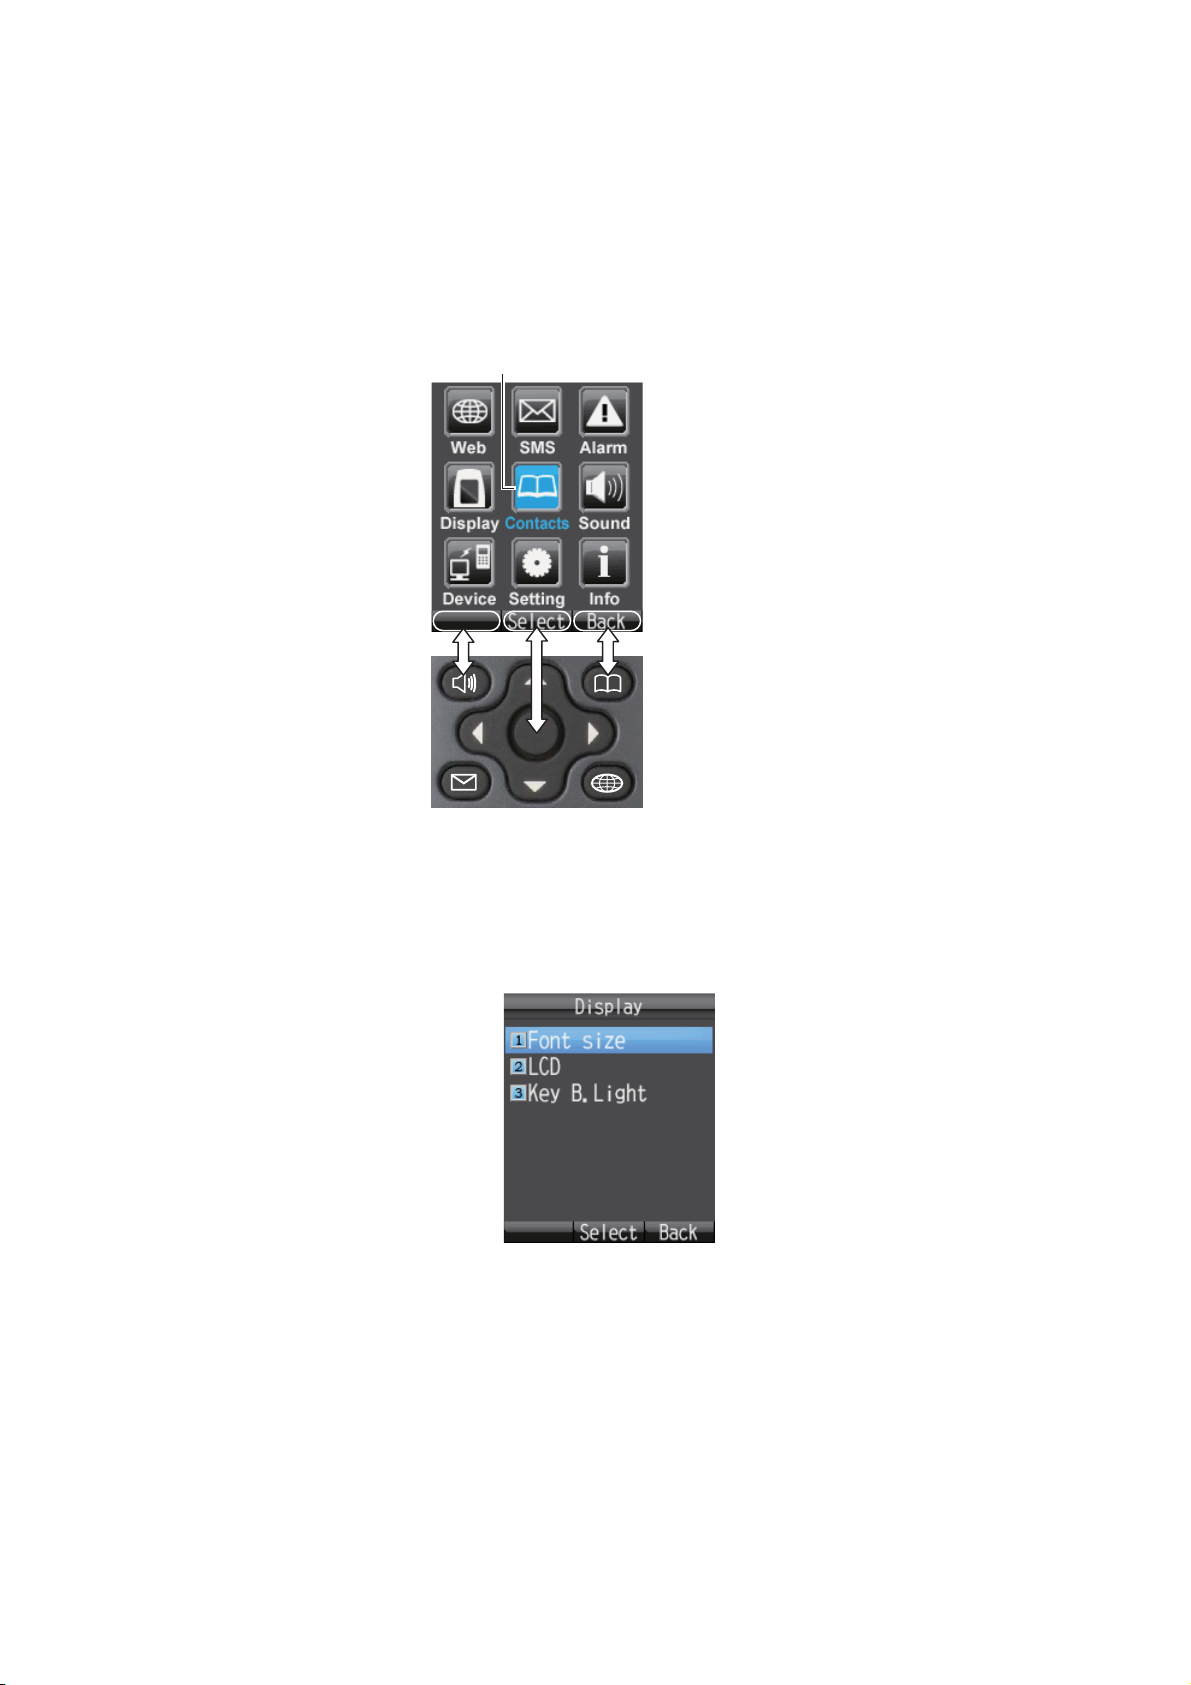
1.5.1 Main menu
The handset main menu has 9 items: [Web], [SMS], [SysMsg], [Display], [Contacts],
[Sound], [Device], [Setting], and [Info].
1. At the idle screen, press the Enter key to open the main menu.
Cursor (Light-blue highlight)
Select with the
corresponding key
1. BASIC OPERATION
2. Press W, S, X or T to select an icon in the menu. The selected icon is highlighted
in light-blue.
3. Press the Enter key to choose [Select]. The corresponding menu displays for the
selected item. For example, if you select [Display] at step 2, the following menu
appears.
1-7
Page 22
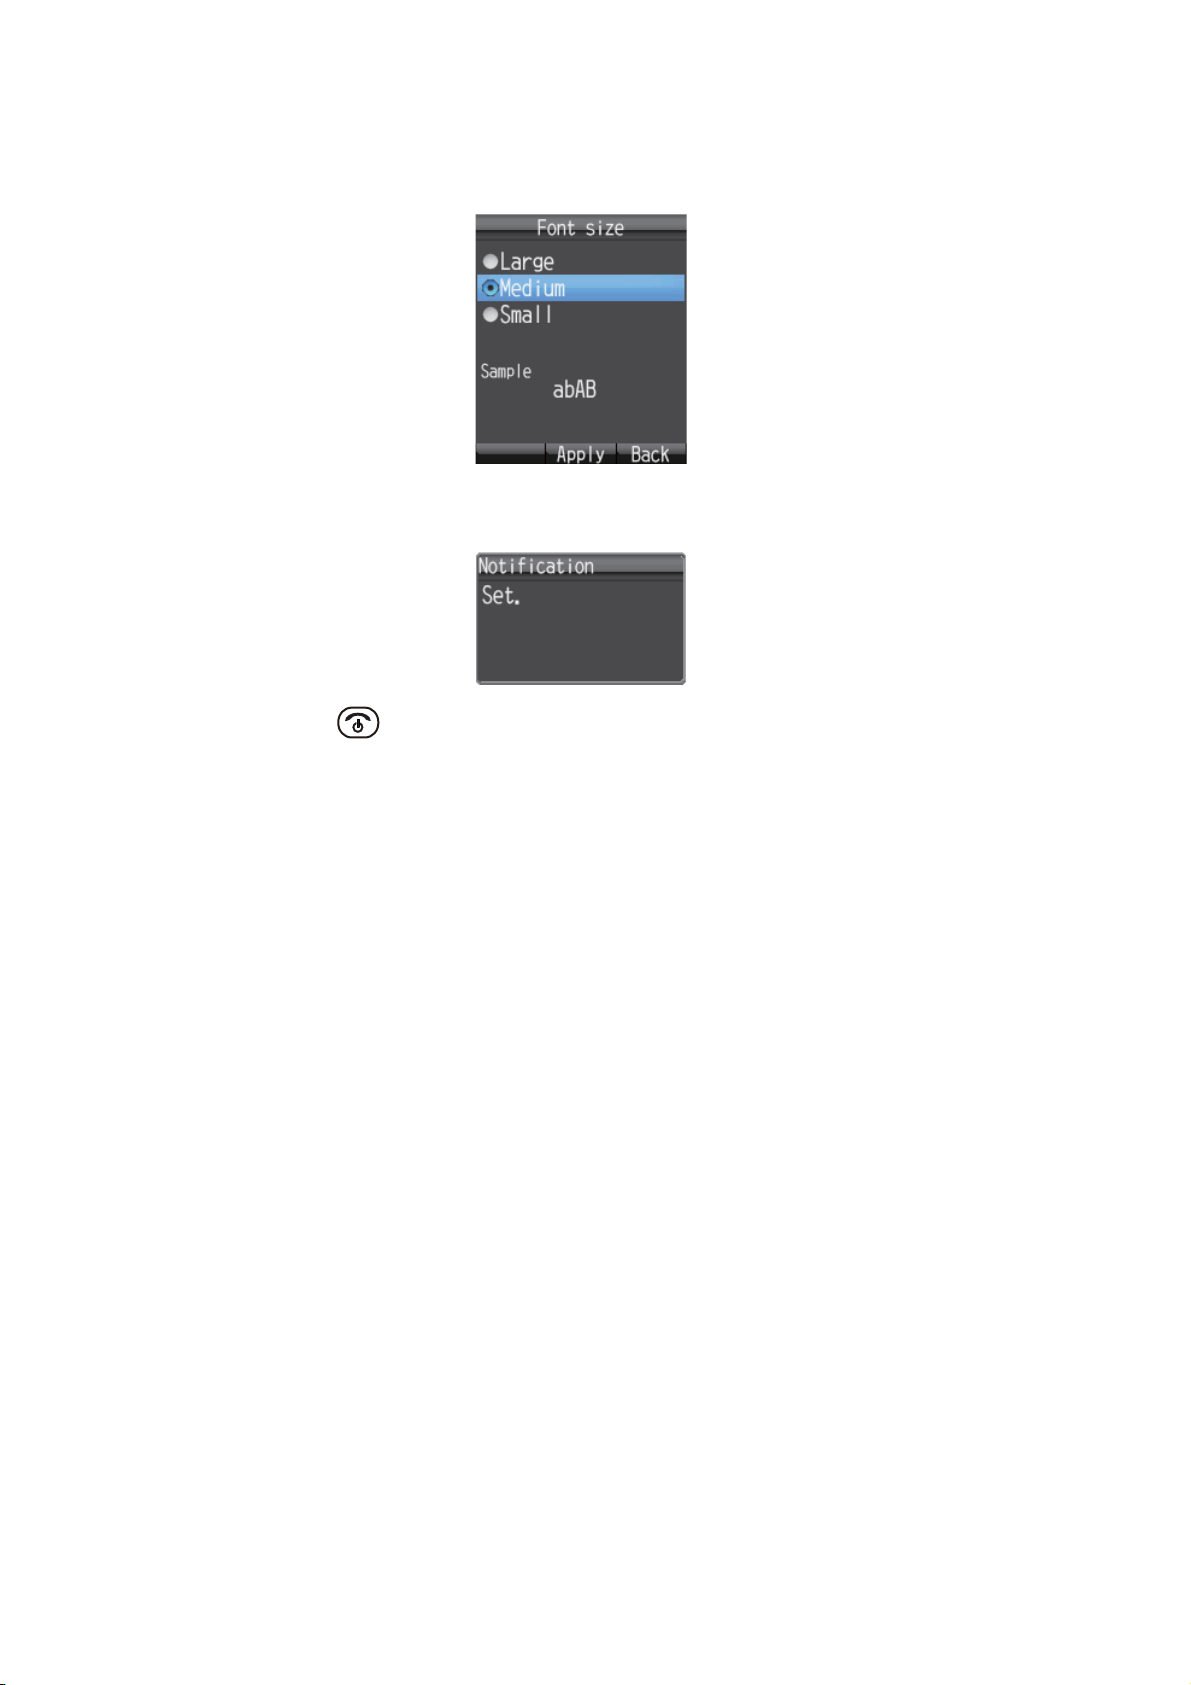
1. BASIC OPERATION
4. In the selected menu, press S or T to choose a menu item, and press the Enter
key to open the item. Or press the corresponding number key for that item. The
item screen appears. As an example, the [Font size] menu is shown below.
5. Press S and T to select an item then press the Enter key. A pop-up window like
the one below appears for three seconds.
6. Press to close the menu.
1-8
Page 23
1.5.2 How to input characters
Input alphabet and numeric characters using the keys on the handset. Press the key
once to input a number, or press repeatedly to cycle through alphabet characters.
Key Alphanumeric character (abAB mode) Character (1234 mode)
1 ., @, -, _, /, :, 1 1
2 a, b, c, A, B, C, 2 2
3 d, e, f, D, E, F, 3 3
4 g, h, i, G, H, I, 4 4
5 j, k, l, J, K, L, 5 5
6 m, n, o, M, N, O, 6 6
7 p, q, r, s, P, Q, R, S, 7 7
8 t, u, v, T, U, V, 8 8
9 w, x, y, z, W, X, Y, Z, 9 9
1. BASIC OPERATION
0 Space, 0, symbols 0
* ~, ?, ,(comma),’, ! n/a
# • If characters are not fixed, cycle through
characters in reverse order.
• If the cursor is on a character, press to insert a line break.
.
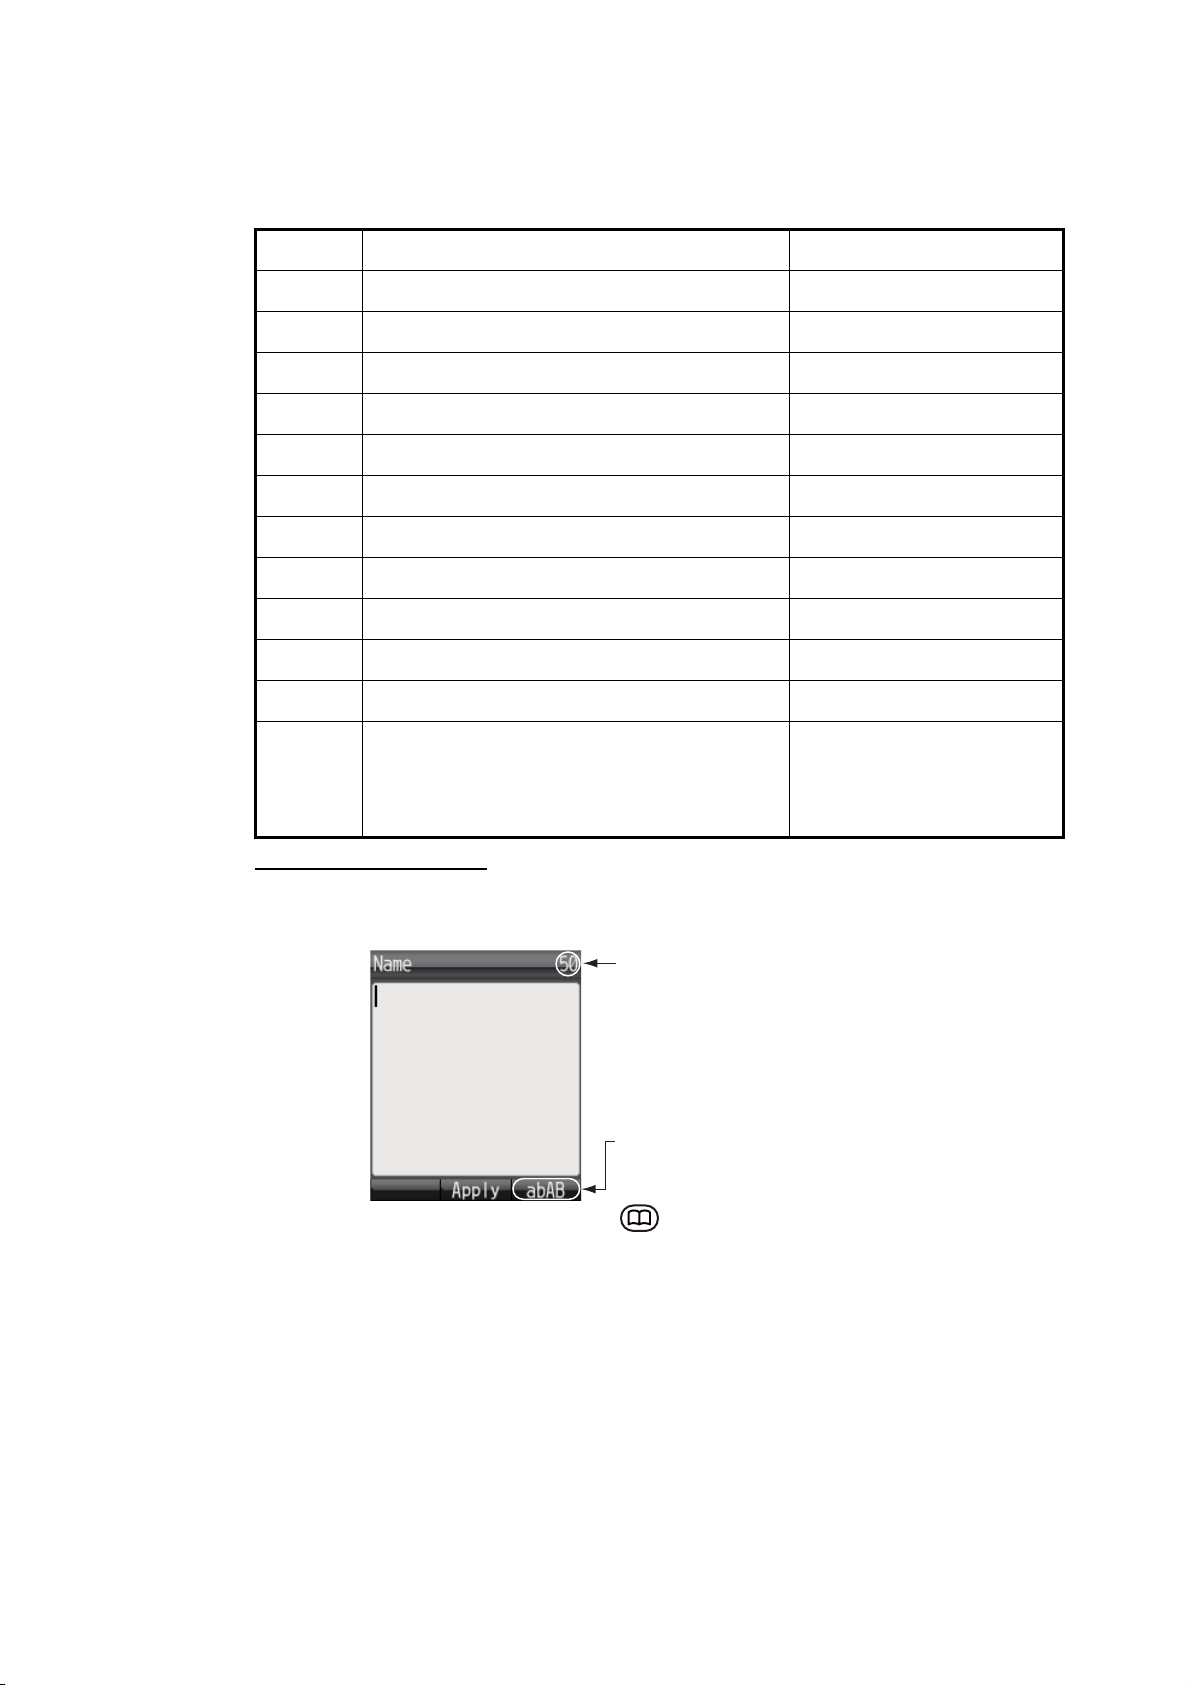
Example of text input
For example, to enter "furuno" at the text input screen, do the following:
Available character count
Input mode
abAB: Alphabet
1234: Numeric
: Change input mode
1. With [abAB] selected in the lower right of the screen, press the 3 key three times.
Note: Press the CLR key to delete a character.
2. Press 8 two times.
3. Press 7 three times.
4. Press 8 two times.
5. Press 6 two times.
6. Press X.
To continue input with the same key, move the cursor right one space.
1-9
Page 24
1. BASIC OPERATION
7. Press 6 three times.
Note: Press T for a line break at the end of a sentence, or # for a line break in
the middle of a sentence.
1.5.3 How to edit text
Edit text at the text input screen.
How to correct text
1. At the text input screen, put the cursor at the beginning of the text to correct.
2. Press the CLR key. One character erases.
Note: To erase all characters to the right of the cursor, press and hold the CLR
key down.
3. Input the correct character(s).
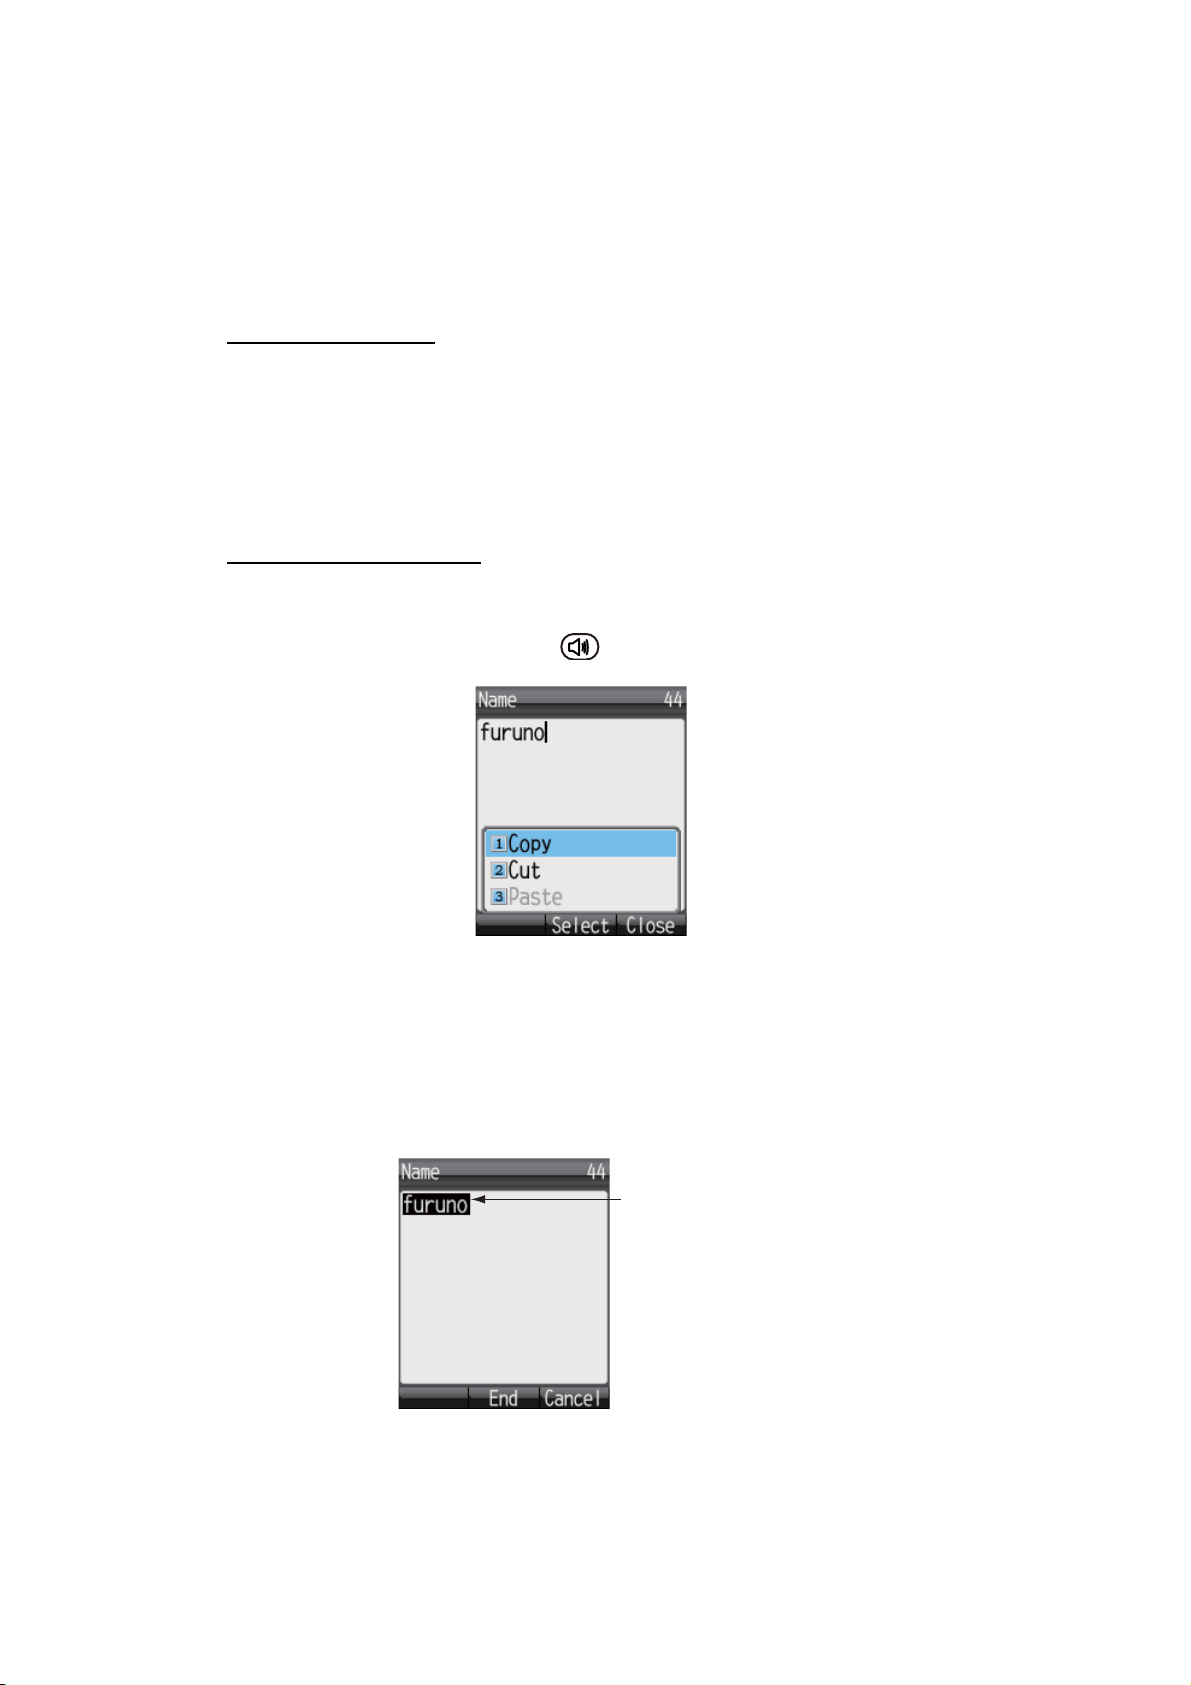
How to copy or cut text
Copy (or cut) indicated text and paste into another message.
1. At the input screen, press the key to open the sub menu.
2. Press 1 (to Copy), or 2 (to Cut).
3. Place the cursor at the beginning of the text to copy or cut, and press the Enter
key.
4. Press X to move the cursor and highlight the desired text to copy or cut (maximum
192 characters).
Note: Press the CLR key to reselect the text to copy or cut.
Highlighted text
1-10
5. Press the Enter key. The text is copied to the clipboard (max.10 text items). If you
copy an 11th text item, the oldest text item is erased.
Page 25
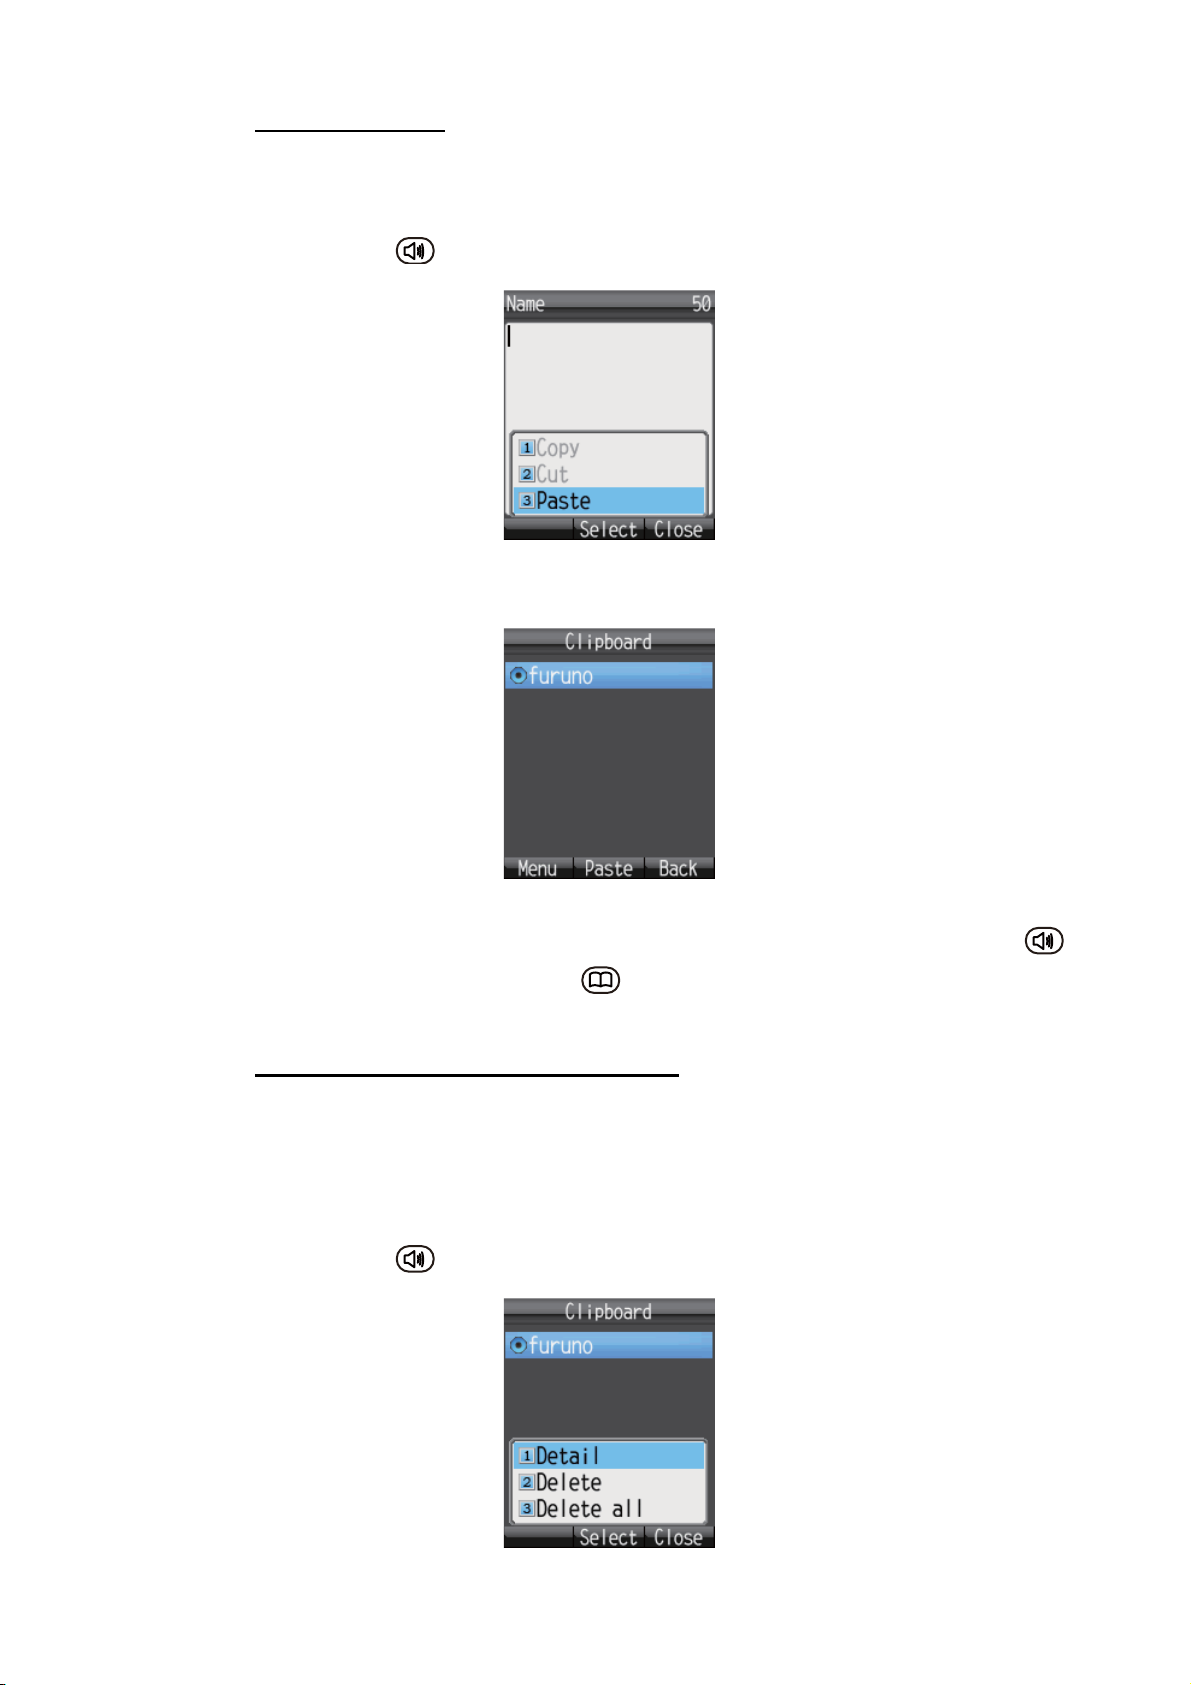
How to paste text
Paste text from the clipboard into a message.
1. Move the cursor to the position to paste the text.
2. Press the key to open the sub menu.
3. Press the 3 key to select [Paste].
The latest item is at the top of the list.
1. BASIC OPERATION
4. Press S or T to select the item to paste.
Note: To view the detailed information screen, with the item selected, press ,
1(Detail) in that order. Press to return to the clipboard.
5. Press the Enter key. Character appears at the location selected at step 1.
How to delete items from the clipboard
Delete one or all items from the clipboard as follows.
1. Open the clipboard screen. To delete one item, refer to step 2. To delete all items
go to step 3.
2. Press S or T to select the item to delete.
3. Press the key to open the submenu.
1-11
Page 26
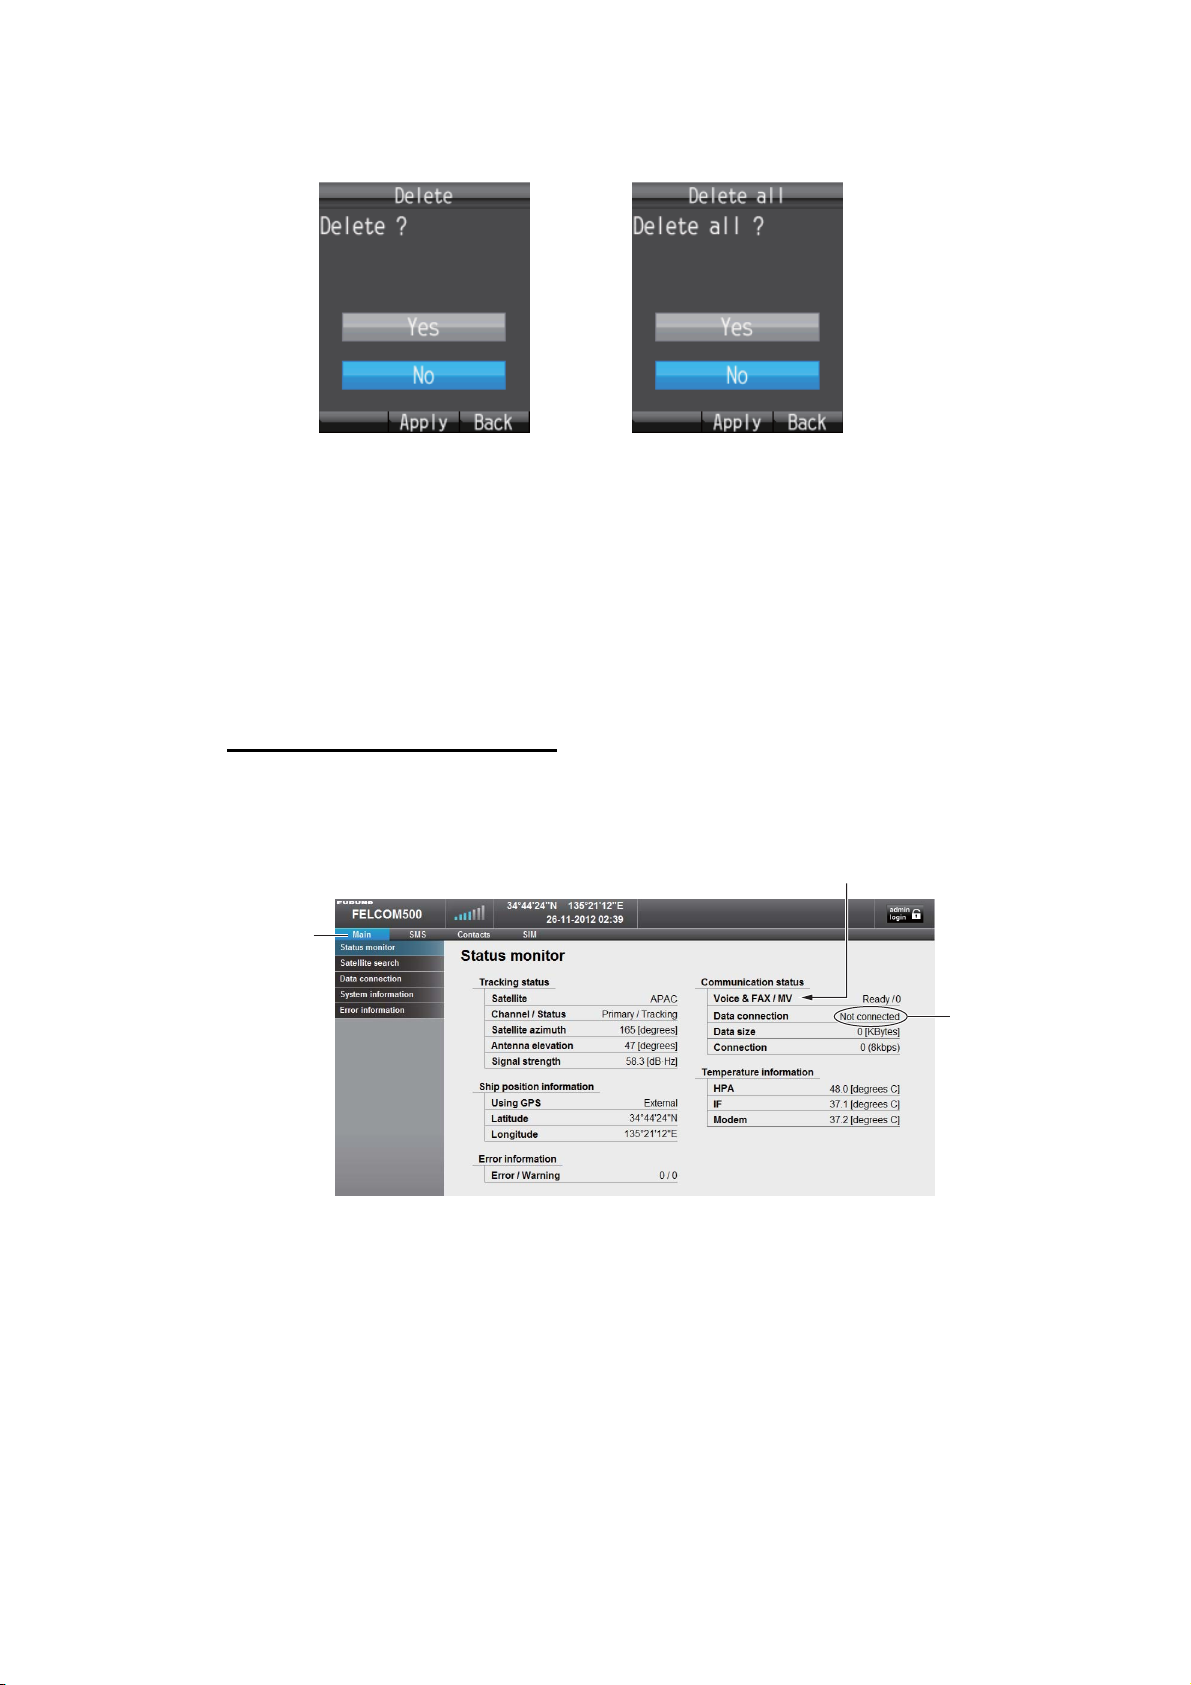
1. BASIC OPERATION
4. To delete one item, press 2 [Delete]. To delete all items press 3 [Delete all]. One
of the following confirmation screen appears:
[Delete] selected [Delete all] selected
5. Press S to select [Yes], and press the Enter key. When complete, the message
"Deleted" or "All deleted" displays.
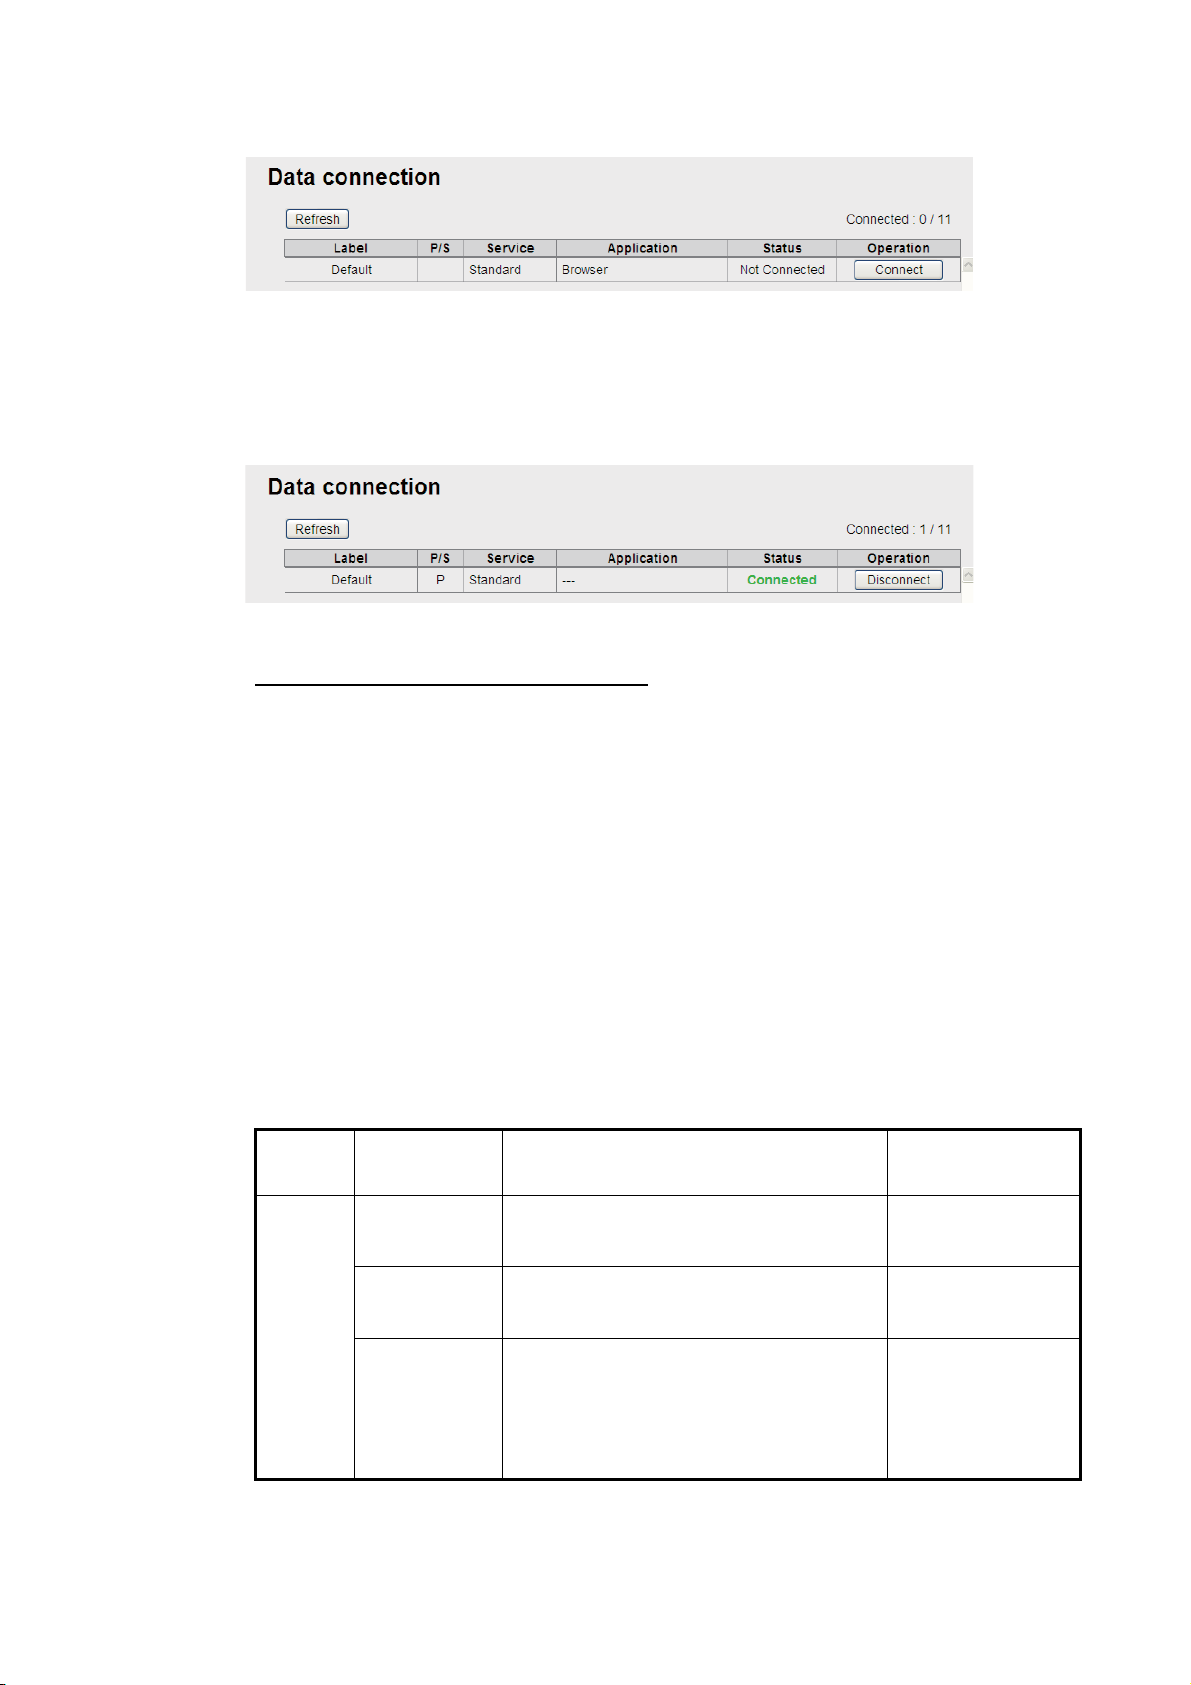
1.6 Data connection using Web software
Below are the procedures to connect to the internet. Refer to chapter 5 for how to activate the Web software and the details of data connection.
How to connect to the internet
Follow the procedure shown below to connect to the internet.
1. Click [Main] in the menu bar.
See “IMPORTANT NOTICES” (page i).
Menu Bar
㪁
*: Below will be shown when the equipment cannot connect to/disconnect from the
internet.
1-12
• “---” (cannot be used): When the equipment is not logged into the satellite sys-
tem.
• “No permission” (internet connection is not permitted): The IP address of PC is
not registered to the user list. (Refer to page 6-16 for the details.)
Page 27
1. BASIC OPERATION
2. Click [Data connection] in the sub menu to show the data connection display.
3. Click the [Connect] button of the service to use.
When connecting, the message "Now connecting..." is displayed. When connected, the message "***connection success." appears.
4. Click [OK] to close the message.
When connected to the internet, the connection list is displayed as shown below.
5. Open the desired application software and begin data communication.
How to disconnect from the internet
Do the following to disconnect from the internet:
1. Click [Main] in the menu bar.
2. Click [Data connection] to show the [Data connection] screen.
3. Click [Disconnect] for the services to disconnect. When disconnecting, the message "Now disconnecting..." is displayed. When disconnected, the message
"***disconnection success." is displayed. (***: Service and application)
4. Click the [OK] button to close the message. The [Status] field displays "Not Connected", the [Operation] button shows "Connect".
1.7 Password
Refer to the following table for information on passwords:
Password Use
Handset Operation
password
Delete all items and display specific
*1
menus.
Password
Update
Refer to
paragraph 3.5.4.
SMS pass-
*1, *2
word
SIP password Authentication password for SIP server.
When accessing SMS menu. Refer to
When you change the SIP password
you must also change the extension
line password to the same, by WEB
software.
paragraph 6.1.13.
Refer to
paragraph 3.5.3.
1-13
Page 28
1. BASIC OPERATION
Password Use
Web
Software
*1
The factory set password is "01234567".
*2
SMS password for handset and web software is commonly used.
Log password *1
Administrator
password*1
SMS pass-
*1, *2
word
extension line
password
PPPoE password
When opening logs. Refer to
When logging in as administrator. Refer to
When opening SMS top menu. Refer to
When registering a new extension line.
Password is the same as handset SIP
password.
When connecting to the internet by PPPoE.
Password
Update
paragraph 5.9.1.
paragraph 6.1.13.
paragraph 6.1.13.
Refer to page 6-2.
See page 6-24.
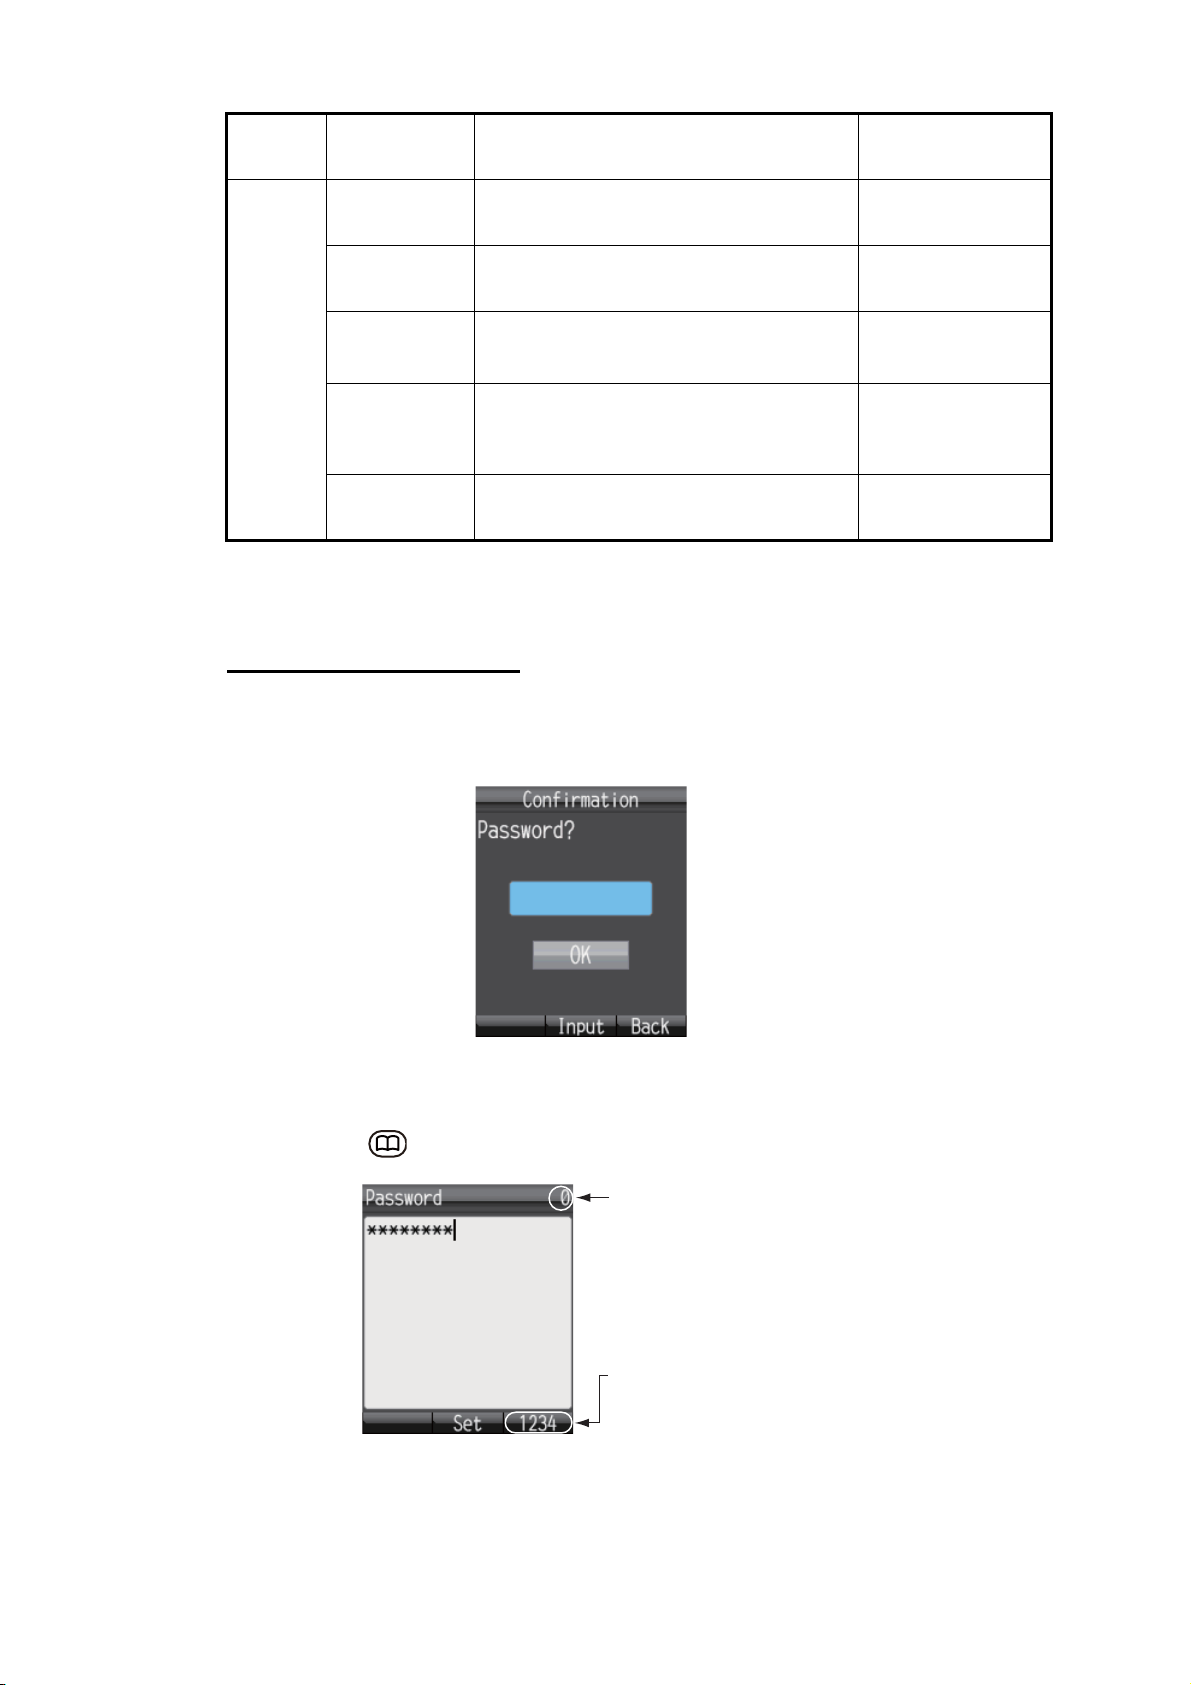
How to enter the password
This section explains how to enter the operation password. When prompted for a
password, do the following:
1-14
1. Press the Enter key to open the password input screen.
2. Enter the password, and press the Enter key.
Press the key to change between input modes:
Available character
count
Input mode:
abAB: Alphabet entry
1234: Numeric entry
3. Press the T key to select [OK], then press the Enter key.
Note: If the entered password is wrong, the message "Incorrect" appears. Enter
the correct password.
Page 29

2. HANDSET OPERATIONS
2.1 Handset
You can call someone on land or ship-to-ship from the handset. This unit allows the
handset to be used at the same time as the internet.
2.1.1 How to make a call
There are three methods to make a call:
1) Enter the number of the party to call
2) Select a number from the call History
3) Select a number from the Contacts list
You can call someone on the idle screen indicated "V: Ready / 0".
How to enter a number
To enter a number from the handset, do the following:
1. Remove the handset from the cradle, and enter the number from the idle screen:
XXXXXX
Land: [00], country code, subscriber number.
Ship-to-ship (Inmarsat terminal): [00], [870] (ocean area code), Inmarsat Fleet-
broadband number.
Internal call: 4 digit inter-line number
Note 1: To erase a number that is entered wrong, press the CLR key.
Note 2: There are two voice services, “4kbps AMBE+2” and “3.1kHz Audio”. Se-
lect the service to use by entering [1][*] or [2][*] before the phone number. If nothing is input before the number, “4kpbs AMBE+2” is used by default. Depending on
SIM card contract, “3.1kHz Audio” cannot be used. Contact the company which
issues your SIM card for details.
2-1
Page 30
2. HANDSET OPERATIONS
Service Charge Selection Method
4kbps AMBE+2
(Standard quality)
3.1kHz Audio
(High quality)
Low cost [1][*] + subscriber number
High cost [2][*] + subscriber number
Display on idle
screen
Voice
Fax
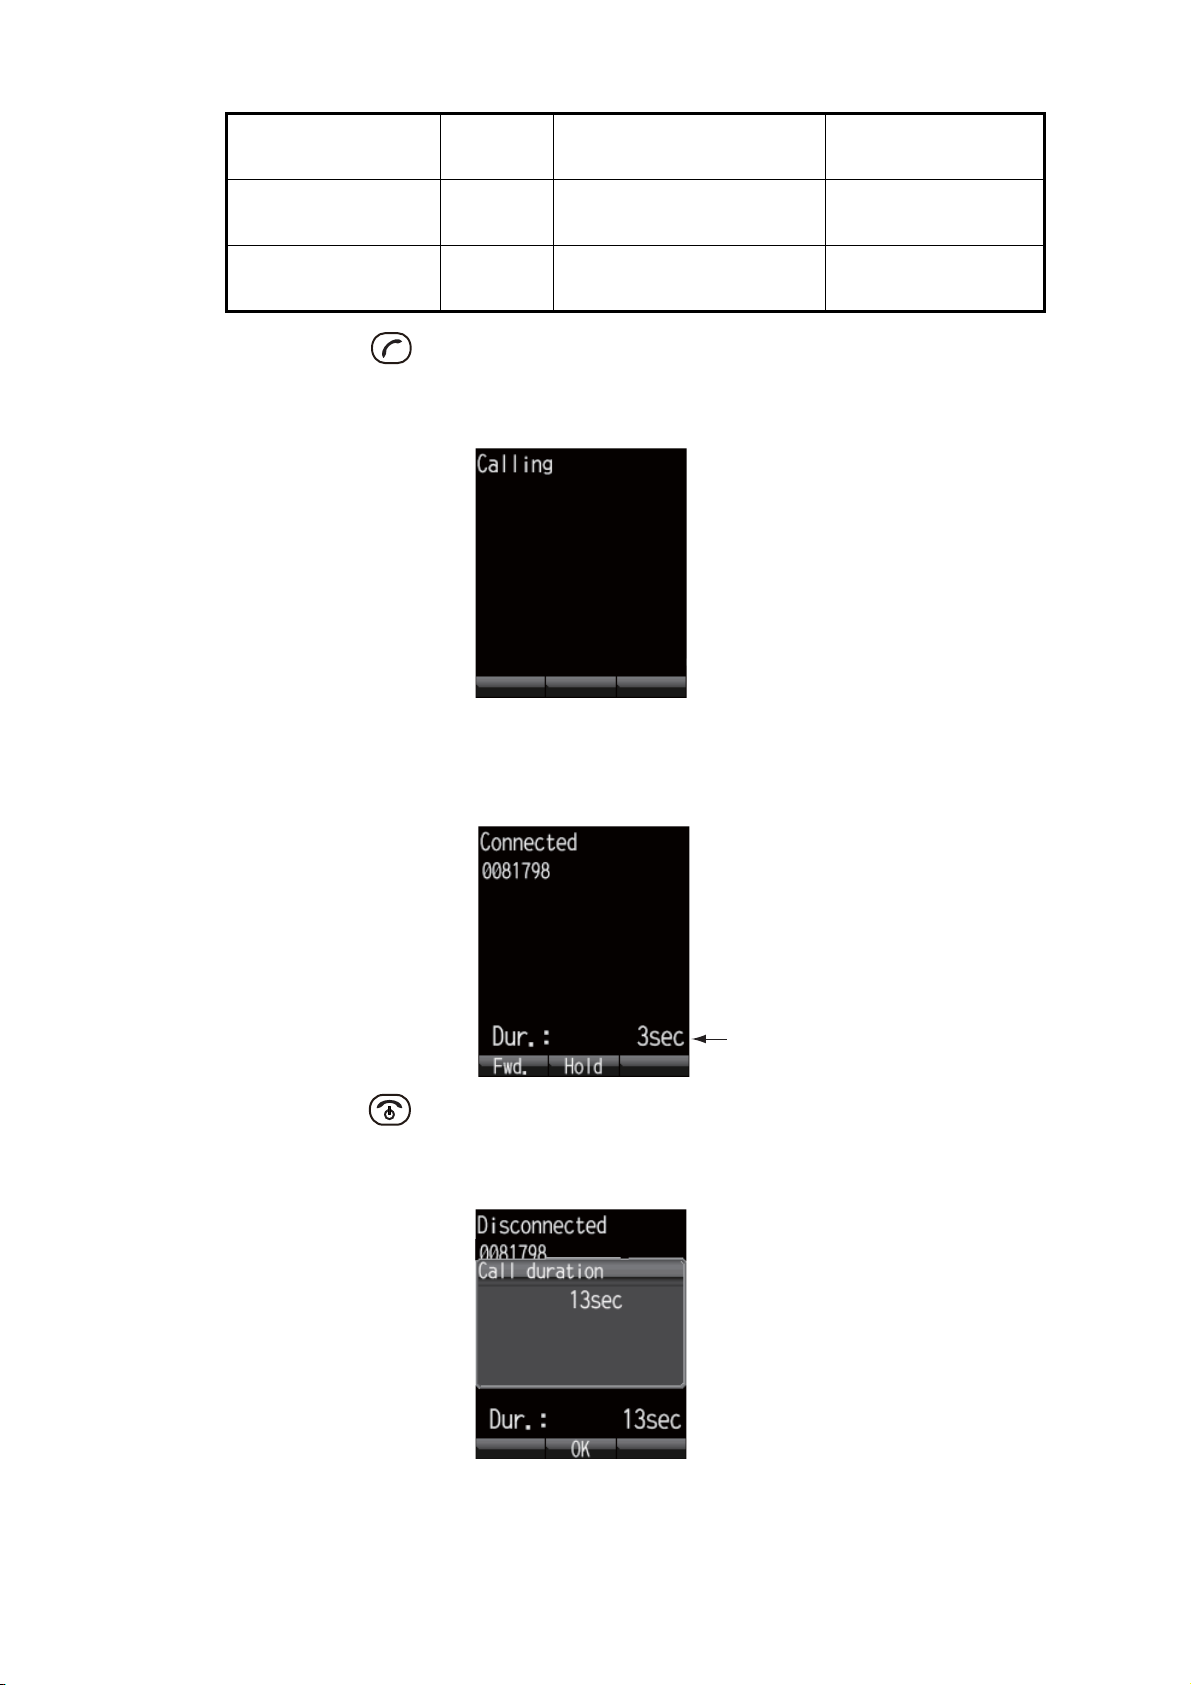
2. Press the key or press the Enter key to send the call. The indication shown
below appears on the screen.
Note: If connection fails, the message "Can’t connect" appears.
XXXXXXXXXXXXXX
3. Complete the conversation.
During conversation, the duration of the communication time is counted and displayed on screen (in seconds).
XXXXXX
Connection time
4. Press the key or replace the handset in the cradle to end the call. The duration of the call is indicated in the display for three seconds and the idle screen appears.
XXXXXX
2-2
Note: To make a telephone call from land to the Inmarsat Terminal FELCOM 250/500,
dial the identification code of the telephone carrier, [870] (ocean area code) then the
Inmarsat number.
Page 31

2. HANDSET OPERATIONS
How to place a call from the History list
A number can be dialed directly from the outgoing and incoming call history list. Up to
20 calls can be stored in each history list. When the 21st call occurs, the oldest logged
call is deleted from the list.
1. From the idle screen press W (for incoming history) or X (for outgoing history).
The caller’s name appears in the history list if it is registered in the Contacts list.
“No-caller-ID” appears if the number is hidden. Press W and X to change between
incoming and outgoing history.
OR
XXXXXX
: Received
: Missed
Outgoing historyIncoming history
: Communication successful
: Communication failed
XXXX
Note: When there are no numbers registered in the incoming or outgoing history,
"no list" appears.
2. Press T or S to select the number to call. 01 is the most recent number.
Note: Press the Enter key to view the complete information for the selected num-
ber. The incoming/outgoing call time log, etc. appear. Press the key to return
to the History list.
Icon
Communication time
Day/month, time
Name
if registered in
䋨
Contacts
䋩
Phone number
3. Press the key to dial the selected number.
2-3
Page 32

2. HANDSET OPERATIONS
Operations from the submenu of the History screen
At the incoming or outgoing history screen, press the key to open the submenu.
How to call from the Contacts list
The Contacts data is saved in the Communication Unit, the handset and the SIM card.
For information about creating or saving a new contact, refer to section 2.2.1 or
section 2.2.2, for handset, or section 5.5.1 for communication unit and SIM card.
Outgoing call
Message creation (see 2.3.2)
Contact entry (see 2.2.2)
Delete individual history
Delete all history
Invalid
Number hiddenNumber displayed
1. At the idle screen, press the key to open the Contacts screen.
Hndset: Handset
CmmUnt: Communication unit
SIM: SIM card
Note: If no numbers are stored in the Contacts list, "no list" appears.
2. Press W or X to select the location to view (Handset, CmmUnt, SIM).
Note: You can switch between displays with the key.
key
: Handset
2-4
: Communication unit
: SIM card
Save location display
All lists
3. Press S or T to select a contact.
Note: Press the Enter key to display the complete information of the selected con-
tact. Press the key to return to the Contacts list.
Page 33

Save location icon
r
Name
Telephone numbe
4. Press to dial the number.
2.1.2 Operation during communication
How to adjust the volume
Adjust the volume of the conversation as follows:
1. During a conversation, press S or T to display the Receive volume screen.
2. HANDSET OPERATIONS
2. Press S to increase the volume, or T to decrease the volume. Press the Enter
key to set the volume or wait two seconds for the volume to set automatically.
How to put a call on hold
It is possible to put a call on hold during the conversation.
1. During a conversation, press the Enter key.
XXXXXX
If the other party puts a call on hold during an internal call, the message "Holding
by party" appears.
2. Press the Enter key again to take the call off hold and return to the conversation.
2-5
Page 34

2. HANDSET OPERATIONS
How to answer an incoming call during a conversation
If another call is received during conversation, perform the following:
1. To answer the call, press the key. To disregard the call, press the
key. If the call is answered, the current conversation is put on hold. If the incoming
call is cancelled, the incoming caller is disconnected.
2. To switch between callers, press the Enter key.
Note: If another call is received by both you and the other party during conversation,
do the following:
• To answer the call, press the key. The communication line with the other par-
ty is disconnected. To disregard the call, press the key. Then, the incoming
caller is rejected and the conversation continues.
2.1.3 How to receive a call
1. When the handset rings, release the handset from the cradle then press the
key.
If the call is from one of the subscribers described below, the name of the caller is
displayed.
• If the caller is saved in Contacts, the registered name appears.
• If [Nickname] is set in the [Client set.] menu for a handset, the nickname of the
internal telephone appears.
• The name of the optional phone set in [Notes] of [Settings], [Basic Settings] and
[Analog ports] in the Web software name appears.
2-6
2. Talk to caller.
Page 35

3. When conversation is finished, press the key to complete the call, or place
the handset on the cradle. The communication time appears for 3 seconds and
then the idle screen returns.
Note 1: If the called party does not answer, a notice appears. Further the missed call
icon appears. (The icon appears if the missed call feature is active.)
Note 2: If the quick telephone feature is set for [Act. :OffHook], you can start your con-
versation as soon as you pick up the handset; it is not necessary to press the key
(see paragraph 3.5.1).
2.1.4 Call forwarding
A call can be forwarded to another internal handset.
1. During conversation, press the key.
2. HANDSET OPERATIONS
2. Enter the 4-digit internal handset number.
3. Press the Enter key. The screen changes as follows:
4. The following options are available in call forwarding:
If the recipient answers: Inform party that you are transferring a call then press
the key. The call is forwarded.
If the recipient doesn’t answer: press the key to go to the hold screen. Press
the Enter key to return to restore normal operation.
2-7
Page 36

2. HANDSET OPERATIONS
2.2 Contacts List
Frequently called numbers can be saved in the Contacts list for easy access when
phoning or sending an SMS. Save the Contacts list to the handset, the communication
unit or the SIM card. The Handset can store 50 contacts. To commonly use a contact
with multiple handsets, save it to the contact list in the communication unit or SIM card.
See paragraph 5.5.1.
2.2.1 How to add a new contact
1. At the idle screen, press the key to open Contacts.
2. Press the key to open the submenu.
Items appear in grey when
nothing is stored on
handset, comm. unit or SIM.
3. With [New] selected, press the Enter key, or press 1 to add a new entry.
Required input
Required input
4. With the [Name] field selected press the Enter key.
5. Enter name of party and press the Enter key. You can use a maximum of 50 char-
acters. For how to enter data, see paragraph 1.5.2.
6. Press T to select the [No.] field then press the Enter key.
7. Enter the telephone number of the party then press the Enter key. A maximum of
20 characters can be used. The available characters are numerics, #, *, and +.
Search
2-8
Page 37

2. HANDSET OPERATIONS
8. Press the key. The message "Registered" appears and the contact is saved
to the Contacts list in the handset.
9. Press the key to close the Contacts screen.
Note: The contacts screen can be opened with [Contacts] in the main menu.
2.2.2 How to save a telephone number from History to Contacts
Save a number from the outgoing and incoming History to Contacts.
1. At the idle screen, press W to open the incoming history list, or X to open the out-
going history list.
2. Press S or T to select the contact to save.
3. Press the key to open the submenu.
4. Press 3 to select [Contacts].
5. With [New] selected, press the Enter key. The telephone number selected at step
2 appears in the [No.] field.
6. With the [Name] field selected, press the Enter key.
7. Enter a name (max. 50 character), then press the Enter key.
8. Press the key. The message "Registered." appears and the number is registered in the Contacts list. The number selected at step 2 now appears as the reg-
istered name.
9. Press the key to close the Contacts list.
Note 1: To write over a number that already exists in the Contact list, select [Overwrite] instead of [New] at step 5 and press the Enter key. Select the contact to overwrite and press the Enter key. The new number overwrites the existing number in the
[No.] field.
2-9
Page 38

2. HANDSET OPERATIONS
Note 2: To register a number entered from the idle screen to the Contacts, press the
key, then 2 to select [Save num.]. The remainder of the procedure is the same
as that from step 5 in this procedure.
2.2.3 How to search the Contacts list
This section shows you how to search the handset, communication unit and SIM card
for registered contact.
1. Press the key to open Contacts.
2. Press the key to open the submenu.
3. Press 3 to select [Search].
4. Select the [Name] field to search by name, or the [No.] field to search by number.
Press the Enter key.
5. Enter part of name (or telephone number) then press the Enter key.
6. Press the key to perform the search. The results of the search appear on the
Result screen. If the contact can not be found, the message "Not found" displays.
Note: To display all the contact data, press the key at step 5 with nothing
entered in the fields.
7. Do one of the following depending on your objective:
2-10
• Place a telephone call: Press the key.
• Edit contact: Press the key to show the submenu. Press 2 key to select
[Edit]. Start from step 5 at paragraph 2.2.4.
Page 39

• Delete contact: Press the key to show the submenu. Press 3 key to select
[Delete]. Press S to select [Yes] then press the Enter key.
2.2.4 How to edit a contact
You can edit a contact from the handset in which the contact is registered. Contacts
saved to the communication unit and SIM card cannot be edited from a handset (refer
to paragraph 5.5.3).
1. At the idle screen, press the key to open Contacts.
2. With [Hndset] selected, press S or T to select the item to edit.
3. Press the key to open the submenu.
4. Press 2 to select [Edit].
2. HANDSET OPERATIONS
5. Edit the recipient name or number (refer to paragraph 2.2.1).
6. After you edit, press the key.
7. Press T to select [Overwrite], and press the Enter key. The message "Edited" ap-
pears.
8. Press the key to close Contacts.
2.2.5 How to delete a contact
You can delete a contact from the handset in which the contact is registered. Contacts
saved to the communication unit and SIM card cannot be deleted from a handset. The
following two methods are available to delete data (refer to section 5.5.4):
• Delete individual: Delete the selected contact.
• Delete all: Delete all addresses in the Contacts list.
2-11
Page 40

2. HANDSET OPERATIONS
Delete individual contact
1. At the idle screen, press the key to open the Contacts.
2. With [Hndset] selected, press S or T to select the contact to delete.
3. Press the key to open the submenu.
4. Press 4 to select [Delete].
5. Press S to select [Yes], and press the Enter key. The data of the contact selected
at step 2 is deleted.
6. Press the key to close Contacts.
Delete all
1. At the idle screen, press the key to open Contacts.
2. Press the key to open the submenu.
3. Press 5 to select [Delete all]. Operation Password is required.
4. Press the Enter key.
5. Enter the operation password, and press the Enter key. For information about the
operation password, see paragraph 1.7.
6. Press T to select [OK], and press the Enter key.
2-12
7. Press S to select [Yes], and press the Enter key.
8. Press the key to close Contacts.
Page 41

2.3 SMS
The Short Message Service (SMS) allows you to send and receive SMS messages
to similarly equipped mobile phones and Inmarsat terminals. An SMS message can
have up to 160 alphanumeric characters.
Note: Not all mobile phone carriers permit reception and transmission of SMS messages to Inmarsat terminals. Contact your mobile phone carrier for details.
2.3.1 How to log in
Log in to access the SMS menu.
1. At the idle screen, press to open the SMS menu. The following login screen
appears.
2. HANDSET OPERATIONS
2. Press the Enter key.
3. Enter the SMS password and press the Enter key. See paragraph 1.7 for information about the SMS password.
4. To shorten the login procedure from the next login, press T to select [Save password], and press the Enter key.
A checkmark [9] appears in the checkbox. See paragraph 3.3.2 for how to set the
SMS password for login.
5. Press T to select [Login], and press the Enter key.
If the SMS password is correct, the [SMS] menu appears.
Note: If the password is incorrect, the message "Incorrect password." appears.
Enter the password again. In addition to the error message, the idle screen shows
"Login failed" and the alarm icon appears.
Note: Descriptions hereafter omit entry of the SMS password.
2-13
Page 42

2. HANDSET OPERATIONS
2.3.2 How to send an SMS message
You can send a message with a maximum of 160 characters (alphanumeric, symbols)
to a communication terminal that has SMS capability.
1. At the idle screen, press the key to show the [SMS] menu.
2. Press 1 to select [Create New].
3. With the [To] field selected press the Enter key.
4. Select from the following methods to choose a recipient:
To get recipient from Contacts, press 1, select contact then press the Enter
key.
To get recipient from outgoing History, press 2, select subscriber then press
the Enter key.
To input recipient number, press 3, enter number (up to 20 digits) then press
the Enter key.
5. Press T to select the [Body] field, and press the Enter key.
6. Enter the text (maximum 160 characters) in the [Body] field and press Enter key.
2-14
Page 43

7. Press the key to open the submenu.
2. HANDSET OPERATIONS
XXXXXXXXXXXX
8. Press 1 to select [Send] to send the message. The message "Sending..." appears
while the message is being sent. When completed, the message "Sent." appears.
Note 1: To save a message to the [Draft] box without sending the message, press
2 instead of 1 to select [Save]. The message is saved to the [Draft] box.
Note 2: To cancel sending of a message while the indication "Sending..." is dis-
played, press .
9. Press to close the menu.
Note: The [SMS] menu can also be accessed with [SMS] on the main menu.
Name appears here if
telephone number is
registered in Contacts.
2.3.3 How to view a received message
If you receive a message while logged in (with [Save password] set to on), an alarm
rings and an alert window appears at the bottom of the screen as shown in the illus-
tration below. Furthermore, the message icon appears in the status bar at the top
of the screen if SMS alert is set to ON (refer to paragraph 3.5.1 for detailed information). When not logged in, neither the alert window nor the icon appears. Manually
check if a new message has arrived, when you log in.
2-15
Page 44

2. HANDSET OPERATIONS
1. With [New SMS] selected, press the Enter key. The Inbox displays.
2. Press S or T to select the message, and press the Enter key.
Message count
XXXXXX
: Unread
: Read
Read status icon
Date/month and time received
Body text
Note: After displaying the message, press the key to display the sub menu.
The following operations are possible: Reply, Forward, Call, Contacts, Move r. bin
(move to Recycle Bin), Copy text. See paragraph 2.3.5.
3. Press the key to close the message.
2.3.4 Message boxes
There are four message boxes: [Received], [Sent], [Draft] and [Recycle Bin]. If there
is no message in a box, "No SMS" is displayed. If the amount of messages exceeds
the maximum storage capacity, the oldest message is deleted automatically.
Box Saved Message Maximum Amount
XXXXXXXXXX
Sender
Name displays if sender is
registered in Contacts
2-16
Inbox Received messages 200 Messages in total
Sent Sent messages
Draft • Un-sent saved messag-
es.
• Messages which did not
reach intended recipient.
Recycle Bin Messages deleted from [In-
box], [Sent], and [Draft]
boxes.
Page 45

2. HANDSET OPERATIONS
*1
*2
*1: Unread message count displays in brackets.
*2: Unsent message count displays in brackets.
Received messages box
Sent messages box
Draft messages box
Recycle bin
How to move a message to the recycle bin
You can move the messages from any box into the Recycle Bin. Messages can be
moved individually or all at once.
1. Open the [Inbox], [Sent] box or [Draft]. To move an individual message, go to step
2. To move all messages from the selected box, go to step 3.
2. Press S or T to select the message to send to the Recycle Bin.
3. Press the key to open the submenu.
XXXXX
4. To move an individual message to the Recycle Bin, press the 1 key to select
[Move r. bin]. To move all messages from the selected box to the Recycle Bin,
press the 2 key to select [R. bin all]. The message "Moving..." appears during the
moving. "Moved" appears when the move is completed.
5. Press the key to close the box.
Note: To move a message to the recycle bin that is opened and being viewed, press
the key and 5 to select [Move r. bin].
How to sort messages in a box
You can sort the messages in the Inbox by date, read/unread status or by sender
name. Further, you can arrange messages in the Sent and Draft boxes by either date
or recipient name.
1. Open the box ([Inbox], [Sent], or [Draft]) to arrange.
2. Press the key to open the submenu.
2-17
Page 46

2. HANDSET OPERATIONS
3. Press 3 to select [Sort].
Inbox
4. Press S or T to select sort method.
Date: Sort messages by date received, sent, or created.
Unread: Sort messages by unread/read status.
Sender name: Sort messages by sender name (A-Z), number (0-9), and symbol.
Senders that are not saved in Contacts display at the top of the list.
Address: Sort messages by address name (A-Z), number (0-9) and symbol. Recipients that are not saved in Contacts display at the top of the list.
5. Press the Enter key.
6. Press the key to close the mailbox.
Sent box/Draft box
How to move messages from the recycle bin to other boxes
Messages in the Recycle Bin can be moved to the other boxes. You can move messages individually or all at once.
1. Open the Recycle Bin. For individual message go to step 2; for all messages go
to step 3.
2. Press Sor T to select the message to send to another box.
3. Press the key to open the submenu.
2-18
Page 47

2. HANDSET OPERATIONS
4. To move an individual message, press 1 to select [Move]. To move all messages,
press the 2 key to select [Move all].
5. Press S or T to select the box where to move the message, and press the Enter
key. The message "Moving..." appears during the move and "Moved." when the
move is completed.
6. Press the key to close menu.
Note: You can move a message in the Recycle Bin that is opened and being viewed
to another box. Press the key, and 1(Move).
How to delete messages in the recycle bin
The messages in the Recycle Bin can be deleted individually or all at once.
1. Open the Recycle Bin. To delete an individual message, go to step 2. To delete
all messages, go to step 3.
2. Press S or T to select the message to delete.
3. Press the key to open the submenu.
4. To delete an individual message, press 3 (Delete). To delete all messages, press
4 (Delete all). Then, do as follows:
• If 3, press S to select [Yes] and press the Enter key.
• If 4, press the Enter key. Enter the operation password and press the Enter
key. Press T to select [OK] and press the Enter key. Press S to select [Yes]
and press the Enter key.
The message "Deleting..." appears during the deleting process and “Deleted”
appears upon completion.
5. Press the key to close menu.
Note: You can delete a message in the Recycle Bin that is opened and being
viewed. Press the key, followed by 2 (Delete).
2-19
Page 48

2. HANDSET OPERATIONS
2.3.5 How to use Received messages
Received messages can be replied to and forwarded. You can also use received messages to telephone the sender of the message, add a sender to Contacts, and copy
the text of the message.
How to reply to a message
Do the procedure below to reply to a received message.
1. Open the Inbox and open the message to reply to.
2. Press the key to open the sub menu.
3. Press 1 to select [Reply]. The Create SMS screen appears.
4. Press T to select the [Body] field, and press the Enter key.
5. Enter the text (maximum 160 characters). Press the Enter key when finished.
6. Press the key to open the submenu.
7. Press 1 to select [Send] to send the message.
8. Press the key to close the box.
How to forward a message
Forward a received message to another recipient as follows:
1. Open the Inbox and open the message to forward.
2. Press the key to open the sub menu.
3. Press 2 to select [Forward].
4. With the [To] field selected press the Enter key.
5. Enter the address of the recipient and press the Enter key. (See paragraph 2.3.2.)
6. Press the key to open the submenu.
2-20
7. Press 1 to select [Send] to send the message.
8. Press the key to close the box.
Page 49

2. HANDSET OPERATIONS
How to call the sender of a message
Call the sender of a received SMS as follows:
1. Open the Inbox and open the message to call sender from.
2. Press the key to open the submenu.
3. Press 3 to select [Call]. The phone number of the sender appears.
4. Press the key, or the Enter key, to call the number.
5. Press the key to close the message.
How to save the sender to Contacts
Save the address of a sender to Contacts as follows:
1. Open the Inbox and open the message to save sender.
2. Press the key to open the sub menu.
3. Press 4 to select [Contacts].
4. With [New] selected, press the Enter key. The phone number of the sender appears in the [No.] field.
5. With [Name] selected press the Enter key.
6. Enter the name (maximum of 50 characters) of the sender, and press the Enter
key.
7. Press the key. The message "Registered" appears and the name is saved
to the Contacts list, under the name entered at step 6.
8. Press the key to close the message.
How to copy text
You can copy text in a message as follows:
1. Open the message from which to copy text.
2. Press the key to open the submenu.
3. Press 6 to select [Copy text].
4. Position the cursor at the beginning of the text to copy and press the Enter key.
5. Move the cursor to highlight the text to copy then press the Enter key.
6. Press the key to close the message.
2-21
Page 50

2. HANDSET OPERATIONS
2.3.6 How to use Sent messages
Messages in the Sent box can be edited and re-sent. You can also use sent messages
to telephone the sender of a message, add a sender to Contacts and copy text of a
message.
How to edit and send a message
Messages in the Sent box can be edited and sent to the same or different recipient.
1. Open the Sent box and open the message.
2. Press the key to open the sub menu.
3. Press 1 to select [Copy & edit]. The [Create SMS] screen appears with the original
message text in the [Body] field. To edit and send a message to the original recipient, go to step 6. To send the message to a different recipient go to step 4.
4. To send the message to a different recipient, with [To] selected, press the Enter
key.
5. Select the recipient. See paragraph 2.3.2.
6. Press T to select the [Body] field, and press the Enter key.
7. Edit the body text (maximum 160 characters) and press the Enter key.
8. Press the key to open the submenu.
9. Press 1 to select [Send] to send the message.
10. Press the key to close the box.
How to resend messages
You can resend a message that was already sent.
1. Open the Sent box and open the message.
2. Press the key to open the submenu.
2-22
3. Press 2 to select [Resend] to resend the message.
4. Press the key to close the box.
Page 51

2.3.7 How to use Draft messages
Un-sent messages, and failed transmission messages are saved in the Draft box. It is
possible to edit, resend, copy text, telephone the sender, and save address to Contacts.
How to edit and send messages
Edit and send a message in the Draft box as follows:
1. Open the Draft box and open the message to edit and/or send.
2. Press the key to open the sub menu.
2. HANDSET OPERATIONS
Icon
: Unsent
: Send Failed
3. To edit the message, press 2 to select [Edit]. To send the message without editing,
press 1 to select [Send]. If 2 is selected, the [Create SMS] screen appears. Follow
directions from step 4. If 1 already has been pressed, follow directions at step 7.
4. Edit the message text.
5. Press the key to open the submenu.
6. Press 1 to select [Send] to send the message.
7. Press the key to close the box.
2-23
Page 52

2. HANDSET OPERATIONS
2.3.8 How to use URL and phone numbers within messages
If a phone number is included in a message, it can be copied, called, replied to (by
SMS), and added to Contacts. If a URL is included in a message, it can be viewed,
added to Favorites, and copied.
Phone numbers
1. Open the message with the included phone number.
2. Press T to select the phone number with the cursor. The phone number is highlighted in light blue. If there are two or more numbers in the message, use T or
S to select the one to use.
Characters which are
recognized as
telephone number
3. Press the Enter key to show the submenu.
4. Do one of the following:
• Call the selected number: Press 1. Press the Enter key or the key to
call.
• Send an SMS message to the selected number: Press 2. Follow the instruc-
tions at step 5 and after in paragraph 2.3.2.
• Save the selected number to Contacts: Press 3. Follow the instructions at
step 4 and after of “How to save the sender to contacts”.
• Copy the selected number: Press 4 to copy the number to the clipboard.
2-24
5. Press the key to close the message.
Page 53

2. HANDSET OPERATIONS
URL
1. Open the message with the included URL.
2. Press T to select the URL. The URL is highlighted in light blue.
Characters which are
recognized as
URL address
3. Press the Enter key to display the submenu.
4. The following operations are possible:
• Open and view the URL: Press 1. Press S to select [Yes] and press the Enter
key. If the idle screen shows "D: Connected", the web page related to the URL
appears (see paragraph 2.4.1). If "D: Not connected" (or “No permission”) is
shown, an error message appears and the web page is not shown.
• Save the URL to Favorites: Press 2. With the [Title] field selected, press the
Enter key. Enter a title in the field and press the Enter key. Press the key
to save to Favorites.
• Copy the URL: Press 3. The URL is copied to the clipboard.
5. Press the key to close the message.
2-25
Page 54

2. HANDSET OPERATIONS
2.4 Web
You can view web pages on the handset by using Standard IP (Best effort) packet
communications service. Service charge is based on the amount of data volume, not
connection time.
Note: The handset can start from Standard IP packet service. However, when using
Streaming IP data packet service with the Web Software, the handset uses streaming
IP service. The charge for Streaming IP service is based on connection time, so it is
not advised to view web pages from the handset. Disconnect from the internet and reconnect to use Standard IP.
2.4.1 How to connect/disconnect to/from the Internet
Note: If the IP address of the handset is not set by web software (the standby display
shows “D: No permission”), you cannot connect to the internet. See page 6-16.
How to connect to the Internet
If you are already connected to the Internet via the Web software (Idle screen displays
"D: Connected"), the following procedure is NOT necessary.
Do the following to connect to the Internet:
1. At the idle screen, press the key to open the [Web top] menu.
2. Press 5 to select [Std. IP].
2-26
3. Press S to select [Yes], and press the Enter key. While connecting, the message
"Connect..." appears. When connected, the message "Completed." is displayed.
Note: If connection cannot be established, the message "Failed." appears.
4. Press the key to close the menu. The idle screen now displays "D: Connected".
Page 55

2. HANDSET OPERATIONS
How to disconnect from the internet
Do the following to disconnect from the internet. This operation disconnects all service
types (Standard IP Packet, Streaming IP packet).
1. At the idle screen, press the key to open the [Web top] menu.
2. Press the 5 key to select [Std. IP]. The following screen appears.
3. Press S to choose [Yes], and press the Enter key. While disconnecting, the mes-
sage "Disconnect..." appears and the message "Completed." appears when disconnection is completed.
4. Press the key to close the menu. The idle screen now displays "D: Not con-
nected".
2.4.2 How to view a web page
There are four ways to view a web page:
• Direct input of URL
• Use Input history
• Select URL from Favorites
• Use last-displayed URL
Confirm that the idle screen shows "D: Connected" then do the procedure shown below. If "D: Not connected" (or “D: No permission”) appears an error message appears
and the web page is blank.
2-27
Page 56

2. HANDSET OPERATIONS
Direct input of URL
1. At the idle screen, press the key to open the [Web top] menu.
2. Press 1 to select [Input URL].
3. Press the Enter key to show the URL input screen.
4. Enter the URL address (maximum 192 characters), and press the Enter key. Any
character, except a space, can be entered. If the most recently accessed web address appears in the field, press the CLR key to erase.
Most recently input URL appears here.
5. Press T to choose [OK], and press the Enter key. The URL web page appears in
the web browser. Use the [Web settings] menu to adjust the display for easy viewing. Refer to paragraph 3.4.
6. Press the key to close the browser.
2-28
7. Press S to select [Yes], and press the Enter key.
Note: You remain connected to the internet even if the browser is closed. See
section 2.4.1for how to disconnect from the internet.
Page 57

2. HANDSET OPERATIONS
How to open a URL from the Input history screen
This procedure is invalid if the input history is empty.
1. At the idle screen, press the key to open the [Web top] menu.
2. Press 1 to select [Input URL].
3. Press the key to show the submenu.
Previously input URLs (maximum 10) are shown. When the 11th URL is added,
the oldest URL is automatically deleted.
4. Press S or T to select a URL.
Note: You can show the complete URL for the selected URL by pressing ,
then 1, to select [Detail]. Press the key to return to the Input history screen.
5. Press the Enter key. Selected URL appears in the [URL] field.
6. Press T to select [OK], and press the Enter key. The web page appears.
7. Press the key to close the browser.
8. Press S to select [Yes], and press the Enter key.
How to delete a URL from the history
1. Open the history. Go to step 2 to delete individual URL, or step 3 for all URLs.
2. Press S or T to select the URL to delete.
3. Press the key to show the submenu.
4. To delete individual URL, press 2 to select [Delete]. To delete all URLs, press 3
to select [Delete all]
5. Press S to select [Yes] then press the Enter key.
2-29
Page 58

2. HANDSET OPERATIONS
How to view URL from the Favorite list
If there are no items on the Favorite list, the message "no list" displays, and the following procedure is invalid.
1. At the idle screen, press the key to open the [Web top] menu.
2. Press 2 to select [Favorite] to show the Favorite list (maximum 10 favorites).
3. Press S or T to select the title.
Note: With the title selected, press the key, then 1(Det./Edit), to show the
detailed information screen. The title and the URL appear. Press the key to
edit the title and the URL. Press the key to return to the Favorite list.
4. Press the Enter key. The web page appears.
5. Press the key to close the browser.
6. Press S to select [Yes] and press the Enter key.
How to view most recent web page
Data from the most recently viewed web page is temporarily saved to the memory,
called a “cache”. When viewing the same web page again, the data saved in the cache
appears. If there is no data in the cache, the following operation is not possible.
1. At the idle screen, press the key to open the [Web top] menu.
2. Press 3 to select [Last display]. The most recently viewed web page appears.
3. Press the key to close the browser.
4. Press S to select [Yes], and press Enter key.
2-30
Page 59

2.4.3 Operations while viewing a web page
While viewing a web page, press the key to open the submenu. The following
operations are available:
• 1 (Back): Return to previous web page (if data is in
cache).
• 2 (Forward): Advance to next web page (if data is in
cache).
• 3 (Entry fav.): Save current page to Favorite list.
• 4 (Reload): Reload the current web page.
• 5 (Favorite): Display the Favorite list.
• 6 (Input URL): Manually enter a URL.
• 7 (Settings): Display the [Web settings] menu (see
paragraph 3.4).
About HTTPS sites
2. HANDSET OPERATIONS
If connecting to HTTPS site, the following screen is shown.
Select from the following choices, and press the Enter key to select.
• Yes: Authenticate the server certificate and display the https site.
• No: Do not authenticate the server certificate and close the pop-up screen.
• Confirm: Show the server certification details. Press the Enter key to authenticate,
or the key to refuse.
2-31
Page 60

2. HANDSET OPERATIONS
2.4.4 Favorite list
How to add a URL to the Favorite list while viewing the list
Add often-accessed web pages to the Favorite list for easy viewing. The Favorite list
stores 10 URLs. Do the following to register pages to the favorite list:
Note: If there are already 10 pages in the Favorite list, it is not possible to add another
without deleting one.
1. While viewing a web page, press the key to open the submenu.
2. Press 3 to select [Entry fav.]. The title and URL of the web page appear in the [Title] and [URL] fields as shown below. For websites that are not in alphanumeric
characters, the title must be manually entered. Go to step 3.
3. Select the [Title] field and press the Enter key.
4. Enter the title in alphanumeric characters and press the Enter key (max. 50 characters).
5. Press the key. The message "Registered" appears and the URL is registered
to the Favorite list.
6. Press the key to close the browser.
7. Press S to select [Yes], and press the Enter key.
2-32
Page 61

2. HANDSET OPERATIONS
How to delete an item from the Favorite list
You can delete one item, or all items, from the Favorite list as follows:
1. Open the Favorite list. To delete one item, go to step 2, and to delete all items, go
to step 3.
2. Press S or T to select the item to delete.
3. Press the key to open the submenu.
4. To delete one item, press 2 (Delete). To delete all items, press 3 (Delete all).
• For 2: Press S to select [Yes] and press the Enter key.
• For 3: Press the Enter key. Enter the operation password and press the Enter
key. Press T to select [OK] and press the Enter key. Press S to select [Yes],
and press the Enter key.
5. Press the key to close the Favorite list.
2-33
Page 62

2. HANDSET OPERATIONS
This page is intentionally left blank.
2-34
Page 63

3. SETTINGS FOR HANDSET
This chapter describes the menus [Sound], [Display], [SMS], [Web], and [Settings].
Also described are system messages from connected equipment, list of connected
equipment, and how to display various information.
3.1 Sound Menu
The [Sound] menu sets options for internal and external phones, message notification
for SMS messages and system messages, key beep, and microphone volume.
1. At the idle screen, press the Enter key to show the main menu.
2. Press X to select the [Sound] icon, and press the Enter
key to show the [Sound] menu.
Note: The [Sound] menu can also be opened by pressing the
key at the idle screen.
3.1.1 Notification sound setting
You can set the sound volume and ring pattern for internal and external phones and
notification for SMS messages and system messages.
How to set the volume
1. In the [Sound] menu, press either the 1, 2, 3, or 4 key for the following items:
1: External phone incoming notification volume
2: Internal phone incoming notification volume
3: SMS message notification volume
4: System message notification volume
2. Press 1 to select [Volume] to show the following.
3-1
Page 64

3. SETTINGS FOR HANDSET
3. Press S or T to adjust the volume level (0 - 7). Set to [0] for no sound.
Note: Press the key to hear the ringtone at the selected volume. Press the
key again to stop the ringtone.
4. Press the Enter key.
5. Press the key to close the menu.
How to set the ring pattern
1. In the [Sound] menu, press either the 1, 2, 3, or 4 key for the following:
1: External phone incoming notification pattern
2: Internal phone incoming notification pattern
3: SMS message notification pattern
4: System message notification pattern
2. Press 2 to select [Pattern] to show the pattern selection
screen.
3. Press S or T to select the pattern.
Note: Press the key to play the pattern at the selected pattern. Press S or
T to adjust the volume, from 1 - 7 and off.Press the key to stop.
4. Press the Enter key.
5. Press the key to close the menu.
3.1.2 How to turn on/off keypad tones
Turn the keypad tones on or off.
3-2
1. In the [Sound] menu, press 5 to select [Keypad tones].
2. Press S or T to select [ON] or [OFF].
3. Press the Enter key.
4. Press the key to close the menu.
Page 65

3. SETTINGS FOR HANDSET
3.1.3 How to adjust the volume for the microphone
1. Press 6 to select [MIC volume] from the [Sound] menu
to show the MIC volume setting window.
2. Press S to increase the volume, or T to decrease the
volume (setting range: 1 to 7).
3. Press the Enter key.
4. Press the key to close the menu.
3.2 Display Settings
Change font size, LCD backlight, and key backlight from the [Display] menu.
1. At the idle screen, press the Enter key to open the main menu.
2. Press W to select the [Display] icon, and press the Enter key to shown the [Display] menu.
3.2.1 How to change the font size
Select the font size to other than that selected for web page.
1. In the [Display] menu, press 1 to select [Font size] to show the Font size screen.
2. Press S or T to select font size ([Large], [Medium] or [Small]). The font size is
shown in the [Sample] area.
3. Press the Enter key.
4. Press the key to close the menu.
3-3
Page 66

3. SETTINGS FOR HANDSET
3.2.2 How to change LCD brightness and backlight ON time
Change the LCD brightness and backlight ON time as follows:
Brightness
1. In the [Display] menu, press 2 to select [LCD] to show the [LCD] menu.
2. Press 1 to select [Brightness] to show the brightness level screen.
3. Press S or T to increase / decrease the LCD brightness level.
4. Press the Enter key.
5. Press the key to close the menu.
LCD Backlight ON time
1. In the [Display] menu, press 2 to select [LCD] to show the [LCD] menu.
2. Press 2 to select [LCD ON time] to show the [LCD ON time] screen.
3-4
Page 67

3. SETTINGS FOR HANDSET
3. Press S or T to select either [Always] or [Specify] and press the Enter key.
[Always]: Keep the LCD light always on. Go to step 6. [Specify]: Enter a time limit
for the backlight. If there is no key operation during the time limit, the LCD backlight automatically turns off. Go to step 4.
4. If you selected [Specify] at step 3, press the Enter key and enter a time limit (1 99 sec.), and press the Enter key. The time is set.
5. Press the key.
6. Press the key to close the menu.
3.2.3 How to adjust the keypad backlight
Change the keyboard backlight settings.
1. In the [Display] menu, press 3 to select [Key B.Light] to show the [Key backlight]
screen.
2. Press S or T to select one of the following and press the Enter key.
[Always ON]: The keyboard backlight is always illuminated. Go to step 6.
[Specify ON]: The keyboard backlight stays illuminated for the set time. Go to
step 3.
[Always OFF]: The keyboard backlight is not illuminated. Go to step 6.
3. Press the Enter key, and the character input screen appears.
4. Enter illumination time (1 -99 sec.) and press the Enter key.
5. Press the key.
6. Press the key to close the menu.
3-5
Page 68

3. SETTINGS FOR HANDSET
3.3 SMS Settings
You can change your signature and password settings in the [SMS Settings] menu.
1. At the idle screen, press the Enter key to open the main menu.
2. Press S to select the [SMS] icon and press the Enter key to show the [SMS]
screen.
Note: The [SMS] menu can also be opened by pressing the key at the idle
screen.
3. Press 6 to select [Settings] to open the [SMS settings] menu.
3.3.1 How to set an SMS Signature
An SMS signature is a line of text that is added to the end of all outgoing messages.
To add a signature to all outgoing messages, do the following:
1. In the [SMS Settings] menu, press 1 to select [Signature].
2. Press S or T to select [ON] or [OFF] and press the Enter key.
[ON]: A signature is automatically added to all SMS messages (go to step 3).
[OFF]: A signature is not automatically added to SMS messages (go to step 4).
3. Enter the signature text (maximum 156 characters) and press the Enter key. For
example, if “FURUNO” is entered as the signature, the sent message looks like
the one shown below.
XXXXXXXXXXXXXX
Signature
appears after
message text
3-6
4. Press the key to close the menu.
Page 69

3.3.2 How to activate the SMS password
To activate the SMS password, do as follows.
1. In the [SMS settings] menu, press 2 to select [Password].
2. Press T to select [Save password].
3. Press the Enter key to delete the checkmark [9] from the checkbox.
4. Press the key.
5. Press the key to close the menu.
After this, the SMS password is requested when you access the [SMS] menu.
3.4 Web Settings
The [Web settings] menu allows you to set features of the Web browser: font size, display zoom, display mode, advanced settings, time out, and clear the cache. To access
the [Web settings] menu do the following:
3. SETTINGS FOR HANDSET
1. At the idle screen, press the Enter key to open the main menu.
2. Press S, then W to select the [Web] icon and press the Enter key to show the
[Web top] menu.
Note: You can also show the [Web top] menu at the idle screen by pressing the
press the key.
3. Press 4 to select [Settings] to display the [Web settings] menu.
3.4.1 How to change web browser font size
1. In the [Web settings] menu, press 1 to select [Font size].
2. Press S or T to select font size ([Large], [Medium], [Small]). The font size is
shown in the [Sample] area.
3. Press the Enter key.
4. Press the key to close the menu.
3-7
Page 70

3. SETTINGS FOR HANDSET
3.4.2 How to change web page display zoom
You can change the display zoom factor to enlarge small print.
1. In the [Web settings] menu, press 2 to select [Zoom level] to show the[ Zoom level]
screen.
2. Press S or T to select a zoom level.
3. Press the Enter key.
4. Press the key to close the menu.
3.4.3 How to change web display mode
Display mode gives three different ways to display web pages:
• [Normal]: Display the web page at normal size (you need to scroll right and left to
view).
• [Just-fit]: The width of the web page including tables is shrunk to fit the screen
width.
• [Smart-fit]: The width of the web page is shrunk to fit the width of the screen. A table
that is larger than the width of the display is split vertically.
Normal Just-fit Smart-fit
3-8
To change the display mode, do the following:
Page 71

1. In the [Web settings] menu, press 3 to select [Disp. mode] to show the [Display
mode] screen.
2. Press S or T to select [Normal], [Just-fit] or [Smart-fit].
3. Press the Enter key to select.
4. Press the key to close the menu.
3.4.4 Advanced settings
3. SETTINGS FOR HANDSET
Display image, Javascript and Popup window options can be set in Advanced Settings.
• [Display Image]: Display or do not display images when viewing web pages. Un-
check to display pages without images.
• [Javascript]: Turn Javascript on or off when viewing web pages. Insert the check-
mark to correctly view pages that use javascript.
• [Popup window]: Block or allow popup windows when viewing web pages. Insert
the checkmark to block popup windows.
1. In the [Web settings] menu, press 4 to select [Advanced] to show the [Advanced]
screen.
2. Press S or T to select the item to edit.
3. Press the Enter key to insert or remove a [9] in the box corresponding to each
item.
4. Press the key to apply settings.
5. Press the key to close the menu.
3-9
Page 72

3. SETTINGS FOR HANDSET
3.4.5 How to set time out
Set the period of no activity before the handset disconnects from the Web. The default
setting is 30 seconds. To change the Timeout setting, do the following:
1. In the [Web settings] menu, press 5 to select [Timeout] to show the [Timeout]
screen.
2. Press S or T to select a time.
3. Press the Enter key to set.
4. Press the key to close the menu.
3.4.6 How to clear the cache
The Cache is a section of memory where downloaded information is stored temporarily. If the Cache becomes full, the oldest data is deleted automatically. To manually
clear all of the data in the cache, do the following:
1. In the [Web settings] menu, press 6 to select [Clear cache] to show the [Clear
cache] screen.
2. Press S to select [Yes] and press the Enter key.
3-10
3. Press the key to close the menu.
Page 73

3.5 Individual Settings Menu
Basic (settings), Network, SIP, Operation Password, Initialization and Self test can be
accessed from the [Settings] menu. Initialize and Self test are explained in Chapter 7.
The communication unit contains the following server functions:
• DHCP Server
• DNS Server
• NTP Server
• IMAP Server (for SMS)
• SIP Server (for telephone)
1. At the idle screen, press the Enter key to open the main menu.
2. Press T to select the [Settings] icon and press the Enter key to show the [Set-
tings] menu.
3. SETTINGS FOR HANDSET
3.5.1 Basic settings
Sound, Display, Clock, Notify, Quick call and Echo Cancel can be set from the [Basic]
menu. [Sound] can also be accessed by pressing the key at the idle screen, or
select [Sound] from the main menu (see paragraph 3.1). [Display] can also be accessed by selecting [Display] from the main menu (see paragraph 3.2).
How to set the clock
GPS time data is fed from the communication unit. If you change the IP address of the
communication unit, do as follows to get data from the communication unit. The Clock
setting in this procedure is for manual setting of the clock. For Automatic, this procedure is not necessary since the IP address of the communication unit is automatically
changed.
1. In the [Settings] menu, press 1 to open the [Basic] menu.
3-11
Page 74

3. SETTINGS FOR HANDSET
2. Press 3 to select [Clock] to show the [NTP server obtain] screen.
3. Press T to select Manual then press the Enter key to show the NTP server IP
address input screen.
4. Select IP address then press the Enter key to show the IP address entry screen.
5. Enter the IP address (maximum 15 characters) of the communication unit then
press the Enter key.
6. Press the key to apply the setting.
7. Press the key to close the menu.
How to set call and message notifications
Set the notifications for missed call and received messages at the [Notify] screen. No-
tifications can be set to appear as icons ( / ) on the upper part of the screen and
as a window message, or as icons with no window message.
1. In the [Settings] menu, press 1 to select [Basic] to show the [Basic] menu.
2. Press 4 to select [Notify] to show the [Notify] screen.
3-12
3. For missed call notification setting, press 1 to open the [Missed call] screen. For
received message notification setting, press 2 to open the [New SMS] screen.
Page 75

3. SETTINGS FOR HANDSET
4. To set notifications as both icons and a window message, set to [ON]. If you don’t
need to display the window message and icon, set to [OFF].
5. Press the Enter key.
If you select [ON] at the above step, the following [New SMS] window appears. Go
to step 6.
If you select [OFF], go to step 9.
6. Press the Enter key to open the input screen.
7. Enter the check interval (1 - 99 minutes) and press the Enter key.
This sets the length of time to access the SMS server to check a new message. If
there is a new message, the icon and the message window are displayed.
8. Press the key.
9. Press the key to close the menu.
How to set Quick Off hook
When quick off hook is set to ON, to take the handset off the cradle has the same ef-
fect as to press the key (phone answers automatically).
1. In the [Settings] menu, press 1 to select [Basic] to show the [Basic] menu.
2. Press 5 to select [Quick call] to display the [Quick OffHook] screen.
3. Press S or T to choose setting for off hook:
[Act.: OffHook]: Removing the handset from the cradle has the same result as to
press the key.
[No action]: Removing the handset from the cradle has no effect.
4. Press the Enter key.
5. Press the key to close the menu.
3-13
Page 76

3. SETTINGS FOR HANDSET
How to set the echo canceller
If the echo canceller is off, you may hear the delayed echo of your own voice in the
handset. Turn the echo canceller on to suppress the echo of your own voice. Do the
following to turn echo canceller on or off:
1. In the [Settings] menu, press 1 to select [Basic] to show the [Basic] menu.
2. Press 6 to select [Echo cancel.]. You are asked to enter the operation password.
3. Press the Enter key.
4. Enter the operation password. Press the Enter key.
5. Press T to select [OK] and press the Enter key to show the [Echo canceller]
screen.
6. To turn on [Echo canceller], select [ON]. To turn off [Echo canceller], select [OFF].
7. Press the Enter key.
8. Press the key to close the menu.
3.5.2 Network settings
Network settings can be set automatically or manually.
1. In the [Settings] menu, press 2 to open the [Network] menu. You are asked to enter the operation password.
2. Press the Enter key.
3. Enter the operation password and press the Enter key.
4. Press T to select [OK] and press the Enter key to show the [Network] menu.
3-14
Page 77

3. SETTINGS FOR HANDSET
5. To have settings detected automatically, press 1 to select [Automatic]. To enter
settings manually, press 2 to select [Manual]. For [Automatic], go to step 24. For
[Manual], go to step 6.
6. Press 1 to select [IP obtain] to show the [IP obtain] screen.
7. Press S or T to select the method for obtaining the IP address.
[Static IP]: The IP address, subnet mask and default gateway are set manually.
[DHCP]: The IP address, subnet mask and default gateway are obtained automatically from the DHCP server.
8. Press the Enter key. Do one of the following depending on selection made at step
7.
If you select the [Static IP] at step 7, the [Static IP] screen appears. Go to step 9.
If you select the [DHCP] at the step 7, the [Manual set.] screen appears. Go to
step 16.
Static IP factory default settings
9. With the [IP address] field selected, press the Enter key.
10. Enter the IP address for this unit, and press the Enter key.
11. Press T to select the [Subnet mask] field, and press the Enter key.
12. Enter the Subnet mask and press the Enter key.
13. Press T to select the [Def. gateway] field, and press the Enter key.
3-15
Page 78

3. SETTINGS FOR HANDSET
14. Enter the default gateway (IP address of the router) and press the Enter key.
15. Press the key to return to the [Manual set.] menu.
16. Press 2 to select the [DNS] menu to show the [DNS obtain] screen.
17. Press S or T to select the method for obtaining the DNS server address.
[Static]: Set Primary and Secondary DNS server addresses manually.
[DHCP]: Obtain DNS server address automatically from the DHCP server.
18. Press the Enter key. Do one of the following depending on selection made at step
17.
If you select the [static] at step 17, the DNS entry screen appears. Go to step 19.
If you select the [DHCP] at step 17, the [Manual set.] screen appears. Go to step
24.
DNS factory default settings
19. With the [DNS (Primary)] field selected, press the Enter key.
20. Enter the IP address of the primary DNS server and press the Enter key.
21. Press T to select the [DNS (Secondary)] field, and press the Enter key.
22. Enter the IP address of the secondary DNS Server and press the Enter key.
Note: If only the Secondary DNS Server address is entered, the Primary DNS is
set to the same value.
23. Press the key to return to the [Manual set.] menu.
24. Press the key to close the menu.
3-16
Page 79

3.5.3 SIP settings
This section describes SIP server settings. Do the procedure if it is necessary to enter
SIP settings.
1. In the [Settings] menu, press 3 to select [SIP] to show
the [SIP] menu.
2. Press one of keys 1 -5 depending on your objective.
1: Set SIP client.
2: Set SIP proxy server.
3: Set SIP server port number.
4: Set SIP server authentication interval.
5: Set RTP port.
3. SETTINGS FOR HANDSET
3. Set SIP by referring to the descriptions in the table.
Menu Item Description
1
Client set.*
Proxy server*
S/L port Server port Enter server port number (0 - 65535).
Expire time - Enter expiration time (1800 - 7200 (sec.)).
RTP port*
3
Phone number Enter extension number (1000 - 9999).
Password Enter SIP password. Up to a maximum of eight al-
phanumeric characters (upper case alphabet only)
can be used. This password is for identification at the
SIP server.
Nickname Enter a nickname (maximum of 50 alphabet). The
nickname appears on the display of the called extension handset.
2
Automatic The IP address (IP address of communication unit)
of the SIP proxy server is automatically changed.
Manual Enter the address (IP address of communication
unit) of the SIP proxy server manually.
Local port Enter local port number (0 - 65535).
RTP port 1 Enter RTP port 1 (16384 - 32766, even number
only). Set different from RTP port 2.
RTP port 2 Enter RTP port 2 (16384 - 32766, even number
only). Set different from RTP port 1.
*1: To change both extension number and SIP password at the [Client set.] menu, you
must also change a setting of the Web software at the SIP server. (See page 6-4.) The
telephone functions cannot be used if the settings for SIP client and SIP server are
different.
*2: The IP address of the SIP proxy server must be the same as the IP address of the
communication unit in order to use the telephone function.
*3: For connection of multiple handsets, enter a different numbers for RTP port 1 and
RTP port 2 of all handsets. Entering the same numbers disables the multi voice function.
3-17
Page 80
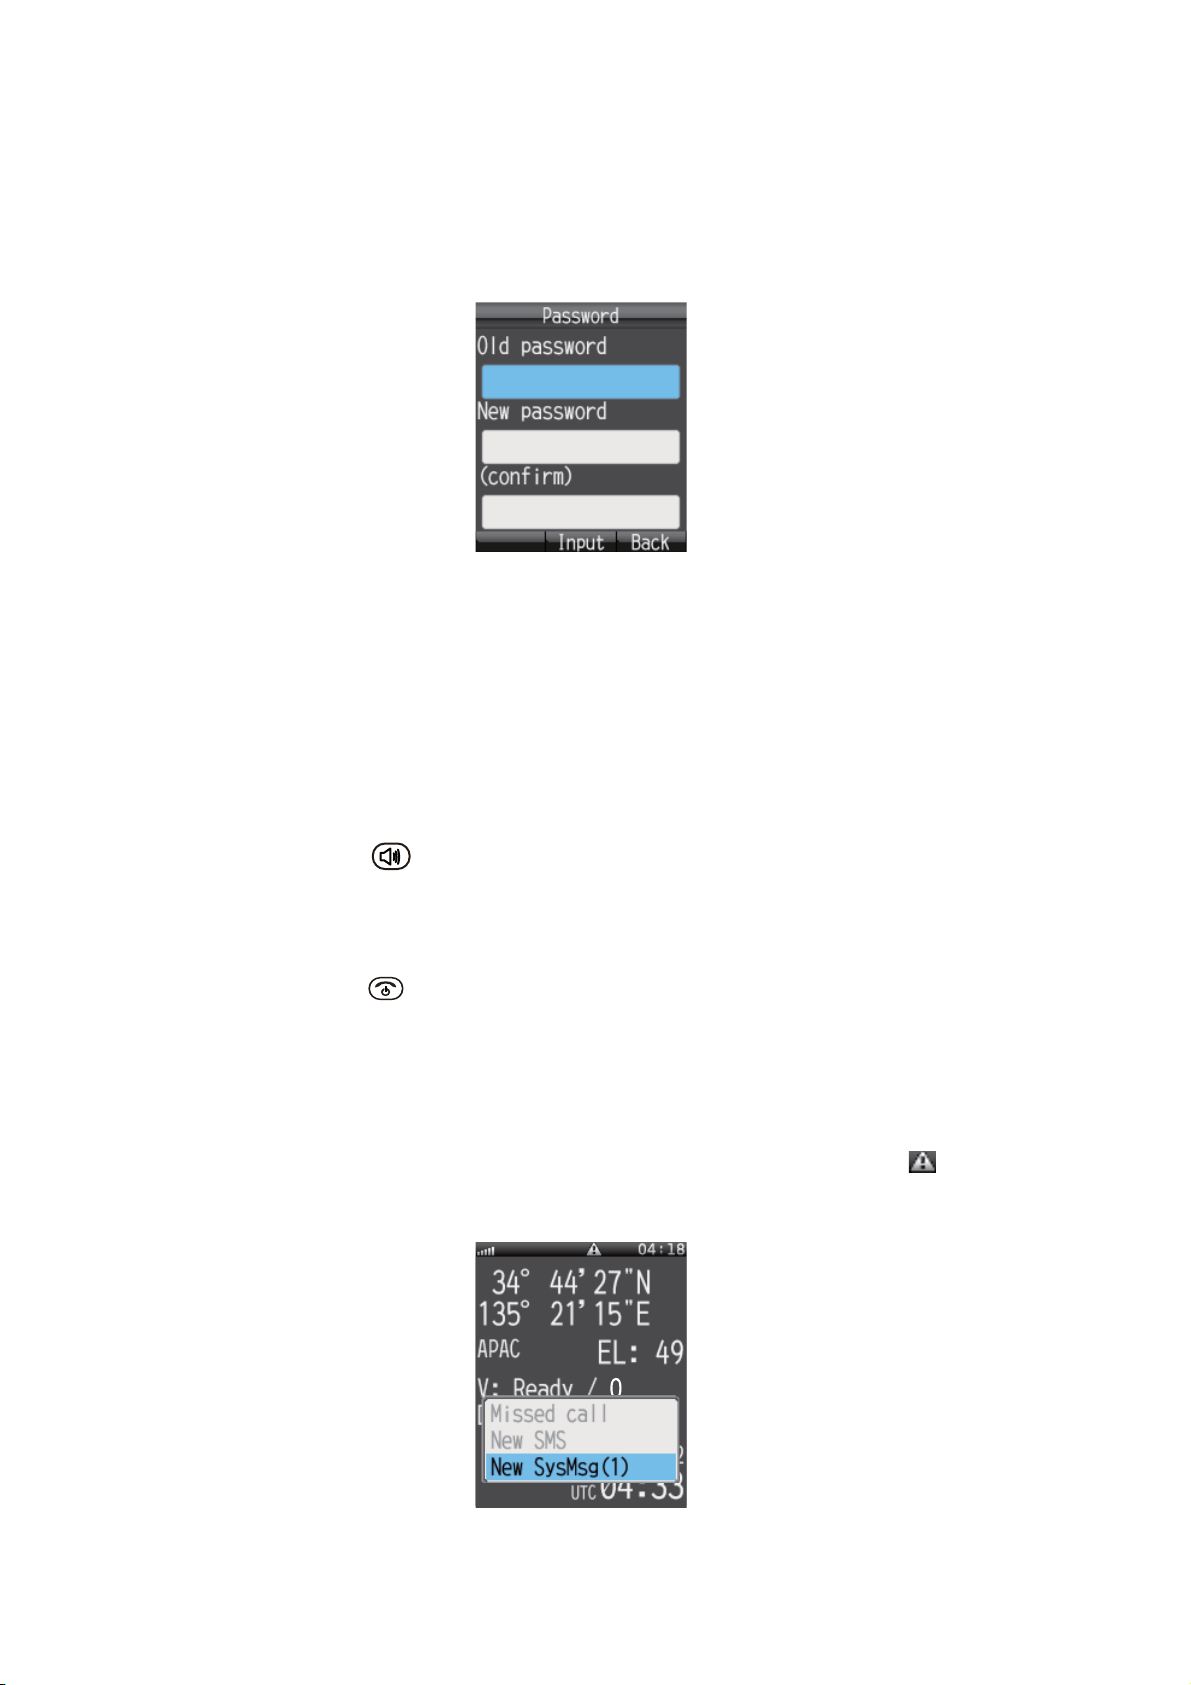
3. SETTINGS FOR HANDSET
3.5.4 How to change operation password for the handset
Do this procedure to change the operation password. After entering a new password
be sure to write it down. If the password is lost, contact your dealer to restore factory
settings. If this occurs, the default settings must be restored. (See section 7.7).
1. In the [Settings] menu, press 4 to select [Password] to show the [Password] menu.
2. With the [Old password] field selected, press the Enter key.
3. Enter the current password and press the Enter key. The entered characters are
shown with asterisks (*).
4. Press T to select the [New password] field and press the Enter key.
5. Enter the new password (4 - 8 characters, upper case alphabet only) and press
the Enter key.
6. Press T to select the [(confirm)] field and press the Enter key.
7. Re-enter the same new password for confirmation and press the Enter key.
8. Press the key. The message "Changed." appears and the equipment returns to the [Settings] menu.
Note: If the password could not be changed, the message "Could not change" appears. Repeat this procedure.
9. Press the key to close the menu.
3.6 System Messages
If an alarm occurs in a unit connected in the same network, the handsets sounds an
alarm tone and an alert information window displays. The alarm icon ( ) also ap-
pears at the status bar on the upper part of the screen.
3-18
Page 81

3. SETTINGS FOR HANDSET
1. In the alert information window, select [New SysMsg] and press the Enter key.
The most recent system messages appears. A maximum of 10 system messages
can be saved, however the messages are erased when the power is turned off.
Msg #/Total msg # saved
2. If there are more than two alert messages, press W and X to cycle through the
messages. Use W to go back one message, and X to go forward one message.
3. Press the Enter key to close the message.
Note: You can also display system messages with the [Sys Msg] icon in the main
menu.
3.7 Device List
The Device list displays a list of all devices (communication unit, handset, incoming
indicator).
1. At the idle screen, press the Enter key to open the main menu.
2. Press W, T to select the [Device] icon and press the Enter key. The message
"Detecting" appears while the list is being prepared. When the search is completed, the [Device list] screen appears.
3. Press the key to close the menu.
Communication Unit
Incoming Indicator
Handset
3-19
Page 82

3. SETTINGS FOR HANDSET
3.8 How to Show TCP/IP, SIP and Software Version information
Do as follows to see TCP/IP, SIP and software version information.
1. At the idle screen, press the Enter key to show the main menu.
2. Press X, then T to select the [Info] icon and press the Enter key to show the [In-
formation] menu.
3. Press one of keys 1 - 3 to view information as follows:
1: TCP/IP information
2: SIP information
3: Software version information of handset
XX.XX
XX.XX
XX.XX
.
TCP/IP info
4. Press S or T to scroll through the screen to see the information.
5. Press the key to close the menu.
Note: If you need to send the information by SMS, press the key to open the
[Create SMS] screen.
SIP info
Software info
XX: Program version no.
: Circuit board version no.
3-20
TCP/IP Info
Page 83

4. OPTIONAL DEVICES
4.1 Analog Telephone FC755D1
RING TONE lamp:
Lights when calling;
blinks when holding a call.
ONE-TOUCH DIAL keys:
Register/dial abbreviated dialing
numbers.
Change the ring tone and ring
pattern.
Display: Shows number being dialed,
settings, etc.
RCV lamp:
Blinks when call is received.
VOLUME key:
Adjusts volume of ring, or volume of receiver
when speaking.
ONE-TOUCH DIAL keys:
Register/dial abbreviated dialing
numbers.
Numeric, symbol keys:
0-9: Manually dial telephone number.
*: Enables hold, forward, and
intercom functions.
#: End code
HOLD key: Holds call.
HOOK key: Starts/cancels forwarding.
REDIAL key: Redials subscriber last dialed. Also used in to insert a
pause when registering one-touch dialing numbers.
key (SPEAKER key): Allows you to dial telephone
number with handset on hook.
FUNCTION key: Registers/dials abbreviated dialing numbers.
Note: If a different telephone is used it must satisfy the requirements shown below.
Item Specification Standard
On hook voltage 49 VDC (no load) ETSI, JAPAN
Ringer frequency 20 Hz JAPAN, ANSI
Ringer pattern 2 s ON/4 s OFF ANSI
Ringer voltage 65 Vrms (no load) ETSI, JAPAN
Off hook detection current 10 mA ETSI
Off hook loop current 24 mA (300 ohm load) ETSI, JAPAN
2 W impedance 600 ohms JAPAN
4-1
Page 84

4. OPTIONAL DEVICES
4.2 Fax (FAX-2820/FAX-2840)
The optional FAX unit can send and receive faxes using 3.1kHz audio service from
land or ship-to-ship.
Note: Depending on SIM card type, 3.1kHz audio service may not be available. Check
with the company that issued your SIM card.
How to dial
To Land
Enter 2*00, the Country Code, the fax number, followed by # and Start to send a fax.
Ship-to-ship
Enter 2*00, 870 (ocean area code), followed by the Inmarsat number, # and Start to
send a fax.
Note 1: In the Web software, if the analog port [Type] is set to [FAX] or [TEL & FAX],
a Fax can be sent without entering [2*] before the number. See the Installation Manual.
Note 2: When sending a FAX, the number that is printed on the sent fax sheet is the
telephone number of your unit, not the FAX number. When replying to a FAX, be sure
to ask the sender for their FAX number.
Note 3: When you send a fax from FELCOM 250/500 to FELCOM 30/50/70, always
use a 3.1 Khz audio service number.
4.3 Incoming Indicator (FB-3000)
The Incoming Indicator sounds a buzzer and blinks its lamp when a telephone call, fax
or ISDN (UDI/RDI, FELCOM 500 only) communication is received. Press the ACK
button to stop the buzzer on the receiving fax. In the case of a phone call, the alarm
automatically stops when the handset is removed from the cradle. Press the [S] and
[T] buttons to raise and lower the alarm volume.
There are two selectable alarm types. The alarm can also be set to Off. (See the Installation Manual.)
4-2
Note: The buzzer volume will reset to maximum volume, regardless of user settings,
every time the power is turned off and on.
Page 85

5. WEB SOFTWARE
The Web software makes a connection to Internet, adjusts the Communication Unit
settings, creates SMS messages, and creates/edits the Contacts list. Connect the
Communication Unit to a PC to use the Web software. The Communication Unit works
with the following web browsers:
• Internet Explorer
Note: For version 8.x, disable the SmartScreen
Screen Filter > Turn Off SmartScreen Filter > click OK button).
• Mozilla Firefox
®
version 6.x/7.x/8.x/9.x
®
version 3.x
®
filter (Safety button > Smart-
5.1 How to Open/Close the Web Software
1. Make sure the SIM card is inserted. Turn the Communication Unit on.
2. Switch the PC power on.
3. After the computer starts, double-click the [FELCOM_FB] icon on the desktop to
start the Web browser.
4. Enter “192.168.1.1” in the address bar and press Enter key.
The Main screen displays.
Note 1: If the following PIN Code entry screen appears, enter the PIN code of the
SIM card. (See section 1.3.)
Note 2: You can add the main menu of the Web software to “Favorite“ or “Bookmark“ for easy access.
5. To close the Web software, click the [X] (Close) button at the upper right corner of
the window.
Note: If the system becomes overloaded while processing data, a CGI error may
occur. If this occurs, wait a short amount of time and try again.
5-1
Page 86

5. WEB SOFTWARE
5.2 Screen Explanation
The screen is divide into several areas.
Administrator login/
logout button.
Refer to 5.9.1, 6.1.1
䋨
䋩
Menu bar System message area
Sub menu area Information area
Status area
See “IMPORTANT NOTICES” (page i).
Status area
The status area displays the reception signal level, ship position information, date and
time. Data is updated every 30 seconds.
Reception signal level (8 bars)
Ship latitude Ship longitude
Date Time
5-2
Page 87

5. WEB SOFTWARE
System message area
Error and Warning messages are displayed in red letters in the System message area
(See section 7.6).
Affected area is displayed in parentheses
Icon
: SIM card related warning message
: Error message unrelated to SIM card message
: Warning message unrelated to SIM card
Menu bar
The menu bar contents are different when you are logged in or if you are logged out.
Click a menu item with the mouse pointer to view the contents in the sub menu or information areas.
Logged out:
“Log” appears only when logged in
Logged in:
These items appear when logged in as “Admin”
Sub menu area
In the menu bar, click [Main], [SMS], [Log], [Settings], [Device] to display respective
menu in the sub menu area. Click an item in the sub menu to display its contents in
the Information area. Click T to expand the sub menu for more contents items. Click
S to close the expanded submenu.
Expands sub menu
Click [Basic Settings]
Information area
The information area displays current setting conditions and various information. Setting conditions can be changed from the menu.
5-3
Page 88

5. WEB SOFTWARE
5.3 Status Monitor
The Status monitor displays satellite tracking status, communication status, ship position information, Communication Unit internal temperature, and error information.
Data is refreshed every five seconds. If the Status monitor is not displayed, do the following to view:
See “IMPORTANT NOTICES” (page i).
1. Click [Main] in the menu bar.
2. Click [Status monitor] in the sub menu. The [Status monitor] appears as shown:
Refer to the following table description of Status Monitor items:
Item Description
Tracking status: Satellite tracking information
Satellite Name of Satellite that is being tracked.
Channel/Status Channel: Displays the searching or tracking channel (Primary/Al-
ternate).
• Primary: First global channel frequency
• Alternate: Second global channel frequency
Status: Displays satellite tracking status. Searching (searching for
satellite), Tuning (antenna fine tuning), Tracking (tracking satel-
lite), Blocking (satellite signal is blocked).
Satellite azimuth Displays satellite bearing, North as reference.
Antenna elevation Displays antenna elevation angle.
Signal strength Displays signal reception level in the modem.
*3
*1
Interference
Communication status: Communication information
Voice & FAX/ MV*
Data connection Displays data communication status. --- (Not available), No per-
Data size
“Detected“ is displayed when interference signal is detected.
4
Display voice communication status.
--- (unavailable), Ready (Line is ready), Voice (Phone in use), Fax
(Fax in use), UDI
mission (No connection permission), Not connected, Connected
(in green). The status of all groups is shown if logged in as Admin-
istrator. “Connected” if one or more groups is connected; “Not
connected” if no groups are connected.
Displays packet traffic volume of group affiliated with the PC cur-
rently in use. If logged in as Administrator, the packet volume for
all groups/PPPoE sessions is shown. If there is no satellite ac-
quired “---” appears.
*2
(ISDN UDI in use), RDI*2 (ISDN RDI in use)
5-4
Page 89

5. WEB SOFTWARE
Item Description
Connection*3
Ship position information
Using GPS Displays GPS in use.
Latitude Displays ship latitude. If no GPS data, [_°_’_”] is displayed.
Longitude Displays ship longitude. If no GPS data, [_°_’_”] is displayed.
Temperature information: Internal temperature information
HPA Temperature of the HPA board in the Antenna Unit. If no informa-
IF Temperature of the IF board in the Communication Unit. If no in-
Modem Temperature of the modem board in the Communication Unit. If
Error information
Error / Warning Number of Errors and Warning generated.
Displays Streaming IP packet session volume. The total for all
groups is shown if logged in as Administrator.
Internal, External, No fix (GPS data invalid), No data (no GPS data)
tion, [---] is displayed.
formation, [---] is displayed.
no information, [---] is displayed.
*1: No indication with non-XL equipment or when there is no interference.
(How to check the XL (extended L-band) applicable unit, refer to section 7.8.)
*2: FELCOM 500 only.
*3: No display if No permission is shown for Data connection.
*4: See "IMPORTANT NOTICES" on page i.
5-5
Page 90

5. WEB SOFTWARE
5.4 Data Connection
There are two types of IP packet communication services:
Service Description
Standard IP
packet communication
(Best effort
packet)
Streaming IP
packet communication
Speed of the communication service
is not guaranteed.
Since the bandwidth is shared by
many vessels, communication speed
varies depending
on the number of
vessels that communicate at the
same time.
Provider guarantees connection
speed.
Connection
speed
• Max. 284
kbps
(FELCOM
250)
• Max. 432
kbps
(FELCOM
500)
Can select 8,
16, 32, 64,
128, 256
kbps (256
kbps FELCOM 500
only).
Payment
method
Fee based
on amount
of data
Fee based
on connection time
Use
• E-mail
• Internet / Intranet
• Update ship voyage information
• Database search
• Electronic trade
• Web browsing
• Video conferences or moving picture delivery*
• Transmit photographic data*
• Streaming video*
*: The streaming IP packet communication method provides uninterrupted transmission of audio and video, provided you are within the guaranteed bandwidth. However,
if you can accept broken audio and video, you can use the standard IP communication. When selecting which service to use, consider whether stable communication or
communication fee is important.
Note: The cost of streaming IP packet communication may be unexpectedly high, so
please use caution.
5-6
Page 91

5. WEB SOFTWARE
How to connect to the internet
Follow the procedure shown below to connect to the internet.
Note 1: You cannot connect to the internet if the main display of the web software
shows “Data connection No permission”.
Note 2: You can connect to the internet via PPPoE. See page 6-35.
1. Click [Main] in the menu bar.
2. Click [Data connection] in the sub menu to show the following display.
Your Data connection list looks something like the one shown below. This list
shows the groups registered in the PC in use. See paragraph 6.1.9 for how to create the connection list. If you are logged in as Administrator, the [Disconnect all
connection] button appears, which lets you disconnect all connections. The connection list for all group/PPPoE session*/Bridge mode is shown.
* PPPoE session shown during data connection. The Application windows shows
“---”.
Number of lines connected/total number of lines
Service
**
Group name/PPPoE session name/Port name for Bridge mode
registered to connection list
**: Connection list
Application
Connection Status
Note: The [Refresh] button updates the list.
3. Click the [Connect] button of the service to use. When connecting, the message
"Now connecting..." displays. When connected, the message "***connection success." appears.
Note: If connection fails, the message "***connection failure." appears.
4. Click the [OK] button to close the message. The Status window shows “Connected” and the label on the button in the Operation window shows “Disconnect.”
5. To use multiple data services, repeat steps 3 - 4.
Note: It is not possible to use the same application that is already connected. Disconnect the service, and reconnect.
When connected to the internet, the connection list is displayed as shown:
P Mark
S Mark
Example: Standard IP packet, 32 kbps streaming IP packet communications
• The first service for each group has a P mark, and "---" appears in the [Applica-
tion] field. The second and subsequent service for each group has an S mark.
5-7
Page 92

5. WEB SOFTWARE
In the above connection list, Standard IP Packet Data Connection Service is
connected first.
• In the [Status] field, "Not connected" changes to "Connected" (displays in
green).
• The display in the [Operation] field changes from "Connect" to "Disconnect".
6. Open the desired application software and begin data communication.
Applications are not limited to only those marked with the P mark (applications
preset at paragraph 6.1.9.) You can use any software that appears after the 2nd
application in the list. For example, when the connection list was as shown above,
Windows Media
service and all other applications use the standard IP packet communication service.
How to disconnect from the internet
Do the following to disconnect from the internet:
1. Click [Main] in the menu bar.
2. Click [Data connection]. The [Data connection] screen is displayed.
®
Player uses the 32 kbps streaming IP packet communication
3. Click [Disconnect] for the services to disconnect. When disconnecting, the message "Now disconnecting..." is displayed. When disconnected, the message
"***disconnection success." is displayed. (***: Service and application)
Note 1: If you disconnect a service marked with a P mark, all other connected services will disconnect.
Note 2: If the disconnection fails, "***disconnection failure." is displayed.
4. Click the [OK] button to close the message. The [Status] field displays "Not Connected", the [Operation] button shows "Connect".
5-8
Page 93

5.5 Contacts
Like the handset, you can add, edit and delete contacts from the Web software. Use
the Web software to save contacts to the Communication Unit or SIM card.
Media Maximum savable address count
Communication Unit 150 addresses
SIM card Different with SIM card type
5.5.1 How to register contacts to the Contacts list
Save contacts (contact name and phone number) to the Contacts list as follows:
1. Click [Contacts] in the menu bar, to show the Contacts list screen. It takes approx.
two minutes after powering on to display the list.
5. WEB SOFTWARE
Contact count / Maximum contact count
SIM: SIM card
CmmUnt: Communication unit
Total: SIM card + Communication unit
2. Click the [Add contact] button, to show the Contact list / Add contact screen.
Mandatory
3. Input the name of the contact in the [Name] field.
You may use alphanumeric characters and symbols (except ^, {, }, [, ] ~, |, and \).
The character limit depends on the type of media storage used. When you save a
contact (at step 5) the number of characters that you can input is shown with
“MAX: *.*
4. Input the phone number in the [Number] field (Maximum 20 characters). Only
numbers and the characters (#, *, and +) are allowed.
5. Select where to save the address in the [Stored] field (CmmUnt: Communication
unit, SIM: SIM card).
6. Click the [Add] button.
When completed, the message "Completed." appears.
7. Click the [OK] button.
5-9
Page 94

5. WEB SOFTWARE
5.5.2 How to arrange the Contacts list
How to sort the Contacts list
You can display your contacts in ascending/descending order of ASCII code order.
1. Click [Contacts] in the menu bar.
2. Click the [Name] field at the very top of the Contacts list. A S (or T) symbol is
displayed beside [Name].
3. Click [Name] to toggle between S and T.
If S: The contact names appear in ascending order (symbol, number, alphabet).
If T: The contact names appear in descending order (alphabet, number, symbol).
Note: Click [Number] at the top of the list to sort ascending or descending order for
phone numbers.
XXXXXXXX
How to search for a contact
Enter a name or number to search for a desired contact.
1. Click [Contacts] in the menu bar.
2. Click [Search] button in the Contacts list to show the search bar.
Click [Search] button again to hide the search bar.
Search bar
XXXXXXXX
3. To search by name, enter part of the name in the [Name] field. To search by number, enter part of the number in the [Number] field. Contacts that match the entered search name or number appear under the search bar.
Note: If [CmmUnt] is selected in the [Stored] list box, only contacts saved on the
Communication Unit are displayed. Further, for [SIM], only the contacts stored on
a SIM card appear.
5-10
Page 95

5.5.3 How to edit contacts
To edit the name or number of a contact, do the following.
1. Click [Contacts] in the menu bar.
2. Select a contact to edit, and click the [Edit] button on the right side of the contact.
3. Edit the name and/or number of the contact. It is also possible to edit the [Stored]
field.
4. When finished, click the [Save] button. The message "Completed." appears.
5. Click the [OK] button.
5.5.4 How to delete data from contacts
Delete individual, multiple, or all contacts as follows:
1. Click [Contacts] in the menu bar.
2. Put a [9] in the checkbox on the left side of the contact to delete. To select all contacts, put a [9] in the checkbox beside the [Name] title.
5. WEB SOFTWARE
XXXXXXXX
Checkbox
3. Click the [Delete] button. The confirmation message "Delete?" appears.
4. Click the [OK] button. The message "Delete completed." appears.
5. Click the [OK] button again to erase the message.
5-11
Page 96

5. WEB SOFTWARE
5.6 SMS (Short Message Service)
You can create SMS messages from the Web software or the handset. Messages are
limited to 160 characters. For the Web software, messages are limited to 70 characters in Japanese, Chinese, French, Russian, Spanish or Arabic due to the Unicode
support. Some special charcters (pictograms etc.) can not be displayed. For the handset, only Japanese or English is available even if the Unicode support is enabled.
Note: Depending on the cellular phone provider, it is not always possible to send or
receive messages from Inmarsat terminals. Refer to your cellular provider for information.
5.6.1 How to enter the SMS password
Enter the password to access the [SMS] menu.
1. Click [SMS] in the menu bar to show the password entry screen.
2. Enter the SMS password. The numerals entered are shown with black circles ( ).
3. To disable password entry on future login, put a [9] in the box at the left side of
[Save password] (click the box to add [9]). To enable the SMS password, see
paragraph 5.6.7.
4. Click the [OK] button. If password is correct, the SMS top screen appears.
Note 1: If the password is entered incorrectly, the message “Password is invalid” appears. Click [OK] to close the message and correctly re-enter the password.
Note 2: From hereafter, the procedures omit password entry.
5-12
Page 97

5.6.2 How to send an SMS message
You can send an SMS message to the terminal enabled SMS.
1. Click [SMS] in the menu bar to show the SMS top screen (Inbox).
2. Click [Create SMS] in the sub-menu to show the Create SMS screen.
Entry
5. WEB SOFTWARE
Entry
Maximum allowable character count
For [GSM] in the [Encode] box
3. Use one of the following two methods to select recipient:
Get from Contacts: Click the [Contact] button on the right side of the [To] field to
select a recipient from the Contacts list. Select the contact and click the [Select]
button.
Enter phone number: Enter the phone number of the recipient in the [To] field
(maximum 20 characters, numeric and [+] only)
4. Click the [Encode] box then select [GSM] or [Unicode].
[GSM]: Maximum 160 characters (alphanumeric and symbols).
[Unicode]: Maximum 70 characters (Japanese or Chinese etc.).
5. Enter the message in the [Message] field.
6. Click the [Send] button to send the message. When send is completed, "Message
sent." appears.
Note 1: To save the message without sending, click the [Save] button instead of
the [Send] button. "Message saved." appears. The message is saved to the Draft
box. Click [OK] to return to the SMS top screen.
Note 2: If the message could not be sent, "Message not sent." appears. The message is saved to the Draft box. Click [OK] to return to the SMS top screen.
7. Click the [OK] button.
5-13
Page 98

5. WEB SOFTWARE
5.6.3 How to review a received message
Received messages are saved to the Inbox.
1. Click [SMS] in the menu bar to show the SMS top screen (Inbox). Unread messages are displayed in bold type.
Inbox message count (unread message count)
XXXXXXXXX
XXXXXXXXX
XXXXXXXXX
XXXXXXXXX
XXXXXXXXX
Received date and time Sender
If the number is saved in
Contacts, the name also
displays.
2. Click the received date and time with the mouse. When the mouse pointer moves
over the date and time, the date and time are highlighted in blue. Detailed information about the message is displayed.
5 (3)
XXXXXXXXX
Refer to the table below for operation information:
Operation Procedure
Reply to sender 1) Click the [Reply] button. The Create SMS
screen appears with the sender name in the
[To] field.
2) Click the Encode box then select [GSM] or
[Unicode].
3) Write the message in the [Message] field.
4) Click the [Send] button to send the message.
5) Click the [OK] button.
Send the message to the Recycle
Bin.
1) Click the [Recycle Bin] button. The confirmation message "Move to Recycle bin?" displays.
2) Click the [OK] button.
View the previous message when
Click W.
there are multiple messages.
View the next message when there
Click X.
are multiple messages.
5-14
Page 99

5.6.4 Message boxes
There are four message boxes: [Inbox], [Sent], [Draft] and [Recycle bin]. When the
amount of messages is more than the maximum, the oldest message in each message box is automatically erased from all boxes.
Box Message type Maximum Amount
[Inbox] Received messages
[Sent] Sent messages
[Draft] Unsent messages
[Recycle bin] Messages erased from the
How to send messages to the Recycle Bin
Send a single message, multiple messages or all messages to the Recycle Bin.
1. Click [SMS] in the menu bar.
2. Click the box to erase message from: [Inbox], [Sent], or [Draft].
3. Put a [9] in the box on the left side of the messages to send to the Recycle Bin.
To select all messages, put a [9] in the box beside the [Time] title.
5. WEB SOFTWARE
All boxes: 200 messages
total
other boxes
4. Click the [Recycle bin] button. The confirmation message "Move to Recycle bin?"
appears.
5. Click the [OK] button to move the message(s) to the [Recycle bin].
How to sort messages
Sort messages in the box to list from either newest->oldest or oldest->newest.
1. Click [SMS] in the menu bar.
2. Click the box to arrange: [Inbox], [Sent], [Draft], or [Recycle bin].
3. Click [Time] at the top of the list. The icon S or T appears beside [Time].
4. Click [Time] again to change between S and T.
If S: List the messages from oldest to newest.
If T: List the messages from newest to oldest.
Note: Click the [From] field (Inbox, Recycle bin) or the [To] field (Sent, Draft) to
change the list from descending to ascending order, or vice versa.
5-15
Page 100

5. WEB SOFTWARE
How to move messages from Recycle Bin to another box
Move a single message, multiple messages, or all messages in the [Recycle bin] to
another box.
1. Click [SMS] in the menu bar.
2. Click the [Recycle bin]. The following screen appears:
Listbox
Recycle bin message count
XXXXXXXXX
3. Put a [9] in the box on the left side of the message(s) to move to another box.
To select all messages, put a [9] in the box on the left side of [Time] at the top of
the list.
4. Click the list box, and select the destination box ([Inbox], [Sent], or [Draft]).
5. Click the [Move to] button.
Note: It is possible to move a message to another box from the [Recycle bin] when
the message is open for viewing.
How to delete a message from the Recycle Bin
Delete a single message, multiple messages or all messages from the [Recycle bin].
1. Click [SMS] in the menu bar.
2. Click the [Recycle bin].
3. Put a [9] in the box on the left side of the message(s) to delete. To select all messages, put a [9] in the box beside the [Time] title. All messages are selected.
4. Click the [Delete] button. The confirmation message "Delete?" appears.
5. Click the [OK] button. The message “Delete completed” is displayed.
6. Click the [OK] button.
5-16
 Loading...