How it Works
Log In / Sign Up
Buy Points
How it Works
FAQ
Contact Us
Questions and Suggestions
Users
FOXCONN
Loading...
N
nT-A3500
nT-A3550
nT-A3700
nT-A3800
nT-A3800 NANOPC
nT-i1000 Series Nettop
nT-i1200
2
nT-i1250
nT-i1500
nT-i2847
nT-iBT18
P
P31A
3
P31A-G
P31A-S
2
P31A-U
P35A
P35AP-S
P35AP-S Series
P35AX
P35AX-S
P41A-G
P43AL Series
P43AL-V
P43A-S
P43A Series
P45A
P45AL-S
P45AL Series
P4M800P7MA-ERS2
P4M800P7MA series
P4M800P7MB
P4M8907MA-KRS2H
P4M8907MB
P4M8907SA
2
P4M9007MB-8EKRS2H
P55A
2
P55MX
2
P67A
2
P67A1
P67A-S
P67A Series
P7AD
2
P7MA
P9657AA
P9657AA-8EKRS2H
P9657AB
P9657AB User's
PL7AC
PL7MA User's
PM_AMD
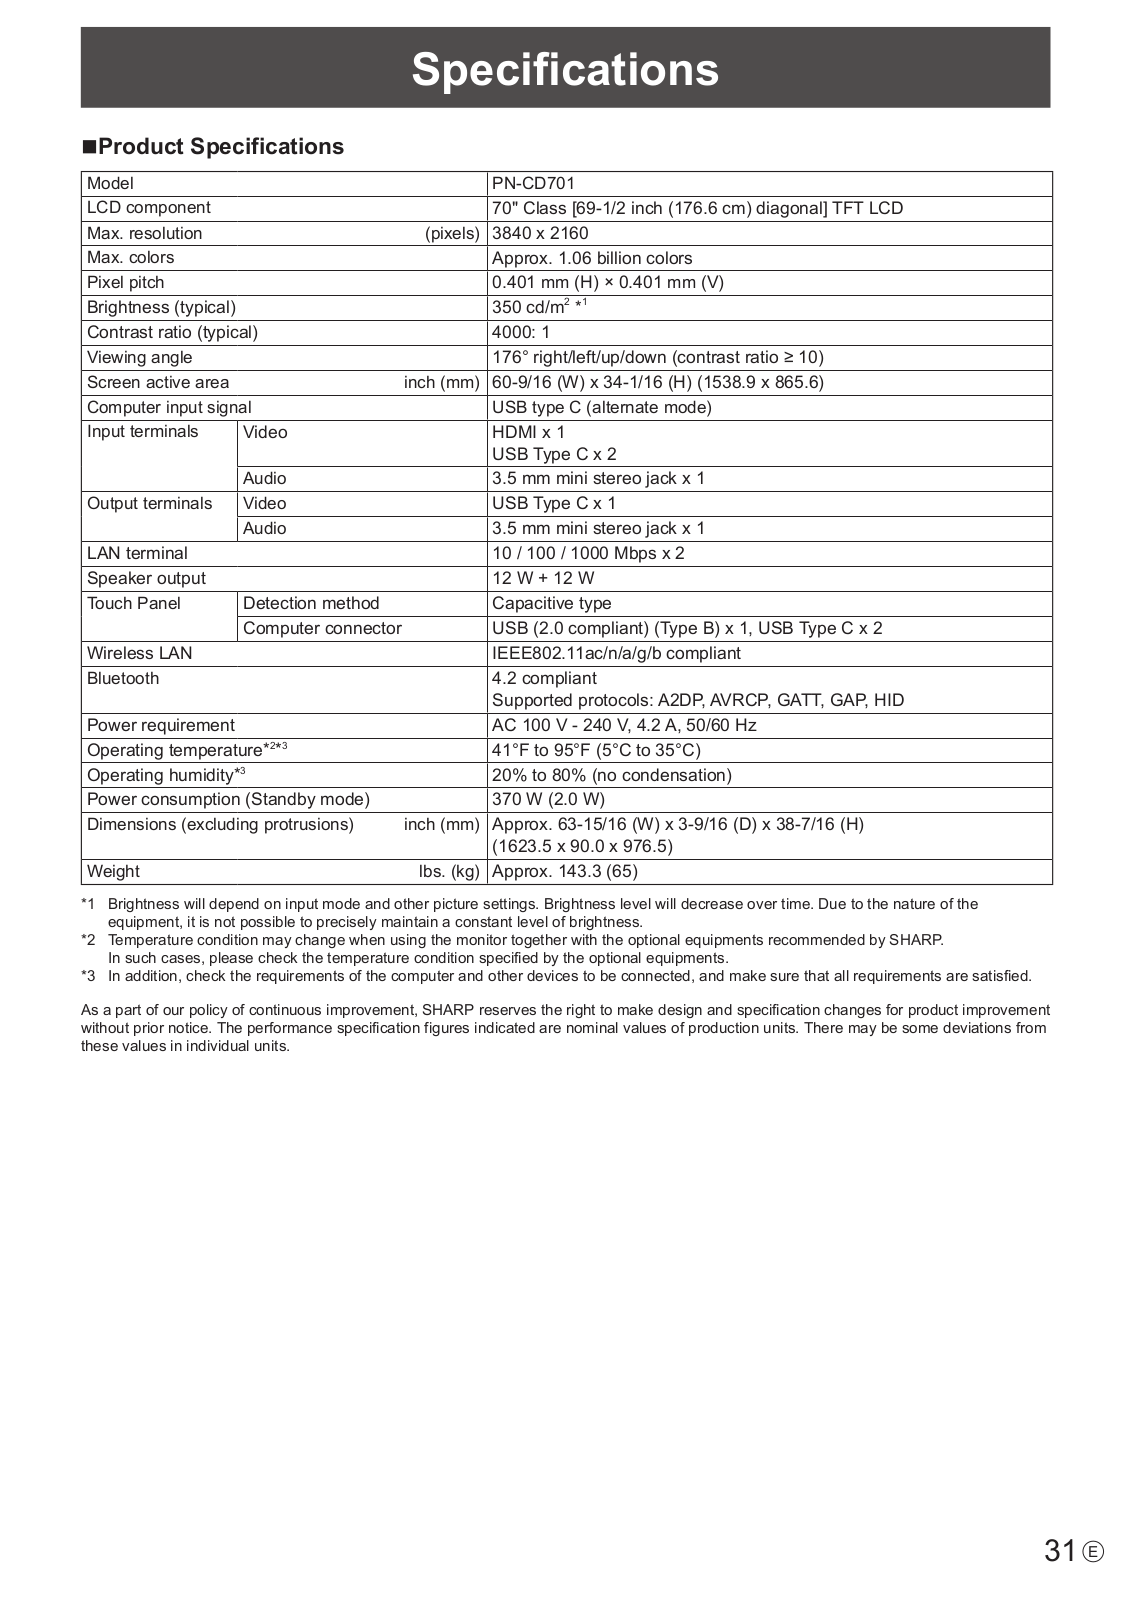
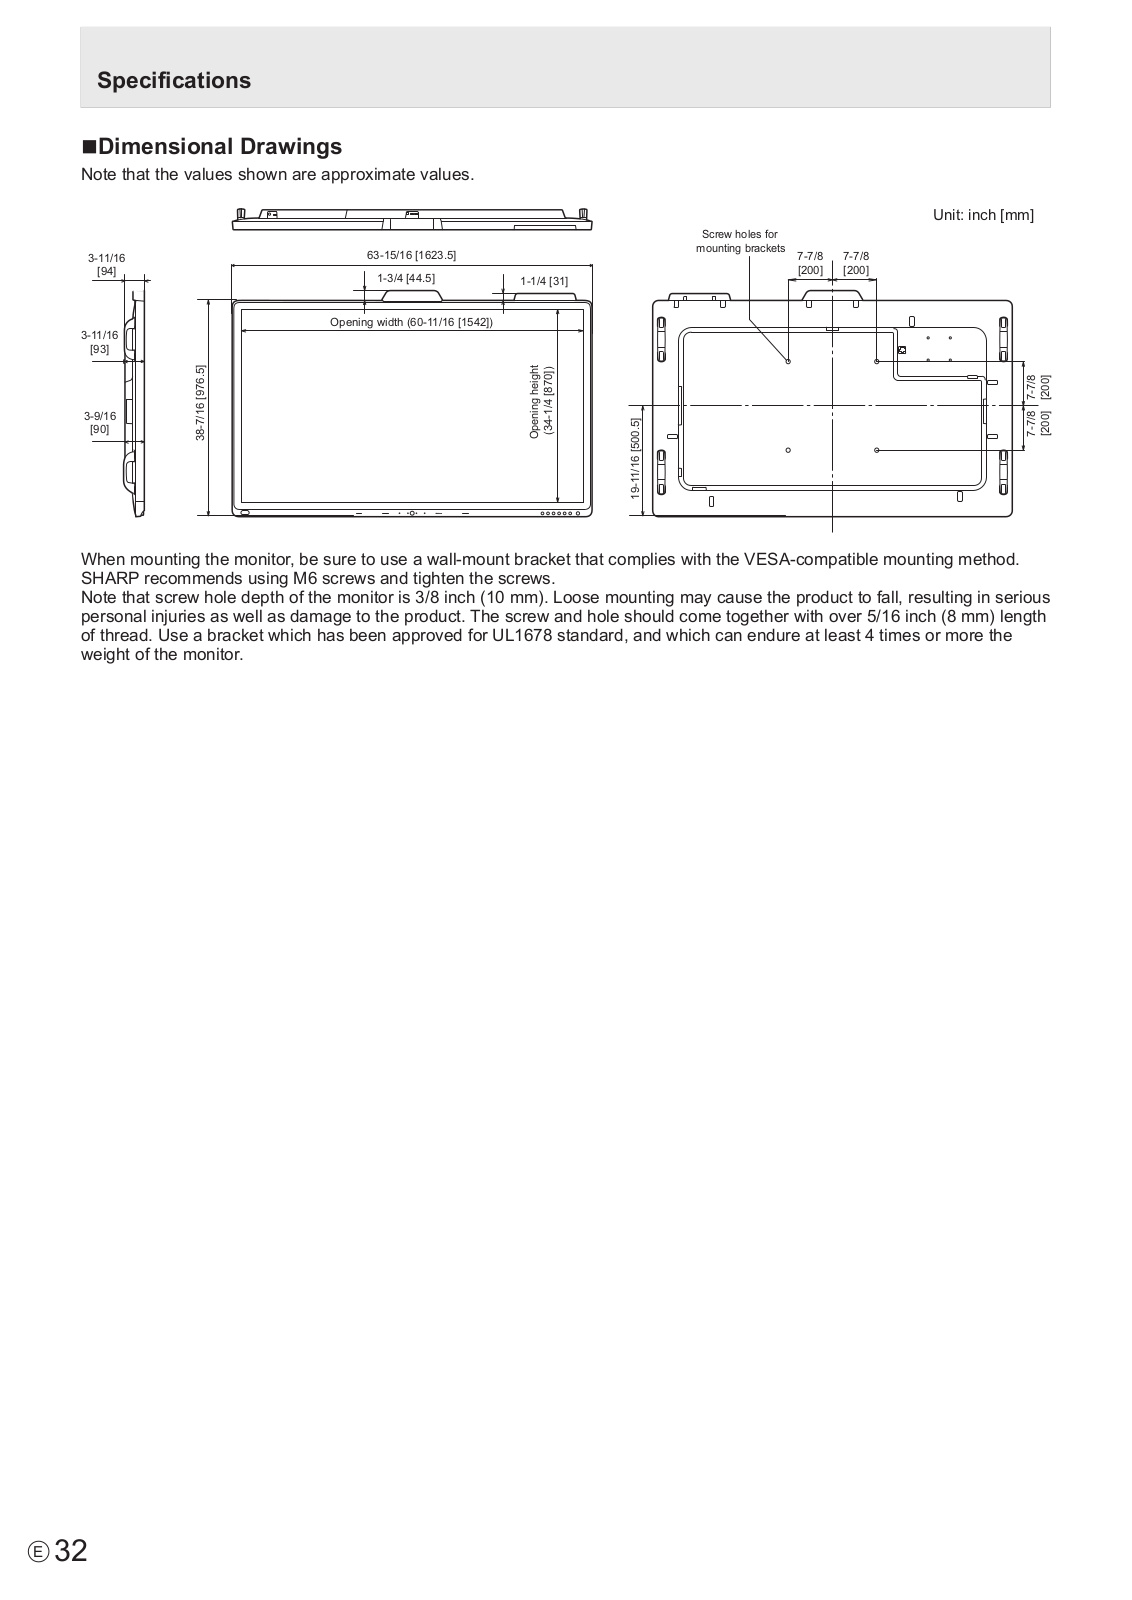
PN-CD701
4
Q
Q189082Q
Q45M
Q45M Series
Q57M
Q67M-S
Q67M series
2
Q77M
Q77M01
Q77M Series
Q9657MC
Q9657MC-8KRS2H V1.1
QBOOK
QBOX270WBG
QBOX N270
QCA9375
Quantumian1
Quantumian 1 Series
R
R10-A1
R10-D1
R10-D4
R10-H1
R10-S2
R10-S3
R20-A1
R20-D2
R30-A1
R40-A1
R40-H1
R50-A1
RAID
3
RAID 91-187-925-00-1E
RAID 91-187-C51-G0-0E
RAID 91-187C51GME0-00
RAID 91-187-U25-A2-0E
RAID Foldout
RAINS-DIS
Rattler
Rattler GTI
Rattler Series
RC4107MA-8KRS2
Renaissance
Renaissance II
S
Safina
2
SDS-BU
Serial ATA RAID
SFF R10-S2
SFF R10-S3
Silicon 3112A
Silicon 3114 SATA RAID
Loading...
Loading...
Nothing found
PN-CD701
Users Manual
1 pgs
4.58 Mb
0
Users Manual
12 pgs
1.01 Mb
0
Users Manual
4 pgs
4.64 Mb
0
Users Manual
23 pgs
4.66 Mb
0
Table of contents
Loading...
FOXCONN PN-CD701 Users Manual
...
FOXCONN Users Manual
Download
Text View
Picture View
Page 1
Page 2
Page 3
Page 4
Page 5
Page 6
Page 7
Page 8
Page 9
Page 10
Page 11
Page 12
Loading...
+
hidden pages
Unhide
You need points to download manuals.
1 point = 1 manual.
You can buy points or you can get point for every manual you upload.
Buy points
Upload your manuals
 Loading...