

FoodSaver V3240, 3250, V3230, V3250 User Manual
User Manual & RecipeBook
Notice d’emploi et recettes
for V3200 series appliances
pour appareils de la série V3200
Models/Modèles V3240 & 3250
www.foodsaver.ca 1 877 804-5383

Important Safeguards & Tips
Important Safeguards
For your own safety, always follow these basic
precautions when using a FoodSaver
®
appliance:
1. Read the User Manual carefully for operating
instructions. Read all instructions in this manual
before use.
2. Do not use appliance on wet surfaces or outdoors.
3. To protect against electric shock, do not immerse
any part of appliance, power cord or plug in water
or other liquid. Unplug from outlet when not in use
and before cleaning.
4. To disconnect, unplug power cord from electrical
outlet. Do not disconnect by pulling on cord.
5. Do not operate appliance with a damaged
power cord or plug. Do not operate appliance
if it malfunctions or is in any way damaged. For
details, contact Consumer Services at number
listed below.
6. Use appliance only for its intended use.
7. Closely supervise children when using any
electrical appliance. Do not allow appliance to be
used as a toy.
8. Caution: A short power cord is provided to
reduce risks from entanglement or tripping over
a longer cord. An extension cord may be used
when marked electrical rating is no less than
electrical rating of this appliance. All cords should
not drape over counter or tabletop where cords
can be tripped over or pulled on unintentionally,
especially by children.
10. Do not place on or near a hot gas or electric
burner, or heated oven. Extreme caution must
be used when moving products containing hot
liquids.
11. Wait 20 seconds between seals to allow appliance
to cool.
Important Tips
1. Vacuum packaging is NOT a substitute for the
heat process of canning. Perishables still need to
be refrigerated or frozen.
2. For best results, use only with FoodSaver
®
Bags,
Rolls, Containers and Accessories.
3. During the vacuum packaging process, small
amounts of liquids, crumbs or food particles
can be inadvertently pulled into the Vacuum
Channel. Empty the Drip Tray after each use.
4. Avoid overfilling, always leave at least 3 inches
of bag material between bag contents and top
of bag. This allows room for the bag material
to cinch tightly against the food and prevents
the bag from pulling out of the vacuum channel
during the sealing process. Then leave at least
one additional inch of bag material for each time
you plan to reuse bag.
5. Do not create your own side seams for a
FoodSaver
®
Bag. These bags are manufactured
with a special side seam, which is sealed all the
way to the outer edge.
6. To prevent wrinkles in the seal when vacuum
packaging bulky items, gently stretch bag flat
while inserting bag into vacuum channel and
continue to hold bag until vacuum pump starts.
7.
When you are vacuum packaging items with sharp
edges (dry spaghetti, silverware, etc.), protect bag
from punctures by wrapping item in soft cushioning
material, such as a paper towel. You may want to
use a canister or Mason jar instead of a bag.
8. When using accessories, remember to leave one
inch of space at top of canister or container.
9. Pre-freeze fruits and blanch vegetables before
vacuum packaging for best results. See
“Guidelines for Vacuum Packaging” section.
This appliance has a polarized plug (one blade
is wider than the other). As a safety feature,
this plug will fit in a polarized outlet only one
way. If the plug does not fit fully in the outlet,
reverse the plug. If it still does not fit, contact a
qualified electrician. Do not attempt to defeat
this safety feature.
For Household Use Only
SAVE THESE INSTRUCTIONS
www.foodsaver.ca 1-877-804-5383
1

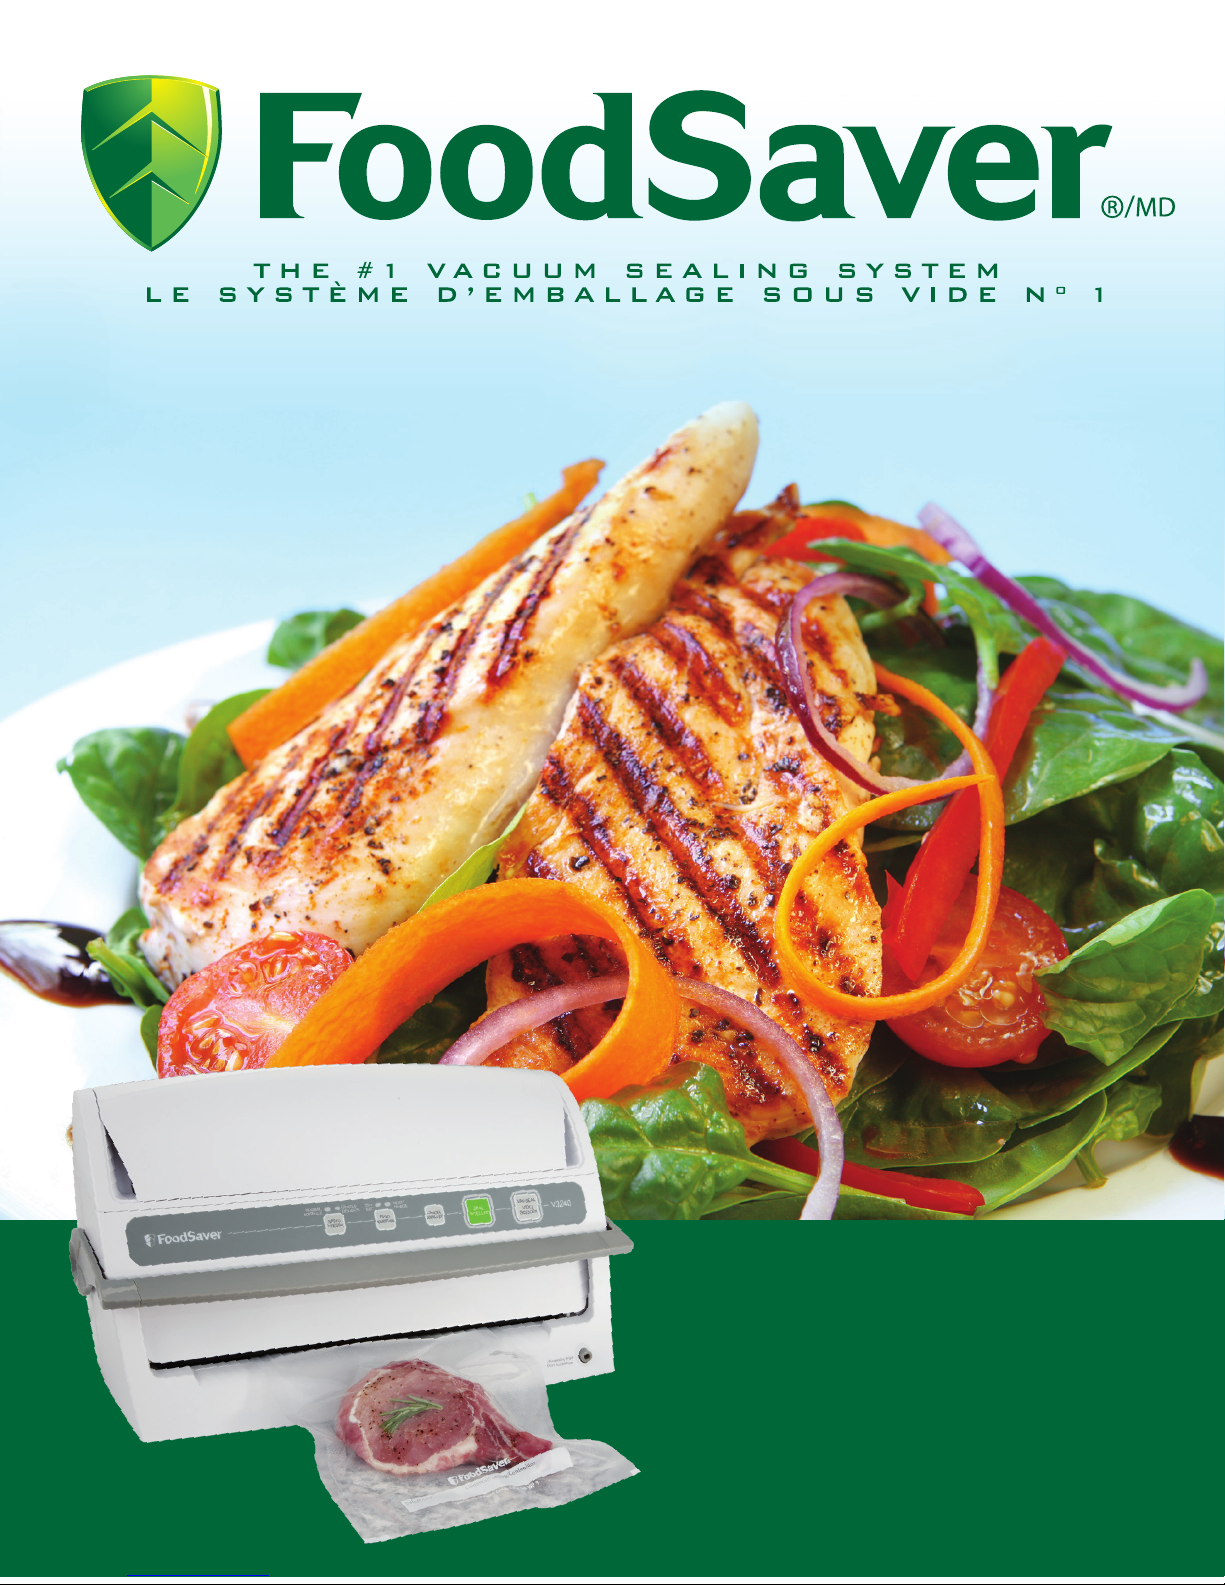
Welcome to FoodSaver
®
Vacuum Sealing System
WELCOME
Congratulations…
You are about to enjoy the freshness benefits of FoodSaver®, The #1 Selling Brand of
Vacuum Packaging Systems. For years, the FoodSaver
®
Vacuum Packaging System has
helped millions of households keep food fresh longer in the refrigerator, freezer and
pantry. The FoodSaver
®
system is designed to remove air and extend freshness up to
five times longer than conventional storage methods. Keep your FoodSaver
®
appliance
on your countertop, and you’ll soon discover its convenience and versatility.
www.foodsaver.ca 1-877-804-5383
Questions?
Contact customer service at
1-877-804-5383
or visit www.foodsaver.ca.
Do not return this product
to place of purchase.
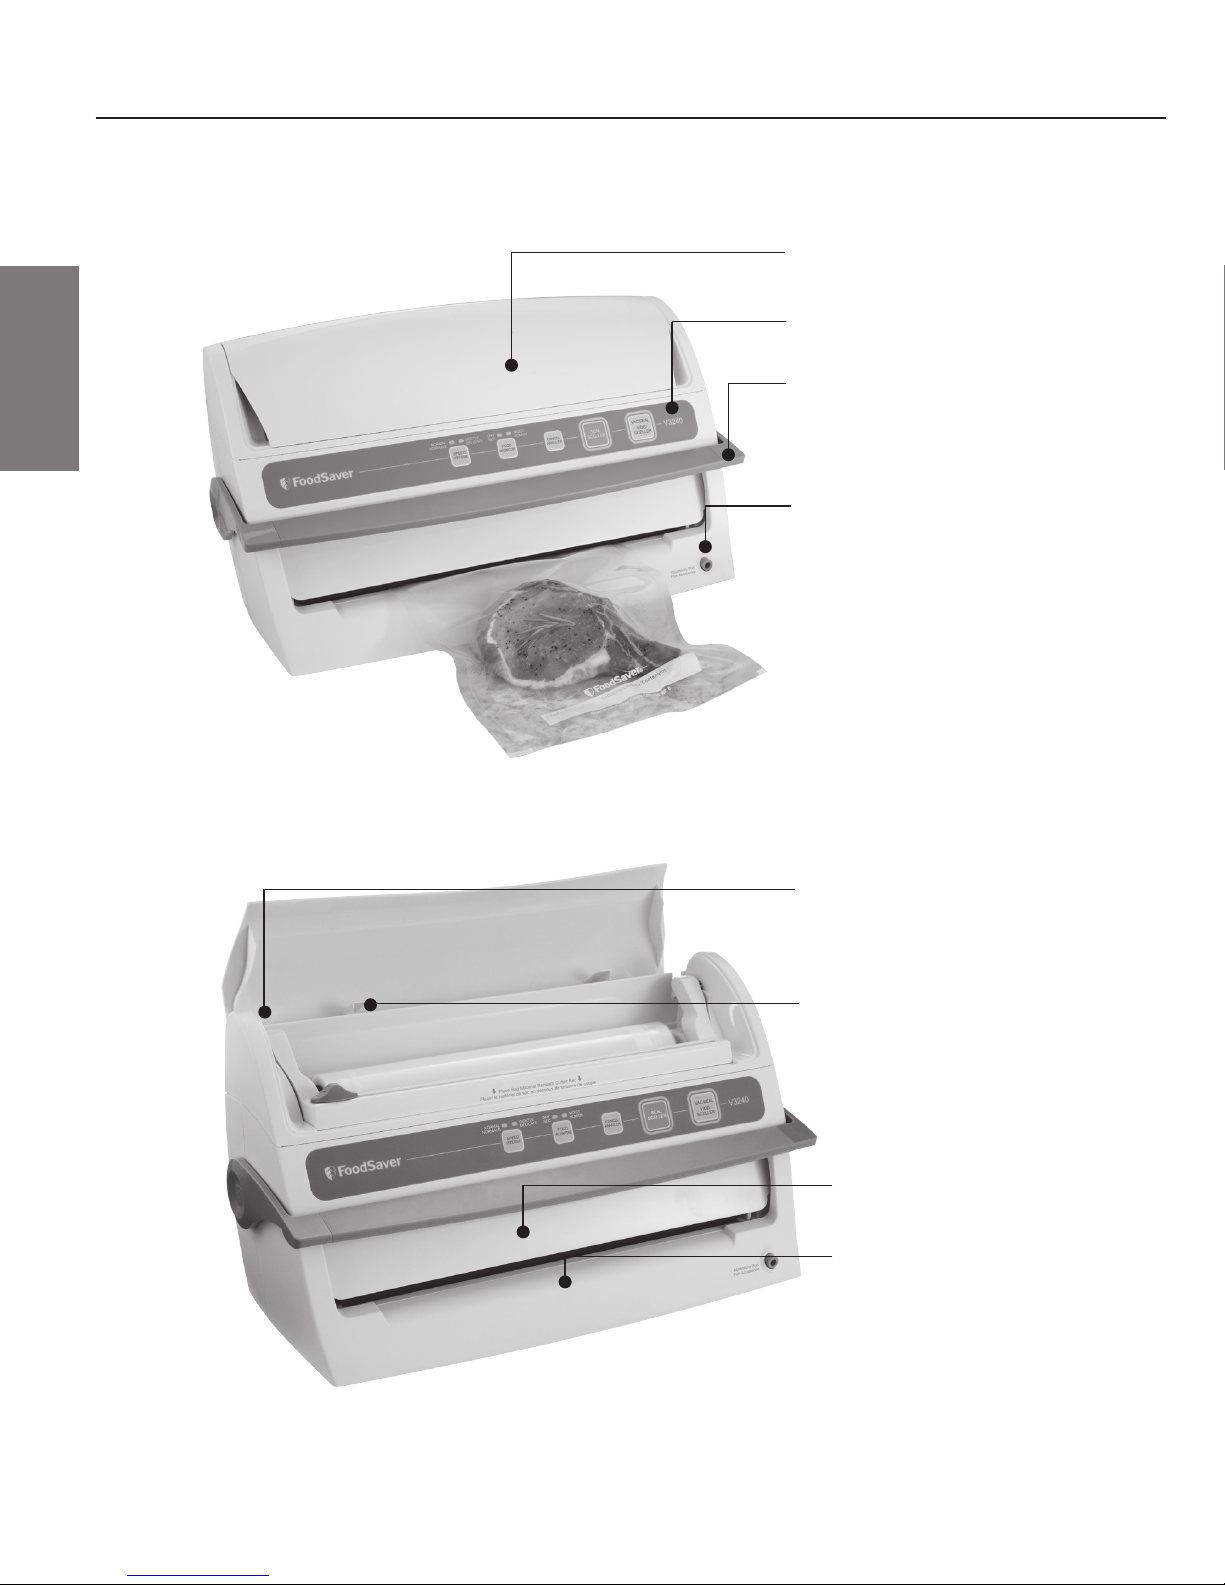
FEATURES
FoodSaver
®
V3200 Series
Shown V3250, V3240 operates in the same manner except where noted.
3 4
www.foodsaver.ca 1-877-804-5383
E. Container Adaptor Storage
(Adaptor not included; it is provided
with FoodSaver containers.)
F. Accessory Hose & Storage
G. Easy-clean Drip Tray
H. Extra-wide Sealing Strip
B. Appliance Control Panel
C. Easy-lock Latch
D. Accessory Port
A. Roll Storage
(Under lid.)

FEATURES
www.foodsaver.ca 1-877-804-5383
Vacuum & Seal
Button
Adjustable
Food Settings
4
2
Advanced Design Features
The user-friendly control panel makes it easy for you to get the most out of your FoodSaver® System,
and the touchpad design allows you to easily wipe it clean.
To Use: Lower bar to close door, when lights illuminate on control panel, you can select seal
or vacuum and seal.
1
Speed Settings
Select speed to optimize vacuum – Gentle for delicate foods; Normal for bags, canisters and
all accessories.
2
Adjustable Food Settings
Select food type to optimize the seal – Dry (normal seal time) for foods without liquid;
Moist (longer seal time) for juicy foods.
3
CrushFree™ Instant Seal Button
This button has three uses:
1. Press to create a seal when making bags from a FoodSaver
®
Roll.
2. Press to immediately stop the vacuum process and begin sealing the bag. This prevents
crushing delicate items such as bread, cookies and pastries.
3. Press to create a seal on other bags (such as potato chip bags) to keep food sealed airtight.
4
Vacuum & Seal Button
This button has two uses:
1. Press to vacuum package and seal food airtight. Appliance shuts off automatically.
2. Press to cancel any process at any point.
5
Seal Indicator Light
This light has two uses:
1. Constant light indicates sealing process is engaged.
2. Flashes to indicate error.
6
Progress Lights
Signal progression of vacuuming and sealing process. All three lights extinguish when the full
process is finished.
7
Vacuum Indicator Light
Shows progress of vacuum and seal process. Shuts off when the full process is finished.
Progress
Lights
6
Speed
Settings
1
CrushFree™
Instant Seal
Button
3
Vacuum
Indicator
Light
7
Seal
Indicator
Light
5
5 6
www.foodsaver.ca 1-877-804-5383
SEALED END
OPEN END
HOW TO
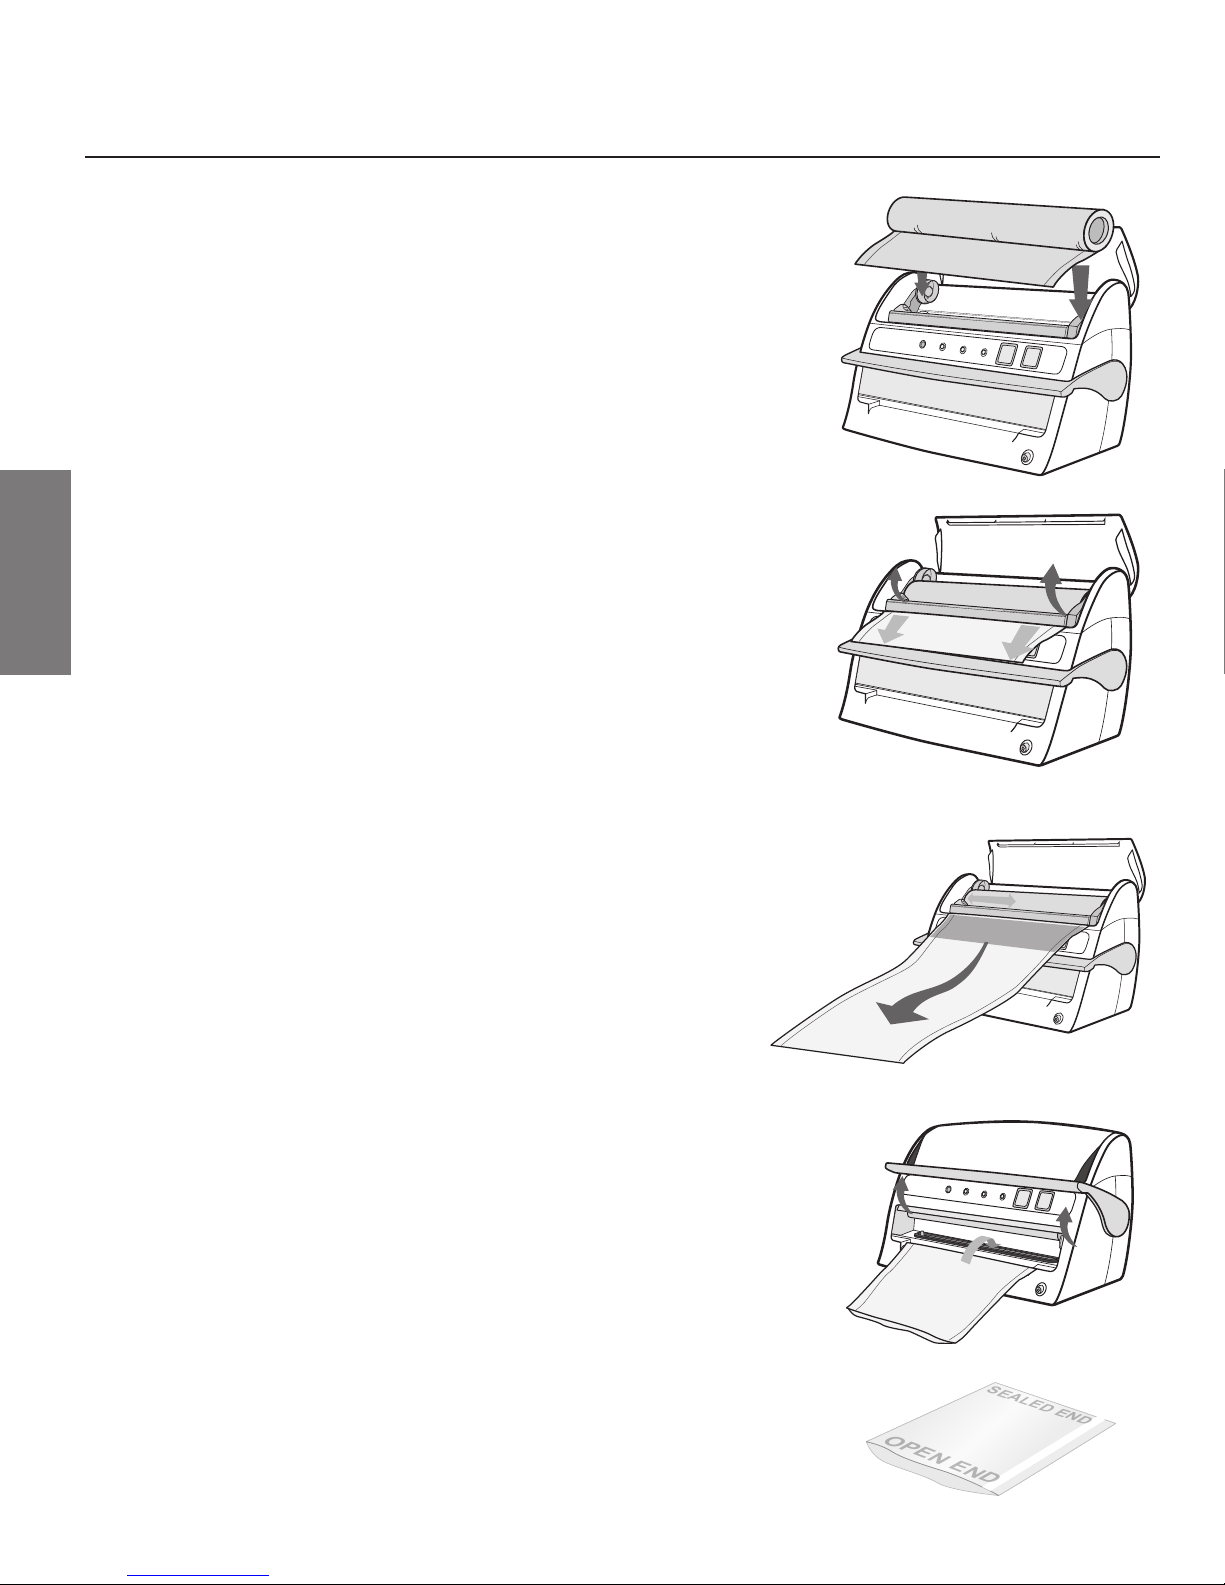
How to
Make a Bag from a FoodSaver® Vacuum Sealing Roll
OPEN END
SEALED END
Fig. 1
Fig. 3
Fig. 5
Fig. 2
1. Open appliance door and place roll into
Roll Storage Compartment (Fig. 1).
For Best results, insert roll with material flap down.
Note: Bags can be sealed with appliance door either
open or closed.
2. Lift up Bag Cutter Bar and place bag material
beneath the Cutter Bar (Fig. 2).
3. Pull out enough bag material to hold item
being vacuum packed, plus 3 inches (7.6cm).
Lower the Cutter Bar and slide Bag Cutter across
the Cutter Bar (Fig. 3).
4. Lift Bar, place bag over sealing strip, gently
lower bar, press Seal button. Once red light
goes off, lift bar and remove bag (Fig. 4).
5. You now have one sealed end (Fig. 5).
6. Now you are ready to vacuum seal with your
new bag (see next page).
3”
Fig. 4
 Loading...