


QS.1085_v2.1 5/26/04 11:32 AM Page 1


 QuickStart
V1085
Features of Your FoodSaver Appliance
A Indicator Light |
D Accessory Port |
Open/Cancel Button |
Seal Control Switch |
|
(2-Position) |
G Vacuum Channel |
I Antibacterial Drip Tray |
For important safety information and helpful tips, please refer to the FoodSaver Reference Guide included in your kit. Questions? Visit us at www.foodsaver.com or call 1-800-777-5452 (U.S.) or 1-877-804-5383 (Canada). Get tips on vacuum packaging and order FoodSaver accessories.
Features
QS.1085_v2.1 5/26/04 11:32 AM Page 2
Getting Started
Registering your appliance is quick and easy at www.foodsaver.com.
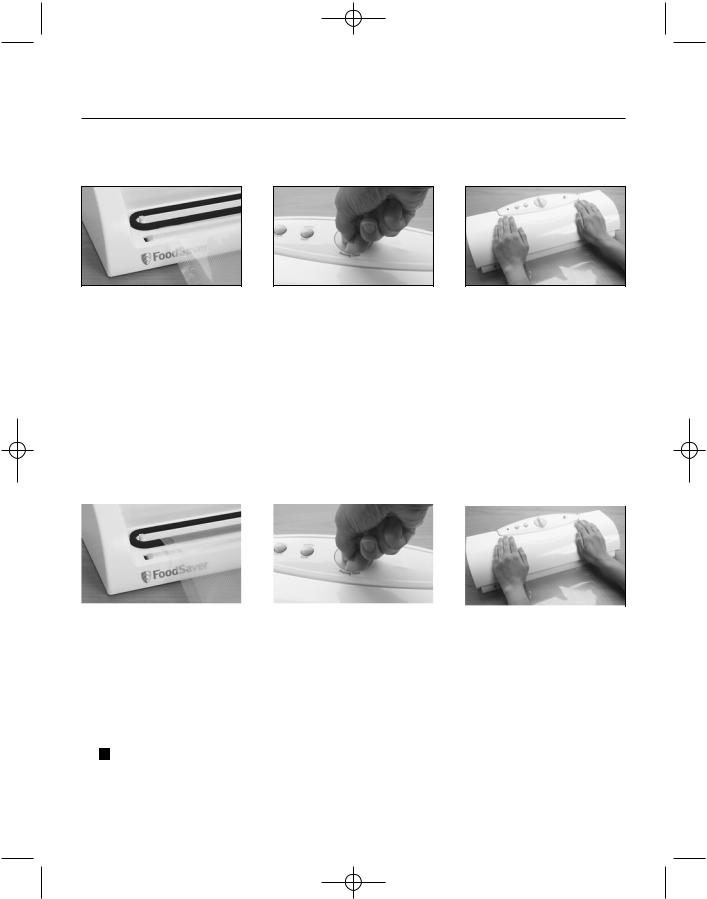
How to Make a Bag from a FoodSaver Roll
Place Bag on Sealing Strip |
|
Set Seal Control Switch |
Press and Release Lid |
|||
1. |
Cut enough bag material from roll to hold item |
5. |
Press down firmly on lid with both hands until |
|||
|
to be vacuum packaged, plus 3 inches. Be sure to |
|
motor starts, wait 3-5 seconds, then release. |
|||
|
cut straight. |
|
|
|
Motor will continue to run. |
|
2. |
Open appliance lid and place one end of bag |
6. |
When motor and Indicator Light (A) turn off, |
|||
|
material across Sealing Strip (H), not over |
|
press Open/Cancel Button (B) to open lid and |
|||
|
rubber gasket (J). |
|
|
|
remove bag. |
|
3. |
Close lid. |
|
|
Now you are ready to vacuum package with your |
||
4. |
Turn Seal Control Switch (E) to |
|
. |
|||
1 |
||||||
new bag (see below). |
||||||
|
|
|
|
|||
How to Vacuum Package with FoodSaver Bags |
Rolls |
||||||||||
|
|
|
|
|
|
|
|
|
|
||
|
|
|
|
|
|
|
|
|
|
|
|
|
|
|
|
|
|
|
|
|
|
& |
|
|
|
|
|
|
|
|
|
|
|
||
|
|
|
|
|
|
|
|
|
|
|
|
Place Bag in Vacuum Channel |
Set Seal Control Switch |
|
|
Press and Release Lid |
Bags |
||||||
1. |
Place item(s) in bag, allowing at least 3 inches of |
5. |
|
|
|
||||||
To begin vacuum process, press down firmly on lid |
|||||||||||
|
space between bag contents and top of bag. |
|
with both hands until motor starts, wait 3-5 seconds, |
||||||||
2. |
Open appliance lid and place open end of bag |
|
then release. Motor will continue to run. |
|
|
||||||
|
down into Vacuum Channel (G). |
|
6. |
When motor and Indicator Light (A) turn off, press |
|||||||
3. |
Close lid. |
|
|
Open/Cancel Button (B) to open lid and remove |
|||||||
4. |
Turn Seal Control Switch (E) to: |
|
|
bag. Refrigerate or freeze if needed. (See FoodSaver |
|||||||
|
|
|
for vacuum and seal. |
|
|
Reference Guide for food safety tips.) |
|
|
|||
|
|
1 |
|
|
|
|
|||||
|
|
2 to vacuum and extended seal (for moist or |
|
|
|
|
|
|
|||
juicy foods such as raw meat).
Note: Let appliance cool down for 20 seconds
after each use.
 Loading...