

Page 1

User Manual
Version 1.5
Page 2

Table of Contents
Get started6
What's in the box6
Charge your tracker7
Set up Charge 58
See your data in the Fitbit app8
Unlock Fitbit Premium9
Wear Charge 510
Placement for all-day wear vs. exercise10
Fasten the band11
Handedness12
Wear and care tips13
Change the band13
Remove a band13
Attach a band14
Basics15
Navigate Charge 515
Basic navigation15
Quick settings16
Adjust settings18
Display19
Quiet modes19
Other settings20
Check battery level20
Set up device lock21
Adjust always-on display21
Turn off the screen22
Clock Faces and Apps23
Change the clock face23
Open apps23
2
Page 3

Find Phone24
Notifications from your phone25
Set up notifications25
See incoming notifications25
Manage notifications26
Turn off notifications26
Answer or reject phone calls27
Respond to messages (Android phones)28
Timekeeping29
Set an alarm29
Dismiss or snooze an alarm29
Use the timer or stopwatch30
Activity and Wellness31
See your stats31
Track a daily activity goal31
Choose a goal32
Track your hourly activity32
Track your sleep32
Set a sleep goal33
Learn about your sleep habits33
Manage stress33
Use the EDA Scan app33
Check your stress management score34
Advanced health metrics35
Exercise and Heart Health36
Track your exercise automatically36
Track and analyze exercise with the Exercise app36
Phone GPSrequirements37
Customize your exercise settings38
Check your workout summary40
Check your heart rate40
Custom heart-rate zones42
3
Page 4

Earn Active Zone Minutes42
Receive heart-rate notifications43
Check your daily readiness score44
View your cardio fitness score44
Share your activity44
Fitbit Pay45
Use credit and debit cards45
Set up Fitbit Pay45
Make purchases46
Change your default card47
Pay for transit47
Update, Restart, and Erase48
Update Charge 548
Restart Charge 548
Erase Charge 549
Troubleshooting50
Heart-rate signal missing50
GPS signal missing50
Other issues52
General Info and Specifications53
Sensors andComponents53
Materials53
Wireless technology53
Haptic feedback53
Battery54
Memory54
Display54
Band size54
Environmental conditions55
Learn more55
Return policy and warranty55
Regulatory and Safety Notices56
4
Page 5

USA:Federal Communications Commission(FCC) statement56
Canada:Industry Canada (IC)statement57
European Union (EU)58
Argentina60
Australia and New Zealand60
Belarus61
Customs Union61
Ghana61
Indonesia62
Israel62
Japan63
Kingdom of Saudi Arabia63
Malaysia63
Mexico64
Morocco64
Nigeria65
Oman65
Paraguay65
Philippines66
Serbia67
Singapore67
South Korea67
Taiwan67
Thailand71
United Arab Emirates71
United Kingdom72
Vietnam72
About the Battery73
IP Rating74
Safety Statement74
Regulatory Markings74
5
Page 6

Get started
Meet Fitbit Charge 5, our most advanced health and fitness tracker that helps you
keep a pulse on your stress, physical readiness, heart health, and overall well-being.
Take a moment to review our complete safety information at fitbit.com/safety.
Charge 5 is not intended to provide medical or scientific data.
What's in the box
Your Charge 5 box includes:
Tracker with small band
(color and material varies)
The detachable bands on Charge 5 come in a variety of colors and materials, sold
separately.
Charging cableAdditional large band
6
Page 7

Charge your tracker
A fully-charged Charge 5 has a battery life of up to 7 days. Battery life and charge
cycles vary with use and other factors; actual results will vary.
To charge Charge 5:
1. Plug the charging cable into the USB port on your computer, a UL-certified
USB wall charger, or another low-energy charging device.
2. Hold the other end of the charging cable near the port on the back of the
tracker until it attaches magnetically. Make sure the pins on the charging cable
align with the port on the back of your tracker.
Charging fully takes about 1-2 hours. While Charge 5 charges, double-tap the screen
to turn it on and check the battery level. Swipe right on the battery screen to use
Charge 5. A fully charged tracker shows a solid battery icon.
7
Page 8

Set up Charge 5
Set up Charge 5 with the Fitbit app. The Fitbit app is compatible with most popular
phones. See fitbit.com/devices to check if your phone is compatible.
To get started:
1. Download the Fitbit app:
l Apple App Store for iPhones
l Google Play Store for Android phones
2. Install the app, and open it.
l
If you already have a Fitbit account, log in to your account
tap the
Today tab your profile picture Set Up a Device.
l If you don't have a Fitbit account, tap
series of questions to create a Fitbit account.
3. Continue to follow the on-screen instructions to connect Charge 5 to your
account.
When you're done with setup, read through the guide to learn more about your new
tracker and then explore the Fitbit app.
For more information, see the related help article.
Join Fitbit to be guided through a
See your data in the Fitbit app
Open the Fitbit app on your phone to view your activity, health metrics, and sleep
data; log food and water; participate in challenges; and more.
8
Page 9

Unlock Fitbit Premium
Fitbit Premium is your personalized resource in the Fitbit app that helps you stay
active, sleep well, and manage stress. A Premium subscription includes programs
tailored to your health and fitness goals, personalized insights, hundreds of
workouts from fitness brands, guided meditations, and more.
New Fitbit Premium customers can redeem a trial subscription in the Fitbit app.
For more information, see the related help article.
9
Page 10

Wear Charge 5
WearCharge 5 around your wrist. If you need to attach a different size band, or if
you purchased another band, see the instructions in "Change the band" on page13.
Placement for all-day wear vs. exercise
When you're not exercising, wear Charge 5 a finger's width above your wrist bone.
In general, it's always important to give your wrist a break on a regular basis by
removing your tracker for around an hour after extended wear. We recommend
removing your tracker while you shower. Although you can shower while wearing
your tracker, not doing so reduces the potential for exposure to soaps, shampoos,
and conditioners, which can cause long-term damage to your tracker and may
cause skin irritation.
For optimized heart-rate tracking while exercising:
l During a workout, experiment with wearing your tracker a bit higher on your
wrist for an improved fit. Many exercises, such as bike riding or weight lifting,
cause you to bend your wrist frequently, which could interfere with the heart-
rate signal if the tracker is lower on your wrist.
10
Page 11

l Wear your tracker on top of your wrist, and make sure the back of the device
is in contact with your skin.
l Consider tightening your band before a workout and loosening it when you’re
done. The band should be snug but not constricting (a tight band restricts
blood flow, potentially affecting the heart-rate signal).
Note: If you have trouble connecting to GPS on Charge 5, see the related help
article.
Fasten the band
1. Place Charge 5 around your wrist.
2. Slide the bottom band through the first loop in the top band.
11
Page 12

3. Tighten the band until it fits comfortably, and press the peg through one of
the holes in the band.
4. Slide the loose end of the band through the second loop until it lies flat on
your wrist. Make sure the band isn’t too tight. Wear the band loosely enough
that it can move back and forth on your wrist.
Handedness
For greater accuracy, you must specify whether you wear Charge 5 on your
dominant or non-dominant hand. Your dominant hand is the one you use for writing
and eating. To start, the Wrist setting is set to non-dominant. If you wear Charge 5
on your dominant hand, change the Wrist setting in the Fitbit app:
From the Today tab
Wrist Dominant.
in the Fitbit app, tap your profile picture Charge 5 tile
12
Page 13

Wear and care tips
l Clean your band and wrist regularly with a soap-free cleanser.
l If your tracker gets wet, remove and dry it completely after your activity.
l Take your tracker off from time to time.
For more information, visit the Fitbit Wear & Care page.
Change the band
Charge 5 comes with a small band attached and an additional large, bottom band in
the box. Boththe top and bottom bands can be swapped with accessory bands,
sold separately on fitbit.com. For band measurements, see "Band size" on page54.
Remove a band
1. Turn over Charge 5 and find the band latches.
2. To release the latch, use your fingernail to press the flat button toward the
band.
13
Page 14

3. Gently pull the band away from the tracker to release it.
4. Repeat on the other side.
Attach a band
To attach a band, press it into the end of the tracker until you hear a click and it
snaps into place. The band with the loops and peg attaches to the top of the
tracker.
14
Page 15

Basics
Learn how to manage settings, set a personal PIN code, navigate the screen, and
check the battery level.
Navigate Charge 5
Charge 5 has a color AMOLED touchscreen display.
Navigate Charge 5 by tapping the screen and swiping side to side and up and down.
To preserve battery, the tracker’s screen turns off when not in use.
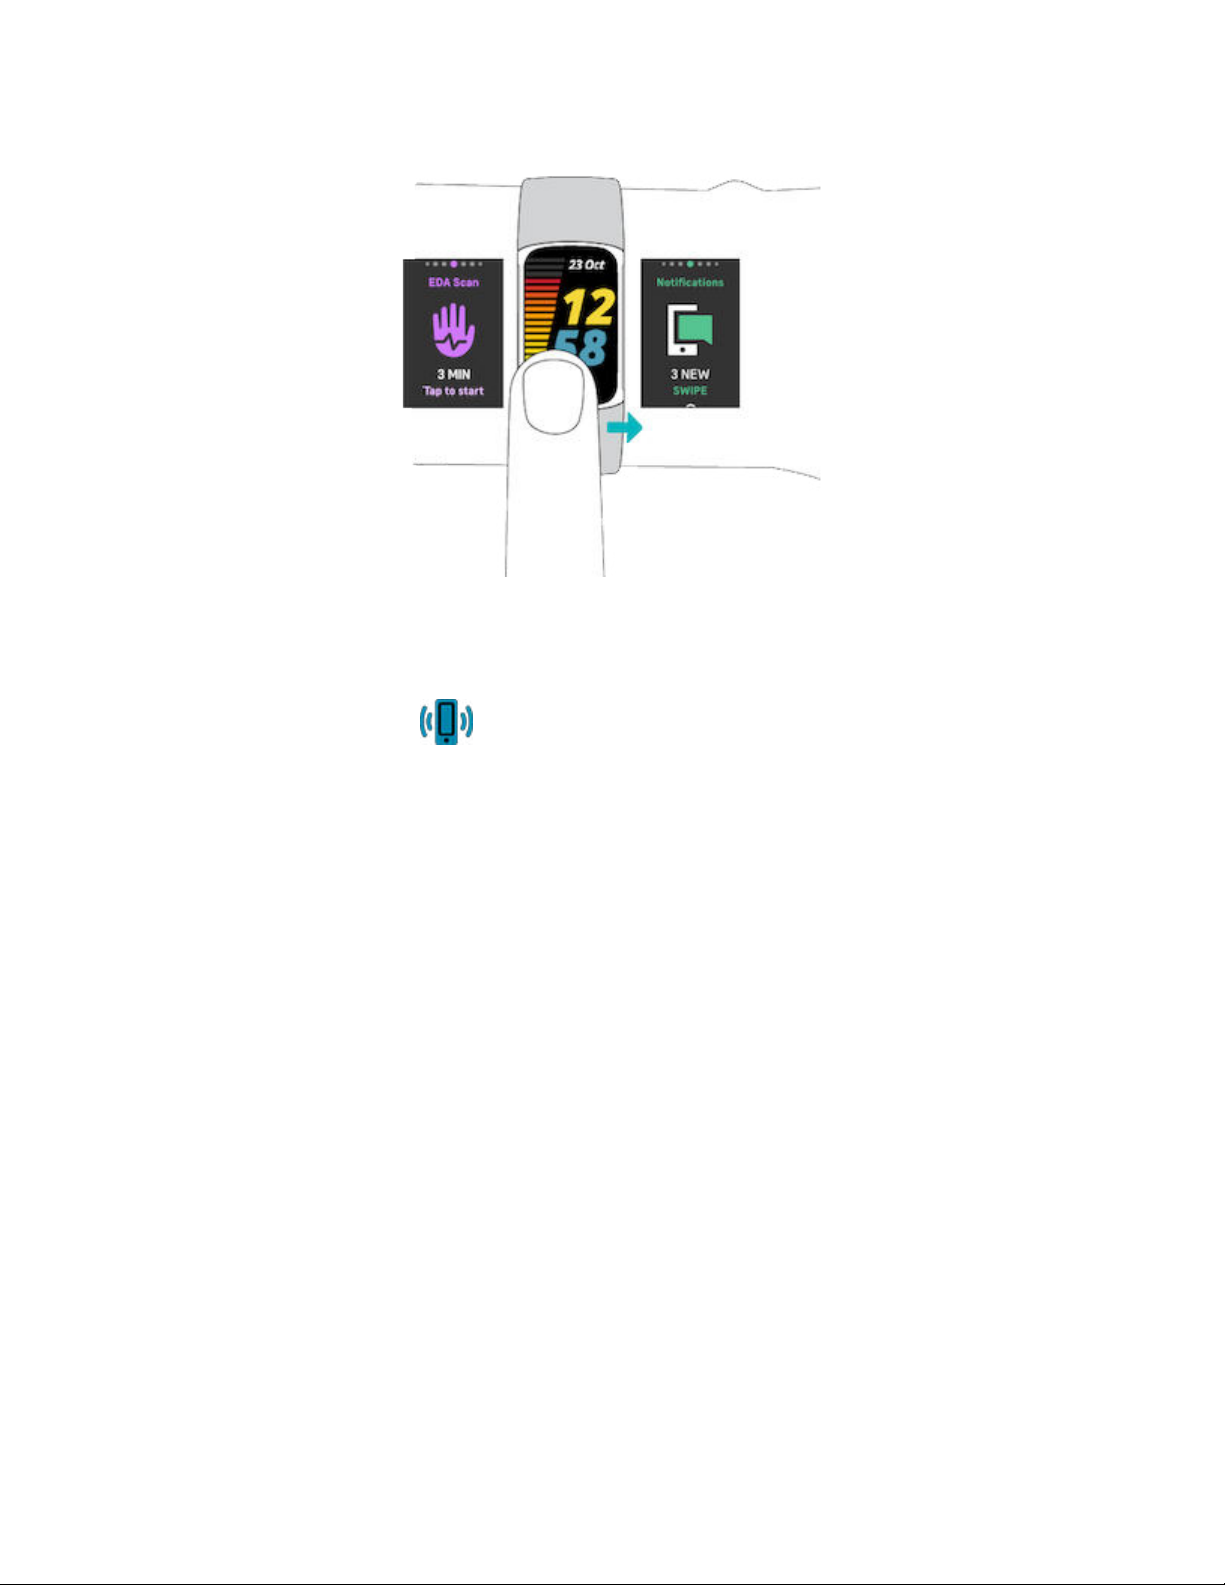
Basic navigation
The home screen is the clock.
l Firmly tap the screen twice or turn your wrist to wake Charge 5.
l Swipe down from the top of the screen to access quick settings, the Payments
app
settings, swipe right to return to the clock screen.
l Swipe up to see your daily stats. To return to the clock screen, swipe right.
l Swipe left and right to see the apps on your tracker.
l Swipe right to go back to a previous screen. Firmly double-tap the screen to
return to the clock screen.
, the Find Phone app , and the Settings app . While in quick
15
Page 16

Quick settings
For a faster way to access certain settings, swipe down from the clock screen.Tap a
setting to adjust it. When you turn off a setting, the icon appears dim with a line
through it.
16
Page 17

Payments
Make contactless payments from your wrist with Fitbit
Pay.
DNDmode
Sleep mode
When the do not disturb setting is on:
l Notifications, goal celebrations, and reminders
are muted.
l
The do not disturb icon illuminates
settings.
You can't turn on the do not disturb setting and sleep
mode at the same time.
When the sleep mode setting is on:
l Notifications, goal celebrations, and reminders
are muted.
l The screen's brightness is set to dim.
l The screen stays dark when you turn your wrist.
To wake Charge 5, firmly tap the screen twice.
l
The sleep mode icon illuminates
settings.
in quick
in quick
Screen wake
Sleep mode turns off automatically when you set a
sleep schedule. For more information, see
settings" on the next page
You can't turn on the do not disturb setting and sleep
mode at the same time.
When you set screen wake to Auto , the screen
turns on each time you turn your wrist.
Whenyou set screen wake to Manual , firmly tap
the screen twice to turn it on.
"Adjust
17
Page 18

Find Phone Tap to open the Find Phone app . For more
information, see "Find Phone" on page24.
Water lock
Turn on the water lock setting when you're in water, for
example showering or swimming, to prevent your
screen from activating. When water lock is on, your
screen locks, and the water lock icon appears at the
bottom. Notifications and alarms still appear on your
tracker, but you must unlock your screen to interact
with them.
To turn on water lock, swipe down from the clock
screen
screen twice. To turn off water lock, firmly double-tap
the middle of the screen with your finger. If you don't
see "Unlocked" appear on screen, try tapping harder.
Turning off this feature uses the accelerometer in your
device, which takes more force to activate.
Note that water lock turns on automatically when you
start a swim in the Exercise app .
tap Water Lock firmly tap your
Settings app Tap the Settings app to open it. For more
information, see "Adjust settings" below.
Adjust settings
Manage basic settings in the Settings app . Swipe down from the clock screen
and tap the Settings app to open it. Tap a setting to adjust it. Swipe to see the
full list of settings.
18
Page 19

Display
BrightnessChange the screen's brightness.
Screen
wake
Screen
timeout
Always-on
display
Change whether the screen turns on when you turn your wrist.
Adjust the amount of time before the screen turns off or switches to
the always-on display clock face.
Turn always-on display on or off. For more information, see "Adjust
always-on display" on page21.
Quiet modes
Exercise
focus
Do not
disturb
Sleep
mode
Turn off notifications while using the Exercise app .
Turn off all notifications.
Adjust sleep mode settings, including setting a schedule for the
mode to automatically turn on and off.
To set a schedule:
1.
Open the Settings app
Schedule Interval.
2. Tap the start or end time to adjust when the mode turns on and
off. Swipe up or down to change the time, and tap the time to
select it. Sleep mode automatically turns off at the time you
schedule, even if you manually turned it on.
and tap Quiet modes Sleep Mode
19
Page 20

Other settings
Heart rateTurn heart-rate tracking on or off.
Heart zone
notifications
VibrationsAdjust your tracker's vibration strength.
GPSChoose the GPS mode. For more information, see the related help
Device Info View your tracker's regulatory information and activation date,
Restart
device
Turn the heart-zone notifications that you receive during everyday
activity on or off. For more information, see the related help article.
article.
which is the day your tracker's warranty begins. The activation date
is the day you set up your device.
Device InfoSystem Info to see the activation date.
Tap
For more information, see
Tap
Restart device
the related help article.
Restart
to restart your
tracker
.
Check battery level
From the clock face, swipe up. The battery level is at the top of the screen.
If your tracker's battery is low (fewer than 24 hours remaining), the battery
indicator turns red. If your tracker's battery is critically low (fewer than 4 hours
remaining), a warning appears on the clock face and the battery indicator flashes.
Swipe right to dismiss the warning.
20
Page 21

When the battery is low:
l If you’re tracking an exercise with GPS, GPS tracking turns off
l Always-on display is turned off
l You can't use quick replies
l You won't receive notifications from your phone
Charge Charge 5 to use or adjust these features.
Set up device lock
To help keep your tracker secure, turn on device lock in the Fitbit app, which
prompts you to enter a personal 4-digit PINcode to unlock your tracker. If you set
up Fitbit Pay to make contactless payments from your tracker, device lock is turned
on automatically and you're required to set a code. If you don't use Fitbit Pay,
device lock is optional.
Turn on device lock or reset your PINcode in the Fitbit app:
From the Today tab
Device Lock.
For more information, see
in the Fitbit app, tap your profile picture Charge 5 tile
the related help article.
Adjust always-on display
Turn on always-on display to show the time on your tracker, even when you're not
interacting with the screen.
21
Page 22

To turn always-on display on or off:
1. Swipe down from the clock face to access quick settings.
2.
Tap the
3. Tap
automatically turn off during certain hours, tap Off-hours.
Note that turning on this feature impacts your tracker's battery life. When always-
on display is turned on, Charge 5 requires more frequent charging.
Clock faces without an always-on display mode use a default always-on display
clock face.
Always-ondisplay automatically turns off when your tracker's battery is critically
low.
For more information, see the related help article.
Settings app Display settingsAlways-on display.
Always-on display to turn the setting on or off. To set the display to
Turn off the screen
To turn off your tracker's screen when not in use, briefly cover the tracker face with
your opposite hand or turn your wrist away from your body.
Note that if you turn on the always-on display setting, the screen won't turn off.
22
Page 23

Clock Faces and Apps
Learn how to change your clock face and access apps on Charge 5.
Change the clock face
The Fitbit Gallery offers a variety of clock faces to personalize your tracker.
1.
From the Today tab
tile.
2.
Tap
Gallery Clocks tab.
3. Browse the available clock faces. Tap a clock face to see a detailed view.
4. Tap
Install to add the clock face to Charge 5.
in the Fitbit app, tap your profile picture Charge 5
Open apps
From the clock face, swipe left and right to see the apps installed on your tracker.
Swipe up or tap an app to open it. Swipe right to return to a previous screen, or
double tap to return to the clock screen.
23
Page 24
Find Phone
Use the Find Phone app to locate your phone.
Requirements:
l Your tracker must be connected (“paired”) to the phone you want to locate.
l Your phone must have Bluetooth turned on and be within 30 feet (10m) of
your Fitbit device.
l The Fitbit app must be running in the background on your phone.
l Your phone must be turned on.
To find your phone:
1. Swipe down from the clock face to access quick settings.
2. Open the Find Phone app on your tracker.
3. Tap
4. When you locate your phone, tap Cancel to end the ringtone.
Find Phone. Your phone rings loudly.
24
Page 25

Notifications from your phone
Charge 5 can show call, text, calendar, and app notifications from your phone to
keep you informed. Keep your tracker within 30 feet of your phone to receive
notifications.
Set up notifications
Check that Bluetooth on your phone is on and that your phone can receive
notifications (often under Settings
1.
From the Today tab
tile.
2. Tap
3. Follow the on-screen instructions to pair your tracker if you haven't already.
4. To turn on notifications from apps installed on your phone, including Fitbit and
Notifications.
Call, text, and calendar notifications are turned on automatically.
WhatsApp, tap App Notifications and turn on the notifications you want to
see.
in the Fitbit app, tap your profile picture Charge 5
Notifications). Then set up notifications:
Note that if you have an iPhone, Charge 5 shows notifications from all calendars
synced to the Calendar app. If you have an Android phone, Charge 5 shows
calendar notifications from the calendar app you chose during setup.
For more information, see the related help article.
See incoming notifications
A notification causes your tracker to vibrate. Tap the notification to expand the
message.
25
Page 26

If you don't read the notification when it arrives, you can check it later in the
Notifications app
up to open it. Your tracker shows the first 250 characters of the notification. Check
your phone for the full message.
. Swipe right or left to the Notifications app , then swipe
Manage notifications
Charge 5 stores up to 10 notifications, after which the oldest are replaced as you
receive new ones.
Manage notifications in the Notifications app
:
l Swipe up to scroll through your notifications, and tap any notification to
expand it.
l To delete a notification, tap to expand it, then swipe to the bottom and tap
Clear.
l To delete all notifications at once, swipe up until you reach the end of your
notifications and tap Clear All.
l To exit the notifications screen, swipe right.
Turn off notifications
Turn off certain notifications in the Fitbit app, or turn off all notifications in quick
settings on Charge 5. When you turn off all notifications, your tracker won't vibrate
and the screen won't turn on when your phone receives a notification.
To turn off certain notifications:
26
Page 27

1.
From the Today tab
picture Charge 5 tile Notifications.
2. Turn off the notifications you no longer want to receive on your tracker.
To turn off all notifications:
1. From the clock face, swipe down to access quick settings.
2.
Turn on
Note that if you use the do not disturb setting on your phone, you don't receive
notifications on your tracker until you turn off this setting.
DNDMode . All notifications and reminders are turned off.
in the Fitbit app on your phone, tap your profile
Answer or reject phone calls
If paired to an iPhone or Android phone, Charge 5 lets you accept or reject
incoming phone calls.
To accept a call, tap the green phone icon on your tracker's screen. Note that you
can't speak into the tracker—accepting a phone call answers the call on your nearby
phone. To reject a call, tap the red phone icon to send the caller to voicemail.
The caller's name appears if that person is in your contacts list; otherwise you see a
phone number.
27
Page 28

Respond to messages (Android phones)
Respond directly to text messages and notifications from certain apps on your
tracker with preset quick replies. Keep your phone nearby with the Fitbit app
running in the background to respond to messages from your tracker.
To respond to a message:
1. Open the notification you want to respond to.
2. Choose how to reply to the message:
l
Tap the text icon
l
Tap the emoji icon
For more information, including how to customize quick replies, see
article.
to respond to a message from a list of quick replies.
to respond to the message with an emoji.
the related help
28
Page 29

Timekeeping
Alarms vibrate to wake or alert you at a time you set. Set up to 8 alarms to occur
once or on multiple days of the week. You can also time events with the stopwatch
or set a countdown timer.
Set an alarm
Set one-time or recurring alarms with the Alarms app . When an alarm goes off,
your tracker vibrates.
When setting an alarm, turn on Smart Wake to allow your tracker to find the best
time to wake you starting 30 minutes before the alarm time you set. It avoids
waking you during deep sleep so you're more likely to wake up feeling refreshed. If
Smart Wake can’t find the best time to wake you, your alarm alerts you at the set
time.
For more information, see
the related help article.
Dismiss or snooze an alarm
When an alarm goes off, your tracker vibrates. To dismiss the alarm, swipe up from
the bottom of the screen and tap the dismiss icon
minutes, swipe down from the top of the screen.
Snooze the alarm as many times as you want. Charge 5 automatically goes into
snooze mode if you ignore the alarm for more than 1 minute.
. To snooze the alarm for 9
29
Page 30

Use the timer or stopwatch
Time events with the stopwatch or set a countdown timer with the Timers app
on your tracker. You can run the stopwatch and countdown timer at the same time.
If always-on display is on, the screen continues to display the stopwatch or
countdown timer until it ends or you exit the app.
For more information, see
the related help article.
30
Page 31

Activity and Wellness
Charge 5 continuously tracks a variety of stats whenever you wear it. Data
automatically syncs with the Fitbit app throughout the day.
See your stats
Swipe up from the clock face to see your daily stats, including:
Core statsSteps taken today, distance covered, calories burned, and
Active Zone Minutes
ExerciseNumber of days you met your exercise goal this week
Heart rateCurrent heart rate and heart-rate zone, and resting heart rate
Hourly activityThe number of hours today you met your hourly activity goal
Menstrual healthInformation on the current stage of your menstrual cycle, if
applicable
Oxygen
Saturation
SleepSleep duration and sleep score
If you set a goal in the Fitbit app, a ring shows your progress toward that goal.
Find your complete history and other information detected by your tracker in the
Fitbit app.
Your most recent resting SpO2 average and range
Track a daily activity goal
Charge 5 tracks your progress toward a daily activity goal of your choice. When you
reach your goal, your tracker vibrates and shows a celebration.
31
Page 32

Choose a goal
Set a goal to help you get started on your health and fitness journey. To begin, your
goal is to take 10,000 steps per day. Choose to change the number of steps, or pick
a different activity goal depending on your device.
For more information, see the related help article.
Track progress toward your goal on Charge 5. For more information, see "See your
stats" on the previous page.
Track your hourly activity
Charge 5 helps you stay active throughout the day by keeping track of when you're
stationary and reminding you to move.
Reminders nudge you to walk at least 250 steps each hour. You feel a vibration and
see a reminder on your screen at 10 minutes before the hour if you haven't walked
250 steps. When you meet the 250-step goal after receiving the reminder, you feel
a second vibration and see a congratulatory message.
For more information, see the related help article.
Track your sleep
Wear Charge 5 to bed to automatically track basic stats about your sleep, including
your time asleep, sleep stages (time spent in REM, light sleep, and deep sleep), and
sleep score (the quality of your sleep).
32
Page 33

Charge 5 also tracks your estimated oxygen variation throughout the night to help
you uncover potential breathing disturbances, as well as your skin temperature to
see how it varies from your personal baseline and SpO2 levels, which estimate the
amount of oxygen in your blood.
To see your sleep stats, sync your tracker when you wake up and check the Fitbit
app, or swipe up from the clock face on your tracker.
For more information, see the related help article.
Set a sleep goal
To start, you have a sleep goal of 8 hours of sleep per night. Customize this goal to
meet your needs.
For more information, see the related help article.
Learn about your sleep habits
With a Fitbit Premium subscription, see more details about your sleep score and
how you compare to your peers, which can help you build a better sleep routine and
wake up feeling refreshed.
For more information, see the related help article.
Manage stress
Track and manage your stress with mindfulness features.
Use the EDA Scan app
The EDA Scan app on Charge 5 detects electrodermal activity which may
indicate your body's response to stress. Because your sweat level is controlled by
the sympathetic nervous system, these changes can show meaningful trends about
how your body responds to stress.
33
Page 34

1.
On your tracker, swipe left or right to the EDA Scan app
2. To begin a scan the same length as your previous scan, tap the play icon. To
change the length of time for the scan, swipe up and tap Edit lengthtap
your desired number of minutes.
3. Gently hold the sides of your tracker with your thumb and index finger.
4. Remain still and keep your fingers on your tracker until the scan is complete.
5. If you remove your fingers, the scan pauses. To resume, place your fingers
back on the sides of your tracker. To end the session, tap
6. When the scan is complete, tap a mood to reflect on how you feel, or tap Skip.
7. Swipe up to see the summary of your scan, including your number of EDA
responses, heart rate at the start and end of the session, and reflection if you
logged a reflection.
8. Tap Done to close the summary screen.
9. To see more details about your session, open the Fitbit app on your phone.
and tap to open it.
End session.
From the Today tab
For more information, see the related help article.
, tap the Mindfulness tile Your Journey.
Check your stress management score
Based on your heart rate, exercise, and sleep data, your stress management score
helps you see if your body is showing signs of stress on a daily basis. The score
ranges from 1 to 100, where a higher number means your body is showing fewer
34
Page 35

signs of physical stress. To see your daily stress management score, wear your
tracker to sleep, and open the Fitbit app on your phone the next morning. From the
Today tab
Log how you feel throughout the day to get a clearer picture of how your mind and
body respond to stress. With a Fitbit Premium subscription, see details about your
score breakdown.
For more information, see
, tap the Stress Management tile.
the related help article.
Advanced health metrics
Know your body better with health metrics in the Fitbit app. This feature helps you
view key metrics tracked by your Fitbit device over time so that you can see trends
and assess what’s changed.
Metrics include:
l Oxygen saturation (SpO2)
l Skin temperature variation
l Heart-rate variability
l Resting heart rate
l Breathing rate
Note: This feature is not intended to diagnose or treat any medical condition and
should not be relied on for any medical purposes. It is intended to provide
information that can help you manage your well-being. If you have any concerns
about your health, please talk to a healthcare provider. If you believe you are
experiencing a medical emergency, call emergency services.
For more information, see the related help article.
35
Page 36

Exercise and Heart Health
Automatically track exercise or track activity with the Exercise app to see real-
time stats and a post-workout summary.
Check the Fitbit app to share your activity with friends and family, see how your
overall fitness level compares to your peers, and more.
Track your exercise automatically
Charge 5 automatically recognizes and records many high-movement activities
which are at least 15 minutes long. See basic stats about your activity in the Fitbit
app on your phone. From the Today tab
For more information, see
the related help article.
, tap the Exercise tile .
Track and analyze exercise with the Exercise app
Track specific exercises with the Exercise app on Charge 5 to see real-time
stats, including heart-rate data, calories burned, elapsed time, and a post-workout
summary on your wrist. For complete workout stats, and a workout intensity map if
you used GPS, tap the Exercise tile in the Fitbit app.
For more information about tracking an exercise with GPS, see
article.
Dynamic GPS on Charge 5 allows the tracker to set the GPS type at the start of the
exercise. Charge 5 attempts to connect to the GPS sensors on your phone to
preserve battery life. If your phone isn’t nearby or moving, Charge 5 uses built-in
the related help
36
Page 37

GPS. Manage your GPS settings in the Settings app . For more information, see
the related help article.
Phone GPSrequirements
PhoneGPS is available for all supported phones with GPSsensors. For more
information, see the related help article.
1. Turn on Bluetooth and GPS on your phone.
2. Make sure Charge 5 is paired to your phone.
3. Make sure the Fitbit app has permission to use GPS or location services.
4. Check that GPS is turned on for the exercise.
1. Open the Exercise app and swipe up to find an exercise.
2. Tap the exercise, then swipe up and make sure GPSis turned on.
5. Make sure the GPSmode on Charge 5 is set to Dynamic or Phone GPS (open
the Settings app
6. Keep your phone with you while you exercise.
To track an exercise:
1.
On Charge 5, swipe left or right to the Exercise app
an exercise.
2. Tap the exercise to choose it. If the exercise uses GPS, you can wait for the
signal to connect, or start the exercise and GPSwill connect when a signal is
available. Note that GPS can take a few minutes to connect.
3.
Tap the play icon
goal or adjust the settings. For more information on the settings, see
"Customize your exercise settings" on the next page.
4. Tap the middle of the screen to scroll through your real-time stats. To pause
your workout, swipe up and tap
5.
When you're done with your workout, swipe up and tap
. Your workout summary appears.
6. Swipe up and tap
GPSGPSMode).
, then swipe up to find
to begin the exercise, or swipe up to choose an exercise
Pause .
Pause Finish
Done to close the summary screen.
Notes:
37
Page 38

l If you set an exercise goal, your tracker alerts you when you’re halfway to your
goal and when you reach the goal.
l
If the exercise uses GPS, "GPSconnecting
screen. Charge 5 is connected when the screen says "GPSconnected ."
l Use connected GPS with your nearby phone for activities with a longer
duration, such as golf or a hike, to ensure your full workout is recorded with
GPS.
l For best results, make sure your tracker's battery is above 80% before you
track an exercise longer than 2 hours with built-in GPS.
For more information, see
Note: If you have trouble connecting to GPS or notice that your distance traveled
seems inaccurate, see "GPS signal missing" on page50.
the related help article.
..." appears at the top of the
Using built-in GPSimpacts your tracker's battery life. If you use GPStracking
regularly, Charge 5 has a battery life of about 4 days.
Customize your exercise settings
Customize settings for each exercise type on your device or in the Fitbit app.
Change or reorder exercise shortcuts in the Fitbit app.
Settings include:
38
Page 39

Always-on
Keep the screen on during exercise
Display
Auto-PauseAutomatically pause a run when you stop moving
GPSTrack your route using GPS
Heart Zone
Notifications
Receive notifications when you hit target heart-rate zones during
your workout.For more information, see the related help article
IntervalAdjust the move and rest intervals used during interval training
Pool LengthSet the length of your pool
Run DetectAutomatically open the exercise app when your tracker detects a
run.
LapsReceive notifications when you reach certain milestones during
your workout
UnitChange the unit of measurement you use for pool length
To customize the settings for each exercise type on your tracker:
1.
Swipe to the Exercise app
, then swipe up to find an exercise.
2. Tap the exercise to choose it.
3. Swipe up through the exercise settings. Tap a setting to adjust it.
4.
When you're done, swipe down until you see the play icon
.
To customize certain exercise settings and change or reorder Exercise app
shortcuts in the Fitbit app:
1.
From the Today tab
in the Fitbit app, tap your profile picture Charge 5
tile.
2. Tap
Exercise Shortcuts.
l To add a new exercise shortcut, tap the + icon and select an exercise.
l To remove an exercise shortcut, swipe left on a shortcut.
l To reorder an exercise shortcut, tap Edit (iPhones only), and press and
hold the menu icon
, then drag it up or down.
39
Page 40

l To customize an exercise setting, tap an exercise and adjust your
settings.
You can have up to 6 exercise shortcuts on Charge 5.
For more information, see the related help article.
Check your workout summary
After you complete a workout, Charge 5 shows a summary of your stats.
Check the Exercise tile in the Fitbit app to see additional stats and a workout
intensity map if you used GPS.
Check your heart rate
Charge 5 personalizes your heart-rate zones using your heart rate reserve, which is
the difference between your maximum heart rate and your resting heart rate. To
help you target the training intensity of your choice, check your heart rate and
heart-rate zone on your tracker during exercise. Charge 5 notifies you when you
enter a heart-rate zone.
40
Page 41

Icon Zone Calculation Description
Below
Zone
Fat Burn
Zone
Cardio
Zone
Below
40%of
your heart
rate
reserve
Between
40% and
59% of
your heart
rate
reserve
Between
60% and
84% of
your heart
rate
reserve
Below the fat burn zone, your
heart beats at a slower pace.
In the fat burn zone, you’re likely in
a moderate activity such as a brisk
walk. Your heart rate and
breathing might be elevated, but
you can still carry on a
conversation.
In the cardio zone, you’re likely
doing a vigorous activity such as
running or spinning.
Peak
Zone
Greater
than 85% of
your heart
rate
reserve
In the peak zone, you’re likely
doing a short, intense activity that
improves performance and speed,
such as sprinting or high-intensity
interval training.
41
Page 42

Custom heart-rate zones
Instead of using these heart-rate zones, you can create a custom zone in the Fitbit
app to target a specific heart-rate range.
For more information, see the related help article.
Earn Active Zone Minutes
Earn Active Zone Minutes for time spent in the fat burn, cardio, or peak heart-rate
zones. To help you maximize your time, you earn 2 Active Zone Minutes for each
minute you’re in the cardio or peak zones.
1 minute in the fat burn zone = 1 Active Zone Minute
1 minute in the cardio or peak zones = 2 Active Zone Minutes
There are 2 ways Charge 5 notifies you about Active Zone Minutes:
l A few moments after you enter a different heart-rate zone during your
exercise using the Exercise app
working. The number of times your tracker vibrates indicates which zone
you’re in:
1 buzz = fat burn zone
2 buzzes = cardio zone
3 buzzes = peak zone
l 7 minutes after you enter a heart-rate zone throughout the day (for example,
during a brisk walk).
, so that you know how hard you’re
42
Page 43
To start, your weekly goal is set to 150 Active Zone Minutes. You’ll receive
notifications as you reach your goal.
For more information, see the related help article.
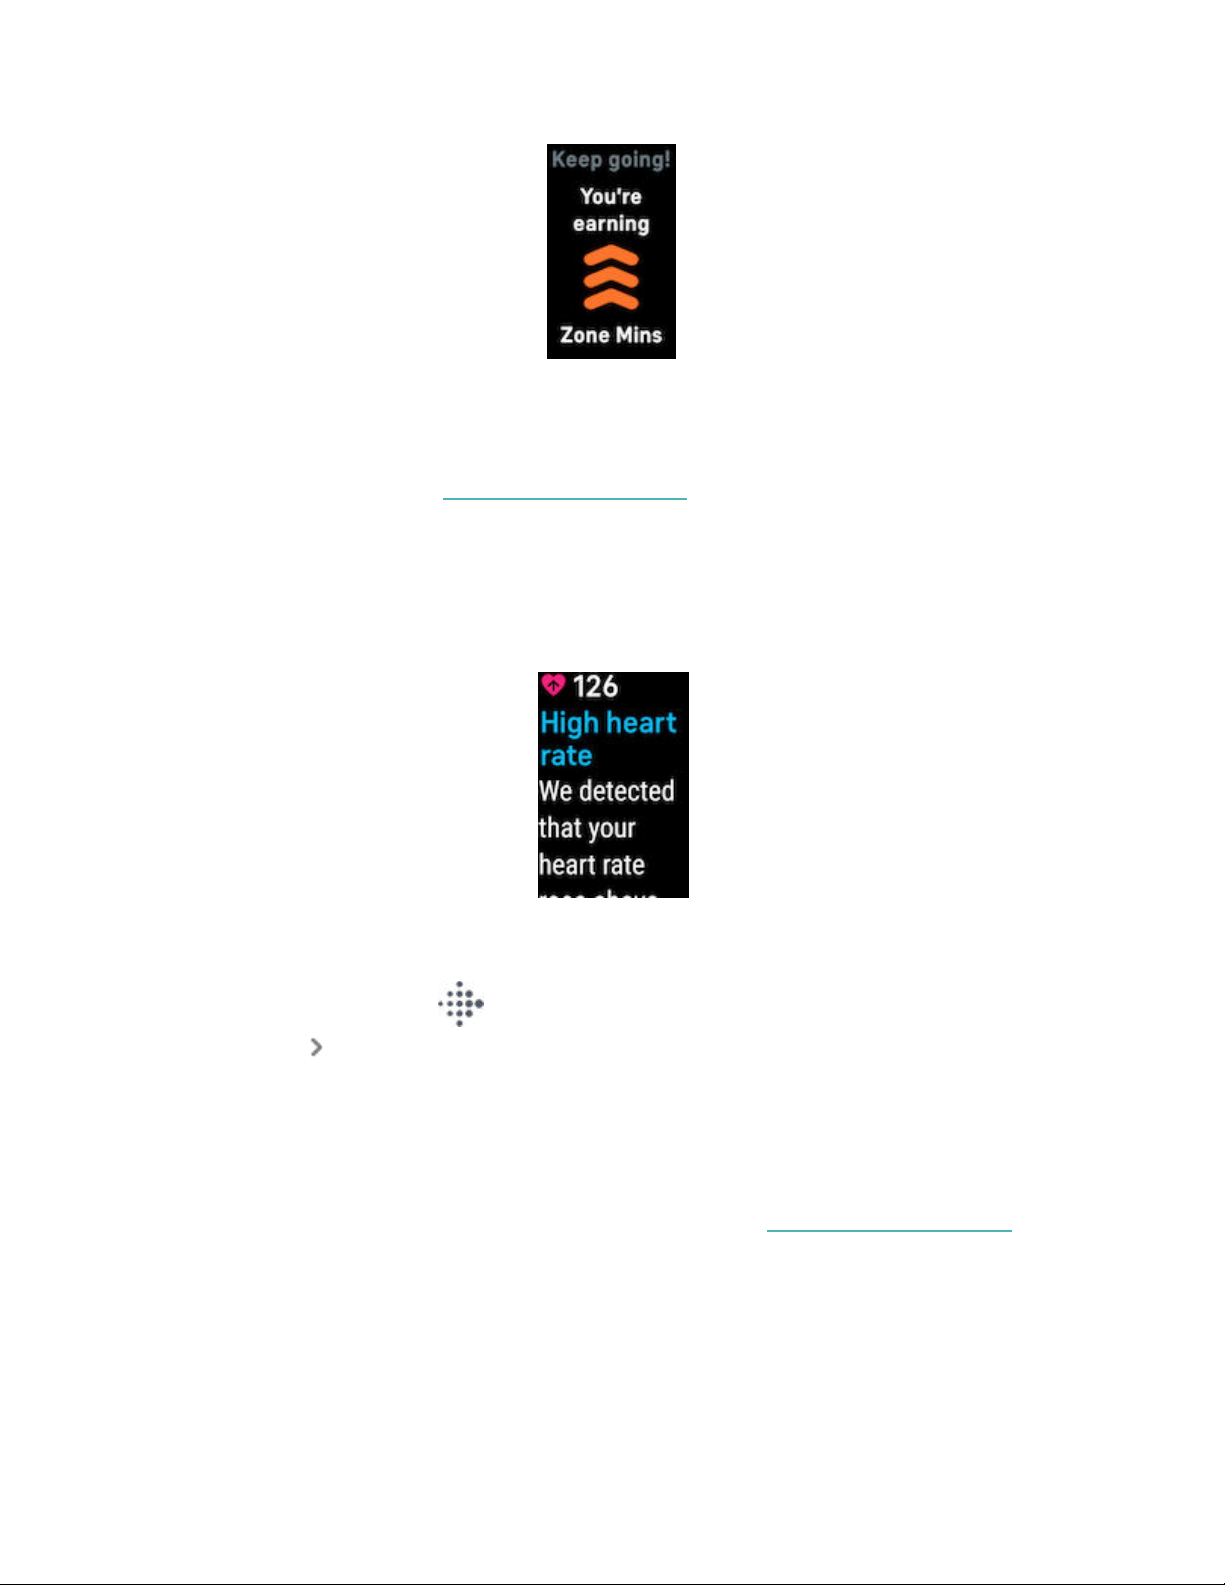
Receive heart-rate notifications
Stay informed when Charge 5 detects that your heart rate is outside of your high or
low thresholds when you appear to be inactive for at least 10 minutes.
To turn this feature off or adjust the thresholds:
1.
From the Today tab
picture Charge 5 tile.
2. Tap
3. Turn High heart rate notification or Low heart rate notification on or off, or tap
View past heart-rate notifications, log possible symptoms and causes, or delete
notifications in the Fitbit app. For more information, see the related help article.
High &low heart rate.
Custom to adjust the threshold.
in the Fitbit app on your phone, tap your profile
43
Page 44

Check your daily readiness score
Understand what’s best for your body with the daily readiness score, available with
a Fitbit Premium subscription. Check the Fitbit app each morning to see your score,
ranging from 1 to 100, based on your activity, sleep, and heart-rate variability. A high
score means you’re ready to exercise, while a low score suggests you should focus
on recovery.
When you check your score, you also see a breakdown of what impacted your
score, a personalized activity goal for the day, and recommended workouts or
recovery sessions.
To see your daily readiness score, wear your tracker to sleep, and open the Fitbit
app on your phone the next morning. From the Today tab
tile .
For more information, see the
related help article.
, tap the Readiness
View your cardio fitness score
View your overall cardiovascular fitness in the Fitbit app. See your cardio fitness
score and cardio fitness level, which shows how you compare to your peers.
In the Fitbit app, tap the Heart-rate tile and swipe left on your heart-rate graph to
see your detailed cardio fitness stats.
For more information, see the related help article.
Share your activity
After you complete a workout, open the Fitbit app to share your stats with friends
and family.
For more information, see the related help article.
44
Page 45

Fitbit Pay
Charge 5 includes a built-in NFC chip, which lets you use your credit and debit cards
on your tracker.
Use credit and debit cards
Set up Fitbit Pay in the Wallet section of the Fitbit app, and use your tracker to
make purchases in stores that accept contactless payments.
We’re always adding new locations and card issuers to our list of partners. To see if
your payment card works with Fitbit Pay, see fitbit.com/fitbit-pay/banks.
Set up Fitbit Pay
To use Fitbit Pay, add at least 1 credit or debit card from a participating bank to the
Wallet section of the Fitbit app. The Wallet is where you add and remove payment
cards, set a default card for your tracker, edit a payment method, and review recent
purchases.
1.
From the Today tab
tile.
2. Tap the
3. Follow the on-screen instructions to add a payment card. In some cases, your
bank might require additional verification. If you're adding a card for the first
time, you might be prompted to set a 4-digit PIN code for your tracker. Note
that you also need passcode protection enabled for your phone.
4. After you add a card, follow the on-screen instructions to turn on notifications
for your phone (if you haven't already done so)to complete the setup.
You can add up to 5 payment cards to the Wallet and choose which card to set as
the default payment option.
Wallet tile.
in the Fitbit app, tap your profile picture Charge 5
45
Page 46

Make purchases
Note: To make contactless payments with Charge 5 in Australia and New Zealand,
follow the instructions below for all card types. If prompted to enter a PIN code,
enter your 4-digit tracker PIN code (not the PIN code for your card). For more
information about setting a PIN code, see the related help article.
Make purchases using Fitbit Pay at any store that accepts contactless payments. To
determine if the store accepts Fitbit Pay, look for the symbol below on the payment
terminal:
All customers, including those in Australia and New Zealand:
1.
Swipe down from the clock face andtap
2. If prompted, enter your 4-digit tracker PINcode. Your default card appears on
the screen.
3. To pay with your default card, hold your wrist near the payment terminal. To
pay with a different card, swipe to find the card you want to use, and hold
your wrist near the payment terminal.
When the payment succeeds, your tracker vibrates and you see a confirmation on
the screen.
Payments .
46
Page 47

If the payment terminal doesn't recognize Fitbit Pay, make sure the tracker face is
near the reader and that the cashier knows you're using a contactless payment.
For added security, you must wear Charge 5 on your wrist to use Fitbit Pay.
For more information, see the related help article.
Change your default card
1.
From the Today tab
tile.
2. Tap the
3. Find the card you want to set as the default option.
4. Tap Set as Default on Charge 5.
Wallet tile.
in the Fitbit app, tap your profile picture Charge 5
Pay for transit
Use Fitbit Pay to tap on and off at transit readers that accept contactless credit or
debit card payments. To pay with your tracker, follow the steps listed in "Use credit
and debit cards" on page45.
Pay with the same card on your Fitbit tracker when you tap the transit reader at the
start and end of your trip. Make sure your device is charged before beginning your
trip.
47
Page 48

Update, Restart, and Erase
Some troubleshooting steps may require you to restart your tracker, while erasing it
is useful if you want to give Charge 5 to another person. Update your tracker to
receive the latest firmware.
Update Charge 5
Update your tracker to get the latest feature enhancements and product updates.
When an update is available, a notification appears in the Fitbit app. After you start
the update, follow the progress bars on Charge 5 and in the Fitbit app until the
update is complete. Keep your tracker and phone close to each other during the
update.
To update Charge 5, your tracker's battery must be at least 20% charged. Updating
Charge 5 may be demanding on the battery. We recommend plugging your tracker
into the charger before starting an update.
For more information, see the related help article.
Restart Charge 5
If you can’t sync Charge 5 or you have trouble with tracking your stats or receiving
notifications, restart your tracker from your wrist:
1.
Swipe down from the clock screen to find the Settings app
2.
Open the Settings app
If Charge 5 is unresponsive:
1. Connect your device to the charging cable. For instructions, see
charge my Fitbit device?
Restart DeviceRestart.
.
How do I
48
Page 49

2. Press the button located on the flat end of the charger 3 times within 8
seconds, holding each press for about 1 second.
3. Wait 10 seconds or until the Fitbit logo appears.
Note: If the device doesn’t restart, wait 15 seconds to try again.
Restarting your tracker doesn't delete any data.
Erase Charge 5
If you want to give Charge 5 to another person or wish to return it, first clear your
personal data:
1.
Swipe down from the clock screen to find the Settings app
2.
Open the Settings app
3. Swipe up, then press
4. When you see the Fitbit logo and Charge 5 vibrates, your data is erased.
Hold 3 Sec for 3 seconds and release.
Device InfoClear User Data.
.
49
Page 50

Troubleshooting
If Charge 5 isn't working properly, see our troubleshooting steps below.
Heart-rate signal missing
Charge 5 continuously tracks your heart rate while you're exercising and
throughout the day. If the heart-rate sensor on your tracker has difficulty detecting
a signal, dashed lines appear.
If your tracker doesn't detect a heart-rate signal, first make sure heart-rate tracking
is turned on in the Settings app
your tracker correctly, either by moving it higher or lower on your wrist or by
tightening or loosening the band. Charge 5 should be in contact with your skin.
After holding your arm still and straight for a short time, you should see your heart
rate again.
For more information, see
the related help article.
on your tracker. Next, make sure you're wearing
GPS signal missing
Environmental factors including tall buildings, dense forest, steep hills, and thick
cloud cover can interfere with your tracker's ability to connect to GPS satellites. If
your tracker is searching for a GPS signal during an exercise, you’ll see “
GPSconnecting
50
Page 51

” appear at the top of the screen. If Charge 5 can't connect to a GPSsatellite,
the tracker stops trying to connect until the next time you start a GPSexercise.
For best results, wait for Charge 5 to find the signal before you start your workout.
If you still have trouble connecting to GPS or notice that your distance traveled
seems inaccurate, try the following tips to allow your device to connect to GPS
satellites:
l Follow the recommendations for wearing your device for exercise. For more
information, see "Wear Charge 5" on page10.
l Try loosening the band 1 notch.
l Make sure your device doesn't touch your wrist bone.
l Avoid bending your wrist backwards.
l To more quickly establish a GPS connection, point your device toward open
sky (clear of heavy tree coverage and away from tall buildings).
l Establish a GPS connection before beginning your exercise.
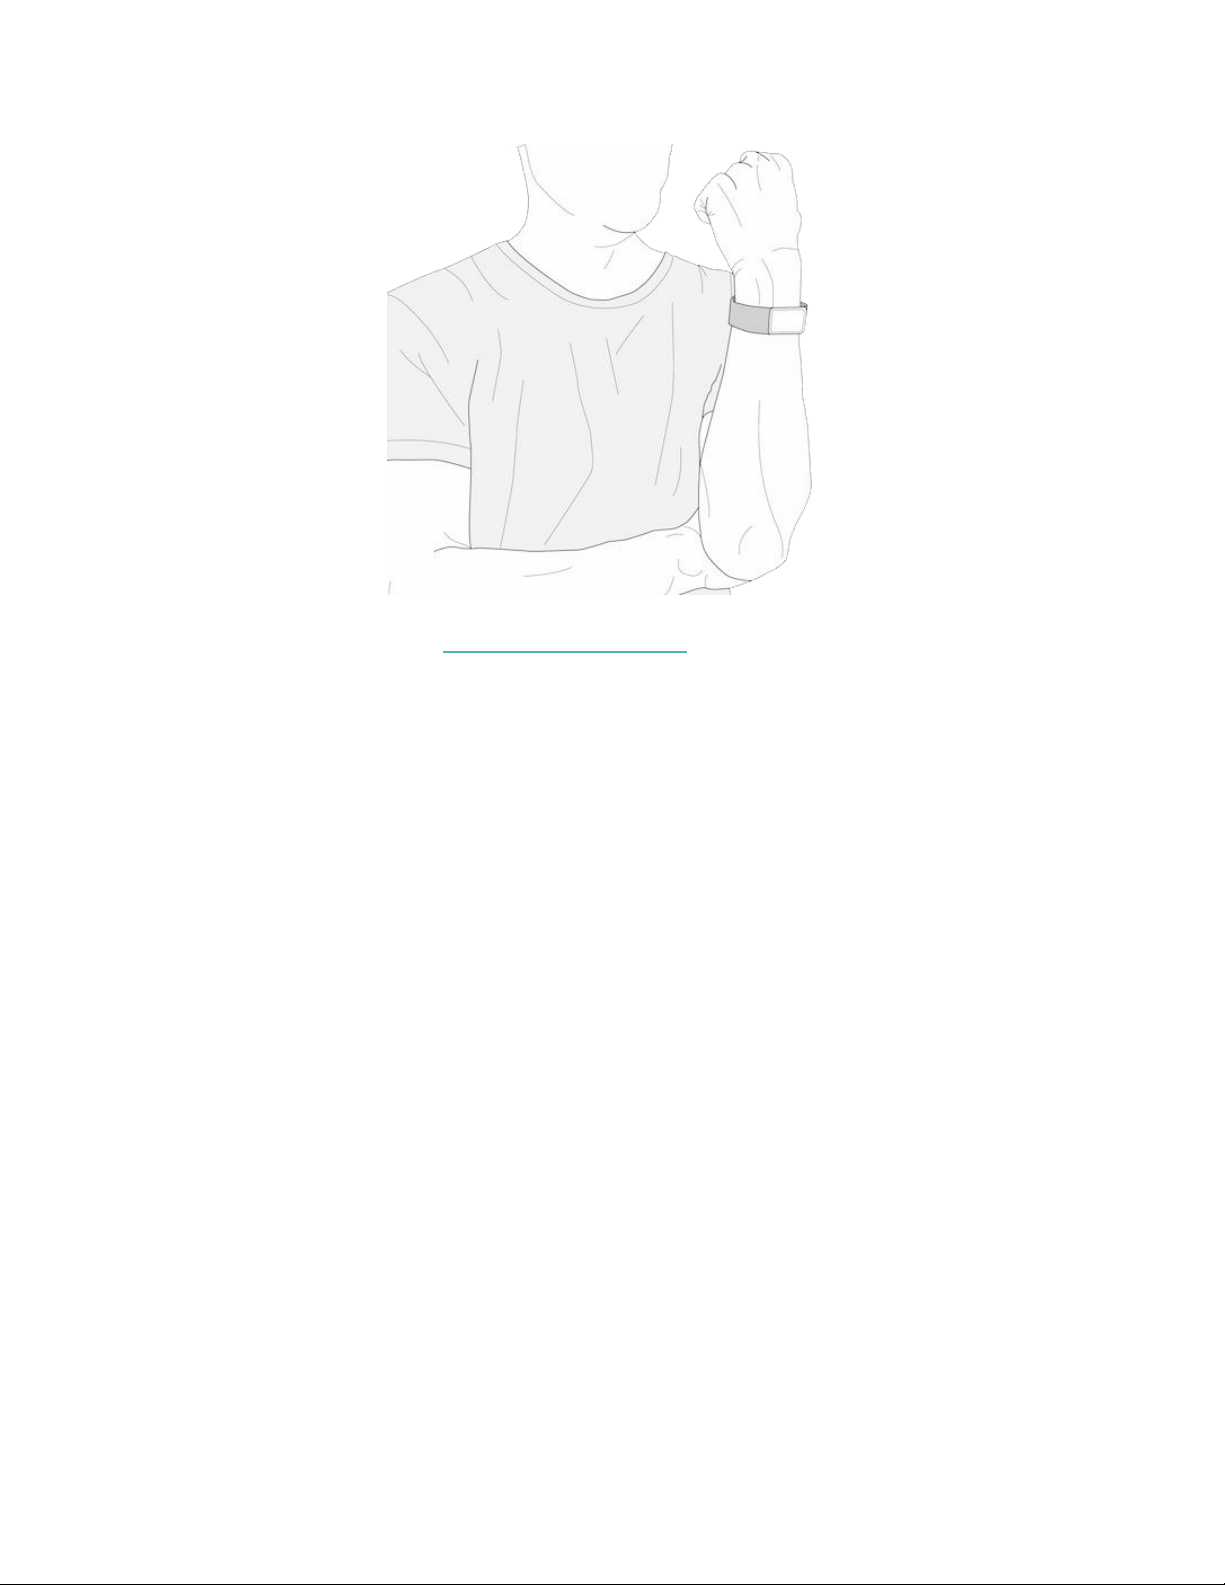
l Hold your arm parallel to your body near your head and at least 2 inches away.
51
Page 52
For more information, see the related help article.
Other issues
If you experience any of the following issues, restart your tracker:
l Won't sync
l Won't respond to taps or swipes
l Won't track steps or other data
l Won't show notifications
For instructions, see "Restart Charge 5" on page48.
52
Page 53

General Info and Specifications
Sensors andComponents
Fitbit Charge 5 contains the following sensors and motors:
l Optical heart-rate tracker
l 3-axis accelerometer, which tracks motion patterns
l Ambient light sensor
l Built-in GPSreceiver + GLONASS, which tracks your location during a workout
l Multipurpose electrical sensors compatible with the EDA Scan app
l Vibration motor
Materials
The housing on Charge 5 is made of anodized aluminum and surgical-grade
stainless steel. The band that comes with Charge 5 is made of a flexible, durable
silicone similar to that used in many sports watches. While all stainless steel and
anodized aluminum can contain traces of nickel, which can cause an allergic
reaction in someone with nickel sensitivity, the amount of nickel in all Fitbit
products meets the European Union's stringent Nickel Directive.
Wireless technology
Charge 5 contains a Bluetooth 5.0 radio transceiver and NFCchip.
Haptic feedback
Charge 5 contains a vibration motor for alarms, goals, notifications, reminders, and
apps.
53
Page 54

Battery
Charge 5 contains a rechargeable lithium-polymer battery.
Memory
Charge 5 stores your data, including daily stats, sleep information, and exercise
history, for 7 days. See your historical data in the Fitbit app.
Display
Charge 5 has a color AMOLED display.
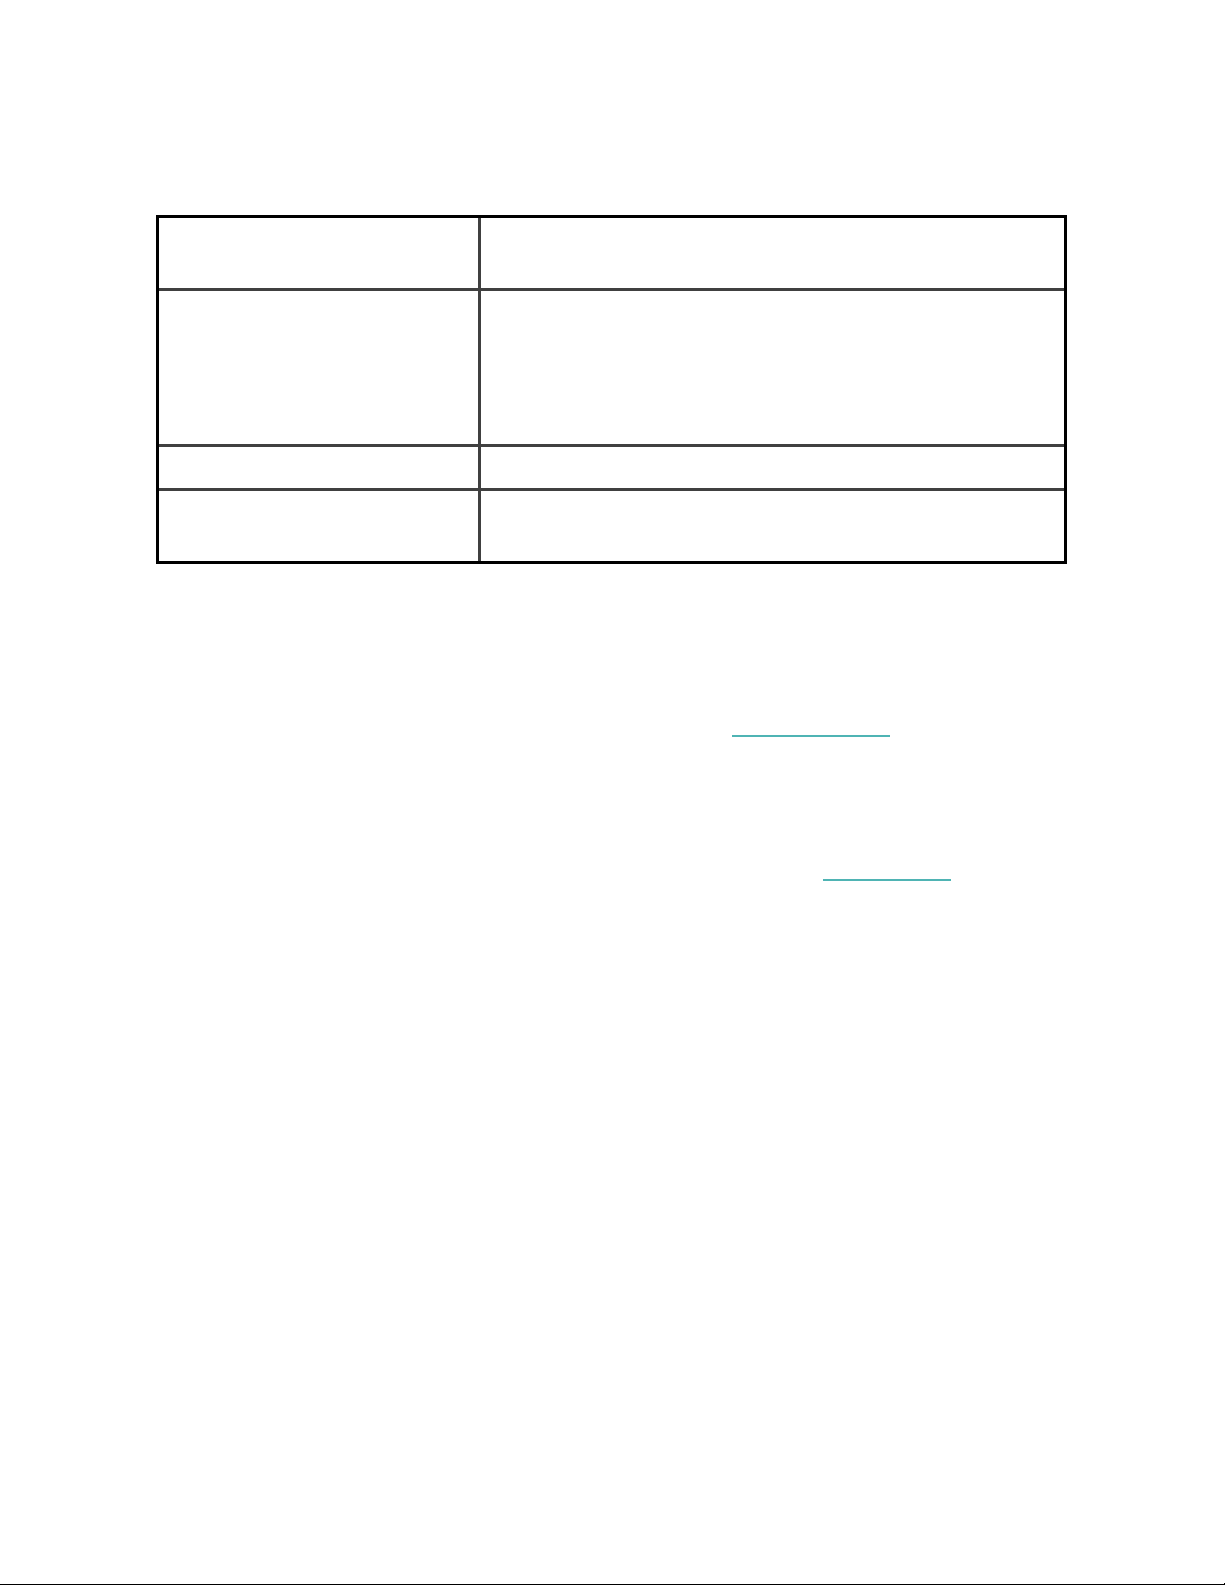
Band size
Band sizes are shown below. Note that accessory bands sold separately may vary
slightly.
Small bandFits a wrist between 5.5 - 7.1 inches (140 mm - 180 mm)in
circumference
Large
band
Fits a wrist between 7.1 - 8.7 inches (180 mm - 220 mm)in
circumference
54
Page 55
Environmental conditions
Operating temperature14° to 113° F
(-10° to 45° C)
Non-operating temperature-4° to 14° F
(-20° to -10° C)
113° to 140°F
(45° to 60° C)
Water resistanceWater resistant up to 50 meters
Maximum operating altitude28,000 feet
(8,534 m)
Learn more
To learn more about your tracker, how to track your progress in the Fitbit app, and
how to build healthy habits with Fitbit Premium, visit help.fitbit.com.
Return policy and warranty
Find warranty information and the fitbit.com return policy on our website.
55
Page 56

Regulatory and Safety Notices
Notice to the User: Regulatory content for certain regions can also be viewed on
your device. To view the content:
Settings Device Info Regulatory Info
USA:Federal Communications Commission(FCC)
statement
Model FB421:
FCC ID:XRAFB421
Model FB423
FCC ID: XRAFB423
Notice to the User: The FCC ID can also be viewed on your device. To view the
content:
Settings Device Info Regulatory Info
Supplier's Declaration of Conformity
Unique Identifier: FB421
Unique Identifier: FB423
Responsible Party – U.S. Contact Information
199 Fremont Street, 14th Floor
San Francisco, CA
94105
United States
877-623-4997
FCC Compliance Statement (for products subject to Part 15)
56
Page 57

This device complies with Part 15 of the FCC Rules.
Operation is subject to the following two conditions:
1. This device may not cause harmful interference and
2. This device must accept any interference, including interference that may
cause undesired operation of the device.
FCC Warning
Changes or modifications not expressly approved by the party responsible for
compliance could void the user’s authority to operate the equipment.
Note: This equipment has been tested and found to comply with the limits for a
Class B digital device, pursuant to part 15 of the FCC Rules. These limits are
designed to provide reasonable protection against harmful interference in a
residential installation. This equipment generates, uses and can radiate radio
frequency energy and, if not installed and used in accordance with the instructions,
may cause harmful interference to radio communications. However, there is no
guarantee that interference will not occur in a particular installation. If this
equipment does cause harmful interference to radio or television reception, which
can be determined by turning the equipment off and on, the user is encouraged to
try to correct the interference by one or more of the following measures:
l Reorient or relocate the receiving antenna.
l Increase the separation between the equipment and receiver.
l Connect the equipment into an outlet on a circuit different from that to which
the receiver is connected.
l Consult the dealer or an experienced radio/TV technician for help.
This device meets the FCC and IC requirements for RF exposure in public or
uncontrolled environments.
Canada:Industry Canada (IC)statement
Model/Modèle FB421
IC: 8542A-FB421
Model/Modèle FB423
57
Page 58

IC: 8542A-FB423
Notice to the User: The IC ID can also be viewed on your device. To view the
content:
Settings Device Info Regulatory Info
Avis à l'utilisateur: L'ID de l'IC peut également être consulté sur votre appareil. Pour
voir le contenu:
Paramètres Informations sur l'appareil Informations réglementaires
This device meets the IC requirements for RF exposure in public or uncontrolled
environments.
Cet appareil est conforme aux conditions de la IC en matière de RF dans des
environnements publics ou incontrôlée
IC Notice to Users English/French in accordance with current issue of RSS GEN:
This device complies with Industry Canada license exempt RSS standard(s).
Operation is subject to the following two conditions:
1. this device may not cause interference, and
2. this device must accept any interference, including interference that may
cause undesired operation of the device.
Cet appareil est conforme avec Industrie Canada RSS standard exempts de licence
(s). Son utilisation est soumise à Les deux conditions suivantes:
1. cet appareil ne peut pas provoquer d’interférences et
2. cet appareil doit accepter Toute interférence, y compris les interférences qui
peuvent causer un mauvais fonctionnement du dispositif
European Union (EU)
Notice to the User:Regulatory content for this region can also be viewed on your
device. To view the content:
58
Page 59

Settings Device Info Regulatory Info
Frequency Bands and Power
Data given here is the maximum radio-frequency power transmitted in the
frequency band(s) in which the radio equipment operates.
Bluetooth 2400-2483.5 MHz < 13 dBm EIRP
NFC 13.56 MHz < 42 dBuA/m at 10m
Simplified EU Declaration of Conformity
Hereby, Fitbit LLC declares that the radio equipment type Models FB421 and FB423
is in compliance with Directive 2014/53/EU. The full text of the EU declaration of
conformity is available at the following internet address: www.fitbit.com/safety
Vereinfachte EU-Konformitätserklärung
Fitbit LLC erklärt hiermit, dass die Funkgerättypen Modelle FB421 und FB423 die
Richtlinie 2014/53/EU erfüllen. Der vollständige Wortlaut der EU-
Konformitätserklärungen kann unter folgender Internetadresse abgerufen werden:
www.fitbit.com/safety
Declaración UE de Conformidad simplificada
Por la presente, Fitbit LLC declara que el tipo de dispositivo de radio Modelos FB421
e FB423 cumple con la Directiva 2014/53/UE. El texto completo de la declaración
de conformidad de la UE está disponible en la siguiente dirección de Internet:
www.fitbit.com/safety
Déclaration UE de conformité simplifiée
Fitbit LLC déclare par la présente que les modèles d’appareils radio FB421 et FB423
sont conformes à la Directive2014/53/UE. Les déclarations UE de conformité sont
disponibles dans leur intégralité sur le site suivant: www.fitbit.com/safety
Dichiarazione di conformità UE semplificata
59
Page 60

Fitbit LLC dichiara che il tipo di apparecchiatura radio Modelli FB421 è FB423 è
conforme alla Direttiva 2014/53/UE. Il testo completo della dichiarazione di
conformità UE è disponibile al seguente indirizzo Internet: www.fitbit.com/safety
Argentina
Model FB421:
C-26160
Model FB423:
C-28353
Australia and New Zealand
Notice to the User: Regulatory content for this region can also be viewed on your
device. To view the content:
Settings Device Info Regulatory Info
60
Page 61

Belarus
Model FB421
Customs Union
Model FB421
Notice to the User: Regulatory content for this region can also be viewed on your
device. To view the content:
Settings Device Info Regulatory Info
Ghana
Notice to the User: Regulatory content for this region can also be viewed on your
device. To view the content:
Settings Device InfoRegulatory Info
61
Page 62

Indonesia
Model FB421
75668/SDPPI/2021
3788
76114/SDPPI/2021
3788
Model FB423
84387/SDPPI/2022
3788
84388/SDPPI/2022
3788
Israel
Model FB421
Model FB423
62
Page 63

Japan
Notice to the User: Regulatory content for this region can also be viewed on your
device. To view the content:
Settings Device Info Regulatory Info
Model FB421
201-210387
Model FB423
201-220559
Kingdom of Saudi Arabia
Notice to the User: Regulatory content for this region can also be viewed on your
device. To view the content:
Settings Device Info Regulatory Info
Malaysia
Notice to the User: Regulatory content for this region can also be viewed on your
device. To view the content:
63
Page 64

Settings Device InfoRegulatory Info
Mexico
Notice to the User: Regulatory content for this region can also be viewed on your
device. To view the content:
Settings Device Info Regulatory Info
La operación de este equipo está sujeta a las siguientes dos condiciones:
1. Es posible que este equipo o dispositivo no cause interferencia perjudicial y
2. Este equipo o dispositivo debe aceptar cualquier interferencia, incluyendo la
que pueda causar su operación no deseada
Model FB421
IFT#: RCPFIFB21-2010
Model FB423
Morocco
Model FB421
AGREE PAR L’ANRT MAROC
Numéro d’agrément: MR00029210ANRT2021
Date d’agrément: 23/06/2021
64
Page 65

Model FB423
AGREE PAR L’ANRT MAROC
Numéro d’agrément: MR00033969ANRT2022
Date d’agrément: 04/08/2022
Nigeria
Connection and use of this communications equipment is permitted by the Nigerian
Communications Commission.
Oman
Model Name FB421
TRA/TA-R/11836/21
D090258
Model FB423
TRA/TA-R/14179/22
D172338
Paraguay
Model FB421
NR: 2022-01-I-0062
65
Page 66

Model FB423
NR: 2022-08-I-0521
Philippines
Model FB421
Type Accepted
No:ESD-RCE-2126831
Model FB423
Type Accepted
No:ESD-RCE-2230916
66
Page 67

Serbia
Singapore
Notice to the User: Regulatory content for this region can also be viewed on your
device. To view the content:
Settings Device Info Regulatory Info
South Korea
Notice to the User: Regulatory content for this region can also be viewed on your
device. To view the content:
Settings Device Info Regulatory Info
Taiwan
用戶注意:某些地區的法規內容也可以在您的設備上查看。要 查 看 內容 :
設置
Translation:
Notice to the User: Regulatory content can also be viewed on your device.
Instructions to view content from your menu:
Settings Device Info Regulatory Info
設備信息 法規信息
67
Page 68

低功率警語:
l 取得審驗證明之低功率射頻器材,非 經 核 准 ,公 司 、商 號 或 使 用 者 均 不 得 擅 自 變 更
頻率、加大功率或變更原設計之 特 性 及 功 能 。
l 低功率射頻器材之使用不得影響飛航安全及干擾合法通信;經發現有干擾現象時,
應立即停用,並改善至無干擾時 方 得 繼 續 使 用 。前 述 合 法 通 信 ,指 依 電 信 管 理 法 規
定作業之無線電通信。低功率射 頻 器 材 須 忍 受 合 法 通 信 或 工 業 、科 學 及 醫 療 用 電
波輻射性電機設備之干擾。
Translation:
Warning Statement for Low Power Radios:
l Without permission granted by the NCC, no company, enterprise, or user is
allowed to change the frequency of an approved low power radio-frequency
device, enhance its transmitting power or alter original characteristics or
performance.
l The use of low power RF devices must not affect flight safety or interfere with
legal communications: when interference is found, it should be immediately
stopped and ameliorated not to interfere before continuing to use it. The legal
communications mentioned here refer to radio communications operating in
accordance with the provisions of the Telecommunication Law. Low power RF
devices need to bear with interference from legal communications or
industrial, scientific and medical radio wave radiating equipment
電池警語:
此裝置使用鋰電池。
若未遵照下列準則,則裝置內的鋰離 子 電 池 壽 命 可 能 會 縮 短 或 有 損 壞 裝 置 、發 生 火 災 、
化學品灼傷、電解液洩漏及/ 或 受 傷 的 風 險 。
l 請勿拆解、鑿孔或損壞裝置或電池 。
l 請勿取出或嘗試取出使用者不可自行更換的電池。
l 請勿將電池曝露於火焰、爆炸或 其 他 危 險 中 。
l 請勿使用尖銳物品取出電池。
Translation:
Battery warning:
68
Page 69

This device uses a lithium-ion battery.
If the following guidelines are not followed, the life of the lithium-ion battery in the
device may be shortened or there is a risk of damage to the device, fire, chemical
burn, electrolyte leakage and / or injury.
l Do not disassemble, puncture or damage the device or battery.
l Do not remove or try to remove the battery that the user cannot replace.
l Do not expose the battery to flames, explosions or other hazards.
l Do not use sharp objects to remove the battery.
Vision Warning
使用過度恐傷害視力
警語
l 使用過度恐傷害視力
注意事項
l 使用30分鐘請休息10分鐘。未滿2歲幼兒不看螢幕,2歲以 上 每 天 看 螢 幕 不 要 超 過 1
小時
Translation:
Excessive use may damage vision
Warning:
l Excessive use may damage vision
Attention:
l Rest for 10 minutes after every 30 minutes.
l Children under 2 years old should stay away from this product. Children 2
years old or more should not see the screen for more than 1 hour a day.
Taiwan RoHS
Model FB421
69
Page 70

Model FB423
70
Page 71

Thailand
United Arab Emirates
Model FB421
Model FB423
71
Page 72

United Kingdom
Notice to the User: Regulatory content for this region can also be viewed on your
device. To view the content:
Settings Device Info Regulatory Info
Simplified UK Declaration of Conformity
Hereby, Fitbit LLC declares that the radio equipment type Models FB421 and FB423
is in compliance with Radio Equipment Regulations 2017. The full text of the UK
declaration of conformity is available at the following internet address:
www.fitbit.com/legal/safety-instructions
Vietnam
Model FB421
72
Page 73

Model FB423
About the Battery
This unit contains a non-replaceable internal lithium-ion battery. The battery can
burst or explode, releasing hazardous chemicals. To reduce the risk of fire or burns,
do not disassemble, crush, puncture or dispose of in fire or water.
CAUTION: Risk of explosion if battery is replaced by an incorrect type. Dispose of
used batteries according to the instructions.
l The battery must be recycled or disposed of properly
l Use the battery only in the specified equipment
l Do not leave the battery in an extremely high temperature environment that
may result in an explosion or the leakage of flammable liquid or gas
73
Page 74

l Do not subject battery to extremely low air pressure that may result in an
explosion or the leakage of flammable liquid or gas
IP Rating
Notice to the User: Regulatory content can also be viewed on your device. To view
the content:
Settings Device Info Regulatory Info
Models FB421 and FB423 have a water resistance rating of IPX8 under IEC standard
60529, up to a depth of 50 meters.
Models FB421 and FB423 have a dust ingress rating of IP6X under IEC standard
60529 which indicates the device is dust-tight.
Safety Statement
This equipment has been tested to comply with safety certification in accordance
with the specifications of: EN62368-1:2014 + A11:2017, BS EN62368-1:2014 +
A11:2017.
Regulatory Markings
Device regulatory markings can be viewed on your device by removing the band.
Markings are located in the band attach area.
74
Page 75

Band Pocket View
75
Page 76

©2022 FitbitLLC. Allrights reserved.Fitbit andthe Fitbitlogo aretrademarks
or registeredtrademarks ofFitbit inthe USand othercountries. Amore
complete listof Fitbittrademarks canbe foundat the
Third-party trademarksmentioned arethe propertyof theirrespective
Fitbit TrademarkList.
 Loading...