

Page 1
CT 22 E HEPA
CT 33 E HEPA
Instruction manual
Page 4 - 9
IMPORTANT: Read and understand all instructions
before using.
Guide d’utilisation
Page 10 - 16
IMPORTANT: Lire et comprendre toutes les
instructions avant de démarrer les travaux.
Manual de instrucciones
Página 17 - 23
IMPORTANTE: Lea y comprende todas las
instrucciones antes de usar.
469 621_003
1
Page 2
1.10
1.9
1.1
1.8
1.7
1.6
1.2
1.3
1.4
1.5
1
2
Page 3
2.1
2.12
2.11
2.10
2.9
2.2
2.3
2.4
2.5
2.6
2
2.8
3.4
3.3
2.7
3.1
3
3.4
3
Page 4

Contents
Safety Rules ............................................ 4
Technical data .........................................6
Symbols .................................................. 6
Intended use ........................................... 6
Connections ............................................6
Electrical connection .................................7
Connecting the suction hose ......................7
Connecting an electric tool ........................7
Connecting pneumatic tools .......................7
Equipment ............................................... 7
Operation ................................................ 7
On/off switch ...........................................7
Suction force regulator .............................7
Opening/closing the vacuum cleaner ..........7
Emptying the dirt container .......................7
Application .............................................. 8
Vacuuming dry materials ...........................8
Vacuuming liquids ....................................8
Filter .......................................................8
Changing the fi lter ...................................8
Cleaning the fi lter element ........................8
After fi nishing work ................................8
Maintenance and care ............................. 8
Accessories, fi lter .................................... 9
Warranty ................................................. 9
Safety Rules
Read and understand all instruc-
tions. Failure to follow all instructions listed below,
may result in electric shock, fi re and/or serious
personal injury.
SAVE THESE INSTRUCTIONS
General Safety Rules
Work Area
Keep your work area clean and well lit. Clut-
tered and dark areas invite accidents.
Do not operate vacuum cleaners in explosive atmospheres, such as in the presence
of fl ammable liquids, gases, or dust. Appli-
ances create sparks, which may ignite the dust
or fumes.
Keep bystanders, children, and visitors away
while operating the vacuum cleaner. Do not
allow to be used as a toy. Close attention is necessary when used by or near children.
Electrical Safety
This vacuum cleaner intended only for use indoor
and for dry or wet pick-up.
The power tool outlet is grounded and the
vacuum cleaner must be plugged into an
outlet properly installed and grounded in
accordance with all codes and ordinances.
Never remove the grounding prong or modify
the plug in any way. Do not use any adapter
plugs. Check with a qualifi ed electrician if
you are in doubt as to whether the outlet
is properly grounded. If the vacuum cleaners
should electrically malfunction or break down,
grounding provides a low resistance path to carry
electricity away from the user.
Do not insert objects like paper clips or
screwdrivers into power tool outlet. The
outlet is live when the vacuum cleaner is plugged
into power source and switch is set to power tool
activation mode or fi lter cleaning mode. Electric
shock may occur.
Avoid body contact with grounded surfaces
such as pipes, radiators, ranges and refrigerators. There is an increased risk of electric
shock if your body is grounded. If operating the
vacuum cleaner in damp locations is unavoidable; a Ground Fault Circuit Interrupter must be
used to supply the power to your vacuum cleaner.
Electrician’s rubber gloves and footwear will further enhance your personal safety.
Don’t expose vacuum cleaner to rain or wet
conditions. This vacuum cleaner can be used
for picking up non-fl ammable liquids but it is not
intended to be immersed or submerged in a fl uid.
Electric shock may occur.
Do not handle plug or appliance with wet
hands. Electric shock may occur.
Do not abuse the cord. Never use the cord to
carry the vacuum cleaner, pull the vacuum
cleaner or yank the plug from an outlet.
Keep cord away from heat, oil, sharp edges
or moving parts. Replace damaged cords
immediately. Don’t drive over it or close a
door on it. Damaged cords increase the risk of
electric shock.
When operating a vacuum cleaner outside,
use an outdoor extension cord marked “WA” or “W”. These cords are rated for outdoor
use and reduce the risk of electric shock. Refer
to Recommended sizes of Extension Cords in the
Accessory section of this manual.
Personal Safety and Vac-
uum Cleaner Use
Stay alert, watch what you are doing and use
common sense when operating a vacuum
cleaner. Do not use vacuum cleaner while tired
4
Page 5

or under the infl uence of drugs, alcohol, or medication. A moment of inattention while operating
vacuum cleaner may result in serious personal
injury.
Avoid accidental starting. Be sure vacuum
cleaner and tool switches are OFF before
plugging in or putting vacuum cleaner
switch into power tool activation mode or
fi lter cleaning mode. Do not keep power tool
plugged into the vacuum cleaner’s power
tool outlet during normal vacuuming. Plug-
ging in vacuum cleaners or tools that have the
switch ON invites accidents.
Do not overreach. Keep proper footing and
balance both for you and the vacuum cleaner
at all times. Use extra care when cleaning on
stairs. Proper footing and balance enables bet-
ter control of the vacuum cleaner in unexpected
situations.
Do not vacuum burning, smoking or smoldering things like cigarettes, matches or
hot ashes. Fire inside the vacuum cleaner tank
may occur.
Do not use to vacuum fl ammable liquids,
alcohol, gases, or explosive dusts, like gasoline or other fuels, lighter fl uid, varnish,
polyurethane coatings, cleaners, oil-based
paints, natural gas, hydrogen, coal dust,
magnesium dust, grain dust, or gun powder.
Electric motors create sparks which may ignite
the dust or fumes.
Dress properly. Do not wear loose clothing
or jewelry. Contain long hair. Keep your
hair, clothing, and gloves away from moving parts. Loose clothes, jewelry, or long hair
can be caught in moving parts, hose, and suction
nozzles. Keep handles dry, clean and free from oil
and grease.
Do not hold the hose against any body parts
during operation.
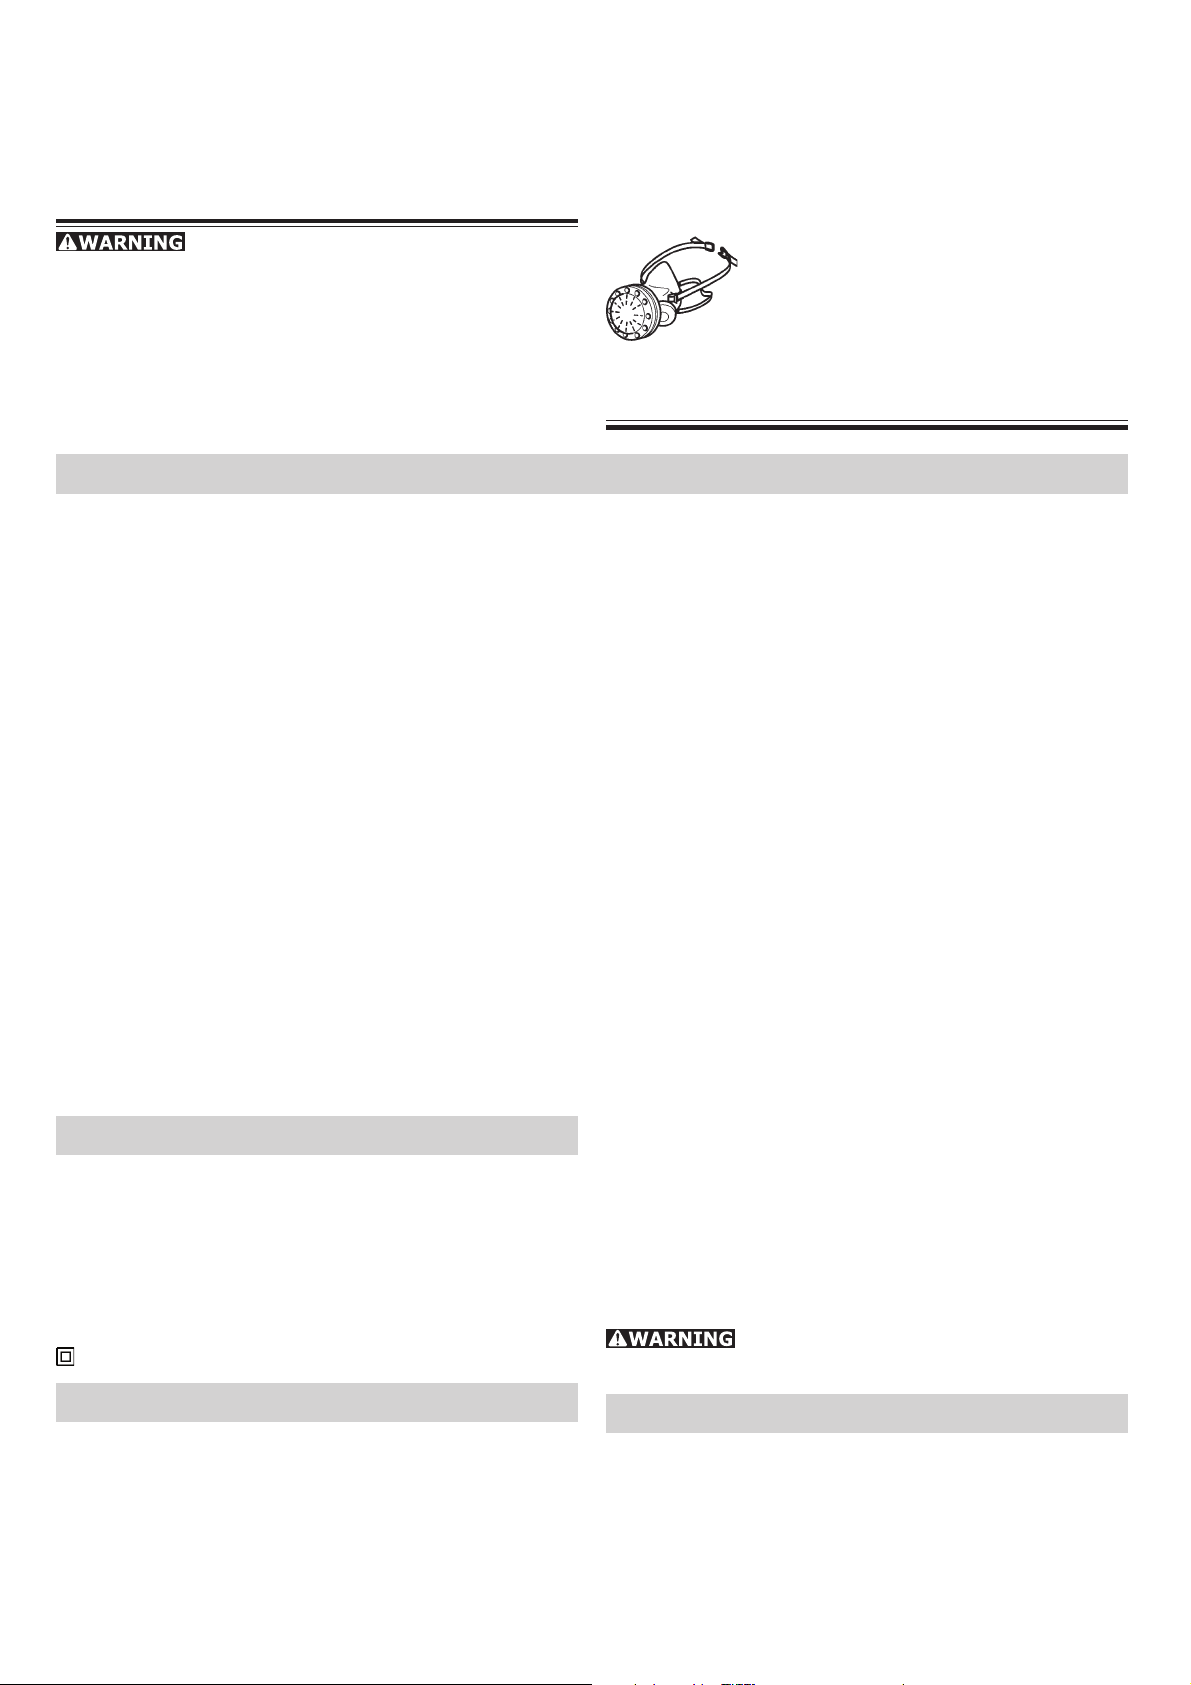
Use safety equipment. Always wear eye and
hearing protection. Dust mask, non-skid safety
shoes, hard hat, or hearing protection must be
used for appropriate conditions.
Not suitable to vacuum hazardous or toxic
substances or dusts e.g. asbestos. The fi lters
will not be able to capture all particles and may
exhaust them back into the environment.
Vacuum Cleaner Safety Rules
Vacuum cleaner Care
Do not use vacuum cleaner if switch does
not turn it ON or OFF. Any vacuum cleaner that
cannot be controlled with the switch is dangerous
and must be repaired.
Disconnect the plug from the power source
before making any adjustments, changing
accessories, or storing the vacuum cleaner.
Such preventive safety measures reduce the risk
of starting the vacuum cleaner accidentally.
Never connect a tool with a rating greater
than the maximum amperes listed on the
receptacle. This vacuum cleaner has a power tool
outlet for use in conjunction with other appliances
such as sanders, jigsaws and planers; tools with
greater ratings may cause a fi re.
Do not vacuum dust when liquid/fl uid is
contained in the vacuum cleaner tank. Do
not vacuum liquids/fl uids when dust is in
the tank. In either case empty the tank and/or
remove dust bag before use so that dust does not
cake and harden inside the tank.
Dry fi lters completely after wet vacuuming
or use a second dry fi lter set for dust vacuuming. Damp or wet fi lters will cake with dust or
develop mold or mildew.
Store idle vacuum cleaner out of reach
of children and other untrained persons.
Vacuum cleaners are dangerous in the hands of
untrained users.
Maintain vacuum cleaner with care. Properly
maintain vacuum cleaner to keep hose unobstructed. Do not put any object into open-
ings. Do not use with any opening blocked;
keep free of dust, lint, hair and anything that
may reduce air fl ow. Any alteration or modifi -
cation is a misuse and may result in a dangerous
condition.
Check for misalignment or binding of moving parts, breakage of parts, and any other
condition that may affect the vacuum cleaners operation. If damaged, have the vacuum
cleaner serviced before using. Poorly main-
tained vacuum cleaners cause many accidents.
Develop a periodic maintenance schedule for your
vacuum cleaner.
Use only accessories that are recommended
by the manufacturer for your model. Accesso-
ries that may be suitable for one vacuum cleaner
may become hazardous when used on another
vacuum cleaner.
Service
Only qualifi ed repair personnel must perform
vacuum cleaner service. Service or mainte-
nance performed by unqualifi ed personnel could
result in a risk of injury. For example: internal
wires may be misplaced or pinched, safety guard
return springs may be improperly mounted.
When servicing a vacuum cleaner, use only
identical replacement parts. Follow instructions in the Maintenance section of this
5
Page 6
manual. Use of unauthorized parts or failure to
follow the Maintenance Instructions may create
a risk of electric shock or injury. Certain cleaning
agents such as gasoline, carbon tetrachloride,
ammonia, etc. may damage plastic parts.
• crystalline silica from bricks and cement and
other masonry products, and
• arsenic and chromium from chemically-treated
lumber.
The risk from these exposures varies, depending
on how often you do this type of work.
Various dust created by power sanding, sawing, grinding, drilling and other construction activities contains chemicals known (to the
State of California) to cause cancer, birth defects
or other reproductive harm. Some examples of
these chemicals are:
• lead from lead-based paints,
To reduce your exposure to these
chemicals: work in a well ventilated
area, and work with approved safety
equipment, such as dust masks that
are specially designed to fi lter out microscopic particles. Wash hands after
handling.
Technical data
Power consumption ..........................................................................................350 - 1200 W
Connected load to appliance plug socket max. ............................................................. 1200 W
Total connected load max. ......................................................................................... 2400 W
Volume fl ow (air) max., turbine .............................................................228 m
Vacuum max., turbine ............................................................................................. 23000 Pa
Filter surface ....................................................................................14000 cm
Suction hose, diameter x length ........................................ 27 mm x 3.5 m (1.06 in. x 11.48 ft.)
Dimensions L x W x H:
CT 22 E HEPA ..................................................... 625 x 380 x 440 mm (24.6 x 15 x 17.3 in.)
CT 33 E HEPA ..................................................... 625 x 380 x 550 mm (24.6 x 15 x 21.6 in.)
Container capacity:
CT 22 E HEPA ...............................................................................................22 l (5.7 gal.)
CT 33 E HEPA ...............................................................................................33 l (8.6 gal.)
Weight:
CT 22 E HEPA ............................................................................................12 kg (26.4 lbs)
CT 33 E HEPA ............................................................................................14.5 kg (32 lbs)
Power cable length ........................................................................................ 7.5 m (24.6 ft.)
Protection type ............................................................................................................IP X4
3
/h (8.2 cu.ft./h)
2
(2170 sq.in.)
The specifi ed illustrations can be found at the
beginning of the operating instructions.
Symbols
V volts
A amperes
Hz hertz
W watt
~ alternating current
n
no load speed
0
Class II Construction
Intended use
The vacuum cleaner is designed for use as specifi ed for the aspiration and evacuation of non-noxious dusts, dirt, sand, shavings etc..
The vacuum cleaner is designed as specifi ed for
vacuuming water.
The vacuum cleaner is designed in accordance
with IEC 60335-1 and IEC 60335-2-69 for a higher
loading in industrial use.
The fi ltering performance of the overall unit, which
is fi tted with a HEPA fi lter element (493334), corresponds to HEPA quality H 13 (medium degree
of fi ltration 99.95 %).
All CT extractors fi tted with the HEPA fi lter element
(493334) have HEPA certifi cation both for the fi lter
material and the whole dust extractor.
The user is liable for damage and
injury resulting from incorrect usage!
Connections
Before start-up:
The accessories are delivered in the container
(2.10), and must be removed prior to initial
operation.
6
Page 7

Electrical connection
The operating voltage and frequency shown on
the specifi cation plate must be the same as the
mains power voltage (wall socket).
Make sure that the vacuum cleaner is
switched off when you plug the power cable in.
The antistatic system (AS)
Friction in the suction hose causes electrostatic
charges which can result in unpleasant electric
shocks for the operator. In order to conduct these
static charges to earth, the extraction units are
provided with an antistatic system as a standard
feature. However, antistatic hoses and accessories
have to be used in this case.
The antistatic function will only work if the plug is
plugged into a totally earthed socket.
Temperature control
A temperature fuse switches the dust extractor off
before this reaches a critical temperature to protect against overheating - switch dust extractor off
and leave for around 5 minutes to cool down.
If the dust extractor still cannot be switched back
on, please consult a Festool-service centre.
Connecting the suction hose
Connect the suction hose at the extraction opening (1.7).
Connecting an electric tool
Equipment
• Tools or accessories can be stowed in the storage
compartments (1.6, not with CT 22 E HEPA).
• A systainer can be fi xed on the shelf with the
two clamps (1.1).
• An air blast is obtained by inserting a suction
hose in the blast opening (2.7).
• Stand / Brake: the wheels can be blocked by
the brakes (2.8), thus preventing the vacuum
cleaner from rolling away unexpectedly.
Operation
On/off switch
In position O (1.3) the vacuum cleaner is switched
off and the appliance plug socket (1.2) is dead.
Two modes of operation are possible:
a) Switch position „MAN“
The appliance plug socket is dead.
The cleaner motor starts immediately.
b) Switch position „Auto“
Before turning the switch to the
„Auto“ position, ensure that the tool connected to
the appliance plug socket is switched off.
The appliance plug socket is live.
The cleaner motor starts only when the tool con-
nected to the appliance plug socket is switched
on.
Observe the maximum connected load on the appliance plug socket (see “Technical Data“)!
Make sure that the electric tool is
switched off when plugging it in and unplugging
it.
Connect the electric tool to the appliance plug
socket (1.2).
Connecting pneumatic tools
Make sure that the pneumatic tool
is switched off when plugging it in and unplugging it.
When the compressed-air module (1.9) (452829)
is fi tted, the automatic cut-in of the appliance
also operates in conjunction with compressed-air
tools.
We also recommend fi tting of the VE supply unit
(452797). The supply unit fi lters and oils the
compressed air and allows the air pressure to be
regulated.
An IAS connecting piece (454757) is available for
connecting Festool compressed-air tools with the
IAS system.
To ensure trouble-free functioning of the automatic cut-in, the operating pressure of the tool
must be 6 bar.
Suction force regulator
The suction force regulator (1.4) can be used to
vary the suction capacity. This permits a precise
adaptation to different substances to be picked
up.
Opening/closing the
vacuum cleaner
– Open retaining clamps (2.2) ,
– Raise upper part (2.4) until support catch (2.5)
engages.
Follow the reverse order to close the appliance.
You must raise the upper part slightly before depressing or disengaging the support.
Emptying the dirt container
Always remove the upper part of
the vacuum cleaner before emptying the dirt
container (2.10)!
– Open the vacuum cleaner,
– Raise the upper part slightly, depress the support
(2.5),
– Raise the upper part to the stop (vertical posi-
tion),
7
Page 8

– Remove the upper part by moving it forwards
horizontally,
– Empty the dirt container,
– Replace the upper part.
that both upper-part pins are fully inserted in
the recesses (1.5)!
– Close the vacuum cleaner.
Make sure
Application
Vacuuming dry materials
Before using the vacuum cleaner to evacuate dry
substances, a fi lter bag must always be inserted
in the container. Then the evacuated material can
be disposed of easily.
The fi lter element becomes damp after evacuating
liquids. A damp fi lter element suffers more wear
and tear if it is used for dry materials. Accordingly,
the fi lter element should be dried or replaced with
a dry one before dry operation.
Vacuuming liquids
Do not evacuate combustible liq-
uids!
If foam or liquid escapes, stop work
immediately and empty the dirt container.
The HEPA fi lter element shall only be
used for extracting dry materials.
The fi lter bag has to be removed before evacuat-
ing liquids. We recommend use of a special wet
fi lter (452924).
When the maximum fi lling level is reached, a
bag-full indicator (2.12) automatically interrupts
extraction.
Filter
– Remove the used fi lter bag (see printed text on
fi lter bag),
– Dispose of the used fi lter bag in accordance with
statutory requirements,
– Thoroughly clean the dirt container (2.10) and
the space (3.1) for suction turbine (wipe down
with a damp cloth),
– Insert new fi lter bag (see printed text on fi lter
bag).
fi rmly onto the dust extraction fi tting (3.2)!
– Close the vacuum cleaner.
Changing the fi lter element (2.3)
Order no. (CT 22 E, CT 33 E):
Standard fi lter element: 452923
HEPA fi lter element: 493334
Do not operate machine without a fi lter element.
This may damage the motor.
– Open the vacuum cleaner,
– Remove the used fi lter element (see printed text
on the fi lter element packaging),
– Dispose of the used fi lter element in a sealed,
dust-tight bag in accordance with statutory requirements,
– Thoroughly clean dirt container (2.10) and space
(3.1) for the suction turbine (wipe down with a
damp cloth),
– Fit a new fi lter element (see printed text on the
fi lter element packaging),
– Close vacuum cleaner.
Press the fi lter bag sleeve (3.3)
Cleaning the fi lter element
To clean, move the handle (2.1) to and fro about
10 times. N.B.: You need to clean the fi lter element only if you use the vacuum cleaner without
a fi lter bag.
Changing the fi lter
During the following procedure, take
care not to raise dust more than is unavoidable.
Moisten the fi lter element with a water spray before removing it.
Check the fi ll level of the fi lter bag at regular
intervals. A full fi lter bag shall be replaced immediately.
Check the fi lter element for damage every time
the fi lter bag is changed. Replace damaged fi lter
elements immediately.
Always insert a fi lter bag when using a HEPA fi lter
element.
Changin the fi lter bag (3.4)
Order no.:
CTL 22 E: 452970
CTL 33 E: 452971
– Open the vacuum cleaner,
After fi nishing work
• Switch off the cleaner and pull the Plug of the
mains lead out of the Plug socket.
• Wind up the mains lead (2.6).
• Empty dirt tank.
• Clean the vacuum cleaner inside and outside by
suction and wiping.
• Deposit the appliance in a dry room, safe from
unauthorised use.
Maintenance and care
Always remove the power supply plug
from the socket before carrying out any work on
the machine.
All maintenance and repair work
which requires the motor casing to be opened
may only be carried out by an authorised service
centre.
8
Page 9

A safety test is to be carried out at least once a
year by the manufacturer or an instructed person,
e.g. for possible damage to the fi lter and leaks
in the appliance, and to ensure that the control
devices are functioning.
Accessories, fi lter
• A hose coupling (1.10) (487072) can be plugged
into the opening (1.8). The suction hose is connected to the tool from above with the hose
coupling. Alternatively, a hose clip (452998) can
be fi tted for coiling the suction hose.
• The push handle (2.11) (452921) makes the
vacuum cleaner easier to move. Accessories
(e.g. vacuum accessories) can be fi xed to the
push handle batten (2.9).
The accessory and fi lter order number can be
found in your Festool catalogue or on the Internet
under www.festool-usa.com.
Warranty
Conditions of 1+2 Warranty
You are entitled to a free extended warranty (1
year + 2 years = 3 years) for your Festool power
tool. Festool shall be responsible for all shipping
costs during the fi rst year of the warranty. During the second and third year of the warranty the
customer is responsible for shipping the tool to
Festool. Festool will pay for return shipping to the
customer using UPS Ground Service. All warranty
service is valid 3 years from the date of purchase
on your receipt or invoice.
Festool Limited Warranty
This warranty is valid on the pre-condition that the
tool is used and operated in compliance with the
Festool operating instructions. Festool warrants,
only to the original consumer purchaser, that the
specifi ed tool will be free from defects in materials and workmanship for a term of one year from
the date of procurement. Festool makes no other
warranty, express or implied, for Festool portable
power tools. No agent, representative, distributor,
dealer or employee of Festool has the authority
to increase or otherwise change the obligations
or limitations of this warranty. The obligations of
Festool in its sole discretion under this warranty
shall be limited to the repair or replacement of
any Festool portable power tool that is found to be
defective as packaged with the User Manual.
Excluded from coverage under this warranty are:
normal wear and tear; damages caused by misuse, abuse or neglect; damage caused by anything
other than defects in material and workmanship.
This warranty does not apply to accessory items
such as circular saw blades, drill bits, router bits,
jigsaw blades, sanding belts, and grinding wheels.
Also excluded are “wearing parts”, such as carbon
brushes, lamellas of air tools, rubber collars and
seals, sanding discs and pads, and batteries.
Festool portable power tools requiring replacement or repair are to be returned with the receipt
of purchase to Festool (call 800-554-8741 for
address details).
IN NO EVENT SHALL FESTOOL BE LIABLE
FOR ANY CONSEQUENTIAL OR INCIDENTAL
DAMAGES FOR BREACH OF THIS OR ANY
OTHER WARRANTY, EXPRESSED OR IMPLIED
WHATSOEVER. ALL WARRANTIES IMPLIED
BY STATE LAW, INCLUDING THE IMPLIED
WARRANTIES OF MERCHANT ABILITY AND
FITNESS FOR A PARTICULAR PURPOSE, ARE
HEREBY LIMITED TO THE DURATION OF
THREE YEARS.
Some states in the U.S. and some Canadian provinces do not allow the limitations on how long
an implied warranty lasts, so the above limitation may not apply to you. With the exception of
any warranties implied by state or province law
as hereby limited, the foregoing express limited
warranty is exclusive and in lieu of all other warranties, guarantees, agreements and similar obligations of Festool.
This warranty gives you specifi c legal rights and
you may also have other rights which vary from
state to state in the U.S. and province to province
in Canada.
9
Page 10

Table des matières
Régles de sécurité ................................. 10
Caractéristiques techniques .................. 12
Symbole ................................................ 13
Utilisation conforme .............................. 13
Connexions ...........................................13
Raccordement électrique ......................... 13
Raccordement du tuyau fl exible d'aspiration 13
Raccordement d’un outil électrique ........... 13
Raccordement de l‘outil pneumatique .......13
Équipement ........................................... 14
Manipulation ......................................... 14
Interrupteur de marche/arrêt ..................14
Réglage de la puissance d’aspiration ......... 14
Ouverture/fermeture de l’aspirateur ......... 14
Vidage de la cuve de collecte ...................14
Utilisation .............................................. 14
Aspiration de matières sèches .................. 14
Aspirations de liquides ............................ 14
Filtre .....................................................14
Changement de fi ltre ..............................14
Nettoyage de l’élément de fi ltre ...............15
Apres le travail ...................................... 15
Entretien et maintenance ...................... 15
Accessoires, fi ltre .................................. 15
Garantie ................................................ 15
Régles de sécurité
Veuillez lire et comprendre
toutes les consignes. Si on n‘observe pas toutes
les consignes décrites ci-dessous, il y a risque
de choc électrique, d’incendie et/ou de blessures
corporelles graves.
CONSERVEZ CES CONSIGNES
Régles de sécurité générales
Aire de travail
Maintenez l’aire de travail propre et bien
éclairée. Les risques d’accident sont plus élevés
quand on travaille dans un endroit encombré ou
sombre.
N’utilisez pas d’aspirateurs dans des atmosphères explosives, comme par exemple
en présence de gaz, poussières ou liquides
infl ammables. Les appareils produisent des
étincelles qui risquent d’enfl ammer les poussières
ou les vapeurs.
Éloignez les curieux, les enfants et les visiteurs quand vous vous servez d’un aspirateur. Un aspirateur n’est pas un jouet et ne doit
pas être utilisé comme tel. Il faut être très attentif
quand des enfants se trouvent à proximité ou
l’utilisent.
Sécurité électrique
Cet aspirateur a été conçu exclusivement
pour aspirer des déchets secs ou humides
à l‘intérieur.
La prise pour outil électroportatif est munie
d’une mise à la terre, par conséquent l’aspirateur doit être branché sur une prise correctement installée et reliée à la terre selon
tous les règlements et décrets en vigueur.
Ne démontez jamais la broche de mise à la
terre, ne modifi ez jamais la fi che. N’utilisez
pas d’adaptateur de prise. Renseignez-vous
auprès d’un électricien qualifi é si vous avez
des doutes quant à la mise à la terre correcte
de la prise. Si l’aspirateur venait à présenter un
défaut électrique ou une avarie, la mise à la terre
présente un passage de faible résistance qui canalise le courant et l’éloigne de l’utilisateur.
N’enfoncez pas d’objets tels que trombones
ou tournevis dans la prise pour outil électroportatif. La prise est sous tension quand
l’aspirateur est branché sur une alimentation
électrique et que l’interrupteur est soit sur le
mode d’alimentation d’outil électroportatif, soit
sur le mode de nettoyage du fi ltre. Il y a risque
de choc électrique.
Évitez tout contact de votre corps avec des
surfaces reliées à la terre tels que tuyaux,
radiateurs, gazinières ou réfrigérateurs. Le
risque de choc électrique augmente si votre corps
est relié à la terre. Si vous ne pouvez pas éviter
d’utiliser l’aspirateur dans des endroits humides,
vous devez avoir un disjoncteur différentiel de
détection de défaut de masse dans le circuit d’alimentation de votre aspirateur. Vous améliorerez
votre sécurité personnelle si vous portez des gants
et des chaussures d’électricien en caoutchouc.
N’exposez pas l’aspirateur à la pluie ou à
des conditions humides. Cet aspirateur peut
être utilisé pour aspirer des liquides ininfl ammables mais il n’est pas conçu pour être trempé ou
immergé dans un liquide. Il y a risque de choc
électrique.
Ne manipulez pas la fi che ni l’appareil avec
les mains mouillées. Il y a risque de choc élec-
trique.
Ne maltraitez pas le cordon. Ne vous en
servez jamais pour transporter l’aspirateur,
pour le tirer ou pour arracher la fi che de la
prise. Éloignez le cordon de la chaleur, des
huiles, des arêtes coupantes ou des pièces
mobiles. Remplacez immédiatement tout
cordon abîmé. Ne roulez pas dessus, ne le
10
Page 11

pincez pas dans une porte. Les cordons abîmés
augmentent les risques de choc électrique.
Si vous utilisez un aspirateur à l’extérieur,
utilisez une rallonge pour usages extérieurs
repérée ‘W-A’ ou ‘W’. Ces rallonges sont faites
pour être utilisées à l’extérieur et réduisent le
risque d’électrocution. Consultez le chapitre ‘accessoires’ de ce mode d’emploi pour les tailles de
rallonges électriques recommandées.
Sécurité personnelle et uti-
lisation de l’aspirateur
Restez concentré, faites attention à ce que
vous faites, et servez-vous de votre bon sens
lorsque vous utilisez un aspirateur. N‘utilisez
pas l’aspirateur quand vous êtes fatigué ou sous
l’emprise de drogues, d’alcool ou de médicaments.
Quand on utilise un aspirateur, un moment d’inattention est suffi sant pour causer des blessures
corporelles graves.
Évitez les démarrages intempestifs. Assurez-vous que l’interrupteur de l’aspirateur et
celui de l’outil sont en position arrêt (OFF)
avant de brancher l’aspirateur ou de mettre l’interrupteur de l’aspirateur en mode
d’alimentation d’outil électroportatif ou en
mode de nettoyage des fi ltres. Ne laissez pas
l’outil électroportatif branché sur la prise de
l’aspirateur quand vous vous servez de ce
dernier pour aspirer normalement. Brancher
des aspirateurs ou des outils avec l’interrupteur
en position «marche» (ON) présente des risques
d’accident.
Ne vous penchez pas. Conservez toujours
une bonne assiette et un bon équilibre pour
vous-même et pour l’aspirateur. Soyez par-
ticulièrement prudent quand vous passez l’aspirateur dans un escalier. Une bonne assise et un
bon équilibre permettent un meilleur contrôle de
l’aspirateur dans des situations inattendues.
N’aspirez pas d’objets en feu, émettant de
la fumée ou rougeoyant tels que cigarettes,
allumettes ou cendres chaudes. Il y a risque
qu’un incendie se déclare dans le réservoir de
l’aspirateur.
N’utilisez pas l’aspirateur pour aspirer des
liquides infl ammables, de l’alcool, des gaz
ou des poussières explosives telles que de
l’essence ou autres carburants, de l’essence
à briquet, du vernis, de l’enduit polyuréthane, des nettoyants, des peintures à base
d’huile, du gaz naturel, de l’hydrogène, de
la poussière de charbon, de la poussière de
magnésium, de la poussière de grain ou de
la poudre à canon. Les moteurs électriques pro-
duisent des étincelles qui risquent d’enfl ammer la
poussière ou les fumées.
Habillez-vous de manière appropriée. Ne portez pas de vêtements amples ou de bijoux.
Attachez les cheveux longs. N’approchez pas
les cheveux, les vêtements ou les gants des
pièces en mouvement. Les vêtements amples,
les bijoux ou les cheveux longs risquent d’être
happés par les pièces en mouvement ou d’être
aspirés par les tuyaux ou les buses d’aspiration.
Maintenez les poignées sèches, propres et exemptes d’huile et de graisse.
N’appuyez pas le tuyau contre votre corps
pendant l’utilisation
Utilisez des équipements de sécurité. Portez
toujours une protection oculaire et auditive.
Si les conditions le demandent, il faut porter un
masque à poussière, des chaussures de sécurité
antidérapantes, un casque de chantier ou une
protection auditive.
Ne convient pas à l’aspiration de substances ou poussières toxiques ou dangereuses
comme l’amiante par exemple. Les fi ltres ne
sont pas conçus pour bloquer toutes les particules
et risquent de les rejeter dans l’atmosphère.
Consignes de sécurité
pour les aspirateurs
Entretien de l’aspirateur
N‘utilisez pas l’aspirateur si l’interrupteur
ne peut le mettre en marche ni l’arrêter. Un
aspirateur qui ne répond pas à la commande de
l’interrupteur est dangereux et doit être réparé.
Débranchez l’aspirateur avant tout réglage,
changement d’accessoire ou avant de le ranger. De telles mesures de prévention réduisent le
risque de démarrage intempestif de l’aspirateur.
Ne branchez jamais un outil dont la consommation est supérieure à la valeur maximale
indiquée en ampères sur la prise. Cet aspira-
teur est muni d’une prise pour outils électroportatifs qui permet de l’utiliser avec d’autres appareils
tels que ponceuses, scies sauteuses et rabots. Si
on utilise des outils plus puissants, il y a risque
d’incendie.
N’aspirez pas de poussière quand il y a un
liquide ou un fl uide dans le réservoir de
l’aspirateur. N’aspirez pas de liquides ou de
fl uides quand il y a de la poussière dans le
réservoir. Dans les deux cas, videz le réservoir
ou enlevez le sac à poussière avant usage pour
éviter que la poussière ne s’agglutine et ne durcisse dans le réservoir.
Séchez les fi ltres complètement après avoir
aspiré un liquide ou utilisez un jeu de fi ltres
secs de rechange pour aspirer des poussières. La poussière tend à s’agglutiner sur les
11
Page 12

fi ltres mouillés ou humides et à les boucher et ils
risquent aussi de moisir.
Rangez l’aspirateur hors de portée des enfants ou autres personnes inexpérimentées
quand vous ne l‘utilisez pas. Les aspirateurs
sont dangereux entre les mains d’utilisateurs
inexpérimentés.
Entretenez l’aspirateur avec soin. Entretenez-le correctement pour éviter que le tuyau
ne se bouche. Ne placez aucun objet dans
les orifi ces. N’utilisez pas l’aspirateur si un
des orifi ces est bloqué; dégagez-les de toute
poussière, peluche, cheveux ou tout autre
objet qui risque de réduire le débit d’air. Tout
changement ou modifi cation de l’appareil constitue une mauvaise utilisation et risque de résulter
en une situation dangereuse.
Vérifi ez que les pièces mobiles sont alignées
et qu’elles ne coincent pas. Vérifi ez qu’aucune pièce n’est cassée, et que rien d’autre
ne risque d’affecter le fonctionnement de
l’aspirateur. Si l’aspirateur est abîmé, faitesle réparer avant de l’utiliser. Les aspirateurs
mal entretenus causent de nombreux accidents.
Développez un calendrier d’entretien périodique
pour votre aspirateur.
N’utilisez que des accessoires qui sont recommandés par le fabricant de votre modèle.
Les accessoires qui conviennent à un aspirateur
donné peuvent présenter un danger s’ils sont
utilisés avec un autre aspirateur.
Entretien
Seul les personnels d’entretien qualifiés
sont habilités à effectuer l’entretien de l’aspirateur. Tout service ou entretien effectué par
une personne non qualifi ée peut résulter en un
risque de blessure. Par exemple : les fi ls internes
peuvent être mal placés ou pincés, les ressorts de
rappel des capots de sécurité peuvent être montés
incorrectement.
Lors de l’entretien d’un aspirateur, utilisez
exclusivement des pièces de rechange identiques. Suivez les instructions se trouvant au
chapitre «Entretien» de ce mode d’emploi.
Si vous utilisez des pièces non agréées ou si vous
n’observez pas les instructions d’entretien, il se
peut que vous causiez un risque de choc électrique
ou de blessure. Certains produits de nettoyage
tels que l’essence, le tétrachlorure de carbone,
l’ammoniaque, etc. risquent d’endommager les
pièces plastiques.
Certaines poussières créées
par le ponçage mécanique, le sciage, le meulage,
le perçage et autres activités reliées à la construction contiennent des substances chimiques connues (dans l’État de la Californie) comme pouvant
causer le cancer, des anomalies congénitales ou
représenter d’autres dangers pour la reproduction.
Voici quelques exemples de telles substances:
• plomb provenant de peintures à base de
plomb,
• silice cristallisée utilisée dans les briques, le
ciment et autres matériaux de maçonnerie, et
• arsenic et chrome du bois d’œuvre traité avec
un produit chimique.
Le risque d’exposition à de tels produits varie
selon la fréquence à laquelle vous faites ce genre
de travail.
Pour réduire les risques d’exposition à
ces substances chimiques : travaillez
dans un endroit adéquatement ventilé
et utilisez un équipement de sécurité
approuvé, tel que masques antipoussières spécialement conçus pour fi ltrer
les particules microscopiques.
Caractéristiques techniques
Puissance consommée ......................................................................................350 - 1200 W
Puissance maxi. connectée à la prise de l’appareil ........................................................ 1200 W
Puissance connectée totale maximale ......................................................................... 2400 W
Débit (air) maxi., turbine ......................................................................228 m
Dépression maxi., turbine ........................................................................................ 23000 Pa
Surface du fi ltre ...............................................................................14000 cm
Tuyau d’aspiration, diamètre x longueur ............................. 27 mm x 3.5 m (1.06 in. x 11.48 ft.)
Dimensions P x L x A:
CT 22 E HEPA ..................................................... 625 x 380 x 440 mm (24.6 x 15 x 17.3 in.)
CT 33 E HEPA ..................................................... 625 x 380 x 550 mm (24.6 x 15 x 21.6 in.)
Capacité de la cuve:
CT 22 E HEPA ...............................................................................................22 l (5.7 gal.)
CT 33 E HEPA ...............................................................................................33 l (8.6 gal.)
12
3
/h (8.2 cu.ft./h)
2
(2170 sq.in.)
Page 13

Poids:
CT 22 E HEPA ............................................................................................12 kg (26.4 lbs)
CT 33 E HEPA ............................................................................................14.5 kg (32 lbs)
Longueur du câble du secteur ......................................................................... 7.5 m (24.6 ft.)
Degré de protection ......................................................................................................IP X4
Les fi gures indiquées se trouvent au début du
mode d’emploi.
Symbole
V Volt
A Ampère
Hz Hertz
W Watt
~ Tension alternative
n
Vitesse de rotation à vide
0
Classe II conception
Utilisation conforme
Les aspirateurs sont conçus pour aspirer des poussières, des impuretés, du sable, des copeaux etc.
qui ne sont pas nocifs pour la santé.
Les aspirateurs sont aptes à aspirer de l’eau.
Conformément à IEC 60335-1 et IEC 60335-2-
69, les aspirateurs sont conçus pour supporter de
fortes sollicitations en utilisation professionnelle.
Les performances de fi ltrage du système dans
son ensemble, équipé de l‘élément fi ltre HEPA
(493334), correspondent à la qualité HEPA H 13
(degré de séparation moyen 99,95 %).
Tous les aspirateurs CT équipés de l‘élément fi ltre
HEPA (493334) possèdent une certifi cation HEPA
tant pour le matériel fi ltrant que pour l‘aspirateur
dans son ensemble.
L‘utilisateur est responsable
des dégâts ou accidents qu‘il peut provoquer en
ne respectant pas les dispositions de sécurité.
Connexions
trostatiques, l’aspirateur est équipé en série d’un
système antistatique. Il est cependant nécessaire
d’utiliser un tuyau antistatique.
La fonction antistatique est uniquement garantie
si la fi che a été branchée sur une prise de courant
dotée d‘une protection de mise à la terre.
Protection thermique
Une protection contre les surchauffes inactive
l’aspirateur avant que la température critique
soit atteinte - inactiver l’aspirateur et le laisser se
refroidir pendant 5 minutes environ.
Si, à la suite de cette phase de refroidissement, il
n’est pas possible de remettre l’aspirateur en marche, veuillez contacter un atelier SAV Festool.
Raccordement du tuyau
fl exible d'aspiration
Raccordez le tuyau fl exible d'aspiration à l‘ouverture d‘extraction (1.7).
Raccordement d’un
outil électrique
Attention! Respecter la valeur de raccordement
maximale indiquée sur la prise de courant intégrée
(voir „caractéristiques techniques“)!
Veiller à ce que l’outil soit ar-
rêté lors du branchement et du débranchement.
Raccorder l’outil électrique à la prise de courant
intégrée (1.2).
Raccordement de l‘outil
pneumatique
Avant la mise en service :
Les accessoires sont livrés dans le conteneur
(2.10); ils doivent être retirés avant la première
utilisation.
Raccordement électrique
La tension secteur et la fréquence doivent correspondre aux indications sur la plaque signalétique!
Avant de brancher le câble du
secteur, vérifi ez que l’aspirateur est coupé.
Le système Antistatic (AS)
L’aspiration provoque des charges statiques par
frottement dans le tuyau d’aspiration. L’utilisateur peut les ressentir par des chocs électriques
désagréables. Pour décharger ces charges élec-
Vérifi ez que l‘outil pneumatique est inopérant avant tout montage ou démontage.
Grâce au montage du module pneumatique (1.9)
(452829), la mise en marche automatique de l’aspirateur fonctionne également avec des appareils
pneumatiques.
Nous recommandons en outre le montage de
l’unité d’alimentation VE (452797). Celle-ci fi ltre et
huile l’air comprimé et règle la pression de l’air.
Un raccord IAS (454757) est disponible pour le
raccordement d’outils pneumatiques Festool.
La pression de service de l’outil doit atteindre 6
bar pour garantir le parfait fonctionne-ment de la
mise en marche automatique.
13
Page 14

Équipement
• Des outils et accessoires peuvent être rangés
dans les compartiments (1.6, pas sur le CT 22
E HEPA).
• Un systainer peut être fi xé sur le plateau avec
deux fermetures (1.1).
• En branchant un tuyau d’aspiration dans l’ouverture de sortie d’air (2.7), vous disposez d’air de
souffl age.
• Béquille / Frein: les freins (2.8) permettent de
bloquer les roues etempêchent ainsi l’aspirateur
de rouler.
– pivoter la partie supérieure vers le haut jusqu’en
butée (position verticale),
– retirer la partie supérieure horizontalement vers
l’avant,
– viser la cuve,
– mettre la partie supérieure en place.
Introduire les deux goujons
de la partie supérieure complètement dans les
évidements (1.5)!
– fermer l’aspirateur.
Utilisation
Manipulation
Interrupteur de marche/arrêt
En position O (1.3), l’aspirateur est arrêté et la
prise de l’appareil (1.2) n’est pas sous tension.
Deux modes de fonctionnement sont possibles:
a) Commutateur sur position „MAN“
La prise de l’appareil n’est pas sous tension.
Le moteur d’aspiration démarre immédiate-
ment.
b) Commutateur sur position „Auto“
Avant de tourner le commu-
tateur sur la position „Auto“, veiller à ce que
l’appareil raccordé soit arrêté.
La prise de l’appareil est conductrice.
Le moteur d’aspiration démarre à la mise sous
tension de l’outil raccordé.
Réglage de la puis-
sance d’aspiration
Le réglage de la puissance d’aspiration (1.4)
permet de varier la puissance d’aspiration, ce qui
permet une adaptation précise aux différentes
matières à aspirer
Aspiration de matières sèches
Insérer toujours un sac fi ltre dans la cuve avant
d’aspirer des matières sèches. Les matières aspirées sont alors faciles à éliminer.
Après l’aspiration de liquides, l’élément de fi ltre
est humide. Un élément de fi ltre humide s’encrasse plus rapidement lorsqu’on aspire des matières
sèches. C’est pourquoi il faut sécher l’élément de
fi ltre ou le remplacer par un élément sec avant
d’aspirer des matières sèches.
Aspirations de liquides
Il est interdit d’aspirer des
liquides infl ammables!
En cas de fuite de mousse ou
de liquide, interrompez immédiatement le travail
et videz la cuve.
L‘élément fi ltre HEPA ne doit
être utilisé que pour l‘aspiration de substances
sèches.
Retirer le sac fi ltre avant d’aspirer des liquides.
Nous recommandons l’utilisation d’un fi ltre à liquides spécial (452924).
Lorsque le niveau de remplissage maximum est
atteint, les indicateurs de niveau (2.12) interrompent automatiquement l’aspiration.
Ouverture/fermetu-
re de l’aspirateur
– ouvrir les pinces de fermeture (2.2),
– pivoter la partie supérieure (2.4) vers le haut
jusqu’à ce que le support (2.5) encliquette.
La fermeture s’effectue dans l’ordre inverse. Il faut
soulever légèrement la partie supérieure avant de
pouvoir enfoncer ou dégager le support.
Vidage de la cuve de collecte
Il faut toujours retirer la partie
supérieure de l’aspirateur avant de vidanger la
cuve (2.10)!
– ouvrir l’aspirateur,
– soulever légèrement la partie supérieure, ap-
puyer sur le support (2.5),
Filtre
Changement de fi ltre
Lors des travaux suivants,
veiller à ne pas soulever inutilement des tourbillons de poussières. Avant le démontage, humidifi er l‘élément fi ltre par brumisation.
Contrôler régulièrement le niveau de remplissage
du sac fi ltre. Tout sac fi ltre plein doit être immédiatement remplacé.
Lors de tout remplacement du sac fi ltre, vérifi er
que l‘élément fi ltre n‘est pas endommagé. Tout
élément fi ltre endommagé doit être immédiatement remplacé.
Lorsqu‘un élément fi ltre HEPA est utilisé, un sac
fi ltre doit toujours être présent.
14
Page 15

Changer le sac fi ltre (3.4)
Référence:
CTL 22 E: 452970
CTL 33 E: 452971
– ouvrir l’aspirateur,
– sortir le sac fi ltre usagé (voir inscription sur le
sac fi ltre),
– éliminer le sac usagé conformément aux dispo-
sitions légales,
– nettoyer soigneusement la cuve (2.10) et l’es-
pace (3.1) de la turbine d’aspiration (essuyer
avec un chiffon humide),
– insérer un nouveau sac fi ltre (voir inscription
sur le sac filtre).
fortement le manchon de sac fi ltre (3.3) sur la
bouche d’aspiration (3.2) !
– fermer l’aspirateur.
Changer l‘élément fi ltre (2.3)
Référence (CT 22 E, CT 33 E):
Elément fi ltre standard: 452923
Elément fi ltre HEPA: 493334
Ne pas aspirer sans l’élément fi ltre! Ceci pourrait
endommager le moteur.
– ouvrir l’aspirateur,
– démonter l’élément de fi ltre usagé (voir inscrip-
tion sur l’emballage de l’élément de fi ltre),
– éliminer l’élément de fi ltre en l’enfermant dans
un sac hermétiquement fermé conformément
aux dispositions légales,
– nettoyer soigneusement la cuve (2.10) et l’es-
pace (3.1) de la turbine d’aspiration (essuyer
avec un chiffon humide),
– monter un nouvel élément de fi ltre usagé (voir
inscription sur l’emballage de l’élément de fi ltre),
– fermer l’aspirateur.
Enfoncer
Nettoyage de l’élément de fi ltre
Pour nettoyer cet élément, actionner la poignée
(2.1) environ 10 fois vers l’avant et l’arrière. Re-
marque : le nettoyage de l’élément de fi ltre est
uniquement nécessaire si l’aspirateur est utilisé
sans sac fi ltre.
Apres le travail
• Arrêter l’aspirateur et débrancher la fi che de la
prise secteur.
• Enrouler le câble d’alimentation (2.6).
• Vider la cuve à saleté.
• Nettoyer l’aspirateur à l’intérieur et à l’extérieur
par aspiration et essuyage.
• Entreposer l’appareil dans un local sec, protégé
contre une utilisation abusive.
Entretien et maintenance
Avant d‘entreprendre une quel-
conque intervention sur la machine, débrancher
la prise de courant!
Tout entretien ou réparation qui
nécessite l‘ouverture du capot du moteur ne doit
être entrepris que par un atelier autorisé.
Un contrôle technique de sécurité doit être effectué au moins une fois par an par le fabricant ou
une personne formée, qui vérifi era par exemple
une éventuelle détérioration du fi ltre, l’étanchéité
de l’appareil et le bon fonctionnement des équipements de contrôle.
Accessoires, fi ltre
• Un support de tuyau (1.10) (487072) peut être
enfoncé dans l’ouverture (1.8). Il permet d’amener le tuyau d’aspiration par le haut sur l’outil.
Un crochet à tuyau (452998) peut également
être fi xé pour enrouler le tuyau d’aspiration.
• La poignée (2.11) (452921) facilite le transport
de l’aspirateur. Des accessoires tels que des
tubes d’aspiration peuvent être fi xés à la barre
(2.9) de la poignée.
Les références des accessoires et fi ltre fi gurent
dans le catalogue Festool ou sur Internet sous
www.festool-usa.com.
Garantie
Conditions de la garantie (1+2 ans)
Vous avez droit à une prolongation de garantie
gratuite (1 an + 2 ans = 3 ans) sur votre outil
électrique Festool. Festool assumera tous les
coûts d’expédition pendant la première année de
la garantie alors que les deuxième et troisième
années, les coûts devront être assumés par le
client. Festool paiera les frais de retour de l’outil
au client par service de livraison terrestre UPS.
La garantie est valable pour une période de 3 ans
à compter de la date d’achat indiquée sur votre
reçu ou votre facture.
Garantie limitée de Festool
Cette garantie est valable à condition que l’outil
soit utilisé conformément aux instructions de
Festool. Festool garantit, à l’acheteur initial seulement, que l’outil indiqué sera exempt de tout
défaut de matériau et de fabrication pendant un
an à compter de la date d’achat. Festool ne donne
aucune garantie supplémentaire, implicite ou explicite, sur les instruments portables électriques
Festool. Aucun agent, représentant commercial,
distributeur, vendeur ou employé de Festool n’est
autorisé à prolonger ou à modifi er les obligations
ou restrictions de la présente garantie. Les obligations de Festool sont, à son entière discrétion,
15
Page 16

limitées à la réparation ou à l’échange des outils
portables électriques Festool trouvés défectueux
dans le présent emballage, tels que fournis avec
le présent Guide d’utilisation.
Cette garantie exclut l’usure normale, les dommages causés par un usage impropre, les abus
ou la négligence, ou tout dommage autre que
ceux attribuables à des défauts de matériau et
de fabrication. Cette garantie ne s’applique pas
aux accessoires tels que lames de scie circulaire,
mèches de perceuse et vilebrequin, lames de
scie sauteuse, bandes abrasives et meules. Sont
également exclues les pièces d’usure, telles que
balais de charbon, lamelles pour outils à air comprimé, joints et manchons de caoutchouc, disques
et patins ponceurs, ainsi que les piles.
Les outils électriques portables Festool à remplacer ou à réparer doivent être retournés avec le
reçu d’achat à Festool (appelez au 800-554-8741
pour connaître l’adresse d’expédition).
FESTOOL N’EST EN AUCUN CAS RESPONSABLE DES DOMMAGES DIRECTS OU INDIRECTS, IMPLICITES OU EXPLICITES, DÉCOULANT DE LA RUPTURE DE CETTE GARANTIE
OU DE TOUTE AUTRE GARANTIE. TOUTES
LES GARANTIES IMPLICITES, Y COMPRIS
LES GARANTIES IMPLICITES DE QUALITÉ
MARCHANDE ET D’ADÉQUATION À UN USAGE
PARTICULIER, SONT LIMITÉES À UNE PÉRIODE DE TROIS ANS.
Certains états américains et certaines provinces
canadiennes ne permettent pas la limitation des
garanties implicites; il se pourrait donc que les
limites indiquées ci-dessus ne s’appliquent pas
dans votre cas. À l’exception de certaines garanties implicites des provinces ou des états indiquées
ici, la présente garantie est exclusive et remplace
toute autre garantie, convention et obligation
similaire de Festool.
Cette garantie vous confère des droits légaux
spécifi ques, et vous pouvez aussi avoir d’autres
droits pouvant varier d’un état à l’autre, ou d’une
province à l’autre au Canada.
16
Page 17

Contenido
Normas de seguridad ............................ 17
Datos técnicos ....................................... 19
Símbolos ............................................... 20
Uso conforme a la destinación .............. 20
Conexiones ............................................ 20
Conexión eléctrica ................................... 20
Conectar la manguera de aspiración ......... 20
Conexión / acoplamiento de la herramienta
eléctrica ................................................ 20
Conectar la herramienta neumática .......... 21
Equipo ...................................................21
Manejo .................................................. 21
Interruptor de conexión/desconexión ........ 21
Regulador de la fuerza de aspiración ......... 21
Abrir/cerrar el aspirador ..........................21
Vaciar el depósito para suciedad .............. 21
Aplicación ............................................. 21
Aspiración de materias secas ...................21
Succión de líquidos ................................. 22
Filtro ..................................................... 22
Cambio de fi ltro .....................................22
Limpieza del elemento fi ltrante ................ 22
Una vez terminado el trabajo ................22
Mantenimiento y conservación .............. 22
Accesorios, fi ltros .................................. 22
Garantía ................................................ 23
Normas de seguridad
Lea y entienda todas las ins-
trucciones. Si no se siguen todas las instruc-
ciones que aparecen a continuación, el resultado
podría ser descargas eléctricas, incendio y/o
lesiones corporales graves.
GUARDE ESTAS INSTRUCCIONES
Normas generales de seguridad
Área de trabajo
Mantenga el área de trabajo limpia y bien
iluminada. Las áreas desordenadas y oscuras
invitan a que se produzcan accidentes.
No utilice aspiradoras en atmósferas explosivas, como las causadas por la presencia
de líquidos, gases o polvos infl amables. Los
electrodomésticos generan chispas, las cuales
pueden incendiar el polvo o los vapores.
Mantenga a las personas que estén presentes, los niños y los visitantes alejados
mientras esté utilizando la aspiradora. No
permita que la aspiradora se use como un juguete.
Es necesario prestar máxima atención cuando la
aspiradora sea usada por niños o cuando se utilice
cerca de éstos.
Seguridad eléctrica
Esta aspiradora está diseñada solamente
para uso en interiores y para recogida de
materiales secos o mojados.
El tomacorriente para herramientas mecánicas está conectado a tierra y la aspiradora
debe enchufarse en un tomacorriente instalado adecuadamente y conectado a tierra
apropiadamente de acuerdo con todos los
códigos y ordenanzas. No quite nunca el
terminal de conexión a tierra ni modifi que el
enchufe de ningún modo. No use enchufes
adaptadores. Consulte con un electricista
califi cado si tiene dudas sobre si el tomacorriente está conectado a tierra apropiadamente. Si la aspiradora tiene algún malfunciona-
miento eléctrico o se avería, la conexión a tierra
proporciona un camino de baja resistencia para
llevar la electricidad alejándola del usuario.
No introduzca objetos como sujetapapeles
o destornilladores en el tomacorriente para
herramientas mecánicas. El tomacorriente tie-
ne electricidad cuando la aspiradora está enchufada en una fuente de energía y el interruptor está
colocado en el modo de activación de herramienta
mecánica o en el modo de limpieza del fi ltro. Podrían producirse descargas eléctricas.
Evite el contacto del cuerpo con las superfi cies conectadas a tierra, como tuberías,
radiadores, estufas y refrigeradores. Hay
un riesgo mayor de que se produzcan descargas
eléctricas si el cuerpo está conectado a tierra. Si la
utilización de la aspiradora en lugares húmedos es
inevitable, se debe usar un interruptor de circuito
accionado por corriente de pérdida a tierra para
suministrar la energía a la aspiradora. Los guantes de goma y el calzado de goma de electricista
aumentarán más su seguridad personal.
No exponga la aspiradora a la lluvia ni a condiciones mojadas. Esta aspiradora puede utili-
zarse para recoger líquidos ininfl amables, pero no
está diseñada para inmersión o sumersión en un
líquido. Podrían producirse descargas eléctricas.
No maneje el enchufe ni el electrodoméstico
con las manos mojadas. Podrían producirse
descargas eléctricas.
No maltrate el cable de alimentación. No use
nunca el cable de alimentación para transportar la aspiradora, tirar de ella o jalar del
enchufe para sacarlo de un tomacorriente.
Mantenga el cable de alimentación alejado
del calor, el aceite, los bordes afi lados o las
piezas móviles. Reemplace inmediatamen-
17
Page 18

te los cables de alimentación dañados. No
maneje un vehículo ni cierre una puerta sobre un cable de alimentación. Los cables de
alimentación dañados aumentan el riesgo de que
se produzcan descargas eléctricas.
Cuando utilice una aspiradora en el exterior,
use un cordón de extensión para intemperie
marcado con las letras „W-A“ o „W“. Estos
cordones tienen capacidad para uso a la intemperie y reducen el riesgo de que se produzcan
descargas eléctricas. Consulte la sección Tamaños
recomendados de cordones de extensión que se
encuentra en la sección Accesorios de este manual.
Seguridad personal y uso
de la aspiradora
Manténgase alerta, fíjese en lo que está haciendo y use el sentido común cuando esté
utilizando una aspiradora. No use la aspira-
dora cuando esté cansado o bajo la infl uencia de
drogas, alcohol o medicamentos. Un momento de
distracción mientras esté utilizando una aspiradora
puede causar lesiones corporales graves.
Evite el arranque accidental. Asegúrese de
que los interruptores de la aspiradora y de la
herramienta estén en la posición de APAGADO antes de enchufar la aspiradora o poner
su interruptor en el modo de activación de
herramienta mecánica o en el modo de limpieza del fi ltro. No mantenga la herramienta
mecánica enchufada en el tomacorriente para
herramientas mecánicas de la aspiradora durante la recogida normal con la aspiradora.
Enchufar aspiradoras o herramientas que tengan
el interruptor en la posición de ENCENDIDO invita
a que se produzcan accidentes.
No intente alcanzar demasiado lejos. Mantenga un apoyo adecuado de los pies y un
equilibrio apropiado, así como un apoyo y
un equilibrio apropiados de la aspiradora
en todo momento. Tenga cuidado adicional
cuando limpie en escaleras. El apoyo adecuado
de los pies y el equilibrio apropiado del usuario,
junto con el apoyo y el equilibrio apropiados de
la aspiradora, permiten tener mejor control de la
aspiradora en situaciones inesperadas.
No use la aspiradora para recoger cosas que
se estén quemando, que estén humeando
o que estén ardiendo sin llama, como cigarrillos, fósforos o cenizas calientes. Podría
producirse un incendio dentro del tanque de la
aspiradora.
No use la aspiradora para recoger líquidos,
alcoholes o gases infl amables, ni polvos explosivos, como gasolina u otros combustibles,
líquido encendedor, barniz, revestimientos
de poliuretano, limpiadores, pinturas a base
de aceite, gas natural, hidrógeno, polvo de
carbón, polvo de magnesio, polvo de granos
o pólvora. Los motores eléctricos generan chispas
que pueden incendiar el polvo o los vapores.
Vístase adecuadamente. No use ropa ni joyas
holgadas. Sujétese el pelo largo. Mantenga
el pelo, la ropa y los guantes alejados de las
piezas móviles. La ropa holgada, las joyas hol-
gadas o el pelo largo pueden quedar atrapados en
las piezas móviles, la manguera y las boquillas de
succión. Mantenga las asas secas, limpias y libres
de aceite y grasa.
No sujete la manguera contra ninguna parte
del cuerpo durante la utilización de la aspiradora.
Utilice equipo de seguridad. Use siempre
protección de los ojos y de la audición. Se
debe usar una máscara antipolvo, zapatos de seguridad antideslizantes, casco o protección de la
audición para las condiciones apropiadas.
Esta aspiradora no es adecuada para recoger sustancias o polvos peligrosos o tóxicos,
como por ejemplo asbesto. Los fi ltros no po-
drán atrapar todas las partículas y es posible que
las expulsen de vuelta al medio ambiente.
Normas de seguridad
para aspiradoras
Cuidado de la aspiradora
No use la aspiradora si el interruptor no la
enciende o apaga. Toda aspiradora que no pueda
controlarse con el interruptor es peligrosa y debe
repararse.
Desconecte el enchufe de la fuente de energía antes de hacer cualquier ajuste, cambiar
accesorios o almacenar la aspiradora. Dichas
medidas preventivas de seguridad reducirán el
riesgo de arrancar accidentalmente la aspiradora.
No conecte nunca una herramienta con una
capacidad nominal superior a los amperios
máximos indicados en el receptáculo. Esta as-
piradora tiene un tomacorriente para herramientas
mecánicas para utilizarse en combinación con
otros electrodomésticos, como lijadoras, sierras
caladoras y cepillos mecánicos; las herramientas
con capacidades nominales mayores pueden causar un incendio.
No use la aspiradora para recoger polvo
cuando el tanque de la aspiradora contenga
líquido o fl uido. No use la aspiradora para
recoger líquidos o fl uidos cuando haya polvo
en el tanque. En cualquiera de estos dos casos,
vacíe el tanque y/o quite la bolsa para polvo an-
18
Page 19

tes de usar la aspiradora, para que el polvo no se
aglutine y se endurezca dentro del tanque.
Seque completamente los fi ltros después de
usar la aspiradora para recoger materiales
mojados o use un segundo juego de fi ltros
secos para recoger polvo. En los fi ltros húme-
dos o mojados se aglutinará polvo o se formará
moho o verdín.
Cuando no se esté usando la aspiradora,
guárdela fuera del alcance de los niños y
de otras personas que no hayan recibido
capacitación para utilizarla. Las aspiradoras
son peligrosas en manos de los usuarios que no
hayan recibido capacitación.
Mantenga la aspiradora con cuidado. Mantenga apropiadamente la aspiradora para
mantener desobstruida la manguera. No
ponga ningún objeto en las aberturas. No use
la aspiradora si alguna de las aberturas está
bloqueada; mantenga las aberturas libres
de polvo, pelusa, pelo y cualquier cosa que
pueda reducir la circulación de aire. Cualquier
alteración o modifi cación es un uso incorrecto y
puede causar una situación peligrosa.
Compruebe si hay piezas desalineadas o que
se atasquen, si hay piezas rotas y cualquier
otra situación que pueda afectar el funcionamiento de la aspiradora. Si la aspiradora
está dañada, haga que le realicen servicio
de ajustes y reparaciones antes de utilizarla.
Las aspiradoras mal mantenidas causan muchos
accidentes. Desarrolle un programa de mantenimiento periódico para su aspiradora.
Utilice únicamente accesorios que estén
recomendados por el fabricante para su modelo. Los accesorios que pueden ser adecuados
para una aspiradora pueden volverse peligrosos
cuando se utilicen en otra aspiradora.
Servicio de ajustes y reparaciones
Solamente personal de reparaciones califi cado deber realizar servicio de ajustes y reparaciones en la aspiradora. El servicio de ajustes
y reparaciones o el mantenimiento realizado por
personal no califi cado podría causar un riesgo de
lesiones. Por ejemplo, los cables internos podrían
quedar colocados incorrectamente o pellizcados, o
los resortes de retorno del protector de seguridad
podrían quedar montados incorrectamente.
Cuando haga servicio de ajustes y reparaciones en una aspiradora, utilice únicamente piezas de repuesto idénticas. Siga las
instrucciones de la sección Mantenimiento
de este manual. El uso de piezas no autoriza-
das o no seguir las instrucciones de la sección
Mantenimiento puede crear un riesgo de que se
produzcan descargas eléctricas o lesiones. Ciertos
agentes de limpieza, como gasolina, tetracloruro
de carbono, amoníaco, etc., pueden dañar las
piezas de plástico.
Algunos polvos creados por lijadoras motorizadas, aserraderos, trituradores,
perforadoras y otras actividades de construcción
contienen sustancias químicas que se sabe (en el
Estado de California) causan cáncer, defectos de
nacimiento u otros daños al sistema reproductivo.
Algunos ejemplos de estas sustancias químicas
son:
• Plomo de las pinturas con base de plomo
• Sílice cristalino de los ladrillos y cemento y otros
productos de mampostería, y
• Arsénico y cromo de madera tratada con sus-
tancias químicas
El riesgo de exposición a estas sustancias varía,
dependiendo de cuantas veces se hace este tipo
de trabajo.
Para reducir el contacto con estas sus-
tancias químicas: trabaje en un área
con buena ventilación y trabaje con
equipo de seguridad aprobado, como
mascarillas para el polvo diseñadas
específi camente para fi ltrar partículas
microscópicas.
Datos técnicos
Potencia absorbida ...........................................................................................350 - 1200 W
Potencia conectada la enchufe del aparato máx. ........................................................... 1200 W
Potencia total conectada, máx. .................................................................................. 2400 W
Caudal volumétrico (aire), máx., turbina ................................................228 m
Depresión máx., turbina .......................................................................................... 23000 Pa
Superfi cie fi ltrante ............................................................................. 14000 cm
Tubo fl exible de aspiración, diametro x longitud .................. 27 mm x 3.5 m (1.06 in. x 11.48 ft.)
Dimensiones P x An x Al:
CT 22 E HEPA ..................................................... 625 x 380 x 440 mm (24.6 x 15 x 17.3 in.)
CT 33 E HEPA ..................................................... 625 x 380 x 550 mm (24.6 x 15 x 21.6 in.)
19
3
/h (8.2 cu.ft./h)
2
(2170 sq.in.)
Page 20

Capacidad del depósito para recoger la suciedad:
CT 22 E HEPA ...............................................................................................22 l (5.7 gal.)
CT 33 E HEPA ...............................................................................................33 l (8.6 gal.)
Peso:
CT 22 E HEPA ............................................................................................12 kg (26.4 lbs)
CT 33 E HEPA ............................................................................................14.5 kg (32 lbs)
Longitud del cable de conexión a la red ........................................................... 7.5 m (24.6 ft.)
Clase de protección ......................................................................................................IP X4
Las fi guras indicadas se encuentran al principio
de las instrucciones de servicio.
Símbolos
V voltios
A amperios
Hz hertzios
W vatios
~ rensión alterna
n
revoluciones por minuto en vacío
0
Clase II Construcción
Uso conforme a la destinación
Según lo predeterminado, los aspiradores son
apropiados para la aspiración de polvos no perjudiciales para la salud, suciedad, arena, virutas,
etc..
Además, los aspiradores son apropiados, según lo
predeterminado, para la succión de agua.
Según las normas IEC 60335-1 y IEC 603352-69, los aspiradores son apropiados para una
solicitación elevada durante el uso en el sector
industrial.
El rendimiento de fi ltración de todo el aparato,
compuesto del elemento fi ltrante HEPA (493334),
corresponde con la calidad HEPA H 13 (rendimiento de eliminación medio 99,95 %).
Todos los aspiradores CT equipados con el elemento fi ltrante HEPA (493334) disponen de una certifi cación HEPA tanto para el material de fi ltración
como para el aparato de aspiración completo.
El usuario responde de los daños
y accidentes que puedan derivarse de un uso no
conforme a lo previsto.
Conexiones
Antes de la puesta en funcionamiento:
Las piezas de los accesorios se suministran colocadas en el depósito (2.10) y deben extraerse
antes de la primera puesta en marcha.
Conexión eléctrica
¡El voltaje de la red y la frecuencia tienen que
coincidir con las indicaciones en la placa de características!
Al enchufar el cable de la alimentación de red se tiene que observar que el
aspirador esté desconectado.
El sistema antiestático (AS)
Durante la aspiración se producen cargas estáticas en el tubo fl exible de aspiración a causa de
la fricción. Estas cargas estáticas pueden resultar
desagrad-ables en forma de descargas eléctricas
para el operador de la máquina. Para facilitar la
descarga de estas cargas estáticas, el aspirador
está equipado de serie con un sistema antiestático. Sin embargo, para ello resulta necesario
emplear un tubo fl exible antiestático.
El funcionamiento antiestático sólo está garantizado si la clavija de enchufe está conectada a
una caja de contacto con protección por puesta
a tierra.
Dispositivo protector contra sobre-temperaturas
Para proteger contra el sobrecalentamiento hay
dispuesto un seguro térmico que desconecta el
aspirador antes de que llegue a una temperatura
crítica - apagar el aspirador y dejarlo que se enfríe
durante aproximadamente 5 minutos.
En caso de que después del proceso descrito no
se pudiera volver a encender el aspirador, sírvase
ponerse en contacto con un taller autorizado de
postventa de Festool.
Conectar la mangue-
ra de aspiración
Conecte la manguera de aspiración en la abertura
de la aspiración (1.7).
Conexión / acoplamiento de
la herramienta eléctrica
¡Observar la potencia conectada máxima en la
caja de enchufe de la máquina (ver bajo „Datos
técnicos“)!
Aquí se tiene que observar, que
al enchufar y desenchufar la herramienta eléctrica
ésta esté desconectada.
Conectar la herramienta eléctrica en la caja de
enchufe de la máquina (1.2).
20
Page 21

Conectar la herramien-
ta neumática
Observar que al insertar o extraer,
la herramienta neumática esté desconectada.
Mediante el montaje del módulo de aire com-pri-
mido (1.9) (452829) el dispositivo de conexión
automática del aspirador funciona también en
combinación con herramientas neumáticas. Adicionalmente recomendamos el montaje de la
unidad de alimentación VE (452797).
La unidad de alimentación se encarga de fi ltrar
el aire comprimido y de añadir aceite al mismo y
permite una regulación de la presión del aire.
Para la conexión o acoplamiento de las herramientas neumáticas Festool con el sistema IAS
se pueda adquirir una pieza de conexión IAS
(454757).
A fi n de garantizar un funcionamiento perfecto
del dispositivo de conexión automática, la presión
de servicio de la herramienta tiene que ser de 6
bar.
La caja de enchufe de la máquina conduce corriente.
El motor de aspiración se arranca al conectar la
herramienta conectada.
Regulador de la fuer-
za de aspiración
Por medio del regulador de la fuerza de aspiración
(1.4) se puede variar la potencia de aspiración. De
este modo es posible conseguir una adaptación
precisa a las diversas funciones de aspiración y
succión.
Abrir/cerrar el aspirador
– Abrir las pinzas de cierre (2.2).
– Girar hacia arriba la parte superior del aspira-
dor (2.4) hasta que enclave la pieza de apoyo
(2.5).
El cierre se realiza procediendo análogamente
pero a la inversa. A fi n de presionar o desenclavar,
respectivamente, la pieza de apoyo, antes se tiene
que levantar ligeramente la parte superior.
Equipo
• En los compartimientos guarda-objetos (1.6, no
en el CT 22 E HEPA) se pueden colocar y guardar
herramientas o accesorios.
• En la superfi cie de apoyo se puede fi jar un
Systainer con los dos elementos de cierre
(1.1).
• Acoplando una manguera de aspiración en la
boca de soplado (2.7) se puede disponer de aire
de soplado.
• Soporte / freno: mediante los frenos de bloqueo
(2.8) se pueden bloquear las ruedas, con lo que
se evita un deslizamiento incontrolado del aspirador.
Manejo
Interruptor de co-
nexión/desconexión
En la posición O (1.3), el aspirador se encuentra
desconectado y la caja de enchufe de la máquina
(1.2) está sin corriente.
Son posibles dos modos de servicio:
a) Posición del conmutador „MAN“
La caja de enchufe de la máquina está sin corriente.
El motor de aspiración se pone inmediatamente
en marcha.
b) Posición del conmutador „Auto“
Antes de girar el conmutador a
la posición „Auto“ se tiene que observar que la
máquina acoplada esté desconectada.
Vaciar el depósito para suciedad
¡Antes de vaciar el depósito (2.10)
para recoger la suciedad se tiene que desmontar
siempre antes la parte superior del aspirador!
– Abrir el aspirador,
– levantar ligeramente la parte superior, presionar
la pieza de apoyo (2.5),
– girar la parte superior hacia arriba hasta el tope
(posición vertical),
– desmontar la parte superior horizontalmente
hacia delante,
– vaciar el depósito,
– colocar la parte superior.
ducir completamente en las escotaduras (1.5)
ambos pernos de la parte superior!
– Cerrar el aspirador.
¡Intro-
Aplicación
Aspiración de materias secas
Antes de proceder a la aspiración de materias
secas deberá encontrarse siempre incorporada
en el depósito la bolsa fi ltrante. De este modo
es más fácil eliminar ecológicamente el material
aspirado.
El elemento fi ltrante está húmedo después de
haber succionado líquidos. Un elemento fi ltrante
húmedo se obtura con mayor rapidez, cuando
se aspiran materiales secos. Por este motivo, el
elemento fi ltrante deberá secarse antes de realizar una aspiración de materiales secos o deberá
cambiarse por uno seco.
21
Page 22

Succión de líquidos
¡No está permitido aspirar / suc-
cionar líquidos infl amables!
Cuando se note que sale espuma
o líquido, se deberá terminar inmediatamente
el trabajo y vaciarse el depósito para recoger la
suciedad.
El elemento fi ltrante HEPA sólo
puede utilizarse para aspirar sustancias secas.
Antes de proceder a la succión de líquidos se
tiene que retirar siempre la bolsa fi ltrante. Se recomienda el empleo de un fi ltro húmedo especial
(452924).
Al alcanzar el nivel máximo de llenado se interrumpe automática-mente la aspiración por los
indicadores del nivel de llenado (2.12).
Filtro
Elemento fi ltrante HEPA: 493334
¡No aspirar sin el elemento de fi ltro! Podría dañar
el motor.
– Abrir el aspirador,
– desmontar el elemento fi ltrante usado (ver la
impresión sobre el embalaje del elemento fi ltrante),
– eliminar el elemento fi ltrante usado en una bolsa
cerrada a prueba de polvo, a saber, conforme a
las disposiciones ecológicas legales locales,
– limpiar completamente el depósito para recoger
la suciedad (2.10) y el espacio (3.1) para la
turbina de aspiración (frotar con un paño húmedo),
– incorporar un elemento fi ltrante nuevo (ver la
impresión sobre el embalaje del elemento fi ltrante),
– cerrar el aspirador.
Cambio de fi ltro
Durante los trabajos expuestos
a continuación se deberá observar que no se
levante innecesariamente el polvo. Humedezca
el elemento fi ltrante con una fi na niebla de agua
antes de desmontarlo.
Controle regularmente el nivel de llenado de la
bolsa fi ltrante. Cuando una bolsa fi ltrante esté
llena, deberá sustituirse inmediatamente.
Controle si el elemento filtrante ha quedado
dañado cuando cambie la bolsa fi ltrante. Si una
bolsa fi ltrante está dañada, deberá sustituirse
inmediatamente.
Al utilizar un elemento fi ltrante HEPA se deberá
colocar siempre una bolsa fi ltrante.
Cambiar la bolsa fi ltrante (3.4)
Núm. de pedido:
CTL 22 E: 452970
CTL 33 E: 452971
– Abrir el aspirador,
– retirar la bolsa fi ltrante usada (ver la impresión
sobre la bolsa fi ltrante),
– eliminar la bolsa fi ltrante usada conforme a las
disposiciones ecológicas legales locales,
– limpiar completamente el depósito para la su-
ciedad (2.10) y el espacio (3.1) para la turbina
de aspiración (frotar con un paño húmedo),
– colocar una bolsa fi ltrante nueva (ver la impre-
sión sobre la bolsa fi ltrante).
¡Presionar fuertemente la boca de la bolsa fi ltrante (3.3) sobre la boca de entrada (3.2)!
– Cerrar el aspirador.
Cambiar el elemento fi ltrante (2.3)
Núm. de pedido (CT 22 E, CT 33 E):
Elemento fi ltrante estándar: 452923
Limpieza del elemento fi ltrante
Para la limpieza se tiene que mover el asa (2.1)
unas 10 veces hacia delante y atrás. Observa-
ción: La limpieza del elemento fi ltrante es solamente necesaria, cuando el aspirador es operado
sin bolsa fi ltrante.
Una vez terminado el trabajo
• Desconectar el aspirador y desenchufar de la
caja de enchufe el enchufe de la red.
• Enrollar el cable de conexión (2.6).
• Vaciar el depósito para recoger la suciedad.
• Limpiar el interior y exterior del aspirador aspirándolo y frotándolo correspondiente-mente.
• Colocar el aspirador en una estancia seca, protegida contra un uso no autorizado.
Mantenimiento y conservación
¡Antes de realizar cualquier trabajo en la máquina se debe retirar el enchufe de
la caja de contacto!
Los trabajos de mantenimiento
y reparación que requieran abrir la carcasa del
motor, deben llevarse a cabo únicamente en un
taller autorizado.
Como mínimo una vez al año tiene que realizarse
una prueba en razón de la seguridad, a saber, por
la casa productora o por una persona correspondientemente instruida, por ejemplo, en cuanto a
daños del fi ltro, hermeticidad del aparato y funcionamiento de los dispositivos de control.
Accesorios, fi ltros
• En la abertura (1.8) se puede meter un soporte
para tubos fl exibles (1.10) (487072). Con ayuda
de este soporte se aproxima el tubo fl exible de
aspiración por arriba a la herramienta. Como
22
Page 23

alternativa se puede fi jar un gancho para mangueras (452998) para así poder colgar la manguera enrollada del aparato.
• La empuñadura (2.11) (452921) simplifi ca el
transporte del aspirador. En la traviesa (2.9) de
la empuñadura se pueden fi jar accesorios como,
p.ej., tubos de succión.
Los números de pedido para los respectivos accesorios y fi ltros se encuentran en su catálogo
Festool o en la dirección de Internet www.fes-
tool-usa.com.
Garantía
Condiciones de la Garantía 1 + 2
Usted tiene derecho a una garantía extendida
gratuita (1 año + 2 años = 3 años) para su
herramienta mecánica Festool. Festool se hará
responsable por los gastos de envío durante el
primer año de garantía. Durante el segundo y
tercer año de garantía el cliente es responsable
por el costo del envío de la herramienta a Festool.
Festool pagará el embarque de regreso al cliente
usando UPS Ground Service. Todo el servicio de
garantía es válido por 3 años desde la fecha de
la compra de acuerdo a la fecha de su recibo o
factura de compra.
Garantía limitada de Festool
Esta garantía es válida con la condición previa de
que la herramienta se usa y opera de conformidad
con las instrucciones de operación de Festool. Festool garantiza, sólo al comprador original, que la
herramienta especifi cada estará libre de defectos
de fabricación y materiales durante un periodo
de un año a partir de la fecha de compra. Festool
no otorga otras garantías, ni explícitas ni implícitas para ninguna de las herramientas mecánicas
portátiles Festool. Ningún agente, representante,
distribuidor, comerciante o empleado de Festool
está autorizado para extender o modifi car de
cualquier manera las obligaciones o limitaciones
de esta garantía. Las obligaciones de Festool, a
su propia entera discreción, están limitadas a la
reparación o sustitución de cualquier herramienta
portátil Festool que se encuentre estar defectuo-
sa en el momento de ser embalada junto con el
manual de usuario.
Quedan excluidos de la cobertura en esta garantía: el desgaste normal; los daños causados por
uso indebido, el abuso o negligencia; los daños
causados por cualquier otra causa que no sean
defectos del material o de la fabricación. Esta
garantía no aplica a accesorios como cuchillas
de sierras circulares, brocas de taladro, barrenas
de buriladora, cuchillas de sierra, cuchillas para
sierras de calado, correas de lijadoras y ruedas de
esmeril. También se excluyen las “partes que se
desgastan” como cepillos de carbón, laminillas de
herramientas de aire, collarines de hule y sellos,
discos y cojines de lijado, y baterías.
Las herramientas mecánicas portátiles Festool
que requieran de reemplazo o reparación deben
devolverse con el recibo de compra a Festool
(llame al 800-554-8741 para los detalles de la
dirección).
EN NINGÚN CASO FESTOOL SE HARÁ
RESPONSABLE POR LOS DAÑOS SECUNDARIOS
O CONSECUENTES OCASIONADOS POR
LA VIOLACIÓN DE ESTA O CUALUQUIER
OTRA GARANTÍA, SEA EXPLÍCITA
O IMPLÍCITA. TODAS LAS GARANTÍAS
IMPLICADAS POR LEYES ESTATALES,
INCLUYENDO LAS GARANTÍAS IMPLICADAS
DE COMERCIALIZACIÓN Y ADECUACIÓN
A UN PROPÓSITO PARTICULAR, QUEDAN
LIMITADAS A TRES AÑOS DE DURACIÓN.
Algunos estados de EE.UU. y algunas provincias
de Canadá no permiten las limitaciones en cuanto
a la duración de las garantías implícitas, de modo
que la limitación arriba indicada puede que no
le afecte. A excepción de algunas garantías
implicadas por leyes estatales o provinciales,
limitadas por la presente, la anteriormente citada
garantía, expresamente limitada, es exclusiva y
sustituye a cualquier otra garantía, acuerdo u
obligación similar de Festool.
Esta garantía le concede derechos legales
específi cos y usted podría tener otros derechos
legales que varían de estado a estado en EE.UU.
y de provincia a provincia en Canadá.
23
Page 24

24
Page 25

25
Page 26

26
 Loading...