

Euro-Pro 14533, 534DX Owner’s Manual
Instruction Book
TABLE OF CONTENTS
Parts Name ......................................................................................................................................... 1
Standard Accessories .......................................................................................................................... 2
Opening and Closing the Looper Cover .......... ....................................................... :........................... 3
Opening and Closing the Sewing Table .............................................................................................. 3
Opening and Closing the Accessory Box ....................................... :.................................................... 3
How to use the Chip Box ..................................................................................................................... 3
Stretch Up the Thread Guide Bar ........................................................................................................ 4
Attaching the Thread Stripping Disc and Net...................................................................................... 4
Connecting the Machine to the Power Supply .................................................................................... 5
Power/Light Switch .............................................................................................................................. 5
How to Use the Foot Controller and Control the Sewing Speed ......................................................... 5
How to Turn the Balance Wheel .......................................................................................................... 5
Raising or Lowering the Presser Foot ................................................................................................. 6
How to Change (Remove) the Presser Foot ........................................................................................ 6
How to Use the Needle Plate .............................................................................................................. 6
How to Thread the Machine ........................................................................................................... 7-10
- Threading the Upper Looper ............................................................................................... 7
- Threading the Lower Looper ................................................................................................ 8
- Threading the Needle on the Right ...................................................................................... 9
- Threading the Needle on the Left...................................................................................... 10
Securing Ends ................................................................................................................................... 11
Adjustment of Differential Feed (DF type only) .................................................................................. 12
How the Use the Lower Looper Automatic Threader ........................................................................ 12
(For certain type only)
Thread Tension .................................................................................................................................. 13
Rolled Hemming, Picot Edging and Narrow Hemming ..................................................................... 14
Thread Tension Adjustment ............................................................................................................... 15
Overlock Sewing 1-Needle 3-Thread ................................................................................................. 16
Adjustment of Stitch Length ............................................................................................................... 17
Adjustment of Cutting Width .............................................................................................................. 17
Replacing the Light Bulb ................................................................................................................... 17
How to Change the Needle ............................................................................................................... 18
How to Change the Upper Knife ....................................................................................................... 18"
Cleaning and Oiling ........................................................................................................................... 19
Trouble Shooting..: ............................................................................................................................. 20,
Optional Accessories ......................................................................................................................... 21
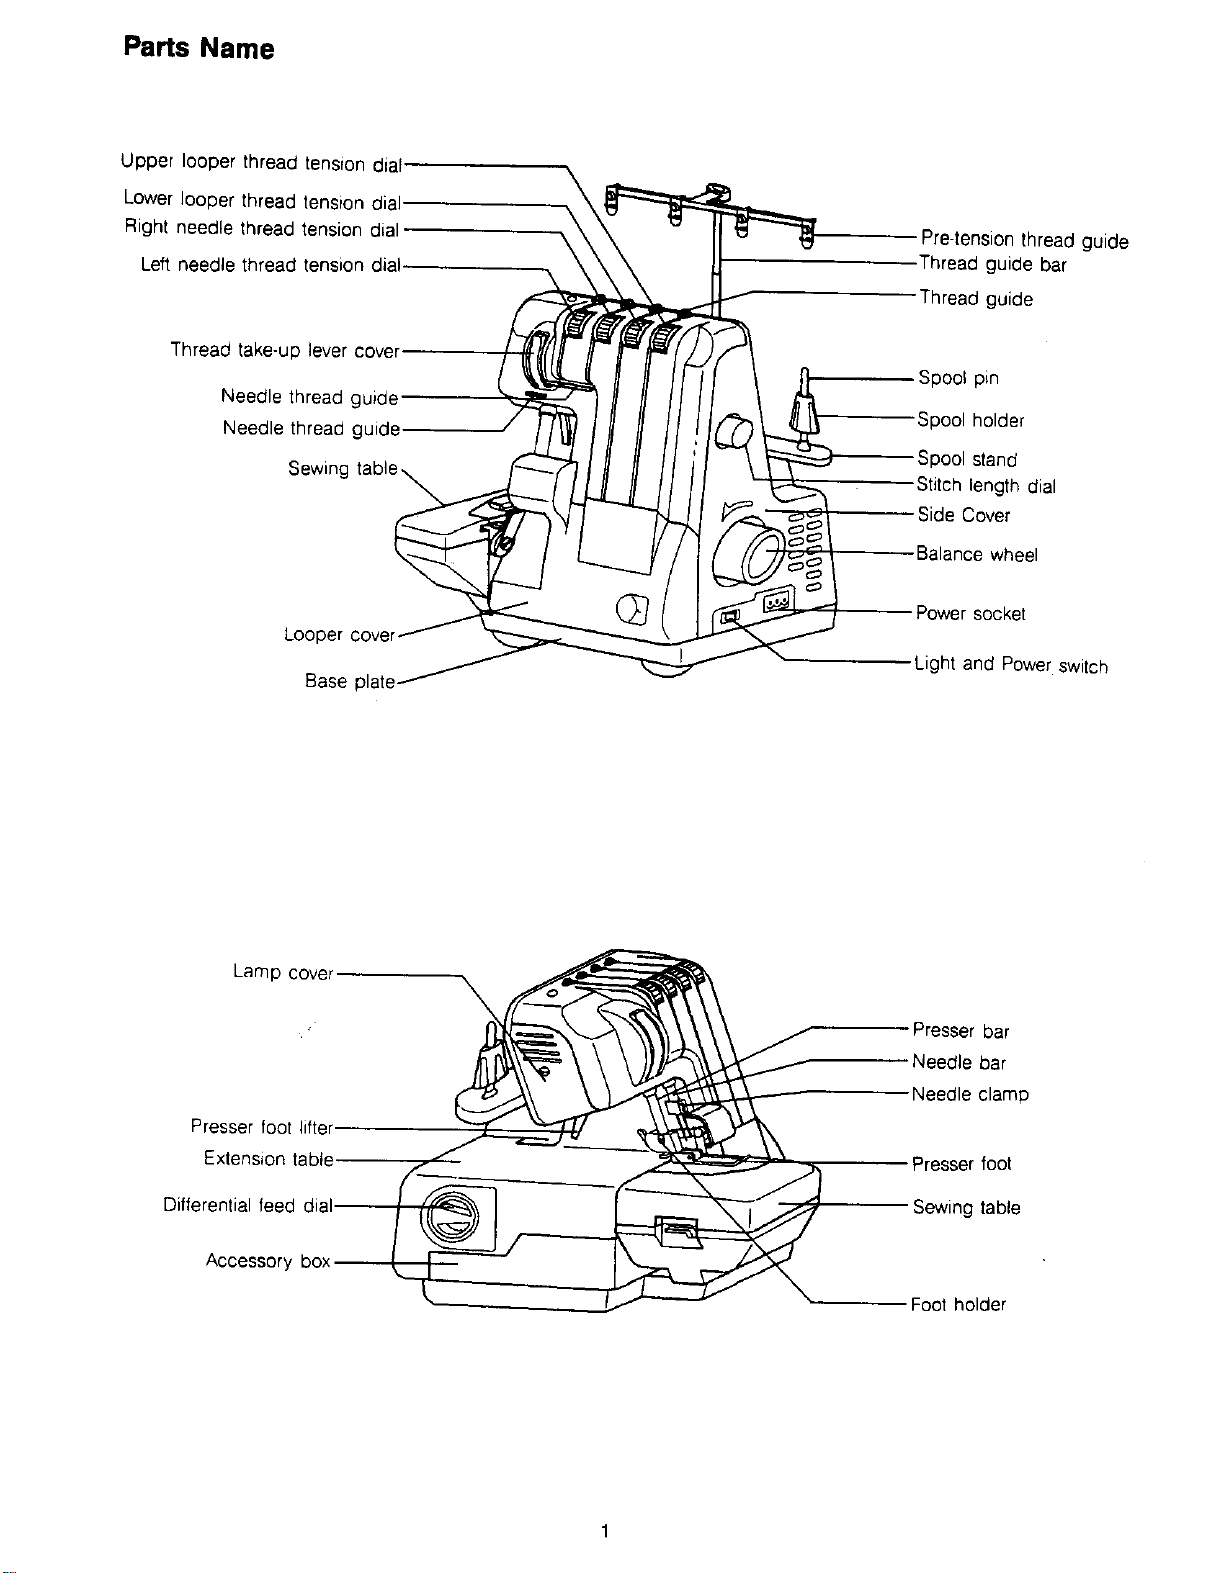
Parts Name
Upper looper thread tension dial.
Lowerlooper thread tension dial
Right needle thread tension dial
Left needle thread tension dial.
Thread take-up lever cover
Needle thread guide'
Needle thread guide
Sewing
Looper cover
Base
\
Pre-tension thread guide
Thread guide bar
thread guide
Spool pin
Spool holder
Spool stand
Stitch length dial
Side Cover
wheel
,r socket
Light and Power switch
Lamp cover
Presser foot lifter
Extension table
Differential feed dial
Accessory box
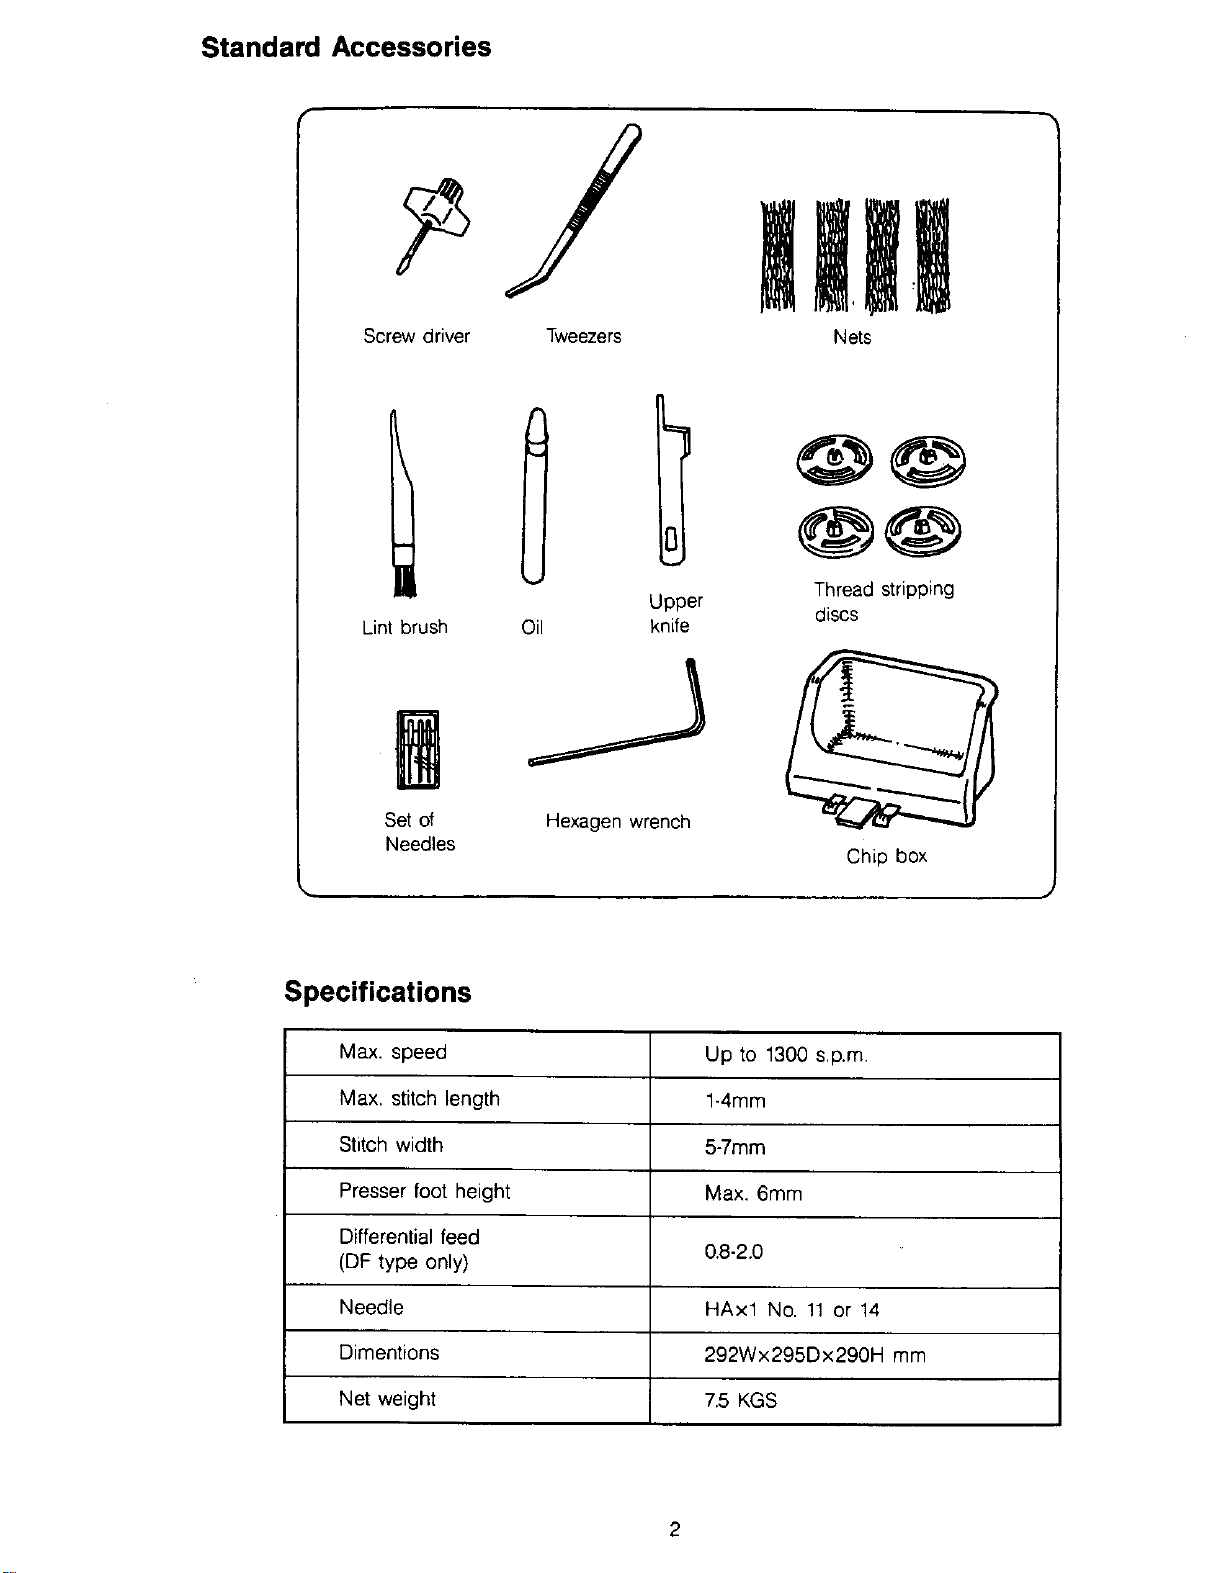
Standard Accessories
Screw driver Tweezers Nets
Lint brush
I I
Thread stripping
Upper discs
Oil knife
Set of Hexagen wrench
Needles
Specifications
Max. speed Up to 1300 sp.m
Max. stitch length 1-4mm
Stitch width 5-7ram
Presser foot height Max. 6mm
Differential feed
(DF type only) 0.8-2.0
Needle HAxl No. 11 or 14
Dimentions 292Wx295Dx290H mm
Net weight 7.5 KGS
Chip box
HQIIOw
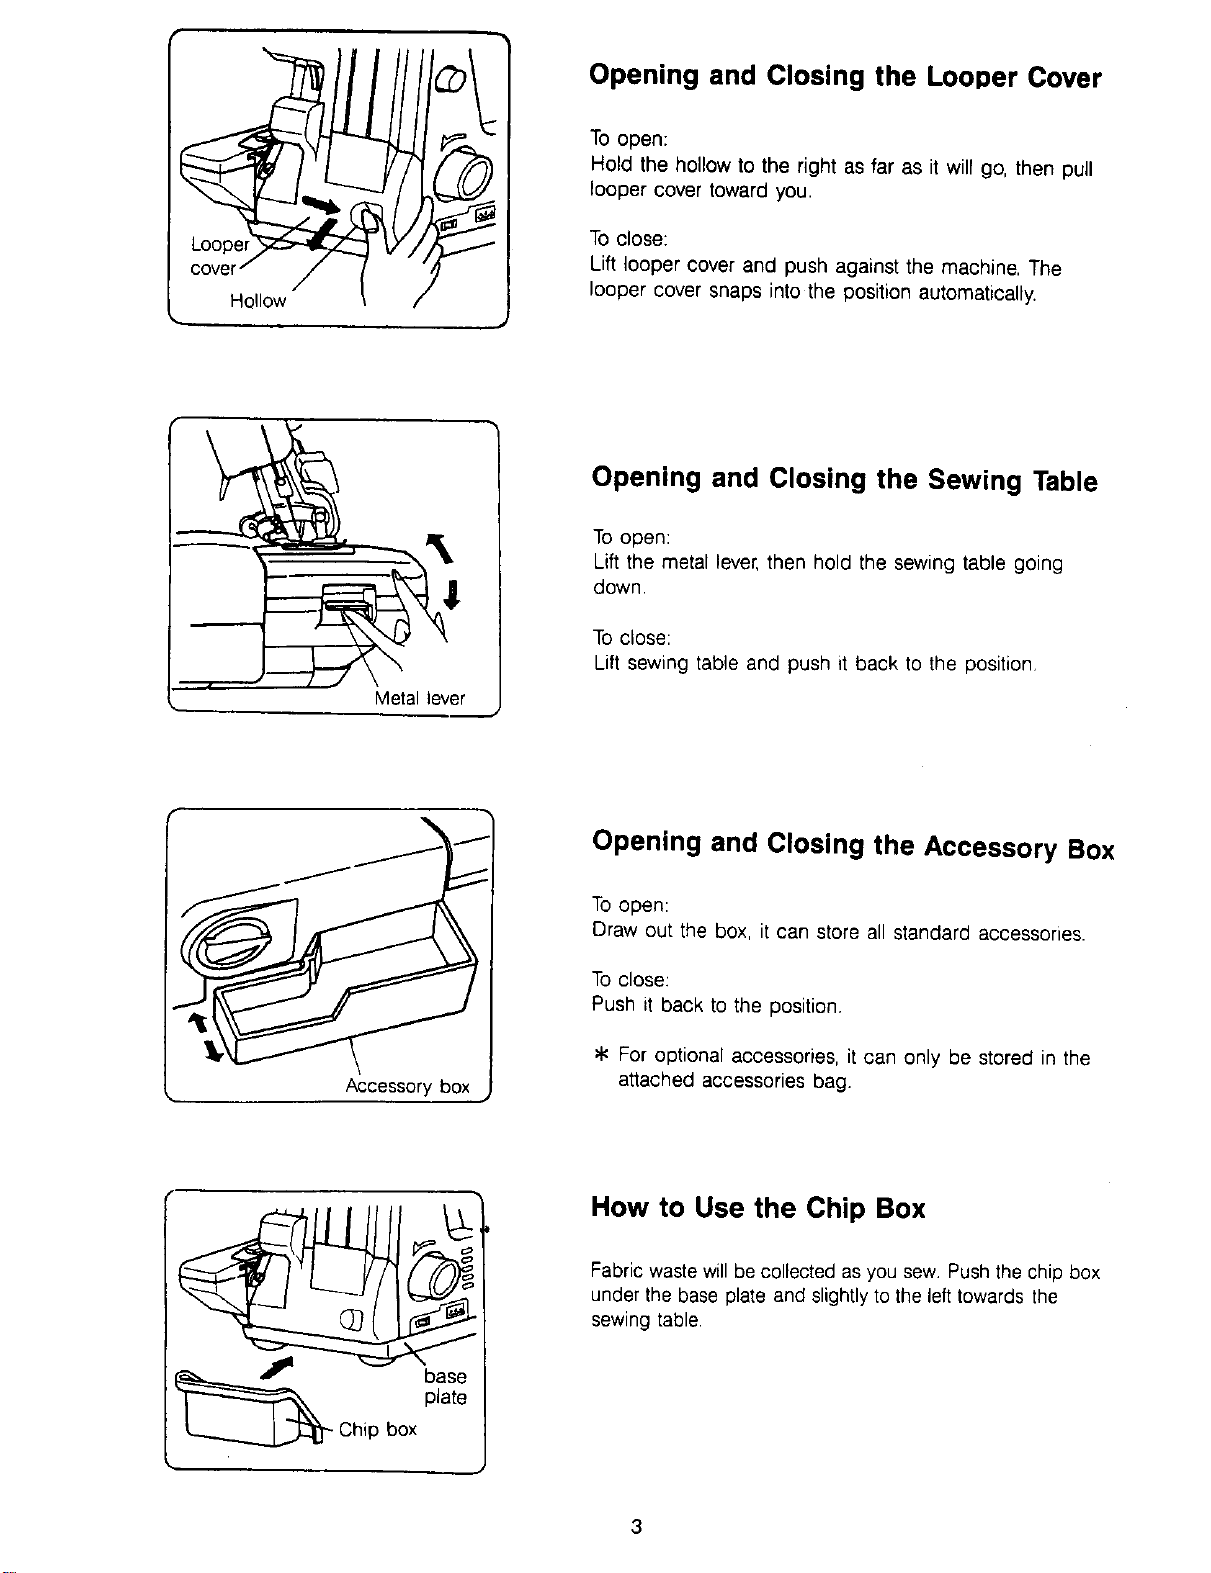
Opening and Closing the Looper Cover
To open:
Hold the hollow to the right as far as it will go, then pull
looper cover toward you.
To close:
Lift looper cover and push against the machine, The
looper cover snaps into the position automatically.
Opening and Closing the Sewing Table
To open:
Lift the metal lever, then hold the sewing table going
down.
To close:
Lift sewing table and push it back to the position.
Metal lever
C.,obox
Accessory box
Opening and Closing the Accessory Box
To open:
Draw out the box, it can store all standard accessones.
To close:
Push it back to the position.
* For optional accessories, it can only be stored in the
attached accessories bag.
How to Use the Chip Box
Fabric waste will be collected as you sew. Push the chip box
under the base plate and slightly to the left towards the
sewing table.
3
Stretch up the Thread Guide Bar
1. Pull the thread guide bar up to the top.
2. Turn the thread guide bar to make it comes right above
the spool pins and locked into the stoppe_
Stopper
Thread
Jide
Attaching the Thread Stripping Disc and Net
Thread stripping
SDO01holaer disc
_S ""_
When you use a small thread spool, pull out the spool holder from the spool pin. Then place the spool
with its slit side up, and put the thread stripping disc on top.
2 If the thread would Slip down from the spool during threading and/or sewing, put a net on the spool as
illustrated for preventing jamming. The nets are supplied with the machine.
pool ptn
4
LightandPower
\ switch
Electricaloutlet
Footcontroller
Powersocket
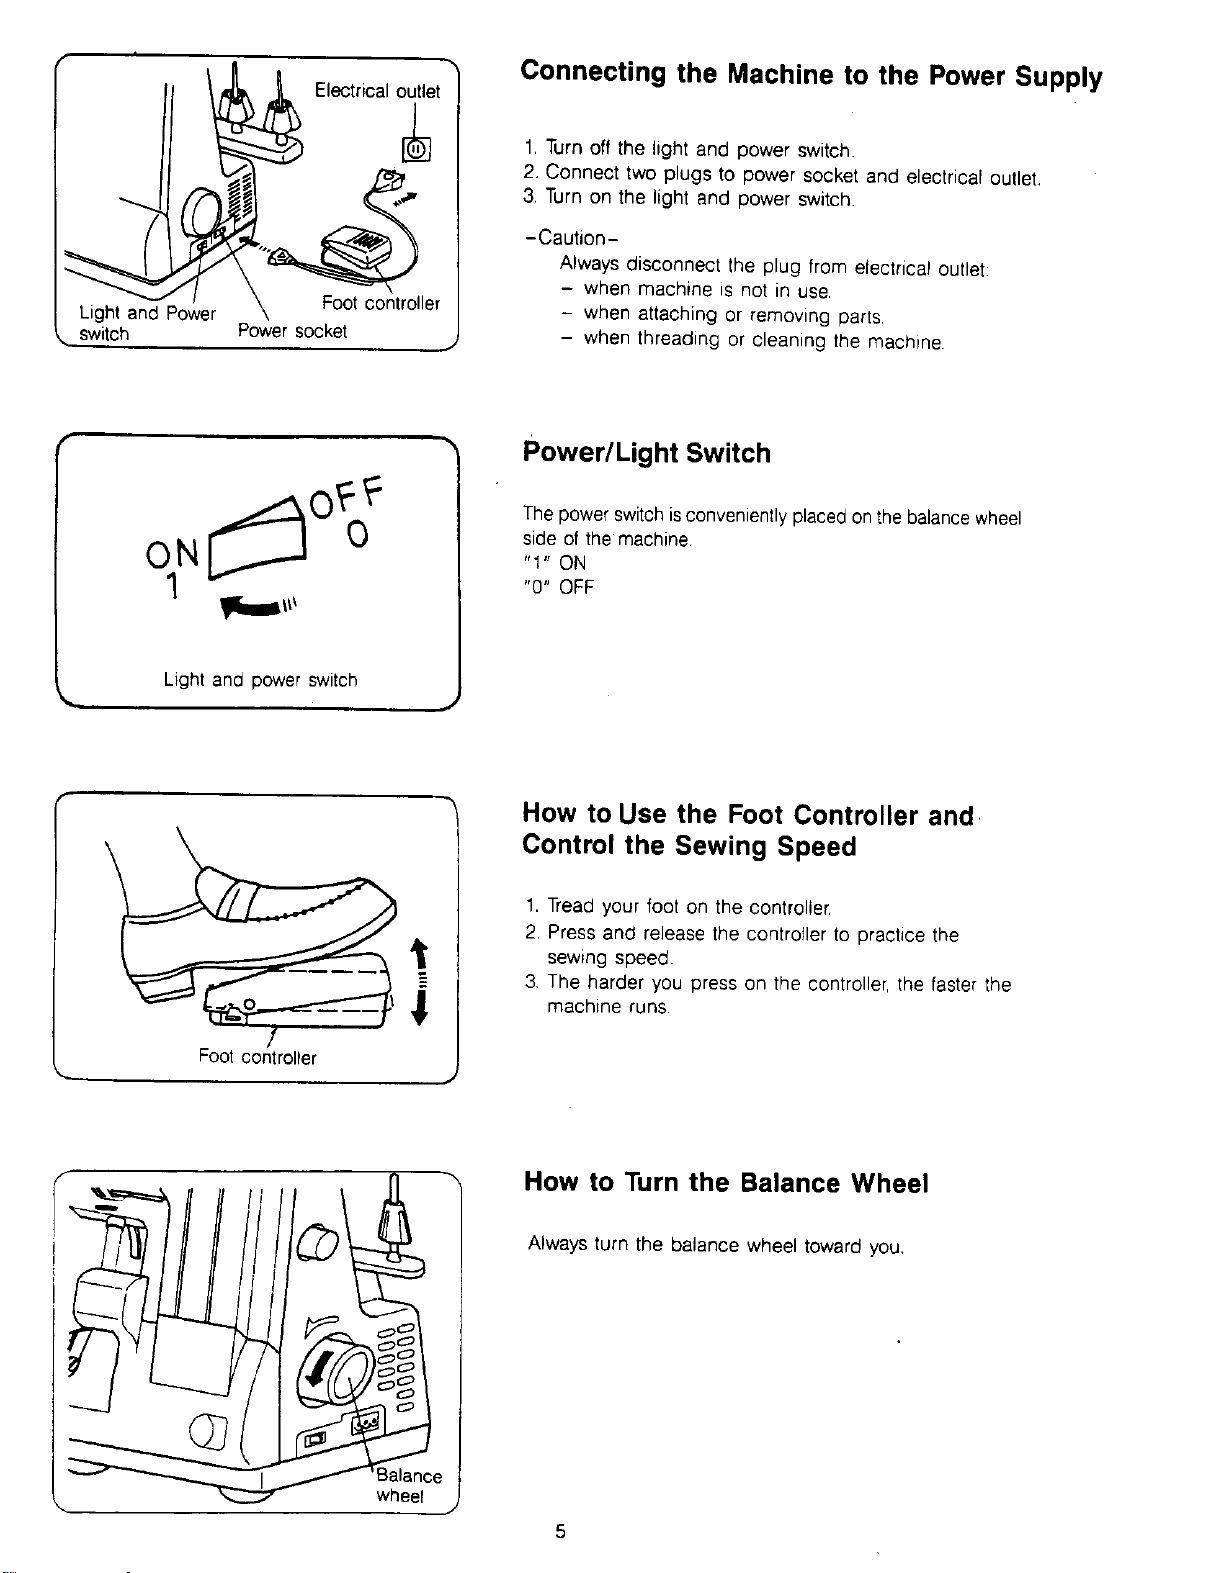
Connecting the Machine to the Power Supply
1. Turn off the light and power switch.
2. Connect two plugs to power socket and electrical outlet,
3. Turn on the light and power switch.
-Caution-
Always disconnect the plug from electrical outlet:
- when machine _s not in use.
- when attaching or removing parts
- when threading or cleaning the machine
Power/Light Switch
The power switch isconveniently placed onthe balance wheel
side of the machine.
"1" ON
"0" OFF
Light and power switch
Foot con/troller
How to Use the Foot Controller and.
Control the Sewing Speed
1. Tread your foot on the controller.
2 Press and release the controller to practice the
sewing speed.
3 The harder you press on the controller, the faster the
i
machine runs
How to Turn the Balance Wheel
Always turn the balance wheel toward you,
5
 Loading...