

Epson STYLUS PHOTO 785EPX User Manual


Copyright Notice
All rights reserved. No part of this publication may be reproduced, stored in a retrieval system, or transmitted in
any form or by any means, electronic, mechanical, photocopying, recording, or otherwise, without the prior
written permission of SEIKO EPSON CORPORATION. The information contained herein is designed only for
use with this EPSON printer. EPSON is not responsible for any use of this information as applied to other
printers.
Neither SEIKO EPSON CORPORATION nor its affiliates shall be liable to the purchaser of this product or third
parties for damages, losses, costs, or expenses incurred by purchaser or third parties as a result of: accident, misuse,
or abuse of this product or unauthorized modifications, repairs, or alterations to this product, or (excluding the
U.S.) failure to strictly comply with SEIKO EPSON CORPORATION’s operating and maintenance instructions.
SEIKO EPSON CORPORATION shall not be liable for any damages or problems arising from the use of any
options or any consumable products other than those designated as Original EPSON Products or EPSON
Approved Products by SEIKO EPSON CORPORATION.
Trademarks
EPSON, EPSON Stylus, EPSON Photo Stickers, and MicroWeave are registered trademarks and PRINT Image
Matching is a trademark of SEIKO EPSON CORPORATION.
EPSON Print Lab is a service mark, and EPSON Software, EPSON Store, PhotoEnhance, and BorderFree are
trademarks of Epson America, Inc.
General Notice: Other product names used herein are for identification purposes only and may be trademarks of
their respective owners. EPSON disclaims any and all rights in those marks.
ii
The E
NERGY STAR
Printed on recycled paper
Copyright © 2001 by Epson America, Inc. 4/01
emblem does not represent EPA endorsement of any product or service.
CPD-12098

Contents
WELCOME! . . . . . . . . . . . . . . . . . . . . . . . . . . . . . . . . . . . . . . . . . 1
PRINT Image Matching . . . . . . . . . . . . . . . . . . . . . . . . . . . . . . . . . . . . . . . . . .
About Your Software . . . . . . . . . . . . . . . . . . . . . . . . . . . . . . . . . . . . . . . . . . . . .
About Your Documentation . . . . . . . . . . . . . . . . . . . . . . . . . . . . . . . . . . . . . . .
Warnings, Cautions, Notes, and Tips . . . . . . . . . . . . . . . . . . . . . . . . . . . . .
Viewing Your On-Screen Reference Guide . . . . . . . . . . . . . . . . . . . . . . . . .
PRINTING WITHOUT A COMPUTER . . . . . . . . . . . . . . . . . . 9
1
Getting Photos into the Printer . . . . . . . . . . . . . . . . . . . . . . . . . . . . . . . . . . . . .
Inserting Memory Cards . . . . . . . . . . . . . . . . . . . . . . . . . . . . . . . . . . . . . . .
Configuring PhotoStarter . . . . . . . . . . . . . . . . . . . . . . . . . . . . . . . . . . . . . .
Removing Memory Cards . . . . . . . . . . . . . . . . . . . . . . . . . . . . . . . . . . . . . .
Using EPSON Paper . . . . . . . . . . . . . . . . . . . . . . . . . . . . . . . . . . . . . . . . . . . . .
Loading Paper . . . . . . . . . . . . . . . . . . . . . . . . . . . . . . . . . . . . . . . . . . . . . . .
Using the Control Panel . . . . . . . . . . . . . . . . . . . . . . . . . . . . . . . . . . . . . . . . . .
Selecting Print Settings . . . . . . . . . . . . . . . . . . . . . . . . . . . . . . . . . . . . . . . .
Changing the Default Settings . . . . . . . . . . . . . . . . . . . . . . . . . . . . . . . . . .
Printing Your Photos . . . . . . . . . . . . . . . . . . . . . . . . . . . . . . . . . . . . . . . . . . . .
2
3
4
4
5
10
10
11
12
13
14
15
16
18
19
Printing an Index . . . . . . . . . . . . . . . . . . . . . . . . . . . . . . . . . . . . . . . . . . . .
Printing Snapshots . . . . . . . . . . . . . . . . . . . . . . . . . . . . . . . . . . . . . . . . . . .
Printing Enlargements . . . . . . . . . . . . . . . . . . . . . . . . . . . . . . . . . . . . . . . . .
Printing Multiple Photos on a Sheet . . . . . . . . . . . . . . . . . . . . . . . . . . . . . .
Printing Snapshots on Roll Paper . . . . . . . . . . . . . . . . . . . . . . . . . . . . . . . . . . .
Loading Roll Paper . . . . . . . . . . . . . . . . . . . . . . . . . . . . . . . . . . . . . . . . . . .
Printing Your Pictures on Roll Paper . . . . . . . . . . . . . . . . . . . . . . . . . . . . .
19
20
21
23
25
25
27
iii

Enhancing Photos and Using Filters . . . . . . . . . . . . . . . . . . . . . . . . . . . . . . . . .
29
Using PhotoEnhance . . . . . . . . . . . . . . . . . . . . . . . . . . . . . . . . . . . . . . . . . .
Adjusting Brightness . . . . . . . . . . . . . . . . . . . . . . . . . . . . . . . . . . . . . . . . . .
Using Filters . . . . . . . . . . . . . . . . . . . . . . . . . . . . . . . . . . . . . . . . . . . . . . . .
Printing Stickers . . . . . . . . . . . . . . . . . . . . . . . . . . . . . . . . . . . . . . . . . . . . . . . .
Adding Fun Frames to Your Stickers . . . . . . . . . . . . . . . . . . . . . . . . . . . . . .
Printing Special Layouts . . . . . . . . . . . . . . . . . . . . . . . . . . . . . . . . . . . . . . . . . .
PRINTING WITH WINDOWS . . . . . . . . . . . . . . . . . . . . . . . . 33
2
Loading Paper . . . . . . . . . . . . . . . . . . . . . . . . . . . . . . . . . . . . . . . . . . . . . . . . . .
Loading Envelopes . . . . . . . . . . . . . . . . . . . . . . . . . . . . . . . . . . . . . . . . . . .
Basic Printing . . . . . . . . . . . . . . . . . . . . . . . . . . . . . . . . . . . . . . . . . . . . . . . . . .
Selecting the Settings You Use Most Often . . . . . . . . . . . . . . . . . . . . . . . . .
Customizing Your Print Settings . . . . . . . . . . . . . . . . . . . . . . . . . . . . . . . . . . . .
Selecting the Correct Media Type . . . . . . . . . . . . . . . . . . . . . . . . . . . . . . . . . . .
Printing Borderless Photos . . . . . . . . . . . . . . . . . . . . . . . . . . . . . . . . . . . . . . . .
Loading Paper . . . . . . . . . . . . . . . . . . . . . . . . . . . . . . . . . . . . . . . . . . . . . . .
Opening Your Photos in Film Factory . . . . . . . . . . . . . . . . . . . . . . . . . . . .
29
29
30
31
32
32
34
35
36
39
40
42
43
43
44
iv
Setting Up Your Print Job . . . . . . . . . . . . . . . . . . . . . . . . . . . . . . . . . . . . . .
Printing Your Photos . . . . . . . . . . . . . . . . . . . . . . . . . . . . . . . . . . . . . . . . .
PRINTING ON A MACINTOSH . . . . . . . . . . . . . . . . . . . . . . . 51
3
Loading Paper . . . . . . . . . . . . . . . . . . . . . . . . . . . . . . . . . . . . . . . . . . . . . . . . . .
Loading Envelopes . . . . . . . . . . . . . . . . . . . . . . . . . . . . . . . . . . . . . . . . . . .
Basic Printing . . . . . . . . . . . . . . . . . . . . . . . . . . . . . . . . . . . . . . . . . . . . . . . . . .
Customizing Your Print Settings . . . . . . . . . . . . . . . . . . . . . . . . . . . . . . . . . . . .
Selecting the Correct Media Type . . . . . . . . . . . . . . . . . . . . . . . . . . . . . . . . . . .
46
48
52
53
54
56
57

Printing Borderless Photos . . . . . . . . . . . . . . . . . . . . . . . . . . . . . . . . . . . . . . . .
58
Loading Paper . . . . . . . . . . . . . . . . . . . . . . . . . . . . . . . . . . . . . . . . . . . . . . .
Opening Your Photos in Film Factory . . . . . . . . . . . . . . . . . . . . . . . . . . . .
Setting Up Your Print Job . . . . . . . . . . . . . . . . . . . . . . . . . . . . . . . . . . . . . .
Printing Your Photos . . . . . . . . . . . . . . . . . . . . . . . . . . . . . . . . . . . . . . . . .
MAINTAINING YOUR PRINTER . . . . . . . . . . . . . . . . . . . . . . 65
4
Cleaning the Print Head . . . . . . . . . . . . . . . . . . . . . . . . . . . . . . . . . . . . . . . . . .
Running the Head Cleaning Utility . . . . . . . . . . . . . . . . . . . . . . . . . . . . . .
Examining the Nozzle Check Pattern . . . . . . . . . . . . . . . . . . . . . . . . . . . . .
Replacing an Ink Cartridge . . . . . . . . . . . . . . . . . . . . . . . . . . . . . . . . . . . . . . . .
Removing and Installing Ink Cartridges . . . . . . . . . . . . . . . . . . . . . . . . . . .
Aligning the Print Head . . . . . . . . . . . . . . . . . . . . . . . . . . . . . . . . . . . . . . . . . .
Cleaning the Printer . . . . . . . . . . . . . . . . . . . . . . . . . . . . . . . . . . . . . . . . . . . . .
Transporting the Printer . . . . . . . . . . . . . . . . . . . . . . . . . . . . . . . . . . . . . . . . .
PROBLEM SOLVING . . . . . . . . . . . . . . . . . . . . . . . . . . . . . . . 75
5
Printer Parts . . . . . . . . . . . . . . . . . . . . . . . . . . . . . . . . . . . . . . . . . . . . . . . . . . .
58
59
61
62
66
66
67
68
69
72
73
74
76
Diagnosing Printer Problems . . . . . . . . . . . . . . . . . . . . . . . . . . . . . . . . . . . . . .
Running a Printer Check . . . . . . . . . . . . . . . . . . . . . . . . . . . . . . . . . . . . . .
Solving Problems Setting Up the Printer or Installing Software . . . . . . . . . . . . .
Solving Printer Problems . . . . . . . . . . . . . . . . . . . . . . . . . . . . . . . . . . . . . . . . . .
Solving Print Quality Problems . . . . . . . . . . . . . . . . . . . . . . . . . . . . . . . . . . . . .
Solving Problems with Paper Feeding . . . . . . . . . . . . . . . . . . . . . . . . . . . . . . . .
Solving Miscellaneous Printout Problems . . . . . . . . . . . . . . . . . . . . . . . . . . . . .
Installing Printer Drivers and Utilities for Windows 2000 . . . . . . . . . . . . . . . .
Installing the Printer Driver . . . . . . . . . . . . . . . . . . . . . . . . . . . . . . . . . . . .
Installing the Storage Device Driver. . . . . . . . . . . . . . . . . . . . . . . . . . . . . . .
Uninstalling Printer Software for Windows . . . . . . . . . . . . . . . . . . . . . . . . . . . .
Reinstalling Printer Software . . . . . . . . . . . . . . . . . . . . . . . . . . . . . . . . . . . .
Where To Get Help . . . . . . . . . . . . . . . . . . . . . . . . . . . . . . . . . . . . . . . . . . . . .
77
78
79
80
82
85
87
88
88
89
90
90
91
v

NOTICES . . . . . . . . . . . . . . . . . . . . . . . . . . . . . . . . . . . . . . . . 93
6
Windows System Requirements . . . . . . . . . . . . . . . . . . . . . . . . . . . . . . . . . . . .
Macintosh System Requirements . . . . . . . . . . . . . . . . . . . . . . . . . . . . . . . . . . . .
E
NERGY STAR
Important Safety Instructions . . . . . . . . . . . . . . . . . . . . . . . . . . . . . . . . . . . . . .
Ink Cartridge Safety Instructions . . . . . . . . . . . . . . . . . . . . . . . . . . . . . . . . .
FCC Compliance Statement . . . . . . . . . . . . . . . . . . . . . . . . . . . . . . . . . . . . . . .
Declaration of Conformity . . . . . . . . . . . . . . . . . . . . . . . . . . . . . . . . . . . . . . . .
Epson America, Inc. Limited Warranty . . . . . . . . . . . . . . . . . . . . . . . . . . . . . . .
Compliance . . . . . . . . . . . . . . . . . . . . . . . . . . . . . . . . . . . . . . .
93
94
94
95
97
98
99
100
INDEX . . . . . . . . . . . . . . . . . . . . . . . . . . . . . . . . . . . . . . . . . . . . . 101
vi

Welcome!
Your EPSON Stylus® Photo 785EPX is the ideal printer for digital
photography. You can print your pictures directly from your digital
camera’s memory card without even turning on your computer.
™
Create true BorderFree
5 × 7, or 8 × 10 sizes perfect for albums or framing. You get quick and easy
snapshots and enlargements just minutes after taking pictures with your
digital camera.
photos directly from your printer—in 4 × 6,
If you want to edit your pictures, you can transfer them immediately to
®
your Windows
or Macintosh® computer and print from there.
Here are some of the printer’s outstanding features:
■
EPSON’s exclusive 6-color ink technology lets you print with
resolutions up to 2880 × 720 dpi.
■
The built-in PC card slot works with most digital camera media,
including CompactFlash
and Memory Stick
■
The roll paper holder included with your printer lets you produce
™
®
Type I and II, SmartMedia,™ Microdrive,™
(with the appropriate adapter).
continuous 4-inch borderless snapshots—even without a computer.
■
Four-picoliter variable droplet ink technology achieves finer shadow
detail, dazzling highlights, and better fill across a wider range of
colors. Genuine EPSON
®
ink and papers create long-lasting and
water-resistant prints.
■
An optional preview monitor is available to help you select photos for
printing.
1

PRINT Image Matching
Your EPSON Stylus Photo 785EPX is the first printer to support PRINT
Image Matching.
printer work together automatically to produce the best prints possible.
Digital camera manufacturers that support PRINT Image Matching
include EPSON, Casio, Konica, Kyocera, Minolta, Olympus, Ricoh,
Sony, and Toshiba. Check with your camera’s manufacturer to find out if
PRINT Image Matching technology is included.
With PRINT Image Matching, the digital camera manufacturer can set
specific printing options for each camera model. These options include:
■
contrast, sharpness, and brightness
■
gamma level, color space, and color saturation
■
shadow point, highlight point, and color balance
The camera saves this information in each image file. Your printer then
uses the information to ensure the most accurate reproduction of the
image.
Currently, your EPSON Stylus Photo 785EPX uses PRINT Image
Matching when you print without a computer. A software upgrade
supporting PRINT Image Matching through your computer will be
available in Summer 2001. Check EPSON’s support web site at:
http://support.epson.com.
™
This new technology lets your digital camera and
2

About Your Software
The printer software CD-ROM that came with your printer includes all
the software you need for printing. (You must have a CD-ROM or DVD
drive installed in your computer.) See the Start Here sheet for installation
instructions.
■
Your printer driver runs your printer and lets you control how your
documents look. You can’t print from your computer without it.
■
The EPSON PhotoStarter and CardMonitor utilities help your
system handle photos on a memory card. If you want, you can have
your photos copied to your computer automatically—and even open
one of your photo editing programs—whenever you insert a memory
card from your camera.
■
You r o n -s cr ee n Reference Guide gives you complete information about
your printer. (You need a browser—such as Microsoft
Explorer or Netscape
®
Navigator,® version 3.0 or later—to view
®
Internet
the guide.)
■
ArcSoft™ PhotoImpression™ is an easy-to-use photo editing program
that lets you edit, enhance, retouch, or add special effects to any
image with just a few clicks (optional).
■
EPSON Software™ Film Factory™ is a photo management program
that lets you organize, beautify, and print your photos in a flash
(optional).
It’s a good idea to check
EPSON’s support web
site periodically for free
updates to your
printer driver. Visit
http://support.epson.com.
Download instructions
are posted for your
convenience.
3

About Your Documentation
To set up your printer and install its software, see the Start Here sheet. For
tips on printing without a computer, see the Quick Reference card. This
book contains system requirements, important safety information, and
instructions on:
■
Viewing your on-screen Reference Guide
■
Printing all types of photos without a computer
■
Printing with Windows or on a Macintosh
■
Maintaining the printer
■
Solving basic problems
For more details about printing with, maintaining, or troubleshooting
your printer, see your on-screen Reference Guide, as described on page 5.
Warnings, Cautions, Notes, and Tips
Please follow these guidelines:
Warnings must be followed carefully to avoid bodily
injury.
4
Cautions must be observed to avoid damage to your
equipment.
Notes contain important information about your printer.
Tips contain additional hints for better printing.
Viewing Your On-Screen Reference Guide
Your printer CD-ROM includes an on-screen Reference Guide. You need a
browser—such as Microsoft Internet Explorer 3.0 or later or Netscape
Navigator 3.0 or later—to view it. If you are using a different browser, the
pages may not display correctly. (A browser is not included on the printer
software CD-ROM.)
You can view your on-screen Reference Guide from the CD-ROM or copy
it to your hard drive and view it from there. Follow these steps:
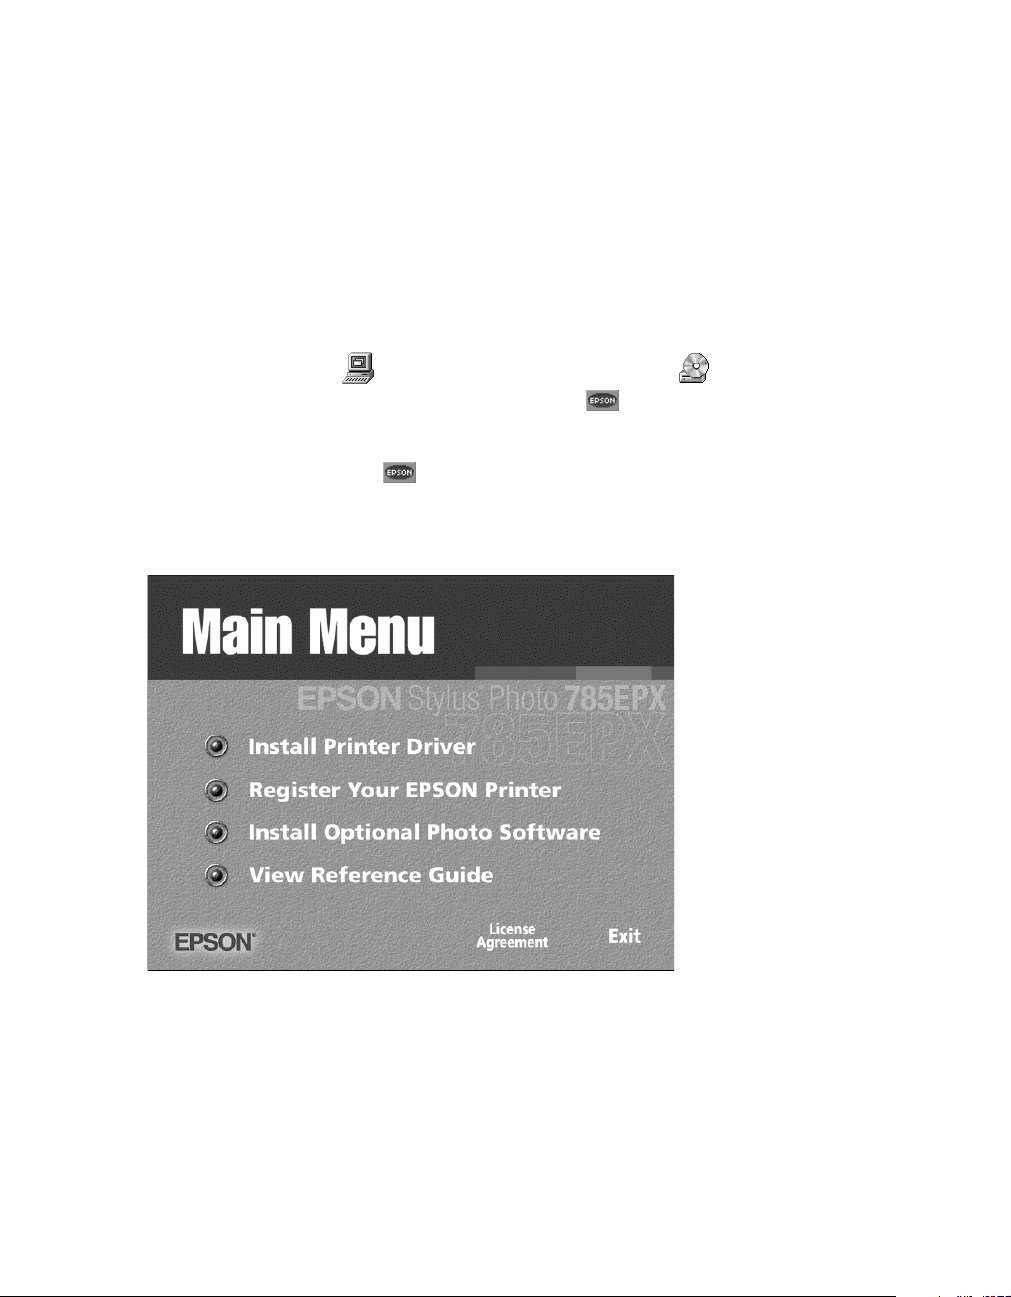
1. Insert your printer software CD-ROM.
2. Windows: Double-click
CD-ROM or DVD drive icon, then double-click the
icon.
Macintosh: Double-click the
window. (If the folder doesn’t open, first double-click your
CD-ROM icon.) The Main Menu appears:
My Computer
EPSON
, double-click your
icon in the CD-ROM
EPSON
EPSON
5

3. Click
View Reference Guide
. You see this screen:
Click here to
expand the
table of
contents
You can either view the guide from the CD-ROM (
Guide
) or copy the guide to your hard drive (
Guide
) and view it from there.
View Reference
Install Reference
If you copy the guide to your hard drive, you can access it at any time,
as follows:
Windows: Select
■
785EPX Guide
■ Macintosh: Open the
and double-click
Start, Programs, EPSON
.
EPSON STYLUS PHOTO 785EPX
View Reference Guide
.
, and click
When you first open the Reference Guide, you see this screen:
ESP
folder
6

Click a topic on the left to expand the table of contents. After expanding
the table of contents, you can click on the topic you want to view.
■
If there’s a right arrow , click it to view subtopics, then click on a
topic to go to it.
■
Click the down arrow to close a subtopic list.
Closed list,
click to
expand
Click to go
to topic
If you see an icon for a
graphic when viewing
your Reference Guide in
Netscape Navigator, click
the Reload button to load
the graphic.
7

8

Printing Without a
1
Computer
Your EPSON Stylus Photo 785EPX lets you print your photos quickly
and easily without a computer. Just insert your digital camera’s memory
card in the printer (with the appropriate adapter), choose settings from the
control panel, and press the
If your digital camera supports PRINT Image Matching, you can use this
technology whenever you print without a computer. When you take
pictures, simply point and shoot in automatic mode or select an image
type like portrait, landscape, macro, scenery, or sport.
With PRINT Image Matching, special print commands are saved in your
photo files. For example, macro mode pictures might include commands
for sharpness and clarity, while portrait mode pictures might emphasize
soft focusing and subtle flesh tones.
When you insert your camera’s memory card in the printer, all the PRINT
Image Matching commands are read and applied. If you don’t want to use
the PRINT Image Matching information, just use the printer’s control
panel to turn off PhotoEnhance,
Print
button.
™
as described on page 18.
Before you start, make sure you plug in the printer, turn it on, and install
ink cartridges, as described on your Start Here sheet. Then follow the
instructions in these sections:
■
Getting Photos into the Printer on page 10
■
Using EPSON Paper on page 13
■
Using the Control Panel on page 15
■
Printing Your Photos on page 19
■
Printing Snapshots on Roll Paper on page 25
■
Enhancing Photos and Using Filters on page 29
■
Printing Stickers on page 31
■
Printing Special Layouts on page 32
9

PC card (PCMCIA Type II)
Getting Photos into the Printer
Before you can print, you need to take the memory card out of your
digital camera, insert it into the adapter, and then insert the adapter into
the printer.
Your EPSON Stylus Photo 785EPX is designed to print digital camera
files that meet these requirements:
■
JPEG files captured with a digital camera. The files must meet the
DCF (Design rule for Camera File systems) Version 1.0 standard.
■
Resolutions ranging from 160 × 160 to 3200 × 3200 pixels
■
Up to 999 files on a memory card
Inserting Memory Cards
Digital cameras store pictures either in the camera’s internal memory or on
a memory card. Your printer works with several different types of memory
cards, as shown at the left. All memory cards (except PCMCIA Type II
cards) require an adapter to work in the printer.
A PCMCIA adapter (PC card adapter) for CompactFlash Type II memory
cards is included with the printer. If your camera uses a different type of
card, you can purchase the appropriate adapter. Look for special offers in
your printer box.
SmartMedia
CompactFlash
Microdrive
Memory Stick
10
Make sure the printer is turned on, then follow these steps to insert your
memory card for printing:
1. Insert your memory card into the PC card adapter.

2. Insert the adapter into the printer’s card slot.
.
Make sure the arrow is up and
pointing into the slot
Make sure the card is straight and goes in as far as it can.
If your computer is connected to your printer and turned on, you will
see a message on your screen the first time you insert a memory card.
Follow the instructions in the next section to respond to the message
and configure the PhotoStarter utility.
Configuring PhotoStarter
PhotoStarter and CardMonitor are utility programs that detect when a
memory card is inserted in your printer and automatically copy photos to
your computer.
Next
1. When you see the message, click
. The PhotoStarter setup
assistant opens:
Next
2. Click
again. The setup assistant asks you a series of questions
about how you want PhotoStarter to work.
11
If you don’t change the default settings, this is what will happen
whenever you insert a memory card:
■
PhotoStarter will copy your pictures to the Photos folder on your
desktop.
■
The pictures will be stored by date.
■
Film Factory will open automatically.
Next
3. Change any of the settings you want, then click
the Confirmation window, click
End
.
. When you see
You can go back and change settings at any time by opening PhotoStarter:
Do not eject a card while
the processing light is
flashing, or you may lose
data on the card.
■
In Windows, click
PhotoStarter3.0
Settings menu and choose
■
On a Macintosh, double-click the
desktop. Open the Tools menu and choose
Start
, point to
, and click
Programs, EPSON
EPSON PhotoStarter3.0
Change Settings
PhotoStarter
.
Change Settings
. Open the
icon on your
.
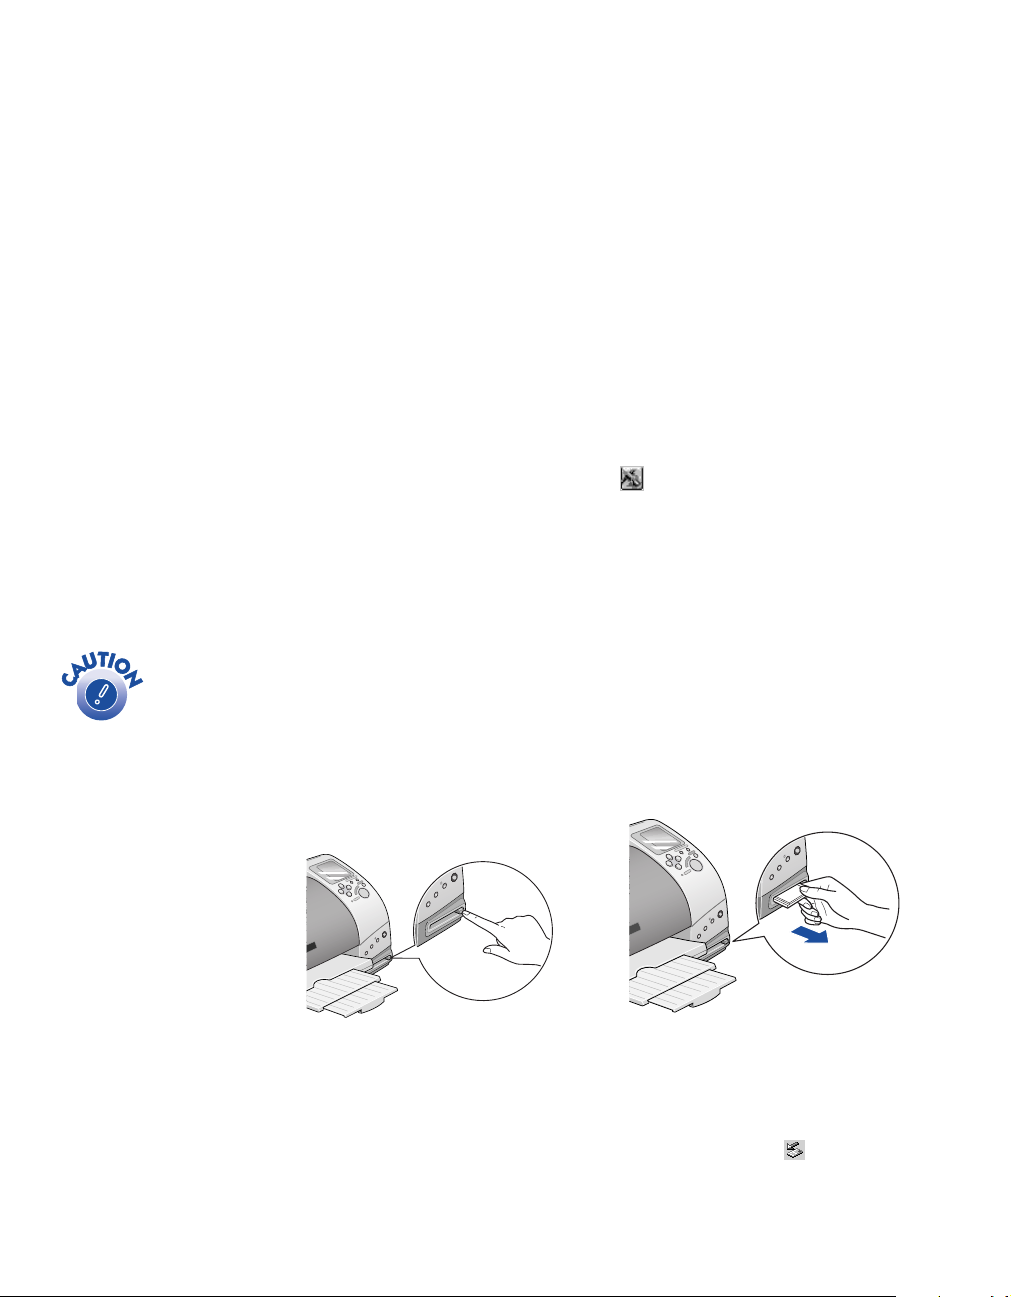
Removing Memory Cards
When you’re finished printing from a memory card, make sure the
processing light is not flashing before you remove the card.
On a Macintosh, select the memory card icon on your desktop and drag it
to the Trash. If you remove the card without doing this, an error message
will remain on your screen until you reinsert the card.
Press the button to eject the card. Then pull the card out of the slot.
12
■
On a Macintosh, you need to drag the memory card icon to the trash
before you turn off the printer or disconnect the cable.
■
If you’re using Windows 2000, you need to stop the card before you
turn off the printer or disconnect the cable. Click the
Hardware
PCMCIA Storage Device.
icon on the Windows taskbar and click
Eject
Stop EPSON

Using EPSON Paper
When you print without a computer, you can use letter-size plain paper,
or the following types of EPSON special paper:
Paper name Description Letter size 4 × 6 5 × 7 8 × 10
Photo Paper Perfect for snapshots S041141
S041272
S041271
Premium Glossy
Photo Paper
Matte Paper Heavyweight
Premium Semigloss
Photo Paper
EPSON Photo
Stickers
Photo Quality Ink Jet
Paper
®
Glossy photos for
framing and albums
Highest-quality matte
photos
Semigloss photos for
framing and albums
16 peel-off stickers per sheet—print fun
photos with or without colorful frames
Low-cost enlargements
and special layouts
S041286 Roll paper:
S041257 ——S041467
S041286 Roll paper:
S041062 — — —
S041458 ——
S041302
S041332
S041144 ——
These papers are designed to give you professional-quality photos directly
from your printer. Many more paper types and sizes are available when
you print from your computer. See the inside back cover for a complete
list.
With proper care, photographs from your EPSON Stylus Photo printer
will last for many years. The special EPSON inks designed for your
printer are formulated to achieve improved lightfastness when used with
EPSON papers for prints that are properly displayed or stored.
S041464 S041465
— —
As with traditional photos, proper care will minimize color changes and
lengthen display life:
■
For display, EPSON recommends that prints be framed under glass or
a protective plastic sleeve to protect them from atmospheric
contaminants like humidity, cigarette smoke, and high levels of ozone.
■
As with all photographs, keep your prints away from direct sunlight.
■
For proper storage, EPSON recommends that you keep prints in a
photo album or plastic photo storage box in acid free, archival sleeves
commonly available from most camera stores.
Always keep unused paper
in the original package.
13

To order EPSON paper, contact your dealer or call the EPSON Store™ at
(800) 873-7766 or visit our web site at www.epsonstore.com (U.S. sales
only). In Canada, please call (800) 873-7766 for dealer referral.
Loading Paper
Place your paper against the right edge of the feeder. Then slide the left
edge guide against the paper.
■
Make sure the printable (whiter or glossier) side of the paper is
face up.
If any paper you buy
comes with a cleaning
sheet, don’t use the
cleaning sheet with this
printer; it may cause a
paper jam.
■
Always load paper short edge first, even when you’re printing
landscape-oriented pictures.
■
Load up to 20 sheets of EPSON Photo Paper or Matte Paper Heavyweight.
■
Load EPSON Premium Glossy and Semigloss Photo Paper one sheet
at a time.
■
Load EPSON Photo Quality Ink Jet paper and plain paper up to the
arrow mark inside the left edge guide.
14

Using the Control Panel
You can use the control panel to print everything from a quick snapshot to
an 8 × 10 enlargement. You can print a variety of layouts and even
enhance your photos—all without turning on your computer.
You use the arrow buttons to select most settings for printing. The control
panel displays the settings you choose for each of the 8 menus:
Menus
Use the arrow
buttons to
select menus
and settings
Use the and buttons to select
menus:
Settings
Press if you need
to cancel settings
or cancel printing
Press to start
printing
Use the and buttons to select
settings:
After you select settings, press the
Print
button to start printing.
15

You can also select Photo
Paper and Photo Quality
Ink Jet paper. See page 22
for instructions.
Selecting Print Settings
Always check the settings before you start to print.
Print Mode
The Print Mode determines which photos are printed.
Print a sheet with small, numbered copies of all photos. Unless
you have the optional Preview Monitor, always start by printing
an index of all the photos on the memory card.
Print all the photos on the memory card.
Print one selected photo.
Print a group of selected photos.
Paper Type
The printer adjusts the ink coverage for each type of paper. That’s why this
setting is especially important.
Print on plain paper. Recommended for index or test prints.
Print on EPSON Premium Glossy or Semigloss Photo Paper. Use
for enlargements, special layouts, or snapshots on roll paper.
You can print multiple
photos on one sheet of
any size paper.
16
Print on EPSON Matte Paper - Heavyweight. Use for non-glossy
8 × 10 enlargements or special layouts.
Paper Size
Make sure this setting matches the paper you loaded in the printer.
Use for letter-size enlargements or printing multiple photos on
one sheet. You can’t use this setting for borderless photos.
Use for snapshots on EPSON Photo Paper—with or without
borders.
Use for enlargements on EPSON Premium Glossy Photo Paper.
Use for enlargements on EPSON Premium Glossy Photo Paper or
EPSON Matte Paper - Heavyweight.
Use for printing a series of borderless snapshots. You can print up
to 52 photos in one batch.
Your images may not match the width/height proportions (aspect ratio) of
the paper size and layout you’re using. Images may be cropped or trimmed
around the edges to fit the paper and layout.

Page Layout
Print borderless photos—either on roll paper or one on each sheet of
the selected paper. Photos will be slightly cropped around the edges
and printing will be a bit slower (especially near the edges).
Print photos with standard margins—one on each sheet of the
selected paper.
Print two photos on each sheet of the selected paper.
Print four photos on each sheet of the selected paper.
Print three photos on each sheet of the selected paper.
Print one photo 20 times or 20 different photos on each sheet. If you
print 20 different photos, the photo number, date, and time are also
printed.
Select Photo
■
When you’re printing one photo, press the button to choose the
number of the picture you want. Refer to your index print (or use the
optional preview monitor) to identify the photo.
■
When you’re printing a Set of photos, press the button to choose
the number of the picture you want. For each picture you want to
print, press the round
on the Copies menu. (Press the
want to print more than one copy of a picture.)
Select Photo
Select Photo
button. The number 1 appears
button again if you
If you change your mind
after selecting a photo,
press the Cancel button.
Copies
■
Press the button to set the number of copies you want to print.
■
When you’re printing a layout with several photos on a page, use the
Copies menu to set either the number of pages (in
mode) or the number of copies for each photo (in
All, One
Set
mode).
Quality
Print at 720 dpi. Always use for the best photographic results.
Print at 360 dpi. Use for faster, draft printing and saving ink (not
available for glossy paper).
, or
Index
17
PhotoEnhance
Use this setting if your camera supports PRINT Image Matching.
If not, you can still use PhotoEnhance to print with optimized
contrast, saturation, and color balance.
Print without PRINT Image Matching and without
enhancement.
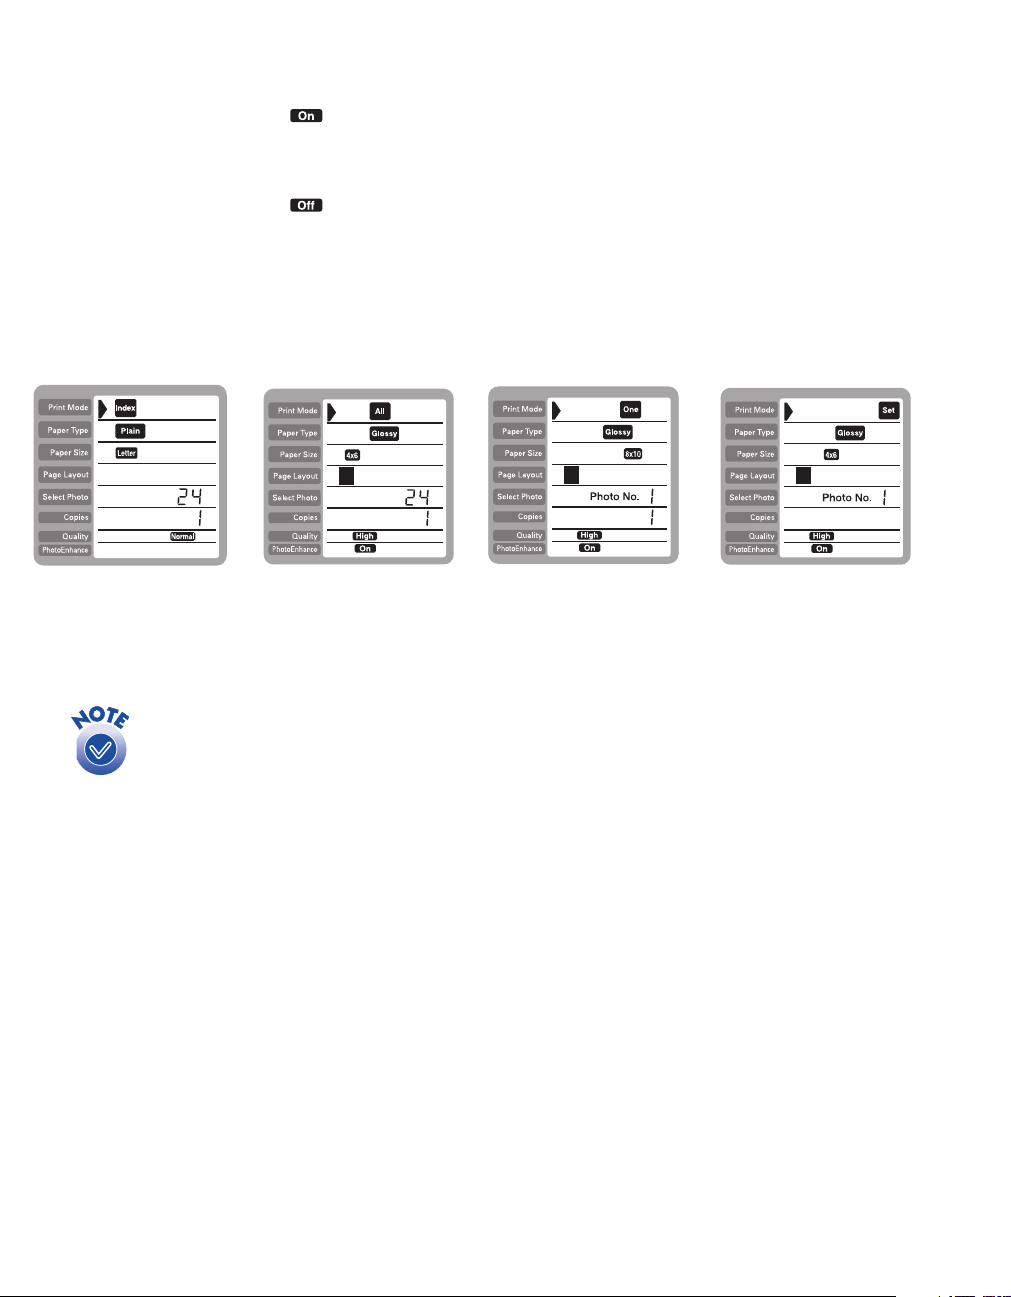
Changing the Default Settings
The printer comes with the following default settings for each print mode:
You can change the defaults to the settings you use most often.
1. Make the settings you want to use for one of the print modes.
If you want to select Photo
Paper or Photo Quality Ink
Jet paper, see page 22 for
instructions.
18
2. Press the
Select Photo
and
Brightness
buttons at the same time.
The settings are saved as defaults, even if you turn off the printer.
3. Repeat steps 1 and 2 for each print mode.
To change back to the factory defaults, first select the print mode you
want to change, then press the
Select Photo, Brightness
, and
Cancel
buttons at the same time.

Printing Your Photos
Whenever you print, you need to insert your memory card and load paper,
as described on pages 10 and 14. Make sure your printer is set up, plugged
in, and turned on, as described on the Start Here sheet.
■
Unless you have the optional preview monitor, it’s a good idea to start
by printing an index, so you can select your photos by number.
■
If your camera supports DPOF (Digital Print Order Format), you can
use your camera to select photos for printing. When you insert your
memory card,
are already selected.
You can press the or button on the Select Photo menu if you
don’t want to use the DPOF settings.
Printing an Index
An index print shows small, numbered images of all the photos on your
memory card—and includes the date each picture was taken. Make sure
your card is inserted and plain paper is loaded in the printer.
1. Check the control panel. It should display these settings (the
defaults), including the number of photos stored on your memory
card.
DPOF
displays on the Select Photo menu. Your photos
If necessary, press the
2. Press the
Print
Cancel
button. Your index is printed.
button to restore the default settings.
Number of photos
on the card
19

If you have EPSON 4 × 6
Photo Paper with
perforations, make sure
you tear off the margins
before you use it to print
without a computer.
Printing Snapshots
First print an index to identify the photos on the memory card (as
described on page 19). Then choose the pictures you want to print.
Follow these steps to print snapshots on 4 × 6 paper without cutting or
trimming. If you want to print a series of snapshots on roll paper, see
page 25.
1. Load up to 20 sheets of EPSON Borderless Photo Paper 4" × 6" in the
printer, short edge first as shown.
Make sure the printable (glossier)
side of the paper is face up
Slide the left edge guide
against the paper
Set
2. In the Print Mode menu, select
pictures on the card, select
All
. (If you want to print all the
.)
Photo numbering may not
match the numbering in
your camera. Always refer
to your index print to
identify photos.
20
PP
3. At the Paper Type menu, press the button and hold it until
flashes on the Select Photo menu. This is the setting to use for
Photo Paper.
4 x 6
4. In the Paper Size menu, select
.
5. In the Page Layout menu, select for borderless prints, or for
prints with white borders.
(If you want to print all the pictures on the card or you’re using
DPOF, skip to step 7.)
6. At the Select Photo menu, press the button to display your picture
numbers. For each picture you want to print, press the round
Photo
The number
button.
1
appears on the Copies menu. (Press the
Select
Select Photo
button again if you want to print more than one copy of a picture.)
For pictures you don’t want to print, the number
0
appears on the
Copies menu.

You can press the or button to scroll through your picture
numbers and check that the correct setting appears on the Copies
menu.
On
7. In the PhotoEnhance menu, select
(if your camera supports
PRINT Image Matching or to improve brightness and contrast)
Off
or
.
Print
8. Press the large green
button. The snapshots you selected are
printed.
Keep your pictures and unused paper away from high temperatures and
humidity and out of direct sunlight. See page 13 for more information
about storing and displaying your pictures.
Printing Enlargements
You ca n pr in t 5 × 7, 8 × 10, or letter-size enlargements suitable for
framing, without cutting or trimming.
First print an index to identify the photos on the memory card (as
described on page 19). Then choose the pictures you want to print.
1. Load one sheet of EPSON Premium Glossy Photo Paper.
■
If you’re using EPSON Matte Paper - Heavyweight or EPSON
Photo Paper, you can load up to 20 sheets at a time.
If you’re printing more than
20 photos at a time, you’ll
see PE flash on the control
panel when your paper
runs out. Load more paper,
then press the
maintenance button
to continue.
b
■
If you’re using EPSON Photo Quality Ink Jet Paper, you can load
as many sheets as necessary, up to the arrow mark on the left edge
guide.
Slide the left edge guide
against the paper
2. In the Print Mode menu, select
enlargements of several photos, select
Make sure the printable
side of the paper is face up
One
. (If you want to print
Set
.)
21

3. At the Paper Type menu, select either
on the type of paper you’re using.
■
If you’re using EPSON Photo Paper, press the button and hold
it until
■
If you’re using EPSON Photo Quality Ink Jet paper, press the
button and hold it until
PP
flashes on the Select Photo menu.
SF (SuperFine)
Photo menu.
Glossy
Matte
or
, depending
flashes on the Select
If you’re printing more than
one glossy enlargement,
you’ll see PE flash on the
control panel after you
print. Load another sheet,
then press the
maintenance button
to continue.
b
4. In the Paper Size menu, select either
5 x 7, 8 x 10
, or
Letter
.
5. In the Page Layout menu, select for borderless prints, or for
prints with white borders.
(If you’re using DPOF, skip to step 7.)
6. At the Select Photo menu, press the button to select the picture
you want to enlarge.
If you want to enlarge more than one picture, press the round
Photo
button for each one you want. Press the
Select Photo
Select
button
again to print more than one copy of an enlargement.
7. At the Copies menu, press the button to set the number of copies
you want to print.
On
8. In the PhotoEnhance menu, select
(if your camera supports
PRINT Image Matching or to improve brightness and contrast) or
Off
.
Print
9. Press the large green
button. Your enlargement is printed.
Keep your pictures and unused paper away from high temperatures and
humidity and out of direct sunlight. See page 13 for more information
about storing and displaying your pictures.
22

Printing Multiple Photos on a Sheet
You can print 2, 3, 4, or 20 photos on one sheet of paper. The printer
automatically sizes your photos to fit the layout you choose on any size
paper—from letter-size to 4 × 6. See page 24 for a list of photo sizes on
various paper sizes.
You can print multiple copies of a single photo, a set of photos, or print all
the photos on your memory card in multi-photo layouts.
First print an index to identify the photos on the memory card (as
described on page 19).
1. Load paper in the printer.
2. Select your Print Mode, Paper Type, and Paper Size.
3. In the Page Layout menu, select one of the following:
to print two photos on each sheet of the selected paper
to print four photos on each sheet of the selected paper
to print three photos on each sheet of the selected paper (the first
photo may be larger on some paper sizes)
to print one photo 20 times or 20 photos on each sheet of the
selected paper. If you print 20 different photos, the photo
number and date are also printed.
If you’re using Photo Paper
or Photo Quality Ink Jet
paper, see page 22 for
instructions on selecting
the Paper Type.
(If you’re using DPOF, skip to step 7.)
4. At the Select Photo menu, press the button to select the picture or
pictures you want to print.
If you want to print more than one picture, make sure
in the Print Mode menu, then press the round
for each photo you want. Press the
Select Photo
Select Photo
Set
is selected
button
button again to
print more than one copy of a picture.
5. At the Copies menu, press the button to set the number of copies
you want to print.
On
6. In the PhotoEnhance menu, select
(if your camera supports
PRINT Image Matching or to improve brightness and contrast) or
Off
.
Print
7. Press the large green
button. Your photos are printed.
Keep your pictures and unused paper away from high temperatures and
humidity and out of direct sunlight. See page 13 for more information
about storing and displaying your pictures.
If you’re printing more than
one page, you may see PE
flash on the control panel
when your paper runs out.
Load more paper, then
press the
button to continue.
b maintenance
23

When you print multi-photo layouts, your photos are sized to fit standard
frames and wallet inserts, as shown in the following tables:
Page
Paper size
layout
Letter 8
4
64 × 6 1.25 × 0.88
×
Size of each
photo (inches)
10 5 × 75 × 7
×
54 × 6
7
×
5 3.5 × 2.5
3.5
×
5
3.5 2 × 2
×
2 3.5 × 2.5 or 2 × 2
2
×
Paper size
Page
layout
Size of each
photo (inches)
3.5 × 58 × 10 8 × 10
2.5 5 × 7
3.5
×
26 × 4
×
1. 5
2
1.5 2.5 × 3.5
×
4-inch wide roll 4
24
0.67 6 × 4 or 3.5 × 2.5
×
0.91
6 1.5 × 1. 5
×
 Loading...