

Page 1

®
®
EPSON PowerLite 735c
Multimedia Projector
User’s Guide Supplement
Installing and Setting Up Wireless Projecting for Macintosh
Using EMP NS Connect for Wireless Projecting
Using Projector Groups
Using E-Mail Alerts
Projecting Movies Through EasyMP
Page 2

EPSON is a registered trademark and EasyMP is a trademark of SEIKO
EPSON CORPORATION.
PowerLite is a registered trademark of Epson America, Inc.
General Notice: Other product names used herein are for identification
purposes only and may be trademarks of their respective owners. EPSON
disclaims any and all rights in those marks.
Copyright © 2003 by Epson America, Inc. 11/03
2
Page 3

Introduction
Your EPSON PowerLite 735c projector includes new features for
Macintosh
Guide. The following features are now available:
■ Presenting through a wireless network from a Macintosh
■ A new version of NS Connection (for Windows and Macintosh)
®
and Windows® user that are not covered in the User’s
that supports improved performance in wireless presenting,
including the ability to connect to four projectors at once
■ Support for SXGA+ and UXGA video modes
■ E-mail notification through the wired or wireless connection
when an error occurs on the projector
■ The ability to play MPEG2 movies and view PNG files from a
memory card in the projector
This booklet provides instructions for using the new features.
Installing and Setting Up Wireless Projecting for Macintosh
The EMP NS Connection software is now available for Macintosh.
This allows you to project wirelessly from Apple
equipped with an 802.11b wireless network interface.
System Requirements
Before you install the software, make sure your Macintosh meets the
following requirements:
■ Power Macintosh
system, running Mac OS X 10.2.4 or above
®
series, iMac,® PowerBook,® or iBook® series
®
Macintosh systems
note
If you want to monitor the
projector using HP
OpenView,
an SNMP management
plug-in from EPSON.
™
you can request
■ 802.11b wireless network interface (AirPort)
■ At least 256MB of RAM
■ At least 128MB of free hard disk space
■ SVGA (800 × 600) or better display adapter and monitor
3
Page 4
Installing the Software
Follow these steps:
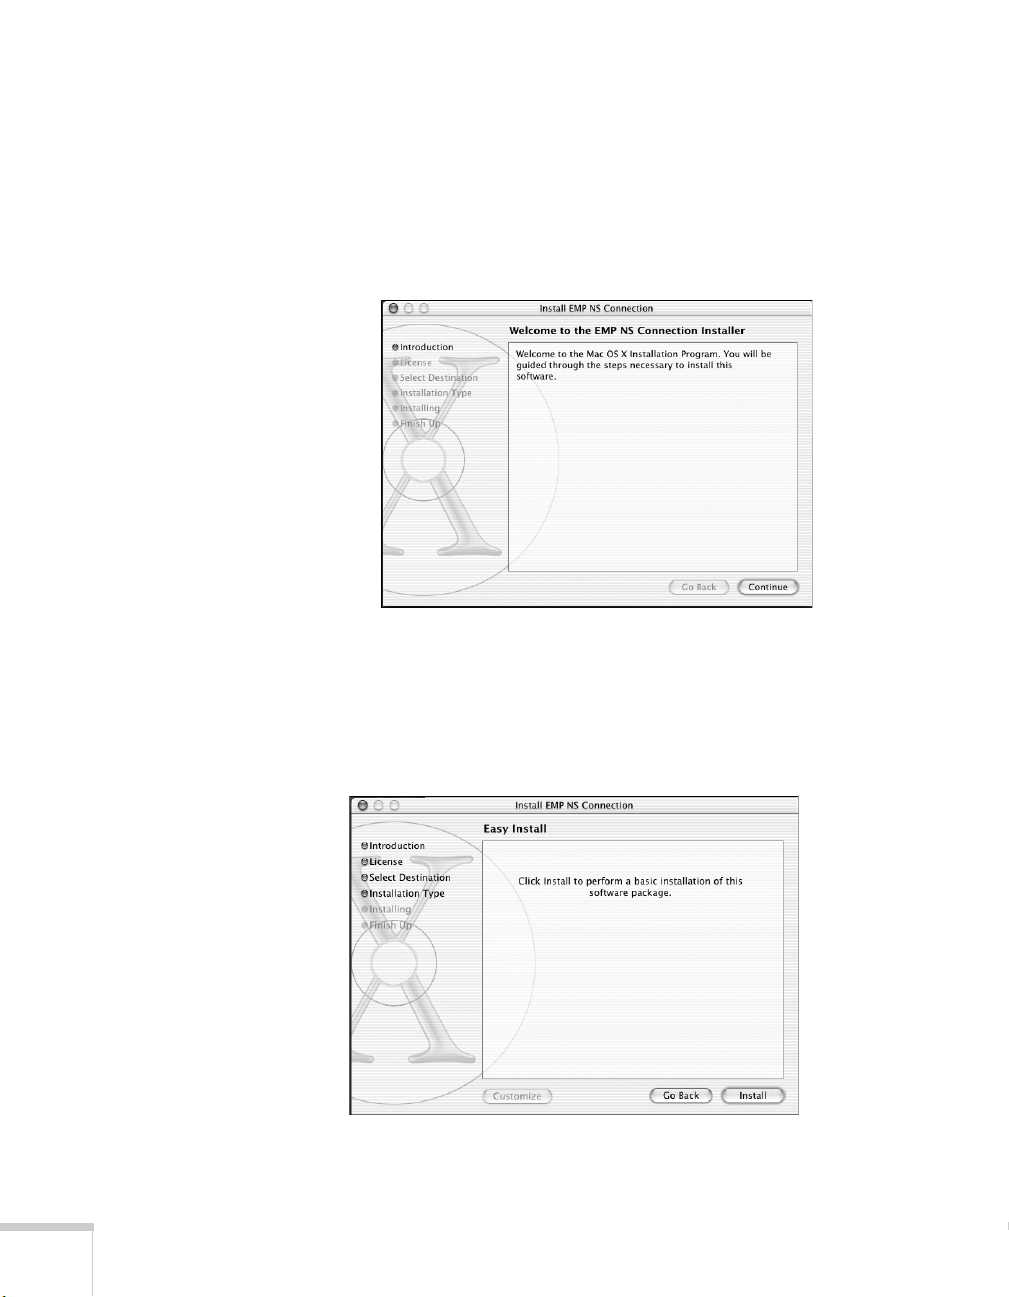
1. Insert the EasyMP software CD-ROM in your drive. You see a
window containing the
EMP NS Connection.pkg icon.
2. Double-click the
3. Click
4. Click
Continue. You see the software license agreement.
Continue, then Agree.
EMP NS Connection.pkg icon.
5. Select the destination drive, then click
following install window:
Continue. You see the
6. Click
4
Install. When installation is complete, close the window.
Page 5
Configuring Your Network Connection
Follow the instructions in your Projector User’s Guide to start EasyMP
and insert the EPSON 802.11b card in the projector.
Determine whether you will use Ad Hoc mode or Access Point mode
to connect to the projector. Follow the instructions in your Projector
User’s Guide to configure the projector for the mode you will be using.
Then follow the instructions beginning on page 5 to set up your
Macintosh in either Ad Hoc mode or Access Point mode.
Before you can connect to the projector, you need to make sure the
network settings on your Macintosh match the settings on the
projector.
note
EMP NS Connection does
not support Macintosh
Channel Ad Hoc mode.
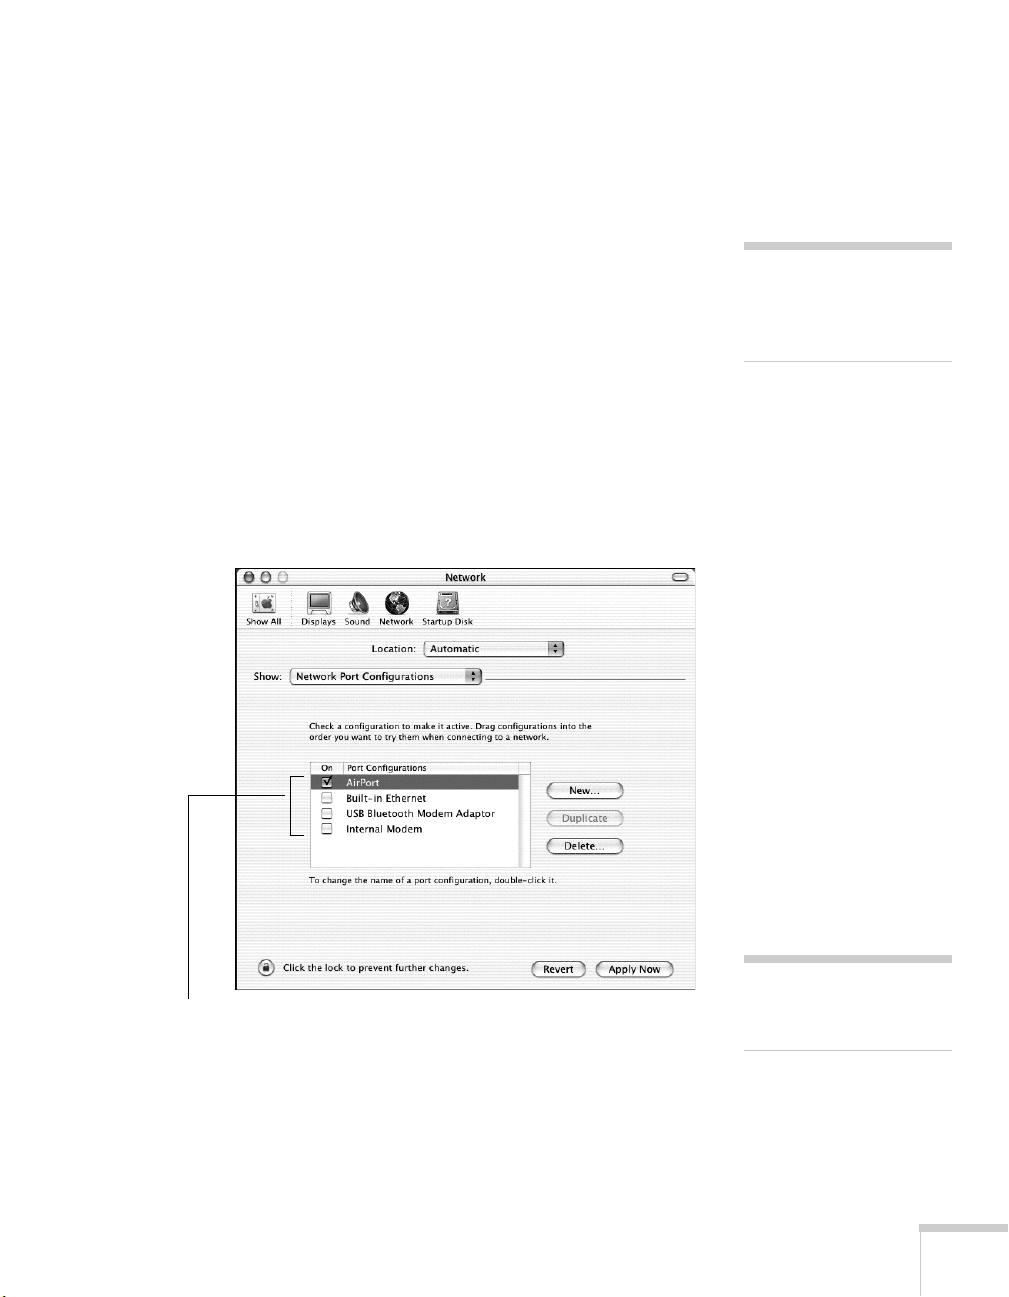
1. From the Apple pull-down menu, select
Then double-click the
Network icon. You see the Network
Settings window:
Check the port you want to use
System Preferences.
note
Make sure that only one port
is selected.
2. Under
network or
3. Click
Port Configurations, select AirPort for a wireless
Built-in Ethernet for a wired network.
Apply Now. Then close the window.
5
Page 6
■ For optimal performance, set your screen resolution to
1024 × 768 or lower with a color depth of Thousands
(16 bit).
■ When making Location settings, you can select the desired
location and change all the network settings one at a time.
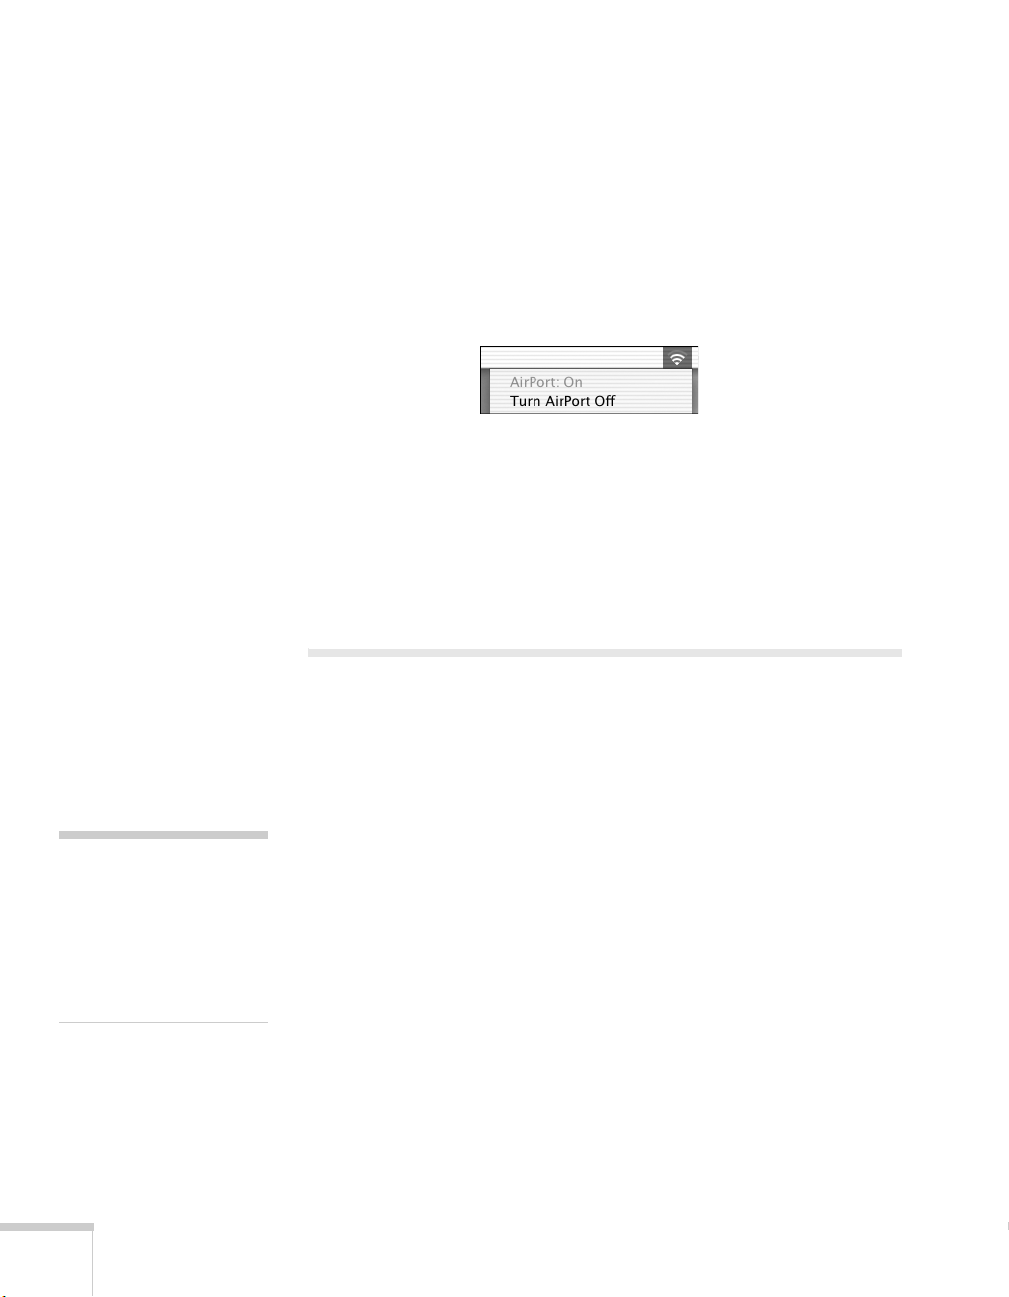
4. Make sure the following is displayed in the communication status
bar in the top right corner of the screen:
■ If the projector has been assigned an ESSID name, click the
communication status icon and select the projector’s ESSID
name from the menu.
■ If you are using the wired LAN Connection mode, click Turn
AirPort Off
.
Using EMP NS Connect for Wireless
note
If you see a message during
installation that the
EPSON GDI Monitor
Driver has not passed
Windows Logo testing, click
Continue Anyway.
6
Projecting
Your projector now includes version 1.20 of EMP NS Connection for
Windows (equivalent to version 1.0 for Macintosh). If you are using a
Macintosh, the screens will look different from those shown in this
section, but the same features are available.
Follow the instructions in your Projector User’s Guide to install the
software, start EasyMP, and set up your projector and computer in
either Ad Hoc mode (computer to computer) or Access Point mode.
Then follow these steps:
1. Make sure you’ve installed your wireless 802.11b card. Then do
one of the following:
■ Windows: select EMP NS Connection from the Start menu.
■ Macintosh: double-click the EMP NS Connection icon in
your Applications folder.
Page 7
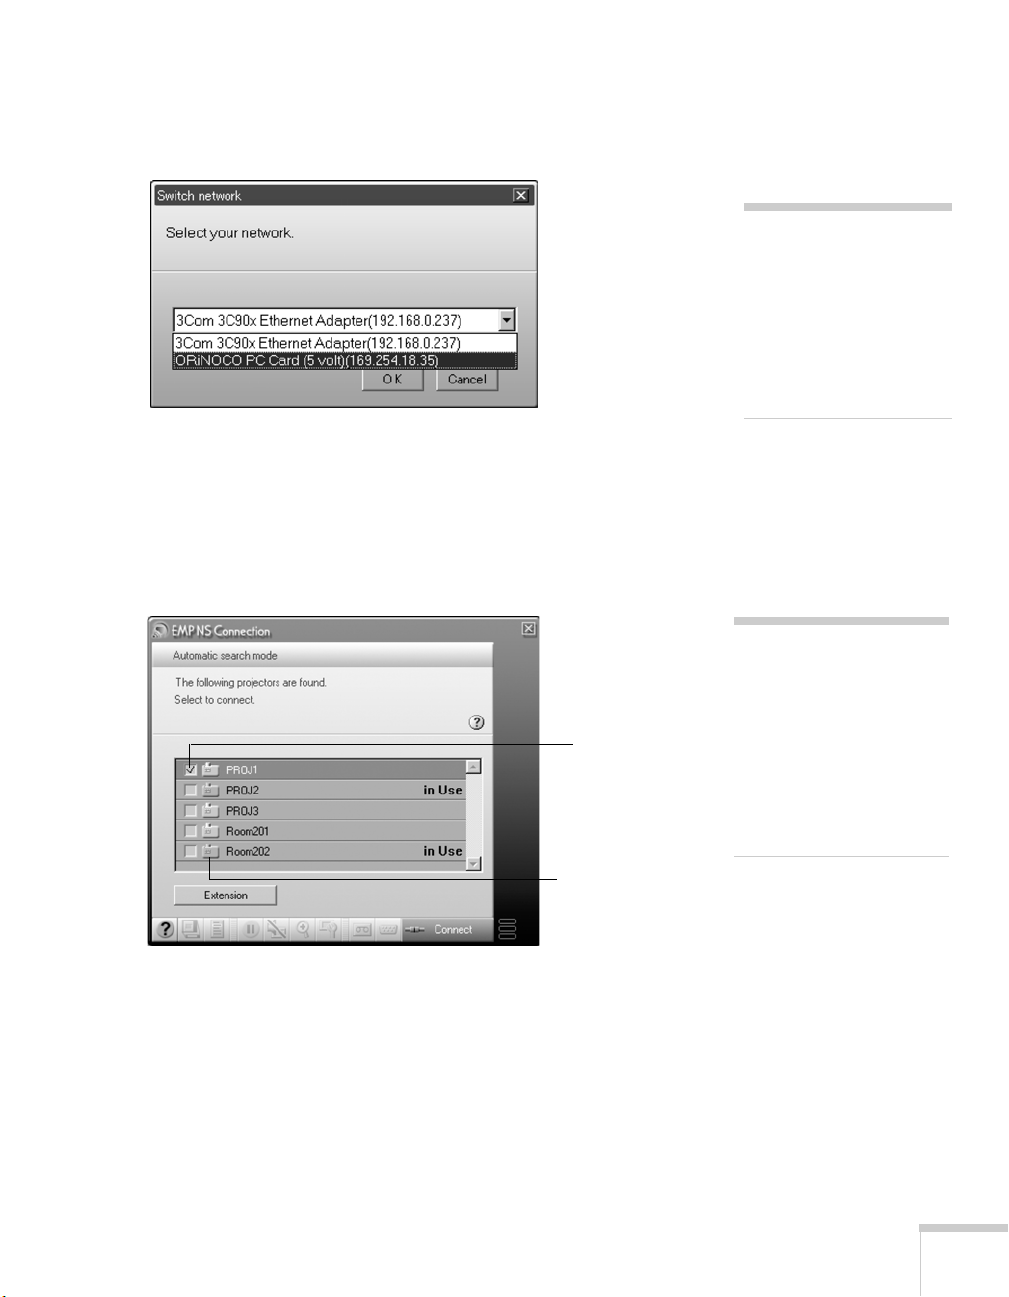
The first time you start NS Connection in Windows, you see a
window asking you to select your network.
2. Select the IP address for your computer’s network adapter card
and click
OK.
You see the screen below. (If you have previously started NS
Connection, or you’re using a Macintosh, this is the first screen
you see.)
Select projector
note
If you don’t see your network
adapter’s IP address, allow a
minute for it to appear. If
your access point uses
DHCP, sometimes it takes a
minute for the server to pick
up the IP address.
note
If you don’t see the Switch
network window and you
want to change to a different
network adapter, click the
Extension button. In
Windows, click
LAN
. On Macintosh, click
Set up network.
Switch
This box indicates
projector status
If the connection is working properly, you see your projector
listed. If you have additional EPSON projectors on the network,
they are also listed, along with their status.
7
Page 8

note
The status icon colors may
be easier to see on the
projected image than on the
computer.
note
If you want your
presentation encrypted,
click
Extension and select
Use encrypted
communication
This step enhances security
but decreases the data
transmission speed.
.
The color of the status icon indicates the projector’s status:
■ Gray: the projector is not connected
■ Red: the projector is connected to another computer
■ Green: the projector is connected to your computer.
3. If you don’t see your projector, check the following:
■ Make sure your wireless signal is strong enough to establish a
connection (see your computer documentation for details).
■ Make sure your computer’s SSID matches the ESSID you
assigned to the projector (for example,
CONF ROOM).
Remember that both the SSID and ESSID are case-sensitive.
■ If you are using Access Point mode, make sure the projector
and your computer are on the same subnet.
■ Make sure the projector and your computer are
communicating on the same channel.
■ Restart your computer and start NS Connection again.
■ If you still don’t see your projector and you are using Access
Point mode, follow the instructions in “Connecting in IP
Connect Mode” on page 11 to connect to the projector.
4. Once the name of your projector appears, select it and click
Connect. If more than one projector is listed, you can select up to
four projectors and connect to them at the same time.
If the selected projector is already being used by another person,
you can still connect to it; however, doing so automatically
disconnects the other user.
If you set up the projector to prompt you for a keyword before
connecting, you see this screen:
Enter keyword
8
Page 9
5. Type in the four-digit number displayed on the EasyMP Network
screen and click
OK.
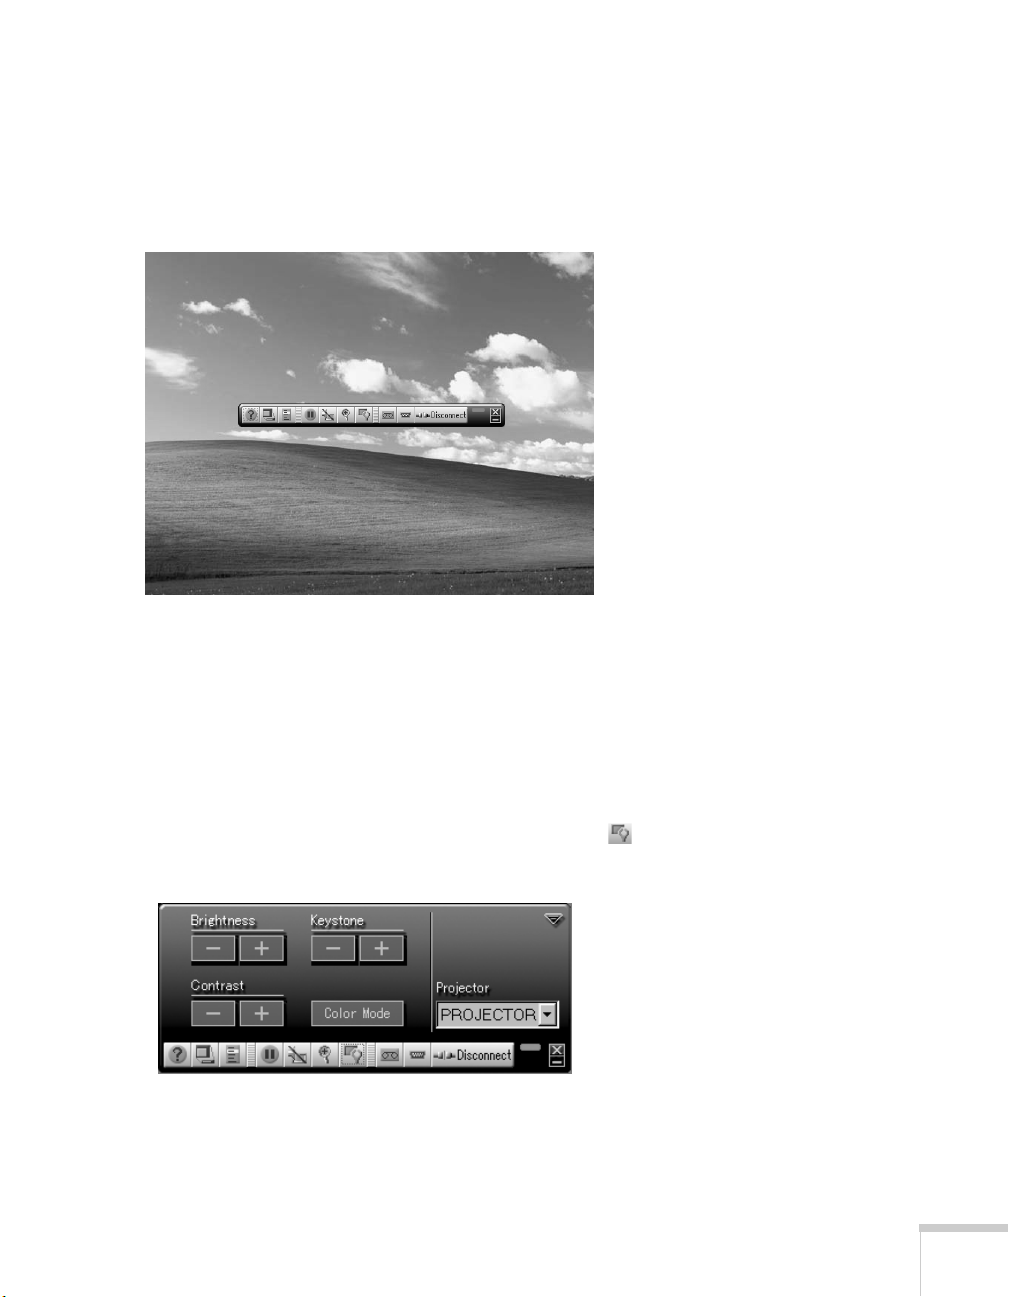
Once the connection is established, you see your computer’s
image transmitted to the projector, and a floating control bar:
6. If necessary, drag the control bar out of the way, or minimize it.
7. When done with your presentation, click
Disconnect on the
control bar.
Using the Control Bar
Clicking one of the buttons on the control bar may cause a submenu
to appear above the control bar. For example, clicking the button
displays the following submenu:
9
Page 10

If you are using more than one projector, you can use the Projector
drop-down menu to select the projector to which you want to make
any of the following changes:
■ Brightness
Increase or decrease brightness
■ Keystone
Click + to narrow the top edge of the screen, or - to narrow the
bottom edge (this option functions like the
Sync buttons on the
projector’s control panel)
■ Contrast
Increase or decrease image contrast
■ Color Mode
Lets you select from five preset modes to adjust the color and
brightness for specific environments:
sRGB for computer displays
(the default when projecting from a computer with analog video),
Meeting for presentations in bright rooms, Presentation for
presentations in dark rooms,
images (the default for video display), and
Theatre for optimizing movie
Game for video games
Clicking the button displays the following screen and allows you
to modify the zoom magnification and position:
10
When you’re done making changes, click the arrow in the upper right
corner to close the menu.
Giving a Wireless Presentation
When projecting a PowerPoint® presentation, you can use the Page
down
and Page up buttons on the remote control to move through
your slideshow. This works the same way as when you connect your
computer to the projector with the USB cable.
Page 11

Connecting in IP Connect Mode
Even if your projector and computer are on a different subnet (Access
Point mode only) or connecting over different routers, you can
establish a connection manually using IP Connect Mode.
1. Start NS Connection on the computer to which you want to
connect. You see this screen:
Click here
note
Depending on your network,
your projector and computer
may connect over different
routers even if they are in
the same room. Try this
method if you are unable to
connect automatically.
2. Click the
You see this screen:
Extension button.
Select this box
11
Page 12

3. Select Use IP connect mode and click OK. You see the following
screen:
Click here
note
You can add up to 16
projectors to the list and
connect to four projectors at
the same time. If you add
more, NS Connection begins
to delete projectors from the
list, starting with the first
projector added.
4. Click
IP connection. You see this screen:
5. Enter the projector’s IP address and click
Enter the IP
address and click
Search
Search.
12
Page 13

The IP address appears in the Projector list and a searching
icon displays:
This icon
indicates search
is in progress
This icon appears if
the search fails to
find the projector
If the search fails to find a projector with the specified IP address,
the searching icon turns into a question mark. If this happens, run
EasyMP to check the projector’s IP address, then repeat this step.
6. Click the projector you want to connect to, then click the
Connect button. If more than one projector is listed, you can
select additional projectors and connect to them at the same time.
7. If you are prompted for a keyword, enter the four-digit number
displayed on the EasyMP Network screen and click
OK.
The computer’s image is transmitted to the projector. See the
Projector User’s Guide and page 9 for details about using the
floating control bar.
13
Page 14

ip
Use a static IP address when
onfiguring a projector for
he network if you plan to
se it in a group. If you use
HCP, the projector’s IP
ddress will change every
ime you turn it off and on
gain, and you will have to
ecreate the projector group.
Using Projector Groups
You can register projectors as a group if you want to provide quick and
easy access to other computers. You can also export or import group
information as a file to another computer. Projectors must be
connected to the network in Access Point mode, and must be on the
same network segment as the computer used to create the group, or
the computers that import or export group information.
Creating a Group
You can register up to 16 projectors as a group, and all projectors must
be part of your wireless network.
1. Start NS Connection. Then click the
Extension button on the
EMP NS Connection screen. You see this screen:
Select these
two boxes
2. Select
Use IP connect mode and Use Group List.
14
Page 15

3. Click the Advanced button. You see this screen:
4. Enter a name for the group in the Connection Group box. Then
enter the IP address of the projector you want to register in the IP
address box:
note
You cannot use the addresses
0.0.0.0 or 255.255.255.255.
15
Page 16

5. Click Add. The IP address appears in the list of registered
printers, and the searching icon appears beside it. If the
projector is found, its name appears in the projector list.
note
To remove a projector from
the group, select it from the
projector list and click
Delete.
6. Repeat steps 4 and 5 for each projector you want to add to the
group.
7. Click
8. Click
9. Click
OK to save the projectors as a group. When you see a
confirmation message, click
Close to close the Advanced screen.
OK to close the Extension screen, then close
Yes.
NS Connection.
16
Page 17

Connecting to a Projector in a Group
Follow these steps to connect to a projector in a group:
1. Start NS Connection. Then click the
Extension button on the
EMP NS Connection screen. You see this screen:
Select these
two boxes
2. Select
Use IP connect mode and Use Group List. You see the
following screen:
17
Page 18

3. From the Connection Group list, choose the group you want to
connect to and click
If this says IP
connect
mode, skip
step 4.
OK. You see this screen:
4. Click
IP connection. (If the upper left button on the screen says
IP connect mode rather than Automatic search mode, skip
this step.) You see this screen:
Select the
projector
Then click
Connect
5. Select the projector you want to connect to and click
Connect.
18
Page 19

6. If you want, repeat step 5 to connect to additional projectors. The
computer’s image appears on the projector screen.
Exporting a Projector Group
You can export group information as a file to another computer on
the wireless network. This is useful, for example, if you want to share
group access with multiple users.
1. Start NS Connection. Then click the
EMP NS Connection screen. You see this screen:
Select these
two boxes
Extension button on the
note
You must export all of the
groups in the Connection
Group list. You can’t export
individual groups.
Even if a projector is
registered in a group, you
don’t have to use the group
to connect to it. If your
laptop is configured for your
wireless network, you can
connect to a projector as
described on page 6.
2. Select
the
Advanced button.
Use IP connect mode and Use Group List. Then click
19
Page 20

note
If you haven’t created any
groups, the
will be grayed out. You must
create at least one group
before the
active.
Export button
Export button is
You see this screen.
3. Click
Export to export a file for all groups in the Connection
Group list.
4. Highlight the file name (
Choose a location on the second computer and click
NSGroup.ini), and then select Save to.
Save.
To connect to the projector from the new computer, follow the steps
beginning on page 17.
20
Page 21

Importing a Projector Group
You can also import group information as a file to another computer
on the wireless network.
1. Start NS Connection. Then click the
Extension button on the
EMP NS Connection screen. You see this screen:
Select these
two boxes
2. Select
Use IP connect mode and Use Group List. Then click
the
Advanced button. You see this screen.
3. Click
Import.
21
Page 22

4. On the next screen, select the file you want to import and click
Open.
The names of all of the groups in the file are added to the
Connection Group list on the Advanced screen.
To connect to the projector from the new computer, follow the steps
beginning on page 17.
Using E-mail Alerts
You can set up e-mail alerts to warn you of problems with the
projector on either a wireless network or a wired LAN connection.
1. Do one of the following:
■ Insert the EPSON 802.11b wireless card and set up your
projector to work in Access Point mode.
■ Insert your LAN card and configure your projector for a
wired network.
22
2. Turn on your projector and remote control. Press the
button on the remote control to switch to EasyMP. You see the
following screen:
3. Select
Config in the lower right corner of the screen and press
Enter on the remote control.
EasyMP
Page 23

You see the following screen:
Select
Advanced
If you’re connecting over a wired LAN network, go to step 5.
If you’re connecting over a wireless network, continue with the
next step.
4. Wireless network only: On the Network Screen, select the
Advanced button next to the Access point mode box. Press
Enter on the remote control.
5. When you see the screen below, select
Select
Mail
Mail and press Enter.
note
The ESSID option is not
displayed if you are
connecting over a wired
LAN network.
23
Page 24

You see the following screen:
note
Use the up and down
buttons on the remote
control to enter letters and
numbers. You will also see
punctuation marks, such as
a period (.) and symbols,
such as @. When you see the
letter or symbol you want,
press
Enter. Then press the
right arrow to move to the
next position. To correct a
mistake, press the left arrow
to return to the previous
position.
6. For Mail Notification Settings, select
ON and press Enter on the
remote control.
7. Highlight the
IP address of SMTP server box and press Enter.
The outline of the box turns green to indicate you are in input
mode. You can enter numbers between 0 and 255. However, you
cannot use the following IP addresses: 255.255.255.255,
224.0.0.0, or 127.x.x.x (where x is a number between 0 and 255).
8. Highlight the
Port Number box and press Enter. Then enter the
SMTP server port number. The default value is 25, but you can
enter numbers between 1 and 65535.
9. Highlight the box for
Destination address 1 and press Enter.
Enter the e-mail address for the first computer that you want to
receive e-mail alerts. You can enter a maximum of 53 single-byte
alphanumeric characters.
10. If you want to send e-mail alerts to one or two other computers,
enter addresses for those computers in
and
Destination address 3.
Destination address 2
11. Select the conditions under which an e-mail alert will be sent.
24
Page 25

12. When done making your settings, highlight the OK button at the
top of the screen, then press
again and press
Enter to return to the main EasyMP Network
Enter. Highlight the OK button
Screen.
Understanding the Notification Messages
If a projector experiences a problem, it sends an e-mail message to
each of the addresses you provided using EMP NetworkManager. The
message includes the heading “EPSON Projector” in the subject line.
The body of the message contains:
■ the name of the projector
■ the projector’s IP address
■ a description of the problem
The problem descriptions are similar to the errors reported by EMP
Monitor:
■ Internal problem
■ Fan-related problem
note
If a projector develops a
critical problem, it may not
be possible for it to report the
error.
■ Sensor problem
■ Lamp timer failure
■ Lamp burned out
■ Lamp cover open
■ Overheating (projection turned off automatically)
■ High-speed cooling in progress (the projector is getting too hot
but continues to operate)
■ Lamp replacement notification (the lamp is nearing the end of its
life)
If a plus (+) sign appears before the description, it indicates that a
problem has occurred. A minus (–) sign appears when the problem
goes away or is resolved.
25
Page 26

Projecting Movies Through EasyMP
Your projector now includes version 1.11 of the SlideMaker2 software
(for Windows only). This upgrade allows you to add movies in the
MPEG2 format and PNG files to a scenario. You can also incorporate
the following PowerPoint transitions:
■ fly ■ blinds ■ box ■ checkerboard
■ peek ■ random bars ■ spiral ■ split
■ strips ■ swivel ■ wipe ■ zoom
■ crawl ■ stretch ■ dissolve
You can use the EasyMP CardPlayer program to play back MPEG2
movies. This works the same way as playing a slideshow or displaying
an image file in the EasyMP CardPlayer program.
EasyMP supports MPEG2 movie files with the following
specifications:
■ Display size up to 720 x 480 pixels
■ Bit rate up to 8Mbps
■ MPEG1-Layer2 (MP2) audio
26
For more information, see Chapter 5 in your projector User’s Guide.
Page 27

27
Page 28

28
CPD-17100R1
Printed in XXX
 Loading...