

Page 1

Label Editor
User’s Guide
Read this document carefully to use this
product safely and correctly.
For Windows
© 2013 Seiko Epson Corporation. All rights reserved.
Page 2

Introduction
Thank you for purchasing this product.
For your safety, read the attached documents carefully to use the dedicated application
software Label Editor correctly.
• This manual describes how to use “Label Editor”. For the settings and operations of this
product, refer to this product's user's guide.
• This manual assumes your computer is running the English version of either of Microsoft
Windows 8, Windows 7, Windows Vista or Windows XP and that you are able to operate
it and understand its basic terms. If you have any questions relating to your computer
and operating system, please refer to their specific manuals.
• No part of this manual may be reproduced without prior permission.
• Contents in this manual are subject to change without prior notice.
• Specifications, and design described in this manual are subject to change without prior
notice.
Microsoft, Windows, and Windows Vista are trademarks or registered trademarks of
Microsoft Corporation in the United States and other countries.
Other companies or product names used herein are also trademarks or registered
trademarks of their respective owners.
Please confirm the software license agreement when installing Label Editor.
Contents
Safety Instructions ................................ 1
Preparation to use Label Editor ........... 2
Operating environment......................................2
Installing Label Editor and the
printer driver ........................................................2
Uninstalling Label Editor and/or
the printer driver ................................................5
How to Create, Open and Save a File ......... 7
Creating a new file ................................................ 7
Opening a created file .........................................8
Opening a file from the history list .................8
Saving the created labels ...................................8
Ending Label Editor ..............................................8
Creating a Label ..................................... 9
Using Label Catalog .............................11
Creating an Original Ribbon ...............13
Creating a Label for Managing Equipment ............ 14
Successive Import Printing ................ 16
Creating data for import printing ................ 16
Laying out labels .................................................17
Printing labels .......................................................17
Saving the created files .....................................17
Creating a Label with a Barcode ........ 18
Other Functions ................................... 19
Checking a Label's Overall Appearance..............20
Printing a Label ................................... 21
Using Label Editor Help ...................... 22
Printing from Other Applications ...... 23
Troubleshooting .................................. 24
Page 3
Safety Instructions
For your safety, read the attached documents carefully to use this product correctly.
Once you have read the instructions, keep this manual handy for future reference. Items
below indicate safety precautions to protect users, their surroundings and their property
from possible injury or damage. Precautionary notations are categorised as follows
according to personal injury and damage to the equipment if the instructions are ignored or
the equipment is misused.
CAUTION
This symbol indicates information that, if ignored, could possibly result in personal
injury or physical damage due to incorrect handling.
The following describes the definitions and meanings for each symbol used in the
precautions.
This indicates an "Important reminder".
This indicates a "Prohibited" item.
CAUTION
The supplied disc is a data DVD-ROM for computers. Do not play it an audio DVD
player. Otherwise there is a risk to hearing and audio equipment.
Be careful of continuous use of this product, which may cause eye fatigue.
1
Page 4
Preparation to use Label Editor
Operating environment
Before installing Label Editor, make sure that your computer satisfies the following
requirements.
Operating system Windows 8 (32bit/64bit), Windows 7 (32bit/64bit),
Hard disk space which
Label Editor uses
Drive DVD-ROM drive
Display XGA (1024 x 768), High Colour or higher
Interface USB, Ethernet 10BASE-T/100BASE-TX*, wireless LAN network*
*Only for models supporting network connection.
Caution
Label Editor may not operate normally in computers upgraded to a later version of
Windows. Label Editor may also not operate normally depending on the computer
environment you use.
Installing Label Editor and the printer driver
This section describes the installation method to use when connecting this printer to a
computer with a USB cable.
If your printer model supports network connection and you want to connect it to your
computer on a network, see the manual provided with each product or “Network
Configuration Guide” on included DVD-ROM.
Windows Vista (32bit/64bit), Windows XP (32bit/64bit)
Approx. 300MB
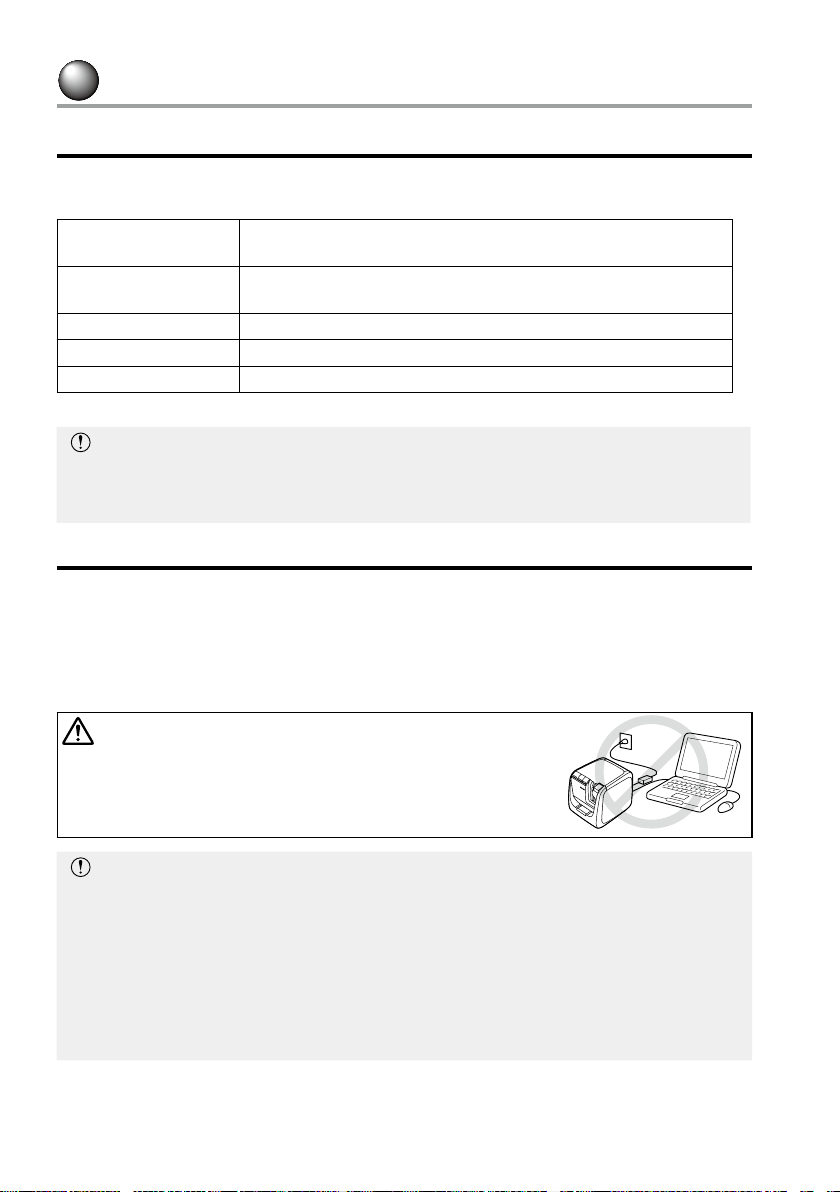
CAUTION
Do not connect this product to your computer until the
install window tells you to do so.
How to connect this product to your computer
This product's user's guide.
s
Caution
• Make sure to install Label Editor as a user with the administrator authority.
• Before installing Label Editor, close all the other applications running on your computer.
• Ensure you install the application and the printer driver in the combination included in
the DVD-ROM. Label printing is not available in other combinations.
• When connecting two or more products to one computer
The printer driver is necessary for each product individually. Installation of the printer
driver for the second or later products will start when the second (or later) product is
first connected to the computer. Install it according to the instructions displayed on the
screen. Newly installed printer drivers are named as copies of the printer driver.
2
Page 5
Turn on your computer and start up Windows.
Close running applications if any. Close any anti-virus software or similar also.
Insert the included DVD-ROM
into the DVD-ROM drive on your
computer.
An install program starts up.
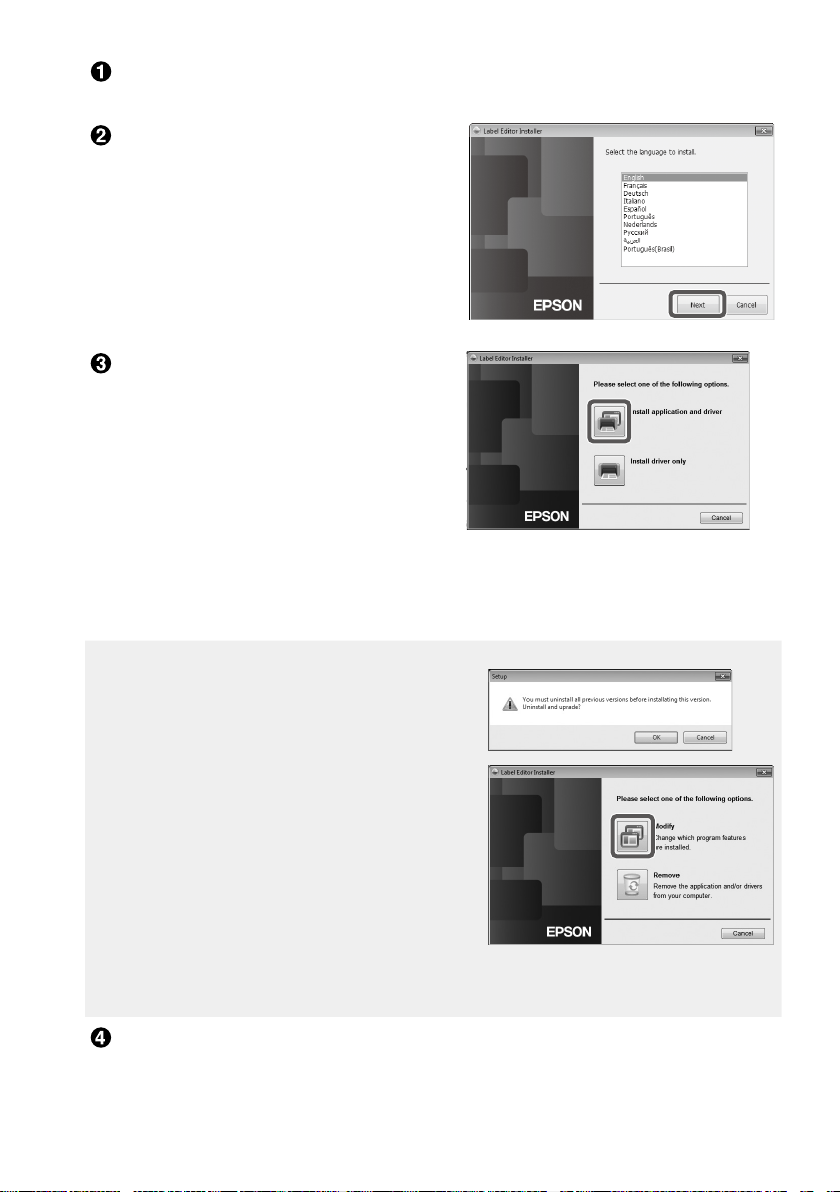
Select the language to install, and click
[Next].
When the installation screen
appears, confirm the content and
click your choice.
When installing both Label Editor and
the printer driver
[Install application and driver]: Click this
item.
When installing the printer driver only
[Install driver only]: Click this item.
When the software license agreement confirmation window appears, confirm the
content and click [Agree].
to Step 8
s
MEMO
• If the following message appears, an old version
of the application is installed. Be sure to uninstall
the old one before installing the new one.
• If the following screen appears, either the
application or the driver is already installed.
When adding or changing items, click [Modify].
• If the installation program does not start, take the following procedure.
Open [Computer] ([My computer] for Windows XP).
Double-click the [DVD-ROM] icon.
When the license agreement dialogue box appears, confirm the content
and click [Agree].
To abort installation: Click [Disagree].
3
Page 6
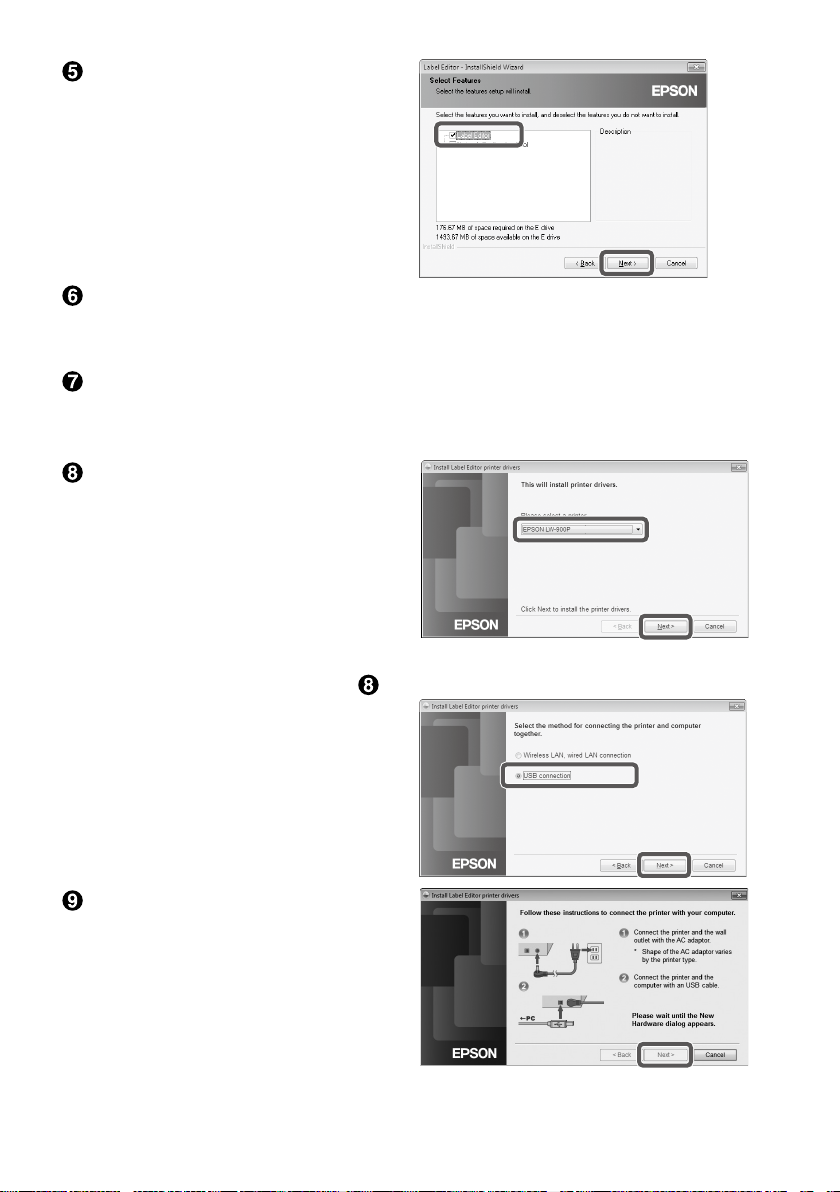
When the screen to select
application to be installed, confirm
[Label Editor] is checked and click
[Next].
When the destination selection dialogue box appears, confirm the
destination folder, and click [Next].
Installation starts.
To change the destination folder: Click [Browse...].
When the completion message appears, the installation is complete.
Click [Finish].
To create a desktop shortcut, turn on the check box.
Install the printer driver next.
Confirm the printer to use, then
click [Next].
If your printer model supports network connection, the screen below for selecting the
connection method appears after Step
When this screen appears, click [USB
connection], and then click [Next].
.
Connect the product to the
computer following the
instructions on the screen.
After the connection is established,
click [Next].
For how to connect the product to the
computer sThis product's user's guide
4
Page 7
When the completion message appears, the installation is complete.
Click [Finish].
Uninstalling Label Editor and/or the printer driver
Caution
• When uninstalling the printer driver, disconnect the product from the computer.
• Before uninstalling Label Editor and/or the printer driver, close all the other applications
running on your computer.
• To uninstall Label Editor and/or the printer driver, carry out the following procedure
using the included DVD-ROM.
Insert the included DVD-ROM into the DVD-ROM drive on your computer.
Select the language installed, and click [Next].
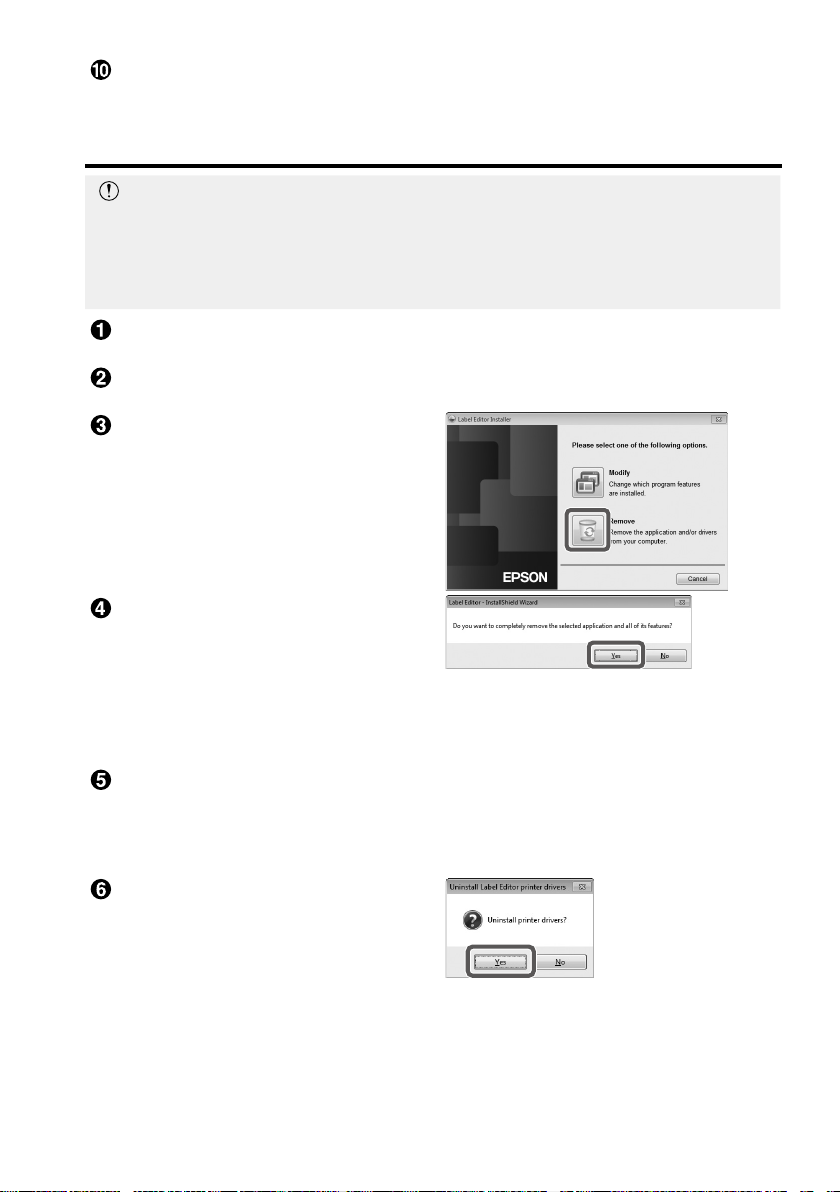
When the installation program
starts, click [Remove].
Click [Yes].
Uninstallation starts.
To abort uninstallation: Click [No].
When uninstalling the printer driver
only
[No]: Click this item.
to Step 6
s
When the completion message appears, the uninstallation is complete.
Click [Finish].
Uninstallation of the application is complete.
Uninstall the printer driver next.
Click [Yes].
5
Page 8

Confirm the printer and click
[Remove].
When the completion message appears, the uninstallation is complete.
Click [Yes].
The computer reboots.
Caution
After uninstalling the printer driver, restart the computer.
MEMO
You can also uninstall Label Editor
and the printer driver as follows.
Select “Control Panel” - “Programs
and Features” and uninstall Label
Editor and/or the driver.
6
Page 9
How to Create, Open and Save a File
When you need more information on how to operate Label Editor, refer to Label Editor Help.
Using Label Editor Help
s
Creating a new file
For a new label, configure the tape width and the tape length first.
Start Label Editor.
Double click the shortcut icon on the desktop.
You can start Label Editor from the Start menu of the Windows.
“All Programs” - “EPSON” - “Label Editor” - “Label Editor”
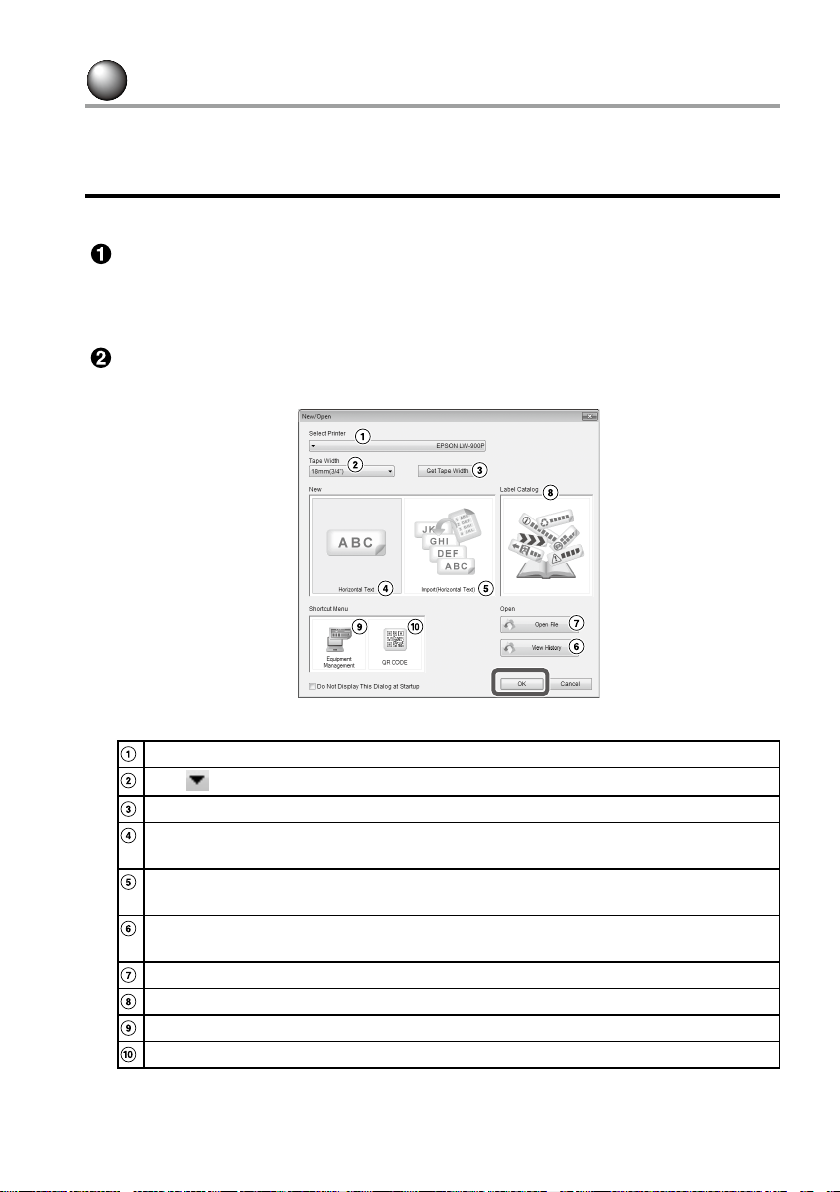
The “New/Open” screen appears.
On the “New/Open” screen, configure the necessary items and click [OK].
For [Open File] or [View History], just click the item itself. Then, the screen to specify
file opens. The following items can be selected and configured.
Select this product from the list.
Click and select a tape width for the label to create.
By clicking this, the tape width of the currently installed tape can be obtained.
Click this when creating a new label or when importing data from another file to
create a label.
Click this when importing data from another file to create a label.
Successive Import Printing
s
Displays the list of created files, and allows you to confirm and open a file on the
preview screen. sOpening a file from the history list
Opens a created file. sOpening a created file
Click to display the Label Catalog. sUsing Label Catalog
Click to display label forms. sCreating a Label for Managing Equipment
Click to display a settings screen. sCreating a Label with a Barcode
The configured tape appears on the “layout edit window” and becomes ready for text entry
and editing. sCreating a Label
7
Page 10

Opening a created file
On the “New/Open” screen, click [Open File].
MEMO
You can open it from the menu bar. “File” - “Open”
When the following screen appears, select a file and click [Open].
The selected file appears on the “layout edit window”, then text entry and editing
become available.
Opening a file from the history list
On the “New/Open” screen, click [View History].
When the following screen appears,
select a file and click [OK].
The selected file appears on the “layout edit
window”, then text entry and editing become
available.
Saving the created labels
On the “layout edit window”, click .
The file is saved as either of the following.
Newly created label: When the Save as dialogue box appears, specify the destination
Revised label: When clicking [Save], the file will be overwritten.
MEMO
You can save it from the menu bar. “File” - “Save As” / “File” - “Save”
folder and the file name, and click [Save].
Ending Label Editor
Click on the top right of the screen.
Label Editor is closed.
MEMO
If the following message appears when is clicked, the
current data of the “layout edit window” is not saved yet.
[Yes]: Saves the file.
[No]: Without saving the file, ends Label Editor.
[Cancel]: Returns to the “layout edit window”.
8
Page 11

Creating a Label
The following describes the basic way to create labels using the label below as an example.
Example:
How to enter text sStep 2
How to insert a frame sStep 3
How to insert a symbol sStep 4
How to print sStep 5
On the “New/Open” screen, select [Horizontal Text], then click [OK].
A new tape for editing appears on the “layout edit window”.
Click .
When clicking on the tape, the cursor appears
and text entry becomes available.
After text entry is complete, click the area
other than the tape.
The entered text will be inserted.
MEMO
Adjusting the size and the position
By operating the scaling handles, you can adjust the
size and the position of the arranged text.
9
Page 12

Click .
When a dialogue box appears, select a border and click [OK].
The selected border is inserted in the print area.
Adjust the size or the position as necessary.
Click .
When a dialogue box appears, select a symbol and click [OK].
When clicking on the “layout edit window”, the selected symbol is inserted into the
position you click.
Adjust the size or the position as necessary.
Click .
When a dialogue box appears, configure the necessary items and click
[OK].
Printing starts.
To check settings or other details, see the following page. sPrinting a Label
10
Page 13

Using Label Catalog
You can select your favorite template to create the label.
On the "New/Open" screen, select [Label Catalog], then click [OK].
The [Label Catalog] appears.
You can also open this screen by selecting "File" - "Label Catalog" from the menu bar.
Basic operations
The table of contents. Clicking a category here switches the displayed catalog
page.
A catalog page. Select a template to edit or print it.
Click to select the tape width to use. The templates that match the selected
tape width are displayed in the catalog page.
Used to move to the next or previous category.
Used to turn the page. These buttons perform the same operation as the
Registers a frequently used template to . sRegistering to
Favorites
Click this icon, then move the mouse pointer to a template in the catalog page
to enlarge the display of the template. Click this icon again to release enlarged
displays.
Prints the selected template.
Used to change the text or font of the selected template.
Displays help information.
buttons in the catalog page.
11
Page 14
Click on a template, then edit or print it.
To change the font size or do other editing, click .
The "layout edit window" appears. sCreating a Label
To print the selected template, click .
Printing a Label
s
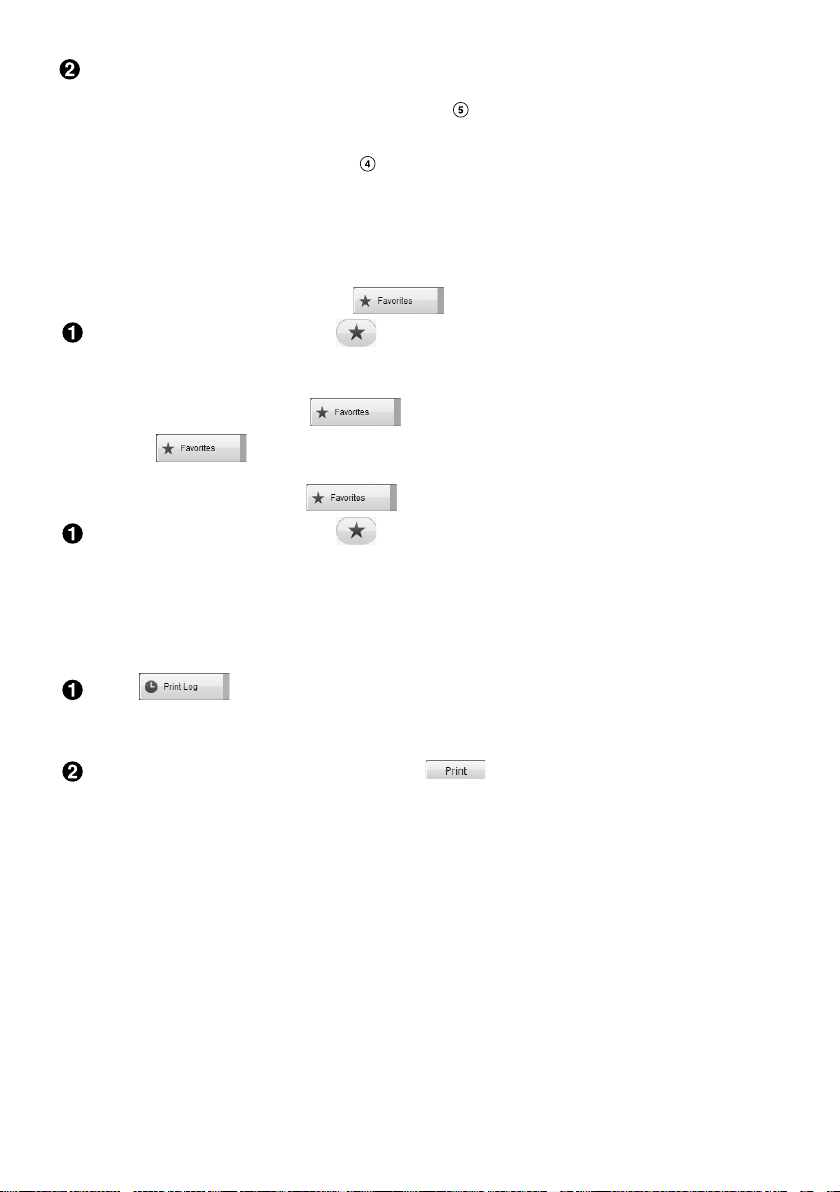
Registering to Favorites
Registers a frequently used template to
.
Select a template, and click .
You can also perform the same operation by right-clicking on a template and selecting
[Register] from the menu that appears.
The template is registered to .
Clicking in the table of contents displays the registered templates.
Removing a template from the
Select a template, and click .
You can also perform the same operation by right-clicking on a template and selecting
[Delete] from the menu that appears.
Reprinting a previously printed label
Click .
The print log is displayed.
You can also perform the same operation by right-clicking and selecting [Register] from
the menu that appears.
Select the template to print, and click .
To check settings or other details, see the following page. sPrinting a Label
12
Page 15

Creating an Original Ribbon
This section describes how to create an original ribbon with a custom message printed on it
repeatedly.
Printing a ribbon requires special ribbon tape. See the supplies catalog that came with the
product for information on the types of tape available.
Creating the text to be printed on the ribbon.
Creating a Label
s
Enter the text for the ribbon,
then click .
A settings screen appears.
Specify the ribbon length.
Specify the space between each repeated
text block.
Configure the settings and click [OK].
The set conditions are displayed.
To check the ribbon's overall appearance, see the following page. sChecking a Label's
Overall Appearance
Click .
When a dialogue box appears, configure the necessary items and click
[OK].
Printing starts.
To check settings or other details, see the following page. sPrinting a Label
13
Page 16
Creating a Label for Managing Equipment
You can easily create a label for managing equipment just by selecting a template and
entering the settings required.
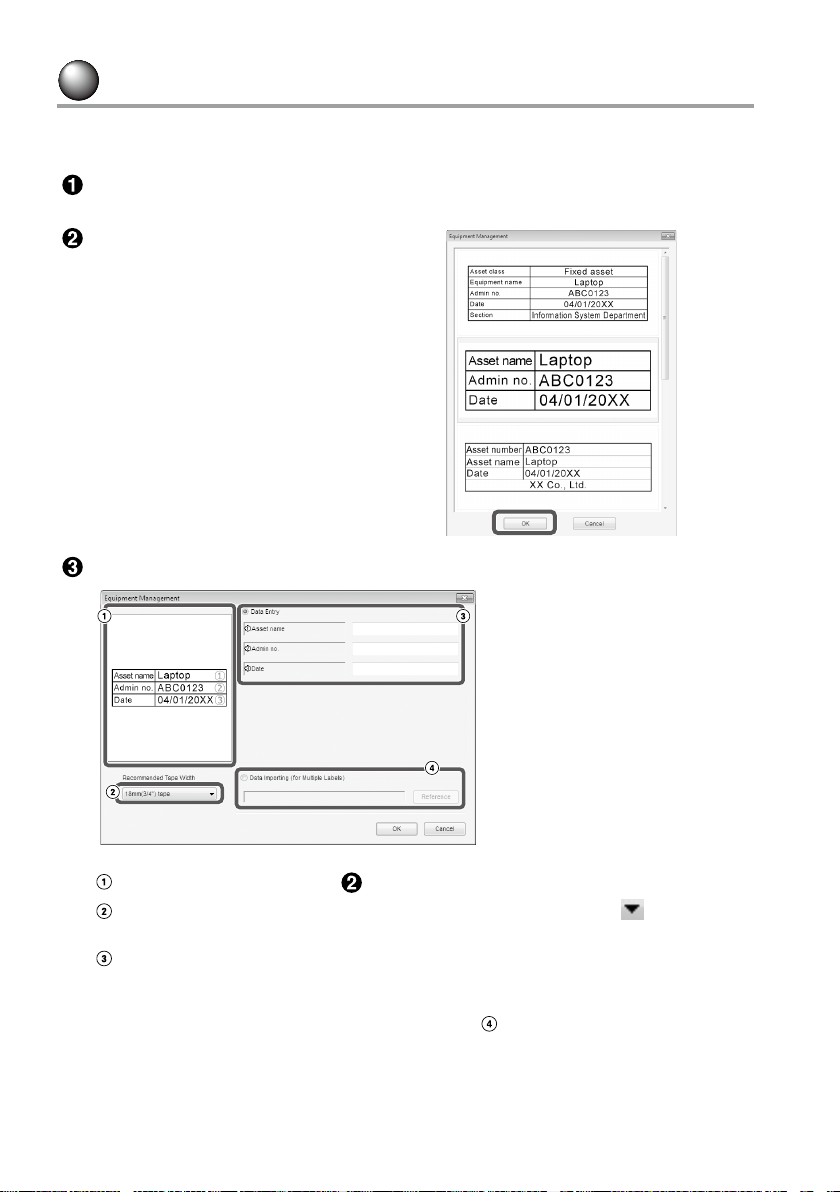
In the "New/Open" screen, select [Equipment Management], then click
[OK].
Select a template, then click [OK].
The screen below appears. Enter the settings, then click [OK].
The template selected in Step appears.
The tape width which is suitable for the template is displayed. Click to select a
tape width. Place a tape cartridge of the selected tape width in this printer.
Enter the text to be printed on the label.
You can print multiple different labels using the same template by first creating a list
file for the selected template and entering all the data into it.
When using a list file, specify the file path in Step
Supported list file formats: xls, xlsx, txt, csv, xlsm
ab ove .
14
Page 17

After the screen below appears, check the font and character size.
layout window
The screen shows the appearance of the text entered in Step in the template
selected in Step . Adjust the text size or position if needed.
Data creation window
The text entered in Step is displayed. You can change the text by double-clicking
the cell.
Low number
Enter to the to print items. Only checked items can be printed.
Column attribute
Displays the template headers.
Click .
When a dialogue box appears, configure the necessary items and click
[OK].
Printing starts.
To check settings or other details, see the following page. sPrinting a Label
15
Page 18

Successive Import Printing
Flow of the successive import printing
Creating data
You can create the data on the “data creation window”.
Data on files created by other applications can be imported.
Supported file format extension: xls, xlsx, txt, csv, xlsm
Caution
When using the data on an xls or xlsx file, Microsoft® Excel supporting the file format
should be installed on the computer.
Laying out
Labels are created based on this layout.
Printing the labels
Labels are printed successively by importing the data on the specified lines into the layout
created earlier.
Creating data for import printing
On the “New/Open” screen, click the items in the following order.
[Import(Horizontal Text)]-[OK] -[New Import Data]
[Load Import Data]: Click this when importing the created data on a file. Follow the
instructions on the screen. sLaying out labels
MEMO
When the “layout edit window” is already displayed, the New Import Data screen can be
displayed by either of the following operations.
• Click
• Select “File” - “Import Data” - “New” from the menu bar.
, then follow the instructions on the screen.
The following screen
appears.
Create labels on the “data creation
window”.
Layout edit window
Data creation window
If you selected “Load Import
Data” in Step
file is displayed.
Low number
Enter
items. Only checked items can
be printed.
Column attribute
Text entry : Double click the target cell and enter the data.
You can enter the data on Text entry bar.
The following operations become available by selecting a cell and right clicking it.
Cut, Copy, Paste, Delete, Import Frame, Enter Column Title, Sort, Print check
, the specified
to the to print
16
Page 19

Laying out labels
Drag on the column
attribute to lay out to the
“layout edit window” and
drop it there.
The content of the column is
displayed there. Adjust the
position and size as necessary.
To do the same, select the cell on
the “data creation window” and
right click it, then select “Import
Frame” on the pop up menu.
Caution
No matter how characters there are, the import frame size is fixed. If there are too many
characters for the import frame, they are automatically fit to the frame by reducing the
width. Line feeds are not available in the import frame.
MEMO
• The content of the currently selected cell is laid out.
• The data out of the print area will not be printed.
Printing labels
Click .
When a dialogue box appears, configure the necessary items and click [OK].
Printing starts.
To check settings or other details, see the following page. sPrinting a Label
Saving the created files
To save the current status of the layout and the data to import
Click
To save the data to import into another file format
Savable file format: txt ,csv.
Select “File” - “Import Data” - “Save” from the menu bar.
If a dialogue box to specify the destination folder appears, specify your destination folder
and click [Save].
or select “File” - “Save” or “Save As” from the menu bar.
17
Page 20
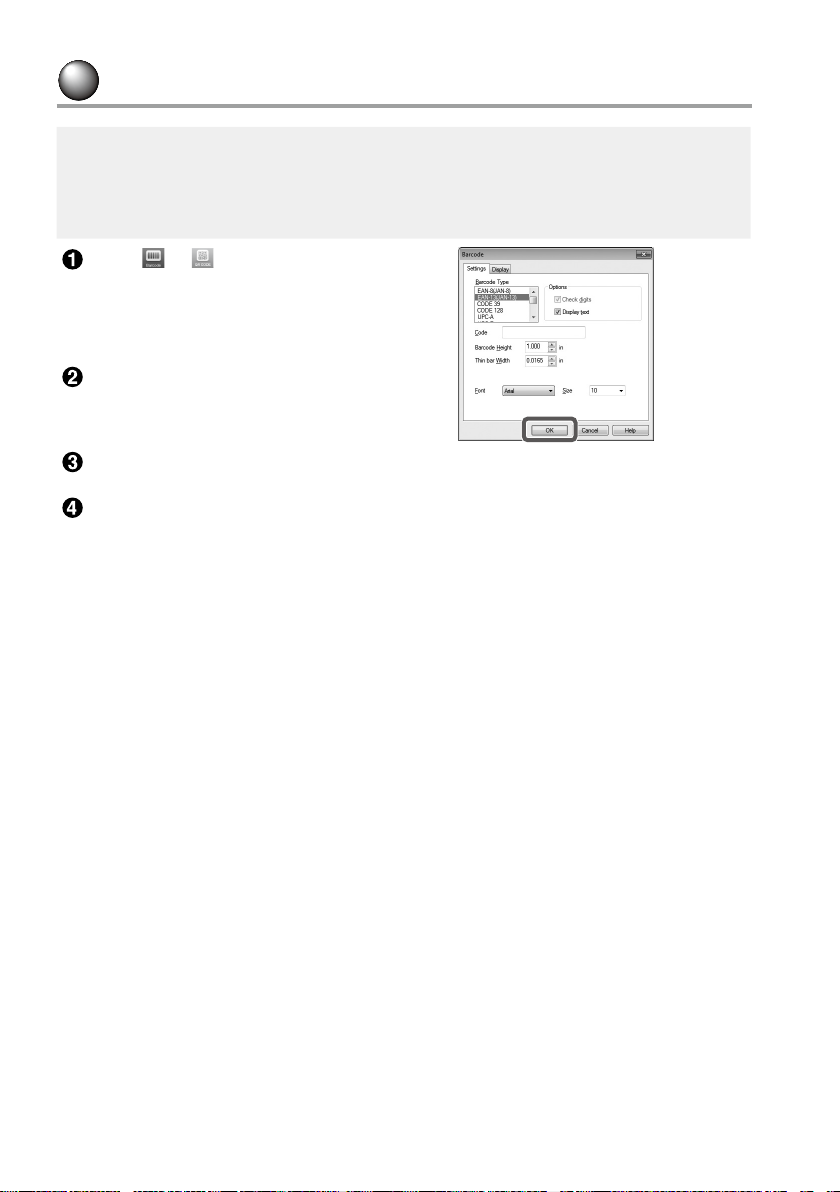
Creating a Label with a Barcode
MEMO
• When inserting a barcode, be sure to leave some margins on both right and left sides.
• Using a barcode reader, check the barcode label is readable.
• The setting items differ depending on the barcode type. Configure the displayed setting
items.
Click or .
The barcode setting dialogue box appears.
Creating a QR code
You can also click [QR CODE] in the “New/
Open” screen to open a settings screen.
Select a barcode type, enter the code,
and configure other settings, then click
[OK].
When a message appears, click [OK].
The cursor becomes the barcode height.
Move the cursor to where you want to insert the barcode, and click there.
The barcode is inserted there.
You can adjust the position and the size while the scaling handles appear.
18
Page 21

Other Functions
The following labels can be created with Label Editor.
Sequence Number Print
Main menu: Insert - Alphanumeric Sequence
Make settings on the Alphanumeric Sequence window.
On the Print dialogue box, turn on "Alphanumeric
Sequence” when printing.
Adding Date and Time
Main menu: Insert - Date and Time Settings
Make settings on the Date and Time Settings window.
Decorating text
Main menu: Insert - Text Art
Enter text and make settings on the Text Art window.
Adding a background pattern
Main menu: Insert - Background Pattern
Make settings on the Select Background Pattern
window. You can create an original background pattern
or use text as a pattern.
You can create various labels other than described above. For the details, see Label Editor
Help.
Using Label Editor Help
s
19
Page 22

Checking a Label's Overall Appearance
You can edit a label while checking label's overall appearance.
This is useful when creating long label such as ribbon.
Select [Preview (Whole View)] from the [View] menu on the menu bar.
A window appears.
The area enclosed by the red box is
the area currently displayed in the
"layout edit window."
Click to close the window.
20
Page 23

Printing a Label
Follow the steps below to print a label.
Click .
A dialogue box for print settings appears.
Select the printer to use.
You can also make settings such as Mirror print, and the tape cutting method.
Specify how many labels to print.
Turn this item on when using the sequence number print. sOther Functions
Turn this item on when using the successive import print function or when
printing a label for managing equipment. sOther Functions, Creating a Label for
Managing Equipment
Successive import:
Turn on this checkbox to print successively.
Print with all data:
Print all the data in the rows displayed in the “data creation window”.
Print data checked in Data Creation Window:
Turn this on when printing the data in the specified rows on the “data creation
window”. Only the selected rows are printed.
Turn this item on when doing Print-Paste Printing.
Print Order: Specifies the print order.
Set Print Range: Selects the parts to print.
Used to set the print order when multiple labels have been created for merge
printing from a list, such as for merge printing or for labels for managing
equipment.
Configure the settings and click [OK].
Labels will be printed.
21
Page 24

Using Label Editor Help
With the Label Editor Help, you can check the functions other than those described in this
manual, or when you are at a loss for how to operate Label Editor when creating a label.
Open Label Editor Help.
Open it from the menu bar.
“Help” - “Help Topics”
MEMO
• You can start Label Editor Help from the Start menu of the Windows.
“All Programs” - “EPSON” - “Label Editor” - “Label Editor Help”
• When editing on the “layout edit window”, Label Editor Help can be started by pressing
the [F1] key.
Click a menu item you want to know on the menu.
22
Too l bar Click a button to use the function.
Menu Displays the help menu.
You can search for what you want to know with
“Search” or “Index”.
Description Shows the description of the selected item.
Page 25

Printing from Other Applications
This product can be used as a printer.
You can create labels by editing data with a commercially available application, and by
printing the data with this product.
Depending on the applications, printing may not be completed correctly.
Specify this product in the printer settings.
Make settings for paper.
Specify the width of currently installed tape, the length and margins of the label, etc.
Enter text, an image, etc.
Arrange the text and image within the print area.
Check the print status with the print preview function.
Print the label.
MEMO
When printing an image
This product prints color image data in black and white tone.
This tone is adjustable. The tone setting can be made in the Properties dialogue box of the
printer setting window.
23
Page 26

Troubleshooting
This section covers problems such as Label Editor not starting or printing not completing,
and suggests solutions.
Printing does not start
Are there any messages displayed on
the computer screen?
Check the content of message.
Is the printer driver installed?
Install the printer driver. sInstalling Label
Editor and the printer driver
Did you reboot the computer after
installing the printer driver?
The printer driver may not be installed
correctly unless the computer is rebooted.
Re-install the printer driver. sInstalling
Label Editor and the printer driver
Is the product correctly connected to
the computer?
Check the cable connecting the product
and the printer. sThis product's user's
guide
Is the selected printer correct?
If the wrong printer is selected, printing
cannot be completed.
Is the printer offline?
If the computer boots up without the
product connected, the printer setting may
be set to offline. Cancel the offline state.
Windows 8
On the Charms Bar, select
“
Control Panel” - “Hardware and Sound” -
“
Device and Printers” in order. Select the
product and right-click it, then cancel the
offline state on the shown menu.
Windows 7/ Windows Vista
Select “Start” - “Control Panel” - “Hardware
and Sound” - “Device and Printers (“Printers”
for Windows Vista)” in order. Select the
product and right-click it, then cancel the
offline state on the shown menu.
Windows XP
Select “Start” - “Control Panel” - “Printers
and Faxes” in order. Then, select the
product and right-click it, then cancel the
offline state on the shown menu.
“
Settings” -
Characters are missing or faint
Is the print head dirty?
Clean the print head. sThis product's
user's guide
Is there any slack in the ink ribbon or
tape?
Remove the slack. sThis product's user's
guide
Are the margin and paper settings
correct?
When using commercially available
applications, configuration of margins is
necessary. Check the current settings. The print
can be checked with the print preview function
or similar. Be sure to check the preview before
printing.sPrinting from Other Applications
Printing stops halfway
Check if enough tape remains in the
current cartridge.
If the tape has run out, replace the tape
cartridge with a new one. sThis product's
user's guide
Tape is not cut after printing
Is “Don’t cut” selected?
Check the settings of the printer driver.
Is the cutter blade worn?
The cutter blade may eventually become
worn and dull. If so, contact the EPSON
customer support centre for further advice.
Half-cut cannot be made correctly
Is the “Half cut” setting enabled?
Check the settings of the printer driver.
Is “Don’t half cut” selected?
Check the settings of the printer driver.
Is the blade for half-cut worn?
The cutter blade may eventually become
worn and dull. If so, contact the EPSON
customer support centre for further advice.
MEMO
If none of the above has solved the problem
or the symptom is other than the above,
contact the EPSON customer support centre.
24
 Loading...