

Page 1
Page 2

FCC COMPLIANCE STATEMENT
FOR AMERICAN USERS
This equipment generates and uses radio frequency energy and if not installed and used
properly, that is, in strict accordance with the manufacturer’s instructions, may cause
interference to radio and television reception. It has been type tested and found to comply
with the limits for a Class B computing device in accordance with the specifications in
Subpart J of Part 15 of FCC rules, which are designed to provide reasonable protection
against such interference in a residential installation. However, there is no guarantee that
interference will not occur in a particular installation. If this equipment does cause interference to radio or television reception, which can be determined by turning the equipment off and on, the user is encouraged to try to correct the interference by one or more of
the following measures:
- Reorient the receiving antenna
-
Relocate the computer with respect to the receiver
-
Move the computer into a different outlet so that computer and receiver are on
different branch circuits.
If necessary, the user should consult the dealer or an experienced radio/television technician for additional suggestions. The user may find the following booklet prepared by the
Federal Communications Commission helpful:
This booklet is available from the U.S. Government Printing Office, Washington DC
20402. Stock No. 004-000-00345-4.
All rights reserved. No part of this publication may be reproduced, stored in a retrieval system,
or transmitted, in any form or by any means, mechanical, photocopying, recording or otherwise, without the prior written permission of Epson America, Inc. No patent liability is
assumed with respect to the use of the information contained herein. While every precaution
has been taken in the preparation of this book, Epson America, Inc. and the author assume no
responsibility for errors or omissions. Neither is any liability assumed for damages resulting
from the use of the information contained herein.
Baby printout on cover reprinted with permission of Apple Computer Inc., copyright 1984
Apple is a registered trademark of Apple Computer, Inc.
Centronics is a registered trademark of Data Computer Corporation.
Concept is a trademark of Corvus Systems, Inc.
DEC is a registered trademark of Digital Equipment Corporation.
FX-80, FX-100, RX-80, and RX-100 are trademarks of Epson America, Inc.
HX-20 Notebook Computer is a trademark of Epson America, Inc.
IBM-PC is a registered trademark of International Business Machines Corporation.
Microsoft is a trademark of Microsoft Corporation.
NEC is the NEC Information Systems, Inc., a subsidiary of Nippon Electronic Company, Ltd.
QX-10 is a trademark of Epson America, Inc.
TRS-80 is a registered trademark of Radio Shack, a division of Tandy Corporation.
80 Micro is published by Wayne Green Publishers.
“How to Identify and Resolve Radio-TV Interference Problems.”
Copyright© 1984 by Epson America, Inc.
Torrance, California
90505
ii
P8294017
Page 3

Preface
The User’s Manual for the FX Series printers consists of two volumes: Tutorial and Reference. This volume, the Tutorial, is arranged
in the following logical groupings:
Introduction (for everyone)
Programmer’s Easy Lesson (for experienced users)
Hardware description: Chapter 1
Software introduction: Chapter 2
Control of the way characters look: Chapters 3 to 6
Control of the way pages look: Chapters 7 to 9
Printer graphics: Chapters 10 to
User-defined characters: Chapters 15 and 16
Using everything together: Chapter 17
A complete table of contents for this volume is after this preface. For
your convenience, there is an index at the end of each volume covering the complete two-volume set. You can therefore find all the references to any topic in either one.
Conventions Used in This Manual
14
We provide sample BASIC programs that allow you to see how
various commands control the printer’s capabilities. Frequently we
start with a few program lines and then make several changes and
additions to end up with a substantial program. We suggest that you
use your SAVE command after each change to prevent losing programs because of power fluctuations or other accidents. When you
can RUN a program, we show the results you should expect.
In our sample programs, we use Microsoft’” BASIC, which is
widely used in personal computers. Because there are several slightly
different versions of Microsoft BASIC and because your computer
iii
Page 4

may use a version of BASIC other than Microsoft, you may need to
modify some of the programs in this manual before they will run.
Appendix F offers help, as do the next several paragraphs.
Methods for sending BASIC print and listing commands to the
screen and to the printer vary widely. We have used PRINT and LIST
as the commands for the screen display, and LPRINT and LLIST as
commands for the printer. You may have to change those to the form
used by your system.
If, for example, your system uses the
you will need to change all instances of PRINT in our programs. Since
we use PRINT to report progress to your screen and that command
does not affect the printing, the easiest modification is to delete such
PRINT statements. For example,
PR#1
and PR#0 commands,
30 FOR D=1 TO 17: PRINT "ROW";D
would become:
39 FOR D=1 TO 17
because the only purpose of the PRINT statement is to display on the
screen information that is not absolutely essential to the program.
Any BASIC system automatically provides a carriage return (and
some BASICS add a line feed) after every program line that includes a
PRINT or LPRINT command, whether that line prints text or not. To
prevent the carriage return, we have you place a semicolon at the end
of such program lines. You will see this technique throughout the
manual.
A few versions of BASIC use semicolons between any two control
codes that fall on one program line, as in:
LPRINT CHR$(27);CHR$(52)
If you use such a version of BASIC, you will need to add semicolons
as appropriate.
After the ESCape code-CHR$(27)-the FX always expects another code. The second code tells the printer which mode to turn on or
off, and you may enter it in either of two formats. One format is like
the ESCape code-you use a number in parentheses after CHR$, such
as CHR$(l). The other format is shorter since it uses only an alphanumeric symbol within quotation marks, such as “E” or “@“. We usually
use the latter format.
iv
Page 5

This format allows you to shorten a program line by combining a
command and its print string. In the case of Double-Strike, for instance, the quoted letter “G” turns the mode on and “H” turns it off. To
see how combining the code with a print string works, compare:
10 LPRINT CHR$(27)"G";"DOUBLE-STRIKE PRINT"
with:
10 LPRINT CHR$(27)"GDOUBLE-STRIKE PRINT"
The second program line may look peculiar, but it gives the same
output that the first version does. The G is not printed on the paper;
instead, it is interpreted by the printer as part of the ESCape sequence.
In long programs with DATA statements or subroutines, we use
END after the line that is executed last, but older BASIC systems require the use of STOP at such points. If yours is one of these, you
should change our ENDS to STOPS.
When the presence of one or more blank spaces in a program line is
especially important, we use a special character pronounced
‘blank’) to represent the spaces. This makes it easier for you to count
the number you need. For example, the following:
SAMPLE STRING"
means that you should type in one blank space for each
SAMPLE STRING"
The use of the symbol makes it easy for you to count the eight spaces
needed between the quotation mark and the beginning of the first
word. The also calls your attention to single blank spaces that are
needed immediately before or after a quotation mark. For example,
the following makes clear that you must type one space between the
quotation mark and the word “and’:
LPRINT " AND EASY TO TURN OFF"
When we include a programming REMark in a program line, it is
always preceded by an apostrophe (‘), the short form of the BASIC
command, REM. For example, we use:
10 LPRINT CHR$(27)"@"
and
99'
Data lines for graphics
'Reset Code
V
Page 6

The computer ignores these remarks; they merely serve to help programmers understand at a glance the way a program is working. You
may type them in or not, depending on whether you think you will
want them in the future.
We use the caret symbol (ˆ) to indicate exponents. For example:
x =
Yˆ2
means let X equal Y raised to the second power. Some computer systems use an up-arrow (t), which prints as a left bracket ([) on FX
printers.
At the end of each chapter, a Summary section provides a concise
review of the chapter’s subject matter and a list of the control codes (if
any) that have been covered. For listings of the control codes in numerical order and in functional groupings, see Appendixes B and C.
When we refer to an FX mode by name, we capitalize it:
Compressed Mode
Italic Mode
Pica Mode
Script Modes
and, for clarity, we capitalize such names even when the word mode
does not appear: Script characters and Italic print.
vi
Page 7

FX Series Printer User’s Manual
Volume
Preface
Conventions Used in This Manual
List of Figures .........................................................
List of Tables
Introduction
Inside the Printer
Inside This Manual
Programmer’s Easy Lesson
First Steps
Ticket Program
Ticket Program Description
1
The FX Printers
Additional Supplies and Accessories
Printer Location
Printer Preparation
Paper Loading
Starting Up
......................................
.......................................................
.............................................
..............................
....................................
...............................
...............................
...............................
Paper separator
Covers
Manual-feed knob
DIP switches..
Ribbon Installation
FX-80: built-in tractor feed
FX-80 and FX-100: friction feed
FX-80 and FX-100: removable
Top-of-form position
Paper-thickness lever
Control panel
The FX tests itself
....................................
..............................
................................
tractor unit (optional on the FX-80)
...................................
...............................
1
Contents
................
............................
......................
.....................
..............
............................
.............................
...........................
..........................
....................
................
.........................
.........................
............................
...........
iii
iii
Xiii
xvii
1
2
2
7
7
8
10
13
16
16
17
17
18
19
20
23
24
24
28
29
32
32
32
35
35
vii
Page 8

BASIC and the Printer
2
BASIC Communications
Character strings
BASIC print commands
ASCII and BASIC basics
Control codes
...............................
.........................
........................
............................
......................
......................
Escape-CHR$(27)-and other CHR$ commands
Change Commands
Reset Code
Mode cancelling codes
DELete and CANcel
............................
.................................
........................
.........................
Alternate Formats for ESCape Sequences
Summary
....................................
..........
37
38
39
39
40
41
42
44
45
45
46
46
47
3 Print Pitches
Dot-Matrix Printing
Main columns
..................................
............................
..............................
Intermediate positions
Modes for Pitches
Pica and Elite Modes
Compressed Mode
Mode priorities
.............................
.........................
...........................
.............................
Pitch Mode Combinations
Expanded Mode
.............................
Multiple print pitches on one line
Summary
4
Print Quality
Bold Modes
Double-StrikeMode
Emphasized Mode
Proportional Mode
Mixing Modes
Summary
Dress-Up Modes and Master Select
5
FourModes
Underline Mode
....................................
.................................
..................................
.........................
...........................
..........................
................................
....................................
...................................
.............................
Script Modes: Super and Sub
Italic Mode
.................................
More Mode Combinations
Master Select
...............................
Master Select combinations
Summary
....................................
........................
......................
...............
...............
..................
......................
...................
49
49
50
51
52
52
53
55
56
56
58
59
61
61
61
62
64
65
66
69
69
69
71
72
73
73
76
78
Viii
Page 9

Special Printing Features
6
Backspace
....................................
Overstrikes
Offsets
.....................................
Unidirectional Mode
International Characters
Special Speeds
Half-SpeedMode
Immediate-Print Mode (FX-80 only)
Summary
....................................
........................
.................................
...........................
........................
................................
............................
............
81
81
81
82
83
85
88
89
89
90
7
Line Spacing and Line Feeds
Line Spacing
..................................
Preset line spacing
Variable line spacing
Microscopic line spacing
Line Feeds
....................................
One-time, immediate line feed
Reverse feed (FX-80 only)
Summary
Forms Control
8
....................................
................................
Form Length Control
Form feed distance
Not-so-standard forms
Paper Perforation Skip
Skip command
..............................
DIP switch skip
Single-Sheet Adjustment
Summary
....................................
.....................
...........................
.........................
......................
.................
.....................
...........................
...........................
.......................
.........................
.............................
........................
93
93
93
95
98
98
99
99
101
103
103
103
105
107
107
109
109
110
ix
Page 10

Margins and Tabs
9
Margins..
Left margin
Margins and pitches
Right margin
Both margins
Tabs..
Horizontal tab usage
Variable horizontal tabs
Vertical tab usage
Ordinary vertical tabs
Vertical tab channels
Summary
.............................
....................................
.................................
.........................
...............................
...............................
.......................................
.........................
......................
............................
........................
.........................
....................................
113
113
113
114
116
118
118
119
121
122
123
126
128
10
Introduction to Dot Graphics
Dots and Matrixes
Print Head
..................................
Graphics Mode
Pin Labels
....................................
.............................
...............................
First Graphics Programs
Straight line
Slash
......................................
Large caret
Wave pattern
Diamond pattern
Summary
Varieties of Graphics Density
11
................................
.................................
...............................
............................
....................................
Graphics Programming Tips
Graphics and the Reset Code
Graphics and low ASCII codes
Density Varieties
..............................
High-Speed Double-Density Graphics Mode
Low-Speed Double-Density Graphics Mode
Quadruple-Density Graphics Mode
Moredensities
..............................
More Graphics Programming Tips
Reassigning alternate graphics codes
Nine-Pin Graphics Mode
Pin Combination Patterns
Repeated patterns
...........................
Repeated DATA numbers
Summary
....................................
....................
........................
....................
.....................
..................
................
.....
......
.............
...............
............
.....................
.......................
.....................
131
131
132
134
135
137
138
139
139
140
141
142
143
143
144
144
145
146
148
149
149
150
150
152
154
155
156
157
X
Page 11

Design Your Own Graphics
12
Planning
Process
..............................
STRATA Program
Three-Dimensional Program
First version of 3D program
Other versions
Summary
....................................
..............................
.....................
.............................
....................
...................
159
159
160
163
165
170
171
Plotter Graphics
13
Arrays
.......................................
...............................
DIMension and arrays
Filling arrays
Circle Plotting
Ones become dots
Pin firing sequences
Code solutions
Higher resolution
Reflections
Exploding galaxy
Big bang
Summary
14
Symmetrical Graphics Patterns
...............................
................................
...........................
..........................
..............................
............................
.................................
............................
...................................
....................................
Pin Pattern Calculation
Graphics Width Settings
Pattern Printout
Variations
Summary
15
User-Defined Characters
Preparation..
Character Definition
Design
.....................................
Dots into DATA
Attribute byte
Proportional print
...............................
....................................
....................................
.................................
...........................
............................
..............................
...........................
Printing User-Defined Characters
Downloading Command
Defining More Characters
Redefining Control Codes
Mode Strings
STRATA
Summary
.................................
.....................................
....................................
.......................
..................
.........................
........................
........................
.................
.......................
.......................
.......................
173
173
176
176
177
178
179
180
181
183
184
185
187
189
192
193
193
195
197
199
200
200
201
202
203
203
205
207
207
208
211
212
212
xi
Page 12

16
Combining User-Defined Characters
Large Letters: Double Wide
Large Letters: Double High
.....................
......................
Giant Letters: Double High and Double Wide
Core Sets
Line Graphics
Summary
....................................
.................................
....................................
..............
......
215
215
217
217
223
225
226
17
Business Application
...........................
Preparation.. .................................
Barchart
Statement Form
999 REM: The End
.....................................
...............................
............................
Index ................................................................................
227
227
227
231
238
239
xii
Page 13

List of Figures
Easy-1
Easy-2
1-1
1-2
1-3
1-4
1-5
1-6
1-7
1-8
1-9
1-10
1-11
1-12
1-13
1-14
1-15
1-16
1-17
1-18
1-19
1-20
1-21
1-22
FX ticket program
Ticket to success
The FX-80 and FX-100 printers
Printer parts
Paperpath
Paper separator
Protective lids
Tractor covers
Manual-feed knob
DIP switch vent
DIP switch location
DIP switch factory settings
Ribbon insertion
Printer readied for paper insertion
Pin feeder adjustment
Loading the FX-80
Tractor unit release
Tractor unit installation
Hook and stud..
Adjusting the pin feeders
Top of form
Paper thickness adjustment
Cable connection
Sample automatic test
................................
..........................
...........................
...............
...............................
............................
.............................
.............................
..........................
............................
.........................
..................
...........................
.............
.......................
..........................
.........................
......................
...........................
....................
...............................
..................
...........................
.......................
8
10
14
15
17
18
19
19
20
21
22
22
25
26
27
27
28
30
30
31
33
34
35
36
2-1
3-1
3-2
3-3
3-4
3-5
3-6
3-7
4-1
4-2
4-3
Italic listing
Dot-matrix characters
The print head
Main columns
Intermediate positions
Pica and Elite letters
Pitch comparison
Pica and Expanded letters
Single-Strike and Double-Strike letters .........
Single-Strike, Expanded and Emphasized letters
Mode priorities ...............................................
...............................
.......................
.............................
.............................
.......................
........................
..........................
....................
43
49
50
51
51
53
53
57
62
63
66
xiii
Page 14

5-1
5-2
5-3
Master Select Program
Master Select choices
.......................
Dress-up combinations
......................
......................
74
75
77
6-1
6-2
7-1
7-2
7-3
8-1
8-2
8-3
8-4
9-1
9-2
9-3
9-4
9-5
9-6
9-7
9-8
9-9
9-10
9-11
9-12
9-13
Bidirectional line
Unidirectional line
Default line spacing
Cascading STAIR STEPS
Staggering STAIR STEPS
Setting the top of form
Two-inch form feed
Two-line form feed
Standardskip
Left margin setting
Listing at new margin
Absolute left margin
Right margin set incorrectly
Right margin set correctly
Default horizontal tabs
Tabs with text and numbers
Variable horizontal tabs
Absolute horizontal tabs
Ordinary vertical tabs
Text at tab stop
Absolute vertical tabs
...........................
..........................
.........................
....................
....................
......................
.........................
.........................
.............................
.........................
.......................
........................
..................
...................
......................
..................
.....................
....................
......................
............................
.......................
Printout of multipage channels
...............
84
84
94
96
100
104
106
106
108
114
115
115
116
117
119
120
121
122
124
125
126
128
10-1
10-2
10-3
10-4
11-1
11-2
11-3
11-4
11-5
11-6
11-7
xiv
Pins numbered sequentially
Dot pattern in two line spacings
Pins labelled uniquely
Pin combinations
..........................
High-Speed Double-Density dots
No overlapping dots
Overlapping dots
Seven density modes
Nine-pin usage
........................
..........................
........................
.............................
Printout using bottom pin
Curling design
.............................
..................
..............
.......................
..............
...................
133
133
136
137
147
147
148
150
153
154
155
Page 15

12-1
12-2
12-3
12-4
12-5
12-6
12-7
12-8
12-9
12-10
12-11
STRATA layout
STRATA logo
STRATA program
...........................
.............................
..........................
Corner of the FX-80 design
FX-80 figure
Program for FX-80 figure
FX-100 figure
...............................
....................
..............................
Program for FX-100 figure
More distinct version
Most distict version
Reversed version
.......................
.........................
...........................
...................
...................
161
162
163
164
168
168
169
170
171
172
172
13-1
13-2
13-3
13-4
13-5
13-6
13-7
14-1
14-2
14-3
14-4
14-5
14-6
15-1
15-2
15-3
15-4
15-5
16-1
16-2
16-3
16-4
16-5
16-6
16-7
16-8
16-9
Computer memory as sketch pad
Array in memory and on paper
Ones and zeros become dots and blanks
Labelled cell
Plotting a circle
Displaying an array
Divide and conquer
Printing the array contents
Pattern sets
Program for SYMMETRY
Symmetric pattern 1
Symmetric pattern 2
Symmetric pattern 3
...............................
............................
........................
........................
...................
...............................
...................
........................
........................
........................
ROM and user-defined characters
User-defined E
Incorrectly designed E
.............................
.......................
Pins chosen by attribute byte
Attribute byte conversions
Side-by-side characters
...................
......................
Double high and wide character
Program for giant G
Giant G
..................................
Data for AMES
Games seem same
Messages in three pitches
Tracks
Interlace
....................................
..................................
........................
............................
..........................
....................
.............
...............
.......
.............
.................
..............
174
174
175
175
177
178
182
191
191
194
195
196
196
199
201
202
203
204
216
218
220
221
222
222
223
224
225
xv
Page 16

17-1
17-2
17-3
17-4
Barchart
..................................
Program for BARCHART
Statement form
............................
Program for STATEMENT
...................
..................
228
230
232
234
xvi
Page 17

List of Tables
1-1 DIP switch functions .........................................
2-1
2-2
2-3
3-1
4-1
5-1
5-2
6-1
6-2
6-3
6-4
7-1
11-1
14-1
Several computers’ print LIST commands ......
Several computers’ printer activating commands .
ASCII codes on the FX .................................
Summary of print pitches .................................
Summary of modes .......................................
Master Select Quick Reference Chart
Print types
Some special characters
................................
..................... 85
International characters in Roman typeface
International characters in Italic typeface
International DIP switch settings
..........
.....
.......
..............
Line-spacing commands ...................................
Graphics Modes
...........................
Variables for SYMMETRY ...............................
23
38
40
42
60
67
76
78
87
87
88
102
151
190
15-1
16-1
International character locations ....................
ASCII pattern
.............................
210
219
xvii
Page 18

Introduction
FX Features
Epson’s MX series of printers attracted enough attention to become
the most popular line of printers in the industry. Our FX printers fol-
low in the same grand tradition. The FX printers’ power-packed
assortment of features includes:
l
Upward compatibility with most MX III features
l
Several different print modes that can be combined to produce a
variety of print styles. These include:
Roman and Italic print fonts
Six different print pitches
Two kinds of bold printing
l
Master Select feature for instant use of any one of
combinations
l
Proportionally spaced characters for professional looking docu-
ments
l
Easy-to-use Underline and Super/Subscript Modes
16 popular
print
l
Detailed forms handling capability, including the setting of horizontal and vertical tabs, margins, form length, a skip-over-perforation
feature, and variable line feeds
l
Up to 233 characters per line with the FX-100™ for spreadsheet users
l
User-definable character sets. With this powerful feature you can
create your own alphabets and special symbols
l
High-resolution graphics capability with six densities to let you create your own charts, diagrams, figures, and illustrations
l
International character sets
l
Typewriter simulation mode with the FX-80™
Page 19

l
Program debugging mode (hexadecimal dump of codes received
from the computer)
l
Fast print speed-160 characters per second-for rapid processing
of documents
l
2K print buffer for smooth operation
l
Adjustable tractor unit for narrow forms
l
Both friction- and tractor-feed capability
l
Replaceable print head
l
Easy-to-reach DIP switches to customize printer features.
l
Epson reliability, quality, and support
In short, the FX is loaded with features
that
will challenge your ability
to put them to work. This manual can help you use one or all of them.
Inside the Printer
The FX printers contain two kinds of internal memory: ROM (Read
Only Memory) and RAM (Random Access Memory). There are 12K
bytes (approximately 12,000 characters) of ROM. This unchangeable
memory contains all the logic required for the various print features as
well as the patterns for all the built-in character sets.
The FX also contains a RAM memory buffer that stores up to 2K
bytes of text and printer commands as they are received from the computer. This frees your computer so that you can continue working
while the FX is printing. You can also use RAM another way; you can
define your own set of characters and then store them in RAM so that
you can print them at will.
It is always tempting (though not always wise) to start playing with
a new printer the instant it is out of the box. Because the FX is a sophis-
ticated piece of equipment, it is important that you understand what
the printer will do and how to operate it before you start printing.
Inside This Manual
This manual will guide you on a carefully planned tour of the vari-
ous features of the FX printers. In these pages, you
use your computer to control the printer for a large variety of applications.
2
can
learn how to
Page 20

You can use this manual as a reference, a tutorial study guide, or
some combination of the two.
l
For those of you who want to use the printer for one simple application (like listing BASIC programs or using a word processing package), a description of the hardware and an overview of the software
may be all that’s necessary. In this case, you need only Chapter
1,
the Quick Reference Card at the back of Volume 2, and a knowl-
edge of the program you are using. You can always learn about the
FX’s advanced features at a later time. (You might, for instance,
someday want to modify a word processing software package so
that its printer driver uses special FX features.) The lessons will be
waiting for you.
l
For those who prefer to roll up their sleeves and see how the printer
works, we’ve included sample programs to demonstrate each of the
printer’s features.
l
For those who want only a quick, and easy reference, the comprehensive Table of Contents, the Appendixes, and the Index provide
ready access to information.
l
For computer professionals and other experienced users who simply
can’t wait to find out what the printer will do, regardless of the
consequences, we have a special section entitled “Programmer’s
Easy Lesson.” It gets you up and running fast, then turns you loose
on a program that demonstrates several of the printer’s features.
This program, the Appendixes, and the Quick Reference Card will
bring you quickly up to speed.
l
For those who are already familiar with the MX or RX series of
printers, Appendix E provides a summary of the differences
between the FX, the RX, and the MX.
3
Page 21
Think of the manual as your personal guide in your exploration of
the FX’s many features.
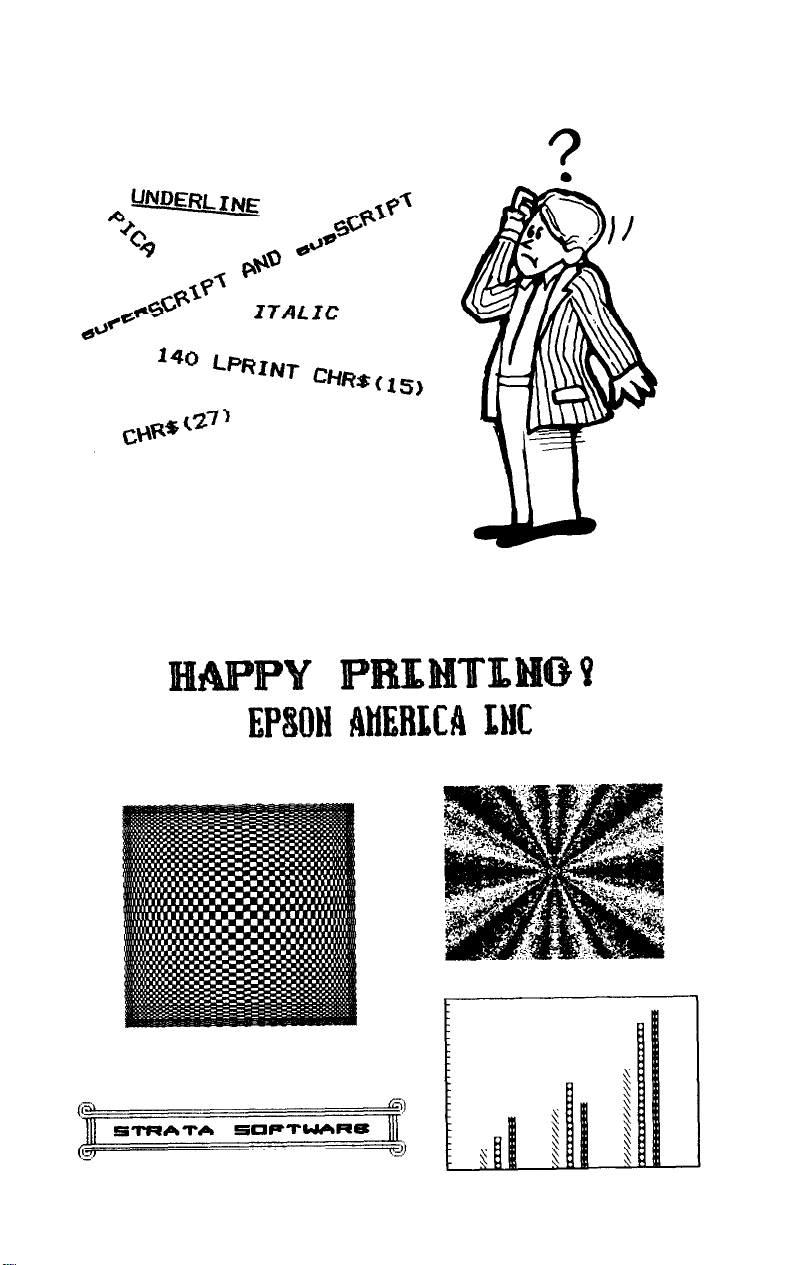
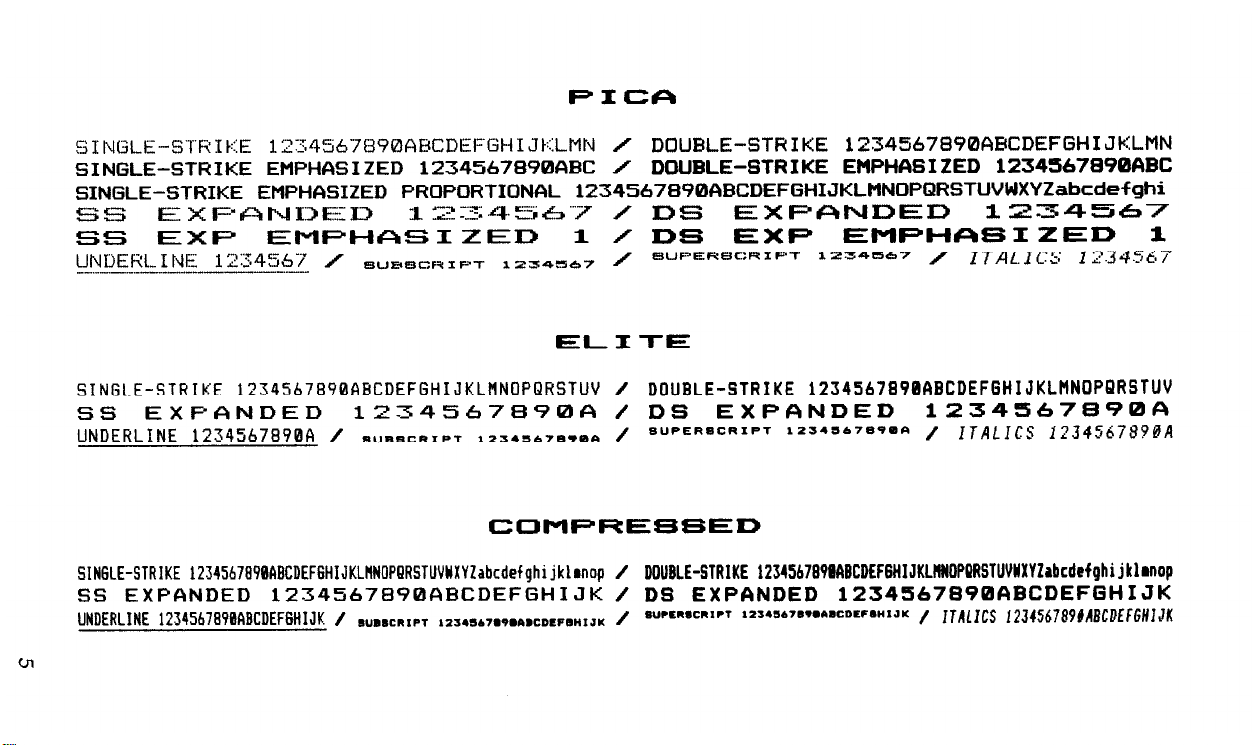
For a preview of what your programs can produce, take a look at the
following potpourri of print modes and graphics.
4
Page 22
Page 23

6
Page 24

Programmer’s Easy Lesson
Before you start, note that we haven’t claimed that one easy lesson
will make you an FX maestro. It takes more than one lesson to learn
the full value of the feature-packed FX printer. In fact, the more time
you spend with this manual, the more your printer will cooperate
with your every command. But some of you want to see something
from a new printer right now-no matter what. The next few pages
are especially for you.
If you get stuck, the proper set-up procedures are covered in full in
Chapter 1.
First Steps
1. Make all connections with the power OFF! Connect your FX to
your computer via the printer cable that you purchased separately.
(Some computers require special printer interface boards, also purchased separately).
2. To use continuous-feed printer paper with pin-feed holes, set the
friction-control lever and the paper bail toward the front of the
printer. If you are using the FX-80, pull the paper under the plastic
separator and through the paper path. If you are using the FX-100,
you may need to first install the tractor unit, then pull the paper
under it. In case the paper starts to jam on either model, refer to
Chapter 1 for tips on inserting paper. As you straighten the paper,
you will probably need to adjust the pin feeders.
To use either a single sheet of paper or roll paper without pin-
feed holes on the FX-80, first move the pin feeders out of the way. If
a tractor unit is installed on your FX-100, you will need to remove
it. Then, for either model, push the friction-control lever toward
the rear of the printer, pull the paper bail forward, and insert the
paper under the plastic separator. Use the manual-feed knob to
7
Page 25
feed the paper through. If you use single sheets of paper, the paper-
out sensor will cause a beep and stop the printing whenever the
bottom edge passes the sensor. You can shut off the sensor by
changing DIP switches as shown in Chapter
3. Turn the printer and computer on and load a short BASIC pro-
gram. Then send a listing to the printer (using LLIST, LIST “P“, or
whatever your computer’s listing command is). You should get a
single-spaced listing. If the printout is double-spaced or printed
without line spacing, you’ll have to change a DIP switch.
Since there are many implementations of the BASIC programming language, it is impossible to write one set of programs that
will work on every computer system. This means you may need to
modify our programs to suit your system. In Appendix F we discuss such compatibility problems and suggest solutions for several
popular computers.
1.
Ticket Program
Here is an example program, written in BASIC, that shows off a lot
of the FX printer’s features. The program can give you a good survey
of print control. If you don’t understand one or more features, you
can check the index to find what part of this manual covers it.
10 N=29: E$=CHR$(27): H$=CHR$(137)
20 LPRINT E$"1";E$"D"CHR$(26)CHR$(1);
30 LPRINT
E$":"CHR$(0)CHR$(0)CHR$(B);
40 LPRINT E$"%"CHR$(1)CHR$(0);
50 LPRINT E$"&"CHR$(0)"0:";
60 FOR Y=1 TO 11: LPRINT CHR$(1l);
70 FOR X=1 TO 11: READ D: LPRINT G-K@(D);: NEXT X
80 NEXT Y: LPRINT E$"U1";
90 FOR X=1 TO N: LPRINT CHR$(95);: NEXT X:
LPRINT E$"A"CHR$(6)
100 LPRINT "7"H$" " 9"; E$"1"
110 LPRINT "7 ";:
FOR X=1 TO 25: LPRINT ":";:
NEXT X: LPRINT H$" 9"
120 LPRINT "7 :"H$": 9"
Figure Easy-1. FX ticket program
8
Page 26
130 LPRINT "7
140 LPRINT "TICKET TO SUCCESS!"; E$"!@"; E$"5";
E$"+0";
150 LPRINT H$": 9":
":9": NEXT X
160 LPRINT "7 :";:
" 2";
170 LPRINT CHR$(20);E$"F";E$"S1"; " SERIES";
E$“T”;H$; H$; 9”
180 LPRINT "4 :";: LPRINT CHR$(14);E$;"E";
" 1 3";
190
LPRINT CHR$(20); E$"F"; E$"S1"; " PRINTERS";
E$ "T"; H$;": 5”
200 LPRINT "6 :"; H$;": 8": LPRINT "7 :";H$;": 9"
210 LPRINT "7 : " CHR$ (15) "BY" " E$"!X";
"EPSON AMERICA".
220 LPRINT E$"S0"; E$;"!@"; " INC "E$"T"; H$;": 9"
230 LPRINT "7 :"; H$;": 9": LPRINT "7 "E$"!Q";
240 LPRINT "GENERAL ADMISSION"; E$"!@"; H$": 9":
LPRINT "7
250 LPRINT "7 ";:
NEXT X: LPRINT H$ " 9"
LPRINT "7 "; H$; " 9"; E$"A" CHR$(1)
260
270 FOR X=1 TO N: LPRINT CHR$(95);: NEXT X: LPRINT
280 LPRINT E$"@":END
290 '*** FX xxx
300 DATA 64,0,127,0,127,0,64,0,65,0,112 :'0 F
310 DATA 1,0,127,0,127,0,65,0,96,0,0
320
DATA 64,48,72,54,73,6,1,4,72,48,64 :'2 X
330 DATA 1,6,11,48,64,48,73,54,11,6,1 :'3
340 '*** TICKET BORDERS ***
350 DATA 64,0,64,0,64,0,32,0,16,8,7 :'4
360 DATA 7,8,16,0,32,0,64,0,64,0,64 :'5
370 DATA 1,0,1,0,1,0,2,0,4,8,112 :'6
380 DATA 127,0,0,0,0,0,0,0,0,0,0,0 :'7
390 DATA 112,8,4,0,2,0,1,0,1,0,1 :'8
400
DATA 0,0,0,0,0,0,0,0,0,0,0,127
410 DATA 73,0,20,34,0,73,0,34,20,0,73 :':
:"; E$" !X"; E$"4"; " " E$" - 1";
FOR X=1 TO 2: LPRINT "7 :"H$
LPRINT CHR$(14);E$;"E";
:"H$":9",
FOR x=1 TO 25: LPRINT ":";:
:'1
F
X
Figure Easy-1. FX ticket program (concluded)
Page 27

Figure Easy-2. Ticket to success
Ticket Program Description
This is not a complete explanation of the program. That’s what the
rest of the manual is for. But this brief, line-by-line description should
help those of you who wish to analyze the program.
10 Stores values in variables for easy access. E$ holds the ESCape
code, CHR$(27).
20 Uses ESCape "1" to set the line spacing to 7/216-inch and the
ESCape “D” sequence to set a horizontal tab stop at column 26.
30 Uses the ESCape
set into RAM.
40
Designates RAM as the source for the active character set.
50 Prepares the printer to redefine characters “0” through “:“.
60 Sets a counter for the 11 letters being defined, and selects the
attribute byte of each new character.
70 Reads the data that defines the letters
15 for additional information on lines 30 through 70.)
80 Turns on the Unidirectional Print Mode.
90 Prints the top of the ticket and sets the line spacing to 6/72-inch.
100 Prints the newly defined symbol “7” (left ticket border), tabs to
the next stop, prints the other border (9) and sets the line spacing
back to 7/72-inch.
":” sequence to copy the entire ROM character
(11
sets of ll).(See Chapter
10
Page 28

110
Prints the outside border, then the top of the inside border (which
was defined as the “:” character).
120 Prints another line of borders.
130 Prints more borders, then uses the Master Select to turn on
Emphasized Double-Strike Pica. Also turns on Italic and Under-
line Modes.
140
Prints TICKET TO SUCCESS, then resets the FX to its defaults,
including Pica, but does not affect the redefined characters.
150 Produces two more border lines.
160
Prints the upper half of the FX letters in Expanded Emphasized
printing. The user-defined character 0 produces the top of the F
and 2 produces the top of the X.
170 Turns off Expanded and Emphasized Modes and prints SERIES in
Superscript Mode and then prints the right side of the border.
180 Prints the bottom half of the FX letters.
190 Turns OFF the codes, prints PRINTERS in Subscript, then prints
a border.
200 Prints borders.
210 Prints borders, then switches to Compressed and prints BY. Sets,
with ESCape ” !X”, Emphasized Double-Strike Pica, and prints
EPSON. This new mode automatically turns off Compressed.
220 Sets Superscript Mode (Escape “S0”), returns to normal print
(Escape”!@“), prints INC in Superscript, then cancels Script
Mode, then prints borders.
230 Prints another line of borders, then sets Master Select with
ESCape ”!Q”, giving Double-Strike Elite.
240 Prints GENERAL ADMISSION, resets the FX to its defaults, and
prints right borders.
250 Prints the outside borders and the bottom of the inside border.
260 Prints the outside borders and sets line spacing to 1/72-inch.
270 Prints the bottom of the outside border.
11
Page 29

280 Returns the printer to its defaults.
300-330 Provides data for the FX letters as user-defined characters
0-3.
350-410
Provides data for the ticket borders.
12
Page 30

Chapter 1
The FX Printers
Once you’ve unpacked your new printer, the first thing you should
do is make sure you have all of the parts. With the FX-80 or FX-100
printer, you should receive the items shown in Figure
1. The printer itself
2. A manual-feed knob
3. A paper separator
4. Two protective lids
5. One ribbon cartridge (in a box)
6. This FX Series Printer User’s Manual
The FX-80 has a tractor built into its platen for handling continuousfeed paper between 9 ½ and
continuous-feed paper, you must purchase the optional FX-80 tractor
unit.
10
inches in width. To handle narrower
1-1:
On an FX-100 you will find these items installed:
7. A tractor unit
8. A dust cover for the tractor unit
As you unpack your printer, you may want to save all protective
plastic, paper, and cardboard to use in the future for repacking. Figure
1-2 displays with labels the parts of each model that we discuss in this
chapter.
13
Page 31

14
Figure 1-1. The FX-80 and FX-100 printers
Page 32

Figure 1-2. Printer parts
15
Page 33

Additional Supplies and Accessories
The following items may be purchased separately from your Epson
dealer:
Printer cable or interface kit. Each computer system has its own way
of connecting to a printer. Some computers need a cable only, others
require both a cable and board. The FX printers use the Centronics
standard parallel interface scheme described in Appendix K. If your
computer expects to communicate through a serial rather than
through a parallel interface, you must purchase a serial board for your
FX. Your Epson dealer stocks a variety of FX interface boards as well
as cables.
Printer paper. FX printers are designed to accommodate several types
and sizes of paper. Both printers include tractors so that you can use
continuous-feed paper with pin-feed holes and friction mechanisms so
that you can use paper without these holes.
Ribbon cartridge replacement. The expected life of a cartridge is three
million characters (roughly 1,000 pages of text).
Print head replacement. The expected life of a print head is one hundred million characters (over 30,000 pages of text).
Roll paper holder. For the FX-80, you may purchase an optional roll-
paper holder.
Printer Location
Naturally, your printer must sit somewhere near the computer (the
length of the cable is the limiting factor), but there are other considerations in finding a choice location for your computer/printer setup.
For instance, you may want to find an electrical outlet that is not
controlled by a switch-since a switch may be accidentally shut off
while you have valuable information stored in memory Be sure the
outlet is grounded (do not use an adapter plug). To minimize power
fluctuations, avoid using an outlet on the same circuit breaker with
large electrical machines or appliances. Finally, for continuous-feed
operations you must allow enough room for the paper to flow freely,
as in Figure 1-3.
16
Page 34

Figure 1-3. Paper path
Printer Preparation
Once you’ve found a good home for FX, you’ll need to do some
preparing before you can print. This section describes the first steps,
which include installing a few parts, checking the setting of some
internal switches, and then inserting the ribbon cartridge.
Note: The printer should be turned OFF during all set-up operations.
Paper separator
To install the paper separator, hold it vertically so that it rests on the
two slots at the back of the metal frame as shown in Figure 1-4. Press
down gently but firmly until the separator snaps into place.
To remove the separator, pull up on the left side first, letting the
right side slide out of its slot.
17
Page 35

Figure 1-4. Paper separator
Covers
For protection from dust and foreign objects and for quiet opera-
tion, FX printers use two types of covers. When you use the friction
feed on either the FX-80 or the FX-100 or the built-in tractor on the
FX-80, use the pair of flat protective lids (Figure 1-5). When you use
the removable tractor unit, use the tractor cover (Figure
Install the center protective lid by inserting tabs into slots (one tab
per side on the FX-80, two on the
FX-100).
Fit the left side of the lid
over the friction-control lever (you may need to slightly bow the middle of the lid before you can snap the tabs into their slots). When you
need to change the setting of the pin feeder on the
tractor unit on either model, remove this lid by giving it a slight
upward tug.
Install and remove either the front protective lid or the tractor cover
by using the hinge posts at the front of the printer opening. This
arrangement allows you to easily raise and lower the cover to load
paper or ribbon. To install the cover, hold it at its full vertical position,
slide the right hinge fitting over the right hinge post, and set the left
FX-80
1-6).
or install a
18
Page 36

fitting over its post. Lower the cover. To remove the cover, move it to
its full vertical position and then lift it up and a little to the left.
Figure 1-5. Protective lids
Figure 1-6. Tractor cover
Manual-feed knob
The manual-feed knob (Figure 1-7) can aid you in loading and
adjusting paper. To install the manual-feed knob, hold it in position on
19
Page 37

the right side and twist until the flat sides of rod and fitting match.
Push the knob straight in with a steady pressure. To remove, pull
straight out.
Figure 1-7. Manual-feed knob
DIP switches
Several tiny switches, called DIP (for Dual In-line Package)
switches, are located inside the FX. They control a number of important printer functions, such as line-feed adjustment, the paper-out sen-
sor, the beeper, and the default print modes. You can check these
switches now, or you can skip to the ribbon section and check the
switches later.
The design of the FX printer allows easy access to the internal
switches. They are located under the upper-right vent. To remove the
vent, you need a Phillip’s-head screwdriver. Once the top screw is
removed, take the vent off by pressing down and sideways with the
palm of your hand (Figure
Do not replace the screw because in the course of this manual, we
will sometimes suggest that you reset switches. Keep the screw in a
safe spot so that you can replace it later.
Locate the two DIP switch assemblies as shown in Figure
check that they are set as shown in Figure
20
1-8).
1-10.
1-9
and
Page 38

Figure 1-8. DIP switch vent
21
Page 39

These switches are set at the factory, and most of them you will
never need to touch. You may, however, want to take the time now to
match up the switches with their functions, as shown in Table 1-1. For
a further discussion of the DIP switches, see Appendix E.
Figure 1-9. DIP switch location
Figure 2-20. DIP switch factory settings
Always turn the power off (with the switch on the left side of the
printer) before touching any internal switch. The printer checks most
switch settings only at power-up. If you make changes when the
power is on, they may be ignored until you turn the printer off, then
back on. So set all switches with the power off. Use a non-metallic
object, such as the back of a pen, to change the DIP switches.
One switch deserves your immediate attention; it is the switch
labelled 4 on switch assembly 2. This switch (let’s call it 2-4) adjusts the
automatic line feed (the movement of the paper up one line) at the end
of each print line to match your computer system’s needs.
22
Page 40

No.
ON
ON
1-8
ON
1-7
ON
1-6
1-5 Emphasized
1-4 2K buffer
Inactive
1-3
1-2 0 (slashed)
1-1 Compressed
Table 1-1. DIP switch functions
Switch 1
Function
International character
International character
International character
Print weight
RAM memory
Paper-out sensor
Zero character
Print pitch
OFF
OFF
OFF
OFF
Single strike
User-defined
characters
Active
0
Pica
Switch 2
No. ON
2-4
CR + LF
2-3 ON
2-2
Sounds
2-1
Active
Note:
The shaded boxes show the factory settings.
Function
Automatic line feed
Skip-over-perforation feature
Beeper
Printer select
I OFF
CR only
OFF
Mute
Inactive
Some computer interfaces automatically send a line-feed code to
the printer at the end of each print line. Other interfaces send only a
carriage return (which returns the print head to its left-most position),
and rely on the printer to perform the automatic line feed. Switch
enables the FX to match either requirement. With switch
2-4
2-4
on, the
printer automatically adds a line feed to every carriage return it
receives from the computer; with the switch off, it expects the computer to provide the line feed. If you are not sure what your system
requires, leave the switch the way you find it, but remember that you
can adjust this if your first printing occurs either all on one line or with
the lines spaces twice as far apart as you requested.
We recommend two changes now. Turning switch 1-2 on adds a
slash to the zero character, which makes program listings easier to
read. If you are not going to create your own characters, turn switch
1-4
on to take advantage of the internal
2K
buffer.
Ribbon installation
First, be sure the printer is turned off and move the print head to the
middle of the platen.
Remove the ribbon cartridge from its packing materials. Holding
the cartridge by the plastic fin on the top, guide the pair of tabs at each
23
Page 41

end of the cartridge into the corresponding slots in the printer frame
(Figure 1-11). The cartridge should snap neatly into place.
With the paper bail resting on the platen, you can tuck the ribbon
between the metal ribbon guide and the black print head.
As Figure 1-11 suggests, you can ease the ribbon into place with the
deft application of a dull pencil. To remove any slack in the ribbon,
turn the ribbon knob in the direction of the arrow.
Note: When you replace a ribbon, remember that the print head may
be hot from usage; be careful.
Paper Loading
How you load your paper depends on which model of FX you have
and which type of paper and feeder you are using. This section covers
each type of paper loading and then illustrates the top-of-form position on both models.
Both the FX-80 and the FX-100 include tractors so that you can use
continuous-feed paper with pin-feed holes and friction mechanisms so
that you can use paper without these holes.
Continuous-feed paper usually comes fanfolded into a box and has
pin-feed holes arranged on half-inch tear-off strips at each side. This
allows the printer’s pin feeders to engage the paper and pull it evenly
through the printer. After printing you can remove the tear-off strips
and separate the pages.
The FX-80’s built-in tractor handles continuous-feed paper that is
9% inches wide, which is the standard 8½-inch width with the tearoff strips removed. The FX printers’ removable tractor units (optional
on the FX-80, standard on the FX-100) handle continuous paper in
widths from 4 inches to the width of the platen - 10 inches on the
FX-80,16 inches on the FX-100. The friction feeder on each FX handles
all papers narrower than the width of the platen.
To refresh your memory about names of the parts, refer back to
Figure 1-2.
FX-80: built-in tractor feed
The FX-80’s built-in tractor will accommodate 9%- to 10-inch wide
continuous-feed paper with pin-feed holes. You should have few problems loading it if you follow these instructions carefully.
24
Page 42

Figure 1-11. Ribbon insertion
25
Page 43

Figure 1-12. Printer readied for paper insertion
l
Be sure the printer is turned off. Lift the front protective lid and
move the print head to the middle of the platen.
l
Remove the center protective lid.
l
Pull the paper bail and the friction-control lever toward the front of
the printer. Your printer should now look like Figure 1-12.
l
Adjust the pin-feed levers to approximate the width of paper you
are using. Pull the levers forward to release the pin feeders, move
them so their arrows line up with the correct position on the scale
(e.g., for 9.5 for 9½-&inch paper), and push the levers backward to
lock them into position (Figure 1- 13).
If you are using fanfold paper, start by positioning your paper
directly beneath or behind the printer, as in Figure 1-14, so that the
paper won’t kink or pull to one side.
l
Insert the paper under the plastic separator, guiding it with your left
hand while you slowly roll the manual-feed knob clockwise. It is
26
Page 44

Figure 1-13. Pin feeder adjustment
very important to keep the paper straight so that the pins on both
sides engage at the same time. If the paper does not move smoothly,
remove it by reversing the manual-feed knob and start again with an
unwrinkled sheet.
Figure 1-14. Loading the FX-80
27
Page 45

l
As the paper comes up the front of the platen, watch to be sure that
it is feeding under the black edges of the pin feeders. If your paper is
wrinkling as it comes through, you may need to readjust the pin
feeders.
l
Reinstall the center protective lid underneath the paper. Push the
paper bail back against the paper and close the front protective lid.
You are now ready to set the top of form, as shown at the end of this
section.
l The friction-control should remain toward the front of the
printer as long as the tractor is used.
FX-80 and FX-100: friction feed
The friction feed is for paper without pin-feed holes.
Before using the friction feed on the FX-80, disengage the pin feeders
by pulling the levers forward, then move the feeders as far toward the
edges as possible. Remove the center protective lid if it is on.
If a tractor unit is installed on the top, remove it. Push both tractor-
unit release levers back (one is shown close up in Figure
the unit up and back, pulling it gently toward the rear of the printer.
The tractor will come off easily-you should not have to tug on the
unit to remove it.
1-15).
Rock
28
Figure 1-15. Tractor unit release
Page 46

Now follow these steps to load your paper into the friction feeder:
l
Be sure the printer is turned off, Lift the front protective lid and
move the print head to the middle of the platen (refer back to Figure
1-12). Pull the paper bail up.
l
Engage the friction-control mechanism by pushing the friction-
control lever to the back.
l
Guide the paper under the paper separator and the platen with your
left hand, while turning the manual-feed knob with your right
hand.
If you hear a crinkling noise, stop. This can result from the paper
getting slightly wrinkled; it is best to remove the paper and start
over with an unwrinkled sheet.
l
Do not pull on the paper as it comes up from the platen; leave the
friction feeder in charge. Push the paper bail back against the paper,
close the front protective lid and reinstall the center protective lid.
You are now ready to set the top of form, as shown at the end of this
section.
There is one more point to consider if you are printing on single
sheets of paper. DIP switch 1-3 is set to active at the factory, and this
means that the paper-out feature will sound the FX’s beeper and halt
printing whenever it senses the bottom of your sheet of paper. In prac-
tice, this means that without deactivating the sensor, you won’t be
able to print on the bottom of a single sheet of paper. You can, usually,
deactivate the paper-out sensor easily by changing switch 1-3. Some
computer systems, however, ignore the setting of DIP switch 1-3 (See
Appendix F.)
FX-80 and FX-100: removable tractor unit
(optional on the FX-80)
The removable tractor will accommodate pin-feed paper in any
width from four inches to the width of the platen.
To install the optional tractor unit on the FX-80, begin by removing
the center protective lid if it is on. Move the built-in pin feeders as far
as possible to the right.
To add the tractor unit to either the FX-80 or the FX-100, hold the
tractor unit over the printer with the gears to your right as shown in
Figure 1-16. Lower the rear hooks over the rear studs as shown in
Figure 1-17, pushing the unit back against the studs to ensure that both
29
Page 47

sides of the tractor assembly are firmly in place. Rock the front of the
unit downward, pressing firmly until it locks into place.
Figure 1-16. Tractor unit installation
30
Figure 1-17. Hook and stud
Page 48

To load the paper into the unit, use this procedure:
l
Be sure the printer is turned off; then open the front protective lid to
move the print head to the middle of the platen.
l
Pull the paper bail and the friction-control lever toward the front of
the printer (refer back to Figure
l
Insert the paper under the paper separator and the platen and push
1-12).
the paper through to the front.
l
Position the pin feeders, using the pin-feed locking levers to make
the adjustment. One is shown in Figure
l
Raise the black covers of both pin feeders and ease the paper over
1-18.
the pins. Adjust the paper or pin feeders as necessary so that there
are no wrinkles or dips in the paper. Now you are ready to set the
top of form.
Figure
1-18.
Adjusting the pin feeders
31
Page 49

Top-of-form position
After you have loaded the paper, you should set it to the top of
form, which is the position of the print head when you turn the printer
on. (Since the computer term form corresponds to the word page, it
may be easier for you to think of this as the top of the page.) To make
this setting, advance the paper until a perforation lies slightly below
the top of the ribbon.
The relationship between the perforation and the printhead is the
same on both models of the printer, as you can see in Figure 1-19. You
need to leave some paper above the ribbon so that the paper moves up
smoothly.
When you have the position set, lower the bail and replace or repo-
sition the lids or cover.
Although you have arranged the paper correctly, you are not done.
The printer will not recognize the top of form until the next time you
turn it on. The FX considers a form to be 66 lines long unless you
change this length as discussed in Chapter 8.
Paper-thickness lever
The paper-thickness lever shown in Figure 1-20 moves the print
head to accommodate various paper thicknesses. The factory sets it
for ordinary paper (which is 1/500th of an inch thick), but you can
adjust it for printing one original and up to two copies. For thick paper
or multiple copies, move it toward the front. Do not use the extreme
rear setting, however. This position is used for head alignment and
will shorten the life of the print head if used in normal operation.
Starting Up
It is finally time to connect the printer to the computer; remember
that some computers need interface kits and all need cables. First make
sure the power switch is off. Connect the printer end of the printer
cable to the connector at the right rear of the FX (as shown in Figure
32
Page 50

Figure 1-19. Top of form
1-21). The other end of the cable plugs into your computer. If your
cable includes grounding wires, be sure to fasten the wires to the
grounding screws at each end.
With the paper loaded, turn the printer on with the toggle switch at
the left-rear comer of the FX. You get a little dance from the print head
and three lights go on: the POWER light, the READY light, and the
ON LINE light. If the ON LINE and READY lights are not on, push
the button marked ON LINE. If the PAPER OUT light is on, the paper
is not loaded correctly.
33
Page 51

34
Figure
1-20.
Paper thickness adjustment
Page 52

Figure 1-21. Cable connection
Control panel
When the control panel’s ON LINE light is on, the printer and computer are in direct communication and the FF (form feed) and LF (line
feed) buttons have no effect. Go ahead, try pushing one.
To use the FF and LF button; press the ON LINE button to turn it
off. Now you can see what the other buttons do.
Press the LF button briefly, then release it. That produces one line
feed. Now hold the LF button down for a moment to produce several
line feeds.
The FF button advances the paper one complete page(form). If you
hold the button down, it advances several forms. Ideally, you’ll set the
top-of-form position before you turn on the printer. That way, your
printing can start on the first line of the paper. If you turn the printer
on while the print head is sitting in the middle of a form, that is precisely where the next form will start when you press the FF button or
your program sends the FX a form feed.
Remember that the ON LINE light has to be off for the FF and LF
buttons to work.
The FX tests itself
Now it’s time to see how your new FX operates. If you’re using an
FX-100, be sure you have full-width (15-inch printing area) paper
35
Page 53

loaded because the printer’s test uses all 136 columns. Turn the printer
completely off (with the switch on the left side of the printer), press
down the LF button, and turn the printer back on again while still
holding down the LF button.
Figure 1-22. Sample automatic test
Figure 1-22 shows the FX’s automatic test, which prints the standard
characters that are stored in the printer. The test pattern continues
until you turn the printer off. If you let it run long enough, you’ll see
two sets (Roman and Italic) of upper- and lower-case letters, plus
many other characters.
If you plan to use your FX printer primarily for word processing or
with some other commercial software, you are now ready to follow
the printer set-up instructions in your software menu or manual.
Because most software packages include set-up routines for dot matrix
printers, this set up may be merely a matter of specifying which
printer you are using.
In case your software asks for specifications that you do not understand, check the appendixes or consult your computer dealer.
Some programs allow you to insert codes to activate such FX features as Emphasized and Compressed printing. Your software manual
will tell you how to use this feature, and the Quick Reference Card in
Volume 2 will give you the necessary ESCape and control codes.
36
Page 54

Chapter 2
BASIC and the Printer
While you read this manual, you’ll be testing your FX with programs in the BASIC language. You can, of course, use another language with your printer; see Appendixes A through D for the ASCII
and ESCape codes that your software manual will explain how to use.
Here we use BASIC because it is the most popular language for personal computers.
One of the simplest things you can do with any FX printer is print
listings of your BASIC programs. You merely load a BASIC program
into the computer and send the LISTing output to the printer instead
of to the screen.
Unfortunately, different computer systems access the printer in
different ways. For example, most computers that use Microsoft
BASIC send PRINT or LIST commands to the printer by adding a
leading L to a screen command: LPRINT, LLIST, etc. Some other computer systems use PRINT # in place of LPRINT Another group uses
PR#l to route information to the printer and PR#0 to restore the flow
of information to the screen. If you aren’t familiar with your system’s
command conventions, consult its manual.
We will use the LPRINT and LLIST commands for our examples in
this manual because the widespread acceptance of Microsoft BASIC
makes these commands as close to a standard as exists in this industry.
But remember that you may need to modify such commands to match
the unique aspects of your system. The Preface and Appendix F can
help.
Once you have discovered how your computer communicates with
the printer, load a BASIC program into memory. Now list it onto the
printer, using your computer’s version of the LLIST command. Some
examples are shown in Table 2-1.
37
Page 55

Table
2-1.
Several computers’ print LIST commands
Command
LLIST
LIST"COM0:"
PR#1
LIST
PR#0
Epson QX-10™, IBM-PC®, and Radio Shack TRS-80
Epson HX-20 Notebook Computer™
Apple® II
Computer
®
If your listing is more than a page long (or if you didn’t start the
listing at the top of a page), your printer may have printed right over
the perforation. Set DIP switch 2-3 to the on position, and the printer
will automatically skip over the perforation. We discuss this further in
Chapter 8.
Meanwhile, printing a program LISTing is a fundamental function
of the printer. Be sure you manage this before continuing (if you have
trouble, consult your computer’s manual for help).
BASIC Communications
Part of the difficulty in controlling communications between computer and printer is the lack of a completely standard coding scheme.
When your computer sends out a numeric code for the letter A, you
naturally want your printer to interpret that code as an A. Most manufacturers of computers, printers, and software use the American
Standard Code for Information Interchange (ASCII, pronounced ask-
ee) to code such frequently used characters as the letters of the alphabet, numerals, and keyboard symbols. Of the 256 ASCII numbers,
most are codes for specific characters; some are codes for such computer or printer functions as sounding a beep or performing a carriage
return.
The ASCII standard does not yet allow for the advanced features in
today’s computers and printers. Individual manufacturers therefore
adjust the codes to suit their own needs, which means that we are
often faced with compatibility problems between printers and computers. (To compare your computer’s version of the ASCII table with
the FX’s version, see your computer manual and this manual’s Appendix A.) You can usually overcome the code inconsistencies by sending
control codes for advanced printer functions in care of a special ASCII
code that is called an ESCape code. The next five subsections discuss
these matters in more detail.
38
Page 56

Character strings
The character-string (or CHR$) function converts any decimal
number from zero through 255 to a character or action. Its format is
CHR$ followed by a number in parentheses, for example, CHR$(84).
The character-string command follows a PRINT or LPRINT command and causes your computer system to send an ASCII code to the
computer’s screen or to the printer. What gets printed or performed is
determined by the particular modified ASCII table that is used by
your system. Where the printing or action happens-on your screen
or your printer-depends on the print command that precedes the
character-string command.
For a fast check on what your computer does with this function, try
printing a few characters on your computer’s screen. The usual format
for this is PRINT CHR$(n). The n represents one of the numbers from
zero to 255, each one of which accesses a unique character or action.
Try typing this:
10 PRINT CHR$(65)
and RUNning it. Since most computers use the numbers from 32 to
127 to mean the ASCII set of characters, you should see a capital A on
the screen.
It’s the numbers less than 32 and greater than 127 that produce
different results on nearly every brand of computer. Try entering:
10 PRINT CHR$(193)
and RUNning it. If you don’t see anything on the screen, don’t worry.
Remember that this was just a quick check. We are mainly interested
in sending that 193 to the printer, and what it prints on the screen is
not as important right now.
BASIC print commands
Well then, what happens when you send such a non-standard code
as 193 to the printer? To test this out, you need to know what program
commands your computer uses to activate the printer. Some typical
command sequences are shown in Table 2-2.
39
Page 57

Table 2-2. Several computers’ printer
activating commands
Activating commands
10 LPRINT CHR$(193)
5 OPEN "0",#1, "COMØ"
10 PRINT#1, CHR$(193)
99 CLOSE#1
5 PR#1
10 PRINT CHR$ (193)
99 PR#Ø
Epson QX-10, IBM-PC, and Radio
Shack TRS-80
Epson HX-20 Notebook Computer
Apple II
Computer
Check your computer’s reference manual and type in the com-
mands appropriate to your computer. Then type RUN.
With any luck, you will get an Italic capital A on the printer: A
If nothing prints, it’s time to double-check your computer manual
and cable connections. Make sure the printer is ON LINE and the
READY light is lit.
ASCII and BASIC basics
If you end up with a Roman A:
40
A
Page 58

instead of an Italic A, pay close attention to the next three paragraphs.
The original ASCII code was designed to use the decimal numbers
zero through 127. Computer systems designers soon decided to extend
this range (to 0 through
255)
in order to make room for more features.
Unfortunately, some designers did not anticipate that printers would
make use of this extended range. So they designed BASIC printer
drivers that intercept any number in the upper half of the range
255)
and automatically convert it to the lower half of the range by
subtracting
128.
(128 -
In these systems such a code as CHR$(193) never makes it to the
printer. The printer driver subtracts
128,
which means that the code
for Italic A gets to the printer as a CHR$(65). The printer then
produces a Roman A.
For many applications, you won’t need the upper half of the ASCII
codes. For others, the inability to generate codes greater than 127 will
be an obstacle. Whenever we can, we suggest ways to get around this
obstacle. In Chapter 5, for instance, we discuss Italic Mode, which is
the FX designers’ method of making Italic characters easily accessible
to all users.
If you’re patting yourself on the back because your printer printed
an Italic A, postpone your celebration for a bit. Nearly all computers’
BASIC programs intercept codes on their way to the printer and alter
some of them. For example, some popular systems intercept a
CHR$(l0)-line feed-and send out a CHR§(13)-carriage returninstead. Typical problem codes involve the numbers 0 and 9 to 13.
Your computer manual may alert you to these problems, Or experience may have to be your guide.
In order to help computer systems that can’t send a zero in a CHR$
command, several printers’ instruction sequences allow such options
as using “0” (quote-zero-quote) in place of CHR$(0). Besides mentioning some of these solutions within the text of this User’s Manual, we
have written a troubleshooting appendix, Appendix F.
Control codes
Enough talking about problems. Here’s a program line to try:
10 LPRINT CHR$(7)
Be sure to use the appropriate printer access commands for your
system.
41
Page 59

Now RUN it. You should hear a short beep. (If you don’t hear it,
check DIP switch 2-2, using the procedure we gave in Chapter
1.)
That’s the printer’s beeper, which most often sounds to inform you
that you’ve run out of paper (Appendix F lists other causes of beeping). When you produce the beep, you’ve proved that on your com-
puter certain codes do indeed perform printer functions. Table 2-3
shows the ranges that the FX uses when it interprets ASCII codes for
characters and functions.
Table 2-3. ASCII codes on the FX
ASCII
code
FX interpretation
group
Ø to 31, 127
32 to 126 Standard (Roman) character
128 to 159, 255 Additional control codes (Function same as Ø-31, 127)
16Ø to 254
See either Appendix A or the Quick Reference Card for a chart of
the FX interpretation of each ASCII code number.
This would be a good time to try printing a few of these codes on
your own. And you may want to take a break before you start the
next section.
Printer control codes
set
Italic character set
Escape-CHR$(27)-and other CHR$ commands
As more features are added to the printer, even the extended range
of codes (0 - 255) is inadequate if only single-code CHR$ instructions
can be used. Because of this, Epson has designed the FX printer’s logic
to understand special sequences of control codes, the ESCape code
sequences. You use these code sequences to select one or more printing
features, or modes.
Such modes as Italic Mode and Expanded Mode affect the way the
characters look. Other modes affect spacing and therefore the formatting of your pages. Appendix C, which is reprinted on the Quick Reference Card, collects the modes into categories for quick reference.
Each ESCape code sequence consists of the ESCape code, which is
CHR$(27), plus one or more of the FX’s other CHR$ control codes.
42
Page 60

Here are two examples of ESCape code sequences:
LPRINT CHR$(27)CHR$(71)
LPRINT CHR$(27)CHR$(38)CHR$(0)CHR$(1)CHR$(3)
To see how such sequences work, start a new program now by
entering:
10 LPRINT CHR$(27)CHR$(52)
20 LPRINT "ITALIC CHARACTER SET"
and RUNning it. When you can RUN a program, we show you the
results that you should expect:
ITALIC CHARACTER SET
Note: If you haven’t yet read the Preface, which includes “Conven-
tions Used in This Manual,” this is the time to do it. Especially
important now are the passages on semicolons and on saving
programs.
The FX interprets the
a command to switch from Roman to Italic characters. The LPRINT
in line
printer is in Italic Mode.
Now type:
to check the printer’s status as in Figure 2-1:
20
sends a string of characters to the printer to verify that the
LLIST
(or your system’s version of the print LIST
command)
10 LPRINT CHR$(27) CHR$(52)
CHR$(27)CHR$(52)
sequence in line
10
above as
20 LPRINT "ITALIC CHARACTER SET"
Figure 2-1. Italic listing
Since all the text is still printed in Italic characters, you can see that this
mode stays on until it is turned off. This is typical of the modes on FX
printers: nearly all modes stay on until turned off. We will alert you to
the few exceptions.
If your printer is printing one line on top of another or if it is double
spacing, you need to change the setting of the FX’s DIP switch
2-4.
43
Page 61

Change Commands
After you have sent commands to the printer, you will often want
to change them, either to turn off one or more modes, or to erase text.
To understand what happens when you use one of the several FX
methods of making changes, you need to know about two special
aspects of the printer, defaults and the printer buffer.
We often talk in these pages about resetting the printer to its
defaults. By defaults, we mean the settings that are in effect whenever
you turn the printer on. The printer has default settings for such features as the size of a line, the size of a page, and the print mode or
mode combination that is in effect (see Appendix G or the Quick Reference Card for a list). Although all of these defaults are originally set
at the factory, you can reset some of them by hardware, by changing
the appropriate DIP switches. You can also change most features that
have defaults by software. But whenever you turn your printer off
and back on, you will have reset its default settings.
For example, you can use the software control codes to make your
pages be four inches long, but the next time you reset your printer, the
page length will return to 11 inches.
Every control code that you send to the printer is stored in the
printer’s RAM buffer right along with the text. All material goes
through this buffer to get to the printed page. This buffer is like a
holding tank in which each print line is collected.
The buffer can hold a full line of text characters (on the FX-80,
characters for normal-width print, more characters for narrower
widths; on the FX-100,136 for normal and more for narrower widths)
as well as control codes. All information resides in the buffer until the
buffer is filled or a control code that empties it is received. (One such
control code issues a carriage return; another type selects graphics, as
discussed in Chapter
at a time. As the printer encounters characters and codes, it prints text
characters on the page and activates the print modes according to the
control codes.
If you understand the concepts of defaults and buffering, you will
rarely be surprised by what happens when you send a change code.
The next three sections concern change codes: the first two cover
changes you make to commands you have sent to the printer; the last
concerns making changes to text.
44
11.)
Then the FX processes the line, one character
80
Page 62

Reset Code
You could turn off the Italic Mode by turning the printer off, then
back on. Although turning the printer off resets the printer to its
defaults, which include Roman Mode, cycling the printer off and on
may disrupt computer/printer communications. FX printers have a
Reset Code to avoid that: ESCape CHR$(64).
To see the Reset Code work, add these lines to your budding
program:
30
LPRINT CHR$(27)CHR$(64)
40
LPRINT "BACK TO ROMAN WITH THE RESET CODE"
and RUN it.
ITALIC CHARACTER SET
RACK TO ROMAN WITH THE RESET CODE
The Reset Code of line
the printer to its default settings, which include Roman typeface. The
top of form is also reset; now it’s at the position of the print head when
your program issued the Reset Code. You can test this by using the FF
button to advance the paper one page.
Notice that there is a blank line between the two lines of text in the
printout. This happens because BASIC provides a line feed after every
line of print commands unless you put a semicolon at the end of the
line. As you will see, we often end lines with semicolons to prevent
unwanted line feeds.
The Reset Code is useful when you want to turn off all printer
modes. It resets everything to its start-up condition. If you have several different modes active in the printer at one time, they are all shut
off by the ESCape CHR$(64).
30
turns off all special print modes and resets
Mode cancelling codes
The FX printer also provides specific codes to turn off each mode
separately. For example, an ESCape CHR$(53) turns off the Italic
character set and leaves everything else untouched. To see how the
specific cancelling code for Italic Mode works, change the Reset Code
in line 30 above to an ESCape CHR$(53):
30
LPRINT CHR$(27)CHR$(53);
40 LPRINT "BACK TO ROMAN WITH ITALIC OFF"
45
Page 63

ITALIC CHARACTER SET
BACK 'TO ROMAN WITH ITALIC OFF
Notice that CHR$(53) turned Italic off and the semicolon at the end of
line 30 eliminated the blank line between the two lines of text.
DELete and CANcel
But suppose you don’t want that much power. Suppose you only
want to erase text in the print buffer without affecting any print
modes. Two codes do this: DELete and CANcel. DELete, which is
CHR$(127), removes the latest text character from the buffer without
affecting control codes. CANcel, which is CHR$(24), is a slightly
more powerful code. It removes all the text currently in the buffer, but
it also does not affect the control codes.
These codes are seldom used, but they can be helpful if your system
sends unwanted characters at the beginning of a program listing or a
program run. You can then use one or more DELete or CANcel codes
at the start of your program to clear out these characters.
Alternate Formats for ESCape Sequences
Activating each of the many FX features with a sequence that con-
sists of the ESCape code plus another character-string command can
be cumbersome to use and difficult to remember. Fortunately, there
are techniques for shortening the format.
The simplest method is to shorten the character-string command
that follows the ESCape code. Instead of using CHR$ and a number in
parentheses, you can use-inside quotation marks-the ASCII char-
acter that corresponds to the number. For example, you have already
seen that you can send the Reset Code with CHR$(27)CHR$(64).
Because the @ symbol is the ASCII equivalent of 64, this command
can also be typed in as CHR$(27) ” @ ” .
We use this shorter format whenever possible. To see it in your
current program, change lines 10 and 30. The ASCII symbol for the 52
46
Page 64

of line
number 5, so enter the following:
10
is the number 4, and the symbol for the
53
of line 30 is the
10 LPRINT CHR$(27)“4”
30
LPRINT CHR$(27)"5";
Now use RUN to make sure that both ESCape sequences work as
before.
You can also shorten your programs by storing the ESCape code in
a character string. If you enter A$=CHR$(27) in an early line of a
program, you can simply enter A$ each time you want the ESCape
code. For example, the following lines produce the same results as the
previous ones:
5 A$=CHR$(27)
1Ø LPRINT A$"4"
3Ø LPRINT
This technique can help if you use the ESCape code frequently.
If you use a certain ESCape sequence often in a program, you can
store it in a character string as shown in this example:
A$"5";
5 B$=CHR$(27)+"4"
1Ø LPRINT B$
Note that in this case you must use a plus sign between the elements of
the ESCape sequence.
Summary
You use CHR$ to send numeric codes from BASIC, and you use
CHR$(27), the ESCape code, to earmark the printing or action to
occur on the FX printer. You turn on an FX mode by using the ESCape
code and adding to it either the character-string command and an
appropriate FX control code or else the ASCII equivalent of the con-
trol code enclosed by quotation marks.
Nearly all printer modes stay active until they are turned off (we
cover the exceptions later). You can turn off one printer mode or set of
modes by shutting the printer off or by sending the Reset Code, either
of which resets the FX to its default modes. In addition, each mode has
its own cancelling code that turns off only that particular mode.
You can delete all the text characters in the FX’s buffer by using the
CANcel code or the latest text character by using the DELete code.
Neither affects the control codes.
47
Page 65

See the Preface for a list of the conventions used in this manual,
Appendix A for a table of the ASCII codes, and Appendixes B and C
for tables of the control codes. Appendix F offers programming solutions to interfacing problems, while Appendix E lists the defaults and
shows the DIP switch settings. See also the Quick Reference Card.
Here are the DIP switches that we mentioned in this chapter:
Switch 2-2
Switch 2-4
Controls the beeper
Controls the number of vertical lines that the
printer spaces at the end of a print line
Here are the codes that we have covered in this chapter, listed in the
order of their appearance:
CHR$(7)
CHR$(27)
Causes a beep
Prepares the printer to accept other control
codes (Escape code)
CHR$(27)“4”
CHR$(27)”@”
Turns Italic Mode ON
Resets the printer to its defaults (Reset Code)
CHR$(27)“5” Turns Italic Mode OFF
CHR$(127)
DELetes the latest text character in the print
buffer
CHR$(24)
CANcels all text in the print buffer
48
Page 66

Chapter 3
Print Pitches '
One of the big advantages an FX printer has over a daisy-wheel
printer or a typewriter is the ability it gives you to choose from a
variety of widths, or pitches, for your characters. To use this feature
well, it’s important to understand just how an FX prints. The technique used by an FX printer is called dot-matrix printing.
Dot-Matrix Printing
A dot matrix is a grid or graph that someone who designs a charac-
ter set for a dot matrix printer uses. The dot-matrix designs for the
characters, which may be letters of the alphabet, numbers, or symbols, are stored in the printer’s read-only memory (ROM).
The FX’s dot matrix is nine rows of dots high and six columns of
dots wide. Look at any letter on your printout-it’s made up of a
series of dots. And, as you can see in Appendix A, every letter fits
inside this six by nine grid.
Figure 3-1. Dot-matrix characters
49
Page 67

Figure
3-1
shows one each of lower- and uppercase letters. The p gives
an example of the way a few lowercase letters use the bottom two
rows of the matrix. All numbers, uppercase letters, and most symbols
are formed within the top seven rows of the matrix.
Main columns
The construction of the print head restricts the maximum height of
any character to nine dots.
As shown in Figure
a vertical column of nine pins (actually, wires). Because there is only
one column of pins, the head must move sideways sequentially to
each of the different column positions of the matrix, then fire the
appropriate pins. Electrical impulses cause the FX to fire pins at the
paper. As a pin is fired, it presses against the ribbon to produce one dot
of the matrix. At each position, the printer fires only the pins that are
necessary to print the current column of the character.
3-2,
the print head uses
Figure 3-2. The print head
To print a capital H as in Figure
7
in column 1; pin4in
in column
50
5.
columns
3-2,
2,3,
the print head fires pins 1 through
and4;and pins1through7again
Page 68

Intermediate positions
FX characters are designed to be five or fewer columns wide. Leaving the sixth column blank allows for space between letters. Figure 3-3
shows the 6 main columns, numbered
Figure 3-3. Main columns
Because the use of 5 dots does not give quite enough detail for the
highest quality characters, an FX prints some dots half way between
the main columns in the 6-dot-wide matrix. This enhancement results
in a matrix grid that is actually
11
intermediate columns. You can count the
shown as Figure 3-4.
1, 3, 5,
etc.
dots wide-6 main columns with 5
11
positions on the grid
Figure 3-4. Intermediate positions
The dots printed in intermediate column positions would overlap with
those in the main columns if they were printed in the same row.
51
Page 69

If you look through Appendix A, you’ll notice that none of the FX’s
characters use dots in consecutive main and intermediate columns in
the same row. There is a reason for this: the printer’s speed. The FX
recalls a character’s dot-matrix pattern from ROM and prints it in
1/160th of a second. At that speed, the print head is simply moving
too fast to pull the pins back and forth in time to print an overlapping
dot. This fact is critical when you design characters, as you will see in
Chapter 15.
Modes for Pitches
Several of the FX printer’s modes produce characters in different
widths, or pitches. You may recognize two of these pitches as standard
character widths used on typewriters; a third produces a narrower
character. Each of these three is covered in one of the subsections
below, followed by a discussion of how the FX assigns priorities to its
print modes. We discuss other pitch modes later.
Pica and Elite Modes
At start-up the FX prints 10 characters per inch (cpi). This is the
same pitch as that of a typewriter’s Pica character set. The FX can also
print characters in an Elite pitch (12 cpi). When you print in Pica on
the FX-80, you can get up to 80 characters on a line; changing to Elite
Mode gives you 96. When you print in Pica on the FX-100, you get up
to 136 characters per line; Elite Mode gives you 163.
Changing the print pitch between Pica and Elite does not change the
number of columns in each character, nor does it change the pattern
used to create each character. It simply moves the columns closer
together or farther apart to change the width of
see how this works, compare the Pica and Elite letters shown in
Figure 3-5. Since the columns used to print Elite characters are packed
more closely than those for Pica, more of them fit on one line of print.
Notice
Try it in this program:
that
Elite pitch compresses spaces as well as characters.
Elite Mode (which produces Elite pitch) is set with an ESCape “M”.
each
character. To
NEW
1Ø LPRINT CHR$(27)"M"
2Ø LPRINT COMPARE ELITE PITCH WITH THE
PICA BELOW"
52
Page 70

Figure 3-5. Pica and Elite letters
3Ø
LPRINT CHR$(27)"P";
4Ø
LPRINT PICA PITCH IS THE NORMAL PRINT
WIDTH"
When you RUN it, you should get:
COMPARE ELITE PITCH WITH THE PICA BELOW
PICA PITCH IS THE NORMAL PRINT WIDTH
Figure 3-6. Pitch comparison
The
10
blank spaces in line 20 above print as
corresponding spaces in line 40 print as Pica spaces. This means, as
you can see in Figure 3-6, that the different width modes affect spaces
as well as characters. The modes also affect tabs, which we will discuss
in Chapter 9.
The ESCape “P”’ in line 30 turns Elite Mode off and returns the
printer to Pica pitch. Notice that, because Pica is the factory-set
default, it comes on whenever you turn the printer on (unless you’ve
changed the pitch default by changing a DIP switch).
10
Elite spaces; the
10
Compressed Mode
To see a third handy print pitch that is available on FX printers,
replace your current program with this one:
53
Page 71

NEW
2Ø LPRINT CHR$(15)"COMPRESSED MODE IS SET WITH
CHR$(15)"
3Ø
LPRINT "IT WILL STAY ON UNTIL YOU CANCEL IT"
4Ø
LPRINT CHR$(l8)"PICA AGAIN"
COMPRESSED MODE IS SET WITH CHR$(15)
IT WILL STAY ON UNTIL YOU CANCEL IT
PICA AGAIN
Notice that we had you use only CHR$(l5) to turn Compressed Mode
on-that is, we didn’t have you type in an ESCape code first. If you
prefer consistency to brevity, you may add one and use ESCape
CHR$(15) to get the same effect.
As
do
most other print modes on FX printers, Compressed stays on
until you turn it off. And there is a specific code that turns Compressed Mode off-CHR$(18). The Reset Code would work just as
well, but remember that it also resets all other current printer modes to
the defaults. The FX gives you a choice of resetting codes one at a time
or all at once.
At 17.16 characters per inch, Compressed Mode is the narrowest
character pitch available on FX printers. FX-80 users can fit 132 Compressed characters into each line (up to 137 by changing the right margin setting; see Chapter 9). FX-100 users can get 233 Compressed
characters per print line. Compressed Mode is especially useful for
printing spreadsheets or reports that require several columns of information.
If you find yourself using this pitch more often than not, you can
change the default pitch from Pica to Compressed Mode by setting
54
Page 72

DIP switch 1-1 on. This adjustment will make the printer reset to
Compressed Mode, after which you can switch to other modes as
needed. You could get Pica Mode with control codes, for instance, by
using the Compressed shut-off code: CHR$(18). Then you could
return to Compressed with either of the usual commands-CHR$(15)
or ESCape " @ “-or by turning the printer off and back on.
Mode priorities
These first three pitches-Pica (10 cpi), Elite (12 cpi), and Compressed (17.16 cpi)-are mutually exclusive. That is, only one can be
in use at a given time. When a program activates conflicting modes,
one of them will take precedence. In the case of Elite, Compressed,
and Pica Modes, for example, Elite has the highest priority. To check
this, try RUNning this line in your current program. In this example
and many others throughout the manual we use the format that combines the command with the print string. The printer will interpret the
letter M as part of the command and will not print it. This format is
further explained in the preface.
10 LPRINT CHR$(27)"MELITE PITCH"
ELITE PITCH
COMPRESSED MODE IS SET WITH CHR$(15)
IT WILL STAY ON UNTIL YOU CANCEL IT
PICA AGAIN
This time the printer doesn’t make it to Compressed Mode. Your
entire printout is in Elite pitch even though Compressed Mode is
turned on in line 20. Does that mean the printer ignores the CHR$(15)
when it is in Elite Mode? Let’s find out. Change line 30 to read:
30
LPRINT CHR$(27)"PCANCEL ELITE TO SEE COMPRESSED"
ELITE PITCH
COMPRESSED MODE IS SET WITH CHR$(15)
CANCEL ELITE TO SEE COMPRESSED
PICA AGAIN
ESCape “P” did cancel Elite Mode, which caused line 30’s text to print
in Compressed. So the printer did recognize the command for Compressed Mode-CHR$(15)-in line 20, but its program masked that
command as long as Elite was in effect.
55
Page 73

Don’t take this lesson lightly-it is a good example of how print
modes interact on FX printers.
Pitch Mode Combinations
The previous three modes can’t be mixed, but the next mode can be
used in combination with any one of them. And you can add it to a
printout for either of two durations, for one print line or for a longer
passage.
Expanded Mode
Expanded Mode doubles the width of the current pitch mode. Since
it can be combined with all previous pitches, Expanded Mode doubles
the number of available print pitches to six.
You can turn on the Expanded print feature for either of two dura-
tions. If you activate it with CHR$(14), it turns off after each print
line. If you want Expanded Mode to stay on line after line (continuously), you activate it with ESCape “W” followed by CHR$(1).
Also notice that ESCape “W” CHR$(1) is turned off with ESCape
“W” CHR(0). CHR$(14), on the other hand, can be turned off either
with CHR$(20) or with ESCape “W “CHR$(0).
To see Expanded characters, type in:
NEW
10 LPRINT CHR$(14)"EXPANDED PRINT"
20 LPRINT "TURNS OFF AFTER EACH LINE WITH CHR$(14)"
30
LPRINT CHR$(27)"W"CHR$(1)"EXPANDED PRINT STAYS
ON"
56
Page 74

40
LPRINT "CONTINUOUSLY WITH ESCAPE W"
50 LPRINT CHR$(27)"W"CHR$(0)
The printer extends the dot matrix by spreading the dots horizontally
to twice their normal distances apart, and then it adds a duplicate of
each dot to the next main dot column (see Figure 3-7).
Figure 3-7. Pica and Expanded letters
Those of you who like compact program lines and those of you
whose computer systems have difficulty sending a CHR$(0) or
57
Page 75

CHR$(1) can use an alternative form for this pair. For continuous
Expanded, and for the other modes which use CHR$(1) and CHR$(0)
as a toggle switch, you can use an abbreviation. Here, for example,
you can use:
LPRINT CHR$(27)"W"CHR$(1)
or you can use:
LPRINT CHR$(27)"W1"
for the same result.
Expanded Mode works equally well with any of the three basic
pitches. Type and RUN this program:
NEW
10 LPRINT "YOU CAN PRINT EXPANDED:"
20 LPRINT CHR$(27)"W1PICA"
30
LPRINT
CHR$(15)"COMPRESSED"
40 LPRINT CHR$(27)"MAND ELITE"
50 LPRINT CHR$(27)"@CHARACTERS"
Most of the FX modes stay on continuously, and so your program
must turn off each mode when you are finished with it. We tell you
about the few exceptions to this rule-such as the CHR$(14) version
of Expanded-as they come up.
Multiple print pitches on one line
Suppose that you want to emphasize just one word within a line by
printing it in a different pitch. The following program shows how it
can be done:
10 LPRINT "YOU CAN MIX:
20 LPRINT "PICAP
30
LPRINT
CHR$(14)"EXPANDED,"
40 LPRINT CHR$(20)CHR$(15) COMPRESSED";
50 LPRINT CHR$(14) EXPANDED,";
60 LPRINT CHR$(20)CHR$(27)"M AND ELITEP
70 LPRINT CHR$(14) "EXPANDED"
80 LPRINT CHR$(27)"@CHARACTERS ON THE SAME LINE'
58
Page 76

By deleting the semicolon at the end of line 10 and adding a semicolon
to the end of line 30, you can mix all six print pitches on a single print
line.
In program lines 30 to 70, CHR$(14) and CHR$(20) move the
printer in and out of Expanded Mode.
This program turns Compressed Mode on in line 40, and Compressed stays on until the Reset Code turns it off in line 80. It gets
replaced (masked) in line 60 when the program turns on Elite Mode,
which has a higher priority.
Since doubling the width of the three standard pitches adds more
dots to the matrix of each character, doubling gives you a darker
print. There are other ways you can get darker print, plus many other
ways you can change the looks of the type, and we discuss these techniques in the next three chapters.
Summary
The FX uses a dot matrix to plot the characters it prints. Vertically,
the matrix consists of 6 main and 5 intermediate columns. Horizon-
tally, the matrix consists of 9 rows. Appendix A shows how each of
the FX’s characters fits into this matrix.
Using these potential positions, the print head is capable of printing
in a large variety of modes. In this chapter we introduced three sets of
commands that add five pitches (widths) to the factory-set default,
Pica. You can change the default to Compressed by changing DIP
switch 1-1.
Table 3-1 shows six pitch modes, their densities in characters per
inch, and the commands you use to turn them on. In this table, we
assume that you are using Pica as the default. If you have changed to
Compressed, you activate Pica with CHR$(18).
59
Page 77

Table 3-1. Summary of print pitches
Here is the DIP switch that we mentioned in this chapter:
Switch 1-1
Allows you to change the pitch default from
Pica to Compressed
Here is a list of the commands that we introduced in this chapter,
listed in the order of their appearance:
CHR$(27)“M”
Turns Elite Mode ON
CHR$(27)“P” Turns Elite OFF
CHR$(15)
CHR$(18)
Turns Compressed Mode ON
Turns Compressed (set either by software or
by hardware) OFF
CHR$(14)
CHR$(20)
CHR$(27)”W1”
Turns Expanded Mode (1-line) ON
Turns Expanded (1-line) OFF
Turns Expanded Mode (continuous version)
ON
CHR$(27)”W0” Turns Expanded (either the 1-line or the con-
tinuous version) OFF
60
Page 78

Chapter 4
Print Quality
In the last chapter you learned how to change the width of the
printed characters to achieve six different print pitches. The FX printer
also offers several modes that improve print quality without affecting
pitch. The three new modes that we discuss in this chapter are
Double-Strike, Emphasized, and Proportional. After we cover these
modes separately, we discuss combining them with pitch modes.
Bold Modes
Each of the modes we discuss here produces darker characters than
do the Single-Strike modes we discussed in Chapter 3, and each gets its
bold effect by printing overlapping dots. Because Proportional Mode
includes Emphasized, it also produces bold characters. The difference
between Double-Strike and Emphasized Modes lies in the direction
the print head moves before it prints the overlapping dots.
Double-Strike Mode
The Double-Strike Mode prints each line twice. You turn DoubleStrike on with ESCape “G”.
ESCape “H”. To see its effect, try this:
It stays on until you turn it off with
NEW
10 LPRINT CHR$(27) "GDOUBLE-STRIKE PRINT IS DARKER";
20 LPRINT CHR$(27) "H THAN SINGLE-STRIKE"
and RUN it:
DOUBLE-STRIKE PRINT IS DARKER THAN SINGLE-STRIKE
In this mode the individual dots are less noticeable, and the characters
are more fully formed than in Single-Strike.
61
Page 79

The way Double-Strike gets this result is rather clever: the FX prints
each character in the regular fashion until it reaches either the end of
the line or the point at which you have Double-Strike turn off. Then
the FX shifts the paper up slightly and prints the Double-Strike passage again. This means that every dot in each row of the character gets
a shadow (see Figure 4-1). Double-Strike Mode fills in some of the
more visible gaps between the dots of a character. The end result is
better looking print.
Figure 4-1. Single-Strike and Double-Strike letters
Differences between Double-Strike and Single-Strike printing don’t
stop with the quality of print. Since each passage prints twice, the
throughput of the Double-Strike Mode is less than that of SingleStrike. It’s the old trade-off between speed and print quality. With
normal print speed of 160 characters per second (cps), the FX still
moves along pretty quickly in the Double-Strike Mode.
a
Emphasized Mode
There is yet another way you can increase the boldness of your
printed characters. ESCape “E” produces what we call Emphasized
print. As in Double-Strike, each character gets two sets of dots. In
Emphasized, however, the print head does not make two passes and
does not move down the page. Instead, it slows down so that it can
print overlapping dots, and prints each dot twice, the second time
slightly to the right of the first, as illustrated in Figure 4-2.
To see Emphasized, add these lines to your program:
30
LPRINT CHR$(27)"EEMPHASIZED ADDS A TOUCH OF
CLASS"
60
LPRINT CHR$(27)"@"
62
Page 80

DOUBLE-STRIKE PRINT IS DARKER THAN SINGLE-STRIKE
EMPHASIZED ADDS A TOUCH OF CLASS
That’s right, Emphasized is very similar to Expanded print, except that
Expanded Mode prints a duplicate set of dots a full (rather than a half)
column to the right of the initial set. Figure 4-2 shows Expanded and
Emphasized characters.
Figure 4-2. Expanded and Emphasized
letters
Although the print head slows to half normal speed (i.e., 80 cps) in
Emphasized Mode, the increase in print quality is well worth it. If you
like Emphasized so well that you want to use it for most of your
printouts, you can set it as a default with DIP switch
1-5.
This adjustment will make the printer automatically reset to Emphasized Mode,
after which you can switch to other modes as needed.
Whether you turn Emphasized on with ESCape “E” or by DIP
switch, you can turn it off with ESCape “F”.
Emphasized Mode is always a variation of Pica; it can never be
combined with either the Elite or the Compressed Mode. It can, however, be added to Double-Strike. See this by adding:
40
LPRINT CHR$(27)"GCOMBINED THEY CAN'T BE BEAT"
to your program.
DOUBLE-STRIKE PRINT IS DARKER THAN SINGLE-STRIKE
EMPHASIZED ADDS A TOUCH OF CLASS
COMBINED THEY CAN’T BE BEAT
63
Page 81

Emphasized Mode (line 30) stays on until you shut it off. DoubleStrike comes on (line 40) before Emphasized is turned off. You see the
result above.
Proportional Mode
Have you ever wondered why most computer printouts don’t look
as good as typeset books, even when you use bold characters? It’s
because most dot-matrix printers use a uniform width for each charac-
ter (monospacing) whereas typesetting machines set the width for
each character proportional to its size. That is, narrow characters like
i and ! are printed without the excess space that would be used if they
were printed in the same width as m and w.
Now the FX offers you a Proportional Mode on a dot-matrix
printer. In this mode characters are printed with a uniform amount of
blank space between them. ESCape “p1” turns on the Proportional
Mode. If your computer system doesn’t allow you to use lowercase
letters, you may use a longer form instead: ESCape CHR$(112) “1".
Here’s an example of the difference between Monospaced and Proportional Modes. Enter:
NEW
10 LPRINT
If"!!!!!!!!!!!!!";
20 LPRINT CHR$(27)“p1”
40 LPRINT "!!!!!!!!!!!!PROPORTIONAL ON"
60 LPRINT CHR$(27)
“p0”;
70 LPRINT "!!!!!PROPORTIONAL OFF"
80 LPRINT CHR$(27)"@"
!!!!!!!!!!!
!!!!!!!!!!!!PROFORTIONAL ON
!!!!!PROPORTIONAL OFF
Lines 10 and 40 print the same number of exclamation marks, but the
characters from line 40 are packed more closely. Proportional Mode
prints the characters in Emphasized and strips off all unused space
between characters.
The shut-off command for Proportional print is either ESCape “p0”
or ESCape
that it was in before it entered Proportional Mode. As an example, if
the printer enters Proportional Mode from Compressed Mode,
ESCape “p0” returns the printer to that mode.
CHR$(112)“0”.
Either puts the printer back into the mode
64
Page 82

Since all Proportional characters are Emphasized, it makes sense
that Proportional characters, like Emphasized, can only be printed in
Pica pitch, not Elite nor Compressed. In addition, Proportional Mode
cannot be mixed with Double-Strike.
The cost of all this high-powered printing is the slower speed of
printing and the wear and tear on the ribbon. Understandably, these
dense modes shorten the life of a ribbon compared to Single-Strike
printing. Used sparingly, however, they can give you increased capability for little increased cost.
Mixing Modes
Much of the fun of owning an FX is trying out all the different mode
combinations. In the process you’ll find that some modes make magic
together, while others cannot be mixed at all. Most important, you’ll
gain an insight into the way the print modes work, and you’ll attain a
higher level of control over your printer.
With the many modes available on the FX, there are enough mode
combinations to suit just about any palate. It’s impossible, however,
for each print mode to get along with all others as well as Emphasized
does with Double-Strike. For example, you cannot mix either Emphasized or its variation, Proportional, with Elite or Compressed pitches
for a very good reason.
Emphasized characters already violate the rule that two overlapping dots cannot be printed in the same row. Since the FX prints
Emphasized in Pica Mode at half normal speed, it can make an exception. But the dots in Elite and Compressed characters are already so
closely packed that printing them in Emphasized print as well is not
possible, even at the slower speed. The print head simply cannot fire
and retract the pins fast enough.
So what does the printer do when it receives a request for two conflicting modes? Ignore one of them, take a vacation, or beep loudly?
The answer is: none of the above. It turns both modes on internally,
but-based on a factory-set priority list-selects only one of them for
printing text.
As you found out in Chapter 3 when you cancelled Elite to see
Compressed print, the FX remembers that a mode is on even though
that doesn’t affect the current print line. Just to produce a little more
printout evidence, change your program to turn on Double-Strike at
the same time as Proportional, Then, when you turn Proportional off,
65
Page 83

the printer will prove that Double-Strike has been turned on all the
time.
Add lines 30 and 50, and make some changes to line 70:
30 LPRINT CHR$(27)"G";
50 LPRINT "WHEN PROPORTIONAL GOES"
70 LPRINT "!!!!!!!!!!!!!OFF, DOUBLE-STRIKE CAN COME
ON"
!!!!!!!!!!!!
!!!!!!!!!!!!PROPORTIONAL ON
WHEN PROPORTIONAL GOES
!!!!!!!!!!!!OFF,
Even though Proportional Mode will not permit Double-Strike to
affect lines 40 and 50 (since Proprotional Mode has priority), Double-
Strike does take hold as soon as Proportional is shut off.
Figure 4-3 shows the priorities for the modes we‘ve covered so far.
DOUELE-STRIKE CAN COME ON
Note: Each mode takes precedence over the modes beneath it.
Figure 4-3. Mode priorities
Not all mode combinations create conflicts. You’ve already seen
how well Emphasized and Double-Strike combine. In the next chapter
we show you more modes to mix with these.
Summary
Double-Strike, Emphasized, and Proportional Modes can be used
to produce bold characters. Proportional, which prints in Empha-
66
Page 84

sized, strips excess space from between characters. Double-Strike can
be combined with all other modes except Proportional, whereas
Emphasized, and thus Proportional, cannot be combined with either
Elite or Compressed.
Mode combinations are governed by the FX’s priority list. This list
determines which mode gets printed when two or more conflicting
modes are active at the same time.
Table 4-1 shows the modes we have covered so far.
Table 4-1. Summary of modes
Type of mode
Typeface
Pitch
Weight
Spacing
Note:
Pitch and weight together make up print density. The defaults are those set
at at the factory. By changing DIP switches, you can change the pitch
default from Pica to Compressed and the weight default from Single-Strike
to Emphasized.
Roman (default)
Italic
Pica (default)
Elite
Compressed
Expanded
Single-Strike (default)
Double-Strike
Emphasized
Monospaced (default)
Proportional
Mode name
Here is the DIP switch that we mentioned in this chapter:
Switch 1-5
Allows you to change the weight default from
Single-Strike to Emphasized
Here are the commands that we introduced in this chapter:
CHR$(27) “G”
Turns Double-Strike Mode ON. Double-
Strike prints in Half-Speed
CHR$(27) “H”
CHR$(27) “E”
Turns Double-Strike OFF
Turns Emphasized Mode ON. Emphasized
prints in Half-Speed
CHR!$(27) “F”
Turns Emphasized OFF
CHR$(27) “p1” or CHR$(27) CHR$(112)“1”
Turns Proportional Mode ON. Proportional
prints in Emphasized and thus Half-Speed.
CHR$(27) “p0” or CHR$(27) CHR$(112)“0”
Turns Proportional OFF
67
Page 85

68
Page 86

Chapter 5
Dress-Up Modes and Master Select
In the first three subsections of this chapter, we cover four more
print modes: Underline; two Script Modes-Superscript and Subscript; and Italic. Each of these modes allows you to add a particular
finishing touch to your printouts. After we show how you can quickly
select
16
combinations of pitch and weight by using the Master Select
feature, we demonstrate combining the combinations.
Four Modes
These four modes give you capabilities that are unusual for dotmatrix printing: an underline of any character or blank space, true
Super- and Subscript characters, and an Italic Mode that any computer system can select without software adjustments.
Underline Mode
In the old days, dot-matrix printers could not underline words.
Even in the not-so-old days, printer users like you had to use all kinds
of tricks to underline words. The technique usually involved using
either the hyphen (-) or underscore (_), along with either a change of
line spacing or the use of backspace. When it worked, the right words
did get underlined, but those methods were tedious and time consuming.
Those days are now gone, thanks to the FX. It has a built-in Underline Mode that makes underlining very easy. You can toggle the control code for Underline, ESCape “-“, on and off just as you toggle the
code for Expanded Mode. To turn Underline on, you use:
CHR$(27)"-"CHR$(1) or
CHR$(27)"-1"
69
Page 87

You can turn Underline Mode off with:
CHR$(27)"-"CHR$(0) or
Enter and RUN this program to see what FX underlining looks like:
CHR$(27)"-0"
NEW
20 LPRINT CHR$(27)"-1UNDERLINING IS SIMPLE";
40
LPRINT CHR$(27)"-0 TO TURN ON/OFF"
UNDERLINING IS SIMPLE TO TURN ON/OFF
You can underline virtually anything you want-even a series of
blank spaces. Try adding this line, typing in the spaces where we have
used characters:
30 LPRINT
UNDERLINING IS SIMPLE
Being able to underline a blank space really helps when you want to
make a form that has lines to be filled in later with signatures or data.
The FX Underline Mode can even underline leading spaces with
BASIC TABS-although it doesn’t work with the FX’s internal tabs
that are set with ESCape “D” (see Chapter 9).
TO TURN ON/OFF
Underline Mode does not use the FX’s underline character. Since the
underline character is itself only five dots wide, it would not print in
the spaces that separate the text characters. See this by printing a row
of underline characters above the text in the current program:
10 FOR X=1 TO 42: LPRINT CHR$(95);: NEXT X: LPRINT
UNDERLINING IS SIMPLE TO TURN ON/OFF
When the FX is in Underline Mode, it is simply using the ninth pin to
underscore the entire passage.
How far under a character its underline appears depends on the
model of FX that is printing. The FX-100 prints a character and its
underline at the same time, and the underline occurs on the ninth row
of the nine-row character matrix. This means that the underline prints
over the bottom row of the descender for a few lowercase letters, such
as y and g.
70
Page 88

The FX-80, on the other hand, can perform a reverse line feed, and
it uses this capability to place the underline one row lower than any
text dot. To do this, the FX-80 prints the text to be underlined, moves
the print head down the paper one row’s worth to print the underline,
then moves the print head back up to the original text line.
To see which method your printer uses, delete line 10 and replace
line 30:
30
FOR x=1 TO
UNDERLINING IS SIMPLEggggg TO TURN ON/OFF
On the FX-80, the underlining does occur below the descenders of
the gs.
5:
LPRINT CHR$(l03);:
NEXT
x
Script Modes: Super and Sub
Print pitches, such as Pica, Elite, and Compressed, affect the width
of characters: both Elite and Compressed Modes may be seen as
squeezing Pica characters horizontally. FX printers can also squeeze a
character vertically-to about half its normal height. These short
characters are called Script characters (not to be confused with cal-
ligraphic manuscript lettering). Because the Script characters are so
short, they can be placed high or low on the line; thus you can use
them for either SUPERscripts or SUBscripts.
This command turns Superscripting on:
LPRINT CHR$(27)"50"
This one turns Subscripting on:
LPRINT CHR$(27)"S1"
Try this program to see both kinds of Script characters:
20 LPRINT CHR$(27)"S0SUPER";
30
LPRINT CHR$(27)"TSCRIPT AND";
40
LPRINT CHR$(27)"S1 SUB";
50 LPRINT CHR$(27)"TSCRIPT"
60
LPRINT "CAN EVEN GO ON THE SAME LINE"
71
Page 89

Notice that ESCape “T” turns either kind of Script Mode off and also
that both versions of Script Mode are automatically printed in
Double-Strike. Since Double-Strike prints at half speed, so do the
Script Modes. And since Double-Strike can’t mix with Proportional,
neither can either type of Script.
If you are using the FX-100 and you switch in and out of Double-
Strike Mode several times in the same line, you will see that
the
print
line slopes slightly to the right. This happens because Script prints in
Double-Strike, for which FX printers use two passes. After one pass to
print the characters on the current print line, the print head moves
down the page one-third of a dot to print
the
second set of dots.
The FX-80 can use reverse feed to return to the original print line,
but the FX-100 cannot. This does not make much difference when you
use Double-Strike infrequently. If you are using an FX-100, you can
add Underline Mode to your program to see exactly where the jog
comes:
10 LPRINT CHR$(27)"-1"
We mention this now because it is with Script characters that you are
most likely to move in and out of Double-Strike several times on one
line. If you do that on an FX-100, you’ll get a line
that
declines.
If Double-Strike was the current mode before the printer entered
Script Mode, the printer exits from Script to Double-Strike. If not, the
printer returns to Single-Strike.
Italic Mode
This is the last print mode
characters are printed in a completely different typeface than are the
more usual Roman characters. Appendix A shows the dot-matrix patterns used to define both Roman and Italic characters, along with their
corresponding ASCII numbers. As you saw in Chapter 2,
characters’ numbering begins in the top half of
160, to be exact). And some computer systems won’t let the numbers
of the top half through to the printer.
72
that
we introduce in this chapter. Italic
the
the
ASCII range (at
Italic
Page 90

Whether your computer system is one of these or not, with ESCape
“4” you can print Italic characters. Prove it by adding these lines to
your program:
10 LPRINT CHR$(27)“4”
70 LPRINT CHR$(27)"@"
When you want to turn off only the Italic Mode, you use ESCape "5"
(instead of line 70’s Reset Code) in your program.
More Mode Combinations
With all the handsome print types we’ve covered up to this point,
you’re probably wondering how many different print combinations
are waiting in your FX. Well, hang onto your hat. By combining the
various print modes, the FX can print text in 128 type styles.
Instead of counting these one by one, we’ll begin by describing a
special FX feature, the Master Select, which lets you choose any one of
16 popular mode combinations more simply than by calling up each
mode separately. Then we’ll demonstrate mixing Master Select choices
with the modes of this chapter.
Master Select
For Master Select you use the code sequence of ESCape " ! " followed by CHR$ and a number in parentheses. With Master Select you
can quickly produce any possible combination of the following:
Single-Strike
Pica
Elite
Compressed
Emphasized
Double-Strike
Expanded
These are the modes for pitch and weight. Master Select will accept
any number between 0 and 255. Since there are only 16 unique combinations, however, we’ve devised a program (Figure 5-1) with which
you can print out a handy reference chart (Figure 5-2) listing one set of
Master Select numbers.
73
Page 91

NEW
20 Y$(1)="SINGLE-STRIKE Y$(2)="SNGL-STRIKE
EMPHASIZED "
30 Y$(3)="DOUBLE-STRIKE Y$(4)="DBL-STRIKE
EMPHASIZED "
40 Z$(1)="PICA Z$(2)="ELITE :
Z$(3)="COMPRESSED
50, FOR X=1 TO 2
60 FOR Y=1 TO 4
70 FOR Z=1 TO 3
80 READ N: IF N<0 THEN 130
90 LPRINT CHR$(27)"!"CHR$(0);: IF N<10 THEN LPRINT
" ";
95 ' OK to substitute CHR$(2) for CHR$(0)
l00 LPRINT N; CHR$(27)"!"CHR$(N);
110 LPRINT Y$(Y);: IF X=2 THEN LPRINT "EXPANDED ";
120 LPRINT Z$(Z)
130 NEXT Z: NEXT Y: NEXT X
140 LPRINT CHR$(27)"!"CHR$(0)
150 DATA 0,1,4,8,-1,-1,16,17,20,24,-1,-1
160 DATA 32,33,36,40,-1,-1,48,49,52,56,-1,-1
Figure 5-1. Master Select Program
If you want to see this in underlined Italic add the following line:
10 LPRINT CHR$(27)"-1"CHR$(27)"S0"CHR$(27)"4";
Now when you want to use Double-Strike Emphasized Expanded
Pica, you do not have to type out the long sequence:
LPRINT CHR$(27)"G"CHR$(27)"E"CHR$(27)"W1"
since you can get the same result by using:
LPRINT CHR$(27)"!"CHR$(56)
or even (after consulting the ASCII table for the equivalent of
56):
LPRINT CHR$(27)"!8"
Because this latter format is the ultimate in simplicity, we use it in
Table
5-1
below. You can find the Master Select code for any valid
combination of pitch and weight by reading across in the row for the
pitch you have selected and down in the column for the weight you
want. Where the two intersect you will find the ASCII symbol to use
in the simplified format. For example, to combine Compressed with
74
Page 92

0 SINGLE-STRIKE PICA
1 SINGLE-STRIKE ELITE
4 SINGLE-STRIKE COMPRESSED
8 SNGL-STRIKE EMPHASIZED PICA
16 DOUBLE-STRIKE PICA
17 DOUBLE-STRIKE ELITE
20 DOUBLE-STRIKE COMPRESSED
24 DEL-STRIKE EMPHASIZED PICA
32 SINGLE-STRIKE
33 SINGLE-STRIKE EXPANDED ELITE
EXPANDED
PICA
36 SINGLE-STRIKE EXPANDED COMPRESSED
40 SNGL-STRIKE EMPHASIZED EXPANDED PICA
48 DOUBLE- STRIKE
EXPANDED PICA
49 DOUBLE-STRIKE EXPANDED ELITE
52 DOUBLE-STRIKE EXPANDED COMPRESSED
56 DBL-STRIKE EMPHASIZED EXPANDED PICA
Page 93

Double-Strike, use LPRINT
CHR$(27)“!T".
N/A indicates that the
two modes cannot be combined.
Table 5-1. Master Select Quick Reference Chart
WEIGHT
PITCH
Pica
Elite
Compressed
Expanded
Pica
Expanded
Elite
Expanded
Compressed
Single Strike
@
A N/A
D
!
$
Emphasized
H
N/A
*
NIA
N/A
Double Strike
P
Q
T
0
1
4
If you rely on Master Select to change print modes, you don’t have
to turn each mode off separately when you want to change to a
different combination. When you select a new mix by Master Select, it
takes care of all resetting. Because the Master Select also overrides the
DIP switch settings, you use the same codes even if you have reset
some of the DIP switches.
Double Strike
Emphasized
X
N/A
N/A
8
N/A
N/A
Master Select combinations
At the beginning of this chapter we introduced you to four print
modes. Figure 5-3 illustrates the 11 different ways these can be com-
bined.
If you add the default Pica Mode, there are 12 different combinations. Four of these
Super- or Subscript) can be combined with any of the
modes. Four times
combinations that involve Super- and Subscript Modes can be combined with the eight Single-Strike Master Select modes. Eight times
eight gives another
get the total of 128 unique print modes that we mentioned previously.
To create a new combination that uses both Master Select and one
or more of the dress-up modes, the simplest method is to choose a
76
12
combinations (the ones that don’t involve
16
Master Select
16
gives you 64 combinations. The other eight
64
combinations. Add these to the first
64,
and you
Page 94

Figure 5-3. Dress-up combinations
Master
embellish it. Here is a program that does just that, several times.
Select base and then add the sequence(s) that you want to
NEW
10
N=4:
GOSUB 70: LPRINT CHR$(27)"S1THE
FX"CHR$(27)"T"
20 N=17: GOSUB 70: LPRINT CHR$(27)"-1PRINTERS"
30 N=8:
40 N=49:
50
60
GOSUB 70: LPRINT CHR$(27)"-0HAVE EVER"
GOSUB 70: LPRINT "EXPANDING"
N=56: GOSUB
70:
LPRINT CHR$(27)"4POSSIBLITIES"
LPRINT CHR$(27)"@": END
70 LPRINT CHR$(27)"!"CHR$(N);: RETURN
Notice that we‘ve stored the Master Select sequence as a subroutine
in line 70 to save typing. As we’ve called up the subroutine and given
it a new number, we’ve three times added the ESCape codes for Subscript (line 10), Underline (line 20), and Italic (line 50) Modes. The
Reset in line 60 returns the printer to its defaults.
To aid you in quickly finding your way around in this forest of
possibilities, we offer Table 5-2.
77
Page 95

Page 96

Here are the commands that we introduced in this chapter.
CHR$(27) “-1”
CHR$(27)“-0”
CHR$(27)“S1”
CHR$(27)“S0”
CHR$(27)“T”
CHR$(27)“4”
CHR$(27)“5”
CHR$(27)"!“CHR$(n)
or CHR$(27)“!n”
Turns Underline Mode ON
Turns Underline OFF
Turns Subscript Mode ON. Script characters
print in Double-Strike and at half speed
Turns Superscript ON
Turns either version of Script Mode OFF
Turns Italic Mode ON
Turns Italic OFF
Selects one of the 16 Master Select combina-
tions, where n stands for a number between 0
and 255
79
Page 97

80
Page 98

Chapter
6
Special Printing Features
In this chapter you’ll discover several new features that will enhance
your control over the printer. Backspacing, for example, allows you
to combine characters. You can use a set of software commands to
switch in and out of international character sets, and you can control
the speed of printing.
Backspace
The backspace function is handy for making overstrikes. Because it
moves the print head backward one character, you can print two
characters in one print position. You can also shift the print head
slightly to print offsets. You activate backspace by typing a CHR$(8)
between the two characters.
Overstrikes
Typically, backspace is used for single-character overstrikes. Here
are a few examples that create some useful mathematical symbols:
NEW
10 LPRINT "=" CHR$(8) “/” ' Not-equal
For the not-equal symbol,‘ the backspace moves the print head back
over the equal sign so that the slash can be printed on top of it. You can
81
Page 99

use the same technique to produce the plus-or-minus symbol:
10 LPRINT CHR$(27)"S0+"CHR$(8); 'Plus/minus
20 LPRINT CHR$(27)"S1-"
30 LPRINT CHR$(27)"@"
±
How about that, and it only took three lines. Next try this approximately equally short program:
10 LPRINT CHR$(126)CHR$(8); ' Approximately equal
20 LPRINT CHR$(27)"J"CHR$(11)CHR$(126)
30
LPRINT
This program prints CHR$(126), a diacritical mark used in Spanish
that is called a tilde. You backspace the print head by using CHR$(8),
then force a partial line feed by using Escape ”J” CHR$(11). The FX
prints the second tilde just below the first one to form the desired
figure.
Offsets
CHR$(27)"@"
The backspace function works in all pitches, which opens up some
interesting possibilities. To see what happens when you mix backspacing with different pitch modes, we’ve prepared a special program that
shows off the backspace function in two passes: first in Pica and then
in Expanded Pica. We cause all backspacing to be done in Compressed
Mode to create a slight offset. Enter:
NEW
10 FOR J=0 TO 1
20 LPRINT CHR$(27)"W"CHR$(J); ' Expanded when J=1
30 LPRINT "BACKSPACES"CHR$(15); ' Compressed
40
FOR X=1 TO 17: LPRINT CHR$(8);: NEXT X
50 LPRINT CHR$(18)"BACKSPACES" ' Compressed off
60 NEXT J: LPRINT CHR$(27)"@" ' Reset
and RUN the program.
82
Page 100

The 17 backspaces (line
difference in character widths makes the second printing of the word
BACKSPACES be offset from the first.
In the next program, the offset is a little more dramatic. Change the
following lines:
40)
are printed in Compressed Mode. The
30 LPRINT "BACKSPACE"CHR$(15);
40 FOR X=1 TO 15: LPRINT CHR$(8);: NEXT X
50 LPRINT CHR$(18)"BACKSPACE"
After the FX prints each BACKSPACE, it moves the print head
Compressed positions backward. Instead of bold characters, you get a
shadow effect. You could spend all day mixing pitch modes to get
different eye-stretching effects.
15
Unidirectional Mode
The FX printers provide high quality printouts in their normal
bidirectional print mode. However, there may be situations in which
vertical columns printed in Elite or Compressed Mode get slightly misaligned. The printer has a Unidirectional Mode to prevent such problems .
To see how effective Unidirectional Mode can be, let’s create a long
vertical line. First we’ll print it in the usual, bidirectional manner.
Begin by typing:
20 LPRINT CHR$(27)"1"CHR$(27)"1"CHR$(40)
40 FOR X=1 TO 10: LPRINT CHR$(124): NEXT X
50 LPRINT CHR$(27)"@"
Line
20
sets the line spacing to seven dots and the left margin to
create the vertical line, line
ASCII
124) 10
defaults.
times (on
10
40
prints one character (represented by
print lines). Line
50
resets the printer to its
40.
To
83
 Loading...