

Page 1

Operating manual—Eppendorf Xplorer® Eppendorf Xplorer® plusseeon p.Fig.Tab.p
O
l
.
perating manua
4861 910.011
Eppendorf Xplorer®
Eppendorf Xplorer® plus
Operating manual
Page 2

Copyright© 2012 Eppendorf AG, Hamburg. No part of this publication may be reproduced without the prior permission of
the copyright owner.
®
eppendorf
, epT.I.P.S.® and Eppendorf Xplorer® are registered trademarks of EppendorfAG, Hamburg, Germany.
Trademarks are not marked in all cases with ™or ®in this manual.
Xplorer pipettes are using U.S. Patent Nos. 7,694,592 B2, 8,028,592 B2, 7,674,432 B2, 7,585,468 B2, 7,434,484 B2,
6,778,917, 6,499,365.
Further information can be found on the enclosed CD or on our website
www.eppendorf.com.
4861 910.011-00/022012
Page 3

Eppendorf Xplorer® (plus) — Operating manual
Table of contents
1 Table of contents
1
1 Operating instructions . . . . . . . . . . . . . . . . . . . . . . . . . . . . . . . . . . . . . . . . . . . . . . . . . . . . . . . . . . . . . . . . . . . . . . . 6
1.1 Using this manual . . . . . . . . . . . . . . . . . . . . . . . . . . . . . . . . . . . . . . . . . . . . . . . . . . . . . . . . . . . . . . . . . . . . . . . 6
1.2 Danger symbols and danger levels . . . . . . . . . . . . . . . . . . . . . . . . . . . . . . . . . . . . . . . . . . . . . . . . . . . . . . . . . 6
1.2.1 Hazard icons . . . . . . . . . . . . . . . . . . . . . . . . . . . . . . . . . . . . . . . . . . . . . . . . . . . . . . . . . . . . . . . . . . . 6
1.2.2 Degrees of danger . . . . . . . . . . . . . . . . . . . . . . . . . . . . . . . . . . . . . . . . . . . . . . . . . . . . . . . . . . . . . . . 6
1.3 Symbols used . . . . . . . . . . . . . . . . . . . . . . . . . . . . . . . . . . . . . . . . . . . . . . . . . . . . . . . . . . . . . . . . . . . . . . . . . . 6
1.4 Glossary . . . . . . . . . . . . . . . . . . . . . . . . . . . . . . . . . . . . . . . . . . . . . . . . . . . . . . . . . . . . . . . . . . . . . . . . . . . . . . 7
2 Product description . . . . . . . . . . . . . . . . . . . . . . . . . . . . . . . . . . . . . . . . . . . . . . . . . . . . . . . . . . . . . . . . . . . . . . . . . . 9
2.1 Main illustration. . . . . . . . . . . . . . . . . . . . . . . . . . . . . . . . . . . . . . . . . . . . . . . . . . . . . . . . . . . . . . . . . . . . . . . . . 9
2.1.1 Single-channel . . . . . . . . . . . . . . . . . . . . . . . . . . . . . . . . . . . . . . . . . . . . . . . . . . . . . . . . . . . . . . . . . . 9
2.1.2 Multi-channel . . . . . . . . . . . . . . . . . . . . . . . . . . . . . . . . . . . . . . . . . . . . . . . . . . . . . . . . . . . . . . . . . . 10
2.2 Display . . . . . . . . . . . . . . . . . . . . . . . . . . . . . . . . . . . . . . . . . . . . . . . . . . . . . . . . . . . . . . . . . . . . . . . . . . . . . . 10
2.2.1 Header . . . . . . . . . . . . . . . . . . . . . . . . . . . . . . . . . . . . . . . . . . . . . . . . . . . . . . . . . . . . . . . . . . . . . . . 11
2.2.2 Status line . . . . . . . . . . . . . . . . . . . . . . . . . . . . . . . . . . . . . . . . . . . . . . . . . . . . . . . . . . . . . . . . . . . . 11
2.2.3 Main field . . . . . . . . . . . . . . . . . . . . . . . . . . . . . . . . . . . . . . . . . . . . . . . . . . . . . . . . . . . . . . . . . . . . . 11
2.2.4 Footer. . . . . . . . . . . . . . . . . . . . . . . . . . . . . . . . . . . . . . . . . . . . . . . . . . . . . . . . . . . . . . . . . . . . . . . . 12
2.3 Delivery package . . . . . . . . . . . . . . . . . . . . . . . . . . . . . . . . . . . . . . . . . . . . . . . . . . . . . . . . . . . . . . . . . . . . . . 12
2.4 Features . . . . . . . . . . . . . . . . . . . . . . . . . . . . . . . . . . . . . . . . . . . . . . . . . . . . . . . . . . . . . . . . . . . . . . . . . . . . . 13
2.5 Warranty . . . . . . . . . . . . . . . . . . . . . . . . . . . . . . . . . . . . . . . . . . . . . . . . . . . . . . . . . . . . . . . . . . . . . . . . . . . . . 13
2.6 Materials . . . . . . . . . . . . . . . . . . . . . . . . . . . . . . . . . . . . . . . . . . . . . . . . . . . . . . . . . . . . . . . . . . . . . . . . . . . . . 13
3 Safety . . . . . . . . . . . . . . . . . . . . . . . . . . . . . . . . . . . . . . . . . . . . . . . . . . . . . . . . . . . . . . . . . . . . . . . . . . . . . . . . . . . . 14
3.1 Intended use. . . . . . . . . . . . . . . . . . . . . . . . . . . . . . . . . . . . . . . . . . . . . . . . . . . . . . . . . . . . . . . . . . . . . . . . . . 14
3.2 Warnings for intended use . . . . . . . . . . . . . . . . . . . . . . . . . . . . . . . . . . . . . . . . . . . . . . . . . . . . . . . . . . . . . . . 14
3.3 Information on product liability . . . . . . . . . . . . . . . . . . . . . . . . . . . . . . . . . . . . . . . . . . . . . . . . . . . . . . . . . . . . 15
Table of contents
4 Installation . . . . . . . . . . . . . . . . . . . . . . . . . . . . . . . . . . . . . . . . . . . . . . . . . . . . . . . . . . . . . . . . . . . . . . . . . . . . . . . . 16
4.1 Power supply assembly . . . . . . . . . . . . . . . . . . . . . . . . . . . . . . . . . . . . . . . . . . . . . . . . . . . . . . . . . . . . . . . . . 16
4.2 Connect rechargeable lithium-polymer battery . . . . . . . . . . . . . . . . . . . . . . . . . . . . . . . . . . . . . . . . . . . . . . . . 16
4.3 Charging the rechargeable battery . . . . . . . . . . . . . . . . . . . . . . . . . . . . . . . . . . . . . . . . . . . . . . . . . . . . . . . . . 17
5 Operation . . . . . . . . . . . . . . . . . . . . . . . . . . . . . . . . . . . . . . . . . . . . . . . . . . . . . . . . . . . . . . . . . . . . . . . . . . . . . . . . . 19
5.1 Switching the pipette on and off . . . . . . . . . . . . . . . . . . . . . . . . . . . . . . . . . . . . . . . . . . . . . . . . . . . . . . . . . . . 19
5.2 Setting the Date and Time . . . . . . . . . . . . . . . . . . . . . . . . . . . . . . . . . . . . . . . . . . . . . . . . . . . . . . . . . . . . . . . 19
5.3 Principle of operation . . . . . . . . . . . . . . . . . . . . . . . . . . . . . . . . . . . . . . . . . . . . . . . . . . . . . . . . . . . . . . . . . . . 20
5.4 Selecting the operating mode. . . . . . . . . . . . . . . . . . . . . . . . . . . . . . . . . . . . . . . . . . . . . . . . . . . . . . . . . . . . . 21
5.5 Setting the parameter (edit mode) . . . . . . . . . . . . . . . . . . . . . . . . . . . . . . . . . . . . . . . . . . . . . . . . . . . . . . . . . 22
5.6 Using pipette tips . . . . . . . . . . . . . . . . . . . . . . . . . . . . . . . . . . . . . . . . . . . . . . . . . . . . . . . . . . . . . . . . . . . . . . 24
5.7 Tips for correct pipetting . . . . . . . . . . . . . . . . . . . . . . . . . . . . . . . . . . . . . . . . . . . . . . . . . . . . . . . . . . . . . . . . . 25
5.7.1 Preparation . . . . . . . . . . . . . . . . . . . . . . . . . . . . . . . . . . . . . . . . . . . . . . . . . . . . . . . . . . . . . . . . . . . 25
5.7.2 Aspirating liquid . . . . . . . . . . . . . . . . . . . . . . . . . . . . . . . . . . . . . . . . . . . . . . . . . . . . . . . . . . . . . . . . 25
5.7.3 Dispensing liquid . . . . . . . . . . . . . . . . . . . . . . . . . . . . . . . . . . . . . . . . . . . . . . . . . . . . . . . . . . . . . . . 25
5.8 Automatic dispensing (Ads dial setting) . . . . . . . . . . . . . . . . . . . . . . . . . . . . . . . . . . . . . . . . . . . . . . . . . . . . . 27
5.9 Dispensing (Dis dial setting) . . . . . . . . . . . . . . . . . . . . . . . . . . . . . . . . . . . . . . . . . . . . . . . . . . . . . . . . . . . . . . 28
5.10 Pipetting (Pip dial setting). . . . . . . . . . . . . . . . . . . . . . . . . . . . . . . . . . . . . . . . . . . . . . . . . . . . . . . . . . . . . . . . 29
5.10.1 Standard pipetting . . . . . . . . . . . . . . . . . . . . . . . . . . . . . . . . . . . . . . . . . . . . . . . . . . . . . . . . . . . . . . 29
5.10.2 Reverse pipetting . . . . . . . . . . . . . . . . . . . . . . . . . . . . . . . . . . . . . . . . . . . . . . . . . . . . . . . . . . . . . . . 30
5.11 Pipetting and mixing (P/M dial setting) . . . . . . . . . . . . . . . . . . . . . . . . . . . . . . . . . . . . . . . . . . . . . . . . . . . . . . 31
5.12 Manual pipetting (Man dial setting). . . . . . . . . . . . . . . . . . . . . . . . . . . . . . . . . . . . . . . . . . . . . . . . . . . . . . . . . 32
5.13 Special operating modes . . . . . . . . . . . . . . . . . . . . . . . . . . . . . . . . . . . . . . . . . . . . . . . . . . . . . . . . . . . . . . . . 33
5.13.1 Multiple aspiration (Aspirate) (Spc dial setting) . . . . . . . . . . . . . . . . . . . . . . . . . . . . . . . . . . . . . . . . 33
3
Page 4

Eppendorf Xplorer® (plus) — Operating manual
1
5.14 Program (Prg dial setting). . . . . . . . . . . . . . . . . . . . . . . . . . . . . . . . . . . . . . . . . . . . . . . . . . . . . . . . . . . . . . . . 39
5.15 Editing (Edit dial setting). . . . . . . . . . . . . . . . . . . . . . . . . . . . . . . . . . . . . . . . . . . . . . . . . . . . . . . . . . . . . . . . . 39
5.16 Pipetting with fixed volume (Fix dial setting) . . . . . . . . . . . . . . . . . . . . . . . . . . . . . . . . . . . . . . . . . . . . . . . . . . 42
Table of contents
5.17 Option (Opt dial setting) . . . . . . . . . . . . . . . . . . . . . . . . . . . . . . . . . . . . . . . . . . . . . . . . . . . . . . . . . . . . . . . . . 42
5.13.2 Diluting (Spc dial setting) . . . . . . . . . . . . . . . . . . . . . . . . . . . . . . . . . . . . . . . . . . . . . . . . . . . . . . . . . 34
5.13.3 Sequential dispensing (Spc dial setting) . . . . . . . . . . . . . . . . . . . . . . . . . . . . . . . . . . . . . . . . . . . . . 36
5.13.4 Reverse pipetting (Spc dial setting) . . . . . . . . . . . . . . . . . . . . . . . . . . . . . . . . . . . . . . . . . . . . . . . . . 37
5.13.5 Sequential pipetting (Spc dial setting) . . . . . . . . . . . . . . . . . . . . . . . . . . . . . . . . . . . . . . . . . . . . . . . 38
5.15.1 Pswrd. protection . . . . . . . . . . . . . . . . . . . . . . . . . . . . . . . . . . . . . . . . . . . . . . . . . . . . . . . . . . . . . . . 40
5.15.2 Fixed volume . . . . . . . . . . . . . . . . . . . . . . . . . . . . . . . . . . . . . . . . . . . . . . . . . . . . . . . . . . . . . . . . . . 40
5.15.3 Programm . . . . . . . . . . . . . . . . . . . . . . . . . . . . . . . . . . . . . . . . . . . . . . . . . . . . . . . . . . . . . . . . . . . . 41
5.17.1 General help . . . . . . . . . . . . . . . . . . . . . . . . . . . . . . . . . . . . . . . . . . . . . . . . . . . . . . . . . . . . . . . . . . 42
5.17.2 Volume limit . . . . . . . . . . . . . . . . . . . . . . . . . . . . . . . . . . . . . . . . . . . . . . . . . . . . . . . . . . . . . . . . . . . 43
5.17.3 Counter . . . . . . . . . . . . . . . . . . . . . . . . . . . . . . . . . . . . . . . . . . . . . . . . . . . . . . . . . . . . . . . . . . . . . . 44
5.17.4 Ejector reset. . . . . . . . . . . . . . . . . . . . . . . . . . . . . . . . . . . . . . . . . . . . . . . . . . . . . . . . . . . . . . . . . . . 44
5.17.5 History . . . . . . . . . . . . . . . . . . . . . . . . . . . . . . . . . . . . . . . . . . . . . . . . . . . . . . . . . . . . . . . . . . . . . . . 44
5.17.6 Rocker setting . . . . . . . . . . . . . . . . . . . . . . . . . . . . . . . . . . . . . . . . . . . . . . . . . . . . . . . . . . . . . . . . . 44
5.17.7 Sound level . . . . . . . . . . . . . . . . . . . . . . . . . . . . . . . . . . . . . . . . . . . . . . . . . . . . . . . . . . . . . . . . . . . 44
5.17.8 Brightness . . . . . . . . . . . . . . . . . . . . . . . . . . . . . . . . . . . . . . . . . . . . . . . . . . . . . . . . . . . . . . . . . . . . 44
5.17.9 Adjustment. . . . . . . . . . . . . . . . . . . . . . . . . . . . . . . . . . . . . . . . . . . . . . . . . . . . . . . . . . . . . . . . . . . . 45
5.17.10 Language . . . . . . . . . . . . . . . . . . . . . . . . . . . . . . . . . . . . . . . . . . . . . . . . . . . . . . . . . . . . . . . . . . . . . 47
5.17.11 Personalization . . . . . . . . . . . . . . . . . . . . . . . . . . . . . . . . . . . . . . . . . . . . . . . . . . . . . . . . . . . . . . . . 47
5.17.12 Service . . . . . . . . . . . . . . . . . . . . . . . . . . . . . . . . . . . . . . . . . . . . . . . . . . . . . . . . . . . . . . . . . . . . . . . 48
5.17.13 Service interval . . . . . . . . . . . . . . . . . . . . . . . . . . . . . . . . . . . . . . . . . . . . . . . . . . . . . . . . . . . . . . . . 48
5.17.14 Date and Time . . . . . . . . . . . . . . . . . . . . . . . . . . . . . . . . . . . . . . . . . . . . . . . . . . . . . . . . . . . . . . . . . 48
6 Troubleshooting . . . . . . . . . . . . . . . . . . . . . . . . . . . . . . . . . . . . . . . . . . . . . . . . . . . . . . . . . . . . . . . . . . . . . . . . . . . . 49
6.1 Reset . . . . . . . . . . . . . . . . . . . . . . . . . . . . . . . . . . . . . . . . . . . . . . . . . . . . . . . . . . . . . . . . . . . . . . . . . . . . . . . 49
6.2 Error search . . . . . . . . . . . . . . . . . . . . . . . . . . . . . . . . . . . . . . . . . . . . . . . . . . . . . . . . . . . . . . . . . . . . . . . . . . 49
7 Maintenance . . . . . . . . . . . . . . . . . . . . . . . . . . . . . . . . . . . . . . . . . . . . . . . . . . . . . . . . . . . . . . . . . . . . . . . . . . . . . . . 51
7.1 Cleaning . . . . . . . . . . . . . . . . . . . . . . . . . . . . . . . . . . . . . . . . . . . . . . . . . . . . . . . . . . . . . . . . . . . . . . . . . . . . . 51
7.2 Sterilizing or disinfecting the pipette . . . . . . . . . . . . . . . . . . . . . . . . . . . . . . . . . . . . . . . . . . . . . . . . . . . . . . . . 51
7.2.1 Autoclaving. . . . . . . . . . . . . . . . . . . . . . . . . . . . . . . . . . . . . . . . . . . . . . . . . . . . . . . . . . . . . . . . . . . . 52
7.2.2 Disinfection . . . . . . . . . . . . . . . . . . . . . . . . . . . . . . . . . . . . . . . . . . . . . . . . . . . . . . . . . . . . . . . . . . . 52
7.3 Replacing O-rings. . . . . . . . . . . . . . . . . . . . . . . . . . . . . . . . . . . . . . . . . . . . . . . . . . . . . . . . . . . . . . . . . . . . . . 52
7.3.1 Removing the O-ring . . . . . . . . . . . . . . . . . . . . . . . . . . . . . . . . . . . . . . . . . . . . . . . . . . . . . . . . . . . . 53
7.3.2 Mounting a new O-ring. . . . . . . . . . . . . . . . . . . . . . . . . . . . . . . . . . . . . . . . . . . . . . . . . . . . . . . . . . . 53
7.4 Xplorer pipette disassembly and assembly. . . . . . . . . . . . . . . . . . . . . . . . . . . . . . . . . . . . . . . . . . . . . . . . . . . 53
7.4.1 Single-channel up to 1000L . . . . . . . . . . . . . . . . . . . . . . . . . . . . . . . . . . . . . . . . . . . . . . . . . . . . . 53
7.4.2 5mL and 10mL single-channel. . . . . . . . . . . . . . . . . . . . . . . . . . . . . . . . . . . . . . . . . . . . . . . . . . . . 56
7.4.3 Multi-channel . . . . . . . . . . . . . . . . . . . . . . . . . . . . . . . . . . . . . . . . . . . . . . . . . . . . . . . . . . . . . . . . . . 57
7.5 Maintenance . . . . . . . . . . . . . . . . . . . . . . . . . . . . . . . . . . . . . . . . . . . . . . . . . . . . . . . . . . . . . . . . . . . . . . . . . . 60
8 General information on adjustment . . . . . . . . . . . . . . . . . . . . . . . . . . . . . . . . . . . . . . . . . . . . . . . . . . . . . . . . . . . . 61
9 Technical data . . . . . . . . . . . . . . . . . . . . . . . . . . . . . . . . . . . . . . . . . . . . . . . . . . . . . . . . . . . . . . . . . . . . . . . . . . . . . 63
9.1 Eppendorf Xplorer single-channel . . . . . . . . . . . . . . . . . . . . . . . . . . . . . . . . . . . . . . . . . . . . . . . . . . . . . . . . . 63
9.2 Eppendorf Xplorer multi-channel . . . . . . . . . . . . . . . . . . . . . . . . . . . . . . . . . . . . . . . . . . . . . . . . . . . . . . . . . . 64
9.3 Test conditions . . . . . . . . . . . . . . . . . . . . . . . . . . . . . . . . . . . . . . . . . . . . . . . . . . . . . . . . . . . . . . . . . . . . . . . . 65
9.4 Speed table for Xplorer single-channel. . . . . . . . . . . . . . . . . . . . . . . . . . . . . . . . . . . . . . . . . . . . . . . . . . . . . . 66
9.5 Speed table for Xplorer multi-channel . . . . . . . . . . . . . . . . . . . . . . . . . . . . . . . . . . . . . . . . . . .
. . . . . . . . . . . 66
4
Page 5

Eppendorf Xplorer® (plus) — Operating manual
10 Ordering Information . . . . . . . . . . . . . . . . . . . . . . . . . . . . . . . . . . . . . . . . . . . . . . . . . . . . . . . . . . . . . . . . . . . . . . . . 67
11 Transport, storage and disposal . . . . . . . . . . . . . . . . . . . . . . . . . . . . . . . . . . . . . . . . . . . . . . . . . . . . . . . . . . . . . . 68
11.1 Decontamination before shipment . . . . . . . . . . . . . . . . . . . . . . . . . . . . . . . . . . . . . . . . . . . . . . . . . . . . . . . . . 68
11.2 Storage . . . . . . . . . . . . . . . . . . . . . . . . . . . . . . . . . . . . . . . . . . . . . . . . . . . . . . . . . . . . . . . . . . . . . . . . . . . . . . 68
11.3 Disposal . . . . . . . . . . . . . . . . . . . . . . . . . . . . . . . . . . . . . . . . . . . . . . . . . . . . . . . . . . . . . . . . . . . . . . . . . . . . . 69
Index . . . . . . . . . . . . . . . . . . . . . . . . . . . . . . . . . . . . . . . . . . . . . . . . . . . . . . . . . . . . . . . . . . . . . . . . . . . . . . . . . . . . . 70
1
Table of contents
5
Page 6

Eppendorf Xplorer® (plus) — Operating manual
1 Operating instructions
1 Operating instructions
1.1 Using this manual
1
1.2 Danger symbols and danger levels
1.2.1 Hazard icons
Operating instructions
1.2.2 Degrees of danger
Read this operating manual completely before using the device for the first time. Also observe
the instructions for use of the accessories.
This operating manual is part of the product. thus, must always be easily accessible.
Enclose this operating manual when transferring the device to third parties.
If this manual is lost, please request another one. The current version is available on our
website:
www.eppendorf.com.
This operating manual applies to devices with software version 2.01.00 or higher.
The operating manual in additional languages, adjusting instructions and additional
information can be found on the Xplorer CD or on our website
Biohazard Explosion
Electric shock Toxic substances
Hazard point Material damage
The safety instructions in this operating manual indicate the following degrees of danger:
www.eppendorf.com.
1.3 Symbols used
DANGER Will lead to severe injuries or death.
WARNING May lead to severe injuries or death.
CAUTION May lead to light to moderate injuries.
NOTICE May lead to material damage.
Depiction Meaning
1.
2.
•
Text Terms and key names from the software.
You are requested to perform an action.
Perform these actions in the sequence described.
List.
References useful information.
6
Page 7

Eppendorf Xplorer® (plus) — Operating manual
1.4 Glossary
A
Air-cushion
principle
Biopur Eppendorf Biopur® is an EppendorfAG purity level for consumables. In addition to the
Blow-out Movement of the piston that dispenses the remaining liquid in the pipette tip after the pipetting
Cycle Together, the piston movement upward (liquid aspiration) and piston movement downward (liquid
Free jet dispensing Dispensing steps without a pipette tip touching tube wall. If a drip forms on the pipette tip after
Increment Step size or resolution. For example, the volume can be increased or decreased in 0.01mL
ISO 8655 The ISO8655 standard defines, among other factors, limiting values (systematic error [accuracy]
Multivolume The total of the remaining stroke and the reverse stroke.
Nominal volume The maximum dispensing volume of a pipette. The nominal volume is also used as the name of a
PCR clean PCR clean is an EppendorfAG purity level for consumables. In addition to the requirements for
PhysioCare
Concept®
An air cushion is located between the piston-cylinder system of the pipette and the liquid in the
pipette tip. Moving the piston creates a vacuum and may lead to liquid being aspirated into the
pipette tip. During the downward movement of the piston, the air cushion is pressed downwards
and the liquid in the pipette tip is dispensed. Optimizing the piston stroke ensures that the stroke
volume leads to the liquid volume shown in the display.
Pipettes in which the piston is brought into contact with the liquid to be dispensed are defined as
positive-displacement pipettes.
B
requirements for standard goods, e.g., precision, accuracy, wetting behavior and leak tightness,
Biopur products also meet the highest standards when it comes to sterility and being free of ATP,
PCR inhibitors, human and bacterial DNA, pyrogens, DNase and RNase.
Goods with the Biopur purity level are inspected and certified by an external laboratory.
Lot-specific certificates can be downloaded from our website:
step has been completed. When using normal pipetting, the liquid blow-out is part of the
dispensing volume. When using reverse pipetting, blow-out is not part of the dispensing volume.
www.eppendorf.com.
C
dispensing) form a cycle.
F
free jet dispensing, this drip always belongs to the next dispensing step. We recommend
completing a dispensing series using only the free jet method or wall dispensing method.
Complete the reverse stroke in accordance with the dispensing series using either the free jet or
wall dispensing method. Errors listed in the technical data were determined using the wall
dispensing method.
I
increments for the volume selection on a 10mL Xplorer pipette.
and random error [precision]) and the test procedure for dispensing devices.
M
N
pipette. The term "nominal volume" comes from the ISO8655 standard.
P
standard goods, e.g., precision, accuracy, wetting behavior and leak tightness, products with the
PCR clean purity level also meet the highest standards when it comes to sterility and being free
of human DNA, DNase, RNase and PCR inhibitors.
Goods with the PCR clean purity level are inspected and certified by an external laboratory.
Lot-specific certificates can be downloaded from our website:
Products that carry the Eppendorf PhysioCare Concept logo feature optimized ergonomics and
make operation as simple as possible, even with complex dispensing tasks. PhysioCare products
can be easily serviced and cleaned. They are made of extremely light materials and require
minimal operating force.
www.eppendorf.com.
1
Operating instructions
7
Page 8

Eppendorf Xplorer® (plus) — Operating manual
Rechargeable
lithium-polymer
1
Operating instructions
Remaining stroke After dispensing steps have been completed, any small quantities of residual liquid as safety
Reverse stroke After aspiration, the piston is moved into a defined position. Liquid is dispensed during this piston
Vapor pressure This term refers to the pressure exerted by the vapor of a material (solid or liquid) in an enclosed
Viscosity Viscosity describes the viscidity of liquids and suspensions. Dynamic or absolute viscosity is now
Wall dispensing Liquid dispensing during which the pipette tip touches the tube inner wall. We recommend
R
This rechargeable battery is a special version of the rechargeable lithium-ion battery. Like
rechargeable lithium-ion batteries, rechargeable lithium-polymer-batteries have a very high
battery
Sterile Sterile is an EppendorfAG purity level for consumables. In addition to the requirements for
charging capacity and a long service life. The special encapsulation of the rechargeable
lithium-polymer-battery makes it lighter than rechargeable lithium-ion batteries.
reserves; this liquid will be dispensed as the remaining stroke. You can discard the liquid of the
remaining stroke or reuse it.
movement. The reverse stroke is not a dispensing step.
S
standard goods, e.g., precision, accuracy, wetting behavior and leak tightness, products with the
Sterile purity level also meet the highest standards when it comes to sterility and being
pyrogen-free.
V
container. The vapor is in equilibrium with the solid or liquid phase of the material. The vapor
pressure increases when the temperature increases. Each pure liquid has a vapor pressure of
1013hPa (mbar) at boiling point. Volume errors caused by high vapor pressure can be reduced
by prewetting the tip.
usually given in Pa·s or mPa·s. The unitP orcP is frequently found in older literature.
1mPa·s corresponds to 1cP.
At room temperature a 50% glycerin solution has a viscosity of approx. 6mPa·s. As the glycerin
concentration increases, viscosity increases considerably. Absolutely anhydrous glycerin has a
viscosity of approx. 1480mPa·s at room temperature.
W
completing a dispensing series using only the free jet method or wall dispensing method.
8
Page 9

Dis
P/M
Man
Opt
Spc
Prg
Edit
Fix
Ads
Eppendorf Xplorer® (plus) — Operating manual
2 Product description
2 Product description
2.1 Main illustration
2.1.1 Single-channel
1
2
3
Fix
Ads
Edit
Dis
Prg
Pip
Spc
P/M
Opt
Man
4
5
6
1 USB port
Only for Eppendorf service.
2 ON switch
3 Reset key
4 Connector socket
For connecting the charging plug of an Eppendorf Xplorer power
2
supply.
7
8
5 Selection dial
For setting an operating mode.
6 Charging contacts
Product description
Gold-plated contacts for loading and storage in a series 4880
9
10
charger stand or charger carousel.
7 Backlit color display
Switch the display off when it is not in use. The display
automatically switches back on when the pipette is moved.
8 Softkeys
The assignment of the respective softkey is shown in the display
footer.
9 Rocker
You can either press the rocker up or down. The rocker can
either be used to trigger the piston movement or to scroll through
12345
11
the menu and change the values of parameters. The color of the
rocker is different for the various volumes and matches the color
of the trays for the suitable epT.I.P.S. pipette tips.
12
13
10 Ejector
Moves the ejector sleeve and ejects the pipette tip. After a filled
pipette tip has been ejected, the piston returns to the basic
position after a slight delay. This option can be switched off
(see p. 42).
14
11 Serial number
12 Ejector sleeve
The ejector sleeve is marked with the nominal volume of the
pipette.
13 Spring-loaded tip cone
The spring loading action optimizes the force required for
attaching and ejecting tips. The spring loading action is available
for all Xplorer pipettes up to 1000L.
14 Pipette tip
The Xplorer pipettes may only be used with the suitable pipette
tip fitted. We recommend using epT.I.P.S.
9
Page 10

Eppendorf Xplorer® (plus) — Operating manual
2.1.2 Multi-channel
2
Product description
A description of the upper part can be found in
the main illustration of the single-channel pipette
(see p. 9).
1Lever
The lever is used to release the multi-channel
lower part.
2 Multi-channel lower part
The multi-channel lower part is autoclavable.
The multi-channel lower part is freely rotatable. It
is not detached when rotated. The outer channels
are marked with the numbers 1 and 8 (or 12).
The multi-channel version has a piston for each
channel so that less than 8 or 12 tips can also be
mounted.
You can open the multi-channel lower part in
6
1
2
3
4
5
order to exchange or remove individual channels.
3 Latches, right and left
Unlock the cover plate(6) and internal ejector rail.
The 1200L multi-channel lower part can be
opened with a pin (see p. 58).
4 Spring-loaded tip cones for 10L, 100L and
300L
The spring loading action optimizes the force
required for attaching and ejecting tips.
5 Pipette tips
We recommend using epT.I.P.S.
6 Cover plate for 10L, 100L and 300L
Removable cover plate with internal ejector rail.
The cover plate is opposite the side with the
lever(1).
2.2 Display
10
The brightness of the display can be changed in the options (see p. 42). The display dims during
usage intervals and switches off after a prolonged usage interval. Move the Xplorer pipette to
switch the display back on.
1
2
3
4
1 Header 2 Status line
3 Main field 4 Footer
Page 11

Eppendorf Xplorer® (plus) — Operating manual
2.2.1 Header
Adjustment
The adjustment can be changed in the options. The adjustment is described separately
Hint!
(see p. 61). Detailed information can be found in a separate document on the CD and on our
website:
If you have changed the factory settings, the symbol will be displayed to the left of the header.
Additional symbols to the right indicate which adjustment is selected in the options.
1-point adjust.
Single-point adjustment by the user.
2-point adjust.
Two-point adjustment by the user.
3-point adjust.
Three-point adjustment by the user.
Glycerol 50%
Adjustment to liquid type 50%glycerol.
Ethanol 75%
Adjustment to liquid type 75%ethanol.
Altitude
Adjustment to an altitude other than 0m above sea level.
epTIPS long
Adjustment to an epT.I.P.S.long.
www.eppendorf.com.
2
Product description
Volume
Battery
2.2.2 Status line
2.2.3 Main field
The selected volume for the acoustic feedback can be set in the options (see p. 42).
If the volume has been set to 0, no loudspeaker symbol is displayed.
Information on the charging capacity of the Li-polymer battery
Rechargeable battery fully charged.
Rechargeable battery partially discharged.
Rechargeable battery almost discharged. Rechargeable battery must be charged (see p. 17).
The selected operating mode is displayed here during operation. In edit mode, the name of the
parameter to be edited is displayed.
All parameters of the operating mode are displayed simultaneously during dispensing. A black
arrow indicates the direction of the next piston movement.
In edit mode, the parameter to be edited is marked in red.
Some of the dispensing parameters in the main field include:
• Dispensing volume
• Speed: 8 speeds for aspiration and dispensing
• Counter: Number of conducted dispensing, optional setting in the Pip mode
An explanation of all dispensing parameters can be found in the "Setting parameters" chapter
Hint!
(see p. 22).
11
Page 12

Eppendorf Xplorer® (plus) — Operating manual
2.2.4 Footer
Assignment of the softkeys with variable functions.
Some of the softkeys in the footer are:
Edit Open the edit mode.
Next Select next parameter.
End Exit the edit or help mode.
Help Show help.
History Display the last dispensing settings of the accessed mode (see p. 44).
2
2.3 Delivery package
Product description
The right softkey can be assigned to Help or History. If the right Help softkey is activated, the
Hint!
softkey can be used to display information on the selected operating mode. If the History softkey
is activated, it can be used to call the most recently executed dispensings. The assignment of the
softkey can be defined in the options (Opt). The softkey is assigned to Help when the Xplorer is
delivered.
Quantity Description
1 Eppendorf Xplorer
1 Rechargeable lithium-polymer battery
1 Power supply with power plug adapters
1 English/German operating manual
Additional languages are available on the CD.
1 CD with operating manual in several languages, ordering information and
additional documents
1 Short instructions in English
Additional languages are available on the CD.
1 Locking ring for deactivating the spring loading action for 1000L
single-channel EppendorfXplorerpipettes
1 For multi-channel pipettes from 100L upwards:
multi-channel tool for cutting the O-rings on the tip cones
12
1 Unlocking tool for opening the 1200L multi-channel lower part
1 Pipette wrench for opening the lower part on 5mL and 10mL single-channel
pipettes
2 or 3 Locking clip for lifting the spring loading on 8 or 12 channel lower parts with
10L, 100L and 300L nominal volumes.
Page 13

Eppendorf Xplorer® (plus) — Operating manual
2.4 Features
The Xplorer pipettes are motorized and electronically controlled piston-stroke pipettes designed
to aspirate and dispense liquid volumes according to the air-displacement principle. The Xplorer
pipette family includes single-channel and multi-channel pipettes (8 or 12 channels). Depending
on the Xplorer pipette, you can dispense volumes ranging from 0.5L to 10mL. The liquid is
aspirated into a pipette tip which is attached to the Xplorer pipette.
The main control element of the Xplorer pipette is a rocker. The color of the rocker differs
depending on the volume range of the Xplorer pipette. It has different functions during dispensing
operations and in the dispensing parameter editing mode. The rocker can either be pressed up or
down.
The lower parts of the Xplorer pipettes are autoclavable.
For all Xplorer pipettes from 10L to 1000L nominal volumes, the tip cone responds with
spring-loading action when a pipette tip is attached.
2
2.5 Warranty
2.6 Materials
NOTICE!
In case of warranty claims, contact your local Eppendorf contractual partner. No warranty is
provided for any damage due to misuse or if the upper part has been opened by unauthorized
persons. The rechargeable lithium-polymer battery and all other wear parts are excluded from the
warranty.
Aggressive substances may damage the pipette, pipette tips and accessories.
Check the chemical resistance before using organic solvents or aggressive chemicals.
Observe the cleaning instructions (see Cleaning on p. 51).
Components of the Xplorer pipette that can be accessed by the user are made of the following
materials:
Component Material
External surfaces of the upper part
Exterior and interior of lower parts
• Improved polypropylene(PP)
• Polycarbonate(PC)
• Polycarbonate(PC), coated
• Polycarbonate(PC), dyed
• Gold plated
• Improved polypropylene(PP)
• Polyvinylidene fluoride(PVDF)
• Polyetherimide(PEI)
• Polyphenylene sulfide(PPS)
• Polyetheretherketone(PEEK)
• Polytetrafluoroethylene(PTFE)
• Ethylene propylene diene rubber(EPDM)
• Silicone
• Steel (stainless steel and spring steel)
Product description
Pipette tip Material
epT.I.P.S. Polypropylene(PP)
epDualfilter T.I.P.S. filter Polyethylene(PE)
13
Page 14

3
Eppendorf Xplorer® (plus) — Operating manual
3 Safety
3 Safety
3.1 Intended use
The Xplorer pipette is a lab device intended for dispensing liquids in the volume range from
0.5L to 10mL, in combination with matching pipette tips. In vivo applications (applications in or
on the human body) are not permitted.
The Xplorer pipette may only be operated by trained specialist staff. All users must have read the
operating manual carefully and familiarized themselves with the device's mode of operation.
3.2 Warnings for intended use
Risk of explosion.
Do not operate the device in areas where work is completed with explosive substances.
DANGER!
Do not use this device to process any explosive or highly reactive substances.
Do not use this device to process any substances which could create an explosive
atmosphere.
Safety
WARNING!
WARNING!
WARNING!
Damage to health due to handling infectious liquids and pathogenic germs.
When handling infectious liquids and pathogenic germs, observe the national regulations, the
biological security level of your laboratory and the material safety data sheets and the
manufacturer's application notes.
Wear personal protective equipment.
Follow the instructions regarding hygiene, cleaning and decontamination.
For complete instructions regarding the handling of germs or biological material of risk group
II or higher, please refer to the "Laboratory Biosafety Manual" (Source: World Health
Organization, current edition of the Laboratory Biosafety Manual).
Damage to health due to toxic, radioactive or aggressive chemicals.
Wear personal protective equipment (PPE).
Observe the national regulations for handling these substances.
Observe the material safety data sheets and the manufacturer's application notes.
Personal injury caused by the incorrect handling of the rechargeable battery.
Do not disassemble or modify the rechargeable battery.
Never pierce, crush or throw the rechargeable battery.
Only use the rechargeable battery in the Xplorer pipette.
Do not touch leaky rechargeable batteries.
Do not use any damaged rechargeable batteries.
Dispose of damaged rechargeable batteries in accordance with legal regulations.
14
CAUTION!
Danger to people from careless use.
Never point the opening of a Xplorer pipette fitted with pipette tip at yourself or anyone else.
Only initiate dispensing if it is safe to do so.
For all dispensing tasks, make sure that you are not endangering yourself or anyone else.
Page 15

Eppendorf Xplorer® (plus) — Operating manual
Poor safety due to incorrect accessories and spare parts.
The use of accessories and spare parts other than those recommended by Eppendorf may
CAUTION!
NOTICE!
NOTICE!
impair the safety, functioning and precision of the device. Eppendorf cannot be held liable or
accept any liability for damage resulting from the use of incorrect or non-recommended
accessories and spare parts or from the improper use of such equipment.
Only use accessories and original spare parts recommended by Eppendorf.
Damage to device from missing pipette tips.
Only use the Xplorer pipette with fitted pipette tips.
Carry-over, contamination and incorrect dispensing results due to the incorrect use of
pipette tips.
The pipette tips are for single use only. Prolonged use can have a negative impact on dispensing
tasks.
Use the pipette tips only once.
Do not use autoclaved ep Dualfilter T.I.P.S. for dispensing.
3
Safety
Incorrect dispensing volume with special liquids and from temperature differences.
Solutions which differ greatly from water in terms of their physical data, or temperature
NOTICE!
NOTICE!
3.3 Information on product liability
differences between the pipette, pipette tip and liquid, can result in incorrect dispensing volumes.
Avoid temperature differences between pipette, pipette tip and liquid.
Check the dispensing volume and make sure that you can affirm all the questions listed in the
general information.
Damage to device from penetration of liquids.
Do not deposit the Xplorer pipette with a filled pipette tip.
Do not allow any liquids to penetrate the inside of the housing.
If liquid has penetrated the inside of the housing, have the upper part of the Xplorer pipette
repaired only by service partners of Eppendorf AG. Contact your responsible sales office
before returning a product.
In the following cases, the designated protection of the device may be compromised. Liability for
any resulting property damage or personal injury is then transferred to the operator:
• The device is not used in accordance with the operating manual.
• The device is used outside of its intended use.
• The device is used with accessories or consumables which are not recommended by
Eppendorf.
• The device is maintained or repaired by people not authorized by Eppendorf.
• The user makes unauthorized changes to the device.
15
Page 16

Eppendorf Xplorer® (plus) — Operating manual
4 Installation
4 Installation
4.1 Power supply assembly
4
1
a
b
c
IIIIIII
I.T.E. POWER SUPPLY
MODEL NO:
INPUT: 100–240 V 50/60 Hz 0.5 A
OUTPUT: 5 V = 1.0 A
Approval no.
N 1388 LEI-4 MADE IN CHINA
U
L
G
S
IIIIIIIIIIIIIIIIIIII
IIIIIIIIIIIIIIIIIIII
C
23
Fit the power plug adapter required for your power supply into the opening of the power
supply. In the event of any doubt which power plug adapter should be used for the power
supply unit, you should ask an electrician for advice.
4.2 Connect rechargeable lithium-polymer battery
The lithium polymer battery is already inserted in the battery compartment upon delivery.
1 Power plug adapters
a EU
d
b United Kingdom
c USA
d Australia
2 Power supply
3 Charging plug
1. Open the rechargeable battery compartment
cover.
Installation
2. Connect the plug of the rechargeable lithium
polymer battery to the connector socket.
3. Close the rechargeable battery compartment
cover.
On the Xplorer plus pipette, you will then be
prompted to set the date and time
(see p. 19).
16
Page 17

Eppendorf Xplorer® (plus) — Operating manual
4.3 Charging the rechargeable battery
Incorrect or damaged power supplies can lead to severe person injury or damage to the
device.
WARNING!
NOTICE!
Incorrect or damaged power supplies can cause electric shock or cause the device to overheat,
catch fire, melt, short circuit or cause similar damage.
Only use the supplied power supply for charging the device. The correct power supply unit is
indicated via the Eppendorf logo and the device name on the power supply.
Do not use a damaged power supply.
Loss of full rechargeable battery charging capacity if charged incorrectly.
The supplied rechargeable battery is not charged completely. If the rechargeable battery is not
charged completely before it is used for the first time, its charging capacity will remain
permanently greatly reduced. The rechargeable battery will only achieve its full capacity after a
few discharge/charge cycles.
Charge the rechargeable battery for at least three hours before it is used for the first time.
Do not charge the rechargeable battery in a hot location (>60°C).
Only charge the rechargeable battery using the supplied power supply.
For identification purposes, the power supply contains a sticker with the name of the compatible
Hint!
devices. The power supply is designed for the 100V-240V range.
4986 603.005
Multipette
Repeater
Xplorer
Recharging the rechargeable battery
1. Insert the assembled power supply (order number 4986603.005) into a power outlet.
2. In the Xplorer pipette check whether a rechargeable battery is inserted and connected.
3. Insert the charging plug of the power supply into the connector socket of the Xplorer pipette.
The display briefly shows the connection with the power supply. The charging process is
indicated by a flashing rechargeable battery symbol in the display. If the rechargeable battery
is almost completely discharged, the display will only switch on after a slight delay.
4. Switch on the ON switch to observe the charging process.
The pipette can be charged in both switch settings.
5. Charge the rechargeable battery for at least three hours.
The rechargeable battery will only achieve its full capacity after several discharge/charge
cycles.
®
stream/Xstream
®
stream/Xstream
TM
4
Installation
17
Page 18

Eppendorf Xplorer® (plus) — Operating manual
A 4880 series charger stand or charger carousel can also be used to store and charge
single-channel and multi-channel Xplorer pipettes (see Ordering information on the Xplorer
CD
CD).
4
Installation
4880 charging stand 4880 charging carousel
18
Page 19

Eppendorf Xplorer® (plus) — Operating manual
5 Operation
5 Operation
5
5.1 Switching the pipette on and off
When not in use, the switched on pipette automatically switches to the standby mode after a
Hint!
On
On
period of time. The pipette automatically switches back on when it is moved.
Power on
Switch on the ON switch to turn on the pipette.
Power off
Switch off the ON switch to turn off the pipette.
5.2 Setting the Date and Time
Only available for the Xplorer plus pipettes
Set the Date and Time parameters during the initial start-up.
Requirement
• Battery connected (see p. 16).
• Battery charged (see p. 17).
• Pipette switched on (see p. 19).
Operation
1. Select Date or Time using the rocker.
2. Press the Select softkey.
3. Change the value using the rocker.
4. Press the Next softkey to change the field.
5. Press the End softkey to end the entry.
6. Change the second parameter in the same way.
7. Press the End softkey to end the entry.
To change the date and time at a later time, change the Date and Time parameter in the options
Hint!
(see p. 48).
19
Page 20

5
Operation
Eppendorf Xplorer® (plus) — Operating manual
5.3 Principle of operation
Every Xplorer pipette is equipped with various operating modes and a primary mode for
configuring the Xplorer pipette. The adjustable parameters and operational procedures differ in
the operating modes.
During operation, the piston in the pipette is moved according to how the rocker is actuated.
When you press the rocker up, the piston in the pipette moves up. Liquid is aspirated into the
attached pipette tip. When you press the rocker down, the piston in the pipette moves down. The
liquid is dispensed into the pipette tip.
Press the Edit softkey to open the edit mode of the selected operating mode. Here, you can use
the rocker to change the parameter that is outlined and marked red.
Special operating sequences with an electric pipette are possible with dispensing with the rocker.
Hint!
For example, you can cancel a piston movement in the Dis, Pip and P/M modes at any time by
pressing the rocker in the other direction. You can cancel the piston movement in the Ads and
Man modes by releasing the depressed rocker. After the piston has been stopped, you can
continue the aspiration or dispensing process by pressing the rocker in the corresponding
direction.
If the piston is in the basic position, you can repeat the blow-out (Blow) at any time by pressing
the rocker down.
The pipette software is available in several languages. To change the language, change the
Hint!
Language parameter in the options (see p. 47).
20
Page 21

P/M
Man
Op
Spc
Prg
Edit
F
ix
A
ds
Dis
Eppendorf Xplorer® (plus) — Operating manual
5.4 Selecting the operating mode
You can set the desired operating mode using the selection dial.
The following operating modes are available:
Selection dial Mode Xplorer Xplorer plus
Ads Auto dispensing
Dispensing partial volumes in a defined
interval
5
Operation
Dis Dispensing
Dispensing uniform partial volumes
Pip Pipetting
Aspiration and dispensing of liquid
P/M Pipetting and Mixing
Pipetting with freely selected mixing volume
Man Manual pipetting
Aspiration and dispensing when the rocker
is held pressed down
Opt Options
Making settings and changing the
adjustment
Spc Multiple aspiration
Aspiration of uniform partial volumes and
combined dispensing (reverse dispensing)
Diluting
For diluting a sample or reagent
Sequential dispensing
Functions like dispensing mode with a fixed
sequence of various volumes
Reverse pipetting
Functions like the pipetting mode, but in
reverse order
Sequential pipetting
For creating pipetting series with various
volumes
Prg Program
Execute saved dispensings
Edit Editing
Procedure programs and pipettings with
fixed volumes
Fix Pipetting with fixed volumes
Procedure pipettings with fixed volumes.
ix
ds
Edit
Dis
Prg
Pip
Spc
t
P/M
Man
To select an operating mode, turn the selection dial to the selected mode.
21
Page 22

5
Eppendorf Xplorer® (plus) — Operating manual
Only available for the Xplorer plus pipette
If you have selected the Spc operating mode:
1. Use the rocker to select the required operating mode from the list.
2. Press the Select softkey.
Operation
5.5 Setting the parameter (edit mode)
Requirement
• Pipette switched on (see p. 19)
• Operating mode selected (see p. 21)
Change the parameters as follows:
1. Press the Edit softkey to open the edit mode.
2. Press the Next softkey to go to the next dispensing parameter.
3. Change the dispensing parameter marked in the display with the rocker.
4. Press the End softkey to save the changes, to exit the edit mode and to continue with
dispensing.
If you want to cancel editing without saving the changes made, briefly turn the selection dial to
Hint!
Hint!
another mode.
You can change the Speed, Time, Cycles and Counter parameters during the dispensing.
Press the Edit softkey during the execution.
Set volume
Aspiration and dispensing volume.
You can change the speed that the Xplorer pipette uses to change the
volume under the Rocker setting parameter in the options.
22
Set max. volume
Maximum aspiration and dispensing volume.
The set value appears after editing in the display next to Max.
Set volume/step
Volume per dispensing step. The maximum number of aspiration
steps (Steps) will be displayed when the Set volume/step is changed.
Aspiration speed
Aspiration speed
8 levels are available. The higher the numerical value, the higher the
speed.
Aspiration speed will be automatically and approximately used for the
blow-out (Blow).
Page 23

Eppendorf Xplorer® (plus) — Operating manual
Dispensing speed
Dispensing speed
8 levels are available. The higher the numerical value, the higher the
speed.
Dispensing speed will be automatically and approximately used for
the blow-out (Blow).
Set time
Interval between the dispensing step (0.1s to10s).
Number of steps
Number of dispensing steps
The available number of dispensing steps depends on the setting for
Set volume/step and is automatically set to the maximum number
when Set volume/step is edited.
Under steps in the "Sequential dispensing" mode, the selected
number of dispensing steps will be displayed to the right, and the
dispensing step for the displayed volume will be shown at the left.
5
Operation
Set counter
The counter counts the number of dispensing operations performed.
The numerical value of the counter is increased by 1 when the piston
reaches the basic position after dispensing.
If the piston is in the basic position, you can alternatively set the
counter to 0 by turning the selection dial forward or backward.
You can switch the counter on and off in the Options.
Mixing volume
The mixing volume used after pipetting. If you change the pipetting
volume under Set volume, the mixing volume changes accordingly.
Mixing cycles
1 to 99 mixing cycles can be set for the mixing volume. The mixing
cycles are counted down to 0. If you keep the rocker pressed down
during mixing, after 0 has been reached, mixing is continued until the
rocker is released. If you press the rocker up during mixing, the mixing
process is stopped.
The mixing speed matches the selected speed for aspiration and
dispensing.
Set sample vol.
Volume of the sample or reagent
The maximum potential diluent volume will be automatically set if the
volume of the sample is changed.
23
Page 24

5
Eppendorf Xplorer® (plus) — Operating manual
Set air volume
Volume of the air bubble
The maximum potential diluent volume will be automatically set if the
volume of the air bubble is changed.
Operation
5.6 Using pipette tips
Set diluent vol.
Volume of the dilution solution (diluent)
The maximum potential diluent volume will be automatically set if the
volume of the sample or the air bubble is changed.
No. dosage
Number of executed dispensings. A maximum of 10 steps are
available.
The selected number of dispensings will be shown in red under
Samples at the right of the display. The active dispensing step will
be activated by the number at the left.
The liquid to be dispensed is aspirated into pipette tips. We recommend using epT.I.P.S.
epT.I.P.S. pipette tips, which are available with various degrees of purity, with and without filters
and as special tips. We recommend using special epT.I.P.S.LoRetention tips with liquids that
have a lower surface tension than water (e.g., due to a wetting agent in the liquid).
The pipette is only functional if a pipette tip has been
attached. You can either attach the pipette tip by hand or
directly insert the end of the pipette into a tip held in the tip
storage box. If attaching a pipette tip by hand, it must be
handled in a way that prevents contamination and heating of
the pipette tip.
The color of the rocker of the Xplorer pipette matches the
color of the epT.I.P.S. tray.
Fit the suitable pipette tip(s) on the tip cone, applying
light pressure.
The pipette tip is securely fitted to the tip cone when it
responds with spring-loaded action (exceptions: no
spring loading action with 5mL and 10mL
single-channel pipettes and with 1200μL multi-channel
pipettes).
You can deactivate the spring loading action of the tip cone
on single-channel pipettes.
24
Page 25

Eppendorf Xplorer® (plus) — Operating manual
5.7 Tips for correct pipetting
To achieve the highest precision and accuracy, we recommend observing the following hints:
5.7.1 Preparation
Reagent reservoir Tip-Tub
Always place the liquid in a suitable tube. For multi-channel pipettes, we recommend reagent
reservoir Tip-Tub as a liquid reservoir. The liquid and the pipette should have approximately
the same temperature.
Use epT.I.P.S. To minimize residual moisture in the tip after dispensing, LoRetention for
solutions containing surfactants.
Use epDualfilterT.I.P.S. to prevent aerosol contamination in the tip.
Use the pipette tips only once.
Check whether the set aspiration and dispensing speeds are suitable for the liquid. The
blow-out (Blow) will be conducted at approximately the same speeds.
5
Operation
5.7.2 Aspirating liquid
1. Wet the new pipette tip by aspirating and dispensing the liquid to be pipetted one to three
2. Vertically immerse the pipette tip into the liquid approx. 4mm during aspiration.
3. Press the rocker up to aspirate liquid. Maintain the immersion depth, to ensure no air is
4. For large volumes, keep the pipette tips in the liquid for approx. 3seconds after aspiration.
5. After aspiration, slowly pull the pipette tip out of the liquid.
6. Wipe the pipette tip slowly against the tube wall to ensure that no outer wetting remains on the
5.7.3 Dispensing liquid
1. When dispensing liquid, place the pipette tip at a slight angle against the wall of the tube.
2. Press the rocker down to dispense the liquid.
3. After dispensing, wait until no more liquid is dispensed.
4. Press the rocker down again to trigger the blow-out (Blow).
times.
accidentally aspirated.
pipette tip.
25
Page 26

5
Operation
Eppendorf Xplorer® (plus) — Operating manual
The following information applies especially to high viscous solutions:
During the blow-out (Blow), keep the rocker pressed down if the liquid is flowing out at a slow
rate to ensure that the liquid can securely flow out. If you keep the rocker pressed during the
blow-out (Blow), the piston in the pipette will remain at its lowest position.
Wipe any outer wetting against the wall of the tube while holding the rocker pressed down.
Leave the dispensing vessel with the rocker pressed down. The rocker may only be released
outside of the dispensing vessel. The piston will only move to its basic position after the
rocker has been released.
Press the rocker down again to repeat the blow-out (Blow) as necessary.
Stopping the piston movement
Hint!
Pressing the rocker in the other direction when the piston is still moving will stop the piston
movement. You can then move the piston either up or down by pressing the rocker in the
corresponding direction. Pressing the rocker up will abort a mixing process.
Operating modes with the rocker pressed down: in the Man mode, the ongoing piston movement
is immediately stopped by releasing the rocker. In the Ads mode, an ongoing dispensing step is
completed after the rocker is released. The next dispensing step is only performed when the
rocker is pressed accordingly.
26
Page 27

Eppendorf Xplorer® (plus) — Operating manual
5.8 Automatic dispensing (Ads dial setting)
In the Auto dispensing (Ads) mode, aspirate liquid and dispense it in uniform partial volumes in
selected time intervals. The reverse stroke and remaining stroke are triggered before or after the
dispensing steps. These additional volumes may result in volume limits when using filter tips
(see p. 43).
5
Operation
1234 6
Aspiration Reverse stroke Auto dispensing Aspirate or
Requirement
5
empty
• Pipette switched on (see p. 19)
• Auto dispensing (Ads) operating mode selected (see p. 33)
• Parameters set (see p. 22)
• Pipette tip attached (see p. 24)
1. Press the rocker up to aspirate liquid.
Then follow the instructions in the display.
2. Press the rocker down to trigger the reverse stroke.
3. Keep the rocker pressed for the duration of dispensing. After the first dispensing step, the
following dispensing steps are triggered with the displayed time interval (Time).
Press the Empty softkey to cancel dispensing. The tip is completely emptied.
Hint!
When you release the rocker, an ongoing dispensing operation is still being completed. The
display shows the possible dispensings under Steps. Press the rocker again to continue
dispensing.
After dispensing, decide whether the residual liquid should be dispensed or liquid should be
aspirated again.
Liquid aspiration: press the rocker up once.
Liquid dispensing: press the rocker down twice.
27
Page 28

5
Operation
Eppendorf Xplorer® (plus) — Operating manual
5.9 Dispensing (Dis dial setting)
In the Dispensing (Dis) mode, liquid is aspirated and individually dispensed in uniform partial
volumes. The reverse stroke and remaining stroke are triggered before or after the dispensing
steps. These additional volumes may result in volume limits when using filter tips (see p. 43).
1234
Aspiration Reverse stroke Dispensing Aspirate or
empty
Requirement
• Pipette switched on (see p. 19)
• Dispensing (Dis) operating mode selected (see p. 33)
• Parameters set (see p. 22)
• Pipette tip attached (see p. 24)
1. Press the rocker up to aspirate liquid.
2. Press the rocker down to trigger the reverse stroke.
3. Press the rocker down again for each dispensing operation. The display indicates the
remaining dispensing steps under Steps.
After dispensing, decide whether the residual liquid should be dispensed or liquid should be
aspirated again.
Liquid aspiration: press the rocker up once.
Liquid dispensing: press the rocker down twice.
Press the Empty softkey to cancel dispensing. The tip is completely emptied.
Hint!
Press the rocker up to stop a current dispensing of a large dispensing volume.
• Free jet dispensing may be used to dispense aqueous solutions with a volume of
Hint!
approximately 20L or more. We recommend wall dispensing for dispensing aqueous
solutions with a smaller volume.
• Select level 8 for the Speed parameter when using use free jet dispensing and if the geometry
of the dispensing tube permits this action.
• If you dispense liquid in the free jet, the reverse stroke must also be dispensed in the free jet.
If a drop then forms on the pipette tip, it is included in the first dispensing volume.
• For wall dispensing, trigger the reverse stroke with the pipette tips on the tube inner wall.
• During dispensing, do not switch between free jet dispensing and wall dispensing.
28
Page 29

Eppendorf Xplorer® (plus) — Operating manual
5.10 Pipetting (Pip dial setting)
5.10.1 Standard pipetting
Aspirate a liquid and then dispense it again in the Pipetting (Pip) mode. The blow-out can be
performed manually or automatically using the dispensing step.
Aspiration Dispensing Blow-out
Requirement
• Pipette switched on (see p. 19)
• Pipetting (Pip) operating mode selected (see p. 33)
• Parameters set (see p. 22)
• Pipette tip attached (see p. 24)
5
Operation
1. Press the rocker up to aspirate liquid.
2. Press the rocker down to dispense the liquid.
If dispensing and blow-out (Blow) are carried out in a single step, hold the rocker pressed
down during dispensing.
3. If you keep the rocker pressed during the blow-out (Blow), the piston moves to the lowest
position and remains there until the rocker is released.
Hold the rocker pressed down to trigger dispensing and blow-out (Blow) in a single step.
Hint!
Dispense the liquid against the tube inner wall if you are determining the systematic and random
Hint!
Hint!
errors.
If you only hold the rocker pressed down during the blow-out (Blow) after dispensing, the piston
remains in the lowest position. The piston will only return to the basic position after the rocker has
been released. This presents the following advantages:
If you pipette liquid that drains slowly, you can allow this liquid to flow out.
You can immerse the pipette tip in the target liquid to prevent unintentional aspiration.
You can trigger the blow-out (Blow) any time the piston is in the basic position. Press the
Hint!
rocker down.
Press the rocker in the opposite direction if you would like to stop aspiration or dispensing
while it is in progress. The display shows the volume present in the pipette tip after the
respective operation has been stopped. You can then continue with liquid aspiration or
dispensing.
The number of dispensing steps performed can be counted with a counter (Counter). The
counter can be activated (Counter) if desired (see p. 42).
29
Page 30

5
Eppendorf Xplorer® (plus) — Operating manual
5.10.2 Reverse pipetting
Reverse pipetting is advantageous for plasma, serum and other liquids with a high protein
content. Reverse pipetting is not necessary for pipetting aqueous solutions. By using the
blow-out, more liquid is aspirated with reverse pipetting than with standard pipetting. These
additional volumes may result in volume limits when using filter tips (see p. 43). During
dispensing, the blow-out (Blow) does not belong to the dispensing volume.
Operation
Use the Rev. Pipetting operating mode for the Xplorer plus pipette (see p. 37).
Keep the
rocker
pressed
down
Requirement
Release the
rocker
Aspirate
blow-out
Aspiration Dispensing Aspirate or
• Pipette switched on (see p. 19)
• Pipetting (Pip) operating mode selected (see p. 33)
• Parameters set (see p. 22)
• Pipette tip attached (see p. 24)
1. Keep the rocker pressed down.
2. Immerse the pipette tip in the liquid.
3. Release the rocker to aspirate the blow-out.
4. Press the rocker up to aspirate the dispensing volume.
5. Place the pipette tip on the wall of the target tube.
6. Press the rocker down to dispense the liquid.
7. Remove the pipette tip from the destination tube. Residual liquid remains in the tip.
There are two courses of further action:
empty
30
Aspirate the same liquid from the same reservoir tube
Press the rocker up to aspirate the same liquid. The residual liquid in the tip is used for further
processing.
Dispense a different liquid
1. Press the rocker up to discard the residual liquid in the tip.
2. Press the ejector to eject the pipette tip.
Use a new pipette tip for the next dispensing operation.
Page 31

Eppendorf Xplorer® (plus) — Operating manual
5.11 Pipetting and mixing (P/M dial setting)
Aspirate a liquid and then dispense it again in the Pipetting+Mix (P/M) mode. Afterwards, an
adjustable number of mixing cycles is automatically triggered. The mixing cycles can be
continued as often as required.
5
Operation
Aspiration Dispensing Release the rocker
Auto mixing
Requirement
• Pipette switched on (see p. 19)
• Pipetting+Mix (P/M) operating mode selected (see p. 33)
• Parameters set (see p. 22)
• Pipette tip attached (see p. 24)
1. Press the rocker up to aspirate liquid.
2. Press the rocker down to dispense the liquid and start the selected mixing cycle.
The mixing cycles shown under Cycles in the main field of the display are reduced by 1 with
each cycle.
3. After the mixing process, press the rocker down to trigger the blow-out (Blow).
If you keep the rocker pressed during the blow-out, the piston moves to the lowest position
and remains there until the rocker is released.
Press the rocker down to stop the aspiration.
Hint!
Press the rocker up to stop the dispensing or current mixing cycle.
Hold the rocker pressed down during the mixing cycles to conduct an unlimited number of
mixing cycles. The current mixing cycle will still be completed after the rocker has been
released.
Blow-out
31
Page 32

5
Operation
Eppendorf Xplorer® (plus) — Operating manual
5.12 Manual pipetting (Man dial setting)
In the Manual Pipetting (Man) mode, use the Xplorer pipette like a manual dispenser. The
maximum aspiration volume can be limited if required. Aspiration can be stopped or continued, or
the direction can be changed, as often as required.
Aspiration Aspiration Dispensing Blow-out
You can set a maximum aspiration volume using the Set max. volume parameter. The maximum
Hint!
aspiration volume will be displayed during the dispensing (Max).
Requirement
• Pipette switched on (see p. 19)
• Manual Pipetting (Man) operating mode selected (see p. 33)
• Parameters set (see p. 22)
• Pipette tip attached (see p. 24)
1. To aspirate or dispense liquid, press the rocker up or hold it pressed down. The piston
movement stops when the rocker is released.
The display shows the liquid volume in the pipette tip.
2. If the piston is in the basic position, you can trigger the blow-out (Blow) any time by pressing
the rocker down.
If you keep the rocker pressed during the blow-out (Blow), the piston moves to the lowest
position and remains there until the rocker is released.
32
Page 33

Eppendorf Xplorer® (plus) — Operating manual
5.13 Special operating modes
The Xplorer plus pipette also features 5 additional special operating modes (see p. 21). If you
have never worked with the Xplorer pipette, we recommend becoming familiar with one of the
simple operating mode first, e.g., Pipetting or Dispensing. If you turn the selection dial to the Spc
dial setting, the special operating modes will be shown in a selection list in the display.
5.13.1 Multiple aspiration (Aspirate) (Spc dial setting)
Only available for the Xplorer plus pipette
A specific volume will be aspirated in the Multi-Aspirate mode several times. All of the liquid will
be dispensed after the aspiration. The Multi-Aspirate mode is the opposite of the dispensing
mode.
5
Operation
1234
Aspirating partial volumes Dispensing
Requirement
5
• Pipette switched on (see p. 19)
• Multi-Aspirate (Spc) operating mode selected (see p. 33)
• Parameters set (see p. 22)
• Pipette tip attached (see p. 24)
The Set volume/step parameter determines the volume to be aspirated for each step. The
Hint!
maximum number of aspiration steps (Steps) will be displayed when the Set volume/step is set.
1. For every aspiration, press the rocker up to aspirate liquid.
The following message appears in the display after the aspiration has been completed:Piston
is in top position! Press rocker down!
2. Press the rocker down to dispense all of the liquid.
3. Press the rocker down again to trigger the blow-out (Blow).
4. If the piston is back in the basic position: press the Back softkey to exit the mode.
33
Page 34

5
Operation
Eppendorf Xplorer® (plus) — Operating manual
5.13.2 Diluting (Spc dial setting)
Only available for the Xplorer plus pipette
Two different liquids are aspirated in the Diluting mode. These liquids are separated by an air
bubble. The Diluting mode is suitable for diluting samples and reagents using an appropriate
dilution solution (diluent). First, the diluent is aspirated, then the air bubble, and finally the sample
or reagent.
Because both liquids are aspirated in a single pipette tip, the sample or reagent may be slightly
Hint!
contaminated by the dilution solution.
Diluent Aspirating the air
bubble
Requirement
Aspiration of the
sample or reagent
Dispensing
• Pipette switched on (see p. 19)
• Diluting (Spc) operating mode selected (see p. 33)
• Parameters set (see p. 22)
• Pipette tip attached (see p. 24)
For execution, the parameter sequence is carried out in the reverse order of the editing process.
Hint!
Hint!
Hint!
The next volume to be aspirated will be shown in the display with a border around it.
1. Press the rocker up to aspirate the diluent.
2. Press the rocker up to aspirate the air bubble.
3. Press the rocker up to aspirate the sample or reagent.
4. Press the rocker down to dispense all of the liquid.
5. Press the rocker down to trigger the blow-out Blow.
6. If the piston is in the basic position: press the Back softkey to exit the mode.
Set a high value for the Dispensing speed parameter to achieve a good mixture for the
dispensing.
To create a very high mixture, you can enter the "Diluting" mode with the Pipetting and Mixing
mode (P/M) as the program (see p. 39).
34
Examples:
Required auxiliary aids:
• Xplorer plus with a nominal volume of 1000L
• Dispensing tube (1.5mL)
Page 35

Eppendorf Xplorer® (plus) — Operating manual
Example 1 - total volume 500μL, dilution 1:10
• Diluent: 450L
• Air bubble: 300L - 500L
• Sample or reagent: 50L
Example 2 - total volume 900μL, dilution 1:10
• Diluent: 810L
• Air bubble: 100L
• Sample or reagent: 90L
Example 3 - total volume 1000μL, dilution 1:10
• Diluent: 900L
• Air bubble: 0L
• Sample or reagent: 100L
5
Operation
35
Page 36

5
Operation
Eppendorf Xplorer® (plus) — Operating manual
5.13.3 Sequential dispensing (Spc dial setting)
Only available for the Xplorer plus pipette
Up to 10 different volumes can be dispensed in the Seq. Dispensing mode. The sum of the
dispensing volumes may not exceed the pipette tip filling volume. This mode is well suited for
dilution series. The Seq. Pipetting mode is also well suited for dilution series. To conduct a
dilution series, dispense two different liquids in the opposite direction. This allows you to achieve
different dilutions with the same volume per tube.
If the sum of the dispensing volumes exceeds the volume of the pipette tip: create a program and
Hint!
execute the mode several times in a row.
1
Requirement
1234 6
5
2
1234 6
• Pipette switched on (see p. 19)
• Seq. Dispensing (Spc) operating mode selected (see p. 33)
• Parameters set (see p. 22)
• Pipette tip attached (see p. 24)
1. Press the rocker up to aspirate liquid.
2. Press the rocker down to execute the reverse stroke.
3. Press the rocker down for each dispensing step.
4. If the piston is in the basic position: press the Back softkey to exit the mode.
Example
Required auxiliary aids:
• Xplorer plus with a nominal volume of 300L
• 4 dispensing tubes (200L)
Tube 1 Tube 2 Tube 3 Tube 4
5
36
Volume/step
Volume/step
Dilution 1+X 1+4 1+1.5 1+0.67 1+0.25
Dilution 1:Y 1:5 1:2.5 1:1.67 1:1.25
Tube sum 150L 150L 150L 150L
30L60L90L 120L
120L90L60L30L
Page 37

Eppendorf Xplorer® (plus) — Operating manual
5.13.4 Reverse pipetting (Spc dial setting)
5
Only available for the Xplorer plus pipette
The Rev. Pipetting mode is well suited for plasma, serums and other liquids with a high protein
content. The Pipetting mode is also well suited for aqueous solutions (see p. 29). The Rev.
Pipetting mode is also well suited for solutions containing wetting agents, in order to minimize the
formation of foam during dispensing in the target tube. The liquid is aspirated using blow-out
(Blow). The blow-out is not part of the dispensing volume and may not be dispensed into the
target tube. If you use the same liquid again, the blow-out may remain in the tip. If you use a
different liquid, discard the blow-out and the pipette tip.
Aspiration Dispensing Aspirate or empty
Requirement
• Pipette switched on (see p. 19)
• Rev. Pipetting (Spc) operating mode selected (see p. 33)
• Parameters set (see p. 22)
• Pipette tip attached (see p. 24)
1. Press the rocker up to aspirate the blow-out and the liquid to be dispensed.
The aspiration of the dispensing volume and blow-out will be displayed under the dispensing
volume with the label +Blow .
Operation
2. Press the rocker down to dispense the liquid.
The piston returns to the basic position. Liquid remains in the tip after the dispensing volume
has been dispensed.
• Press the rocker up to aspirate the same liquid.
• Press the rocker down to end the pipetting and discard the blow-out (Blow).
If necessary, activate the Counter setting in the (see p. 42)options to count the executed
Hint!
dispensings using the pedometer.
37
Page 38

5
Operation
Eppendorf Xplorer® (plus) — Operating manual
5.13.5 Sequential pipetting (Spc dial setting)
Only available for the Xplorer plus pipette
In the Seq. Pipetting mode, a maximum of 10 different pipetting volumes are dispensed in a fixed
sequence. This mode is well suited for dilution series. The Seq. Dispensing mode is also well
suited for dilution series. The random error (precision) and systematic error (accuracy) are better
for pipetting than with dispensing. The Seq. Pipetting mode offers more flexibility with the volume
selection than the Seq. Dispensing mode.
Aspiration Dispensing Aspiration Dispensing
Requirement
• Pipette switched on (see p. 19)
• Seq. Pipetting (Spc) operating mode selected (see p. 33)
• Parameters set (see p. 22)
• Pipette tip attached (see p. 24)
1. Press the rocker up to aspirate liquid.
2. Press the rocker down to dispense the liquid.
3. Press the rocker downward after the dispensing to execute the blow-out (Blow).
4. If the piston is in the basic position: press the Back softkey to exit the mode.
After each dispensing, you can repeat the blow-out (Blow) as many times as you would like by
Hint!
pressing the rocker down.
Observe the information on the blow-out (Blow) (see p. 29).
38
Page 39

Eppendorf Xplorer® (plus) — Operating manual
5.14 Program (Prg dial setting)
5
Only available for the Xplorer plus pipette
Previously stored programs can be executed in the Program (Prg) operating mode. Programs
consist of 1-4 combined operating modes in a defined sequence. Up to 10 different programs can
be created (see Editing (Edit dial setting) on p. 39).
Requirement
• Pipette switched on (see p. 19)
• Program (Prg) operating mode selected (see p. 33)
• Program created (see p. 39)
• Pipette tip attached (see p. 24)
1. Select the program using the rocker.
2. Press the Select softkey.
The execution of the program depends on the operating modes used.
The blow-out (Blow) must always be executed In the "Pipetting" mode.
Hint!
5.15 Editing (Edit dial setting)
Only available for the Xplorer plus pipette
Operation
Programs and pipettings with fixed volumes can be created and edited in the Edit mode. Stored
programs can be executed in the Program (Prg) mode. Stored programs with fixed volumes can
be stored in the Fixed volumes (Fix) mode. If necessary, programs and pipettings with fixed
volumes can be password protected using the Pswrd. protection option.
Requirement
• Pipette switched on (see p. 19)
• Edit operating mode selected (see p. 33)
1. Selected the required option using the rocker.
2. Press the Select softkey.
The next steps are described in the following subchapters.
39
Page 40

5
Operation
Eppendorf Xplorer® (plus) — Operating manual
5.15.1 Pswrd. protection
You can protect the Edit mode using a four-digit, numerical password. This prevents stored
programs and pipettings from being changed. The passwords for the Edit mode and Adjustment
option may vary. The password can be changed or deactivated after it has been entered. If you
lose your password, please contact Eppendorf AG Application Support to request a temporary
(Master key) password. Have your pipette ready during your phone call with Application Support.
Or you can trigger an Initial reset; all stored data is lost during an Initial reset. The Xplorer plus
pipette will be reset to the factory settings.
If you lose the password for the Edit mode, you will not be able to change any programs or
Hint!
pipettings with fixed volume.
1. Press the rocker upward to activate the password protection.
ON appears in the display.
2. Press the Select softkey.
3. Use the rocker to select the digit.
4. Press the Next softkey to switch to the next field.
5. Enter data in all of the fields.
6. Press the Save softkey to save the password.
7. Reenter the password after completing the saving procedure. Press the Enter softkey.
Password protection is now active.
5.15.2 Fixed volume
Creating a new pipetting
1. Select the New fixed volume entry using the rocker.
The parameters of the most recently used pipetting will be displayed when the New fixed
volume entry is opened. Up to 10 fixed volumes can be saved.
2. Press the Edit softkey.
3. Change the parameters as you did in the Pipetting mode.
4. Press the Save softkey.
The saved pipetting now appears in the Fixed volumes (Fix) operating mode with dispensing
volume, aspiration speed and dispensing speed (see p. 42).
Changing saved pipettings
1. Select the pipetting using the rocker.
2. Press the Select softkey.
3. Select the Edit option.
4. Press the Select softkey.
40
Page 41

Eppendorf Xplorer® (plus) — Operating manual
5.15.3 Programm
Creating a new program
1. Select the New program entry using the rocker. Up to 10 programs can be saved.
You will be prompted to name the program. You can enter a name with a maximum of six
characters.
The program name cannot be changed later. Copy the program to change the name. You will be
Hint!
prompted to enter a new name. Then delete the original program.
2. Select the characters using the rocker.
3. Press the Next softkey to switch to the next field.
4. Press the Save softkey to save the name.
5. Select the first operating mode. All operating modes except Manual Pipetting are available.
6. Press the Edit softkey.
7. Change the parameters of the mode as usual (see p. 22).
8. Press the Save softkey.
A list with all of the previously saved program modes appears.
5
Operation
• Press the Next softkey to add another mode. A program can contain up to 4 modes.
• Press the Save softkey to save the program. The saved program now appears in the
Program (Prg) operating mode (see p. 39).
Changing the saved program
Requirement
To change the mode of a program, the program needs to be saved first.
1. Select a saved program from the list.
2. Press the Select softkey.
Select the Copy option to create a program based on another program. You must then enter a
Hint!
name for the copied program. If you only want to change the name of a program, select the Copy
option.
3. Select the Edit option.
4. Press the Select softkey.
• Select the Edit mode option to change a program mode.
• Select the Insert mode option to add a mode to the program.
• Select the Delete mode option to delete a program mode.
41
Page 42

5
Operation
Eppendorf Xplorer® (plus) — Operating manual
5.16 Pipetting with fixed volume (Fix dial setting)
Only available for the Xplorer plus pipette
Previously stored programs with fixed volumes can be executed in the Fixed volumes (Fix) mode.
Up to 10 different pipettings can be created (see Editing (Edit dial setting) on p. 39). 3 fixed
volumes are predefined upon delivery:
• 10% of the nominal volume
• 50% of the nominal volume
• 100% of the nominal volume
The aspiration speed and dispensing speed are displayed to the right of the fixed volume.
Requirement
• Pipette switched on (see p. 19)
• Fixed volumes (Fix) operating mode selected (see p. 42)
• Pipetting with fixed volume created (see p. 39)
• Pipette tip attached (see p. 24)
1. Select the pipetting using the rocker.
2. Press the Select softkey.
3. Press the rocker up to aspirate liquid.
4. Press the rocker down to dispense the liquid.
5. Press the rocker downward after the dispensing to execute the blow-out (Blow).
5.17 Option (Opt dial setting)
You can set the following options, which apply to all operating modes in the Option mode.
Requirement
• Pipette switched on (see p. 19)
• Option operating mode selected (see p. 33)
1. Select the option using the rocker.
2. Press the Select softkey to open the option.
3. Change the option using the rocker.
4. Press the End or Back softkey to exit the option.
5. Turn the selection dial to an operating mode to exit the options and to continue with
dispensing operations.
Press the Help softkey to display information on the selected option.
Hint!
5.17.1 General help
42
This describes the elementary steps for all modes. This option does not contain any adjustable
parameters. The help texts in the Xplorer are not a substitute for reading the operating manual.
Page 43

Eppendorf Xplorer® (plus) — Operating manual
5.17.2 Volume limit
This limits the aspiration volume in all dispensing modes.
After a volume limit has been set, a note will be shown in the display when the Pip, P/M and
Hint!
Man operating modes are edited and when the volume limit has been reached. In this mode,
too large dispensing volumes will be automatically reduced to the defined volume limit. The
number of potential dispensing steps will be automatically limited in the Dis and Ads modes.
If the corresponding volume is above the defined volume limit, saved dispensing can no
longer be executed under History and under the Spc, Prg and Fix modes. The volume can be
changed in the corresponding mode or the Edit mode.
Use the volume limit in the following cases:
• For strongly foaming solutions in order to prevent contamination of the tip cone or the
protection filter.
• When using epDualfilterT.I.P.S. in the Ads, Dis and Pip modes (reverse pipetting) and the
Xplorer plus Rev. Pipetting mode. For these three versions, there is a risk of the liquid coming
into contact with the dualfilter because of the additional volumes during aspiration.
• For pipette tips or filter tips whose aspiration volume is smaller than the nominal volume of the
Xplorer pipette.
5
Operation
ep Dualfilter T.I.P.S. Volume limit
Ads/Dis Reverse pipetting
10 L Not required Not required
100 L Not required Not required
200 L Not required Not required
300 l 270L 260L
1000L Not required 950L
1250L Long* Not required 1130L
5mL 4.9mL 4.6mL**
10mL* 9.75mL 8.5mL**
* When using these filter tips we recommend using the epTIPS
long adjustment to increase the accuracy of dispensing. The
specified volume limit only applies to the changed adjustment.
** We also recommend this volume limit for "Reverse Pipetting"
when using 5mL and 10mL epT.I.P.S. without filter.
Other volume limits may apply when using filter tips from other manufacturers. The volume limit
differs depending on the tip geometry and the position of the filter in the tip.
The volume limit is dependent on the additional aspirated volumes of the Xplorer pipette. On the
Xplorer the individual nominal volumes result in different additional volumes.
43
Page 44

5
Eppendorf Xplorer® (plus) — Operating manual
Operation
5.17.3 Counter
5.17.4 Ejector reset
CAUTION!
Xplorer
Single-channel and
multi-channel
10 L Approx.0.6 L Approx.2 L
100 L Approx.7 L Approx.20 L
300 l Approx.20 L Approx.60 L
1000L Approx.65 L Approx.200 L
1200L Approx.140 L Approx.220 L
5mL Approx. 0.3 mL Approx. 1 mL
10mL Approx. 0.55 mL Approx. 1.8 mL
The counter provides information on the dispensing operations performed in the Pip mode. You
can switch the counter on and off using the rocker. After you select the Pip mode, an activated
counter shows 0. The value can be changed in the Pip mode.
When (ON) is activated, the piston moves to the basic position when a filled pipette tip is ejected.
Unintended dispensing when the Ejector reset option is activated.
Ads/Dis Reverse pipetting
Additional aspiration volumes
When working with a removed ejector sleeve, set the Ejector reset option to OFF to prevent
unintentional dispensing from the pipette tip in case the ejector is accidentally pressed.
5.17.5 History
5.17.6 Rocker setting
5.17.7 Sound level
5.17.8 Brightness
If you activate the History option, the History softkey will be activated instead of the Help softkey
for most of the operating modes. The last 10 dispensing settings of the active mode can be
accessed using the History softkey. The dispensing steps appear in chronological order.
Dispensing settings will only be stored if the History option is activated.
The change speed of the volume in the editing mode can be adjusted to suit your needs. 8 levels
are available (1 = slow, 8 = very fast). Level 5 is set upon delivery.
You can change the sound volume of the acoustic signals. At 0 volume, the sound is switched off
and the symbol will not be displayed.
The display brightness can be adjusted to meet your needs.
44
Page 45

Eppendorf Xplorer® (plus) — Operating manual
5.17.9 Adjustment
5
Changing the adjustment will change the dispensing volume and affect the accuracy of the
Hint!
Xplorer pipette! Carry out a gravimetric test of the adjustment.
Operation
Every Xplorer pipette whose adjustment has been changed must be marked with a clearly
visible label that indicates the type of change made. This ensures that other users will be
informed of the changes to the adjustment, in addition to the information provided in the
header of the display.
You can overwrite a selected adjustment by selecting another adjustment. The applicable
symbols for the new adjustment will be shown in the display header (see p. 10).
For the Xplorer plus, the adjustment can be protected with a password (see Pswrd. protection
on p. 47).
Instructions on performing the adjustment can be found in the Adjustment document on the
Xplorer CD.
CD
The adjustment of the Xplorer pipette can be changed to suit your needs. If you have disabled the
factory settings, the symbol and at least one additional symbol appear in the display header.
Before changing an adjustment, make sure to read the chapters "Display" (see p. 10)and
"General information about adjustment" (see p. 61).
The following adjustments can be selected:
• Factory settings
Resets the adjustment to the factory setting.
• Liquid type: Ethanol 75%
The factory setting is changed by a factor in order to allow 75% ethanol to be dispensed with
higher accuracy. The internally used factor takes into account the density and the following
work technique in the Pip mode:
1. Wet the tip with liquid three times at room temperature. Hold the Xplorer pipette in an
upright position. Avoid outer wetting during dispensing.
2. Use speed level 5 (standard setting) for aspiration and dispensing.
3. Dispense liquid against the tube wall of the destination tube.
4. Trigger a blow-out (Blow) approx. 2 seconds after dispensing. Then eject the tip.
• Liquid type: Glycerol 50%
The factory setting is changed by a factor in order to allow 50% glycerol to be dispensed with
higher accuracy. The internally used factor takes into account the density of the 50% glycerol
and the same work technique as described previously for Ethanol 75% in the Pip mode.
• epTIPS long
In addition to the "standard tips", a second longer tip is available for most Xplorer pipettes.
When epTIPS long is selected, the tip geometry of this longer tip is taken into account in the
internal volume calculation. This reduces the systematic error of dispensing when using these
tips.
45
Page 46
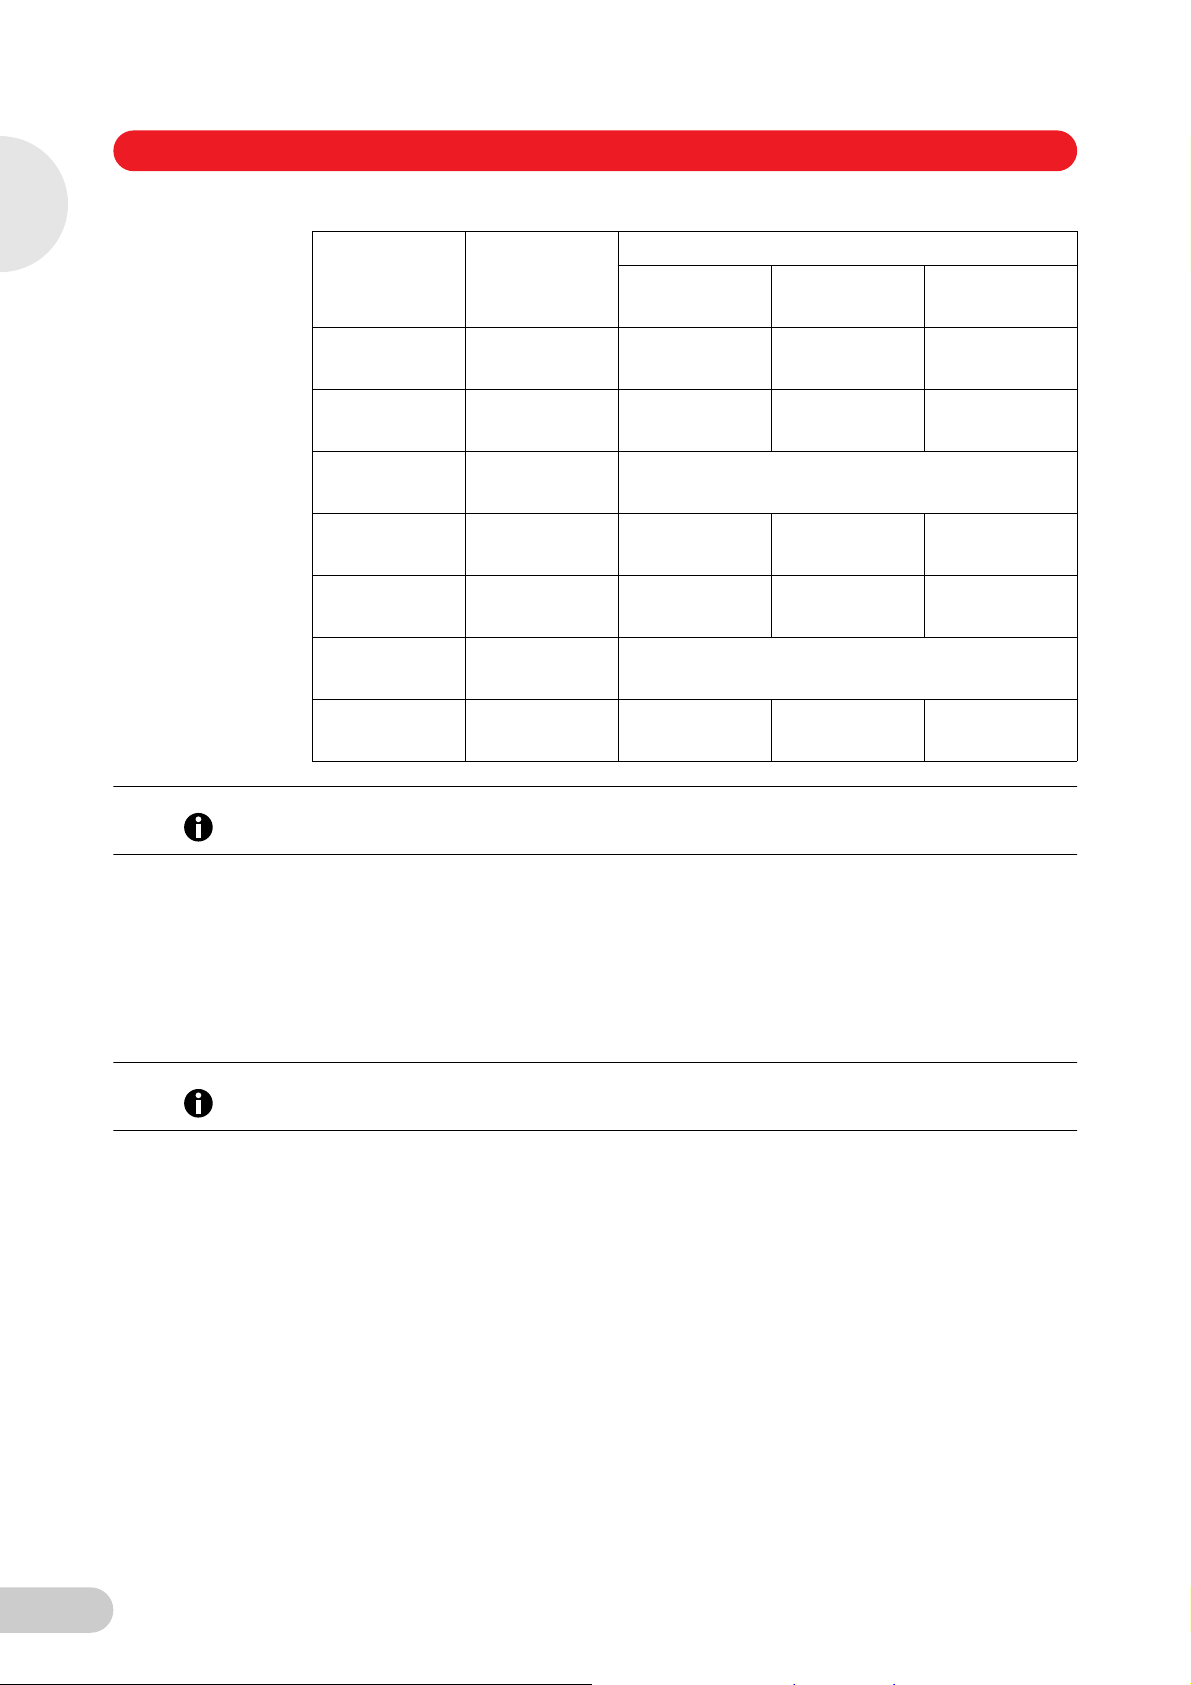
5
Eppendorf Xplorer® (plus) — Operating manual
Operation
Xplorer
Nominal volume
Volume range
10 L
0.5- 10L
100L
5- 100L
300L
15- 300L
1000L
50 - 1000L
1200L
50- 1200L
5mL
0.25– 5mL
10mL
0.5– 10mL
You can select volumes 0.2mL for the 5 mL Xplorer. No technical data has been specified for
Hint!
the 0.2mL–0.5mL volume range.
Color code
Xplorer rocker
medium gray light gray 20 L Long 46 mm
yellow orange 300 l 55 mm
orange not available
blue dark green 1 250 L Long 103 mm
green dark green 1 250 L Long 103 mm
purple not available
turquoise turquoise 10 mL Long 243 mm
The adjustment for epTIPS long applies only to
Color code
epT.I.P.S.
Model
epT.I.P.S.
Length
epT.I.P.S.
The epT.I.P.S. specified here are also available as epDualfilterT.I.P.S.
• Altitude
The aspiration volume of a piston-stroke pipette is reduced at increased altitudes, which entail
a fall in air pressure. The average air pressure at the corresponding height is used to correct
the stroke. The altitude can be selected in 250m (820ft) increments. 5000m is the
maximum altitude that can be selected.
The Xplorer pipette is set to an altitude of 0m upon delivery. This is the factory setting.
The liquid type (Ethanol 75% or Glycerol 50%), epTIPS long and Altitude options can be
Hint!
combined.
For the following adjustments, you must know the exact density of the solution to be dispensed.
The recording of the weighing results requires the use of a fine balance with a high resolution.
Dispensing operations under 10L require a balance with a resolution of 0.001mg. An existing
1-3 point adjustment can be changed.
• 1-point adjust.
After you enter the density, selected volume and corresponding weighing results, the Xplorer
pipette will determine a correction factor. The factor is only correct for the selected volume
and the selected work technique. However, the factor is used for the entire volume range of
the Xplorer pipette. You must carry out a gravimetric test to check the validity of the factor.
• 2-point adjust.
After you enter the density, two different volumes and the corresponding weighing result, the
Xplorer pipette will determine a correction factor. The factor is only correct for the selected
volume range and the selected work technique. However, the factor is used for the entire
volume range of the Xplorer pipette, i.e., below and above the two measuring points as well.
You must carry out a gravimetric test to check the validity of the factor.
46
Page 47

Eppendorf Xplorer® (plus) — Operating manual
• 3-point adjust.
After you enter the density, three different volumes and the corresponding weighing results,
the Xplorer pipette determines two correction factors. The factors are correct from measuring
point to measuring point in the selected volume regions and for the selected work technique.
The respective factor is, however, also used below and above the first or third measuring
point. You must carry out a gravimetric test to check the validity of the factors.
You must gravimetrically check each Xplorer pipette whose factory setting has been changed by
Hint!
selection or by performing the above-mentioned adjustments. This is the only way to ensure that
the selected adjustment meets requirements regarding errors.
Pswrd. protection
Only available for the Xplorer plus pipette
For the Xplorer plus, the adjustment can be protected with a four-digit numeric password. The
passwords for the Edit mode and Adjustment option may vary. The password can be changed or
deactivated after it has been entered. Please contact EppendorfAG Application Support or
conduct a reset if you lose the password.
5
Operation
Hint!
5.17.10 Language
Hint!
5.17.11 Personalization
The adjustment can no longer be changed if the password has been lost.
1. Press the rocker upward to activate the password protection.
ON appears in the display.
2. Press the Select softkey.
3. Use the rocker to select the digit.
4. Press the Next softkey to switch to the next field.
5. Enter data in all of the fields.
6. Press the Save softkey to save the password.
7. Reenter the password after completing the saving procedure. Press the Enter softkey.
Password protection is now active.
Mark a language in the selection list with the rocker.
The selected language is only activated after the completion of the language selection.
When selecting a language, the softkeys and the language selection list are always in English.
This makes it easier to return to the desired language if you select an unknown language by
mistake.
You can use the rocker to select letters and numbers to personalize the pipette. The selected
personalization will be displayed after the pipette has been activated from sleep mode or after the
reset. When the Xplorer pipette is delivered, it is personalized as My Xplorer.
47
Page 48

5
Operation
Eppendorf Xplorer® (plus) — Operating manual
5.17.12 Service
The options listed here are not needed during normal routine use. A selection list offers the
following service options:
• Software version: Display of the software that is valid for this Xplorer.
• Parameter ver.: Display of the applicable data record for this Xplorer. The data record is
different for the various volumes.
• Initial reset: After a security query, the pipette will be reset to factory settings and all entries
will be reset to the "default values". This type of reset may be useful when transferring the
Xplorer pipette to another workstation.
The Initial reset function can also be executed if the Pswrd. protection option is active. Please
Hint!
contact EppendorfAG Application Support if you would like to remove the password protection
without losing saved settings and programs. You will receive a Master key and additional
information on how to proceed.
• Check procedure: For service personnel only. Not released for general use.
• Software update: For service personnel only.
• USB: For service personnel only.
5.17.13 Service interval
5.17.14 Date and Time
Only available for the Xplorer plus pipette
If the Service interval option is activated, the pipette will remind you about the required
maintenance or repeating the gravimetric test. You can set the reminder for a specific time or
after a specific number of cycles. The display shows the following options after Time interval or
Cycles interval has been selected:
• Last service
• Next service
• Set interval
• Reset
For the Set interval parameter, set the required interval. If you would not like to use the Service
interval option, set the parameter value to 0. The interval will be reset when the reset function is
triggered. If the pipette should start counting at a specific initial value, enter the value under Set
interval and then select Reset. You can view the last time a reset was triggered for the executed
maintenance under Last service You can view when the next maintenance needs to be executed
under Next service. If the interval has elapsed up to 90%, the pipette shows the next required
maintenance in the display. Monitoring of the interval time and the interval cycles function
independently of each other. If you activate the interval time and interval cycles, you will receive a
maintenance reminder for both settings. A reset may be required after the maintenance and the
gravimetric test.
48
Only available for the Xplorer plus pipette
You can set the date and time of the pipette.
Select and change the parameter as described above (see p. 19).
Page 49

Eppendorf Xplorer® (plus) — Operating manual
6 Troubleshooting
6 Troubleshooting
6.1 Reset
The pipette will be reset to the initial state during the reset. Your saved settings are not lost.
On
Hint!
Press the Reset key using a pipette tip or another pointed object.
The personalization and software version will be shown in the display during the reset.
You will be prompted to press the rocker down in the display. Make sure that any liquid in the
pipette tip is dispensed correctly. Then, you need to confirm the Date and Time.
6.2 Error search
Symptom Possible cause Solution
Display dark
Liquid is dripping from the tip
and/or the dispensed volume
is incorrect.
• Pipette switched off.
• The rechargeable battery is not
connected.
• The rechargeable battery is
discharged.
• Battery defective.
The pipette tip is loose or does not fit
correctly.
Liquid with high vapor pressure and/or
different density.
Connect the rechargeable battery
Switch on the Xplorer pipette.
Load the Xplorer pipette.
Replace the battery.
Note: If the rechargeable battery is almost
completely discharged, the display will only
switch on after a short charging time.
Attach the tip firmly.
Use epT.I.P.S.
Wet the tip several times and adjust the
pipette for the liquid used.
6
Troubleshooting
Liquid flows unevenly into or
out of the tip.
Display shows the symbol.
Pipetted too quickly.
Tip withdrawn from the liquid too early or
too quickly.
Liquid dispensed without blow-out in Pip
mode.
The piston is contaminated or damaged.
The tip cone is damaged.
The O-rings of the tip cones are damaged.
• The tip is damaged
The piston is contaminated
• The seal is contaminated.
• The pipette is blocked.
The pipette has been adjusted for another
liquid.
Set a lower speed.
Withdraw the tip from the liquid slowly
and with a time delay (of about
3seconds for large volumes) after
aspiration.
Trigger blow-out after dispensing has
been completed during standard
pipetting applications.
Clean the piston, relubricate slightly
and/or replace.
Replace the lower part or channel.
Replace the O-rings (only 100L,
300L, 1200L multi-channel).
Use a new tip
Clean the lower part.
5mL and 10mL sizes: replace the
protection filter.
Check whether the adjustment selected
in the options is correct and change it if
necessary.
49
Page 50

6
Eppendorf Xplorer® (plus) — Operating manual
Symptom Possible cause Solution
No spring loading action of the
tip cone when taking up pipette
tips.
Spring-loading action is blocked by a
locking ring.
Use a 5mL or 10mL single-channel
pipette or 1200L multi-channel pipette.
Remove the locking ring again.
No remedy. The tip cone of these sizes do
not have spring loading action.
Troubleshooting
The following message
appears briefly before the
aspiration:
Selected volume not possible
with stored adjustment!
The following message
appears briefly for the selected
volume:
Volume limit XXXXμL/mL
The rechargeable battery is heavily
discharged.
The rechargeable battery is almost
completely discharged. The remaining
rechargeable battery capacity is only
sufficient for displaying the information to
the left. Dispensing cannot performed.
A factor that was determined during the
Xplorer adjustment leads to a very high
stroke increase. This high stroke increase
limits the dispensing volume.
The Volume limit option was used to limit
the volume to the displayed value.
Confirm the message with the OK softkey.
Complete the dispensing operation as
quickly as possible and charge the
rechargeable battery for 3hours. You can
continue dispensing with the power supply
connected. Then charge for an additional
3hours.
The rechargeable battery must be charged
for at least 15minutes before further use.
A charging time of 3hours is
recommended.
Confirm the error message with the OK
softkey.
The situation can only be remedied by
changing the adjustment.
Make sure that you are authorized to
carry out the adjustment.
1. Make sure that you are authorized to
change the Volume limit option.
2. Move the selection dial to Opt.
3. Select the Volume limit option.
Password incorrect
CD
• Password for the Edit mode and the
Adjustment option have been mixed up.
• Password forgotten
Regularly check the precision and accuracy of the Xplorer pipette to prevent dispensing errors.
You can use the "PICASO" software, version 2.3.18 or higher, to determine the maximum
permissible systematic and random errors. If the pipette is used at a location with an extremely
high altitude, it must be adjusted to the ambient air pressure (see Adjustment on p. 45).
You can find an SOP (Standard Operation Procedure) for the test on our website:
www.eppendorf.com or on the Xplorer CD.
Enter the correct password.
Perform reset.
Contact EppendorfAG Application
Support and request a Master key.
50
Page 51

Eppendorf Xplorer® (plus) — Operating manual
7 Maintenance
7 Maintenance
• All single and multi-channel lower parts are wear parts. Clean them after contamination, use
of aggressive chemicals and/or heavy stress. If the lower parts are worn or damaged, replace
the respective parts.
• Faulty dispensing results are sometimes due to lack of maintenance.
7.1 Cleaning
Damage to device from unsuitable cleaning fluids or sharp or pointed objects
Unsuitable cleaning fluids can damage the display, surfaces and printing.
NOTICE!
7.2 Sterilizing or disinfecting the pipette
NOTICE!
Never use corrosive cleaning fluids, strong solvents or abrasive polishes.
Check the compatibility with the materials used.
Do not use acetone to clean the Xplorer pipette.
Do not use sharp objects to clean the Xplorer pipette.
Remove any contamination on the outside of the Xplorer pipette as follows:
Wet a cloth with a mild cleaning fluid and water and remove the contamination.
To remove heavy contamination resulting from liquid penetration, disassemble the lower part
of the pipette (see Xplorer pipette disassembly and assembly on p. 53)and clean it with
demineralized water.
Relubricate the piston sealing rings after contamination, use of aggressive chemicals and/or
heavy stress. Remove the old grease before relubricating.
Damage to device from incorrect handling.
Only autoclave the lower part of the Xplorer pipette.
Do not use any additional disinfectants, decontamination agents or sodium hypochlorite when
autoclaving the lower part.
When autoclaving the lower part, make sure that the temperature does not exceed 121°C.
Before using disinfecting agents or decontaminating agents, test for material compatibility
and check the manufacturer's instructions about chemical resistance. Consider also the
material of the pipette.
7
Maintenance
51
Page 52

Eppendorf Xplorer® (plus) — Operating manual
7.2.1 Autoclaving
All Xplorer lower parts are steam autoclavable.
Before autoclaving
1. Remove any contamination from the exterior and in the lower part (see Xplorer pipette
disassembly and assembly on p. 53).
2. If you remove grease, only relubricate the piston seal slightly with the grease specified in the
ordering information (see the Xplorer CD).
7
Maintenance
7.2.2 Disinfection
7.3 Replacing O-rings
Procedure
Follow the operating manual of the autoclave manufacturer.
1. Autoclave at 121°C, 20minutes, 1bar pressure.
2. Put the lower part into the autoclave in such a way to ensure that the temperature at the lower
part does not exceed 121°C.
3. You can put the lower part into the autoclave as a whole unit or as individual parts.
4. Make sure that no parts of disassembled lower parts are confused during subsequent
assembly (recommendation: use a plastic beaker for each lower part).
After autoclaving
1. Cool the lower part down to room temperature and leave to dry. The piston does not need to
be greased following autoclaving.
2. Carry out a gravimetric test to check that the Xplorer pipette is functioning.
1. Carefully wipe off the outer surfaces with disinfectant, DNA/RNA decontamination agents or
70% isopropanol.
2. You can wipe the outside of the tip cone and the ejector sleeve with a sodium hypochlorite
solution of 4%.
3. After the exposure time of the sodium hypochlorite solution has elapsed, thoroughly remove it
using demineralized water.
52
The 100L, 300L and 1200L multi-channel lower parts are equipped with O-rings. These
are wear parts. Replace old, worn or damaged O-rings. Defective O-rings result in the incorrect
positioning of the tips and in dispensing errors.
Page 53

Eppendorf Xplorer® (plus) — Operating manual
7.3.1 Removing the O-ring
1. Push the opening of the O-ring tool (included in the delivery package) against the tip cone
from the side so that the sharp edge in the opening of the O-ring tool is positioned on top of
the o-ring. Do not slide the O-ring tool onto the cone! The figure shows the O-ring tool for
100L and 300L. A separate O-ring tool is available for 1200L.
2. Supporting the O-ring tool with your thumb, push it firmly against the tip cone.
This O-ring is cut in one place.
3. Remove the O-ring tool and the O-ring from the tip cone.
7
Maintenance
7.3.2 Mounting a new O-ring
1. Fit the mounting aid (shortened pipette tip, included in the delivery package of the O-rings) on
the tip cone.
2. Push the new O-ring over the tip onto the tip cone.
3. Check that the pipette tips are correctly positioned. Ensure that the tips are tightly sealed and
properly aligned.
7.4 Xplorer pipette disassembly and assembly
7.4.1 Single-channel up to 1000μL
Removing the lower part
PUSH UP TO RELEASE
1 2
1. Keep the ejector pressed and remove the ejector sleeve .
2 3
2. and : On the lower part, slide the ring marked "PUSH UP TO RELEASE" up by about
5mm until the lower part comes off.
4
3. : Remove the lower part from the upper part.
3 4
1
53
Page 54

Eppendorf Xplorer® (plus) — Operating manual
Deactivating spring loading
For the following dispensing tasks, it may be helpful to deactivate the spring loading action of the
tip cone.
• A pipette tip is to be used for a long period.
• The pipette tip is slightly bent during dispensing.
Deactivating this action may also be helpful for pipette tips that are not designed for the
Eppendorf pipette tip cone.
Single-channel pipettes
7
Maintenance
Multi-channel pipettes
The spring loading action of the tip cone can be deactivated by installing the locking ring. The
locking ring is included in the delivery package.
1. Push the black locking ring onto the lower part from the top by slightly squeezing the
clamps on the lower part.
2. Insert the lower part into the upper part until it audibly engages.
3. Keep the ejector pressed. The ejector rod protrudes from the upper part.
4. Fit the ejector sleeve onto the ejector rod. If correctly fitted, it will engage slightly.
Remove the locking ring to reactivate the spring loading action.
The spring loading of the tip cones can be deactivated in the 10L, 100L and 300L
multi-channel lower parts by installing 2-3 locking clips. The locking clips are part of the delivery
package.
Requirement
• Multi-channel lower part is open and has been removed from the upper part (see p. 57)
• Channels removed (see p. 57)
1. Remove the spring from the channels.
2. Insert the channels without the springs.
54
3. Firmly press the locking clips onto the channels.
4. Assemble the pipette (see p. 58).
Page 55

Eppendorf Xplorer® (plus) — Operating manual
Opening and assembling the lower part (1000μL)
To avoid confusion of parts, only disassemble and assemble one pipette at a time.
Hint!
The piston must be in its basic position before separating the lower and upper part. If necessary,
press the rocker down to move the piston to its basic position.
1
2
3
4
Opening the lower part:
1. Push the stop pins together slightly on the piston mount (1).
2. Remove the piston mount.
3. Remove the piston (2) and the piston spring (3). The piston is under spring
tension. The appearance of pistons and piston springs will vary for the
individual volume versions.
Assembling the lower part:
1. Carefully guide the piston and the piston spring into the cylinder. Make
sure that the piston is guided correctly in the piston spring and the cylinder.
There must not be any perceptible resistance. Stop pushing as soon as
any resistance is felt This may indicate that the piston is not positioned
correctly in the cylinder. There is a risk of bending the piston if too much
force is applied. Carefully pull out the piston and repeat the process
correctly. In the case of piston springs with double windings (4), these
windings must point downwards.
2. Keep the piston and the piston spring pressed.
3. Keep the stop pins on the piston mount pressed with the other hand.
4. Mount the piston mount so that the two locking mechanisms engage in
their retainers.
5. Gently press a pipette tip against the inserted piston. The piston must
move down in the cylinder without any noticeable resistance.
Installing the lower part and ejector sleeve:
1. Insert the lower part into the upper part until it audibly engages.
2. Set the maximum volume and move the rocker up and down several times.
There should not be any unusual running noises.
3. Keep the ejector pressed. The ejector rod protrudes from the upper part.
4. Fit the ejector sleeve onto the ejector rod. If correctly fitted, it will engage
slightly.
5. Carry out a gravimetric test of the systematic and random error.
This test ensures that no parts were confused during assembly and that the
pipette has been assembled correctly.
7
Maintenance
55
Page 56

7
Eppendorf Xplorer® (plus) — Operating manual
7.4.2 5mL and 10mL single-channel
The piston must be in its basic position before separating the lower and upper part. Press the
rocker down to move the piston to its basic position.
4
30°
Maintenance
1 2
1
1. : Unscrew the ejector sleeve.
2
2. : Keep the ejector pressed and turn the lower part to the left or right by approximately 30°.
3
Pull the lower part down to cancel the magnetic coupling of the lower part.
The lower part is separated from the upper part.
3 4
3. : Open the lower part: fit the pipette key (included in the delivery package) onto the lower
part. Hold the cylinder and unscrew it from the lower part.
The cylinder with the tip cone is separated from the upper part of the lower part. The upper
part of the lower part and the piston cannot be disassembled any further.
See the next figure.
The lower part consists of the following:
1
1 Upper part of the lower part
2 Piston (with seal)
Piston rod with magnet (covered here by 1 "Upper part of the lower
part")
3 Cylinder and tip cone
2
56
3
The assembly is performed in reverse order. Make sure that the magnet on the piston in the lower
part is coupled with the magnet on the spindle in the upper part. After the assembly:
Carry out a gravimetric test of the systematic and random error.
This test ensures that no parts were confused during assembly and that the pipette has been
assembled correctly.
For replacing an ejector sleeve, the 5mL and 10mL sizes are delivered with an ejector sleeve
Hint!
and ejector carrier. The lower part must be removed in order to install a new ejector carrier.
Page 57

1
2
3
1
2
3
4
5
Eppendorf Xplorer® (plus) — Operating manual
7.4.3 Multi-channel
Loosen and open the 10μL, 100μL and 300μL multi-channel lower part
1 2
1. and : Slide the lever on the lower part to the left or right. Pull the lower part down to cancel
the magnetic coupling of the lower part to the upper part.
This separates the lower part from the upper part so that it can be removed.
2. Put down the lower part with the lever facing downwards.
3
3. : Slide the two latches (right and left at the side) down using a coin.
The lower part is still lying on the table with the lever facing downwards.
4. Remove the cover panel facing upwards with the integrated ejector rail.
Do not remove the ejector rail from the cover panel. The spring for the ejector rail may
accidentally come off and get lost in this step.
7
Maintenance
Removing and installing channels
Channels must only be removed and installed if the multi-channel lower part is separated from
the upper part! The channels in the lower parts consist of piston, cylinder and spring. The
channels for 100 L and 300 L are equipped with an O-ring at the tip cone (see Replacing
O-rings on p. 52).
1 2
1. and : Position a pipette tip under the piston and carefully take the piston off the upper rail.
2. Carefully pull the piston out in an upward direction. Do not bend the piston.
3. Hold the tip cone at the lower end and push it upwards slightly .
3
This compresses the spring.
4
4. : Lift the tip cone slightly and release it from the lower rail.
5
5. : Relax the spring by letting the tip cone slide back again above the lower rail.
6. Remove the tip cone, along with the cylinder and spring, from the upper rail.
Before installation, slide the piston into the cylinder. Install the channels in reverse order.
57
Page 58

7
Eppendorf Xplorer® (plus) — Operating manual
Assembling the 10 - 300 μL multi-channel pipette
1. Fit the cover plate with the integrated ejector.
2. Push the latches upwards.
3. To mount, push the lower part into the upper part until it audibly engages.
Make sure that the magnet on the piston actuator in the lower part is coupled with the magnet
on the spindle in the upper part (see p. 59).
4. Carry out a gravimetric test of the systematic and random error (see p. 63).
This test ensures that no parts were confused during assembly and that the pipette has been
assembled correctly.
Loosening and opening the 1200μL multi-channel
The method of loosening the 1200L lower part matches that of loosening the 5mL or 10mL
lower parts.
1. The piston must be in its basic position before loosening the lower part. Press the rocker
down to move the piston into its basic position.
2. With the ejector pressed down, turn the lower part by approximately 30° and pull down to
cancel the magnetic coupling. This releases the lower part from the upper part.
Maintenance
3. View the detached lower part from above. For this, slide the housing case down. Note the
exact position of the red marked parts. The red marked stops on the housing case and the
red marked teeth on the inner part are adjacent. If the stops and teeth are on top of each
other after assembly, the housing case has been attached incorrectly.
58
Page 59

Eppendorf Xplorer® (plus) — Operating manual
Removing and installing 1200μL channels
1 Housing case
2 Piston actuator
3 Inner part
4 Piston rod in the guiding rail of the piston
1
2
3
4
actuator
5 Channel, consisting of a piston, a cylinder and a
tip cone
6 Fixing strip
7 Base plate
8 Unlocking tool for 1200 L lower part
7
Maintenance
5
6
7
8
Only disassemble the channels when the upper part is detached from the lower part.
1. Press the unlocking tool as far as it will go into the base plate.
The base plate can now be detached by pulling gently at the side - at the side with the
unlocking tool inserted. This loosens the base plate on the other side. Remove the base plate.
2. Take the inner part out of the housing case.
3. Loosen the fixing strip from the inner part. To do this, push the fixing strip away from the inner
part in the area near the three fixing strip catches on the inner part.
4. Have a close look at the channel arrangement in the inner part. Four channels are accessible
from each side. The tip cone of the channels is eccentric to the cylinder. The channels on the
opposite side are therefore positioned "mirror-inverted". Ensure that the channels are inserted
so that they are aligned in the center again during subsequent assembly.
5. Completely press down the guiding rail for the piston rods. Press the piston rod lightly out of
the guiding rail and remove the channels.
59
Page 60

Eppendorf Xplorer® (plus) — Operating manual
6. Before installation, slide the piston into the cylinder. Install the channels in reverse order in
accordance with the previously mentioned instructions. After installing the channels, carefully
push the guiding rail with the piston rods upwards to ensure that the magnetic coupling of the
lower and upper part can be safely reestablished.
7. Insert the reassembled lower part into the upper part. The lower part automatically snaps into
the upper part on insertion. Make sure that the magnet on the piston actuator in the lower part
is coupled with the magnet on the spindle in the upper part.
8. Carry out a gravimetric test of the systematic and random error (see p. 63).
This test ensures that no parts were confused during assembly and that the pipette has been
assembled correctly.
7
7.5 Maintenance
Maintenance
We recommend that you have all maintenance and servicing carried out by Eppendorf AG or
Eppendorf service partners. No warranty is provided for any damage due to misuse or if the
device has been opened by unauthorized persons.
60
Page 61

Eppendorf Xplorer® (plus) — Operating manual
8 General information on adjustment
8 General information on adjustment
Incorrect dispensing volume with special liquids and from temperature differences.
Solutions which differ greatly from water in terms of their physical data, or temperature
NOTICE!
Hint!
differences between the pipette, pipette tip and liquid, can result in incorrect dispensing volumes.
Avoid temperature differences between pipette, pipette tip and liquid.
Check the dispensing volume and make sure that you can affirm all the questions listed in the
general information.
The random and systematic errors determined before delivery can be found in the enclosed
Eppendorf Certificate. If the factory settings are superseded by a different adjustment, the
Eppendorf Certificate is no longer valid. If you reset the adjustment to the factory settings, the
random and systematic errors determined before delivery and the enclosed Eppendorf
Certificate are once again valid.
The Xplorer pipette was calibrated before delivery and tested with double distilled water
according to ISO 8655.
Changing the adjustment of the Xplorer pipette is sometimes recommended for solutions with a
density, viscosity, surface tension and/or vapor pressure that vary greatly from that of water If the
density of an aqueous solution changes by approximately ±10%, e.g., due to the salt
concentration, the volume changes by approximately ±0.2%. This statement does not apply if
other relevant properties of the liquid also change.
If the pipette is used at extremely high altitudes, it must be calibrated to the ambient air pressure.
At 1000m above sea level, the volume error of a 100L pipette is about –0.3%.
Changing the adjustment can improve the dispensing accuracy (systematic error) when using
tips that have a very different geometry than standard tips.
You can cancel a modified adjustment using simple steps.
Changes to the adjustment do not affect the precision (random error) of the dispensing. The
precision (random error) can be improved by replacing worn parts. Furthermore, handling has a
strong influence on the precision (random error).
Before the adjustment is changed, the existing adjustment must be checked in the factory
settings using distilled water.
The actual volume can be checked by weighing:
8
General information on adjustment
The density of distilled water is Approx. 0.9982mg/L at 20°C and 0.9965mg/L at 27°C.
If the set volume corresponds to the actual volume, no correction is necessary.
If there is a difference between the actual volume and the set volume of distilled water, please
check the following:
• Is there any liquid dripping from the tip?
• Is the pipette tip fitted leak-proof?
Adequate leak tightness is ensured when no drop is formed at the pipette tip after aspiration of
Hint!
the nominal volume with distilled water and a waiting time of approx. 15s. Hold the pipette
vertically, without touching the pipette tip. Prewet the pipette tip several times.
• Is the tip cone undamaged?
• Are the piston and the cylinder leak-proof?
61
Page 62

8
Eppendorf Xplorer® (plus) — Operating manual
• Does the temperature of the pipetted liquid correspond to:
– The temperature of the device?
– The ambient air temperature?
• Is the weighing location free from drafts?
• Does the work method and pipetting speed permit complete aspiration and dispensing of the
liquid?
• Has the correct numerical value for "Density liquids at weighing temperature" been used for
the calculation of the actual volume?
• Is the set volume correct?
• For very small volumes (<10L): is the fine balance sufficiently sensitive (balance resolution:
0.001mg)?
• Were original epT.I.P.S pipette tips used for testing?
The pipette tip which must be used as the test tip for checking technical data is listed in the
Hint!
"Technical data" chapter in the operating manual.
No adjustment changes are allowed unless you can answer all the questions with "yes".
In all other cases, the problems associated with the questions answered with "no" must be
eliminated. If the problem is remedied by exchanging a complete lower part or other parts that
have an effect on the volume, proper assembly must be verified by carrying out a gravimetric test.
The systematic and random errors which must be met are listed in the technical data.
If you would like to conduct a 1-3point adjustment for a liquid other than water on the Xplorer, the
items listed above should also be precisely observed when determining the balance results. In
particular, please note that the density of the test liquid must be precisely determined at the test
temperature. The density is dependent on the temperature. The use of an incorrect density will
lead to an incorrect volume calculation.
The execution of the adjustment is described in the Adjustment document on the Xplorer CD.
CD
Furthermore, use the specifications in the Standard Operating Procedure for Pipettes document
on the Xplorer CD as the foundation for determining the weighing results and errors.
CD
General information on adjustment
62
Page 63

Eppendorf Xplorer® (plus) — Operating manual
9 Technical data
9 Technical data
9.1 Eppendorf Xplorer single-channel
Model
Increment
0.5- 10L
Increment:
0.01L
5- 100L
Increment:
0.1L
15- 300L
ement:
Incr
0.2L
50 - 1000L
Increment:
1L
0.25– 5mL
ement:
Incr
0.005mL
Test tip
epT.I.P.S. Color code
Volume range
Length
medium gray
0.1 - 20 L
40 mm
yellow
2 - 200L
53 mm
orange
15 - 300 L
55 mm
blue
50 - 1000L
71 mm
purple
0.1 –5 mL
120 mm
Testing
volume
Systematic error Random error
±%±μL±%±μL
1L ±2.5 ±0.025 ±1.8 ±0.018
5L ±1.5 ±0.075 ±0.8 ±0.04
10 L ±1.0 ±0.1 ±0.4 ±0.04
10 L ±2.0 ±0.2 ±1.0 ±0.1
50L ±1.0 ±0.5 ±0.3 ±0.15
100L ±0.8 ±0.8 ±0.2 ±0.2
30L ±2.5 ±0.75 ±0.7 ±0.21
150L ±1.0 ±1.5 ±0.3 ±0.45
300L ±0.6 ±1.8 ±0.2 ±0.6
100L ±3.0 ±3.0 ±0.6 ±0.6
500L ±1.0 ±5.0 ±0.2 ±1
1000L ±0.6 ±6.0 ±0.2 ±2
0.5mL ±3.0 ±15.0 ±0.6 ±3
2.5mL ±1.2 ±30.0 ±0.25 ±6.25
5mL ±0.6 ±30.0 ±0.15 ±7.5
Error limits EppendorfAG
Error
9
Technical data
0.5– 10mL
Increment:
0.01mL
Hint!
turquoise
1 –10 mL
165 mm
You can select a volume of up to 0.20mL for the 5mL Xplorer pipette. For the 0.2mL–0.5mL
volume range, handling has a strong influence on the achievable random errors.
1mL ±3.0 ±30.0 ±0.60 ±6.0
5mL ±0.8 ±40.0 ±0.20 ±10.0
10mL ±0.6 ±60.0 ±0.15 ±15.0
63
Page 64

Eppendorf Xplorer® (plus) — Operating manual
9.2 Eppendorf Xplorer multi-channel
The technical data applies to both the 8-channel and 12-channel pipettes.
9
Model
Increment
0.5- 10L
Increment:
0.01L
5- 100L
Increment:
0.1L
15- 300L
Increment:
0.2L
50- 1200L
Increment:
1L
Test tip
epT.I.P.S. Color code
Volume range
Length
medium gray
0.1- 20 L
40mm
yellow
2 - 200L
53mm
orange
15- 300L
55 mm
green
50- 1250L
76mm
Testing
volume
Systematic error Random error
±%±μL±%±μL
1L ±5.0 ±0.05 ±3.0 ±0.03
5L ±3.0 ±0.15 ±1.5 ±0.075
10 L ±2.0 ±0.2 ±0.8 ±0.08
10 L ±2.0 ±0.2 ±2.0 ±0.2
50L ±1.0 ±0.5 ±0.8 ±0.4
100L
30L ±2.5 ±0.75 ±1.0 ±0.3
150L ±1.0 ±1.5 ±0.5 ±0.75
300L ±0.6 ±1.8 ±0.25 ±0.75
120L ±6.0 ±7.2 ±0.9 ±1.08
600L±2.7 ±16.2 ±0.4 ±2.4
1200L
±0.8 ±0.8 ±0.25 ±0.25
±1.2 ±14.2 ±0.3 ±3.6
Error limits EppendorfAG
Error
Technical data
64
Page 65

Eppendorf Xplorer® (plus) — Operating manual
9.3 Test conditions
The errors specified apply only when the epT.I.P.S. pipette tips. Test conditions and test
evaluation in compliance with ISO 8655, Part 6. Test using a standardized fine balance with a
moisture trap.
• Check the volumes in the Pip mode; keep the rocker pressed during the blow-out (Blow)
• Set speed level: 5
• Number of determinations: 10
• Use of water in accordance with ISO 3696
• Test at 20°C-25°C±0.5°C
• Dispensing against the tube wall
Rechargeable battery
Type: Lithium polymer battery
Capacity: 750 mAh/3.7 V
Charging time: Approx. 3 hours
Number of dispensing
operations:
Weight: Approx.20g
Power supply
Type: Power supply for Xplorer, Multipette/Repeater stream/
Input voltage: 100V to 240V ±10% 50/60Hz
Output voltage: 5V, 1 A
Xplorer
Operating temperature: +5to+40°C
Air humidity during operation: 10to95% rel. humidity
Storage temperature: -5to+45°C
Air humidity during storage: 10to95% rel. humidity
Weight without rechargeable
battery, without pipette tip:
Approx. 1400 in the Pip mode with fully charged battery and
average dispensing speed with a single-channel version
1000L in continuous operation
Xstream with plug-in power plug adapters
100L single-channel approx.: 135g (0.30lb)
100L eight-channel approx.: 213g (0.47lb)
9
Technical data
65
Page 66

Eppendorf Xplorer® (plus) — Operating manual
9.4 Speed table for Xplorer single-channel
The following speed table applies to Xplorer pipettes starting with software version 2.01.00.
9
Speed
level
(Speed) Time [sec] Time [sec] Time [sec] Time [sec] Time [sec] Time [sec]
1 12.0 12.0 12.0 12.0 12.0 12.0
2 8.0 8.0 8.0 8.0 8.0 8.0
3 4.0 4.0 4.0 4.0 6.0 6.0
4 2.8 2.8 2.8 2.8 4.8 4.8
5 2.2 2.2 2.2 2.2 3.6 3.6
6 1.6 1.6 1.6 1.6 3.2 3.2
7 1.2 1.2 1.2 1.2 2.8 2.8
8 0.9 0.9 0.9 0.9 2.6 2.6
You can select a volume of up to 0.20mL for the 5mL Xplorer pipette. For the 0.2mL–0.5mL
Hint!
volume range, handling has a strong influence on the achievable random errors.
10 μL 100 μL 300 μl 1 000 μl 5 mL 10 mL
9.5 Speed table for Xplorer multi-channel
The following speed table applies to Xplorer pipettes starting with software version 2.01.00.
Speed level 10 μL 100 μL 300 μl 1 200 μL
Technical data
(Speed) Time [sec] Time [sec] Time [sec] Time [sec]
1 12.0 12.0 12.0 12.0
2 8.0 8.0 8.0 8.0
3 4.0 4.0 4.0 4.0
4 2.8 2.8 2.8 2.8
5 2.2 2.2 2.2 2.2
6 1.6 1.6 1.6 1.6
7 1.2 1.2 1.2 1.2
8 0.9 0.9 0.9 1.0
66
Page 67

Eppendorf Xplorer® (plus) — Operating manual
10 Ordering Information
10 Ordering Information
10
CD
The ordering information can be found on the CD for the Xplorer pipette.
Ordering Information
67
Page 68

Eppendorf Xplorer® (plus) — Operating manual
11 Transport, storage and disposal
11 Transport, storage and disposal
11.1 Decontamination before shipment
11
CAUTION!
Transport, storage and disposal
11.2 Storage
If you wish to return the pipette to Eppendorf AG or an Eppendorf AG service partner to be
checked or repaired, please note the following:
Use of a contaminated device may result in personal injuries and damage to the device.
Clean and decontaminate the Xplorer pipette before shipping or storage according to the
cleaning instructions.
Hazardous substances are:
• solutions presenting a hazard to health
• potentially infectious agents
• organic solvents and reagents
• radioactive substances
• proteins presenting a hazard to health
• DNA
1. Please note the information in the document "Decontamination certificate for product returns".
It is available in PDF format on our homepage
2. Enter the serial number of the Xplorer pipette in the decontamination certificate.
3. Enclose the fully-completed decontamination certificate for returned goods with the Xplorer
pipette.
www.eppendorf.com or on the enclosed CD.
NOTICE!
Damage to device due to inserted rechargeable battery during storage.
Remove the rechargeable battery from the Xplorer pipette if you do not intended to use the
Xplorer pipette for an extended period.
Air temperature Relative humidity Atmospheric
pressure
In transport packaging -25°C– 55°C 10%– 95%70kPa– 106kPa
Without transport
packaging
-5°C– 45°C 10%– 95%70kPa– 106kPa
68
Page 69

Eppendorf Xplorer® (plus) — Operating manual
11.3 Disposal
In case the product is to be disposed of, the relevant legal regulations are to be observed.
Information on the disposal of electrical and electronic devices in the European
Community:
Within the European Community, the disposal of electrical devices is regulated by national
regulations based on EU Directive 2002/96/EC pertaining to waste electrical and electronic
equipment (WEEE).
According to these regulations, any devices supplied after August 13, 2005, in the
business-to-business sphere, to which this product is assigned, may no longer be disposed of in
municipal or domestic waste. They are marked with the following symbol to indicate this:
As disposal regulations may differ from country to country within the EU,
please contact your supplier if necessary.
Risk of explosion and fire due to overheated accumulators and batteries.
Do not heat accumulators and batteries to over 80 °C and do not throw them into fires.
11
Transport, storage and disposal
WARNING!
Disposing of accumulators and batteries
Do not dispose of accumulators and batteries as household waste. Dispose
of accumulators and batteries according to the locally applicable legal
regulations.
69
Page 70

Eppendorf Xplorer® (plus) — Operating manual
Index
Index
Index
A
Adjustment.......................................................................61
1-point adjust..............................................................46
2-point adjust..............................................................46
3-point adjust..............................................................47
Altitude .......................................................................46
epTIPS long ...............................................................45
Ethanol 75%...............................................................45
Factory settings..........................................................45
Glycerol 50%..............................................................45
Assemble
O-ring .........................................................................53
Assembly
10L, 100L and 300L multi-channel lower part ...58
1200L multi-channel lower part ...............................59
5mL and 10mL single-channel lower part ................56
Single-channel lower part up to 1000L...................55
Auto dispensing ...............................................................27
C
Charging carousel............................................................18
Charging stand ................................................................18
Cleaning...........................................................................51
D
Diluting ............................................................................34
Disassemble
O-ring .........................................................................53
Disassembly
10L, 100L and 300L multi-channel lower part ...57
1200L multi-channel lower part ...............................58
5mL and 10mL single-channel lower part ................56
Single-channel lower part up to 1000L...................53
Disinfection ......................................................................51
Dispensing .......................................................................28
Display .............................................................................10
Disposal ...........................................................................69
E
Edit...................................................................................39
Edit mode.........................................................................22
Error limits
Multi-channel..............................................................64
Single-channel ...........................................................63
F
Features...........................................................................13
Fixed volume....................................................................42
Footer...............................................................................12
H
Header .............................................................................11
L
Locking clip .....................................................................54
Locking ring .....................................................................54
M
Main field .........................................................................11
Main illustration
Multi-channel.............................................................. 10
Single-channel .............................................................9
Maintenance .................................................................... 60
Manual pipetting ..............................................................32
Multiple aspiration (Aspirate) .......................................... 33
O
ON switch ..........................................................................9
Operating mode ...............................................................21
Auto dispensing..........................................................27
Diluting ......................................................................34
Dispensing .................................................................28
Manual pipetting......................................................... 32
Multiple aspiration (Aspirate)......................................33
Pipetting ..................................................................... 29
Pipetting and Mixing................................................... 31
Reverse pipetting ....................................................... 37
Sequential dispensing................................................36
Sequential pipetting ...................................................38
Option
Adjustment ................................................................. 45
Brightness .................................................................. 44
Counter ......................................................................44
Date and Time ...........................................................48
Ejector reset...............................................................44
General help ..............................................................42
History........................................................................44
Language ................................................................... 47
Personalization ..........................................................47
Pswrd. protection .......................................................47
Rocker setting ............................................................ 44
Service ....................................................................... 48
Service interval ..........................................................48
Sound level ................................................................44
Volume limit ...............................................................43
P
Parameter
set ..............................................................................22
Pipetting........................................................................... 29
Pipetting and Mixing ........................................................31
Power off..........................................................................19
Power on..........................................................................19
Power supply assembly...................................................16
Program...........................................................................39
R
rechargeable lithium-polymer battery
Charge .......................................................................17
70
Page 71

Eppendorf Xplorer® (plus) — Operating manual
Connect......................................................................16
Replace channel
10L up to 300L multi-channel lower part ..............57
1200L multi-channel lower part ..............................59
Reset................................................................................49
Reset key...........................................................................9
Reverse pipetting.......................................................30, 37
S
Selector wheel ...................................................................9
Sequential dispensing......................................................36
Sequential pipetting .........................................................38
Special .............................................................................33
Speed table
Multi-channel..............................................................66
Single-channel ...........................................................66
Spring mechanism ...........................................................54
Standard pipetting............................................................29
Status line ........................................................................11
Sterilization .....................................................................51
Storage ............................................................................68
U
USB port ............................................................................9
Using pipette tips .............................................................24
W
Warranty ..........................................................................13
Index
71
Page 72

Index
Eppendorf Xplorer® (plus) — Operating manual
72
Page 73

Page 74

In touch with life
Eppendorf AG · 22331 Hamburg · Germany · Tel: +49 40 53801-0 · Fax: +49 40 538 01-556 · E-mail: eppendorf@eppendorf.com
Eppendorf North America, Inc. · 102 Motor Parkway · Hauppauge, N.Y. 11788-5178 · USA
Tel: +1 516 334 7500 · Toll free phone: +1 800-645-3050 · Fax: +1 516 334 7506 · E-mail: info@eppendorf.com
Application Support Europe: Tel: +49 1803 666 789 (Preis je nach Tarif im Ausland; 9 ct/min aus dem dt. Festnetz; Mobilfunkhöchstpreis 42 ct/min)
Asia Pacific: Tel: +60 3 8023 6869 · E-mail: support_asiapacific@eppendorf.com
Your local distributor: www.eppendorf.com/worldwide
support@eppendorf.com
North America: Tel: +1 800 645 3050 · E-mail: techserv@eppendorf.com
 Loading...