

Page 1
Page 2

Page 3

Proteus operation manual
INTRODUCTION 3
Proteus System ....................................................................................................................... 6
CONNECTION INSTRUCTIONS 7
Basic Setup .............................................................................................................................. 7
Performance Setup ................................................................................................................ 8
Studio Setup ........................................................................................................................... 9
BASIC OPERATION 13
Selecting Presets ................................................................................................................... 14
Selecting MIDI Channels,Volume and Pan ..................................................................... 14
Multi-Timbral Operation .................................................................................................... 15
Master Menu Functions ...................................................................................................... 16
About the Proteus ................................................................................................................ 24
3
CONTENTS
PROGRAMMING BASICS 27
Modulation ........................................................................................................................... 28
Proteus Modulation Sources .............................................................................................. 29
Envelope Generators ........................................................................................................... 30
Low Frequency Oscillators ................................................................................................. 31
MidiPatch .............................................................................................................................. 32
Keyboard and Velocity Modulation ................................................................................. 33
Key Number ......................................................................................................................... 34
Velocity Curves .................................................................................................................... 34
Realtime Modulation .......................................................................................................... 35
MIDI Realtime Controls...................................................................................................... 36
Stereo Mix Outputs ............................................................................................................. 38
EDIT MENU 41
Enabling the Edit Menu ...................................................................................................... 41
Edit Menu Functions
Preset Name and Keyboard Character Charts ................................................................ 42
Mix Output ........................................................................................................................... 43
Primary Instrument ............................................................................................................. 43
Secondary Instrument ......................................................................................................... 43
Key Range ............................................................................................................................. 43
Primary Key Range ............................................................................................................. 44
Secondary Key Range ......................................................................................................... 45
Volume .................................................................................................................................. 45
Pan ......................................................................................................................................... 45
Coarse Tuning ...................................................................................................................... 46
Fine Tuning........................................................................................................................... 46
Chorus ................................................................................................................................... 46
Delay ...................................................................................................................................... 46
Solo Mode ............................................................................................................................. 47
Page 4

4
CONTENTS
Proteus operation manual
Sound Start ........................................................................................................................... 47
Reverse Sound ...................................................................................................................... 47
Alternate Envelope On/Off ............................................................................................... 48
Primary Alternate Envelope Parameters ......................................................................... 48
Secondary Alternate Envelope Parameters ..................................................................... 48
Crossfade Mode ................................................................................................................... 49
Crossfade Direction ............................................................................................................. 50
Crossfade Balance ................................................................................................................ 50
Crossfade Amount............................................................................................................... 51
Cross-Switch Point .............................................................................................................. 51
LFO - Shape and Amount................................................................................................... 51
LFO - Rate and Variation .................................................................................................... 52
Auxiliary Envelope.............................................................................................................. 53
Keyboard and Velocity Modulation Control ................................................................... 54
Realtime Modulation Control ............................................................................................ 55
Footswitch Control .............................................................................................................. 56
MIDI Controller Amount ................................................................................................... 56
Pressure Amount .................................................................................................................. 56
Pitch Bend Range ................................................................................................................. 57
Velocity Curve ..................................................................................................................... 57
Keyboard Center .................................................................................................................. 58
Keyboard Tuning ................................................................................................................. 58
Preset Links .......................................................................................................................... 59
Save Preset ............................................................................................................................ 60
PROGRAMMING PROTEUS 63
Linking Presets ..................................................................................................................... 63
Editing Presets ..................................................................................................................... 64
Proteus Synthesis ................................................................................................................. 66
Using Proteus with a Sequencer ........................................................................................ 68
Using the 32 Channels ........................................................................................................ 70
Using External Processing .................................................................................................. 71
Proteus Patch Sheet ............................................................................................................. 72
REFERENCE SECTION 73
Proteus/1 Factory Presets .................................................................................................. 74
Proteus/1 Instrument Listing ............................................................................................ 76
Proteus/1 Plus 2 Orchestral Presets ................................................................................. 86
Proteus/1 Plus 2 Orchestral Instrument Listing ............................................................. 88
Proteus/2 Factory Presets .................................................................................................. 92
Proteus/2 Instrument Listing ............................................................................................ 94
Proteus/3 Factory Presets ................................................................................................ 104
Proteus/3 Instrument Listing .......................................................................................... 106
LFO, Delay and Envelope Times ..................................................................................... 116
Technical Specifications .................................................................................................... 117
MIDI Specifications ........................................................................................................... 118
INDEX WARRANTY
Page 5

Proteus operation manual
Introduction
5
INTRODUCTION
Page 6

6
Proteus operation manual
Page 7
Proteus operation manual
Introduction
7
INTRODUCTION
POWER
What is
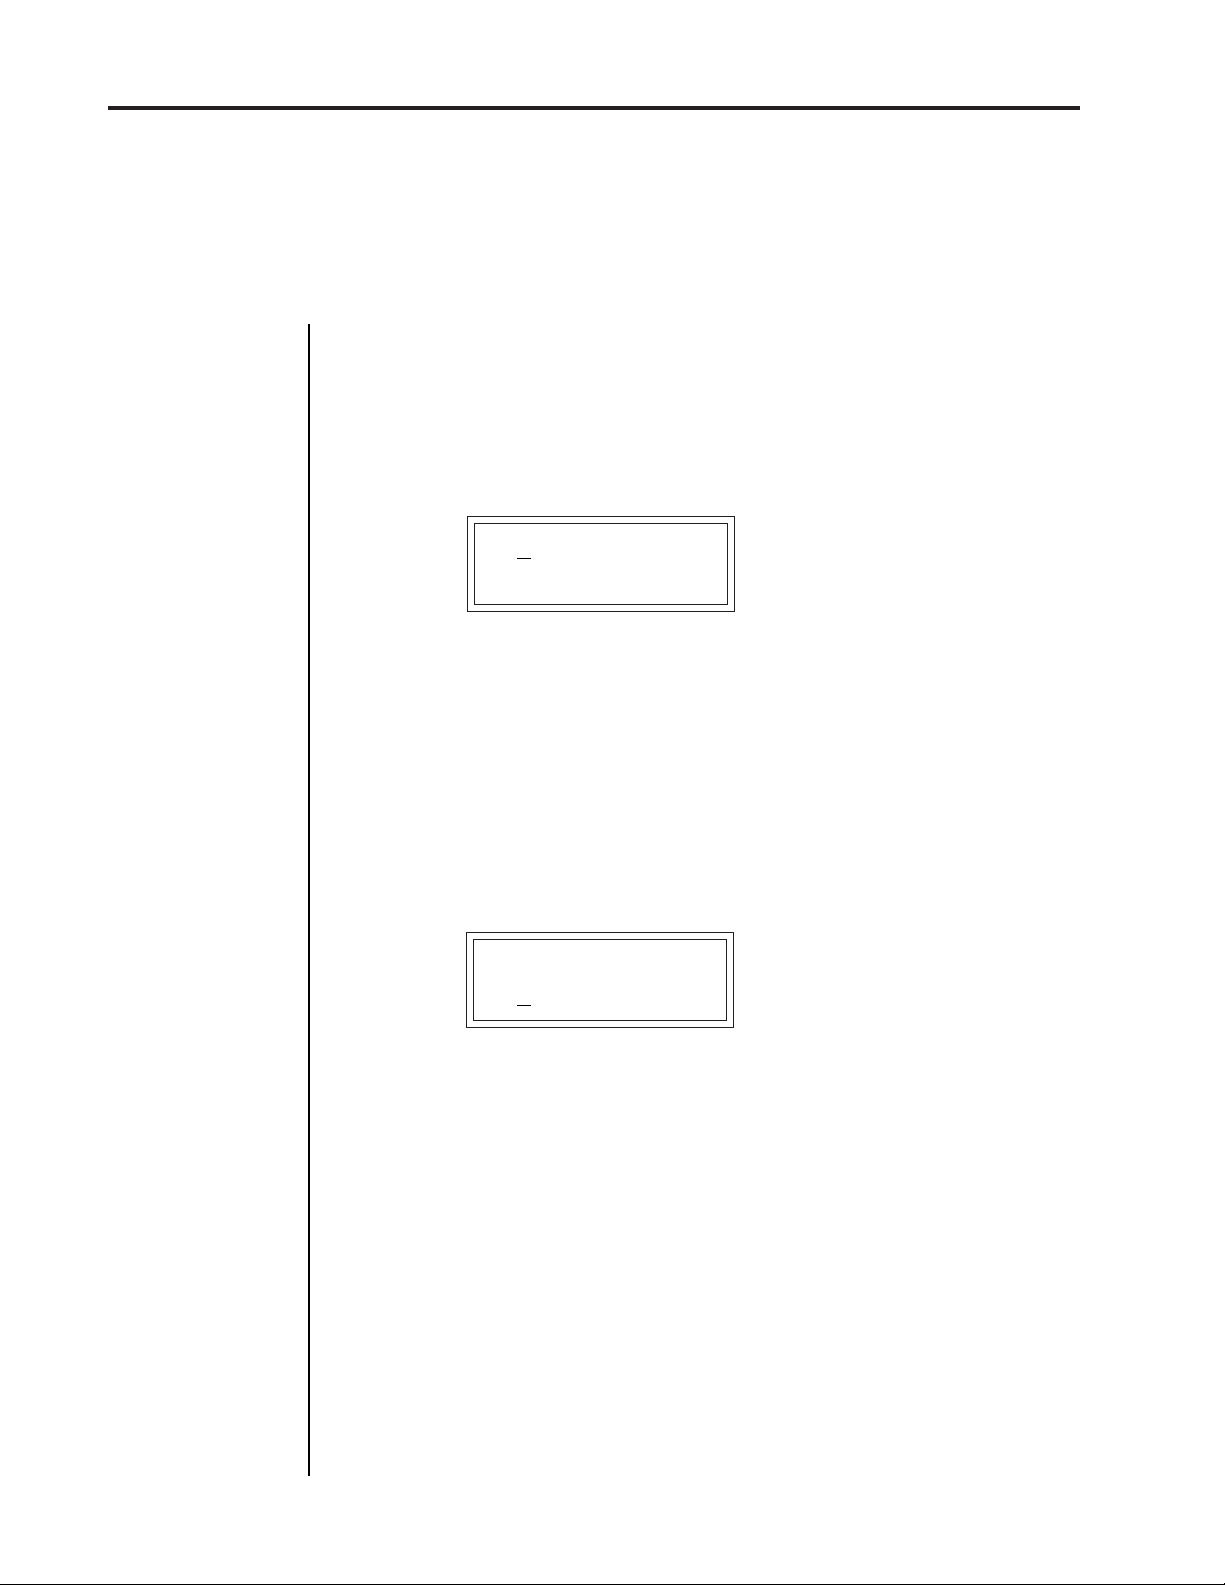
MASTER EDIT DATA VOLUME
C01 Vol127 Pan+0
000 Preset Name
PROTEUS?
CURSORENTER
Proteus is a musical instrument whose sounds are based on actual digital
recordings of "real" instruments. In this way the Proteus is very similar to
a sampling instrument. With the Proteus, we have done the sampling for
you and loaded it with some of the cleanest 16 bit sounds ever sampled.
Proteus begins with sound. Four megabytes (internally expandable to 8
megabytes) of the highest quality 16 bit samples selected from the
Emulator III sound library and stored in ROMs for instant access.
Everything you need to play and compose in a wide range of contemporary styles. You simply plug in and play.
But this is only the beginning. Proteus gives you the ability to literally
take these sounds apart and reassemble them into an almost limitless
number of entirely new sounds, combining parts of one sound with
another or with any of a selection of digital waveforms also stored on
ROM. For example, the attack of a flute can be faded out as a vibe tone is
faded in, giving you a completely new sound! The monophonic and true
stereo 16 bit samples are arranged into 192 preset locations, 64 of which
are user-programmable.
Proteus also features 32 voice polyphony allowing you to take full
advantage of its layering capabilities (up to 8 sounds on each key) and its
ability to respond multi-timbrally to all 16 MIDI channels makes it ideally
suited for multitrack sequencing and composing using a MIDI sequencer.
Other features include 3 stereo outputs for individually processing
sounds (also configurable as 6 polyphonic submixes with fully programmable panning), integral sends and returns to allow the addition of
external effects units without the need for a separate mixer, user definable alternate tuning, and of course, an extensive MIDI implementation.
Page 8
8
Proteus system
Proteus operation manual
THE
PROTEUS
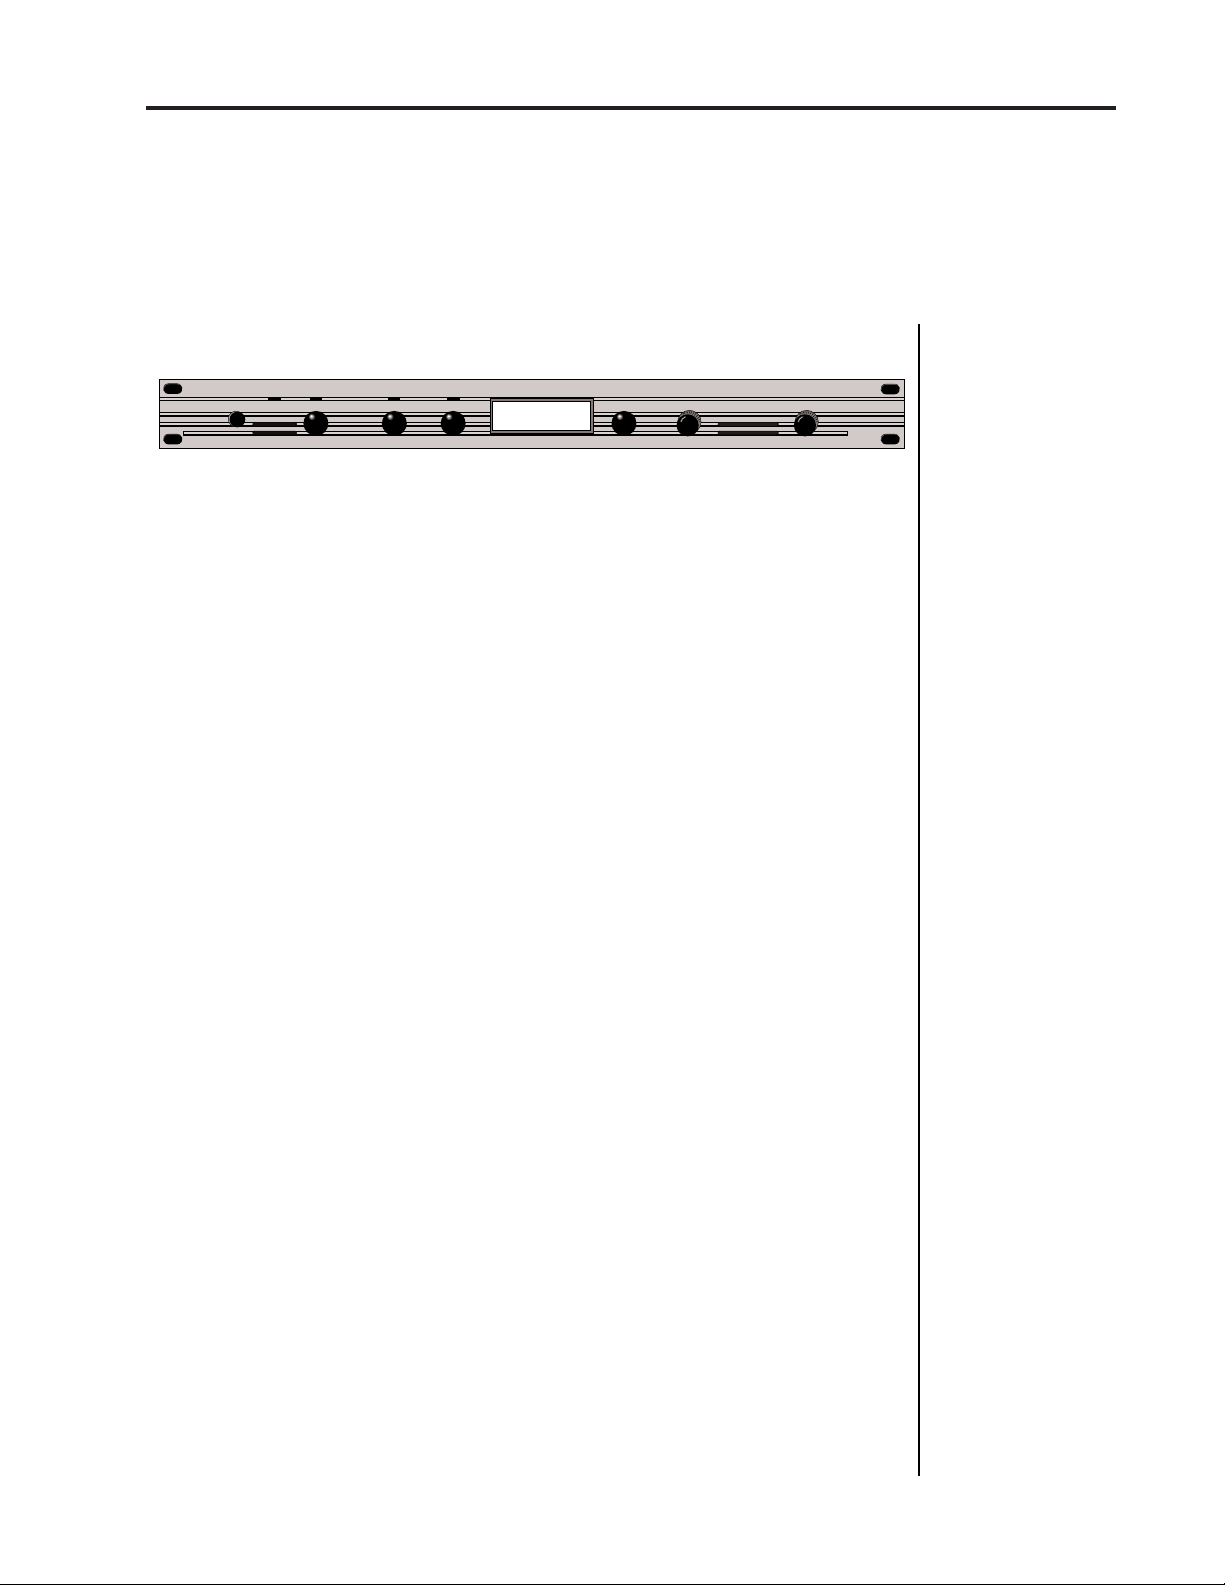
Proteus is organized as shown in the diagram below.
The Preset is a complete set of all program parameters for a complete
Proteus sound. There are 192 preset locations in the Proteus.
Presets 0-63 are unalterable factory presets, presets 64-127 are user
presets which can be changed, and presets 128-191 are unalterable
factory presets.
SYSTEM
INSTRUMENT
PRIMARY
PRESET
SECONDARY
INSTRUMENT
Each preset consists of one or more instruments. An instrument is a
complete set of samples or a digital waveform which covers the entire
keyboard range. An instrument can be assigned to each of the Primary and
Secondary layers of the preset.
The primary and secondary layers are essentially two complete sounds
stacked or placed adjacent to each other, and can be switched or
crossfaded together in various ways.
Up to four presets can be Linked in order to have more than one preset on
the keyboard at a time. The linked presets may overlap each other for
layered sounds or be adjacent to each other to create keyboard "splits".
PRESET
PRIMARY
SECONDARY
PRESET
LINK 1
PRIMARY
SECONDARY
PRESET
LINK 2
PRIMARY
SECONDARY
LINK 3
PRESET
PRIMARY
SECONDARY
Page 9
Proteus operation manual
Connection Instructions - Basic Setup
CONNECTION INSTRUCTIONS
9
MIDI Controller
(MIDI Keyboard, Sequencer, etc.)
MIDI Out
MIDI
IN OUT THRU
Male RCA plug
to
Male Phono plug
Aux. or
Tape In
SUB 2
To
Main Outs
Use the Left Main Output
OUTPUTS POWER
SUB 1
LLLR
RR
STEREOMONO
MAIN
Mixer
Amp
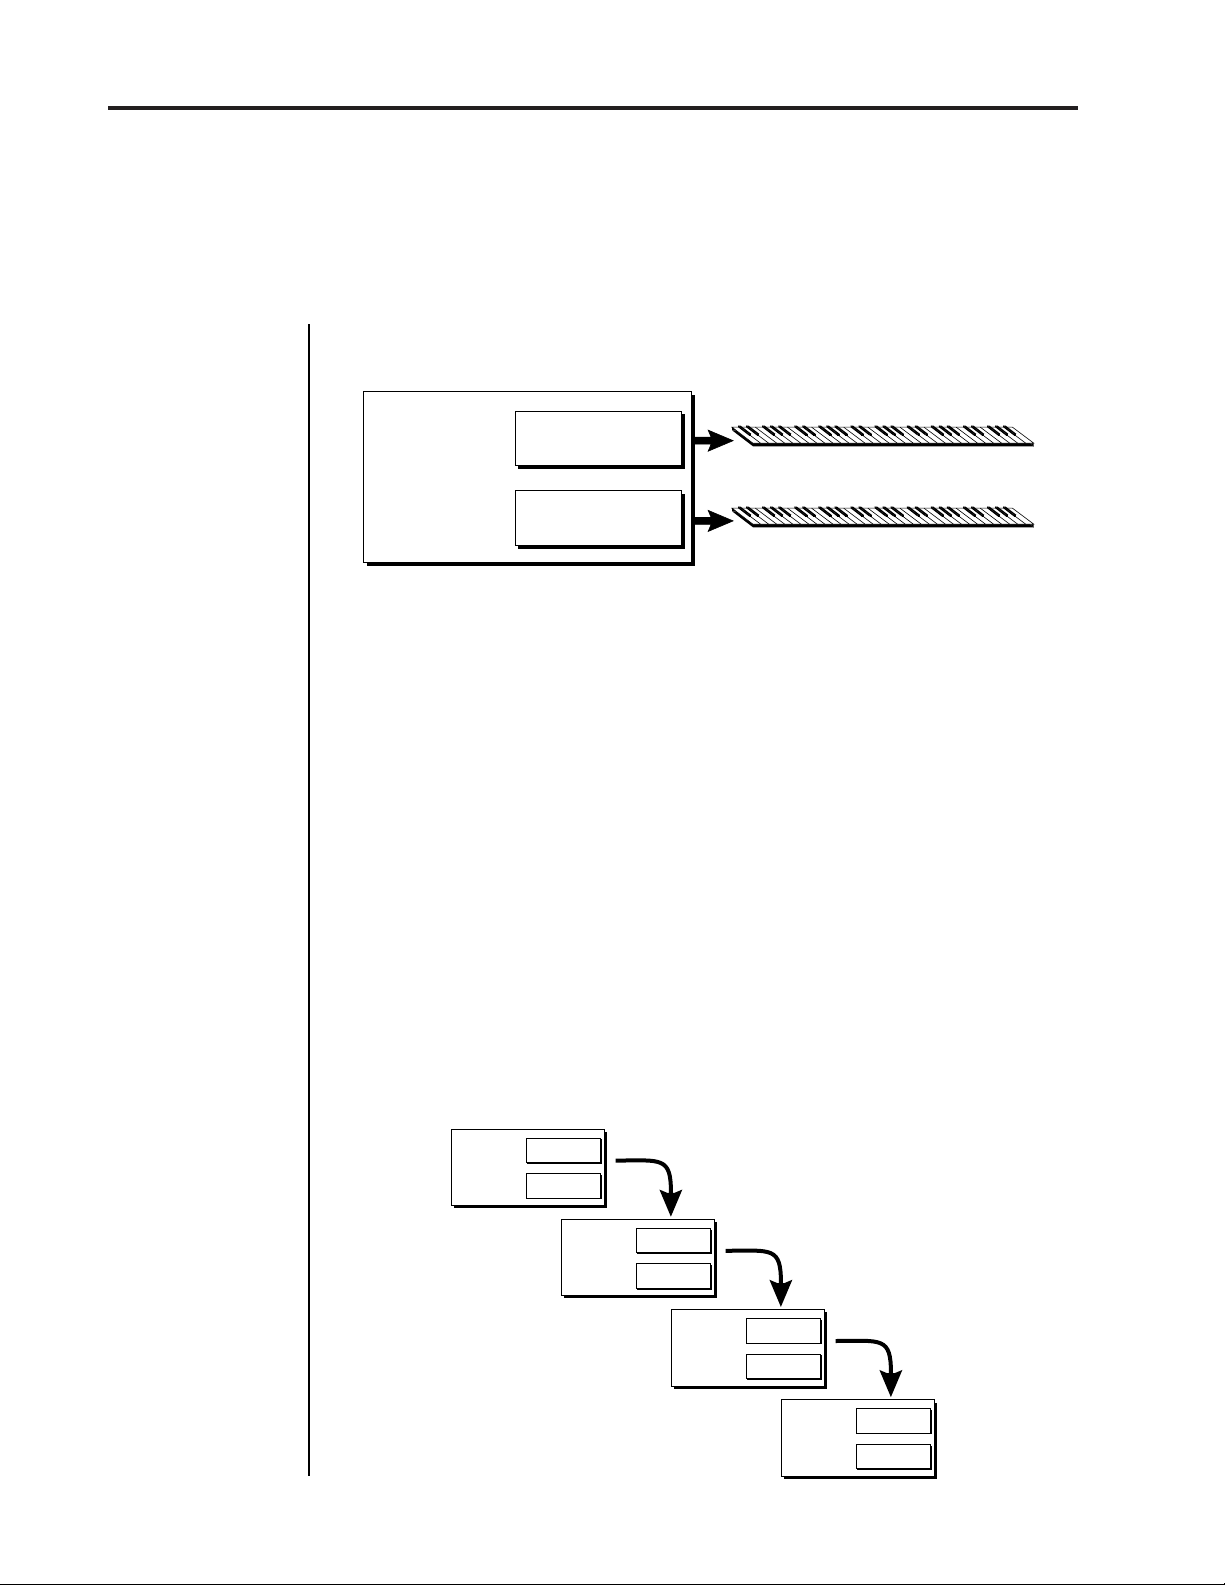
Setup #1 BASIC SETUP
for Stereophones
If Proteus does not
seem to be responding
correctly, make sure
that both Proteus and
your MIDI Controller
are set to the same
MIDI channel.
Speakers
Home Stereo
System
Home Studio
System
This diagram shows a typical equipment setup for the Proteus.
MIDI In
- Proteus is controlled by MIDI messages received at the MIDI In
connector. Connect the MIDI In of the Proteus to the MIDI Out connector
of a MIDI controller such as a MIDI keyboard, MIDI wind controller, or
MIDI guitar controller.
Outputs
- Proteus is a high quality, stereo audio device. In order to
reproduce its wide dynamic range and frequency response, use a high
quality amplification and speaker system such as a keyboard amplifier or
home stereo system. A stereo setup is highly desirable because of the
added realism of stereophonic sound. Headphones can be used if an
amplifier and speaker system is not available. Plug stereo headphones
into the Left Main output jack. The Right Main output jack serves as a
mono output when the left jack is not plugged in.
Page 10
10
Connection Instructions - Studio Setup
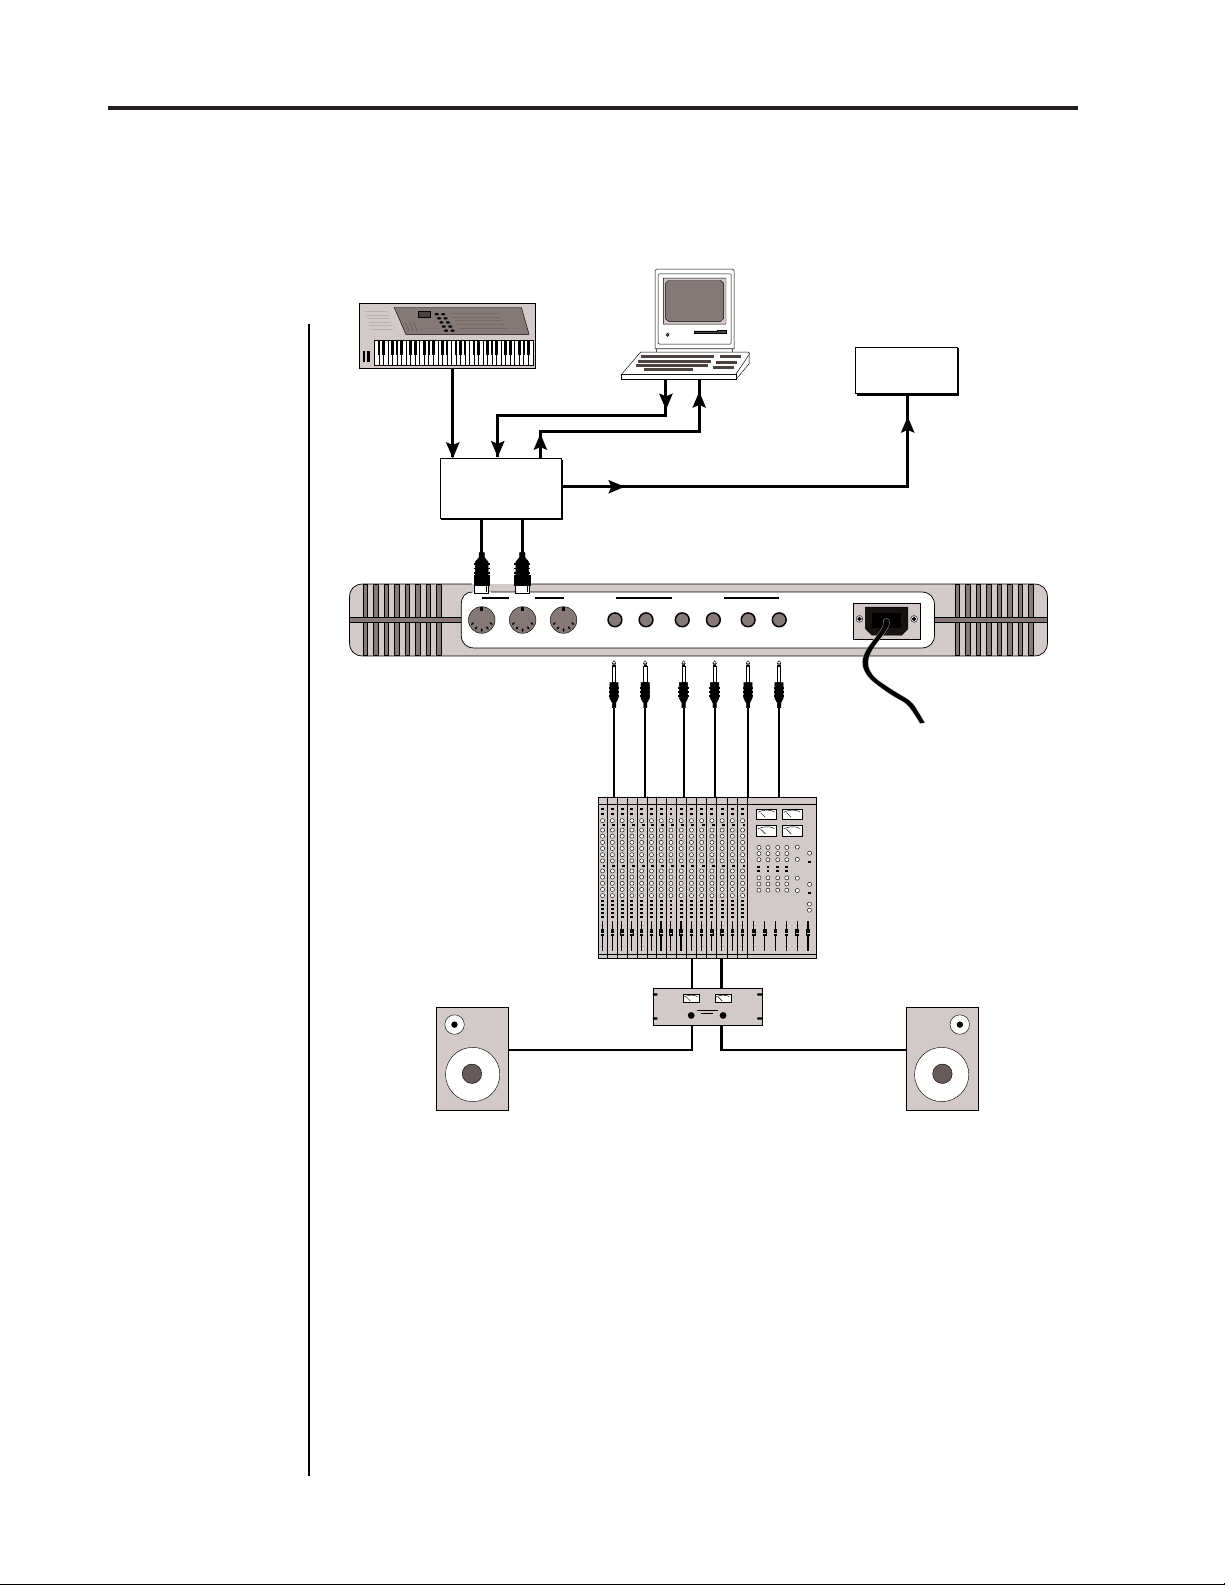
Setup #2 STUDIO SETUP
MIDI Controller
(MIDI Keyboard, Sequencer, etc.)
MIDI Out
Proteus operation manual
Computer
Additional
MIDI
MIDI Out
OutInIn
MIDI In
Devices
MIDI In
MIDI Switcher
Out In
MIDI
IN OUT THRU
Out
OUTPUTS POWER
SUB 2
SUB 1
LLLR
RR
Sub 2 Outputs
STEREOMONO
MAIN
Sub 1 Outputs
Main Outputs
MIDI In
- In this setup, Proteus is controlled by MIDI messages received
at the MIDI In connector which have been routed by a MIDI switcher. The
MIDI switcher allows any MIDI controller such as a MIDI keyboard,
MIDI wind controller, or a computer to be easily connected.
MIDI Out
- The MIDI Out jack is normally used to transmit program data
to a computer or other device.
Outputs
- Proteus has three sets of programmable stereo outputs; Main,
Sub 1, and Sub 2. Specific Proteus instruments can be routed to one of
these stereo pairs in order to be further processed or mixed separately.
Page 11
Proteus operation manual
MIDI Controller
(MIDI Keyboard, Sequencer, etc.)
MIDI Out
Connection Instructions- Performance Setup
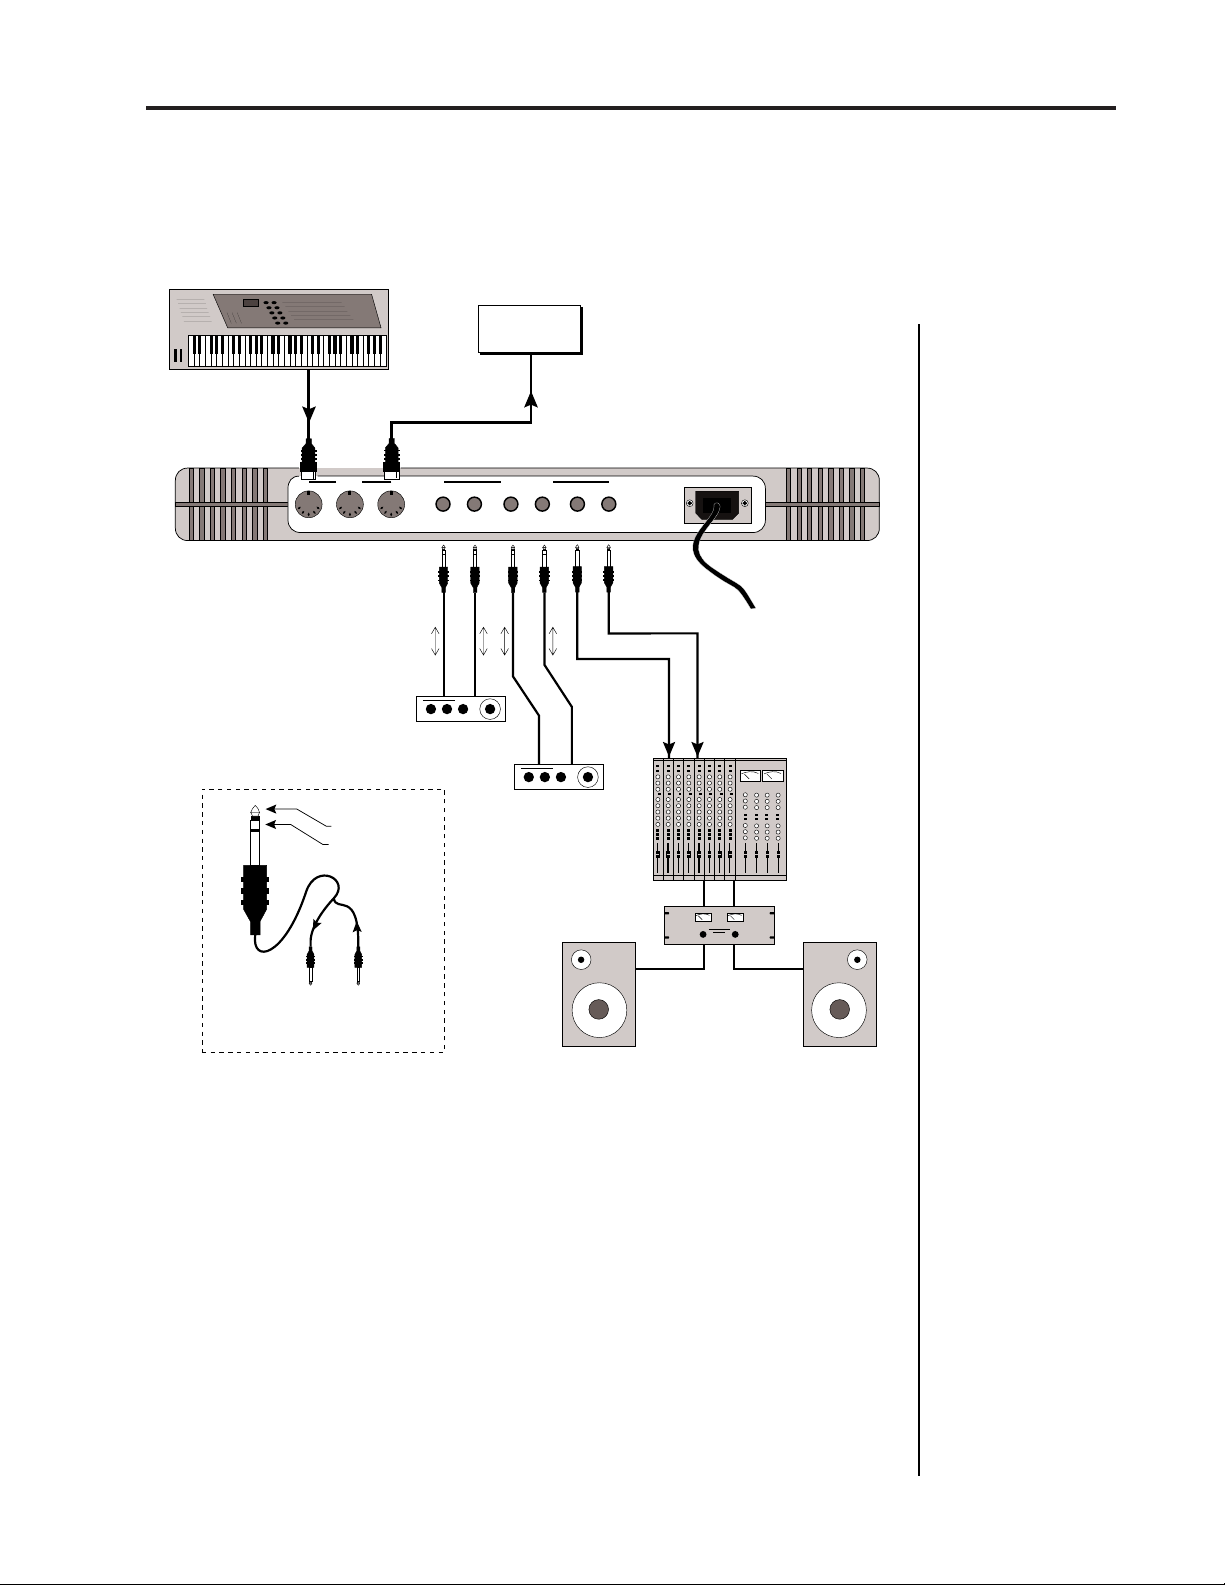
Setup #3 PERFORMANCE SETUP
Additional
MIDI
Devices
MIDI In
11
MIDI
IN OUT THRU
Sub Output
Return
(To Main Output)
Tip Ring
To Effect From Effect
SEND/RETURN CABLES
SUB 2
LLLR
Send/Return
Effect Device
OUTPUTS POWER
SUB 1
RR
Effect Device
STEREOMONO
MAIN
Send/Return
Main Outputs
MIDI In
- Proteus is controlled by MIDI messages received at the MIDI In
connector. Connect the MIDI In of Proteus to the MIDI Out connector of
a MIDI controller such as a MIDI keyboard, MIDI wind controller, or
MIDI guitar controller.
MIDI Thru
- The MIDI Thru jack is used to connect additional MIDI
devices onto the MIDI chain. MIDI Thru transmits an exact copy of the
messages received at the MIDI In jack.
Outputs
- Each of the Sub 1 and Sub 2 output jacks on the Proteus are
stereo jacks. The tip of each jack (accessed when a standard phone plug is
inserted) connects to the left or right output of that group.
Page 12
12
Power Up!
Proteus operation manual
If a stereo plug is inserted, the Ring of the stereo plug serves as a signal
Return which sums into the Main outputs.
Therefore, the Sub 1 and Sub 2 jacks can serve as effect sends and returns
in order to further process selected instruments and then return them to
the main mix.
The diagram shows the Sub 1 and Sub 2 jacks being used as send/returns
in order to further process selected Proteus instruments without using
the effects bus on the mixing board. In a pinch, the effect returns could
also be used to sum additional instruments into the main outputs of the
Proteus.
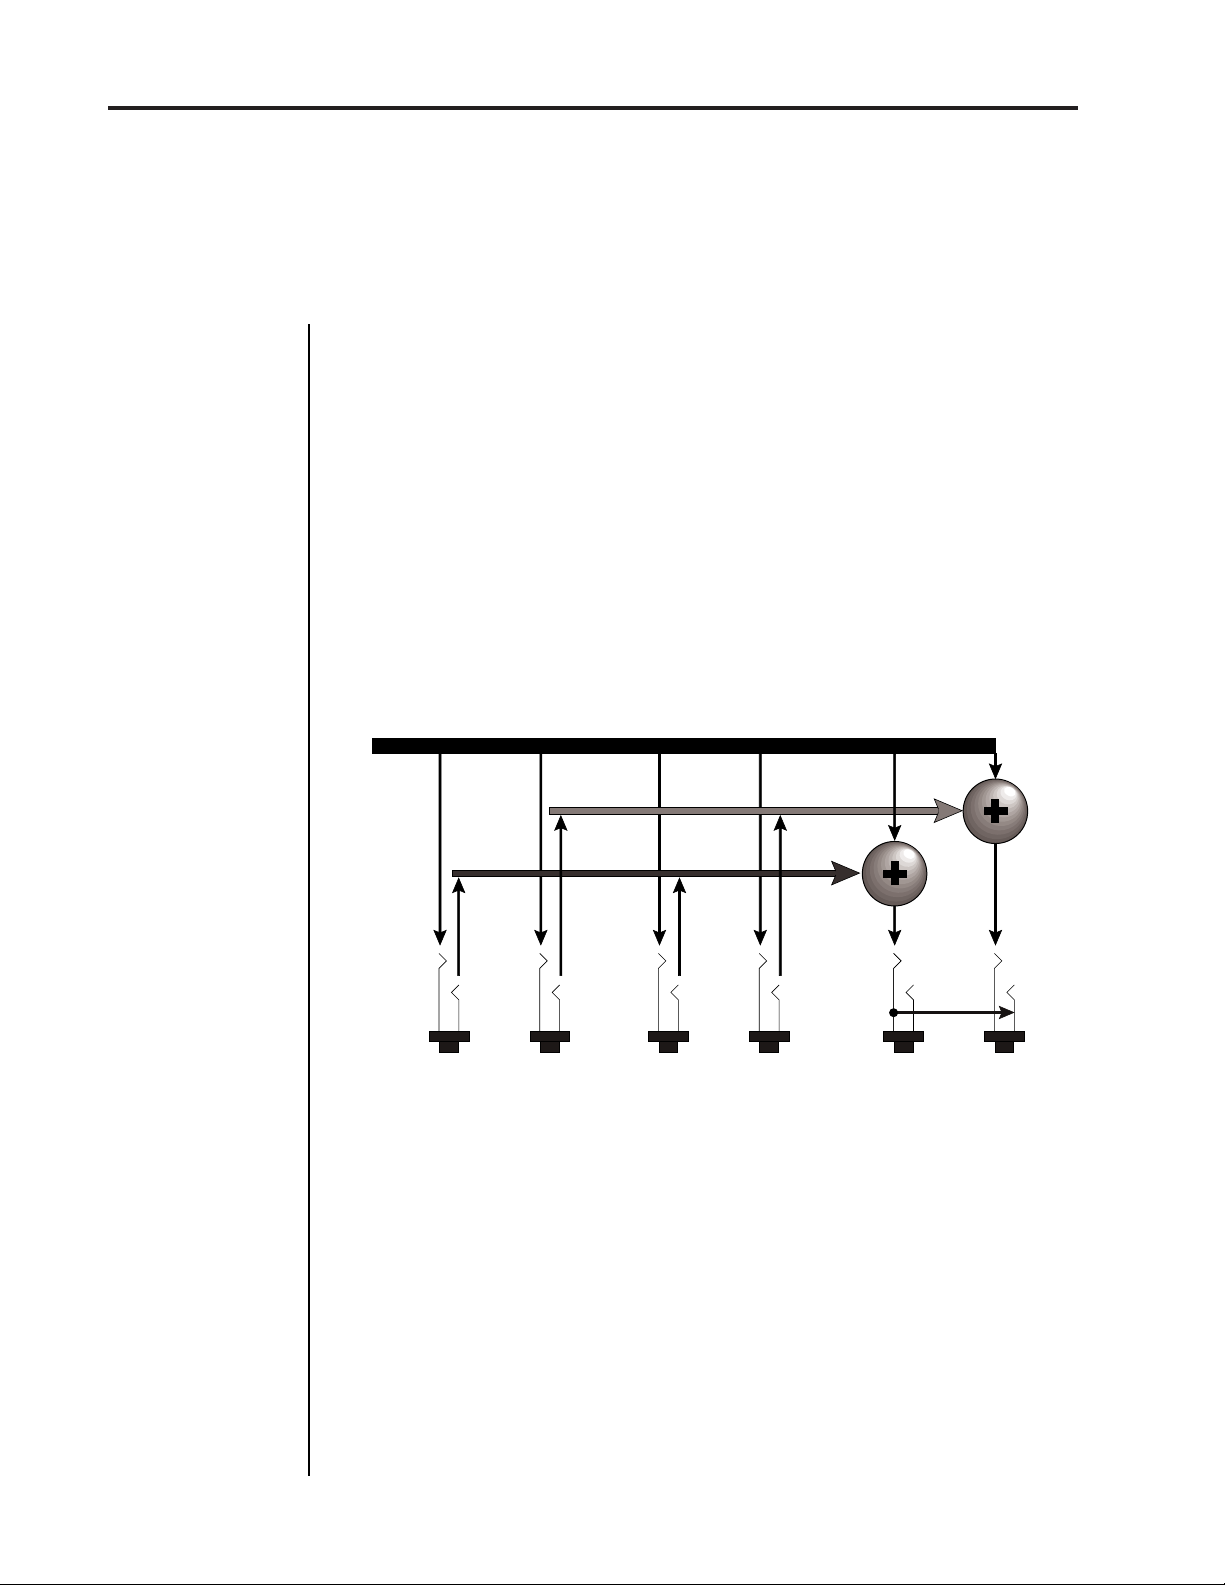
Proteus Output Section
L Bus
R Bus
Tip
RL RL RL
The Sub 1 and Sub 2 jacks can be used as effect returns to the Main Outputs.
Tip
Ring
SUB 2 SUB 1 MAIN
Ring
Tip
Ring
Tip
Tip Tip
Ring
Ring
POWER UP!
The power switch is located on the left side of the front panel. The
Proteus and its MIDI controller may be turned on in any order. When
power is applied, the liquid crystal display will light, indicating that
the Proteus is operating.
You may have noticed that there is no 110/220 Volt power selector
switch on the Proteus.
Proteus automatically switches itself for 110 or 220 Volt operation.
Page 13

Proteus operation manual
Basic Operation
11
BASIC OPERATION
Page 14

12
Proteus operation manual
Page 15
Proteus operation manual
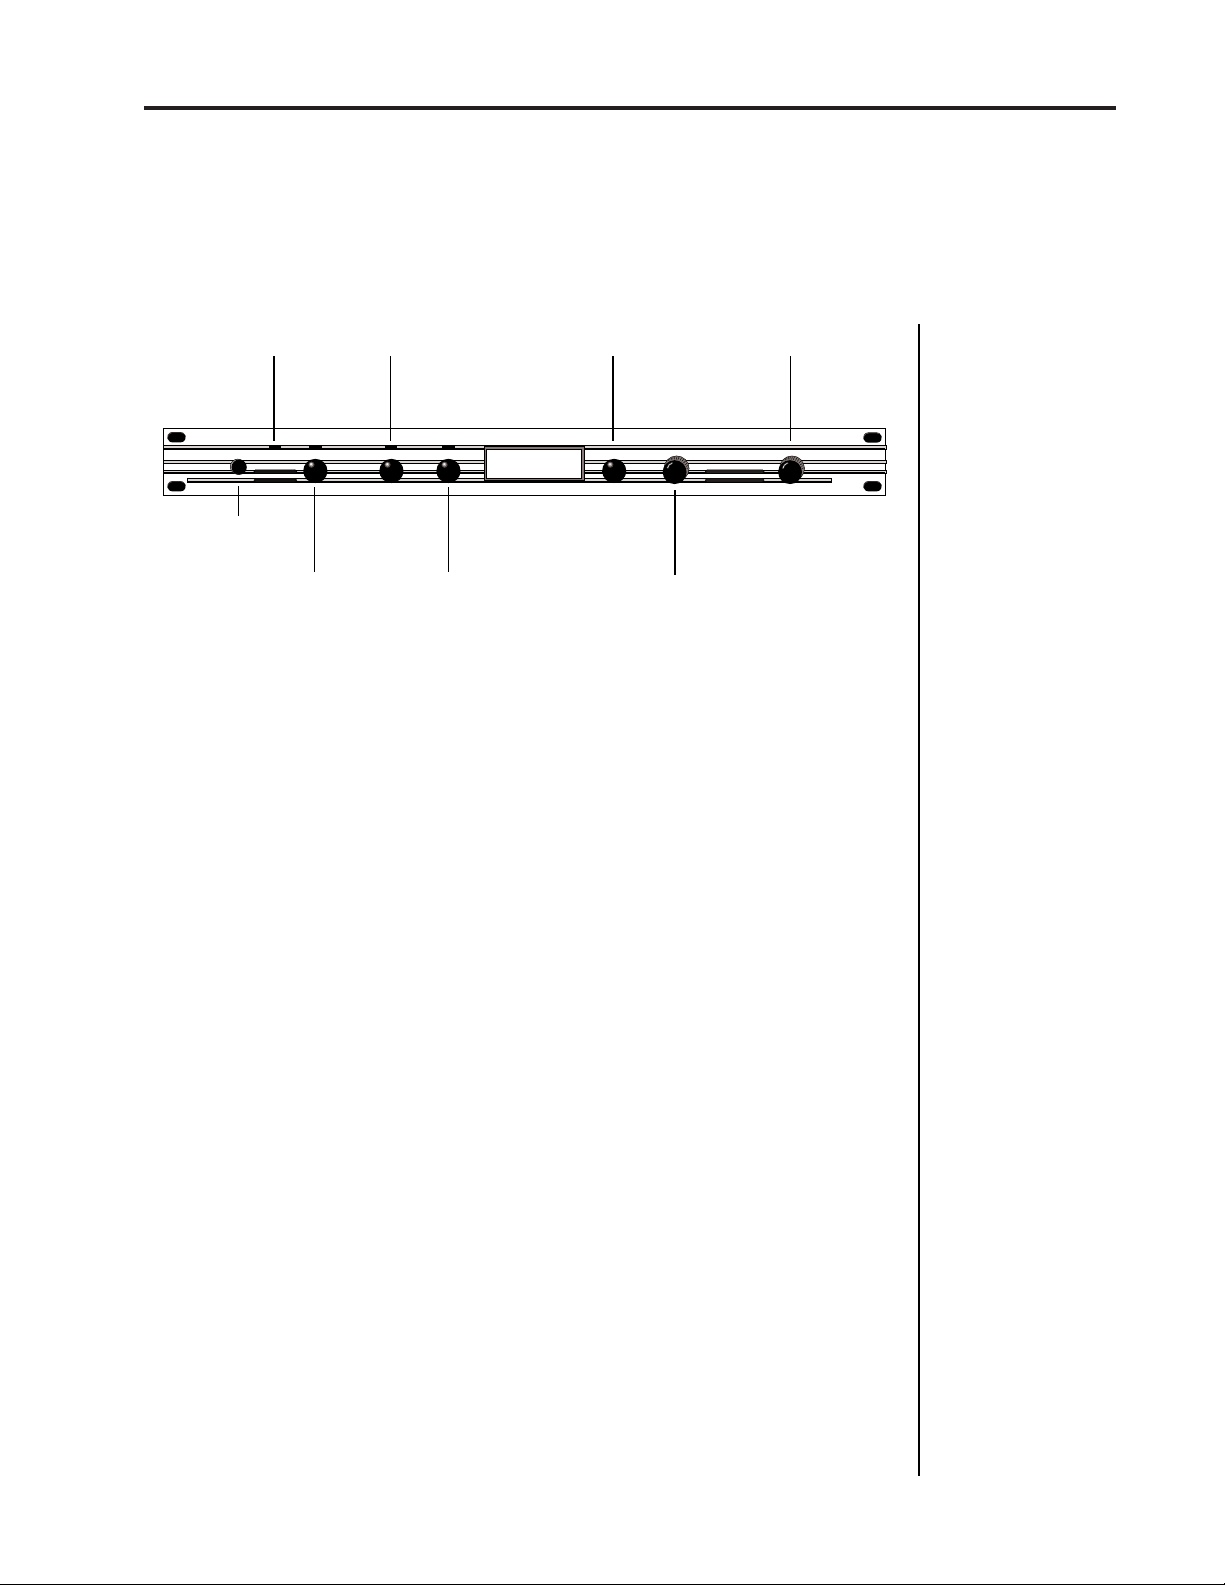
MAIN CONTROLS
Main Controls
13
BASIC OPERATION
MIDI
ACTIVITY
POWER
POWER
SWITCH
MASTER MENU
SELECT
■
Power Switch
■
MIDI Activity LED
■
Master Menu Select Button
EDIT MENU
SELECT
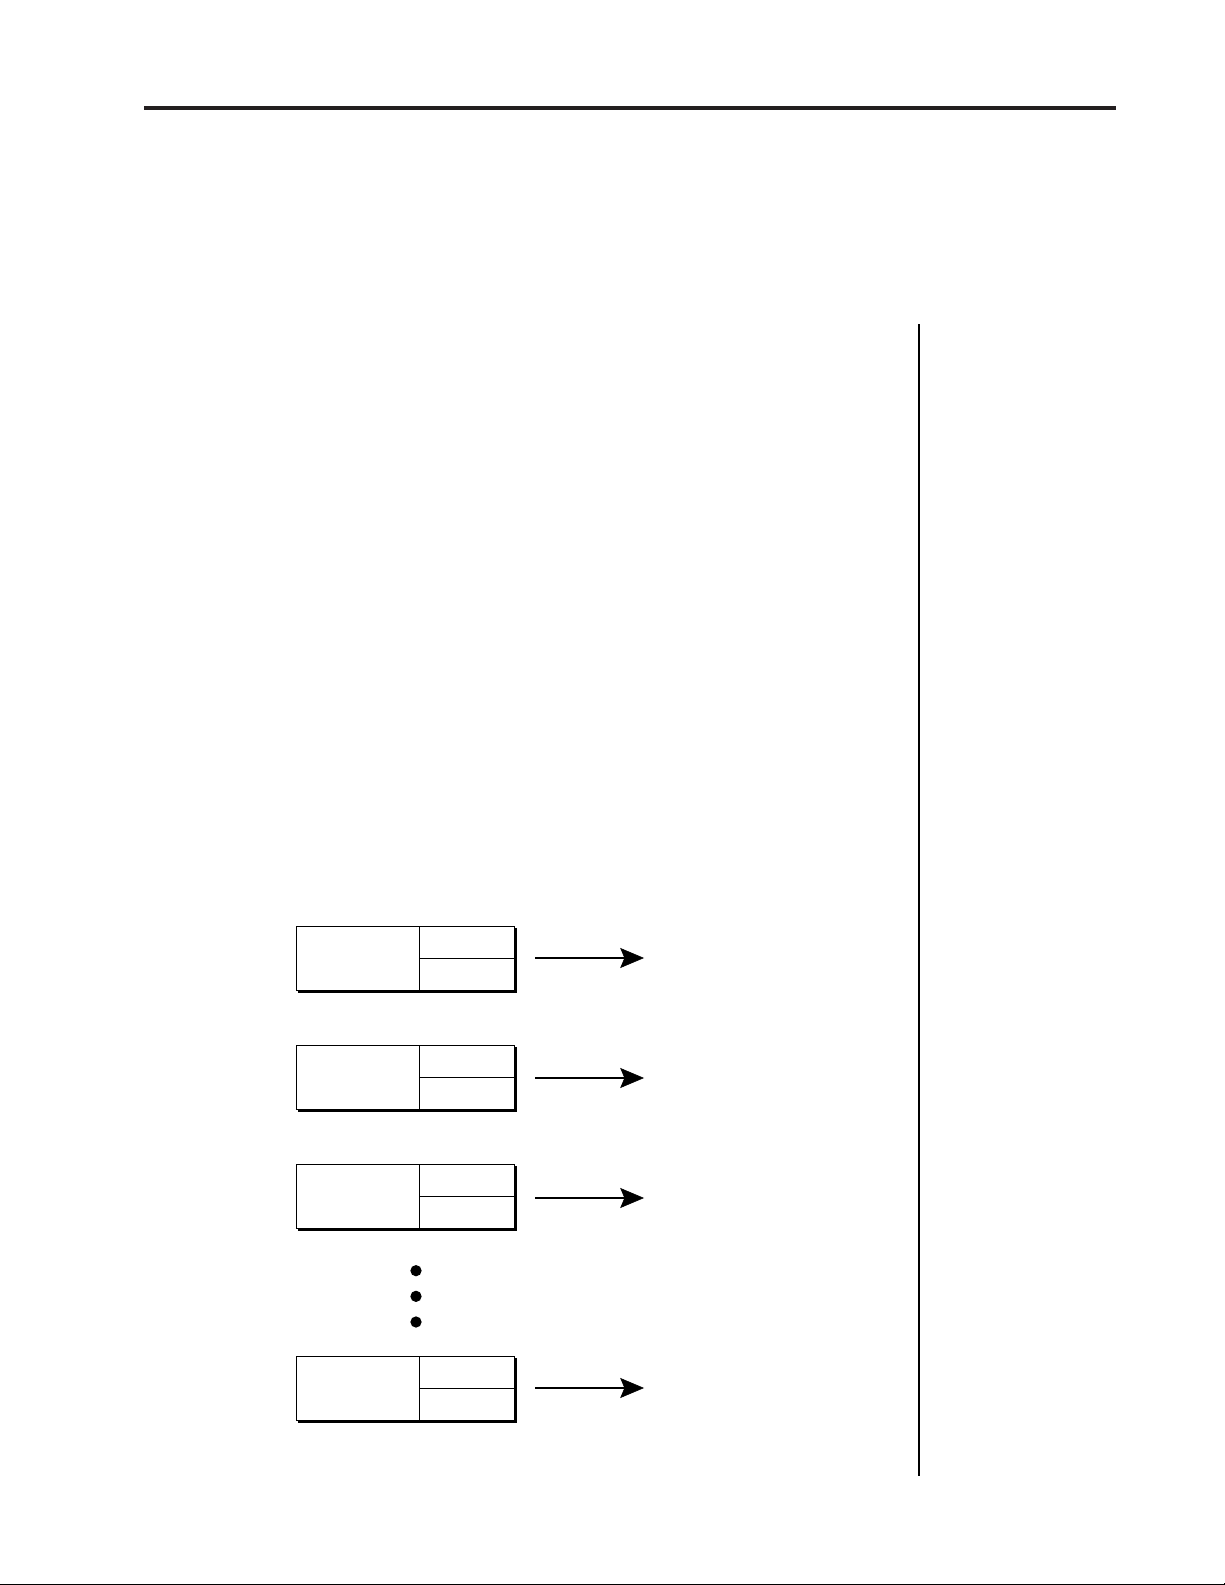
MASTER EDIT DATA VOLUME
- Switches AC power to the Proteus ON and OFF.
- Indicates that MIDI data is being received.
C01 Vol127 Pan+0
000 Preset Name
DISPLAY
ENTER
BUTTON
- The Master menu contains parameters
CURSOR
CONTROL
CURSORENTER
DATA ENTRY
CONTROL
VOLUME
CONTROL
that affect the entire machine, not just certain presets. An illuminated LED
above the button indicates that you are in the Master menu.
■
Edit Menu Select Button
- The Edit menu is used when you want to
change parameters of a preset. An illuminated LED above the button
indicates that you are in the Edit menu.
■
Enter Button
- The Enter button is used to initiate a particular operation
within the Proteus. The red LED above the enter button flashes to let you
know that the Proteus is waiting for your response.
■
Cursor Control
- This button moves the cursor to the next parameter
on the display. (The cursor is a little flashing line underneath one of the
parameters in the display.) Press the cursor control repeatedly until the
cursor is underneath the desired parameter. The cursor can also be moved
bidirectionally using the data entry control while the cursor select button
is being held down (i.e. Press and hold the cursor button and turn the data
entry knob).
■
Data Entry Control
- The data entry control is a stepped, variable
control which is used to change parameter values. The control increments
or decrements the current value one unit with each click.
■
Volume Control
- This is the master volume control for all audio
outputs. Note: For maximum dynamic range, set this control at full level.
Page 16
14
Preset Selection
BASIC OPERATION
MIDI CHANNEL SELECTION
Press the cursor key repeatedly until the cursor is underneath the channel
number. (The cursor is a little flashing line underneath one of the
parameters in the display.) Rotate the data entry control to select MIDI
channel 01-16. As the channel is changed, the display will change to show
■
If your Proteus is not
responding properly or
plays the wrong preset,
make sure that Proteus
and your MIDI controller are set to the same
MIDI channel and that
the MIDI Volume is
turned up.
the preset, volume and pan associated with the displayed channel.
C0
1 Vol127 Pan+0
000 Preset Name
Proteus operation manual
For more information
about MIDI, see MIDI
Realtime Controls on
page 36.
PRESET SELECTION
Press the cursor key repeatedly until the cursor is underneath the preset
number. (The cursor is a little flashing line underneath one of the
parameters in the display.) As the data entry control is rotated, the preset
number and name will change. The displayed preset will be assigned to
the displayed MIDI channel. Preset numbers range from 000 to 191 on a
standard Proteus or from 000 to 383 on the Proteus XR.
C01 Vol127 Pan+0
00
0 Preset Name ÷ Preset Information
÷ MIDI Channel Parameters
CHANNEL VOLUME
Press the cursor key repeatedly until the cursor is underneath the volume
value. Rotate the data entry control to select volume 00-127. (This is the
same parameter as MIDI volume control #7, and changes made over
MIDI will be shown in the display.)
■
Channel Pan should
normally be set to "P"
unless realtime control
of panning is desired.
This will allow the pan
settings programmed
for each preset to be
used.
CHANNEL PAN
Press the cursor key repeatedly until the cursor is underneath the pan
value. Rotate the data entry control to select pan values -7 to +7 or “P”.
When “P” is selected, the pan value specified in the preset is selected. Any
other value will override the pan parameter in the preset. (This is the same
parameter as MIDI pan control #10, and changes made over MIDI will be
shown in the display.)
Page 17
Proteus operation manual
Multi-Timbral Operation
BASIC OPERATION
MULTI-TIMBRAL OPERATION
Multi-timbral operation means that the Proteus can play more than one
sound at the same time. To access multiple presets on different MIDI
channels simultaneously, follow these instructions:
1. Set the MIDI mode to MULTI-Mode, using the MIDI mode function in
the Master menu (page 18).
2. Decide which MIDI channels you wish the Proteus to receive, and turn
all other channels OFF using the MIDI Enable function in the Master
menu (page 19). Up to 16 channels can be selected simultaneously!
3. Select the desired preset for each of the MIDI channels you wish the
Proteus to receive using the MIDI Channel/Preset selection screen (see
previous instructions).
15
4. Proteus will now respond multi-timbrally on the MIDI channels you
have specified. The volume and pan position parameters can be adjusted
over MIDI (for each MIDI channel) or using the Cursor and Data Entry
control in the MIDI Channel/Preset selection screen.
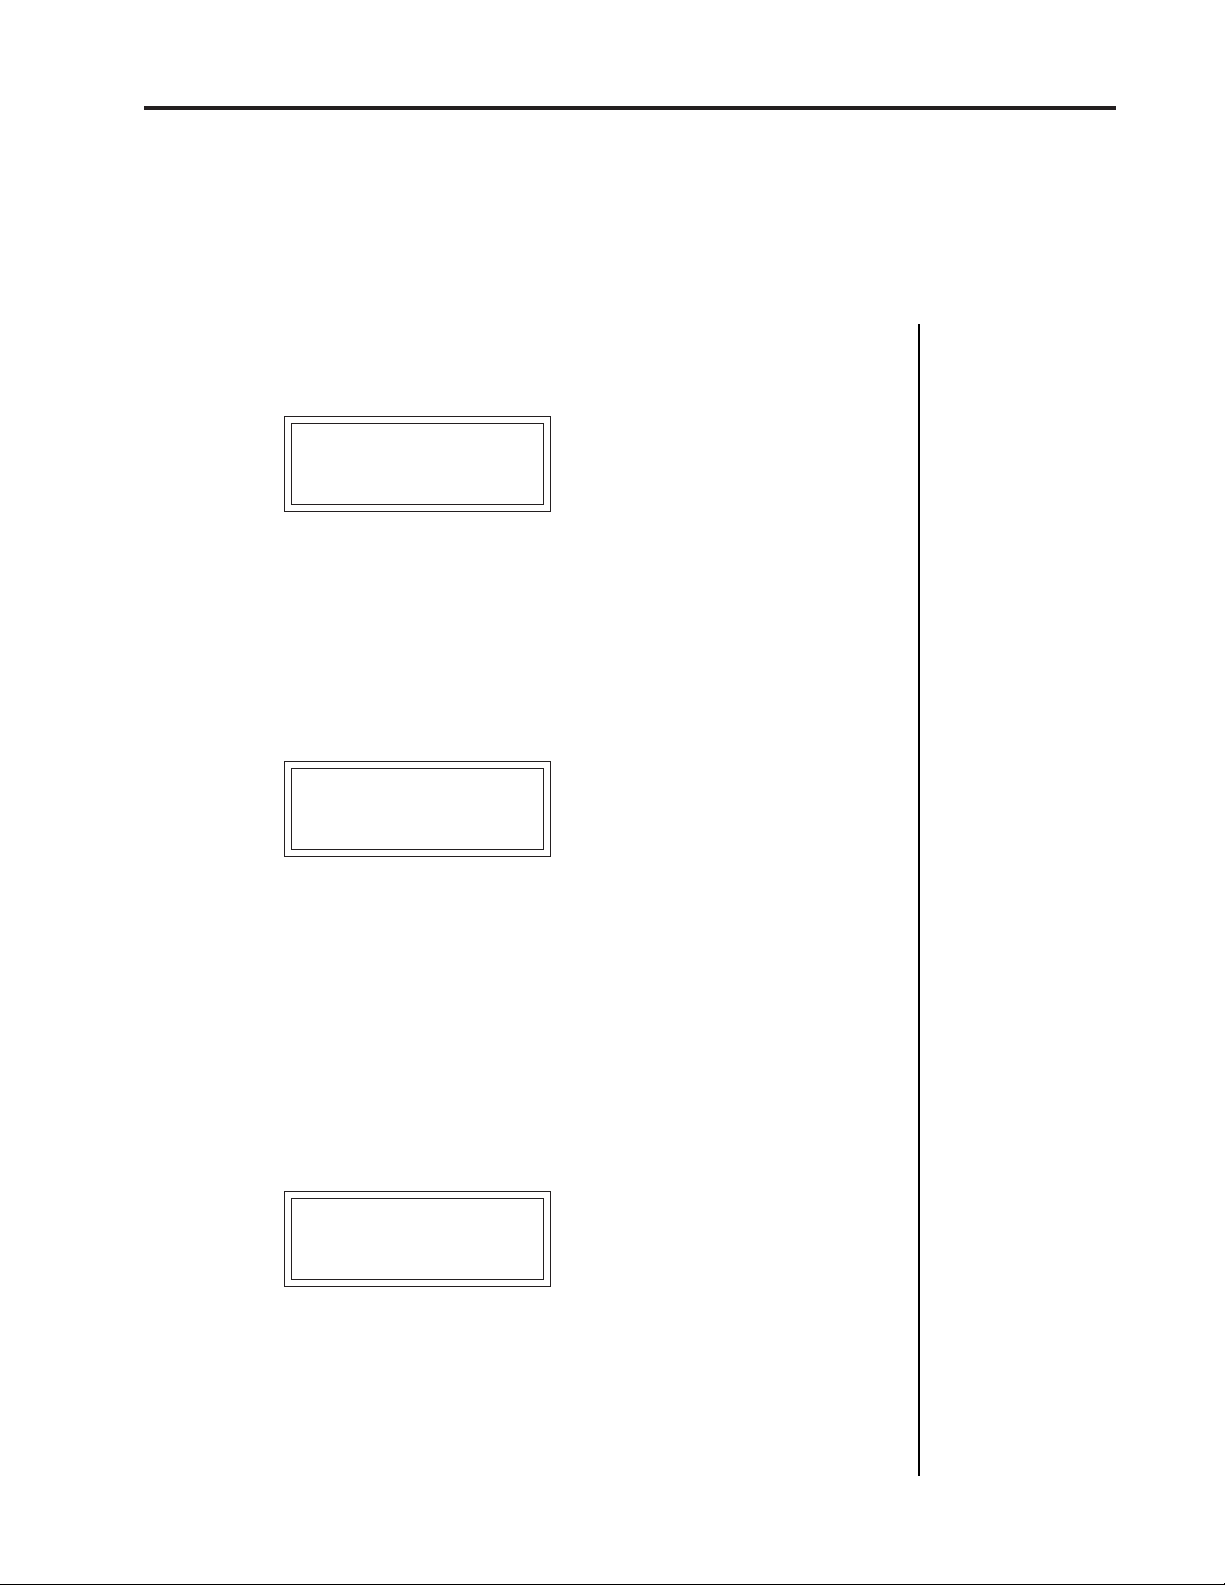
Channel 01
Channel 02
Channel 03
Volume
Pan
Volume
Pan
Volume
Pan
PRESET
PRESET
PRESET
Channel 16
Each of the 16 MIDI channels can be assigned to play a specific preset in Proteus.
Volume
Pan
PRESET
Page 18

16
Master Menu
MASTER MENU
The Master menu contains functions that affect the overall operation of
the Proteus. For example, changing the Master Tune will change the
tuning of all the presets, not just the one currently displayed.
To enable the Master menu: Press the Master key, lighting the LED. The
current screen will be the one most recently selected since powering up
the Proteus. The cursor will appear underneath the first character of the
screen heading on line one.
To select a new screen: Press the cursor key repeatedly (or hold the
cursor key while turning the data entry control) until the cursor is
underneath the screen title heading. Rotate the data entry control to select
another screen.
Proteus operation manual
To modify a parameter: Press the cursor key repeatedly (or hold the
cursor key while turning the data entry control) until the cursor is
underneath the parameter value. Rotate the data entry control to change
the value.
To return to Preset Select mode: Press the Master key, turning off the
LED.
MASTER MENU FUNCTIONS
MASTER TUNE
Master Tune adjusts the overall tuning of all presets so that the
Proteus
± 1 semitone in 1/64th semitone increments. A master tune setting of
"00" would indicate that the Proteus is perfectly tuned to concert pitch
(A=440 Hz).
can be tuned to other instruments. The master tuning range is
MASTER TUNE
+63
Page 19
Proteus operation manual
TRANSPOSE
This function transposes the key of the Proteus in half-step intervals. The
transpose range is ± 12 semitones or one octave.
TRANSPOSE
+12 semitones
GLOBAL BEND
This function sets the range of the pitch wheel only when it is routed to
control pitch. The maximum pitch bend range is ± 12 semitones. This
function only affects presets which have their individual pitch bend range
set to global.
Transpose
17
MASTER MENU
GLOBAL BEND
+- 12 semitones
GLOBAL VELOCITY CURVE
Incoming velocity data can be modified by a velocity curve in order to
provide different types of dynamics in response to your playing or to
better adapt to a MIDI controller. This function allows you to select one
of the four velocity curves or leave the velocity data unaltered (off). Global
velocity curve only affects presets which have their individual velocity
curve set to global. For more information on the velocity curves, see page
57.
GLOBAL VEL CURVE
4
Page 20

18
Mix Output
MASTER MENU
Proteus operation manual
MIX OUTPUT
This function allows you override the output assignments made in each
preset and instead assign the outputs according to MIDI channel. This
also allows you to change the output assignment of the factory presets.
For each of the 16 MIDI channels, you can select the Main, Sub 1, or Sub
2 outputs, or "P". When "P" is selected, the output assignment selected in
the preset is used. If no plugs are inserted into the sub outputs, the audio
will be automatically directed to the main outputs.
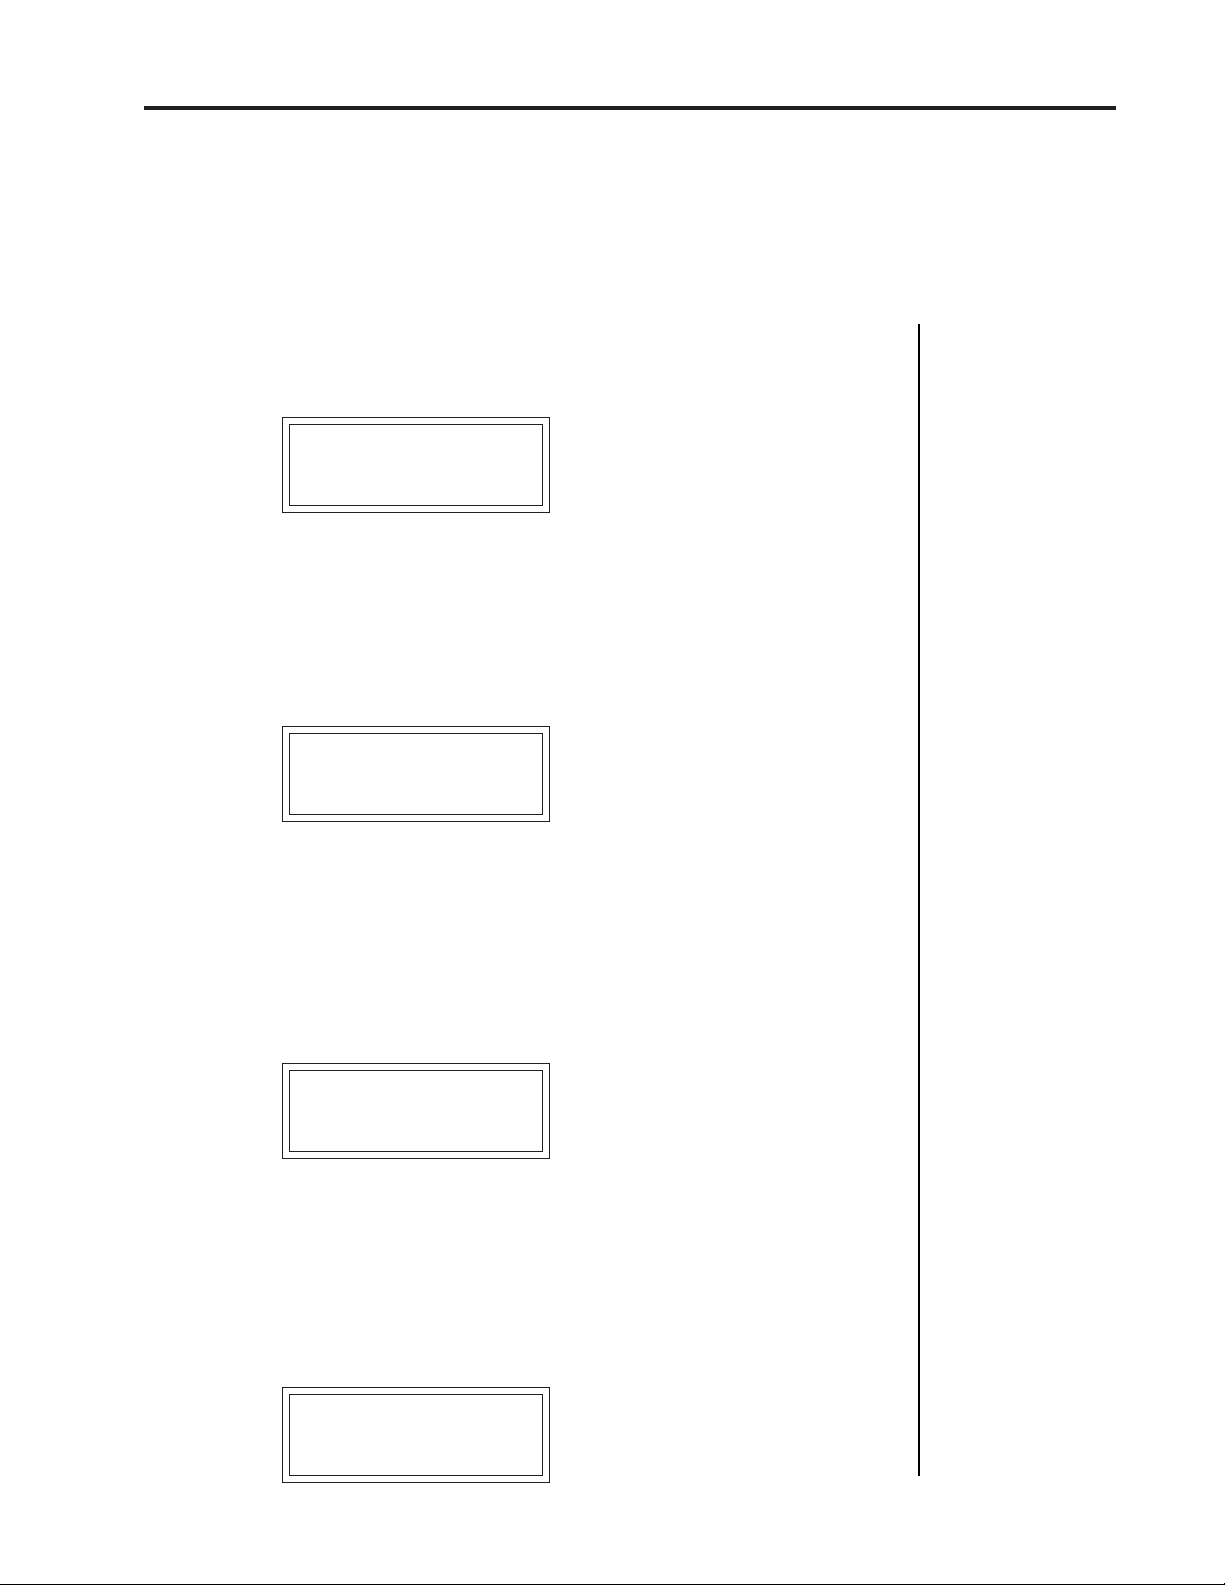
MIX OUTPUT
channel 01:P
▼
Warning: Presets
will not be transferred
between two Proteus'
unless the ID numbers
of both units match.
MIDI MODE
This function selects one of the four MIDI modes and the MIDI system
exclusive ID number.
■ Omni mode - Proteus responds to note information on all MIDI
channels and plays the preset currently displayed in the main screen.
■ Poly mode - Proteus only responds to note information received on the
currently selected MIDI channel (on the preset selection screen) and plays
that channel’s associated preset.
■ Multi mode - Proteus responds to data on any combination of MIDI
channels and plays the specific preset associated with each of the MIDI
channels.
■ Mono mode - Proteus responds to data on any combination of MIDI
channels but plays each channel monophonically. If a new note on a
channel is played before the last note is released, the envelopes will not
be retriggered (legato). Mono mode is particularly useful with alternate
controllers such as MIDI guitars, etc.
■ ID number - This function allows an external programming unit to
distinguish between multiple Proteus units. In the case of multiple
Proteus units, each Proteus should have a different ID number.
MIDI MODE ID
Omni 00
Page 21
Proteus operation manual
MIDI Mode Change
MIDI MODE CHANGE
This function selects whether or not MIDI mode change commands are
accepted or ignored when received over MIDI (see MIDI Mode).
MIDI MODE CHANGE
Disabled
MIDI OVERFLOW
When on, if you play more notes than the Proteus has channels (32), the
additional note data will be directed out the MIDI Out port to a second
Proteus or other MIDI device. MIDI Overflow can be turned On or Off.
19
MASTER MENU
MIDI OVERFLOW
Off
MIDI ENABLE
When in MIDI Multi mode, this function lets you turn each MIDI channel
On or Off. This is useful when you have other MIDI devices connected and
do not want the Proteus to respond to the MIDI channels reserved for the
other devices. MIDI Enable only operates in Multi Mode.
MIDI ENABLE
channel:01 On
PRESET CHANGE
This function lets the Proteus utilize or ignore incoming MIDI preset
change commands for each channel. Note that MIDI can only select
presets 000-127. Presets 128-191 can either be selected manually or over
MIDI using the mapping function "MIDI PROGRAM ➙ PRESET".
PRESET CHANGE
channel:01 On
Page 22

20
MIDI Controller Assign
MASTER MENU
Some of the standard
MIDI Controller numbers are listed below.
1 - Modulation Wheel or
Lever
2 - Breath Controller
3 - Pressure: Rev 1 DX7
4 - Foot Pedal
5 - Portamento Time
6 - Data Entry
7 - Volume
8 - Balance
9 - Undefined
10 - Pan
Proteus operation manual
MIDI CONTROLLER ASSIGN
The Proteus allows you to assign up to four realtime control sources from
your MIDI controller. These control sources could be modulation wheels,
data sliders or whatever. In this screen, you set up which controllers will
be received by the Proteus. What effect the controller will have is
programmed separately for each preset. The Proteus MIDI controllers are
each assigned a letter, A-D. Each controller letter can be assigned to a
MIDI realtime controller from 01-31. Note: If controller numbers 7 or 10
are selected, they will override the standard MIDI volume and pan
control routings. For more information, see MIDI Realtime Controls in
the Programming Basics section.
CONTROLLER #
A:01 B:02
Next Screen:
CONTROLLER #
C:03 D:04
Some of the standard
MIDI switch numbers
are listed below.
64 - Sustain Switch
(on/off)
65 - Portamento Switch
(on/off)
66 - Sostenuto (chord
hold, on/off)
67 - Soft Pedal (on/off)
69 - Hold Pedal 2 (on/off)
MIDI FOOTSWITCH ASSIGN
Like the MIDI Controllers, 3 MIDI footswitches can be assigned to MIDI
footswitch numbers. Footswitches can be assigned numbers from 64-79.
Destinations for the footswitch controllers are programmed in the Edit
menu.
FOOTSWITCH #
1:64 2:65 3:66
Page 23
Proteus operation manual
Selected
Program
10
11
12
0 1 2 3 4 5 6 7 8 9
0
00 01 02 03 04 05 06 07 08 09
44 191 50 01 15 88 151 78 99 88
1
34 73 106 55 43 75 120 121 180
2
30 31 32 33 34 35 36 37 38 39
3
40 41 42 43 44 45 46 47 48 49
4
50 51 52 53 54 55 56 57 58 59
5
60 61 62 63 64 65 66 67 68 69
6
70 71 72 73 74 75 76 77 78 79
7
80 81 82 83 84 85 86 87 88 89
8
90 91 92 93 94 95 96 97 98 99
9
100 101 102 103 104 105 106 107 108 109
110 111 112 113 114 115 116 117 118 119
120 121 122 123 124 125 126 127
12
MIDI Footswitch Assign
MASTER MENU
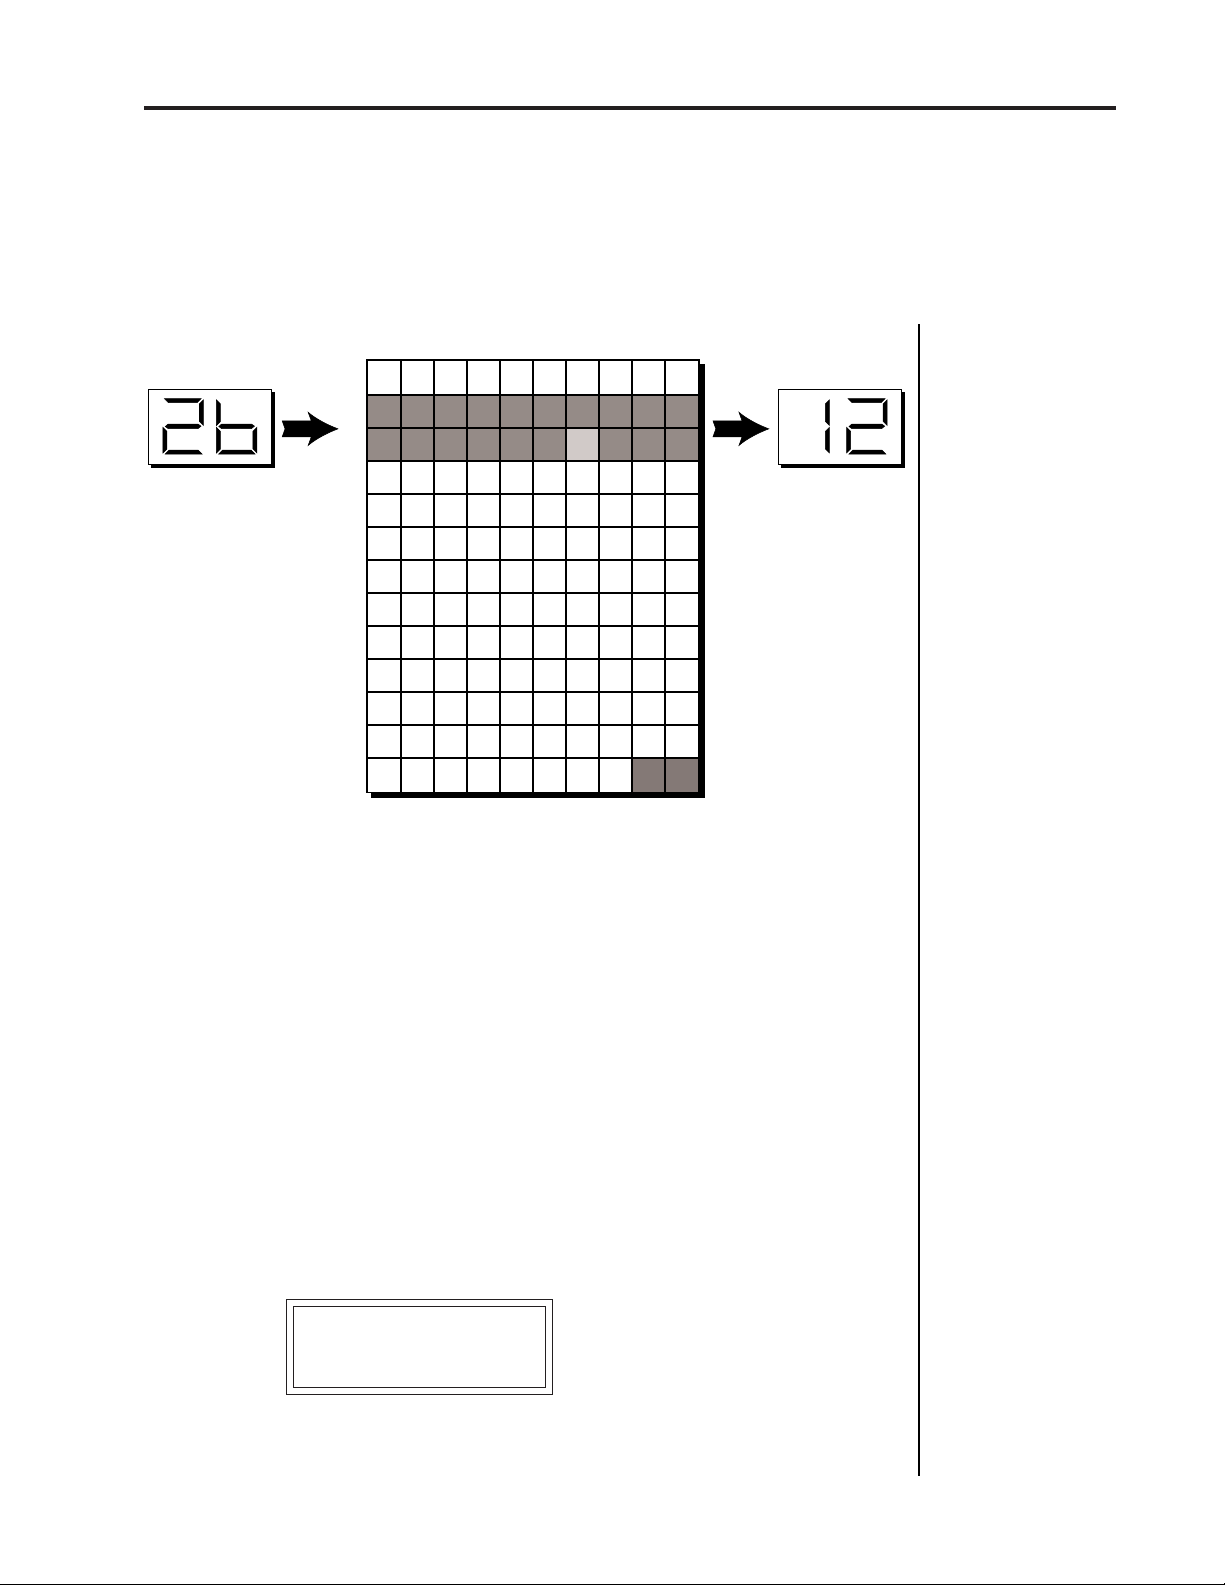
Mapped
Program
21
This chart shows how MIDI preset changes can be re-mapped. In this example, program changes
10-29 have been re-mapped. All other programs will be selected normally.
MIDI PROGRAM ➔PRESET
Incoming MIDI program changes can be “mapped” to call a different
numbered preset. This is a handy feature when you want a specific preset
number sent from the master synth to be linked with a specific preset on
the Proteus. Simply selecting a preset on the master synth will automatically call up the proper Proteus preset. Any of the presets in the Proteus
can be mapped to any incoming MIDI program change number. This
feature also allows you to call up the presets 128-383, which are not
normally accessable over MIDI.
MIDI PROG>PRESET
000 > 000
Page 24

22
Send Preset Data
MASTER MENU
To Record MIDI Data
into a Sequencer:
1. Setup sequencer to
receive system exclusive
data.
2. Place sequencer into
record mode, then Send
Preset Data.
To Receive MIDI Data
from a Sequencer:
1. Simply play back the
sequence into Proteus.
Proteus operation manual
SEND MIDI DATA
This function will send MIDI System Exclusive data to the MIDI Out port
of the Proteus. The MIDI data can either be sent to a computer/sequencer
or to another Proteus. Using the cursor key and the data entry control,
select the type of MIDI data you wish to transmit. The choices are:
Master Settings: Transmits all parameters in the Master menu except
tuning table, program/preset map and viewing angle.
Program/ Preset Map: Transmits only the program/preset map.
Tuning Table: Transmits only the user tuning table.
Factory Presets: Transmits all the factory presets.
User Presets: Transmits all the user presets.
Any Individual Preset: Transmits only the selected preset.
■
The Preset, Volume,
and Pan information for
all 16 channels is included when the Master
settings are transmitted
or received.
▼
Warning: When
transferring SysEx data
from one Proteus to another, the ID numbers of
both units must match.
Application:
The user key tuning
can be used to tune
individual percussion
instruments.
The Enter LED will be flashing. Press the Enter button to confirm the
operation. To receive MIDI data, simply send the MIDI data into Proteus
from another Proteus or your sequencer.
SEND MIDI DATA
000 Stereo Piano
USER KEY TUNING
In addition to standard twelve tone equal temperament, the Proteus
contains four additional preset tuning tables (Just C, Vallotti, 19 tone, and
Gamelan) and one user definable tuning. User Key Tuning allows you to
alter the parameters of the user definable tuning stored in memory. The
initial frequency of every key can be individually tuned, facilitating the
creation of microtonal scales. Using the cursor key and the data entry
control, select the key name, the MIDI key number and the fine tuning.
The key name is variable from C-2 to G8. MIDI key number is variable
from 0 to 127. The fine tuning is variable from 00 to 63 in increments of
1/64 of a semitone (approx. 1.56 cents). For each preset, the specific
tuning table is selected in the Edit menu.
USER KEY TUNING
Key:C1 036.00
Page 25

Proteus operation manual
MIDI
Key #
Key
Name
0 1224364860728496108120127
C-2 C-1 C0 C1 C2 C3 C4 C5 C6 C7 C8
Proteus Keyboard Range
= Standard 5 Octave Keyboard Range
User Key Tuning
23
MASTER MENU
VIEWING ANGLE
This function allows you to change the viewing angle of the display so that
it may be easily read from either above or below. The angle is adjustable
from +7 to -8. Positive values will make the display easier to read when
viewed from above. Negative values make the display easier to read from
below.
VIEWING ANGLE
+7
DEMO SEQUENCE
Proteus contains a play-only sequencer in order to give you an idea of
what is possible using this amazing machine. Press the cursor switch to
move the cursor to the bottom line of the display. The Enter LED will
begin flashing. Press the Enter switch to start the sequence. The Enter
LED will be lit and the bottom line of the display will change to "Stop".
Pressing the Enter button again will stop the sequence.
DEMO SEQUENCE
Start Sequence
Page 26
24
About Proteus
Proteus operation manual
about
PROTEUS
Proteus, unlike most synthesizers, utilizes digital recordings of real
instruments for the basis of its sound. This is similar to a tape recorder
except that in the Proteus, the sounds are permanently recorded on
digital memory chips.
To perform this modern miracle, sounds and instrument waveforms are
first sampled into the Emulator III, our top of the line, 16 bit stereo digital
sampler. After the sounds and waveforms have been truncated, looped
and processed, they are “masked” into the Proteus ROM (Read Only
Memory) chips.
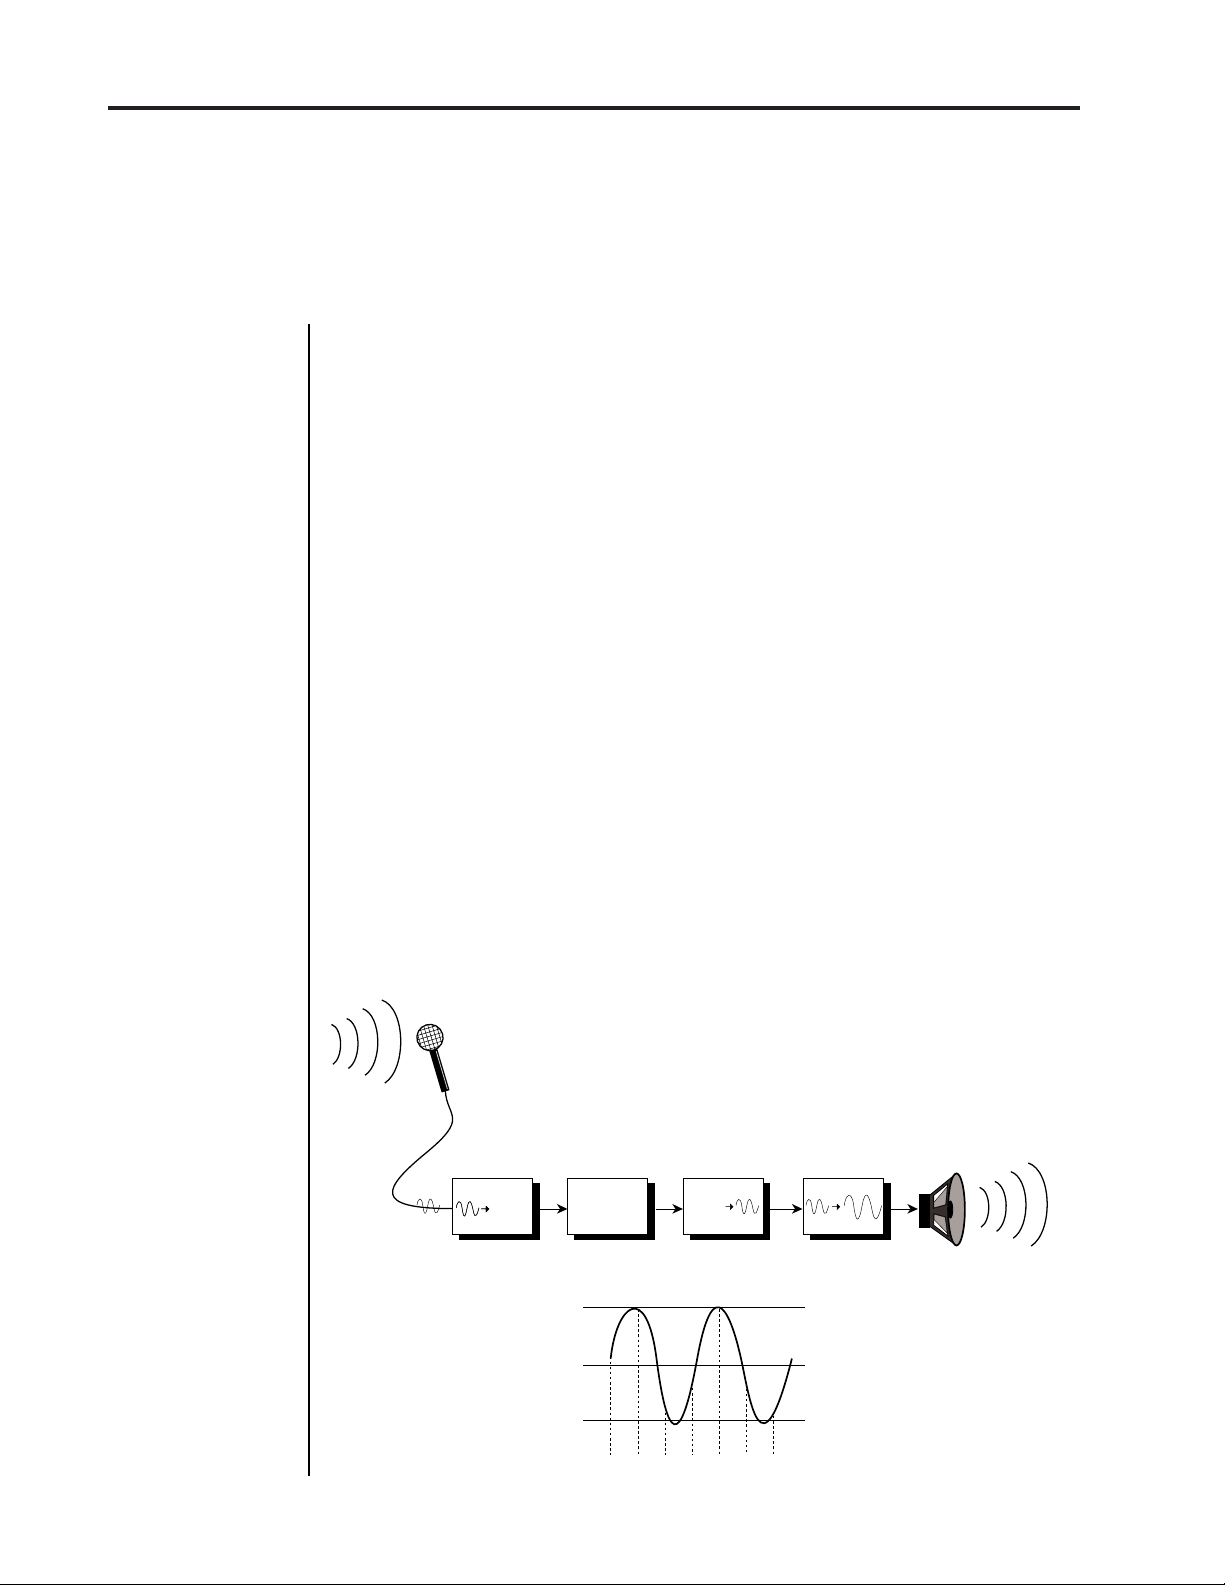
Conceptually, the sampling process is very simple, as shown in the Basic
Sampling System diagram. As a sound wave strikes the diaphragm of a
microphone, a corresponding voltage is generated. To sample the sound,
the voltage level is repeatedly measured at a very high rate and the
voltage measurements are stored in memory. To play the sound back, the
numbers are read back out of memory, converted back into voltages, then
amplified and fed to a speaker which converts the voltage back into sound
waves. Of course, playing back 32 channels at different pitches tends to
complicate matters, but this is basically how it works. In Proteus, we have
left out the Analog/Digital converter stage since the sounds are already
sampled for you.
Analog/Digital
Converter
1011001
1011001
Basic Sampling System
Memory
10100101001
01010010100
10101010100
10101001010
3V
0V
-3V
Digital/Analog
Converter
1011001
-1V -2V3V-1V-2V3V1V
Amplifier
Page 27

Proteus operation manual Programming Basics
25
PROGRAMMING BASICS
PROGRAMMING BASICS
Page 28

26
PROGRAMMING BASICS
Proteus operation manual
Page 29

Proteus operation manual
General Information
27
PROGRAMMING BASICS
PROGRAMMING BASICS
Your initial involvement with the Proteus will most likely consist of using
the existing presets and selecting MIDI channels. While the factory
presets are very good, there are probably some things you would like to
change, perhaps the LFO speed, or the attack time. You may also want to
make your own custom presets using complex modulation routings.
Entirely new sounds can be created by combining the attack portion of
one sound with the body of another sound or by combining the digital
waveforms with sampled sounds. There are 64 user locations (64-127)
available to store your own creations or edited factory presets. Best of all,
it’s easy to edit or create new presets using the edit menu.
Presets can be made up of both a primary and secondary instrument.
Presets can also be “linked” with up to 3 additional presets to create
layering or splits.
One way to create a keyboard split is assign an instrument to a specific
range and then link it to other presets which fill in the empty keys. Using
a combination of 4 linked presets and the primary and secondary instrument ranges, up to 8 keyboard splits can be produced. If linked presets
overlap on the same keyboard range, the presets will be doubled or
stacked.
LINK
PRESET #1
Key Range
PRESET #2
Key Range
CREATING A SPLIT KEYBOARD
Key Range
PRESET #1
LINK
PRESET #2
LAYERING TWO PRESETS
These diagrams show how keyboard splits and layers can be created by linking presets.
Remember that each preset can consist of both a primary and secondary instrument.
Page 30
28
PROGRAMMING BASICS
Proteus has an extensive modulation implementation using two multiwave LFO’s (Low Frequency Oscillators), two envelope generators and
the ability to respond to multiple MIDI controllers. You can simultaneously route any combination of these control sources to multiple destinations.
MODULATION
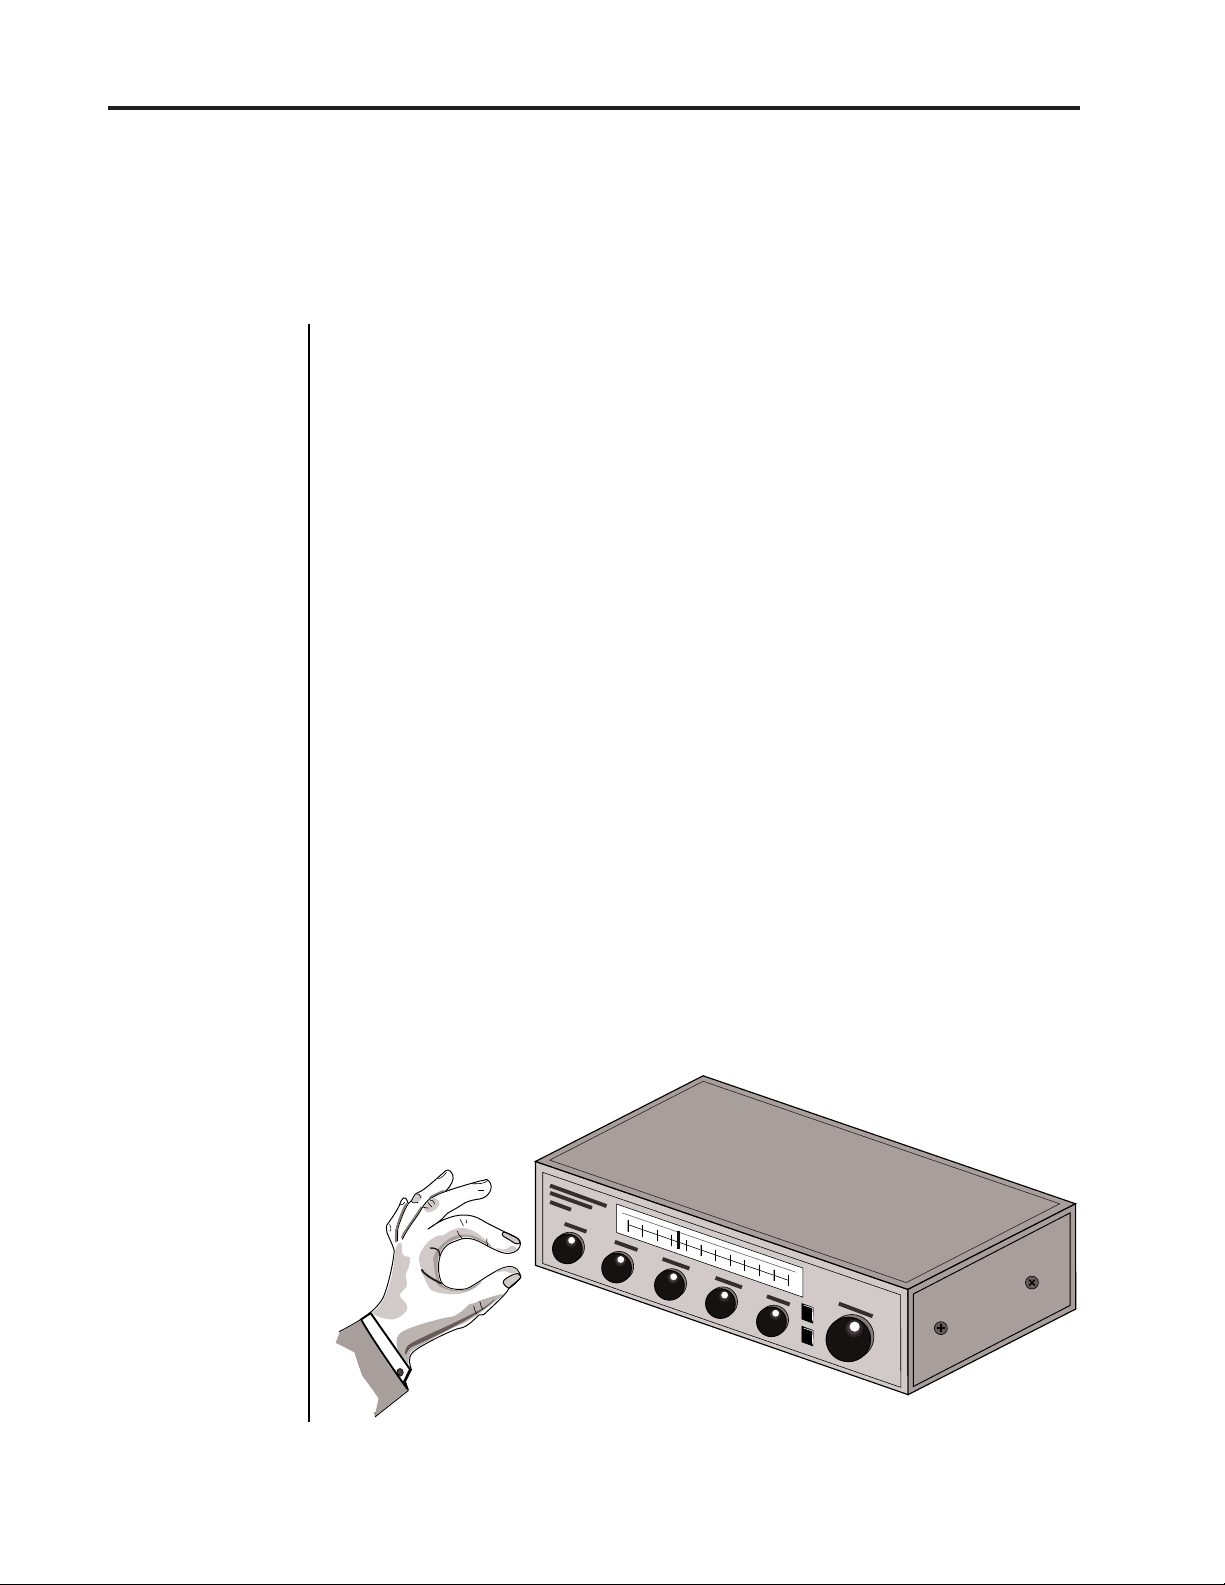
Modulation means to dynamically change a parameter, whether it be the
volume (amplitude modulation), the pitch (frequency modulation), or
whatever. Turning the volume control on your home stereo rapidly back
and forth would be an example of amplitude modulation. To modulate
something we need a modulation source and a modulation destination.
The source is your hand turning the knob, and the destination is the
volume control. If we had a device that would automatically turn the
volume control, we would also call that device a modulation source. The
Proteus is designed so that for each of the variable parameters, such as the
volume, there is an initial setting which can be changed by a modulation
source. Therefore in the case of volume, we have an initial volume and we
can change or modulate that volume with a modulation source. Two
main types of modulation sources on the Proteus are Envelope Generators
and Low Frequency Oscillators. In the example above, an envelope genera-
tor could be routed to automatically turn the volume control as programmed by the envelope. Or, a low frequency oscillator could be routed
to automatically turn the volume control up and down in a repeating
fashion.
Proteus operation manualModulation
Turning the volume control back and forth on your home stereo is an example of Amplitude Modulation.
Page 31

Proteus operation manual Modulation Sources
PROGRAMMING BASICS
MODULATION SOURCES
The Proteus uses three kinds of modulation sources.
KEYBOARD and VELOCITY MODULATION
■
Values which are generated at the start of a note and do not change during
the note.
29
Keyboard Key
Key Velocity
■
REALTIME MODULATION
Values which can be continuously changed during the entire duration of
the sound.
Pitch Wheel
Miscellaneous Controllers (4)
Keyboard Pressure (mono aftertouch)
key is initially pressed.
Polyphonic Key Pressure
generating polyphonic pressure data.
Low Frequency Oscillators (2)
- Which key is pressed.
- How hard the key is pressed.
- A synthesizer pitch bend wheel.
- Any type of MIDI controller data.
- Key pressure applied after the
- Pressure from a controller capable of
- Generate repeating waves.
Envelope Generators (2)
changes over time when a key is pressed.
■
FOOTSWITCH MODULATION
Changes a parameter when one of the three footswitches are pressed. The
footswitches can be programmed to switch: Sustain (pri/sec/both),
Alternate Volume Envelope (pri/sec/both), Alternate Volume Release
(pri/sec/both), or Cross-Switch between the primary and secondary
instruments.
- Generate a programmable “contour” which
Page 32

30
Envelope Generators
PROGRAMMING BASICS
ENVELOPE GENERATORS
An envelope can be described as a “contour” which can be used to shape
the sound in some way over time. Each channel of the Proteus contains
two envelope generators. One of the envelope generators, the Alternate
Volume Envelope, controls the volume of the primary or secondary
instrument and has 5 stages, Attack, Hold, Decay, Sustain, and Release.
Percussion
The other envelope, the Auxiliary Envelope, can be routed to any realtime
control destination and is a general purpose envelope. The Auxiliary
Envelope has 6 stages: Delay, Attack, Hold, Decay, Sustain, and Release.
The Envelope parameters can be described as follows:
Proteus operation manual
Organ
String
Plucked
■
The generalized
envelope shapes
of a few types of
sounds are shown
above.
■ Delay - The time between when a key is played and when the attack
phase begins.
■ Attack - The time it takes to go from zero to the peak (full) level.
■ Hold - The time the envelope will stay at the peak level before starting
the decay phase.
■ Decay - The time it takes the envelope to go from the peak level to the
sustain level.
■ Sustain - The level at which the envelope remains as long as a key is
held down.
■ Release - The time it takes the envelope to fall to the zero level after the
key is released.
level
time
key
down
S
D
AH
D
R
key
released
Page 33

Proteus operation manual
level
time
AHR
AHDSRS and LFOs
31
PROGRAMMING BASICS
key
down
If the key is released during the Hold (H) phase, the Release (R) phase begins.
key
released
LOW FREQUENCY OSCILLATORS (LFOs)
A Low Frequency Oscillator is simply a wave which repeats at a slow rate.
The Proteus has two multi-wave LFOs for each of its 32 channels. The LFO
waveforms are: Triangle, Sine, Square, Sawtooth, and Random, which is
a random “sample and hold” type of wave.
By examining the diagram of the LFO waveforms, you can see how the
LFO will affect a modulation destination. Suppose we are modulating the
pitch of an instrument. The sine wave looks smooth, and will smoothly
change the pitch. The square wave changes abruptly, and will abruptly
change the pitch from one pitch to another. The sawtooth wave smoothly
decreases, then abruptly changes back up. The sound’s pitch will follow
the same course. Controlling the pitch of an instrument is an easy way to
hear the effects of the LFO waves.
Triangle
Sine
Square
Sawtooth
Random
Page 34

32
Modulation "Patching"
PROGRAMMING BASICS
When the amount of an LFO is a negative value, the LFO shape will be
inverted. For example, inverting the sawtooth wave produces a wave that
smoothly increases, then instantly resets down.
Proteus operation manual
Negative Amount
+-
Sawtooth
Inverted Sawtooth
MIDIPATCH
Connecting a modulation source to a destination is called a patch.
Proteus lets you connect the modulation sources in almost any possible
way to the modulation destinations. You can even modulate other
modulators. Each patch also has an amount parameter which determines
“how much” modulation is applied to the destination. The modulation
amount can be positive or negative and will either add or subtract from
the initial value. Keyboard and velocity sources can be simultaneously
patched to any 6 of the 33 destinations for each preset. Realtime modulation sources can be simultaneously patched to any 8 of the 24 destinations
for each preset.
Amount +/-
Modulation
Source Destination
LFO 1
+-
Primary
Level
Sources
LFO 1
LFO 2
Aux Env
Wheel
Pressure
MIDI
etc.
Destinations
Pitch
X-Fade
Level
LFO Amt.
LFO Rate
Attack
etc.
Page 35

Proteus operation manual
Modulation Chart
33
PROGRAMMING BASICS
Primary
Instrument
Pitch
Secondary
Instrument
Pitch
LFO 1
Amount Freq.
Sample
Start
Sample
Start
LFO 2
Amount Freq.
KEYBOARD
CENTER
KEY NUMBER
Tone
Tone
X-Fade
DCA Pan
Volume
AHDSR
Atk Dec Rel
Level
DCA
Level
Volume
AHDSR
Atk Dec Rel
VELOCITY
CURVE
Pan
VELOCITY
Auxiliary
DAHDSR
R
L
R
L
AmtAtk Dec Rel
Keyboard and Velocity Modulation Sources
KEYBOARD and VELOCITY MODULATION
The Keyboard and Velocity Modulation diagram shows the possible
routing of Key Number (which key is pressed), and Velocity (how hard
the key is pressed). These modulation sources can control any of the
destinations indicated by the small arrows. A modulation source can
control up to six destinations or one destination can be controlled by up
to six modulation sources. The possible modulation routings are completely flexible as shown in the example above.
Modulation Sources:
Key Number and Key
Velocity
Destinations:
Pitch, Primary Pitch,
Secondary Pitch,
Volume,
Primary Volume,
Secondary Volume,
Attack,
Primary Attack,
Secondary Attack,
Decay,
Primary Decay,
Secondary Decay,
Release,
Primary Release,
Secondary Release,
Crossfade, LFO 1
Amount, LFO 1 Rate,
LFO 2 Amount,
LFO 2 Rate, Auxiliary
Envelope Amount,
Auxiliary Envelope
Attack, Auxiliary
Envelope Decay,
Auxiliary Envelope
Release, Sample
Start, Primary Sample
Start, Secondary
Sample Start, Pan,
Primary Pan,
Secondary Pan, Tone,
Primary Tone,
Secondary Tone
Off,
Page 36

34
PROGRAMMING BASICS
KEY NUMBER
The Key Number is affected by the Keyboard Center parameter which
can be set to any key from A-1 to C7. The keyboard center establishes a
reference point for keyboard modulation; keys above this point will have
a positive value, while keys below it will be negative. For example, if we
wished to change the volume of an instrument using key number and the
key center were set to middle C, the instrument would get progressively
louder above middle C and progressively softer below middle C.
KEY CENTER
+
-
Proteus operation manualKey Number
+
0
-
VELOCITY CURVES
Incoming velocity values can be scaled by one of the four velocity curves
in order to match your playing style or better adapt to the MIDI controller.
Experiment with the four curves to find the one that works best for your
style and MIDI controller.
140
120
100
80
60
40
20
0
0 102030405060708090100
Curve 1
140
120
100
80
60
40
20
0
0 102030405060708090100
Curve 2
Curve 3
140
120
100
80
60
40
20
0
0 102030405060708090100
Curve 4
140
120
100
80
60
40
20
0
0 102030405060708090100
Page 37

Proteus operation manual
Realtime Modulation
35
PROGRAMMING BASICS
R
L
R
L
AmtAtk Dec Rel
AUXILIARY
ENVELOPE
PITCH WHEEL
Primary
Instrument
Pitch
Secondary
Instrument
Pitch
LFO 1
Amount Freq.
MONO
PRESSURE
X-Fade
LFO 2
Amount Freq.
POLY
PRESSURE
DCA Pan
Level
DCA
Level
MIDI
CONTROLLER
A/B/C/D
Volume
AHDSR
Atk Dec Rel
Volume
AHDSR
Atk Dec Rel
LFO 1
Pan
LFO 2
Auxiliary
Envelope
(DAHDSR)
Realtime Modulation Sources
REALTIME MODULATION
In addition to keyboard and velocity modulation, Proteus has multiple
realtime modulation sources. Realtime modulation sources are parameters which vary over time. The velocity and keyboard modulations, in
comparison, are set at the key depression. The realtime modulation
sources can control any of the destinations except Sample Start, Tone and
Pan as indicated by the small arrows. A modulation source can control up
to eight destinations or one destination can be controlled by up to eight
modulation sources. The possible modulation routings are completely
flexible as shown in the example above.
Modulation Sources:
Pitch Wheel,
MIDI Control A,
MIDI Control B,
MIDI Control C,
MIDI Control D,
Mono Pressure,
Polyphonic Pressure,
LFO 1, LFO 2,
Auxiliary Envelope
Destinations:
Off,
Pitch, Primary Pitch,
Secondary Pitch,
Volume,
Primary Volume,
Secondary Volume,
Attack,
Primary Attack,
Secondary Attack,
Decay,
Primary Decay,
Secondary Decay,
Release,
Primary Release,
Secondary Release,
Crossfade, LFO 1
Amount, LFO 1 Rate,
LFO 2 Amount,
LFO 2 Rate, Auxiliary
Envelope Amount,
Auxiliary Envelope
Attack, Auxiliary
Envelope Decay,
Auxiliary Envelope
Release
Page 38

36
PROGRAMMING BASICS
MIDI REALTIME CONTROLS
The MIDI realtime controllers may seem confusing at first, but they are
really very simple to understand. You probably already know that there
are 16 MIDI channels that can be used. Each of the 16 MIDI channels uses
basically 3 types of messages; note on/off, program changes, and continuous
controller messages.Your MIDI keyboard, in addition to telling Proteus
which note was played, may also send realtime control information, which
simply means occuring in real time or live. (You may be using a MIDI
device other than a keyboard, but for simplicity's sake we'll presume that
you're using a keyboard.) Realtime control sources include such things as
pitch wheels or levers, modulation wheels or levers, control pedals,
MIDI wind controllers
may work better if you
assign one of the MIDI
A, B, C, D controllers to
control volume. This will
allow the MIDI volume
to be added to the
current volume.
aftertouch, etc. and are used to add more expression or control. Your
MIDI keyboard sends out realtime controller information on separate
channels called continuous controller channels. There is a set of 32 continuous controller channels for each of the 16 MIDI channels. Some of the
controller channels, such as pitch wheel, volume, and pan have been
standardized. For example, volume is usually sent on continuous controller channel #7.
Proteus operation manualMIDI Realtime Controllers
MIDI
Channel 1
Note
On/Off
Program
Change
Continuous
Controllers
MIDI
Channel 2
Note
On/Off
Program
Change
Continuous
Controllers
MIDI
Channel 3
Note
On/Off
Program
Change
Continuous
Controllers
MIDI
Channel 16
Note
On/Off
Program
Change
Continuous
Controllers
Common realtime controllers such as the pitch wheel, volume, pan and
pressure are pre-programmed to their proper destinations. Your keyboard may have other realtime controls such as a control pedal or data
slider which can also be programmed to control most of the parameters
on Proteus.
The Proteus is equipped with a sophisticated MidiPatch
™ system, which
allows you to route any continuous controller to any realtime modulation
destination. The MidiPatch system is also very easy to use. First, you
must know which controller numbers your keyboard can transmit.
Page 39

Proteus operation manual
MIDI Realtime Controllers
PROGRAMMING BASICS
Let's say for instance, that you are using a Yamaha DX7 as your master
keyboard. The DX has pitch and mod. wheels, a breath controller, a data
slider and a foot pedal, all of which transmit their values over MIDI. The
standard MIDI controller numbers for the controls are listed below (the
pitch wheel has a dedicated controller, PWH). First, we would go to the
Master menu, MIDI Controller Assign and define the 4 MIDI controllers
that we wish to use. Assign each controller number to one of the letters
A-B-C-D.
01 - Modulation Wheel A
02 - Breath Controller B
04 - Foot Pedal C
06 - Data Entry D
To complete the connections for a particular preset, go to the Edit menu,
Realtime Control, and route the MIDI A, B, C, D to the desired destinations. These could be patched to any 4 destinations or even to the same
destination. The MIDI Controller Amount menu, (in the Edit menu)
allows you to scale the amounts of each of the controllers by a positive or
negative value. The signal flow is shown in the diagram below.
37
Standard MIDI
Controller Numbers:
1- Modulation Wheel
2- Breath Controller
Pressure Rev 1 DX7
3 4- Foot Pedal
5- Portamento Time
6- Data Entry
7- Volume
8- Balance
9- Undefined
10- Pan
MIDI
Master
Menu
0
1
MIDI
2
3
Controller
31
A
0
1
MIDI
2
3
Controller
31
B
0
1
MIDI
2
3
Controller
31
C
0
1
MIDI
2
3
Controller
31
D
Edit
Menu
A
B
C
D
Amount
Control Destinations
Pitch
Primary Pitch only
+-
+-
+-
+-
Secondary Pitch only
Volume
Primary Volume only
Secondary Volume only
Attack
Primary Attack only
Secondary Attack only
Decay
Primary Decay only
Secondary Decay only
Release
Primary Release only
Secondary Release only
Crossfade
LFO 1 Rate
LFO 1 Amount
LFO 2 Rate
LFO 2 Amount
Auxiliary Envelope Amount
Auxiliary Envelope Attack
Auxiliary Envelope Decay
Auxiliary Envelope Release
The MIDI controllers A-B-C-D must have both a source (0-31), and a control destination assigned.
Page 40

38
PROGRAMMING BASICS
STEREO MIX OUTPUTS
Proteus has three sets of polyphonic stereo outputs (Main, Sub 1, Sub 2).
The channels used by a particular preset may be directed to appear at any
one of these three stereo outputs. This feature is useful for signal processing (EQ, reverb, etc.) of individual sounds prior to final mixdown.
By panning a preset completely left or right, it can be routed to a single
output jack.
Note: All presets will be automatically routed to the Main outputs unless
plugs are inserted into the Sub 1 or Sub 2 outputs.
Proteus operation manualStereo Mix Outputs
MIX
OUTPUT
Preset
01
Preset
22
Preset
12
Preset
127
Preset
18
Preset
120
etc.
Each preset can be routed to one (and only one) set of stereo outputs.
L
Main
R
L
Sub 1
R
L
Sub 2
R
Page 41

Proteus operation manual Edit Menu
EDIT MENU
39
EDIT MENU
Page 42

40
EDIT MENU
Proteus operation manual
Page 43

Proteus operation manual
The edit menu contains functions that can be modified by the user and
then saved as preset information in one of the user presets. For example,
the LFO speed or other parameter can be edited, then the preset can be
saved to a user location (64-127 on standard Proteus, 0-255 on Proteus
XR).
While the Edit menu is activated, incoming MIDI preset changes are ignored.
This is a quick and easy way to temporarily turn MIDI Preset Change OFF.
WARNING: Changes made in the Edit menu will be forever lost unless the
preset is "saved" using the Save Preset function (page 60) before changing
the preset.
Proteus Programming
41
EDIT MENU
EDIT MENU
To enable the Edit menu: Press the Edit key, lighting the LED. The
current screen will be the one most recently selected since powering up
the machine. The cursor will appear underneath the first character of the
screen heading on line one.
To select a new screen: Press the parameter key repeatedly (or hold the
parameter key while turning the data entry control) until the cursor is
underneath the screen heading. Rotate the data entry control to select the
screen.
To modify a parameter: Press the parameter key repeatedly (or hold the
parameter key while turning the data entry control) until the cursor is
underneath the screen heading. Rotate the data entry control to change
the value.
To return to Preset Select mode: Press the Edit button, turning off the
LED.
Page 44

42
C C# D D# E F F# G G# A A# B Pitch
Octave
No.
-1
0
1
2
3
4
5
6
"!#$%&
blank
'()*+,-./012
3456789 : ; < >=
?@AB CDE FGH I J
KLMNOPQRSTUV
WX YZ [ ¥ ]^_`ab
cdefghi jklmn
opqr s tuvwxyz
{|}
-2
Edit Menu Functions
EDIT MENU
Proteus operation manual
EDIT MENU FUNCTIONS
PRESET NAME
Preset Name allows you to name each of the user presets with a name of
up to 12 characters. Position the cursor under the character location and
use the data entry control to change the character. The keyboard can also
be used to select characters. The charts below show the keyboard
character assignment.
PRESET NAME
000 Untitled
%
*
#
(
!
+
&
b
l
'
"
a
n
k
)
$
6
1
4
/
-
0
5
2
,
7
3
.
8
;=@
9
:
B
E
?
D
<
A
>
C
GIL
J
F
H
N
Q
O
K
P
M
SUX
T
R
Z
]
Y
V
[
W
¥
C3C2 C4 C5 C6C1C0C-1
_ad
^
`
b
f
i
c
h
e
g
kmp
n
j
l
r
s
o
t
q
wy|
u
v
->
x
}
z
<-
{
Page 45

Proteus operation manual Mix Output
EDIT MENU
MIX OUTPUT
This function allows you to direct the channels used by a particular preset
to appear at one of these three stereo outputs (Main, Sub 1, Sub 2).
MIX OUTPUT
Main
PRIMARY INSTRUMENT
This function allows you to select which of the available instrument
sounds (or none) will be placed on the primary layer of the current user
preset.
Simply changing the
instrument creates a
INSTRUMENT pri
I002 Piano Pad
new sound while
retaining all other
parameters of the
preset.
43
SECONDARY INSTRUMENT
This function allows you to select which of the available instrument
sounds (or none) will be placed on the secondary layer of the current user
preset.
INSTRUMENT sec
I001 Piano
KEY RANGE
Key range sets the keyboard range of both primary and secondary
instruments. This sets the keyboard range for the entire preset and will
further limit the primary and secondary keyboard ranges. The key range
can be set anywhere from C-2 to G8.
KEY RANGE
C-2 -> G8
Page 46

44
Pri Instr.
Sec Instr.
Key Range
Primary Instrument
Key Range
Key Range
Secondary Instrument
Key Range
EDIT MENU
Proteus operation manual
PRIMARY KEY RANGE
Key range sets the keyboard range of the primary instrument. This is
useful for creating positional crossfades and keyboard splits between the
primary and secondary layers. The key range can be set anywhere from
C-2 to G8.
KEY RANGE pri
C-2 -> G8
This diagram shows how a "split" keyboard can be programmed using the primary
and secondary instruments.
This diagram shows how instruments can be layered or "stacked" using the primary
and secondary instruments.
Page 47

Proteus operation manual
Proteus Keyboard Range
MIDI
Key #
Key
Name
0 1224364860728496108120127
C-2 C-1 C0 C1 C2 C3 C4 C5 C6 C7 C8
= Standard 5 Octave Keyboard Range
SECONDARY KEY RANGE
Key range sets the keyboard range of the secondary instrument. The key
range can be set anywhere from C-2 to G8.
Key Range
EDIT MENU
45
KEY RANGE sec
C-2 -> G8
VOLUME
Volume sets the amplitude of the primary and secondary instruments.
This function also allows you to compensate for the relative volume
differences between instruments.
VOLUME
pri:127 sec:64
PAN
Pan allows you to independently set the initial pan position of the primary
and secondary instruments. A value of -7 pans the instrument hard left
and a value of +7 pans the instrument hard right. This pan setting is only
valid if “P”, for preset pan, is selected in the main display.
PAN
pri:-7 sec:+7
Page 48

46
Coarse Tuning
EDIT MENU
Proteus operation manual
COARSE TUNING
This function allows you to change the tuning of the primary and
secondary instruments in semitone intervals. The coarse tuning range is
-36 to +36 semitones. A coarse tuning setting of "00" would indicate that
the instrument is tuned to concert pitch (A=440 Hz).
TUNING coarse
pri:+00 sec:+00
FINE TUNING
This function allows you to change the tuning of the primary and
secondary instruments in 1/64 semitone intervals (approx. 1.56 cents).
The fine tuning range is ± 1 semitone.
TUNING fine
pri:+00 sec:+00
CHORUS
Chorus “thickens” the sound by doubling the sound and then detuning
it. Proteus/1 chorus can be only be turned On or Off. Proteus/2 and above
allow you select the chorus amount from a range of 1 to 15. When Chorus
is on, the number of channels used by an instrument will be doubled.
Proteus/1 Proteus/2 and above
CHORUS CHORUS
pri:On sec:Off pri:Off sec:07
DELAY
Delay varies the time between when a MIDI Note On message is received
and the onset of a note. The delay time is adjustable from 0 to 13 seconds
(000-127).
DELAY
pri:000 sec:000
Page 49

Proteus operation manual Solo Mode
EDIT MENU
SOLO MODE
Solo mode provides the playing action of a monophonic instrument with
single triggering and last-note priority. This mode does not allow you to
play a chord. Solo mode will not retrigger the envelope generators if a
new note is played while another is being held. This allows a legato
playing technique to be used. Solo mode also provides more realistic
effects when working with guitar and wind controllers.
SOLO MODE
pri:Off sec:On
47
SOUND START
This function allows you to set where a sample begins playing when you
hit a key. A setting of 000 plays a sound from the beginning, higher values
move the sample start point toward the end of the sound.
SOUND START
pri:000 sec:000
REVERSE SOUND
When reverse sound is turned On, the instrument will be played backwards. When an instrument is reversed, any loops in the sound will be
ignored, which means that the sound will not sustain indefinitely.
REVERSE SOUND
pri:Off sec:On
Page 50

48
Alternate Envelope
EDIT MENU
Proteus operation manual
DCA
Normal
Envelope
Atk Dec Rel
Alternate
Envelope
Atk Dec Rel
ALTERNATE ENVELOPE ON/OFF
Each instrument has its own factory preset AHDSR volume envelope
which is normally employed. If a programmable volume envelope is
desired, the alternate envelope is used.
ALT ENVELOPE
pri:Off sec:On
PRIMARY ALTERNATE ENVELOPE PARAMETERS
This function allows you to adjust the alternate volume envelope parameters for the primary instrument. The parameters are Attack time, Hold
time, Decay time, Sustain level, Release time and are adjustable from 00
to 99.
P: A H D S R
00 00 00 99 16
SECONDARY ALTERNATE ENVELOPE PARAMETERS
This function allows you to adjust the alternate volume envelope parameters for the secondary instrument. The parameters are Attack time, Hold
time, Decay time, Sustain level, Release time and are adjustable from 00
to 99.
S: A H D S R
00 00 00 99 16
Page 51

Proteus operation manual
CROSSFADE MODE
This function determines which of the following crossfade modes will be
selected: Off, Crossfade, or Cross-Switch.
Off: When “off” is selected, none of the crossfade parameters will have
any effect.
Crossfade: When “crossfade” is selected, a control input is used to fade
between the primary and secondary. Any modulation source may be
used as an input (velocity, wheel, etc.)
Cross-switch: When “cross-switch” mode is selected, the switched layer
is selected if the input crosses a certain threshold or if a footswitch
controlling cross-switch is activated. The switch occurs only at the start of
the note; no further switching takes place while the key is held down.
If key position or velocity is routed to cross-switch, the threshold is the
switch point. Realtime controllers do not have any effect when routed to
cross-switch. For more information, see Cross-Switch Point on page 51.
Crossfade Mode
EDIT MENU
49
XFADE MODE
Off
Primary
Instrument
Key Range
Crossfade Range
By overlapping the primary and secondary instruments, you can crossfade or cross-switch
between the two layers.
Secondary
Instrument
Key Range
Page 52

50
Crossfade Direction
EDIT MENU
Proteus operation manual
CROSSFADE DIRECTION
This function determines the polarity of the crossfade or cross-switch.
The direction is either primary ➝ secondary, or secondary ➝ primary.
XFADE DIRECTION
Pri -> Sec
CROSSFADE BALANCE
The crossfade balance parameter determines the initial balance between
the primary and secondary layers. Any modulation is subsequently
added to this value. Crossfade balance is variable between 000 and 127.
■
A Crossfade Balance
setting of 000 would be
appropriate with a
source such as a
modulation wheel or
footpedal which only
change the value in a
positive direction.
INPUT
Velocity,
Mod. Wheel,
Footpedal,
etc.
XFADE BALANCE
064
PRIMARY
AMOUNT
CROSSFADE
CROSSFADE
BALANCE
32
Primary
Only
Equal
Amount
12 52
CROSSFADE
AMOUNT
40
Secondary
Only
SECONDARY
AMOUNT
12864032 96
Crossfading between Primary and Secondary instruments will occur between the values of 12
and 52. Above and below these points, the output will be completely Primary or Secondary.
Page 53

Proteus operation manual Crossfade Amount
EDIT MENU
CROSSFADE AMOUNT
The crossfade amount parameter determines the range over which
crossfading will occur. Crossfade amount is variable from 000 to 255. The
larger the value, the more modulation will be required to effect a complete
crossfade.
XFADE AMOUNT
128
CROSS-SWITCH POINT
The cross-switch point parameter determines the point at which crossswitching will occur when key position or velocity is controlling crossswitch.
51
SWITCH POINT
Velocity
064 c#2
Key
LFO 1 - SHAPE and AMOUNT
This screen controls the waveshape and amount of Low Frequency
Oscillator 1. The LFO can be used to produce vibrato (when routed to
pitch), or tremolo (when routed to volume). The five LFO waveshapes
are: Triangle, Sine, Square, Sawtooth, and Random. The amount can be
varied from -128 to +127. Negative values will produce inverted waveshapes.
LFO1 SHAPE AMT
Rand +127
Triangle
Sine
Sawtooth
Random
Square
Page 54

52
EDIT MENU
Proteus operation manualLFO 1
LFO 1 - RATE, DELAY and VARIATION
This screen controls the rate, delay and variation of LFO 1.
■ LFO Rate: varies the LFO speed from 0.052 Hz to 25 Hz (000-127).
■ LFO Delay: sets the amount of time between hitting a key and the onset
of modulation. This can be used to simulate an effect often used by
acoustic instrument players, where the vibrato is brought in only after the
initial note pitch has been established. The delay range is variable from 0
to 13 seconds (000-127).
time
Delay
key
down
The LFO wave begins after the specified delay time has elapsed.
■ LFO Variation: sets the amount of random variation of an LFO each
time a key is pressed. This function is useful for ensemble effects, where
each note played has a slightly different modulation rate. The higher the
number, the greater the note to note variation in LFO rate. LFO variation
is variable from 000-127.
LFO1 RT DLY VAR
000 000 000
LFO 2 - SHAPE and AMOUNT
LFO 2 is functionally identical to LFO 1.
LFO 2 - RATE, DELAY and VARIATION
LFO 2 is functionally identical to LFO 1.
Page 55

Proteus operation manual
AUXILIARY ENVELOPE
This is a supplementary, utility envelope that can be routed to any
realtime control destination. The auxiliary envelope parameters are:
Envelope Amount, Delay, Attack Time, Hold Time, Decay Time, Sustain
Level, and Release Time. The delay time is variable from 0 to 13 seconds
(000-127). The envelope amount is variable from -128 to +127. Negative
values will produce inverted envelopes.
AUX ENV AMT DLY
+127 000
Auxiliary Envelope
EDIT MENU
53
level
time
D
e
l
a
y
key
down
A: A H D S R
00 00 00 99 20
A
t
t
a
c
k
H
o
l
d
D
e
c
a
y
Sustain
R
e
l
e
a
s
e
key
released
This diagram shows the six stages of the Auxiliary Envelope Generator.
Page 56

54
Auxiliary
DAHDSR
AmtAtk Dec Rel
LFO 1
Amount Freq.
LFO 2
Amount Freq.
Modulation Destinations
Pan
R
L
R
L
Level
Level
Volume
AHDSR
Atk Dec Rel
DCA
DCA Pan
Atk Dec Rel
Volume
AHDSR
X-Fade
Primary
Instrument
Pitch
Sample
Start
Tone
Secondary
Instrument
Pitch
Sample
Start
Tone
VELOCITY
VELOCITY
CURVE
KEY NUMBER
KEYBOARD
CENTER
Keyboard and Velocity Modulation Sources
KYBD/ Velocity.Modulation
EDIT MENU
Proteus operation manual
Modulation Sources:
Key Number and Key
Velocity
Destinations:
Off,
Pitch, Primary Pitch,
Secondary Pitch,
Volume, Primary
Volume, Secondary
Volume, Attack,
Primary Attack,
Secondary Attack,
Decay, Primary
Decay, Secondary
Decay, Release,
Primary Release,
Secondary Release,
Crossfade, LFO 1
Amount, LFO 1 Rate,
LFO 2 Amount, LFO 2
Rate, Auxiliary
Envelope Amount,
Auxiliary Envelope
Attack, Auxiliary
Envelope Decay,
Auxiliary Envelope
Release, Sample
Start, Primary Sample
Start, Secondary
Sample Start, Pan,
Primary Pan,
Secondary Pan, Tone,
Primary Tone,
Secondary Tone
When Modulating
Envelope Attack,
Decay, or Release
Times:
KEYBOARD and VELOCITY MODULATION CONTROL
These functions allow you to route keyboard and velocity information to
any of the modulation destinations on the Proteus. Up to 6 simultaneous
paths or “patches” may be programmed. For each modulation patch,
there is a source (keyboard or velocity), and a corresponding amount
parameter which is variable from -128 to +127. Place the cursor under the
appropriate parameter and change the patch number, modulation
source, modulation destination, or the amount using the data entry
control. If a parameter is not labeled either primary or secondary, it
affects both.
KEY/VELOCITY CTL
1 V>Attack -064
Modulation
Destination
Modulation
Source
Modulation
Amount
Number
Patch
Positive amounts of
modulation increase
the time.
Negative amounts of
modulation decrease
the time.
Page 57

Proteus operation manual
Realtime Modulation
REALTIME MODULATION CONTROL
These functions allow you to route realtime controllers to any of the
modulation destinations on Proteus except Tone, Sample Start and Pan.
Up to 8 simultaneous patches may be programmed. For each modulation
patch, there is a source and a destination parameter. Place the cursor
under the appropriate parameter and change the patch number, modulation source or modulation destination using the data entry control. If
a parameter is not labeled either primary or secondary, it affects both.
REALTIME CTL
1 LFO1 ->Pitch
55
EDIT MENU
Modulation Sources:
Pitch Wheel, MIDI
Control A, MIDI
Control B, MIDI
Control C, MIDI
Control D, Mono
Pressure, Polyphonic
Pressure, LFO 1, LFO
2, Auxiliary Envelope
LFO 1
Amount Freq.
LFO 2
Amount Freq.
Auxiliary
DAHDSR
AmtAtk Dec Rel
Patch
Number
Modulation
Destination
Modulation
Source
Primary
Instrument
Pitch
X-Fade
Secondary
Instrument
Pitch
Modulation Destinations
DCA Pan
Volume
AHDSR
Atk Dec Rel
Level
DCA
Volume
Level
AHDSR
Atk Dec Rel
Pan
Destinations:
Pitch, Primary Pitch,
Secondary Pitch,
Volume, Primary
Volume, Secondary
Volume, Attack,
Primary Attack,
Secondary Attack,
Decay, Primary
R
Decay, Secondary
Decay, Release,
L
Primary Release,
Secondary Release,
Crossfade, LFO 1
Amount, LFO 1 Rate,
LFO 2 Amount, LFO 2
Rate, Auxiliary
R
Envelope Amount,
Auxiliary Envelope
Attack, Auxiliary
L
Envelope Decay,
Auxiliary Envelope
Release
Off,
PITCH WHEEL
MONO
PRESSURE
POLY
PRESSURE
MIDI
CONTROLLER
A/B/C/D
LFO 1
Realtime Modulation Sources
LFO 2
AUXILIARY
ENVELOPE
Page 58

56
EDIT MENU
Proteus operation manualFootswitch Control
FOOTSWITCH CONTROL
This function allows you route the 3 footswitch controllers (1, 2 or 3) to
any of the footswitch destinations. The footswitches can be routed to
switch: Sustain (pri/sec/both), alternate volume envelope (pri/sec/
both), alternate volume release (pri/sec/both), or cross-switch between
the primary and secondary instruments.
FOOTSWITCH CTL
1 -> Sustain
MIDI CONTROLLER AMOUNT
This function allows you to specify an amount parameter (variable from
-128 to +127) for each of the MIDI controllers.
CONTROLLER AMT
A:+127 B:-090
CONTROLLER AMT
C:+127 D:-090
PRESSURE AMOUNT
This function allows you to specify an amount parameter for mono or
poly keyboard pressure data. The pressure amount is variable from -128
to +127.
PRESSURE AMOUNT
+127
Page 59

Proteus operation manual Pitch Bend Range
EDIT MENU
PITCH BEND RANGE
This function allows you to specify the pitch wheel range for the current
preset or it can be set to be controlled globally (set in the Master menu).
Pitch bend range is only applied when the pitch wheel is used to control
pitch.
PITCH BEND RANGE
+- 12 semitones
VELOCITY CURVE
Incoming velocity data can be modified by a velocity curve in order to
provide different types of dynamics in response to your playing or better
adapt to the MIDI controller. This function allows you to select one of the
four velocity curves or leave the velocity data unaltered (off). In addition,
the velocity curve can be set to "Global", which means that the global
velocity curve (programmed in the Master menu) is used.
57
VELOCITY CURVE
Global
140
120
100
80
60
40
20
0
0 102030405060708090100
Curve 1 Curve 2
140
120
100
80
60
40
20
0
0 102030405060708090100
Curve 3 Curve 4
140
120
100
80
60
40
20
0
0 102030405060708090100
140
120
100
80
60
40
20
0
0 102030405060708090100
Page 60

58
EDIT MENU
Proteus operation manualKeyboard Center
KEYBOARD CENTER
The Keyboard Center parameter establishes a reference point for keyboard modulation. Keys above this point will have a positive value and
keys below it will be negative. The keyboard center can be set to any key
within the range A-1 to C7.
KEYBOARD CENTER
c#3
KEY CENTER
+
-
+
0
-
KEYBOARD TUNING
In addition to the standard equally divided octave tuning, Proteus
contains three other types of scale tuning and one user-definable tuning.
This function selects which tuning will be used in the current preset.
The choices of keyboard tunings are:
Equal tuning (12 tone equal temperment)
Standard Western tuning
Just C tuning (just intonation)
Based on small interval ratios; sweet and pure; non-beating intervals
Vallotti tuning (Vallotti and Young non-equal temperment)
Similar to 12 tone equal temperment; for a given scale, each key has a
different character
19 Tone tuning (19 tone equal temperment)
19 notes per octave; difficult to play but works well with a sequencer
Gamelan (Javanese) tuning (5 tone Slendro and 7 tone Pelog)
Pelog-white keys; Slendro-black keys; exotic tunings of Gamelan flavor
User tuning which is defined in the Master menu.
Page 61

Proteus operation manual
PRESET LINKS
Presets may be linked to other presets in order to create layering or
keyboard splits. The current preset can be linked with up to three other
presets. Each linked preset can be assigned to a specific range in order to
easily create keyboard splits. The modulation parameters specified in
each preset remain in effect for each preset in the link.
LINK 1 c#1->f#4
000 Preset Name
Preset Links
EDIT MENU
59
LINK 2 c#1->f#4
191 Preset Name
LINK 3
Off
LINK
PRESET #1
Key Range
CREATING A SPLIT KEYBOARD
PRESET #2
Key Range
LINK
Key Range
PRESET #1
PRESET #2
LAYERING TWO PRESETS
Page 62

60
Save Preset
EDIT MENU
Proteus operation manual
SAVE PRESET
Changes made to a preset in the Edit menu are not made permanent until
the preset is Saved. To save a preset, move the cursor to the bottom line and
select the location for the new preset with the data entry control. The Enter
LED will be flashing. Pressing the Enter switch will confirm the operation. Any user preset (64-127) may be selected using the data entry
control. Writing to a user preset erases the existing preset in that location.
Make sure that the destination preset does not contain information that
you wanted to keep.
SAVE PRESET to
064 Preset Name
To Save a Preset:
1. Select the new location
2. Press Enter
Page 63

Proteus operation manual
Programming Proteus
61
PROGRAMMING PROTEUS
Page 64

62
Proteus operation manual
Page 65

Proteus operation manual Linking Presets
PROGRAMMING PROTEUS
This section is an introduction to the Edit menu, explains the concept of
Proteus Synthesis, and contains specific programming examples and tips.
LINKING PRESETS
Linking presets is a quick and easy way to create new sounds by “layering
presets” and also to “split” the keyboard into sections containing different sounds.
LAYERING TWO PRESETS
1) Select the first preset you wish to layer.
2) Press the Edit button.
63
3) Use the data entry control to move through the screens until you find
one of the “LINK” screens.
4) Move the cursor to the second line of the display, then select the preset
that you want to be linked with this preset. You may want to play the
keyboard as you scroll through the various presets in order to hear the
results.
5) If you want the link to be a permanent part of the preset, be sure to
“SAVE PRESET”.
CREATE A SPLIT KEYBOARD USING LINKS
1) Follow steps 1 through 4 above.
2) Now set the range of the linked preset while still in the LINK menu.
3) Save the preset.
4) Now go back to the first preset, press the Edit button and use the data
entry control to move through the screens to KEY RANGE.
5) Set the range of this preset so that it fills the remaining range of your
keyboard.
6) Save the preset.
Page 66

64
PROGRAMMING PROTEUS
EDITING PRESETS
The easiest way to make a preset is to edit an existing preset. This is also
an excellent way of becoming familiar with Proteus. If you don’t like
what you hear, simply change the preset and Proteus reverts back to the
original sound. Changes are not made permanent until you Save them
using the “SAVE PRESET” function, which is the last screen in the Edit
menu. Let’s experiment and modify a few parameters of an existing
preset. We’ll start with functions that have an obvious effect on the sound
like Instrument select, Coarse Tuning, Chorus, and Reverse Sound.
First, choose a preset that strikes your fancy and press the Edit button.
CHANGING THE INSTRUMENT
This is probably the easiest way to modify existing presets. Scroll through
the Edit menu functions until you come to:
Proteus operation manualEditing Presets
INSTRUMENT pri
IXXX Instr Name
Move the cursor down to the bottom line (using the cursor button) and
change the primary instrument with the data entry control. Play the
keyboard as you scroll through the various instruments. When you find
an interesting instrument, move the cursor back up to the first line and
select:
INSTRUMENT sec
IXXX Instr Name
Repeat the process for the secondary instrument. Find an instrument that
sounds good when combined with the first one you selected. You can
probably see that with all these great instruments to work with, you really
can’t go wrong. Now let’s play with the tuning.
CHANGING THE TUNING OF AN INSTRUMENT
Scroll through the Edit menu functions until you come to:
TUNING coarse
pri:+00 sec:+00
Page 67

Proteus operation manual Editing Presets
PROGRAMMING PROTEUS
If the numbers are “00” as in the example above, it means that the
instruments are tuned to concert pitch (A=440 Hz). Each whole number
in coarse tuning represents a semitone interval. To tune one or both of the
instruments up an octave, move the cursor to the number (using the
cursor button) and set the number to +12 using the data entry control. Try
tuning one of the instruments to a perfect fifth above the other. Simply set
the coarse tuning to +7.
CHORUS
This is an easy one. With the cursor on the top line of the display, turn the
data control until you find CHORUS. Chorus can be turned on or off for
each of the primary and secondary instruments. Chorus works by doubling the instruments and detuning them slightly. Try it.
65
CHORUS
pri:Off sec:Off
REVERSING THE SOUND
A simple concept. The instrument sounds can be played in reverse. This
will normally make an instrument sound quite a bit different. It also
virtually doubles the number of raw instruments you have to work with,
and it’s fun.
REVERSE SOUND
pri:Off sec:Off
You’re probably getting the idea by now. Remember not to change presets
or the preset will return to normal. If you want to save your creation, select
the last screen in the Edit menu and select a destination preset location for
your masterpiece, then press Enter. That’s it.
The previous examples were offered solely to pique your curiosity. By all
means, go ahead and experiment with any of the other functions. Some of
the best sounds have been discovered by accident. If it sounds good ... Do
it!
Page 68

66
PROGRAMMING PROTEUS
PROTEUS SYNTHESIS
Oh, no! Not another form of synthesis to learn.
Relax. It’s easy.
Proteus Synthesis is actually just a form of additive synthesis. Only,
instead of building a sound from simple sine waves, Proteus starts with
complete sampled sounds or complex waveforms and combines all or
part of these together to form a new sound. The process is illustrated
below.
Proteus operation manualProteus Synthesis
PROTEUS SYNTHESIS
Instrument
Pri
Sec
Fade
Area
Portions of two sounds are dynamically crossfaded in order to produce a new sound containing
elements of both.
Shaped with DCA Added Together to
form Resultant Sound
Fade
Area
The envelope generators controlling the DCAs (digitally controlled amplifiers) can be used to fade between two instruments (primary and
secondary) during the course of a note. This powerful technique allows
you to combine elements of different instruments together to form
completely new sounds. New sounds that are totally natural, because
they are based on natural sounds. Proteus also contains many digitally
generated waveforms that can be combined with other digital waves or
with sampled instruments in order to change the character of the sound,
perhaps to add a digital “edge” or add more bottom. In addition to the
envelope generators, parameters such as Delay, Sample Start, and
Crossfade allow you to further control the blend of primary and secondary instruments.
Page 69

Proteus operation manual Programming Examples
PROGRAMMING PROTEUS
As an example, let's combine the electric guitar and a synthesized waveform to create a new instrument. Refer to the Edit menu parameters in the
chart below. The Electric Guitar is the basic sound and is augmented by
a chorused, synthesized wave which adds a digital sheen. Note that the
guitar has a slower attack, which completely changes its character.
Basically, the attack of the guitar has been replaced by the synthesized
wave. In addition, the guitar is tuned up one octave and the two sounds
have been panned to different positions in the stereo field.
Primary Secondary
Instrument: Oct. 7 All
Alt Envelope: On Alt Envelope: On
A H D S R
00 00 51 00 36
Volume: 45
Chorus: On
Pan: +2
Instrument: El. Guitar
A H D S R
05 05 27 88 44
Volume: 88
Chorus: Off
Tuning: +12Tuning: +00
Pan: -2
67
ANOTHER EXAMPLE
As another example, we'll use the attack portion of the Soft Flute and the
sustain portion of the Tenor Sax as raw material. This time we will use the
Delay and Sample Start parameters as well as the Alternate Envelopes to
blend the two instruments. The attack portion of the secondary instrument is removed using the sample start parameter and then delayed
slightly so it will sound only after the flute attack portion begins to decay.
Primary Secondary
Instrument: Soft Flute
Alt Envelope: On Alt Envelope: On
A H D S R
04 02 16 00 16
Volume: 109
Fine Tuning: +05
Delay: 000
Sound Start: 000 Sound Start: 040
Instrument: Tenor Sax
A H D S R
06 00 38 85 40
Volume: 83
Fine Tuning: +00
Tuning: +12Tuning: +12
Delay: 002
Page 70

68
Sequencing Proteus
PROGRAMMING PROTEUS
The alternate envelopes are used to "fine tune" the splice. Furthermore,
the flute attack has been detuned a bit sharp so the composite sound will
start sharp and fall into correct pitch. Continue your experiments using
this example, but changing the primary and secondary instruments.
When you have found a good combination, "fine tune" the delay, sample
start, volume and envelope parameters. Feel free to play with the modu-
lation parameters as well.
USING PROTEUS WITH A SEQUENCER
We thought you’d never ask. Proteus was designed from its conception
with multi-timbral sequencing in mind. Just take a look at the main
screen.
Proteus operation manual
C01 Vol127 Pan+0
000 Preset Name
The preset for each MIDI channel is selected from the main screen. Press
the cursor button to move the cursor up so that it is underneath the
channel number.
C01 Vol127 Pan+0
000 Preset Name
Turn the data entry control and you will see that every MIDI channel has
a preset assigned to it. Just select a preset for each of the MIDI channels.
It’s simple! In order to respond to multiple MIDI channels, Proteus must
be in Multi-Mode. Multi-Mode is selected in the Master menu. Press the
Master menu button and use the data entry control to scroll through the
screens until you find MIDI MODE.
MIDI MODE ID
Multi 00
Page 71

Proteus operation manual
Advanced Sequencing
PROGRAMMING PROTEUS
Move the cursor down to the second line and change the mode to Multi
as shown. Proteus will now respond to multiple MIDI channels.
MORE ADVANCED SEQUENCING
PRE-SEQUENCE SETUP
Suppose that you want to have your sequencer set up everything for you
before the start of the song. Good idea. This will make the Proteus setup
procedure automatic and prevent the wrong presets from playing.
The basic idea of a pre-sequence setup is to send out MIDI information
just before the start of the song. This MIDI information will select all the
proper presets, adjust the mix, and pan positions of each preset.
69
Note: Proteus setup information should be transmitted from the sequencer before the song actually starts, perhaps during a lead-in measure
or countdown. DO NOT send setup information just before the first beat
of the song or MIDI timing errors could result.
INITIAL SETUP
In the Master menu:
1) Turn ON Multi-Mode
2) Turn ON Preset Change enable for each channel.
3) Turn OFF MIDI Enable on MIDI channels that are to be used for other
synthesizers.
PRESET, VOLUME and PAN SETUP
Program your MIDI sequencer to transmit the following information
before the song starts.
1) Select the proper presets for each MIDI channel used on Proteus.
■
The Preset, Volume,
and Pan information for
all 16 channels is included when the Master
settings are transmitted
or received.
2) Send MIDI volume information (controller #7) for each MIDI channel
used on Proteus.
3) Send MIDI pan information (controller #10) for each MIDI channel
used on Proteus.
Page 72

70
PROGRAMMING PROTEUS
Now your song will play perfectly every time using the proper presets,
volumes and pan positions. In addition, presets, volumes and pan
positions (or anything else for that matter) can be adjusted in realtime
during the song. Note: If the wrong presets are being selected, check the
MIDI Program -> Preset map.
The following
Proteus/1 presets
use only one output
channel:
5. Acoustic Guitar
14. Rock Drums 1
20. Velocity Falls
25. Special FX 1
30. Latin Drums
31. Wind Chimes
35. Baritone Sax
36. Solo Trumpet
46. Latin Percussion
48. Grand Piano
53. Solo Trombone
124. Tremolo Vibe
127. Barber Pole
160. Low Grand
161. Bright Piano
162. Xpressive String
163. String Vel.-> Atk.
164. Choir
165. Dark Choir
167. Alto Sax
168. Tenor Sax
170. French Horn
171. Trombone 2
172. Trom./Trumpet
173. Guitar Mutes
174. Electric Guitar
176. Rock Bass
177. Flint Bass
178. Bass Synth 2
179. Harmonics
180. Marimba
181. Vibes Wheel
182. Percussives
183. Rock Drums 2
184. Rock Drums 3
185. Snares/Drums
186. Kick Drums
187. Cymbals
188. Tom Toms
189. Conga Trans.
190. Block Trans.
To carry the pre-sequence setup even further, you can even include preset
data for each preset used in the sequence. See page 22 for details.
USING THE 32 CHANNELS
As stated earlier, Proteus has 32 independent audio channels which are
utilized dynamically. With 32 channels and 192 presets, you have a
universe of sonic textures at your disposal. But you have probably
noticed that many of the best sounding presets in Proteus are linked with
other presets or have chorus applied to them in order to make them sound
larger. While this is fine when the preset is played solo, you may begin to
run out of channels when Proteus is played multi-timbrally. Linking and
chorusing cause twice as many channels to be used by the preset. Learn
to "budget" your output channels for maximum efficiency.
CHANNEL RIPOFF
When Proteus uses up all its 32 channels and needs more, it steals a
channel from the key that has been held the longest. This is commonly
known as “channel ripoff”. You will most commonly encounter this
“ripoff” when using Proteus in multi-timbral mode. Since Proteus dynamically allocates channels as needed, to eliminate ripoff you must
either, play fewer notes, use simpler sounds, turn off doubling (pri/sec,
chorus, or linked presets), or use MIDI overflow to another Proteus.
INSTRUMENT DEFINITION
If your sequence has a instrumental section using numerous chords, it
may be advantageous to use a basic preset without links or chorus. A
preset will sound much different alone than when combined with an
ensemble. Try to resist the temptation to make every sound as fat as
possible or you can wind up with “MIDI Soup”; a huge, stifling sound
with every possible audio frequency filled. A solo saxophone in a band
isn't chorused and it sounds great. Each voice in your composition should
have it’s own identity. Save the monster sounds for solos or dramatic
effects.
Proteus operation manualUsing the 32 Channels
Page 73

Proteus operation manual External Processing
PROGRAMMING PROTEUS
USING EXTERNAL PROCESSING
Don't be afraid to use external processing on specific sounds if you feel the
urge. The submix sends and returns on Proteus are there for a reason. In
many instances a bit of reverb or EQ will be just the thing an instrument
needs to give it a distinct identity. Incidentally, an external fuzz box can
work wonders on the clean electric guitar sound. If you think about it,
adding distortion to a clean guitar sound is much closer to the way an
electric guitar is normally processed. By dedicating one of your old fuzz
boxes to a submix out/in, you can have programmable distortion for use
on guitars, organs, or whatever.
71
SUB 2
Fuzzman
OUTPUTS
SUB 1
LLLR
RingTip
RR
RingTip RingTip
STEREOMONO
MAIN
Stereo
Fuzz Box
Using the programmable outputs and returns, specific presets can be routed through your
favorite effects without using up precious mixer channels.
Reverb Unit
Page 74

72
This patch sheet may be photocopied and used to keep written records of your favorite Proteus sounds.
PROTEUS Patch Sheet
Proteus operation manualPatch Sheet
KEY/VELOCITY CONTROL
MIX OUTPUT
PRI INSTRUMENT
SEC INSTRUMENT
KEY RANGE
Pri KEY RANGE
Sec KEY RANGE
Pri VOLUME
Sec VOLUME
Pri PAN
Sec PAN
Pri COARSE TUNE
Sec COARSE TUNE
Pri FINE TUNE
Sec FINE TUNE
Pri CHORUS
Sec CHORUS
Pri DELAY
Sec DELAY
Pri SOLO
Sec SOLO
Pri SOUND START
Sec SOUND START
Pri REVERSE
Sec REVERSE
Pri ATTACK
Pri HOLD
Pri DECAY
Pri SUSTAIN
Pri RELEASE
Sec ATTACK
Sec HOLD
Sec DECAY
Sec SUSTAIN
Sec RELEASE
XFADE MODE
XFADE DIRECTION
XFADE BALANCE
XFADE AMOUNT
SWITCH POINT
LFO 1 SHAPE
LFO 1 AMOUNT
LFO 1 RATE
LFO 1 DELAY
LFO 1 VARIATION
LFO 2 SHAPE
LFO 2 AMOUNT
LFO 2 RATE
LFO 2 DELAY
LFO 2 VARIATION
AUX ENV AMOUNT
AUX ENV DELAY
AUX ENV-ATTACK
AUX ENV-HOLD
AUX ENV-DECAY
FD Xsw
1 >
2 >
3 >
4 >
5 >
6 >
REALTIME MOD. CONTROL
1 -
2 -
3 -
4 -
5 -
6 -
7 -
8 -
FOOTSWITCH CONTROL
1
2
3
CONTROLLER AMOUNT
CONTROLLER A
CONTROLLER B
CONTROLLER C
CONTROLLER D
PRESSURE AMT.
P-BEND RANGE
VEL. CURVE
KYBD CENTER
KYBD TUNING
LINK 1
Pri ALT. ENVELOPE
Sec ALT. ENVELOPE
AUX ENV-SUSTAIN
AUX ENV-RELEASE
LINK 2
LINK 3
Page 75

Proteus operation manual Reference
REFERENCE SECTION
73
Page 76

74
Factory Presets
PROTEUS/1 FACTORY PRESETS
Proteus operation manual
PROTEUS
Presets
0-63
64-127
128-191
PROTEUS XR
0-255
256-383
■
The RAM presets
may be modified or replaced as you desire,
but the ROM presets
are stored permanently in the Proteus.
ROM
RAM
ROM
Presets
RAM
ROM
KEYBOARDS
0. (256) Stereo Piano
9. (265) B3 Mod->Leslie
16. (272) Heaven
18. (274) Electric Piano
32. (288) Harpsikord
39. (295) String Bass/Piano *
48. (304) Grand Piano
66. (66) Space Clavier
69. (69) Ball Game
80. (80) Vibrant Piano *
96. (96) Piano Drama
99. (99) Reedy Keys
112. (112) Winston Grand
122. (122) Mr. Minister
128. (320) Piano & Synth *
144. (336) Saloon Piano
160. (352) Low Grand
161. (353) Bright Piano
STRINGS
1. (257) Hall Strings
33. (289) String Orchestra
49. (305) Flange String
65. (65) Isham Strings *
90. (90) Synth String
100. (100) String Swell
110. (110) Hall 2 Strings **
111. (111) Hall 2 Link **
113. (113) STRings
129. (321) String Chamber
132. (324) New Orchestra *
151. (343) Orchestra Hit
162. (354) Xpressive String
163. (355) String Vel. ->Atk.
VOICES
2. (258) InChoirIrie
34. (290) Human Voices
58. (314) Octave Choir
66. (66) WeAteFlangers
116. (116) Vibes/Choir *
145. (337) Crystal Choir *
146. (338) Herbal Verbal
164. (356) Choir
165. (357) Dark Choir
BRASS
3. (259) Big City Brass
19. (275) French Horn Sect.
20. (276) Velocity Falls
36. (292) Solo Trumpet
52. (308) Miles Solos
53. (309) Solo Trombone
68. (68) Hard Trumpet
83. (83) Orchestral Brass
84. (84) Low Octave Bones
91. (91) Space Trumpet
123. (123) Bone Face
131. (323) Trumpet Combo
132. (324) New Orchestra *
147. (339) Section Falls
148. (340) Section Horns *
170. (362) French Horn
171. (363) Trombone 2
172. (364) Tromb./Trumpet
REEDS/FLUTES
4. (260) Stereo Sax
17. (273) Verb Flute
35. (291) Baritone Sax
115. (115) Uboe
130. (322) Breathy Flute
132. (324) New Orchestra *
166. (358) Soprano Reed
167. (359) Alto Sax
168. (360) Tenor Sax
169. (361) Synth. Clarinet
PLUCKED
5. (261) Acou. Guitar
6. (262) Modern Guitar
21. (277) Stereo Mutes
37. (293) 12 String *
38. (294) Modern Harp
47. (303) SpaceBkwdGuitar
54. (310) Xpr. El. Guitar
59. (315) Gitano
70. (70) Clean Stratocaster
97. (97) Punctuate
107. (107) BanJovi
118. (118) Rock Gitaro
125. (125) Dulcimer
133. (325) Ster. Acou. Guitar
134. (326) Shamisen
173. (365) Guitar Mutes
174. (366) Electric Guitar
175. (367) Ster. El. Guitar
179. (371) Harmonics
SYNTHESIZER
8. MiniMoog Bass
10. (266) Phantazia
11. (267) Zound Trax
26. (282) Har. Synth
27. (283) Beyond FM
40. (296) Mythical Pad
41. (297) PianoBell
43. (299) Empyrean
50. (306) White Veil
51. (307) Dark World
55. (311) Space Bass Pad
56. (312) Dune
57. (313) RB’s Wine
64. (64) FM Style Piano *
66. (66) WeAteFlangers
67. (67) Space Clavier
73. (73) Space Horn
74. (74) Blue Ice
75. (75) Embered Tines
81. (81) Emperor *
82. (82) NoiseFree LA *
85. (85) Synthibell
Bold Type ... indicates a User Preset.
Number in Parenthesis = XR Preset Number
* ................... indicates that the preset is linked to another preset.
** ................. indicates that the two adjacent presets are linked.
Page 77

Proteus operation manual
Factory Presets
75
PROTEUS/1 FACTORY PRESETS
SYNTHESIZER
86. (86) Space Steel
89. (89) Squarish Lead
90. (90) Synth String
91. (91) Space Trumpet
98. (98) Lunar Window
101. (101) Jingle Pad
102. (102) Solo Lead
104. (104) Bass & Synth *
105. (105) Gillectro
106. (106) Pop Pad
114. (114) Sharp Edge
117. (117) Solo Synth 3
121. (121) Bed Tine
128. (320) Piano & Synth *
136. (328) Rock Attitude
137. (329) Tocatta Seven
138. (330) Pop Art
139. (331) Mini Solo
140. (332) Airimba
149. (341) Hollow Solo
152. (344) Keys Please
155. (347) Crazy Man
156. (348) Clock Chimes
178. (370) Bass Synth. 2
BASS
7. (263) Thunder Bass
8. (264) MiniMoog Bass
22. (278) Stone Bass & Har.
23. (279) Slap/Pop Bass
24. (280) Rap Bass
39. (295) String Bass/Piano *
55. (311) Space Bass Pad
71. (71) Noze Bass/Pad
72. (72) Wide Neck *
103. (103) Buzzy Frets
104. (104) Bass & Synth *
109. (109) Slippery Bass
135. (327) Stone Slap Bass
150. (342) Fat Boy Bass
176. (368) Rock Bass
177. (369) Flint Bass
178. (370) Bass Synth. 2
179. (371) Harmonics
TUNED
PERCUSSION
12. (268) Vibe n Me
13. (269) Tiki Threat
44. (300) Glockenspiel
45. (301) Wide Marimba
61. (317) Medicine Drum
76. (76) Odd Vibes
77. (77) Bright Steel *
92. (92) Metal Throat
93. (93) Light Mallet
94. (94) Congablock
108. (108) Malletumba
116. (116) Vibes/Choir *
124. (124) Tremolo Vibe
126. (126) Block Head
140. (332) Airimba
141. (333) Steel Drums
157. (349) Vibe & Marimba
180. (372) Marimba
181. (373) Vibes Whl-Mod.
189. (381) Conga Trans.
190. (382) Block Trans.
PERCUSSION
14. (270) Rock Drums 1
30. (286) Latin Drums
46. (302) Latin Percussion
61. (317) Medicine Drum
62. (318) Radical Drum
142. (334) Modern Drums
153. (345) Metal Toys
158. (350) Ster. Slap Drum
182. (374) Percussives
183. (375) Rock Drums 2
184. (376) Rock Drums 3
185. (377) Snares/Drums
186. (378) Kick Drums
187. (379) Cymbals
188. (380) Tom Toms
WORLD
28. (284) Kyoto Forest
29. (285) Balinesia
42. (298) Noh Way! *
60. (316) Thai Bath House
78. (78) Native Power *
134. (326) Shamisen
SOUND EFFECTS
15. (271) Metal Vapor
25. (281) Special FX 1
31. (287) Wind Chimes
63. (319) Mtlphone Arp. 9
79. (79) Insects
87. (87) Jet Boom **
88. (88) Jet Boom **
95. (95) Hold & Sample
119. (119) Animal 1 **
120. (120) Animal **
127. (127) Barber Pole
143. (335) Space Texture
153. (345) Metal Toys
154. (346) Weather
156. (348) Clock Chimes
159. (351) Flying Module
191. (383) Default Patch
Bold Type ... indicates a User Preset.
Number in Parenthesis = XR Preset Number
* ................... indicates that the preset is linked to another preset.
** ................. indicates that the two adjacent presets are linked.
Page 78

76
Sampled Sounds
PROTEUS INSTRUMENTS
SAMPLED SOUNDS
1. Piano ........................................................................... 9 foot Grand Piano
2. Piano Pad .......................... Piano with slow attack and sustained loop
3. Loose Piano.......................................................... Old style Grand Piano
4. Tight Piano...................................... Contemporary 9 foot Grand Piano
5. Strings .............. String section with Basses, Cellos, Violas and Violins
6. Long Strings...................... String section with long attack and release
7. Slow Strings ................. Section Strings with longer attack and release
8. Dark Strings ..................................... Section Strings with a darker tone
9. Voices.................................................................................... Female Choir
10. Slow Voices ................... Female Choir with longer attack and release
11. Dark Choir ........................................ Female Choir with a darker tone
12. Synth Flute ......................................... Genuine Flute with a short loop
13. Soft Flute ..................................................................... Slow attack Flute
14. Alto Sax ....................................................................................... Alto Sax
15. Tenor Sax.................................................................................. Tenor Sax
16. Baritone Sax ......................................................................... Baritone Sax
17. Dark Sax .................................................. Tenor sax with a darker tone
18. Soft Trumpet.......................................................... Soft blown Trumpet
19. Dark Soft Trumpet ............. Soft blown Trumpet with a darker tone
20. Hard Trumpet ..................................................... Hard blown Trumpet
21. Dark Hard Trumpet ......... Hard blown Trumpet with a darker tone
22. Horn Falls ................................................. Descending pitch Trumpets
23. Trombone 1 .............................................................................. Trombone
24. Trombone 2 ............................................................................. Trombone
25. French Horn....................................................................... French Horn
26. Brass 1 .................................... Combination Trombone/Soft Trumpet
27. Brass 2 .................................. Combination Trombone/Hard Trumpet
28. Brass 3 ........ Combination Trombone/Soft Trumpet/Hard Trumpet
29. Trombone/Sax ................................ Combination Trombone and Sax
30. Guitar Mute .............................................. Palm muted Electric Guitar
31. Electric Guitar............................. Clean, Humbucking Electric Guitar
32. Acoustic Guitar ........................................ Steel String Acoustic Guitar
33. Rock Bass ...................................................... Carbon Fiber Bass Guitar
34. Stone Bass .................................... Rare, Aluminum Neck Bass Guitar
35. Flint Bass ..................................... Bass Guitar with altered harmonics
36. Funk Slap .............................. Lower two Bass Guitar strings slapped
37. Funk Pop ..... Popped Bass Guitar strings (combine with Funk Slap)
38. Harmonics......................................................... Bass Guitar Harmonics
39. Rock/Harmonics ....... Combination Rock Bass and Bass Harmonics
Proteus operation manual
Page 79

Proteus operation manual
Sampled Sounds
PROTEUS/1 INSTRUMENTS
40. Stone/Harmonics .. Combination Alum. Neck Bass and Harmonics
41. Nose Bass ................................................ Chunky, Popped Bass Guitar
42. Bass Synth 1 ......................... Classic, Analog Synthesizer Bass Sound
43. Bass Synth 2 ..................................................... Digital Bass Synthesizer
44. Synth Pad .................................................. Fat, Digital Synthesizer pad
45. Medium Envelope Pad ..... Digital Synth pad with altered envelope
46. Long Envelope Pad. Digital Synth pad with long attack and release
47. Dark Synth .............................. Digital Synthesizer with a darker tone
48. Percussive Organ .......................... Classic, Tone Wheel Organ sound
49. Marimba ..................................................................................... Marimba
50. Vibraphone ........................................................................... Vibraphone
51. All Percussion (balanced levels) ........
52. All Percussion (unbalanced levels) ...
53. Standard Percussion Setup 1..............
54. Standard Percussion Setup 2..............
55. Standard Percussion Setup 3..............
56. Kicks ......................................................
57. Snares.....................................................
58. Toms ......................................................
59. Cymbals ................................................
60. Latin Drums..........................................
61. Latin Percussion ...................................
62. Agogo Bell.............................................
63. Woodblock ............................................
64. Conga.....................................................
65. Timbale ..................................................
66. Ride Cymbal .........................................
67. Percussion FX1 .....................................
68. Percussion FX2 .....................................
69. Metal ....................... Percussive, Metallic, Analog Synthesizer Sound
See the
Percussion
Instrument Location
Diagrams
on the following pages.
77
Page 80

78
Proteus/1 Harmonic Waveforms
PROTEUS/1 INSTRUMENTS
HARMONIC WAVEFORMS
70. Oct 1 (Sine)
71. Oct 2 All
72. Oct 3 All
73. Oct 4 All
74. Oct 5 All
75. Oct 6 All
76. Oct 7 All
77. Oct 2 Odd
78. Oct 3 Odd
79. Oct 4 Odd
80. Oct 5 Odd
81. Oct 6 Odd
82. Oct 7 Odd
83. Oct 2 Even
84. Oct 3 Even
85. Oct 4 Even
86. Oct 5 Even
87. Oct 6 Even
88. Oct 7 Even
89. Low Odds
90. Low Evens
91. Four Octaves
Proteus operation manual
Starting from the first octave (fundamental), the
harmonic waveforms contain the harmonics (odd,
even, or all) present in each octave. In each successive octave the number of harmonics doubles. By
combining (pri/sec or link) the harmonic waveforms in various amounts (volume), and transposing them (coarse/fine tuning), a vast range of timbres may be produced.
Frequency (log)
Level
Harmonic
Octave
The Harmonic Waveforms have been designed so that almost any harmonic combination may
be assembled.
12345678910 151617 3118
12 3 4 5
Page 81

Proteus operation manual Proteus/1 Waveforms
PROTEUS/1 INSTRUMENTS
SINGLE CYCLE WAVEFORMS
92. Synth Cycle 1
93. Synth Cycle 2
94. Synth Cycle 3
95. Synth Cycle 4
96. Fundamental Gone 1
97. Fundamental Gone 2
98. Bite Cycle
99. Buzzy Cycle 1
100. Metalphone 1
101. Metalphone 2
102. Metalphone 3
103. Metalphone 4
104. Duck Cycle 1
105. Duck Cycle 2
106. Duck Cycle 3
107. Wind Cycle 1
108. Wind Cycle 2
109. Wind Cycle 3
110. Wind Cycle 4
111. Organ Cycle 1
112. Organ Cycle 2
These single cycle waveforms were
either synthesized or taken from actual sampled sounds. They were
chosen for their diversity and interesting qualities.
79
MULTI-CYCLE WAVEFORMS
113. Noise
114. Stray Voice 1
115. Stray Voice 2
116. Stray Voice 3
117. Stray Voice 4
118. Synth String 1
119. Synth String 2
120. Animals
121. Reed
122. Pluck 1
123. Pluck 2
124. Mallet 1
125. Mallet 2
The multi-cycle cycle waveforms are
short sections of sampled sounds.
Page 82

80
All + Standard 1
PROTEUS/1
PERCUSSION INSTRUMENT LOCATIONS
14" Tom Tom
Proteus operation manual
MIDI
Key #
36 48 60 72 84 96
Kick 2
Kick 3
Snare 2
Reverb Kick 1
Reverb Snare 1
Snare 3
Reverb Click
Closed HiHat 1
Big HiHat
Ride Cymbal
Open HiHat 2
Closed HiHat 2
Rude Crash
Finger Snap
Electro Cymbal
Low Electro Cymbal
10" Tom Tom
Timbale Strike
Conga
Wood Block
Timbale Rimshot
Timbale Rimshot
Conga Open Slap
Conga Closed Slap
Cabasa
Maracas
Guiro Up
Agogo Bell
Guiro Down
Rosewood Claves
All Percussion
Instruments 51, 52
Reverb Click
Closed HiHat 1
Big HiHat
Finger Snap
Agogo Bell
Closed HiHat 2
Ride Cymbal
Rude Crash
Open HiHat 2
Wood Block
Agogo Bell
Rosewood Claves
Maracas
Cabasa
Agogo Bell
Reverb Click
Closed HiHat 1
Finger Snap
Big HiHat
Agogo Bell
Closed HiHat 2
Ride Cymbal
Rude Crash
Open HiHat 2
Agogo Bell
MIDI
Key #
36 48 60 72 84 96
Kick 3
Kick 2
Snare 2
10" Tom Tom
10" Tom Tom
Electro Cymbal
Snare 3
Timbale Strike
14" Tom Tom
14" Tom Tom
14" Tom Tom
Reverb Kick 1
Reverb Snare 1
Kick 2
10" Tom Tom
10" Tom Tom
10" Tom Tom
Electro Cymbal
Kick 3
Snare 2
Conga
Snare 3
Timbale Strike
Timbale Rimshot
Guiro Up
Guiro Up
Guiro Down
Reverb Kick 1
Conga Open Slap
Conga Closed Slap
10" Tom Tom
14" Tom Tom
14" Tom Tom
14" Tom Tom
Reverb Snare 1
Standard 1
Instrument 53
Timbale Rimshot
Page 83

Proteus operation manual
Standard 2 + 3
81
PROTEUS/1
PERCUSSION INSTR UMENT LOCA TIONS
MIDI
Key #
Reverb Click
Closed HiHat 2
Open HiHat 2
Finger Snap
36 48 60 72 84 96
Kick 2
Snare 2
10" Tom Tom
14" Tom Tom
14" Tom Tom
14" Tom Tom
Ride Cymbal
Rude Crash
Electro Cymbal
10" Tom Tom
10" Tom Tom
Reverb Kick 1
Electro Cymbal
Electro Cymbal
Closed HiHat 1
Big HiHat
Wood Block
Kick 3
Snare 3
Timbale Strike
Reverb Snare 1
Timbale Rimshot
Maracas
Rosewood Claves
Conga
Guiro Down
Conga Open Slap
Conga Closed Slap
Cabasa
Agogo Bell
Guiro Up
Guiro Up
Reverb Click
Finger Snap
Kick 2
Snare 2
14" Tom Tom
14" Tom Tom
Closed HiHat 2
Open HiHat 2
Rude Crash
Electro Cymbal
10" Tom Tom
10" Tom Tom
10" Tom Tom
14" Tom Tom
Electro Cymbal
Closed HiHat 1
Big HiHat
Ride Cymbal
Kick 3
Snare 3
Reverb Kick 1
Reverb Snare 1
Electro Cymbal
Timbale Strike
Standard 2
Instrument 54
Reverb Click
Closed HiHat 2
Open HiHat 2
Finger Snap
Electro Cymbal
Closed HiHat 1
Ride Cymbal
Rude Crash
Big HiHat
Wood Block
Electro Cymbal
Maracas
Cabasa
Rosewood Claves
Agogo Bell
Reverb Click
Closed HiHat 2
Finger Snap
Open HiHat 2
Ride Cymbal
Rude Crash
Electro Cymbal
Closed HiHat 1
Big HiHat
Electro Cymbal
Timbale Rimshot
MIDI
Key #
36 48 60 72 84 96
Kick 3
Snare 3
14" Tom Tom
10" Tom Tom
10" Tom Tom
10" Tom Tom
14" Tom Tom
14" Tom Tom
Kick 2
Snare 2
Reverb Kick 1
Hi Electro Cymbal
Timbale Strike
Reverb Snare 1
Conga
Timbale Rimshot
Conga Open Slap
Conga Closed Slap
Kick 3
Guiro Up
Guiro Up
Guiro Down
Snare 3
14" Tom Tom
14" Tom Tom
14" Tom Tom
10" Tom Tom
10" Tom Tom
10" Tom Tom
Electro Cymbal
Standard 3
Instrument 55
Standard percussion setups 1, 2, and 3 are compatible with the Alesis HR16,
Korg M1, Dr. T's "Dr. Drum" patterns as well as other devices and programs.
Kick 2
Snare 2
Reverb Kick 1
Timbale Strike
Reverb Snare 1
Timbale Rimshot
Page 84

82
Kicks, Snares, Toms
PROTEUS/1
PERCUSSION INSTR UMENT LOCA TIONS
Kick 2
Proteus operation manual
MIDI
Key #
MIDI
Key #
36 48 60 72 84 96
Reverb Kick 1
Kick 3
Kicks
Instrument 56
Snare 3
36 48 60 72 84 96
Reverb Snare 1
Snare 2
Snares
Instrument 57
MIDI
Key #
14" Tom Tom
36 48 60 72 84 96
10" Tom Tom
Toms
Instrument 58
Page 85

Proteus operation manual
PERCUSSION INSTR UMENT LOCA TIONS
Big HiHat Closed HiHat 2 Open HiHat 2
Cymbals + Latin
PROTEUS/1
83
MIDI
Key #
MIDI
Key #
36 48 60 72 84 96
Closed HiHat 1
Ride Cymbal Rude Crash
Cymbals
Instrument 59
Timbale Strike
36 48 60 72 84 96
Conga Closed Slap
Conga Closed Slap
Conga
Conga
Conga Open Slap
Conga Open Slap
Conga Closed Slap
Conga Closed Slap
Conga
Conga
Conga Closed Slap
Conga Closed Slap
Conga
Conga
Conga Open Slap
Conga Open Slap
Conga Closed Slap
Conga Closed Slap
Conga Closed Slap
Conga Closed Slap
Conga Closed Slap
Conga
Conga
Conga Open Slap
Conga Open Slap
Conga Open Slap
Conga Open Slap
Timbale Strike
Timbale Rimshot
Timbale Rimshot
Timbale Strike
Timbale Strike
Timbale Strike
Timbale Rimshot
Timbale Rimshot
Timbale Strike
Timbale Rimshot
Timbale Rimshot
Timbale Strike
Timbale Strike
Timbale Strike
Timbale Rimshot
Timbale Rimshot
Timbale Strike
Timbale
Rimshot
MIDI
Key #
Latin Drums
Instrument 60
Guiro UpCabasaMaracas
36 48 60 72 84 96
Guiro Down
Wood
Block
Claves
Electro Cymbal Agogo Bell
Latin Percussion
Instrument 61
Page 86

84
FX, Agogo, Conga, Ride
PROTEUS/1
PERCUSSION INSTR UMENT LOCA TIONS
Open
HiHat
2
Ride
Cymbal
Electro
Cymbal
Finger
Snap
Proteus operation manual
Big
HiHat
MIDI
Key #
MIDI
Key #
36 48 60 72 84 96
Reverb
Snare 1
Reverb
Click
Rude
Crash
Guiro
Up
Conga
Open Slap
Percussion FX 1
Instrument 67
Ride Cymbal
36 48 60 72 84 96
Conga Open Slap
Big HiHat
Percussion FX 2
Instrument 68
MIDI
Key #
Agogo Bell
Conga
Ride Cymbal
36 48 60 72 84 96
Agogo Bell, Conga, Ride Cymbal
Instruments 62, 64, 66
Page 87

Proteus operation manual
85
PROTEUS/1
Plus
2
PRESETS and INSTRUMENTS
Page 88

Plus
86
Proteus/1
2 Orchestral Presets
ORCHESTRAL
ROM PRESETS
Proteus operation manual
STRINGS
384. Solo Cello
385. Solo Viola
386. Solo Violin
387. Quartet
388. Solo Chamber
389. StrHarmonic
391. Gamba Musik
392. Cellophane
393. Vienna Dream
394. RoomOfStrings
395. Legato Str
396. Concerto
397. Power Cello
398. Devil Dance
399. Just Violin
400. Violin&Viola
401. BassoViolino
402. Celli Viola
403. String Stuff
404. Pizz Basses
405. Pizz Celli
406. Pizz Violas
407. Pizz Violins
408. Pizzicato 1
409. Pizzicato 2
410. Bowed () Pitz
412. 3 Octave Pix
413. Paper Pizza
414. Synth-N-Pitz
420. PizzBass 8vb
421. PizzVlns 8va
474. Harpsomatic
475. Harpsicato
*
*
WOODWINDS
427. Piccolodeeyo
428. Oboe
429. English Horn
430. Clarinet
431. Verb Clarinet
432. Bass Clarinet
433. Bassoon
434. ContrBassoon
437. Chamber Wind
438. Section Winds
439. Wind Stack
440. Double Reeds
441. Krummhorns
442. Asian Reed
444. Myth Maker
445. Egyptian Reed
447. BassClar 8vb
448. Cntrbsn 8vb
449. Clarinet/Bb
450. Clarinet/A
451. BassClar/Bb
452. Eng.Horn/F
*
S
S
BRASS
443. Fusion Horn
453. Harmon Mute
454. Harmony Room
ENSEMBLES
390. Quintoctave
417. Violin&Oboe
418. Oboe/Strings
422. Strgs/Winds
423. Pizz/Piccolo
424. Divertimento
425. Pluck d'Bois
426. Clarinola
435. Flute/Oboe
436. Clar/Bassoon
446. Piano Winds
499. SawBass/Lead
511. Piano Pizz
*
S
PERCUSSION
455. Timpani
456. Tam Tam
457. Tubular Bells
458. Timba Mallet
459. Deep Drum
460. Bell Ensemble
461. Warm Mallet
464. Mongol Man
465. Timp w/Tone
466. Gamelan Vibe
va ................
vb ................
* ................... indicates that the preset is linked to another preset.
S .................. Synthesized - the preset was created in Proteus, not sampled.
indicates that the preset is shifted an octave up.
indicates that the preset is shifted an octave down.
Page 89

Proteus operation manual
Proteus/1
Plus
2 Orchestral Presets
87
ORCHESTRAL ROM PRESETS
KEYBOARD
419. Piano Trio
467. Notre Dame
468. Carousel
469. Requiem
470. Chapel Organ
471. Sepulcher
473. Harpsikord 2
474. Harpsomatic
476. Lurch Pluck
479. Deep Pad
482. Phaedra
488. Tarkus Twin
490. Sympathetic
492. Glitter God
493. Tinker Bell
494. Bronze Pad
495. ShimmerWays
496. Link2Shimmer
497. Analog Pad
502. Square One
503. Square Link
504. Nice Night
505. Prophet Lead
506. Prophet Link
507. Mystery Scene
508. ElectricLady
509. AnalogueMood
510. Kosmos Keys
S
*
*
TEXTURES
462. Magic Bells
472. Pipe Dream
477. Whistl'n Joe
478. Winter Signs
S
S
489. Wrong Room
498. Electrovocal
SOUND EFFECTS
480. Cyberspace
481. Grim Reaper
483. Darn Saucers
485. Space Cowboy
486. Infinite One
*
491. Boat Haus
500. Psychlotron
501. Vampirical
BASS
411. Jazz Bass
415. PizzMoogBass
416. Amplify Bass
463. Sub It
484. Kool Bass
487. Turbo Bass
S
va ................
vb ................
* ................... indicates that the preset is linked to another preset.
S .................. Synthesized - the preset was created in Proteus, not sampled.
indicates that the preset is shifted an octave up.
indicates that the preset is shifted an octave down.
Page 90

88
Proteus/1
Plus
2 Orchestral Instruments
Proteus operation manual
Plus
■
been designed so that
they can be layered
without having the
individual instruments
overlap each other.
This gives you a much
richer sound than you
would get by simply
layering the same
instruments on top of
each other.
INSTRUMENTS
Quartets 1-4 have
Your Proteus/1 Plus Orchestral contains a full 8 Megabytes of true 16-bit
Pop/Rock and Orchestral samples. In addition, because you purchased
the Plus Orchestral, you get an extra 128 ROM presets. To make room for
the additional presets, the Demo Sequence has been deleted. The new
instruments and presets have been added on to the end of the Proteus/
1 lists.
ORCHESTRAL SAMPLED SOUNDS
126. Solo Cello ............................ Bowed, Solo Cello with natural vibrato
127. Solo Viola ............................ Bowed, Solo Viola with natural vibrato
128. Solo Violin......................... Bowed, Solo Violin with natural vibrato
129. Gambambo ........................................... Cello, Violin with no vibrato
130. Quartet 1 ................................................................. Celli, Viola, Violin
131. Quartet 2 ..................................................... Bass, Celli, Violas, Violins
132. Quartet 3 ................................................................. Celli, Viola, Violin
133. Quartet 4 ............................................................................. Celli, Violin
134. Pizz Basses ......................................................... Bass section, plucked
135. Pizz Celli ............................................................. Celli section, plucked
136. Pizz Violas .........................................................Viola section, plucked
137. Pizz Violin ........................................................ Violin section, plucked
138. Pizzicombo................................ Pizzicato Bass, Celli, Violas, Violins
139. Bass Clarinet .................................................. Sustained Bass Clarinet
140. Clarinet .................................................................... Sustained Clarinet
141. Bass Clarinet/Clarinet .......... Bass Clarinet and Clarinet split at C3
142. Contra Bassoon ........................................................... Contra Bassoon
143. Bassoon...................................................................................... Bassoon
144. English Horn .............................. English Horn with natural vibrato
145. Oboe ............................................................ Oboe with natural vibrato
146. Woodwinds ........... Contra Bassoon, Bassoon, English Horn, Oboe
147. Harmon Mute ...................................... Solo Trumpet, Harmon Mute
148. Tubular Bell ................................................... Orchestral Tubular Bell
149. Timpani ...................................................................................... Timpani
150. Timpani/Tubular Bell ...................Timpani/Tubular Bell split at C2
151. Tamborine ................................................................... Brass Tamborine
152. Tam Tam .................................................................................. Tam Tam
153. Percussion 3 .................................................... See Percussion 3 Chart
154. Special Effects ............................................. See Special Effects Chart
155. Oboe noVib ........................................................ Oboe with no vibrato
156. Upright Pizz ............ Pizzicato Bass transposed across entire range
Page 91

Proteus operation manual
Proteus/1
Plus
2 Orchestral Instruments
89
DIGITAL WAVEFORMS
157. Sine Wave
158. Triangle Wave
159. Square Wave
160. Pulse 33%
161. Pulse 25%
162. Pulse 10%
163. Sawtooth
164. Sawtooth Odd Gone
165. Ramp
166. Ramp Even Only
167. Violin Essence
168. Buzzoon
169. Brassy Wave
170. Reedy Buzz
171. Growl Wave
172. HarpsiWave
173. Fuzzy Gruzz
174. Power 5ths
175. Filtered Saw
176. Ice Bell
177. Bronze Age
178. Iron Plate
179. Aluminum
180. Lead Beam
181. Steel Extract
182. Winter Glass
183. Town Bell Wash
184. Orchestral Bells
185. Tubular SE
186. Soft Bell Wave
187. Swirly
188. Tack Attack
189. Shimmer Wave
190. Moog Lead
191. B3 SE
192. Mild Tone
193. Piper
194. Ah Wave
195. Vocal Wave
196. Fuzzy Clav
197. Electrhode
198. Whine 1
199. Whine 2
200. Metal Drone
201. Silver Race
202. Metal Attack
203. Filter Bass
Plus
INSTRUMENTS
MIDI
Key #
MIDI
Key #
36 48 60 72 84 96
Tam Tam
36 48 60 72 84 96
Tubular Bell
Brass Tambourine
Tam Tam Brass Tamborine
Timpani
Timpani
Tubular Bell
Page 92

90
Proteus operation manual
Page 93

Proteus operation manual
91
PROTEUS/2 PRESETS and INSTRUMENTS
Page 94

92
Proteus/2 Factory Presets
PROTEUS/2 FACTORY PRESETS
Proteus operation manual
PROTEUS
Presets
0-63
64-127
128-191
ROM
RAM
ROM
PROTEUS XR
Presets
0-255
256-383
■
On the Proteus XR,
ROM presets 256-319
are duplicated in the
first 64 RAM locations.
RAM
ROM
STRINGS
0. Solo Cello †
1. Solo Viola †
2. Solo Violin †
3. Quartet
4. Solo Chamber
5. Arco Basses †
6. Arco Celli †
7. Arco Violas †
8. Arco Violins †
9. Marcato 1
10. Marcato 2
11. Legato Str
12. Concerto
13. Pizz Basses †
14. Pizz Celli †
15. Pizz Violas †
16. Pizz Violins †
17. Pizzicato 1
18. Pizzicato 2
19. Trem Strings
20. Tremulus
60. Harp
74. Exotic Harp
96. Vienna Dream
99. RoomOfStrings
109. String Thing
132. Koto
136. Soft Harp
139. Classic Gtr
141. StrHarmonic
142. Cellophane
143. Gamba Musik
E
E
WOODWINDS
24. Flute †
25. Piccolo †
26. Oboe †
27. English Horn †
28. Clarinet †
29. Bass Clarinet †
30. Bassoon †
31. Contrbassoon †
32. Chamber Winds
33. Section Winds
85. Piccolodeeyo
131. Recorder
135. Asian Reed
154. Krummhorns
156. Soft Flute
157. Hi Wind Solo
158. Verb Clarinet
159. PiccoloPeace
160. Flute/Oboe
161. Clar./Flute
162. Clar/Bassoon
163. Double Reeds
164. Bassoon/Horn
165. Alto Flute
184. Clarinet/Bb †
185. Clarinet/A †
186. BassClar/Bb †
187. EngHorn/F †
E
E
E
ENSEMBLES
145. Basses&Vios
146. Violin&Celli
147. ArcoViolins
148. Arco Duet
149. Str Section
150. Arco Strings
151. In The Pit
152. <<InThePit<<
153. Rotary Chmbr
166. WindEnsemble **
167. DblReeds/Hrn **
BRASS
36. French Horn 1 †
37. French Horn 2 †
38. Section Horns
39. Trumpet 1 †
40. Trumpet 2 †
41. Two Trumpets
42. Harmon Mute †
43. Trombone 1 †
44. Trombone 2 †
45. Tuba †
46. Back Brass
47. Bright Brass
48. Chamber Brass
168. Verb Horn
E
169. Xprsv Cornet
170. Bone&Trumpet
ENSEMBLES
21. Strgs/Flutes
22. Resting Pad
23. Divertimento
34. Epilogue
35. Wind Stack
49. BrassStrings
171. Bone&Tuba
172. Trombones
173. Sfz Brass
174. Horn Vel+Wh
188. FrenchHorn/F †
189. Trumpet/Bb †
190. Trumpet/D †
61. Harpstrings
84. Gently Now *
107. Pizz/Piccolo
144. Quintoctave
Bold Type ... indicates a User Preset.
* ...................
** .................
† ..................
E .................. Ersatz; the instrument was created in Proteus, not sampled.
indicates that the preset is linked to another preset.
indicates that the two adjacent presets are linked.
the keyboard range is limited to the actual range of the instrument.
Page 95

Proteus operation manual
Proteus/2 Factory Presets
93
PROTEUS/2 FACTORY PRESETS
PERCUSSION
50. Timpani
51. Gong/Cymbal
52. Bass/Snare +
53. Temple Block
54. Xylophone
55. Glockenspiel
56. Celesta
57. Tubular Bells
58. Percussion 1
59. Percussion 2
60. Harp
70. Marimbala
77. Vibraphone
83. Early Perc
102. Sub It!
104. CloudChamber
138. Grandfather
140. Temple Bell
175. Afroblocks
176. Timba Mallet
177. Timp w/Tone
178. Bass Drum
179. TimpLowBlock
180. Deep Drum
181. Triangle
182. Big Log
183. Gamelan
E
E
E
E
E
KEYBOARD
62. Harpsikord
63. Notre Dame
65. Deep Pad
67. Bell Ensemble
72. Tinker Bell
73. Carousel
76. Bronze Pad
87. ShimmerWays *
89. Requiem
91. Analog Pad
92. Chapel Organ
95. SawBass/Lead
98. Tarkus Twin
101. Reginatron
105. Sepulcher
106. Lurch Pluck
111. Square One **
112. Square Link **
115. Master Tron
117. Sympathetic
120. Glitter God
122. Nice Night
123. Prophet Lead **
124. Prophet Link **
126. Link2Shimmer *
128. Harpsomatic
129. Phaedra
130. Cimbalon
E
E
E
TEXTURES
64. Winter Signs
80. Sombre Winds
81. Space Cowboy
82. The Machine
90. Wrong Room
93. Electrovocal
97. Vertigo Pad
103. Psychlotron
108. Vampirical
113. <*>
114. Sardonicus
116. Lo Wind Inst
127. Ascending
SOUND EFFECTS
66. Portamento/F
68. Cyberspace
71. Grim Reaper
75. Darn Saucers
78. Astral Flute
86. Infinite One
100. Magic Bells
110. Galapagos
118. Wind Chimes
119. Boat Haus
125. Whistl'n Joe
133. Dream Garden
138. Grandfather
E
E
BASS
69. PizzMoogBass
79. Kool Bass
88. Turbo Bass
94. Fat Boy Tuba
121. Story Bass
134. Amplify Bass
137. Jazz Bass
155. C.Bsn/Dbl Bs
191. Default
Bold Type ... indicates a User Preset.
* ................... indicates that the preset is linked to another preset.
** ................. indicates that the two adjacent presets are linked.
E .................. Ersatz - the instrument was created in Proteus, not sampled.
E
E
Page 96

94
Proteus/2 Instruments
PROTEUS/2 INSTRUMENTS
SAMPLED SOUNDS
1. Arco Basses ................................................. Bowed, 3 piece Bass section
2. Arco Celli .................................................... Bowed, 4 piece Celli section
3. Arco Violas .............................................. Bowed, 10 piece Viola section
4. Arco Violin............................................. Bowed, 16 piece Violin section
5. Dark Basses ........................................... Bass section with a darker tone
6. Dark Celli .............................................. Celli section with a darker tone
7. Dark Violas .......................................... Viola section with a darker tone
8. Dark Violin ........................................ Violin section with a darker tone
9. Low Tremolo ................................................... Tremolande Bass section
10. High Tremolo ............................................. Tremolande Violin section
11. Tremolande......................................... Tremolande Basses and Violins
12. Strings 1 ........................................... Section Bass, Celli, Violas, Violins
13. Strings 2 ........................................... Section Bass, Celli, Violas, Violins
14. Strings 3 ........................................... Section Bass, Celli, Violas, Violins
15. Solo Cello .............................. Bowed, Solo Cello with natural vibrato
16. Solo Viola .............................. Bowed, Solo Cello with natural vibrato
17. Solo Violin............................. Bowed, Solo Cello with natural vibrato
18. Quartet 1 ................................................................... Cello, Viola, Violin
19. Quartet 2 .......................................................... Bass, Cello, Viola, Violin
20. Quartet 3 ................................................................... Cello, Viola, Violin
21. Quartet 4 .............................................................................. Cello, Violin
22. Gambambo .............................................. Cello, Violin with no vibrato
23. Pizz Basses ............................................................ Bass section, plucked
24. Pizz Celli ............................................................... Celli section, plucked
25. Pizz Violas ........................................................... Viola section, plucked
26. Pizz Violin ...........................................................Violin section, plucked
27. Pizzicombo.................................. Pizzicato Bass, Celli, Violas, Violins
28. Flute w/Vib ......................................... Solo Flute with natural vibrato
29. Flute noVib ............................................. Darker Flute with no vibrato
30. Alt. Flute........................................................ Flute with natural vibrato
31. Piccolo ............................................................................................ Piccolo
32. Bass Clarinet ..................................................... Sustained Bass Clarinet
33. Clarinet ....................................................................... Sustained Clarinet
34. Bass Clarinet/Clarinet ............ Bass Clarinet and Clarinet split at C3
35. Contra Bassoon ............................................................. Contra Bassoon
36. Bassoon......................................................................................... Bassoon
37. English Horn ................................. English Horn with natural vibrato
38. Oboe w/Vib ................................................. Oboe with natural vibrato
39. Oboe noVib .......................................................... Oboe with no vibrato
40. Alt. Oboe ............................................ Different Oboe with no vibrato
Proteus operation manual
Page 97

Proteus operation manual
Proteus/2 Instruments
PROTEUS/2 INSTRUMENTS
41. Woodwinds .............. Contra Bassoon, Bassoon, English Horn, Oboe
42. Hi Trombone ............................................................................ Trombone
43. Lo Trombone ............................................. Slightly different Trombone
44. mf Trumpet .................................................... Solo Trumpet, MF attack
45. ff Trumpet ................................................... Solo Trumpet, Forte attack
46. Harmon Mute ......................................... Solo Trumpet, Harmon Mute
47. mf French Horn ...................................... Solo French Horn, MF attack
48. ff French Horn ..................................... Solo French Horn, Forte attack
49. Tuba .................................................................................................... Tuba
50. ff Brass ............................................ Trombone, French Horn, Trumpet
51. mf Brass ................................................... Tuba, French Horn, Trumpet
52. Harp .................................................................................... Concert Harp
53. Xylophone ............................................................................... Xylophone
54. Celesta ........................................................................................... Celesta
55. Triangle ........................................................................................ Triangle
56. Bass Drum ............................................................................... Bass Drum
57. Snare Drum + ............................................... See Snare Drum + Chart
58. Piatti ................................................................................................... Piatti
59. Temple Block ...................................................................... Temple Block
60. Glockenspiel ....................................................................... Glockenspiel
61. Percussion 1 ...................................................... See Percussion 1 Chart
62. Percussion 2 ...................................................... See Percussion 2 Chart
63. Low Percussion 2 ............... Same as Percussion 2, but at lower pitch
64. High Percussion 2 ............. Same as Percussion 2, but at higher pitch
65. Tubular Bell ....................................................... Orchestral Tubular Bell
66. Timpani ........................................................................................ Timpani
67. Timpani/Tubular Bell ..................... Timpani/Tubular Bell split at C2
68. Tambourine .......................................................................... Tambourine
69. Tam Tam .................................................................................... Tam Tam
70. Percussion 3 ...................................................... See Percussion 3 Chart
71. Special Effects ............................................... See Special Effects Chart
95
Page 98

96
Proteus/2 Harmonic Waveforms
PROTEUS/2 INSTRUMENTS
HARMONIC WAVEFORMS
72. Oct 1 (Sine)
73. Oct 2 All
74. Oct 3 All
75. Oct 4 All
76. Oct 5 All
77. Oct 6 All
78. Oct 7 All
79. Oct 2 Odd
80. Oct 3 Odd
81. Oct 4 Odd
82. Oct 5 Odd
83. Oct 6 Odd
84. Oct 7 Odd
85. Oct 2 Even
86. Oct 3 Even
87. Oct 4 Even
88. Oct 5 Even
89. Oct 6 Even
90. Oct 7 Even
91. Low Odds
92. Low Evens
93. Four Octaves
Proteus operation manual
These are the same waveforms that are in
the Proteus/1 and are very useful, either
to accent certain harmonics in the
sampled sounds, or combined with other
waveforms for synthesized and additive
timbres.
Frequency (log)
OCTAVE-5 ODD
17
19
21
23
25
27
29
Level
Harmonic
Octave
As an example, this chart shows the harmonics present in the Octave 5 Odd waveform.
12345678910 151617 3118
12 3 4 5
31
Page 99

Proteus operation manual
DIGITAL WAVEFORMS
94. Sine Wave
95. Triangle Wave
96. Square Wave
97. Pulse 33%
98. Pulse 25%
99. Pulse 10%
100. Sawtooth
101. Sawtooth Odd Gone
102. Ramp
103. Ramp Even Only
104. Violin Essence
105. Buzzoon
106. Brassy Wave
107. Reedy Buzz
108. Growl Wave
109. HarpsiWave
110. Fuzzy Gruzz
111. Power 5ths
112. Filtered Saw
113. Ice Bell
114. Bronze Age
115. Iron Plate
116. Aluminum
117. Lead Beam
118. Steel Extract
PROTEUS/2 INSTRUMENTS
119. Winter Glass
120. Town Bell Wash
121. Orchestral Bells
122. Tubular SE
123. Soft Bell Wave
124. Swirly
125. Tack Attack
126. Shimmer Wave
127. Moog Lead
128. B3 SE
129. Mild Tone
130. Piper
131. Ah Wave
132. Vocal Wave
133. Fuzzy Clav
134. Electrhode
135. Whine 1
136. Whine 2
137. Metal Drone
138. Silver Race
139. Metal Attack
140. Filter Bass
141. Upright Pizz
142. Nylon Pluck 1
143. Nylon Pluck 2
144. Plucked Bass
Proteus/2 Waveforms
97
Page 100

98
Strings 1, 2 and 3
PROTEUS/2
INSTRUMENT LOCATIONS
Proteus operation manual
MIDI
Key #
MIDI
Key #
36 48 60 72 84 96
Arco Basses
Arco Celli
Arco Violas
Arco Violins
Strings 1
Instrument 12
36 48 60 72 84 96
Arco Violas
Arco ViolinsArco Celli
Strings 2
Instrument 13
MIDI
Key #
36 48 60 72 84 96
Arco Violas Arco Violas
Arco ViolinsArco Celli
Strings 3
Instrument 14
 Loading...