


 Loading...
2345678901234567 |
|
|
|
|
2345678901234567 |
|
|
|
|
2345678901234567 |
|
|
|
|
2345678901234567 |
|
|
|
|
2345678901234567 |
|
|
|
|
2345678901234567 |
|
|
|
|
2345678901234567 |
|
|
|
|
2345678901234567 |
|
|
|
|
2345678901234567 |
|
|
|
|
2345678901234567 |
|
|
|
|
2345678901234567 |
|
|
|
|
2345678901234567 |
|
|
|
|
2345678901234567 |
|
|
|
|
2345678901234567 |
|
|
|
|
2345678901234567 |
|
|
|
|
2345678901234567 |
|
|
|
|
2345678901234567 |
|
|
|
|
2345678901234567 |
|
|
|
|
2345678901234567 |
|
|
|
|
2345678901234567 |
|
|
|
|
2345678901234567 |
|
|
|
|
2345678901234567 |
|
|
|
|
2345678901234567 |
|
|
|
|
2345678901234567 |
|
|
|
|
2345678901234567 |
|
|
|
|
2345678901234567 |
|
|
|
|
2345678901234567 |
|
|
|
|
2345678901234567 |
|
|
|
|
2345678901234567 |
|
|
|
|
2345678901234567 |
|
|
|
|
2345678901234567 |
|
|
|
|
2345678901234567 |
|
|
|
|
2345678901234567 |
|
|
|
|
2345678901234567 |
|
|
|
|
2345678901234567 |
|
|
|
|
2345678901234567 |
|
|
|
|
2345678901234567 |
|
|
|
|
2345678901234567 |
|
|
|
|
2345678901234567 |
|
|
|
|
2345678901234567 |
|
|
|
|
2345678901234567 |
|
|
|
|
2345678901234567 |
|
|
|
|
2345678901234567 |
|
|
|
|
2345678901234567 |
|
|
|
|
2345678901234567 |
|
|
|
|
2345678901234567 |
|
|
|
|
2345678901234567 |
|
|
|
|
2345678901234567 |
|
|
|
|
2345678901234567 |
|
|
|
|
2345678901234567 |
|
|
|
|
2345678901234567 |
|
|
|
|
2345678901234567 |
|
|
|
|
2345678901234567 |
Operator’s Manual |
|
||
2345678901234567 |
|
|||
2345678901234567 |
|
|
|
|
2345678901234567 |
|
|
|
|
2345678901234567 |
|
|
|
|
2345678901234567 |
|
|
|
|
2345678901234567 |
|
|
|
|
2345678901234567 |
|
|
|
|
2345678901234567 |
|
|
|
|
2345678901234567 |
|
|
|
|
2345678901234567 |
|
|
|
|
2345678901234567 |
|
|
|
|
2345678901234567 |
with Illustrated Parts List |
|
||
2345678901234567 |
|
|||
2345678901234567 |
|
|
|
|
2345678901234567 |
|
|
|
|
2345678901234567 |
|
|
|
|
2345678901234567 |
|
|
|
|
2345678901234567 |
|
|
|
|
2345678901234567 |
|
|
|
|
2345678901234567 |
|
|
|
|
2345678901234567 |
|
|
|
|
2345678901234567 |
|
|
|
|
2345678901234567 |
|
|
|
|
2345678901234567 |
|
|
|
|
2345678901234567 |
|
|
|
|
2345678901234567 |
|
|
|
|
2345678901234567 |
|
|
|
|
2345678901234567 |
|
|
|
|
2345678901234567 |
|
|
|
|
2345678901234567 |
|
|
|
|
2345678901234567 |
|
|
|
|
2345678901234567 |
|
|
|
|
2345678901234567 |
|
|
|
|
2345678901234567 |
|
|
|
|
2345678901234567 |
|
|
|
|
2345678901234567 |
|
|
|
|
2345678901234567 |
|
|
|
|
2345678901234567 |
|
|
|
|
2345678901234567 |
|
|
|
|
2345678901234567 |
|
|
|
|
2345678901234567 |
|
|
|
|
2345678901234567 |
|
|
|
|
2345678901234567 |
|
|
|
|
2345678901234567 |
|
|
|
|
2345678901234567 |
|
|
|
|
2345678901234567 |
|
|
|
|
2345678901234567 |
|
|
|
|
2345678901234567 |
|
|
|
|
2345678901234567 |
|
|
|
|
2345678901234567 |
|
|
|
|
2345678901234567 |
|
|
|
|
2345678901234567 |
|
|
|
|
2345678901234567 |
|
|
|
|
2345678901234567 |
|
|
|
|
2345678901234567 |
|
|
|
|
2345678901234567 |
|
|
|
|
2345678901234567 |
|
|
|
|
2345678901234567 |
|
|
|
|
2345678901234567 |
|
|
|
|
2345678901234567 |
|
|
|
|
2345678901234567 |
|
360 |
||
2345678901234567 |
|
|||
2345678901234567 |
|
|||
2345678901234567 |
|
|
º |
|
2345678901234567 |
|
|
|
|
2345678901234567 |
|
|
|
|
2345678901234567 |
FREEDOM |
|
|
|
2345678901234567 |
|
|
||
2345678901234567 |
|
|
|
|
2345678901234567 |
|
|
|
|
2345678901234567 |
|
|
|
|
2345678901234567 |
|
|
|
|
2345678901234567 |
|
|
|
|
2345678901234567 |
|
|
|
|
2345678901234567 |
|
Series |
|
|
2345678901234567 |
|
|
||
2345678901234567 |
|
|
|
|
2345678901234567 |
Soft Serve Twist Freezer |
|||
2345678901234567 |
||||
2345678901234567 |
|
|
|
|
2345678901234567 |
|
|
|
|
2345678901234567 |
|
|
|
|
2345678901234567 |
|
|
|
|
2345678901234567 |
|
|
|
|
2345678901234567 |
Model 88T-RMT |
|
||
2345678901234567 |
|
|||
2345678901234567 |
|
|
|
|
2345678901234567 |
|
|
|
|
2345678901234567 |
|
|
|
|
2345678901234567 |
|
|
|
|
2345678901234567 |
P/N 184950 7/07 |
|
||
2345678901234567 |
|
|||
2345678901234567 |
|
|||
2345678901234567 |
|
|
|
|
2345678901234567 |
|
|
|
|
2345678901234567 |
|
|
|
|
2345678901234567 |
|
|
|
|
2345678901234567 |
|
|
|
|
2345678901234567 |
|
|
|
|
2345678901234567 |
|
|
|
|
2345678901234567 |
|
|
|
|
2345678901234567 |
|
|
|
|
2345678901234567 |
|
|
|
|
2345678901234567 |
|
|
|
|
2345678901234567 |
|
|
|
|
2345678901234567 |
|
|
|
|
2345678901234567 |
|
|
|
|
2345678901234567 |
|
|
|
|
2345678901234567 |
|
|
|
|
2345678901234567 |
|
|
|
|
2345678901234567 |
|
|
|
|
2345678901234567 |
|
|
|
|
2345678901234567 |
|
|
|
|
2345678901234567 |
|
|
|
|
2345678901234567 |
|
|
|
|
2345678901234567 |
|
|
|
|
2345678901234567 |
|
|
|
|
2345678901234567 |
|
|
|
|
2345678901234567 |
|
|
|
|
2345678901234567 |
|
|
|
|
|
|
|
|
|
2345678901234567 |
|
|
|
|
2345678901234567 |
|
|
|
|
2345678901234567 |
|
|
|
|
2345678901234567 |
|
|
|
|
23456789012345678 |
|
|
|
|
184950H.C. Duke & Son, Inc. |
P/N 184950 July 2007 |
Printed In U.S.A. |

Operator’s Manual
for
Electro Freeze Freedom 360° Series
Soft Serve Twist Freezer
Model 88T-RMT
All contents © Copyright 2007 H.C. Duke & Son, Inc., 2116 Eighth Avenue, East Moline, Illinois 61244
184950 |
i |

ELECTRO FREEZE Soft Serve Model 88T-RMT
2345678901234 |
5 |
|
|
|
|
|
|
|
2345678901234 |
5 |
|
|
|
|
|
|
|
2345678901234 |
5 |
|
|
|
|
|
|
|
2345678901234 |
5 |
|
|
SAFETY |
FIRST! |
|||
2345678901234 |
5 |
|
|
|||||
2345678901234 |
5 |
|
|
|
|
|
|
|
2345678901234 |
5 |
|
|
|
|
|
|
|
2345678901234 |
5 |
|
|
|
|
|
|
|
2345678901234 |
5 |
|
|
|
|
|
|
|
2345678901234 |
5 |
|
|
|
|
|
|
|
2345678901234 |
5 |
|
|
|
|
|
|
|
2345678901234 |
5 |
|
|
|
|
|
|
|
2345678901234 |
5 |
|
|
|
|
|
|
|
2345678901234 |
5 |
|
|
|
|
|
|
|
2345678901234 |
5 |
|
|
|
|
|
|
|
2345678901234 |
5 |
|
|
|
|
|
|
|
2345678901234 |
5 |
|
these four steps to safety .... |
|||||
2345678901234Follow5 |
|
|||||||
2345678901234 |
5 |
|
|
|
|
|
|
|
2345678901234 |
5 |
|
|
|
|
|
|
|
2345678901234 |
5 |
|
|
|
|
|
|
|
2345678901234 |
5 |
|
|
|
|
|
|
|
2345678901234 |
5 |
|
|
|
|
|
|
|
2345678901234 |
5 |
|
|
|
|
|
|
|
2345678901234 |
5 |
|
|
|
|
|
|
|
2345678901234 |
5 |
|
|
|
|
|
|
|
2345678901234 |
5 |
|
|
|
|
|
|
|
2345678901234 |
5 |
|
Recognize Safety Information ....Look for this |
|||||
23456789012341.5 |
|
|||||||
2345678901234 |
5 |
|
|
|
|
|
|
|
2345678901234 |
5 |
|
|
|
|
|
|
|
2345678901234 |
5 |
|
|
|
|
|
|
|
2345678901234 |
5 |
|
|
|
|
|
|
|
2345678901234 |
5 |
|
|
alert symbol throughout this manual. |
||||
2345678901234safety5 |
||||||||
2345678901234 |
5 |
|
|
|
|
|
|
|
2345678901234 |
5 |
|
|
|
|
|
|
|
2345678901234 |
5 |
|
|
|
|
|
|
|
2345678901234 |
5 |
|
|
|
|
|
|
|
2345678901234 |
5 |
|
|
|
|
|
|
|
2345678901234 |
5 |
|
|
|
|
|
|
|
2345678901234 |
5 |
|
|
|
|
|
|
|
2345678901234 |
5 |
|
|
|
|
|
|
|
2345678901234 |
5 |
|
|
|
|
|
|
|
2345678901234 |
5 |
|
|
|
|
|
|
|
2345678901234 |
5 |
|
|
|
|
|
|
|
2345678901234 |
5 |
|
|
|
|
|
|
|
2345678901234 |
5 |
|
|
|
|
|
|
|
2345678901234 |
5 |
|
|
|
When you see this symbol on your freezer or in this |
|||
2345678901234 |
5 |
|
|
|
||||
2345678901234 |
5 |
|
|
|
||||
2345678901234 |
5 |
|
|
|
|
|
|
|
2345678901234 |
5 |
|
|
|
|
|
|
|
2345678901234 |
5 |
|
|
|
manual, be alert to the potential for personal injury. |
|||
2345678901234 |
5 |
|
|
|
||||
2345678901234 |
5 |
|
|
|
|
|
|
|
2345678901234 |
5 |
|
|
|
Follow recommended precautions and safe operating |
|||
2345678901234 |
5 |
|
|
|
||||
2345678901234 |
5 |
|
|
|
|
|
|
|
2345678901234 |
5 |
|
|
|
|
|
|
|
2345678901234 |
5 |
|
|
|
practices. |
|
|
|
2345678901234 |
5 |
|
|
|
|
|
||
2345678901234 |
5 |
|
|
|
|
|
|
|
2345678901234 |
5 |
|
|
|
|
|
|
|
2345678901234 |
5 |
|
|
|
|
|
|
|
2345678901234 |
5 |
|
|
|
|
|
|
|
2345678901234 |
5 |
|
|
|
|
|
|
|
2345678901234 |
5 |
|
|
|
|
|
|
|
2345678901234 |
5 |
|
|
|
|
|
|
|
2345678901234 |
5 |
|
|
|
|
|
|
|
2345678901234 |
5 |
|
|
|
|
|
|
|
2345678901234 |
5 |
|
|
|
|
|
|
|
2345678901234 |
5 |
|
|
|
|
|
|
|
2345678901234 |
5 |
|
|
|
|
|
|
|
2345678901234 |
5 |
|
|
|
|
|
|
|
2345678901234 |
5 |
|
|
|
|
|
|
|
2345678901234 |
5 |
|
|
|
|
|
|
|
2345678901234 |
5 |
|
|
|
|
|
|
|
2345678901234 |
5 |
|
|
|
|
|
|
|
2345678901234 |
5 |
|
Understand Signal Words .... |
|||||
23456789012342.5 |
|
|||||||
2345678901234 |
5 |
|
|
|
|
|
|
|
2345678901234 |
5 |
|
|
|
|
|
|
|
2345678901234 |
5 |
|
|
|
|
|
|
|
2345678901234 |
5 |
|
|
|
|
|
|
|
2345678901234 |
5 |
|
|
|
|
|
|
|
2345678901234 |
5 |
|
|
|
|
|
|
|
2345678901234 |
5 |
|
|
|
|
|
|
|
2345678901234 |
5 |
|
|
|
|
|
|
|
2345678901234 |
5 |
|
|
|
|
|
|
|
2345678901234 |
5 |
|
|
|
|
|
|
|
2345678901234 |
5 |
|
|
|
|
|
|
|
2345678901234 |
5 |
|
|
|
|
|
|
|
2345678901234 |
5 |
|
|
|
|
|
|
|
2345678901234 |
5 |
|
|
|
|
|
|
|
2345678901234 |
5 |
|
|
|
|
|
|
|
2345678901234 |
5 |
|
|
|
|
|
|
|
2345678901234 |
5 |
|
|
|
|
|
|
|
2345678901234 |
5 |
|
|
|
|
|
|
|
2345678901234 |
5 |
|
|
|
|
|
|
|
2345678901234 |
5 |
|
|
|
|
|
|
|
2345678901234 |
5 |
|
|
|
The signal words — DANGER, WARNING and CAU- |
|||
2345678901234 |
5 |
|
|
|
||||
2345678901234 |
|
|
|
|
||||
2345678901234 |
5 |
|
|
|
|
|
|
|
2345678901234 |
|
|
|
|
|
|
|
|
234567890123423456789012342345678901234 |
|
|
DANGER |
TION — are used with the safety alert symbol (DANGER |
||||
2345678901234 |
5 |
|
decals on the freezer may or may not have the safety |
|||||
2345678901234 |
|
|
|
|||||
2345678901234 |
|
|
|
|
|
|
|
|
2345678901234 |
|
|
|
|
|
|
|
|
2345678901234 |
5 |
|
|
|
alert symbol, but the message is the same). Decals with |
|||
2345678901234 |
5 |
|
|
|
||||
2345678901234 |
5 |
|
|
|
|
|
|
|
2345678901234 |
5 |
|
|
|
|
|
|
|
2345678901234 |
5 |
|
|
|
the words DANGER, WARNING or CAUTION appear on |
|||
2345678901234 |
|
|
|
|
||||
2345678901234 |
5 |
|
|
|
|
|
|
|
2345678901234 |
|
|
|
|
the freezer. DANGER identifies the most serious hazard. |
|||
2345678901234 |
|
|
|
|
||||
2345678901234 |
|
|
WARNING |
|
|
|
|
|
2345678901234 |
|
|
|
|
|
|
||
2345678901234 |
|
|
|
|
Decals with the words DANGER or WARNING are typi- |
|||
2345678901234 |
5 |
|
|
|
||||
2345678901234 |
|
|
|
|
|
|
|
|
2345678901234 |
|
|
|
|
|
|
|
|
2345678901234 |
5 |
|
|
|
cally near specific hazards on the freezer. General pre- |
|||
2345678901234 |
5 |
|
|
|
||||
2345678901234 |
5 |
|
|
|
|
|
|
|
2345678901234 |
5 |
|
|
|
|
|
|
|
2345678901234 |
5 |
|
|
|
cautions are listed on CAUTION safety decals. In this |
|||
2345678901234 |
|
|
|
|
||||
2345678901234 |
5 |
|
|
|
|
|
|
|
2345678901234 |
5 |
|
|
|
manual, CAUTION messages with the safety alert sym- |
|||
2345678901234 |
|
|
|
|
||||
2345678901234 |
|
|
|
|
|
|
|
|
2345678901234 |
|
|
CAUTION |
|
|
|
|
|
2345678901234 |
|
|
|
|
|
|
||
2345678901234 |
|
|
|
|
|
|
|
|
2345678901234 |
|
|
|
|
bol |
call attention to safety messages. |
||
2345678901234 |
5 |
|
|
|
||||
2345678901234 |
|
|
|
|
|
|
|
|
2345678901234 |
5 |
|
|
|
|
|
|
|
2345678901234 |
5 |
|
|
|
|
|
|
|
2345678901234 |
5 |
|
|
|
|
|
|
|
2345678901234 |
5 |
|
|
|
|
|
|
|
2345678901234 |
5 |
|
|
|
|
|
|
|
2345678901234 |
5 |
|
|
|
|
|
|
|
2345678901234 |
5 |
|
|
|
|
|
|
|
2345678901234 |
5 |
|
|
|
|
|
|
|
2345678901234 |
5 |
|
|
|
|
|
|
|
2345678901234 |
5 |
|
|
|
|
|
|
|
2345678901234 |
5 |
|
|
|
|
|
|
|
2345678901234 |
5 |
|
|
|
|
|
|
|
2345678901234 |
5 |
|
|
|
|
|
|
|
2345678901234 |
5 |
|
|
|
|
|
|
|
2345678901234 |
5 |
|
|
|
|
|
|
|
2345678901234 |
5 |
|
|
|
|
|
|
|
2345678901234 |
5 |
|
|
|
|
|
|
|
2345678901234 |
5 |
|
|
|
|
|
|
|
2345678901234 |
5 |
|
|
|
|
|
|
|
2345678901234 |
5 |
|
|
|
|
|
|
|
2345678901234 |
5 |
|
|
|
|
|
|
|
2345678901234 |
5 |
|
|
|
|
|
|
|
2345678901234 |
5 |
|
|
|
|
|
|
|
2345678901234 |
5 |
|
|
|
|
|
|
|
2345678901234 |
5 |
|
|
|
|
|
|
|
2345678901234 |
5 |
|
|
|
|
|
|
|
2345678901234 |
5 |
|
|
|
|
|
|
|
2345678901234 |
5 |
|
|
|
|
|
|
|
2345678901234 |
5 |
|
|
|
|
|
|
|
2345678901234 |
5 |
|
|
|
|
|
|
|
2345678901234 |
5 |
|
|
|
|
|
|
|
2345678901234 |
5 |
|
|
|
|
|
|
|
2345678901234 |
5 |
|
|
|
|
|
|
|
23456789012345 |
|
|
|
|
|
|
|
|
ii |
184950 |

ELECTRO FREEZE Soft Serve Model 88T-RMT
2345678901234 |
5 |
|
|
|
|
|
|
|
|
|
|
|
|
|
|
|
|
2345678901234 |
5 |
|
|
|
|
|
|
|
|
|
|
|
|
|
|
|
|
2345678901234 |
5 |
|
|
|
|
|
|
|
|
|
|
|
|
|
|
|
|
2345678901234 |
5 |
|
|
|
|
|
SAFETY |
FIRST! |
|||||||||
2345678901234 |
5 |
|
|
|
|
|
|||||||||||
2345678901234 |
5 |
|
|
|
|
|
|
|
|
|
|
|
|
|
|
|
|
2345678901234 |
5 |
|
|
|
|
|
|
|
|
|
|
|
|
|
|
|
|
2345678901234 |
5 |
|
|
|
|
|
|
|
|
|
|
|
|
|
|
|
|
2345678901234 |
5 |
|
|
|
|
|
|
|
|
|
|
|
|
|
|
|
|
2345678901234 |
5 |
|
|
|
|
|
|
|
|
|
|
|
|
|
|
|
|
2345678901234 |
5 |
|
|
|
|
|
|
|
|
|
|
|
|
|
|
|
|
2345678901234 |
5 |
|
|
|
|
|
|
|
|
|
|
|
|
|
|
|
|
2345678901234 |
5 |
|
|
|
|
|
|
|
|
|
|
|
|
|
|
|
|
2345678901234 |
5 |
|
|
|
|
|
|
|
|
|
|
|
|
|
|
|
|
2345678901234 |
5 |
|
|
|
|
|
|
|
|
|
|
|
|
|
|
|
|
2345678901234 |
5 |
|
|
|
|
|
|
|
|
|
|
|
|
|
|
|
|
2345678901234 |
5 |
|
|
|
|
|
|
|
|
|
|
|
|
|
|
|
|
2345678901234 |
5 |
|
|
|
|
|
|
|
|
|
|
|
|
|
|
|
|
2345678901234 |
5 |
|
|
|
|
|
|
|
|
|
|
|
|
|
|
|
|
2345678901234 |
5 |
|
|
|
|
|
|
|
|
|
|
|
|
|
|
|
|
2345678901234 |
5 |
|
|
|
|
|
|
|
|
|
|
|
|
|
|
|
|
2345678901234 |
5 |
|
|
|
|
|
|
|
|
|
|
|
|
|
|
|
|
2345678901234 |
5 |
|
|
|
|
|
|
|
|
|
|
|
|
|
|
|
|
2345678901234 |
5 |
|
|
|
|
|
|
|
|
|
|
|
|
|
|
|
|
2345678901234 |
5 |
|
|
|
|
|
|
|
|
|
|
|
|
|
|
|
|
2345678901234 |
5 |
|
|
|
|
|
|
|
|
|
|
|
|
|
|
|
|
2345678901234234567890123423456789012342345678901234 |
5555 |
|
|
|
|
|
|
|
|
|
|
|
|
|
|
|
|
23456789012343.5 |
Follow Safety Instructions .... |
||||||||||||||||
2345678901234 |
5 |
|
|
|
|
|
|
|
|
|
|
|
|
|
|
|
|
2345678901234 |
5 |
|
|
|
|
|
|
|
|
|
|
|
|
|
|
|
|
2345678901234 |
5 |
|
|
|
|
|
|
|
|
|
|
|
|
|
|
|
|
2345678901234 |
5 |
|
|
|
|
|
|
|
|
|
|
|
|
|
|
|
|
2345678901234 |
5 |
|
|
|
|
|
|
|
|
|
|
|
|
|
|
|
|
2345678901234 |
5 |
|
|
|
|
|
|
|
|
|
|
|
|
|
|
|
|
2345678901234 |
5 |
|
|
|
|
|
|
|
|
|
|
|
|
|
|
|
|
2345678901234 |
5 |
|
|
|
|
|
|
|
|
|
Read and understand all safety messages in this |
||||||
2345678901234 |
5 |
|
|
|
|
|
|
|
|
|
|||||||
2345678901234 |
5 |
|
|
|
|
|
|
|
|
|
|
|
|
|
|
|
|
2345678901234 |
5 |
|
|
|
|
|
|
|
|
|
|
|
|
|
|
|
|
2345678901234 |
5 |
|
|
|
|
|
Safety |
|
manual. Read and understand the decal safety |
||||||||
2345678901234 |
5 |
|
|
|
|
|
|
||||||||||
2345678901234 |
5 |
|
|
|
|
|
|
|
|
|
|
|
|
|
|||
2345678901234 |
5 |
|
|
|
|
|
|
|
|
|
|
|
|
|
|
|
|
2345678901234 |
5 |
|
|
|
|
|
First! |
|
messages on your freezer. Take notice of the location |
||||||||
2345678901234 |
5 |
|
|
|
|
|
|
||||||||||
2345678901234 |
5 |
|
|
|
|
|
|
|
|
|
|||||||
2345678901234 |
5 |
|
|
|
|
|
|
|
|
|
of all decals on the freezer and keep the safety decals |
||||||
2345678901234 |
5 |
|
|
|
|
|
|
|
|
|
|||||||
2345678901234 |
5 |
|
|
|
|
|
|
|
|
|
|
|
|
|
|
|
|
2345678901234 |
5 |
|
|
|
|
|
|
|
|
|
|
|
|
|
|
|
|
2345678901234 |
5 |
|
|
|
|
|
|
|
|
|
in good condition. Check them periodically and replace |
||||||
2345678901234 |
5 |
|
|
|
|
|
|
|
|
|
|||||||
2345678901234 |
5 |
|
|
|
|
|
|
|
|
|
|
|
|
|
|
|
|
2345678901234 |
5 |
|
|
|
|
|
|
|
|
|
|
|
|
|
|
|
|
2345678901234 |
5 |
|
|
|
|
|
|
|
|
|
missing, damaged or illegible safety decals. The safety |
||||||
2345678901234 |
|
|
|
|
|
|
|
|
|
|
|||||||
2345678901234 |
5 |
|
|
|
|
|
|
|
|
|
|
|
|
|
|
|
|
2345678901234 |
5 |
|
|
|
|
|
|
|
|
|
|
|
|
|
|
|
|
2345678901234 |
5 |
|
|
|
|
|
|
|
|
|
decals must remain in place and legible for the life of |
||||||
2345678901234 |
|
|
|
|
|
|
|
|
|
||||||||
2345678901234 |
|
|
|
|
|
|
|
|
|
|
|
|
|
|
|
|
|
2345678901234 |
5 |
|
|
|
|
|
|
|
|
|
the freezer. If you need new decals, use the information |
||||||
2345678901234 |
5 |
|
|
|
|
|
|
|
|
|
|||||||
2345678901234 |
5 |
|
|
|
|
|
|
|
|
|
|
|
|
|
|
|
|
2345678901234 |
5 |
|
|
|
|
|
|
|
|
|
|
|
|
|
|
|
|
2345678901234 |
5 |
|
|
|
|
|
|
|
|
|
and illustrations on pages iv and v of this manual to |
||||||
2345678901234 |
5 |
|
|
|
|
|
|
|
|
|
|||||||
2345678901234 |
5 |
|
|
|
|
|
|
|
|
|
|
|
|
|
|
|
|
2345678901234 |
5 |
|
|
|
|
|
|
|
|
|
|
|
|
|
|
|
|
2345678901234 |
5 |
|
|
|
|
|
|
|
|
|
identify the decals and order replacements. |
||||||
2345678901234 |
5 |
|
|
|
|
|
|
|
|
|
|||||||
2345678901234 |
5 |
|
|
|
|
|
|
|
|
|
|
|
|
|
|
|
|
2345678901234 |
5 |
|
|
|
|
|
|
|
|
|
|
|
|
|
|
|
|
2345678901234 |
5 |
|
|
|
|
|
|
|
|
|
|
|
|
|
|
|
|
2345678901234 |
5 |
|
|
|
|
|
|
|
|
|
|
|
|
|
|
|
|
2345678901234 |
5 |
|
|
|
|
|
|
|
|
|
|
|
|
|
|
|
|
2345678901234 |
5 |
|
|
|
|
|
|
|
|
|
DO NOT attempt to operate the freezer until you read |
||||||
2345678901234 |
5 |
|
|
|
|
|
|
|
|
|
|||||||
2345678901234 |
5 |
|
|
|
|
|
|
|
|
|
|
|
|
|
|
|
|
2345678901234 |
5 |
|
|
|
|
|
|
|
|
|
|
|
|
|
|
|
|
2345678901234 |
5 |
|
|
|
|
|
|
|
|
|
and understand all safety messages and the operating |
||||||
2345678901234 |
5 |
|
|
|
|
|
|
|
|
|
|||||||
2345678901234 |
5 |
|
|
|
|
|
|
|
|
|
|
|
|
|
|
|
|
2345678901234 |
5 |
|
|
|
|
|
|
|
|
|
|
|
|
|
|
|
|
2345678901234 |
5 |
|
|
|
|
|
|
|
|
|
instructions in this manual. |
||||||
2345678901234 |
5 |
|
|
|
|
|
|
|
|
|
|||||||
2345678901234 |
5 |
|
|
|
|
|
|
|
|
|
|
|
|
|
|
|
|
2345678901234 |
5 |
|
|
|
|
|
|
|
|
|
|
|
|
|
|
|
|
2345678901234 |
5 |
|
|
|
|
|
|
|
|
|
|
|
|
|
|
|
|
2345678901234 |
5 |
|
|
|
|
|
|
|
|
|
|
|
|
|
|
|
|
2345678901234 |
5 |
|
|
|
|
|
|
|
|
|
|
|
|
|
|
|
|
2345678901234 |
5 |
|
|
|
|
|
|
|
|
|
|
|
|
|
|
|
|
2345678901234 |
5 |
|
|
|
|
|
|
|
|
|
|
|
|
|
|
|
|
2345678901234 |
5 |
|
|
|
|
|
|
|
|
|
|
|
|
|
|
|
|
2345678901234 |
5 |
|
|
|
|
|
|
|
|
|
|
|
|
|
|
|
|
2345678901234 |
5 |
|
|
|
|
|
|
|
|
|
|
|
|
|
|
|
|
2345678901234 |
5 |
|
|
|
|
|
|
|
|
|
|
|
|
|
|
|
|
2345678901234 |
5 |
|
|
|
|
|
|
|
|
|
|
|
|
|
|
|
|
2345678901234 |
5 |
|
|
|
|
|
|
|
|
|
|
|
|
|
|
|
|
|
|
|
|
|
|
|
|
|
|
|
|
|
|
|
|
||
2345678901234 |
5 |
|
|
|
|
|
|
|
|
|
|
|
|
|
|
|
|
2345678901234 |
5 |
|
|
|
|
|
|
|
|
|
|
|
|
|
|
|
|
2345678901234 |
5 |
|
|
|
|
|
|
|
|
|
|
|
|
|
|
|
|
2345678901234 |
5 |
|
|
|
|
|
|
|
|
|
|
|
|
|
|
|
|
2345678901234 |
5 |
|
|
|
|
|
|
|
|
|
|
|
|
|
|
|
|
2345678901234 |
5 |
|
|
|
|
|
|
|
|
|
|
|
|
|
|
|
|
2345678901234 |
5 |
|
|
|
|
|
|
|
|
|
|
|
|
|
|
|
|
2345678901234 |
5 |
Operate Safely .... |
|
|
|
||||||||||||
234567890123423456789012344.55 |
|
|
|
||||||||||||||
2345678901234 |
5 |
|
|
|
|
|
|
|
|
|
|
|
|
|
|
|
|
2345678901234 |
5 |
|
|
|
|
|
|
|
|
|
|
|
|
|
|
|
|
2345678901234 |
5 |
|
|
|
|
|
|
|
|
|
|
|
|
|
|
|
|
2345678901234 |
5 |
|
|
|
|
|
|
|
|
|
|
|
|
|
|
|
|
2345678901234 |
5 |
|
|
|
|
|
|
|
|
|
|
|
|
|
|
|
|
2345678901234 |
5 |
|
|
|
|
|
|
|
|
|
|
|
|
|
|
|
|
2345678901234 |
5 |
|
|
|
|
|
|
|
|
|
|
|
|
|
|
|
|
2345678901234 |
5 |
|
|
|
|
|
|
|
|
|
|
|
|
|
|
|
|
2345678901234 |
5 |
|
|
|
|
|
|
|
|
|
|
|
|
|
|
|
|
2345678901234 |
5 |
|
|
|
|
|
|
|
|
|
|
|
DO NOT allow untrained personnel to maintain or |
||||
2345678901234 |
|
|
|
|
|
|
|
|
|
|
|
|
|||||
2345678901234 |
|
|
|
|
|
|
|
|
|
|
|
|
|
|
|
|
|
2345678901234 |
|
|
|
|
|
|
|
|
|
|
|
|
|
|
|
|
|
2345678901234 |
|
|
|
|
|
|
|
|
|
|
|
|
service this machine. Failure to follow this instruction |
||||
2345678901234 |
|
|
|
|
|
|
|
|
|
|
|
|
|||||
2345678901234 |
|
|
|
|
|
|
|
|
|
|
|
|
|
|
|
|
|
2345678901234 |
|
|
|
|
|
|
|
|
|
|
|
|
|
|
|
|
|
2345678901234 |
|
|
|
|
|
|
|
|
|
|
|
|
may result in severe personal injury. DO NOT operate |
||||
2345678901234 |
|
|
|
|
|
|
|
|
|
|
|
|
|||||
2345678901234 |
|
|
|
|
|
|
|
|
|
|
|
|
|
|
|
|
|
2345678901234 |
|
|
|
|
|
|
|
|
|
|
|
|
the freezer unless all service panels and access doors |
||||
2345678901234 |
|
|
|
|
|
|
|
|
|
|
|
|
|||||
2345678901234 |
|
|
|
|
|
|
|
|
|
|
|
|
|
|
|
|
|
2345678901234 |
|
|
|
|
|
|
|
|
|
|
|
|
|
|
|
|
|
2345678901234 |
|
|
|
|
|
|
|
|
|
|
|
|
are secured with screws. DO NOT attempt to repair the |
||||
2345678901234 |
|
|
|
|
|
|
|
|
|
|
|
|
|||||
2345678901234 |
|
|
|
|
|
|
|
|
|
|
|
|
|
|
|
|
|
2345678901234 |
|
|
|
|
|
|
|
|
|
|
|
|
|
|
|
|
|
2345678901234 |
|
|
|
|
|
|
|
|
|
|
|
|
freezer until the main power supply has been |
||||
2345678901234 |
|
|
|
|
|
|
|
|
|
|
|
|
|||||
2345678901234 |
|
|
|
|
|
|
|
|
|
|
|
|
|
|
|
|
|
2345678901234 |
|
|
|
|
|
|
|
|
|
|
|
|
|
|
|
|
|
2345678901234 |
|
|
|
|
|
|
|
|
|
|
|
|
disconnected. Some freezers have more than one |
||||
2345678901234 |
|
|
|
|
|
|
|
|
|
|
|
|
|||||
2345678901234 |
|
|
|
|
|
|
|
|
|
|
|
|
|
|
|
|
|
2345678901234 |
|
|
|
|
|
|
|
|
|
|
|
|
disconnect switch. Contact your local Electro Freeze |
||||
2345678901234 |
|
|
|
|
|
|
|
|
|
|
|
|
|||||
2345678901234 |
|
|
|
|
|
|
|
|
|
|
|
|
|
|
|
|
|
2345678901234 |
|
|
|
|
|
|
|
|
|
|
|
|
|
|
|
|
|
2345678901234 |
|
|
|
|
|
|
|
|
|
|
|
|
Distributor for authorized service. |
||||
2345678901234 |
|
|
|
|
|
|
|
|
|
|
|
|
|||||
2345678901234 |
|
|
|
|
|
|
|
|
|
|
|
|
|
|
|
|
|
2345678901234 |
|
|
|
|
|
|
|
|
|
|
|
|
|
|
|
|
|
2345678901234 |
|
|
|
|
|
|
|
|
|
|
|
|
|
|
|
|
|
2345678901234 |
|
|
|
|
|
|
|
|
|
|
|
|
|
|
|
|
|
2345678901234 |
|
|
|
|
|
|
|
|
|
|
|
|
|
|
|
|
|
2345678901234 |
5 |
|
|
|
|
|
|
|
|
|
|
|
|
|
|
|
|
2345678901234 |
5 |
|
|
|
|
|
|
|
|
|
|
|
|
|
|
|
|
2345678901234 |
5 |
|
|
|
|
|
|
|
|
|
|
|
|
|
|
|
|
2345678901234 |
5 |
|
|
|
|
|
|
|
|
|
|
|
|
|
|
|
|
2345678901234 |
5 |
|
|
|
|
|
|
|
|
|
|
|
|
|
|
|
|
2345678901234 |
5 |
|
|
|
|
|
|
|
|
|
|
|
|
|
|
|
|
2345678901234 |
5 |
|
|
|
|
|
|
|
|
|
|
|
|
|
|
|
|
2345678901234 |
5 |
|
|
|
|
|
|
|
|
|
|
|
|
|
|
|
|
2345678901234 |
5 |
|
|
|
|
|
|
|
|
|
|
|
|
|
|
|
|
2345678901234 |
5 |
|
|
|
|
|
|
|
|
|
|
|
|
|
|
|
|
2345678901234 |
5 |
|
|
|
|
|
|
|
|
|
|
|
|
|
|
|
|
2345678901234 |
5 |
|
|
|
|
|
|
|
|
|
|
|
|
|
|
|
|
2345678901234 |
5 |
|
|
|
|
|
|
|
|
|
|
|
|
|
|
|
|
2345678901234 |
5 |
|
|
|
|
|
|
|
|
|
|
|
|
|
|
|
|
2345678901234 |
5 |
|
|
|
|
|
|
|
|
|
|
|
|
|
|
|
|
2345678901234 |
5 |
|
|
|
|
|
|
|
|
|
|
|
|
|
|
|
|
2345678901234 |
5 |
|
|
|
|
|
|
|
|
|
|
|
|
|
|
|
|
2345678901234 |
5 |
|
|
|
|
|
|
|
|
|
|
|
|
|
|
|
|
2345678901234 |
5 |
|
|
|
|
|
|
|
|
|
|
|
|
|
|
|
|
23456789012345 |
|
|
|
|
|
|
|
|
|
|
|
|
|
|
|
|
|
184950 |
iii |

ELECTRO FREEZE Soft Serve Model 88T-RMT
|
123456789012345 |
|
|
|
|
|
|
|
|
|
|
|
|
|
12345678901234 |
5 |
|
|
|
|
|
|
|
|
|
|
|
|
12345678901234 |
5 |
|
|
|
|
|
|
|
|
|
|
|
|
12345678901234 |
5 |
|
|
|
|
|
|
|
|
|
|
|
|
12345678901234 |
5 |
|
|
|
|
|
|
|
|
|
|
|
|
12345678901234 |
5 |
|
|
|
|
|
|
|
|
|
|
|
|
12345678901234 |
5 |
|
|
|
|
|
|
|
|
|
|
|
|
|
Safety Decal Locations |
|
|
|
|
|
||||||
1 |
2345678901234 |
5 |
|
|
|
|
|
|
|
|
|
|
|
12345678901234 |
5 |
|
|
|
|
|
|
|
|
|
|
||
12345678901234 |
5 |
|
|
|
|
|
|
|
|
|
|
||
12345678901234 |
5 |
|
|
|
|
|
|
|
|
|
|
||
12345678901234 |
5 |
|
|
|
|
|
|
|
|
|
|
||
12345678901234 |
5 |
|
|
|
|
|
|
|
|
|
|
||
12345678901234 |
5 |
|
|
|
|
|
|
|
|
|
|
||
12345678901234 |
5 |
|
|
|
|
|
|
|
|
|
|
||
12345678901234 |
5 |
|
|
|
|
|
|
|
|
|
|
||
12345678901234 |
5 |
|
|
|
|
|
|
|
|
|
|
||
12345678901234 |
5 |
|
|
|
|
|
|
|
|
|
|
||
12345678901234 |
5 |
Do not attempt to operate the freezer |
You may contact your local authorized |
||||||||||
1234567890123412345678901234 |
55 |
||||||||||||
12345678901234 |
5 |
||||||||||||
12345678901234 |
5 |
until all safety precautions and operating |
Electro Freeze Distributor, as follows: |
||||||||||
12345678901234 |
5 |
|
|
|
|
|
|
|
|
|
|
||
12345678901234 |
5 |
instructions in this manual are read and |
|
|
|
|
|
||||||
12345678901234 |
5 |
|
|
|
|
|
|||||||
12345678901234 |
5 |
|
|
|
|
|
|
|
|
|
|
||
12345678901234 |
5 |
|
|
|
|
|
Name: |
|
|
|
|||
12345678901234 |
5 |
understood. |
|
|
|
|
|
||||||
12345678901234 |
5 |
|
|
|
|
|
|
|
|||||
12345678901234 |
5 |
|
|
|
|
|
|
|
|||||
12345678901234 |
5 |
|
|
|
|
|
Address: |
|
|
|
|||
12345678901234 |
5 |
|
|
|
|
|
|
|
|
||||
12345678901234 |
5 |
Take notice of all warning, caution, |
|
|
|
|
|
||||||
12345678901234 |
5 |
|
|
|
|
|
|||||||
12345678901234 |
5 |
|
|
|
|
|
|||||||
12345678901234 |
5 |
instruction and information decals (or |
|
|
|
|
|
||||||
12345678901234 |
5 |
|
|
|
|
|
|||||||
12345678901234 |
5 |
|
|
|
|
|
|
|
|
|
|
||
12345678901234 |
5 |
labels) on the freezer as shown in the |
|
|
|
|
|
||||||
|
|
|
|
|
|||||||||
12345678901234 |
5 |
|
|
|
|
|
|||||||
12345678901234 |
5 |
figure to the right. The labels have been |
Phone: |
|
|
|
|||||||
12345678901234 |
5 |
|
|
|
|||||||||
12345678901234 |
5 |
|
|
|
|
|
|
|
|
|
|
||
12345678901234 |
5 |
|
|
|
|
|
|
|
|
|
|
||
12345678901234 |
5 |
put there to help maintain a safe working |
|
|
|
|
|
||||||
12345678901234 |
5 |
|
|
|
|
|
|||||||
12345678901234 |
5 |
|
|
|
|
|
or — for factory service assistance — |
||||||
12345678901234 |
5 |
|
|
|
|
|
|||||||
12345678901234 |
5 |
|
|
|
|
|
|
|
|
|
|
||
12345678901234 |
5 |
environment. |
|
|
contact H. C. Duke & Son, Inc., Electro |
||||||||
12345678901234 |
5 |
|
|
|
|
|
|||||||
12345678901234 |
5 |
|
|
|
|
|
|
|
|
|
|
||
12345678901234 |
5 |
The labels have been designed to |
Freeze Service Department by phone, |
||||||||||
12345678901234 |
5 |
||||||||||||
12345678901234 |
5 |
|
|
|
|
|
|||||||
12345678901234 |
5 |
|
|
|
|
|
|
|
|
|
|
||
12345678901234 |
5 |
withstand washing and cleaning. All |
fax or e-mail: |
|
|
|
|||||||
12345678901234 |
5 |
|
|
|
|
|
|||||||
12345678901234 |
5 |
labels must remain legible for the life of |
|
|
|
|
|
||||||
12345678901234 |
5 |
|
|
|
|
|
|||||||
12345678901234 |
5 |
|
|
|
|
|
Phone: (309) 755-4553 |
||||||
12345678901234 |
5 |
|
|
|
|
|
|||||||
12345678901234 |
5 |
the freezer. Check labels periodically to |
|||||||||||
12345678901234 |
5 |
|
|
|
|
|
|||||||
12345678901234 |
5 |
|
|
|
|
|
|
|
(800) 755-4545 |
|
|||
12345678901234 |
5 |
be sure they can be recognized as |
|
|
|
||||||||
12345678901234 |
5 |
|
|
|
|
|
|||||||
12345678901234 |
5 |
|
|
|
|
|
FAX: |
(309) 755-9858 |
|
||||
12345678901234 |
5 |
warning labels. |
|
|
|
||||||||
12345678901234 |
5 |
|
|
|
|
|
|
|
|||||
12345678901234 |
5 |
|
|
|
|
|
E-mail: Service@hcduke.com |
||||||
12345678901234 |
5 |
|
|
|
|
|
|||||||
12345678901234 |
5 |
|
|
|
|
|
|
|
|
|
|
||
12345678901234 |
5 |
If it is necessary to replace any label, |
|
|
|
|
|
||||||
12345678901234 |
5 |
|
|
|
|
|
|||||||
12345678901234 |
5 |
|
|
|
|
|
(The decals on the next page are num- |
||||||
12345678901234 |
5 |
|
|
|
|
|
|||||||
12345678901234 |
5 |
please contact your local authorized |
|
|
|
|
|
||||||
12345678901234 |
5 |
bered 1, 2, 3, and 4. Those numbers |
|||||||||||
12345678901234 |
5 |
|
|
|
|
|
|||||||
12345678901234 |
5 |
Electro Freeze Distributor or H. C. Duke |
|
|
|
|
|
||||||
12345678901234 |
5 |
correspond to the numbers in the table |
|||||||||||
12345678901234 |
5 |
|
|
|
|
|
|||||||
12345678901234 |
5 |
|
|
|
|
|
|
|
|
|
|
||
12345678901234 |
5 |
& Son, Inc. When ready to order, you |
below. The table provides the part |
||||||||||
12345678901234 |
5 |
|
|
|
|
|
|||||||
12345678901234 |
5 |
will need to determine the (1) part |
|
|
|
|
|
||||||
12345678901234 |
5 |
number, description, and quantity for |
|||||||||||
12345678901234 |
5 |
|
|
|
|
|
|||||||
12345678901234 |
5 |
number, (2) type of label, (3) location of |
|||||||||||
12345678901234 |
5 |
each decal.) |
|
|
|
||||||||
12345678901234 |
5 |
|
|
|
|
|
|
|
|
||||
12345678901234 |
5 |
label, and (4) quantity required, and |
|
|
|
||||||||
12345678901234 |
5 |
|
|
|
|
|
|||||||
12345678901234 |
5 |
|
|
|
|
|
|
|
|
|
|
||
12345678901234 |
5 |
include a return shipping address. |
|
|
|
|
|
||||||
12345678901234 |
5 |
|
|
|
|
|
|||||||
12345678901234 |
5 |
|
|
|
|
|
|
|
|
|
|
||
12345678901234 |
5 |
|
|
|
|
|
|
|
|
|
|
||
12345678901234 |
5 |
|
|
|
|
|
|
|
|
|
|
||
12345678901234 |
5 |
|
|
|
|
|
|
|
|
|
|
||
12345678901234 |
5 |
|
|
|
|
|
|
|
|
|
|
||
12345678901234 |
5 |
|
|
|
|
|
|
|
|
|
|
||
12345678901234 |
5 |
|
|
|
|
|
|
|
|
|
|
||
12345678901234 |
5 |
|
|
|
|
|
|
|
|
|
|
||
12345678901234 |
5 |
|
|
|
|
|
|
|
|
|
|
||
12345678901234 |
5 |
|
|
|
|
|
|
|
|
|
|
||
12345678901234 |
5 |
|
|
|
|
|
|
|
|
|
|
||
12345678901234 |
5 |
|
|
|
|
|
|
|
|
|
|
||
12345678901234 |
5 |
|
|
|
|
|
|
|
|
|
|
||
12345678901234 |
5 |
|
|
|
|
|
|
|
|
|
|
||
12345678901234 |
5 |
|
|
|
|
|
|
|
|
|
|
||
12345678901234 |
5 |
|
|
|
|
|
|
|
|
|
|
||
12345678901234 |
5 |
|
|
|
|
|
|
|
|
|
|
||
12345678901234 |
5 |
|
|
|
|
|
|
|
|
|
|
||
12345678901234 |
5 |
|
|
|
|
|
|
|
|
|
|
||
12345678901234 |
5 |
|
|
|
|
|
|
|
|
|
|
||
12345678901234 |
5 |
|
|
|
|
|
|
|
|
|
|
||
12345678901234 |
5 |
|
|
|
|
|
|
|
|
|
|
||
12345678901234 |
5 |
|
|
|
|
|
|
|
|
|
|
||
12345678901234 |
5 |
|
|
|
|
|
|
|
|
|
|
||
12345678901234 |
5 |
|
No. |
|
Part No. |
Description (Qty) |
|
|
|
||||
12345678901234 |
5 |
|
|
|
|
|
|||||||
12345678901234 |
5 |
|
|
|
|
|
|
|
|
|
|
||
12345678901234 |
5 |
|
|
|
|
|
|
|
|
|
|
||
12345678901234 |
5 |
|
|
|
|
|
|
|
|
|
|
||
12345678901234 |
5 |
1 |
|
|
|
|
|
|
|
|
|||
12345678901234 |
5 |
|
HC165025 |
Decal — Beater Warning (1) |
|
|
|
||||||
12345678901234 |
5 |
|
|
|
|
||||||||
12345678901234 |
5 |
|
|
|
|
|
|
|
|
|
|
||
12345678901234 |
5 |
|
|
|
|
|
|
|
|
|
|
||
12345678901234 |
5 |
2 |
|
|
|
|
|
|
|
|
|||
12345678901234 |
5 |
|
|
|
|
|
|
|
|
||||
12345678901234 |
5 |
|
HC165126 |
Decal — Panel Removal Warning (3) |
|||||||||
12345678901234 |
5 |
|
|||||||||||
12345678901234 |
5 |
|
|
|
|
|
|
|
|
|
|
||
12345678901234 |
5 |
|
|
|
|
|
|
|
|
|
|
||
12345678901234 |
5 |
3 |
|
|
|
|
|
|
|
|
|||
12345678901234 |
5 |
|
HC165246 |
Decal — Pressurized System Warning (1) |
|||||||||
12345678901234 |
5 |
|
|||||||||||
12345678901234 |
5 |
|
|||||||||||
12345678901234 |
5 |
|
|
|
|
|
|
|
|
|
|
||
12345678901234 |
5 |
|
|
|
|
|
|
|
|
|
|
||
12345678901234 |
5 |
4 |
|
|
|
|
|
|
|
|
|||
12345678901234 |
5 |
|
HC165048 |
Decal — Warning Rotating Parts (2) |
|||||||||
12345678901234 |
5 |
|
|||||||||||
12345678901234 |
5 |
|
|
|
|
|
|
|
|
|
|
||
12345678901234 |
5 |
|
|
|
|
|
|
|
|
|
|
||
12345678901234 |
5 |
|
|
|
|
|
|
|
|
|
|
||
12345678901234 |
5 |
|
|
|
|
|
|
|
|
|
|
||
12345678901234 |
5 |
|
|
|
|
|
|
|
|
|
|
||
12345678901234 |
5 |
|
|
|
|
|
|
|
|
|
|
||
12345678901234 |
5 |
|
|
|
|
|
|
|
|
|
|
||
12345678901234 |
5 |
|
|
|
|
|
|
|
|
|
|
||
12345678901234 |
5 |
|
|
|
|
|
|
|
|
|
|
||
12345678901234 |
5 |
|
|
|
|
|
|
|
|
|
|
||
12345678901234 |
5 |
|
|
|
|
|
|
|
|
|
|
||
12345678901234 |
5 |
|
|
|
|
|
|
|
|
|
|
||
12345678901234 |
5 |
|
|
|
|
|
|
|
|
|
|
||
12345678901234 |
5 |
|
|
|
|
|
|
|
|
|
|
||
12345678901234 |
5 |
|
|
|
|
|
|
|
|
|
|
||
12345678901234 |
5 |
|
|
|
|
|
|
|
|
|
|
||
12345678901234 |
5 |
|
|
|
|
|
|
|
|
|
|
||
12345678901234 |
5 |
|
|
|
|
|
|
|
|
|
|
||
12345678901234 |
5 |
|
|
|
|
|
|
|
|
|
|
||
12345678901234 |
5 |
|
|
|
|
|
|
|
|
|
|
||
12345678901234 |
5 |
|
|
|
|
|
|
|
|
|
|
||
12345678901234 |
5 |
|
|
|
|
|
|
|
|
|
|
||
12345678901234 |
5 |
|
|
|
|
|
|
|
|
|
|
||
12345678901234 |
5 |
|
|
|
|
|
|
|
|
|
|
||
12345678901234 |
5 |
|
|
|
|
|
|
|
|
|
|
||
12345678901234 |
5 |
|
|
|
|
|
|
|
|
|
|
||
|
12345678901234 |
5 |
|
|
|
|
|
|
|
|
|
|
|
|
12345678901234 |
5 |
|
|
|
|
|
|
|
|
|
|
|
12345678901234 |
5 |
|
|
|
|
|
|
|
|
|
|
||
12345678901234 |
5 |
|
|
|
|
|
|
|
|
|
|
||
12345678901234 |
5 |
|
|
|
|
|
|
|
|
|
|
||
|
123456789012345 |
|
|
|
|
|
iv |
|
|
|
|
|
|
|
|
|
|
|
|
|
|
|
|
|
|
|
|
184950
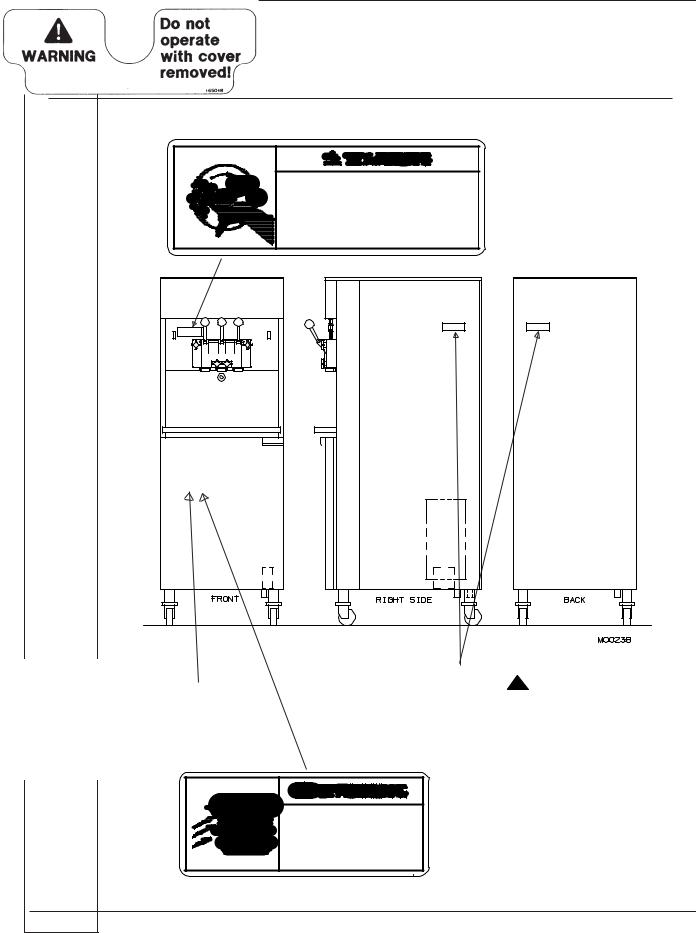
ELECTRO FREEZE Soft Serve Model 88T-RMT
234567890123456 |
|
|
|
|
23456789012345 |
|
|
|
|
23456789012345 |
|
|
|
|
23456789012345 |
|
|
|
|
23456789012345 |
|
|
|
|
23456789012345 |
|
|
|
|
23456789012345 |
|
|
|
|
23456789012345234567890123452345678901234523456789012345 |
|
|
|
|
Safety Decal Locations |
|
|
||
23456789012345 |
|
|
|
|
23456789012345 |
|
|
|
|
23456789012345 |
|
|
|
|
23456789012345 |
|
|
|
|
23456789012345 |
|
|
|
|
23456789012345 |
|
|
|
|
23456789012345 |
|
|
|
|
23456789012345 |
|
|
|
|
23456789012345 |
|
|
|
|
23456789012345 |
|
|
|
|
23456789012345 |
|
|
|
|
23456789012345 |
|
|
|
|
23456789012345 |
|
|
|
|
23456789012345 |
|
|
|
|
23456789012345 |
|
|
|
|
23456789012345 |
|
|
|
|
23456789012345 |
|
|
|
|
23456789012345 |
|
|
|
|
23456789012345 |
|
Hazardous rotating beater shaft. Do not |
|
|
23456789012345 |
|
|
|
|
23456789012345 |
|
1 |
|
|
23456789012345 |
|
operate unit with dispense head removed. |
|
|
23456789012345 |
|
|
P/N HC165025 |
|
23456789012345 |
|
Before removing dispense head: |
||
23456789012345 |
|
|
||
23456789012345 |
|
1. Turn all control switches to "OFF", and |
|
|
23456789012345 |
|
|
|
|
23456789012345 |
|
2. Disconnect all power supplies. Unit may |
|
|
23456789012345 |
|
|
|
|
23456789012345 |
|
have more than one power supply. |
|
|
23456789012345 |
|
|
|
|
23456789012345 |
|
|
|
|
23456789012345 |
|
|
|
|
23456789012345 |
|
|
|
|
23456789012345 |
|
|
|
|
23456789012345 |
|
|
|
|
23456789012345 |
|
|
|
|
23456789012345 |
|
|
|
|
23456789012345 |
|
|
|
|
23456789012345 |
|
|
|
|
23456789012345 |
|
|
|
|
23456789012345 |
|
|
|
|
23456789012345 |
|
|
|
|
23456789012345 |
|
|
|
|
23456789012345 |
|
|
|
|
23456789012345 |
|
|
|
|
23456789012345 |
|
|
|
|
23456789012345 |
|
|
|
|
23456789012345 |
|
|
|
|
23456789012345 |
|
|
|
|
23456789012345 |
|
|
|
|
23456789012345 |
|
|
|
|
23456789012345 |
|
|
|
|
23456789012345 |
|
|
|
|
23456789012345 |
|
|
|
|
23456789012345 |
|
|
|
|
23456789012345 |
|
|
|
|
23456789012345 |
|
|
|
|
23456789012345 |
|
|
|
|
23456789012345 |
|
|
|
|
23456789012345 |
|
|
|
|
23456789012345 |
|
|
|
|
23456789012345 |
|
|
|
|
23456789012345 |
|
|
|
|
23456789012345 |
|
|
|
|
23456789012345 |
|
|
|
|
23456789012345 |
|
|
|
|
23456789012345 |
|
|
|
|
23456789012345 |
|
|
|
|
23456789012345 |
|
|
|
|
23456789012345 |
|
|
|
|
23456789012345 |
|
|
|
|
23456789012345 |
|
|
|
|
23456789012345 |
|
|
|
|
23456789012345 |
|
|
|
|
23456789012345 |
|
|
|
|
23456789012345 |
|
|
|
|
23456789012345 |
|
|
|
|
23456789012345 |
INSIDE CABINET |
|
|
|
23456789012345 |
|
|
|
|
23456789012345 |
|
|
|
|
23456789012345 |
|
|
|
|
23456789012345 |
|
|
|
|
23456789012345 |
|
|
|
|
23456789012345 |
|
|
|
|
23456789012345 |
|
|
|
|
23456789012345 |
|
|
|
|
23456789012345 |
|
|
|
|
23456789012345 |
|
|
|
|
23456789012345 |
|
|
|
|
23456789012345 |
|
|
|
|
23456789012345 |
|
|
|
|
23456789012345 |
|
|
|
|
23456789012345 |
|
|
|
|
23456789012345 |
|
|
|
|
23456789012345 |
|
|
|
|
23456789012345 |
|
|
|
|
23456789012345 |
|
|
|
|
23456789012345 |
|
|
|
|
23456789012345 |
|
|
|
|
23456789012345 |
|
|
|
|
23456789012345 |
|
|
|
|
23456789012345 |
|
|
|
|
23456789012345 |
|
|
|
|
23456789012345 |
|
|
|
|
23456789012345 |
|
|
|
|
23456789012345 |
|
|
|
|
23456789012345 |
|
|
|
|
23456789012345 |
4 |
|
|
|
23456789012345 |
|
|
|
|
23456789012345 |
|
2 |
|
|
23456789012345 |
|
|
|
|
23456789012345 |
|
|
|
|
23456789012345 |
|
|
P/N HC165126 |
|
23456789012345 |
|
|
||
23456789012345 |
|
|
|
|
P/N HC165048 |
|
|
|
|
! WARNING
Hazardous moving parts. Machine starts automatically. Do not operate with panel removed.
23456789012345 |
|
|
23456789012345 |
|
|
23456789012345 |
|
|
23456789012345 |
|
|
23456789012345 |
|
|
23456789012345 |
|
|
23456789012345 |
|
|
23456789012345 |
|
|
23456789012345 |
Pressurized system. |
|
23456789012345 |
||
23456789012345 |
||
23456789012345 |
Depressurize unit |
|
23456789012345 |
||
23456789012345 |
|
|
23456789012345 |
before dismantling |
|
23456789012345 |
||
23456789012345 |
mix transfer system. |
|
23456789012345 |
||
23456789012345 |
|
|
23456789012345 |
|
|
23456789012345 |
|
|
23456789012345 |
3 |
|
23456789012345 |
|
|
23456789012345 |
|
P/N HC165246 |
23456789012345 |
|
|
23456789012345 |
|
|
23456789012345 |
|
|
23456789012345 |
|
|
23456789012345 |
|
|
23456789012345 |
|
|
23456789012345 |
|
|
23456789012345 |
|
|
234567890123456 |
|
|
v
184950

ELECTRO FREEZE Soft Serve Model 88T-RMT
234567890123456 |
|
|
|
|
23456789012345 |
|
|
|
|
23456789012345 |
|
Table of Contents |
|
|
23456789012345 |
|
|
||
23456789012345 |
|
|
|
|
23456789012345 |
|
|
|
|
23456789012345 |
|
|
|
|
23456789012345 |
|
|
|
|
23456789012345 |
|
|
|
|
23456789012345 |
|
|
|
|
23456789012345 |
|
|
|
|
23456789012345 |
|
|
|
|
23456789012345 |
|
|
|
|
23456789012345 |
|
|
|
|
23456789012345 |
|
|
|
|
23456789012345 |
|
|
|
|
23456789012345 |
|
|
ii |
|
Safety First .................................................................................... |
||||
23456789012345 |
|
|
|
|
23456789012345 |
|
|
|
|
23456789012345 |
|
|
|
|
23456789012345 |
|
|
|
|
23456789012345 |
|
|
|
|
23456789012345 |
|
|
iv |
|
23456789012345Safety Decal Locations .................................................................. |
||||
23456789012345 |
|
|
|
|
23456789012345 |
|
|
|
|
23456789012345 |
|
|
|
|
23456789012345 |
|
|
|
|
23456789012345 |
|
|
|
|
23456789012345 |
|
|
|
|
23456789012345 |
|
|
|
|
23456789012345 |
|
|
|
|
23456789012345 |
|
|
|
|
23456789012345 |
|
Part I |
|
|
23456789012345 |
|
|
||
23456789012345 |
|
|
|
|
23456789012345 |
|
|
|
|
23456789012345 |
|
|
|
|
23456789012345 |
|
|
|
|
23456789012345 |
|
|
|
|
23456789012345 |
Introduction |
1 |
||
1 |
||||
234567890 |
2345 |
|
|
|
234567890 |
2345 |
|
|
|
234567890 |
2345 |
|
|
|
23456789012345 |
|
|
|
|
23456789012345 |
|
|
|
|
23456789012345 |
|
|
|
|
2345678901 |
345 |
Note to Installer |
1 |
|
23456789012345 |
||||
2345678901 |
345 |
|
|
|
2345678901 |
345 |
|
|
|
23456789012345 |
|
|
|
|
23456789012345 |
|
|
|
|
23456789012345 |
2.1 |
Uncrating and Inspection |
2 |
|
23456789012345 |
||||
23456789012345 |
|
|
|
|
23456789012345 |
|
|
|
|
23456789012345 |
|
|
|
|
23456789012345 |
|
|
|
|
23456789012345 |
2.2 |
Installation |
2 |
|
23456789012345 |
||||
23456789012345 |
|
|
|
|
23456789012345 |
|
|
|
|
23456789012345 |
|
|
|
|
23456789012345 |
|
|
|
|
23456789012345 |
2.3 |
Electrical Requirements |
3 |
|
23456789012345 |
||||
23456789012345 |
|
|
|
|
23456789012345 |
|
|
|
|
23456789012345 |
|
|
|
|
23456789012345 |
|
|
|
|
23456789012345 |
2.4 |
Electrical Connections |
3 |
|
23456789012345 |
||||
23456789012345 |
|
|
|
|
23456789012345 |
|
|
|
|
23456789012345 |
|
|
|
|
23456789012345 |
Specifications |
4 |
||
234567890123453 |
||||
23456789012345 |
|
|
|
|
23456789012345 |
|
|
|
|
23456789012345 |
|
|
|
|
23456789012345 |
|
|
|
|
23456789012345 |
3.1 |
Particulars |
4 |
|
23456789012345 |
||||
23456789012345 |
|
|
|
|
23456789012345 |
|
|
|
|
23456789012345 |
|
|
|
|
23456789012345 |
|
|
|
|
23456789012345 |
3.2 |
Data Plate |
4 |
|
23456789012345 |
||||
23456789012345 |
|
|
|
|
23456789012345 |
|
|
|
|
23456789012345 |
|
|
|
|
23456789012345 |
|
|
|
|
23456789012345 |
3.3 |
Reference Information |
5 |
|
23456789012345 |
||||
23456789012345 |
|
|
|
|
23456789012345 |
|
|
|
|
23456789012345 |
|
|
|
|
23456789012345 |
3.4 |
Installation Date |
5 |
|
23456789012345 |
||||
23456789012345 |
|
|
|
|
23456789012345 |
|
|
|
|
23456789012345 |
|
|
|
|
23456789012345 |
|
|
|
|
23456789012345 |
3.5 |
Dimensions |
5 |
|
23456789012345 |
||||
23456789012345 |
|
|
|
|
23456789012345 |
|
|
|
|
23456789012345 |
|
|
|
|
23456789012345 |
Part Names and Functions |
6 |
||
4 |
||||
23456789012345 |
|
|
|
|
23456789012345 |
|
|
|
|
23456789012345 |
|
|
|
|
23456789012345 |
|
|
|
|
23456789012345 |
|
|
|
|
23456789012345 |
|
|
|
|
23456789012345 |
Operator Controls and Indicators |
10 |
||
5 |
||||
23456789012345 |
|
|
|
|
23456789012345 |
|
|
|
|
23456789012345 |
|
|
|
|
23456789012345 |
|
|
|
|
23456789012345 |
|
|
|
|
23456789012345 |
5.1 |
Selector Switch |
10 |
|
23456789012345 |
||||
23456789012345 |
|
|
|
|
23456789012345 |
|
|
|
|
23456789012345 |
|
|
|
|
23456789012345 |
|
|
|
|
23456789012345 |
5.2 |
Day–Night Switch |
11 |
|
23456789012345 |
||||
23456789012345 |
|
|
|
|
23456789012345 |
|
|
|
|
23456789012345 |
|
|
|
|
23456789012345 |
5.3 Mix Transfer System (MTS) Switch |
11 |
||
23456789012345 |
||||
23456789012345 |
|
|
|
|
23456789012345 |
|
|
|
|
23456789012345 |
|
|
|
|
23456789012345 |
|
|
|
|
23456789012345 |
5.4 |
Cabinet Switch |
11 |
|
23456789012345 |
||||
23456789012345 |
|
|
|
|
23456789012345 |
|
|
|
|
23456789012345 |
|
|
|
|
23456789012345 |
|
|
|
|
23456789012345 |
5.5 |
Timer |
11 |
|
23456789012345 |
||||
23456789012345 |
|
|
|
|
23456789012345 |
|
|
|
|
23456789012345 |
|
|
|
|
23456789012345 |
5.6 |
Reset — Overload |
12 |
|
23456789012345 |
||||
23456789012345 |
|
|
|
|
23456789012345 |
|
|
|
|
23456789012345 |
|
|
|
|
23456789012345 |
|
|
|
|
23456789012345 |
5.7 Indicator Light — “ADD MIX” |
12 |
||
23456789012345 |
||||
23456789012345 |
|
|
|
|
23456789012345 |
|
|
|
|
23456789012345 |
|
|
|
|
23456789012345 |
5.8 Probe — “ADD MIX” |
13 |
||
23456789012345 |
||||
23456789012345 |
|
|
|
|
23456789012345 |
|
|
|
|
23456789012345 |
|
|
|
|
23456789012345 |
|
|
|
|
23456789012345 |
5.9 |
Thermometer — Cabinet |
13 |
|
23456789012345 |
||||
23456789012345 |
|
|
|
|
23456789012345 |
|
|
|
|
23456789012345 |
|
|
|
|
23456789012345 |
|
|
|
|
23456789012345 |
|
|
|
|
23456789012345 |
|
|
|
|
23456789012345 |
|
|
|
|
23456789012345 |
|
|
|
|
|
|
|
vi |
184950 |
|
|
|
||
|
|
|
|
|

|
|
|
|
ELECTRO FREEZE Soft Serve Model 88T-RMT |
|
|
|
|
|
|
|
|
|
|
|
|
|
23456789012345 |
|
|
|
|
|
2345678901234 |
5 |
|
|
|
|
2345678901234 |
5 |
|
Table of Contents (continued) |
|
|
2345678901234 |
5 |
|
|
||
2345678901234 |
5 |
|
|
|
|
2345678901234 |
5 |
|
|
|
|
2345678901234 |
5 |
|
|
|
|
2345678901234 |
5 |
|
|
|
|
2345678901234 |
5 |
|
|
|
|
2345678901234 |
5 |
|
|
|
|
2345678901234 |
5 |
|
|
|
|
2345678901234 |
5 |
|
|
|
|
2345678901234 |
5 |
|
|
|
|
2345678901234 |
5 |
|
|
|
|
2345678901234 |
5 |
|
|
|
|
2345678901234 |
5 |
|
|
|
|
2345678901234 |
5 |
Disassembly and Cleaning |
14 |
||
6 |
5 |
||||
2345678901234 |
5 |
|
|
|
|
2345678901234 |
5 |
|
|
|
|
2345678901234 |
|
|
|
|
|
2345678901234 |
5 |
|
|
|
|
2345678901234 |
5 |
|
|
|
|
2345678901234 |
5 |
6.1 |
Cleaning Accessories |
15 |
|
2345678901234 |
5 |
||||
2345678901234 |
5 |
|
|
|
|
2345678901234 |
5 |
|
|
|
|
2345678901234 |
5 |
|
|
|
|
2345678901234 |
5 |
|
|
|
|
2345678901234 |
5 |
6.2 |
Disassembly Instructions |
16 |
|
2345678901234 |
5 |
||||
2345678901234 |
5 |
|
|
|
|
2345678901234 |
5 |
|
|
|
|
2345678901234 |
5 |
|
|
|
|
2345678901234 |
5 |
6.3 |
Cleaning Instructions |
18 |
|
2345678901234 |
5 |
||||
2345678901234 |
5 |
|
|
|
|
2345678901234 |
5 |
|
|
|
|
2345678901234 |
5 |
|
|
|
|
2345678901234 |
5 |
|
|
|
|
2345678901234 |
5 |
6.3.1 |
Cleaning Shoe |
20 |
|
2345678901234 |
5 |
||||
2345678901234 |
5 |
|
|
|
|
2345678901234 |
5 |
|
|
|
|
2345678901234 |
5 |
|
|
|
|
2345678901234 |
5 |
Assembly |
|
||
7 |
5 |
|
|||
2345678901234 |
5 |
|
|
21 |
|
2345678901234 |
|
|
|
||
2345678901234 |
5 |
|
|
|
|
2345678901234 |
5 |
|
|
|
|
2345678901234 |
5 |
|
|
|
|
2345678901234 |
5 |
|
|
|
|
2345678901234 |
5 |
Start-up Instructions |
26 |
||
8 |
5 |
||||
2345678901234 |
5 |
|
|
|
|
2345678901234 |
5 |
|
|
|
|
2345678901234 |
|
|
|
|
|
2345678901234 |
5 |
|
|
|
|
2345678901234 |
5 |
|
|
|
|
2345678901234 |
5 |
8.1 |
Sanitizing Instructions |
26 |
|
2345678901234 |
5 |
||||
2345678901234 |
5 |
|
|
|
|
2345678901234 |
5 |
|
|
|
|
2345678901234 |
5 |
|
|
|
|
2345678901234 |
5 |
|
|
|
|
2345678901234 |
5 |
8.2 |
Priming |
28 |
|
2345678901234 |
5 |
||||
2345678901234 |
5 |
|
|
|
|
2345678901234 |
5 |
|
|
|
|
2345678901234 |
5 |
|
|
|
|
2345678901234 |
5 |
|
|
|
|
2345678901234 |
5 |
Closing Procedures |
29 |
||
9 |
5 |
||||
2345678901234 |
5 |
|
|
|
|
2345678901234 |
5 |
|
|
|
|
2345678901234 |
|
|
|
|
|
2345678901234 |
5 |
|
|
|
|
2345678901234 |
5 |
|
|
|
|
2345678901234 |
5 |
9.1 |
Night Switch Operation |
29 |
|
2345678901234 |
5 |
||||
2345678901234 |
5 |
|
|
|
|
2345678901234 |
5 |
|
|
|
|
2345678901234 |
5 |
|
|
|
|
2345678901234 |
5 |
|
|
|
|
2345678901234 |
5 |
9.2 |
Draining Product |
30 |
|
2345678901234 |
5 |
||||
2345678901234 |
5 |
|
|
|
|
2345678901234 |
5 |
|
|
|
|
2345678901234 |
5 |
|
|
|
|
2345678901234 |
5 |
Soft Serve Information |
29 |
||
234567890123410 |
5 |
||||
234567890 |
234 |
5 |
|
|
|
234567890 |
234 |
5 |
|
|
|
234567890 |
234 |
5 |
|
|
|
2345678901234 |
5 |
|
|
|
|
2345678901234 |
5 |
|
|
|
|
2345678901234 |
5 |
10.1 |
Overrun |
32 |
|
2345678901234 |
5 |
||||
2345678901234 |
5 |
|
|
|
|
2345678901234 |
5 |
|
|
|
|
2345678901234 |
5 |
|
|
|
|
2345678901234 |
5 |
10.2 |
Overrun Adjustment |
33 |
|
2345678901234 |
5 |
||||
2345678901234 |
5 |
|
|
|
|
2345678901234 |
5 |
|
|
|
|
2345678901234 |
5 |
|
|
|
|
2345678901234 |
5 |
|
|
|
|
2345678901234 |
5 |
10.3 |
Rerun |
33 |
|
2345678901234 |
5 |
||||
2345678901234 |
5 |
|
|
|
|
2345678901234 |
5 |
|
|
|
|
2345678901234 |
5 |
|
|
|
|
2345678901234 |
5 |
Routine Maintenance |
|
||
11 |
5 |
|
|||
234567890 |
234 |
5 |
|
|
34 |
2345678901234 |
|
|
..................................................... |
||
234567890 |
234 |
5 |
|
|
|
234567890 |
234 |
5 |
|
|
|
2345678901234 |
5 |
|
|
|
|
2345678901234 |
5 |
|
|
|
|
234567890 |
234 |
5 |
Troubleshooting Table |
40 |
|
12 |
5 |
||||
234567890 |
234 |
5 |
|
|
|
234567890 |
234 |
5 |
|
|
|
2345678901234 |
|
|
|
|
|
2345678901234 |
5 |
|
|
|
|
2345678901234 |
5 |
|
|
|
|
2345678901234 |
5 |
|
|
|
|
2345678901234 |
5 |
|
|
|
|
2345678901234 |
5 |
|
|
|
|
2345678901234 |
5 |
|
|
|
|
2345678901234 |
5 |
|
|
|
|
2345678901234 |
5 |
|
Part II |
|
|
2345678901234 |
5 |
|
|
||
2345678901234 |
5 |
|
|
|
|
2345678901234 |
5 |
|
|
|
|
2345678901234 |
5 |
|
|
|
|
2345678901234 |
5 |
|
|
|
|
2345678901234 |
5 |
|
|
|
|
2345678901234 |
5 |
|
|
|
|
2345678901234 |
5 |
|
|
|
|
2345678901234 |
5 |
|
|
|
|
2345678901234 |
5 |
|
|
|
|
2345678901234 |
5 |
|
|
|
|
2345678901234 |
5 |
|
|
|
|
2345678901234 |
5 |
|
|
|
|
2345678901234 |
5 |
Model 88T-RMT Replacement Parts Manual |
|
||
2345678901234 |
5 |
|
|||
2345678901234 |
5 |
|
|
|
|
2345678901234 |
5 |
|
|
|
|
2345678901234 |
5 |
|
|
|
|
2345678901234 |
5 |
|
|
|
|
2345678901234 |
5 |
|
with Illustrations |
* |
|
2345678901234 |
5 |
|
|||
2345678901234 |
5 |
|
|
|
|
2345678901234 |
5 |
|
|
|
|
2345678901234 |
5 |
|
|
|
|
2345678901234 |
5 |
|
|
|
|
2345678901234 |
5 |
* Refer to Part II Table of Contents for help with locating part numbers |
|
||
2345678901234 |
5 |
|
|||
2345678901234 |
5 |
|
|
|
|
2345678901234 |
5 |
|
|
|
|
2345678901234 |
5 |
|
|
|
|
2345678901234 |
5 |
|
and illustrations. |
|
|
2345678901234 |
5 |
|
|
||
2345678901234 |
5 |
|
|
|
|
2345678901234 |
5 |
|
|
|
|
2345678901234 |
5 |
|
|
|
|
2345678901234 |
5 |
|
|
|
|
2345678901234 |
5 |
|
|
|
|
2345678901234 |
5 |
|
|
|
|
2345678901234 |
5 |
|
|
|
|
2345678901234 |
5 |
|
|
|
|
2345678901234 |
5 |
|
|
|
|
2345678901234 |
5 |
|
|
|
|
2345678901234 |
5 |
|
|
|
|
2345678901234 |
5 |
|
|
|
|
2345678901234 |
5 |
|
|
|
|
2345678901234 |
5 |
|
|
|
|
2345678901234 |
5 |
|
|
|
|
2345678901234 |
5 |
|
|
|
|
2345678901234 |
5 |
|
|
|
|
23456789012345 |
|
|
|
|
|
184950 |
vii |
|

ELECTRO FREEZE Soft Serve Model 88T-RMT
|
234567890123456 |
|
|
|
|
|
|
|
23456789012345 |
|
|
|
|
|
|
|
23456789012345 |
|
|
|
|
|
|
|
23456789012345 |
|
|
|
|
|
|
|
23456789012345 |
|
|
|
|
|
|
|
23456789012345 |
Introduction |
|
|
|
||
|
1 |
|
|
|
|||
|
23456789012345 |
|
|
|
|
|
|
|
23456789012345 |
|
|
|
|
|
|
|
23456789012345 |
|
|
|
|
|
|
|
23456789012345 |
|
|
|
|
|
|
|
23456789012345 |
|
|
|
|
|
|
|
23456789012345 |
|
|
|
|
|
|
|
23456789012345 |
|
|
|
|
|
|
|
23456789012345 |
|
|
|
|
|
|
|
23456789012345 |
|
|
|
|
|
|
|
23456789012345 |
|
|
|
|
|
|
|
23456789012345 |
|
|
|
|
|
|
|
23456789012345 |
|
The Model 88T-RMT Freezer is de- |
Make sure all personnel responsible for |
|||
|
23456789012345 |
|
|||||
|
23456789012345 |
|
|
|
|
|
|
|
23456789012345 |
|
signed to produce soft serve ice cream, |
equipment operation completely read |
|||
|
23456789012345 |
|
|||||
|
23456789012345 |
|
|
|
|
|
|
|
23456789012345 |
|
|
|
|
|
|
|
23456789012345 |
|
ice milk, yogurt, and similar frozen dairy |
and understand this manual before |
|||
|
23456789012345 |
|
|||||
|
23456789012345 |
|
|
|
|
|
|
|
23456789012345 |
|
products, with a product serving tem- |
operating the freezer. When properly |
|||
|
23456789012345 |
|
|||||
|
23456789012345 |
|
|
|
|
|
|
|
23456789012345 |
|
perature range of 15 to 25°F (-9 to -4°C). |
operated and maintained, the freezer will |
|||
|
23456789012345 |
|
|||||
|
23456789012345 |
|
|
|
|
|
|
|
23456789012345 |
|
If such products are prepared from |
produce a consistent quality product. |
|||
|
23456789012345 |
|
|||||
|
23456789012345 |
|
|
|
|
|
|
|
23456789012345 |
|
powdered concentrate, they should be |
|
|
|
|
|
23456789012345 |
|
|
|
|
||
|
23456789012345 |
|
|
|
|
|
|
|
23456789012345 |
|
|
If you require technical assistance, |
|||
|
23456789012345 |
|
precooled to 40ºF (4°C) prior to introduc- |
||||
|
23456789012345 |
|
|
|
|
||
|
23456789012345 |
|
|
please contact your local authorized |
|||
|
23456789012345 |
|
tion to the freezer. Use of other products |
||||
|
23456789012345 |
|
|
|
|
||
|
23456789012345 |
|
|
|
|
|
|
|
23456789012345 |
|
in this machine is considered misuse |
Electro Freeze Distributor as follows: |
|||
|
23456789012345 |
|
|
|
|
||
|
23456789012345 |
|
|
|
|
|
|
|
23456789012345 |
|
(see Warranty). |
Name __________________________ |
|||
|
23456789012345 |
|
|||||
|
23456789012345 |
|
|
||||
|
23456789012345 |
|
|
|
|
|
|
|
23456789012345 |
|
This manual has been prepared to assist |
|
|
|
|
|
23456789012345 |
|
Address: _______________________ |
||||
|
23456789012345 |
|
|||||
|
23456789012345 |
|
|
||||
|
23456789012345 |
|
you in the proper operation and general |
|
|
|
|
|
23456789012345 |
|
|
|
|
||
|
23456789012345 |
|
maintenance of the Electro Freeze Soft |
_________________________ |
|
||
|
23456789012345 |
|
|
||||
|
23456789012345 |
|
|
|
|
|
|
|
23456789012345 |
|
|
|
|
|
|
|
23456789012345 |
|
Serve Model 88T-RMT. |
|
|
|
|
|
23456789012345 |
|
|
|
|
||
|
23456789012345 |
|
|
Phone: _________________________ |
|||
|
23456789012345 |
|
|
||||
|
23456789012345 |
|
|
|
|
|
|
|
23456789012345 |
|
Your freezer will not compensate for or |
|
|
|
|
|
23456789012345 |
|
|
|
|
||
|
23456789012345 |
|
|
For factory service assistance — contact |
|||
|
23456789012345 |
|
|
||||
|
23456789012345 |
|
correct any assembly or priming errors |
|
|
|
|
|
23456789012345 |
|
H. C. Duke & Son, Inc., Electro Freeze |
||||
|
23456789012345 |
|
|
||||
|
23456789012345 |
|
|
|
|
|
|
|
23456789012345 |
|
made during the initial start-up; there- |
Service Department as follows: |
|||
|
23456789012345 |
|
|
||||
|
23456789012345 |
|
fore, it is important to follow the assem- |
|
|
|
|
|
23456789012345 |
|
|
|
|
||
|
23456789012345 |
|
|
|
|
|
|
|
23456789012345234567890123452345678901234523456789012345234567890123452345678901234523456789012345 |
|
bly and priming procedures detailed in |
Phone: |
(309) 755-4553 |
|
|
|
|
this manual. |
|
(800) 755-4545 |
|
||
|
23456789012345 |
|
|
FAX: |
(309) 755-9858 |
|
|
|
23456789012345 |
|
|
|
|||
|
23456789012345 |
|
|
|
|||
|
23456789012345 |
|
|
|
|
|
|
|
23456789012345 |
|
|
|
|
|
|
|
23456789012345 |
|
|
E-mail: |
Service@hcduke.com |
||
|
23456789012345 |
|
|
||||
|
23456789012345 |
|
|
||||
|
23456789012345 |
|
|
|
|
|
|
|
23456789012345 |
|
|
|
|
|
|
|
23456789012345 |
|
|
|
|
|
|
|
23456789012345 |
|
|
|
|
|
|
|
23456789012345 |
|
|
|
|
|
|
|
23456789012345 |
|
|
|
|
|
|
|
23456789012345 |
Note to Installer |
|
|
|
||
|
2 |
|
|
|
|||
|
23456789012345 |
|
|
|
|
|
|
|
23456789012345 |
|
|
|
|
|
|
|
23456789012345 |
|
|
|
|
|
|
|
23456789012345 |
|
|
|
|
|
|
|
23456789012345 |
|
|
|
|
|
|
|
23456789012345 |
|
|
|
|
|
|
|
|
|
|
|
|
|
|
|
23456789012345 |
|
|
|
|
|
|
|
23456789012345 |
|
|
|
|
|
|
|
23456789012345 |
|
|
|
|
|
|
|
23456789012345 |
|
|
|
|
|
|
|
23456789012345 |
|
|
|
|
|
|
|
23456789012345 |
|
|
|
|
|
|
|
23456789012345 |
|
This freezer must be installed and serviced by an Electro Freeze Distributor or |
||||
|
23456789012345 |
|
|||||
|
23456789012345 |
|
|
|
|
|
|
|
23456789012345 |
|
authorized service technician in accordance with the installation instructions. |
||||
|
23456789012345 |
|
|||||
|
23456789012345 |
|
|
|
|
|
|
|
23456789012345 |
|
|
|
|
|
|
|
23456789012345 |
|
|
|
|
|
|
|
23456789012345 |
|
After installation, the warranty registration card must be completed and |
||||
|
23456789012345 |
|
|||||
|
23456789012345 |
|
|
|
|
|
|
|
23456789012345 |
|
returned to validate the warranty. |
|
|
|
|
|
23456789012345 |
|
|
|
|
||
|
23456789012345 |
|
|
|
|
|
|
|
23456789012345 |
|
|
|
|
|
|
|
23456789012345 |
|
|
|
|
|
|
|
23456789012345 |
|
|
|
|
|
|
|
23456789012345 |
|
|
|
|
|
|
|
23456789012345 |
|
|
|
|
|
|
|
23456789012345 |
|
|
|
|
|
|
|
23456789012345 |
|
|
|
|
|
|
|
23456789012345 |
|
|
|
|
|
|
|
23456789012345 |
|
|
|
|
|
|
|
23456789012345 |
|
|
|
|
|
|
|
23456789012345 |
|
|
|
|
|
|
|
23456789012345 |
|
|
|
|
|
|
|
23456789012345 |
|
|
|
|
|
|
|
23456789012345 |
|
|
|
|
|
|
|
23456789012345 |
|
|
|
|
|
|
|
23456789012345 |
|
|
|
|
|
|
|
23456789012345 |
|
|
|
|
|
|
|
23456789012345 |
|
|
|
|
|
|
|
23456789012345 |
|
|
|
|
|
|
|
23456789012345 |
|
|
|
|
|
|
|
23456789012345 |
|
|
|
|
|
|
|
23456789012345 |
|
|
|
|
|
|
|
23456789012345 |
|
|
|
|
|
|
|
23456789012345 |
|
|
|
|
|
|
|
23456789012345 |
|
|
|
|
|
|
|
23456789012345 |
|
|
|
|
|
|
|
23456789012345 |
|
|
|
|
|
|
|
23456789012345 |
|
|
|
|
|
|
|
23456789012345 |
|
|
|
|
|
|
|
23456789012345 |
|
|
|
|
|
|
|
23456789012345 |
|
|
|
|
|
|
|
23456789012345 |
|
|
|
|
|
|
|
23456789012345 |
|
|
|
|
|
|
|
23456789012345 |
|
|
|
|
|
|
|
23456789012345 |
|
|
|
|
|
|
|
23456789012345 |
|
|
|
|
|
|
|
23456789012345 |
|
|
|
|
|
|
|
23456789012345 |
|
|
|
|
|
|
|
23456789012345 |
|
|
|
|
|
|
|
23456789012345 |
|
|
|
|
|
|
|
23456789012345 |
|
|
|
|
|
|
|
23456789012345 |
|
|
|
|
|
|
|
23456789012345 |
|
|
|
|
|
|
|
23456789012345 |
|
|
|
|
|
|
|
23456789012345 |
|
|
|
|
|
|
|
23456789012345 |
|
|
|
|
|
|
|
23456789012345 |
|
|
|
|
|
|
|
23456789012345 |
|
|
|
|
|
|
|
23456789012345 |
|
|
|
|
|
|
|
234567890123456 |
|
|
|
|
|
|
184950 |
1 |

ELECTRO FREEZE Soft Serve Model 88T-RMT
123456789012345 |
|
|
|
|
|
|
12345678901234 |
5 |
|
|
|
|
|
12345678901234 |
5 |
Uncrating and Inspection |
|
|
||
1234567890123412345678901234123456789012342.1 |
555 |
|
|
|||
12345678901234 |
5 |
|
|
|
|
|
1 |
2345678901234 |
5 |
|
|
|
|
12345678901234 |
5 |
|
|
|
|
|
12345678901234 |
5 |
|
|
|
|
|
12345678901234 |
5 |
|
|
|
|
|
12345678901234 |
5 |
|
CAUTION |
|
|
|
12345678901234 |
5 |
|
|
|
||
12345678901234 |
5 |
|
|
punctured, note the damage on the |
||
12345678901234 |
5 |
Be sure to properly support |
||||
12345678901234 |
5 |
|
|
|||
12345678901234 |
5 |
|
|
carrier’s freight bill and notify the |
||
12345678901234 |
5 |
the machine when remov- |
||||
12345678901234 |
5 |
|
|
|||
12345678901234 |
5 |
|
|
carrier’s local agent immediately. |
||
12345678901234 |
5 |
|
|
|||
12345678901234 |
5 |
ing bolts and installing legs |
|
|
||
12345678901234 |
5 |
|
|
|||
12345678901234 |
5 |
or casters. |
1. |
Remove the carton from the |
||
12345678901234 |
5 |
|||||
12345678901234 |
5 |
|
|
|
|
|
12345678901234 |
5 |
|
|
pallet, and move the machine as close |
||
12345678901234 |
5 |
|
|
|||
12345678901234 |
5 |
|
|
|
|
|
12345678901234 |
5 |
When the unit is received and while |
as possible to the permanent location. |
|||
12345678901234 |
5 |
|||||
12345678901234 |
5 |
|
|
|
|
|
12345678901234 |
5 |
the carrier is still present, inspect the |
|
|
||
12345678901234 |
5 |
|
|
|||
12345678901234 |
5 |
|
|
|
|
|
12345678901234 |
5 |
|
|
2. |
Remove the shipping bolts on |
|
12345678901234 |
5 |
shipping carton for any damage that |
||||
12345678901234 |
5 |
|
|
|||
12345678901234 |
5 |
|
|
the bottom of the freezer (figure 2-1) |
||
12345678901234 |
5 |
may have occurred in transit. If the |
||||
12345678901234 |
5 |
|
|
|||
12345678901234 |
5 |
and install either the legs or casters |
||||
12345678901234 |
5 |
|
® |
|||
12345678901234 |
5 |
SHOCKWATCH label indicates red |
|
|
||
12345678901234 |
5 |
(figure 2-2). |
||||
12345678901234 |
5 |
|
|
|||
12345678901234 |
5 |
and/or the carton is broken, torn, or |
|
|
||
12345678901234 |
5 |
|
|
|||
12345678901234 |
5 |
|
|
|
|
|
12345678901234 |
5 |
|
|
|
|
|
12345678901234 |
5 |
|
|
|
|
|
12345678901234 |
5 |
|
|
|
|
|
12345678901234 |
5 |
|
|
|
|
|
12345678901234 |
5 |
|
|
|
|
|
12345678901234 |
5 |
|
|
|
|
|
12345678901234 |
5 |
|
|
|
|
|
12345678901234 |
5 |
|
|
|
|
|
12345678901234 |
5 |
|
|
|
|
|
12345678901234 |
5 |
|
|
|
|
|
12345678901234 |
5 |
|
|
|
|
|
12345678901234 |
5 |
|
|
|
|
|
12345678901234 |
5 |
|
|
|
|
|
12345678901234 |
5 |
|
|
|
|
|
12345678901234 |
5 |
|
|
|
|
|
12345678901234 |
5 |
|
|
|
|
|
12345678901234 |
5 |
|
|
|
|
|
12345678901234 |
5 |
|
|
|
|
|
12345678901234 |
5 |
|
|
|
|
|
12345678901234 |
5 |
|
|
|
|
|
12345678901234 |
5 |
|
|
|
|
|
12345678901234 |
5 |
|
|
|
|
|
12345678901234 |
5 |
|
|
|
|
|
12345678901234 |
5 |
|
|
|
|
|
12345678901234 |
5 |
|
|
|
|
|
12345678901234 |
5 |
|
|
|
|
|
12345678901234 |
5 |
|
|
|
|
|
12345678901234 |
5 |
Figure 2-1 Machine Bolted to Shipping Base |
|
|||
12345678901234 |
5 |
|
||||
12345678901234 |
5 |
|
||||
12345678901234 |
5 |
|
|
|
|
|
12345678901234 |
5 |
|
|
|
|
|
12345678901234 |
5 |
|
|
|
|
|
12345678901234 |
5 |
|
|
|
|
|
12345678901234 |
5 |
|
|
|
|
|
12345678901234 |
5 |
|
|
|
|
|
12345678901234 |
5 |
|
|
|
|
|
12345678901234 |
5 |
|
|
|
|
|
12345678901234 |
5 |
|
|
|
|
|
12345678901234 |
5 |
|
|
|
|
|
12345678901234 |
5 |
|
|
|
|
|
12345678901234 |
5 |
|
|
|
|
|
12345678901234 |
5 |
|
|
|
|
|
12345678901234 |
5 |
|
|
|
|
|
12345678901234 |
5 |
|
|
|
|
|
12345678901234 |
5 |
|
|
|
|
|
12345678901234 |
5 |
|
|
|
|
|
12345678901234 |
5 |
|
|
|
|
|
12345678901234 |
5 |
|
|
|
|
|
12345678901234 |
5 |
|
|
|
|
|
12345678901234 |
5 |
|
|
|
|
|
12345678901234 |
5 |
|
|
|
|
|
12345678901234 |
5 |
|
|
|
|
|
12345678901234 |
5 |
|
|
|
|
|
12345678901234 |
5 |
|
|
|
|
|
12345678901234 |
5 |
|
|
|
|
|
12345678901234 |
5 |
|
|
|
|
|
12345678901234 |
5 |
|
|
|
|
|
12345678901234 |
5 |
|
|
|
|
|
12345678901234 |
5 |
|
|
|
|
|
12345678901234 |
5 |
|
|
|
|
|
12345678901234 |
5 |
|
|
|
|
|
12345678901234 |
5 |
|
|
|
|
|
12345678901234 |
5 |
|
|
|
|
|
12345678901234 |
5 |
|
|
|
|
|
12345678901234 |
5 |
|
|
|
|
|
12345678901234 |
5 |
|
|
|
|
|
12345678901234 |
5 |
|
|
|
|
|
12345678901234 |
5 |
|
|
|
|
|
12345678901234 |
5 |
|
|
|
|
|
12345678901234 |
5 |
|
|
|
|
|
12345678901234 |
5 |
|
|
|
NOTE: Screw |
|
12345678901234 |
5 |
|
|
|
||
12345678901234 |
5 |
|
|
|
|
|
12345678901234 |
5 |
|
|
|
casters or legs all the |
|
12345678901234 |
5 |
|
|
|
||
12345678901234 |
5 |
|
|
|
|
|
12345678901234 |
5 |
|
|
|
way in coupling, then |
|
12345678901234 |
5 |
|
|
|
||
12345678901234 |
5 |
|
|
|
|
|
12345678901234 |
5 |
|
|
|
adjust out to level |
|
12345678901234 |
5 |
|
|
|
||
12345678901234 |
5 |
|
|
|
|
|
12345678901234 |
5 |
|
|
|
side to side with 1/4” |
|
12345678901234 |
5 |
|
|
|
||
12345678901234 |
5 |
|
|
|
slope to the front. |
|
12345678901234 |
5 |
|
|
|
||
12345678901234 |
5 |
|
|
|
|
|
12345678901234 |
5 |
Figure 2-2 Installing Mounting Legs or Casters |
|
|||
12345678901234 |
5 |
|
||||
12345678901234 |
5 |
|
|
|
|
|
12345678901234 |
5 |
|
|
|
|
|
12345678901234 |
5 |
|
|
|
|
|
12345678901234 |
5 |
|
|
|
|
|
12345678901234 |
5 |
|
|
|
|
|
12345678901234 |
5 |
|
|
|
|
|
12345678901234 |
5 |
|
|
|
|
|
12345678901234 |
5 |
|
|
|
|
|
12345678901 34 |
5 |
Installation |
|
|
|
|
|
2.2 |
|
|
|
|
|
12345678901 34 |
5 |
|
|
|
|
|
12345678901 34 |
5 |
|
|
|
|
|
12345678901234 |
5 |
|
|
|
|
|
12345678901234 |
5 |
|
|
|
|
|
12345678901234 |
5 |
|
|
|
|
|
12345678901234 |
5 |
|
|
|
|
|
12345678901234 |
5 |
|
|
|
|
|
12345678901234 |
5 |
|
|
|
|
|
12345678901234 |
5 |
CAUTION |
1. This freezer is designed for indoor |
|||
12345678901234 |
5 |
|||||
12345678901234 |
5 |
|
|
|||
12345678901234 |
5 |
|
|
|
|
|
12345678901234 |
5 |
All materials and connections |
use and must be protected from outdoor |
|||
12345678901234 |
5 |
|
|
|||
12345678901234 |
5 |
must conform to local require- |
|
|
||
12345678901234 |
5 |
weather conditions. |
||||
12345678901234 |
5 |
|
|
|||
12345678901234 |
5 |
ments and be in compliance with |
||||
12345678901234 |
5 |
|
|
|||
12345678901234 |
5 |
|
|
|
|
|
12345678901234 |
5 |
the National Electrical Code |
|
– continued |
||
12345678901234 |
5 |
|
||||
12345678901234 |
5 |
|
|
|||
12345678901234 |
5 |
(NEC). |
|
|
|
|
12345678901234 |
5 |
|
|
|
||
12345678901234 |
5 |
|
|
|
|
|
12345678901234 |
5 |
|
|
|
|
|
12345678901234 |
5 |
|
|
|
|
|
12345678901234 |
5 |
|
|
|
|
|
12345678901234 |
5 |
|
|
|
|
|
123456789012345 |
|
|
|
|
|
|
2 |
184950 |
|
|
|
|
|
|
ELECTRO FREEZE Soft Serve Model 88T-RMT |
|
||
|
|
|
|
|
|
|
|
||
|
|
|
|
|
|
|
|
||
|
234567890123456 |
|
|
|
|
|
|
||
|
23456789012345 |
|
|
|
|
|
|
||
|
23456789012345 |
Installation (continued) |
|
|
|
||||
|
234567890123452.2 |
|
|
|
|||||
|
2345678901 |
345 |
|
|
|
|
|
|
|
|
2345678901 |
345 |
|
|
|
|
|
|
|
|
2345678901 |
345 |
|
|
|
|
|
|
|
|
23456789012345 |
|
|
|
|
|
|
||
|
23456789012345 |
|
|
|
|
|
|
||
|
23456789012345 |
|
|
|
|
|
|
||
|
23456789012345 |
2. |
Where codes permit, Electro |
4. |
Water cooled models will require |
|
|||
|
23456789012345 |
|
|||||||
|
23456789012345 |
|
|
|
|
|
|
||
|
23456789012345 |
|
Freeze recommends that the freezer be |
a 3/8 inch MPT water inlet and water |
|
||||
|
23456789012345 |
|
|
||||||
|
23456789012345 |
|
|
|
|
|
|
||
|
23456789012345 |
|
installed on casters and have flexible |
waste connection. The connections are |
|
||||
|
23456789012345 |
|
|
||||||
|
23456789012345 |
|
|
|
|
|
|
||
|
23456789012345 |
|
water and electrical connections for |
found on the bottom under the compres- |
|
||||
|
23456789012345 |
|
|
||||||
|
23456789012345 |
|
|
|
|
|
|
||
|
23456789012345 |
|
|
|
|
|
|
||
|
23456789012345 |
|
easier service and cleaning. |
sor mounting area and are clearly |
|
||||
|
23456789012345 |
|
|
||||||
|
23456789012345 |
|
|
|
|
|
|
||
|
23456789012345 |
|
|
|
tagged “Water Inlet” and “Water Waste.” |
|
|||
|
23456789012345 |
|
|
|
|
||||
|
23456789012345 |
3. |
All freezers require a minimum 6 |
|
|
|
|||
|
23456789012345 |
|
|
|
|||||
|
23456789012345 |
|
|
|
A manual shut-off valve should be |
|
|||
|
23456789012345 |
|
inch (15 cm) clearance on either the side |
|
|||||
|
23456789012345 |
|
|
|
|
||||
|
23456789012345 |
|
|
|
installed in the water inlet line at the time |
|
|||
|
23456789012345 |
|
panels or the rear panel for adequate |
|
|||||
|
23456789012345 |
|
|
|
|
||||
|
23456789012345 |
|
|
|
of installation. The water pressure must |
|
|||
|
23456789012345 |
|
|
|
|
||||
|
23456789012345 |
|
ventilation. Freezers designed with top air |
|
|
|
|||
|
23456789012345 |
|
be between 35-140 psig (241-965 kPa) |
|
|||||
|
23456789012345 |
|
|
|
|
||||
|
23456789012345 |
|
discharge require that at least 18 inches |
|
|
|
|||
|
23456789012345 |
|
for proper operation. |
|
|||||
|
23456789012345 |
|
|
|
|
||||
|
23456789012345 |
|
(45 cm) above the top panel be free of |
|
|
|
|||
|
23456789012345 |
|
|
|
|
||||
|
23456789012345 |
|
obstructions. Anything blocking ventila- |
5. |
Place the freezer in the final |
|
|||
|
23456789012345 |
|
|
||||||
|
23456789012345 |
|
|
|
|
|
|
||
|
23456789012345 |
|
tion of the freezer (including cone dis- |
location and level by adjusting the legs |
|
||||
|
23456789012345 |
|
|
||||||
|
23456789012345 |
|
|
|
|
|
|
||
|
23456789012345 |
|
|
|
|
|
|
||
|
23456789012345 |
|
pensers) will reduce the efficiency of the |
or casters so that it is level side-to-side |
|
||||
|
23456789012345 |
|
|
||||||
|
23456789012345 |
|
|
|
|
|
|
||
|
23456789012345 |
|
freezer. |
|
and the front is approximately ¼ inch (6 |
|
|||
|
23456789012345 |
|
|
|
|||||
|
23456789012345 |
|
|
|
|
|
|
||
|
23456789012345 |
|
|
|
mm) lower than the rear to allow proper |
|
|||
|
23456789012345 |
|
|
|
|
||||
|
23456789012345 |
|
|
|
|
|
|
||
|
23456789012345 |
|
|
|
drainage of the freezing cylinder. |
|
|||
|
23456789012345 |
|
|
|
|
||||
|
23456789012345 |
|
|
|
|
|
|
||
|
23456789012345 |
|
|
|
|
|
|
||
|
23456789012345 |
|
|
|
|
|
|
||
|
23456789012345 |
|
|
|
|
|
|
||
|
23456789012345 |
|
|
|
|
|
|
||
|
23456789012345 |
|
|
|
|
|
|
||
|
23456789012345 |
|
|
|
|
|
|
||
|
23456789012345 |
|
|
|
|
|
|
||
|
234567890122345678901223456789012 |
|
454545 |
Electrical Requirements |
|
|
|
||
|
2.3 |
|
|
|
|||||
|
23456789012345 |
|
|
|
|
|
|
||
|
23456789012345 |
|
|
|
|
|
|
||
|
23456789012345 |
|
|
|
|
|
|
||
|
23456789012345 |
|
|
|
|
|
|
||
|
23456789012345 |
|
|
|
|
|
|
||
|
23456789012345 |
|
|
CAUTION |
2. |
Supply voltage must be within + |
|
||
|
23456789012345 |
|
|
|
|||||
|
23456789012345 |
|
|
|
|
|
|||
|
23456789012345 |
|
|
10% of voltage indicated on the name- |
|
||||
|
23456789012345 |
|
|
|
|
||||
|
23456789012345 |
|
|
To prevent accidental |
|
|
|
||
|
23456789012345 |
|
|
plate. Also, on three-phase systems, |
|
||||
|
23456789012345 |
|
|
|
|
||||
|
23456789012345 |
|
|
electrical shock, a |
|
|
|
||
|
23456789012345 |
|
|
voltage between phases must be bal- |
|
||||
|
23456789012345 |
|
|
positive earth ground is |
|
||||
|
23456789012345 |
|
|
|
|
|
|
||
|
23456789012345 |
|
|
required. |
anced within 2%. (More than a 6 volt |
|
|||
|
23456789012345 |
|
|
|
|||||
|
23456789012345 |
|
|
|
|
|
|
||
|
23456789012345 |
|
|
|
|
|
|
||
|
23456789012345 |
|
|
|
difference between any two voltage |
|
|||
|
23456789012345 |
|
|
|
|
||||
|
23456789012345 |
|
|
|
|
|
|
||
|
23456789012345 |
|
|
|
measurements at 208-230 volts indicates |
|
|||
|
23456789012345 |
|
|
|
|
||||
|
23456789012345 |
|
|
|
|
|
|
||
|
23456789012345 |
1. |
Always verify electrical specifica- |
a possible imbalance.) Request your |
|
||||
|
23456789012345 |
|
|||||||
|
23456789012345 |
|
|
|
|
|
|
||
|
23456789012345 |
|
tions on the data plate of each freezer. |
local power company to correct any |
|
||||
|
23456789012345 |
|
|
||||||
|
23456789012345 |
|
|
|
|
|
|
||
|
23456789012345 |
|
Data plate specifications will always |
voltage problem. |
|
||||
|
23456789012345 |
|
|
||||||
|
23456789012345 |
|
|
|
|
||||
|
23456789012345 |
|
supersede the information in this |
|
|
|
|||
|
23456789012345 |
|
|
|
|
||||
|
23456789012345 |
|
|
|
|
|
|
||
|
23456789012345 |
|
|
|
3. |
An easily accessible main power |
|
||
|
23456789012345 |
|
manual. |
|
|||||
|
23456789012345 |
|
|
|
|
||||
|
23456789012345 |
|
|
|
disconnect must be provided for all poles |
|
|||
|
23456789012345 |
|
|
|
|
||||
|
23456789012345 |
|
|
|
of the wiring to the freezer. |
|
|||
|
23456789012345 |
|
|
|
|
||||
|
23456789012345 |
|
|
|
|
|
|
||
|
23456789012345 |
Electrical Connections |
|
|
|
||||
|
2.4 |
|
|
|
|||||
|
234567890123 |
5 |
|
|
|
|
|
|
|
|
234567890123 |
5 |
|
|
|
|
|
|
|
|
234567890123 |
5 |
|
|
|
|
|
|
|
|
23456789012345 |
|
|
|
|
|
|
||
|
23456789012345 |
|
|
|
|
|
|
||
|
23456789012345 |
|
|
|
|
|
|
||
|
23456789012345 |
|
|
|
|
|
|
||
|
23456789012345 |
|
|
|
|
|
|
||
|
23456789012345 |
|
|
|
3. |
Electrical connections are made |
|
||
|
23456789012345 |
|
|
|
|
||||
|
23456789012345 |
|
|
CAUTION |
|
|
|
||
|
23456789012345 |
|
|
|
|
|
|||
|
23456789012345 |
|
|
in the junction box located mid-level |
|
||||
|
23456789012345 |
|
|
|
|
||||
|
23456789012345 |
|
|
To prevent accidental |
|
|
|
||
|
23456789012345 |
|
|
behind the left side panel. |
|
||||
|
23456789012345 |
|
|
|
|
||||
|
23456789012345 |
|
|
electrical shock, a |
|
|
|
||
|
23456789012345 |
|
|
|
|
|
|||
|
23456789012345 |
|
|
positive earth ground |
4. |
Use a flexible connection when |
|
||
|
23456789012345 |
|
|
|
|||||
|
23456789012345 |
|
|
|
|
||||
|
23456789012345 |
|
|
is required. |
|
|
|
||
|
23456789012345 |
|
|
permissible. All materials and connec- |
|
||||
|
23456789012345 |
|
|
|
|
||||
|
23456789012345 |
|
|
|
|
||||
|
23456789012345 |
|
|
|
tions must conform to local codes and/or |
|
|||
|
23456789012345 |
|
|
|
|
||||
|
23456789012345 |
|
|
|
|
|
|
||
|
23456789012345 |
|
|
|
the National Electric Code. |
|
|||
|
23456789012345 |
|
|
|
|
||||
|
23456789012345 |
|
1. Check the data plate for fuse size, |
|
|
|
|||
|
23456789012345 |
|
|
|
|
||||
|
23456789012345 |
|
|
|
|
|
|
||
|
23456789012345 |
|
wire ampacity and electrical specifica- |
5. |
For 3 phase freezers, beater |
|
|||
|
23456789012345 |
|
|
||||||
|
23456789012345 |
|
|
|
|
|
|
||
|
23456789012345 |
|
tions. |
|
shaft rotation must be clockwise as |
|
|||
|
23456789012345 |
|
|
|
|||||
|
23456789012345 |
|
|
|
|
|
|
||
|
23456789012345 |
|
|
|
viewed from the front of the freezer. |
|
|||
|
23456789012345 |
|
|
|
|
||||
|
23456789012345 |
|
|
|
|
|
|
||
|
23456789012345 |
2. |
Refer to the wiring diagram |
|
|
|
|||
|
23456789012345 |
|
|
|
|||||
|
23456789012345 |
|
provided for proper power connections. |
|
|
|
|||
|
23456789012345 |
|
|
|
|
||||
|
23456789012345 |
|
|
|
|
|
|
||
|
23456789012345 |
|
|
|
|
|
|
||
|
23456789012345 |
|
|
|
|
|
|
||
|
23456789012345 |
|
|
|
|
|
|
||
|
23456789012345 |
|
|
|
|
|
|
||
|
23456789012345 |
|
|
|
|
|
|
||
|
23456789012345 |
|
|
|
|
|
|
||
|
23456789012345 |
|
|
|
|
|
|
||
|
234567890123456 |
|
|
|
|
|
|
||
184950 |
3 |

ELECTRO FREEZE Soft Serve Model 88T-RMT
123456789012345 |
|
|
|
|
12345678901234 |
5 |
|
|
|
12345678901234 |
5 |
|
|
|
12345678901234 |
5 |
|
|
|
12345678901234 |
5 |
|
|
|
12345678901234 |
5 |
|
|
|
12345678901234 |
5 |
Specifications |
|
|
123456789012343 |
5 |
|
||
1 |
2345678901234 |
5 |
|
|
12345678901234 |
5 |
|
|
|
12345678901234 |
5 |
|
|
|
12345678901234 |
5 |
|
|
|
12345678901234 |
5 |
|
|
|
12345678901234 |
5 |
|
|
|
12345678901234 |
5 |
|
|
|
12345678901234 |
5 |
|
|
|
12345678901234 |
5 |
Particulars |
|
|
123456789012343.1 |
5 |
|
||
12345678901234 |
5 |
|
|
|
12345678901234 |
5 |
|
|
|
12345678901234 |
5 |
|
|
|
12345678901234 |
5 |
|
|
|
12345678901234 |
5 |
|
|
|
12345678901234 |
5 |
|
|
|
12345678901234 |
5 |
|
|
|
12345678901234 |
5 |
Always check and verify voltage and amperage on the data |
||
12345678901234 |
5 |
|||
12345678901234 |
5 |
|
|
|
12345678901234 |
5 |
plate located on the back panel of each freezer. |
||
12345678901234 |
5 |
|||
12345678901234 |
5 |
|
|
|
12345678901234 |
5 |
|
|
|
12345678901234 |
5 |
|
|
|
12345678901234 |
5 |
|
|
|
12345678901234 |
5 |
88T-RMT |
||
12345678901234 |
5 |
|||
12345678901234 |
5 |
|
|
|
12345678901234 |
5 |
|
|
|
12345678901234 |
5 |
|
|
|
12345678901234 |
5 |
|
|
|
12345678901234 |
5 |
|
|
|
12345678901234 |
5 |
Width (in/cm) |
24/61 |
|
12345678901234 |
5 |
|||
12345678901234 |
5 |
|
|
|
12345678901234 |
5 |
|
|
|
12345678901234 |
5 |
Height (in/cm) |
68/173 |
|
12345678901234 |
5 |
|||
12345678901234 |
5 |
|
|
|
12345678901234 |
5 |
|
|
|
12345678901234 |
5 |
Depth (in/cm) |
30.5/77.5 |
|
12345678901234 |
5 |
|||
12345678901234 |
5 |
|
|
|
12345678901234 |
5 |
|
|
|
12345678901234 |
5 |
Weight (lbs/kg) |
680/308 |
|
12345678901234 |
5 |
|||
12345678901234 |
5 |
|
|
|
12345678901234 |
5 |
|
|
|
12345678901234 |
5 |
Compressor* |
2 HP/12000 BTUH |
|
12345678901234 |
5 |
|||
12345678901234 |
5 |
|
|
|
12345678901234 |
5 |
|
|
|
12345678901234 |
5 |
|
1.5 kw (Motor) |
|
12345678901234 |
5 |
|
||
12345678901234 |
5 |
|
|
|
12345678901234 |
5 |
|
|
|
12345678901234 |
5 |
|
3.8 kw (Cooling) |
|
12345678901234 |
5 |
|
||
12345678901234 |
5 |
|
|
|
12345678901234 |
5 |
Beater Motor |
2 HP/1.5 kw |
|
12345678901234 |
5 |
|||
12345678901234 |
5 |
|||
12345678901234 |
5 |
|
|
|
12345678901234 |
5 |
Refrigerant |
404a |
|
12345678901234 |
5 |
|||
12345678901234 |
5 |
|||
12345678901234 |
5 |
|
|
|
12345678901234 |
5 |
Charge |
3.75 lb/1.7 kg |
|
12345678901234 |
5 |
|||
12345678901234 |
5 |
|||
12345678901234 |
5 |
|
|
|
12345678901234 |
5 |
|
|
|
12345678901234 |
5 |
Mix Container (2) |
20 Qts/18.9 Liters |
|
12345678901234 |
5 |
|||
12345678901234 |
5 |
|
|
|
12345678901234 |
5 |
|
|
|
12345678901234 |
5 |
Cylinder (2) |
3 Qts/2.8 Liters |
|
12345678901234 |
5 |
|||
12345678901234 |
5 |
|
|
|
12345678901234 |
5 |
|
|
|
12345678901234 |
5 |
|
|
|
12345678901234 |
5 |
|
|
|
12345678901234 |
5 |
|
|
|
12345678901234 |
5 |
*Contact factory for other voltages |
||
12345678901234 |
5 |
|||
12345678901234 |
5 |
|
|
|
12345678901234 |
5 |
|
|
|
12345678901234 |
5 |
|
|
|
12345678901234 |
5 |
|
|
|
12345678901234 |
5 |
|
|
|
12345678901234 |
5 |
|
|
|
12345678901234 |
5 |
|
|
|
12345678901234 |
5 |
|
|
|
12345678901234 |
5 |
|
|
|
12345678901234 |
5 |
|
|
|
12345678901234 |
5 |
|
|
|
12345678901234 |
5 |
|
|
|
12345678901234 |
5 |
|
|
|
12345678901234 |
5 |
|
|
|
12345678901234 |
5 |
|
|
|
12345678901234 |
5 |
|
|
|
12345678901234 |
5 |
|
|
|
12345678901234 |
5 |
|
|
|
12345678901234 |
5 |
|
|
|
12345678901234 |
5 |
|
|
|
12345678901234 |
5 |
|
|
|
123456789011234567890112345678901 343434 |
555 |
Data Plate |
|
|
123456789012343.2 |
5 |
|
||
12345678901234 |
5 |
|
|
|
12345678901234 |
5 |
|
|
|
12345678901234 |
5 |
|
|
|
12345678901234 |
5 |
|
|
|
12345678901234 |
5 |
|
|
|
12345678901234 |
5 |
|
|
|
12345678901234 |
5 |
|
|
|
12345678901234 |
5 |
|
|
|
12345678901234 |
5 |
|
|
|
12345678901234 |
5 |
|
|
|
12345678901234 |
5 |
|
|
|
12345678901234 |
5 |
|
|
|
12345678901234 |
5 |
|
|
|
12345678901234 |
5 |
|
|
|
12345678901234 |
5 |
|
|
|
12345678901234 |
5 |
|
|
|
12345678901234 |
5 |
|
The data plate provides important |
|
12345678901234 |
5 |
|
||
12345678901234 |
5 |
|
|
|
12345678901234 |
5 |
|
information that the operator should |
|
12345678901234 |
5 |
|
||
12345678901234 |
5 |
|
|
|
12345678901234 |
5 |
|
record and have available for parts |
|
12345678901234 |
5 |
|
||
12345678901234 |
5 |
|
|
|
12345678901234 |
5 |
|
ordering, warranty and service requests. |
|
12345678901234 |
5 |
|
||
12345678901234 |
5 |
|
|
|
12345678901234 |
5 |
|
|
|
12345678901234 |
5 |
|
|
|
12345678901234 |
5 |
|
|
|
12345678901234 |
5 |
|
|
|
12345678901234 |
5 |
|
|
|
12345678901234 |
5 |
|
|
|
12345678901234 |
5 |
|
|
|
12345678901234 |
5 |
|
|
|
12345678901234 |
5 |
|
|
|
12345678901234 |
5 |
|
|
|
12345678901234 |
5 |
|
|
|
12345678901234 |
5 |
|
|
|
12345678901234 |
5 |
|
|
|
12345678901234 |
5 |
|
|
|
12345678901234 |
5 |
|
|
|
12345678901234 |
5 |
|
|
|
12345678901234 |
5 |
|
|
|
12345678901234 |
5 |
|
|
|
12345678901234 |
5 |
|
|
|
12345678901234 |
5 |
|
|
|
12345678901234 |
5 |
|
|
|
12345678901234 |
5 |
|
|
|
12345678901234 |
5 |
Figure 3-1 |
|
|
12345678901234 |
5 |
|
||
12345678901234 |
5 |
|
|
|
12345678901234 |
5 |
|
|
|
12345678901234 |
5 |
|
|
|
12345678901234 |
5 |
|
|
|
12345678901234 |
5 |
|
|
|
12345678901234 |
5 |
|
|
|
12345678901234 |
5 |
|
|
|
123456789012345 |
|
|
|
|
4 |
184950 |

ELECTRO FREEZE Soft Serve Model 88T-RMT
234567890123456
23456789012345
23456789012345
23456789012345
234567890122345678901223456789012234567890123.345454545
23456789012345
23456789012345
23456789012345
23456789012345
23456789012345
23456789012345
23456789012345
23456789012345
23456789012345
23456789012345
23456789012345
23456789012345
23456789012345
23456789012345
23456789012345
23456789012345
23456789012345
23456789012345
23456789012345
23456789012345
23456789012345
23456789012345
23456789012345
23456789012345
23456789012345
23456789012345
23456789012345
23456789012345
23456789012345
23456789012345
23456789012345
23456789012345
23456789012345
23456789012345
23456789012345
23456789012345
23456789012345
23456789012345
23456789012345
23456789012345
23456789012345
23456789012345
23456789012345
23456789012345
23456789012345
2345678901233.45
234567890123 5
234567890123 5
23456789012345
23456789012345
23456789012345
23456789012345
23456789012345
23456789012345
23456789012345
23456789012345
23456789012345
23456789012345
23456789012345
23456789012345
23456789012345
23456789012345
23456789012345
23456789012345
23456789012345
23456789012345
23456789012345
23456789012345
23456789012345
23456789012345
23456789012345
23456789012345
23456789012345
23456789012345
23456789012345
23456789012345
23456789012345
23456789012345
23456789012345
23456789012345
23456789012345
23456789012345
23456789012345
23456789012345
23456789012345
23456789012345
23456789012345
23456789012345
23456789012345
23456789012345
23456789012345
234567890123453.5
23456789012345
23456789012345
23456789012345
23456789012345
23456789012345
23456789012345
23456789012345
23456789012345
23456789012345
23456789012345
23456789012345
23456789012345
23456789012345
23456789012345
23456789012345
23456789012345
23456789012345
23456789012345
23456789012345
23456789012345
23456789012345
23456789012345
23456789012345
23456789012345
23456789012345
23456789012345
23456789012345
23456789012345
23456789012345
23456789012345
23456789012345
23456789012345
23456789012345
23456789012345
23456789012345
23456789012345
23456789012345
23456789012345
23456789012345
23456789012345
23456789012345
23456789012345
23456789012345
23456789012345
23456789012345
23456789012345
23456789012345
23456789012345
23456789012345
23456789012345
23456789012345
23456789012345
23456789012345
23456789012345
23456789012345
23456789012345
23456789012345
23456789012345
23456789012345
23456789012345
23456789012345
23456789012345
23456789012345
23456789012345
23456789012345
23456789012345
23456789012345
23456789012345
23456789012345
23456789012345
23456789012345
23456789012345
23456789012345
23456789012345
23456789012345
23456789012345
23456789012345
23456789012345
234567890123456
Reference Information
Write in
Reference Informa-
tion HERE!
Fill in this information as soon as you receive the Electro Freeze 88T-RMT Soft Serve Twist Freezer. The item numbers, encircled, correspond with the callout numbers in figure 3-1.
1Model Number: ________________
2Serial Number: ________________
3Electrical Spec: Voltage _________
Phase _______ Hertz __________
4Maximum Fuse Size: ____________
5Minimum Circuit Ampacity: _______
Installation Date
Fill in the date of installation, and the name, address, and phone number of the installer in the space provided below. This information will be needed when ordering parts or service for the 88T-RMT Freezer.
Date of installation: __________________________________
Installed by: __________________________________
Address: __________________________________
__________________________________
Phone: __________________________________
Dimensions
Figure 3-2
184950 |
5 |

ELECTRO FREEZE Soft Serve Model 88T-RMT
123456789012345 |
|
|
|
|
|
12345678901234 |
5 |
|
|
|
|
12345678901234 |
5 |
|
|
|
|
12345678901234 |
5 |
|
|
|
|
12345678901234 |
5 |
|
|
|
|
12345678901234112345678901234123456789012342345678901234 |
5555 |
Part Names and Functions |
|
||
123456789012344 |
5 |
|
|||
12345678901234 |
5 |
|
|
|
|
12345678901234 |
5 |
|
|
|
|
12345678901234 |
5 |
|
|
|
|
12345678901234 |
5 |
|
|
|
|
12345678901234 |
5 |
|
|
|
|
12345678901234 |
5 |
|
|
|
|
12345678901234 |
5 |
|
|
|
|
12345678901234 |
5 |
|
|
|
|
12345678901234 |
5 |
|
|
|
|
12345678901234 |
5 |
|
|
|
|
12345678901234 |
5 |
|
|
|
|
12345678901234 |
5 |
|
|
|
|
12345678901234 |
5 |
|
|
|
|
12345678901234 |
5 |
|
|
|
|
12345678901234 |
5 |
|
|
|
|
12345678901234 |
5 |
|
|
|
|
12345678901234 |
5 |
|
|
|
|
12345678901234 |
5 |
|
|
|
|
12345678901234 |
5 |
|
|
|
|
12345678901234 |
5 |
|
|
|
|
12345678901234 |
5 |
|
|
|
|
12345678901234 |
5 |
|
|
|
|
12345678901234 |
5 |
|
|
|
|
12345678901234 |
5 |
|
|
|
|
12345678901234 |
5 |
|
|
|
|
12345678901234 |
5 |
|
|
|
|
12345678901234 |
5 |
|
|
|
|
12345678901234 |
5 |
|
|
|
|
12345678901234 |
5 |
|
|
|
|
12345678901234 |
5 |
|
|
|
|
12345678901234 |
5 |
|
BLEED |
|
|
12345678901234 |
5 |
|
|
|
|
12345678901234 |
5 |
|
|
|
|
12345678901234 |
5 |
|
|
|
|
12345678901234 |
5 |
|
|
|
|
12345678901234 |
5 |
|
|
|
|
12345678901234 |
5 |
|
|
|
|
12345678901234 |
5 |
|
|
|
|
12345678901234 |
5 |
|
|
|
|
12345678901234 |
5 |
|
|
|
|
12345678901234 |
5 |
|
|
|
|
12345678901234 |
5 |
|
|
|
|
12345678901234 |
5 |
|
|
|
|
12345678901234 |
5 |
|
|
|
|
12345678901234 |
5 |
|
|
|
|
12345678901234 |
5 |
|
|
|
|
12345678901234 |
5 |
|
|
|
|
12345678901234 |
5 |
|
|
|
|
12345678901234 |
5 |
|
|
|
|
12345678901234 |
5 |
|
|
|
|
12345678901234 |
5 |
|
|
|
|
12345678901234 |
5 |
|
|
|
|
12345678901234 |
5 |
|
|
|
|
12345678901234 |
5 |
|
|
|
|
12345678901234 |
5 |
|
|
|
|
12345678901234 |
5 |
|
|
|
|
12345678901234 |
5 |
|
|
|
|
12345678901234 |
5 |
|
|
|
|
12345678901234 |
5 |
|
|
|
|
12345678901234 |
5 |
|
|
|
|
12345678901234 |
5 |
|
|
|
|
12345678901234 |
5 |
|
|
|
|
12345678901234 |
5 |
|
|
|
|
12345678901234 |
5 |
|
|
|
|
12345678901234 |
5 |
|
|
|
|
12345678901234 |
5 |
|
|
|
|
12345678901234 |
5 |
|
|
|
|
12345678901234 |
5 |
|
|
|
|
12345678901234 |
5 |
|
|
|
|
12345678901234 |
5 |
|
|
|
|
12345678901234 |
5 |
|
|
|
|
12345678901234 |
5 |
|
|
|
|
12345678901234 |
5 |
|
|
|
|
12345678901234 |
5 |
|
|
|
|
12345678901234 |
5 |
|
|
|
|
12345678901234 |
5 |
|
|
|
|
12345678901234 |
5 |
Figure 4-1 Head Assembly |
|
|
|
12345678901234 |
5 |
|
|
||
12345678901234 |
5 |
|
|
||
12345678901234 |
5 |
|
|
||
12345678901234 |
5 |
|
|
|
|
12345678901234 |
5 |
|
|
|
|
12345678901234 |
5 |
|
|
|
|
12345678901234 |
5 |
|
|
|
|
12345678901234 |
5 |
|
|
|
|
12345678901234 |
5 |
|
|
|
|
12345678901234 |
5 |
1 |
HEAD |
7 |
PLUG - AIR BLEED |
12345678901234 |
5 |
||||
12345678901234 |
5 |
||||
12345678901234 |
5 |
|
Encloses the freezing cylinder and |
|
Seals the air bleed opening in the |
12345678901234 |
5 |
|
|
||
12345678901234 |
5 |
|
|
||
12345678901234 |
5 |
|
provides an opening for product to |
|
dispense head when closed. |
12345678901234 |
5 |
|
|
||
12345678901234 |
5 |
|
|
||
12345678901234 |
5 |
|
|
||
12345678901234 |
5 |
|
be dispensed. |
|
Allows excess air to be removed |
12345678901234 |
5 |
|
|
||
12345678901234 |
5 |
|
|
||
12345678901234 |
5 |
|
|
|
from the cylinder in the filling |
12345678901234 |
5 |
2 |
BUSHING - HEAD |
|
|
12345678901234 |
5 |
|
|||
12345678901234 |
5 |
|
process. |
||
12345678901234 |
5 |
|
|||
12345678901234 |
5 |
|
Holds the beater in place at the front |
|
|
12345678901234 |
5 |
|
|
|
|
12345678901234 |
5 |
|
|
|
|
12345678901234 |
5 |
|
of the cylinder. Must lubricate center |
8 |
O-RING - PLUG |
12345678901234 |
5 |
|
|||
12345678901234 |
5 |
|
|||
12345678901234 |
5 |
|
of bushing. |
|
Seals the air bleed plug in the |
12345678901234 |
5 |
|
|
||
12345678901234 |
5 |
|
|
||
12345678901234 |
5 |
|
|
|
dispense head. |
12345678901234 |
5 |
3 |
O-RING - HEAD |
|
|
12345678901234 |
5 |
|
|||
12345678901234 |
5 |
|
|
||
12345678901234 |
5 |
|
|
||
12345678901234 |
5 |
|
Seals the head to the freezing |
9 |
PIN - HANDLE |
12345678901234 |
5 |
|
|||
12345678901234 |
5 |
|
|||
12345678901234 |
5 |
|
cylinder. Must be lubricated. |
|
Secures the handle to the dis- |
12345678901234 |
5 |
|
|
||
12345678901234 |
5 |
|
|
||
12345678901234 |
5 |
|
|
|
pense head. |
12345678901234 |
5 |
|
|
|
|
12345678901234 |
5 |
4 |
PLUNGER |
|
|
12345678901234 |
5 |
|
|
||
12345678901234 |
5 |
|
|
||
12345678901234 |
5 |
|
Seals the product opening in the |
10 |
KNOB - HAND |
12345678901234 |
5 |
|
|||
12345678901234 |
5 |
|
|||
12345678901234 |
5 |
|
|||
12345678901234 |
5 |
|
dispense head when closed. Allows |
|
Secures the dispense head to the |
12345678901234 |
5 |
|
|
||
12345678901234 |
5 |
|
|
||
12345678901234 |
5 |
|
product to flow when open. |
|
freezing cylinder. |
12345678901234 |
5 |
|
|
||
12345678901234 |
5 |
|
|
||
12345678901234 |
5 |
|
|
|
|
12345678901234 |
5 |
5 |
O-RING - PLUNGER |
11 |
HANDLE - DISPENSE |
12345678901234 |
5 |
||||
12345678901234 |
5 |
||||
12345678901234 |
5 |
||||
12345678901234 |
5 |
|
Seals the plunger in the head. Must |
|
Opens and closes the plunger to |
12345678901234 |
5 |
|
|
||
12345678901234 |
5 |
|
|
||
12345678901234 |
5 |
|
be lubricated to seal and slide |
|
start and stop the flow of product |
12345678901234 |
5 |
|
|
||
12345678901234 |
5 |
|
|
||
12345678901234 |
5 |
|
properly. |
|
from the freezer. |
12345678901234 |
5 |
|
|
||
12345678901234 |
5 |
|
|
||
12345678901234 |
5 |
|
|
|
|
12345678901234 |
5 |
6 |
ROD - PLUNGER |
12 |
NOZZLE |
12345678901234 |
5 |
||||
12345678901234 |
5 |
||||
12345678901234 |
5 |
||||
12345678901234 |
5 |
|
Starts the freezer when dispensing. |
|
Forms the frozen product as it is |
12345678901234 |
5 |
|
|
||
12345678901234 |
5 |
|
|
||
12345678901234 |
5 |
|
Must be in place before freezer will |
|
dispensed. |
12345678901234 |
5 |
|
|
||
12345678901234 |
5 |
|
|
||
12345678901234 |
5 |
|
operate. |
|
|
12345678901234 |
5 |
|
|
|
|
12345678901234 |
5 |
|
|
|
|
12345678901234 |
5 |
|
|
|
|
123456789012345 |
|
|
|
|
|
6 |
184950 |

ELECTRO FREEZE Soft Serve Model 88T-RMT
234567890123456
23456789012345
23456789012345
23456789012345
234567890123452345678901234523456789012345234567890123454
23456789012345
23456789012345
23456789012345
23456789012345
23456789012345
23456789012345
23456789012345
23456789012345
23456789012345
23456789012345
23456789012345
23456789012345
23456789012345
23456789012345
23456789012345
23456789012345
23456789012345
23456789012345
23456789012345
23456789012345
23456789012345
23456789012345
23456789012345
23456789012345
23456789012345
23456789012345
23456789012345
23456789012345
23456789012345
23456789012345
23456789012345
23456789012345
23456789012345
23456789012345
23456789012345
23456789012345
23456789012345
23456789012345
23456789012345
23456789012345
23456789012345
23456789012345
23456789012345
23456789012345
23456789012345
23456789012345
23456789012345
23456789012345
23456789012345
23456789012345
23456789012345
23456789012345
23456789012345
23456789012345
23456789012345
23456789012345
23456789012345
23456789012345
23456789012345
23456789012345
23456789012345
23456789012345
23456789012345
23456789012345
23456789012345
23456789012345
23456789012345
23456789012345
23456789012345
23456789012345
23456789012345
23456789012345
23456789012345
23456789012345
23456789012345
23456789012345
23456789012345
23456789012345
23456789012345
23456789012345
23456789012345
23456789012345
23456789012345
23456789012345
23456789012345
23456789012345
23456789012345
23456789012345
23456789012345
23456789012345
23456789012345
23456789012345
23456789012345
23456789012345
23456789012345
23456789012345
23456789012345
23456789012345
23456789012345
23456789012345
23456789012345
23456789012345
23456789012345
23456789012345
23456789012345
23456789012345
23456789012345
23456789012345
23456789012345
23456789012345
23456789012345
23456789012345
23456789012345
23456789012345
23456789012345
23456789012345
23456789012345
23456789012345
23456789012345
23456789012345
23456789012345
23456789012345
23456789012345
23456789012345
23456789012345
23456789012345
23456789012345
23456789012345
23456789012345
23456789012345
23456789012345
23456789012345
23456789012345
23456789012345
23456789012345
23456789012345
23456789012345
23456789012345
23456789012345
23456789012345
23456789012345
23456789012345
23456789012345
23456789012345
23456789012345
23456789012345
23456789012345
23456789012345
23456789012345
23456789012345
23456789012345
23456789012345
23456789012345
23456789012345
23456789012345
23456789012345
23456789012345
23456789012345
23456789012345
23456789012345
23456789012345
23456789012345
23456789012345
23456789012345
23456789012345
23456789012345
23456789012345
23456789012345
23456789012345
23456789012345
234567890123456
Part Names and Functions (continued)
BLADE |
SHAFT |
BLADE |
- |
- |
- |
|
||
SCRAPER |
BEATER |
SCRAPER |
|
SEAL - ASSY .
SHAFT
Figure 4-2 |
Beater Shaft Assembly |
|
|
|
|
|
|
|
|
1 |
SHAFT - BEATER |
5 BUSHING - DISPENSE HEAD |
||
|
|
Rotates in the freezing cylinder, |
Holds the beater in place at the |
|
|
|
front of the cylinder. Must lubricate |
||
|
|
blending air and ejecting |
||
|
|
center of bushing. |
||
|
|
product. |
||
|
|
|
|
|
2BLADE - SCRAPER FRONT
Scrapes the frozen product from the freezing cylinder.
3BLADE - SCRAPER REAR
Scrapes the frozen product from the freezing cylinder.
4SEAL - ASSY. SHAFT
Seals the opening between the freezing cylinder and the beater shaft. Consists of the following 4A, 4B, and 4C.
4A SEAL - BEATER SHAFT (CUP SEAL)
4B WASHER - SHAFT SEAL (BUSHING)
4C O-RING - SEAL
184950 |
7 |

ELECTRO FREEZE Soft Serve Model 88T-RMT
123456789012345 |
|
|
|
12345678901234 |
5 |
|
|
12345678901234 |
5 |
|
|
12345678901234 |
5 |
|
|
12345678901234 |
5 |
|
|
12345678901234 |
5 |
|
|
12345678901234123456789012341123456789012342345678901234 |
5555 |
Part Names and Functions (continued) |
|
123456789012344 |
5 |
||
12345678901234 |
5 |
|
|
12345678901234 |
5 |
|
|
12345678901234 |
5 |
|
|
12345678901234 |
5 |
|
|
12345678901234 |
5 |
|
|
12345678901234 |
5 |
|
|
12345678901234 |
5 |
|
|
12345678901234 |
5 |
|
|
12345678901234 |
5 |
|
|
12345678901234 |
5 |
|
|
12345678901234 |
5 |
|
|
12345678901234 |
5 |
|
|
12345678901234 |
5 |
|
|
12345678901234 |
5 |
|
|
12345678901234 |
5 |
|
|
12345678901234 |
5 |
|
|
12345678901234 |
5 |
|
|
12345678901234 |
5 |
|
|
12345678901234 |
5 |
|
|
12345678901234 |
5 |
|
|
12345678901234 |
5 |
|
|
12345678901234 |
5 |
|
|
12345678901234 |
5 |
|
|
12345678901234 |
5 |
|
|
12345678901234 |
5 |
|
|
12345678901234 |
5 |
|
|
12345678901234 |
5 |
|
|
12345678901234 |
5 |
|
|
12345678901234 |
5 |
|
|
12345678901234 |
5 |
|
|
12345678901234 |
5 |
|
|
12345678901234 |
5 |
|
|
12345678901234 |
5 |
|
|
12345678901234 |
5 |
|
|
12345678901234 |
5 |
|
|
12345678901234 |
5 |
|
|
12345678901234 |
5 |
|
|
12345678901234 |
5 |
|
|
12345678901234 |
5 |
|
|
12345678901234 |
5 |
|
|
12345678901234 |
5 |
|
|
12345678901234 |
5 |
|
|
12345678901234 |
5 |
|
|
12345678901234 |
5 |
|
|
12345678901234 |
5 |
|
|
12345678901234 |
5 |
|
|
12345678901234 |
5 |
|
|
12345678901234 |
5 |
|
|
12345678901234 |
5 |
|
|
12345678901234 |
5 |
|
|
12345678901234 |
5 |
|
|
12345678901234 |
5 |
|
|
12345678901234 |
5 |
|
|
12345678901234 |
5 |
|
|
12345678901234 |
5 |
|
|
12345678901234 |
5 |
|
|
12345678901234 |
5 |
|
|
12345678901234 |
5 |
|
|
12345678901234 |
5 |
|
|
12345678901234 |
5 |
|
|
12345678901234 |
5 |
|
|
12345678901234 |
5 |
|
|
12345678901234 |
5 |
|
|
12345678901234 |
5 |
|
|
12345678901234 |
5 |
|
|
12345678901234 |
5 |
|
|
12345678901234 |
5 |
|
|
12345678901234 |
5 |
|
|
12345678901234 |
5 |
|
|
12345678901234 |
5 |
|
|
12345678901234 |
5 |
|
|
12345678901234 |
5 |
|
|
12345678901234 |
5 |
|
|
12345678901234 |
5 |
|
|
12345678901234 |
5 |
|
|
12345678901234 |
5 |
|
|
12345678901234 |
5 |
|
|
12345678901234 |
5 |
|
|
12345678901234 |
5 |
|
|
12345678901234 |
5 |
|
|
12345678901234 |
5 |
|
|
12345678901234 |
5 |
|
|
12345678901234 |
5 |
|
|
12345678901234 |
5 |
|
|
12345678901234 |
5 |
|
|
12345678901234 |
5 |
|
|
12345678901234 |
5 |
|
|
12345678901234 |
5 |
|
|
12345678901234 |
5 |
|
|
12345678901234 |
5 |
|
|
12345678901234 |
5 |
|
|
12345678901234 |
5 |
|
|
12345678901234 |
5 |
|
|
12345678901234 |
5 |
|
|
12345678901234 |
5 |
|
|
12345678901234 |
5 |
|
|
12345678901234 |
5 |
|
|
12345678901234 |
5 |
|
|
12345678901234 |
5 |
|
|
12345678901234 |
5 |
|
|
12345678901234 |
5 |
|
|
12345678901234 |
5 |
|
|
12345678901234 |
5 |
|
|
12345678901234 |
5 |
|
|
12345678901234 |
5 |
|
|
12345678901234 |
5 |
|
|
12345678901234 |
5 |
|
|
12345678901234 |
5 |
|
|
12345678901234 |
5 |
|
|
12345678901234 |
5 |
|
|
12345678901234 |
5 |
|
|
12345678901234 |
5 |
|
|
12345678901234 |
5 |
|
|
12345678901234 |
5 |
|
|
12345678901234 |
5 |
|
|
12345678901234 |
5 |
|
|
12345678901234 |
5 |
|
|
12345678901234 |
5 |
|
|
12345678901234 |
5 |
|
|
12345678901234 |
5 |
|
|
12345678901234 |
5 |
|
|
12345678901234 |
5 |
|
|
12345678901234 |
5 |
|
|
12345678901234 |
5 |
|
|
12345678901234 |
5 |
|
|
12345678901234 |
5 |
|
|
12345678901234 |
5 |
|
|
12345678901234 |
5 |
|
|
12345678901234 |
5 |
|
|
12345678901234 |
5 |
|
|
12345678901234 |
5 |
|
|
12345678901234 |
5 |
|
|
12345678901234 |
5 |
|
|
12345678901234 |
5 |
|
|
12345678901234 |
5 |
|
|
12345678901234 |
5 |
|
|
12345678901234 |
5 |
|
|
12345678901234 |
5 |
|
|
12345678901234 |
5 |
|
|
12345678901234 |
5 |
|
|
12345678901234 |
5 |
|
|
12345678901234 |
5 |
|
|
12345678901234 |
5 |
|
|
12345678901234 |
5 |
|
|
12345678901234 |
5 |
|
|
12345678901234 |
5 |
|
|
12345678901234 |
5 |
|
|
12345678901234 |
5 |
|
|
12345678901234 |
5 |
|
|
12345678901234 |
5 |
|
|
12345678901234 |
5 |
|
|
12345678901234 |
5 |
|
|
12345678901234 |
5 |
|
|
12345678901234 |
5 |
|
|
12345678901234 |
5 |
Figure 4-3 |
Mix Transfer System (MTS) |
12345678901234 |
5 |
||
12345678901234 |
5 |
|
|
12345678901234 |
5 |
|
|
12345678901234 |
5 |
|
|
12345678901234 |
5 |
|
|
12345678901234 |
5 |
|
|
12345678901234 |
5 |
|
|
12345678901234 |
5 |
|
|
12345678901234 |
5 |
|
|
12345678901234 |
5 |
|
|
12345678901234 |
5 |
|
|
12345678901234 |
5 |
|
|
123456789012345 |
|
|
|
8 |
184950 |

ELECTRO FREEZE Soft Serve Model 88T-RMT
234567890123456 |
|
|
|
|
23456789012345 |
|
|
|
|
23456789012345 |
|
|
|
|
23456789012345 |
|
|
|
|
23456789012345 |
|
|
|
|
23456789012345234567890123452345678901234523456789012345 |
Part Names and Functions (continued) |
|||
234567890123454 |
||||
23456789012345 |
|
|
|
|
23456789012345 |
|
|
|
|
23456789012345 |
|
|
|
|
23456789012345 |
|
|
|
|
23456789012345 |
|
|
|
|
23456789012345 |
|
|
|
|
23456789012345 |
|
|
|
|
23456789012345 |
|
|
|
|
23456789012345 |
|
|
|
|
23456789012345 |
|
|
|
|
23456789012345 |
|
|
|
|
23456789012345 |
|
|
|
|
23456789012345 |
|
|
|
|
23456789012345 |
|
|
|
|
23456789012345 |
1 |
SUPPORT-ROLLER BEARING |
11 |
COVER-MTS |
23456789012345 |
||||
23456789012345 |
|
|
|
|
23456789012345 |
|
Holds roller assembly in place. |
|
Protection against moving parts. |
23456789012345 |
|
|
||
23456789012345 |
|
|
|
|
23456789012345 |
|
|
|
|
23456789012345 |
|
|
|
Cover must be in place for the |
23456789012345 |
|
|
|
|
23456789012345 |
2 |
SHOE-ROLLER |
|
|
23456789012345 |
|
|
||
23456789012345 |
|
|
|
MTS to operate. |
23456789012345 |
|
Provides an opening to insert the mix |
|
|
23456789012345 |
|
|
|
|
23456789012345 |
|
transer hose. Squeezes transfer hose |
|
|
23456789012345 |
|
|
|
|
23456789012345 |
|
|
|
|
23456789012345 |
|
|
12 |
HOSE-TRANSFER RED |
23456789012345 |
|
against rollers. |
||
23456789012345 |
|
|
|
|
23456789012345 |
|
|
|
Special “red-lined” hose that is |
23456789012345 |
|
|
|
|
23456789012345 |
|
|
|
squeezed by rollers to transfer mix |
23456789012345 |
|
|
|
|
23456789012345 |
3 |
ROLLER ASSEMBLY COMPLETE |
|
|
23456789012345 |
|
|
||
23456789012345 |
|
to freezer. |
||
23456789012345 |
|
|
|
|
23456789012345 |
|
Squeezes mix/air through tubing to |
|
|
23456789012345 |
|
|
|
|
23456789012345 |
|
freezing cylinder. |
|
|
23456789012345 |
|
|
|
|
23456789012345 |
|
|
13 |
TUBE-ASSEMBLY MIX INLET |
23456789012345 |
|
|
||
23456789012345 |
|
|
|
|
23456789012345 |
4 |
KNOB-HAND |
|
Carries mix from mix container to |
23456789012345 |
|
|||
23456789012345 |
|
|
||
23456789012345 |
|
|
|
MTS. |
23456789012345 |
|
Locks roller shoe in positon. |
|
|
23456789012345 |
|
|
|
|
23456789012345 |
|
|
|
|
23456789012345 |
|
|
|
|
23456789012345 |
5 |
CLAMP-SHOE |
14 |
DUCKBILL |
23456789012345 |
||||
23456789012345 |
|
|
|
|
23456789012345 |
|
Swings hand knob into position over |
|
A rubber check valve that |
23456789012345 |
|
|
||
23456789012345 |
|
|
|
|
23456789012345 |
|
roller shoe. |
|
prevents mix from falling back into |
23456789012345 |
|
|
||
23456789012345 |
|
|
|
|
23456789012345 |
|
|
|
|
23456789012345 |
|
|
|
the mix container. |
23456789012345 |
|
|
|
|
23456789012345 |
6 |
RETAINER-AIR TUBE |
|
|
23456789012345 |
|
|
||
23456789012345 |
|
|
|
|
23456789012345 |
|
Holds air meter tube in the “up” position. |
|
|
23456789012345 |
|
|
|
|
23456789012345 |
|
|
15 |
PORT-AIR/MIX |
23456789012345 |
|
|
||
23456789012345 |
|
|
|
Blends air and mix as it flows into |
23456789012345 |
7 |
AIR METER |
|
|
23456789012345 |
|
|
||
23456789012345 |
|
the transfer hose. |
||
23456789012345 |
|
Regulates the amount of air being drawn |
|
|
23456789012345 |
|
|
|
|
23456789012345 |
|
|
|
|
23456789012345 |
|
into the system. |
|
|
23456789012345 |
|
|
|
|
23456789012345 |
|
|
16 |
CLIP-TUBE RETAINER |
23456789012345 |
|
|
||
23456789012345 |
|
|
|
|
23456789012345 |
8 |
TUBE-AIR |
|
Locks mix pickup tube into air/mix |
23456789012345 |
|
|||
23456789012345 |
|
|
||
23456789012345 |
|
|
|
port. |
23456789012345 |
|
Provides connection for the air meter. |
|
|
23456789012345 |
|
|
|
|
23456789012345 |
|
|
|
|
23456789012345 |
|
|
|
|
23456789012345 |
9 |
CLAMP-ASSY. SOFT HOSE 5/8" |
17 |
O-RING |
23456789012345 |
||||
23456789012345 |
|
|
|
|
23456789012345 |
|
Prevents mating parts from leaking. |
|
|
23456789012345 |
|
|
|
|
23456789012345 |
|
|
|
Seals the mix tube in the air/mix |
23456789012345 |
|
|
|
|
23456789012345 |
|
|
|
port. |
23456789012345 |
|
|
|
|
23456789012345 |
10 |
HOSE-ASSY. MIX BRAIDED |
|
|
23456789012345 |
|
|
||
23456789012345 |
|
Connecting hose between the Mix |
|
|
23456789012345 |
|
|
|
|
23456789012345 |
|
|
|
|
23456789012345 |
|
Transfer System and the cylinder inlet. |
|
|
23456789012345 |
|
|
|
|
23456789012345 |
|
|
|
|
23456789012345 |
|
|
|
|
23456789012345 |
|
|
|
|
23456789012345 |
|
|
|
|
23456789012345 |
|
|
|
|
23456789012345 |
|
|
|
|
23456789012345 |
|
|
|
|
23456789012345 |
|
|
|
|
23456789012345 |
|
|
|
|
23456789012345 |
|
|
|
|
23456789012345 |
|
|
|
|
23456789012345 |
|
|
|
|
23456789012345 |
|
|
|
|
23456789012345 |
|
|
|
|
23456789012345 |
|
|
|
|
23456789012345 |
|
|
|
|
23456789012345 |
|
|
|
|
23456789012345 |
|
|
|
|
23456789012345 |
|
|
|
|
23456789012345 |
|
|
|
|
23456789012345 |
|
|
|
|
23456789012345 |
|
|
|
|
23456789012345 |
|
|
|
|
23456789012345 |
|
|
|
|
23456789012345 |
|
|
|
|
23456789012345 |
|
|
|
|
23456789012345 |
|
|
|
|
23456789012345 |
|
|
|
|
23456789012345 |
|
|
|
|
23456789012345 |
|
|
|
|
23456789012345 |
|
|
|
|
23456789012345 |
|
|
|
|
23456789012345 |
|
|
|
|
23456789012345 |
|
|
|
|
23456789012345 |
|
|
|
|
23456789012345 |
|
|
|
|
23456789012345 |
|
|
|
|
23456789012345 |
|
|
|
|
23456789012345 |
|
|
|
|
23456789012345 |
|
|
|
|
23456789012345 |
|
|
|
|
23456789012345 |
|
|
|
|
23456789012345 |
|
|
|
|
23456789012345 |
|
|
|
|
23456789012345 |
|
|
|
|
23456789012345 |
|
|
|
|
23456789012345 |
|
|
|
|
23456789012345 |
|
|
|
|
23456789012345 |
|
|
|
|
23456789012345 |
|
|
|
|
23456789012345 |
|
|
|
|
23456789012345 |
|
|
|
|
23456789012345 |
|
|
|
|
23456789012345 |
|
|
|
|
23456789012345 |
|
|
|
|
23456789012345 |
|
|
|
|
234567890123456 |
|
|
|
|
184950 |
9 |

ELECTRO FREEZE Soft Serve Model 88T-RMT
123456789012345 |
5555 |
|
|
|
|
12345678901234123456789012341234567890123412345678901234 |
|
|
|
||
|
5 |
5 |
Operator Controls and Indicators |
||
12345678901234 |
|
|
|
|
|
12345678901234 |
5 |
|
|
|
|
1 |
2345678901234 |
5 |
|
|
|
12345678901234 |
5 |
|
|
|
|
12345678901234 |
5 |
|
|
|
|
12345678901234 |
5 |
|
|
|
|
12345678901234 |
5 |
|
|
|
|
12345678901234 |
5 |
|
|
|
|
12345678901234 |
5 |
|
|
|
|
12345678901234 |
5 |
|
|
|
|
12345678901234 |
5 |
|
|
|
|
12345678901234 |
5 |
|
|
|
|
12345678901234 |
5 |
|
|
|
|
12345678901234 |
5 |
|
|
|
|
12345678901234 |
5 |
|
|
|
|
12345678901234 |
5 |
|
|
|
|
12345678901234 |
5 |
|
|
|
|
12345678901234 |
5 |
|
|
|
|
12345678901234 |
5 |
|
|
|
|
12345678901234 |
5 |
|
|
|
|
12345678901234 |
5 |
|
|
|
|
12345678901234 |
5 |
|
|
|
|
12345678901234 |
5 |
|
|
|
|
12345678901234 |
5 |
|
|
|
|
12345678901234 |
5 |
|
|
|
|
12345678901234 |
5 |
|
|
|
|
12345678901234 |
5 |
|
|
|
|
12345678901234 |
5 |
|
|
|
|
12345678901234 |
5 |
|
|
|
|
12345678901234 |
5 |
|
|
|
|
12345678901234 |
5 |
|
|
|
|
12345678901234 |
5 |
|
|
|
|
12345678901234 |
5 |
|
|
|
|
12345678901234 |
5 |
|
|
|
|
12345678901234 |
5 |
|
|
|
|
12345678901234 |
5 |
|
|
|
|
12345678901234 |
5 |
|
|
|
|
12345678901234 |
5 |
|
|
|
|
12345678901234 |
5 |
|
|
|
|
12345678901234 |
5 |
|
|
|
|
12345678901234 |
5 |
|
|
|
|
12345678901234 |
5 |
|
|
|
|
12345678901234 |
5 |
|
|
|
|
12345678901234 |
5 |
|
|
|
|
12345678901234 |
5 |
|
|
|
|
12345678901234 |
5 |
|
|
|
|
12345678901234 |
5 |
|
|
|
|
12345678901234 |
5 |
|
|
|
|
12345678901234 |
5 |
|
|
|
|
12345678901234 |
5 |
|
|
|
|
12345678901234 |
5 |
|
|
|
|
12345678901234 |
5 |
|
|
|
|
12345678901234 |
5 |
|
|
|
|
12345678901234 |
5 |
|
|
|
|
12345678901234 |
5 |
|
|
|
|
12345678901234 |
5 |
|
|
|
|
12345678901234 |
5 |
|
|
|
|
12345678901234 |
5 |
|
|
|
|
12345678901234 |
5 |
|
|
|
|
12345678901234 |
5 |
|
|
|
|
12345678901234 |
5 |
|
|
|
|
12345678901234 |
5 |
|
|
|
|
12345678901234 |
5 |
|
|
|
|
12345678901234 |
5 |
|
|
|
|
12345678901234 |
5 |
|
|
|
|
12345678901234 |
5 |
|
|
|
|
12345678901234 |
5 |
|
|
|
|
12345678901234 |
5 |
|
|
|
|
12345678901234 |
5 |
|
|
|
|
12345678901234 |
5 |
|
|
|
|
12345678901234 |
5 |
|
|
|
|
12345678901234 |
5 |
|
|
|
|
12345678901234 |
5 |
|
|
|
|
12345678901234 |
5 |
|
|
|
|
12345678901234 |
5 |
|
|
|
|
12345678901234 |
5 |
|
|
|
|
12345678901234 |
5 |
|
|
|
|
12345678901234 |
5 |
Figure 5-1 |
|
|
|
12345678901234 |
5 |
|
|
||
12345678901234 |
5 |
|
|
|
|
12345678901234 |
5 |
|
|
|
|
12345678901234 |
5 |
|
|
|
|
12345678901234 |
5 |
|
|
|
|
12345678901234 |
5 |
|
|
|
|
12345678901234 |
5 |
|
|
|
|
12345678901234 |
5 |
|
|
|
|
12345678901234 |
5 |
|
|
|
|
12345678901234 |
5 |
|
|
|
|
12345678901234 |
5 |
|
|
|
|
12345678901234 |
5 |
|
|
|
|
12345678901234 |
5 |
|
|
CAUTION |
|
12345678901234 |
5 |
|
|
||
12345678901234 |
5 |
The following paragraphs describe the |
|
||
12345678901234 |
5 |
Test operation of the head |
|||
12345678901234 |
5 |
|
|
||
12345678901234 |
5 |
operator controls and indicators. Refer to |
|
||
12345678901234 |
5 |
switch prior to placing the |
|||
12345678901234 |
5 |
|
|
||
12345678901234 |
5 |
figure 5-1 for location of these controls |
|
||
12345678901234 |
5 |
|
|||
12345678901234 |
5 |
|
|
freezer in service. See Section |
|
12345678901234 |
5 |
and indicators on the freezer. |
|||
12345678901234 |
5 |
|
|||
12345678901234 |
5 |
|
|
11, Routine Maintenance, |
|
12345678901234 |
5 |
|
|
||
12345678901234 |
5 |
NOTE: The head must be in place before |
Monthly. |
||
12345678901234 |
5 |
||||
12345678901234 |
5 |
|
|
|
|
12345678901234 |
5 |
the beater will operate. |
|
||
12345678901234 |
5 |
|
|||
12345678901234 |
5 |
|
|
|
|
12345678901234 |
5 |
|
|
|
|
12345678901234 |
5 |
|
|
|
|
12345678901234 |
5 |
|
|
|
|
12345678901234 |
5 |
|
|
|
|
12345678901234 |
5 |
|
|
|
|
12345678901234 |
5 |
|
|
|
|
12345678901234 |
5 |
|
|
|
|
12345678901234 |
5 |
|
|
|
|
12345678901234 |
5 |
|
|
|
|
12345678901234 |
5 |
|
|
|
|
12345678901234 |
5 |
|
|
|
|
12345678901234 |
5 |
Selector Switch 1 |
|
||
123456789012345.1 |
5 |
|
|||
12345678901234 |
5 |
|
|
|
|
12345678901234 |
5 |
|
|
|
|
12345678901234 |
5 |
|
|
|
|
12345678901234 |
5 |
|
|
|
|
12345678901234 |
5 |
|
|
|
|
12345678901234 |
5 |
|
|
|
|
12345678901234 |
5 |
|
|
|
|
12345678901234 |
5 |
|
|
|
|
12345678901234 |
5 |
|
|
Important: |
|
12345678901234 |
5 |
|
|
||
12345678901234 |
5 |
This three-position switch controls the |
|
||
12345678901234 |
5 |
|
|||
12345678901234 |
5 |
|
|
|
|
12345678901234 |
5 |
operating mode of your freezer. |
Do not use the "AUTO" position with |
||
12345678901234 |
5 |
|
|||
12345678901234 |
5 |
|
|
water or sanitizer in the cylinder — |
|
12345678901234 |
5 |
|
|
||
12345678901234 |
5 |
a. |
"CLEAN" (left) — This position |
the freezer will be damaged. |
|
12345678901234 |
5 |
||||
12345678901234 |
5 |
|
|
|
|
12345678901234 |
5 |
operates the beater only (no refrigera- |
|
||
12345678901234 |
5 |
|
|||
12345678901234 |
5 |
|
|
|
|
12345678901234 |
5 |
|
|
|
|
12345678901234 |
5 |
tion to the cylinder). This position must |
c. "AUTO" (right) — This position |
||
12345678901234 |
5 |
||||
12345678901234 |
5 |
|
|
||
12345678901234 |
5 |
|
|
|
|
12345678901234 |
5 |
be used in all cleaning and sanitizing |
activates both the beater motor and the |
||
12345678901234 |
5 |
|
|
||
12345678901234 |
5 |
|
|
|
|
12345678901234 |
5 |
operations. |
refrigeration unit. This is the normal |
||
12345678901234 |
5 |
|
|
||
12345678901234 |
5 |
|
|
operating position. |
|
12345678901234 |
5 |
|
|
||
12345678901234 |
5 |
|
|
|
|
12345678901234 |
5 |
b. |
"OFF" (center) — In this posi- |
|
|
12345678901234 |
5 |
|
|||
12345678901234 |
5 |
tion the beater motor and refrigeration |
|
||
12345678901234 |
5 |
|
|||
12345678901234 |
5 |
|
|
|
|
12345678901234 |
5 |
system will not operate. |
|
||
12345678901234 |
5 |
|
|||
12345678901234 |
5 |
|
|
|
|
12345678901234 |
5 |
|
|
|
|
12345678901234 |
5 |
|
|
|
|
12345678901234 |
5 |
|
|
|
|
12345678901234 |
5 |
|
|
|
|
12345678901234 |
5 |
|
|
|
|
123456789012345 |
|
|
|
|
|
10 |
184950 |

|
|
|
|
|
|
|
|
|
|
ELECTRO FREEZE Soft Serve Model 88T-RMT |
|||
|
|
|
|
|
|
|
|
|
|||||
|
5 |
Operator Controls and Indicators (continued) |
|||||||||||
|
234567890123456 |
|
|
|
|
|
|
|
|
|
|||
|
23456789012345 |
|
|
|
|
|
|
|
|
|
|||
|
23456789012345 |
|
|
|
|
|
|
|
|
|
|||
|
23456789012345 |
|
|
|
|
|
|
|
|
|
|||
|
23456789012345 |
|
|
|
|
|
|
|
|
|
|||
|
23456789012345 |
|
|
|
|
|
|
|
|
|
|||
|
|
|
|
|
|
|
|
|
|
|
|
||
|
23456789012345 |
|
|
|
|
|
|
|
|
|
|||
|
23456789012345 |
|
|
|
|
|
|
|
|
|
|||
|
23456789012345 |
|
|
|
|
|
|
|
|
|
|||
|
23456789012345 |
|
|
|
|
|
|
|
|
|
|||
|
23456789012345 |
|
|
|
|
|
|
|
|
|
|||
|
23456789012345 |
|
|
|
|
|
|
|
|
|
|||
|
234567890123452345678901234523456789012345 |
|
|
|
|
|
|
|
|
|
|||
|
5.2 |
|
DAY-NIGHT Switch |
2 |
|
|
|||||||
|
23456789012345 |
|
|
|
|
|
|
|
|
|
|||
|
23456789012345 |
|
|
|
|
|
|
|
|
|
|||
|
|
|
|
|
|
|
|
|
|
|
|
|
|
|
23456789012345 |
|
|
|
|
|
|
|
|
|
|||
|
23456789012345 |
|
|
|
|
|
|
|
|
|
|||
|
23456789012345 |
|
|
|
This two-position switch controls the day |
b. |
"NIGHT" (right) — The medium- |
||||||
|
23456789012345 |
|
|
|
|||||||||
|
23456789012345 |
|
|
|
|
|
|
|
|
|
|||
|
23456789012345 |
|
|
|
and night refrigeration modes. |
temperature thermostat controls the |
|||||||
|
23456789012345 |
|
|
|
|||||||||
|
23456789012345 |
|
|
|
|
|
|
|
|
|
|||
|
23456789012345 |
|
|
|
|
|
|
|
system refrigeration to maintain a mix |
||||
|
23456789012345 |
|
|
|
|
|
|
|
|||||
|
23456789012345 |
|
|
|
|
|
|
|
|
|
|||
|
23456789012345 |
|
|
|
a. |
"DAY" (left) — The temperature |
|
|
|||||
|
23456789012345 |
|
|
|
holding temperature of 40°F (4ºC) or |
||||||||
|
23456789012345 |
|
|
|
|
|
|
|
|||||
|
23456789012345 |
|
|
|
thermostat controls the system refrigera- |
|
|
||||||
|
23456789012345 |
|
|
|
below. |
|
|||||||
|
23456789012345 |
|
|
|
|
|
|
|
|
||||
|
23456789012345 |
|
|
|
tion to maintain the product serving |
|
|||||||
|
23456789012345 |
|
|
|
|
|
|||||||
|
23456789012345 |
|
|
|
|
|
|
|
|
|
|||
|
23456789012345 |
|
|
|
temperature between 18 to 21°F (-8 to - |
|
|
||||||
|
23456789012345 |
|
|
|
|
|
|||||||
|
23456789012345 |
|
|
|
|
|
|
|
|
|
|||
|
23456789012345 |
|
|
|
6°C). This is the normal operating posi- |
|
|
||||||
|
23456789012345 |
|
|
|
|
|
|||||||
|
23456789012345 |
|
|
|
|
|
|
|
|
|
|||
|
23456789012345 |
|
|
|
tion. |
|
|
|
|
|
|||
|
23456789012345 |
|
|
|
|
|
|
|
|
||||
|
23456789012345 |
|
|
|
|
|
|
|
|
|
|||
|
|
23456789012345 |
|
|
|
|
|
|
|
|
|
||
|
|
23456789012345 |
|
|
|
|
|
|
|
|
|
||
|
|
23456789012345 |
|
|
|
|
|
|
|
|
|
||
|
|
23456789012345 |
|
|
|
|
|
|
|
|
|
||
|
|
23456789012345 |
|
Mix Transfer System (MTS) Switch |
3 |
||||||||
|
5.3 |
|
|||||||||||
|
23456789012345 |
|
|
|
|
|
|
|
|
|
|||
|
23456789012345 |
|
|
|
|
|
|
|
|
|
|||
|
23456789012345 |
|
|
|
|
|
|
|
|
|
|||
|
23456789012345 |
|
|
|
|
|
|
|
|
|
|||
|
23456789012345 |
|
|
|
|
|
|
|
|
|
|||
|
23456789012345 |
|
|
|
|
|
|
|
|
|
|||
|
23456789012345 |
|
|
|
|
|
|
|
|
|
|||
|
23456789012345 |
|
|
|
This two-position switch controls the |
b. |
"OFF" (right) — In this position |
||||||
|
23456789012345 |
|
|
|
|||||||||
|
23456789012345 |
|
|
|
|
|
|
|
|
|
|||
|
23456789012345 |
|
|
|
operation of the MTS located in the |
the MTS will not operate. Use this |
|||||||
|
23456789012345 |
|
|
|
|||||||||
|
23456789012345 |
|
|
|
|
|
|
|
|
|
|||
|
23456789012345 |
|
|
|
refrigerated mix storage cabinet. |
position for night operation. |
|||||||
|
23456789012345 |
|
|
|
|||||||||
|
23456789012345 |
|
|
|
|
|
|
|
|
|
|||
|
23456789012345 |
|
|
|
|
|
|
|
|
|
|||
|
23456789012345 |
|
|
|
|
|
|
|
|
|
|||
|
23456789012345 |
|
|
|
a. |
"MIX ON" (left) — This position |
|
|
|||||
|
23456789012345 |
|
|
|
|
|
|||||||
|
23456789012345 |
|
|
|
|
|
|
|
|
|
|||
|
23456789012345 |
|
|
|
is the normal operating mode. This |
|
|
||||||
|
23456789012345 |
|
|
|
|
|
|||||||
|
23456789012345 |
|
|
|
|
|
|
|
|
|
|||
|
23456789012345 |
|
|
|
position is for priming the cylinder, |
|
|
||||||
|
23456789012345 |
|
|
|
|
|
|||||||
|
23456789012345 |
|
|
|
|
|
|
|
|
|
|||
|
23456789012345 |
|
|
|
|
|
|
|
|
|
|||
|
23456789012345 |
|
|
|
cleaning, and day operation. |
|
|
|
|||||
|
23456789012345 |
|
|
|
|
|
|
||||||
|
23456789012345 |
|
|
|
|
|
|
|
|
|
|||
|
23456789012345 |
|
|
|
|
|
|
|
|
|
|||
|
23456789012345 |
|
|
|
|
|
|
|
|
|
|||
|
23456789012345 |
|
|
|
|
|
|
|
|
|
|||
|
23456789012345 |
|
|
|
|
|
|
|
|
|
|||
|
23456789012345 |
|
|
|
|
|
|
|
|
|
|||
|
23456789012345 |
|
|
|
|
|
|
|
|
|
|||
|
23456789012345 |
|
|
|
|
|
|
|
|
|
|||
|
23456789012345 |
|
|
|
|
|
|
|
|
|
|||
|
23456789012345 |
|
|
|
|
|
|
|
|
|
|||
|
23456789012345 |
|
Cabinet Switch |
4 |
|
|
|
||||||
|
234567890123455.4 |
|
|
|
|
||||||||
|
23456789012345 |
|
|
|
|
|
|
|
|
|
|||
|
23456789012345 |
|
|
|
|
|
|
|
|
|
|||
|
23456789012345 |
|
|
|
|
|
|
|
|
|
|||
|
23456789012345 |
|
|
|
|
|
|
|
|
|
|||
|
23456789012345 |
|
|
|
|
|
|
|
|
|
|||
|
23456789012345 |
|
|
|
|
|
|
|
|
|
|||
|
23456789012345 |
|
|
|
This two-position switch controls the |
b."OFF" (right) — In this position |
|||||||
|
23456789012345 |
|
|
|
|||||||||
|
23456789012345 |
|
|
|
|||||||||
|
23456789012345 |
|
|
|
|
|
|
|
|
|
|||
|
23456789012345 |
|
|
|
cabinet refrigeration. |
|
|
the cabinet will not be refrigerated. |
|||||
|
23456789012345 |
|
|
|
|
|
|||||||
|
23456789012345 |
|
|
|
|
|
|
|
|
|
|||
|
23456789012345 |
|
|
|
|
|
|
|
|
|
|||
|
23456789012345 |
|
|
|
NOTE: Cabinet door must be closed |
NOTE: The cabinet is automatically |
|||||||
|
23456789012345 |
|
|
|
|||||||||
|
23456789012345 |
|
|
|
|||||||||
|
23456789012345 |
|
|
|
|
|
|
|
|
|
|||
|
23456789012345 |
|
|
|
for cabinet refrigeration to operate. |
"ON" when either SELECTOR switch |
|||||||
|
23456789012345 |
|
|
|
|||||||||
|
23456789012345 |
|
|
|
|
|
|
|
|
|
|||
|
23456789012345 |
|
|
|
|
|
|
|
is in the"AUTO" position. |
||||
|
23456789012345 |
|
|
|
|
|
|
|
|||||
|
23456789012345 |
|
|
|
a. |
"ON" (left) — The cabinet ther- |
|
|
|||||
|
23456789012345 |
|
|
|
|
|
|||||||
|
23456789012345 |
|
|
|
|
|
|
|
|
|
|||
|
23456789012345 |
|
|
|
mostat controls the system refrigeration |
|
|
||||||
|
23456789012345 |
|
|
|
|
|
|||||||
|
23456789012345 |
|
|
|
|
|
|
|
|
|
|||
|
23456789012345 |
|
|
|
to maintain a mix temperature of 36 to |
|
|
||||||
|
23456789012345 |
|
|
|
|
|
|||||||
|
23456789012345 |
|
|
|
|
|
|
|
|
|
|||
|
23456789012345 |
|
|
|
41°F (2 to 5°C) in the storage cabinet. |
|
|
||||||
|
23456789012345 |
|
|
|
|
|
|||||||
|
23456789012345 |
|
|
|
|
|
|
|
|
|
|||
|
23456789012345 |
|
|
|
Use this position when mix is in the |
|
|
||||||
|
23456789012345 |
|
|
|
|
|
|||||||
|
23456789012345 |
|
|
|
|
|
|
|
|
|
|||
|
23456789012345 |
|
|
|
storage cabinet but not in the cylinder. |
|
|
||||||
|
23456789012345 |
|
|
|
|
|
|||||||
|
23456789012345 |
|
|
|
|
|
|
|
|
|
|||
|
23456789012345 |
|
|
|
|
|
|
|
|
|
|||
|
23456789012345 |
|
|
|
|
|
|
|
|
|
|||
|
23456789012345 |
|
|
|
|
|
|
|
|
|
|||
|
23456789012345 |
|
|
|
|
|
|
|
|
|
|||
|
23456789012345 |
|
|
|
|
|
|
|
|
|
|||
|
23456789012345 |
|
|
|
|
|
|
|
|
|
|||
|
23456789012345 |
|
|
|
|
|
|
|
|
|
|||
|
23456789012345 |
|
|
|
|
|
|
|
|
|
|||
|
23456789012345 |
|
|
|
|
|
|
|
|
|
|||
|
23456789012345 |
|
Timer |
5 |
|
|
|
|
|||||
|
234567890123455.5 |
|
|
|
|
|
|||||||
|
23456789012345 |
|
|
|
|
|
|
|
|
|
|||
|
23456789012345 |
|
|
|
|
|
|
|
|
|
|||
|
23456789012345 |
|
|
|
|
|
|
|
|
|
|||
|
23456789012345 |
|
|
|
|
|
|
|
|
|
|||
|
23456789012345 |
|
|
|
|
|
|
|
|
|
|||
|
23456789012345 |
|
|
|
|
|
|
|
|
|
|||
|
23456789012345 |
|
|
|
This control will bypass the thermostat, |
|
Important: |
||||||
|
23456789012345 |
|
|
|
|
||||||||
|
23456789012345 |
|
|
|
|
|
|
|
|
|
|||
|
23456789012345 |
|
|
|
|
|
|
|
|
|
|||
|
23456789012345 |
|
|
|
forcing the compressor and beater motor |
Excessive use of the timer causes |
|||||||
|
23456789012345 |
|
|
|
|||||||||
|
23456789012345 |
|
|
|
|
|
|
|
|||||
|
23456789012345 |
|
|
|
|
|
|
|
|
|
|||
|
23456789012345 |
|
|
|
to run up to 3 minutes. Use the timer for |
freeze-up and damage to the freezer. |
|||||||
|
23456789012345 |
|
|
|
|
|
|
|
|||||
|
23456789012345 |
|
|
|
for quick start-ups or fast recovery when |
|
|
||||||
|
23456789012345 |
|
|
|
|
|
|||||||
|
23456789012345 |
|
|
|
|
|
|
|
|
|
|||
|
23456789012345 |
|
|
|
dispensing large portions. |
|
|
|
|||||
|
23456789012345 |
|
|
|
|
|
|
||||||
|
23456789012345 |
|
|
|
|
|
|
|
|
|
|||
|
23456789012345 |
|
|
|
|
|
|
|
|
|
|||
|
23456789012345 |
|
|
|
|
|
|
|
|
|
|||
|
23456789012345 |
|
|
|
|
|
|
|
|
|
|||
|
23456789012345 |
|
|
|
|
|
|
|
|
|
|||
|
23456789012345 |
|
|
|
|
|
|
|
|
|
|||
|
23456789012345 |
|
|
|
|
|
|
|
|
|
|||
|
23456789012345 |
|
|
|
|
|
|
|
|
|
|||
|
23456789012345 |
|
|
|
|
|
|
|
|
|
|||
|
23456789012345 |
|
|
|
|
|
|
|
|
|
|||
|
23456789012345 |
|
|
|
|
|
|
|
|
|
|||
|
23456789012345 |
|
|
|
|
|
|
|
|
|
|||
|
234567890123456 |
|
|
|
|
|
|
|
|
|
|||
184950 |
11 |
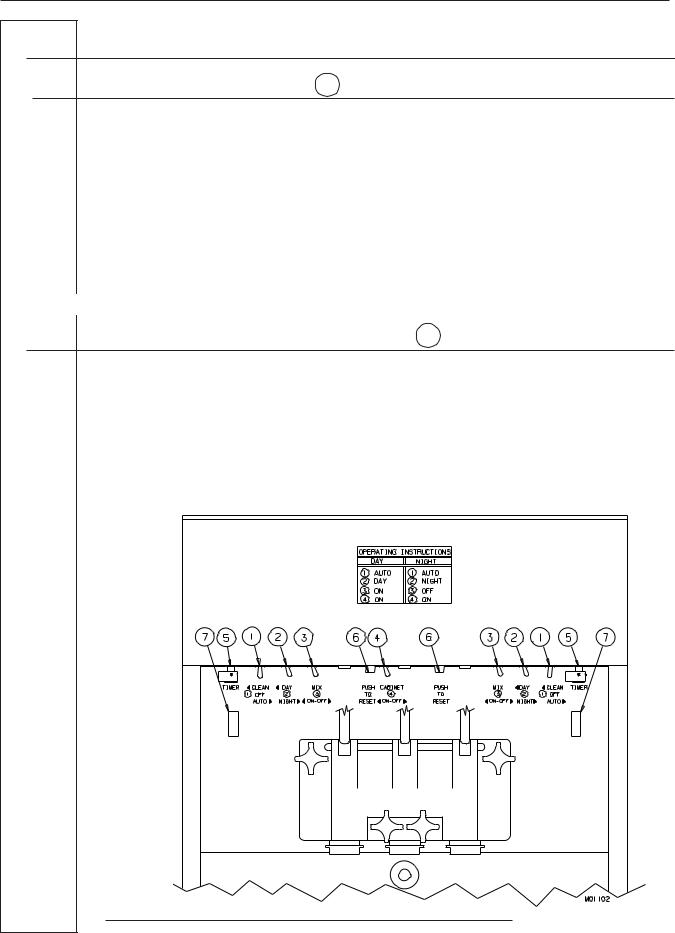
ELECTRO FREEZE Soft Serve Model 88T-RMT
123456789012345 |
|
|
|
|
|
|
12345678901234 |
5 |
Operator Controls and Indicators |
|
|||
|
5 |
|
|
|||
12345678901234 |
5 |
|
|
|
(continued) |
|
12345678901234 |
5 |
|
|
|
||
12345678901234 |
5 |
|
|
|
|
|
12345678901234 |
5 |
|
|
|
|
|
12345678901234 |
5 |
|
|
|
|
|
1 |
2345678901234 |
5 |
|
|
|
|
12345678901234 |
5 |
|
|
|
|
|
12345678901234 |
5 |
|
|
|
|
|
12345678901234 |
5 |
|
|
|
|
|
12345678901234 |
5 |
Reset — Overload |
6 |
|
|
|
|
5.6 |
|
|
|
||
12345678901234 |
5 |
|
|
|
|
|
12345678901234 |
5 |
|
|
|
|
|
12345678901234 |
5 |
|
|
|
|
|
12345678901234 |
5 |
|
|
|
|
|
12345678901234 |
5 |
|
|
|
|
|
12345678901234 |
5 |
|
|
|
|
|
12345678901234 |
5 |
This control protects the beater motor |
|
|
||
12345678901234 |
5 |
|
|
|||
12345678901234 |
5 |
|
|
|||
12345678901234 |
5 |
|
|
Important: |
||
12345678901234 |
5 |
|
|
|||
12345678901234 |
5 |
against failure from an overload condi- |
|
|
||
12345678901234 |
5 |
If the overload trips frequently, your |
||||
12345678901234 |
5 |
|
|
|||
12345678901234 |
5 |
tion by automatically shutting down the |
|
|
||
12345678901234 |
5 |
freezer should be checked for proper |
||||
12345678901234 |
5 |
|
|
|||
12345678901234 |
5 |
freezer. To restart the freezer properly, |
|
|
||
12345678901234 |
5 |
product temperature, overrun and |
||||
12345678901234 |
5 |
|
|
|||
12345678901234 |
5 |
turn the SELECTOR switch to “OFF” and |
|
|
||
12345678901234 |
5 |
|
|
|||
12345678901234 |
5 |
|
|
|
|
|
12345678901234 |
5 |
wait 2-3 minutes. Then depress the red |
voltage. Contact your Electro Freeze |
|||
12345678901234 |
5 |
|
|
|||
12345678901234 |
5 |
|
|
|
|
|
12345678901234 |
5 |
reset button and turn the SELECTOR |
Distributor. |
|
||
12345678901234 |
5 |
|
|
|||
12345678901234 |
5 |
|
|
|
|
|
12345678901234 |
5 |
switch back to the “AUTO” or “CLEAN” |
|
|
||
12345678901234 |
5 |
|
|
|||
12345678901234 |
5 |
|
|
|
|
|
12345678901234 |
5 |
position. |
|
|
|
|
12345678901234 |
5 |
|
|
|
||
12345678901234 |
5 |
|
|
|
|
|
12345678901234 |
5 |
|
|
|
|
|
12345678901234 |
5 |
|
|
|
|
|
12345678901234 |
5 |
|
|
|
|
|
12345678901234 |
5 |
|
|
|
|
|
12345678901234 |
5 |
|
|
|
|
|
12345678901234 |
5 |
|
|
|
|
|
12345678901234 |
5 |
|
|
|
|
|
12345678901234 |
5 |
|
|
|
|
|
12345678901234 |
5 |
|
|
|
|
|
12345678901234 |
5 |
|
|
|
|
|
12345678901234 |
5 |
|
|
|
|
|
12345678901234 |
5 |
|
|
|
|
|
12345678901234 |
5 |
|
|
|
|
|
123456789012341234567890123412345678901234123456789012345.7 |
5555 |
Indicator Light — “ADD MIX” |
7 |
|
||
12345678901234 |
5 |
|
|
|
|
|
12345678901234 |
5 |
|
|
|
|
|
12345678901234 |
5 |
|
|
|
|
|
12345678901234 |
5 |
|
|
|
|
|
12345678901234 |
5 |
When flashing, this light indicates the |
|
|
||
12345678901234 |
5 |
|
|
|||
12345678901234 |
5 |
|
|
|||
12345678901234 |
5 |
|
|
Important: |
||
12345678901234 |
5 |
|
|
|||
12345678901234 |
5 |
mix in the mix container is at a low level |
|
|
||
12345678901234 |
5 |
If proper mix level is not maintained, |
||||
12345678901234 |
5 |
|
|
|||
12345678901234 |
5 |
and should be refilled as soon as pos- |
|
|
||
12345678901234 |
5 |
a freeze-up may occur and cause |
||||
12345678901234 |
5 |
|
|
|||
12345678901234 |
5 |
sible. Always maintain at least 2 inches |
|
|
||
12345678901234 |
5 |
damage to the freezer. |
||||
12345678901234 |
5 |
|
|
|||
12345678901234 |
5 |
(5 cm) of mix in the tank. For best oper- |
|
|
||
12345678901234 |
5 |
|
|
|||
12345678901234 |
5 |
ating results keep mix tank full. |
|
|
||
12345678901234 |
5 |
|
|
|||
12345678901234 |
5 |
|
|
|
|
|
12345678901234 |
5 |
|
|
|
|
|
12345678901234 |
5 |
|
|
|
|
|
12345678901234 |
5 |
|
|
|
|
|
12345678901234 |
5 |
|
|
|
|
|
12345678901234 |
5 |
|
|
|
|
|
12345678901234 |
5 |
|
|
|
|
|
12345678901234 |
5 |
|
|
|
|
|
12345678901234 |
5 |
|
|
|
|
|
12345678901234 |
5 |
|
|
|
|
|
12345678901234 |
5 |
|
|
|
|
|
12345678901234 |
5 |
|
|
|
|
|
12345678901234 |
5 |
|
|
|
|
|
12345678901234 |
5 |
|
|
|
|
|
12345678901234 |
5 |
|
|
|
|
|
12345678901234 |
5 |
|
|
|
|
|
12345678901234 |
5 |
|
|
|
|
|
12345678901234 |
5 |
|
|
|
|
|
12345678901234 |
5 |
|
|
|
|
|
12345678901234 |
5 |
|
|
|
|
|
12345678901234 |
5 |
|
|
|
|
|
12345678901234 |
5 |
|
|
|
|
|
12345678901234 |
5 |
|
|
|
|
|
12345678901234 |
5 |
|
|
|
|
|
12345678901234 |
5 |
|
|
|
|
|
12345678901234 |
5 |
|
|
|
|
|
12345678901234 |
5 |
|
|
|
|
|
12345678901234 |
5 |
|
|
|
|
|
12345678901234 |
5 |
|
|
|
|
|
12345678901234 |
5 |
|
|
|
|
|
12345678901234 |
5 |
|
|
|
|
|
12345678901234 |
5 |
|
|
|
|
|
12345678901234 |
5 |
|
|
|
|
|
12345678901234 |
5 |
|
|
|
|
|
12345678901234 |
5 |
|
|
|
|
|
12345678901234 |
5 |
|
|
|
|
|
12345678901234 |
5 |
|
|
|
|
|
12345678901234 |
5 |
|
|
|
|
|
12345678901234 |
5 |
|
|
|
|
|
12345678901234 |
5 |
|
|
|
|
|
12345678901234 |
5 |
|
|
|
|
|
12345678901234 |
5 |
|
|
|
|
|
12345678901234 |
5 |
|
|
|
|
|
12345678901234 |
5 |
|
|
|
|
|
12345678901234 |
5 |
|
|
|
|
|
12345678901234 |
5 |
|
|
|
|
|
12345678901234 |
5 |
|
|
|
|
|
12345678901234 |
5 |
|
|
|
|
|
12345678901234 |
5 |
|
|
|
|
|
12345678901234 |
5 |
|
|
|
|
|
12345678901234 |
5 |
|
|
|
|
|
12345678901234 |
5 |
|
|
|
|
|
12345678901234 |
5 |
|
|
|
|
|
12345678901234 |
5 |
|
|
|
|
|
12345678901234 |
5 |
|
|
|
|
|
12345678901234 |
5 |
|
|
|
|
|
12345678901234 |
5 |
|
|
|
|
|
12345678901234 |
5 |
|
|
|
|
|
12345678901234 |
5 |
|
|
|
|
|
12345678901234 |
5 |
|
|
|
|
|
12345678901234 |
5 |
|
|
|
|
|
12345678901234 |
5 |
|
|
|
|
|
12345678901234 |
5 |
|
|
|
|
|
12345678901234 |
5 |
|
|
|
|
|
12345678901234 |
5 |
|
|
|
|
|
12345678901234 |
5 |
|
|
|
|
|
12345678901234 |
5 |
|
|
|
|
|
12345678901234 |
5 |
|
|
|
|
|
12345678901234 |
5 |
|
|
|
|
|
12345678901234 |
5 |
|
|
|
|
|
12345678901234 |
5 |
|
|
|
|
|
12345678901234 |
5 |
|
|
|
|
|
12345678901234 |
5 |
|
|
|
|
|
12345678901234 |
5 |
|
|
|
|
|
12345678901234 |
5 |
|
|
|
|
|
12345678901234 |
5 |
|
|
|
|
|
12345678901234 |
5 |
|
|
|
|
|
12345678901234 |
5 |
|
|
|
|
|
12345678901234 |
5 |
|
|
|
|
|
12345678901234 |
5 |
|
|
|
|
|
12345678901234 |
5 |
|
|
|
|
|
12345678901234 |
5 |
|
|
|
|
|
12345678901234 |
5 |
|
|
|
|
|
12345678901234 |
5 |
|
|
|
|
|
12345678901234 |
5 |
Figure 5-1 |
|
|
|
|
12345678901234 |
5 |
|
|
|
||
12345678901234 |
5 |
|
|
|
|
|
12345678901234 |
5 |
|
|
|
|
|
12345678901234 |
5 |
|
|
|
|
|
12345678901234 |
5 |
|
|
|
|
|
12345678901234 |
5 |
|
|
|
|
|
12345678901234 |
5 |
|
|
|
|
|
123456789012345 |
|
|
|
|
|
|
12 |
184950 |
|
ELECTRO FREEZE Soft Serve Model 88T-RMT |
||
234567890123456 |
Operator Controls and Indicators |
|
|
5 |
|
||
23456789012345 |
|
|
(continued) |
23456789012345 |
|
|
|
23456789012345 |
|
|
|
23456789012345 |
|
|
|
23456789012345 |
|
|
|
23456789012345 |
|
|
|
23456789012345 |
|
|
|
23456789012345 |
|
|
|
23456789012345 |
|
|
|
23456789012345 |
Probe - “ADD MIX” (See Figure 5-2) |
|
|
234567890123455.8 |
|
||
23456789012345 |
|
|
|
23456789012345 |
|
|
|
23456789012345 |
|
|
|
23456789012345 |
|
|
|
23456789012345 |
|
|
|
23456789012345 |
|
|
|
23456789012345 |
|
|
|
23456789012345 |
For the “ADD MIX” indicator light to |
|
|
23456789012345 |
|
|
|
23456789012345 |
|
|
|
23456789012345 |
indicate low mix, the must be installed in |
|
|
23456789012345 |
|
||
23456789012345 |
|
|
|
23456789012345 |
the mix tank, with cord attached and |
|
|
23456789012345 |
|
|
|
23456789012345 |
|
|
|
23456789012345 |
plugged into the receptacle located in the |
|
|
23456789012345 |
|
||
23456789012345 |
|
|
|
23456789012345 |
back of the cabinet wall. |
|
|
23456789012345 |
|
|
|
23456789012345 |
|
|
|
23456789012345 |
|
|
|
23456789012345 |
|
|
|
23456789012345 |
|
|
|
23456789012345 |
|
|
|
23456789012345 |
|
|
|
23456789012345 |
|
|
|
23456789012345 |
|
|
|
23456789012345 |
|
|
|
23456789012345 |
|
|
|
23456789012345 |
|
|
|
23456789012345 |
|
|
|
23456789012345 |
|
|
|
23456789012345 |
|
|
|
23456789012345 |
|
|
|
23456789012345 |
|
|
|
23456789012345 |
|
|
|
23456789012345 |
|
|
|
23456789012345 |
Thermometer - Cabinet |
|
|
5.9 |
|
|
|
23456789012345 |
|
|
|
23456789012345 |
|
|
|
23456789012345 |
|
|
|
23456789012345 |
(See Figure 5-2) |
|
|
23456789012345 |
|
|
|
23456789012345 |
|
|
|
23456789012345 |
|
|
|
23456789012345 |
|
|
|
23456789012345 |
|
|
|
23456789012345 |
|
|
|
23456789012345 |
|
|
|
23456789012345 |
|
THERMOMETER |
|
23456789012345 |
|
|
|
23456789012345 |
This thermometer is used |
|
|
23456789012345 |
|
|
|
23456789012345 |
to monitor the tempera- |
|
|
23456789012345 |
|
|
|
23456789012345 |
|
|
|
23456789012345 |
ture in the mix cabinet. |
|
|
23456789012345 |
|
|
|
23456789012345 |
|
|
|
23456789012345 |
|
|
|
23456789012345 |
When the cabinet switch |
|
|
23456789012345 |
|
|
|
23456789012345 |
|
|
|
23456789012345 |
is in the “ON” position, |
|
|
23456789012345 |
|
|
|
23456789012345 |
|
|
|
23456789012345 |
the thermometer should |
|
|
23456789012345 |
|
|
|
23456789012345 |
|
|
|
23456789012345 |
be green which indicates |
|
|
23456789012345 |
|
|
|
23456789012345 |
|
|
|
23456789012345 |
the temperature is be- |
|
|
23456789012345 |
|
|
|
23456789012345 |
|
|
|
23456789012345 |
tween 35º to 41ºF (2º to |
|
|
23456789012345 |
|
|
|
23456789012345 |
|
|
|
23456789012345 |
5ºC). If the thermometer |
|
|
23456789012345 |
|
|
|
23456789012345 |
|
|
|
23456789012345 |
is indicating red or blue |
|
|
23456789012345 |
|
|
|
23456789012345 |
|
|
|
23456789012345 |
|
|
|
23456789012345 |
and the cabinet switch is |
|
|
23456789012345 |
|
|
|
23456789012345 |
|
|
|
23456789012345 |
“ON” contact your autho- |
|
|
23456789012345 |
|
|
|
23456789012345 |
|
|
|
23456789012345 |
rized service company for |
|
|
23456789012345 |
|
|
|
23456789012345 |
|
|
|
23456789012345 |
service. |
|
|
23456789012345 |
|
|
|
23456789012345 |
|
|
|
23456789012345 |
|
|
|
23456789012345 |
|
|
|
23456789012345 |
|
|
|
23456789012345 |
|
|
|
23456789012345 |
|
|
|
23456789012345 |
|
|
|
23456789012345 |
|
|
|
23456789012345 |
|
|
|
23456789012345 |
|
|
|
23456789012345 |
|
|
|
23456789012345 |
|
|
|
23456789012345 |
Figure 5-2 |
|
|
23456789012345 |
|
||
23456789012345 |
|
||
23456789012345 |
|
|
|
23456789012345 |
|
|
|
23456789012345 |
|
|
|
23456789012345 |
|
|
|
23456789012345 |
|
|
|
23456789012345 |
|
|
|
23456789012345 |
|
|
|
23456789012345 |
|
|
|
23456789012345 |
|
|
|
23456789012345 |
|
|
|
23456789012345 |
|
|
|
23456789012345 |
|
|
|
23456789012345 |
|
|
|
23456789012345 |
|
|
|
23456789012345 |
|
|
|
23456789012345 |
This chart shows the correct |
|
|
234567890123452345678901234523456789012345 |
|
|
|
23456789012345 |
positions of the switches for day |
|
|
23456789012345 |
|
|
|
23456789012345 |
|
|
|
23456789012345 |
and night operations. This decal is |
|
|
23456789012345 |
|
|
|
23456789012345 |
|
|
|
23456789012345 |
located on the dispensing panel. |
|
|
23456789012345 |
|
|
|
23456789012345 |
|
|
|
23456789012345 |
|
|
|
23456789012345 |
|
|
|
23456789012345 |
To turn the entire machine off, |
|
|
23456789012345 |
|
|
|
23456789012345 |
|
|
|
23456789012345 |
switches numbered 1, 3, and 4 |
|
|
23456789012345 |
|
|
|
23456789012345 |
|
|
|
23456789012345 |
must be in the “OFF” position. |
|
|
23456789012345 |
|
|
|
23456789012345 |
|
|
|
23456789012345 |
|
|
|
23456789012345 |
|
|
|
23456789012345 |
|
|
|
23456789012345 |
|
|
|
23456789012345 |
|
|
|
23456789012345 |
|
|
|
23456789012345 |
|
|
|
23456789012345 |
|
|
|
23456789012345 |
|
|
|
23456789012345 |
|
|
|
23456789012345 |
|
|
|
23456789012345 |
|
|
|
23456789012345 |
|
|
|
23456789012345 |
|
|
|
234567890123456 |
|
|
|
184950 |
13 |

ELECTRO FREEZE Soft Serve Model 88T-RMT
123456789012345 |
|
|
|
|
||
|
|
|
|
|||
12345678901234 |
5 |
|
|
|
||
12345678901234 |
5 |
|
|
|
||
12345678901234 |
5 |
|
|
|
||
12345678901234 |
5 |
Disassembly and Cleaning |
||||
|
6 |
|
||||
12345678901234 |
5 |
|
|
|
||
12345678901234 |
5 |
|
|
|
||
1 |
2345678901234 |
5 |
|
|
|
|
12345678901234 |
5 |
|
|
|
||
12345678901234 |
5 |
|
|
|
||
12345678901234 |
5 |
|
|
|
||
|
|
|
|
|
|
|
12345678901234 |
5 |
|
|
|
||
12345678901234 |
5 |
|
|
|
||
12345678901234 |
5 |
|
|
|
||
12345678901234 |
5 |
|
|
|
||
12345678901234 |
5 |
|
|
|
||
12345678901234 |
5 |
|
|
|
||
12345678901234 |
5 |
|
|
|
||
12345678901234 |
5 |
Safety Information |
|
|
||
12345678901234 |
5 |
|
|
|||
12345678901234 |
5 |
|
|
|||
12345678901234 |
5 |
|
CAUTION |
|||
12345678901234 |
5 |
|
||||
12345678901234 |
5 |
|
||||
12345678901234 |
5 |
|
To avoid electrical shock or |
|||
12345678901234 |
5 |
|
||||
12345678901234 |
5 |
This freezer uses pressure to assure |
|
|
||
12345678901234 |
5 |
|
|
|||
12345678901234 |
5 |
|
contact with moving parts, |
|||
12345678901234 |
5 |
consistent product quality. It is important |
||||
12345678901234 |
5 |
|
|
|||
12345678901234 |
5 |
|
make sure all switches are in |
|||
12345678901234 |
5 |
for your safety that the freezer is depres- |
||||
12345678901234 |
5 |
|
|
|||
12345678901234 |
5 |
|
the “OFF” position and that |
|||
12345678901234 |
5 |
surized slowly and completely whenever |
||||
12345678901234 |
5 |
|
|
|||
12345678901234 |
5 |
|
the main power supply is |
|||
12345678901234 |
5 |
the freezer is to be drained, disas- |
||||
12345678901234 |
5 |
|
|
|||
12345678901234 |
5 |
|
disconnected. Some freezers |
|||
12345678901234 |
5 |
|
||||
12345678901234 |
5 |
sembled, cleaned, or serviced. The |
|
|
||
12345678901234 |
5 |
have more than one discon- |
||||
12345678901234 |
5 |
|
||||
12345678901234 |
5 |
safety instructions in this manual will |
|
|
||
12345678901234 |
5 |
nect switch. |
||||
12345678901234 |
5 |
|
||||
12345678901234 |
5 |
remind you when to check to make sure |
||||
12345678901234 |
5 |
|
|
|||
12345678901234 |
5 |
|
|
|
||
12345678901234 |
5 |
the freezer is depressurized. When you |
|
|
||
12345678901234 |
5 |
|
|
|||
12345678901234 |
5 |
|
|
|
||
12345678901234 |
5 |
see this CAUTION statement |
5. Inside the cabinet, remove the |
|||
12345678901234 |
5 |
|||||
12345678901234 |
5 |
|
||||
12345678901234 |
5 |
|
MTS cover, loosen the shoe clamp hand |
|||
12345678901234 |
5 |
|
||||
12345678901234 |
5 |
|
|
|
||
12345678901234 |
5 |
|
|
|
||
12345678901234 |
5 |
|
knob, swing back the shoe clamp and |
|||
12345678901234 |
5 |
|
||||
12345678901234 |
5 |
|
|
|
||
1234567890123412345678901234 |
55 |
CAUTION |
swing open the roller shoe on both mix |
|||
12345678901234 |
5 |
|||||
12345678901234 |
5 |
Make sure freezer is depressur- |
transfer systems. |
|||
12345678901234 |
5 |
|||||
12345678901234 |
5 |
|
|
|
||
12345678901234 |
5 |
ized before proceeding. |
|
|
||
12345678901234 |
5 |
|
|
|||
12345678901234 |
5 |
|
Following these steps will assure that the |
|||
12345678901234 |
5 |
|
||||
12345678901234 |
5 |
|
|
|
||
12345678901234 |
5 |
|
system is depressurized. |
|||
12345678901234 |
5 |
|
||||
12345678901234 |
5 |
|
|
|
||
12345678901234 |
5 |
the following steps should be taken: |
|
|
||
12345678901234 |
5 |
It is important that the freezer |
||||
12345678901234 |
5 |
|||||
12345678901234 |
5 |
|
||||
12345678901234 |
5 |
|
|
|
||
12345678901234 |
5 |
1. Make sure both MTS switches |
be disassembled, washed, lubri- |
|||
12345678901234 |
5 |
|||||
12345678901234 |
5 |
|
|
|
||
12345678901234 |
5 |
and both selector switches are in the |
cated and sanitized before op- |
|||
12345678901234 |
5 |
|||||
12345678901234 |
5 |
|
|
|
||
12345678901234 |
5 |
“OFF” position. |
eration. |
|||
12345678901234 |
5 |
|||||
12345678901234 |
5 |
|
|
|
||
12345678901234 |
5 |
|
|
|
||
12345678901234 |
5 |
|
|
|
||
12345678901234 |
5 |
2. Place a clean bucket under the |
The cleaning and sanitizing instructions |
|||
12345678901234 |
5 |
|||||
12345678901234 |
5 |
|
|
|
||
12345678901234 |
5 |
dispense head. |
explained in this manual are required to |
|||
12345678901234 |
5 |
|||||
12345678901234 |
5 |
|
|
|
||
12345678901234 |
5 |
|
|
|
||
12345678901234 |
5 |
|
maintain a clean, sanitary freezer. The |
|||
12345678901234 |
5 |
|
||||
12345678901234 |
5 |
3. Slowly open the plungers by |
|
|
||
12345678901234 |
5 |
freezer should be disassembled, cleaned, |
||||
12345678901234 |
5 |
|
||||
12345678901234 |
5 |
pulling down on each of the dispense |
||||
12345678901234 |
5 |
|
|
|||
12345678901234 |
5 |
|
reassembled, lubricated and sanitized |
|||
12345678901234 |
5 |
handles, allowing any pressurized |
||||
12345678901234 |
5 |
daily to ensure the best possible product |
||||
12345678901234 |
5 |
|
|
|
||
12345678901234 |
5 |
cleaning solution or air to escape. If |
|
|
||
12345678901234 |
5 |
|
|
|||
12345678901234 |
5 |
|
quality and freezer operation. |
|||
12345678901234 |
5 |
|
||||
12345678901234 |
5 |
there is product in the freezer refer to |
|
|
||
12345678901234 |
5 |
|
|
|||
12345678901234 |
5 |
|
Persons assembling, cleaning or sanitiz- |
|||
12345678901234 |
5 |
Section 9, Closing Procedures, 9.2 |
||||
12345678901234 |
5 |
|
|
|||
12345678901234 |
5 |
ing the freezer must first wash and |
||||
12345678901234 |
5 |
|
||||
12345678901234 |
5 |
Draining Product. |
|
|
||
12345678901234 |
5 |
sanitize hands and forearms with an |
||||
12345678901234 |
5 |
|
||||
12345678901234 |
5 |
|
|
|
||
12345678901234 |
5 |
4. Remove the plunger rods and |
|
|
||
12345678901234 |
5 |
approved sanitizer. |
||||
12345678901234 |
5 |
|
||||
12345678901234 |
5 |
open the plungers completely. |
|
|
||
12345678901234 |
5 |
|
|
|||
12345678901234 |
5 |
|
|
|
||
12345678901234 |
5 |
|
|
|
||
12345678901234 |
5 |
|
|
|
||
12345678901234 |
5 |
|
|
|
||
12345678901234 |
5 |
|
|
|
||
12345678901234 |
5 |
|
|
|
||
12345678901234 |
5 |
|
|
|
||
12345678901234 |
5 |
|
|
|
||
12345678901234 |
5 |
|
|
|
||
12345678901234 |
5 |
|
|
|
||
12345678901234 |
5 |
|
|
|
||
12345678901234 |
5 |
|
|
|
||
12345678901234 |
5 |
|
|
|
||
12345678901234 |
5 |
|
|
|
||
12345678901234 |
5 |
|
|
|
||
12345678901234 |
5 |
|
|
|
||
12345678901234 |
5 |
|
|
|
||
12345678901234 |
5 |
|
|
|
||
12345678901234 |
5 |
|
|
|
||
12345678901234 |
5 |
|
|
|
||
12345678901234 |
5 |
|
|
|
||
12345678901234 |
5 |
|
|
|
||
12345678901234 |
5 |
|
|
|
||
12345678901234 |
5 |
|
|
|
||
12345678901234 |
5 |
|
|
|
||
12345678901234 |
5 |
|
|
|
||
12345678901234 |
5 |
|
|
|
||
12345678901234 |
5 |
|
|
|
||
12345678901234 |
5 |
|
|
|
||
12345678901234 |
5 |
|
|
|
||
12345678901234 |
5 |
|
|
|
||
12345678901234 |
5 |
|
|
|
||
12345678901234 |
5 |
|
|
|
||
12345678901234 |
5 |
|
|
|
||
12345678901234 |
5 |
|
|
|
||
12345678901234 |
5 |
|
|
|
||
12345678901234 |
5 |
|
|
|
||
12345678901234 |
5 |
|
|
|
||
12345678901234 |
5 |
|
|
|
||
12345678901234 |
5 |
|
|
|
||
12345678901234 |
5 |
|
|
|
||
12345678901234 |
5 |
|
|
|
||
12345678901234 |
5 |
|
|
|
||
12345678901234 |
5 |
|
|
|
||
12345678901234 |
5 |
|
|
|
||
12345678901234 |
5 |
|
|
|
||
123456789012345 |
|
|
|
|
||
14 |
184950 |

ELECTRO FREEZE Soft Serve Model 88T-RMT
234567890123456 |
|
|
|
|
|
|
|
23456789012345 |
|
|
|
|
|
|
|
23456789012345 |
|
|
|
|
|
|
|
23456789012345 |
|
|
|
|
|
|
|
23456789012345 |
|
Cleaning Accessories |
|
|
|
|
|
6.1 |
|
|
|
|
|||
23456789012345 |
|
|
|
|
|
|
|
23456789012345 |
|
|
|
|
|
|
|
23456789012345 |
|
|
|
|
|
|
|
23456789012345 |
|
|
|
|
|
|
|
23456789012345 |
|
|
|
|
|
|
|
23456789012345 |
|
|
|
|
|
|
|
23456789012345 |
|
|
|
|
|
|
|
23456789012345 |
|
|
|
|
|
|
|
23456789012345 |
|
|
|
|
|
|
|
23456789012345 |
|
|
|
|
|
|
|
23456789012345 |
|
The following accessories shipped with the freezer are necessary for cleaning, |
|||||
2345678901234523456789012345 |
|
||||||
23456789012345 |
|
||||||
23456789012345 |
|
sanitizing, and disassembly/assembly: |
|
|
|
|
|
23456789012345 |
|
|
|
|
|
||
23456789012345 |
|
|
|
|
|
|
|
23456789012345 |
|
|
|
|
|
|
|
23456789012345 |
|
|
|
|
|
|
|
23456789012345 |
|
|
|
|
|
|
|
23456789012345 |
|
|
|
|
|
|
|
23456789012345 |
|
1 BRUSH - Cylinder, 4 inch diameter |
5 BRUSH - 1/4 inch diameter with an |
||||
23456789012345 |
|
||||||
23456789012345 |
|
||||||
23456789012345 |
|
|
|
|
|
|
|
23456789012345 |
|
with 36 inch handle: used to clean the |
overall length of 18-1/2 inches: used |
||||
23456789012345 |
|
||||||
23456789012345 |
|
|
|
|
|
|
|
23456789012345 |
|
cylinder. |
|
to clean the air meter hose, the small |
|||
23456789012345 |
|
|
|||||
23456789012345 |
|
|
|
|
|
|
|
23456789012345 |
|
|
|
hole in the back of the dispense head |
|||
23456789012345 |
|
|
|
||||
23456789012345 |
|
|
|
|
|
|
|
23456789012345 |
|
2 BRUSH - 9/16 inch diameter with an |
and small parts. |
|
|
||
23456789012345 |
|
|
|
||||
23456789012345 |
|
|
|
|
|
|
|
23456789012345 |
|
overall length of 30 inches: used to |
|
|
|
|
|
23456789012345 |
|
|
|
|
|
||
23456789012345 |
|
|
|
|
|
|
|
23456789012345 |
|
clean the drain tube, the mix feed |
6 TOOL - O-RING REMOVAL: aids in |
||||
23456789012345 |
|
||||||
23456789012345 |
|
|
|
|
|
|
|
23456789012345 |
|
|
|
|
|
|
|
23456789012345 |
|
tube in the ceiling of the cabinet, and |
removing o-rings from the spigot, |
||||
23456789012345 |
|
||||||
23456789012345 |
|
|
|
|
|
|
|
23456789012345 |
|
the pickup tube. |
|
head, air bleed plug, and shaft seal. |
|||
23456789012345 |
|
|
|||||
23456789012345 |
|
|
|
|
|
|
|
23456789012345 |
|
|
|
|
|
|
|
23456789012345 |
|
|
|
7 LUBRICANT - Petrol Gel: approved |
|||
23456789012345 |
|
|
|
||||
23456789012345 |
|
|
|
||||
23456789012345 |
|
3 BRUSH - 7/16 inch diameter with an |
|
|
|
|
|
23456789012345 |
|
lubricant for moving parts and o-rings. |
|||||
23456789012345 |
|
|
|
||||
23456789012345 |
|
overall length of 12 inches: used to |
|
|
|
|
|
23456789012345 |
|
|
|
|
|
||
23456789012345 |
|
clean the transfer hose, the braided |
|
|
|
|
|
23456789012345 |
|
|
|
|
|
||
23456789012345 |
|
|
|
|
|
|
|
23456789012345 |
|
hose and the air bleed opening in the |
8 KIT - O-RING: contains all o-rings |
||||
23456789012345 |
|
||||||
23456789012345 |
|
|
|
|
|
|
|
23456789012345 |
|
dispense head. |
|
and seals needing replacement on a |
|||
23456789012345 |
|
|
|||||
23456789012345 |
|
|
|
|
|
|
|
23456789012345 |
|
|
|
|
|
|
|
23456789012345 |
|
|
|
regular basis. (not shown) |
|||
23456789012345 |
|
|
|
||||
23456789012345 |
|
|
|
|
|
|
|
23456789012345 |
|
4 BRUSH - 1 inch diameter with an |
|
|
|
|
|
23456789012345 |
|
|
|
|
|
||
23456789012345 |
|
|
|
|
|
|
|
23456789012345 |
|
overall length of 12 inches: used to |
|
|
|
|
|
23456789012345 |
|
|
|
|
|
||
23456789012345 |
|
|
|
|
|
|
|
23456789012345 |
|
clean the plunger opening in the |
|
|
|
|
|
23456789012345 |
|
|
|
|
|
||
23456789012345 |
|
|
|
|
|
|
|
23456789012345 |
|
dispense head. Also use to clean the |
|
|
|
|
|
23456789012345 |
|
|
|
|
|
||
23456789012345 |
|
|
|
|
|
|
|
23456789012345 |
|
disassembled shaft seal and the head |
|
|
|
|
|
23456789012345 |
|
|
|
|
|
||
23456789012345 |
|
|
|
|
|
|
|
23456789012345 |
|
bushing. |
|
|
|
|
|
23456789012345 |
|
|
|
|
|
|
|
23456789012345 |
|
|
|
|
|
|
|
23456789012345 |
|
|
|
|
|
|
|
23456789012345 |
|
|
|
|
|
|
|
23456789012345 |
|
|
|
|
|
|
|
23456789012345 |
|
|
|
|
|
|
|
23456789012345 |
|
|
|
|
|
|
|
23456789012345 |
|
|
|
|
|
|
|
23456789012345 |
|
|
|
|
|
|
|
23456789012345 |
|
|
|
|
|
|
|
23456789012345 |
|
|
|
|
|
|
|
23456789012345 |
|
|
|
|
|
|
|
23456789012345 |
|
|
|
|
|
|
|
23456789012345 |
|
|
|
|
|
|
|
23456789012345 |
|
|
|
|
|
|
|
23456789012345 |
|
|
|
|
|
|
|
23456789012345 |
|
|
1 |
HC158004 BRUSH -4” DIA x 36” |
|
||
23456789012345 |
|
|
|
||||
23456789012345 |
|
|
|
||||
23456789012345 |
|
|
|
HANDLE |
|
|
|
23456789012345 |
|
|
|
|
|
|
|
23456789012345 |
|
|
|
|
|
|
|
23456789012345 |
|
|
|
|
|
|
|
23456789012345 |
|
|
|
|
|
|
|
23456789012345 |
|
|
|
|
|
|
|
23456789012345 |
|
2 |
HC158019 BRUSH -9/16” DIA x 30” OAL |
|
|
||
23456789012345 |
|
|
|
||||
23456789012345 |
|
|
|
|
|
|
|
23456789012345 |
|
|
|
|
|
|
|
23456789012345 |
|
|
|
|
|
|
|
23456789012345 |
|
|
|
|
|
|
|
23456789012345 |
|
|
|
|
|
|
|
23456789012345 |
|
|
|
|
|
|
|
23456789012345 |
|
HC158018 BRUSH -7/16” DIA x 12” OAL |
|
|
|
|
|
23456789012345234567890123453 |
|
|
|
|
|
|
|
23456789012345 |
|
|
|
|
|
|
|
23456789012345 |
|
|
|
|
|
|
|
23456789012345 |
|
6 HC169374 TOOL -O RING |
|
|
|
||
23456789012345 |
|
|
|
|
|||
23456789012345 |
|
|
|
|
|
|
|
23456789012345 |
|
4 HC158026 BRUSH -1” DIA x 12” LG. |
REMOVAL |
|
|
|
|
23456789012345 |
|
|
|
|
|
||
23456789012345 |
|
|
|
7 |
HC158000A |
|
|
23456789012345 |
|
|
|
|
|
||
23456789012345 |
|
|
|
|
|
|
|
23456789012345 |
|
|
|
|
LUBRICANT- |
|
|
23456789012345 |
|
|
|
|
|
|
|
23456789012345 |
|
|
|
|
|
8 |
|
23456789012345 |
5 |
HC158037 BRUSH -1/4” DIA x 18-1/2” LG. |
|
|
PETROL GEL |
HC196103 BOTTLE- |
|
2345678901234523456789012345 |
|
|
|
||||
23456789012345 |
|
|
|
|
|
|
WASH 500ml |
23456789012345 |
|
|
|
|
|
|
|
23456789012345 |
|
|
|
|
|
|
|
23456789012345 |
|
|
|
|
|
|
|
23456789012345 |
|
|
|
|
|
|
|
23456789012345 |
|
Figure 6-1 |
|
|
|
|
|
23456789012345 |
|
|
|
|
|
|
|
23456789012345 |
|
|
|
|
|
|
|
23456789012345 |
|
|
|
|
|
|
|
23456789012345 |
|
|
|
|
|
|
|
23456789012345 |
|
|
|
|
|
|
|
23456789012345 |
|
|
|
|
|
|
|
23456789012345 |
|
|
|
|
|
|
|
23456789012345 |
|
|
|
|
|
|
|
23456789012345 |
|
|
|
|
|
|
|
23456789012345 |
|
|
|
|
|
|
|
23456789012345 |
|
|
|
|
|
|
|
23456789012345 |
|
|
|
|
|
|
|
23456789012345 |
|
|
|
|
|
|
|
23456789012345 |
|
|
|
|
|
|
|
23456789012345 |
|
|
|
|
|
|
|
23456789012345 |
|
|
|
|
|
|
|
23456789012345 |
|
|
|
|
|
|
|
23456789012345 |
|
|
|
|
|
|
|
23456789012345 |
|
|
|
|
|
|
|
23456789012345 |
|
See Replacement Parts section of manual, Accessories, for additional part numbers. |
|||||
23456789012345 |
|
||||||
23456789012345 |
|
||||||
23456789012345 |
|
|
|
|
|
|
|
23456789012345 |
|
|
|
|
|
|
|
23456789012345 |
|
|
|
|
|
|
|
23456789012345 |
|
|
|
|
|
|
|
23456789012345 |
|
|
|
|
|
|
|
234567890123456 |
|
|
|
|
|
|
|
184950 |
|
|
|
|
|
|
15 |

ELECTRO FREEZE Soft Serve Model 88T-RMT
123456789012345 |
|
|
|
|
|
12345678901234 |
5 |
|
|
|
|
12345678901234 |
5 |
Disassembly Instructions |
|
|
|
|
6.2 |
|
|
|
|
12345678901234 |
5 |
|
|
|
|
12345678901234 |
5 |
|
|
|
|
12345678901234 |
5 |
|
|
|
|
12345678901234 |
5 |
|
|
|
|
1 |
2345678901234 |
5 |
|
|
|
12345678901234 |
5 |
|
|
|
|
12345678901234 |
5 |
|
|
|
|
12345678901234 |
5 |
|
|
|
|
12345678901234 |
5 |
|
|
|
|
12345678901234 |
5 |
|
|
|
|
12345678901234 |
5 |
|
|
|
|
12345678901234 |
5 |
|
|
|
|
12345678901234 |
5 |
|
|
|
|
12345678901234 |
5 |
|
|
|
|
12345678901234 |
5 |
|
|
|
|
12345678901234 |
5 |
|
|
|
|
12345678901234 |
5 |
|
|
|
|
12345678901234 |
5 |
|
|
|
|
12345678901234 |
5 |
|
|
|
|
12345678901234 |
5 |
|
|
|
|
12345678901234 |
5 |
|
|
|
|
12345678901234 |
5 |
|
|
|
|
12345678901234 |
5 |
|
|
|
|
12345678901234 |
5 |
|
|
|
|
12345678901234 |
5 |
|
|
|
|
12345678901234 |
5 |
|
|
|
|
12345678901234 |
5 |
|
|
|
|
12345678901234 |
5 |
|
|
|
|
12345678901234 |
5 |
|
|
|
|
12345678901234 |
5 |
|
|
|
|
12345678901234 |
5 |
|
|
|
|
12345678901234 |
5 |
|
|
|
|
12345678901234 |
5 |
|
|
|
|
12345678901234 |
5 |
|
|
|
|
12345678901234 |
5 |
|
|
|
|
12345678901234 |
5 |
|
|
|
|
12345678901234 |
5 |
|
|
|
|
12345678901234 |
5 |
|
|
|
|
12345678901234 |
5 |
|
|
|
|
12345678901234 |
5 |
|
|
|
|
12345678901234 |
5 |
BLEED |
|
|
|
12345678901234 |
5 |
|
|
||
12345678901234 |
5 |
|
|
|
|
12345678901234 |
5 |
|
|
|
|
12345678901234 |
5 |
|
|
|
|
12345678901234 |
5 |
|
|
|
|
12345678901234 |
5 |
|
|
|
|
12345678901234 |
5 |
|
|
|
|
12345678901234 |
5 |
|
|
|
|
12345678901234 |
5 |
|
|
|
|
12345678901234 |
5 |
|
|
|
|
12345678901234 |
5 |
|
|
|
|
12345678901234 |
5 |
|
|
|
|
12345678901234 |
5 |
|
|
|
|
12345678901234 |
5 |
|
|
|
|
12345678901234 |
5 |
|
|
|
|
12345678901234 |
5 |
|
|
|
|
12345678901234 |
5 |
|
|
|
|
12345678901234 |
5 |
|
|
|
|
12345678901234 |
5 |
|
|
|
|
12345678901234 |
5 |
|
|
|
|
12345678901234 |
5 |
|
|
|
|
12345678901234 |
5 |
|
|
|
|
12345678901234 |
5 |
|
|
|
|
12345678901234 |
5 |
|
|
|
|
12345678901234 |
5 |
|
|
|
|
12345678901234 |
5 |
|
|
|
|
12345678901234 |
5 |
|
|
|
|
12345678901234 |
5 |
|
|
|
|
12345678901234 |
5 |
|
|
|
|
12345678901234 |
5 |
|
|
|
|
12345678901234 |
5 |
|
|
|
|
12345678901234 |
5 |
|
|
|
|
12345678901234 |
5 |
|
|
|
|
12345678901234 |
5 |
|
|
|
|
12345678901234 |
5 |
|
|
|
|
12345678901234 |
5 |
|
|
|
|
12345678901234 |
5 |
|
|
|
|
12345678901234 |
5 |
|
|
|
|
12345678901234 |
5 |
|
|
|
|
12345678901234 |
5 |
|
|
|
|
12345678901234 |
5 |
|
|
|
|
12345678901234 |
5 |
|
|
|
|
12345678901234 |
5 |
|
|
|
|
12345678901234 |
5 |
|
|
|
|
12345678901234 |
5 |
|
|
|
|
12345678901234 |
5 |
|
|
|
|
12345678901234 |
5 |
|
|
|
|
12345678901234 |
5 |
|
|
|
|
12345678901234 |
5 |
|
|
|
|
12345678901234 |
5 |
|
|
|
|
12345678901234 |
5 |
|
|
|
|
12345678901234 |
5 |
|
|
|
|
12345678901234 |
5 |
|
|
|
|
12345678901234 |
5 |
|
|
|
|
12345678901234 |
5 |
|
|
|
|
12345678901234 |
5 |
|
|
|
|
1234567890123412345678901234 |
55 |
|
|
|
|
12345678901234 |
5Figure 6-2 Head Assembly |
|
|
||
12345678901234 |
5 |
|
|
|
|
12345678901234 |
5 |
|
|
|
|
12345678901234 |
5 |
|
1. |
If there is product in the freezer, |
|
12345678901234 |
5 |
|
|||
12345678901234 |
5 |
|
|||
12345678901234 |
5 |
CAUTION |
|
|
|
12345678901234 |
5 |
refer to Section 9, Closing Procedures, |
|||
12345678901234 |
5 |
|
|||
12345678901234 |
5 |
To avoid electrical shock or |
|
|
|
12345678901234 |
5 |
9.2 Draining Product. |
|||
12345678901234 |
5 |
|
|||
12345678901234 |
5 |
contact with moving parts, |
|
|
|
12345678901234 |
5 |
|
|
||
12345678901234 |
5 |
make sure all switches are in |
|
|
|
12345678901234 |
5 |
|
|
||
12345678901234 |
5 |
|
2. Remove the plunger rods (6, |
||
12345678901234 |
5 |
the “OFF” position and that |
|||
12345678901234 |
5 |
|
|
||
12345678901234 |
5 |
|
figure 6-2) by lifting up and swinging the |
||
12345678901234 |
5 |
the main power supply is |
|||
12345678901234 |
5 |
bottom out and down. Remove hand |
|||
12345678901234 |
5 |
||||
12345678901234 |
5 |
|
|||
12345678901234 |
5 |
|
|
|
|
12345678901234 |
5 |
disconnected. Some |
knobs (10) and pull the dispensing head |
||
12345678901234 |
5 |
|
|||
12345678901234 |
5 |
|
|
|
|
12345678901234 |
5 |
freezers have more than one |
(1) straight out. |
||
12345678901234 |
5 |
|
|||
12345678901234 |
5 |
disconnect switch. |
|
|
|
12345678901234 |
5 |
|
|
||
12345678901234 |
5 |
|
3. Remove the head bushings and |
||
12345678901234 |
5 |
|
|||
12345678901234 |
5 |
|
|
|
|
12345678901234 |
5 |
|
|
|
|
12345678901234 |
5 |
|
beater shafts from the cylinders. |
||
12345678901234 |
5 |
|
|||
12345678901234 |
5 |
CAUTION |
|
|
|
12345678901234 |
5 |
|
|
||
12345678901234 |
5 |
|
|
|
|
12345678901234 |
5 |
|
4. |
Remove scraper blades and |
|
12345678901234 |
5 |
Make sure freezer is |
|||
12345678901234 |
5 |
|
|
||
12345678901234 |
5 |
shaft seals from the beater shafts. |
|||
12345678901234 |
5 |
depressurized before |
|||
12345678901234 |
5 |
|
|
||
12345678901234 |
5 |
|
|
||
12345678901234 |
5 |
proceeding. |
5. |
Remove the drip tray (see Re- |
|
12345678901234 |
5 |
||||
12345678901234 |
5 |
|
|||
12345678901234 |
5 |
|
|||
12345678901234 |
5 |
|
placement Parts Manual - Panel Assem- |
||
12345678901234 |
5 |
|
|||
12345678901234 |
5 |
|
|
|
|
12345678901234 |
5 |
CAUTION |
bly) and drip tray insert from the front of |
||
12345678901234 |
5 |
||||
12345678901234 |
5 |
|
|
|
|
12345678901234 |
5 |
To prevent bacteria growth, |
the freezer. |
||
12345678901234 |
5 |
||||
12345678901234 |
5 |
|
|
|
|
12345678901234 |
5 |
remove ALL O-rings when |
|
|
|
12345678901234 |
5 |
|
|
||
12345678901234 |
5 |
|
6. |
Remove the air bleed plugs (7, |
|
12345678901234 |
5 |
|
|||
12345678901234 |
5 |
disassembling for cleaning. |
|
|
|
12345678901234 |
5 |
figure 6-2) and remove the two O-rings |
|||
12345678901234 |
5 |
|
|||
12345678901234 |
5 |
Failure to do so could |
|
|
|
12345678901234 |
5 |
(8) on each plug. (See figure 6-2) |
|||
12345678901234 |
5 |
|
|||
12345678901234 |
5 |
create a health hazard. |
|
|
|
12345678901234 |
5 |
|
|
||
12345678901234 |
5 |
|
|
|
|
12345678901234 |
5 |
|
|
|
|
12345678901234 |
5 |
|
|
|
|
123456789012345 |
|
|
|
|
|
16 |
184950 |

|
|
ELECTRO FREEZE Soft Serve Model 88T-RMT |
|
234567890123456 |
|
|
|
23456789012345 |
|
|
|
234567890123452345678901234523456789012345 |
Disassembly Instructions (continued) |
||
6.2 |
|||
23456789012345 |
|
|
|
23456789012345 |
|
|
|
23456789012345 |
|
|
|
23456789012345 |
|
|
|
23456789012345 |
|
|
|
23456789012345 |
|
|
|
23456789012345 |
|
|
11. Remove MTS cover. |
23456789012345 |
|
|
|
23456789012345 |
|
|
|
23456789012345 |
|
|
|
23456789012345 |
|
|
|
23456789012345 |
|
|
12. Remove MTS hose assemblies |
23456789012345 |
|
|
|
23456789012345 |
|
|
|
23456789012345 |
|
|
|
23456789012345 |
|
|
from the Mix Transfer Systems as follows |
23456789012345 |
|
|
|
23456789012345 |
|
CUP SEAL |
|
23456789012345 |
|
(figure 6-4): |
|
23456789012345 |
|
|
|
23456789012345 |
|
|
|
23456789012345 |
|
|
|
23456789012345 |
|
|
|
23456789012345 |
|
|
a. loosen the hand knob, |
23456789012345 |
|
|
|
23456789012345 |
|
WASHER |
|
23456789012345 |
|
|
|
23456789012345 |
|
|
|
23456789012345 |
|
|
b. swing back the shoe clamp, |
23456789012345 |
|
|
|
23456789012345 |
|
|
|
23456789012345 |
|
O-RING |
|
23456789012345 |
|
|
|
23456789012345 |
|
|
|
23456789012345 |
|
|
c. swing open the roller shoe, |
23456789012345 |
|
|
|
23456789012345 |
|
|
|
23456789012345 |
|
|
|
23456789012345 |
|
|
d. loosen the clamp on braided |
23456789012345 |
|
|
|
23456789012345 |
|
|
|
23456789012345 |
Figure 6-3 Shaft Seal |
hose, |
|
23456789012345 |
|||
23456789012345 |
|
|
|
23456789012345 |
|
|
|
23456789012345 |
|
|
|
23456789012345 |
|
|
e. pull tube off cylinder inlet and |
23456789012345 |
|
|
|
23456789012345 |
|
|
|
23456789012345 |
7. |
Remove the handle pin (9), |
slide hose assembly out of roller support |
23456789012345 |
|||
23456789012345 |
|
|
|
23456789012345 |
handles (11), plungers (4) and nozzles |
housing. |
|
23456789012345 |
|||
23456789012345 |
|
|
|
23456789012345 |
(12) from the dispense head. |
|
|
23456789012345 |
|
||
23456789012345 |
|
|
|
23456789012345 |
|
|
13. Disassemble MTS hose |
23456789012345 |
|
|
|
23456789012345 |
8. |
Remove O-rings (3) from the |
assembiles as shown in figure 6-5. |
23456789012345 |
|||
23456789012345 |
|
|
|
23456789012345 |
|
|
|
23456789012345 |
dispense head and O-rings (5) from |
|
|
23456789012345 |
|
||
23456789012345 |
|
|
|
23456789012345 |
the plungers (4). |
|
|
23456789012345 |
|
||
23456789012345 |
|
|
|
23456789012345 |
|
|
|
23456789012345 |
9. |
Remove the cup seals (figure |
|
23456789012345 |
|
||
23456789012345 |
|
||
23456789012345 |
|
|
|
23456789012345 |
6-3) and O-rings from the plastic |
|
|
23456789012345 |
|
||
23456789012345 |
|
|
|
23456789012345 |
washers on the shaft seal assemblies. |
|
|
23456789012345 |
|
||
23456789012345 |
|
|
|
23456789012345 |
|
|
|
23456789012345 |
|
|
|
23456789012345 |
10. Remove mix tanks, covers and |
|
|
23456789012345 |
|
||
23456789012345 |
|
|
|
23456789012345 |
low mix probes. |
|
|
23456789012345 |
|
||
23456789012345 |
|
|
|
23456789012345 |
|
|
|
23456789012345 |
|
|
|
23456789012345 |
|
|
|
23456789012345 |
|
|
|
23456789012345 |
|
|
|
23456789012345 |
|
|
|
23456789012345 |
|
|
|
23456789012345 |
|
|
|
23456789012345 |
|
|
|
23456789012345 |
|
|
|
23456789012345 |
|
|
|
23456789012345 |
|
|
|
23456789012345 |
|
|
|
23456789012345 |
|
|
|
23456789012345 |
|
|
|
23456789012345 |
|
|
|
23456789012345 |
|
|
|
23456789012345 |
|
|
|
23456789012345 |
|
|
|
23456789012345 |
|
|
|
23456789012345 |
|
|
|
23456789012345 |
|
|
|
23456789012345 |
|
|
|
23456789012345 |
|
|
|
23456789012345 |
|
|
|
23456789012345 |
|
|
|
23456789012345 |
|
|
|
23456789012345 |
|
|
|
23456789012345 |
|
|
|
23456789012345 |
|
|
|
23456789012345 |
|
|
|
23456789012345 |
|
|
|
23456789012345 |
|
|
|
23456789012345 |
|
|
|
23456789012345 |
|
|
|
23456789012345 |
|
|
|
23456789012345 |
|
|
|
23456789012345 |
|
|
|
23456789012345 |
|
|
|
23456789012345 |
|
|
|
23456789012345 |
|
|
|
23456789012345 |
|
|
|
23456789012345 |
|
|
|
23456789012345 |
|
|
|
23456789012345 |
|
|
|
23456789012345 |
|
|
|
23456789012345 |
|
|
|
23456789012345 |
|
|
|
23456789012345 |
|
|
|
23456789012345 |
|
|
|
23456789012345 |
|
|
|
23456789012345 |
|
|
|
23456789012345 |
|
|
|
23456789012345 |
|
|
|
23456789012345 |
|
|
|
23456789012345 |
|
|
|
23456789012345 |
|
|
|
23456789012345 |
|
|
|
23456789012345 |
|
|
|
23456789012345 |
|
|
|
23456789012345 |
|
|
|
23456789012345 |
|
|
|
23456789012345 |
|
|
|
23456789012345 |
|
|
|
23456789012345 |
|
|
|
23456789012345 |
|
|
|
23456789012345 |
|
|
|
23456789012345 |
|
|
|
23456789012345 |
|
|
|
23456789012345 |
|
|
|
23456789012345 |
|
|
|
23456789012345 |
|
|
|
23456789012345 |
|
|
|
23456789012345 |
|
|
|
23456789012345 |
|
|
|
23456789012345 |
|
|
|
23456789012345 |
|
|
Figure 6-5 MTS Hose Assembly |
23456789012345Figure 6-4 MTS |
|
||
23456789012345 |
|
|
|
23456789012345 |
|
|
|
23456789012345 |
|
|
|
23456789012345 |
|
|
|
23456789012345 |
|
|
|
23456789012345 |
|
|
|
234567890123456 |
|
|
|
184950 |
17 |

ELECTRO FREEZE Soft Serve Model 88T-RMT
123456789012345 |
|
|
|
|
12345678901234 |
5 |
|
|
|
12345678901234 |
5 |
Cleaning Instructions |
|
|
123456789012346.3 |
5 |
|
||
12345678901234 |
5 |
|
|
|
12345678901234 |
5 |
|
|
|
12345678901234 |
5 |
|
|
|
1 |
2345678901234 |
5 |
|
|
12345678901234 |
5 |
|
|
|
12345678901234 |
5 |
|
|
|
12345678901234 |
5 |
|
|
|
12345678901234 |
5 |
The cleaning instructions explained in |
|
|
12345678901234 |
5 |
|
||
12345678901234 |
5 |
|
||
12345678901234 |
5 |
|
CAUTION |
|
12345678901234 |
5 |
this section are procedures to remove |
||
12345678901234 |
5 |
|
||
12345678901234 |
5 |
To prevent bacteria growth, |
||
12345678901234 |
5 |
|
||
12345678901234 |
5 |
bacteria and maintain a clean, sanitary |
|
|
12345678901234 |
5 |
remove all O-rings when |
||
12345678901234 |
5 |
|
||
12345678901234 |
5 |
freezer. The freezer must be disas- |
|
|
12345678901234 |
5 |
cleaning. Failure to do so |
||
12345678901234 |
5 |
|
||
12345678901234 |
5 |
sembled, washed, and sanitized accord- |
|
|
12345678901234 |
5 |
|
||
12345678901234 |
5 |
|
|
|
12345678901234 |
5 |
ing to the instructions in this manual. |
could create a health |
|
12345678901234 |
5 |
|
||
12345678901234 |
5 |
Always sanitize before start-up to ensure |
|
|
12345678901234 |
5 |
|
||
12345678901234 |
5 |
|
|
|
12345678901234 |
5 |
the best possible cleanliness. |
|
|
12345678901234 |
5 |
|
||
12345678901234 |
5 |
|
|
|
12345678901234 |
5 |
|
Important: |
|
12345678901234 |
5 |
|
||
12345678901234 |
5 |
|
|
|
12345678901234 |
5 |
|
|
|
12345678901234 |
5 |
|
Do not use unapproved sanitizer or |
|
12345678901234 |
5 |
|
||
12345678901234 |
5 |
CAUTION |
|
|
12345678901234 |
5 |
laundry bleach. These materials may |
||
12345678901234 |
5 |
|
||
12345678901234 |
5 |
Electrical shock hazard. |
||
12345678901234 |
5 |
|
||
12345678901234 |
5 |
|
contain high concentrations of chlo- |
|
12345678901234 |
5 |
Do not splash water on |
||
12345678901234 |
5 |
|
||
12345678901234 |
5 |
|
rine and will chemically attack freezer |
|
12345678901234 |
5 |
|
||
12345678901234 |
5 |
switches or allow water to |
|
|
12345678901234 |
5 |
components. |
||
12345678901234 |
5 |
|
||
12345678901234 |
5 |
flow onto electrical |
|
|
12345678901234 |
5 |
|
||
12345678901234 |
5 |
components inside the |
|
|
12345678901234 |
5 |
|
||
12345678901234 |
5 |
|
NOTE: The sanitizer should be mixed |
|
12345678901234 |
5 |
|
||
12345678901234 |
5 |
machine. |
|
|
12345678901234 |
5 |
according to the manufacturer’s instruc- |
||
12345678901234 |
5 |
|
||
12345678901234 |
5 |
|
|
|
12345678901234 |
5 |
|
tions to yield 100PPM available chlorine |
|
12345678901234 |
5 |
|
||
12345678901234 |
5 |
|
|
|
12345678901234 |
5 |
|
solution (example: Stera-Sheen Green |
|
12345678901234 |
5 |
|
||
12345678901234 |
5 |
NOTE: It is your responsibility to be |
|
|
12345678901234 |
5 |
|
||
12345678901234 |
5 |
|
Label.) Use warm water (100° to 110°F |
|
12345678901234 |
5 |
aware of, and conform to, the require- |
||
12345678901234 |
5 |
|
||
12345678901234 |
5 |
|
or 38° to 43°C) to wash, rinse, and |
|
12345678901234 |
5 |
ments for meeting all federal, state, and |
||
12345678901234 |
5 |
|
||
12345678901234 |
5 |
|
sanitize. |
|
12345678901234 |
5 |
|
||
12345678901234 |
5 |
local laws concerning the frequency of |
|
|
12345678901234 |
5 |
|
||
12345678901234 |
5 |
cleaning and sanitizing the freezer. |
2. Wash all parts removed from the |
|
12345678901234 |
5 |
|||
12345678901234 |
5 |
|
|
|
12345678901234 |
5 |
|
freezer thoroughly with dish detergent. |
|
12345678901234 |
5 |
|
||
12345678901234 |
5 |
|
|
|
12345678901234 |
5 |
1. Prepare a three-compartment |
|
|
12345678901234 |
5 |
Clean the following parts with the appro- |
||
12345678901234 |
5 |
|
||
12345678901234 |
5 |
|
|
|
12345678901234 |
5 |
sink for cleaning, rinsing, and sanitizing |
priate supplied brush: |
|
12345678901234 |
5 |
|
||
12345678901234 |
5 |
parts removed from the freezer, per |
|
|
12345678901234 |
5 |
|
||
12345678901234 |
5 |
applicable local health codes. Also |
a. The mix tank, pickup tube |
|
12345678901234 |
5 |
|||
12345678901234 |
5 |
|
|
|
12345678901234 |
5 |
|
|
|
12345678901234 |
5 |
prepare a clean surface to air-dry all |
assemblies, hoses, and probes. |
|
12345678901234 |
5 |
|||
12345678901234 |
5 |
|
|
|
12345678901234 |
5 |
parts. |
|
|
12345678901234 |
5 |
|
||
12345678901234 |
5 |
|
— continued |
|
12345678901234 |
5 |
|
||
12345678901234 |
5 |
|
|
|
12345678901234 |
5 |
|
|
|
12345678901234 |
5 |
|
|
|
12345678901234 |
5 |
|
|
|
12345678901234 |
5 |
|
|
|
12345678901234 |
5 |
|
|
|
12345678901234 |
5 |
|
|
|
12345678901234 |
5 |
|
|
|
12345678901234 |
5 |
|
|
|
12345678901234 |
5 |
|
|
|
12345678901234 |
5 |
|
|
|
12345678901234 |
5 |
|
|
|
12345678901234 |
5 |
|
|
|
12345678901234 |
5 |
|
|
|
12345678901234 |
5 |
|
|
|
12345678901234 |
5 |
|
|
|
12345678901234 |
5 |
|
|
|
12345678901234 |
5 |
|
|
|
12345678901234 |
5 |
|
|
|
12345678901234 |
5 |
|
|
|
12345678901234 |
5 |
|
|
|
12345678901234 |
5 |
|
|
|
12345678901234 |
5 |
|
|
|
12345678901234 |
5 |
|
|
|
12345678901234 |
5 |
|
|
|
12345678901234 |
5 |
|
|
|
12345678901234 |
5 |
|
|
|
12345678901234 |
5 |
|
|
|
12345678901234 |
5 |
|
|
|
12345678901234 |
5 |
|
|
|
12345678901234 |
5 |
|
|
|
12345678901234 |
5 |
|
|
|
12345678901234 |
5 |
|
|
|
12345678901234 |
5 |
|
|
|
12345678901234 |
5 |
|
|
|
12345678901234 |
5 |
|
|
|
12345678901234 |
5 |
|
|
|
12345678901234 |
5 |
|
|
|
12345678901234 |
5 |
|
|
|
12345678901234 |
5 |
|
|
|
12345678901234 |
5 |
|
|
|
12345678901234 |
5 |
|
|
|
12345678901234 |
5 |
|
|
|
12345678901234 |
5 |
|
|
|
12345678901234 |
5 |
|
|
|
12345678901234 |
5 |
|
|
|
12345678901234 |
5 |
|
|
|
12345678901234 |
5 |
|
|
|
12345678901234 |
5 |
|
|
|
12345678901234 |
5 |
|
|
|
12345678901234 |
5 |
|
|
|
12345678901234 |
5 |
|
|
|
12345678901234 |
5 |
|
|
|
12345678901234 |
5 |
|
|
|
12345678901234 |
5 |
|
|
|
12345678901234 |
5 |
|
|
|
12345678901234 |
5 |
|
|
|
12345678901234 |
5 |
|
|
|
12345678901234 |
5 |
|
|
|
12345678901234 |
5 |
|
|
|
12345678901234 |
5 |
|
|
|
12345678901234 |
5 |
|
|
|
12345678901234 |
5 |
|
|
|
12345678901234 |
5 |
|
|
|
12345678901234 |
5 |
|
|
|
12345678901234 |
5 |
|
|
|
12345678901234 |
5 |
Figure 6-6 Clean head ports and openings with brush. |
||
1234567890123412345678901234 |
55 |
|||
12345678901234 |
5 |
|||
12345678901234 |
5 |
|
|
|
123456789012345 |
|
|
|
|
18 |
184950 |

ELECTRO FREEZE Soft Serve Model 88T-RMT
234567890123456 |
|
|
|
|
|
234567890123452345678901234523456789012345 |
Cleaning Instructions (continued) |
|
|
||
23456789012345 |
|
|
|||
6.3 |
|
|
|||
23456789012345 |
|
|
|
|
|
23456789012345 |
|
|
|
|
|
23456789012345 |
|
|
|
|
|
23456789012345 |
|
|
|
|
|
23456789012345 |
|
|
|
|
|
23456789012345 |
|
|
|
|
|
23456789012345 |
|
|
|
|
|
23456789012345 |
|
|
|
|
|
23456789012345 |
|
|
|
|
|
23456789012345 |
|
b. The head plunger openings, |
|
|
|
23456789012345 |
|
|
|
|
|
23456789012345 |
|
|
|
|
|
23456789012345 |
center plunger ports, O-ring grooves, |
|
|
|
|
23456789012345 |
|
|
|
||
23456789012345 |
|
|
|
||
23456789012345 |
dispense nozzle mounting rings, and mix |
|
|
|
|
23456789012345 |
|
|
|
||
23456789012345 |
|
|
|
||
23456789012345 |
|
|
|
||
23456789012345 |
ports, as shown in figure 6-6. |
|
|
|
|
23456789012345 |
|
|
|
||
23456789012345 |
|
|
|
||
23456789012345 |
|
|
|
|
|
23456789012345 |
|
c. The shaft cup seals, washers, |
|
|
|
23456789012345 |
|
|
|
|
|
23456789012345 |
|
|
|
|
|
23456789012345 |
|
|
|
|
|
23456789012345 |
and O-rings, plunger O-ring grooves and |
|
|
|
|
23456789012345 |
|
|
|
||
23456789012345 |
|
|
|
||
23456789012345 |
nozzles, as shown in figure 6-7. |
|
|
|
|
23456789012345 |
|
|
|
||
23456789012345 |
|
|
|
||
23456789012345 |
|
|
|
|
|
23456789012345 |
|
d. The air bleed plug O-ring |
|
|
|
23456789012345 |
|
|
|
|
|
23456789012345 |
|
|
|
|
|
23456789012345 |
|
|
|
|
|
23456789012345 |
grooves. |
Figure 6-7 |
Clean O-ring grooves, seal |
||
23456789012345 |
|||||
23456789012345 |
|||||
23456789012345 |
|
|
|
and nozzle with brush. |
|
23456789012345 |
|
e. The beater shaft and the |
|
||
23456789012345 |
|
|
|||
23456789012345 |
|
|
|
|
|
23456789012345 |
|
|
|
|
|
23456789012345 |
scraper blade pin holes as shown in |
|
|
|
|
23456789012345 |
|
|
|
||
23456789012345 |
|
|
|
||
23456789012345 |
figure 6-8. |
|
|
|
|
23456789012345 |
|
|
|
||
23456789012345 |
|
|
|
||
23456789012345 |
|
|
|
|
|
23456789012345 |
|
|
|
|
|
23456789012345 |
|
ÖImportant: |
|
|
|
23456789012345 |
|
|
|
|
|
23456789012345 |
|
|
|
|
|
23456789012345 |
Do not leave parts in sanitizer for |
|
|
|
|
23456789012345 |
|
|
|
||
23456789012345 |
|
|
|
||
23456789012345 |
|
|
|
||
23456789012345 |
more than 15 minutes. |
|
|
|
|
23456789012345 |
|
|
|
||
23456789012345 |
|
|
|
||
23456789012345 |
|
|
|
|
|
23456789012345 |
|
|
|
|
|
23456789012345 |
3. |
After all parts are washed, rinse |
|
|
|
23456789012345 |
|
|
|
||
23456789012345 |
|
|
|
||
23456789012345 |
|
|
|
||
23456789012345 |
and then place them in the sanitizer |
|
|
|
|
23456789012345 |
|
|
|
||
23456789012345 |
Figure 6-8 |
|
Clean beater shaft pin holes. |
||
23456789012345 |
solution. Brush the inside of all mix |
|
|||
23456789012345 |
|
||||
23456789012345 |
|
||||
23456789012345 |
transfer hoses with sanitizer. For proper |
|
|
|
|
23456789012345 |
|
|
|
||
23456789012345 |
|
|
|
||
23456789012345 |
sanitizing, the parts must remain fully |
|
|
|
|
23456789012345 |
|
|
|
||
23456789012345 |
|
|
|
||
23456789012345 |
immersed in the sanitizer for 5 minutes. |
|
|
|
|
23456789012345 |
|
|
|
||
23456789012345 |
|
|
|
||
23456789012345 |
Allow parts to air-dry after sanitizing. |
|
|
|
|
23456789012345 |
|
|
|
||
23456789012345 |
|
|
|
||
23456789012345 |
|
|
|
||
23456789012345 |
|
|
|
|
|
23456789012345 |
4. |
Using a warm dish detergent |
|
|
|
23456789012345 |
|
|
|
||
23456789012345 |
|
|
|
||
23456789012345 |
|
|
|
||
23456789012345 |
solution thoroughly brush; the mix feed |
|
|
|
|
23456789012345 |
|
|
|
||
23456789012345 |
|
|
|
||
23456789012345 |
tubes from the refrigerated cabinet to the |
|
|
|
|
23456789012345 |
|
|
|
||
23456789012345 |
|
|
|
||
23456789012345 |
cylinders as shown in figure 6-9, the |
|
|
|
|
23456789012345 |
|
|
|
||
23456789012345 |
|
|
|
||
23456789012345 |
inside of the cylinders including the back |
|
|
|
|
23456789012345 |
|
|
|
||
23456789012345 |
|
|
|
||
23456789012345 |
wall, and the inside of the drain tube, as |
|
|
|
|
23456789012345 |
|
|
|
||
23456789012345 |
|
|
|
||
23456789012345 |
shown in figure 6-10. Repeat with |
|
|
|
|
23456789012345 |
|
|
|
||
23456789012345 |
|
|
|
||
23456789012345 |
sanitizing solution and rinse with clear |
|
|
|
|
23456789012345 |
Figure 6-9 Brush inside of cylinder mix |
||||
23456789012345 |
|||||
23456789012345 |
water. |
|
|||
23456789012345 |
|
||||
23456789012345 |
|
|
|
feed tubes. |
|
23456789012345 |
|
|
|
||
23456789012345 |
|
|
|
|
|
23456789012345 |
5. |
Remove the drip tray and insert. |
|
|
|
23456789012345 |
|
|
|
||
23456789012345 |
|
|
|
||
23456789012345 |
|
|
|
||
23456789012345 |
Wash in a warm dish detergent solution |
|
|
|
|
23456789012345 |
|
|
|
||
23456789012345 |
|
|
|
||
23456789012345 |
and rinse with clear water. |
|
|
|
|
23456789012345 |
|
|
|
||
23456789012345 |
|
|
|
||
23456789012345 |
|
|
|
|
|
23456789012345 |
6. |
Wash the outside of the freezer |
|
|
|
23456789012345 |
|
|
|
||
23456789012345 |
|
|
|
||
23456789012345 |
|
|
|
||
23456789012345 |
and inside of the cabinet with a warm |
|
|
|
|
23456789012345 |
|
|
|
||
23456789012345 |
|
|
|
||
23456789012345 |
dish detergent solution. Rinse with clear |
|
|
|
|
23456789012345 |
|
|
|
||
23456789012345 |
|
|
|
||
23456789012345 |
water. |
|
|
|
|
23456789012345 |
|
|
|
|
|
23456789012345 |
|
|
|
|
|
23456789012345 |
|
|
|
|
|
23456789012345 |
|
|
|
|
|
23456789012345 |
|
|
|
|
|
23456789012345 |
Replace worn brushes. Use |
|
|
|
|
23456789012345 |
|
|
|
||
23456789012345 |
|
|
|
||
23456789012345 |
|
|
|
||
23456789012345 |
only Electro Freeze original |
|
|
|
|
23456789012345 |
|
|
|
||
23456789012345 |
|
|
|
||
23456789012345 |
|
|
|
||
23456789012345 |
or authorized replacement |
|
|
|
|
23456789012345 |
|
|
|
||
23456789012345 |
|
|
|
||
23456789012345 |
|
|
|
||
23456789012345 |
parts. See Accessories |
|
|
|
|
23456789012345 |
|
|
|
||
23456789012345 |
|
|
|
||
23456789012345 |
|
|
|
||
23456789012345 |
parts list in Part II of this |
|
|
|
|
23456789012345 |
|
|
|
||
23456789012345 |
|
|
|
||
23456789012345 |
Manual to order new |
|
|
|
|
23456789012345 |
|
|
|
||
23456789012345 |
Figure 6-10 |
|
|||
23456789012345 |
Brush inside of drain tube |
||||
23456789012345 |
|
brushes. |
|||
23456789012345 |
|
||||
23456789012345 |
|
|
|
|
|
|
|
|
|
|
|
184950 |
|
|
|
|
19 |

ELECTRO FREEZE Soft Serve Model 88T-RMT
123456789012345 |
|
|
|
|
|
|
12345678901234 |
5 |
|
|
|
|
|
12345678901234 |
5 |
|
|
|
|
|
12345678901234 |
5 |
|
|
|
|
|
123451234512345 789012347890123478901234 |
555 |
|
|
|
|
|
1 |
6.3.1 |
5 |
Cleaning and Lubricating MTS Assembly |
|||
|
2345678901234 |
|
|
|
|
|
12345678901234 |
5 |
|
|
|
|
|
12345678901234 |
5 |
|
|
|
|
|
12345678901234 |
5 |
|
|
|
|
|
12345678901234 |
5 |
|
|
|
|
|
12345678901234 |
5 |
|
|
|
|
|
12345678901234 |
5 |
NOTE: Clean the shoe weekly or when |
|
Important: |
||
12345678901234 |
5 |
|
||||
12345678901234 |
5 |
|
|
|||
12345678901234 |
5 |
necessary. Do not interchange the |
|
|
||
12345678901234 |
5 |
|
|
|||
12345678901234 |
5 |
|
|
|
|
|
12345678901234 |
5 |
|
|
Do not let shoe sit in sanitizing |
||
12345678901234 |
5 |
shoe with any other MTS shoes. |
||||
12345678901234 |
5 |
|
|
|||
12345678901234 |
5 |
|
|
solution or water. Corrosion will |
||
12345678901234 |
5 |
|
|
|||
12345678901234 |
5 |
1. |
Remove the O-rings and slide the occur in bore. |
|||
12345678901234 |
5 |
|||||
12345678901234 |
5 |
|
|
|
|
|
12345678901234 |
5 |
|
|
|
|
|
12345678901234 |
5 |
shoe off of the pivot arm and the swing |
|
|
||
12345678901234 |
5 |
|
|
|||
12345678901234 |
5 |
|
|
4. |
Lubricate the shoe pivot arm and |
|
12345678901234 |
5 |
clamp off of the clamp arm. See figure |
||||
12345678901234 |
5 |
|
|
|||
12345678901234 |
5 |
the swing clamp arm with food grade |
||||
12345678901234 |
5 |
|
|
|||
12345678901234 |
5 |
6-11. |
|
|
|
|
12345678901234 |
5 |
|
lubricant such as Petrol-Gel. |
|||
12345678901234 |
5 |
|
|
|||
12345678901234 |
5 |
|
|
|
|
|
12345678901234 |
5 |
2. |
Carry to the sink, wash in mild |
|
|
|
12345678901234 |
5 |
|
|
|||
12345678901234 |
5 |
|
|
5. |
Reassemble the shoe and O-ring |
|
12345678901234 |
5 |
|
|
|||
12345678901234 |
5 |
detergent with the brush provided and dry |
|
|
||
12345678901234 |
5 |
on pivot arm. |
||||
12345678901234 |
5 |
|
|
|||
12345678901234 |
5 |
thoroughly. |
|
|
||
12345678901234 |
5 |
|
|
|||
12345678901234 |
5 |
|
|
|
|
|
12345678901234 |
5 |
|
|
6. |
Reassemble the shoe swing |
|
12345678901234 |
5 |
|
|
|||
12345678901234 |
5 |
3. |
Brush in between rollers. Flush |
|
|
|
12345678901234 |
5 |
clamp and O-ring on the swing clamp |
||||
12345678901234 |
5 |
|
|
|||
12345678901234 |
5 |
clean with water bottle. |
||||
12345678901234 |
5 |
arm. |
|
|||
12345678901234 |
5 |
|
|
|
||
12345678901234 |
5 |
|
|
|
||
12345678901234 |
5 |
|
|
|
|
|
12345678901234 |
5 |
|
|
|
|
|
12345678901234 |
5 |
|
|
|
|
|
12345678901234 |
5 |
|
|
|
|
|
12345678901234 |
5 |
|
|
|
|
|
12345678901234 |
5 |
|
|
|
|
|
12345678901234 |
5 |
|
|
|
|
|
12345678901234 |
5 |
|
|
|
|
|
12345678901234 |
5 |
|
|
|
|
|
12345678901234 |
5 |
|
|
|
|
|
12345678901234 |
5 |
|
|
|
|
|
12345678901234 |
5 |
|
|
|
|
|
12345678901234 |
5 |
|
|
|
|
|
12345678901234 |
5 |
|
|
|
|
|
12345678901234 |
5 |
|
|
|
|
|
12345678901234 |
5 |
|
|
|
|
|
12345678901234 |
5 |
|
|
|
|
|
12345678901234 |
5 |
|
|
|
|
|
12345678901234 |
5 |
|
|
|
|
|
12345678901234 |
5 |
|
|
|
|
|
12345678901234 |
5 |
|
|
|
|
|
12345678901234 |
5 |
|
|
|
|
|
12345678901234 |
5 |
|
|
|
|
|
12345678901234 |
5 |
|
|
|
|
|
12345678901234 |
5 |
|
|
|
|
|
12345678901234 |
5 |
|
|
|
|
|
12345678901234 |
5 |
|
|
|
|
|
12345678901234 |
5 |
|
|
|
|
|
12345678901234 |
5 |
|
|
|
|
|
12345678901234 |
5 |
|
|
|
|
|
12345678901234 |
5 |
|
|
|
|
|
12345678901234 |
5 |
|
|
|
|
|
12345678901234 |
5 |
|
|
|
|
|
12345678901234 |
5 |
|
|
|
|
|
12345678901234 |
5 |
|
|
|
|
|
12345678901234 |
5 |
|
|
|
|
|
12345678901234 |
5 |
|
|
|
|
|
12345678901234 |
5 |
|
|
|
|
|
12345678901234 |
5 |
|
|
|
|
|
12345678901234 |
5 |
|
|
|
|
|
12345678901234 |
5 |
|
|
|
|
|
12345678901234 |
5 |
|
|
|
|
|
12345678901234 |
5 |
|
|
|
|
|
12345678901234 |
5 |
|
|
|
|
|
12345678901234 |
5 |
|
|
|
|
|
12345678901234 |
5 |
|
|
|
|
|
12345678901234 |
5 |
|
|
|
|
|
12345678901234 |
5 |
|
|
|
|
|
12345678901234 |
5 |
|
|
|
|
|
12345678901234 |
5 |
|
|
|
|
|
12345678901234 |
5 |
|
|
|
|
|
12345678901234 |
5 |
|
|
|
|
|
12345678901234 |
5 |
|
|
|
|
|
12345678901234 |
5 |
|
|
|
|
|
12345678901234 |
5 |
|
|
|
|
|
12345678901234 |
5 |
|
|
|
|
|
12345678901234 |
5 |
|
|
|
|
|
12345678901234 |
5 |
|
|
|
|
|
12345678901234 |
5 |
|
|
|
|
|
12345678901234 |
5 |
|
|
|
|
|
12345678901234 |
5 |
|
|
|
|
|
12345678901234 |
5 |
|
|
|
|
|
12345678901234 |
5 |
|
|
|
|
|
12345678901234 |
5 |
|
|
|
|
|
12345678901234 |
5 |
|
|
|
|
|
12345678901234 |
5 |
|
|
|
|
|
12345678901234 |
5 |
|
|
|
|
|
12345678901234 |
5 |
|
|
|
|
|
12345678901234 |
5 |
|
|
|
|
|
12345678901234 |
5 |
|
|
|
|
|
12345678901234 |
5 |
|
|
|
|
|
12345678901234 |
5 |
|
|
|
|
|
12345678901234 |
5 |
|
|
|
|
|
12345678901234 |
5 |
|
|
|
|
|
12345678901234 |
5 |
|
|
|
|
|
12345678901234 |
5 |
|
|
|
|
|
12345678901234 |
5 |
|
|
|
|
|
12345678901234 |
5 |
|
|
|
|
|
12345678901234 |
5 |
|
|
|
|
|
12345678901234 |
5 |
|
|
|
|
|
12345678901234 |
5 |
|
|
|
|
|
12345678901234 |
5 |
|
|
|
|
|
12345678901234 |
5 |
|
|
|
|
|
12345678901234 |
5 |
|
|
|
|
|
12345678901234 |
5 |
|
|
|
|
|
12345678901234 |
5 |
|
|
|
|
|
12345678901234 |
5 |
|
|
|
|
|
12345678901234 |
5 |
|
|
|
|
|
12345678901234 |
5 |
|
|
|
|
|
12345678901234 |
5 |
|
|
|
|
|
12345678901234 |
5 |
Figure 6-11 |
|
|
||
12345678901234 |
5 |
|
|
|||
12345678901234 |
5 |
|
|
|||
12345678901234 |
5 |
|
|
|
|
|
12345678901234 |
5 |
|
|
|
|
|
12345678901234 |
5 |
|
|
|
|
|
12345678901234 |
5 |
|
|
|
|
|
12345678901234 |
5 |
|
|
|
|
|
12345678901234 |
5 |
|
|
|
|
|
12345678901234 |
5 |
|
|
|
|
|
12345678901234 |
5 |
|
|
|
|
|
12345678901234 |
5 |
|
|
|
|
|
12345678901234 |
5 |
|
|
|
|
|
12345678901234 |
5 |
|
|
|
|
|
12345678901234 |
5 |
|
|
|
|
|
12345678901234 |
5 |
|
|
|
|
|
12345678901234 |
5 |
|
|
|
|
|
12345678901234 |
5 |
|
|
|
|
|
12345678901234 |
5 |
|
|
|
|
|
12345678901234 |
5 |
|
|
|
|
|
12345678901234 |
5 |
|
|
|
|
|
12345678901234 |
5 |
|
|
|
|
|
12345678901234 |
5 |
|
|
|
|
|
12345678901234 |
5 |
|
|
|
|
|
12345678901234 |
5 |
|
|
|
|
|
12345678901234 |
5 |
|
|
|
|
|
12345678901234 |
5 |
|
|
|
|
|
12345678901234 |
5 |
|
|
|
|
|
12345678901234 |
5 |
|
|
|
|
|
12345678901234 |
5 |
|
|
|
|
|
123456789012345 |
|
|
|
|
|
|
20 |
184950 |

ELECTRO FREEZE Soft Serve Model 88T-RMT
234567890123456 |
|
|
|
|
|
23456789012345 |
|
|
|
|
|
23456789012345 |
|
|
|
|
|
23456789012345 |
|
|
|
|
|
23456789012345234567890123452345678901234523456789012345 |
|
|
|
|
|
7 |
Assembly |
|
|
|
|
23456789012345 |
|
|
|
|
|
23456789012345 |
|
|
|
|
|
23456789012345 |
|
|
|
|
|
23456789012345 |
|
|
Correct assembly of the freezer is |
|
|
23456789012345 |
|
|
|
||
23456789012345 |
|
|
|
|
|
23456789012345 |
|
|
essential to prevent leakage of the |
|
|
23456789012345 |
|
|
|
||
23456789012345 |
|
|
|
|
|
23456789012345 |
|
|
product and damage to the freezer. To |
||
23456789012345 |
|
|
|||
23456789012345 |
|
|
|
|
|
23456789012345 |
|
|
assemble the freezer you will need an |
||
23456789012345 |
|
|
|||
23456789012345 |
|
|
|
|
|
23456789012345 |
|
|
approved lubricant (such as Petrol-Gel). |
||
23456789012345 |
|
|
|||
23456789012345 |
|
|
|
|
|
23456789012345 |
|
|
|
|
|
23456789012345 |
|
|
Make sure all parts of the assemblies |
|
|
23456789012345 |
|
|
|
||
23456789012345 |
|
|
|
|
|
23456789012345 |
|
|
have been washed and sanitized before |
||
23456789012345 |
|
|
|||
23456789012345 |
|
|
|
|
|
23456789012345 |
|
|
assembling. Follow these directions for |
||
23456789012345 |
|
|
|||
23456789012345 |
|
|
|
|
|
23456789012345 |
|
|
each cylinder of the freezer. |
|
|
23456789012345 |
|
|
|
||
23456789012345 |
|
CUP SEAL |
|
|
|
23456789012345 |
|
|
|
|
|
23456789012345 |
|
|
|
|
|
23456789012345 |
|
|
|
|
|
23456789012345 |
|
|
|
|
|
23456789012345 |
|
|
|
CAUTION |
|
23456789012345 |
|
|
|
|
|
23456789012345 |
|
|
|
|
|
23456789012345 |
|
|
|
To avoid electrical shock or |
|
23456789012345 |
|
|
|
|
|
23456789012345 |
|
|
|
|
|
23456789012345 |
|
WASHER |
|
|
|
23456789012345 |
|
|
contact with moving parts, |
|
|
23456789012345 |
|
|
|
|
|
23456789012345 |
|
|
|
|
|
23456789012345 |
|
|
|
make sure all switches are |
|
23456789012345 |
|
|
|
|
|
23456789012345 |
|
|
|
|
|
23456789012345 |
|
|
|
in the “OFF” position and |
|
23456789012345 |
|
|
|
|
|
23456789012345 |
|
O-RING |
|
|
|
23456789012345 |
|
|
|
|
|
23456789012345 |
|
|
|
that the main power supply |
|
23456789012345 |
|
|
|
|
|
23456789012345 |
|
|
|
is disconnected. Some |
|
23456789012345 |
|
|
|
|
|
23456789012345 |
Figure 7-1 Shaft Seal Assembly |
|
|
|
|
23456789012345 |
|
|
|
||
23456789012345 |
|
|
|
freezers have more than |
|
23456789012345 |
|
|
|
|
|
23456789012345 |
|
|
|
one disconnect switch. |
|
23456789012345 |
|
|
|
|
|
23456789012345 |
|
|
|
|
|
|
|
|
1. Persons assembling the freezer |
||
|
|
|
must first wash and sanitize their hands |
||
|
|
|
and forearms with an approved sani- |
|
|
|
|
|
tizer. |
|
|
|
23456789012345 |
|
2. |
To assemble the shaft seal, |
|
|
23456789012345 |
|
|
||
|
23456789012345 |
|
|
||
|
23456789012345 |
|
|
|
|
|
23456789012345 |
|
install the cup seal and O-ring on the |
|
|
|
23456789012345 |
|
|
||
|
23456789012345 |
|
|
|
|
|
23456789012345 |
|
bushing (see figure 7-1). Apply a light |
|
|
|
23456789012345 |
|
|
||
|
23456789012345 |
|
|
|
|
|
23456789012345 |
|
amount of approved sanitary lubricant |
|
|
|
23456789012345 |
|
|
||
|
23456789012345 |
|
|
|
|
|
23456789012345 |
|
(such as Petrol-Gel) to the O-ring and |
|
|
|
23456789012345 |
|
|
||
|
23456789012345 |
|
|
|
|
|
23456789012345 |
|
the face of the plastic washer opposite |
||
|
23456789012345 |
|
|||
|
23456789012345 |
|
|
|
|
|
23456789012345 |
|
the bell portion of the seal. Do not allow |
||
|
23456789012345 |
|
|||
|
23456789012345 |
|
|
|
|
|
23456789012345 |
|
any lubricant to come into contact with |
||
|
23456789012345 |
|
|||
|
23456789012345 |
|
|
|
|
|
23456789012345 |
|
|
|
|
|
23456789012345 |
|
the bell-shaped rubber portion of the |
|
|
|
23456789012345 |
|
|
||
|
23456789012345 |
|
|
|
|
|
23456789012345 |
|
seals. |
|
|
|
23456789012345 |
|
|
|
|
|
23456789012345 |
|
|
|
|
|
23456789012345 |
|
|
|
|
|
23456789012345 |
|
3. |
Install the shaft seal over the |
|
|
23456789012345 |
|
|
||
|
23456789012345 |
|
|
||
|
23456789012345 |
|
|
|
|
|
23456789012345 |
|
rear of the beater shaft, with the bell- |
|
|
|
23456789012345 |
|
|
||
|
23456789012345 |
|
|
|
|
|
23456789012345 |
|
shaped portion facing the rear, as |
|
|
|
23456789012345 |
|
|
||
|
23456789012345 |
|
|
|
|
|
23456789012345 |
|
shown in figure 7-2. |
|
|
|
23456789012345 |
|
|
||
|
23456789012345 |
|
|
|
|
|
23456789012345 |
|
|
|
|
|
23456789012345 |
|
|
|
|
23456789012345 |
|
|
4. |
Place the scraper blades on the |
|
23456789012345 |
|
|
|||
23456789012345 |
|
|
|
|
|
23456789012345 |
|
|
beater shaft, making sure the blades |
|
|
23456789012345 |
|
|
|
||
23456789012345 |
|
|
|
|
|
23456789012345 |
|
|
are installed properly (see figure 7-3). |
|
|
23456789012345 |
|
|
|
||
23456789012345 |
|
|
|
|
|
23456789012345 |
|
|
|
|
|
23456789012345 |
|
|
|
|
|
23456789012345 |
|
|
5. |
Install the assembled beater |
|
23456789012345 |
|
|
|
||
23456789012345 |
|
|
|
|
|
23456789012345 |
|
|
shaft into the cylinder by placing the |
|
|
23456789012345 |
|
|
|
||
23456789012345 |
|
|
|
|
|
23456789012345 |
|
|
|
|
|
23456789012345 |
|
|
rear blade on the bottom of the cylinder. |
||
23456789012345 |
|
|
|||
23456789012345 |
|
|
|
|
|
23456789012345 |
|
|
This will center the beater and allow |
|
|
23456789012345 |
|
|
|
||
23456789012345 |
|
|
|
|
|
23456789012345 |
|
|
alignment with the drive coupling. |
|
|
23456789012345 |
|
|
|
||
23456789012345 |
|
|
|
|
|
23456789012345 |
|
|
Rotate the beater assembly while |
|
|
23456789012345 |
|
|
|
||
23456789012345 |
|
|
|
|
|
23456789012345 |
|
|
pushing, until the shank has engaged |
|
|
23456789012345 |
|
|
|
||
23456789012345 |
|
|
|
|
|
23456789012345 |
|
|
the coupling. Repeat for second cylinder |
||
23456789012345 |
|
|
|||
23456789012345 |
Figure 7-3 Scraper Blade Installation |
|
|
|
|
23456789012345 |
|
|
|
||
23456789012345 |
|
|
assembly. |
|
|
23456789012345 |
|
|
|
||
23456789012345 |
|
|
|
|
|
184950 |
|
|
|
-continued |
21 |
|
|
|
|
||
Loading...