

Page 1
XM
XM
Electronic
Labelmaker
Instructions for Use
Elektronisk
Märkmaskin
Bruksanvisning
Elektroninen
Tarrakirjoitin
Käyttöohjeet
GB
S
FIN
Page 2

Dymo LetraTag XM
This product is CE marked in accordance with the CE directive and is designed to conform with
the following international standards:
Safety – BSEN 60950
- EN 61000-4-2 (1995)
- EN 61000-4-3 (1995)
- ENV 50204 (1995)
- EN 55022 (1994) + amendment 1 (1995)
- FCC Class B (part 15)
* Although unlikely, it is possible that abnormal behaviour may result from electrostatic
discharges. In such cases, should normal operation not resume, follow the relevant procedure as
detailed in the trouble-shooting section: No response to keys.
The user should avoid directly touching the thermal print head.
IEC 950
UL 1950
© 2000 Esselte N.V., Industriepark-Noord 30, 9100 Sint-Niklaas, Belgium
Page 3

A
D
1
B
C
CLICK!
E
CAPS
DYMO
labelmaker
STYLEB123
CAPS
★
➫
➙
CAPS
STYLEB123
E
R
V
P
I
E
W
PRINT
45
D
E
0
A
☎
B
¿¡:()
C
%+ = # °
D
£ÆØŒß
E
F
ЕГСХВ
G
жшœ * '
егсхв
H
I
2
F
➙
Page 4

PRINT STYLEB123
DYMO
labelmaker
L
E
C
A
R
DEL
CAPS
12345
B
A
6789
F
GH
SIZE
STYLE
KL
.
’
PQ
&
*
UVW
$
C
Æ
Z
SYMBOLS
ˆ
Ç
R
P
PRINT
CD
IJ
2
=
MN
?
!
RS
-
@
X
ß
´
O
Å
★...
★
☎
E
V
I
E
0
O
/
T
Y
¨
OK
E
W
123
’
´
Page 5
Visit our website (www.dymo.com) for information
on obtaining tapes and accessories for the LetraTag.
Power Supply
• Insert six size AA batteries, as shown in Fig. A.
• Remove batteries if the Labelmaker is to be unused for some time.
Inserting the cassette
• The Labelmaker uses paper, plastic and metallic labels.
• Insert cassette as shown in Fig. B and press until it "clicks" into place - Fig. C.
• Check that the cassette is correctly located before closing the access door.
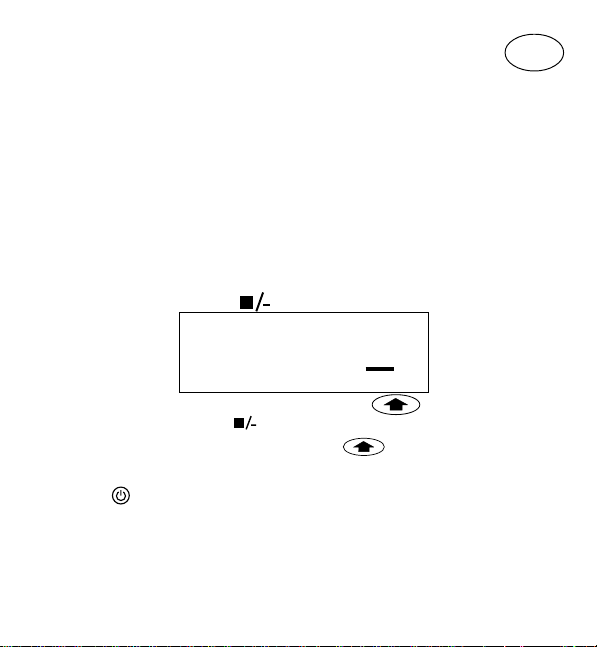
The Display
• Shows up to 6 characters plus cursor and 5 indicators ▲ as shown below.
Indicators show whether a feature is selected.
GB
CAPS
▲
STYLE
▲▲
▲
123456
CAPS = capital letters = box/underline STYLE = outline/italic etc.
B = BIG CAPS
B
▲
123
▲
= shift key
Function keys
ON/OFF
Switches the power on and off.
• Switches off automatically after two minutes if no keys are pressed. The last
label will be retained automatically in memory.
Note: If the batteries are removed for more than a few seconds,
the memory will be lost.
Page 6

CAPITALS
• Press for all subsequent characters in UPPER CASE (CAPITALS), as confirmed
by the
CAPS
indicator in the display.
• Press again to cancel and return to lower case.
SHIFT KEY
• Press before pressing a number, punctuation or function indicated above a
key.
DELETE
DEL
• Press to delete the character to the left of the cursor or to exit function menus.
L
E
C
A
R
CLEAR
+
DEL
• Press to clear all the text and stored labels but leave the last labelsettings
unchanged.
CURSOR KEYS
or
• Press to move the cursor along the text, one character at a time.
• Press
+ or to move the cursor to the beginning or end of the label or
to the beginning of the next or previous label, when labels are stored.
• When used in conjunction with certain function keys, use
options.
or to select
SPACE
• Press to insert a space into the text.
Page 7
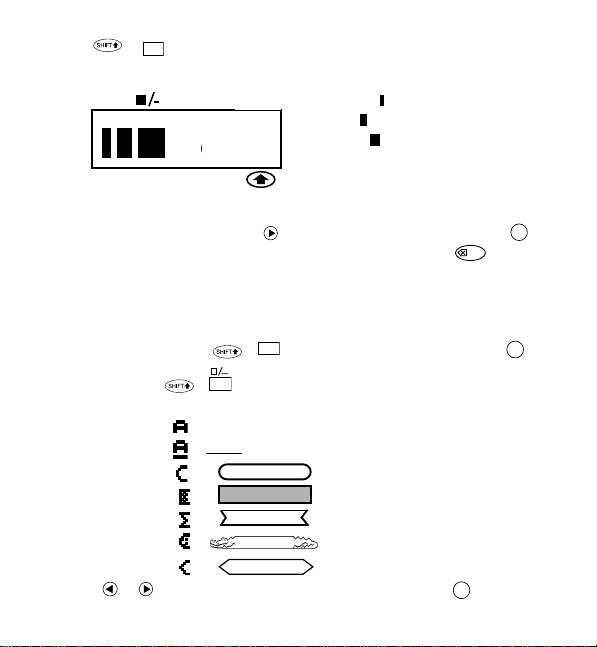
SIZE +
• Press to display the four text print sizes:
The "B" (BIG CAPS) mode will produce highly visible labels using the entire print
height.
• To create a label in "B" mode use
Note: 1. "B" can not be selected if text is entered. In that case press
• Now key in text and the label is ready to print in BIG CAPS ONLY.
• To exit “B ” mode, press
SIZE
K
CAPS
remove all text and then select "B".
2. When "B" is selected, all other options are not available.
3. Stored labels in memory can not be converted into Big font.
STYLE
BB
B
123
▲
B
SIZE
+
condensed
normal
extended
BIG CAPS B
to move the cursor under "B" and press OK.
K
and select another text size, then pressOK.
DEL
to
BOX/UNDERLINE
• There are seven options available under the BOX/UNDERLINE feature:
1. Normal -
2. Underlined -
3. Round Corners -
4. Shaded Box - =
5. Toothed Box - =
6. Crocodile Box - =
7. Pointed Box - =
• Use or to move the cursor under the desired option. Press OK.
L
+
= DYMO
= DYMO
=
DYMO
DYMO
DYMO
DYMO
DYMO
Page 8

STYLE +
STYLE
M
CAPS
STYLE
• There are 5 options available
under the STYLE menu.
OK
• Place cursor under required STYLE and press
2
=
2-LINE LABELS
+
N
• Print two lines of half height characters.
• Type the first line of text eg. DYMO and press then
The display shows an arrow (
line of your text, eg. DYMO
) to indicate the line break. Type the second
LABEL This will print as
.
Normal
Outline
Shadow
Italic
2
=
.
N
DYMO
LABEL
Note: The Box/Underline and Style features are not available on 2-line labels.
B
Vertical
123
NEW LABEL + .
• Press
Allows you to start a new label after stored labels. You may store as many labels as
you like until the memory is full when an error flash warning is given. To make
+ .
O
O
space in the memory you can edit any stored label.
INTERNATIONAL CHARACTERS
To add a diacritical (accent) to create an international character, enter the character
first, followed by the diacritical.
ˆ
Eg. a +
a +
= á
+ ˆ = â
Page 9

SYMBOLS
★
★
SYMBOLS
☎
Press followed by the space bar ( ) to access symbols and special
characters. The display will show: A-H? (or A-F? if "B" has been selected)
DEL
Press
symbols required. See table.
Use
to cancel, or press a letter key ‘A’ to ‘H’ until you find the line of
or to select a symbol. Press OK to place the symbol in the label.
Printing a label
• To print a label place the cusor anywhere within the label and press
PRINT PREVIEW
Allows you to preview all your labels before printing.
• Press
+
PRINT
CUTTING A LABEL
• To cut a label push the cutter forward as shown in Fig. E.
E
R
V
P
I
E
W
PRINT
+
E
R
V
P
I
E
W
and all labels in memory will scroll across the display.
✂
• The label has a split in the backing for easy removal, as shown in Fig. F.
PRINT
.
Cleaning
• Check and clean the print head regularly to ensure optimum print quality - see
Fig. D.
• Using the cleaning tool D1 supplied, clean the print head as shown in D2.
Troubleshooting
No display
• check machine is on
• check batteries and replace if necessary
No response to keys
• remove batteries for a few minutes then refit. The Labelmaker will now reset
No printing or poor text
• check batteries and replace if necessary
• check tape cassette installed correctly and not empty
• clean print head (see ‘Cleaning’)
Page 10

Print contrast
For use under extreme temperature or humidity conditions.
• Press + + 'X'.
• The display will show the five contrast symbols
• Use
or to select lighter or darker print and press OK to set.
Flashing !!!!!!!! in the display
• !!!!!!!! in the display indicates that the tape can not be transported.
• Press any key to return to normal display.
• Check if there is a tape jam. In that case, lift out the cassette and carefully
release jammed tape. Cut off excess tape and refit/replace the cassette.
• If there is no tape jam, replace the batteries.
No success?
• call the customer service telephone number - see warranty booklet.
.
Page 11

Label cassettes
Type: Paper Plastic Metallic
Length: 4m 4m 4m
White 91220 ------ -----Pearl White ------ 91221 -----HyperYellow ------ 91222 -----Cosmic Red ------ 91223 -----Acid Green ------ 91224 -----Ultra Blue ------ 91225 -----Smiles (Yellow) ------ 91206 -----Feet (Blue) ------ 91227 -----Party ------ 91342 -----Silver ------ ------ 91228
Green ------ ------ 91229
Assorted Pack 91241:
1 x paper white
1 x plastic yellow
1 x metallic silver
Page 12

Besök vår hemsida (www.dymo.com) för information
om var du finner taper och tillbehör till Letratag.
Strömförsörjning
• Sätt i sex batterier storlek AA enligt fig A.
• Ta ur batterierna om märkmaskinen ej skall användas under längre tid.
Sätta i kassetten
• Märkmaskinen hanterar pappers-, plast- och metalletiketter.
• Sätt i kassetten enligt fig B och tryck tills den snäpper i med ett “klick“ - fig C.
• Kontrollera att kassetten sitter korrekt på plats innan du stänger luckan.
Displayen
• Visar upp till 6 tecken, markören och 5 indikatorer enligt bilden nedan.
Indikatorerna visar om en funktion valts.
CAPS
▲
STYLE
▲
▲▲
123
B
▲
S
123456
CAPS = VERSALER
= box/understrykning
STYLE = outline/kursiv etc.
B = STORA VERSALER
= shift-tangent
▲
Funktionstangenter
TILL/FRÅN
Kopplar till och från strömmen.
• Stängs av två minuter efter senaste tangenttryckning. Senaste etikett sparas
automatiskt i minnet.
Page 13

VERSALER
• När denna tangent tryckts in skrivs alla följande tecken som VERSALER (STORA
CAPS
BOKSTÄVER). Detta visas med indikatorn CAPS på displayen.
• Tryck igen för att återgå till små bokstäver (gemena).
SHIFT-tangenten
• Tryck på innan du skriver in en siffra, ett interpunktionstecken eller en
funktion som indikeras över tangenten.
RADERA
• Raderar tecknet till vänster om markören eller avslutar funktionsmenyn.
CLEAR (rensa)
DEL
L
E
C
A
R
+
DEL
• Tryck för att radera all text och lagrade etiketter men spara etikettinställningar.
PILTANGENTER
eller
• Flyttar markören längs texten, ett tecken i taget.
• Tryck
+ eller för att flytta markören till början eller slutet av etiketten,
eller till början eller slutet av nästa etikett, när etiketter är lagrade.
• Använd
eller för att i samband med vissa funktionstangenter välja
alternativ.
MELLANSLAG
• Tryck på för att lägga in ett mellanslag i texten
SIZE (storlek)
+
SIZE
K
• Tryck för att visa de fyra teckenstorlekarna:
CAPS
STYLE
B
B
▲
123
B
komprimerad
normal
dubbel
STORA VERSALER B
“B“ (STORA VERSALER) ger tydliga etiketter med text över hela etikettens
tryckhöjd.
• Skapa en etikett i “B“-mode genom att placera markören under “B“ med
trycka på
OK
.
och
• När “B“ valts är inga andra alternativ tillgängliga.
Page 14

Märk: 1. “B“ kan inte använcas efter att text matats in. Om så är fallet, tryck
DEL
för att ta bort all text, välj sedan “B“ och skriv texten igen.
2. Lagrade etiketter kan inte konverteras till “B“.
• När du skrivit in texten är etiketten klar för utskrift i enbart STORA VERSALER.
• Avsluta “B“-mode genom att trycka på +
OK
tryck sedan på
BOX/UNDERSTRYKNING
.
+
L
SIZE
K
och välja annan textstorlek,
• Det finns sju alternativ under funktionen BOX/UNDERSTRYKNING:
+
= DYMO
= DYMO
=
STYLE
M
DYMO
DYMO
DYMO
DYMO
DYMO
1. Normal -
2. Understruken -
3. Rundade hörn -
4. Skuggad box - =
5. Tandad box - =
6. Krokodilbox - =
7. Pilbox - =
• Använd eller för att flytta markören till önskat alternativ. Tryck på OK.
STYLE (stil)
• Det finns fem alternativ under STYLE menyn.
CAPS
STYLE
123
B
Normal
Outline
Skuggad
Kursiv
Vertikal
• Placera markören under önskad STYLE och tryck på OK.
Page 15

2
=
2-RADIGA ETIKETTER +
• Skriv två rader med halva teckenhöjden.
• Skriv första textraden, tex DYMO och tryck på
Displayen visar en vinklad pil (
N
och sedan
) som indikerar radbrytningen. Skriv den
2
=
.
N
andra textraden, tex DYMO LABEL
Detta skrivs ut som
DYMO
LABEL
OBS: Funktionerna Box/understrykning och stil finns ej för 2-radiga etiketter.
NY ETIKETT
Tryck
Möjliggör att börja med en ny etikett efter en lagrad etikett. Du kan spara hur
många etiketter du vill tills minnet är fullt och en varningssignal blinkar. För att
plus
O
O
frigöra minne kan du ta bort valfri lagrad etikett.
INTERNATIONELLA TECKEN
Lägg till diakritiska tecken (accenter) för att skapa internationella tecken genom att
skriva tecknet först och därefter det diakritiska tecknet.
´
a +
= ä
+ ´ = à
Ex: a +
SYMBOLS
★
★
SYMBOLER
Tryck på följt av mellanslag ( ) för att kunna skriva symboler och
specialtecken. Displayen klommer att visa: A-H? (eller A-F? om "B" är vald)
• Tryck på
☎
DEL
för att avbryta eller tryck på bokstavstangent “A“ till “H“ tills du
hittar önskad symbolrad. Se tabell.
• Använd
eller för att markera en symbol. Tryck på OK för att föra över
symbolen till etiketten.
Page 16

Skriva ut en etikett
• För att skriva ut en etikett placeras markören inom etikettettexten,
tryck sedan
PREVIEW (förhandsgranska)
Gör det möjligt att förhandsgranska etiketten före utskrift.
• Tryck
displayen.
KLIPPA ETIKETT
• Klipp etiketten genom att skjuta saxen framåt enligt fig E.
• Etiketten är försedd med perforerad skyddsfilm för att lätt kunna dras av, se fig F.
PRINT
.
E
R
V
P
I
E
W
+
PRINT
E
R
V
P
I
E
W
PRINT
och alla etiketter i minnet kommer att "rulla" förbi i
✂
Rengöring
• Kontrollera och rengör skrivhuvudet regelbundet för att garantera optimal
utskriftkvalitet – se fig D.
• Rengör skrivhuvudet med bifogat rengöringsredskap D1, se D2.
Felsökning
Ingen display
• Kontrollera att maskinen är påslagen
• Kontrollera batterierna och byt vid behov
Reagerar ej på tangenttryckningar
• Avlägsna batterierna i några minuter och sätt sedan i dem igen. Märkmaskinen
återställs nu.
Ingen utskrift eller svag text
• Kontrollera batterierna och byt vid behov
• Kontrollera att kassetten är korrekt isatt och inte är tom
• Rengör skrivhuvudet (se “Rengöring“)
Utskriftskontrast
Används under extrema temperatur- eller luftfuktighetsförhållanden.
• Tryck på
• Använd
att spara inställningen.
+ + 'X'. Displayen visar de fem kontrastsymbolerna .
eller för att välja ljusare eller mörkare utskrift och tryck på OK för
Page 17

Blinkande !!!!!!!! i displayen
• !!!!!!!! som blinkar i displayen indikerar att tapen ej kan matas fram
• Tryck på någon tangent för att återgå till normal läge
• Se efter om tapen strasslat. Om så är fallet lyft ur kassetten och lossna försiktigt
tapen. Klipp av överskottet av tapen och sätt tillbaks kassetten
• Om det inte är något tapetrassell, byt batterier.
Lyckades ej?
• Ring kundservice – numret finns på garantibeviset.
Kassetter
Typ: Papper Plast Metall
Längd: 4m 4m 4m
White 91220 ------ -----Pearl White ------ 91221 -----HyperYellow ------ 91222 -----Cosmic Red ------ 91223 -----Acid Green ------ 91224 -----Ultra Blue ------ 91225 -----Smiles (gul) ------ 91226 -----Feet (Blå) ------ 91227 ------
Party ------ 91342 -----Silver ------ ------ 91228
Green ------ ------ 91229
Assorted Pack 91241:
1 x paper white
1 x plastic yellow
1 x metallic silver
Page 18

Lisätietoja Letratagin teipeistä sekä lisävarusteista
saat WWW-sivuiltamme osoitteessa www.dymo.com.
FIN
Virransyöttö
• Aseta paikoilleen kuusi AA-kokoista paristoa kuten kuvassa A on esitetty.
• Poista paristot, jos tarrakirjoitin on pitkään käyttämättä.
Kasetin asettaminen
• Letratag käyttää paperi-, muovi- ja metalliteippiä.
• Aseta kasetti kuten kuvassa B ja paina, kunnes se napsahtaa paikalleen – kuva C.
• Varmista, että kasetti on oikein asetettu, ennen kuin suljet kotelon.
Näyttö
• Näytöllä esitetään jopa 6 merkkiä sekä kohdistin ja 5 osoitinta ▲ kuten alla on
esitetty. Osoittimet kertovat, onko jokin toiminto käytössä.
CAPS
▲
STYLE
▲▲
▲
123
B
▲
123456
CAPS = Isot kirjaimet = Kehystetty / alleviivattu
STYLE = ääriviiva/kursiivi jne B = BIG CAPS (SUURAAKKOSET)
= Vaihtonäppäin
▲
Toimintonäppäimet
ON/OFF
Kytkee virran päälle (ON) ja pois (OFF).
• Virta kytkeytyy automaattisesti pois, jos näppäimistöä ei käytetä kahteen
minuuttiin.Viimeksi tehty tarra säilyy muistissa aiemmin tallennettujen tarrojen
kanssa ja se esitetään näytöllä, kun virta seuraavan kerran kytketään.
Huom.: Jos paristot poistetaan muutamaa sekuntia pidemmäksi ajaksi, valmis teksti
ja tarran asetukset häviävät.
Page 19

ISOT KIRJAIMET
• Paina näppäintä kirjoittaaksesi kaikki seuraavat kirjaimet ISOLLA
(SUURAAKKOSET), ja toiminto vahvistetaan näytön CAPS -osoittimella.
CAPS
• Paina näppäintä uudelleen, jos haluat poistaa toiminnon käytöstä ja palata
pienaakkosiin.
VAIHTONÄPPÄIN
• Paina ja sitten näppäintä, jonka yläpuolella haluamasi numero, välimerkki
tai toiminto on esitetty.
POISTO
DEL
• Painamalla poistonäppäintä poistat kohdistimen vasemmalla puolella olevan
merkin, tai poistut toimintovalikosta.
TEKSTIN TYHJENNYS
• Painamalla tyhjennysnäppäintä poistat kaiken tekstin ja tallennetut tarrat, mutta
tarran asetukset jäävät ennalleen.
KOHDISTINNÄPPÄIMET
L
E
C
A
R
+
DEL
tai
• Painamalla kohdistinnäppäintä siirrät kohdistinta tekstissä merkin kerrallaan.
• Paina
+ tai siirtääksesi kursorin tarran alkuun tai loppuun, tai
seuraavan tai edellisen tarran alkuun, kun tarroja on talletettu muistiin.
• Tiettyjen toimintonäppäinten käytön yhteydessä käytetään
tai
vaihtoehtojen valintaan.
VÄLINÄPPÄIN
• Painamalla välinäppäintä lisäät tekstiin välilyönnin.
TEKSTIKOKO
+
SIZE
K
Näyttö osoittaa valitun tulostuskoon:
CAPS
STYLE
B
B
▲
123
B
Tiivistetty Normaali Levennetty
SUURAAKKOSET (BIG CAPS) B
Page 20

“B” (BIG CAPS)-tila tuottaa erittäin näkyviä tarroja käyttämällä koko
tulostuskorkeutta.
• Tuottaaksesi tarran “B”-tilassa siirrä kohdistin “B”:n alle käyttämällä
OK
.
paina
Huom.: 1. “B”-tilaa ei voi valita, jos tekstiä on jo kirjoitettu. Jos näin on, käytä
DEL
poistaaksesi kaiken tekstin ja valitse sitten “B”.
ja
2. Kun “B” on valittuna, muita vaihtoehtoja ei voi käyttää.
3. Muistiin tallennettuja tarroja ei voi muuntaa BIG CAPS-tilaan.
• Kirjoita nyt teksti ja tarra on valmis tulostettavaksi SUURAAKKOSILLA.
• Poistuaksesi “B”-tilasta, paina
SIZE
K
+
ja valitse sitten muu koko, ja paina OK.
KEHYS / ALLEVIIVAUS
+
L
• Tässä toiminnossa (BOX/UNDERLINE) on seitsemän vaihtoehtoa:
Normaali Alleviivattu Pyöristetty Varjostettu - =
Hammastettu - =
Krokotiili - =
Terävä - =
= DYMO
= DYMO
=
DYMO
DYMO
DYMO
DYMO
DYMO
• Siirrä kohdistin tai avulla haluamasi vaihtoehdon alle. Paina OK.
TYYLI
STYLE
+
M
CAPS
STYLEB123
• Tyyli (STYLE)-valikossa on viisi vaihtoehtoa.
OK
• Sijoita kohdistin haluamasi tyylin alle ja paina
.
Kursiivi
Ääriviiva
Normaali
Varjostettu
Pystyteksti
Page 21

2
=
KAKSIRIVISET TARRAT +
• Voit tulostaa kaksirivisiä tarroja puolikorkeilla merkeillä.
• Kirjoita ensin ensimmäinen rivi, esim. DYMO ja paina
Näytölle tulee rivinvaihtoa osoittava nuoli (
DYMO
TARRA.Tämä tulostuu seuraavasti:
N
). Kirjoita toinen tekstirivi, esim.
ja
2
=
.
N
DYMO
TARRA
Huom.: Kehys/Alleviivaus sekä tyyliominaisuudet EIVÄT ole käytettävissä
kaksirivitarroilla.
UUSI TARRA
Paina
Mahdollistaa uuden tarran aloittamisen tallennettujen jälkeen. Voit tallentaa niin
monta tarraa kuin haluat, kunnes muisti on täynnä ja vilkkuva varoitus näkyy.
ja
O
Vapauttaaksesi muistitilaa voit muokata mitä tahansa muistissa olevaa tarraa.
KANSAINVÄLISET MERKIT
Jos haluat lisätä aksentin, näppäile ensin haluamasi merkki ja sitten aksentti.
´
Esim. a +
SYMBOLIT
SYMBOLS
= ä
+ ´ = à
a +
★
★
☎
• Paina ja välilyönti ( ) saadaksesi näyttöön symboleja ja
erikoismerkkejä.
• Näytössä näkyy: A-H ? (tai A-F? jos “B” on valittu)
• Paina
DEL
peruuttaaksesi toiminnon ,tai paina “A” – “H” kunnes löydät
haluamasi symbolin.Katso taulukko.
• Paina
tai valitaksesi symbolin. Paina OK laittaaksesi symbolin tarraan.
Page 22

Tarran tulostaminen
• Tulosta tarra sijoittamalla kohdistin mihin tahansa tarrassa ja painamalla
E
R
V
P
I
E
W
ESIKATSELU
Voit esikatsella tarran ennen sen tulostamista.
• Paina
poikki.
TARRAN LEIKKAAMINEN
PRINT
E
R
V
P
I
E
W
+
ja kaikki muistissa olevat tarratekstit vierivät näytön
PRINT
✂
• Leikkaa tarra painamalla vipua eteenpäin kuten näet kuvassa E.
• Teippien taustapaperi on halkaistu pituussuunnassa poiston helpottamiseksi.
Katso kuva F.
Puhdistaminen
• Tarkista ja puhdista tulostuspää säännöllisesti varmistaaksesi parhaan
tulostusjäljen. ks. kuva D.
• Puhdista tulostuspää puhdistusvälineellä D kuten kuvassa D2 esitetään.
Häiriöiden selvittäminen
Näyttö on tyhjä
• Tarkista, että laite on kytketty päälle.
• Vaihda tyhjentyneet paristot tarvittaessa.
Näppäimmistö ei toimi
• Poista paristot muutamaksi minuutiksi. Letratag palaa alkutilaan.
Teksti ei tulostu tai tulostuu huonosti
• Tarkista paristot ja vaihda ne tarvittaessa.
• Tarkista, että teippikasetti on oikein asennettu ja teippiä on jäljellä.
• Puhdista tulostuspää ( ks. “Puhdistus”).
Tulostuksen tummuusaste (Print Contrast)
Käytetään äärilämpötiloissa ja kosteissa olosuhteissa.
• Paina
Näytöllä esitetään viisi tummuusasteen symbolia
• Valitse tummempi tai vaaleampi tulostus käyttämällä
painamalla
+ + 'X'.
OK
.
.
tai ja valitse
PRINT
.
Page 23

Vilkkuva !!!!!!!! näytöllä
• Näytössä oleva !!!!!!!! kertoo, ettei teippi siirry.
• Paina jotain näppäintä palauttaaksesi normaalinäytön.
• Tarkista, onko kyseessä teippitukos. Poista kasetti ja selvitä mahdollinen
tukkeuma varovasti. Leikkaa ylimääräinen teippi pois ja aseta kasetti paikoilleen
tai vaihda kasetti tarvittaessa.
• Jos kyseessä ei ole teippitukos, vaihda paristot.
Ei auttanut?
• Soita DYMO-asiakaspalveluun, jonka numeron saat takuuvihkosesta.
Teippikasetit
Tyyppi: Paperi Muovi Metalli
Pituus: 4m 4m 4m
Valkoinen 91220 ------ -----Valkoinen ------ 91221 -----Hyper Keltainen ------ 91222 -----Cosmic Punainen ------ 91223 -----Vihreä ------ 91224 -----Ultra Sininen ------ 91225 -----Smiles Keltainen ------ 91226 -----Feet Sininen ------ 91227 -----Juhla ------ 91342 -----Hopea ------ ------ 91228
Vihreä ------ ------ 91229
Lajitelmapakkaus 91241:
1 x paperi valkoinen
1 x muovi keltainen
1 x metalli hopea
Page 24

Esselte NV 2000
 Loading...