


Contents
About Your New La bel Maker .................................................................................................................................5
Warranty Registration........................................................................................................................................................................ 5
Getting Started .....................................................................................................................................................5
Connecting the Power ........................................................................................................................................................................5
Connecting the Power Adapter ......................................................................................................................................................5
Inserting the Batteries ...................................................................................................................................................................5
Inserting the Tape Casset te ................................................................................................................................................................5
Settings ................................................................................................................................................................ 6
Selecting a Language .........................................................................................................................................................................6
Setting the Current Date .................................................................................................................................................................... 6
Setting the Current Time .................................................................................................................................................................... 7
Selecting Units of Measure................................................................................................................................................................. 7
Printing Your First Label .....................................................................................................................................................................7
Getting to Know the Label Maker ........................................................................................................................... 7
Power ................................................................................................................................................................................................ 7
LCD Display .........................................................................................................................................................................................7
CAPS Mode ......................................................................................................................................................................................... 8
Shift Key ............................................................................................................................................................................................. 8
Space Bar ............................................................................................................................................................................................8
Backspace ........................................................................................................................................................................................... 8
Cancel ................................................................................................................................................................................................8
Navigation Keys .................................................................................................................................................................................8
Connecting to Your Computer ................................................................................................................................ 8
Formatting Your Label ....................................................................................................................................................................... 8
Changing the Font ............................................................................................................................................................................. 8
Adding Font Sty les .............................................................................................................................................................................9
Adding Box and Background Sty les ....................................................................................................................................................9
Creating Multi-Line Labels ............................................................................................................................................................... 10
Using Mixed Formats ........................................................................................................................................................................ 10
Using Tabs ........................................................................................................................................................................................ 10
Using Symbols and Special Charac ters .................................................................................................................. 10
Adding International Characters ......................................................................................................................................................10
Currency Symbols ............................................................................................................................................................................. 11
Adding Date and Time ......................................................................................................................................... 12
Changing the Date Format ............................................................................................................................................................... 12
Adding the Date to Your Label .......................................................................................................................................................... 12
Changing the Time Format ............................................................................................................................................................... 12
Adding the Time to your Label ......................................................................................................................................................... 12
2

Printing O ptions ................................................................................................................................................. 12
Printing Multiple Copies ................................................................................................................................................................... 12
Serializing Your Labels ..................................................................................................................................................................... 13
Printing a Fixed-Length L abel .......................................................................................................................................................... 13
Adding Barcodes to Labels .............................................................................................................................................................. 13
Previewing Your Label...................................................................................................................................................................... 14
Aligning the Text .............................................................................................................................................................................. 14
Changing the Cutting Option ...........................................................................................................................................................14
Adjusting the Print Contrast ............................................................................................................................................................. 14
Using Labe l Maker Memory.................................................................................................................................. 14
Storing Label Text ............................................................................................................................................................................ 14
Storing Formats ................................................................................................................................................................................ 15
Recalling Stored Labels and Formats ............................................................................................................................................... 15
Caring for Your Label Maker ................................................................................................................................. 15
Troubleshooting ................................................................................................................................................. 16
DYMO D1 Tape Cassettes ...................................................................................................................................... 17
Power Adapter .................................................................................................................................................... 17
Documentation Feedback .................................................................................................................................... 18
Environmental Information ................................................................................................................................ 18
3

1,2...n
Enter
P
O
L
K
I
U
J
HG
B
V
F
T
C
D
R
E
S
X
0
987
65
4
3
2
1
?
w
w
w
.
d
y
m
o
.
c
o
m
!
N
Clear
Cancel
CAPS
SPACE
&
–
+
,
=
/
,
Y
Shift Shift
Language
Settings
Memory
Insert
Preview
Symbols
20 21
22 23 24 25
1
2
3
19
18
17
4
5
6
7
16
9
10
11
1112131415
8
Figure 1 LabelManager 450D Professional Label Maker
Auto cut ter
1
Tape exit
2
LCD display
3
Cutter
4
Print
5
Cancel
6
Navigation
7
Return/Enter
8
Currency
9
Clear/Delete
10
Shift
11
Space bar
12
Memory
13
Preview insert
CAPS
Tab
Language
Settings
14
15
16
17
18
Power
19
AC power conne ctor
20
21
22
23
24
25
USB connec tor
Font Size/Style
Font/Fixed Length
Underline-Box/Align
Symbo ls
4

About Your New Label Maker
With your new DYMO LabelManager™ 450D label maker, you
can create a wide variety of high-quality, self-adhesive labels.
You can choose to print your labels in many differ ent font sizes
and styles. The label maker uses DYMO D1 tape cassettes in
widths of 6 mm, 9 mm, 12 mm, 19 mm, or 24 mm. These tape
casset tes are available in a wide range of materials.
Visit www.dymo.com for information on obtaining labels
and accessories for your label maker.
To insert the batteries
Remove the bat tery compartment cover. See Figure 2. 1.
Warranty Registration
Visit www.dymo.com/registration to register your label
maker online.
Getting Started
Follow the instructions in this sec tion to print your fir st label.
Connecting the Power
The label maker can operate on AC or bat tery power. To save
power, the label maker will au tomatically turn off after t wo
minutes of inac tivity.
Connecting the Power Adapter
An optional 9 Volt, 1.5 A power adapter can also be used to
power the label maker. Connecting the AC adapter to the label
maker disconnects the batteries as a power source.
To connect the power adapter
Plug the power adapter into the power connector on t he 1.
top, left side of the label maker.
Plug the other end of the power adapter into a power 2.
outlet.
x Make sure the label maker power is turned o before you
disconnec t the power adapter from the main power source.
Otherwise, your most r ecent memory sett ings will be lost.
Inserting the Batteries
The label maker uses six 1.5 volt high-capacit y AA alkaline
batteries.
Figure 2
Insert the batteries following the polarit y markings 2.
(+ and –).
Replace the bat tery compartment cover.3.
x Remove the bat teries if the label maker will not be used
for a long period of time.
Inserting the Tape Cassette
Your label maker comes with one DYMO D1 tape cassette.
Visit www.dymo.com for information about purchasing
additional t ape cassettes.
To insert the tape cassette
Press and release the tape c assette cover to open the tape 1.
compartment. See Figure 3.
Figure 3
5

x The first time you use t he label maker, remove the
Language
Settings
protect ive cardboard inser t from between the print head
and pinch roller. See Figure 4.
Remove
cardboard
insert
Figure 4
Insert the casset te with the tape and ribbon positioned 2.
between t he guideposts. See Figure 5.
Figure 5
Press firmly until cassette clicks into place. 3.
Close the tap e cassette cover and press 4.
pow er.
The Tape Settings menu automatic ally appears
immediately after inserting a new tape cassette.
Use the arrow keys to select the tape width of the tape 5.
cassette currently in the label maker and press H
A to turn on the
.
Settings
You can set the language, current date and time, and the unit s
of measure you want the label maker to us e.
Selecting a Language
You can select f rom a number of different language options.
By default, the language is se t to English.
To select a language
Press 1.
.
Use the arrow keys to select the language and press 2. H.
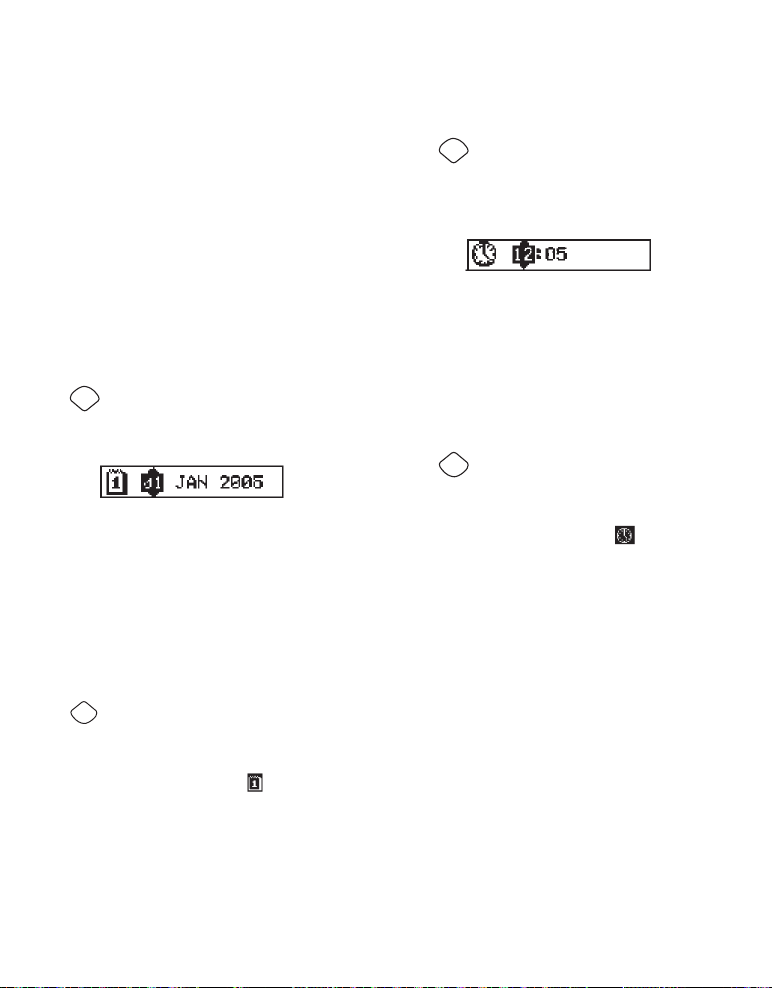
Setting the Current Date
The default date format depends upon the language selec tion
for the label maker. You can change the default date format
by following the instruc tions in Changing the Date Format
on page 12.
To set the date
Press 1.
.
Select 2. Set Date, and pre ss H.
The default date is displayed.
Click !!
Figure 6
6
Move the cursor over each set ting (month, day, and year) 3.
and use the arr ow keys to increase or decreas e the value.
When finished, press 4. H.

Setting the Current Time
Settings
Settings
1,2...n
BIG
The default t ime format depends upon the language selection
for the label maker. You can change the default time format
by following the instruc tions in Changing the Time Format
on page 12.
To set the time
Press 1.
Select 2. Set Time, and press H.
The default t ime is displayed.
.
Getting to Know the Label Maker
The following sections describe each feature in detail. Become
familiar with the location of the feature and function keys on
your label maker. See Figure 1.
Power
The A button turns the power on and off. Af ter two minutes
of no activ ity, the power is switched of f automatically.
The last label c reated is remembered and displayed when
the power is turned back on. The previously selected s tyle
settings are also restored.
Move the cursor over each set ting (hours and minutes) and 3.
use the arrow key s to increase or decrease the value.
When finished, press 4. H.
Selecting Units of Measure
You can choose to show measurements in inches or
millimeters. The default units of measure depends upon the
language chosen.
To set the units of measure
Press 1.
Use the arrow keys to select 2. Set Units and press H.
Select inches or millimeters and pre ss 3. H.
.
Printing Your First Label
You are now ready to print yo ur first label.
To print a label
Enter text to c reate a simple label.1.
Press 2.
The Auto Cut feature is turned on by default. To disable the
Auto Cut feature, see Changing the Cutting Option on
page 14.
Remove the label.3.
Congratulations! You have printed your fir st label. Continue
reading to learn more about the options available for creating
labels.
. The label is automatically cut.
LCD Display
The label maker ’s LCD display shows a row of up to 16
characters. However, you can enter up to 99 charac ters and
spaces.
The display window can accommodate 16 upper-case
characters. As you t ype more character s, they begin to scroll
to the left. The number of character s actually displayed can
vary due to proportional spacing.
In addition, feature indicators appear on the display to let you
know when a feat ure is selected. See Figure 7.
Font and Size Style Scroll
Auto Cut
CAPS mod e
Align/Justify
Fixed Length
Multiple Lines
Figure 7
# of Copies
Underline/Box
Mixed For mats
7

CAPS Mode
CAPS
Shift
Shift
Clear
Shift
Clear
Clear
Shift
Clear
Cancel
The
key toggles capitalization on and off. When CAPS
mode is turned on, the CAPS mo de indicator is shown on the
display and all let ters that you enter will be capitalized. The
default setting is C APS mode on. When CAPS mode is off, all
letters entered appear in lower case.
Shift Key
The
key, when used in combination with an alphabet
key, changes the case of the selec ted letter. When used in
combination with number keys or function keys, the
key
select s the alternate function shown on the key. For example,
when you press
deleted; however, when you press
, the charac ter to the left of the cur sor is
+
together, the
entire label te xt and formatting is deleted and the display is
ready for you to t ype a new label.
Space Bar
The Space bar inserts one or more blank spaces in your tex t.
Backspace
The
key removes the character to the left of the cursor.
+
clears all label text and formatting.
Cancel
The
key allows you to exit from a menu wi thout making a
selection or to cancel an action.
Navigation Keys
With the keys, you can review and edit your label, and
navigate through the menus. Use the left and right arrow keys
to move the curs or along the label text or to move through
fields. Us e the up and down arrow keys to increase or decrease
settings and to selec t menu items, and then press
accept the selection.
H to
Connecting to Your Computer
Your label maker can be used as a standalone label printer or
you can print labels from your computer using DYMO L abel
Soft ware. Your label maker connects to your computer using
the USB connection located on the top of the label maker. See
Figure 8.
Figure 8
Refer to the Labe lManager 450D Quick Start Card for installation
instruc tions and the DYMO Label Software User Guide for
information about designing and printing labels.
Formatting Your Label
You can choose fr om a number of formatting options to
enhance the appearance of your labels.
x The label maker remembers the last feature s election
made so that each t ime you enter one of the feature menus
described in this sec tion, you are positioned at the last item
selecte d from that menu.
Changing the Font
Seven fonts are available for your labels:
Arial Narrow
Arial Normal
Arial Wide
Times New Roman
When you speci fy a font, that font applies to all charac ters
on the label. If you want to use more than one font, you mus t
insert format break s. See Using Mixed Formats on page 10
for more information.
BIG
8

To set the font
DY MO
LabelManager 450D
Press the 1. ke y.
Use the arrow keys to move to the desire d font and then 2.
press
H.
Adding Font Styles
You can choose fr om many different font s tyles to apply to
your text:
Normal
Bold
Italic
Outline
Shadow
3D
Strikethrough
Ver tical
Mirror
Italic + Bold
Italic + Outline
Italic + Shadow
Italic + 3D
Adding Box and Background Styles
You can further highlight your text by choosing a box,
underline, or background st yle. You can also use label text
stored in memory as background tex t on your label. See
Storing Label Text on page 14 for information on storing
text in memory.
A label can be underlined or enclosed in a box or background,
but not both together. The styles available are shown in
Figure 9.
≥
›
¢
√
¿
Underline
Square Box
Pointed Box
Rounded Box
Crocodile Box
Scroll Box
3D Box
Dots
Wood Grain
Bricks
When you selec t a style, that style applies to all character s on
a label. If you want to use more than one s tyle, you must insert
format breaks. See Using Symbols and Special Characters
on page 11 for more infor mation on printing symbols.
To set the font style
Press the 1. ke y.
Use the arrow keys to move to the desire d style and then 2.
press
H.
Checkers
Parquet
Diamonds
Weave
Text Background
Figure 9
x Background p atterns are not available for 6 mm labels.
9

Insert
Preview
Settings
æ
To set the box style
Press the 1. key.
Select a f rame style and then press 2.
On multi-line labels, all lines are underlined. In box style
mode, all lines are enclosed in one box style.
H.
To select a text background
Press the 1. ke y.
Select 2. Text Background and then press
The first memory location is displayed.
Use the arrow keys to select the stored text you wish to us e 3.
as a background and press
Tex t on p age 14.
H. Refer to Storing L abel
H.
Creating Multi-Line Labels
The number of lines you can print on a label depends on the
width of the lab el you are using:
Maximum of f ive lines on 19 mm and 24 mm labels •
Maximum of three lines on 9 mm and 12 mm labels •
Maximum of one line on 6 mm labels•
To create a multi-line label
Type the text for the fir st line, and press 1. Enter.
A new line charac ter
in the display, but will not print on the label.
Type the text for the second line. 2.
The display shows the line on which you are currently
entering tex t. The example below indic ates that the second
line is the current line on the label.
Use the arrow keys to move between lines.3.
is placed at the end of the fir st line
Using Mixed Formats
You can apply dif ferent fonts and format styles to the text on a
label by inser ting format breaks to divide the label into blocks
or sections of text. Each sec tion is separated by a format break.
You can add two format breaks, allowing you to apply three
separate formats to a label.
Alignment, underline, box st yles, and background pat terns
cannot be mixe d on a label. These styles are common to the
entire label.
To add a format break
Enter and format text for t he first section.1.
Press 2.
Select 3. Insert Format Break and press
Continue entering and formatting tex t for the next sec tion of
the label.
.
H.
Using Tabs
You can add tabs to a label to align text on multi-line labels.
Tabs are left jus tified and the default spacing is 50 mm.
To change the tab spacing
Press 1.
.
Select 2. Set Tab Length and press
Use the up and down arrow keys to increase or decrease the 3.
tab setting, and then press
H.
H.
To insert a tab
Enter your tex t.1.
Press the 2.
key and continue entering tex t.
Using Symbols and Special
Characters
Symbols and other special characters c an be added to labels.
Adding International Characters
The label maker supports the extended Latin characer set
using RACE technology. Similar to using a mobile phone
keypad, if you t ype a letter multiple times within a ver y short
time, you will scroll through variations on that letter.
For example, if French is selec ted as the language and you
repeatly pre ss the letter a, you will see a à á â ã ä å and so on
through all the variations available. The charac ter variations
and the order in w hich the variations appear depend on the
language you have selected to us e.
10

Currency Symbols
Symbols
The currency key also uses RACE to scroll through a number of
currenc y symbols:
€ £ $ ¢ ¥
The order these symbols appear depends on the language you
have selected.
Adding Symbols
The label maker supports the extended symbol s et as shown
in Figure 10.
To add a symbol
Press 1.
appears in the display.
Use the arrow keys to move to the desire d symbol. 2.
The left and right arrows move horizont ally along a row
of symbols. The up and down arrow keys scroll vertically
through the rows of symbols.
To quickly see a row of s ymbols, you can press the letter
correspon ding to the row you want.
When you locate the desired s ymbol, press 3. H to add the
symbol to your label text.
. The first row of symbols shown in the t able
Figure 10
11
Adding Date and Time
Settings
Insert
Preview
Settings
Insert
Preview
You can add the date and time to your labels.
Changing the Date Format
You can choose fr om 12 different date format s:
24/12 /20 04 12/24/2004
24/12 /04 12/ 24/0 4
24 Dec 2004 Dec 24, 2004 (US default)
24 Dec 04 (EU default) Dec 24, 04
24 December 2004 December 24, 2004
24 December 04 December 24, 04
To change the date format
Press 1.
, select S et Date, and press H.
Use the arrow keys to select the date format and press 2.
The display shows the currently set date.
Use the arrow keys to change each part of the date (month, 3.
day, year) and press H after each part.
Adding the Date to Your Label
The date can be added as fixe d text (the date remains the
same) or as variable text that is automatically updated with
the current date when the label is actually printed.
To add the date
Press 1.
.
Select 2. Insert Date and press
Select 3. FIXED DATE or AUTOM. UPDATED and press
When Autom. Updated is selec ted, a date
on your label. When Fixed Date is sele cted, the actual date is
inserted on your label in the format spec ified.
H.
icon is inser ted
H.
H.
Changing the Time Format
You can choose to show the time in 12-hour format or 24-hour
format.
To set the time format
Press 1.
, select S et Time, and press H.
Use the arrow keys to select the time format (24 Hour Clock 2.
or 12 Hour Clock) and pre ss H.
The display shows the default time.
Use the arrow keys to change each part of the time (hours 3 .
and minutes) and press H after each part.
Adding the Time to your Label
The time can be added as fi xed text (the current time) or as
variable tex t that is automatically updated with the c urrent
time when the label is actually printed.
To add the time
Press 1.
.
Select 2. Insert Time and press
Select 3. Fixed Time or Autom. Updated and press
When Autom. Updated is selec ted, a time
on your label. When Fixed Time is se lected, the actual time is
inserted on your label in the format spec ified.
H.
H.
icon is inser ted
Printing Options
You can print multiple copies of a label at one time, print
serialized labels, add a barcode, print fixed-length labels,
review label te xt and format, and adjus t the printing contrast.
Printing Multiple Copies
You can print up to 16 copies of a label at one time. When
printing multiple copies, a dotted cut-line is printed between
each label.
12

To print multiple copies of the label
Settings
1,2...n
Settings
Shift
1,2...n
Shift
Settings
Press 1.
Select 2. Set # Copies and press
Press the up ar row key to increase the number of copies 3.
to print.
Press the down arrow key to begin decreasing the number 4.
of copies from 16.
Press 5.
Press 6.
x You may notice a brief pause in printing between each
label for more complex formats.
When printing is finishe d, the number of copies to print
returns to the default value of 1.
.
H.
H.
to begin printing.
Serializing Your Labels
You can print a serie s of labels with the last number
incremented by one number. The number of labels serialized
depends upon the number of copies you selec ted to print. Only
the last series of number s that follows any letter, space, or
punctuation will be ser ialized. For example, abc123 will print
as abc123, abc124, abc125; and 123-998 will print as 123-998,
123-999, 123-1000, and so on.
To serialize your labels
Enter the tex t for your label.1.
Press 2.
Press the up ar row key to increase the number of 3.
increment s to print and press .
Press 4.
The labels automatically print, each label incremented by one
number.
and then select Set # Copies.
+
.
Printing a Fixed-Length Label
Normally, the lengt h of the label is determined by the length
of the text entered. However, you may wish to make a label
for a specific purpose that is a fixed length regardless of t he
length of the te xt.
You can specif y a fixed length for a label in 2 mm increments
between 4 0 mm and 400 mm. The prese t fixed length is
100 mm. Any change you make to the fixed-length setting
remains in ef fect until you change it.
To set the label length
Press 1.
+ .
Press the up ar row to select 2. Fixed Length On and then
press
H.
Use the arrow keys to set the lengt h.3.
Press 4.
H.
After you pr int the label, you must reset the fixed-length label
setting to OFF; otherwise, all your subsequent labels will print
with this f ixed length.
Adding Barcodes to Labels
The label maker can print barcodes in six standard format s:
UPCA, UPCE, E AN8, EAN13, CODE39, and CODE128.
You can print a barcode on 19 mm and 24 mm label tape; and
you can print only one barcode p er label.
The barcode pr ints horizontally along the label with the text
in small print underneath the barcode. You can optionally
add text before and af ter the barcode. Or, you can add tex t
above or below the b arcode by creating a two-line label. See
Creating Multi-Line Labels on page 10.
Four of the standard barcodes require a f ixed number of
characters to generate the barcode: EAN8, EAN13, UPCA, and
UPCE. CODE39 and CODE128 barcodes allow a variable numb er
of characters to be entered.
To set the barcode type
Press 1.
Select 2. Set Barco de and press
Use the arrow keys to select the barcode t ype and press 3.
One or more question mark s appear between the barcode
symbols (
You may see a 0 in the far right position for some barcode
types. This is a check digit and will be replaced with a
number when the barcode data is entered.
Enter the data for the barcode, replacing the que stion 4.
marks, and press
.
H.
H.
).
H when finished.
13

Settings
Settings
Memory
Once you selec t a barcode type, that se tting remains until you
Insert
Preview
1,2...n
Shift
Insert
Preview
Shift
select a different barcode t ype.
To insert a barcode
Enter the tex t you wish to appear before the barcode on the 1.
label. (Optional)
Press 2.
.
Select 3. Insert Barco de and press
H.
Enter any text you wish to appear af ter the barcode. 4.
(Optional)
Press 5.
.
Previewing Your Label
You can preview the text or format of your label pr ior to
printing. A t wo-line label is previewe d as a single-line label.
To preview your label
Press 1.
+
.
Select 2. Tex t or Format, and then press
If you selec t Te xt, the text of the label scrolls across the display.
If you selec t Format, the format sele cted displays brief ly.
H.
Aligning the Text
When you print a f ixed length label you can choose to align
the text at the left, center, or right side of the label. For multiline labels, all lines of text are aligned lef t, center, and right
relative to each other.
To align the text
Press 1.
+ .
Select the desired alignment and pres s 2.
The alignment setting remains active until you rese t the
alignment.
H.
Changing the Cutting Option
You can choose to have each label automatically cut af ter
printing or you can manually cut the labels using t he
By default, labels are cut automatically. When manual cutting
is selected and you print multiple copie s or serialized labels, a
dotted cu t-line is printed between each label.
key.
To change the cutting option
Press 1.
.
Select 2. Set Auto Cut and p ress
Select 3. On or Off, and then press
H.
H.
This setting will remain until you change it.
Adjusting the Print Contrast
You can adjust the print contrast to fine tune the print quali ty
of your label.
To set the contrast
Press 1.
.
Select 2. Set Contrast and press
Select a contrast setting and press 3.
H.
H.
Using Label Maker Memory
The label maker has a powerful memory feature that stores
text and formatting as follows:
Automatically stores the last fif teen labels printed.•
Allows you to store the text of up to ten labels you use •
frequently.
Allows you to name and s tore up to ten commonly used •
label formats.
Storing Label Text
The label maker automatically keeps the last f ifteen labels
printed in a text buf fer. In addition, you can store up to ten
specif ic labels you use frequently.
To store the current label text
Press 1.
.
Select 2. Save and then press
Use the arrow keys to select 3. Label and then press
fields, which represent memory locations, are displayed.
Fields that are f illed indicate store d label text. You can
store new tex t in any of the memory locations. However,
if you selec t a location that is filled, the previous label tex t
will be overw ritten.
Select a memory loc ation and press 4.
Your label text is s aved and you are re turned to the label.
H.
H. Ten
H.
14

Storing Formats
Memory
Memory
Shift
Shift
In addition to label text, you can store up to ten specif ic
label formats you use frequently. This feat ure stores only the
formatting information not the label text.
Ten fields, which represent memory loc ations, are displayed.
You can store new for mats in any of the fields, however, if you
select a location that is filled, the previous label format will b e
overwritten.
To store the current format
Press 1.
Select 2. Save and press
Select 3. Format and press
Select a f ield and press 4.
the field.
Enter a name for the format and press 5.
format is saved and you are returned to the labe l.
.
H.
H.
H. The word Name? appears in
H. Your label
Recalling Stored Labels and Formats
You can easily recall labels and formats stored in memory to
use at a later time.
To recall labels or formats
Press 1.
Select 2. Recall and then Label, Format, or Last Pr inted.
A list of memor y locations is displayed similar to storing a
label or format.
Select a label or format to recall and press 3.
.
H.
To clean the cutter blade
Press 1. A to turn of f the power.
Open tape cassette compartment and remove cassette.2.
Press 3.
and A together. The me ssage, Cut Test,
appears on the display.
Press the 4.
repeatedly, while holding the
will move into view in small steps.
When you are able to access both sides of the blade, release 5.
the keys.
Use a cotton ball and alcohol to clean both sides of the 6.
cutter blade.
+
keys together, then press the
down. The cut ter blade
è The cutter blade is extremely sharp. Use caution when
cleaning.
After cleaning the blade, pre ss 7.
home position.
You can also follow this p rocedure if the cutter blade become s
lodged in the f orward position and will not move.
To clean the print head
Remove the tape c assette.1.
Remove the cleaning tool from inside the label 2.
compartment cover.
Gently wipe the padded side of the tool acro ss the print 3.
head. See Figure 11.
to return the blade to its
Caring for Your Label Maker
Your label maker is designed to give you long and trouble-f ree
service, while requiring very lit tle maintenance.
Clean your label maker from time to time to keep it work ing
properly. Clean the cutter blade each time you replace the tape
cassette.
Figure 11
15

Troubleshooting
Review the following possible solutions i f you encounter a problem while using your label maker.
Problem /Error Message Solution
No display Ensure the l abel maker is turned o n.•
Replace dis charged batte ries.•
Poor Print Q uality Replace bat teries or att ach power adapter.•
Set Contr ast to higher level. •
See Adju sting the Print C ontrast.
Ensure tap e cassette is in stalled proper ly.•
Clean the pr int head.•
Replace the t ape cassett e.•
Poor Cutt er Performance Clean the cu tter blade.
Printi ng . . . No actio n required. Mess age disappear s when printing is f inished.
Too many char acters
Exceed ed maximum number o f characters
Too many lines
Exceed ma ximum number of lin es
Inser t Tape Cass ette
Tape casset te missing or empt y.
Batter y low
Batter ies almost disc harged
Tape Jam
Motor is st alled due to label jam
Too many pages
Exceed ed maximum number o f format breaks a llowed
Page not em pty Delete all co ntent on the page.
See Car ing for Your Label Ma ker.
Delete so me or all of the buff er text.
Delete a lin e to fit on the tape w idth.•
Insert a w ider tape casse tte.•
Insert a n ew tape casset te
Replace bat teries or conne ct AC power adapter.
Remove jamme d label; replace tape c assette. •
Clean cut ter blade.•
Change lab el layout
Tape size too sm all Change lab el size or change the fo rmatting on the l abel.
Set
Fixed-l ength label sele cted and the lengt h necessary to p rint
the label e xceeds the selec ted length.
Followin g this message, a fi xed-length val ue is displayed which i ndicates •
the minimu m label length nece ssary to fit t he text. Do one of th e following:
Adjust the f ixed-lengt h label setting a ppropriately, or•
Selec t a narrower font size.•
If you still need assistance, contact DYMO Customer Suppor t. See Contacting Customer Suppor t at the back of this User Guide to
locate the contact number for your count ry.
16

DYMO D1 Tape Cassettes
Width:
Length:
Black/Clear
Blue/Clear
Red/Clear
Black/Wh ite
Blue/White
Red/White
Black/Blue
Black/Red
Black/Yellow
Black/Green
White/Clear
White/Black
Width:
Length:
Flexible Nylon
Width:
Length:
Permanent Polyester
6 mm
7 m
S0720770
43610
9 mm
7 m
S0720670
40910
___ ___
___ ___
S0720780
43613
___
___
___
___
S0720790
43618
___
S0720680
409 13
S0720690
40914
S0720700
409 15
S0720710
40916
S0720720
40 917
S0720730
40918
S0720740
409 19
___ ___
___ ___
6 mm
3,5 m
9 mm
3,5 m
___ ___
6 mm
5,5 m
9 mm
5,5 m
___ ___
12 mm
7 m
S072 0500
45010
S0720510
450 11
S0720520
45012
S0720530
45013
S0720540
45014
S0720550
45015
S0720560
45016
S0720570
45017
S0720580
45018
S0720590
45019
S0720600
45020
S072 0610
45021
12 mm
3,5 m
S0718040
16957
12 mm
5,5 m
S0718060
16959
19 mm
7 m
S0720820
45800
24 mm
7 m
S0720920
53710
___ ___
___ ___
S0720830
45803
S0720840
45804
S0720850
45805
S0720860
45806
S0720870
45807
S0720880
45808
S0720890
45809
S072090 0
45810
S0720 910
458 11
19 mm
3,5 m
S0718050
16958
19 mm
5,5 m
S0718070
16960
S0720 930
53713
S0720940
53714
S0720950
53715
S072096 0
53716
S0720970
53717
S072098 0
53718
S0720990
53719
S07210 00
53720
S0721010
53721
24 mm
3,5 m
___
24 mm
5,5 m
___
Power Adapter
UK Adapter S0721430/40075 European Ad apter S 0721440/40076
17

Documentation Feedback
We are constantly working to produce the highest quality documentation for our products. We welcome your feedback.
Send us your comments or sugge stions about our user guides. Please inc lude the following information with your feedback:
Product name, version number, and page number•
Brief description of content (instructions that are inaccurate or unclear, areas where more detail is needed, and so on)•
We also welcome your suggestions about additional topics you would like to see covered in the documentation.
Send email messages to: documentation@dymo.com
Please keep in mind that this email address is only for documentation feedback. If you have a technical question, please contact
Customer Support.
Environmental Information
The equipment that you have bought requires the e xtraction and us e of natural resources for i ts production. It may contain
substances that are hazar dous to health and the environment.
In order to avoid the dissemination of those subs tances in our environment, an d to diminish the pressure on natural resources, we
encourage you to use the appropriate take-back systems. These systems will reuse or recycle most of the materials of your end-oflife equipment in an environmentally sound way.
The crosse d-bin symbol marked on your device indic ates you should use these systems.
If you need more information on the collec tion, reuse, and recycling of this product, please contact your local or regional waste
administration.
You can also contac t us for more information on the environmental performance of our product s.
This product is CE marked in accordance with the EMC directive and the low voltage directive and is designed to conform with the following international standards:
US FCC Class B Compatibility
Safety - UL, CUL, TUV, CE, T-Mark, SAA, BABT, C-Tick
EMC - EMI Compatibility
EN 55022; EN 61000 (+ addendums)
RoHS 2002/95/EC
18

CONTACTING CUSTOMER SUPPORT
COUNTRY TELEPHONE SUPPORT FAX SUPPORT
UNITED KINGDOM 020 73 41 55 29 + 31 20 581 93 80
IRELAND 014 118 934 + 31 20 581 93 80
FRANCE 01 69 32 49 32 + 31 20 581 93 80
NEDERLAND 020 581 93 86 020 581 93 80
BELGIË BELGIQUE 02 713 38 08 + 31 20 581 93 80
DEUTSCHLAND 069 66 56 85 29 + 31 20 581 93 80
ÖSTERREICH 01 599 14 20 12 + 31 20 581 93 80
SCHWEIZ SUISSE 044 342 04 66 + 31 20 581 93 80
SVERIGE 08 632 00 57 + 31 20 581 93 80
NORGE 22 97 17 10 + 31 20 581 93 80
DANMARK 35 25 65 08 + 31 20 581 93 80
SUOMI 09 229 07 04 + 31 20 581 93 80
ITALIA 02 45 28 13 08 + 31 20 581 93 80
ESPAÑA 91 662 31 49 + 31 20 581 93 80
PORTUGAL 21 120 61 64 + 31 20 581 93 80
POLSKA 022 349 15 02 + 31 20 581 93 80
MAGYAR 01 777 49 31 + 31 20 581 93 80
ČESKÁ REPUBLIKA 239 000 448 + 31 20 581 93 80
SLOVENSKÁ REPUBLIKA + 420 603 216 958 + 31 20 581 93 80
AUSTRALIA 1800 633 868 1800 727 537
NEW ZEALAND 0800 848 111 09 257 1080
HONG KONG 852 2690 4003 852 2690 4005
INTERNATIONAL + 31 20 50 40 566 + 31 20 581 93 80

©2007 DYMO
A Newell Rubb ermaid company
DYMO bvba
Industriepark-N oord 30
9100 Sint-Niklaas
931655
Belgium
www.dymo.com
 Loading...