

Duke AHPO-18 Installation Manual
Short 3/4” screws
AHPO/EPO D
OOR REPLACEMENT INSTRUCTIONS
This procedure will instruct how to remove and install
a Standard door or an Air-Wash door.
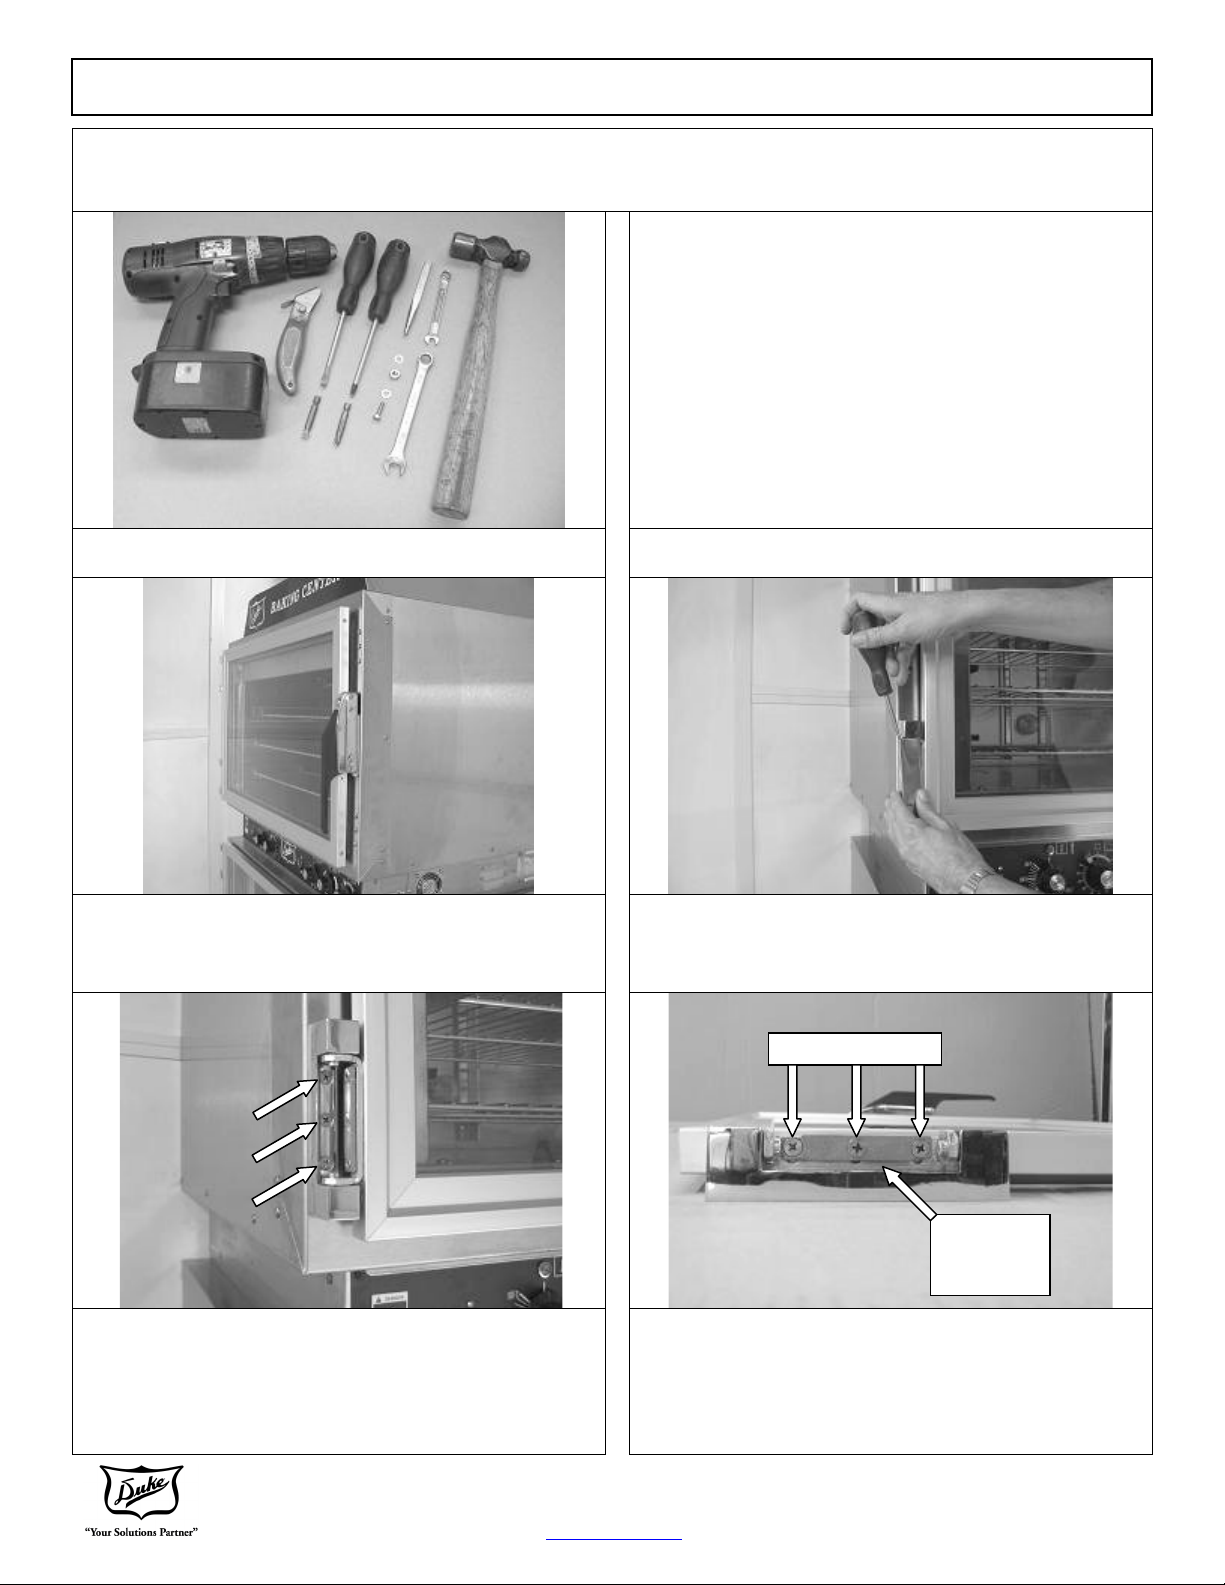
-Box Knife
-Tape Measure or ruler
-Flat tip screwdriver (5/16”) and #2 Phillips screwdriver,
or a Cordless Drill (preferred) with screwdriver tips
-Center punch and Hammer
-#10 flat washer, #10 lock washer with internal teeth,
-Hex head screw 10-24x1”, -1/4 – 20 nut, and open-end
wrenches to fit the nut and screw head.
-Silicone Sealer, Aluminum in color, NSF 51 compliant,
and rated for 350ºF.
Tools Required
1. Turn “OFF” the unit and allow it to cool.
Then close the door so that the magnetic handle is
holding the door closed.
Tool Descriptions
2. Remove hinge covers with a screwdriver by gently
pushing them out of the hinge side as shown.
3. Remove the 1” long screws which hold the hinges to
the frame, and carefully remove the old door.
4. For doors without hinges, mount the hinges to the
door with the new short 3/4” screws.
Adjust the hinge as far as possible towards the gasket.
For Air-Wash doors without hinges:
Use short 3/4” screws to fasten the hinges to the door.
Long 1” screws will damage the inner door.
DUKE MANUFACTURING CO.
Broadway • St. Louis, MO 63102
800.735.3853 • 314.231.1130 • 314.231.5074 Fax
www.dukemfg.com
Adjust to
show the
most ridges
512944 rev.B
Page 1 of 4
doors
AHPO/EPO D
OOR REPLACEMENT INSTRUCTIONS
Long space
at top
Adjust to
show the
most ridges
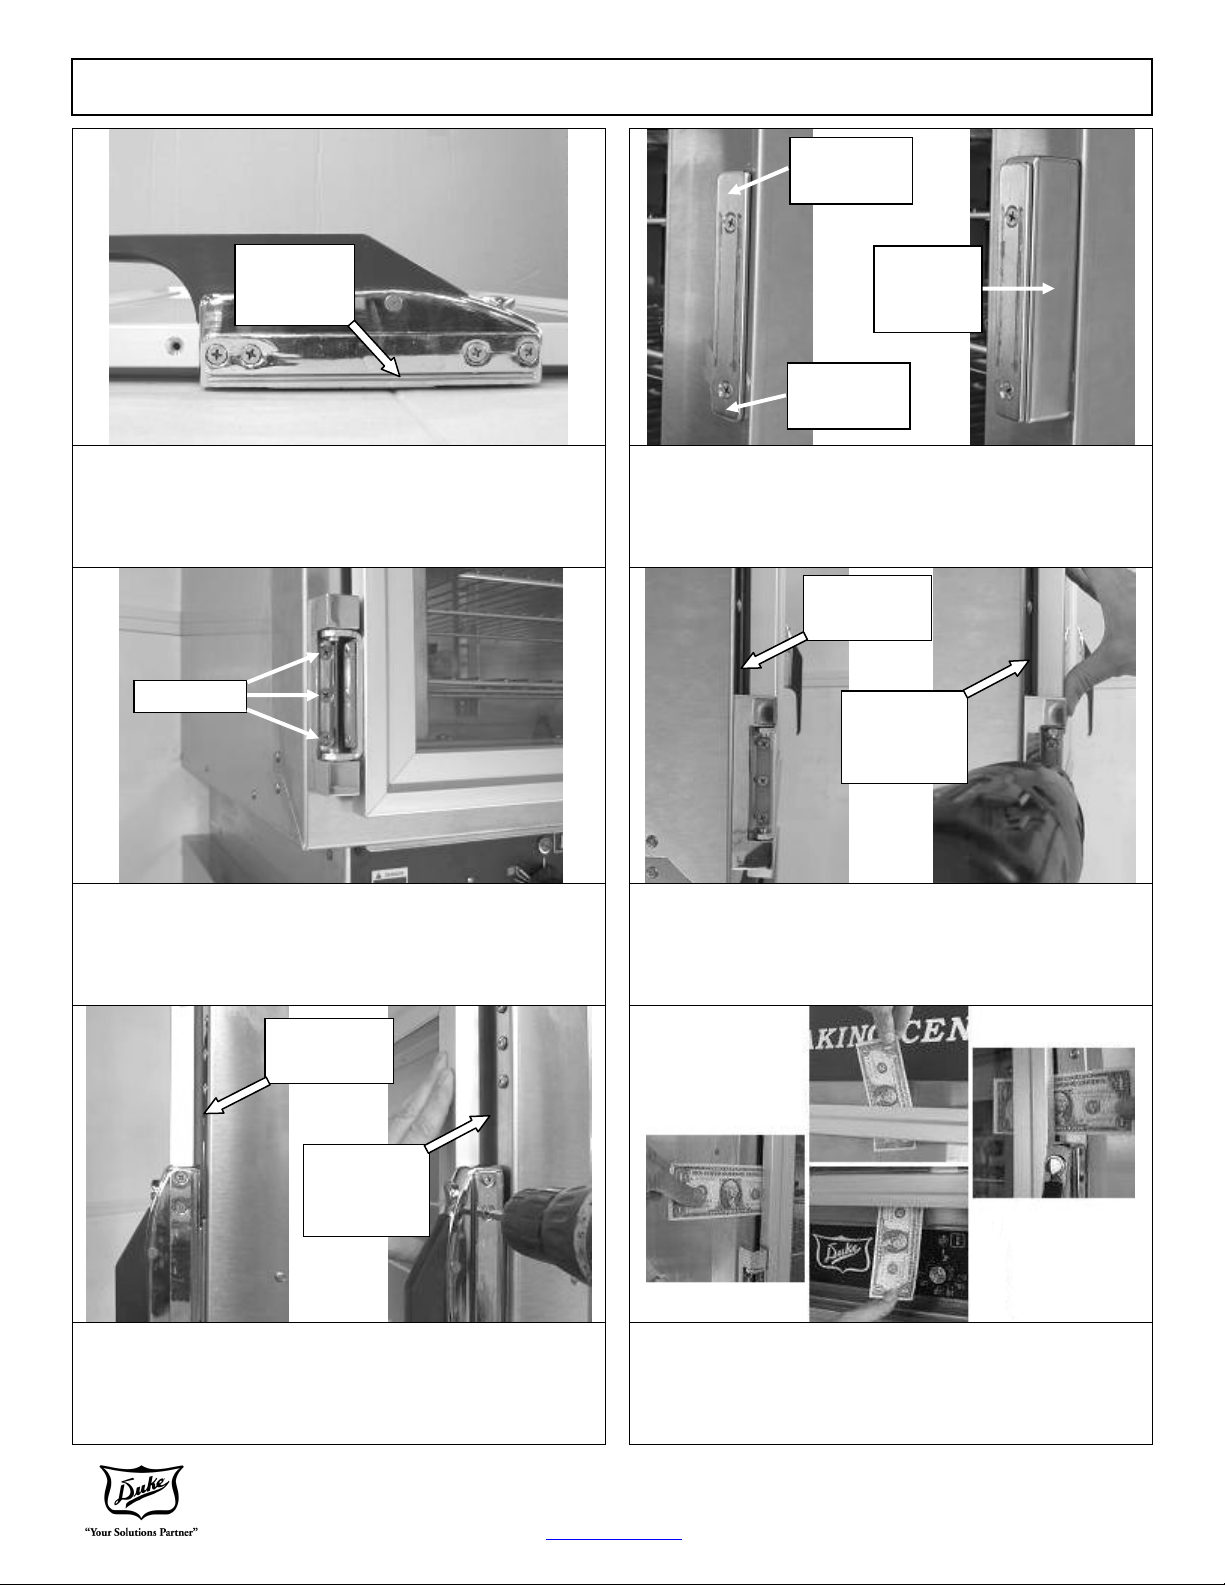
5. For doors without handles, mount the handle with the
new screws and lock washers. The old screws may
damage the door plate.
Adjust the handle as far as possible towards the gasket.
1” screws
Spacer for
Air-Wash
Short space
at bottom
6. A new strike plate and mounting screws are also
provided on doors with hinges.
For Air-Wash doors: Mount the strike plate on the
spacer. Use the long mounting screws.
Gasket is
not touching
Gasket is
slightly
compressed
7. Mount the new door assembly to the oven face.
Engage the magnetic handle to the strikeplate to help
hold the door in place.
Then tighten the screws to secure the door on the frame.
New 1” screws are provided.
Gasket is
not touching
Gasket is
slightly
compressed
9. Adjust the door position by moving the door frame to
seal any gap between the gasket and the oven front near
the handle.
DUKE MANUFACTURING CO.
Broadway • St. Louis, MO 63102
800.735.3853 • 314.231.1130 • 314.231.5074 Fax
www.dukemfg.com
8. Adjust the door position by moving the door frame to
seal any gap between the gasket and the oven front
near the hinges. Then tighten the hinge screws.
Be careful not to compress the gasket too much, or it
will cause the door to bind near the hinges.
10. To check the gasket compression, close the door
with a dollar bill between the gasket and the front of the
oven. You should feel resistance when you try to pull
the dollar bill out with the door closed. Do this check in
several places and re-adjust the door if necessary.
512944 rev.B
Page 2 of 4
 Loading...