

DORO Congress 200 User Manual
English
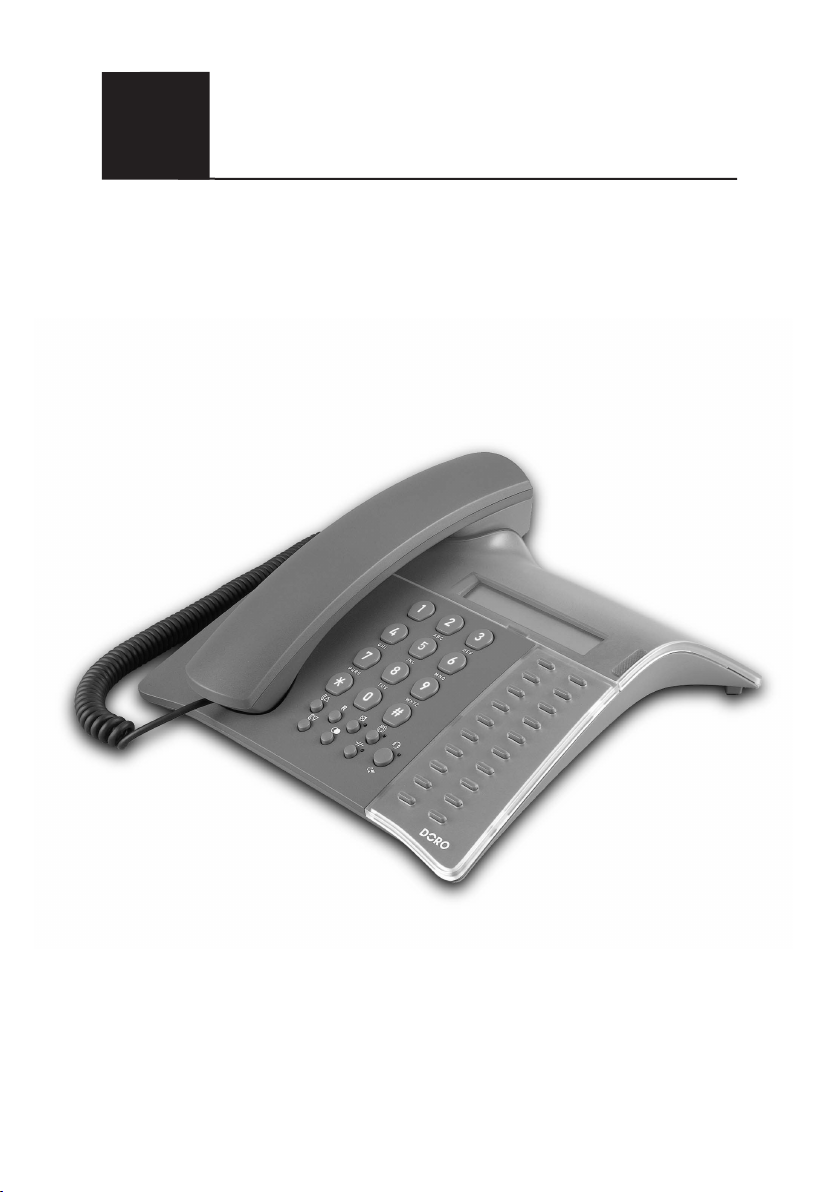
CONGRESS 200
Business Telephone
User guide
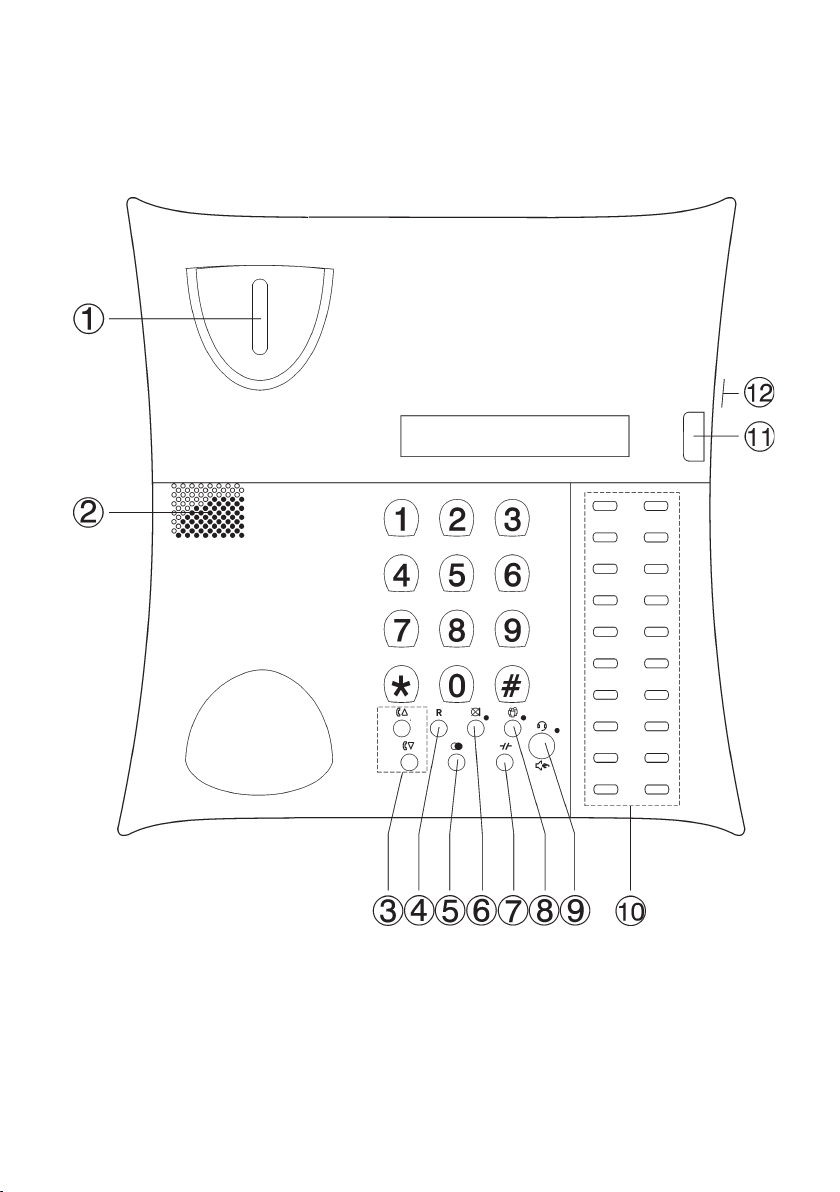

1 Hook switch
2 Speaker
3 Handset/Headset Volume Control
4 Recall Button
5 Redial/Pause Button
6 Store/Mute button and LED
7 Hold button and LED
8 Group listening button and LED
9 Speaker/Headset button and LED
10 One-Touch Memories
11 Ringer/Message Waiting Indicator
12 Speaker Volume Control (on the
underside)

English
Installation
Batteries
In order for the Caller ID, memory and other functions to operate, the
telephone requires three good quality AAA 1,5 V alkaline batteries to be
installed. If batteries are either not installed or running low, the Mo bAtt
symbol will be visible in the display, you will need to change the batteries as
soon as possible.
The battery compartment is located on the underside of the telephone.
1. Ensure the telephone line cord is not connected to the telephone network
wall socket.
2. Remove the battery cover by pressing a small screwdriver (up to Ø 2,5mm)
or similar into the hole to the right of the cover.
3. Install the batteries ensuring correct battery polarity is observed.
4. Ret the battery cover.
Connection
Once the batteries have been installed:
1. Connect the curly cord to the handset and to the socket marked q on the
underside of the telephone.
2. Connect the telephone line cord to the socket marked T on the underside
of the telephone and then to a telephone network wall socket.
3. A click will be heard when the modular plug is correctly in place.
4. Position the cables in the grooves underneath the telephone.
5. Lift the handset and listen for the dial tone. Your telephone is now
operational.
Setting the Time
1. Lift the handset (ignore the dialling tone) and press z and *.
2. Press # (to select 12/24 hour display please refer to page 11).
3. Enter time (Hours-Minutes-Seconds) using the telephone keypad (0-9).
4. Replace the handset. The time (clock) will be displayed after 5-10 seconds.
Hearing Aid Compatible
This telephone is hearing aid compatible. Select the T mode on your hearing
aid to enable this feature.
4 www.doro.com

English
Installation
Connection of a headset
A headset can be connected to the socket underneath the telephone marked =.
Simply press the headset button = to access an incoming call or dial tone, press
again to terminate the call.
While a headset is connected the speaker function will NOT operate.
IMPORTANT!
The DORO Congress 200 is designed to operate with DORO original headsets. Other
manufacturer headsets may be used, although the function and sound quality cannot be
guaranteed.
Any damage occurring due to incompatible or non Doro headsets being installed, will not be
covered under the telephones guarantee.
Making a call with the headset
1. Press =. Dial tone will be heard in the headset and the LED next to the
headset button will illuminate.
2. Dial the telephone number required.
3. Press the headset button again to terminate the call.
Connection of additional equipment
On the side of the telephone there is a socket marked 8, this will allow
additional telephone equipment i.e. cordless, modems etc to be connected
allowing access to the telephone line.
IMPORTANT!
When additional equipment is connected to the socket marked 8, only one device at a time
will operate.
Labels/protective cover
Information such as a company logo can be placed under the protective cover.
This is especially useful where the back of the telephone is facing a customer/
visitor on a reception desk.
The back cover is fastened by 2 pieces of plastic and secured by two screws,
these have to be removed rst.
To memory index cover can be removed by carefully prising the right hand side
of the cover using a small at blade screwdriver.
www.doro.com 5
 Loading...