

Page 1
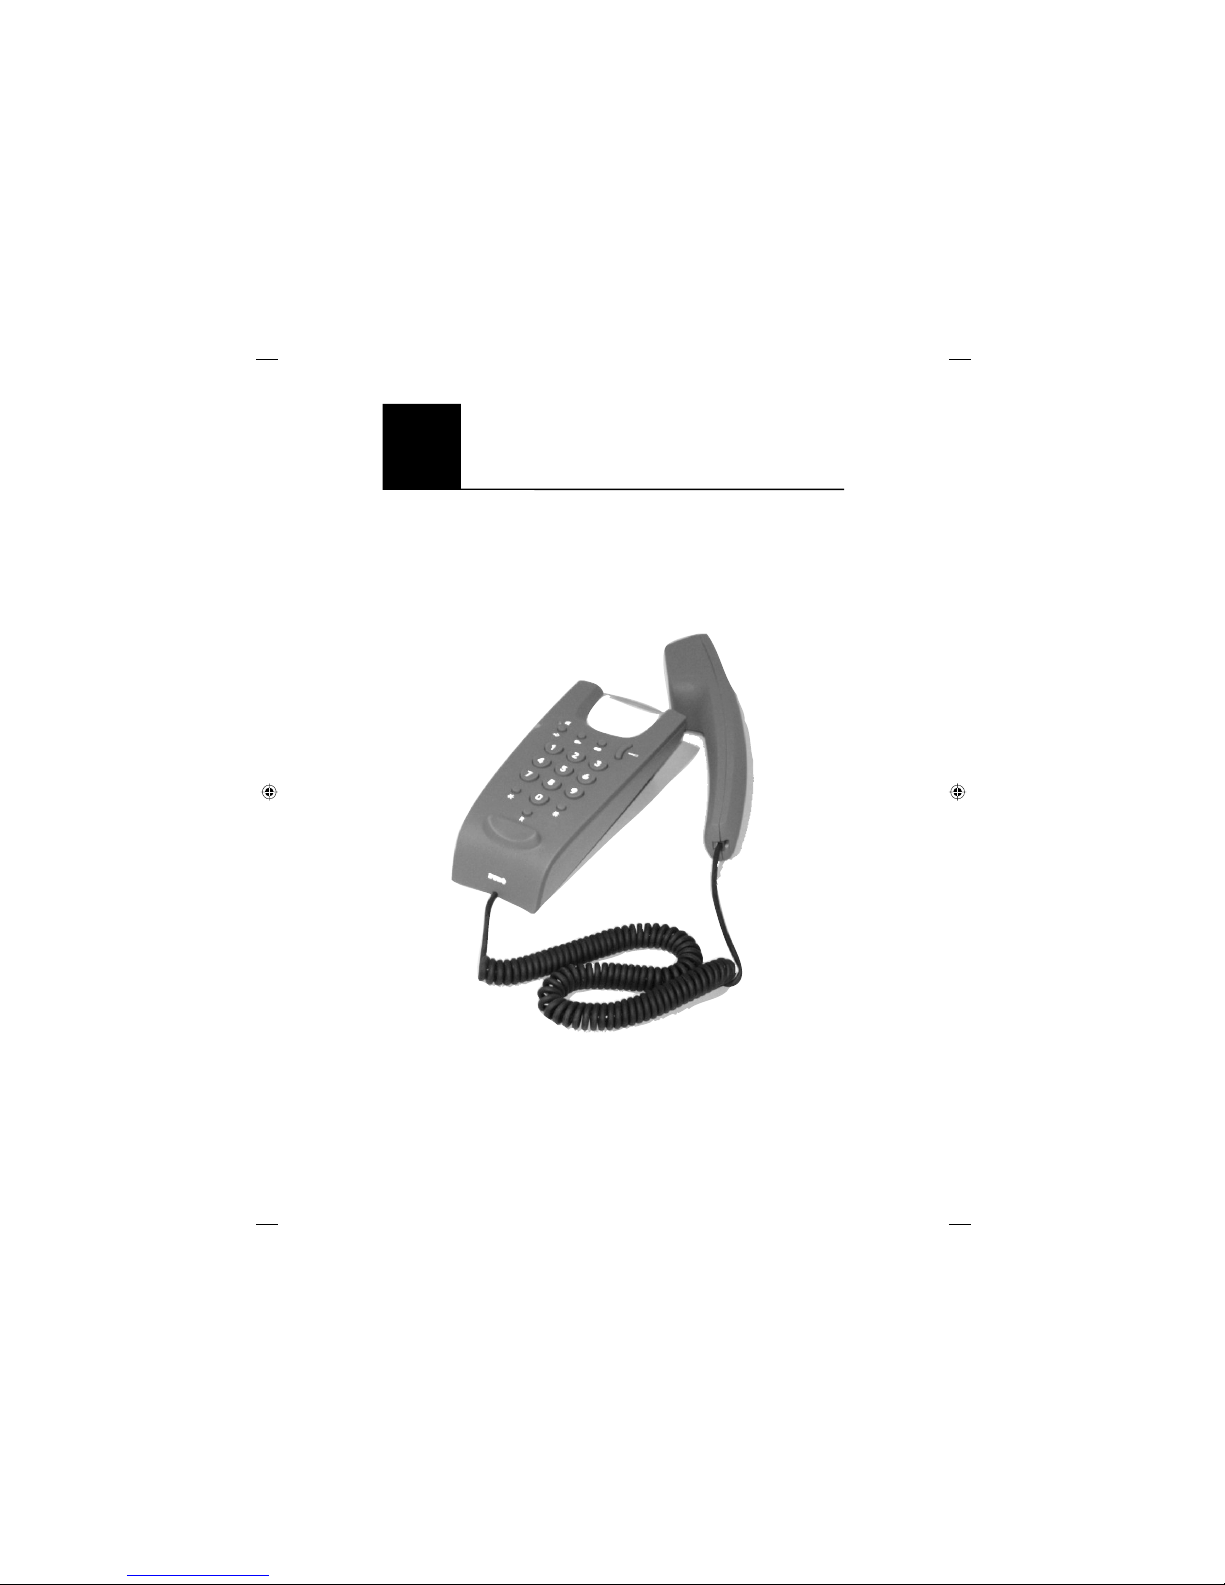
AFTI 20
English
French
German
Italian
Polish
User guide
Manuel d'utilisation
Bedienungsanleitung
Istruzioni per l’uso
Instrukcja obsługi
Desk and Wall mountable Telephone
Téléphone Compact
Wandtelefon
Telefono da parete
Telefon biurkowy lub montowany na ścianie
Page 2

2 www.doro.com
www.doro.com 3
1 Hook switch
2 Memory button
3 Store/Mute button and LED
4 Number keys 0-9, *, #
5 Recall button
6 Volume control for handset
7 Redial/Pause button
English (see page 4-8)
1 Pédale de raccroché/liste des
mémoires
2 Touche de sélection directe
3 Touche Programmation et secret
+ LED
4 Touches numérotées 0-9, *, #
5 Touche R
6 Réglage du volume du combiné
7 Touche Bis
Français (voir page 9-14)
1 Hörer/Nummernliste
2 Kurzwahl-Taste A
3 Taste Speichern/Stummschalten
und LED
4 Zifferntasten 0 -9, *, #
5 Wahlwiederholungs-Taste
6 Hörerlautstärkeregler
7 Wahlwiederholung
Deutsch (sehe seite 15-18)
1 Commutatore a gancio/rubrica
2 Pulsante Numero abbreviato A
3 Pulsante Memorizzazione/
Silenziamento e LED
4 Tasti numerici 0-9, *, #
5 Pulsante Recall
6 Regolazione volume per
microtelefono
7 Pulsante Ripetizione numero
Italiano (vedere pagina 19-22)
1 Przełącznik słuchawki/lista
numerów
2 Przycisk wybierania z pamięć
3 Przycisk i kontrolka zapisu /
wyciszania
4 Klawisze z cyframi 0-9, *, #
5 Przycisk „Rec all”
6 Sterowanie głośnością słuchawki
7 Przycisk ponownego wybierania
Polski (zobacz strony 23-26)
Page 3

English
4 www.doro.com
English
www.doro.com 5
Operation
Connection
1. Connect the curly cord to the handset and the socket marked q
underneath the telephone.
2. Connect the telephone cord to the socket marked T underneath the
telephone, and then to the telephone network socket.
3. A click will be heard when the modular plug is correctly in place.
4. Lift the handset and listen for the dial tone. Your telephone is now
operational.
Wall mounting
The telephone can be wall mounted by using two screws positioned vertically at
a distance of 100mm. Remove the desktop bracket and the screws should then fi t
into the two ‘keyholes’ at the back of the telephone.
Hearing Aid compatible
This telephone is hearing aid compatible. Select T mode on the hearing aid to
enable coupling.
Mute button
The handset microphone can be muted during a call by pressing the mute button
z
. Press the mute button again to activate the microphone. The LED next to
the button fl ashes when the microphone is muted.
Redial button
If the number dialled is engaged or if the last number dialled is to be redialled,
lift the receiver and press the redial button r.
Recall
Press the recall button R followed by the extension number to transfer calls
when connected to a PBX (TBR only).
Access to additional network services can be gained by using the recall button
R,
* and # keys. Contact your network operator for more information.
Settings
Memory
This telephone has 10 indirect memories (0-9).
When a number is stored in a memory location, you need to press only two
buttons to make the call.
The telephone number (or name) stored can be written on the memory label
located under the hook switch cover. To remove and insert the memory label use
a thin item to ‘grab’ the label.
Please note that the hook-switch itself cannot be opened.
Storing numbers
1. Lift the receiver and press store button P (ignore the dialling tone).
2. Press memory button m.
3. Select memory location by pressing one of the number keys 0-9.
4. Enter the phone number (max 21 digits).
5. Press store button P and replace the receiver. The number is now stored.
Calling using memory locations
1. Lift the receiver and wait for a dialling tone.
2. Press memory button m.
3. Select memory location by pressing any of the number keys 0-9.
Press r if you whant a pause in the telephone number..
Enter the name of the call receiver on the memor y card, if desired . In case of a number change,
replace the old number with the new.
Page 4

English
6 www.doro.com
English
www.doro.com 7
Settings
Volume control
The volume level in the earpiece can be increased or decreased using the volume
buttons during a call (5 steps). Use the volume up button v to increase the
volume and the volume down button V to decrease the volume.
Ringer
1. Lift the receiver (ignore the dialling tone) and press the store button P
and #.
2. Select ring signal by pressing the number keys 0-9 in accordance with the
table below.
3. Press store button P and replace the receiver. The ring signal is now set.
Key/setting Melody type Ringer level
1.......................................... Melody A........................ Low
2.......................................... Melody A........................ Normal
3.......................................... Melody A........................ High
4.......................................... Melody B........................ Low
5.......................................... Melody B........................ Normal
6 (factory setting)................ Melody B........................ High
7.......................................... Melody C ....................... Low
8.......................................... Melody C ....................... Normal
9.......................................... Melody C ....................... High
0.......................................... Off * ............................... -
* If the key 0 is selected, the ring signal will be turned off until the next time the receiver is
lifted. After that, the ring signal will revert to the previous set ting.
Other
Technical information
Recall time (Australia/ New Zealand only)
One selector switch is located on the underside of the telephone. Selection of
100/600ms timed loop break for recall functionality.
REN (RN for New Zealand)
The REN (Ringer Equivalence Number) or (RN) is of signifi cance only if you
wish to connect more than 1 telephone to your telephone line. A standard
telephone line has a maximum REN capacity of 3 (RN of 5). It is possible
to connect 3 devices with a REN of 1 (RN of 1) with no degradation to the
product’s performance. Exceeding this limit may cause the volume of the ringer
in any phone to decrease or not ring at all.
Tro uble shoo ting
Check that the telephone cord is undamaged and properly plugged in.
Disconnect any additional equipment that may be connected. If the problem is
resolved the fault is with the other equipment.
Test the equipment on a known working line, if the product works then the
fault is with the line.
If you are still experiencing diffi culties, contact the place of purchase.
Guarantee
This product is guaranteed for a period of 12 months from the date of purchase.
Proof of purchase is required for any service or support required during the
guarantee period.
This guarantee shall not apply to a fault caused by an accident or a similar
incident or damage, liquid ingress, negligence, abnormal usage or any other
circumstances on the purchaser’s part. Furthermore, this guarantee shall not
apply to a fault caused by a thunderstorm or any other voltage fl uctuations.
This guarantee does not in any way affect your statutory rights. (As a matter of
precaution, we recommend disconnecting the telephone during a thunderstorm.)
Page 5

English
8 www.doro.com
Français
www.doro.com 9
Utilisation
Raccordement
1. Reliez le câble téléphonique fourni à la prise de téléphone et à la fi che située
au dos du téléphone marquée T.
2. Reliez le câble fl exible spiralé à la prise du combiné et dans la fi che située au
dos du téléphone marquée q.
3. Un déclic indique que la prise est branchée correctement.
4. Prenez le combiné: vous devez entendre la tonalité.
Installation murale
Vous pouvez fi xer ce téléphone au mur avec deux vis espacées verticalement de
100mm. Enlevez le support de bureau et encastrez les têtes des vis dans les trous
correspondants situés au dos du téléphone.
Utilisation avec appareil auditif
Pour utiliser ce téléphone avec un appareil auditif, mettez l’appareil sur T.
Tou ch e S ec ret
Le micro peut être coupé en cours de communication en appuyant sur la touche
secret z. Appuyez à nouveau sur la touche secret pour ré-activer le micro. La
LED en regard de la touche indique si le micro est coupé.
Tou ch e Bi s
Lorsque la ligne de votre correspondant est occupée ou si vous désirez rappeler
le dernier numéro composé, prenez le combiné et appuyez sur la touche Bis r.
Autocommutateurs / Opérateurs
Cet appareil peut être installé derrière la plupart des autocommutateurs. Il
peut également vous donner accès à des services additionnels proposés par des
opérateurs de réseau. Les touches *, # et R vous permettront d’accéder à ces
fonctions ou services complémentaires.
Pour toute information, adressez-vous directement au fabricant du PABX ou à
votre opérateur de réseau.
Technical Support
UK
If you cannot resolve the fault using the faultfi nder section, technical support is
available on the Premium Rate Number: 0906 302 0114.
Calls cost 50 pence per minute (prices correct at the time of going to
press), and is operational between 9AM - 5PM Monday-Friday excluding Bank
Holidays. Alternatively,
You can contact us in writi ng: Consumer Support Group, Doro UK Ltd.,
22 Walkers Road, North Moons Moat, Redditch, Worcestershire, B98 9HE,
(regarding any Spares or Technical query), or
Telephoning Spares: 01527 584377
E-mail on: tech@doro-uk.com
Web site: www.doro-uk.com
Australia and New Zealand
AUSTR ALIA NEW ZEALAND
DORO Australia Pty Ltd Atlas Gentech (NZ) Limited
PO Box 6760 Private Bag 14927,
Baulkham Hills BC NSW 2153 Panmure
Australia Auckland
Helpline Consumer Support
Ph: (02) 8853 8444 Ph: 0900 50-025 (Toll Call)
Fax: (02) 8853-8489 Fax: (09) 574-2722
Email: helpline@doro.com.au Email: support@atlasgentech.co.nz
Accessories
Headsets are available for this product, please contact Sales Department
Ph: (02) 8853-8488
Fax: (02) 8853-8489
Email: sales@doro.com.au
Notes for operation in New Zealand
The gra nt of a Telepermit for any item of terminal equipment ind icates only that Telecom has
accepted that the item compl ies with the minimum conditions for connection to its network. It
indicates no endorsement of the product by Telecom, nor does it provide any sort of warranty.
Above all, it provides no assurance t hat any item will work correct ly in all respects with anot her
item of Telepermitted equipment of a different make or model, nor does it imply t hat any product is
compatible with all of Telecom’s network services.
This equipment sha ll not be set to make automat ic calls to the Telecom “111” Emergency Ser vice.
This equipment may not provide for the effective ha nd-over of a call to anot her device connected
to the same l ine.
Page 6

Français
10 www.doro.com
Français
www.doro.com 11
Réglages
Mémoires
Ce téléphone possède 10 numéros enregistrés en mémoires abrégées.
Une fois un numéro de téléphone enregistré sur une de ces plages, vous le
composez en pressant simplement deux touches. Les plages en mémoire abrégée
sont numérotées de 0 à 9. Vous pouvez noter sur la carte mémoire située sur la
pédale de raccroché les noms/ numéros enregistrés en mémoire abrégée. Pour
retirer ou replacer la carte mémoire, utilisez un outil à pointe fi ne afi n de faire
coulisser la carte.
Attention! La pédale de raccroché ne peut être démontée.
Enregistrement de numéros en mémoire abrégée
1. Prenez le combiné et appuyez sur la touche P (ne tenez pas compte de
la tonalité).
2. Appuyez sur la touche m.
3. Sélectionnez ensuite la plage de mémoire souhaitée 0- 9.
4. Composez le numéro de téléphone souhaité. (21 chiffres max.).
5. Appuyez sur la touche P et reposez le combiné. Le numéro est alors
enregistré.
Composer un numéro enregistré en mémoire abrégée
1. Prenez le combiné et attendez la tonalité.
2. Appuyez sur la touche m.
3. Sélectionnez le numéro de mémoire abrégée en appuyant sur une des touches
numérotées 0-9. Le numéro est composé automatiquement.
Insérez une pause en appuyant sur r.
Au besoin, mettez le nom du cor respondant dans la liste en mémoire. En cas de changement de
numéro, remplacez l’ancien par le nouveau.
Réglages
Réglage du volume
Utilisez la touche de réglage du volume pour ajuster le volume du combiné
pendant une communication. Appuyez sur la touche v pour augmenter le
volume et sur la touche V pour le réduire.
Réglage de la sonnerie
1. Prenez le combiné (ne tenez pas compte de la tona lité) et appuyez sur la
touche P et sur #.
2. Sélectionnez une des sonneries en appuyant sur une des touches numérotées
0-9
qui correspondent au tableau suivant.
3. Appuyez sur la touche P et reposez le combiné. La sonnerie est alors réglée.
Tou che/r égla ge Mélo die Ni veau so nore
1.......................................... Mélodie A....................... Faible
2.......................................... Mélodie A....................... Normal
3.......................................... Mélodie A....................... Fort
4.......................................... Mélodie B....................... Faible
5.......................................... Mélodie B....................... Normal
6 (réglage d’usine) .............. Mélodie B....................... Fort
7.......................................... Mélodie C ...................... Faible
8.......................................... Mélodie C ...................... Normal
9.......................................... Mélodie C ...................... Fort
0.......................................... Coupée *........................ -
* Quand la touche 0 est sélectionnée, la sonnerie reste coupée tant que le combiné n’est pas
décroché. Après utilisation du combiné, le réglage antérieur de la sonnerie est rétabli.
Page 7

Français
12 www.doro.com
Français
www.doro.com 13
Autres
Numérotation Fréquences Vocales ou Décimales
Sélectionnez le réglage souhaité en positionnant le curseur situé sous l’appareil
marqué ♫/... sur Fréquences Vocales (♫) ou Numérotation Décimale (...).
Attention! La position “Numérotation Décimale” ne doit être sélectionnée que pour une
utilisation hors de la Communauté Européenne.
Autres
Conseils et sécurité
Cet appareil doit être utilisé à une température comprise entre 5°C et 45°C.
Ne pas installer l’appareil dans une pièce humide, salle de bains, buanderie, ni
dans une cuisine à moins de 1,50m de l’évier.
Dans les zones à risques d’orages fréquents, protégez l’appareil avec un dispositif
de protection* contre les surtensions électriques et vérifi ez que votre assurance
couvre ce type de dégâts.
Attention : la garantie constructeur ne s’applique pas en cas de dégâts occasionnés par ef fet de la
foudre ou de toute autre source de surtension (voir chapitre “Garantie”)
* Obligatoire dans certains départements.
Garantie et S.A.V.
Cet appareil est garanti un an à partir de sa date d’achat, la facture faisant
foi. La réparation dans le cadre de cette garantie sera effectuée gratuitement,
pièces et main d’oeuvre.
La garantie est valable pour un usage normal de l’appareil tel qu’il est défi ni
dans la notice d’utilisation.
Les fournitures utilisées avec l’appareil ne sont pas couvertes par la garantie.
Sont exclues de cette garantie les détér iorations dues à une cause étrangère
à l’appareil.
En particulier la garantie ne s’appliquera pas si l’appareil a été endommagé à la
suite d’un choc ou d’une chute, d’une fausse manoeuvre, d’un branchement
non conforme aux instructions mentionnées dans la notice ou aux prescriptions
de l’ART (-Autorité de Régulation des Télécommunications), de l’effet de
la foudre, de surtensions électriques ou électrostatiques, d’une protection
insuffi sante contre l’humidité, la chaleur ou le gel. En tout état de cause, la
garantie légale pour vices cachés s’appliquera conformément aux articles 1641 et
suivants du Code Civil.
En cas de panne, adressez-vous au S.A.V. de votre revendeur ou installateur.
Si vous avez des soucis d’utilisation, contactez notre Service d’Assistance
Téléphonique au 08 92 68 90 18 ( N° Audiotel - 2,21F / mn ).
Entretien
· Nettoyez votre appareil avec un chiffon doux qui ne peluche pas.
· Nettoyez les plots de charge avec un chiffon imbibé d’alcool.
· N’utilisez ni solvant, ni produit ménager.
Page 8

14 www.doro.com
Deutsch
www.doro.com 15
Bedienung
Anschliessen
1. Schliessen Sie das Telefonkabel an eine geeignete Telefonsteckdose und an
den Anschluss T auf der Unterseite des Telefons an.
2. Schliessen Sie das mitgelieferte Hörerkabel an den Anschluss des
Telefonhörers und an den Anschluss mit dieser Markierung q an der
Unterseite des Telefons an.
3. Sie hören ein Klickgeräusch, wenn die Anschlüsse einrasten.
4. Heben Sie den Hörer ab und vergewissern Sie sich, dass ein Freizeichen zu
hören ist.
Wandmontage
Das Telefon kann an der Wand angebracht werden. Dies geschieht mit Hilfe
von zwei Schrauben, die waagerecht mit 100 mm Abstand in der Wand montiert
werden. Die Schrauben sollten dann in die beiden Löcher des Telefons passen.
Hörgerät
Der Hörer hat eine eingebaute Hörhilfe, wenn Sie ein Hörgerät während des
Gesprächs benutzen wollen. Schliessen Sie die Telefonspule an den Hörer an,
indem Sie das Hörgerät auf die T-Stellung schalten.
Mikrofonstummschaltung
Sie können das Mikrofon während eines Gesprächs durch Drücken der Taste
z
abschalten. Drücken Sie die Taste nochmals, wird das Mikrofon wieder
eingeschaltet. Ein Indikator an der Taste zeigt an, wenn das Mikrofon
ausgeschaltet ist.
Wahlwiederholung
Wenn die angerufene Nummer besetzt war, oder wenn Sie die zuletzt gewählte
Nummer noch einmal wählen möchten, heben Sie den Hörer ab und drücken Sie
die Wahlwiederholungs-Taste r.
Weitere Dienste
Dieses Telefon kann mit den Tasten R, * und # weitere Dienste ausführen.
Welche Dienste zur Verfügung stehen, hängt vom Angebot Ihres Netzbetreibers
ab.
Page 9

Deutsch
16 www.doro.com
Deutsch
www.doro.com 17
Einstellungen
Speicher
Das Telefon kann 10 Kurzwahlnummern speichern.
Wenn eine Nummer auf einer dieser Tasten gespeichert ist, kann diese mit nur
zwei Tasten gewählt werden. Die Kurzwahlnummern sind mit 0-9 nummeriert.
Kurzwahlnummer speichern
1. Heben Sie den Hörer ab und drücken Sie die Taste P.
2. Drücken Sie die Taste m.
3. Wählen Sie den gewünschten Speicherplatz mit den Tasten 0-9.
4. Geben Sie die Telefonnummer mit den Zifferntasten ein (max. 21 Zeichen).
5. Drücken Sie die Taste P und legen Sie den Hörer auf. Die Nummer ist
gespeichert.
Anruf mit Kurzwahl
1. Heben Sie den Hörer ab und warten Sie auf das Freizeichen.
2. Drücken Sie die Taste m.
3. Wählen Sie die gewünschte Kurzwahlnummer mit den Tasten 0-9.
Wenn Sie eine Pause während der Anwahl möchten, drücken Sie die Taste r.
Schreiben Sie die Nummern auf die Nummernkarte. Wenn eine Nummer geändert werden soll,
speichern Sie die neue Nummer über der alten Nummer.
Einstellungen
Lautstärke
Mit der Lautstärkeeinstellung können Sie die Hörerlautstärke während des
Gesprächs in mehreren Stufen ändern. Drücken Sie die Taste v um die
Lautstärke zu erhöhen, und die Taste V um die Lautstärke zu senken.
Rufsignal einstellen
1. Heben Sie den Hörer ab und drücken Sie die Tasten P und #.
2. Wählen Sie das gewünschte Rufsignal mit den Tasten 0-9 nach der
untenstehenden Tabelle aus.
3. Drücken Sie die Taste P und legen Sie den Hörer auf. Das Rufsignal ist
eingestellt.
Zifferntaste Melodietyp Rufsignal
1.......................................... Melodie A....................... Leise
2.......................................... Melodie A....................... Normal
3.......................................... Melodie A....................... Laut
4.......................................... Melodie B....................... Leise
5.......................................... Melodie B....................... Normal
6 (Voreinstellung)................ Melodie B....................... Laut
7.......................................... Melodie C ...................... Leise
8.......................................... Melodie C ...................... Normal
9.......................................... Melodie C ...................... Laut
0.......................................... Aus * ..............................-
* Wenn Sie die Zifferntaste 0 drücken, ist das R ufsignal ausgeschaltet, bis der Hörer
wieder abgehoben wird. Danach wird das Rufsignal wieder auf den voreingestellten Wert
zurückgesetzt.
Page 10

Deutsch
18 www.doro.com
Italiano
www.doro.com 19
Allgemeines
Wenn das Telefon nicht funktioniert
Vergewissern Sie sich, dass das Telefonkabel unbeschädigt und korrekt
eingesteckt ist. Entfernen Sie eventuelle Zusatzausrüstung, Verlängerungskabel
und andere Telefone. Wenn das Gerät jetzt funktioniert, liegt der Fehler
woanders.
Versuchen Sie, das Telefon bei z.B. einem Nachbarn an zu schliessen. Wenn
das Gerät dort funktioniert, ist Ihr Telefonanschluss vielleicht gestört. Rufen Sie
die Störungsstelle an.
Wenn der Fehler dadurch nicht beseitigt wird, fragen Sie Ihren Händler.
Garantie
Dieses Gerät hat die Warengarantiezeit von einem Jahr. Bei eventuellen
Reklamationen wenden Sie sich bitte an Ihren Händler. Der Garantieservice
wird nur mit gültiger Kaufquittung bzw. Rechnungskopie ausgeführt.
Die Garantie gilt nicht, wenn der Fehler aufgrund eines Unglücks
oder ähnlichem entstanden ist. Weiterhin gilt die Garantie nicht bei
Gewaltanwendung, eingedrungenen Flüssigkeiten, schlechter Wartung,
Missbrauch oder anderer Fehler des Käufers. Die Garantie verfällt auch, wenn
die Seriennummer des Telefons vernichtet wurde sowie bei Schäden die durch
Gewitter oder andere Spannungsvariationen entstanden sind.
Bei Gewitter sollte das Telefon zur Sicherheit von der Steckdose getrennt
werden.
Funzionamento
Collegamento
1. Collegare il cavo arricciato al microtelefono e alla presa contrassegnata con
q
sotto il telefono.
2. Collegare il cavo telefonico alla presa contrassegnata con T sotto il
telefono, e quindi alla presa di rete telefonica.
3. Quando la spina modulare sarà posizionata correttamente, si udirà uno
scatto.
4. Sollevare il microtelefono e attendere il segnale acustico di linea libera. A
questo punto il telefono è operativo.
Montaggio a parete
Il telefono può essere montato a parete. Tale operazione viene effettuata
posizionando due viti verticali ad una distanza di 100 mm. Le viti devono essere
inserite nelle due ‘scanalature’ situate sul retro del telefono.
Compatibilità con apparecchi acustici
Il presente telefono è compatibile con apparecchi acustici. Selezionare la
modalità T sull’apparecchio acustico per consentire l’accoppiamento.
Pulsante Silenziamento
Durante una chiamata è possibile silenziare il microfono del microtelefono/
dell'auricolare premendo il pulsante Silenziamento z. Per riattivare il
microfono, premere nuovamente il pulsante Silenziamento. Il LED posto di
fi anco al pulsante lampeggia quando il microfono è silenziato.
Pulsante Ripetizione numero
Se il numero composto è occupato o se l'ultimo numero composto deve essere
richiamato, sollevare il ricevitore e premere il pulsante Ripetizione numero r.
Pulsante Recall
Premere il pulsante Recall R seguito dal numero dell’interno nel caso in cui si sia
collegati ad un centralino telefonico interno.
E’ possibile accedere ad altri servizi di rete utilizzando il pulsante Recall. Per
ulteriori informazioni, contattare l’operatore di retei tasti * e #.
Page 11

Italiano
20 www.doro.com
Italiano
www.doro.com 21
Impostazioni
Memoria
Il presente telefono è dotato di 10 memorie indirette (0-9).
Quando un numero telefonico viene memorizzato in un numero della memoria,
per effettuare una chiamata è suffi ciente premere due soli pulsanti.
Memorizzazione dei numeri telefonici
1. Sollevare il ricevitore e premere il pulsante Memorizzazione P (ignorare il
segnale acustico di linea libera).
2. Premere il pulsante Memoria m.
3. Selezionare il numero della memoria premendo uno dei tasti numerici da
0
a 9.
4. Inserire il numero telefonico (max. 21 cifre).
5. Premere il pulsante Memorizzazione P e riposizionare il ricevitore. A
questo punto il numero telefonico è memorizzato.
Esecuzione di chiamate utilizzando i numeri della memoria
1. Sollevare il ricevitore di linea libera.
2. Premere il pulsante Memoria m.
3. Selezionare il numero della memoria premendo uno qualsiasi dei tasti
numerici da 0 a 9.
Premere r se si desidera una pausa nel numero telefonico.
Se si desidera, è possibile inserire il nome di chi riceve la chiamata sulla memory card. In caso di
modifi ca di un numero, sostituire il vecchio numero telefonico con quello nuovo.
Impostazioni
Regolazione del volume
Durante una chiamata è possibile aumentare o diminuire il livello del volume
dell'auricolare utilizzando i pulsanti di regolazione del volume (5 toni).
Utilizzare il pulsante di aumento volume v per alzare il volume e il pulsante di
riduzione volume V per abbassare il volume.
Suoneria
1. Sollevare il ricevitore (ignorare il segnale acustico di linea libera) e premere il
pulsante Memorizzazione P e #.
2. Selezionare il segnale di squillo premendo i tasti numerici 0-9 in base alla
tabella sotto riportata.
3. Premere il pulsante Memorizzazione P e riposizionare il ricevitore. A
questo punto il segnale di squillo è impostato.
Tasto/impostazione Tipo di melodia Livello suoneria
1.......................................... Melodia A....................... Basso
2.......................................... Melodia A....................... Normale
3.......................................... Melodia A....................... Alto
4.......................................... Melodia B....................... Basso
5.......................................... Melodia B....................... Normale
6 (impostazione di fabbrica)Melodia B....................... Alto
7.......................................... Melodia C ...................... Alto
8.......................................... Melodia C ...................... Normale
9.......................................... Melodia C ...................... Alto
0.......................................... Off * ............................... -
* Se viene selezionato il tasto 0, il segnale di squillo verrà disattivato fi no alla volta successsiva
in cui verrà risollevato il ricevitore. Dopo tale operazione, il segnale di squillo ritornerà
all’impostazione precedente.
Page 12

Italiano
22 www.doro.com
Polski
www.doro.com 23
Varie
Apparecchio difettoso
Ver ifi care che il cavo telefonico non sia danneggiato e che la spina sia
correttamente inserita. Scollegare qualsiasi altro apparecchio eventualmente
collegato. Se il problema viene risolto, il difetto può essere attribuito all’altro
apparecchio.
Provare l’apparecchio con una linea del cui funzionamento si è certi. Se il
prodotto funziona, il difetto può essere attribuito alla linea.
Qualora si riscontrino ulteriori diffi coltà, contattare il punto d’acquisto.
Garanzia
Il presente prodotto è garantito per un periodo di 12 mesi a decorrere dalla data
di acquisto. Per avere diritto a qualsiasi servizio o assistenza durante il periodo di
garanzia è necessario presentare il relativo documento di acquisto.
La presente garanzia non verrà applicata ad eventuali guasti causati da incidenti
o infortuni o danni simili, eventuale penetrazione di liquidi, negligenza, uso
anomalo o qualsiasi altra circostanza simile da parte dell’acquirente. Inoltre, la
presente garanzia non verrà applicata ad eventuali guasti causati da temporali o
da qualsiasi altra variazione della tensione.
La presente garanzia non infl uisce in alcun modo sui diritti legali del
proprietario. (Come misura precauzionale, si consiglia di scollegare il telefono
durante i temporali.)
Obsługa
Podłączanie
1. Podłącz przewód spiralny do słuchawki i do gniazdka oznaczonego q,
które znajduje się na spodzie telefonu.
2. Podłącz przewód telefoniczny do gniazdka oznaczonego T, które znajduje
się na spodzie telefonu, a następnie do gniazdka sieci telefonicznej.
3. Po poprawnym włożeniu wtyczki modularnej do gniazdka powinno być
słyszalne kliknięcie.
4. Podnieś słuchawkę i sprawdź, czy słychać cią gły sygnał wybierania. Telefon
jest teraz gotów do użytku.
Montaż na ścianie
Telefon można zamontować na ścianie. Do montażu służą dwie pionowo
umieszczone śruby w odległości 100 mm jedna od drugiej. Śruby powinny
trafi ać w dwa otwory w kształcie dziurki od klucza, znajdujące się z tyłu
telefonu. W przypadku montażu na ścianie należy zdemontować podstawkę
Z g o d n o ś ć z a p a r a t a m i s ł u c h o w y m i
Telefon ten jest zgodny z aparatami słuchowymi. Aby uaktywnić sprzężenie z
aparatem słuchowym, przełącz aparat w tryb T.
Przycisk wyciszania
Podczas rozmowy można odłączyć mikrofon, naciskając przycisk wyciszania
z
. Ponowne naciśnięcie tego przycisku aktywuje mikrofon. Gdy mikrofon jest
odłączony, kontrolka obok przycisku pulsuje.
Przycisk ponownego wybierania
Jeśli wybrany numer jest zajęty, lub jeśli zachodzi potrzeba ponownego wybrania
tego samego numeru, podnieś słuchawkę i naciśnij przycisk ponownego
wybierania r.
Page 13

Polski
24 www.doro.com
Polski
www.doro.com 25
Ustawienia
Usługi dodatkowe
Jeśli aparat współpracuje z centralą wewnętrzną (PBX), aby przekazać
połączenie na inny numer wewnętrzny należy nacisnąć przycisk R , a następnie
wybrać numer. Przyciski R, * i # dają dostęp do usług dodatkowych,
realizowanych przez centralę lokalnego operatora telekomunikacyjnego.
Aby uzyskać więcej informacji na temat usług dodatkowych, należy
skontaktować się z operatorem telekomunikacyjnym. Odpowiednie informacje
można także znaleźć w książce telefonicznej.
Pamięć
Telefon jest wyposażony w pamięć na 10 numerów, wybieranych pośrednio
(0-9).
Aby wybrać numer przechowywany w pamięci, wystarczy nacisnąć dwa
przyciski.
Zapamiętywanie numerów
1. Podnieś słuchawkę i naciśnij przycisk zapisu P (zignoruj sygnał
wybierania).
2. Naciśnij przycisk pamięci m.
3. Wybierz pozycję, pod którą ma być zapamiętany numer, naciskając jeden z
przycisków 0-9.
4. Wprowadź numer telefoniczny (maksymalnie 21 cyfr).
5. Naciśnij przycisk zapisu P i odłóż słuchawkę. Numer został zapamiętany.
Wybieranie numerów z pamięci
1. Podnieś słuchawkę i poczekaj na sygnał wybierania.
2. Naciśnij przycisk pamięci m.
3. Wybierz pozycję, pod którą jest zapamiętany numer, naciskając jeden z
przycisków 0-9.
Aby wprowadzić przerwę w numer ze telefonicznym, naciśnij prz ycisk r.
W razie potrzeby można zapisać na karcie pamięci numer abonenta odbierającego połączenie.
W prz ypadku zmiany numeru można zastąpić star y numer nowym.
Ustawienia
Regulacja głośności
W trakcie rozmowy można zwiększyć lub zmniejszyć głośność dźwięku w
głośniku słuchawki (dostępnych jest 5 poziomów). Do zwiększania głośności
służy przycisk v, a do zmniejszania głośności - przycisk V.
Regulowany sygnał dzwonka
1. Podnieś słuchawkę (zignoruj sygnał wybierania) i naciśnij przycisk zapisu
P
oraz #.
2. Wybierz sygnał dzwonka naciskając przyciski 0-9, zgodnie z tabelą
zamieszczoną poniżej.
3. Naciśnij przycisk zapisu P i odłóż słuchawkę. Sygnał dzwonka został
ustawiony.
Przycisk/ustawienie Typ melodii Głośność dzwonka
1.......................................... Melodia A....................... Niska
2.......................................... Melodia A....................... Normalna
3.......................................... Melodia A....................... Wysoka
4.......................................... Melodia B....................... Niska
5.......................................... Melodia B....................... Normalna
6 (ust. fabryczne) ................ Melodia B....................... Wysoka
7.......................................... Melodia C ...................... Niska
8.......................................... Melodia C ...................... Normalna
9.......................................... Melodia C ...................... Wysoka
0.......................................... Brak * ............................. -
* Po wybraniu prz ycisku 0 sygnał dzwonka będzie wyłączony, aż do następnego podniesienia
słuchawki. Po podniesieniu słuchawki prz ywrócone zostanie ostatnio wybrane ustawienie
dzwonka .
Page 14

Polski
26 www.doro.com
Inne
Wybieranie tonowe/impulsowe
Metodę wybierania numeru, tonową (♫) lub impulsową (...), wybiera się
przełącznikiem oznaczonym ♫/..., umieszczonym na spodzie telefonu.
Uszkodzenia aparatu
Należy sprawdzić, czy przewód telefoniczny nie jest uszkodzony i czy jest
prawidłowo podłączony. Należy odłączyć wszelkie dodatkowe urządzenia,
przedłużacze i telefony. Jeśli po wykonaniu tych czynności aparat działa,
uszkodzenie występuje w innym urządzeniu.
Aparat należy przetestować z inną linią (np. u sąsiada). Jeśli aparat działa z
inną linią, to prawdopodobnie uszkodzona jest linia telefoniczna użytkownika.
Uszkodzenie należy zgłosić operatorowi.
Jeśli żaden z powyższych środków nie przynosi rezultatu, należy zwrócić się do
najbliższego serwisu lub do sprzedawcy, u którego aparat został zakupiony.
Gwarancja
Aparat jest objęty standardową roczną gwarancją. W przypadku reklamacji
proszę skontaktować się z najbliższym serwisem lub ze sprzedawcą. Serwis
gwarancyjny jest dostępny wyłącznie po przedstawieniu ważnego dowodu
zakupu/faktury.
Gwarancja nie obejmuje uszkodzeń powstałych w wyniku wypadku lub
podobnych zniszczeń, uszkodzeń spowodowanych zalaniem aparatu płynem,
niedbałością, niewłaściwym użytkowaniem lub innymi przyczynami leżącymi po
stronie nabywcy. Ponadto gwarancja nie obejmuje uszkodzeń spowodowanych
przez burze i inne skoki napięcia.
Gwarancja w żaden sposób nie wpływa na ustawowe uprawnienia nabywcy. (Ze
względów bezpieczeństwa zaleca się odłączanie telefonu podczas burzy.)
• INFO LINIA pomocy technicznej: 0-801-67-48-88, czynna od 8.00-16.00
od poniedziałku do piątku z wyjątkiem świąt i dni wolnych od pracy.
• INTERNET: www.doro.atlantel.pl
Page 15

www.doro.com
 Loading...