

Page 1
MSBE7
EN
DE
FR
ES
PT
IT
NL
DA
SV
NO
FI
RU
PL
SK
CS
HU
DRIVING SUPPORT
MAGICSPEED
Kontrollspak för
hastighetsregulatorer
Monterings- och bruksanvisning. . . . . . . 95
Betjeningsmodul for
hastighetsregulator
Monterings- og bruksanvisning . . . . . . 104
Operating module for
speed regulator
Installation and Operating Manual . . . . . . 6
Bedienmodul für
Geschwindigkeitsregler
Montage- und Bedienungsanleitung . . . 17
Module de commande pour
régulateur de vitesse
Instructions de montage
et de service . . . . . . . . . . . . . . . . . . . . . . . 28
Módulo de mando para el
regulador de velocidad
Instrucciones de montaje y de uso . . . . . 40
Alavanca de comando para
regulador de velocidade
Instruções de montagem e manual de
instruções . . . . . . . . . . . . . . . . . . . . . . . . . 51
Modulo di comando per
regolatore di velocità
Istruzioni di montaggio e d’uso . . . . . . . .62
Nopeudensäätimen
käyttömoduuli
Asennus- ja käyttöohje. . . . . . . . . . . . . . .115
Модуль управления для
регулятора скорости
Инструкция по монтажу
и эксплуатации. . . . . . . . . . . . . . . . . . . . 126
Moduł sterowania tempomatem
Instrukcja montażu i obsługi . . . . . . . . . 137
Ovládací modul pre
regulátor rýchlosti
Návod na montáž a uvedenie
do prevádzky . . . . . . . . . . . . . . . . . . . . . 149
Ovládací modul
regulátoru rychlosti
Návod k montáži a obsluze . . . . . . . . . . 160
Kezelőmodul
sebességszabályozóhoz
Szerelési és használati útmutató . . . . . . 172
Automatische Cruise Control
Montagehandleiding en
gebruiksaanwijzing. . . . . . . . . . . . . . . . . . 73
Betjeningsmodul til
hastighedsregulering
Monterings- og betjeningsvejledning. . . 84
Page 2

Page 3
MagicSpeed MSBE7
1 2 3 4
9
6
8
5 7
10
11
12
1
2 3
3
Page 4

1 2 3 4 5 6
4
2
5
4
1
3
6
7
MagicSpeed MSBE7
5
4
Page 5
MagicSpeed MSBE7
6
7
1
2
1
2
3
4
5
8
5
Page 6

Explanation of symbols MagicSpeed MSBE7
EN
Please read this instruction manual carefully before installation and first use, and store
it in a safe place. If you pass on the product to another person, hand over this instruction manual along with it.
Contents
1 Explanation of symbols. . . . . . . . . . . . . . . . . . . . . . . . . . . . . . . . . . . . . . . . . . . . . . . . . . . . . . . 6
2 Safety and installation instructions . . . . . . . . . . . . . . . . . . . . . . . . . . . . . . . . . . . . . . . . . . . . . .7
3 Scope of delivery . . . . . . . . . . . . . . . . . . . . . . . . . . . . . . . . . . . . . . . . . . . . . . . . . . . . . . . . . . . 8
4 Intended use . . . . . . . . . . . . . . . . . . . . . . . . . . . . . . . . . . . . . . . . . . . . . . . . . . . . . . . . . . . . . . . 9
5 Technical description . . . . . . . . . . . . . . . . . . . . . . . . . . . . . . . . . . . . . . . . . . . . . . . . . . . . . . . . 9
6 Installing MagicSpeed . . . . . . . . . . . . . . . . . . . . . . . . . . . . . . . . . . . . . . . . . . . . . . . . . . . . . . 11
7 Connecting the electrical power to MagicSpeed. . . . . . . . . . . . . . . . . . . . . . . . . . . . . . . . . 12
8 Programming MagicSpeed . . . . . . . . . . . . . . . . . . . . . . . . . . . . . . . . . . . . . . . . . . . . . . . . . . 13
9 Performing a functional test . . . . . . . . . . . . . . . . . . . . . . . . . . . . . . . . . . . . . . . . . . . . . . . . . . 13
10 Using MagicSpeed. . . . . . . . . . . . . . . . . . . . . . . . . . . . . . . . . . . . . . . . . . . . . . . . . . . . . . . . . 14
11 Maintaining and cleaning MagicSpeed. . . . . . . . . . . . . . . . . . . . . . . . . . . . . . . . . . . . . . . . . 15
12 Guarantee . . . . . . . . . . . . . . . . . . . . . . . . . . . . . . . . . . . . . . . . . . . . . . . . . . . . . . . . . . . . . . . . 16
13 Disposal. . . . . . . . . . . . . . . . . . . . . . . . . . . . . . . . . . . . . . . . . . . . . . . . . . . . . . . . . . . . . . . . . . 16
14 Technical data. . . . . . . . . . . . . . . . . . . . . . . . . . . . . . . . . . . . . . . . . . . . . . . . . . . . . . . . . . . . . 16
1 Explanation of symbols
WARNING!
!
!
A
Safety instruction: Failure to observe this instruction can cause fatal or serious injury.
CAUTION!
Safety instruction: Failure to observe this instruction can lead to injury.
NOTICE!
Failure to observe this instruction can cause material damage and impair the function
of the product.
NOTE
I
6
Supplementary information for operating the product.
Page 7

MagicSpeed MSBE7 Safety and installation instructions
EN
2 Safety and installation instructions
The manufacturer accepts no liability for damage in the following cases:
• Damage to the product resulting from mechanical influences and excess voltage
• Alterations to the product without express permission from the manufacturer
• Use for purposes other than those described in the operating manual
Please observe the prescribed safety instructions and stipulations from the vehicle
manufacturer and service workshops.
WARNING!
Inadequate supply cable connections could result in short circuits, which could have as
!
A
a consequence that:
• Cable fires occur
• The airbag is triggered
• Electronic control devices are damaged
• Electric functions fail (indicators, brake light, horn, ignition, lights)
NOTICE!
To prevent the risk of short circuits, always disconnect the negative terminal of the
vehicle's electrical system before working on it.
If the vehicle has an additional battery, its negative terminal should also be disconnected.
If you disconnect the negative terminal of the battery, all data stored in the volatile memories will
be lost.
• The following data must be set again, depending on the vehicle equipment options:
–Radio code
– Vehicle clock
–Timer
– On-board computer
– Seat position
You can find instructions for making these settings in the appropriate operating instructions.
Observe the following installation instructions:
• Secure the parts installed in the vehicle in such a way that they cannot become loose under any
circumstances (sudden braking, accidents) and cause injuries to the occupants of the
vehicle.
• Secure any parts of the system covered by the bodywork in such a manner that they cannot be
come loose or damage other parts and cables or impair vehicle functions (steering, pedals,
etc).
• Always follow the safety instructions of the vehicle manufacturer.
Some work (e.g. on retention systems such as the AIRBAG etc.) may only be performed by
qualified specialists.
• To prevent damage when drilling, make sure there is sufficient space on the other side for the
drill head to come out.
7
Page 8
Scope of delivery MagicSpeed MSBE7
EN
• Deburr all drill holes and treat them with a rust-protection agent.
Observe the following instructions when working with electrical parts:
• When testing the voltage in electrical cables, only use a diode test lamp or a voltmeter.
Test lamps with an illuminant take up voltages which are too high and which can damage the
vehicle's electronic system.
• When making electrical connections, ensure that:
– they are not kinked or twisted
– they do not rub on edges
– they are not laid in sharp edged ducts without protection.
• Insulate all connections.
• Secure the cables against mechanical wear with cable binders or insulating tape, for example
to existing cables.
Please observe the following instructions in particular:
• Observe the applicable legal regulations.
• When driving, make sure no other road users can be injured.
• MagicSpeed is designed as an additional aid; i.e., it does not relieve you of the duty of taking
due care when driving.
3Scope of delivery
No. in
fig. 4,
page 4
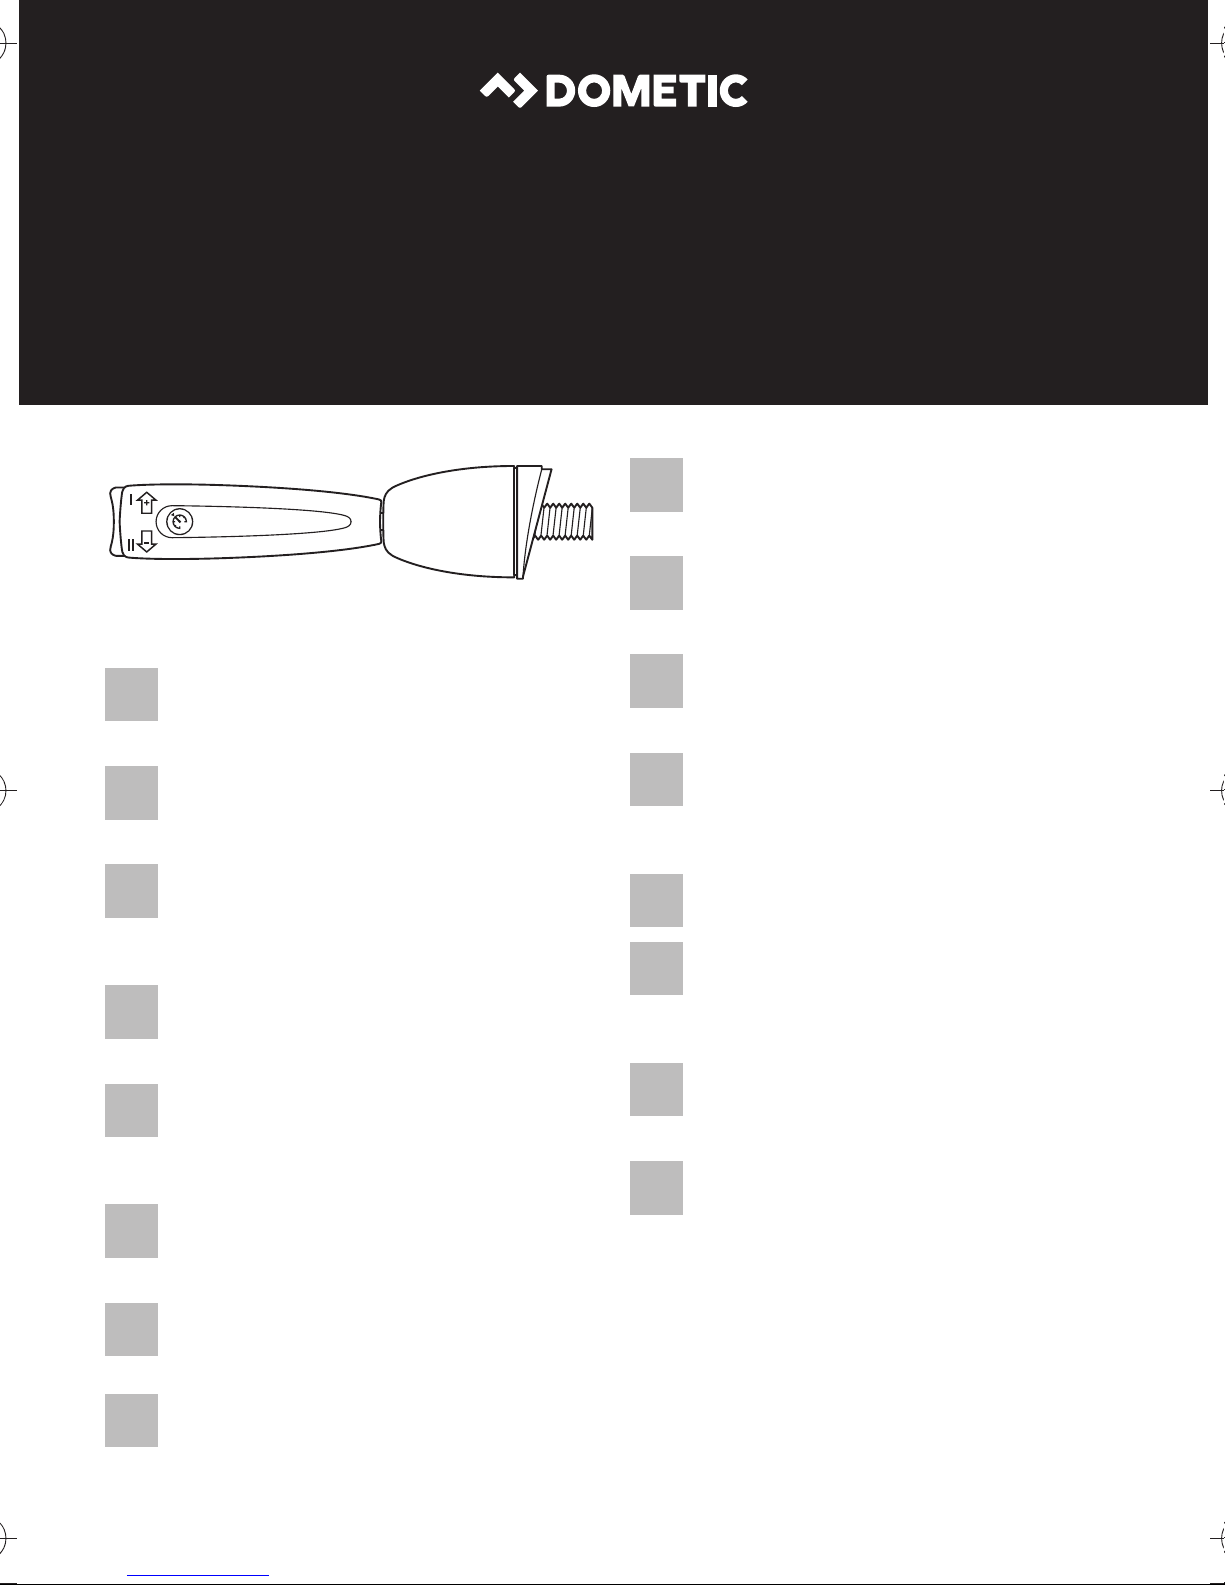
1 1 Control lever 9600000387
21Outer adaptor
31Inner adaptor
42Spring washer
51M14 nut
6 1 Plug housing
Quantity Description
8
Page 9

MagicSpeed MSBE7 Intended use
EN
4Intended use
MagicSpeed MSBE7 (ref. no. 9600000387) is control lever which is connected onto a cruise
control. The control lever transmits the driver's commands to the speed regulator's electronic
module, which maintains a constant set speed.
MagicSpeed is designed as an aid for drivers; it does not relieve you of the duty to take
proper care when driving.
MagicSpeed MSBE7 is designed for installation in cars, vans and motor homes.
5 Technical description
5.1 Function description
This MagicSpeed accessory is a control lever which is connected to the electronic module of the
MS 880 cruise control. The control lever allows you to make the required settings. It should be
installed near the steering column.
The electronic module measures the current speed and compares it to the set speed.
NOTE
I
To guarantee safe and economical operation, never use the speed regulator in congested traffic
or on wet, slippery roads.
In the event of an emergency, you can always switch off the ignition, in order to
deactivate MagicSpeed.
9
Page 10
Technical description MagicSpeed MSBE7
EN
5.2 Displays and controls
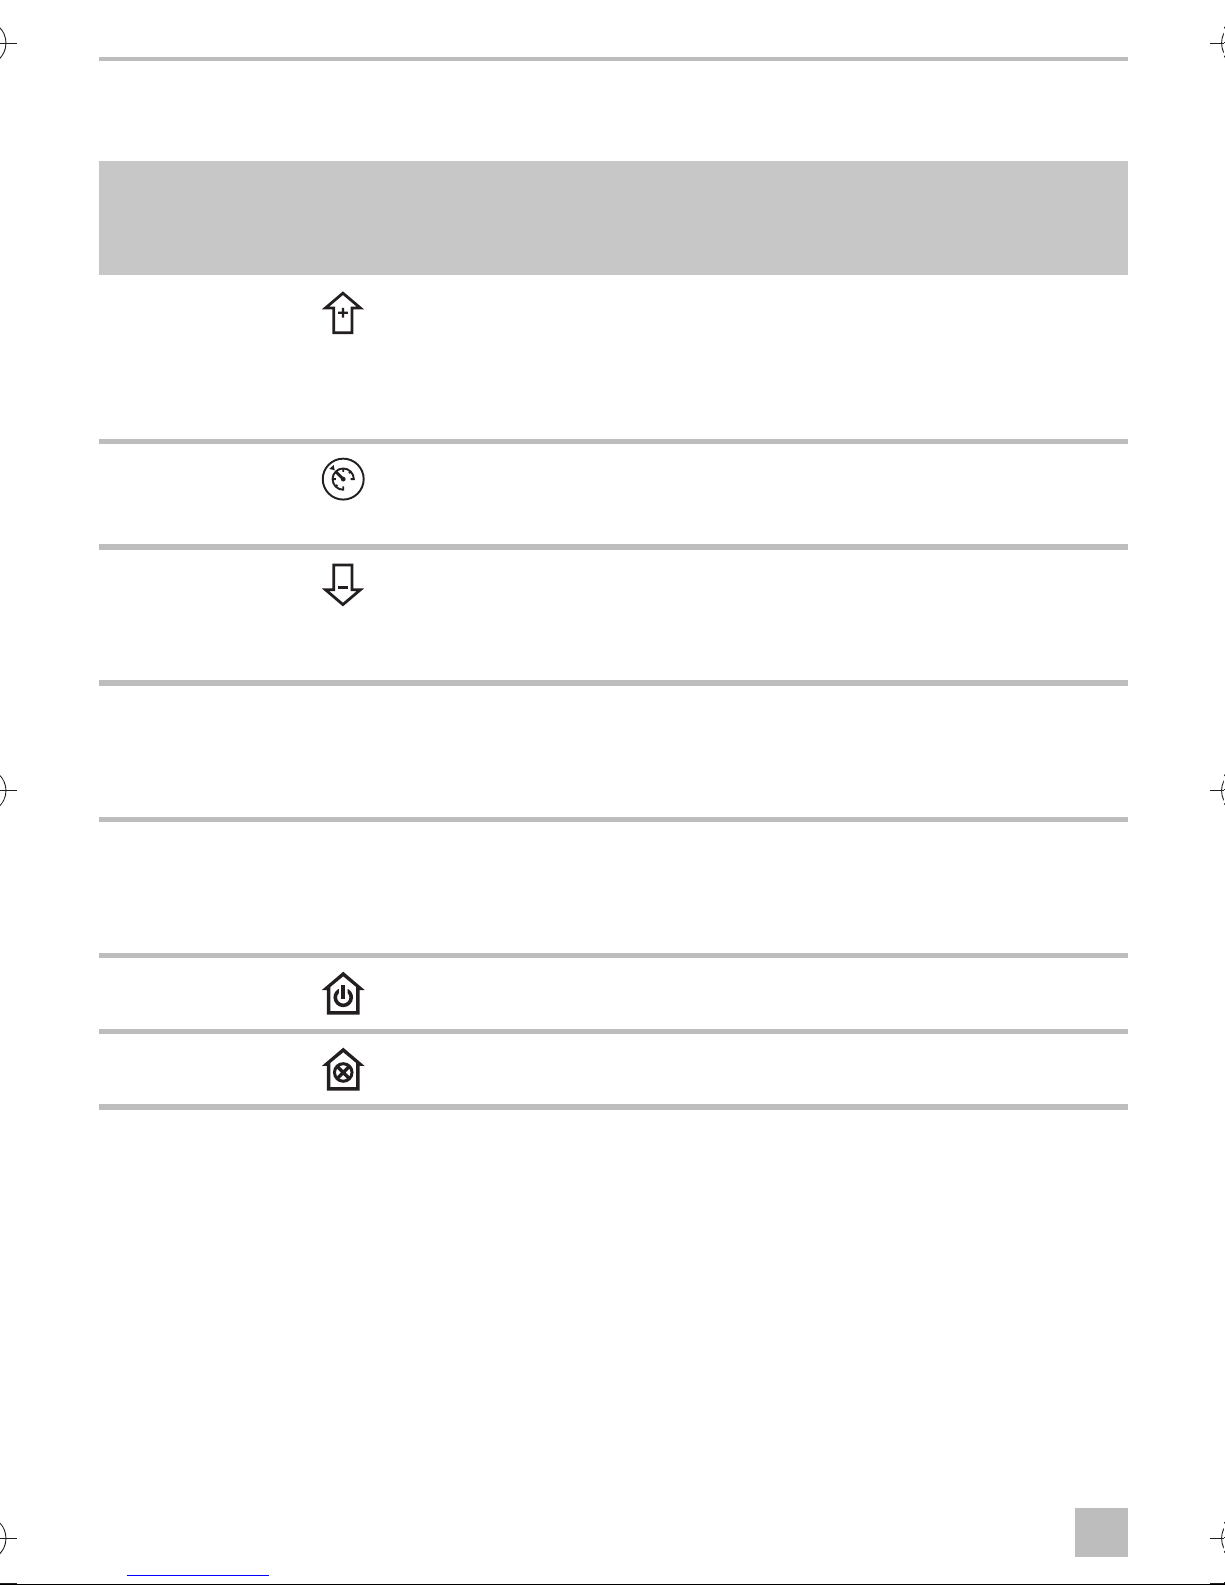
The control panel features the following displays and controls:
No. in
fig. 5,
page 4
1 Increases the cruising speed.
2 This LED lights up green when the cruise control is switched on.
3 Decreases the cruising speed.
Symbol Explanation
Saves the current cruising speed. This is deleted when the
ignition is switched off.
Performs the SET function (confirm) (see the MS880 instruction
manual)
This LED lights up orange when a current speed or a speed from
memory I or II is activated.
Activates the last cruising speed saved.
Performs the RES function (RESUME) (see page 15 and the
MS880 instruction manual)
4 I Saves a required cruising control, for example 70 km/h
(see chapter “Using MagicSpeed” on page 14).
Retrieves the last cruising speed saved. This speed remains
saved even after the ignition is switched off.
5 II Saves a required cruising control, for example 120 km/h
(see chapter “Using MagicSpeed” on page 14).
Retrieves the last cruising speed saved. This speed remains
saved even after the ignition is switched off.
6 Switches the cruise control on and off.
7 Deactivates the current cruise control set. The cruise control
remains switched on. The LED changes from orange to green.
10
Page 11

MagicSpeed MSBE7 Installing MagicSpeed
EN
6 Installing MagicSpeed
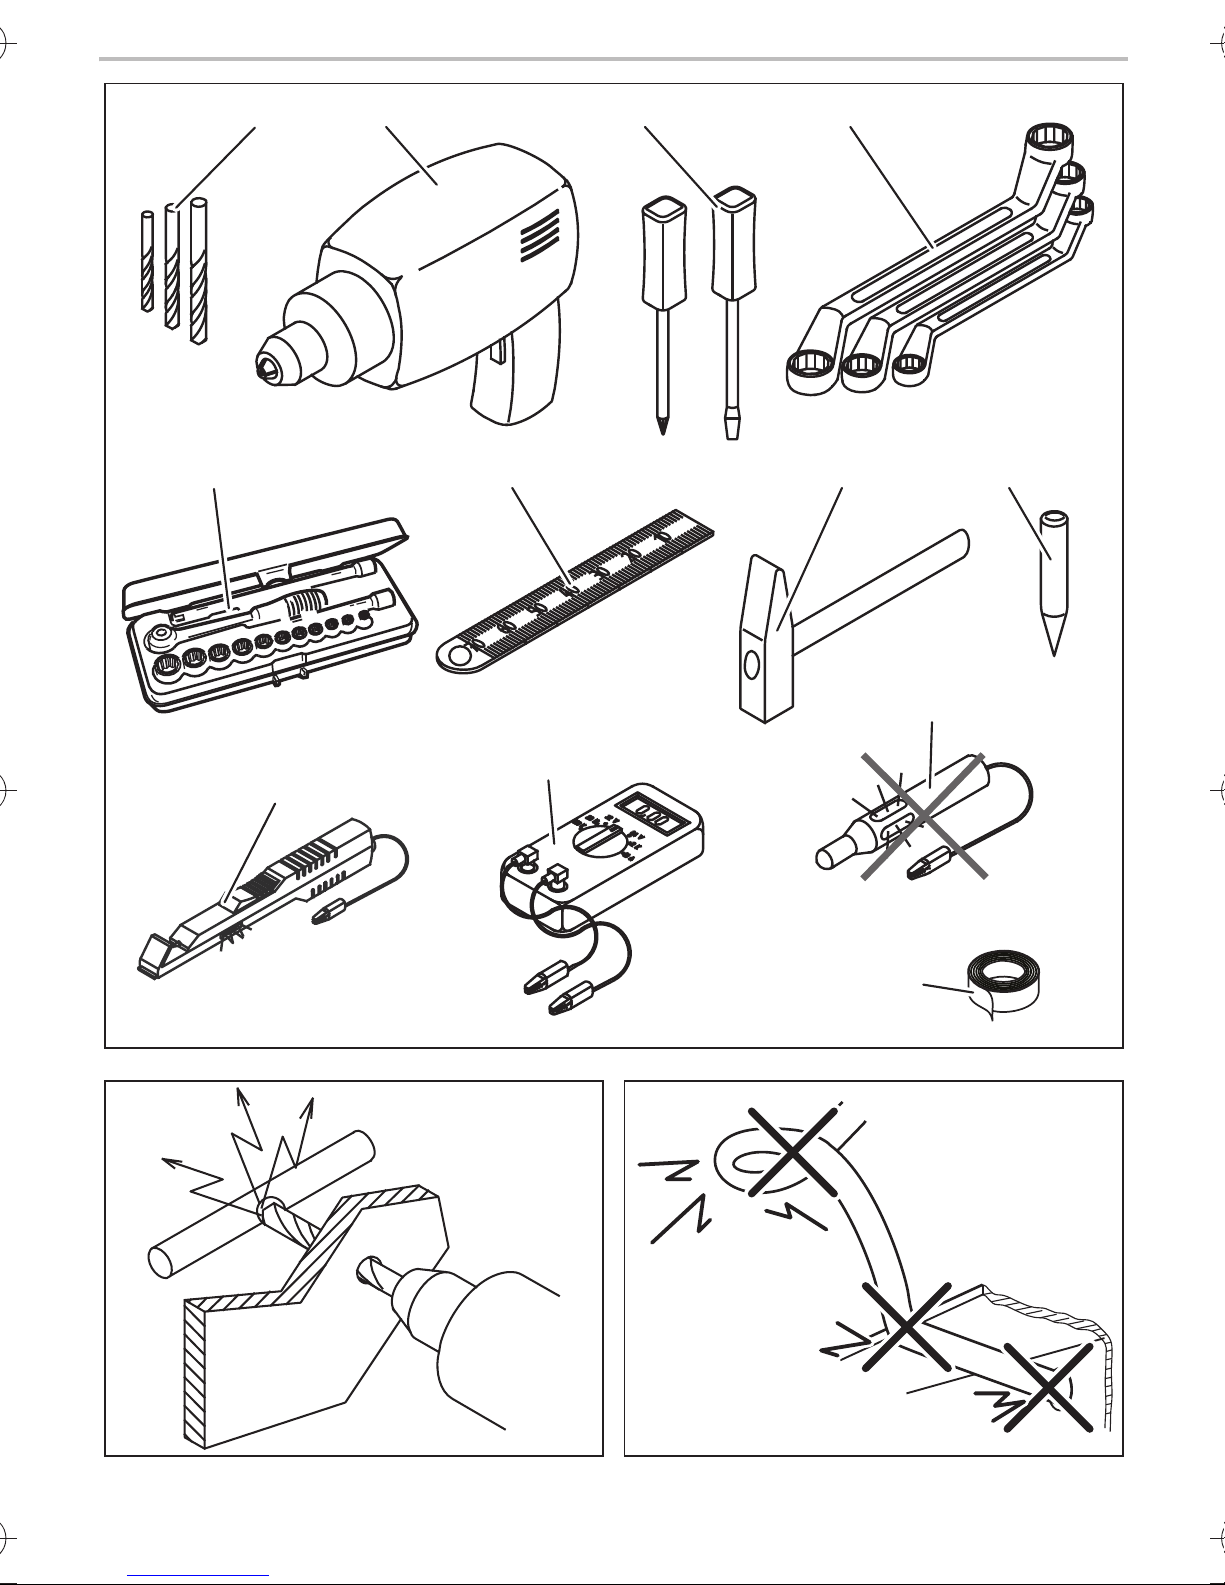
6.1 Tools required
For installation and assembly you will need the following tools:
• Drill bit set (fig. 1 1, page 3)
• Electric drill (fig. 1 2, page 3)
• Screwdriver (fig. 1 3, page 3)
• Set of ring or open-ended spanners (fig. 1 4, page 3)
• Set of box spanners (fig. 1 5, page 3)
• Measuring ruler (fig. 1 6, page 3)
• Hammer (fig. 1 7, page 3)
• Centre punch (fig. 1 8, page 3)
To establish and test the electrical connection, the following tools are required:
• Diode test lamp (fig. 1 9, page 3) or voltmeter (fig. 1 10, page 3)
• Insulating tape (fig. 1 12, page 3)
• Sealant
• Cable bushing sleeves (optional)
To fasten the module and the cables, you may need additional screws and cable binders.
6.2 Installing the control lever
When selecting the installation location, observe the following instructions:
• Make sure the driver does not have to reach through the steering wheel to use the control lever.
• Install the control lever in a suitable position on the steering column where it can be safely used
at all times.
NOTICE!
A
Before drilling holes, make sure the drill bit will not damage anything on the other side
(fig. 2, page 3).
➤ Remove the cover on the steering column.
➤ Drill a 10 mm hole.
➤ Insert the outer adaptor (fig. 6 2, page 5) onto the thread of the control lever (fig. 6 1,
page 5).
➤ Guide the thread through the drill hole.
➤ Attach the control lever by pushing the spring washers (fig. 6 4, page 5) and the inner adap-
tor (fig. 6 3, page 5) onto the thread and tightening with the nut (fig. 6 5, page 5).
11
Page 12

Connecting the electrical power to MagicSpeed MagicSpeed MSBE7
EN
➤ Lay the connection cable to the cable set.
➤ Replace the cover on the steering column.
7 Connecting the electrical power to MagicSpeed
7.1 General notes on laying cables
NOTE
I
• As far as possible, use original ducts for laying the cables, or other suitable options,
such as panelling edges, ventilation grilles or dummy plugs. If no openings are
available, you must drill holes for the cables. Check beforehand that there is
sufficient space on the other side for the drill head to come out.
• Cables and connections that are not properly installed will cause malfunctions or
damage to components. Correct installation of cables and connections ensures
lasting and trouble-free operation of the retrofitted components.
Therefore, please observe the following instructions:
• To prevent damage to the cables, when laying them, ensure that they are far enough away from
hot or moving vehicle components (exhaust pipes, drive shafts, light systems, fans, heater etc.).
• Wrap insulating tape around every connection on the cable (even inside the vehicle).
• When laying electric connections (fig. 3, page 3), ensure that
– They are not kinked or twisted
– They do not rub on edges
– They are not laid in sharp-edged ducts without protection
• Protect every hole you drill against water penetration, e.g. by using a cable with a sealant and
by spraying the cable and the the cable sleeve with sealant.
12
Page 13
MagicSpeed MSBE7 Programming MagicSpeed
EN
7.2 Connecting the control lever
➤ Plug the connection cable of the control lever (fig. 7 1, page 5) as follows into the sockets of
the 8 pin plug housing (fig. 7 2, page 5):
–Blue into slot 1
–Brown into slot 2
–Yellow into slot 3
– Black into slot 4
– Slot 5 is not assigned
–Red into slot 6
–Green into slot 7
–Orange into slot 8
Make sure that the colours on the connection cables match those on the mating connector or
the colour markings on the plug housing.
➤ Lay the connection cable for the control lever to the electronic module.
➤ Plug the assembled 8-pin compact plug of the control lever into the 8-pin socket of the cable
set of the MagicSpeed cruise control (fig. 8, page 5).
8 Programming MagicSpeed
➤ Program MagicSpeed as described in the installation and operating manual of the cruise
control.
9 Performing a functional test
NOTE
I
➤ Start the vehicle.
➤ Switch on the cruise control by pressing the control lever in the direction.
✓ The LED on the control lever lights up green.
✓ You will hear two signals.
➤ Drive at a speed of approx. 40 to 50 km/h.
➤ Press the control lever in the direction to activate the cruise control.
✓ The LED on the control lever lights up orange.
The lowest speed at which the speed regulator can operate is approximately 30 km/h
and the highest approximately 140 km/h.
✓ The cruise control gently takes on the speed and maintains the driving speed constantly.
13
Page 14

Using MagicSpeed MagicSpeed MSBE7
EN
10 Using MagicSpeed
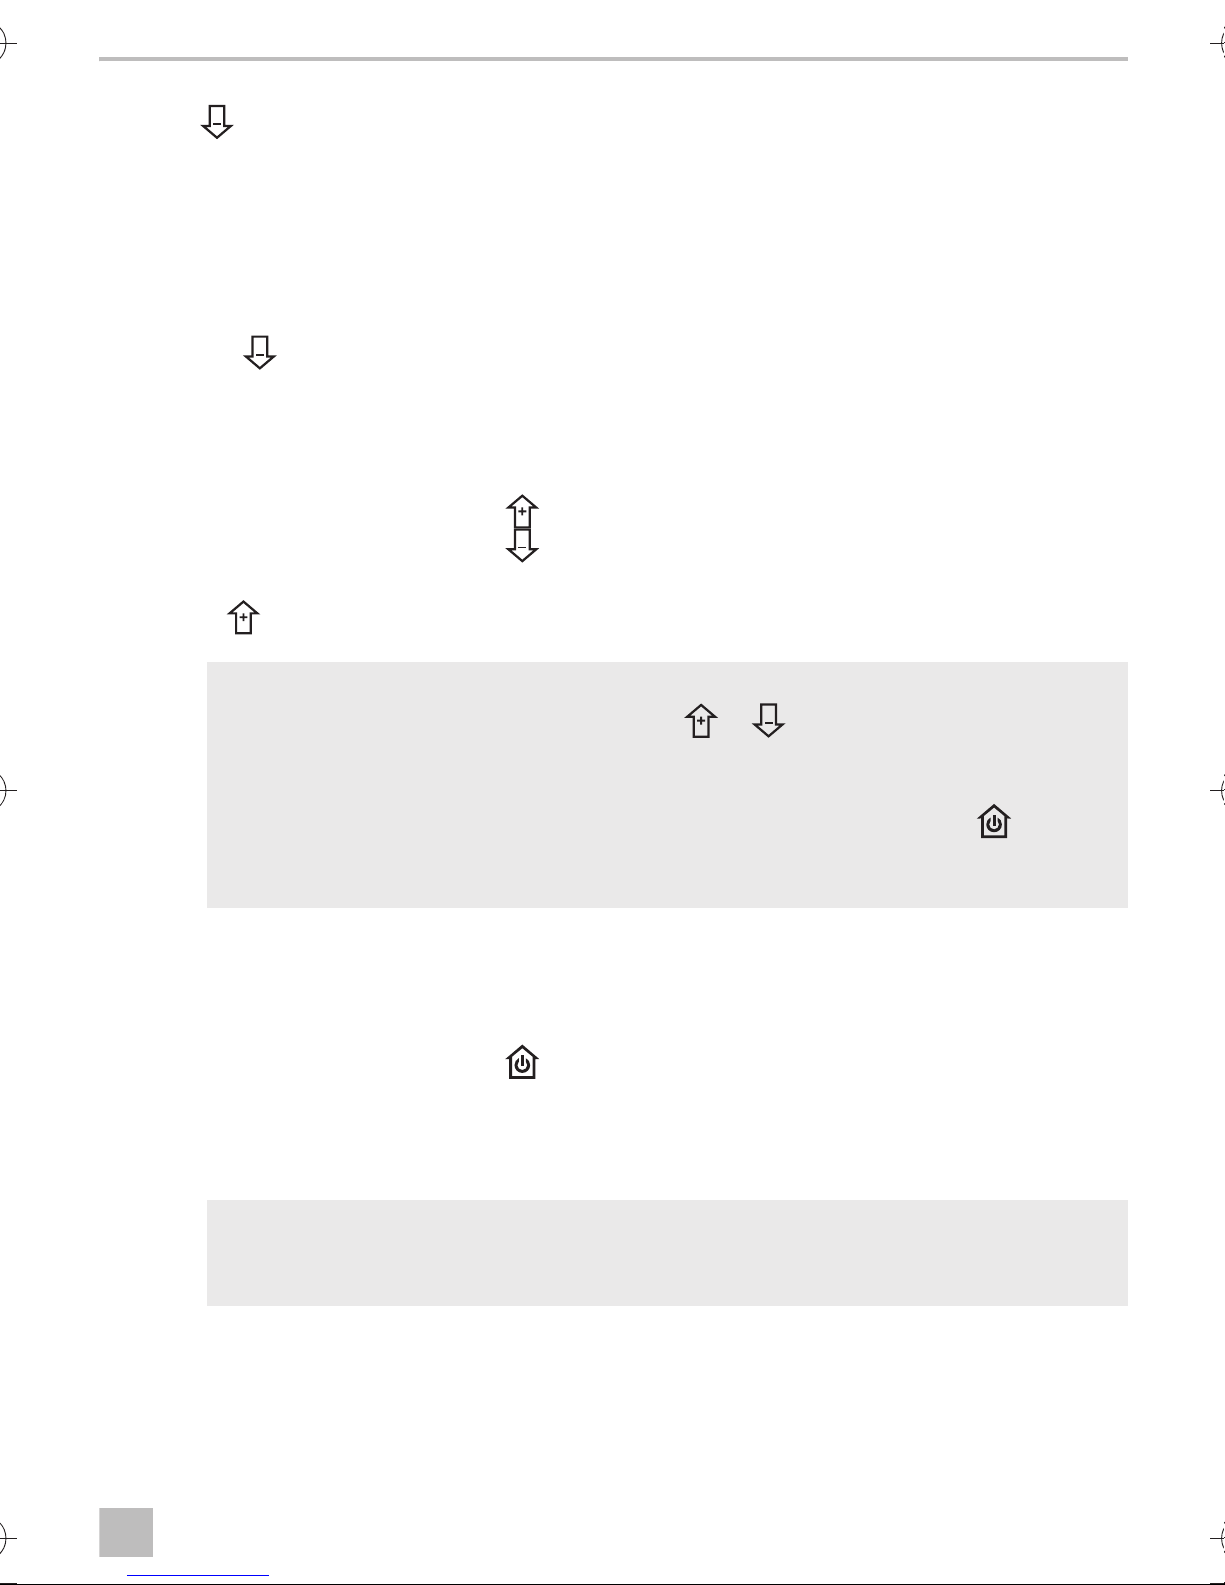
You operate MagicSpeed using the control lever.
Switching MagicSpeed on and off
➤ Press the control lever once in the direction to switch on the cruise control.
✓ The LED on the control lever lights up green.
✓ You will hear two signals.
➤ When the cruise control is switched on, press the control lever again in the direction to
switch the cruise control off.
✓ The LED on the control lever goes out.
✓ The last saved current speed will be discarded.
Saving required speeds
Use the I or II button to save two speeds in the cruise control (for example 70 km/h and 120 km/h).
NOTICE!
A
The engine can be damaged if the speed is too high. Save the required speed whilst
you are underway travelling at that speed.
NOTE
I
➤ Press and hold down the I or II button until you hear two beeps, to save the speed you are
currently driving at.
This set speed is maintained until:
– you apply the brake or clutch pedal,
– you have switched off the cruise control or you cancel the function,
– the vehicle slows down to below the lower activation speed,
– the speed drops by more than 25% on a slope.
➤ Press the I or II button briefly to use the last saved speed.
The control lever has two memory buttons for saving two different speeds (for example
70 km/h and 120 km/h).
14
Page 15
MagicSpeed MSBE7 Maintaining and cleaning MagicSpeed
EN
Retrieving the last saved speed
Press the button to retrieve the last saved speed when:
• you have switched on the cruise control,
• you do not apply the brake or clutch pedal,
• you do not switch off the ignition in the meantime,
• your vehicle is travelling at over 35 km/h.
➤ Press the button and let go again immediately to retrieve the last saved speed.
Accelerating and decelerating
If the cruise control is activated, you have the option of fine tuning it. This allows you to adapt the
speed of the vehicle precisely to suit traffic conditions or speed limits.
➤ Press the control lever once in the direction, to increase the speed by 1 km/h.
➤ Press the control lever once in the direction, to reduce the speed by 1 km/h.
If, for example, you wish to increase the speed by around 3 km/h, press the control lever three
times in the direction.
NOTE
I
Disabling
If the cruise control is activated, you have the option of disabling it. However the cruise control still
remains switched on.
➤ Press the control lever once in the direction.
• If you press the control lever for longer in or direction, the speed will keep
changing until you let go of the control lever.
• If you wish to decrease the set speed sharply, do not use the control lever.
Switch off the cruise control by pressing the control lever once in the direction
or apply the brake or clutch and then set the required speed again using the control
lever.
11 Maintaining and cleaning MagicSpeed
NOTICE!
A
Do not use sharp or hard objects or cleaning agents for cleaning as these may damage
the product.
➤ Occasionally clean the product with a damp cloth.
15
Page 16
Guarantee MagicSpeed MSBE7
EN
12 Guarantee
The statutory warranty period applies. If the product is defective, please contact the
manufacturer's branch in your country (see the back of the instruction manual for the addresses) or
your retailer.
For repair and guarantee processing, please include the following documents when you send in
the device:
• A copy of the receipt with purchasing date
• A reason for the claim or description of the fault
13 Disposal
➤ Place the packaging material in the appropriate recycling waste bins wherever possible.
If you wish to finally dispose of the product, ask your local recycling centre or specialist
dealer for details about how to do this in accordance with the applicable disposal
M
regulations.
14 Technical data
MagicSpeed MSBE7
Ref. no.: 9600000387
Operating voltage: 12 V
Operating temperature: –40 °C to +85 °C
Certification: ABE no. 91178
16
Page 17

MagicSpeed MSBE7 Erklärung der Symbole
DE
Bitte lesen Sie diese Anleitung vor Einbau und Inbetriebnahme sorgfältig durch und
bewahren Sie sie auf. Geben Sie sie im Falle einer Weitergabe des Produktes an den
Nutzer weiter.
Inhaltsverzeichnis
1 Erklärung der Symbole . . . . . . . . . . . . . . . . . . . . . . . . . . . . . . . . . . . . . . . . . . . . . . . . . . . . . . 17
2 Sicherheits- und Einbauhinweise. . . . . . . . . . . . . . . . . . . . . . . . . . . . . . . . . . . . . . . . . . . . . . 18
3 Lieferumfang . . . . . . . . . . . . . . . . . . . . . . . . . . . . . . . . . . . . . . . . . . . . . . . . . . . . . . . . . . . . . . 19
4 Bestimmungsgemäßer Gebrauch . . . . . . . . . . . . . . . . . . . . . . . . . . . . . . . . . . . . . . . . . . . . .20
5 Technische Beschreibung . . . . . . . . . . . . . . . . . . . . . . . . . . . . . . . . . . . . . . . . . . . . . . . . . . .20
6 MagicSpeed montieren . . . . . . . . . . . . . . . . . . . . . . . . . . . . . . . . . . . . . . . . . . . . . . . . . . . . .22
7 MagicSpeed elektrisch anschließen . . . . . . . . . . . . . . . . . . . . . . . . . . . . . . . . . . . . . . . . . . .23
8 MagicSpeed programmieren . . . . . . . . . . . . . . . . . . . . . . . . . . . . . . . . . . . . . . . . . . . . . . . .24
9 Funktion testen . . . . . . . . . . . . . . . . . . . . . . . . . . . . . . . . . . . . . . . . . . . . . . . . . . . . . . . . . . . .24
10 MagicSpeed benutzen. . . . . . . . . . . . . . . . . . . . . . . . . . . . . . . . . . . . . . . . . . . . . . . . . . . . . .25
11 MagicSpeed pflegen und reinigen . . . . . . . . . . . . . . . . . . . . . . . . . . . . . . . . . . . . . . . . . . . .27
12 Gewährleistung . . . . . . . . . . . . . . . . . . . . . . . . . . . . . . . . . . . . . . . . . . . . . . . . . . . . . . . . . . .27
13 Entsorgung . . . . . . . . . . . . . . . . . . . . . . . . . . . . . . . . . . . . . . . . . . . . . . . . . . . . . . . . . . . . . . .27
14 Technische Daten . . . . . . . . . . . . . . . . . . . . . . . . . . . . . . . . . . . . . . . . . . . . . . . . . . . . . . . . . .27
1 Erklärung der Symbole
WARNUNG!
!
!
A
Sicherheitshinweis: Nichtbeachtung kann zu Tod oder schwerer Verletzung führen.
VORSICHT!
Sicherheitshinweis: Nichtbeachtung kann zu Verletzungen führen.
ACHTUNG!
Nichtbeachtung kann zu Materialschäden führen und die Funktion des Produktes
beeinträchtigen.
HINWEIS
I
Ergänzende Informationen zur Bedienung des Produktes.
17
Page 18

Sicherheits- und Einbauhinweise MagicSpeed MSBE7
DE
2 Sicherheits- und Einbauhinweise
Der Hersteller übernimmt in folgenden Fällen keine Haftung für Schäden:
• Beschädigungen am Produkt durch mechanische Einflüsse und Überspannungen
• Veränderungen am Produkt ohne ausdrückliche Genehmigung vom Hersteller
• Verwendung für andere als die in der Anleitung beschriebenen Zwecke
Beachten Sie die vom Fahrzeughersteller und vom Kfz-Handwerk vorgeschriebenen
Sicherheitshinweise und Auflagen!
WARNUNG!
Unzureichende Leitungsverbindungen können zur Folge haben, dass durch Kurzschluss
!
A
• Kabelbrände entstehen,
• der Airbag ausgelöst wird,
• elektronische Steuerungseinrichtungen beschädigt werden,
• elektrische Funktionen ausfallen (Blinker, Bremslicht, Hupe, Zündung, Licht).
ACHTUNG!
Klemmen Sie wegen der Kurzschlussgefahr vor Arbeiten an der Fahrzeugelektrik immer
den Minuspol ab.
Bei Fahrzeugen mit Zusatzbatterie müssen Sie an dieser ebenfalls den Minuspol
abklemmen.
Beim Abklemmen des Minuspols der Batterie verlieren alle flüchtigen Speicher der Komfortelektronik ihre gespeicherten Daten.
• Folgende Daten müssen Sie je nach Fahrzeugausstattung neu einstellen:
–Radiocode
–Fahrzeuguhr
– Zeitschaltuhr
– Bordcomputer
– Sitzposition
Hinweise zur Einstellung finden Sie in der jeweiligen Bedienungsanleitung.
Beachten Sie folgende Hinweise bei der Montage:
• Befestigen Sie die im Fahrzeug montierten Teile so, dass sie sich unter keinen Umständen
(scharfes Abbremsen, Verkehrsunfall) lösen und zu Verletzungen der Fahrzeuginsassen
führen können.
• Befestigen Sie verdeckt unter Verkleidungen anzubringende Teile des Systems so, dass sie sich
nicht lösen oder andere Teile und Leitungen beschädigen und keine Fahrzeugfunktionen
(Lenkung, Pedale usw.) beeinträchtigen können.
• Achten Sie beim Bohren auf ausreichenden Freiraum für den Bohreraustritt, um Schäden zu ver-
meiden.
• Entgraten Sie jede Bohrung und behandeln Sie diese mit Rostschutzmittel.
• Beachten Sie immer die Sicherheitshinweise des Fahrzeugherstellers.
Einige Arbeiten (z. B. an Rückhaltesystemen wie Airbag usw.) dürfen nur von geschultem Fachpersonal durchgeführt werden.
18
Page 19
MagicSpeed MSBE7 Lieferumfang
DE
Beachten Sie folgende Hinweise bei der Arbeit an elektrischen Teilen:
• Benutzen Sie zum Prüfen der Spannung in elektrischen Leitungen nur eine Diodenprüflampe
oder ein Voltmeter.
Prüflampen mit einem Leuchtkörper nehmen zu hohe Ströme auf, wodurch die Fahrzeugelektronik beschädigt werden kann.
• Beachten Sie beim Verlegen der elektrischen Anschlüsse, dass diese
– nicht geknickt oder verdreht werden,
–nicht an Kanten scheuern,
– nicht ohne Schutz durch scharfkantige Durchführungen verlegt werden.
• Isolieren Sie alle Verbindungen und Anschlüsse.
• Sichern Sie die Kabel gegen mechanische Beanspruchung durch Kabelbinder oder Isolier-
band, z. B. an vorhandenen Leitungen.
Beachten Sie insbesondere folgende Hinweise:
• Beachten Sie die geltenden gesetzlichen Vorschriften.
• Verhalten Sie sich beim Fahren so, dass eine Gefährdung anderer Verkehrsteilnehmer ausge-
schlossen ist.
• MagicSpeed soll Sie zusätzlich unterstützen, d. h. das Gerät entbindet Sie nicht von Ihrer
besonderen Vorsichtspflicht beim Fahren.
3Lieferumfang
Nr. in
Abb. 4,
Seite 4
1 1 Bedienhebel 9600000387
21Äußerer Adapter
31Innerer Adapter
4 2 Federring
5 1 Mutter M14
6 1 Steckergehäuse
Menge Bezeichnung
19
Page 20

Bestimmungsgemäßer Gebrauch MagicSpeed MSBE7
DE
4 Bestimmungsgemäßer Gebrauch
MagicSpeed MSBE7 (Art.-Nr. 9600000387) ist ein Bedienhebel, der an einen Geschwindigkeitsregler angeschlossen wird. Der Bedienhebel überträgt die Befehle des Fahrers an das Elektronikmodul des Geschwindigkeitsreglers, der die eingestellte Geschwindigkeit möglichst konstant
beibehält.
MagicSpeed stellt eine Unterstützung beim Fahren dar, es entbindet Sie jedoch nicht von der
besonderen Vorsichtspflicht beim Fahren.
MagicSpeed MSBE7 ist zum Einbau in PKW, Transporter und Wohnmobile ausgelegt.
5 Technische Beschreibung
5.1 Funktionsbeschreibung
MagicSpeed Accessory ist ein Bedienhebel, der an das Elektronikmodul des Geschwindigkeitsreglers MS880 angeschlossen wird. Über den Bedienhebel nehmen Sie die gewünschten
Einstellungen vor. Es sollte im Bereich der Lenksäule montiert werden.
Das Elektronikmodul misst die tatsächliche Geschwindigkeit und vergleicht diese mit Ihrer
Wunschgeschwindigkeit.
HINWEIS
I
Um einen sicheren und wirtschaftlichen Betrieb zu gewährleisten, sollten Sie den Geschwindigkeitsregler niemals bei Stau oder auf nassen, rutschigen Straßen einsetzen.
Falls ein Notfall eintritt, können Sie jederzeit die Zündung ausschalten, um
MagicSpeed zu deaktivieren.
20
Page 21
MagicSpeed MSBE7 Technische Beschreibung
DE
5.2 Anzeigen und Bedienelemente
Das Bedienpanel besitzt folgende Anzeigen und Bedienelemente:
Pos. in
Abb. 5,
Seite 4
1 Dient zum Erhöhen der Reisegeschwindigkeit.
2Diese LED leuchtet grün auf, wenn der Geschwindigkeitsregler
3 Dient zum Verringern der Reisegeschwindigkeit.
Symbol Erklärung
Dient zum Speichern der momentanen Reisegeschwindigkeit.
Diese wird beim Ausschalten der Zündung gelöscht.
Führt die Funktion SET (Bestätigen) aus (siehe Anleitung MS880)
eingeschaltet ist.
Diese LED leuchtet orange auf, wenn eine momentane
Geschwindigkeit oder eine Geschwindigkeit aus dem Speicher I
oder II aktiviert wird.
Dient zum Aktivieren der zuletzt gespeicherten Reisegeschwindigkeit.
Führt die Funktion RES (RESUME) aus (siehe Seite 26 und
Anleitung MS880)
4 I Dient zum Speichern einer gewünschten Reisegeschwindigkeit,
z. B. 70 km/h (siehe Kapitel „MagicSpeed benutzen“ auf
Seite 25).
Dient zum Abrufen der zuletzt gespeicherten Reisegeschwindigkeit. Diese Geschwindigkeit bleibt auch nach
Ausschalten der Zündung gespeichert.
5 II Dient zum Speichern einer gewünschten Reisegeschwindigkeit,
z. B. 120 km/h (siehe Kapitel „MagicSpeed benutzen“ auf
Seite 25).
Dient zum Abrufen der zuletzt gespeicherten Reisegeschwindigkeit. Diese Geschwindigkeit bleibt auch nach
Ausschalten der Zündung gespeichert.
6 Dient zum Ein- und Ausschalten des Geschwindigkeitsreglers.
7 Dient zur Deaktivierung der momentan gesetzten Reise-
geschwindigkeit.. Der Geschwindigkeitsregler bleibt eingeschaltet. Die LED wechselt von orange auf grün.
21
Page 22

MagicSpeed montieren MagicSpeed MSBE7
DE
6 MagicSpeed montieren
6.1 Benötigtes Werkzeug
Für Einbau und Montage benötigen Sie folgende Werkzeuge:
• Satz Bohrer (Abb. 1 1, Seite 3)
• Bohrmaschine (Abb. 1 2, Seite 3)
• Schraubendreher (Abb. 1 3, Seite 3)
• Satz Ring- oder Maulschlüssel (Abb. 1 4, Seite 3)
• Steckschlüsselsatz (Abb. 1 5, Seite 3)
• Maßstab (Abb. 1 6, Seite 3)
• Hammer (Abb. 1 7, Seite 3)
• Körner (Abb. 1 8, Seite 3)
Für den elektrischen Anschluss und seine Überprüfung benötigen Sie folgende Hilfsmittel:
• Diodenprüflampe (Abb. 1 9, Seite 3) oder Voltmeter (Abb. 1 10, Seite 3)
• Isolierband (Abb. 1 12, Seite 3)
• Dichtungsmasse
• Ggf. Kabeldurchführungstüllen
Zur Befestigung der Module und der Kabel benötigen Sie ggf. noch weitere Schrauben und
Kabelbinder.
6.2 Bedienhebel montieren
Beachten Sie bei der Wahl des Montageortes folgende Hinweise:
• Stellen Sie sicher, dass der Fahrer zur Bedienung des Bedienhebels nicht durch das Lenkrad
greifen muss.
• Montieren Sie den Bedienhebel an einer geeigneten Stelle an der Lenksäule, wo eine sichere
Arbeitsweise unter allen Umständen sichergestellt ist.
ACHTUNG!
A
Überprüfen Sie vor dem Bohren immer die Austrittsseite auf freien Durchgang
(Abb. 2, Seite 3).
➤ Montieren Sie die Abdeckung der Lenksäule ab.
➤ Bohren Sie ein 10 mm großes Loch.
➤ Stecken Sie den äußeren Adapter (Abb. 6 2, Seite 5) auf das Gewinde des Bedienhebels
(Abb. 6 1, Seite 5).
➤ Führen Sie das Gewinde durch das Bohrloch.
22
Page 23

MagicSpeed MSBE7 MagicSpeed elektrisch anschließen
DE
➤ Befestigen Sie den Bedienhebel, indem Sie die Federringe (Abb. 6 4, Seite 5) und den
inneren Adapter (Abb. 6 3, Seite 5) auf das Gewinde schieben und mit der Mutter
(Abb. 6 5, Seite 5) festschrauben.
➤ Verlegen Sie das Verbindungskabel zum Kabelsatz.
➤ Montieren Sie die Abdeckung am ursprünglichen Platz.
7 MagicSpeed elektrisch anschließen
7.1 Allgemeine Hinweise zur Kabelverlegung
HINWEIS
I
• Verwenden Sie für die Durchführung der Anschlusskabel nach Möglichkeit
Originaldurchführungen oder andere Durchführungsmöglichkeiten, z. B.
Verkleidungskanten, Lüftungsgitter oder Blindschalter. Wenn keine
Durchführungen vorhanden sind, müssen Sie für die jeweiligen Kabel
entsprechende Löcher bohren. Schauen Sie vorher nach, ob ausreichender
Freiraum für den Bohreraustritt vorhanden ist.
• Nicht fachgerechte Kabelverlegungen und Kabelverbindungen führen immer
wieder zu Fehlfunktionen oder Beschädigungen von Bauteilen. Eine korrekte
Kabelverlegung und Kabelverbindung ist die Grundvoraussetzung für eine
dauerhafte und fehlerfreie Funktion der nachgerüsteten Komponenten.
Beachten Sie deshalb folgende Hinweise:
• Um Beschädigungen am Kabel zu vermeiden, halten Sie beim Verlegen der Kabel immer ausreichend Abstand zu heißen und sich bewegenden Fahrzeugteilen (Auspuffrohre, Antriebswellen, Lichtmaschine, Lüfter, Heizung usw.).
• Umwickeln Sie jede Verbindung am Kabel (auch im Fahrzeug) dicht mit einem guten Isolierband.
• Beachten Sie beim Verlegen der Kabel (Abb. 3, Seite 3), dass diese
– nicht stark geknickt oder verdreht werden,
–nicht an Kanten scheuern,
– nicht ohne Schutz durch scharfkantige Durchführungen verlegt werden.
• Schützen Sie jeden Durchbruch durch geeignete Maßnahmen gegen Wassereinbruch, z. B.
durch Einsetzen des Kabels mit Dichtungsmasse und durch Abspritzen des Kabels und der
Durchführungstülle mit Dichtungsmasse.
23
Page 24
MagicSpeed programmieren MagicSpeed MSBE7
DE
7.2 Bedienhebel anschließen
➤ Stecken Sie die Anschlusskabel des Bedienhebels (Abb. 7 1, Seite 5) wie folgt in die Steck-
plätze des 8-poligen Steckergehäuses (Abb. 7 2, Seite 5):
– blau in Steckplatz 1
– braun in Steckplatz 2
–gelb in Steckplatz 3
– schwarz in Steckplatz 4
– Steckplatz 5 bleibt unbelegt
–rot in Steckplatz 6
– grün in Steckplatz 7
–orange in Steckplatz 8
Achten Sie darauf, dass die Farben der Anschlusskabel mit denen aus dem Gegenstecker
oder den Farbmarkierungen auf dem Steckergehäuse übereinstimmen.
➤ Führen Sie das Anschlusskabel des Bedienhebels zum Elektronikmodul.
➤ Stecken Sie den montierten 8-poligen Kompaktstecker des Bedienhebels in die 8-polige
Buchse des Kabelsatzes des Geschwindigkeitsreglers MagicSpeed (Abb. 8, Seite 5).
8 MagicSpeed programmieren
➤ Programmieren Sie MagicSpeed wie in der Montage- und Bedienungsanleitung des
Geschwindigkeitsreglers beschrieben.
9 Funktion testen
HINWEIS
I
➤ Starten Sie Ihr Fahrzeug.
➤ Schalten Sie den Geschwindigkeitsregler ein, indem Sie den Bedienhebel in Richtung
betätigen.
✓ Die LED am Bedienhebel leuchtet grün auf.
✓ Zwei akustische Quittiersignale ertönen.
➤ Fahren Sie mit einer Geschwindigkeit von ca. 40 bis 50 km/h.
➤ Drücken Sie den Bedienhebel in Richtung , um den Geschwindigkeitsregler zu aktivieren.
Die niedrigste Geschwindigkeit, bei dem der Geschwindigkeitsregler arbeitet, liegt
ca. bei 30 km/h und die höchste bei ca. 140 km/h.
✓ Die LED am Bedienhebel leuchtet orange.
✓ Der Geschwindigkeitsregler übernimmt sanft die Geschwindigkeit und hält die gefahrene
Geschwindigkeit konstant.
24
Page 25
MagicSpeed MSBE7 MagicSpeed benutzen
DE
10 MagicSpeed benutzen
Sie bedienen MagicSpeed über den Bedienhebel.
MagicSpeed ein- und ausschalten
➤ Drücken Sie den Bedienhebel einmal in Richtung , um den Geschwindigkeitsregler einzu-
schalten.
✓ Die LED am Bedienhebel leuchtet grün auf.
✓ Zwei akustische Quittiersignale ertönen.
➤ Wenn der Geschwindigkeitsregler eingeschaltet ist, drücken Sie den Bedienhebel erneut in
Richtung , um den Geschwindigkeitsregler auszuschalten.
✓ Die LED am Bedienhebel erlischt.
✓ Die zuletzt gespeicherte momentane Geschwindigkeit wird verworfen.
Gewünschte Geschwindigkeit speichern
Mit der Taste I oder II können Sie zwei Geschwindigkeiten im Geschwindigkeitsregler speichern
(z. B. 70 km/h und 120 km/h).
ACHTUNG!
A
I
➤ Halten Sie die Taste I oder II so lange gedrückt, bis zwei Pieptöne ertönen, um die momentan
gefahrene Geschwindigkeit zu speichern.
Diese Wunschgeschwindigkeit wird aufrecht erhalten, bis
– Sie das Brems- oder das Kupplungspedal betätigen,
– Sie den Geschwindigkeitsregler ausgeschaltet haben oder bei Funktion Abbrechen,
– die Geschwindigkeit des Fahrzeuges unter der unteren Einschaltgeschwindigkeit liegt,
– die Geschwindigkeit an einer Steigung um mehr als ca. 25 % abfällt.
➤ Drücken Sie die Taste I oder II kurz, um die zuvor gespeicherte Geschwindigkeit zu
verwenden.
Der Motor kann durch zu hohe Drehzahlen beschädigt werden. Speichern Sie die
gewünschte Geschwindigkeit in dem Gang, in dem diese Geschwindigkeit gefahren
wird.
HINWEIS
Der Bedienhebel besitzt zwei Speichertaster, mit denen zwei unterschiedliche
Geschwindigkeiten (z.B. 70 km/h und 120 km/h) gespeichert werden können.
25
Page 26
MagicSpeed benutzen MagicSpeed MSBE7
DE
Zuletzt verwendete Geschwindigkeit wieder aufrufen
Mit der Taste können Sie die zuletzt verwendete Geschwindigkeit wieder aufrufen, wenn
• Sie den Geschwindigkeitsregler eingeschaltet haben,
• Sie das Brems- oder Kupplungspedal nicht betätigen,
• Sie die Zündung zwischenzeitlich nicht ausschalten,
• die Geschwindigkeit Ihres Fahrzeuges über 35 km/h beträgt.
➤ Drücken Sie die Taste und lassen Sie sie sofort wieder los, um die zuletzt verwendete
Geschwindigkeit wieder aufzurufen.
Beschleunigen und verlangsamen
Wenn der Geschwindigkeitsregler aktiviert ist, haben Sie die Möglichkeit zur Feinabstimmung.
Dadurch können Sie die Fahrzeuggeschwindigkeit genau dem Verkehrsfluss oder an
Geschwindigkeitsbegrenzungen angleichen.
➤ Drücken Sie den Bedienhebel einmal in Richtung , um die Geschwindigkeit um ca. 1 km/h
zu erhöhen.
➤ Drücken Sie den Bedienhebel einmal in Richtung , um die Geschwindigkeit um ca. 1 km/h
zu verringern.
Wenn Sie zum Beispiel die Geschwindigkeit um etwa 3 km/h erhöhen möchten, drücken Sie den
Bedienhebel dreimal in Richtung .
HINWEIS
I
Abbrechen
Wenn der Geschwindigkeitsregler aktiviert ist, haben Sie die Möglichkeit, den Betrieb zu unterbrechen. Dann bleibt der Geschwindigkeitsregler jedoch weiter eingeschaltet.
➤ Drücken Sie den Bedienhebel einmal in Richtung .
• Wenn Sie den Bedienhebel jeweils länger in Richtung oder drücken, wird
die Geschwindigkeit so lange geändert, bis Sie den Bedienhebel loslassen.
• Wenn Sie die gesetzte Geschwindigkeit extrem verlangsamen wollen, benutzen
Sie nicht den Bedienhebel.
Schalten Sie den Geschwindigkeitsregler aus, indem Sie den Bedienhebel einmal
in Richtung drücken, oder benutzen Sie die Bremse oder die Kupplung, und
setzen Sie danach über den Bedienhebel die gewünschte Geschwindigkeit erneut.
26
Page 27
MagicSpeed MSBE7 MagicSpeed pflegen und reinigen
DE
11 MagicSpeed pflegen und reinigen
ACHTUNG!
A
➤ Reinigen Sie das Produkt gelegentlich mit einem feuchten Tuch.
Keine scharfen oder harten Gegenstände oder Reinigungsmittel zur Reinigung verwenden, da dies zu einer Beschädigung des Produktes führen kann.
12 Gewährleistung
Es gilt die gesetzliche Gewährleistungsfrist. Sollte das Produkt defekt sein, wenden Sie sich bitte
an die Niederlassung des Herstellers in Ihrem Land (Adressen siehe Rückseite der Anleitung) oder
an Ihren Fachhändler.
Zur Reparatur- bzw. Gewährleistungsbearbeitung müssen Sie folgende Unterlagen mitschicken:
• eine Kopie der Rechnung mit Kaufdatum,
• einen Reklamationsgrund oder eine Fehlerbeschreibung.
13 Entsorgung
➤ Geben Sie das Verpackungsmaterial möglichst in den entsprechenden Recycling-Müll.
Wenn Sie das Produkt endgültig außer Betrieb nehmen, informieren Sie sich bitte beim
nächsten Recyclingcenter oder bei Ihrem Fachhändler über die zutreffenden
M
Entsorgungsvorschriften.
14 Technische Daten
MagicSpeed MSBE7
Art.-Nr.: 9600000387
Betriebsspannung: 12 V
Betriebstemperatur: –40 °C bis +85 °C
Zulassungen: ABE Nr. 91178
27
Page 28

MagicSpeed MSBE7
FR
Veuillez lire attentivement cette notice avant le montage et la mise en service. Veuillez
ensuite la conserver. En cas de passer le produit, veuillez le transmettre au nouvel
acquéreur.
Table des matières
1 Explication des symboles . . . . . . . . . . . . . . . . . . . . . . . . . . . . . . . . . . . . . . . . . . . . . . . . . . . .29
2 Consignes de sécurité et instructions de montage. . . . . . . . . . . . . . . . . . . . . . . . . . . . . . . .29
3 Contenu de la livraison. . . . . . . . . . . . . . . . . . . . . . . . . . . . . . . . . . . . . . . . . . . . . . . . . . . . . . 31
4 Usage conforme . . . . . . . . . . . . . . . . . . . . . . . . . . . . . . . . . . . . . . . . . . . . . . . . . . . . . . . . . . . 31
5 Description technique . . . . . . . . . . . . . . . . . . . . . . . . . . . . . . . . . . . . . . . . . . . . . . . . . . . . . .32
6 Montage du MagicSpeed . . . . . . . . . . . . . . . . . . . . . . . . . . . . . . . . . . . . . . . . . . . . . . . . . . .34
7 Raccordement électrique du MagicSpeed. . . . . . . . . . . . . . . . . . . . . . . . . . . . . . . . . . . . . .35
8 Programmation de MagicSpeed . . . . . . . . . . . . . . . . . . . . . . . . . . . . . . . . . . . . . . . . . . . . . .36
9 Test du fonctionnement . . . . . . . . . . . . . . . . . . . . . . . . . . . . . . . . . . . . . . . . . . . . . . . . . . . . .36
10 Utilisation de MagicSpeed. . . . . . . . . . . . . . . . . . . . . . . . . . . . . . . . . . . . . . . . . . . . . . . . . . .37
11 Entretien et nettoyage du MagicSpeed . . . . . . . . . . . . . . . . . . . . . . . . . . . . . . . . . . . . . . . .39
12 Garantie. . . . . . . . . . . . . . . . . . . . . . . . . . . . . . . . . . . . . . . . . . . . . . . . . . . . . . . . . . . . . . . . . .39
13 Recyclage . . . . . . . . . . . . . . . . . . . . . . . . . . . . . . . . . . . . . . . . . . . . . . . . . . . . . . . . . . . . . . . .39
14 Caractéristiques techniques. . . . . . . . . . . . . . . . . . . . . . . . . . . . . . . . . . . . . . . . . . . . . . . . . .39
28
Page 29

MagicSpeed MSBE7 Explication des symboles
FR
1 Explication des symboles
AVERTISSEMENT !
!
!
A
I
Consigne de sécurité : le non-respect de ces consignes peut entraîner la mort ou de
graves blessures.
ATTENTION !
Consigne de sécurité : le non-respect de ces consignes peut entraîner des bles-
sures.
AVIS !
Le non-respect de ces consignes peut entraîner des dommages matériels et des dysfonctionnements du produit.
REMARQUE
Informations complémentaires sur l'utilisation du produit.
2 Consignes de sécurité et instructions de montage
Le fabricant décline toute responsabilité pour des dommages dans les cas suivants :
• des influences mécaniques et des surtensions ayant endommagé le matériel
• des modifications apportées au produit sans autorisation explicite de la part du fabricant
• une utilisation différente de celle décrite dans la notice
Respectez les consignes de sécurité et autres prescriptions imposées par le fabricant
du véhicule et par les professionnels de l'automobile !
AVERTISSEMENT !
Tout branchement électrique inadéquat peut entraîner un court-circuit causant
!
A
• la combustion de câbles,
• le déclenchement de l'airbag,
• l’endommagement des dispositifs électroniques de commande,
• la défaillance des fonctions électriques (clignotants, feux-stop, klaxon, allumage,
éclairage).
AVIS !
Débranchez toujours la borne négative avant de procéder à des travaux sur les éléments
électriques du véhicule afin d’éviter tout risque de court-circuit.
Sur les véhicules équipés d’une batterie supplémentaire, vous devez également
débrancher le pôle négatif de cette dernière.
29
Page 30

Consignes de sécurité et instructions de montage MagicSpeed MSBE7
FR
Lorsque vous débranchez le pôle négatif de la batterie, les mémoires volatiles de l’électronique de
confort perdent toutes les données enregistrées.
• Vous devez procéder à un nouveau réglage des données suivantes en fonction de l’équipement du véhicule :
–code radio
– horloge du véhicule
–minuterie
– ordinateur de bord
– position du siège
Les instructions de réglage figurent dans les notices d’utilisation correspondantes.
Veuillez respecter les consignes suivantes lors du montage :
• Fixez les pièces installées dans le véhicule de manière à ce qu’elles ne puissent en aucun cas se
desserrer (freinage abrupt, accident) et risquer de causer des blessures aux occupants du
véhicule.
• Fixez les pièces du système sous l'habillage de telle sorte qu'elles ne puissent pas se détacher,
endommager d'autres pièces ou connexions, ni gêner le fonctionnement du véhicule (direction, pédales, etc.).
• Respectez toujours les consignes de sécurité du fabricant du véhicule.
Certains travaux (p. ex. au niveau des systèmes de retenue, AIRBAG, etc.) doivent être effectués
uniquement par un personnel spécialisé ayant reçu une formation correspondante.
• Avant de percer des trous, assurez-vous que vous disposez d’un espace suffisant de l'autre côté
du trou à percer afin que la mèche n'occasionne aucun dégât.
• Ebavurez tous les trous et protégez-les avec un enduit anticorrosif.
Veuillez respecter les consignes suivantes pour les travaux sur les éléments électriques :
• Pour le contrôle de la tension des lignes électriques, n’utilisez qu’une lampe étalon à diode ou
un voltmètre.
Les lampes étalons à corps lumineux absorbent des courants trop élevés qui pourraient endommager les composants électroniques du véhicule.
• Lors de l'installation des raccordements électriques, veillez à ce que ceux-ci
– ne soient ni pliés, ni tordus,
– ne frottent pas contre des arêtes,
– ne soient pas placés dans des passages à arêtes vives sans protection.
• Isolez toutes les connexions et tous les raccords.
• Protégez les câbles contre toute contrainte mécanique en les fixant par exemple aux lignes exis-
tantes à l'aide de serre-câbles ou de ruban vinyle.
30
Page 31

MagicSpeed MSBE7 Contenu de la livraison
FR
Veuillez particulièrement respecter les consignes suivantes :
• Respectez les consignes légales en vigueur.
• En conduisant, veillez à ne mettre en danger aucun autre usager de la route.
• Le MagicSpeed doit vous apporter une aide supplémentaire mais l’appareil ne vous dégage
pas du devoir de prudence qui vous incombe lors de la conduite.
3 Contenu de la livraison
N° sur la
fig. 4,
page 4
1 1 Levier de commande 9600000387
2 1 Adaptateurs externes
3 1 Adaptateurs internes
Quantité Désignation
4 2 Rondelle ressort
51Écrou M14
6 1 Boîtier de connexion
4Usage conforme
MagicSpeed MSBE7 (n° de produit 9600000387) est un levier de commande raccordé à un régulateur de vitesse. Le levier de commande transmet les commandes du conducteur au module électronique du régulateur de vitesse qui maintient la vitesse réglée aussi constante que possible.
MagicSpeed représente une aide lors de la conduite, il ne vous dégage cependant pas du devoir
de prudence qui vous incombe alors.
MagicSpeed MSBE7 est conçu pour être installé dans les voitures, les camionnettes et les camping-cars.
31
Page 32

Description technique MagicSpeed MSBE7
FR
5 Description technique
5.1 Description du fonctionnement
MagicSpeed Accessory est un levier de commande raccordé au module électronique du régulateur de vitesse MS880. Ce levier de commande vous permet de procéder aux réglages souhaités.
Il doit être monté au niveau de la colonne de direction.
Le module électronique mesure la vitesse effective et la compare à la vitesse souhaitée.
REMARQUE
I
Afin de garantir un fonctionnement sûr et rentable, vous ne devez jamais utiliser le régulateur de
vitesse dans les embouteillages ou sur des routes mouillées, glissantes.
Si une situation d’urgence se produit, vous pouvez couper à tout moment le
contact pour désactiver le MagicSpeed.
32
Page 33

MagicSpeed MSBE7 Description technique
FR
5.2 Affichages et éléments de commande
Le panneau de commande dispose des affichages et éléments de commande suivants :
Pos. dans
fig. 5,
page 4
1 Sert à augmenter la vitesse de croisière.
2Cette LED s'allume en vert lorsque le régulateur de vitesse est
3 Sert à réduire la vitesse de croisière.
Symbole Explication
Sert à enregistrer la vitesse de croisière momentanée. Celle-ci est
effacée lorsque le contact est éteint.
Exécute la fonction SET (confirmer) (voir notice MS880)
activé.
Cette LED s'allume en orange, lorsqu'une vitesse momentanée
ou une vitesse de la mémoire I ou II est activée.
Sert à activer la dernière vitesse de croisière mémorisée.
Exécute la fonction RES (RESUME) (voir page 38 et notice
MS880)
4 I Sert à enregistrer une vitesse de croisière souhaitée, p. ex.
70 km/h (voir chapitre « Utilisation de MagicSpeed », page 37).
Sert à appeler la dernière vitesse de croisière mémorisée. Cette
vitesse reste mémorisée même une fois que le contact est
coupé.
5 II Sert à enregistrer une vitesse de croisière souhaitée, p. ex.
120 km/h (voir chapitre « Utilisation de MagicSpeed »,
page 37).
Sert à appeler la dernière vitesse de croisière mémorisée. Cette
vitesse reste mémorisée même une fois que le contact est
coupé.
6 Sert à mettre le régulateur de vitesse en marche et à l'arrêt.
7 Sert à désactiver la vitesse de croisière momentanément réglée.
Le régulateur de vitesse reste activé. La LED passe de orange à
vert.
33
Page 34

Montage du MagicSpeed MagicSpeed MSBE7
FR
6 Montage du MagicSpeed
6.1 Outils nécessaires
Pour la mise en place et le montage, vous devez disposer des outils suivants :
• Jeu de mèches (fig. 1 1, page 3)
• Perceuse (fig. 1 2, page 3)
• Tournevis (fig. 1 3, page 3)
• Jeu de clés à œil ou de clés plates (fig. 1 4, page 3)
• Jeu de clés à douilles (fig. 1 5, page 3)
• Mètre (fig. 1 6, page 3)
• Marteau (fig. 1 7, page 3)
• Pointeau (fig. 1 8, page 3)
Pour le raccordement électrique et le contrôle de celui-ci, vous devez disposer du matériel
suivant :
• Lampe étalon à diode (fig. 1 9, page 3) ou voltmètre (fig. 1 10, page 3)
• Ruban vinyle (fig. 1 12, page 3)
• Mastic
• Si nécessaire : passe-câbles
Pour la fixation des modules et des câbles, vous pourriez avoir besoin de vis et de serre-fils
supplémentaires.
6.2 Montage du levier de commande
Lisez attentivement les remarques suivantes lors du choix du lieu d'installation :
• Veillez à ce que le volant ne soit pas un obstacle à l'utilisation du levier de commande.
• Montez le levier de commande à un endroit adapté au niveau de la colonne de direction, où un
fonctionnement sûr est garanti dans toutes les circonstances.
AVIS !
A
Avant de percer, vérifiez toujours qu'il y a un espace libre suffisant de l'autre côté
(fig. 2, page 3).
➤ Démontez le cache de la colonne de direction.
➤ Percez un trou de 10 mm.
➤ Enfichez l'adaptateur externe (fig. 6 2, page 5) sur le filetage du levier de commande
(fig. 6 1, page 5).
➤ Faites passer le filetage dans le trou percé.
34
Page 35

MagicSpeed MSBE7 Raccordement électrique du MagicSpeed
FR
➤ Fixez le levier de commande en insérant les rondelles ressorts (fig. 6 4, page 5) et l'adapta-
teur interne (fig. 6 3, page 5) sur le filetage et en les vissant avec l'écrou (fig. 6 5, page 5).
➤ Installez le câble de raccordement jusqu'au jeu de câbles.
➤ Montez le cache à sa place d'origine.
7 Raccordement électrique du MagicSpeed
7.1 Remarques générales concernant la pose des câbles
REMARQUE
I
• Pour la pose des câbles de raccordement, utilisez si possible des passages existants
ou d’autres possibilités de passage telles que les arêtes de garnitures, grilles
d’aération ou interrupteurs intégrés. Si aucun passage n’est disponible, vous
devrez percer des trous pour y faire passer les câbles. Vérifiez avant le perçage qu’il
y a un espace suffisant pour la sortie de la mèche de l’autre côté du trou.
• Toute erreur de pose ou de branchement des câbles entraîne presque toujours des
perturbations et des détériorations des composants. Une pose et un branchement
corrects des câbles sont indispensables au fonctionnement durable et fiable des
composants que vous installez.
Veuillez donc respecter les consignes suivantes :
• Installez les câbles à une distance suffisante des éléments chauds et/ou mobiles du véhicule
(tuyaux d’échappement, arbres de transmission, dynamo, ventilateurs, chauffage, etc.) qui
pourraient les endommager.
• Entourez soigneusement chaque raccord de câble à l’aide d’un ruban vinyle de qualité (à l’intérieur du véhicule également).
• Lors de la pose des câbles (fig. 3, page 3), veillez à ce que ceux-ci
– ne soient ni fortement pliés, ni tordus,
– ne frottent pas contre des arêtes,
– ne soient pas placés dans des passages à arêtes vives sans protection.
• Veillez à protéger chaque trou percé en prenant des mesures appropriées contre toute infiltration d’eau, par exemple en appliquant du mastic sur le câble et sur le passe-câble.
35
Page 36

Programmation de MagicSpeed MagicSpeed MSBE7
FR
7.2 Raccordement du levier de commande
➤ Branchez le câble de raccordement du levier de commande (fig. 7 1, page 5) comme suit
dans les emplacements du boîtier de connexion 8 pôles (fig. 7 2, page 5) :
– bleu à l'emplacement 1
– marron à l'emplacement 2
– jaune à l'emplacement 3
– noir à l'emplacement 4
– l'emplacement 5 reste libre
– rouge à l'emplacement 6
– vert à l'emplacement 7
– orange à l'emplacement 8
Veillez à ce que les couleurs des câbles de raccordement correspondent à celles de la contrefiche ou à ce que les repères de couleur sur le boîtier de fiche correspondent.
➤ Installez le câble de raccordement du levier de commande vers le module électronique.
➤ Placez le connecteur compact à 8 pôles du levier de commande dans la douille à 8 pôles du
jeu de câbles du régulateur de vitesse MagicSpeed (fig. 8, page 5).
8 Programmation de MagicSpeed
➤ Programmez MagicSpeed comme indiqué dans les instructions de montage et de service du
régulateur de vitesse.
9 Test du fonctionnement
REMARQUE
I
➤ Démarrez votre véhicule.
➤ Allumez le régulateur de vitesse en actionnant le levier de commande dans la direction .
✓ La LED du levier de commande s'allume en vert.
✓ Deux signaux sonores de validation retentissent.
➤ Conduisez à une vitesse d'environ 40 à 50 km/h.
➤ Appuyez sur le levier de commande en direction pour activer le régulateur de vitesse.
✓ La LED du levier de commande s'allume en orange.
Le régulateur de vitesse fonctionne lorsque la vitesse est comprise entre 30 km/h et
140 km/h env.
✓ Le régulateur de vitesse gère doucement la vitesse et maintient la vitesse de conduite
constante.
36
Page 37

MagicSpeed MSBE7 Utilisation de MagicSpeed
FR
10 Utilisation de MagicSpeed
Vous commandez MagicSpeed à l'aide du levier de commande.
Activation et désactivation de MagicSpeed
➤ Appuyez une fois sur le levier de commande en direction pour activer le régulateur de
vitesse.
✓ La LED du levier de commande s'allume en vert.
✓ Deux signaux sonores de validation retentissent.
➤ Lorsque le régulateur de vitesse est en marche, appuyez une nouvelle fois sur le levier de
commande en direction pour désactiver le régulateur de vitesse.
✓ La LED du levier de commande s'éteint.
✓ La dernière vitesse momentanée mémorisée est rejetée.
Mémorisation de la vitesse souhaitée
À l'aide de la touche I ou II, vous pouvez enregistrer deux vitesses dans le régulateur de vitesse
(p. ex. 70 km/h et 120 km/h).
AVIS !
A
I
➤ Maintenez la touche I ou II enfoncée jusqu'à ce que deux signaux sonores retentissent pour
enregistrer la vitesse momentanée de conduite.
La vitesse souhaitée est maintenue jusqu'à ce que
– vous actionniez la pédale de frein ou d'embrayage,
– vous ayez éteint le régulateur de vitesse ou activé la fonction Interruption,
– la vitesse du véhicule soit en dessous de la vitesse inférieure de mise en marche,
– la vitesse chute de plus de 25 % dans une côte.
➤ Appuyez brièvement sur la touche I ou II pour utiliser la vitesse préalablement enregistrée.
Les régimes trop élevés peuvent endommager le moteur. Enregistrez la vitesse
souhaitée dans le rapport dans lequel cette vitesse doit être atteinte.
REMARQUE
Le levier de commande possède deux touches de mémoire qui permettent de
mémoriser deux vitesses différentes (p. ex. 70 km/h et 120 km/h).
37
Page 38

Utilisation de MagicSpeed MagicSpeed MSBE7
FR
Rappel de la dernière vitesse utilisée
Avec la touche , vous pouvez faire rappeler la dernière vitesse utilisée, si
• vous avez activé le régulateur de vitesse,
• vous n'actionnez pas la pédale de frein ou d'embrayage,
• vous ne coupez pas le contact entre-temps,
• la vitesse de votre véhicule est supérieure à 35 km/h.
➤ Appuyez sur la touche et relâchez-la aussitôt pour faire réapparaître la dernière vitesse uti-
lisée.
Accélération et ralentissement
Lorsque le régulateur de vitesse est activé, vous pouvez effectuer un réglage de précision. Vous
pouvez ainsi adapter exactement la vitesse du véhicule au flux du trafic ou aux limitations de
vitesse.
➤ Appuyez une fois sur le levier de commande en direction pour augmenter la vitesse
d'env. 1 km/h.
➤ Appuyez une fois sur le levier de commande en direction pour diminuer la vitesse
d'env. 1 km/h.
Si vous voulez par exemple augmenter la vitesse d'environ 3 km/h, appuyez trois fois sur le levier
de commande en direction .
REMARQUE
I
Interruption
Lorsque le régulateur de vitesse est activé, vous pouvez interrompre son utilisation. Le régulateur
de vitesse reste toutefois activé.
• Si vous appuyez le levier de commande plus longtemps en direction ou , la
vitesse continue de se modifier jusqu'à ce que vous relâchiez le levier de commande.
• Si vous souhaitez réduire extrêmement la vitesse réglée, n'utilisez pas le levier de
commande.
Éteignez le régulateur de vitesse en appuyant une fois le levier de commande en
direction , ou bien utilisez les freins ou l'embrayage, puis réglez de nouveau la
vitesse souhaitée à l'aide du levier de commande.
➤ Appuyez une fois le levier de commande en direction .
38
Page 39

MagicSpeed MSBE7 Entretien et nettoyage du MagicSpeed
FR
11 Entretien et nettoyage du MagicSpeed
AVIS !
A
➤ Nettoyez le produit avec un tissu humide.
N’utilisez aucun objet coupant ou dur, ni de détergents pour le nettoyage. Cela pourrait endommager le produit.
12 Garantie
Le délai légal de garantie s'applique. Si le produit s'avérait défectueux, veuillez vous adresser à la
filiale du fabricant située dans votre pays (voir adresses au verso du présent manuel) ou à votre
revendeur spécialisé.
Veuillez y joindre les documents suivants pour la gestion des réparations et de la garantie :
• une copie de la facture avec la date d'achat,
• le motif de la réclamation ou une description du dysfonctionnement.
13 Recyclage
➤ Jetez les emballages dans les conteneurs de déchets recyclables prévus à cet effet.
Lorsque vous mettrez votre produit définitivement hors service, informez-vous auprès
du centre de recyclage le plus proche ou auprès de votre revendeur spécialisé sur les
M
prescriptions relatives au retraitement des déchets.
14 Caractéristiques techniques
MagicSpeed MSBE7
N° d'article : 9600000387
Tension de service : 12 V
Température de fonctionnement : –40 °C à +85 °C
Certifications : N° ABE 91178
39
Page 40

Aclaración de los símbolos MagicSpeed MSBE7
ES
Lea detenidamente estas instrucciones antes de llevar a cabo la instalación y puesta en
funcionamiento, y consérvelas en un lugar seguro. En caso de vender o entregar el producto a otra persona, entregue también estas instrucciones.
Índice
1 Aclaración de los símbolos . . . . . . . . . . . . . . . . . . . . . . . . . . . . . . . . . . . . . . . . . . . . . . . . . .40
2 Indicaciones relativas a la seguridad y al montaje. . . . . . . . . . . . . . . . . . . . . . . . . . . . . . . . . 41
3 Volumen de entrega. . . . . . . . . . . . . . . . . . . . . . . . . . . . . . . . . . . . . . . . . . . . . . . . . . . . . . . .43
4 Uso adecuado. . . . . . . . . . . . . . . . . . . . . . . . . . . . . . . . . . . . . . . . . . . . . . . . . . . . . . . . . . . . .43
5 Descripción técnica . . . . . . . . . . . . . . . . . . . . . . . . . . . . . . . . . . . . . . . . . . . . . . . . . . . . . . . .43
6 Montar MagicSpeed . . . . . . . . . . . . . . . . . . . . . . . . . . . . . . . . . . . . . . . . . . . . . . . . . . . . . . .45
7 Conexión eléctrica de MagicSpeed . . . . . . . . . . . . . . . . . . . . . . . . . . . . . . . . . . . . . . . . . . .46
8 Programar MagicSpeed . . . . . . . . . . . . . . . . . . . . . . . . . . . . . . . . . . . . . . . . . . . . . . . . . . . . .47
9 Comprobación del funcionamiento . . . . . . . . . . . . . . . . . . . . . . . . . . . . . . . . . . . . . . . . . . .47
10 Usar MagicSpeed . . . . . . . . . . . . . . . . . . . . . . . . . . . . . . . . . . . . . . . . . . . . . . . . . . . . . . . . . .48
11 Mantenimiento y limpieza de MagicSpeed . . . . . . . . . . . . . . . . . . . . . . . . . . . . . . . . . . . . .50
12 Garantía legal . . . . . . . . . . . . . . . . . . . . . . . . . . . . . . . . . . . . . . . . . . . . . . . . . . . . . . . . . . . . .50
13 Gestión de residuos . . . . . . . . . . . . . . . . . . . . . . . . . . . . . . . . . . . . . . . . . . . . . . . . . . . . . . . .50
14 Datos técnicos . . . . . . . . . . . . . . . . . . . . . . . . . . . . . . . . . . . . . . . . . . . . . . . . . . . . . . . . . . . .50
1 Aclaración de los símbolos
¡ADVERTENCIA!
!
!
Indicación de seguridad: su incumplimiento puede acarrear la muerte o graves
lesiones.
¡ATENCIÓN!
Indicación de seguridad: su incumplimiento puede acarrear lesiones.
¡AVISO!
A
I
40
Su incumplimiento puede acarrear daños materiales y perjudicar el correcto funcionamiento del producto.
NOTA
Información adicional para el manejo del producto.
Page 41

MagicSpeed MSBE7 Indicaciones relativas a la seguridad y al montaje
ES
2 Indicaciones relativas a la seguridad y al montaje
El fabricante declina toda responsabilidad ante daños ocurridos en los siguientes casos:
• daños en el producto debido a influencias mecánicas y sobretensiones
• modificaciones realizadas en el producto sin el expreso consentimiento del fabricante
• utilización del aparato para fines distintos a los descritos en las instrucciones
¡Tenga en cuenta las indicaciones de seguridad y la documentación suministrada por
el fabricante y el taller del vehículo!
¡ADVERTENCIA!
Las conexiones eléctricas deficientes pueden provocar, como consecuencia de un cor-
!
tocircuito, que:
• se quemen los cables,
• se dispare el airbag,
• resulten dañados los dispositivos electrónicos de control,
• queden sin funcionamiento determinadas funciones eléctricas (intermitentes, luz de
freno, claxon, encendido, luz).
¡AVISO!
Desemborne el polo negativo siempre que vaya a trabajar en el sistema eléctrico del
A
Tenga en cuenta que al desembornar el polo negativo de la batería se perderán todos los datos
almacenados en las memorias volátiles de la electrónica de confort.
• Dependiendo del equipamiento del vehículo, deberá volver a ajustar los siguientes datos:
– código de la radio
– reloj del vehículo
– reloj programador
– ordenador de a bordo
– posición del asiento
Las indicaciones para realizar los ajustes se encuentran en las instrucciones de uso correspondientes.
vehículo para evitar un cortocircuito.
Desemborne también el polo negativo de la batería adicional en aquellos vehículos que
dispongan de una.
41
Page 42

Indicaciones relativas a la seguridad y al montaje MagicSpeed MSBE7
ES
Tenga en cuenta las siguientes indicaciones durante el montaje:
• Sujete las piezas montadas en el vehículo de forma que no se puedan soltar bajo ninguna cir-
cunstancia (frenazo o accidente) ni ocasionar lesiones a los ocupantes del vehículo.
• Fije ocultas bajo revestimientos las partes del sistema que se deban montar, de manera que no
puedan soltarse o dañar otras piezas ni cables, y de manera que no puedan afectar a las
funciones del vehículo (dirección, pedales, etc.).
• Respete siempre las indicaciones de seguridad del fabricante del vehículo.
Algunos trabajos (p. ej. en los sistemas de retención como AIRBAG, etc.) sólo los puede realizar
personal especializado y con la debida formación.
• A fin de evitar que se produzcan daños al utilizar el taladro, asegúrese de disponer de suficiente
espacio para la salida de la broca.
• Lije las perforaciones y aplíqueles un antioxidante.
Tenga en cuenta las siguientes indicaciones al trabajar en los componentes eléctricos:
• Para comprobar la tensión en los cables eléctricos utilice solamente un diodo de comproba-
ción o un voltímetro.
Las lámparas de prueba con un elemento luminoso tienen un consumo de corriente demasiado
elevado, por lo que puede dañarse el sistema electrónico del vehículo.
• Al instalar las conexiones eléctricas tenga en cuenta que éstas:
– no se doblen ni se tuerzan,
– no rocen con bordes,
– no se instalen sin protección en canales de paso con bordes afilados.
• Aísle todos los empalmes y conexiones.
• Asegure los cables frente a tracciones mecánicas mediante abrazaderas para cables o cinta ais-
lante, por ejemplo, fijándolos a los cables eléctricos ya existentes.
Preste especial atención a las siguientes indicaciones:
• Cumpla siempre las normas legales vigentes.
• Conduzca de forma que no ponga en peligro a otros conductores.
• MagicSpeed sólo es una ayuda, es decir, que el aparato no le exime de tomar precauciones al
conducir.
42
Page 43

MagicSpeed MSBE7 Volumen de entrega
ES
3 Volumen de entrega
Nº en
fig. 4,
página 4
1 1 Palanca de mando 9600000387
2 1 Adaptador exterior
3 1 Adaptador interior
4 2 Arandela elástica
51Tuerca M14
61Clavija
Cantidad Denominación
4Uso adecuado
MagicSpeed MSBE7 (n° art. 9600000387) es una palanca de mando que se conecta a una
regulador de velocidad. La palanca de mando trasmite los comandos del conductor al módulo
electrónico del regulador de velocidad, que mantiene la velocidad configurada lo más constante
posible.
MagicSpeed nos ofrece una ayuda adicional al conducir, aunque por ello no queda excluido
tomar las precauciones necesarias al conducir.
MagicSpeed MSBE7 está diseñado para su montaje en turismos, furgonetas y caravanas.
5 Descripción técnica
5.1 Descripción del funcionamiento
MagicSpeed Accessory es una palanca de mando que se conecta al módulo electrónico de un
regulador de velocidad MS 880. La palanca de mando le permite realizar los ajustes que desee.
Se debe montar en la zona de la columna de dirección.
El módulo electrónico mide la velocidad real y la compara con la velocidad deseada.
NOTA
I
Si se produce una emergencia, siempre puede desconectar el contacto para
desactivar MagicSpeed.
Para garantizar un funcionamiento seguro y económico, no utilice nunca el regulador de velocidad en atascos o en vías mojadas o resbaladizas.
43
Page 44

Descripción técnica MagicSpeed MSBE7
ES
5.2 Indicaciones y elementos de mando
El panel de mando cuenta con las siguientes indicaciones y elementos de mando:
Pos. en
fig. 5,
página 4
1 Sirve para aumentar la velocidad de avance.
2 Este LED se enciende en verdecuando el regulador de veloci-
3 Sirve para disminuir la velocidad de avance.
Símbolo Explicación
Sirve para almacenar la velocidad de avance actual. Se apaga
desconectando el encendido.
Realiza la función SET (confirmar) (ver instrucciones MS 880)
dad está encendido.
Este LED se ilumina en naranja, cuando se activa una velocidad
actual o una velocidad de la memoria I o II.
Sirve para activar la velocidad de avance última almacenada.
Realiza la función RES (REANUDAR) (verpágina 48 e instrucciones MS 880)
4 I Sirve para almacenar una velocidad de avance deseada, p. ej.
70 km/h (ver capítulo “Usar MagicSpeed” en la página 48).
Sirve para abrir la velocidad de avance última almacenada. Esta
velocidad también permanece guardada tras desconectar el
encendido.
5 II Sirve para almacenar una velocidad de avance deseada, p. ej.
120 km/h (ver capítulo “Usar MagicSpeed” en la página 48).
Sirve para abrir la velocidad de avance última almacenada. Esta
velocidad también permanece guardada tras desconectar el
encendido.
6 Sirve para encender y apagar el regulador de velocidad.
7 Sirve para desactivar la velocidad de avance seleccionada actual-
mente. El regulador de velocidad permanece conectado. El LED
cambia de naranja a verde.
44
Page 45

MagicSpeed MSBE7 Montar MagicSpeed
ES
6 Montar MagicSpeed
6.1 Herramientas necesarias
Para realizar la instalación y el montaje son necesarias las siguientes herramientas:
• Juego de brocas (fig. 1 1, página 3)
• Taladradora (fig. 1 2, página 3)
• Destornillador (fig. 1 3, página 3)
• Juego de llaves poligonales o de boca (fig. 1 4, página 3)
• Juego de llaves de carraca (fig. 1 5, página 3)
• Regla graduada (fig. 1 6, página 3)
• Martillo (fig. 1 7, página 3)
• Punzón para marcar (fig. 1 8, página 3)
Para realizar la conexión eléctrica y su comprobación, necesitará los siguientes medios auxiliares:
• Diodo de comprobación (fig. 1 9,página 3) o voltímetro (fig. 1 10, página 3)
• Cinta aislante (fig. 1 12, página 3)
• Pasta para juntas
• Si fuese necesario, tubos protectores para los cables
Para fijar los módulos y los cables pueden ser necesarios más tornillos y bridas para cables.
6.2 Montar la palanca de mando
Al elegir el lugar de montaje, tenga en cuenta las siguientes indicaciones:
• Asegúrese de que el conductor no tenga que acceder a la palanca pasando por el volante.
• Monte la palanca de mando en un punto adecuado en la columna de dirección donde se ase-
gure un proceso de trabajo seguro en cualquier circunstancia.
¡AVISO!
A
➤ Quite la cubierta de la columna.
Asegúrese antes de perforar de hacerlo en un lugar adecuado (fig. 2 , página 3).
➤ Taladre un agujero de 10 mm.
➤ Conecte el adaptador externo (fig. 6 2, página 5) en la rosca de la palanca de mando
(fig. 6 1, página 5).
➤ Pase la rosca por el agujero.
➤ Fije la palanca de mando montando las arandelas elásticas (fig. 6 4, página 5) y el adaptador
interior (fig. 6 3, página 5) en la rosca y fijando con la tuerca (fig. 6 5, página 5).
45
Page 46

Conexión eléctrica de MagicSpeed MagicSpeed MSBE7
ES
➤ Lleve el cable de conexión hasta el juego de cables.
➤ Monte la cubierta de la columna en su lugar.
7 Conexión eléctrica de MagicSpeed
7.1 Indicaciones generales para la instalación de cables
NOTA
I
• Para tender los cables de conexión utilice, siempre que sea posible, canales de
paso originales u otras posibilidades, como por ejemplo, bordes del revestimiento,
rejillas de ventilación o tapas de interruptores. Si no existe ningún canal de paso
previo, deberá realizar las correspondientes perforaciones para cada cable. Antes,
compruebe si hay suficiente espacio libre para la salida de la broca.
• La instalación y conexión de cables no realizadas por personal técnico tienen como
consecuencia el mal funcionamiento o daños en los componentes. La instalación y
conexión correctas de los cables son requisitos fundamentales para un funcionamiento duradero y correcto de los accesorios instalados.
Por ello, observe las siguientes indicaciones:
• A fin de evitar daños en los cables, al instalarlos, mantenga una distancia suficiente respecto a
las piezas del vehículo que estén calientes y en movimiento (tubos de escape, ejes de accionamiento, dínamo, ventiladores, calefacción, etc.).
• Recubra completamente todas las conexiones de los cables (también en el vehículo) con una
cinta aislante de buena calidad.
• Al tender los cables (fig. 3, página 3) asegúrese de que:
– no se doblen ni se retuerzan,
– no rocen con bordes,
– no los tienda sin protección a través de canales de paso con aristas afiladas.
• Proteja las aberturas con las medidas adecuadas para evitar la entrada de agua, por ejemplo,
instalando el cable con pasta para juntas y rociando el cable y la boquilla de paso con pasta para
juntas.
46
Page 47

MagicSpeed MSBE7 Programar MagicSpeed
ES
7.2 Conectar la palanca de mando
➤ Introduzca el cable de conexión de la palanca de mando (fig. 7 1, página 5) como sigue en
los conectores de la clavija de 8 polos (fig. 7 2, página 5):
–azul en conexión 1
– marrón en conexión 2
– amarillo en conexión 3
– negro en conexión 4
– la conexión 5 permanece libre
– rojo en conexión 6
– verde en conexión 7
– naranja en conexión 8
Asegúrese de que los colores del cable de conexión coincidan con los de la clavija o con los
códigos de colores de la carcasa de conectores.
➤ Guíe el cable de conexión de la palanca de mando al módulo electrónico.
➤ Introduzca el conector compacto de 8 polos montado de la palanca de mando en el conector
de 8 polos del juego de cables del regulador de velocidad MagicSpeed (fig. 8, página 5).
8 Programar MagicSpeed
➤ Programe el MagicSpeed según las instrucciones de montaje y de uso del regulador de
velocidad.
9 Comprobación del funcionamiento
NOTA
I
➤ Ponga en marcha el vehículo.
➤ Conecte el regulador de velocidad accionando la palanca en sentido .
✓ El LED de la palanca de mando se ilumina en verde.
✓ Se oyen dos señales acústicas de confirmación.
➤ Conduzca a una velocidad de 40 a 50 km/h aproximadamente.
➤ Pulse la palanca de mando en sentido para activar el regulador de velocidad.
✓ El LED de la palanca de mando se ilumina en naranja.
La velocidad más baja con la que funciona el regulador de velocidad es de
aproximadamente 30 km/h y la más alta, de 140 km/h.
✓ El regulador de velocidad toma el control de la velocidad de forma suave y mantiene la
velocidad de desplazamiento constante.
47
Page 48

Usar MagicSpeed MagicSpeed MSBE7
ES
10 Usar MagicSpeed
El MagicSpeed se maneja con la palanca de mando.
Encender y apagar MagicSpeed
➤ Pulse la palanca de mando una vez en sentido para activar el regulador de velocidad.
✓ El LED de la palanca de mando se ilumina en verde.
✓ Se oyen dos señales acústicas de confirmación.
➤ Cuando el regulador de velocidad está encendido, pulse otra vez la palanca en sentido
para apagarlo.
✓ El LED de la palanca de mando se apaga.
✓ Se desecha la velocidad instantánea que se ha guardado por última vez.
Guardar la velocidad deseada
Con la tecla I o II puede almacenar dos velocidades en la memoria del regulador de velocidad
(p. ej. 70 km/h y 120 km/h).
¡AVISO!
A
Puede dañar el motor si lo revoluciona demasiado. Guarde la velocidad deseada
estando engranada la marcha con la que se desplaza a esa velocidad.
NOTA
I
➤ Mantenga la tecla I o II pulsada hasta que oiga dos pitidos para almacenar la velocidad a la que
se avanza actualmente.
La velocidad deseada se mantiene constante hasta que
– pise el pedal del freno o del embrague,
– haya apagado el regulador de velocidad o interrumpido la función,
– la velocidad del vehículo esté por debajo de la velocidad de conexión,
– la velocidad en una cuesta arriba se reduzca más del 25%.
➤ Pulse brevemente la tecla I o II para emplear la velocidad guardada anteriormente.
Abrir la velocidad empleada por última vez
Con la tecla puede abrir la última velocidad empleada, si
• ha conectado el regulador de velocidad,
• no pisa el pedal del freno o del embrague,
La palanca de mando tiene dos botones de guardado con los que puede almacenar
dos distintas velocidades (p.ej. 70 km/h y 120 km/h).
• no ha desconectado el encendido,
• la velocidad de su vehículo es de más de 35 km/h.
➤ Pulse la tecla y suéltela inmediatamente para abrir la última velocidad empleada.
48
Page 49

MagicSpeed MSBE7 Usar MagicSpeed
ES
Acelerar y reducir la velocidad
Al estar activado el regulador de velocidad puede realizar un ajuste exacto. De esa forma, puede
adaptar de forma exacta la velocidad del vehículo a la del tráfico o a los límites de velocidad.
➤ Pulse la palanca de mando una vez en sentido para aumentar la velocidad en
aprox. 1 km/h.
➤ Pulse la palanca de mando una vez en sentido para reducir la velocidad en aprox. 1 km/h.
Si, por ejemplo, desea aumentar la velocidad 3 km/h aproximadamente, pulse tres veces la
palanca en sentido .
NOTA
I
Interrumpir
Al estar activado el regulador de velocidad puede interrumpir la operación. Entonces se mantiene
conectada el regulador de velocidad.
➤ Pulse una vez la palanca de mando en dirección .
• Si pulsa la palanca más tiempo en sentido o , la velocidad se modificará
mientras mantenga pulsada la palanca.
• Si desea reducir mucho la velocidad ajustada, no lo haga con la palanca de mando.
Desconecte el regulador de velocidad pulsando la palanca una vez en sentido ,
o use el freno o el embrague y vuelva a establecer la velocidad deseada con la
palanca.
49
Page 50

Mantenimiento y limpieza de MagicSpeed MagicSpeed MSBE7
ES
11 Mantenimiento y limpieza de MagicSpeed
¡AVISO!
A
➤ Limpie de vez en cuando el producto con un paño húmedo.
No utilice ningún objeto o producto de limpieza corrosivo o duro en la limpieza, ya
que podría dañar el producto.
12 Garantía legal
Rige el plazo de garantía legal. Si el producto presenta algún defecto, diríjase a la sucursal del
fabricante de su país (ver direcciones en el dorso de estas instrucciones) o a su establecimiento
especializado.
Para la tramitación de la reparación y de la garantía debe enviar también los siguientes documentos:
• una copia de la factura con fecha de compra,
• el motivo de la reclamación o una descripción de la avería.
13 Gestión de residuos
➤ Deseche el material de embalaje en el contenedor de reciclaje correspondiente.
Cuando vaya a desechar definitivamente el producto, infórmese en el centro de
reciclaje más cercano o en un comercio especializado sobre las normas pertinentes de
M
eliminación de materiales.
14 Datos técnicos
MagicSpeed MSBE7
Nº de artículo: 9600000387
Tensión de funcionamiento: 12 V
Temperatura de funcionamiento: –40 °C hasta +85 °C
Homologaciones: ABE nº 91178
50
Page 51

MagicSpeed MSBE7 Explicação dos símbolos
PT
Por favor, leia atentamente este manual antes da montagem e colocação em funcionamento do aparelho e guarde-o em local seguro. Em caso de transmissão do produto,
entregue o manual ao novo utilizador.
Índice
1 Explicação dos símbolos . . . . . . . . . . . . . . . . . . . . . . . . . . . . . . . . . . . . . . . . . . . . . . . . . . . . 51
2 Indicações de segurança e de montagem . . . . . . . . . . . . . . . . . . . . . . . . . . . . . . . . . . . . . .52
3 Material fornecido . . . . . . . . . . . . . . . . . . . . . . . . . . . . . . . . . . . . . . . . . . . . . . . . . . . . . . . . .53
4 Utilização adequada. . . . . . . . . . . . . . . . . . . . . . . . . . . . . . . . . . . . . . . . . . . . . . . . . . . . . . . .54
5 Descrição técnica . . . . . . . . . . . . . . . . . . . . . . . . . . . . . . . . . . . . . . . . . . . . . . . . . . . . . . . . . .54
6 montar a MagicSpeed . . . . . . . . . . . . . . . . . . . . . . . . . . . . . . . . . . . . . . . . . . . . . . . . . . . . . .56
7 Efetuar a ligação eléctrica da MagicSpeed . . . . . . . . . . . . . . . . . . . . . . . . . . . . . . . . . . . . . .57
8 Programar a MagicSpeed . . . . . . . . . . . . . . . . . . . . . . . . . . . . . . . . . . . . . . . . . . . . . . . . . . .58
9 Testar o funcionamento . . . . . . . . . . . . . . . . . . . . . . . . . . . . . . . . . . . . . . . . . . . . . . . . . . . . .58
10 Utilizar a MagicSpeed . . . . . . . . . . . . . . . . . . . . . . . . . . . . . . . . . . . . . . . . . . . . . . . . . . . . . .59
11 Conservar e limpar a MagicSpeed . . . . . . . . . . . . . . . . . . . . . . . . . . . . . . . . . . . . . . . . . . . . 61
12 Garantia. . . . . . . . . . . . . . . . . . . . . . . . . . . . . . . . . . . . . . . . . . . . . . . . . . . . . . . . . . . . . . . . . . 61
13 Eliminação. . . . . . . . . . . . . . . . . . . . . . . . . . . . . . . . . . . . . . . . . . . . . . . . . . . . . . . . . . . . . . . . 61
14 Dados técnicos . . . . . . . . . . . . . . . . . . . . . . . . . . . . . . . . . . . . . . . . . . . . . . . . . . . . . . . . . . . . 61
1 Explicação dos símbolos
AVISO!
!
!
Indicação de segurança: o incumprimento pode provocar a morte ou ferimentos
graves.
PRECAUÇÃO!
Indicação de segurança: o incumprimento pode provocar ferimentos.
NOTA!
A
I
O incumprimento pode causar danos materiais e pode prejudicar o funcionamento do
produto.
OBSERVAÇÃO
Informações suplementares sobre a operação do produto.
51
Page 52

Indicações de segurança e de montagem MagicSpeed MSBE7
PT
2 Indicações de segurança e de montagem
O fabricante não se responsabiliza por danos nos seguintes casos:
• Danos no produto resultantes de influências mecânicas e sobretensões
• Alterações ao produto sem autorização expressa do fabricante
• Utilização para outras finalidades que não as descritas no manual de instruções
Cumpra as advertências de segurança e o especificado na literatura do fabricante
automóvel e das associações profissionais!
AVISO!
Conexões insuficientes podem ter como consequência um curto circuito
!
A
• queimaduras de cabos,
• o airbag dispara,
• dispositivos de comando electrónicos são danificados,
• falhas de funções eléctricas (pisca-pisca, luz de travagem, buzina, ignição, luzes).
NOTA!
Antes de efetuar trabalhos no sistema eléctrico do veículo, desligue sempre o pólo
negativo devido a perigo de curto-circuito.
No caso de veículos com bateria adicional a mesma também deve ser desligada do
pólo negativo.
Ao retirar o borne do pólo negativo da bateria todas as memórias voláteis da eletrónica de conforto perdem os seus dados memorizados.
• De acordo com a versão do veículo, terá de configurar novamente os seguintes dados:
– Código do rádio
–Relógio do veículo
– Temporizador
– Computador de bordo
– Posição de utilização
No respetivo manual de instruções encontrará indicações relativas à regulação.
Respeite as seguintes indicações na montagem:
• Fixe as peças montadas no veículo de forma a que não se soltem em circunstância alguma
(travagem busca, acidente de viação) o que poderia causar ferimentos aos ocupantes do
veículo.
• Fixe os componentes do sistema instalados por debaixo de revestimentos de modo a que não
se soltem ou danifiquem outros componentes e cabos e não limitem as funções do veículo
(direção, pedais, etc.).
• Durante a perfuração, certifique-se de que existe espaço suficiente para a saída da broca de
modo a evitar danos.
• Remova as rebarbas de cada furo e coloque nos furos um produto anticorrosão.
• Preste sempre atenção às indicações de segurança do fabricante automóvel.
Alguns trabalhos (p.ex. sistemas de retenção como airbag, etc.) apenas podem ser realizados
por técnicos qualificados.
52
Page 53

MagicSpeed MSBE7 Material fornecido
PT
Respeite as seguintes indicações durante o trabalho em peças elétricas:
• Para verificar a tensão em ligações elétricas utilize apenas uma lâmpada-padrão do diodo ou
um voltímetro.
Lâmpadas-padrão com um corpo luminoso consomem correntes muito elevadas, pelo que a
eletrónica do veículo pode ser danificada.
• Ao colocar as ligações elétricas tenha atenção para que estas
– não fiquem dobradas ou torcidas,
–não esfreguem nos cantos,
– não sejam colocadas através de passagens com arestas afiadas sem proteção.
• Isole todos os cabos e ligações.
• Proteja os cabos contra desgaste mecânico através de abraçadeiras ou fita isolante, p.ex. nos
cabos existentes.
Preste atenção às seguintes indicações:
• Preste atenção às normas legais em vigor.
• Durante a condução tenha um comportamento de forma a que esteja excluído um perigo para
os outros utentes.
• A MagicSpeed deve prestar-lhe um apoio adicional, i.e. o aparelho não o dispensa da sua
particular obrigatoriedade de prudência durante a condução.
3 Material fornecido
Nº na
fig. 4,
página 4
1 1 Alavanca de comando 9600000387
2 1 Adaptador exterior
3 1 Adaptador interior
4 2 Anilha de mola
51Porca M14
61Corpo da ficha
Quantidade Designação
53
Page 54

Utilização adequada MagicSpeed MSBE7
PT
4 Utilização adequada
A MSBE7 (n.º art. 9600000387) é uma alavanca de comando que está ligada a um regulador de
velocidade. A alavanca de velocidade transmite os comandos do condutor ao módulo eletrónico
do regulador de velocidade que mantém a velocidade estabelecida o mais constante possível.
A representa um apoio durante a condução, não o dispensa no entanto da particular obrigato-
riedade de prudência durante a condução.
A MagicSpeed MSBE7 foi concebida para montagem em automóveis, furgonetas e caravanas.
5 Descrição técnica
5.1 Descrição do funcionamento
A MagicSpeed Accessory é uma alavanca de comando, que está ligada ao módulo eletrónico do
regulador de velocidade MS880. Através da alavanca de velocidade realiza as regulações desejadas. Deveria ser montado na zona da coluna da direção.
O módulo eletrónico mede a velocidade real e compara-a com a sua velocidade desejada.
OBSERVAÇÃO
I
De forma a garantir um funcionamento seguro e económico, não deverá utilizar nunca o regula-
dor de velocidade em represas ou em estradas molhadas e escorregadias.
Caso surja uma situação de emergência, pode a qualquer momento desligar
aignição, para desativar a MagicSpeed.
54
Page 55

MagicSpeed MSBE7 Descrição técnica
PT
5.2 Indicações e elementos de comando
O painel de comando possui as seguintes indicações e elementos de comando:
Pos. na
fig. 5,
página 4
1 Serve para o aumento da velocidade de viagem.
2 Este LED acende a verde , quando o regulador de velocidade
3 Serve para a redução da velocidade de viagem.
Símbolo Explicação
Serve para a memorização da velocidade de viagem momentânea. Esta é eliminada aquando do desligamento da ignição.
Executa a função SET (confirmar) (ver o manual MS880)
está ligado.
Este LED acende a cor-de-laranja quando está ativada uma
velocidade momentânea ou uma velocidade da memória I ou II.
Serve para a ativação da última velocidade de viagem memorizada.
Executa a função RES (RETOMAR) (ver a página 60 e o manual
MS880)
4 I Serve para a memorização de uma velocidade de viagem dese-
jada, p. ex. 70 km/h (ver capítulo “Utilizar a MagicSpeed” na
página 59).
Serve para aceder à ultima velocidade de viagem memorizada..
Esta velocidade fica memorizada também após o desligamento
da ignição.
5 II Serve para a memorização de uma velocidade de viagem dese-
jada, p. ex. 120 km/h (ver capítulo “Utilizar a MagicSpeed” na
página 59).
Serve para aceder à ultima velocidade de viagem memorizada..
Esta velocidade fica memorizada também após o desligamento
da ignição.
6 Serve para ligar e desligar o regulador de velocidade.
7 Serve para a desativação da velocidade de viagem definida no
momento. O regulador de velocidade mantém-se ligado. O LED
comuta de cor-de-laranja para verde.
55
Page 56

montar a MagicSpeed MagicSpeed MSBE7
PT
6 montar a MagicSpeed
6.1 Ferramenta necessária
Para a Instalação e montagem necessita das seguintes ferramentas:
• Conjunto de brocas (fig. 1 1, página 3)
• Berbequim (fig. 1 2, página 3)
• Chave de parafusos (fig. 1 3, página 3)
• Conjunto de chaves em estrela ou chaves de brocas (fig. 1 4, página 3)
• Conjunto de chaves de caixa (fig. 1 5, página 3)
• Régua (fig. 1 6, página 3)
• Martelo (fig. 1 7, página 3)
• Punções (fig. 1 8, página 3)
Para a ligação elétrica e sua verificação necessita das seguintes ferramentas de apoio:
• Lâmpada-padrão do diodo (fig.1 9, página 3) ou voltímetro (fig. 1 10, página 3)
• Fita isoladora (fig. 1 12, página 3)
• Massa de vedação
• Eventualmente blocos de ligações para passagem de cabos.
Para a fixação dos módulos e dos cabos necessita, eventualmente, de mais parafusos e
abraçadeiras.
6.2 Montar a alavanca de comando
Ao escolher o local de montagem, tenha atenção às seguintes indicações:
• Certifique-se de que, para operar a alavanca de comando, o condutor não tem de pegar no
volante.
• Monte a alavanca de comando num local adequado na coluna da direção, onde está assegurado um método de trabalho seguro em quaisquer condições.
NOTA!
A
Antes da perfuração, verifique sempre o lado de saída quanto à passagem
desimpedida (fig. 2, página 3).
➤ Desmonte a cobertura da coluna da direção.
➤ Perfure um furo de 10 mm.
➤ Insira o adaptador externo (fig. 6 2, página 5) na rosca da alavanca de comando (fig. 6 1,
página 5).
➤ Conduza a rosca através do furo perfurado.
56
Page 57

MagicSpeed MSBE7 Efetuar a ligação eléctrica da MagicSpeed
PT
➤ Fixe a alavanca de comando, empurrando as anilhas de mola (fig. 6 4, página 5) e o adapta-
dor interno (fig. 6 3, página 5) sobre a rosca e apertando firmemente com a porca (fig. 6 5,
página 5).
➤ Coloque o cabo de ligação no conjunto de cabos.
➤ Monte a cobertura no local original.
7 Efetuar a ligação eléctrica da MagicSpeed
7.1 Indicações gerais relativas à colocação dos cabos
OBSERVAÇÃO
I
• Utilize para a passagem do cabo de ligação se possível passagens originais ou
outras possibilidades de passagem, p. ex. cantos de revestimento, grades de
ventilação ou interruptores cegos. Se não estiverem disponíveis quaisquer
passagens, terá de perfurar os respetivos furos para cada cabo. Confira antes se
está disponível espaço livre suficiente para a saída da broca.
• Colocações de cabos e ligações de cabos não adequadas voltam sempre a
conduzir a falhas de funcionamento ou danos nos componentes. Uma colocação
de cabos e uma ligação de cabos correta é a condição fundamental para um
funcionamento duradouro e sem erros dos componentes reequipados.
Preste por isso atenção às seguintes indicações:
• Para evitar danos no cabo, mantenha sempre, ao colocar os cabos, uma distância suficiente em
relação a peças de veículos quentes ou em movimento (tubos de escape, eixos de transmissão,
máquinas de luz, ventiladores, aquecimento, etc.).
• Enrole bem cada ligação ao cabo (também no veículo) com uma boa fita isolante.
• Ao colocar os cabos (fig. 3, página 3), tenha atenção para que estes
– não fiquem muito dobrados ou torcidos,
–não esfreguem nos cantos,
– não sejam colocados através de passagens com arestas afiadas sem proteção.
• Proteja cada fenda com medidas adequadas contra a entrada de água, p.ex. através da colocação do cabo com massa vedante e através da irrigação do cabo e do bloco de ligação para a
passagem dos cabos com massa de vedação.
57
Page 58

Programar a MagicSpeed MagicSpeed MSBE7
PT
7.2 Ligar a alavanca de comando
➤ Insira o cabo de ligação da alavanca de comando (fig. 7 1, página 5) nas tomadas do corpo
da ficha de 8 pólos (fig. 7 2, página 5), como segue:
–azul na tomada 1
– castanho na tomada 2
–amarelo na tomada 3
– preto na tomada 4
– A tomada 5 mantém-se desocupada
– vermelho na tomada 6
– verde na tomada 7
– cor-de-laranja na tomada 8
Tenha atenção para que as cores do cabo de ligação coincidam com as da tomada oposta ou
com as marcações de cor apostas no corpo da ficha.
➤ Conduza o cabo de ligação da alavanca de comando para o módulo eletrónico.
➤ Introduza a ficha compacta de 8 pólos montada da alavanca de comando na tomada de 8
pólos do conjunto de cabos do regulador de velocidade MagicSpeed (fig. 8, página 5).
8 Programar a MagicSpeed
➤ Programe a MagicSpeed como descrito no manual de instruções e de montagem do regula-
dor de velocidade.
9 Testar o funcionamento
OBSERVAÇÃO
I
➤ Coloque o seu veículo a trabalhar.
➤ Ligue o regulador de velocidade, acionando a alavanca de comando no sentido .
✓ O LED na alavanca de velocidade acende a verde.
✓ Ouvem-se dois sinais acústicos de confirmação
➤ Conduza a uma velocidade de aprox. 40 a 50 km/h.
➤ Pressione a alavanca de comando no sentido , de forma a ativar o regulador de velocidade.
✓ O LED na alavanca de velocidade acende a cor-de-laranja.
A velocidade mais reduzida à qual o regulador de velocidade trabalha situa-se aprox.
em 30 km/h e a mais elevada em aprox. 140 km/h.
✓ O regulador de velocidade assume a velocidade suavemente e mantém a velocidade de con-
dução constante.
58
Page 59

MagicSpeed MSBE7 Utilizar a MagicSpeed
PT
10 Utilizar a MagicSpeed
Utiliza a MagicSpeed através da alavanca de comando.
Ligar e desligar a MagicSpeed
➤ Pressione a alavanca de comando uma vez no sentido , para ligar o regulador de
velocidade.
✓ O LED na alavanca de velocidade acende a verde.
✓ Ouvem-se dois sinais acústicos de confirmação
➤ Quando o regulador de velocidade estiver ligado, pressione a alavanca de comando nova-
mente no sentido , para desligar o regulador de velocidade.
✓ O LED na alavanca de velocidade apaga-se.
✓ A última velocidade momentânea memorizada é rejeitada.
Memorizar a velocidade desejada
Com o botão I ou II pode memorizar duas velocidades no regulador de velocidade (p. ex.
70 km/h e 120 km/h).
NOTA!
A
I
➤ Mantenha o botão I ou II premido até se ouçam dois sinais de apito, afim de memorizar a velo-
cidade conduzida no momento.
Esta velocidade desejada é mantida corretamente até
– que acione o pedal do travão ou da embraiagem,
– que tenha desligado o regulador de velocidade ou tenha interrompido o seu funciona-
– a velocidade do veículo se situar abaixo da velocidade de ligação inferior,
– a velocidade baixar em mais de aprox. 25 % numa subida.
➤ Prima brevemente o botão I ou II para utilizar a velocidade anteriormente memorizada.
O motor pode ficar danificado através de rotações demasiado elevadas. Memorize a
velocidade desejada na marcha em que esta velocidade vai ser conduzida.
OBSERVAÇÃO
A alavanca de comando possui dois botões de memorização, com os quais podem ser
memorizadas duas velocidades diferentes (p.ex. 70 km/h e 120 km/h).
mento,
59
Page 60

Utilizar a MagicSpeed MagicSpeed MSBE7
PT
Ativar novamente a última velocidade utilizada
Com o botão pode ativar novamente a última velocidade utilizada, se
• tiver ligado o regulador de velocidade
• não acionar o pedal do travão ou da embraiagem,
• não desligar a ignição entretanto,
• a velocidade do seu veículo for superior a 35 km/h.
➤ Prima o botão e solte-o imediatamente logo de seguida, para ativar a última velocidade
utilizada.
Acelerar e abrandar
Quando o regulador de velocidade está ativado tem a possibilidade de efetuar uma afinação.
Através disso pode ajustar exatamente a velocidade do veículo ao fluxo de transito ou a limitações
de velocidade.
➤ Pressione a alavanca de comando uma vez no sentido , para aumentar a velocidade em
aprox. 1 km/h.
➤ Pressione a alavanca de comando uma vez no sentido , para reduzir a velocidade em
aprox. 1 km/h.
Se quiser por exemplo aumentar a velocidade em aprox. 3 km/h, pressione a alavanca de
comando três vezes no sentido .
OBSERVAÇÃO
I
Interromper
Se o regulador de velocidade estiver ativado tem a possibilidade de interromper o funcionamento. O regulador de velocidade continua no entanto a manter-se ligado.
➤ Pressione a alavanca de comando uma vez no sentido .
• Se pressionar a alavanca de comando durante mais tempo de cada vez no
sentido ou a velocidade será alterada até que solte a alavanca de comando.
• Se pretender reduzir extremamente a velocidade regulada, não utilize a alavanca
de comando.
Desligue o regulador de velocidade pressionando a alavanca de comando uma vez
no sentido ou utilize o travão ou a embraiagem e coloque de seguida, de novo,
a velocidade desejada através da alavanca de comando.
60
Page 61

MagicSpeed MSBE7 Conservar e limpar a MagicSpeed
PT
11 Conservar e limpar a MagicSpeed
NOTA!
A
➤ De vez em quando, limpe o aparelho com um pano húmido.
Não utilizar objectos afiados ou duros ou agentes de limpeza para a limpeza, uma vez
que podem ser causados danos no produto.
12 Garantia
É válido o prazo de garantia legal. Se o produto estiver com defeito, por favor, dirija-se à representação do fabricante no seu país (endereços, ver verso do manual) ou ao seu revendedor.
Para fins de reparação ou de garantia, terá de enviar os seguintes documentos em conjunto:
• uma cópia da factura com a data de aquisição,
• um motivo de reclamação ou uma descrição da falha.
13 Eliminação
➤ Sempre que possível, coloque o material de embalagem no respectivo contentor de recicla-
gem.
Para colocar o aparelho definitivamente fora de funcionamento, por favor, informe-se
junto do centro de reciclagem mais próximo ou revendedor sobre as disposições de eli-
M
minação aplicáveis.
14 Dados técnicos
MagicSpeed MSBE7
N.º art.: 9600000387
Tensão de funcionamento: 12 V
Temperatura de funcionamento: –40 °C bis +85 °C
Certificações: ABE nº 91178
61
Page 62

MagicSpeed MSBE7
IT
Prima di effettuare il montaggio e la messa in funzione leggere accuratamente questo
manuale di istruzioni, conservarlo e in caso di trasmissione del prodotto, consegnarlo
all'utente successivo.
Indice
1 Spiegazione dei simboli. . . . . . . . . . . . . . . . . . . . . . . . . . . . . . . . . . . . . . . . . . . . . . . . . . . . .63
2 Indicazioni di sicurezza e di montaggio . . . . . . . . . . . . . . . . . . . . . . . . . . . . . . . . . . . . . . . .63
3 Dotazione . . . . . . . . . . . . . . . . . . . . . . . . . . . . . . . . . . . . . . . . . . . . . . . . . . . . . . . . . . . . . . . .65
4 Uso conforme alla destinazione. . . . . . . . . . . . . . . . . . . . . . . . . . . . . . . . . . . . . . . . . . . . . . .65
5 Descrizione tecnica . . . . . . . . . . . . . . . . . . . . . . . . . . . . . . . . . . . . . . . . . . . . . . . . . . . . . . . .65
6 Montaggio del MagicSpeed . . . . . . . . . . . . . . . . . . . . . . . . . . . . . . . . . . . . . . . . . . . . . . . . .67
7 Allacciamento elettrico di MagicSpeed . . . . . . . . . . . . . . . . . . . . . . . . . . . . . . . . . . . . . . . .68
8 Programmazione di MagicSpeed . . . . . . . . . . . . . . . . . . . . . . . . . . . . . . . . . . . . . . . . . . . . .69
9 Controllo del funzionamento. . . . . . . . . . . . . . . . . . . . . . . . . . . . . . . . . . . . . . . . . . . . . . . . .69
10 Impiego di MagicSpeed . . . . . . . . . . . . . . . . . . . . . . . . . . . . . . . . . . . . . . . . . . . . . . . . . . . .70
11 Cura e pulizia di MagicSpeed . . . . . . . . . . . . . . . . . . . . . . . . . . . . . . . . . . . . . . . . . . . . . . . .72
12 Garanzia . . . . . . . . . . . . . . . . . . . . . . . . . . . . . . . . . . . . . . . . . . . . . . . . . . . . . . . . . . . . . . . . .72
13 Smaltimento . . . . . . . . . . . . . . . . . . . . . . . . . . . . . . . . . . . . . . . . . . . . . . . . . . . . . . . . . . . . . .72
14 Specifiche tecniche . . . . . . . . . . . . . . . . . . . . . . . . . . . . . . . . . . . . . . . . . . . . . . . . . . . . . . . .72
62
Page 63

MagicSpeed MSBE7 Spiegazione dei simboli
IT
1 Spiegazione dei simboli
AVVERTENZA!
!
!
A
I
Avviso di sicurezza: la mancata osservanza di questo avviso può causare ferite gravi
anche mortali.
ATTENZIONE!
Avviso di sicurezza: la mancata osservanza di questo avviso può essere causa di
lesioni.
AVVISO!
La mancata osservanza di questa nota può causare danni materiali e compromettere il
funzionamento del prodotto.
NOTA
Informazioni integranti relative all'impiego del prodotto.
2 Indicazioni di sicurezza e di montaggio
Il produttore non si assume nessuna responsabilità per danni nei seguenti casi:
• danni al prodotto dovuti a influenze meccaniche o a sovratensioni
• modifiche al prodotto senza esplicita autorizzazione del produttore
• impiego per altri fini rispetto a quelli descritti nel manuale di istruzioni
Osservare le indicazioni di sicurezza e le direttive previste dal produttore del veicolo e
dagli specialisti del settore!
AVVERTENZA!
Collegamenti elettrici inadeguati possono provocare in caso di cortocircuito:
!
A
• bruciatura di cavi,
• attivazione dell'airbag,
• danneggiamento ai dispositivi elettronici di controllo,
• guasti delle funzioni elettriche (lampeggiatore, luce di arresto, segnalatore acustico,
accensione, luce di marcia).
AVVISO!
Per scongiurare il pericolo di un cortocircuito, staccare sempre il polo negativo, prima
di eseguire qualsiasi lavoro al sistema elettrico del veicolo.
È necessario staccare il polo negativo della batteria anche quando si tratta di veicoli con
batteria ausiliare.
63
Page 64

Indicazioni di sicurezza e di montaggio MagicSpeed MSBE7
IT
Quando si stacca il polo negativo della batteria tutte le memorie volatili del sistema dell'elettronica
per funzioni comfort perdono i dati memorizzati.
• A seconda dell'equipaggiamento del veicolo devono essere reimpostati i seguenti dati per:
–codice radio
–orologio
–timer
– computer di bordo
– posizione sedile
Per indicazioni relative all'impostazione consultare le istruzioni per l'uso valide di volta in
volta.
Osservare le seguenti indicazioni per il montaggio
• Fissare i componenti montati nel veicolo in modo che non possano staccarsi, (ad es. in caso di
frenate brusche o incidenti) e non possano portare al ferimento dei passeggeri.
• Fissare i componenti del sistema non a vista da applicare sotto il rivestimento in modo tale che
non possano staccarsi o danneggiare altri componenti e cavi e compromettere le funzioni del
veicolo (sterzo, pedali ecc.).
• Osservare sempre le indicazioni di sicurezza del produttore del veicolo.
Alcuni lavori (ad es. ai sistemi di arresto quali AIRBAG ecc.) devono essere eseguiti esclusivamente da personale qualificato addestrato.
• Durante i lavori di trapanatura, assicurarsi che ci sia spazio sufficiente per l'uscita del trapano per
evitare eventuali danni.
• Sbavare ogni foro e trattarlo con antiruggine.
Osservare le seguenti indicazioni durante l'esecuzione dei lavori ai componenti elettrici:
• Per il controllo della tensione nelle linee elettriche utilizzare unicamente una lampada campione
a diodi oppure un voltmetro.
Le lampade campione con un corpo luminoso assorbono correnti troppo elevate rischiando
così di danneggiare il sistema elettronico del veicolo.
• Durante la disposizione degli allacciamenti elettrici fare in modo che questi
– non vengano torti o piegati,
– non sfreghino contro spigoli,
– non vengano posati in canaline con spigoli vivi senza protezione.
• Isolare tutti i collegamenti e gli allacciamenti.
• Con fascette serracavi o con nastro isolante fissare i cavi, ad es. alle linee disponibili, per pro-
teggerli dalle sollecitazioni meccaniche.
Osservare in particolare le seguenti indicazioni:
• Attenersi alle prescrizioni di legge vigenti.
• Durante la guida comportarsi in modo da escludere pericoli per gli altri automobilisti.
• MagicSpeed deve servire ad aiutare ulteriormente il conducente, tuttavia ciò non significa che
l’apparecchio esuli il conducente dal dovere di guidare con particolare prudenza.
64
Page 65

MagicSpeed MSBE7 Dotazione
IT
3Dotazione
N. nella
fig. 4,
pagina 4
1 1 Leva di comando 9600000387
2 1 Adattatore esterno
3 1 Adattatore interno
4 2 Rosetta elastica spaccata
51Dado M14
6 1 Alloggiamento della spina
Quantità Denominazione
4 Uso conforme alla destinazione
MagicSpeed MSBE7 (Art.-Nr. 9600000387) è una leva di comando che viene collegata a un
regolatore di velocità. La leva di comando trasmette i comandi del conducente al modulo elettronico del regolatore di velocità che mantiene la velocità impostata il più costante possibile.
MagicSpeed rappresenta un aiuto in fase di marcia, tuttavia non dispensa il conducente dal
dovere di guidare con particolare prudenza durante la marcia.
MagicSpeed MSBE7 è stato ideato per essere montato su autoveicoli e camper.
5 Descrizione tecnica
5.1 Descrizione del funzionamento
MagicSpeed Accessory è una leva di comando che viene collegata al modulo elettronico del
regolatore di velocità MS880. Le impostazioni desiderate vengono effettuate mediante la leva di
comando. Il montaggio avviene nei pressi del piantone dello sterzo.
Il modulo elettronico misura la velocità reale e la confronta alla velocità desiderata.
NOTA
I
In caso di emergenza è possibile disinserire in ogni istante l’accensione, al fine di
disattivare MagicSpeed.
Per assicurare un funzionamento sicuro ed economico non utilizzare mai il regolatore di velocità
quando si è in coda o su strade bagnate e scivolose.
65
Page 66

Descrizione tecnica MagicSpeed MSBE7
IT
5.2 Indicazioni ed elementi di comando
Il pannello di comando comprende le seguenti indicazioni ed elementidi comando:
Pos. in
fig. 5,
pagina 4
1 Serve ad aumentare la velocità di crociera.
2 Questo LED è verde se è attivato il regolatore di velocità.
3 Serve a diminuire la velocità di crociera.
Simbolo Spiegazione
Serve a memorizzare la velocità di crociera attuale. Questa verrà
cancellata allo spegnimento dell’accensione.
Esegue la funzione SET (Conferma) (vedi manuale di istruzioni
MS880)
Questo LED è arancione se viene attivata una velocità momentanea oppure una velocità dalla memoria I o II.
Serve ad attivare la velocità di crociera memorizzata per ultima.
Esegue la funzione RES (RESUME) (vedi pagina 71 manuale di
istruzioni MS880)
4 I Serve a memorizzare una velocità di crociera desiderata, ad es.
70 km/h (vedi capitolo “Impiego di MagicSpeed” a pagina 70).
Serve ad attivare la velocità di crociera memorizzata per ultima.
Questa velocità resta memorizzata anche dopo lo spegnimento
dell’accensione.
5 II Serve a memorizzare una velocità di crociera desiderata, ad es.
120 km/h (vedi capitolo “Impiego di MagicSpeed” a
pagina 70).
Serve ad attivare la velocità di crociera memorizzata per ultima.
Questa velocità resta memorizzata anche dopo lo spegnimento
dell’accensione.
6 Serve per attivare e disattivare il regolatore di velocità.
7 Serve a disattivare la velocità di crociera attuale. Il regolatore di
velocità resta attivato. Il LED da arancione diventa verde.
66
Page 67

MagicSpeed MSBE7 Montaggio del MagicSpeed
IT
6 Montaggio del MagicSpeed
6.1 Attrezzi necessari
Per l’installazione e il montaggio sono necessari i seguenti attrezzi:
• set di punte per trapano (fig. 1 1, pagina 3)
• trapano (fig. 1 2, pagina 3)
• cacciaviti (fig. 1 3, pagina 3)
• set di chiavi ad anello o chiavi fisse (fig. 1 4, pagina 3)
• set di chiavi a tubo (fig. 1 5, pagina 3)
• metro (fig. 1 6, pagina 3)
• martello (fig. 1 7, pagina 3)
• punzone (fig. 1 8, pagina 3)
Per l’allacciamento elettrico e per il controllo dello stesso sono necessari i seguenti mezzi ausiliari:
• lampada campione a diodi (fig. 1 9, pagina 3) o voltmetro (fig. 1 10, pagina 3)
• nastro isolante (fig. 1 12, pagina 3)
• mastice
• evt. boccole passacavi
Per il fissaggio dei moduli e dei cavi potrebbero essere necessarie anche altre viti e fascette
serracavi.
6.2 Montaggio della leva di comando
Per la scelta del luogo di montaggio fare attenzione alle seguenti indicazioni.
• Assicurarsi che il conducente per utilizzare la leva di comando non debba eseguire movimenti
attraverso il volante.
• Montare la leva di comando in un apposito punto del piantone dello sterzo, in modo che si
possa lavorare con sicurezza in ogni circostanza.
AVVISO!
A
Prima di eseguire i fori con il trapano controllare sempre che sul lato di uscita ci sia
spazio libero sufficiente per la perforazione (fig.2, pagina 3).
➤ Smontare la copertura del piantone dello sterzo.
➤ Trapanare un foro di 10 mm.
➤ Inserire l’adattatore esterno (fig. 6 2, pagina 5) sul filetto della leva di comando (fig. 6 1,
pagina 5).
➤ Far passare il filetto attraverso il foro.
67
Page 68

Allacciamento elettrico di MagicSpeed MagicSpeed MSBE7
IT
➤ Fissare la leva di comando spingendo le rosette elastiche (fig. 6 4, pagina 5) e l’adattatore
interno (fig. 6 3, pagina 5) sul filetto e serrarla con il dado (fig. 6 5, pagina 5).
➤ Posare il cavo di collegamento fino al set di cavi.
➤ Montare la copertura al posto originario.
7 Allacciamento elettrico di MagicSpeed
7.1 Indicazioni generali per la posa dei cavi
NOTA
I
• Per il passaggio dei cavi di allacciamento impiegare, per quanto possibile, canaline
originali o altri tipi di aperture, ad es. spigoli dei pannelli interni, griglie di aerazione
oppure finti interruttori. Se non vi sono aperture disponibili, occorre realizzare di
volta in volta fori adatti per i vari cavi. Verificare dapprima che vi sia uno spazio
sufficiente per l’uscita del trapano.
• Pose e collegamenti dei cavi non eseguiti a regola d’arte portano sempre a
malfunzionamenti o danni degli elementi costruttivi. Un’esecuzione corretta della
posa e del collegamento dei cavi rappresenta il presupposto essenziale per un
funzionamento duraturo e corretto dei componenti dell’equipaggiamento
ausiliario.
Osservare perciò le seguenti indicazioni:
• Per evitare danni al cavo, nel posarlo fare in modo che vi sia sempre una distanza sufficiente da
parti surriscaldate e rotanti del veicolo (tubi di scarico, alberi motore, alternatore, ventola,
riscaldamento e simili).
• Rendere ermetici tutti i collegamenti sul cavo (anche all’interno del veicolo) avvolgendoli
strettamente con un nastro isolante di buona qualità.
• Durante la posa dei cavi (fig. 3, pagina 3) assicurarsi che essi
– non vengano torti o piegati eccessivamente,
– non sfreghino contro spigoli,
– non vengano posati senza protezione in canaline con spigoli vivi.
• Prendere le dovute precauzioni per proteggere ogni apertura in modo che non penetri acqua,
ad es. mediante l’introduzione del cavo con materiale sigillante e spruzzando mastice sul cavo
e sulla boccola passacavo.
68
Page 69

MagicSpeed MSBE7 Programmazione di MagicSpeed
IT
7.2 Collegamento della leva di comando
➤ Inserire il cavo di collegamento della leva di comando (fig. 7 1, pagina 5) negli slot
dell’alloggiamento della spina a 8 poli (fig. 7 2, pagina 5) nel modo seguente:
– blu nello slot 1
– marrone nello slot 2
– giallo nello slot 3
– nero nello slot 4
– lo slot 5 resta libero
– rosso nello slot 6
– verde nello slot 7
– arancione nello slot 8
Assicurarsi che i colori dei cavi di collegamento corrispondano a quelli del connettore di arresto o a quelli dei contrassegni colorati indicati sull’alloggiamento della spina.
➤ Portare il cavo di collegamento della leva di comando fino al modulo elettronico.
➤ Inserire la spina compatta a 8 poli montata nella leva di comando nella presa a 8 poli del set di
cavi del regolatore di velocità MagicSpeed (fig. 8, pagina 5).
8 Programmazione di MagicSpeed
➤ Programmare MagicSpeed come descritto nelle istruzioni di montaggio e d’uso del regola-
tore di velocità.
9 Controllo del funzionamento
NOTA
I
➤ Avviare il veicolo.
➤ Attivare il regolatore di velocità azionando la leva di comando in direzione .
✓ Il LED sulla leva di comando è verde.
✓ Vengono emessi due segnali acustici di conferma.
➤ Guidare ad una velocità di ca. 40 - 50 km/h.
➤ Premere la leva di comando in direzione per attivare il regolatore di velocità.
✓ Il LED sulla leva di comando è arancione.
La velocità più bassa alla quale il regolatore di velocità opera è di circa 30 km/h,
mentre quella più elevata è di circa 140 km/h.
✓ Il regolatore di velocità acquisisce il controllo della velocità delicatamente, mantenendo una
velocità di marcia costante.
69
Page 70

Impiego di MagicSpeed MagicSpeed MSBE7
IT
10 Impiego di MagicSpeed
Utilizzare MagicSpeed con la leva di comando.
Attivazione e disattivazione di MagicSpeed
➤ Premere una volta la leva di comando in direzione per attivare il regolatore di velocità.
✓ Il LED sulla leva di comando è verde.
✓ Vengono emessi due segnali acustici di conferma.
➤ Se il regolatore di velocità è attivato, premere di nuovo la leva di comando in direzione per
disattivare il regolatore di velocità.
✓ IL LED della leva di comando si spegne.
✓ Il valore della velocità memorizzato per ultimo viene eliminato.
Memorizzare la velocità desiderata.
Con il tasto I o II è possibile memorizzare due velocità nel regolatore di velocità (ad. es. 70 km/h
e 120 km/h).
AVVISO!
A
Il motore può subire danni se il numero di giri è troppo elevato. Memorizzare la
velocità desiderata nella marcia corrispondente a tale velocità.
NOTA
I
➤ Per memorizzare la velocità attuale, tenere premuto il tasto I o II finché vengono emessi due
segnali acustici.
La velocità desiderata viene mantenuta finché
– non viene premuto il pedale del freno o della frizione,
– non viene disattivato il regolatore di velocità oppure durante la funzione di interruzione,
– la velocità del veicolo non si trova al di sotto della velocità di inserimento più bassa,
– in salita la velocità diminuisce più del 25 %.
➤ Premere brevemente il tasto I o II per procedere con la velocità memorizzata precedente-
mente.
La leva di comando è dotata di due tasti di memorizzazione, con i quali possono essere
memorizzate due velocità diverse (ad es. 70 km/h e 120 km/h).
70
Page 71

MagicSpeed MSBE7 Impiego di MagicSpeed
IT
Richiamare la velocità utilizzata per ultima
Premendo il tasto è possibile richiamare la velocità utilizzata per ultima, se
• il regolatore di velocità è attivato,
• il pedale del freno o della frizione non viene premuto,
• l’accensione nel frattempo non si disinserisce,
• la velocità del vostro veicolo è superiore a 35 km/h.
➤ Premere e rilasciare subito il tasto per richiamare la velocità utilizzata per ultima.
Accelerazione e decelerazione
Se il regolatore di velocità è attivato è possibile eseguire una regolazione di precisione. Tale funzione offre la possibilità di adattare la velocità del veicolo con la massima precisione al traffico o ai
limiti di velocità.
➤ Premere una volta la leva di comando in direzione per aumentare la velocità di ca. 1 km/h.
➤ Premere una volta la leva di comando in direzione per diminuire la velocità di ca. 1 km/h.
Se ad es. si desidera aumentare la velocità di circa 3 km/h, premere la leva di comando tre volte in
direzione .
NOTA
I
Interruzione
Se il regolatore di velocità è attivato, è possibile interromperne il funzionamento. Tuttavia il regolatore di velocità resta attivato.
➤ Premere una volta la leva di comando in direzione .
• Se la leva di comando viene premuta più a lungo in direzione o , la velocità
continua a modificarsi fino a quando la leva di comando non viene più premuta.
• Se si desidera rallentare considerevolmente la velocità impostata non impiegare la
leva di comando.
Disattivare il regolatore di velocità premendo una volta la leva di comando in
direzione , oppure utilizzare il freno o la frizione e impostare successivamente
con la leva di comando la velocità desiderata.
71
Page 72

Cura e pulizia di MagicSpeed MagicSpeed MSBE7
IT
11 Cura e pulizia di MagicSpeed
AVVISO!
A
➤ Pulire il prodotto di tanto in tanto con un panno umido.
Per la pulizia non impiegare oggetti ruvidi o appuntiti, oppure detergenti perché
potrebbero danneggiare il prodotto.
12 Garanzia
Vale il termine di garanzia previsto dalla legge. Qualora il prodotto risultasse difettoso, La preghiamo di rivolgersi alla filiale del produttore del suo Paese (l'indirizzo si trova sul retro del manuale
di istruzioni), oppure al rivenditore specializzato di riferimento.
Per la riparazione e per il disbrigo delle condizioni di garanzia è necessario inviare la seguente
documentazione:
• una copia della fattura con la data di acquisto del prodotto,
• un motivo su cui fondare il reclamo, oppure una descrizione del guasto.
13 Smaltimento
➤ Raccogliere il materiale di imballaggio possibilmente negli appositi contenitori di riciclaggio.
Quando il prodotto viene messo fuori servizio definitivamente, informarsi al centro di
riciclaggio più vicino, oppure presso il proprio rivenditore specializzato, sulle prescri-
M
zioni adeguate concernenti lo smaltimento.
14 Specifiche tecniche
MagicSpeed MSBE7
N. articolo: 9600000387
Tensione di esercizio: 12 V
Temperatura di esercizio: da –40 °C a +85 °C
Omologazioni: N. ABE 91178
72
Page 73

MagicSpeed MSBE7 Verklaring van de symbolen
NL
Lees deze handleiding voor de montage en de ingebruikname zorgvuldig door en
bewaar hem. Geef de handleiding bij het doorgeven van het product aan de gebruiker.
Inhoudsopgave
1 Verklaring van de symbolen . . . . . . . . . . . . . . . . . . . . . . . . . . . . . . . . . . . . . . . . . . . . . . . . . .73
2 Veiligheids- en montage-instructies. . . . . . . . . . . . . . . . . . . . . . . . . . . . . . . . . . . . . . . . . . . .74
3 Omvang van de levering . . . . . . . . . . . . . . . . . . . . . . . . . . . . . . . . . . . . . . . . . . . . . . . . . . . .75
4 Gebruik volgens de voorschriften . . . . . . . . . . . . . . . . . . . . . . . . . . . . . . . . . . . . . . . . . . . . .76
5 Technische beschrijving. . . . . . . . . . . . . . . . . . . . . . . . . . . . . . . . . . . . . . . . . . . . . . . . . . . . .76
6 MagicSpeed monteren . . . . . . . . . . . . . . . . . . . . . . . . . . . . . . . . . . . . . . . . . . . . . . . . . . . . .78
7 MagicSpeed elektrisch aansluiten . . . . . . . . . . . . . . . . . . . . . . . . . . . . . . . . . . . . . . . . . . . . .79
8 MagicSpeed programmeren . . . . . . . . . . . . . . . . . . . . . . . . . . . . . . . . . . . . . . . . . . . . . . . . .80
9 Werking testen . . . . . . . . . . . . . . . . . . . . . . . . . . . . . . . . . . . . . . . . . . . . . . . . . . . . . . . . . . . .80
10 MagicSpeed gebruiken . . . . . . . . . . . . . . . . . . . . . . . . . . . . . . . . . . . . . . . . . . . . . . . . . . . . . 81
11 MagicSpeed onderhouden en reinigen . . . . . . . . . . . . . . . . . . . . . . . . . . . . . . . . . . . . . . . .83
12 Garantie. . . . . . . . . . . . . . . . . . . . . . . . . . . . . . . . . . . . . . . . . . . . . . . . . . . . . . . . . . . . . . . . . .83
13 Afvoer . . . . . . . . . . . . . . . . . . . . . . . . . . . . . . . . . . . . . . . . . . . . . . . . . . . . . . . . . . . . . . . . . . .83
14 Technische gegevens. . . . . . . . . . . . . . . . . . . . . . . . . . . . . . . . . . . . . . . . . . . . . . . . . . . . . . .83
1 Verklaring van de symbolen
WAARSCHUWING!
!
!
A
Veiligheidsaanwijzing: Het niet naleven kan leiden tot overlijden of ernstig letsel.
VOORZICHTIG!
Veiligheidsaanwijzing: Het niet naleven kan leiden tot letsel.
LET OP!
Het niet naleven ervan kan leiden tot materiële schade en de werking van het product
beperken.
INSTRUCTIE
I
Aanvullende informatie voor het bedienen van het product.
73
Page 74

Veiligheids- en montage-instructies MagicSpeed MSBE7
NL
2 Veiligheids- en montage-instructies
De fabrikant kan in de volgende gevallen niet aansprakelijk worden gesteld voor schade:
• beschadiging van het product door mechanische invloeden en overspanningen
• veranderingen aan het product zonder uitdrukkelijke toestemming van de fabrikant
• gebruik voor andere dan de in de handleiding beschreven toepassingen
Neem de veiligheidsinstructies en voorschriften van de fabrikant van het voertuig en
het garagebedrijf in acht!
WAARSCHUWING!
Ontoereikende leidingverbindingen kunnen tot gevolg hebben, dat door kortsluiting
!
A
• kabelbranden ontstaan,
• de airbag wordt geactiveerd,
• elektronische besturingsinrichtingen worden beschadigd,
• elektrische functies uitvallen (knipperlicht, remlicht, claxon, contact, licht).
LET OP!
In verband met kortsluitingsgevaar moet voor werkzaamheden aan het elektrische
syteem van het voertuig altijd de minpool worden losgekoppeld.
Bij voertuigen met een extra accu moet ook hier de minpool worden losgekoppeld.
Bij het loskoppelen van de minpool van de accu verliezen alle vluchtige geheugens van de elektronica voor comfortvoorzieningen de opgeslagen data.
• De volgende data moet u afhankelijk van de voertuiguitrusting opnieuw instellen:
–radiocode
–voertuigklok
–tijdschakelklok
–boordcomputer
– stoelinstelling
Instructies voor het instellen vindt u in de betreffende gebruiksaanwijzing.
Neem bij de montage de volgende instructies in acht:
• Bevestig de in het voertuig te monteren delen zodanig, dat deze in geen geval (hard remmen,
verkeersongeval) los kunnen raken en tot verwondingen bij de inzittenden van het
voertuig kunnen leiden.
• Bevestig onderdelen die afgedekt onder bekledingen moeten worden aangebracht zodanig,
dat ze niet losraken of andere onderdelen en leidingen beschadigen en geen functies van het
voertuig (besturing, pedalen etc.) kunnen beperken.
• Neem altijd de veiligheidsinstructies van de fabrikant van het voertuig in acht.
Een paar werkzaamheden (bijv. aan beveiligingssystemen zoals AIRBAG etc.) mogen alleen
door geschoolde vaklui uitgevoerd worden.
• Let er bij het boren op dat er ook achter het te doorboren oppervlak genoeg ruimte is voor de
boor, zo kunt u schade voorkomen.
• Ontbraam elk boorgat en behandel de boorgaten met antiroestmiddel.
74
Page 75

MagicSpeed MSBE7 Omvang van de levering
NL
Neem bij werkzaamheden aan elektrische onderdelen de volgende instructies in acht:
• Gebruik voor het controleren van de spanning in elektrische leidingen alleen een diodetest-
lamp of een voltmeter.
Testlampen met een lampbehuizing gebruiken te veel stroom, hierdoor kan de elektronica in
het voertuig worden beschadigd.
• Let er bij het leggen van de elektrische aansluitingen op dat deze
– niet worden geknikt of verdraaid,
– niet langs randen schuren,
– niet zonder bescherming door doorvoeren met scherpe randen worden gelegd.
• Isoleer alle verbindingen en aansluitingen.
• Borg de kabels tegen mechanische belasting met kabelverbinders of isolatieband, bijv. aan de
aanwezige leidingen.
Neem in het bijzonder de volgende instructies in acht:
• Neem de geldende wettelijke voorschriften in acht.
• Gedraag u bij het rijden zodanig, dat u geen andere verkeersdeelnemers in gevaar brengt.
• MagicSpeed dient ervoor u te ondersteunen, dat betekent dat het apparaat u niet ontslaat van
de plicht bijzonder voorzichtig te zijn bij het rijden.
3 Omvang van de levering
Nr. in
afb. 4,
pagina 4
1 1 Bedieningshendel 9600000387
2 1 Buitenste adapter
3 1 Binnenste adapter
4 2 Veerring
5 1 Moer M14
61Stekkerdoos
Aantal Omschrijving
75
Page 76

Gebruik volgens de voorschriften MagicSpeed MSBE7
NL
4 Gebruik volgens de voorschriften
MagicSpeed MSBE7 (Art.-nr. 9600000387) is een bedieningshendel, die aan een snelheidsregelaar wordt aangesloten. De bedieningshendel geeft de commando's van de bestuurder aan
de electronicamodule van de snelheidsregelaar door, die de ingestelde snelheid zo constant
mogelijk aanhoudt.
MagicSpeed is een hulpmiddel bij het rijden, het ontslaat u echter niet van de plicht bijzonder
voorzichtig te zijn bij het rijden.
MagicSpeed MSBE7 is voor de montage in personenauto's en campers ontworpen.
5 Technische beschrijving
5.1 Beschrijving van de werking
MagicSpeed Accessory is een bedieningshendel die aan een de elektrische module van de
snelheidsregelaar MS880 wordt aangesloten. Via de bedieningshendel voert u de gewenste
instellingen uit. Het dient in het bereik van de stuurkolom te worden gemonteerd.
De elektronicamodule meet de werkelijke snelheid en vergelijkt deze met de gewenste snelheid.
INSTRUCTIE
I
Om een veilig en voordelig gebruik te garanderen, kan u de automatische cruise control beter
nooit in een file of op natte, gladde wegen gebruiken.
In een noodgeval kan u altijd de ontsteking uitschakelen om MagicSpeed te
deactiveren.
76
Page 77

MagicSpeed MSBE7 Technische beschrijving
NL
5.2 Indicaties en bedieningselementen
Het bedieningspaneel bezit de volgende indicaties en bedieningselementen:
Pos. in
afb. 5,
pagina 4
1 Dient voor het verhogen van de rijsnelheid.
2Deze led wordt groen, als de snelheidsregelaar is ingeschakeld.
3 Dient voor het reduceren van de rijsnelheid.
Symbool Verklaring
Dient voor het opslaan van de huidige rijsnelheid. Dit wordt bij
uitschakelen van het contact gewist.
Voert de functie SET (bevestigen) uit (zie handleiding MS880)
Deze led wordt oranje, als een momentele snelheid of een snel-
heid uit het geheugen I of II wordt geactiveerd.
Dient voor het activeren van de eerder opgeslagen rijsnelheid.
Voer de functie RES (RESUME) uit (zie pagina 82 en handleiding
MS880)
4 I Dient voor het opslaan van een gewenste rijsnelheid, bijvoor-
beeld 70 km/h (zie hoofdstuk „MagicSpeed gebruiken” op
pagina 81).
Dient voor het oproepen van de eerder opgeslagen rijsnelheid.
Deze snelheid blijft ook na uitschakelen van het contact opgeslagen.
5 II Dient voor het opslaan van een gewenste rijsnelheid, bijvoor-
beeld 120 km/h (zie hoofdstuk „MagicSpeed gebruiken” op
pagina 81).
Dient voor het oproepen van de eerder opgeslagen rijsnelheid.
Deze snelheid blijft ook na uitschakelen van het contact opgeslagen.
6 Dient voor het in- en uitschakelen van de snelheidsregelaar.
7 Dient voor de deactivering van de momenteel ingestelde rijsnel-
heid. De snelheidsregelaar blijft ingeschakeld. De led wisselt van
orange naar groen.
77
Page 78

MagicSpeed monteren MagicSpeed MSBE7
NL
6 MagicSpeed monteren
6.1 Benodigd gereedschap
Voor inbouw en montage hebt u de volgende gereedschappen nodig:
• set boren (afb. 1 1, pagina 3)
• boormachine (afb. 1 2, pagina 3)
• schroevendraaier (afb. 1 3, pagina 3)
• set ring- of steeksleutels (afb. 1 4, pagina 3)
• steeksleutelset (afb. 1 5, pagina 3)
• rolmaat (afb. 1 6, pagina 3)
• hamer (afb. 1 7, pagina 3)
• center (afb. 1 8, pagina 3)
Voor de elektrische aansluiting en de controle daarvan hebt u de volgende hulpmiddelen
nodig:
• diodetestlamp (afb. 1 9, pagina 3) of voltmeter (afb. 1 10, pagina 3)
• isolatieband (afb. 1 12, pagina 3)
• afdichtingspasta
• evt. kabeldoorvoerbuisjes
Voor het bevestigen van de modules en de kabels heeft u evt. nog meer schroeven en kabelverbinders nodig.
6.2 Bedieningshendel monteren
Neem bij de keuze van de montageplaats de onderstaande instructies in acht.
• Zorg ervoor dat de bestuurder voor de bediening van de bedieningshendel niet door het stuurwiel moet grijpen.
• Monteer de bedieningshendel op een geschikte positie aan de stuurkolom, waar een veilige
werkwijze onder alle omstandigheden kan worden gegarandeerd.
LET OP!
A
Controleer voor het boren altijd of er aan de achterkant genoeg ruimte is voor de boor
(afb. 2, pagina 3).
➤ Demonteer de afdekking van de stuurkolom.
➤ Boor een 10 mm groot gat.
➤ Steek de buitenste adapter (afb. 6 2, pagina 5) op de schroefdraad van de bedienings-
hendel (afb. 6 1, pagina 5).
➤ Voer de schroefdraad door de boring.
78
Page 79

MagicSpeed MSBE7 MagicSpeed elektrisch aansluiten
NL
➤ Bevestig de bedieningshendel, door de veerringen (afb. 6 4, pagina 5) en de binnenste
adapter (afb. 6 3, pagina 5) op de schroefdraad te schuiven en met de moer (afb. 6 5,
pagina 5) vast te schroeven.
➤ Leg de verbindingskabel naar de kabelset.
➤ Monteer de afdekking op de oorspronkelijke positie.
7 MagicSpeed elektrisch aansluiten
7.1 Algemene instructies voor het aanleggen van kabels
INSTRUCTIE
I
• Gebruik voor de doorvoer van de aansluitkabels indien mogelijk originele door-
voeren of andere doorvoermogelijkheden, zoals bijv. bekledingsranden, ventilatieroosters of blinde schakelaars. Als er geen doorvoeren aanwezig zijn, moet u voor
de betreffende kabels bijbehorende gaten boren. Controleer van tevoren of er
voldoende ruimte is voor de boor aan de achterkant.
• Niet vakkundig gelegde of verbonden kabels leiden steeds weer tot storingen of
beschadigingen van onderdelen. Het correcte aanleggen en verbinden van kabels
is een voorwaarde voor een duurzame en storingsvrije werking van de later aangebouwde onderdelen.
Neem daarom de volgende instructies in acht:
• Houd bij het aanleggen van de kabels altijd voldoende afstand tot hete en bewegende
voertuigonderdelen (uitlaatpijpen, aandrijfassen, dynamo, ventilatoren, verwarming etc.) om
beschadigingen aan de kabel te vermijden.
• Omwikkel elke verbinding aan de kabel (ook in het voertuig) met een goede isolatieband.
• Let er bij het leggen van de kabels (afb. 3, pagina 3) op dat deze
– niet te zeer worden geknikt of verdraaid,
– niet langs randen schuren,
– niet zonder bescherming door openingen met scherpe kanten worden gelegd.
• Bescherm iedere doorvoer d.m.v. geschikte maatregelen tegen het binnendringen van water,
bijv. door de kabel met afdichtingspasta aan te brengen en door de kabel en de doorvoertule
in te spuiten met afdichtingspasta.
79
Page 80

MagicSpeed programmeren MagicSpeed MSBE7
NL
7.2 Bedieningshendel aansluiten
➤ Steek de aansluitkabels van de bedieningshendel (afb. 7 1, pagina 5) als volgt in de aansluit-
posities van de 8-polige stekkerbehuizing (afb. 7 2, pagina 5).
–blauw in positie 1
–bruin in positie 2
– geel in positie 3
–zwart in positie 4
– positie 5 blijft vrij
– rood in positie 6
– groen in positie 7
– orange in positie 8
Let erop dat de kleuren van de aansluitkabels overeenkomen met die van de contrastekker of
de kleurmarkeringen op de stekkerbehuizing.
➤ Leid de aansluitkabel van de bedieningshendel naar de electronicamodule.
➤ Steek de gemonteerde 8-polige compacte stekker van de bedieningshendel in de 8-polige
bus van de kabelset van de snelheidsregelaar MagicSpeed (afb. 8, pagina 5).
8 MagicSpeed programmeren
➤ Programmeer MagicSpeed zoals beschreven in de montagehandleiding en gebruiks-
aanwijzing van de snelheidsregelaar.
9 Werking testen
INSTRUCTIE
I
➤ Start uw voertuig.
➤ Schakel de snelheidsregelaar in, door de bedieningshendel in de richting te bedienen.
✓ De led op de bedieningshendel wordt groen.
✓ Er klinken twee akoestische bevestigingssignalen.
➤ Rij met een snelheid van ca. 40 tot 50 km/h.
➤ Druk de bedieningshendel in de richting , om de snelheidsregelaar te activeren.
✓ De led op de bedieningshendel wordt oranje.
De laagste snelheid, waarbij de automatische cruisecontrol werkt, ligt ca. bij 30km/h
en de hoogste bij ca. 140 km/h.
✓ De snelheidsregelaar neemt zacht de snelheid over en houdt de gereden snelheid constant.
80
Page 81

MagicSpeed MSBE7 MagicSpeed gebruiken
NL
10 MagicSpeed gebruiken
U bedient MagicSpeed via de bedieningshendel.
MagicSpeed in- en uitschakelen
➤ Druk de bedieningshendel een keer in de richting , om de snelheidsregelaar in te
schakelen.
✓ De led op de bedieningshendel wordt groen.
✓ Er klinken twee akoestische bevestigingssignalen.
➤ Als de snelheidsregelaar is ingeschakeld, drukt u de bedieningshendel opnieuw in de
richting , om de snelheidsregelaar uit te schakelen.
✓ De led op de bedieningshendel gaat uit.
✓ De laatste opgeslagen momentele snelheid wordt verworpen.
Gewenste snelheid opslaan.
Met de knop I of II kunt u twee snelheden in de snelheidsregelaar opslaan (bijvoorbeeld 70 km/h
en 120 km/h).
LET OP!
A
I
➤ Houd de knop I of II zo lang ingedrukt, tot twee er pieptonen klinken, om de momentele
rijsnelheid op te slaan.
Deze gewenste snelheid wordt in stand gehouden, tot
– u het rem- of koppelingspedaal intrapt,
– u de snelheidregelaar heeft uitgeschakeld of bij functie Afbreken,
– de snelheid van het voertuig onder de minimale inschakelsnelheid ligt,
– de snelheid bij een stijging met meer dan ca. 25 % daalt.
➤ Druk kort op knop I of II, om de eerder opgeslagen snelheid te gebruiken.
De motor kan door een te hoog toerental beschadigd raken. Sla de gewenste snelheid
op in de versnelling waarin met deze snelheid wordt gereden.
INSTRUCTIE
De bedieningshendel bevat twee opslagknoppen, waarmee twee verschillende
snelheden (bijvoorbeeld 70 km/h en 120 km/h) kunnen worden opgeslagen.
81
Page 82

MagicSpeed gebruiken MagicSpeed MSBE7
NL
Laatst gebruikte snelheid weer oproepen
Met de knop kunt u de laatste gebruikte snelheid weer oproepen, als
• u de snelheidsregelaar ingeschakeld heeft,
• u het rem- of koppelingspedaal niet intrapt,
• u het contact tussentijds niet uitschakelt,
• de snelheid van uw voertuig meer dan 35 km/h bedraagt.
➤ Druk op de knop en laat direct weer los, om de laatste gebruikte snelheid weer op te
roepen.
Accelereren en decelereren
Als de snelheidsregelaar geactiveerd is, dan is een fijnafmstemming mogelijk. Daardoor kunt u de
voertuigsnelheid precies aan de verkeersstroom of aan snelheidsbeperkingen aanpassen.
➤ Druk de bedieningshendel een maal in de richting , om de snelheid met ca. 1 km/h te ver-
hogen.
➤ Druk de bedieningshendel een maal in de richting , om de snelheid met ca. 1 km/h te redu-
ceren.
Als u bijvoorbeeld de snelheid met ongeveer 3 km/h wilt verhogen, drukt u drie keer in de
richting .
INSTRUCTIE
I
Afbreken
Als de snelheidsregelaar is geactiveerd, dan heeft u de mogelijkheid om het bedrijf te onderbreken. Dan blijft de snelheidsregelaar echter verder ingeschakeld.
➤ Druk de bedieningshendel een keer in de richting .
• Als u de bedieningshendel langer in de richting of drukt, dan wordt de
snelheid zo lang gewijzigd, tot u de bedieningshendel loslaat.
• Als u de opgeslagen snelheid aanzienlijk wilt reduceren, gebruik dan niet de
bedieningshendel.
Schakel de snelheidsregelaar uit, door de bedieningshendel een keer in de
richting te drukken, of gebruik de rem of de koppeling, en stel daarna met de
bedieningshendel de gewenste snelheid opnieuw in.
82
Page 83

MagicSpeed MSBE7 MagicSpeed onderhouden en reinigen
NL
11 MagicSpeed onderhouden en reinigen
LET OP!
A
➤ Reinig het product af en toe met een vochtige doek.
Geen scherpe of harde voorwerpen of reinigingsmiddelen bij het reinigen gebruiken.
Dit kan het product beschadigen.
12 Garantie
De wettelijke garantieperiode is van toepassing. Als het product defect is, wendt u zich tot het
filiaal van de fabrikant in uw land (adressen zie achterkant van de handleiding) of tot uw speciaalzaak.
Voor de afhandeling van de reparatie of garantie dient u de volgende documenten mee te sturen:
• een kopie van de factuur met datum van aankoop,
• reden van de klacht of een beschrijving van de storing.
13 Afvoer
➤ Laat het verpakkingsmateriaal indien mogelijk recyclen.
Als u het product definitief buiten bedrijf stelt, informeer dan bij het dichtstbijzijnde
recyclingcentrum of uw speciaalzaak naar de betreffende afvoervoorschriften.
M
14 Technische gegevens
MagicSpeed MSBE7
Artikelnr.: 9600000387
Bedrijfsspanning: 12 V
Bedrijfstemperatuur: –40 °C tot +85 °C
Certificaties: ABE nr. 91178
83
Page 84

Forklaring af symbolerne MagicSpeed MSBE7
DA
Læs denne vejledning omhyggeligt igennem før installation og ibrugtagning, og
opbevar den. Giv den til brugeren, hvis du giver produktet videre.
Indholdsfortegnelse
1 Forklaring af symbolerne . . . . . . . . . . . . . . . . . . . . . . . . . . . . . . . . . . . . . . . . . . . . . . . . . . . .84
2 Sikkerheds- og installationshenvisninger. . . . . . . . . . . . . . . . . . . . . . . . . . . . . . . . . . . . . . . .85
3 Leveringsomfang . . . . . . . . . . . . . . . . . . . . . . . . . . . . . . . . . . . . . . . . . . . . . . . . . . . . . . . . . .86
4 Korrekt brug . . . . . . . . . . . . . . . . . . . . . . . . . . . . . . . . . . . . . . . . . . . . . . . . . . . . . . . . . . . . . .87
5 Teknisk beskrivelse . . . . . . . . . . . . . . . . . . . . . . . . . . . . . . . . . . . . . . . . . . . . . . . . . . . . . . . . .87
6 Montering af MagicSpeed . . . . . . . . . . . . . . . . . . . . . . . . . . . . . . . . . . . . . . . . . . . . . . . . . . .89
7 Elektrisk tilslutning af MagicSpeed . . . . . . . . . . . . . . . . . . . . . . . . . . . . . . . . . . . . . . . . . . . .90
8 Programmering af MagicSpeed. . . . . . . . . . . . . . . . . . . . . . . . . . . . . . . . . . . . . . . . . . . . . . . 91
9 Funktionstest. . . . . . . . . . . . . . . . . . . . . . . . . . . . . . . . . . . . . . . . . . . . . . . . . . . . . . . . . . . . . . 91
10 Anvendelse af MagicSpeed . . . . . . . . . . . . . . . . . . . . . . . . . . . . . . . . . . . . . . . . . . . . . . . . . .92
11 Vedligeholdelse og rengøring af MagicSpeed . . . . . . . . . . . . . . . . . . . . . . . . . . . . . . . . . .93
12 Garanti. . . . . . . . . . . . . . . . . . . . . . . . . . . . . . . . . . . . . . . . . . . . . . . . . . . . . . . . . . . . . . . . . . .93
13 Bortskaffelse . . . . . . . . . . . . . . . . . . . . . . . . . . . . . . . . . . . . . . . . . . . . . . . . . . . . . . . . . . . . . .94
14 Tekniske data . . . . . . . . . . . . . . . . . . . . . . . . . . . . . . . . . . . . . . . . . . . . . . . . . . . . . . . . . . . . .94
1 Forklaring af symbolerne
ADVARSEL!
!
!
Sikkerhedshenvisning: Manglende overholdelse kan medføre død eller alvorlig
kvæstelse.
FORSIGTIG!
Sikkerhedshenvisning: Manglende overholdelse kan medføre kvæstelser.
VIGTIGT!
A
I
84
Manglende overholdelse kan medføre materielle skader og begrænse produktets
funktion.
BEMÆRK
Supplerende informationer om betjening af produktet.
Page 85

MagicSpeed MSBE7 Sikkerheds- og installationshenvisninger
DA
2 Sikkerheds- og installationshenvisninger
Producenten påtager sig intet ansvar for skader i følgende tilfælde:
• Beskadigelser på produktet på grund af mekanisk påvirkning og overspænding
• Ændringer på produktet uden udtrykkelig tilladelse fra producenten
• Anvendelse til andre formål end dem, der er beskrevet i vejledningen
Overhold sikkerhedshenvisningerne og pålæggene, der er foreskrevet af køretøjsproducenten og af automobilbranchen.
ADVARSEL!
Utilstrækkelige ledningsforbindelser kan føre til, at en kortslutning
!
A
• fører til kabelbrand,
• udløser airbaggen,
• beskadiger elektroniske styreanordninger,
• forårsager, at elektriske funktioner svigter (blinklys, bremselys, horn, tænding, lys).
VIGTIGT!
Afbryd på grund af faren for kortslutning altid minuspolen før arbejder på køretøjets
el-system.
Ved køretøjer med ekstra batteri skal du også afbryde minuspolen på dette batteri.
Når batteriets minuspol afbrydes, mister alle komfortelektronikkens flygtige lagre de gemte data.
• Afhængigt af køretøjets udstyr skal du indstille følgende data igen:
–Radiokode
–Køretøjets ur
–Kontaktur
– Køretøjets computer
–Sædeposition
Henvisninger til indstillingen findes i den pågældende betjeningsvejledning.
Overhold følgende henvisninger ved monteringen:
• Fastgør de dele, der er monteret i køretøjet, så de under ingen omstændigheder (hård
opbremsning, trafikuheld) kan løsne sig og føre til kvæstelse af dem, der sidder i køretøjet.
• Fastgør de af systemets dele, der skal monteres skjult under beklædningerne, så de ikke kan
løsne sig, beskadige andre dele og ledninger og begrænse køretøjets funktioner (styring,
pedaler osv.).
• Læs altid sikkerhedshenvisningerne fra køretøjets producent.
Nogle arbejder (f.eks. på fastholdelsessystemer som AIRBAG osv.) må kun foretages af uddannet fagpersonale.
• For at undgå skader, når du borer, skal du sørge for tilstrækkeligt frirum, hvor boret kommer ud.
• Fjern grater fra hvert hul, og behandl dem med rustbeskyttelsesmiddel.
85
Page 86

Leveringsomfang MagicSpeed MSBE7
DA
Overhold følgende henvisninger ved arbejde på elektriske dele:
• Anvend kun en diodeprøvelampe eller et voltmeter til spændingskontrol i elektriske ledninger.
Testlamper med et lyselement optager for høj strøm. Derved kan køretøjets elektronik
beskadiges.
• Når de elektriske tilslutninger etableres, skal det sikres, at de
– ikke knækkes eller snos,
– ikke skurer mod kanter,
– ikke trækkes uden beskyttelse mod gennemføringer med skarpe kanter.
• Isolér alle forbindelser og tilslutninger.
• Sørg for at sikre kablerne mod mekanisk belastning ved hjælp af kabelbindere eller isolerings-
bånd, f.eks. på eksisterende ledninger.
Overhold især følgende henvisninger:
• Overhold de gældende retslige forskrifter.
• Kør på en sådan måde, at fare for andre trafikanker er udelukket.
• MagicSpeed skal give dig ekstra støtte, dvs. apparatet fritager dig ikke fra din pligt til at udvise
særlig forsigtighed, når du kører.
3 Leveringsomfang
Nr. på
fig. 4,
side 4
1 1 Betjeningshåndtag 9600000387
21Udvendig adapter
3 1 Indvendig adapter
42Fjederring
51Møtrik M14
61Stikhus
Mængde Betegnelse
86
Page 87

MagicSpeed MSBE7 Korrekt brug
DA
4Korrekt brug
MagicSpeed MSBE 7 (art.nr. 9600000387) er et betjeningshåndtag, som kan tilsluttes en fartpilot.
Betjeningshåndtaget overfører førerens kommandoer til hastighedsreguleringens elektronikmodul, som holder den indstillede hastighed så konstant som muligt.
MagicSpeed er en støtte, når der køres, men den fritager dig ikke fra din pligt til at udvise
særlig forsigtighed, når du kører.
MagicSpeed MSBE7 er beregnet til montering i personbiler og autocampere.
5 Teknisk beskrivelse
5.1 Funktionsbeskrivelse
MagicSpeed Accessory er et betjeningshåndtag, der tilsluttes til elektronikmodulet MS 880 på en
hastighedsregulering. Med betjeningshåndtaget foretages de ønskede indstillinger. Den skal
monteres i nærheden af ratstammen.
Elektronikmodulet måler den faktiske hastighed og sammenligner den med din ønskede hastighed.
BEMÆRK
I
For at sikre en sikker og økonomisk anvendelse bør du aldrig anvende hastighedsreguleringen,
når du kører i en kø eller på våde, glatte veje.
I nødstilfælde kan tændingen altid slås fra for at deaktivere MagicSpeed.
87
Page 88

Teknisk beskrivelse MagicSpeed MSBE7
DA
5.2 Visninger og betjeningselementer
Betjeningspanelet har følgende visninger og betjeningselementer:
Pos. på
fig. 5,
side 4
1For at forøge hastigheden.
2Denne LED lyser grønt, når fartpiloten er slået til.
3 For at reducere hastigheden.
Symbol Forklaring
For at gemme den aktuelle hastighed. Denne slettes, når
tændingen slås fra.
Udfører funktionen SET (bekræft) (se vejledning til MS880)
Denne LED lyser orange, når en aktuel hastighed eller en hastighed fra hukommelse I eller II aktiveret.
For at aktivere den sidst gemte hastighed.
Udfører funktionen RES (RESUME) (se side 92 og vejledningen til
MS880)
4 I For at gemmer en ønsket hastighed, f.eks. 70 km/h (se kapitlet
„Anvendelse af MagicSpeed“ på side 92).
For at hente den sidst gemte hastighed. Denne hastighed gemmes fortsat, efter tændingen er blevet slået fra.
5 II For at gemmer en ønsket hastighed, f.eks. 120 km/h (se kapitlet
„Anvendelse af MagicSpeed“ på side 92).
For at hente den sidst gemte hastighed. Denne hastighed gemmes fortsat, efter tændingen er blevet slået fra.
6 For at tænde og slukke fartpiloten.
7 For at deaktivere den aktuelt indstillede hastighed. Fartpiloten
forbliver fortsat tændt. LED'en skifter fra orange til grøn.
88
Page 89

MagicSpeed MSBE7 Montering af MagicSpeed
DA
6 Montering af MagicSpeed
6.1 Nødvendigt værktøj
Til installation og montering har du brug for følgende værktøj:
• Sæt bor (fig. 1 1, side 3)
• Boremaskine (fig. 1 2, side 3)
• Skruetrækker (fig. 1 3, side 3)
• Sæt ring- eller gaffelnøgler (fig. 1 4, side 3)
• Topnøglesæt (fig. 1 5, side 3)
• Målestok (fig. 1 6, side 3)
• Hammer (fig. 1 7, side 3)
• Kørner (fig. 1 8, side 3)
Til den elektriske tilslutning og kontrollen af den har du brug for følgende hjælpemidler:
• Diodeprøvelampe (fig. 1 9, side 3) eller voltmeter (fig. 1 10, side 3)
• Isoleringsbånd (fig. 1 12, side 3)
• Tætningsmasse
• Evt. kabelgennemføringsmuffer
Til fastgørelse af modulerne og kablerne har du evt. brug for yderligere skruer og kabelbindere.
6.2 Montering af betjeningshåndtaget
Vær opmærksom på følgende henvisninger ved valg af monteringssted:
• Sørg for, at føreren ikke skal gribe gennem rattet for at betjene betjeningshåndtaget.
• Montér betjeningshåndtaget på et egnet sted på ratstammen, hvor den kan betjenes og
fungere sikkert under alle forhold.
VIGTIGT!
A
Før du borer, skal du altid kontrollere, om der er fri gennemgang der, hvor boret
kommer ud (fig. 2, side 3).
➤ Afmontér ratstammens afdækning.
➤ Bor et hul på 10 mm.
➤ Sæt den udvendige adapter (fig. 6 2, side 5) på betjeningshåndtagets gevind (fig. 6 1,
side 5).
➤ Før gevindet gennem hullet.
➤ Fastgør betjeningshåndtaget ved at skubbe fjederringene (fig. 6 4, side 5) og den indven-
dige adapter (fig. 6 3, side 5) på gevindet, og spænd fast med møtrikken (fig. 6 5, side 5).
89
Page 90

Elektrisk tilslutning af MagicSpeed MagicSpeed MSBE7
DA
➤ Træk forbindelseskablet til kabelsættet.
➤ Montér ratstammens afdækning på dens oprindelige plads.
7 Elektrisk tilslutning af MagicSpeed
7.1 Generelle henvisninger til kabelføringen
BEMÆRK
I
• Anvend originale gennemføringer eller andre gennemføringsmuligheder, f.eks.
beklædningskanter, ventilationsgitre eller blindstik, til gennemføringen af
tilslutningskablerne. Hvis der ikke findes gennemføringer, skal du bore huller til de
pågældende kabler. Kontrollér først, om der er tilstrækkeligt frirum, hvor boret
kommer ud.
• Kabelføringer og kabelforbindelser, der ikke er korrekte, fører igen og igen til fejlfunktioner på eller beskadigelser på komponenter. En korrekt kabelføring og kabelforbindelse er grundforudsætningen for, at de monterede komponenter fungerer
konstant og fejlfrit.
Overhold derfor følgende henvisninger:
• For at undgå, at kablet beskadiges, skal der altid være tilstrækkelig afstand til dele på køretøjet,
der er varme eller bevæger sig (udstødningsrør, drivaksler, dynamo, ventilatorer, varmeapparater osv.).
• Sørg for at vikle isoleringsbånd fast om hver forbindelse på kablet (også i køretøjet).
• Når kablerne trækkes (fig. 3, side 3), skal det sikres, at de
– ikke knækkes eller snos kraftigt,
– ikke skurer mod kanter,
– ikke trækkes uden beskyttelse mod gennemføringer med skarpe kanter.
• Beskyt hver gennemføring mod indtrængende vand ved hjælp af egnede forholdsregler, f.eks.
ved at isætte kablet med tætningsmasse og ved at sprøjte tætningsmasse på kablet og
gennemføringsmuffen.
90
Page 91

MagicSpeed MSBE7 Programmering af MagicSpeed
DA
7.2 Tilslutning af betjeningshåndtaget
➤ Sæt betjeningshåndtagets tilslutningskabel (fig. 7 1, side 5) i stikkene til stikhuset med 8
ledere (fig. 7 2, side 5) på følgende måde:
– blå i stik 1
– brun i stik 2
– gul i stik 3
– sort i stik 4
– stik 5 forbliver ledigt
– rød i stik 6
– grøn i stik 7
– orange i stik 8
Sørg for, at farverne på tilslutningskablerne svarer til dem på modstikket eller farvemarkeringerne på stikhuset.
➤ Før betjeningshåndtagets tilslutningskabel til elektronikmodulet.
➤ Sæt betjeningshåndtagets monterede kompaktstik med 8 ledere i kabelsættets bøsning med
8 ledere (fig. 8, side 5).
8 Programmering af MagicSpeed
➤ Programmér MagicSpeed som beskrevet i monterings- og betjeningsvejledningen til
hastighedsreguleringen.
9 Funktionstest
BEMÆRK
I
➤ Start køretøjet.
➤ Tænd for fartpiloten ved at trykke betjeningshåndtaget i retningen .
✓ LED'en på betjeningshåndtaget lyser grønt.
✓ Der lyder to akustiske kvitteringssignaler.
➤ Kør med en hastighed på ca. 40 til 50 km/h.
➤ Tryk på betjeningshåndtaget i retningen for at aktivere fartpiloten.
✓ LED'en på betjeningshåndtaget lyser orange.
Den laveste hastighed, hvor hastighedsreguleringen fungerer, ligger ved ca. 30 km/h
og højeste ved ca. 140 km/h.
✓ Fartpiloten overtager blødt hastigheden og holder den kørte hastighed konstant.
91
Page 92

Anvendelse af MagicSpeed MagicSpeed MSBE7
DA
10 Anvendelse af MagicSpeed
MagicSpeed betjenes via betjeningshåndtaget.
Til- og frakobling af MagicSpeed
➤ Tryk på betjeningshåndtaget én gang i retningen for at tænde fartpiloten.
✓ LED'en på betjeningshåndtaget lyser grønt.
✓ Der lyder to akustiske kvitteringssignaler.
➤ Når fartpiloten er tændt, skal du igen trykke på betjeningshåndtaget i retningen for at
slukke fartpiloten.
✓ LED'en på betjeningshåndtaget slukker.
✓ Den sidst gemte aktuelle hastighed forkastes.
Lagring af ønsket hastighed
Med tasten I eller II kan der gemmes to hastigheder i fartpiloten (f.eks. 70 km/h og 120 km/h).
VIGTIGT!
A
Motoren kan beskadiges ved for højt omdrejningstal. Gem den ønskede hastighed i
gearet, hvor denne hastighed køres.
BEMÆRK
I
➤ Hold tasten I eller II trykket ind, indstil der lyder to bip-toner, for at gemme den aktuelt kørte
hastighed.
Denne ønskede hastighed opretholdes, indtil
– du træder på bremse- eller koblingspedalen
– du slukker fartpiloten eller aktiverer funktionen Afbryd
– køretøjets hastighed er under den nederste tilkoblingshastighed
– hastigheden falder med mere end ca. 25 % ved en stigning.
➤ Tryk kort på tasten I eller II for at anvende den forinden gemte hastighed.
Ny hentning af den sidst anvendte hastighed
Med tasten kan du hente den sidst gemte hastighed frem, når
• fartpiloten er tændt
• du ikke træder på bremse- eller koblingspedalen
Betjeningshåndtaget har to hukommelsestaster, med hvilke der kan gemmes to
forskellige hastigheder (f.eks. 70 km/h og 120 km/h).
• du ikke slår tændingen fra i mellemtiden
• køretøjets hastighed er over 35 km/h.
➤ Tryk på tasten , og slip den straks igen for at hente den sidst gemte hastighed.
92
Page 93

MagicSpeed MSBE7 Vedligeholdelse og rengøring af MagicSpeed
DA
Acceleration og deceleration
Når hastighedsreguleringen er aktiveret, har du mulighed for at finindstille. På den måde kan du
tilpasse køretøjets hastighed præcist til trafikstrømmen eller til hastighedsbegrænsninger.
➤ Tryk betjeningshåndtaget én gang i retningen for at forøge hastigheden med ca. 1 km/h.
➤ Tryk betjeningshåndtaget én gang i retningen for at reducere hastigheden med
ca. 1 km/h.
Hvis du for eksempel vil forøge hastigheden med ca. 3 km, skal du trykke tre gange på betjeningshåndtaget i retningen .
BEMÆRK
I
Afbryd
Hvis fartpiloten er aktiveret, har du mulighed for at afbryde funktionen. Fartpiloten er dog forsat
tændt.
➤ Tryk betjeningshåndtaget én gang i retningen .
• Hvis du holder betjeningshåndtaget trykket inde længere i retningen eller ,
ændres hastigheden, indtil du slipper betjeningshåndtaget igen.
• Hvis du vil reducere den indstillede hastighed ekstremt meget, skal du ikke bruge
betjeningshåndtaget.
Sluk for fartpiloten ved at trykke betjeningshåndtaget én gang i retningen , eller
brug bremsen eller koblingen, og indstil derefter den ønskede hastighed igen vha.
betjeningshåndtaget.
11 Vedligeholdelse og rengøring af MagicSpeed
VIGTIGT!
A
Anvend ikke skarpe eller hårde genstande eller rengøringsmidler til rengøring, da det
kan beskadige produktet.
➤ Rengør af og til produktet med en fugtig klud.
12 Garanti
Den lovbestemte garantiperiode gælder. Hvis produktet er defekt, skal du kontakte producentens
afdeling i dit land (adresser, se vejledningens bagside) eller din forhandler.
Ved reparation eller krav om garanti skal du medsende følgende bilag:
• En kopi af regningen med købsdato
• En reklamationsgrund eller en fejlbeskrivelse
93
Page 94

Bortskaffelse MagicSpeed MSBE7
DA
13 Bortskaffelse
➤ Bortskaf så vidt muligt emballagen sammen med det tilsvarende genbrugsaffald.
Hvis du tager produktet endegyldigt ud af drift, skal du kontakte det nærmeste
recyclingcenter eller din faghandel for at få de pågældende forskrifter om bortskaffelse.
M
14 Tekniske data
MagicSpeed MSBE7
Artikel-nr.: 9600000387
Driftsspænding: 12 V
Driftstemperatur: –40 °C til +85 °C
Godkendelser: Standardtypegodkendelse nr. 91178
94
Page 95

MagicSpeed MSBE7 Förklaring till symboler
SV
Läs igenom anvisningarna noga innan produkten monteras och används. Spara monterings- och bruksanvisningen för senare bruk. Överlämna bruksanvisningen till den
nya ägaren vid ev. vidareförsäljning.
Innehållsförteckning
1 Förklaring till symboler . . . . . . . . . . . . . . . . . . . . . . . . . . . . . . . . . . . . . . . . . . . . . . . . . . . . . .95
2 Säkerhets- och installationsanvisningar . . . . . . . . . . . . . . . . . . . . . . . . . . . . . . . . . . . . . . . . .96
3 Leveransomfattning . . . . . . . . . . . . . . . . . . . . . . . . . . . . . . . . . . . . . . . . . . . . . . . . . . . . . . . .97
4 Ändamålsenlig användning . . . . . . . . . . . . . . . . . . . . . . . . . . . . . . . . . . . . . . . . . . . . . . . . . .97
5 Teknisk beskrivning . . . . . . . . . . . . . . . . . . . . . . . . . . . . . . . . . . . . . . . . . . . . . . . . . . . . . . . .98
6 Montera MagicSpeed . . . . . . . . . . . . . . . . . . . . . . . . . . . . . . . . . . . . . . . . . . . . . . . . . . . . . .99
7 Ansluta kablarna till MagicSpeed. . . . . . . . . . . . . . . . . . . . . . . . . . . . . . . . . . . . . . . . . . . . . 100
8 Programmera MagicSpeed . . . . . . . . . . . . . . . . . . . . . . . . . . . . . . . . . . . . . . . . . . . . . . . . . 101
9 Funktionstest. . . . . . . . . . . . . . . . . . . . . . . . . . . . . . . . . . . . . . . . . . . . . . . . . . . . . . . . . . . . . 101
10 Använda MagicSpeed . . . . . . . . . . . . . . . . . . . . . . . . . . . . . . . . . . . . . . . . . . . . . . . . . . . . . 101
11 Skötsel och rengöring av MagicSpeed . . . . . . . . . . . . . . . . . . . . . . . . . . . . . . . . . . . . . . . . 103
12 Garanti. . . . . . . . . . . . . . . . . . . . . . . . . . . . . . . . . . . . . . . . . . . . . . . . . . . . . . . . . . . . . . . . . . 103
13 Avfallshantering . . . . . . . . . . . . . . . . . . . . . . . . . . . . . . . . . . . . . . . . . . . . . . . . . . . . . . . . . . 103
14 Tekniska data. . . . . . . . . . . . . . . . . . . . . . . . . . . . . . . . . . . . . . . . . . . . . . . . . . . . . . . . . . . . . 103
1 Förklaring till symboler
VARNING!
!
!
A
Observera: Beaktas anvisningen ej kan det leda till dödsfara eller svåra skador.
AKTA!
Observera: Beaktas anvisningen ej kan det leda till kroppsskador.
OBSERVERA!
Om anvisningarna inte beaktas kan det leda till materialskador och produktens funktion
kan påverkas negativt.
ANVISNING
I
Kompletterande information om användning av produkten.
95
Page 96

Säkerhets- och installationsanvisningar MagicSpeed MSBE7
SV
2 Säkerhets- och installationsanvisningar
Tillverkaren övertar inget ansvar för skador i följande fall:
• skador på produkten, orsakade av mekanisk påverkan eller överspänning
• ändringar som utförts utan uttryckligt medgivande från tillverkaren
• ej ändamålsenlig användning
Beakta säkerhetsanvisningarna och riktlinjerna från fordonstillverkaren samt reglerna
för bilmekaniska arbeten!
VARNING!
Ej korrekt utförda anslutningar kan leda till kortslutning, som
!
A
• kan förorsaka kabelbrand,
• kan utlösa krockkudden,
• kan skada den elektroniska styrutrustningen,
• kan leda till att elektriska komponenter inte fungerar (blinkers, bromsljus, signalhorn,
tändning, lyse).
OBSERVERA!
Koppla alltid från minuspolen i fordonets elsystem innan några arbeten utförs – annars
finns risk för kortslutning.
Om fordonet har ett extra batteri måste minuspolen kopplas bort även på detta.
När batteriets minuspol kopplas bort försvinner all data ur komfortelektronikens flyktiga minnen.
• Beroende på fordonsutrustning måste följande data ställas in på nytt:
–radiokod
–klocka
–timer
– fordonsdator
–sätesposition
Inställningarna beskrivs i respektive bruksanvisning.
Beakta följande anvisningar vid monteringen:
• Fäst de delar som monteras i fordonet så att de inte kan lossna (t.ex. vid kraftiga bromsningar,
trafikolyckor) och skada personerna i fordonet.
• Fäst de delar av systemet som monteras under täckplattor el.dyl. på så sätt att de inte kan lossna,
eller skada andra delar och ledningar resp. störa några fordonsfunktioner (styrning, pedaler
osv.).
• Beakta alltid fordonstillverkarens säkerhetsanvisningar.
Vissa arbeten (t.ex. på säkerhetsutrustning som AIRBAG osv.) får endast utföras av behörigt
fackfolk.
• Se till att det finns tillräckligt mycket plats för borrspetsen så att inga delar skadas av misstag.
• Slipa graderna i borrhålen och behandla hålen med rostskyddsmedel.
96
Page 97

MagicSpeed MSBE7 Leveransomfattning
SV
Beakta följande anvisningar vid arbeten på elsystemet:
• Använd endast en diodtestlampa eller en voltmeter för att testa spänningen i elledningar.
Testlampor med andra ljuskällor förbrukar för mycket ström och kan på så sätt skada fordonselektroniken.
• Beakta, när elledningar dras, att
– de inte böjs eller vrids,
– de inte skaver mot kanter,
– skydd används om de dras genom genomföringar med vassa kanter.
• Isolera alla ledningar och anslutningar.
• Skydda kablarna mot mekanisk belastning genom kabelband eller isoleringsband, t. ex. på
befintliga ledningar.
Beakta speciellt följande anvisningar:
• Beakta gällande lagar och bestämmelser.
• Var alltid mycket försiktig när du kör - se till att andra trafikanter inte råkar i fara.
• MagicSpeed är till för att underlätta körningen, d.v.s. föraren måste alltid iaktta största försiktig-
het under körningen.
3 Leveransomfattning
Nr på
bild 4,
sida 4
1 1 Kontrollspak 9600000387
2 1 Yttre adapter
31Inre adapter
4 2 Fjäderring
5 1 Mutter M14
61kontaktdosa
Mängd Beteckning
4 Ändamålsenlig användning
MagicSpeed MSBE7 (art.nr 9600000387) är en kontrollspak som ska anslutas på en farthållare.
Kontrollspaken överför förarens kommandon till elektronikmodulen i farthållaren, som håller den
inställda hastigheten så konstant som möjligt.
MagicSpeed är till för att underlätta körningen, d.v.s. föraren måste alltid iaktta största försik-
tighet under körningen.
MagicSpeed MSBE7 avsedd för personbilar, skåpbilar och husbilar.
97
Page 98

Teknisk beskrivning MagicSpeed MSBE7
SV
5 Teknisk beskrivning
5.1 Funktionsbeskrivning
MagicSpeed Accessory är en kontrollspak som ansluts till elektronikmodulen i farthållaren MS 880.
Kontrollspaken används för att göra önskade inställningar. Den ska monteras vid rattstången.
Elektronikmodulen mäter den faktiska hastigheten och jämför den med det inställda värdet.
ANVISNING
I
För säker och ekonomisk användning bör hastighetsregulatorn aldrig användas i trafikköer eller
på våta, hala vägar.
5.2 Lysdioder och reglage
Kontrollpanelen har följande lysdioder och reglage:
Vid nödfall kan man slå av tändningen för att stänga av MagicSpeed.
Pos. på
bild 5,
sida 4
1 Ökar körhastigheten.
2 Denna lysdiod tänds med ett grönt sken när farthållaren är aktiverad.
3 Minskar körhastigheten.
4 I Används för att spara en önskad körhastighet, t.ex. 70 km/h (se kapitel
Symbol Förklaring
Sparar den aktuella körhastigheten. Denna raderas när tändningen
slås av.
Utför funktionen SET (bekräfta) (se bruksanvisning MS880)
Denna lysdiod tänds med ett orange sken när en tillfällig hastighet eller
en hastighet från minne I eller II aktiveras.
Aktiverar den senast sparade körhastigheten.
Utför funktionen RES (RESUME) (se sida 102 och bruksanvisning MS880)
”Använda MagicSpeed” på sidan 101).
Hämtar den senast sparade körhastigheten. Denna hastighet sparas även
efter att tändningen har slagits av.
5 II Används för att spara en önskad körhastighet, t.ex. 120 km/h (se kapitel
”Använda MagicSpeed” på sidan 101).
Hämtar den senast sparade körhastigheten. Denna hastighet sparas även
efter att tändningen har slagits av.
6 Aktiverar och stänger av farthållaren.
7 Avaktiverar den tillfälligt inställda körhastigheten. Farthållaren förblir
aktiverad. Lysdioden växlar från orange till grön.
98
Page 99

MagicSpeed MSBE7 Montera MagicSpeed
SV
6 Montera MagicSpeed
6.1 Verktyg
För monteringen krävs följande verktyg:
• Borrsats (bild 1 1, sida 3)
• Borrmaskin (bild 1 2, sida 3)
• Skruvmejsel (bild 1 3, sida 3)
• En sats ringnycklar eller U-nycklar (bild 1 4, sida 3)
• Sats hylsnycklar (bild 1 5, sida 3)
• Måttsticka (bild 1 6, sida 3)
• Hammare (bild 1 7, sida 3)
• Körnare (bild 1 8, sida 3)
För elanslutningen och kontrollen krävs följande hjälpmedel:
• Diod-testlampa (bild 1 9, sida 3) eller voltmeter (bild 1 10, sida 3)
• Isoleringsband (bild 1 12, sida 3)
• Tätningsmassa
• Ev. kabelgenomföringshylsor
För fastsättning av moduler och kablar krävs ev. ytterligare skruvar och kabelband.
6.2 Montera kontrollspaken
Beakta följande anvisningar vid monteringen:
• Se till att föraren inte behöver sticka in handen bakom ratten för att använda kontrollspaken.
• Montera kontrollspaken på ett lämpligt ställe på rattstången. Kontrollspaken ska kunna
manövreras utan att körsäkerheten påverkas negativt.
OBSERVERA!
A
➤ Demontera rattstångskåpan.
Innan borrningar görs: kontrollera att inga delar kan skadas/är i vägen (bild 2, sida 3).
➤ Borra ett 10 mm hål.
➤ Sätt den yttre adaptern (bild 6 2, sida 5) på kontrollspakens gänga (bild 6 1, sida 5).
➤ För gängan genom borrhålet.
➤ Fäst kontrollspaken genom att sätta dit fjäderringarna (bild 6 4, sida 5) och den inre adaptern
(bild 6 3, sida 5) på gängan och skruva fast dem med muttern (bild 6 5, sida 5).
➤ Dra anslutningskabeln till kabelsatsen.
➤ Montera tillbaka rattstångskåpan.
99
Page 100

Ansluta kablarna till MagicSpeed MagicSpeed MSBE7
SV
7 Ansluta kablarna till MagicSpeed
7.1 Allmänna anvisningar om kabeldragning
ANVISNING
I
Beakta därför följande anvisningar:
• Drag inte kablarna tätt intill heta och/eller rörliga delar (avgasrör, drivaxlar, generator, fläkt,
värmeaggregat osv); kablarna kan skadas.
• Använd om möjligt originalgenomföringar eller andra genomföringar som t.ex.
fogar, ventilationsgaller eller oanvända anslutningar för anslutningskablarna. Om
det inte finns lämpliga genomföringar måste man borra hål för kablarna. Kontrollera
först att det finns tillräckligt mycket plats för borrspetsen.
• Ej fackmässig kabeldragning och kabelanslutning leder ofta till felaktiga funktioner
eller skador på komponenterna. Korrekt kabeldragning och anslutning är en nödvändig förutsättning för att komponenterna ska fungera felfritt och länge.
• Isolera kopplingar/skarvar på kablarna tätt med bra isoleringsband (även i fordonet).
• Beakta, när kablarna dras (bild 3, sida 3), att
– de inte böjs eller vrids för mycket,
– de inte skaver mot kanter,
– skydd används om de dras genom genomföringar med vassa kanter.
• Skydda borrhålen så att det inte kan komma in vatten, t.ex. genom att sätta in kabeln med
tätningsmassa och spruta tätningsmassa på kabeln och genomföringen.
7.2 Ansluta kontrollspaken
➤ Anslut kontrollspakens anslutningskablar (bild 7 1, sida 5) på följande sätt till uttagen på den
8-poliga kontaktdosan (bild 7 2, sida 5).
– Blå till uttag 1
– Brun till uttag 2
– Gul till uttag 3
– Svart till uttag 4
–Uttag 5 används inte
– Röd till uttag 6
– Grön till uttag 7
– Orange till uttag 8
Se till att anslutningskablarnas färg stämmer överens med färgen i kontakten eller på kontaktdosan.
➤ Dra kontrollspakens anslutningskabel till elektronikmodulen.
➤ Sätt in kontrollspakens monterade 8-poliga kompaktkontakt i kabelsatsen för farthållaren till
MagicSpeeds 8-poliga uttag (bild 8, sida 5).
100
 Loading...