

Page 1

D-Link System, Inc.™
xStack Storage DSN-1000 / 2000 / 3000 / 4000 / 5000 series
Command Line Interface User’s Guide
Version 1.5
Page 2

© 2011 D-Link Systems, Inc. All Rights Reserved
D-Link Systems, Inc. makes no warranty of any kind with regard to this material, including,
but not limited to, the implied warranties of merchantability and fitness for a particular
purpose. D-Link Systems, Inc. shall not be liable for errors contained herein or for incidental
or consequential damages in connection with the furnishing, performance, or use of this
material.
This document contains proprietary information, which is protected by copyright. No part of
this document may be photocopied, reproduced, or translated into another language without
the prior written consent of D-Link Systems, Inc.
The information is provided “as is” without warranty of any kind and is subject to change
without notice. The only warranties for D-Link Systems products and services are set forth in the
express warranty statements accompanying such products and services. Nothing herein
should be construed as constituting an additional warranty. D-Link Systems shall not be liable for
technical or editorial errors or omissions contained herein.
Copyright © 2011 D-Link Systems, Inc.™
Trademarks
xStack is a registered trademark of D-Link, Inc.
Adobe® and Acrobat® are trademarks of Adobe Systems, Incorporated.
Java™ is a U.S. trademark of Sun Microsystems, Incorporated.
Microsoft Windows is a U.S. registered trademarks of Microsoft Corporation.
Oracle® is a registered U.S. trademark of Oracle Corporation, Redwood City, California.
UNIX® is a registered trademark of The Open Group.
All other brand or product names are or may be trademarks or service marks, and are used
to identify products or services, of their respective owners.
D-Link Systems, Inc.
17595 Mount Herrmann Street
Fountain Valley, CA 92708
www.DLink.com
Page 3

Notice of Export Controls
Export of technical data contained in this document may require an export license from the
United States government. Please contact D-Link, Inc. for any export compliance questions.
Document Revision Level
Date Description
July 2008 Version 1.0
September 2008 Version 1.1 – updated for software version 2.5.0 and redundant controllers
January 2009 Version 1.2 – minor technical and formatting updates
May 2009 Version 1.3 – updated for software version 2.6.0
December 2009
October 2010
Version 1.4 – updated for software version 2.7.0, including new commands
for SNMP support, revised syntax for the IntegrityScanNow command, and
several new Volume attributes
Version 1.5 – updated for software version 2.8.0, including several new
commands in the AdvancedSettings context and removal of the
IsBatteryFailed and IsBatteryCharging items from the System context
Command Line Interface User’s Guide iii
Page 4
Preface
This document is intended for storage managers, administrators, and developers responsible
for using the command-line interface (CLI) to configure, manage, or develop custom
applications for the D-Link storage array from D-Link. This document assumes that the user
is computer literate, familiar with storage array products, has a basic understanding of
storage products and concepts, and has previous experience using a CLI.
Document Conventions
This document uses the following conventions to draw your attention to certain information.
The CLI is intended for users who have significant storage management
expertise and previous experience using a CLI. Improper CLI use can cause
undesired results.
Notes
Notes provide information that deserves special attention. They are preceded by:
Cautions
Cautions contain information, which if not followed, can cause damage to the DLink storage system. They are preceded by:
Warnings
Warnings contain information, which if not followed, can cause damage to the DLink storage system and to the person installing it. They are preceded by:
iv Preface
Page 5

Typographic Conventions
The following typographic conventions are used in this document.
Bold text = indicates commands and keywords that you enter literally as shown. When
appropriate, bold text is also used to call attention to text.
Italics = indicate arguments for which you supply values.
< > = angle brackets denote a descriptor to be specified.
[X] = square brackets enclose an optional item.
| = a vertical bar indicates a choice within an optional or required set of items.
[x|y] = square brackets enclosing items separated by a vertical bar indicate an optional
choice.
{x|y} = braces enclosing items separated by a vertical bar indicate a required choice.
[x {y | z}] = nested sets of square brackets or braces indicate optional or required
choices within optional or required items. Braces and a vertical bar within square
brackets indicate a required choice within an optional item.
Courier typeface is used to represent commands and command prompts.
How to Use This Document
This CLI User’s Guide is intended as a general overview of the operation of the CLI. This
User’s Guide also provides concepts and terminology specific to understanding the use of the
CLI. It is intended that the reader can start to use the CLI with this understanding, and later
refer to this User’s Guide as a reference for details on the commands.
Command Line Interface User’s Guide v
Page 6

vi Preface
Page 7

Contents
Chapter 1 Introduction ............................................................................................................................ 1
1.1 Contexts ............................................................................................. 2
1.2 Commands .......................................................................................... 3
1.3 Properties ........................................................................................... 4
1.4 Understanding the CLI Hierarchy ............................................................... 4
1.5 Members ............................................................................................ 6
1.6 Enumerators ........................................................................................ 6
1.7 Special Keywords .................................................................................. 6
Chapter 2 Installing the CLI..................................................................................................................... 7
2.1 Supported Operating Systems ................................................................... 8
2.2 Installing the CLI .................................................................................. 8
2.3 Starting the CLI ................................................................................... 14
2.3.1 Using the CLI Shortcut to Start the CLI ............................................. 14
2.3.2 Using the Run Command to Start the CLI ........................................... 15
2.4 Exiting the CLI .................................................................................... 18
2.5 Removing the CLI ................................................................................. 18
Chapter 3 Using the CLI ........................................................................................................................ 19
3.1 General Guidelines ............................................................................... 20
3.1.1 Understanding Commands ............................................................. 20
3.1.2 Global Action Commands .............................................................. 20
3.1.3 Context-Specific Commands .......................................................... 20
3.1.4 Abbreviating Commands ............................................................... 20
3.1.5 Editing Command Lines ................................................................ 21
3.1.6 Concatenating Commands ............................................................. 21
3.1.7 Referencing Root Items ................................................................ 21
3.2 Specifying Operating Modes .................................................................... 22
3.2.1 Output Mode ............................................................................. 23
3.2.2 Indication Mode ......................................................................... 24
3.2.3 Stream Mode ............................................................................. 25
3.2.4 Completion Code Mode ................................................................ 25
3.2.5 Echo Command Mode ................................................................... 26
3.2.6 Exit Script on Error Mode .............................................................. 26
3.3 Command Line Syntax ........................................................................... 27
3.4 Getting Help with CLI Commands ............................................................. 28
3.4.1 Help Summary ........................................................................... 28
3.4.2 Command Help .......................................................................... 30
3.4.3 Advanced Scripting Concepts ......................................................... 31
Chapter 4 Global Action Commands .................................................................................................... 33
4.1 List of Global Action Commands ............................................................... 34
4.2 Description of Global Action Commands ..................................................... 35
4.2.1 Do .......................................................................................... 35
4.2.2 Echo ....................................................................................... 36
4.2.3 Execute ................................................................................... 36
4.2.4 Exit ........................................................................................ 37
4.2.5 Help ....................................................................................... 37
4.2.6 List ......................................................................................... 38
Command Line Interface User’s Guide vii
Page 8

4.2.7 Mode ...................................................................................... 38
4.2.8 Pop ........................................................................................ 40
4.2.9 Push ....................................................................................... 40
4.2.10 RequireArgs .............................................................................. 41
4.2.11 Select ..................................................................................... 42
4.2.12 Set ......................................................................................... 43
4.2.13 ShiftArgs .................................................................................. 43
4.2.14 Show....................................................................................... 44
4.2.15 System .................................................................................... 45
Chapter 5 Supported CLI Commands and Properties ........................................................................ 47
5.1 System Commands and Properties ............................................................ 48
5.2 Controller Commands and Properties ........................................................ 50
5.3 PhysicalPort Commands and Properties ...................................................... 52
5.4 PoolList Commands and Properties ........................................................... 53
5.5 DiskList Property ................................................................................. 53
5.6 Disk Commands ................................................................................... 54
5.7 VolumeList Property ............................................................................. 55
5.8 Volume Commands and Properties ............................................................ 55
5.9 VolumeComposition Properties ................................................................ 57
5.10 Extent Properties................................................................................. 57
5.11 TaskList Property ................................................................................. 58
5.12 Task Commands and Properties ............................................................... 59
5.13 iSCSI Commands and Properties ............................................................... 60
5.14 iSCSITarget Commands and Properties ....................................................... 61
5.15 iSCSISession Properties .......................................................................... 64
5.16 iSCSIConnection Properties ..................................................................... 65
5.17 Portal Commands and Properties ............................................................. 66
5.18 Initiator Commands and Properties ........................................................... 67
5.19 AdvancedSettings Commands and Properties ............................................... 68
5.20 SystemPolicy Properties ........................................................................ 69
5.21 ExternalConnectionsManager Properties ..................................................... 70
5.22 SystemStatistics Properties ..................................................................... 71
5.23 LAG Commands and Properties ................................................................ 72
5.24 ManagementPort Commands and Properties ................................................ 73
5.25 NetworkRoute Commands and Properties ................................................... 74
5.26 ServicePool Commands and Properties ....................................................... 75
Chapter 6 Application Examples .......................................................................................................... 77
6.1 Setting the Name of the System ............................................................... 78
6.2 Creating Volumes ................................................................................ 78
6.3 Obtaining the Maximum Size of a Volume ................................................... 79
6.4 Obtaining the Maximum Stripe Width of a Volume ......................................... 79
6.5 Adding an iSCSI Initiator ........................................................................ 80
6.6 Obtaining a Vector of All Controllers on a System ......................................... 80
6.7 Restarting the System ........................................................................... 81
6.8 Shutting Down the System ...................................................................... 81
6.9 Showing the Status of a Controller ............................................................ 81
6.10 Navigating and Displaying System, Volume, and Drive Information ..................... 82
Index ............................................................................................................................................... 85
viii Contents
Page 9

List of Figures
Figure 1-1. Hierarchy of the System Context ........................................................... 5
Figure 2-1. Management Center Home Page ............................................................ 8
Figure 2-2. File Download Security Warning Message ................................................. 9
Figure 2-3. Secondary Warning Message ................................................................. 9
Figure 2-4. Welcome Page ................................................................................ 10
Figure 2-5. License Agreement ........................................................................... 10
Figure 2-6. Destination Folder Screen .................................................................. 11
Figure 2-7. Setup Type Screen ........................................................................... 11
Figure 2-8. Custom Setup Screen ........................................................................ 12
Figure 2-9. Ready to Install the Program Screen ...................................................... 12
Figure 2-10. Progress Bar .................................................................................. 13
Figure 2-11. InstallShield Wizard Complete Screen .................................................. 13
Figure 2-12. Run Dialog Box .............................................................................. 15
Figure 2-13. Example of Using the –g, -u, and –p Switches ......................................... 16
Figure 2-14. Example of Using the –x Switch .......................................................... 16
Figure 2-15. Example of Using the –x Switch with the –g, -u, and –p Switches .................. 17
Figure 2-16. Example of Using the –I Switch ........................................................... 17
Figure 3-1. Example of Viewing Operating Modes .................................................... 22
Figure 3-2. Example of Normal Output ................................................................. 23
Figure 3-3. Example of XML Output ..................................................................... 23
Figure 3-4. Example of Formatted XML Output (Excerpt Shown) .................................. 24
Figure 3-5. Examples of Errors Displayed in Completion Code Mode .............................. 25
Command Line Interface User’s Guide ix
Page 10

List of Tables
Table 1-1. Members .......................................................................................... 6
Table 3-1. Items in a Command Line .................................................................... 27
Table 4-1. Global Action Commands .................................................................... 34
Table 5-1. System Context Commands ................................................................. 48
Table 5-2. System Context Properties .................................................................. 49
Table 5-3. Controller Commands ........................................................................ 50
Table 5-4. Controller Properties ......................................................................... 50
Table 5-5. PhysicalPort Command ....................................................................... 52
Table 5-6. PhysicalPort Properties ...................................................................... 52
Table 5-7. PoolList Commands ........................................................................... 53
Table 5-8. PoolList Properties ............................................................................ 53
Table 5-9. DiskList Property .............................................................................. 53
Table 5-10. Disk Commands .............................................................................. 54
Table 5-11. Disk Properties ............................................................................... 54
Table 5-12. Volume Property ............................................................................. 55
Table 5-13. Volume Commands .......................................................................... 55
Table 5-14. Volume Properties ........................................................................... 56
Table 5-15. VolumeComposition Properties ........................................................... 57
Table 5-16. Extent Properties ............................................................................ 57
Table 5-17. TaskList Properties .......................................................................... 58
Table 5-18. Task Commands .............................................................................. 59
Table 5-19. Task Properties .............................................................................. 59
Table 5-20. iSCSI Commands ............................................................................. 60
Table 5-21. iSCSI Properties .............................................................................. 60
Table 5-22. iSCSITarget Commands ..................................................................... 61
Table 5-23. iSCSITarget Properties ...................................................................... 61
Table 5-24. iSCSISession Properties ..................................................................... 64
Table 5-25. iSCSIConnection Properties ................................................................ 65
Table 5-26. Portal Commands ............................................................................ 66
Table 5-27. Portal Properties ............................................................................ 66
Table 5-28. Initiator Command .......................................................................... 67
Table 5-29. Initiator Properties .......................................................................... 67
Table 5-30. AdvancedSettings Commands ............................................................. 68
Table 5-31. AdvancedSettings Properties .............................................................. 68
Table 5-32. SystemPolicy Properties .................................................................... 69
Table 5-33. ExternalConnectionsManager Properties ................................................ 70
Table 5-34. SystemStatistics Properties ................................................................ 71
Table 5-35. LAG Commands .............................................................................. 72
Table 5-36. LAG Properties ............................................................................... 72
Table 5-37. ManagementPort Command ............................................................... 73
Table 5-38. ManagementPort Properties ............................................................... 73
Table 5-39. NetworkRoute Command ................................................................... 74
Table 5-40. NetworkRoute Properties .................................................................. 74
Table 5-41. ServicePool Commands ..................................................................... 75
Table 5-42. ServicePool Properties ...................................................................... 75
x Contents
Page 11

Chapter 1 Introduction
The CLI is a line-oriented user interface that provides commands for configuring, managing,
and monitoring an D-Link storage array. The CLI can be used as an alternative or supplement
to the Management Center graphical user interface (GUI).
Using the CLI can be useful in the following scenarios:
Users who want to develop tools and applications that utilize D-Link functions.
Users that do not have access to a Web browser or the Internet.
Users who prefer to use a CLI rather than a graphical user interface (GUI).
Users that want to perform multiple tasks. CLI users can create a sequence of commands
that are connected together to achieve a very flexible range of results. By comparison,
there is no simple way to connect the output of one GUI program to the input of
another.
Users who perform activities using scripts that contain one or more command lines.
For the latest information about the CLI, consult the Interoperability Matrix
on the D-Link Web site: www.dlink.com.
This chapter provides an introduction to the CLI. The topics covered in this chapter are:
Section 1.1, Contexts (page 2)
Section 1.2, Commands (page 3)
Section 1.3, Properties (page 4)
Section 1.4, Understanding the CLI Hierarchy (page 4)
Section 1.5, Members (page 6)
Section 1.6, Enumerators (page 6)
Section 1.7, Special Keywords (page 6)
Command Line Interface User’s Guide 1
Page 12

1.1 Contexts
Controller[A] ::
Volume[Mynewvolume] ::
All actions performed with the CLI are done in a specific “context.” A context is a reference
to a specific physical or logical object on the system. Examples of contexts are:
When you start the CLI, for example, you interact with the root context. There is one
instance of the root context on an D-Link storage array. In this guide, the root context is
referred to as System.
Every context has a unique ID. When you are in a context, the prompt indicates the specific
object with which you are communicating. For example:
The system itself (referred to as the root context),
A disk drive in the system.
A volume that was created on the system.
An iSCSI Initiator object that has been registered with the system.
If you communicate with the root object, the prompt takes the form of the IP address of
the root. For example:
192.168.59.25 ::
In the controller context, the prompt displays the unique ID in brackets. For example:
In the volume context, the unique ID is the volume name shown in brackets. For
example:
2 Chapter 1 Introduction
Page 13

1.2 Commands
Commands cause some action to happen or a state to change. For example, the command
createVolume creates a new volume and the command addInitiator adds an iSCSI
initiator to the list of known initiators for an array. For a complete list of the commands
available in the CLI, see Chapter 5.
The CLI provides a special set of commands called global action commands. Global action
commands indicate an action that you want to perform and precede other commands and
properties on a command line. For example, the global action command Show can be used
with the property Controllers to return information about an array’s controller(s) from
the System context:
192.168.59.25 :: show controller[a]
ID = A
Status = OK
IsActive = true
SlotNumber = 0
SerialNumber = 00001
DriveSlots = 12
NumFrontPorts = 8
DisplayName = Blade A
SoftwareVersion = 2.5.1.21
IsAlternateSoftwareVersionPresent = true
AlternateSoftwareVersion = 2.5.1.21
BoardType = 0009
BoardTypeRevision = XC05
I8kHwVersion = 1.0.0.0
I8kSwVersion = 0.1.0.0
MpuSwVersion = 2.5.1.21
BindFailReason = Bind_OK
BladeHealth = Healthy
BladeState = Bound
BladeType = SFF
PersistenceSetting = Unchanged
BatteryState = Failed
BufferMemDimmCnt = 2
BufferMemSize = 2048
SystemMemDimmCnt = 2
SystemMemSize = 512
SystemTime = 13:18:27
Ports = 8 Ports
LAGs = 8 LAGs
ManagementPort = ManagementPort [192.168.59.25], Status=OK
BasePool = [BaseA], 2 disks
You can also chain commands on a command line and have the CLI execute them in
sequence by separating each command with a semicolon (;). The following command line,
for example, tells the CLI to perform two Pop operations and then create a 30 GB volume
named Engineering.
Command Line Interface User’s Guide 3
Page 14

Pop; Pop; createVolume Engineering 30GB mirror
For a complete list of the global action commands available in the CLI, see Chapter 4.
1.3 Properties
Properties are items that you show using the global action command Show. For example, the
command Show softwareVersion returns the current version of software running on the
array. Some properties can also be set. For example, the property
context lets you set the name of an array using the global action command Set.
Volume[Parity3] :: set name ThisIsMyParityVolume
For a complete list of the properties available in the CLI, see Chapter 5. This chapter
includes the global action commands used with the properties.
1.4 Understanding the CLI Hierarchy
Name
in the Volume
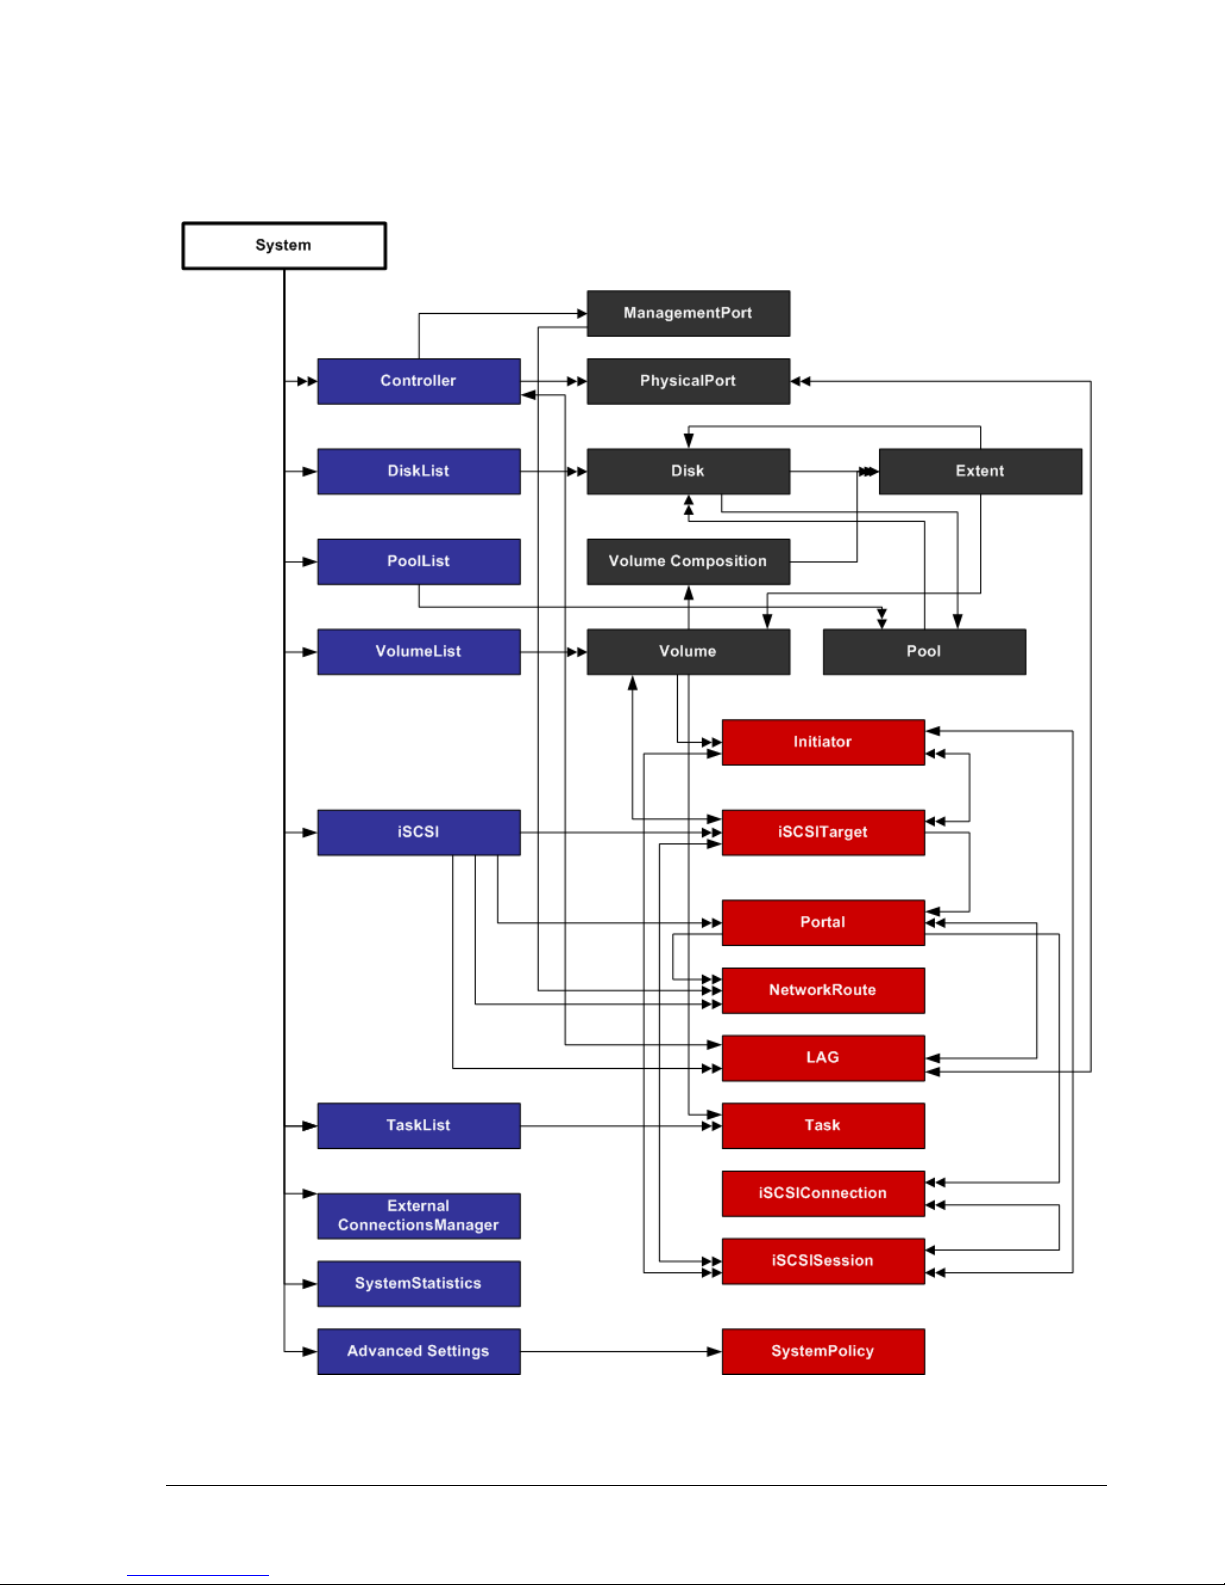
The CLI consists of a hierarchy of contexts, commands, and properties. For example, Figure
1-1 shows the relationships between contexts, commands, and the properties in the root
context. Navigation within the CLI hierarchy is achieved ether by using properties that are of
type Context or ContextList, or by using commands that return Contexts (such as
createVolume and addInitiator).
In Figure 1-1, the arrows represent command- and property-based navigation:
Single arrows show a link from one starting context to one resulting context (for
example, from System to diskList).
Double arrows show a link from one starting context to one resulting context as a result
of selecting from a ContextList (for example, from System to a specifically selected
controller, from Controller to a specifically selected physical port, or from
DiskList to a specifically selected Disk).
Some contexts have both single and double arrows. PhysicalPort, for example, has a
single LAG associated with it (indicated by a single arrow from PhysicalPort to LAG).
However a LAG can have many physical ports(indicated by a double arrow from LAG to
PhysicalPort).
Navigating within the CLI hierarchy is achieved using the following commands:
Push moves down one level in the CLI hierarchy and adds the context to the push/pop
stack.
Select changes to the specified context, without adding the context to the push/pop
stack.
Pop moves up either one level in the CLI hierarchy (if you used the Push command to
navigate down the hierarchy) or to the root level (if you used the Select command to
navigate down the hierarchy).
4 Chapter 1 Introduction
Page 15
For more information about these global action commands, see Chapter 4.
Command Line Interface User’s Guide 5
Figure 1-1. Hierarchy of the System Context
Page 16

1.5 Members
Each context has one or more members associated with it. A member can be a value
property, context property, context list, or command. Table 1-1 describes these types of
members.
Table 1-1. Members
Member Description Examples of Data Types for This Member
Value properties Value properties can be read-only or read-write:
Context property
Context lists
Commands Commands support Do.
1.6 Enumerators
Enumerators are a data type, much like Number, String, Boolean, and Date/Time.
Enumerators have a discrete list of possible values that can be used in a property or
command argument . Examples include:
VolumeComposition (for example, JBOD, Stripe, Mirror, Parity, StripeMirror)
Read-only properties only support Show.
Read-write properties support Show and
Set.
Context properties can be read-only or readwrite.
Types of entities that can be displayed or
operated upon from the current context.
Number
String
Enumeration (see section 1.6)
Boolean
Date/Time
DiskList on the root context.
LAG on PhysicalPort
Controllers on the root context
Disks on DiskList
CreateVolume on the root context
Reconfigure on Volume
StripeDepth (for example, 32KB, 64KB, 128KB, 256KB, 512KB, 1024KB, 2048KB)
1.7 Special Keywords
When working in a context that can contain one or more members, the special keywords of
$first and $last let you reference the first or last entry in the list of members, although
the order of entries in the list may be random. This is useful if you use advanced scripts or
perform a repetitive operation that should continue until the entire list is empty, without
needing to indicate the names or index values for the specific members of the list. For
example, you can delete all volumes on an array by specifying the following command
repeatedly until an error occurs (when no more volumes exist):
do volumelist.volume[$last].delete
6 Chapter 1 Introduction
Page 17

Chapter 2 Installing the CLI
This chapter describes how to install the CLI. The topics covered in this chapter are:
Section 2.1, Supported Operating Systems (page 8)
Section 2.2, Installing the CLI (page 8)
Section 2.3, Starting the CLI (page 14)
Section 2.4, Exiting the CLI (page 18)
Section 2.5, Removing the CLI (page 18)
Command Line Interface User’s Guide 7
Page 18
2.1 Supported Operating Systems
The CLI supports the following operating systems:
Microsoft Windows XP Professional Service Pack 2
Microsoft Windows Server 2003 R2
Microsoft Windows Server 2008
Microsoft Windows Vista Business and above
2.2 Installing the CLI
To install the CLI, use the following procedure.
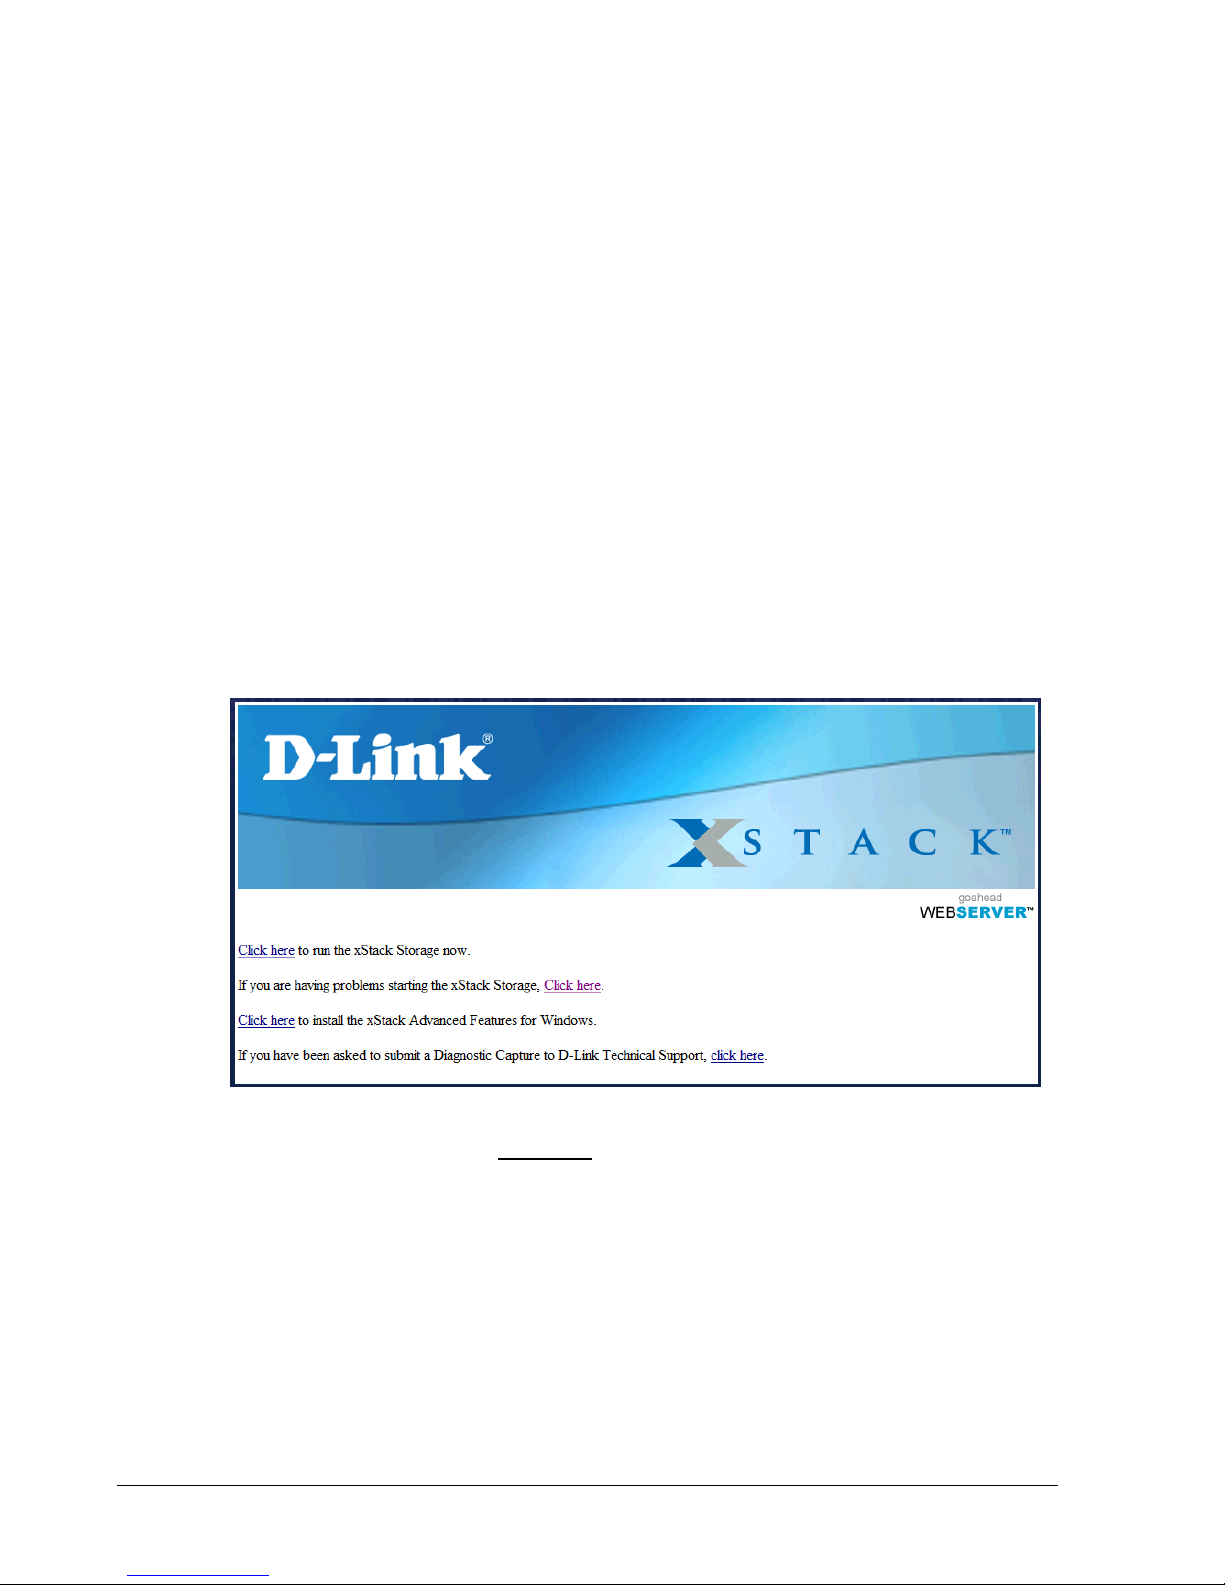
1. Start your Web browser.
In the browser address field, enter the IP address of the management port. The home
page in Figure 2-1 appears.
2. From the home page, click Click here to install the Advanced Features for Windows.
The file download security warning message in Figure 2-2 appears.
8 Chapter 2 Installing the CLI
Figure 2-1. Management Center Home Page
Page 19
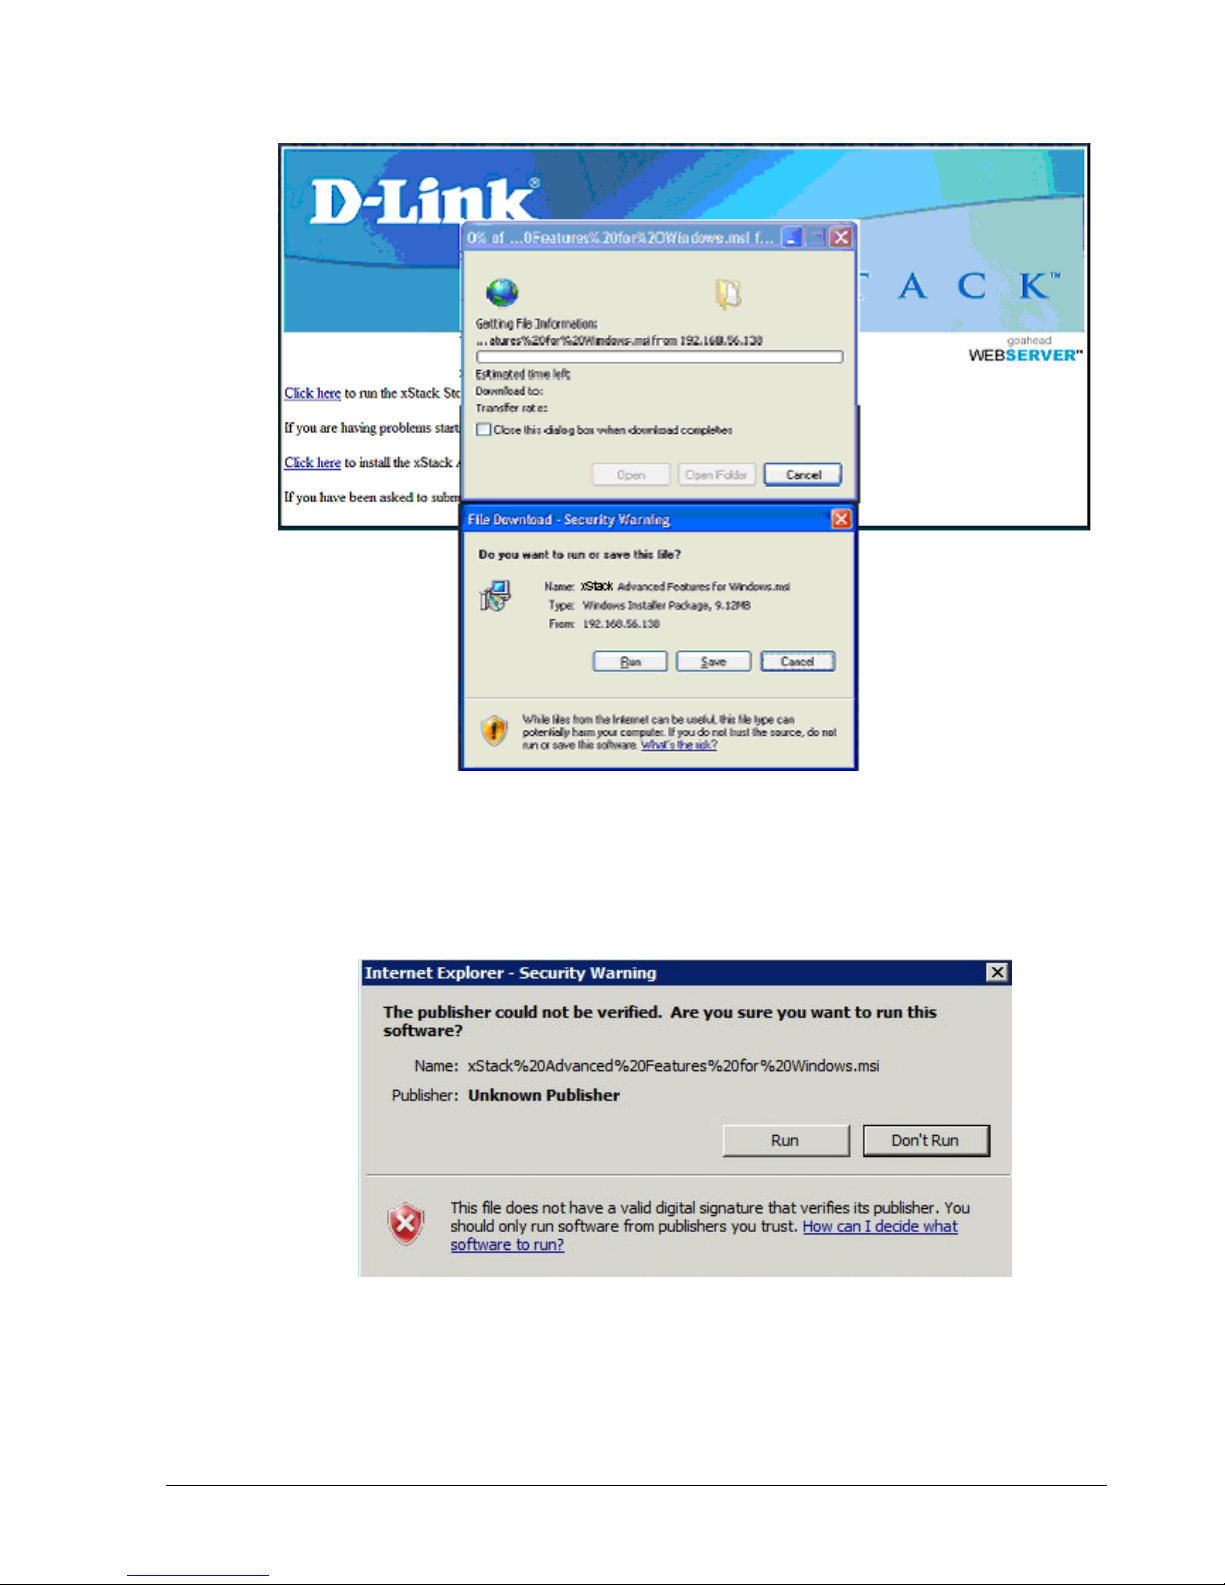
Figure 2-2. File Download Security Warning Message
3. Click Run to run the installer.
4. If the security warning appears in Figure 2-3, click Run. A Welcome page appears (see
Figure 2-4).
Figure 2-3. Secondary Warning Message
Command Line Interface User’s Guide 9
Page 20
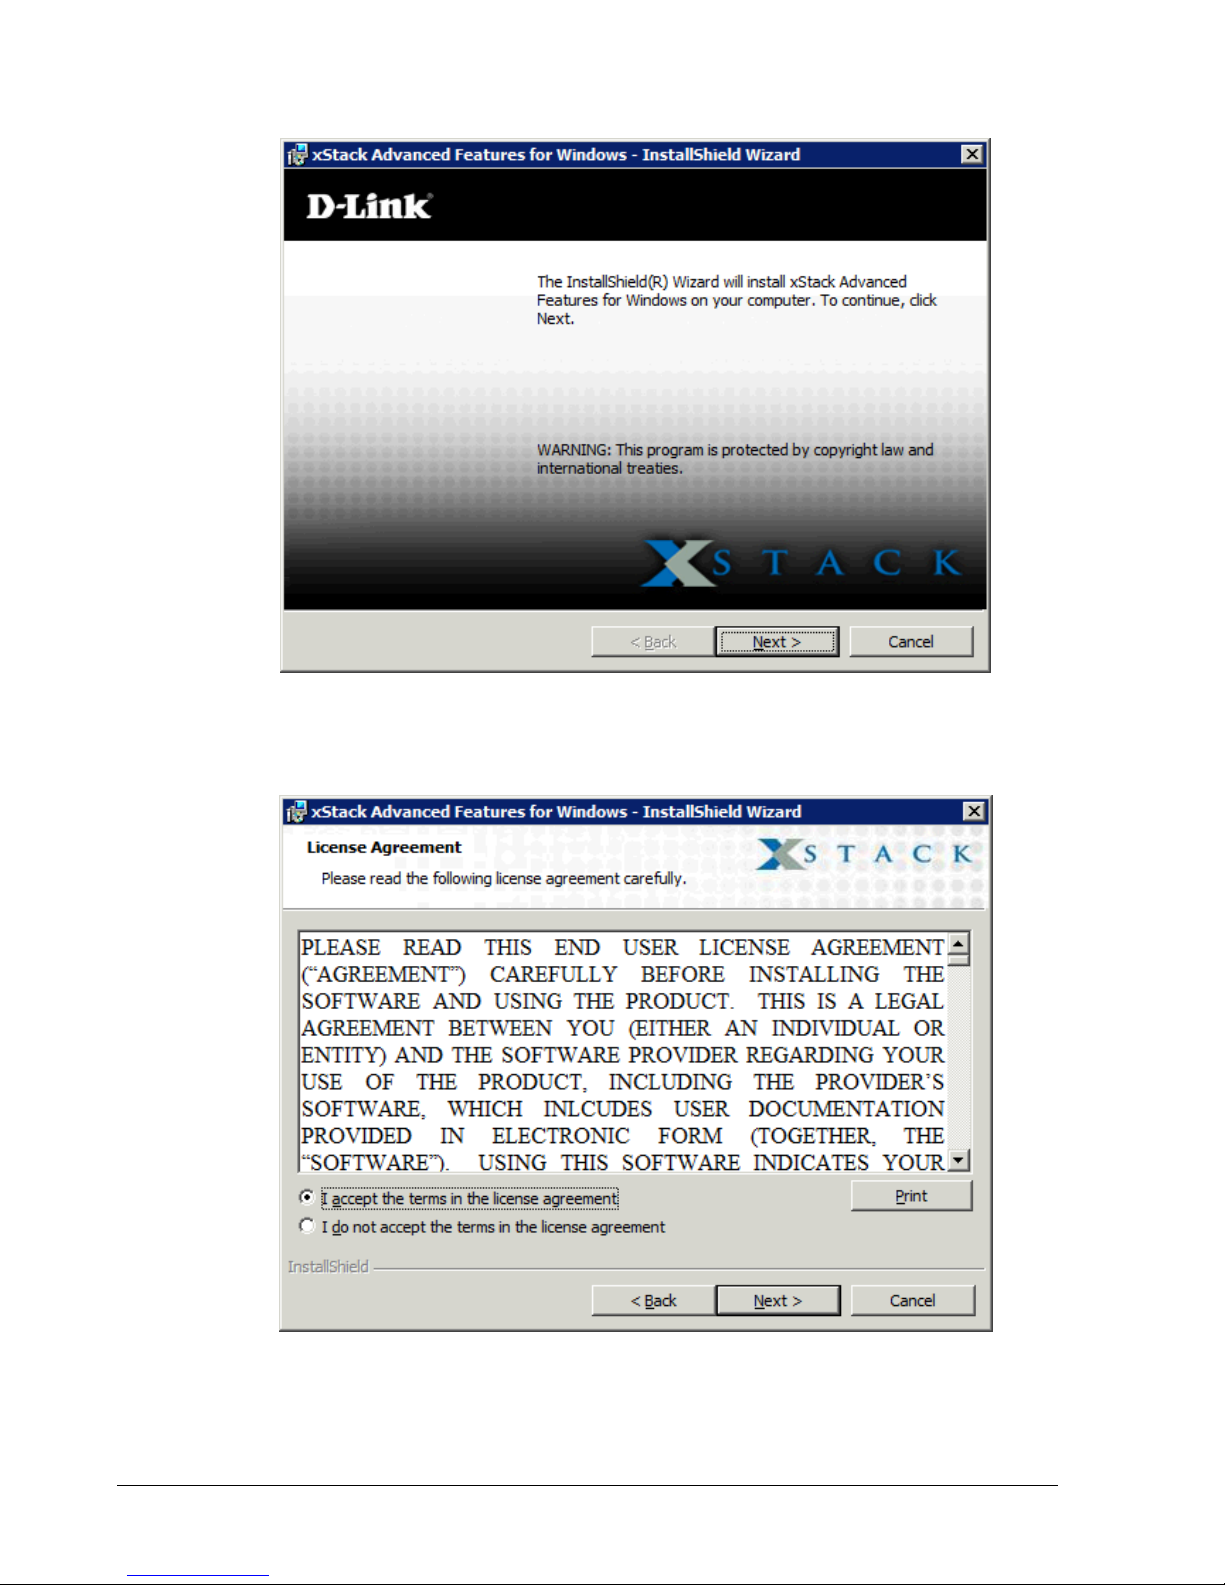
Figure 2-4. Welcome Page
5. Click Next. The License Agreement appears (see Figure 2-5).
6. Read the License Agreement, then click I accept the terms in the license agreement
and click Next. (You must accept the terms of the license agreement to proceed.) The
Destination Folder screen appears (see Figure 2-6).
10 Chapter 2 Installing the CLI
Figure 2-5. License Agreement
Page 21
To obtain a printed copy of the License Agreement, click Print.
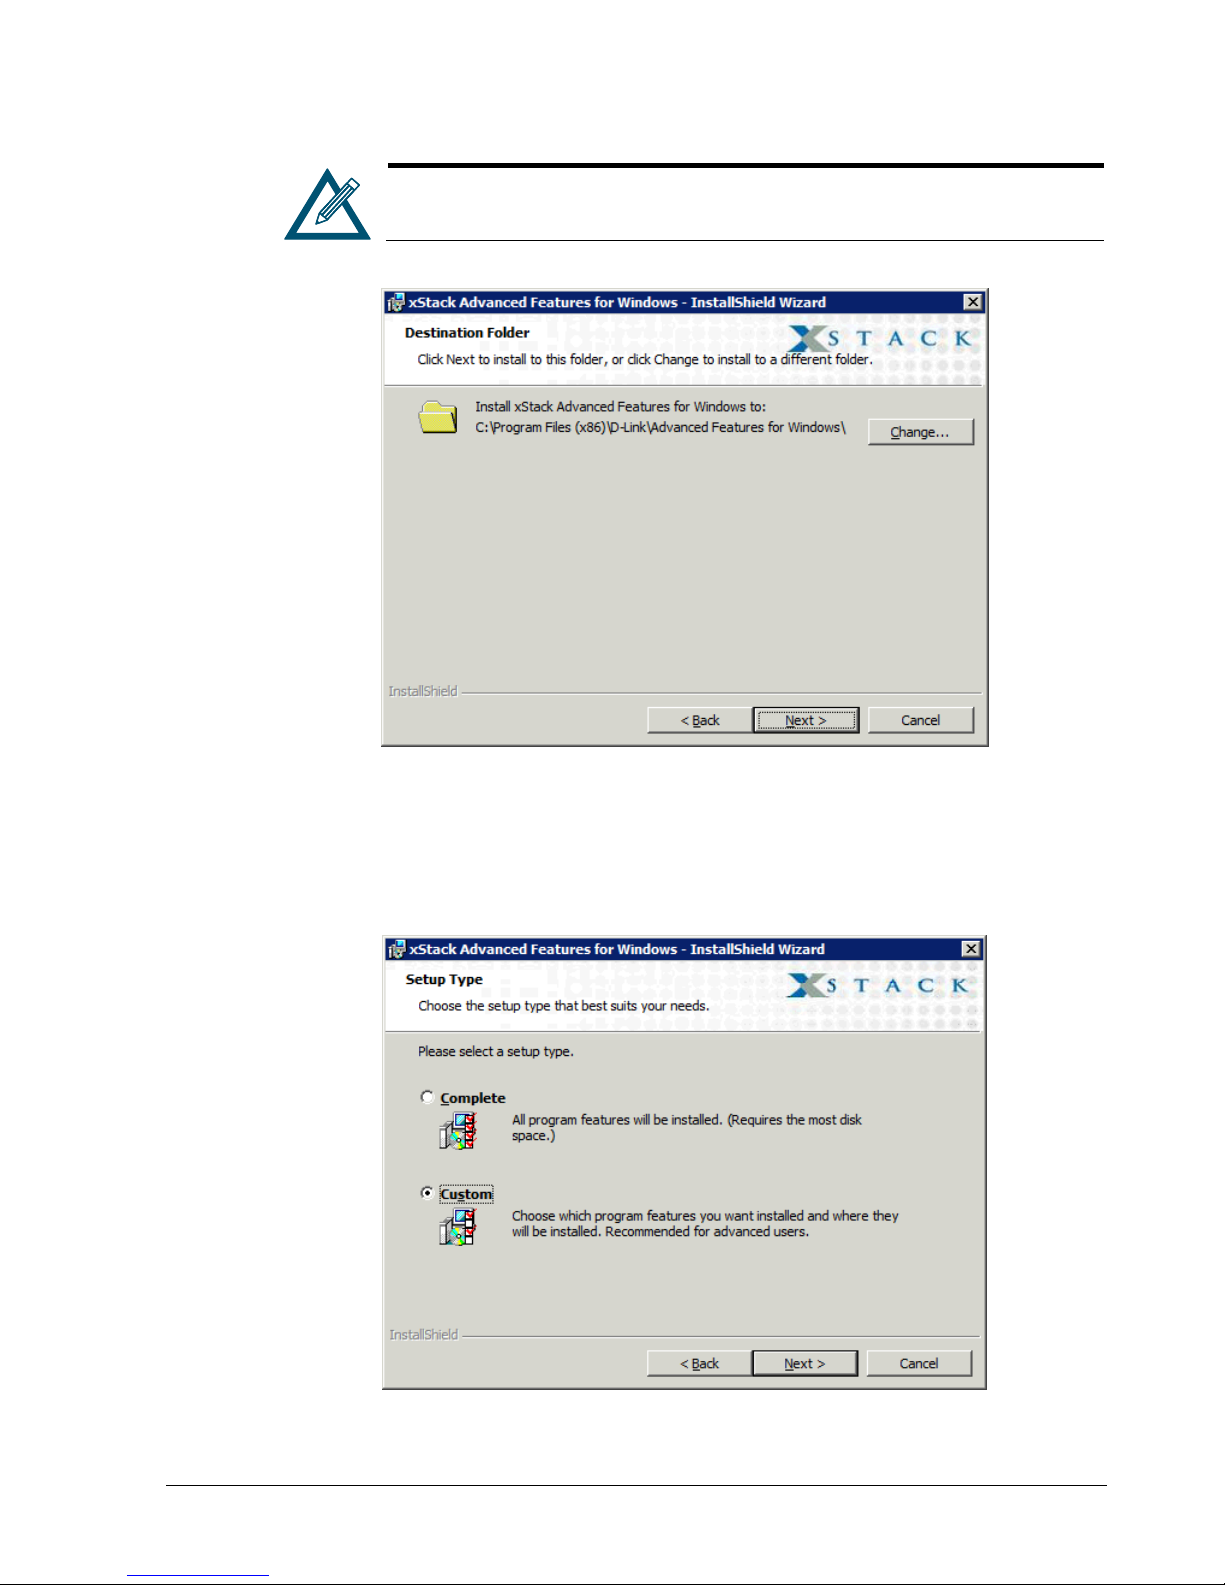
Figure 2-6. Destination Folder Screen
7. Either accept the default destination folder shown, or click the Change button and
specify a different installation location.
8. Click Next. You are prompted to select a setup type (see Figure 2-7).
Command Line Interface User’s Guide 11
Figure 2-7. Setup Type Screen
Page 22
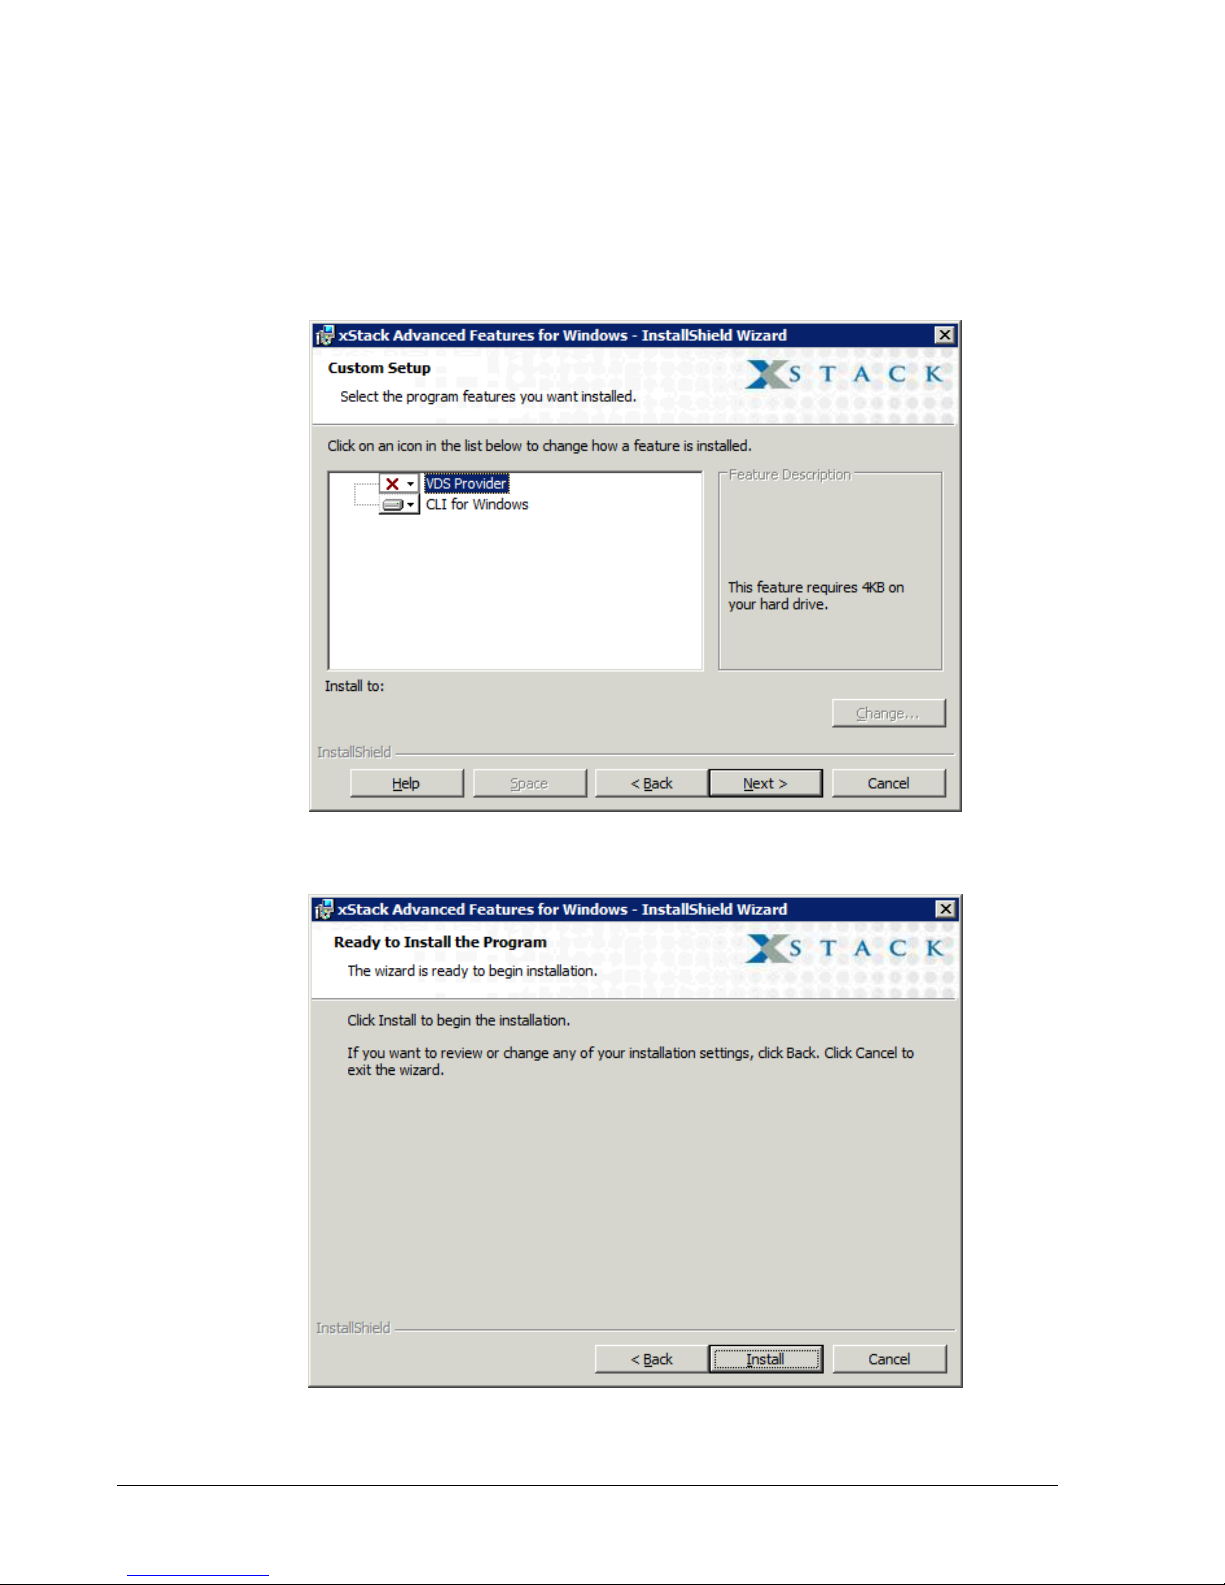
9. Select whether you want to perform the complete or custom setup. The complete setup
installs the Windows VDS Provider and the CLI, and displays the screen in Figure 2-9. If
you only want to install the CLI, select Custom and make the appropriate selections in
the screens that appear (see Figure 2-8); then click Next until the screen in Figure 2-9
appears.
Figure 2-8. Custom Setup Screen
Figure 2-9. Ready to Install the Program Screen
12 Chapter 2 Installing the CLI
Page 23
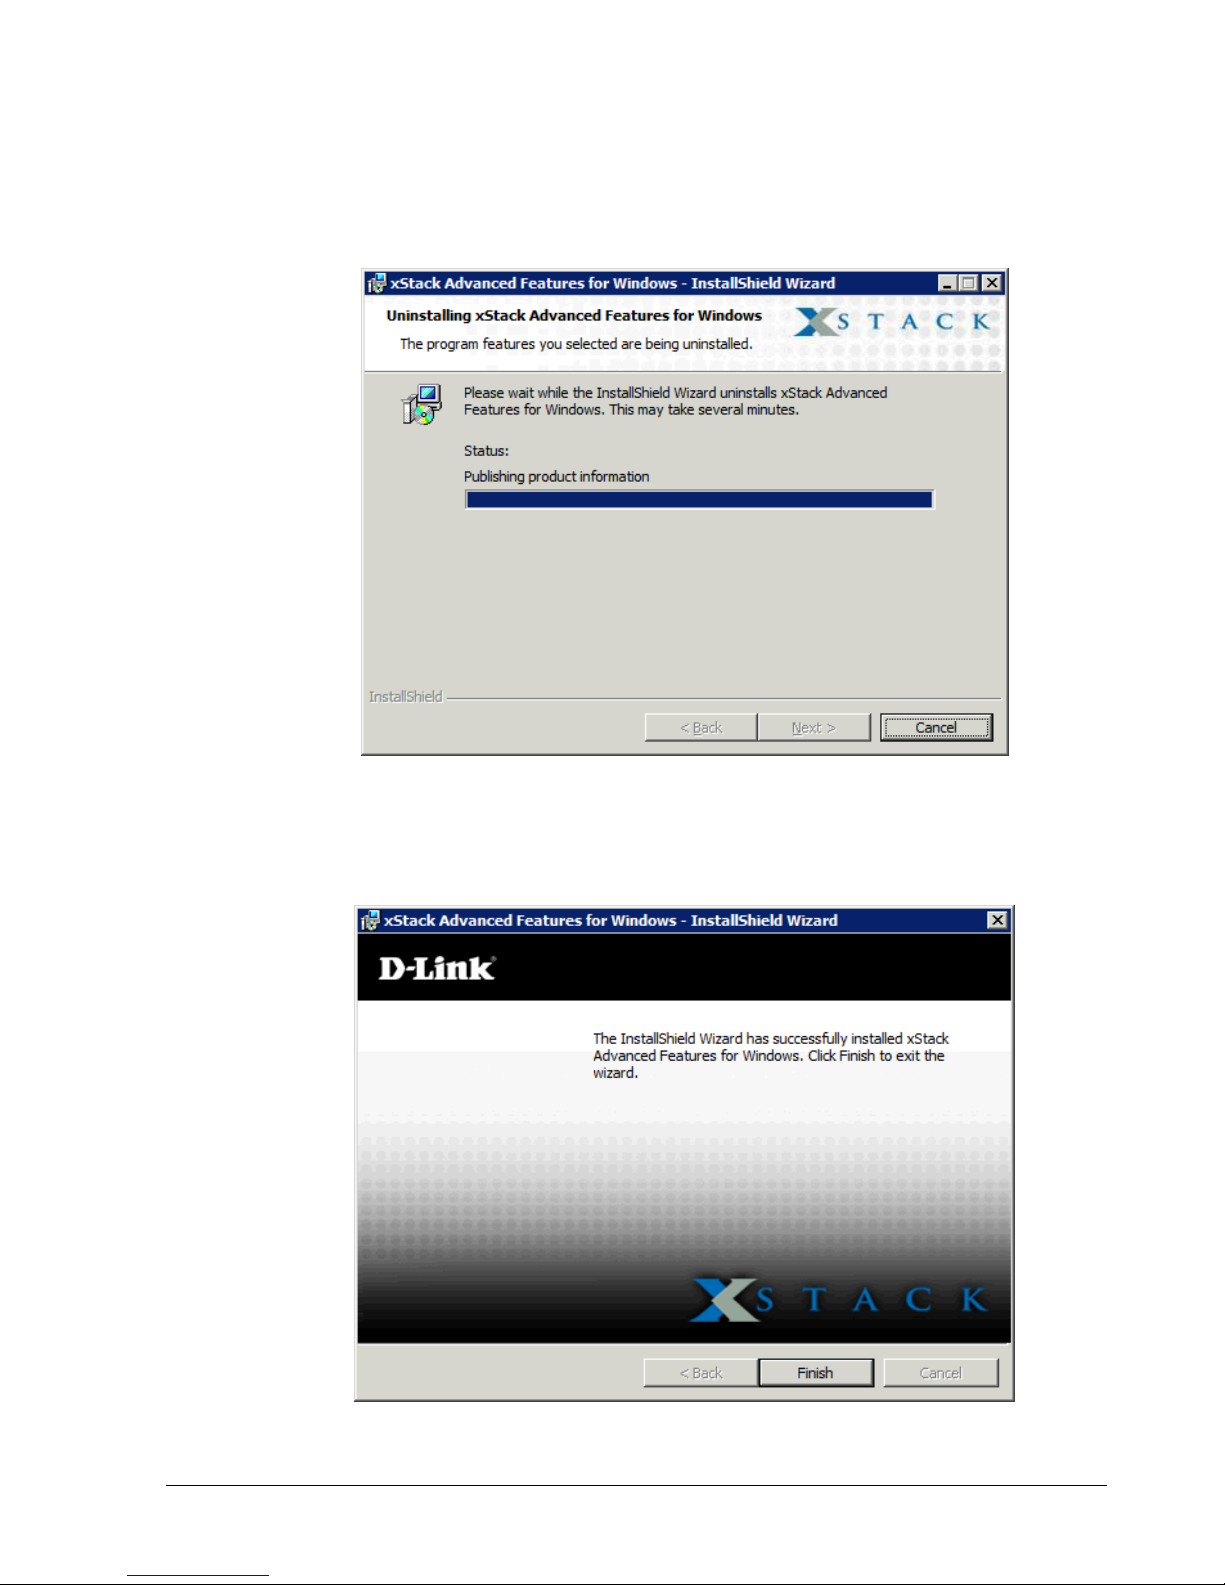
10. With the Ready to Install the Program screen displayed, click Install. A progress bar
shows the progress of the installation (see Figure 2-10). As part of this process, a
shortcut is placed on your Windows desktop for starting the CLI.
Figure 2-10. Progress Bar
11. When the installation is complete, the screen in Figure 2-11 appears. Click Finish to
close the screen.
Command Line Interface User’s Guide 13
Figure 2-11. InstallShield Wizard Complete Screen
Page 24
2.3 Starting the CLI
The CLI can be started using either the CLI shortcut installed on your Windows desktop or
the Run command. The following sections describe these methods for starting the CLI.
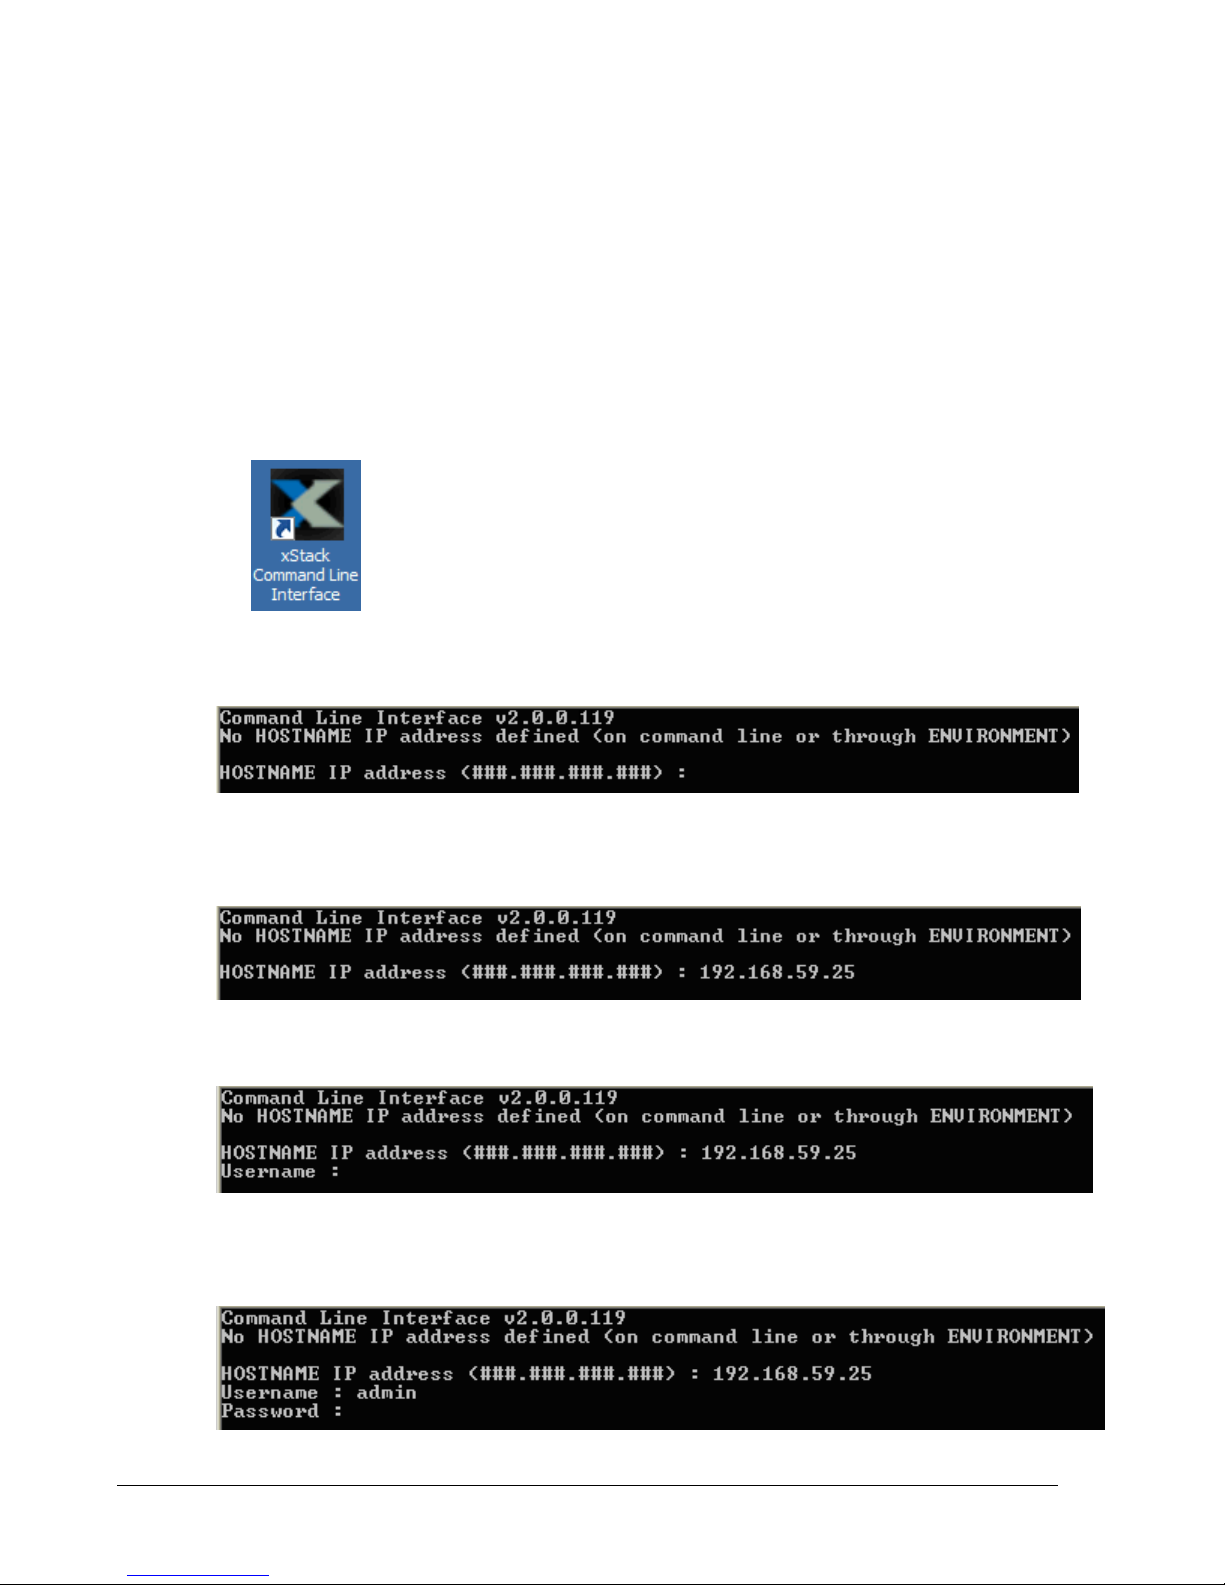
2.3.1 Using the CLI Shortcut to Start the CLI
When you installed the CLI, a desktop shortcut was automatically placed on your desktop. To
start the CLI using the shortcut, use the following procedure.
1. Double-click the following shortcut on your Windows desktop:
A HOSTNAME IP address prompt similar to the one below appears.
2. Enter the IP address of the management port for the array with which you want to
communicate (for example, 192.168.59.25).
3. Press the Enter key. You are prompted for a username.
4. Enter a username (the default username is admin) and press Enter. You are prompted
for a password.
14 Chapter 2 Installing the CLI
Page 25

5. Enter a case-sensitive password (the default password is admin) and press Enter. For
security, each typed password character appears as an asterisk (*). The following actions
occur when you press Enter:
A series of numbers count down from 5 to zero.
When zero is reached, a Successful login message with the IP address of the array you
logged in to appears if the login was successful. In the example below, the user has
logged in to an array with an IP address of 192.168.59.25.
A prompt appears that consists of the IP address of the array to which you are logged in
followed by two colons (for example, 192.168.59.25 ::).
You are now at the System level and can issue CLI command lines at the root context, or
navigate to and issue commands from subcontexts (see section 1.1).
2.3.2 Using the Run Command to Start the CLI
The following procedure describes how to start the CLI using the Windows Run command.
With this method, you enter the name of the CLI executable file in the Open field of the
Windows Run dialog box. If you know the IP address of the array management port,
username, and password, you can add them to the command line following the name of the
CLI executable file. If desired, you can also specify the name of a script that you want the
CLI to automatically run at login.
1. Click the Start button and click Run. The Run dialog box appears (see Figure 2-12).
Figure 2-12. Run Dialog Box
2. In the Open field, click the Browse button. Navigate to the location Program
Files/D-Link, Inc./Advanced Features for Windows (or the destination
location you specified during the installation). Double-click the name of the CLI
executable (cli2.exe).
Command Line Interface User’s Guide 15
Page 26
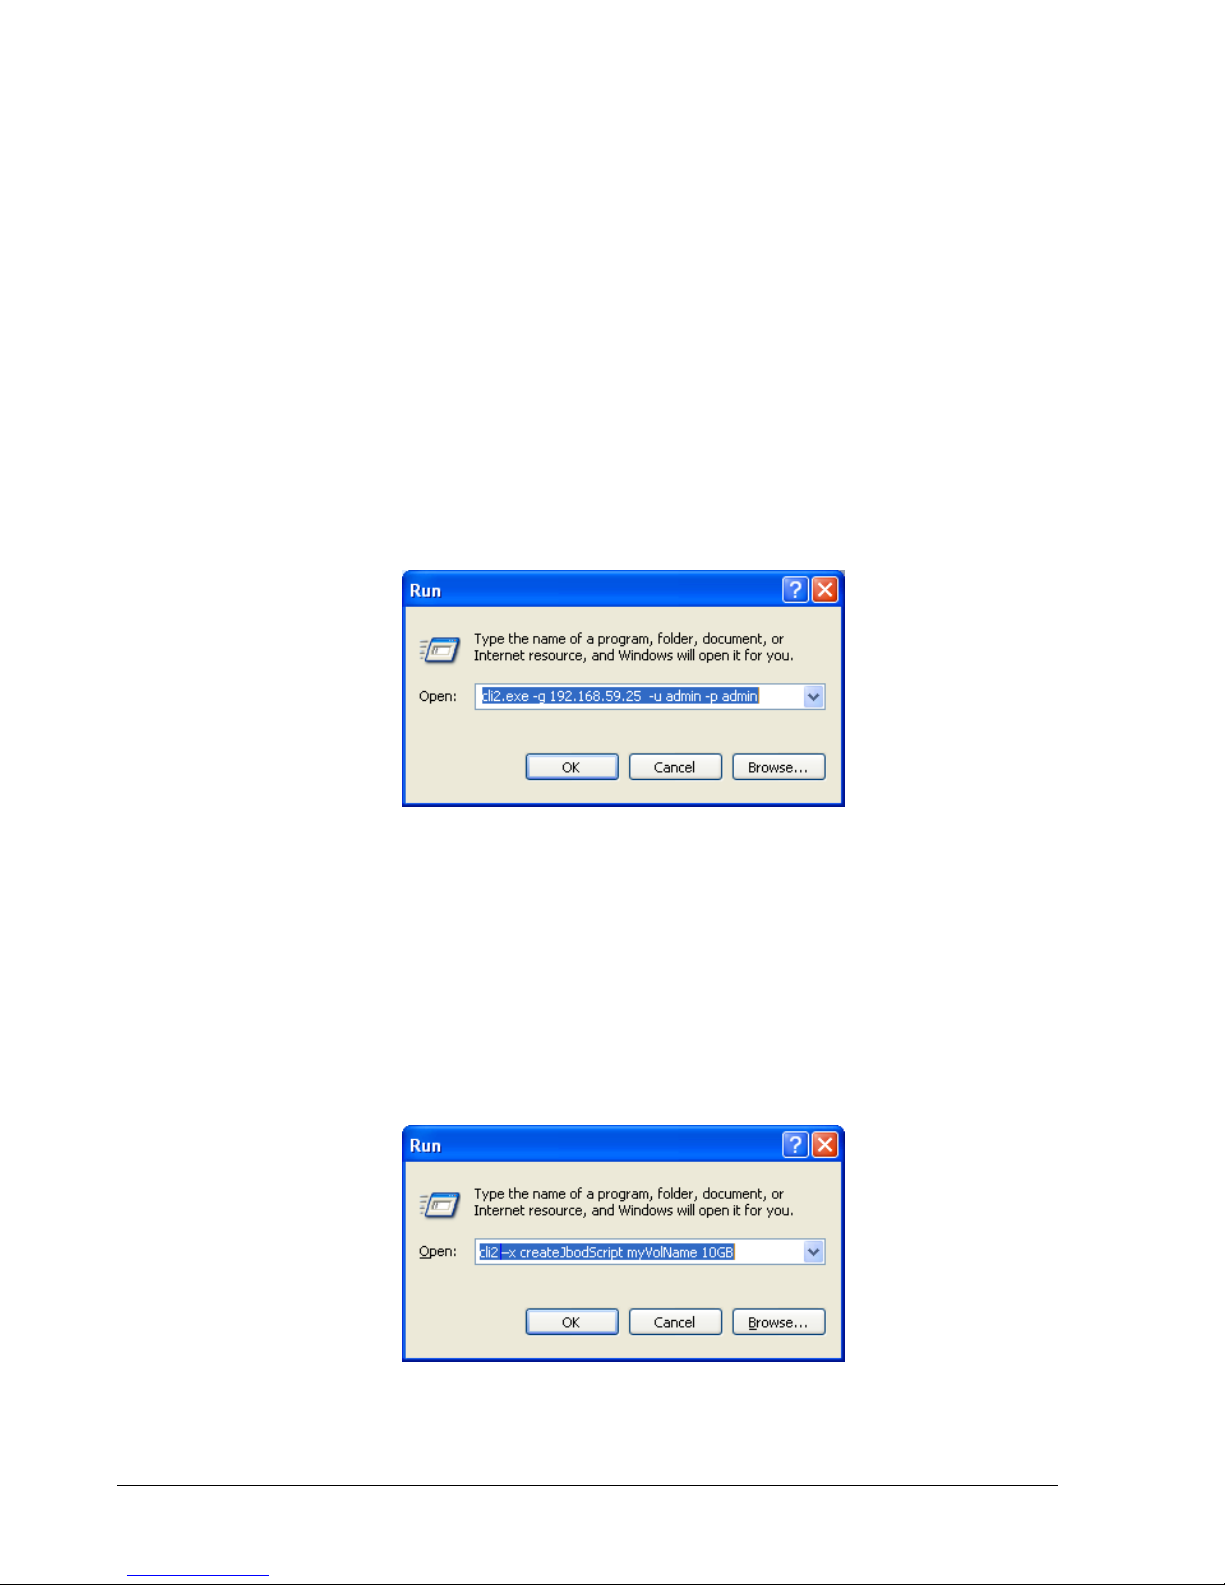
3. Optional: To add an IP address of the array management port, username, and password,
or script file name after the CLI executable name, or to disable any real-time
indications, type the option (which consists of a switch and an entry such as an IP
address or hostname) after the name of the CLI executable, as shown in the following
steps. Separate the CLI executable filename from these options with a space.
Adding a system IP address or host name: -g <IPAddressOrHostName>
See the example in Figure 2-13. If -g is omitted, the environment variable
ISA_HOSTNAME is used. If that environment variable is not defined, you are prompted
for an IP address if none is found.
Adding a username: -u <username> Adding a password: -p <password>
The default username and password are admin (see the example in Figure 2-13). If -u is
omitted, the environment variable ISA_USERNAME is used. If -p is omitted, the
ISA_PASSWORD environment variable is used. If these environment variables are not
defined, you are prompted for a username and/or password if none is found.
Figure 2-13. Example of Using the –g, -u, and –p Switches
Running a script: -x <scriptFileName>
See the examples in Figure 2-14 and Figure 2-15. The name of the script file referenced
in the Open field should have the file name scriptFileName.cli. The file name
entered in the Open field should not include the .cli extension. In Figure 2-14, for
instance, the command line will have the CLI run a script called createJbodScript,
which creates a JBOD on the array. The 10GB following the script name tells the CLI to
create a 10 GB volume called myVolName on that JBOD. In Figure 2-15, the command
line will provide the IP address, username, and password for logging in and run the same
script as in Figure 2-14, without creating the 10 GB volume.
Figure 2-14. Example of Using the –x Switch
16 Chapter 2 Installing the CLI
Page 27
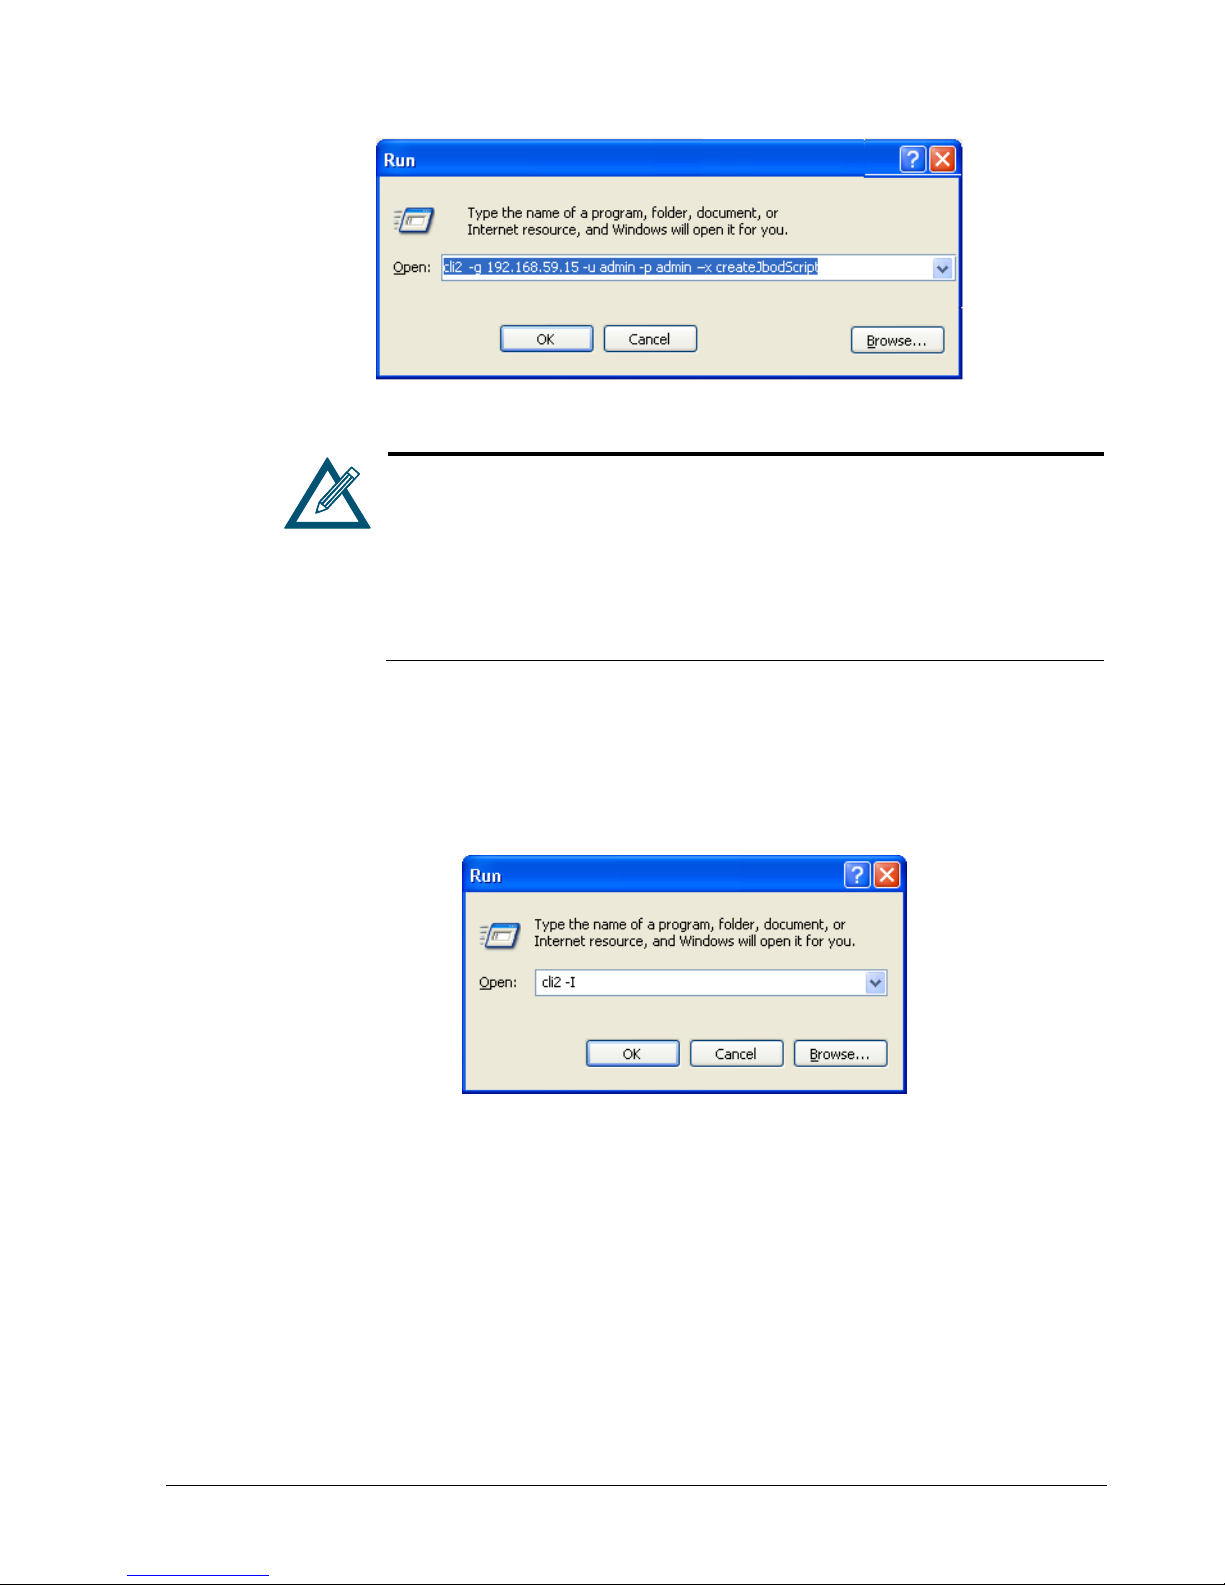
Figure 2-15. Example of Using the –x Switch with the –g, -u, and –p Switches
Because the CLI uses a computer’s environment variables if the –g, -u,
and/or –p switches are not specified on the command line, it is
recommended that you set the environment variables as desired on the
machine where the CLI is running. System environment variables are defined
by Windows and apply to all computer users. However, you must be an
administrator to modify a system environment variable. Changes to the
system environment are written to the registry and usually require a restart
to become effective.
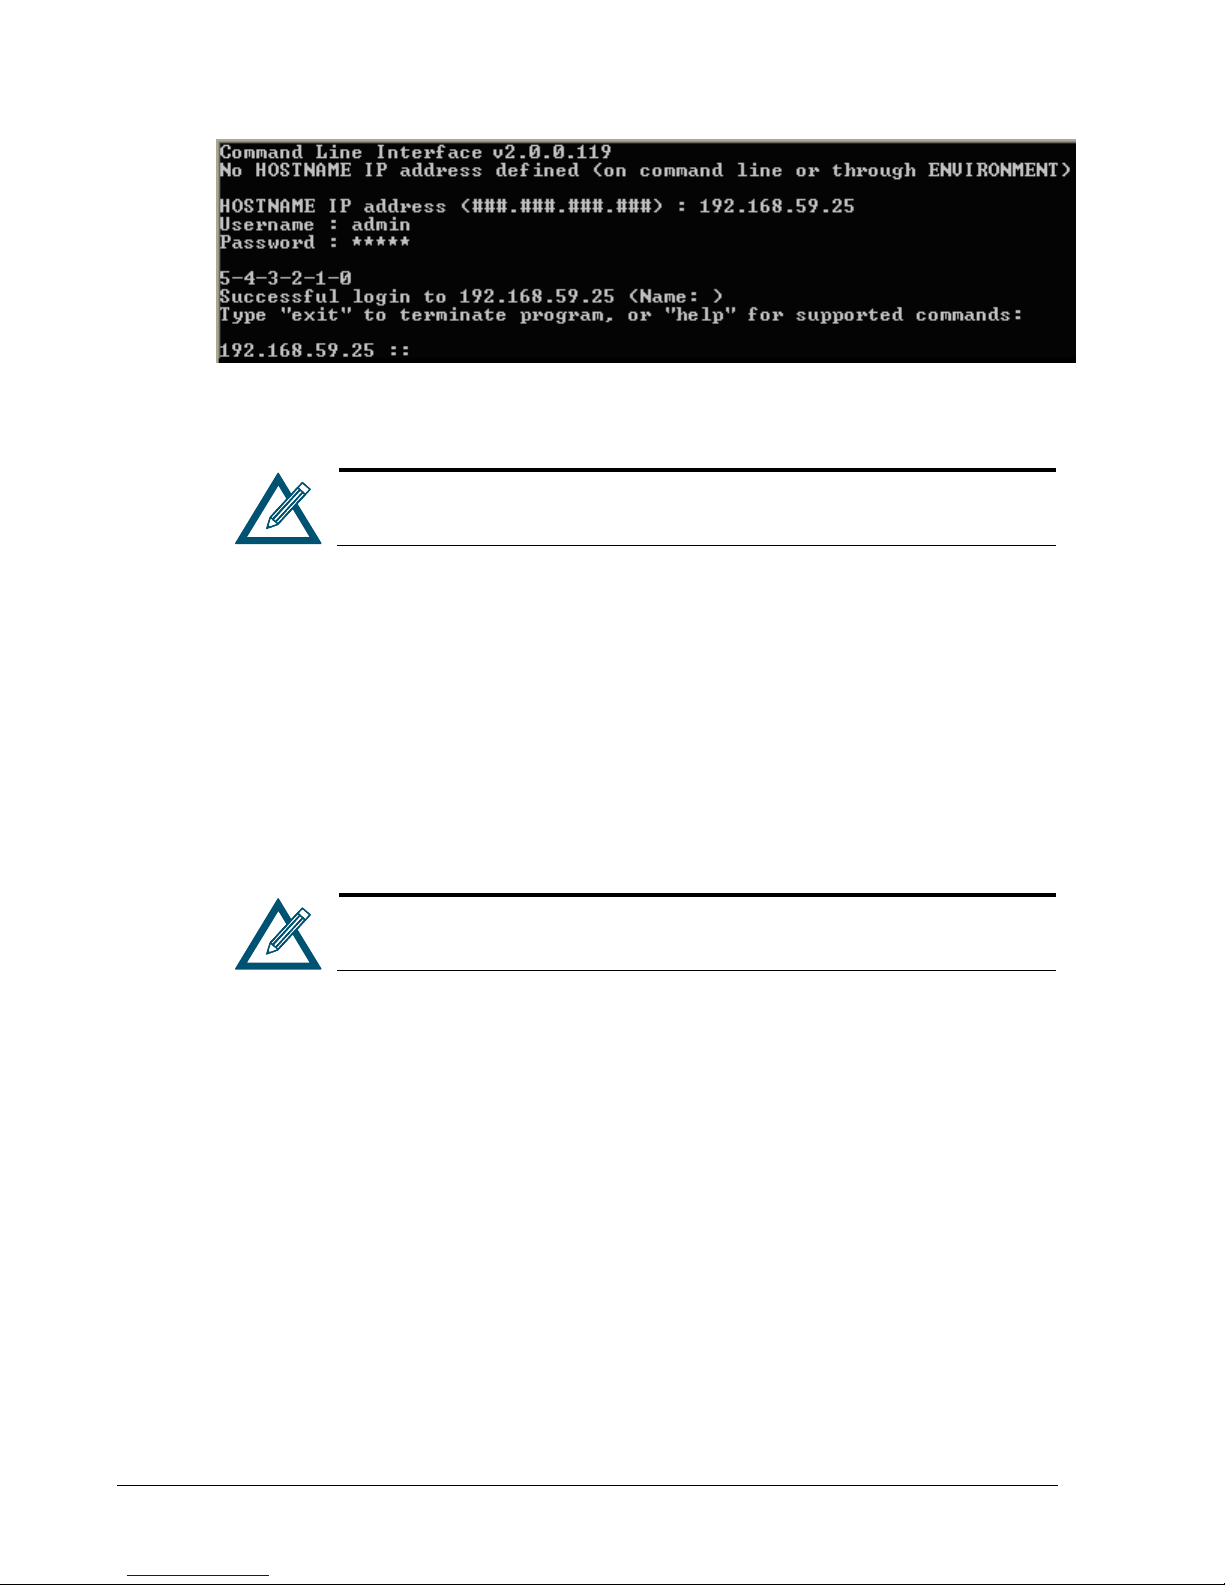
Disabling real-time indications: -I
See the example in Figure 2-16. Specify the -I switch to enable real-time indications
while the CLI is running. This will allow the CLI to provide asynchronous reporting of
changed services and may have performance impacts for heavily loaded systems. It is
generally recommended that this option not be used unless there is a specific need for
it. You can combine the -I switch with any other switches.
Figure 2-16. Example of Using the –I Switch
4. Click the OK button. The following actions occur:
A series of numbers count down from 5 to zero.
When zero is reached, a Successful login message with the IP address of the array you
logged in to appears if the login was successful. In the example below, the user has
logged in to an array with an IP address of 192.168.59.25.
A prompt appears that consists of the IP address of the array to which you are logged in
followed by two colons (for example, 192.168.59.25 ::).
Command Line Interface User’s Guide 17
Page 28
You are now at the System level and can issue CLI command lines at the root context, or
navigate to and issue commands from sub-contexts (see section 1.1).
2.4 Exiting the CLI
To exit a CLI session, type the Exit command from the CLI session and press Enter to
terminate the CLI program. The Exit command is a “global action” command and can be
issued from any context.
If you omitted the IP address, username, and password in step 2, you will be
prompted for these before gaining access to the root context.
2.5 Removing the CLI
To remove the CLI from the computer on which it is installed, rerun the installer from the
Advanced Features for Windows link. When the screen appears with links for repairing or
uninstalling the CLI, click the un-installation link to remove the CLI.
You can also use Add/Remove Programs from the Windows control panel to
remove the CLI as you would any other Windows application.
18 Chapter 2 Installing the CLI
Page 29

Chapter 3 Using the CLI
This chapter describes how to use the CLI. The topics covered in this chapter are:
Section 3.1, General Guidelines (page 20)
Section 3.2, Specifying Operating Modes (page 22)
Section 3.3, Command Line Syntax (page 27)
Section 3.4, Getting Help with CLI Commands (page 28)
Command Line Interface User’s Guide 19
Page 30

3.1 General Guidelines
The following sections describe general guidelines to follow when issuing CLI command lines.
3.1.1 Understanding Commands
Commands are organized into two categories, global action commands and context-specific
commands. All CLI commands are case-insensitive. For readability, the commands in this
guide are shown with a mix of upper-case and lower-case characters.
3.1.2 Global Action Commands
Global action commands can be used within all contexts. For example, the help command is
a global action command. Issuing this command displays all of the global action and contextspecific commands available in the CLI. For a list of all the global action commands, see
Table 4-1 on page 34.
3.1.3 Context-Specific Commands
Context-specific commands can be used within the current context only. Context-specific
commands are prefaced by the global action command Do, Show, or Set. The following
example uses the global command Show and the context-specific command diskList to
get the DiskList information.
192.168.59.25 :: Show diskList ← typed by user
ID = 0 ← returned by CLI
Status = OK ← returned by CLI
Disks = 4 Disks ← returned by CLI
For a list of all the context-specific commands, see Chapter 5.
3.1.4 Abbreviating Commands
The CLI lets you abbreviate context-specific command keywords to their fewest unique
characters. For example, instead of entering the full command Show diskList, you can
type Show d. If you type an abbreviated command that can match more than one
command, an error message is returned and you must retype the command, entering
additional characters to make the command unambiguous to the CLI.
192.168.59.25 :: Show d ← typed by user
ID = 0 ← returned by CLI
Status = OK ← returned by CLI
Disks = 4 Disks ← returned by CLI
20 Chapter 3 Using the CLI
Page 31

3.1.5 Editing Command Lines
The CLI allows you to view all previously entered commands by pressing the up-arrow key on
your keyboard. Once you have examined a previously entered command, you can move
forward in the list by pressing the down-arrow key on your keyboard.
If you view a command you want to reuse, you can edit it or press the Enter key to execute
it.
3.1.6 Concatenating Commands
The CLI is ideally suited to handling large batches of tasks by allowing you to chain (or
concatenate) commands on a command line using a dot (period). The following command
lines provide examples of concatenating commands on a single command line.
Example 1: This command line lists all volumes whose names begin with mynewvol. The
square bracket selects a volume that starts with [mynewvol].
Show volumeList.Volumes[mynewvol]
Example 2: This command line lists all volumes.
Show volumeList.Volumes
Example 3: This command line grants all iSCSI initiators with access to the volume named
mynewvol.
volumeList.Volumes[mynewvol].target.grantInitiatorAccess All
Example 4: This command line is similar to the one above. However, in this example,
quotation marks are added to the grantInitiatorAccess argument because it consists of
more than one word. The grantInitiatorAccess command accepts one argument. In this
example, however, the argument consists of two words (All Initiators) separated by a space.
Including the quotation marks tells the CLI to treat the items between the quotation marks
as a single object instead of as two arguments (in which case, the command line would fail).
volumeList.Volumes[mynewvol].target.grantInitiatorAccess "All
Initiators"
Example 5: This command line deletes the volume mynewvol.
volumeList.Volumes[mynewvol].delete
3.1.7 Referencing Root Items
There may be times when you are in a subcontext and want to execute commands that are
only available at the top (root) context. One way to accomplish this is to use the Pop
command to reach the root level and then type the command line. Alternatively, you can
issue the command line without having to leave the current subcontext by prefacing the
command line with the caret (^) character.
Command Line Interface User’s Guide 21
Page 32

The caret character provides a shortcut for executing commands available at the top (root)
context from any subcontext. Issuing this command leaves you in the current context. For
example, createVolume is a command that is available at the root level. If you are in a
subcontext and want to issue the CreateVolume command, type a caret followed by the
command, as shown in the following example.
^createVolume Engineering 30GB mirror
3.2 Specifying Operating Modes
The CLI provides the following operating modes:
Output mode – see section 3.2.1.
Indication mode – see section 3.2.2.
Stream mode – see section 3.2.3.
Completion code – see section 3.2.4.
Echo Command mode – see section 3.2.5.
Exit Script on Error mode – see section 3.2.6.
Each operating mode operates independently of the other modes, and can be configured
independently using the Mode command. The following sections describe these operating
modes.
To see the status of these operating modes, type Mode and press Enter. The
figure below shows an example of the status information returned.
Figure 3-1. Example of Viewing Operating Modes
22 Chapter 3 Using the CLI
Page 33

3.2.1 Output Mode
Output mode allows you to configure the format of the output from the CLI as humanreadable, XML, or formatted XML output.
Normal - output is displayed in human-readable format. This is the default setting and is
recommended if the CLI output will be read by people. Figure 3-2 shows an example of
this mode when the Show command at the root (system) context is issued. If you change
to another output mode, type the following command to return to this output mode:
Mode outputMode Normal
Figure 3-2. Example of Normal Output
XML - output is nested together as XML, with XML tags. This selection is useful when a
computer program will be receiving and interpreting the output from the CLI. Figure 3-3
shows an example of this mode when the Show command is issued. To select the XML
output mode, type the following command:
Mode outputMode XML
Figure 3-3. Example of XML Output
Command Line Interface User’s Guide 23
Page 34

Formatted XML - output is similar to XML, but with indentations to enhance human
readability and facilitate scripted interaction for parsing. This selection is useful when a
computer program and possibly a person will be interpreting the output from the CLI.
Figure 3-4 shows an example of this mode when the Show command is issued. To select
the formatted XML output mode, type the following command:
Mode outputMode FormattedXML
Figure 3-4. Example of Formatted XML Output (Excerpt Shown)
3.2.2 Indication Mode
Enabling indication mode displays messages of changes made to the system as a result of
commands executed by you and other CLI users. For example, if you or another user creates
a volume with indication mode enabled, messages inform you that the volume list was
modified to include the new volume.
By default, indication mode is disabled. To enable it, type:
Mode indicationMode Enabled
To disable indication mode, type:
Mode indicationMode Disabled
24 Chapter 3 Using the CLI
Page 35

3.2.3 Stream Mode
By default, the CLI directs output to two destinations:
Error messages go to standard error (STDERR).
All other output goes to standard out (STDOUT).
This separation may be undesirable for some scripting methods. Therefore, you can enable
stream mode to direct all output to STDOUT, obviating the need to read two streams at the
same time.
To enable stream mode, type:
Mode streamMode Mixed_STDOUT_Only
To disable stream mode, type:
Mode streamMode Mixed_STDOUT_STDERR
If the CLI is invoked with redirection to a file using a standard redirection
(greater-than) character, standard out will be directed to the file and error
messages will be directed to the screen.
3.2.4 Completion Code Mode
Completion code mode determines whether the CLI returns a text code and text description
each time it executes (or tries to execute) a command line, or only when the command line
fails due to an error. Figure 3-5 shows examples of error messages returned due to errors in
command lines.
192.168.55.224 :: create Zeus 3tb jbod
UA_E_REQUEST_FAILED = Error - CIM_ERR_FAILED: A general error
occurred that is not covered by a more specific error code: "Not
enough space available
192.168.55.224 :: addInitiator
UA_E_INVALIDARG = Error - Expected 1 arguments
192.168.55.224 :: addInitiator Windows3
UA_E_UNEXPECTED = Error - CIM_ERR_ALREADY_EXISTS: Operation cannot
be carried out because an object already exists: "An Initiator with
that name already exists"
Figure 3-5. Examples of Errors Displayed in Completion Code Mode
Command Line Interface User’s Guide 25
Page 36

By default, completion code mode returns a message when the command line has one or
more errors. To enable completion codes for all command lines, type:
Mode completionCodeMode Always
To display completion codes only when an error occurs, type:
Mode completionCodeMode ErrorsOnly
3.2.5 Echo Command Mode
Echo command mode repeats everything you type. In the following example, echo command
mode repeated the command typed next to the IP address.
192.168.59.25 :: Mode EchoCommandMode Enabled ← typed by user
Mode EchoCommandMode Enabled ← returned by CLI
By default, echo command mode is disabled To enable it, type:
Mode echoCommand Enabled
To disable echo command mode, type:
Mode EchoCommand Disabled
3.2.6 Exit Script on Error Mode
Exit script on error mode allows the CLI to exit a script automatically if the CLI encounters
an error in the script. This mode is useful when running the CLI from a shell script.
By default, exit script on error mode is enabled To disable it, type:
Mode ExitScriptonError Disabled
To enable exit script on error mode, type:
Mode ExitScriptonError Enabled
26 Chapter 3 Using the CLI
Page 37

3.3 Command Line Syntax
[Action]
[Member]
[Action]
[Member]
[Argument]
[Action]
[Member]
[Arguments]
CLI input is case-insensitive, except when otherwise noted. The general CLI syntax format is
as follows:
{Action} {Member} [Arguments]
Table 3-1 describes the items that can be included in a command line. The command Do can
be omitted for action commands.
Item Description
Table 3-1. Items in a Command Line
{Action}
{Action} refers to the global action command Do, Show, or Set. Every member has a default
action that is assumed if an action is omitted from the beginning of a command line.
One such default is Show. If you want to issue a Show Identity command, for
example, you need only type ID at the CLI prompt because Show is assumed and ID
is a sufficient number of characters to make this command unambiguous to the CLI
(see section 3.1.4). Note, however, that if you want to issue a Set command, you
must type Set; otherwise, the CLI defaults to Show.
{Member}
{Member} is a context member name, such as a property or command. Examples
include Name on Volume and CreateVolume on the root.
[Arguments]
Arguments are extensions that provide extra information needed for the execution of
a particular action. Whether or not an argument is required depends on the specific
action being executed. For example, CreateVolume has arguments for defining
characteristics such as the name, size, and composition of the volume to be created.
If you omit an argument, the default action is assumed.
Example 1: The following example shows a command line that has no arguments. This
command line restarts the system.
Do SystemRestart
Example 2: The following example shows a command line that has one argument. This
command line sets the name of the system to Zeus.
Example 3: The following example shows a command line that has more than one argument.
This command line creates a new volume called Venus that is 100 GB large and configured as
a JBOD.
Command Line Interface User’s Guide 27
Set Name Zeus
Do createVolume Venus 100GB jbod
Page 38

3.4 Getting Help with CLI Commands
The help subsystem consists of two levels: help summary and command help.
3.4.1 Help Summary
Typing the global command help as the sole command on a command line from any context
lists all of the supported global and context-specific commands:
192.168.59.25 :: help
Global Commands ----------------------------------------
Help This help
List Brief list of current context properties/methods
Exit To end the session
Echo Echo a line of text to STDOUT
Execute Execute a CLI script file (same as '@' prefix)
RequireArgs Requires at least # arguments, or exits
ShiftArgs Shifts off # arguments
Mode Sets some session options
Push Saves the current context on a LIFO stack and changes context
Pop Returns to the last pushed context
Select Changes context
Show Shows a property in the current context
Set Sets a property in the current context
Do Performs a command in current context
System Invokes a system shell command (same as '!' prefix)
Context Specific Commands ------------------------------
show ID - The service's ID
Returns: ID
show Status - The service's Operational Status
Returns: Status
show Name - Gets the user-settable system name
Returns: name
set Name - Sets the user-settable system name
> name (String) - Name of the system
show Identity - Gets the %productshortname% identity
Returns: identity
show DurableName - Gets the Durable system name
Returns: name
show ProductId - Gets the system ProductId
Returns: productId
show RevisionLevel - Gets the system RevisionLevel
28 Chapter 3 Using the CLI
Page 39

Returns: revisionLevel
show VendorId - Gets the system VendorId
Returns: vendorId
show BindFailReason - Gets the bind failure/success state detail
Returns: bindFailReason
(Undefined,Bind_OK,Bind_Error,RCP_Determination,Bind_Not_Possible,Split_RG,Non_Co
nfig_Params,insufficient_resources,system_class_data,pblade_info_unavailable,FW_V
ersions,SM_Size,BM_Size,SM_Dimms,BM_Dimms,Controller_Type,Product_ID,Starting_i8k
,Merge_Bind,Slam_Dunk,Cache,Board_revision,SEP_module_error,Discovered_drives_mis
match,Incorrect_enclosure_cabling,Loss_of_peer_while_binding,Loss_of_comm_chan_wh
ile_binding,Loss_of_rmc_link_while_binding,Message_returned_failure_status,Fatal_
error_on_other,Controller_states_dont_allow_bind,Moved_controller_in_restart_reco
very,Unable_to_determine_seq_to_execute,Controllers_dont_agree_on_seq)
show BladeType - Gets the BladeType
Returns: bladeType
(Unknown,EBlade,DBlade,xStack,SFF,I386)
show SerialNumber - Gets the system SerialNumber
Returns: serialNumber
show SystemState - Gets the SystemState
Returns: systemState
(Undefined,Standalone,Bound,Survivor,Not_bound,Split,Failed)
show Controllers - Gets a vector of all controllers in the system
Returns: controllers (Controller list)
show DiskList - Gets the DiskList service
Returns: diskList (DiskList object)
show PoolList - Gets the PoolList.
Returns: poolList (PoolList object)
show VolumeList - Gets the VolumeList
Returns: volumeList (VolumeList object)
show TaskList - Gets the TaskList
Returns: taskList (TaskList object)
show iSCSI - Returns the iSCSI Service
Returns: iSCSI (iSCSI object)
show EventHD-Linky - Gets the EventHD-Linky
Returns: eventHD-Linky (EventHD-Linky object)
show ExternalConnectionsManager - Gets the ExternalConnectionsManager.
Returns: externalConnectionsManager (ExternalConnectionsManager object)
show AdvancedSettings - NO DOC
Returns: advancedSettings (AdvancedSettings object)
show SystemStatistics - Gets the SystemStatistics object
Returns: service (SystemStatistics object)
do SystemShutdown - Shuts down the system
do SystemRestart - Reboots the system
do CreateVolume - Creates a volume.
> name (String) - Volume name
> sizeInBytes (StorageSize) - Volume size in bytes
> compositionName (UAEnum) - Volume composition
(JBOD,Stripe,Mirror,StripeMirror,Parity)
> disks (ServiceList) - List of disks to use (Disk)
> stripeWidth (Integer) - Stripe width
> stripeDepth (UAEnum) - Stripe depth
(32KB,64KB,128KB,256KB,512KB,1024KB,2048KB)
Returns: newVolume (Volume object)
Command Line Interface User’s Guide 29
Page 40

do GetMaxVolumeStripeWidth - Gets the Maximum StripeWidth supported for a vo
lume type
> compositionName (UAEnum) - Volume composition
(JBOD,Stripe,Mirror,StripeMirror,Parity)
Returns: stripeWidth
do GetMaxVolumeSize - Gets maximum volume size
> compositionName (UAEnum) - Volume composition to use
(JBOD,Stripe,Mirror,StripeMirror,Parity)
> disks (ServiceList) - List of disks to use (Disk)
> stripeWidth (Integer) - Stripe width
> stripeDepth (UAEnum) - Stripe depth (chunksize)
(32KB,64KB,128KB,256KB,512KB,1024KB,2048KB)
Returns: sizeInBytes
do AddInitiator - Adds an initiator
> name (String) Returns: initiator (Initiator object)
3.4.2 Command Help
Typing help followed by a global or context-specific command displays help information
about the command. The following example displays help for the global command do:
192.168.59.25 :: help do
Global Commands ----------------------------------------
Do Performs a command in current context
The following example displays help for the context-specific command createVolume:
192.168.59.25 :: help createvolume
Context Specific Commands ------------------------------
do CreateVolume - Creates a volume.
> name (String) - Volume name
> sizeInBytes (_ERROR_) - Volume size in bytes
> compositionName (UAEnum) - Volume composition
(JBOD,Stripe,Mirror,StripeMirror,Parity)
> disks (ServiceList) - List of disks to use (Disk)
> stripeWidth (Integer) - Stripe width
> stripeDepth (UAEnum) - Stripe depth
(32KB,64KB,128KB,256KB,512KB,1024KB,2048KB)
Returns: newVolume (Volume object)
30 Chapter 3 Using the CLI
Page 41

3.4.3 Advanced Scripting Concepts
The CLI provides the ability to perform environment variable substitution. Variable
substitution is the process of replacing a reference to the name of a variable with its actual
value. Variable substitution is useful in Python, Perl, Bash, or other scripts that invoke
predefined CLI script files and perform substitution at runtime.
The substitution syntax is ${varName}, with the information typed between the curly
brackets specifying the variable name. Any time you use this syntax in a command line, the
CLI expects the variable name in curly brackets to be the name of a variable. If you want the
dollar sign preceding the first curly bracket to be interpreted as just a simple dollar sign,
precede it with the backslash (\) “escape” character.
Example 1: The following example shows how variable substitution might work with a bash
script. In this example, assume that a bash script has the following lines:
#!/bin/bash
export VolName="MyNewVolName"
cli2 –x DeleteVolume
export VolName="Zeus"
cli2 –x DeleteVolume
Also, assume that DeleteVolume.cli contains the following line:
VolumeList.Volumes[${VolName}].Delete
In this example, ${VolName} will be replaced with the volume named Zeus, which will be
deleted.
Example 2: The following example shows how the backslash character can be used to have
the CLI interpret a dollar sign character as just a simple dollar sign. In this example, assume
that an ENV variable called envvar equals ABC. In this case, abc\${envvar} becomes
abc${envvar}, while abc${envvar} becomes abcABC.
Command Line Interface User’s Guide 31
Page 42

This Page Left Intentionally Blank
32 Chapter 3 Using the CLI
Page 43

Chapter 4 Global Action Commands
This chapter describes the global action commands in the CLI. The topics covered in this
chapter are:
Section 4.1, List of Global Action Commands (page 34)
Section 4.2, Description of Global Action Commands (page 35)
Command Line Interface User’s Guide 33
Page 44

4.1 List of Global Action Commands
Global action commands help you navigate through the set of contexts, and perform controland configuration-related activities, such as piping output, setting operating modes,
navigating contexts, and executing operating system functions.
Table 4-1 lists the global action commands in alphabetical order, and includes a description
of the command and a link to the section that describes each command. The global action
commands are described in detail, with examples, in the sections shown in the See Section
column.
Command Description See Section
Do Performs a command in the current context. 4.2
Echo Echoes command lines to Standard Out (STDOUT). 4.2.2
Execute Executes a CLI script file. 4.2.3
Exit Ends the current CLI session. 4.2.4
Table 4-1. Global Action Commands
Help Displays all of the global and context-specific commands that the CLI supports. 4.2.5
List Displays a brief list of current context properties and methods. 4.2.6
Mode Sets the session operating modes. 3.2 and 4.2.7
Pop Returns to the context that was last pushed. 4.2.8
Push Saves the current context on a last-in-first-out (LIFO) stack and changes context. 4.2.9
RequireArgs Advanced feature intended for script files. 4.2.10
Select Changes contexts. 4.2.11
Set Sets a property in the current context. 4.2.12
ShiftArgs Advanced feature intended for script files. 4.2.13
Show Shows a property in the current context. 4.1.14
System Invokes a system shell command (equivalent to typing the prefix !). 4.2.15
34 Chapter 4 Global Action Commands
Page 45

4.2 Description of Global Action Commands
4.2.1 Do
Use the Do command to perform a command in the current context. The command Do is the
default action and can be omitted from action commands. For this reason, Do is shown
within brackets in the syntax below.
Syntax
[Do] addInitiator <String>
[Do] createVolume <String> <SizeinBytes> <CompositionName> <Disks>
<StripeWidth> <StripeDepth>
[Do] getMaxVolumeSize <CompositionName> <Disks> <StripeWidth>
<StripeDepth>
[Do] getMaxVolumeStripeWidth <CompositionName> <Disks>
<StripeWidth> <StripeDepth>
[Do] SystemRestart
[Do] SystemShutdown
Examples
Do SystemRestart
Restarts the system.
Do createVolume Venus 100GB jbod
Creates a new volume called Venus that is 100 GB in size and configured as a JBOD.
createVolume Venus 100GB jbod
Functionally equivalent to the previous command line, but with Do omitted.
Help Do
Displays help for the Do command.
Command Line Interface User’s Guide 35
Page 46

4.2.2 Echo
Use the Echo command to echo command lines to Standard Out (STDOUT). When enabled, a
copy of each command line you issue is sent to STDOUT. By default, echo is disabled. Issuing
this command enables echo. Issuing the command again disables echo.
Syntax
Echo
Examples
Because Echo writes to STDOUT, it can be redirected.
Echo
Enables echo to STDOUT (if echo was disabled) or disables echo to STDOUT (if echo was
enabled).
Help Echo
Displays help for the Echo command.
4.2.3 Execute
Use the Execute command to execute a text file containing one or more CLI command
lines. Adding command lines to a file is particularly convenient if you will be performing
repetitive operations on several systems: just enter the commands into a text file and then
execute the text file each time you want to perform those operations. The text file
extension must be .cli.
Syntax
Execute <pathname>
Examples
Execute createVols
Executes a file called CreateVols.cli that contains the following two CreateVolume
commands to be performed:
Do createVolume CAD 30000000 mirror
Do createVolume Exchange 125829120 parity [0,1,2,3] 4 512kb
In the command line example above, the .cli extension in the file name is assumed and
should be omitted from the command line.
The CLI ignores blank lines or lines beginning with two forward slashes (//) in
a script file. Therefore, you can add comment (remark) lines to a script file
and not have the CLI execute them by starting the lines with //.
Help Execute
Displays help for the Execute command.
36 Chapter 4 Global Action Commands
Page 47

4.2.4 Exit
Use the Exit command to end the current CLI session.
Syntax
Exit
Examples
4.2.5 Help
Use the Help command to display a list of the global action commands and context-specific
commands supported by the CLI. If a global action or context-specific command follows
Help, only help for the command is displayed. For more information, see section 3.4.
Exit
Closes the current CLI session.
Help Exit
Displays help for the Exit command.
Syntax
Help
Help <Command>
where <Command> is either a global action command or a context-specific command.
Examples
Help
Displays all the global action and context-specific commands supported by the CLI.
Help Echo
Displays help for the Echo command.
Help CreateVolume
Displays help for the CreateVolume command.
Command Line Interface User’s Guide 37
Page 48

4.2.6 List
Use the List command to list the current contexts and their properties (see the example
below).
Syntax
List
Examples
4.2.7 Mode
Use the Mode command to set the CLI operating modes. Operating modes that can be set
with this command include:
List
Displays a list of current contexts and properties.
Help List
Displays help for the List command.
Output mode – configures the output format from the CLI as human-readable, XML, or
formatted XML.
Indication mode – displays messages when changes made to the system as a result of
commands executed by you and other CLI users.
Stream mode – configures the CLI to either output error messages to STDERR and all
other output to STDOUT, or direct all output (including error messages) to STDOUT.
Completion code mode – configures the CLI to return a confirmation message each time it
executes (or tries to execute) a command line.
Echo command mode – repeats every character you type.
Exit script on error mode - lets the CLI exit a script automatically if the CLI encounters
an error in the script.
38 Chapter 4 Global Action Commands
Page 49

For more information, see section 3.2.
Syntax
Mode outputMode [Normal | XML | FormattedXML]
Mode indicationMode [Enabled | Disabled]
Mode streamMode [Mixed_STDOUT_Only | Mixed_STDOUT_STDERR]
Mode completionCodeMode [Always | ErrorsOnly]
Mode echoCommandMode [Enabled | Disabled]
Mode exitScriptOnError [Enabled | Disabled]
Examples
Mode outputMode Normal
CLI output is displayed in human-readable format.
Mode outputMode XML
CLI output is nested together as XML, with XML tags.
Mode outputMode FormattedXML
CLI output is nested together as XML, with XML tags.
Mode indicationMode Enabled
Enables indication mode, which displays messages of changes made to the system as a
result of commands executed by you and other CLI users.
Mode indicationMode Disabled
Disables indication mode.
Mode streamMode Mixed_STDOUT_Only
Enables stream mode, directing all output to STDOUT.
Mode streamMode Mixed_STDOUT_STDERR
Disables stream mode, directing error messages to STDERR and all other output to
STDOUT.
Mode completionCodeMode Always
Enable completion code mode – return a completion code with each command line.
Mode completionCodeMode ErrorsOnly
Disable completion code mode – return a completion code only when a command line has
an error.
Mode echoCommandMode Enabled
Enable echo command mode – repeats every command line character you type.
Mode echoCommandMode Disabled
Disable echo command mode – do not repeat every command line character you type.
Mode exitScriptOnError Enabled
Enable exit script on error – the CLI exits the script if an error is encountered.
Mode exitScriptOnError Disabled
Disable exit script on error – the CLI doe not exit the script if an error is encountered.
Help Mode
Displays help for the Mode command.
Command Line Interface User’s Guide 39
Page 50

4.2.8 Pop
As you execute command lines, you may navigate through various CLI context levels. For
example, accessing diskList from the root level moves you down one level in the CLI
hierarchy. From this level, you can access Disk (two levels down from the root) and
Extent (three levels down from the root).
Using the Pop command, you can move up in the CLI hierarchy. The number of levels you
move up depends on whether you used the Push or Select command to move down in the
hierarchy.
Syntax
Pop
Examples
If you used the Push command, the Pop command moves you up one level.
If you used the Select command, the Pop command moves you to the top (root) level
in the CLI hierarchy.
Pop
Moves you up one level in the CLI hierarchy (if you previously used a Push command) or
to the root level (if you previously used a Select command). If you are at the root
level, issuing this command displays the error message Content Stack empty.
4.2.9 Push
Use the Push command to move down one level in the CLI hierarchy. The context is added
to the push/pop stack. Issuing a Pop command after a Push command moves you up one
level at a time in the hierarchy.
Syntax
Push <context>
where <context> is a member of the current context that returns a context. From the
root context, for example, you can issue the command Push diskList because diskList
is a property in the root context.
Examples
Help Pop
Displays help for the Pop command.
Push volumeList.volumes[mynewvolume]
Pushes a volume called mynewvolume.
192.168.56.125 :: push iscsi.targets[$first]
Changes the context to the first iSCSI target, which is accessible from the top-level
system context, then the iSCSI context, and finally the targets context.
40 Chapter 4 Global Action Commands
Page 51

Controller[A] :: push ^iscsi.targets[$first]
Changes the context to the first iSCSI target, even though the current context is
Controller[A].
Help Push
Displays help for the Push command.
4.2.10 RequireArgs
The requireArgs command is an advanced feature intended for use with script files. This
command lets you specify the required number of arguments for subsequent commands.
If a CLI script has this command and the number of arguments provided does not provide at
least the number of required arguments specified with RequireArgs, the script is
terminated.
Syntax
requireArgs <integer> [optionalDisplayStringOnError]
where <integer> is the required number of arguments for subsequent commands and
[optionalDisplayStringOnError] is a string that is displayed to the user if the
argument count is not satisfied.
Examples
requireArgs 8
Checks that at least 8 arguments are present for the current script, and terminates the
script if not.
Help requireArgs
Displays help for the RequireArgs command.
Command Line Interface User’s Guide 41
Page 52

4.2.11 Select
Use the Select command to change contexts to the argument specified. The context is not
added to the push/pop stack. As a result, issuing a Pop command after a Select command
moves you to the top (root) level context of the CLI hierarchy.
Syntax
Select <context>
where <context> is a member of the current context (or a concatenated member
reference) that returns a context. From the root context, for example, you can issue the
command Select diskList because diskList is a property in the root context.
Examples
Select Controller[a]
Displays the new context in the prompt.
In the following example, at the System context of machine 192.168.59.25, the
command line jumps directly to the context Controller. Then a show command
displays the properties of the Controller context.
192.168.59.25 :: Select Controller[a]
Controller[A] :: show
ID = A
Status = OK
IsActive = true
SlotNumber = 0
SerialNumber = 00001
DriveSlots = 12
NumFrontPorts = 8
DisplayName = Blade A
SoftwareVersion = 2.5.1.21
IsAlternateSoftwareVersionPresent = true
AlternateSoftwareVersion = 2.5.1.21
BoardType = 0009
BoardTypeRevision = XC05
I8kHwVersion = 1.0.0.0
I8kSwVersion = 0.1.0.0
MpuSwVersion = 2.5.1.21
BindFailReason = Bind_OK
BladeHealth = Healthy
BladeState = Bound
BladeType = SFF
PersistenceSetting = Unchanged
BatteryState = Failed
BufferMemDimmCnt = 2
BufferMemSize = 2048
SystemMemDimmCnt = 2
SystemMemSize = 512
SystemTime = 13:18:27
Ports = 8 Ports
LAGs = 8 LAGs
ManagementPort = ManagementPort [192.168.56.138], Status=OK
BasePool = [BaseA], 2 disks
42 Chapter 4 Global Action Commands
Page 53

Help Select
Displays help for the Select command.
4.2.12 Set
Use the Set command to set a property in the current context.
Syntax
Set <memberName> <newvalue>
Examples
Set name Zeus
Sets the array name to Zeus.
Help Set
Displays help for the Set command.
4.2.13 ShiftArgs
The shiftArgs command is an advanced feature intended for use with script files. This
command left-shifts off a minimum number of arguments.
This command is useful when working with an external text file containing command line
parameters and arguments. It is particularly useful if you will be performing repetitive
operations on several systems where argument shifting is required. If <integer> is omitted
from the command line, 1 is assumed.
Syntax
shiftArgs <integer>
Examples
shiftArgs
If a script has arguments 0, 1, and 2, including this command strips the leftmost
argument (0), resulting in arguments 1 and 2 being passed (as arguments #0 and #1).
shiftArgs 2
If a script has arguments 0, 1, and 2, including this command strips the two leftmost
arguments (0,1), resulting in argument 2 being passed (as argument #0).
Help shiftArgs
Displays help for the ShiftArgs command.
Command Line Interface User’s Guide 43
Page 54

4.2.14 Show
Use the Show command to show a property in the current context.
Syntax
Show
Examples
Show
Displays the properties in the current context, as shown in the following example.
In the following example, the show command displays the properties of the
iSCSITarget context for the target named “myvol”.
iSCSITarget[two] :: show
ID = myvol
Status = OK
DurableName = iqn.2000-03.com.D-Link:myvol:6-001215-0200005d6-484f4348e87aea61
Name = myvol
Secret =
IsChapRequired = false
PrimaryAuthenticationMethod = NO_AUTHENTICATION
SecondaryAuthenticationMethod = CHAP
MaxReceiveDataSegmentLength = 32768
PrimaryHeaderDigestMethod = NO_DIGEST
PrimaryDataDigestMethod = NO_DIGEST
SecondaryHeaderDigestMethod = CRC32C
SecondaryDataDigestMethod = CRC32C
RequestingMarkersOnReceive = false
MaxConnectionsPerSession = 8
InitialR2TPreference = true
ImmediateDataPreference = false
MaxOutstandingR2T = 8
MaxUnsolicitedFirstDataBurstLength = 8192
MaxDataBurstLength = 262144
DataSequenceInOrderPreference = true
DataPDUInOrderPreference = true
DefaultTimeToWaitPreference = 2
DefaultTimeToRetainPreference = 20
ErrorRecoveryLevelPreference = 0
Initiators = 0 Initiators
Sessions = 0 Sessions
Volume = [myvol], State=Normal, Composition=JBOD, Size=10.00GB
Help Show
Displays help for the Show command.
44 Chapter 4 Global Action Commands
Page 55

4.2.15 System
Use the System command to invoke a system shell command. (This command is equivalent
to adding a ! prefix to a command line.)
Syntax
System <DOS command>
where <DOS command> is the name of the DOS command you want performed.
Examples
System "dir c:\\"
Displays the results of the DOS command (in this example, the contents of the root
directory on the C drive are displayed).
!dir c:\
Displays the results of the DOS command (in this example, the contents of the root
directory on the C drive are displayed).
Help System
Displays help for the System command.
Command Line Interface User’s Guide 45
Page 56

This Page Left Intentionally Blank
46 Chapter 4 Global Action Commands
Page 57

Chapter 5 Supported CLI Commands and Properties
This chapter describes the commands and properties supported by the CLI. Each section
describes the commands and properties specific to that context.
The topics covered in this chapter are:
Section 5.1, System Commands and Properties (page 48)
Section 5.2, Controller Commands and Properties (page 49)
Section 5.3, PhysicalPort Commands and Properties (page 52)
Section 5.4, PoolList Commands and Properties (page 53)
Section 5.5, DiskList Property (page 53)
Section 5.6, Disk Commands (page 54)
Section 5.7, VolumeList Property (page 55)
Section 5.8, Volume Commands and Properties (page 55)
Section 5.9, VolumeComposition Properties (page 57)
Section 5.10, Extent Properties (page 57)
Section 5.11, TaskList Property (page 58)
Section 5.12, Task Commands and Properties (page 59)
Section 5.13, iSCSI Commands and Properties (page 59)
Section 5.14, iSCSITarget Commands and Properties (page 61)
Section 5.15, iSCSISession Properties (page 64)
Section 5.16, iSCSIConnection Properties (page 65)
Section 5.17, Portal Commands and Properties (page 66)
Section 5.18, Initiator Commands and Properties (page 67)
Section 5.19, AdvancedSettings Commands and Properties (page 68)
Section 5.20, SystemPolicy Properties (page 69)
Section 5.21, ExternalConnectionsManager Properties(page 70)
Section 5.22, SystemStatistics Properties(page 71)
Section 5.23, LAG Commands and Properties (page 72)
Section 5.24, ManagementPort Commands and Properties (page 73)
Section 5.25, NetworkRoute Commands and Properties (page 74)
Section 5.26, ServicePool Commands and Properties (page 75)
Command Line Interface User’s Guide 47
Page 58

5.1 System Commands and Properties
System commands and properties let you perform system-related activities, such as
creating volumes, configuring, restarting, or shutting down the array. System commands
are issued at the System context.
Table 5-1 provides an alphabetical list of the commands in the System context and Table
5-2 provides an alphabetical list of the properties in the System context. Both tables
include a description of the command or property, and the global action commands that can
be used with the command or property, and the return parameter. For example, in Table
5-1, AddInitiator can be used with the global action commands Do, Push, and Select,
and the command returns a context.
Table 5-1. System Context Commands
System Context Command Description Associated Global Action Commands Return Parameter
AddInitiator Adds an iSCSI initiator Do/Push/Select Context
CreateVolume Creates a volume Do/Push/Select Context
MaxVolumeSize Obtains the maximum volume size Do Value
MaxVolumeStripeWidth
SystemRestart Reboots the system Do No Return Value
SystemShutdown Shuts down the system Do No Return Value
Obtains the maximum stripe width
supported for a volume type
Do Value
48 Chapter 5 Supported CLI Commands and Properties
Page 59

Table 5-2. System Context Properties
System Context Property Description Associated Global Action Commands Return Parameter
AdvancedSettings
BindFailReason
BladeType Displays the controller type Show Value
Controllers
DiskList Lets you access the DiskList service Show/Push/Select Context
DurableName Displays the durable name of the controller Show Value
EventHD-Linky
ExternalConnectionsManager
Identity Returns the Product Short Name identity. Show Value
ID The IP Address of the Management Port Show Value
iSCSI Lets you access the iSCSI Service Show/Push/Select Context
Name Returns the name of the array Show Value
Lets you access the system’s advanced
settings
Displays the reason for a Bind failure (defined
for DSN-5000 systems only)
Lets you access a vector of all controllers in
the system
Lets you access the Event HD-Linky
information
Lets you access the External Connections
Manager
Sets the name of the array Set Value
Show/Push/Select Context
Show/Push/Select Context
Show/Show[ID]/Push[ID]/Select[ID] Context List
Show/Push/Select Context
Show/Push/Select Context
PoolList Lets you access the poolList. Show/Push/Select Context
ProductID Displays the controller type Show Value
RevisionLevel Displays the controller software revision Show Value
SerialNumber Displays the system serial number Show Context
Status Displays the system status Show Value
SystemState
SystemStatistics Lets you access the SystemStatistics object Show/Push/Select Context
TaskList Lets you access the TaskList Show/Push/Select Context
VendorId Displays the vendor name of the SCSI Inquiry Show Value
VolumeList Lets you access the VolumeList Show/Push/Select Context
Displays the system state (e.g., Standalone,
Bound, Survivor, etc.)
Show Value
Command Line Interface User’s Guide 49
Page 60

5.2 Controller Commands and Properties
Controller commands and properties let you perform controller-related activities, such as
creating Link Aggregation Groups (LAGs); returning the number of drive slots, serial number,
or name of a controller; and restarting the controller. Table 5-3 provides an alphabetical list
of the commands in the Controller context and
Table 5-4 provides an alphabetical list of the properties in the Controller context. Both
tables include a description of the command or property, the global action commands that
can be used with the command or property, and the return parameter (if any). In Table 5-3,
for example, CreateLAG is used with the global action commands Do, Push, and Select.
Table 5-3. Controller Commands
Command Description Associated Global Action Commands Return Parameter
CreateLAG Lets you create a LAG
ControllerRestart Restarts the controller
ControllerShutdown Shuts down the controller
Do/Push/Select Context
Do No Return Value
Do No Return Value
Table 5-4. Controller Properties
Property Description Associated Global Action Commands Return Parameter
AlternateSoftwareVersion Returns the software version
in the alternate partition of the
controller
BasePool Lets you access the system’s
base pool
BatteryState Returns the battery state
BindFailReason Returns the results of the
attempted BIND operation
(dual controller systems only)
BladeHealth Returns the health of the
controller
BladeState Returns the Bind status of the
controller (Standalone, Bound,
Survivor, etc.)
BladeType Returns the controller
hardware type (“SFF” for DSN5000-series. or “ATX” for DSN1000/2000/3000 series
controllers)
BoardType Returns the hardware type (a
numeric identifier to identify
the product configuration)
BoardTypeRevision Returns the hardware revision
BufferMemDimmCnt Returns the number of Buffer
Memory DIMM modules
Show Value
Show/Push/Select Context
Show Value
Show Value
Show Value
Show Value
Show Value
Show Value
Show Value
Show Value
50 Chapter 5 Supported CLI Commands and Properties
Page 61

Property Description Associated Global Action Commands Return Parameter
BufferMemSize Returns the amount of Buffer
Memory measured in MB
ControllerStatusDescription Returns controller status
DisplayName Returns the display name of
the controller
DriveSlots Returns the number of drive
bays
I8kHwVersion Returns the hardware revision
of the iSNP8008 ASIC
I8kSwVersion Returns the software revision
of the iSNP8008 ASIC
ID Returns the controller ID (A or
B)
IsActive Indicates whether a controller
in a bound pair is active
IsAlternateSoftwareVersionPresent Indicates whether an alternate
firmware version is present
LAGs Lets you access array LAGs
ManagementPort Lets you access the service
management port
MpuSwVersion Returns the software version
that is running in the controller
NumFrontPorts Returns the number of iSCSI
data ports
PersistenceSetting Returns the state of the
controller’s persistence data
Ports Lets you access array Ports
SerialNumber Returns the serial number of
controller
SlotNumber Returns the slot number of the
controller (0 or 1)
SoftwareVersion Returns the software version
in the active partition of the
controller
Status Returns the overall status of
the controller
SystemMemDimmCnt Returns the number of System
Memory DIMM modules
SystemMemSize Returns the amount of System
Memory measured in MB
SystemTime Returns the system time
Sets the system time
Show Value
Show Value
Show Value
Show Value
Show Value
Show Value
Show Value
Show Value
Show Value
Show/Show[ID]/Push[ID]/Select[ID] ContextList
Show/Push/Select Context
Show Value
Show Value
Show Value
Show/Show[ID]/Push[ID]/Select[ID] ContextList
Show Value
Show Value
Show Value
Show Value
Show Value
Show Value
Show Value (hh:mm:ss)
Set Value (hh:mm:ss)
Command Line Interface User’s Guide 51
Page 62

5.3 PhysicalPort Commands and Properties
PhysicalPort commands and properties let you perform activities related to an array’s
physical ports, such as returning a port number, port state, or port speed. Table 5-5 lists the
command in the PhysicalPort context and Table 5-6 provides an alphabetical list of the
properties in the PhysicalPort context. Both tables include a description of the command
or property, the global action commands that can be used with the command or property,
and the return parameter (if any). In Table 5-5, for example, RemoveFromLAG is used with
the global action command Do.
Table 5-5. PhysicalPort Command
Command Description
Enable Enables the port Do No Return Value
Disable Disables the port Do No Return Value
RemoveFromLAG Removes the port from its current LAG Do No Return Value
Associated Global
Action Commands
Return Parameter
Table 5-6. PhysicalPort Properties
Property Description Associated Global Action Commands Return Parameter
IsEnabled Returns the Is Enabled state Show Value
LAG Returns the LAG Show/Push/Select Context
Sets the LAG Set Context
Name Returns the port name Show Value
PortNumber Returns the port number Show Value
PortState Returns the port state Show Value
Speed
Returns the port link speed in
bits per second
Show Value
52 Chapter 5 Supported CLI Commands and Properties
Page 63

5.4 PoolList Commands and Properties
PoolList commands and properties let you perform activities related to drive pools, such
as accessing the global available pool or global unavailable pool, accessing disks, and
accessing the global spare pool. Table 5-7 provides an alphabetical list of the commands in
the PoolList context and Table 5-8 provides an alphabetical list of the properties in the
PoolList context. Both tables include a description of the command or property, the
global action commands that can be used with the command or property, and the return
parameter (if any). In Table 5-7, for example, CreateVolume is used with the global action
commands Do, Push, and Select.
Command Description Associated Global Action Commands Return Parameter
CreateVolume Creates a volume. Do/Push/Select Context
MaxVolumeSize Returns the maximum volume size Do Value
Table 5-7. PoolList Commands
Table 5-8. PoolList Properties
Property Description Associated Global Action Commands Return Parameter
GlobalAvailablePool
GlobalSparePool
GlobalUnavailablePool
Disks Lets you access drives Show/Show[ID]/Push[ID]/Select[ID] ContextList
PoolName Returns the pool name Show
Pools Lets you access pools Show/Show[ID]/Push[ID]/Select[ID] ContextList
PoolType Returns the pool type Show Value
5.5 DiskList Property
The DiskList property lets you perform tasks related to arrays of disks. Table 5-9
describes the property in the DiskList context, the global action commands that can be
used with the property, and the return parameter. In Table 5-9, for example, Disks is used
with the global action commands Show, Push, and Select.
Lets you access the available pool
of drives
Lets you access the spares for the
system
Lets you access the unavailable
pool of drives
Show/Push/Select Context
Show/Push/Select Context
Show/Push/Select Context
Property Description Associated Global Action Commands Return Parameter
Disks Lets you access the array of disks in this list Show/Show[ID]/Push[ID]/Select[ID] ContextList
Command Line Interface User’s Guide 53
Table 5-9. DiskList Property
Page 64
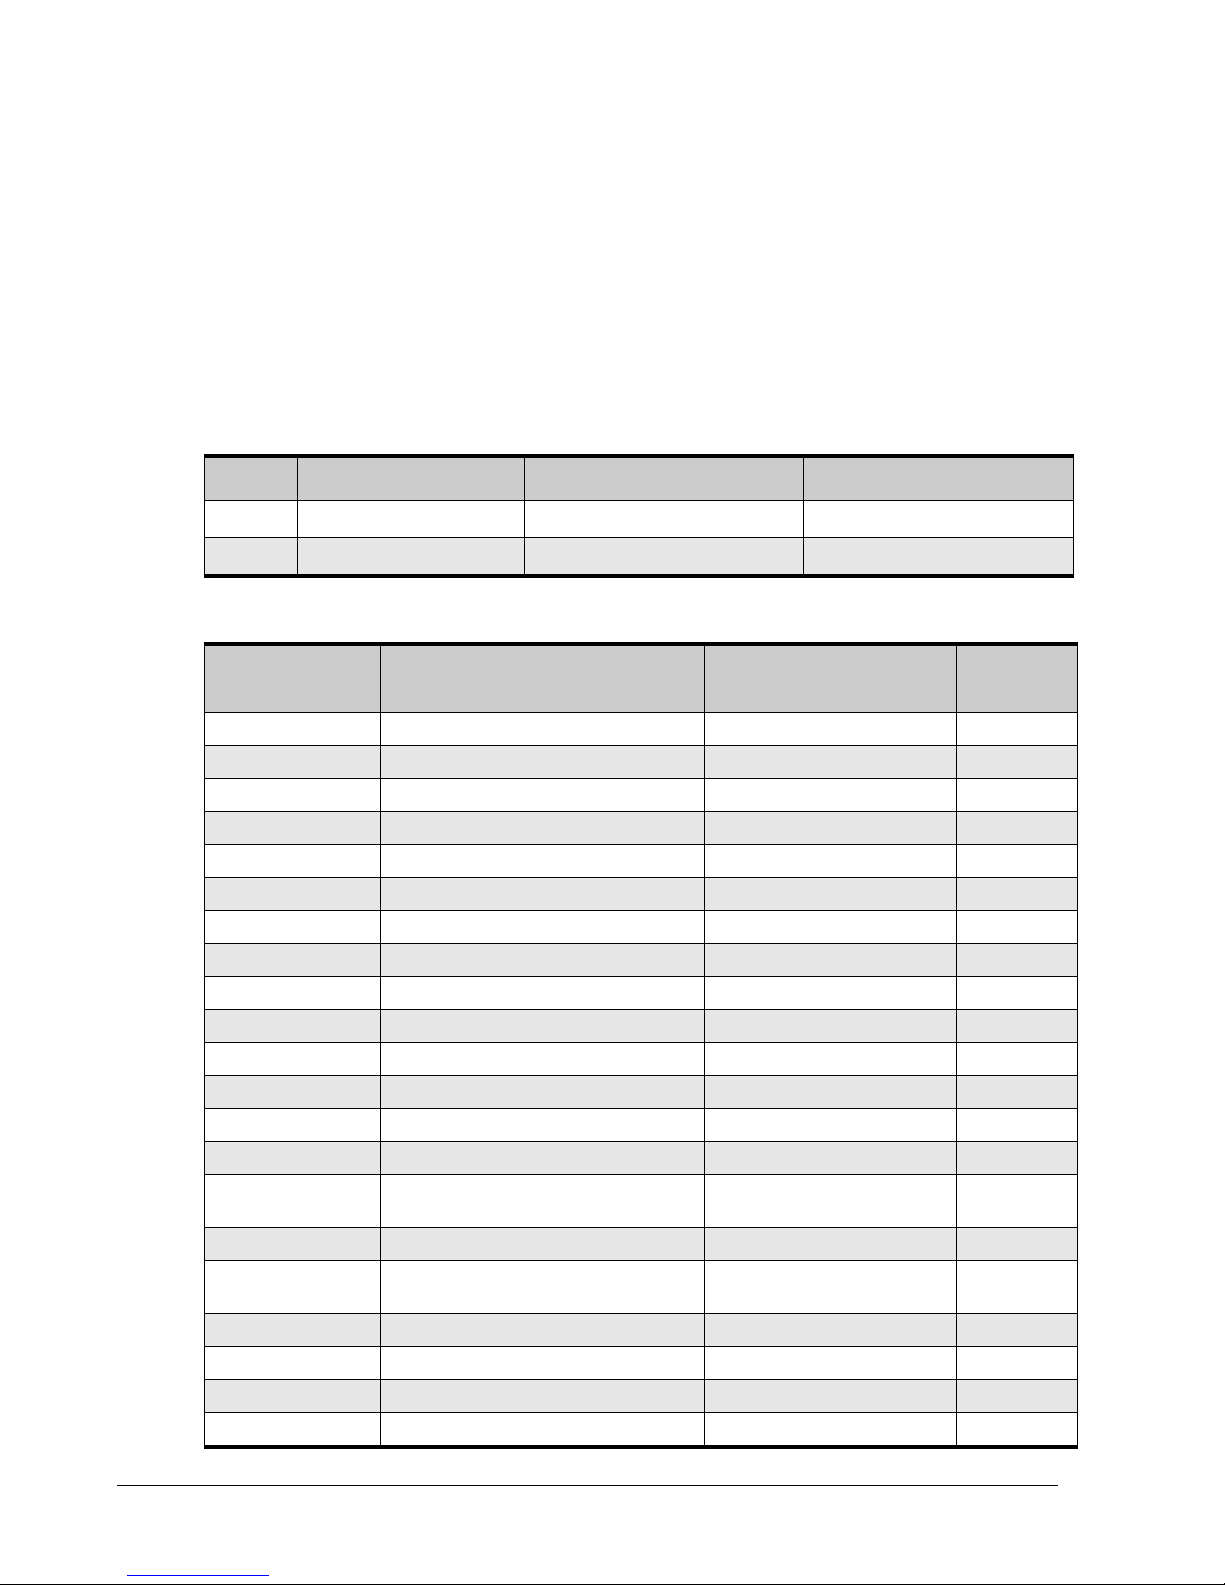
5.6 Disk Commands
Disk commands and properties let you perform disk-related activities, such as viewing a
drive’s capacity or free space, link speed, or a number of an enclosure containing a drive.
Table 5-10 provides an alphabetical list of the commands in the Disk context and Table
5-11 provides an alphabetical list of the properties in the Disk context (although some
properties may be unique to SAS or SATA drive types). Both tables include a description of
the command or property, the global action commands that can be used with the command
or property, and the return parameter (if any). In Table 5-10, for example, DownDrive is
used with the global action command Do.
Command Description Associated Global Action Commands Return Parameter
DownDrive Downs the drive Do No Return Value
InitDrive Initializes the drive Do No Return Value
Table 5-10. Disk Commands
Table 5-11. Disk Properties
Property Description
ActualLinkSpeed Returns the actual link speed Show Value
ATAVersion Returns the ATA version Show Value
DriveNumber Returns the drive number Show Value
DriveType Returns the type of drive Show Value
EnclosureNumber Returns the enclosure the disk is in Show Value
Extents Lets you access all the extents on the disk Show/Show[ID]/Push[ID]/Select[ID] ContextList
FreeSpaceSize Returns the amount of free space Show Value
PhysicalCapacity Returns the total drive capacity Show Value
Pool Lets you access the pool to which the disk belongs Show/Push/Select Context
Pool Sets the pool to which the disk belongs Set Context
SASChannelNumber Returns the channel number of the SAS drive Show Value
SATAQueueDepth Returns the SATA queue depth Show Value
SATAQueueingSupport Returns the SATA queuing support setting Show Value
SerialNumber Returns the serial number Show Value
SlotNumber Returns the slot number in which the disk is
installed
State Returns the drive state Show Value
Supports48BitAddress Returns TRUE if the drive supports 48-bit
addressing or FALSE if the drive does not support it
SupportedLinkSpeeds Returns supported link speeds Show Value
Tasks Returns an array of all the tasks for this disk Show/Show[ID]/Push[ID]/Select[ID] ContextList
Vendor Returns the drive manufacturer Show Value
VendorModel Returns the vendor model Show Value
Associated Global
Action Commands
Show Value
Show Value
Return
Parameter
54 Chapter 5 Supported CLI Commands and Properties
Page 65

5.7 VolumeList Property
The VolumeList property lets you access all volumes in a list. Table 5-12 describes the
property in the VolumeList context, the global action commands that can be used with the
property, and the return parameter. In Table 5-12, for example, Volumes is used with the
global action commands Show, Push, and Select.
Property Description Associated Global Action Commands Return Parameter
Volumes Lets you access all the volumes in the list Show/Show[ID]/Push[ID]/Select[ID] ContextList
5.8 Volume Commands and Properties
Volume commands and properties let you perform volume-related activities, such a
growing, deleting, or scanning a volume for integrity. Table 5-13 provides an alphabetical
list of the commands in the Volume context and Table 5-14 provides an alphabetical list of
the properties in the Volume context. Both tables include a description of the command or
property, the global action commands that can be used with the command or property, and
the return parameter (if any). In Table 5-13, for example, Delete is used with the global
action command Do. For a detailed description of the syntax and parameters of these
commands, refer to the Help command.
Table 5-12. Volume Property
Table 5-13. Volume Commands
Command Description
Delete Deletes the volume Do No Return Value
GrowTo Grows the volume to the specified size Do No Return Value
IntegrityScanNow Scans the volume for integrity (media and possibly parity) Do No Return Value
IntegrityScanAt Scans the volume for integrity (media and possibly parity) Do No Return Value
MaxGrowSize Expands the maximum size to which a volume can grow Do Value
Reconfigure Reconfigures the volume Do No Return Value
Associated Global
Action Commands
Return Parameter
Command Line Interface User’s Guide 55
Page 66

Table 5-14. Volume Properties
Property Description Associated Global
CompositionName Returns the name of the composition type Show Value
DurableName Returns the durable name Show Value
Initiators Returns all iSCSI initiators for an array Show/Show[ID]/Push[ID]/Select[ID] ContextList
IsReadOnly Returns a flag indicating read only (R/O) or
read/write (R/W)
IsReadOnly Sets the flag indicating R/O or R/W Set Value
IsReconfiguring Returns a Boolean value indicating whether
the volume is currently being reconfigured
IsSyncCacheDisabled Returns a flag indicating whether Sync Cache
is disabled (Sync Cache becomes NOP)
IsSyncCacheDisabled Sets the flag indicating whether Sync Cache
is disabled (Sync Cache becomes NOP)
Name Returns the volume name Show Value
Name Sets the volume name Set Value
NSPOF Returns the No Single Point of Failure flag Show Value
State Shows the volume state Show Value
Size Shows the volume size Show Value
Action Commands
Show Value
Show Value
Show Value
Set Value
Return Parameter
StripeDepth Shows the stripe depth Show Value
StripeWidth Shows the stripe width Show Value
Target Lets you access the associated iSCSI target Show/Push/Select Context
Tasks Lets you access all volume tasks for an array Show/Show[ID]/Push[ID]/Select[ID] ContextList
VolumeComposition Lets you access the VolumeComposition
object.
ReadAheadSizeIsAutomatic Returns a Boolean value to that indicates
whether the Read Ahead Cache Size should
be determined automatically
ReadAheadSizeIsAutomatic Sets a flag indicating whether the Read
Ahead Cache Size should be determined
determined
MaxReadAheadByteCount Returns the maximum size of the Read
Ahead Cache (in megabytes) for the volume
ReadAheadByteCount Sets the size of the Read Ahead Cache for
the volume ( “ReadAheadSizeIsAutomatic”
must also be set to “FALSE”)
ReadAheadByteCount Returns a numeric value for the Read Ahead
Cache Size (in Kbytes) for the volume
IsOptimizedForMultiTrackAudio Sets the multi-track audio optimization mode Set (TRUE or FALSE) Value
IsOptimizedForMultiTrackAudio Shows the current mode Show Value
Show/Push/Select Context
Show Value
Set Value
Show Value
Set Value
Show Value
BlockSizeBytes Sets the size of the volume block size to
BlockSizeBytes Returns the volume block size Show Value
56 Chapter 5 Supported CLI Commands and Properties
either 512 bytes or 4096 bytes
Set Value
Page 67

5.9 VolumeComposition Properties
VolumeComposition properties let you view a volume’s composition name and access
extents. Table 5-15 provides an alphabetical list of the properties in the
VolumeComposition context, a description of the property and the global action
commands that can be used with the property, and the return parameter. In Table 5-15, for
example, CompositionName is used with the global action command Show.
Property Description Associated Global Action Commands Return Parameter
CompositionName Returns the name of the composition Show Value
Table 5-15. VolumeComposition Properties
Extents
5.10 Extent Properties
Extent properties let you perform activities related to extents, such as returning the size,
state, or composition name of an extent. Table 5-16 provides an alphabetical list of the
properties in the Extent context, a description of the property and the global action
commands that can be used with the command or property, and the return parameter. In
Table 5-16, for example, CompositionName is used with the global action command Show.
Property Description
CompositionName Returns the volume composition Show Value
Disk Lets you access the disk containing the extent Show/Push/Select Context
ExtentMemberElementBlockNumber Returns the element block number Show Value
ExtentState Returns the current state Enum of the extent Show Value
MemberBlockNumber
Lets you access all the extents for this
volume
Table 5-16. Extent Properties
Returns the member block number within the
volume
Show/Show[ID]/Push[ID]/Select[ID] ContextList
Associated Global
Action Commands
Show Value
Return Parameter
MirrorElementNumber Returns the mirror element number Show Value
PhysicalBlockNumber Returns the physical block number on the disk Show Value
Size Returns the size of the extent Show Value
StripeElementNumber Returns the stripe element number Show Value
Volume
Command Line Interface User’s Guide 57
Lets you access the volume associated with
the extent
Show/Push/Select Context
Page 68

5.11 TaskList Property
The TaskList property lets you access the tasks available for an array. Table 5-17 lists the
property in the TaskList context, the global action commands that can be used with the
property, and the return parameter. In the table below, for example, Tasks is used with
the global action commands Show, Push, and Select.
Property Description Associated Global Action Commands Return Parameter
Tasks Lets you access the array of tasks Show/Show[ID]/Push[ID]/Select[ID] ContextList
Table 5-17. TaskList Properties
58 Chapter 5 Supported CLI Commands and Properties
Page 69
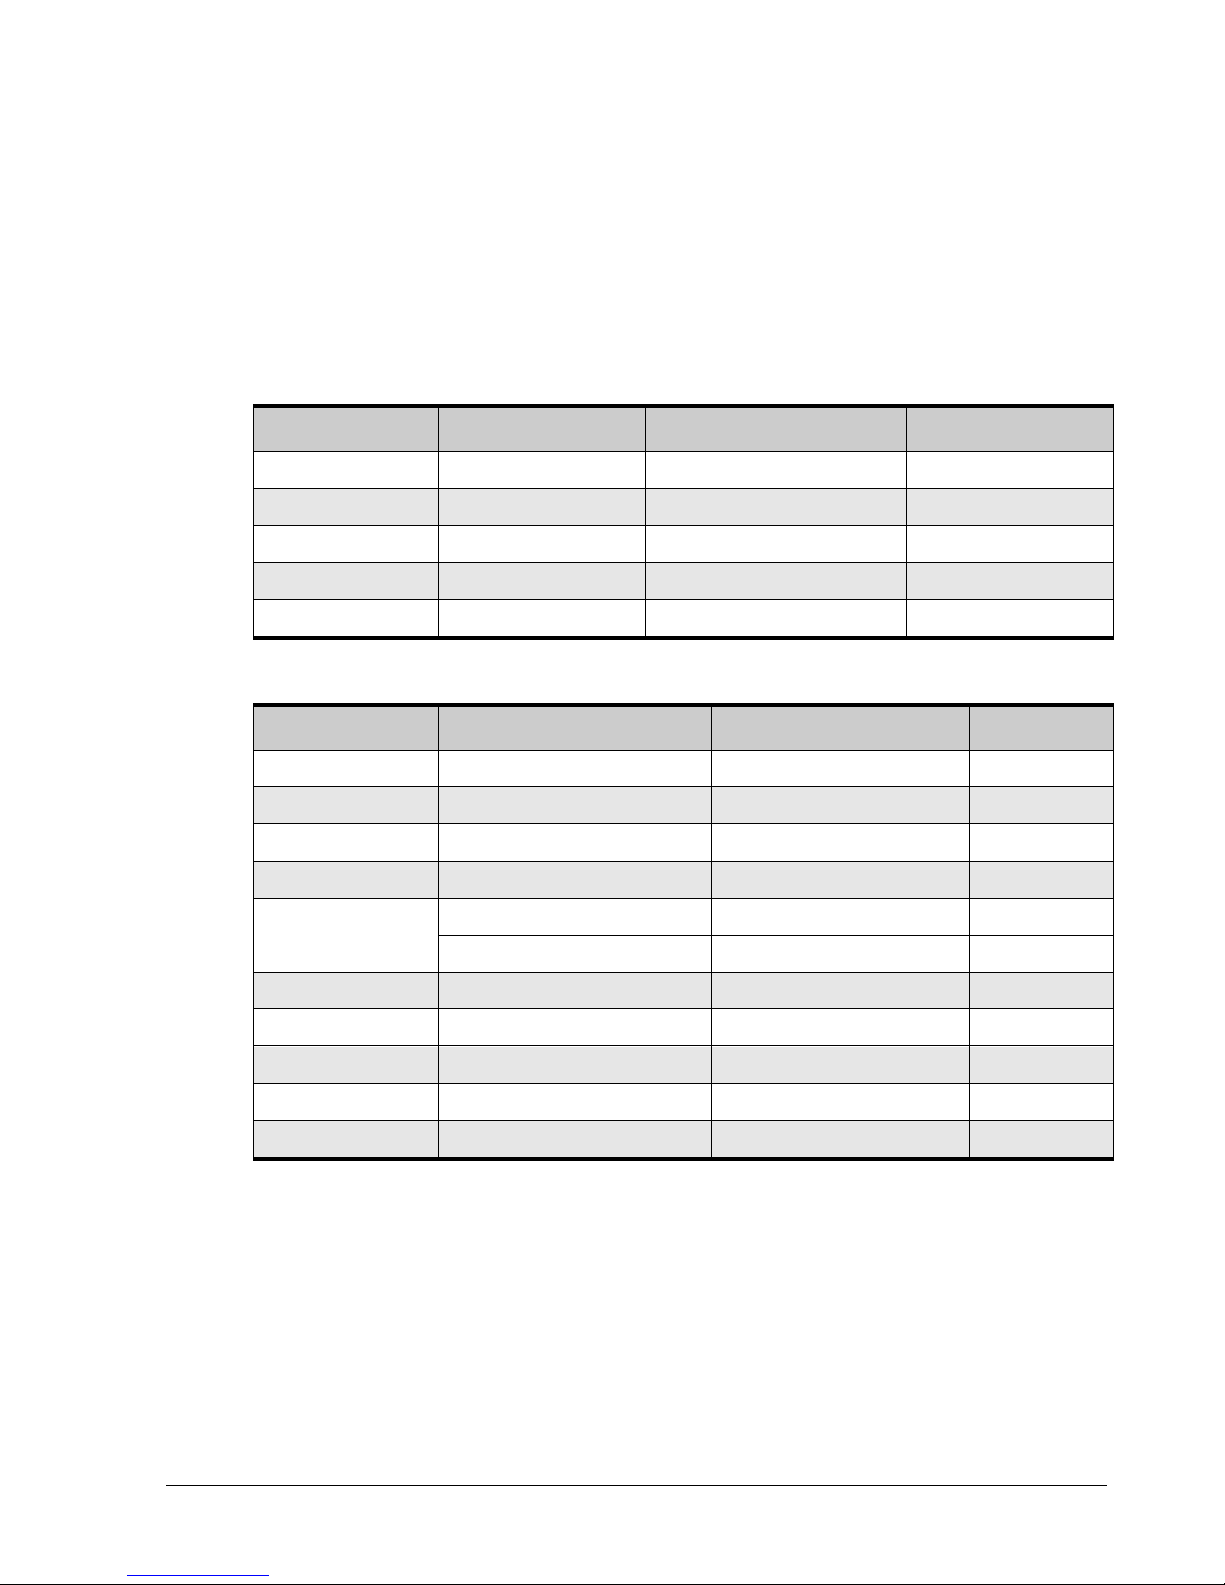
5.12 Task Commands and Properties
Task commands and properties let you perform task-related activities such as scheduling,
modifying, and suspending tasks. Table 5-18 provides an alphabetical list of the commands in
the Task context and Table 5-19 provides an alphabetical list of the properties in the Task
context. Both tables include a description of the command or property, the global action
commands that can be used with the command or property, and the return parameter (if
any). In Table 5-18, for example, Cancel is used with the global action command Do.
Command Description Associated Global Action Commands Return Parameter
Cancel Cancels a task Do No Return Value
Delete Deletes a task Do No Return Value
Modify Modifies a task Do No Return Value
Resume Resumes a suspended task Do No Return Value
Suspend Suspends the task Do No Return Value
Table 5-18. Task Commands
Table 5-19. Task Properties
Property Description Associated Global Action Commands Return Parameter
EstimatedCompletionTime Estimate completion time Show
ObjectName Returns the object name Show
PercentComplete Returns a task’s percent completion Show
PeriodicityType Returns the units of the periodicity interval Show
Priority Returns the task priority Show
Sets the task priority Set
ScheduledStartTime Returns the scheduled start time Show
StartTime Returns the task start time Show
State Returns the task state Show
StatusDescription Returns the status description Show
TaskID Returns the task ID Show
Value
Value
Value
Value
Value
Value
Value
Value
Value
Value
Value
Command Line Interface User’s Guide 59
Page 70
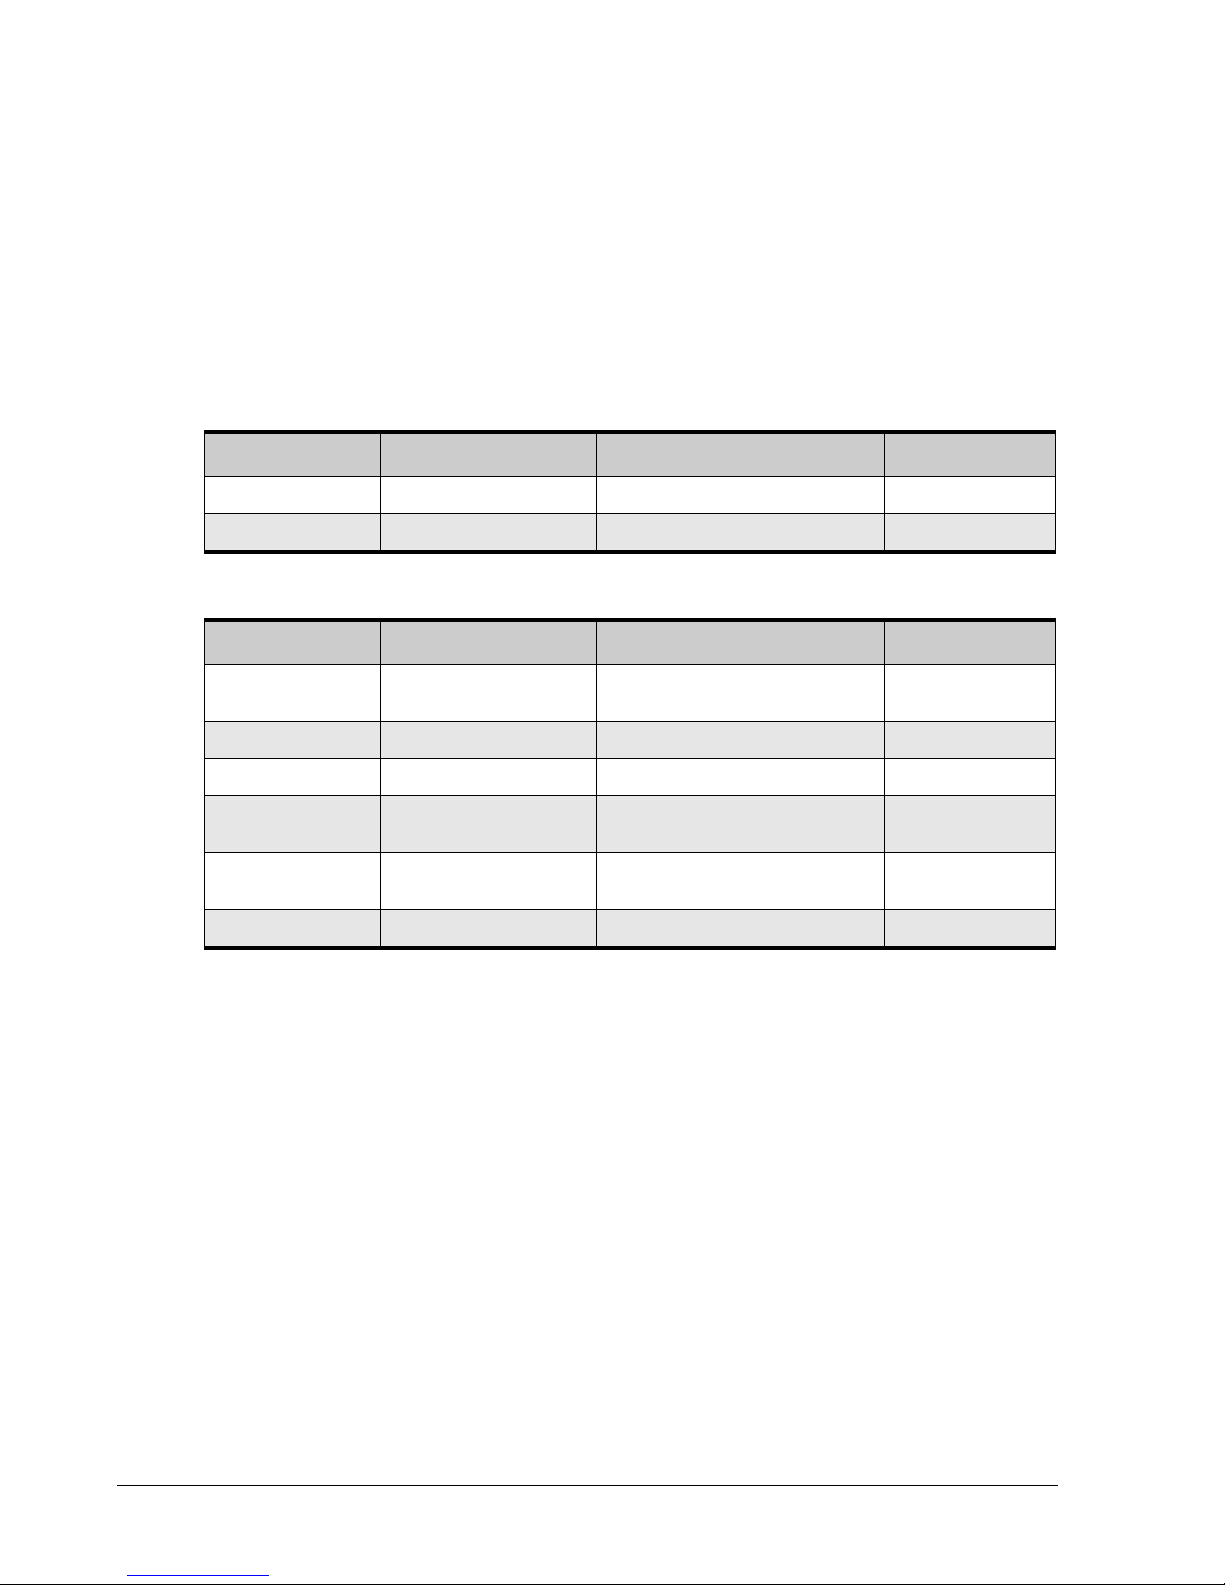
5.13 iSCSI Commands and Properties
iSCSI commands and properties lets you perform iSCSI-related activities such as creating
LAGs and accessing ports, portals, targets, and iSCSI initiators. Table 5-20 provides an
alphabetical list of the commands in the iSCSI context and Table 5-21 provides an
alphabetical list of the properties in the iSCSI context. Both tables include a description of
the command or property, the global action commands that can be used with the command
or property, and the return parameter (if any). In Table 5-20, for example, CreateLAG is
used with the global action commands Do, Push, and Select.
Command Description Associated Global Action Commands Return Parameter
CreateLAG Creates a LAG Do/Push/Select Context
CreateStaticRoute Creates a static route entry Do No Return Value
Property Description Associated Global Action Commands Return Parameter
Table 5-20. iSCSI Commands
Table 5-21. iSCSI Properties
Initiators
LAGs Lets you access the array LAGs Show/Show[ID]/Push[ID]/Select[ID] ContextList
Portals Lets you access the array portals Show/Show[ID]/Push[ID]/Select[ID] ContextList
Ports
StaticRoutes
Targets Lets you access the array targets Show/Show[ID]/Push[ID]/Select[ID] ContextList
Lets you access the array
initiators
Lets you access the array
physical ports
Lets you access the array static
routing table entries
Show/Show[ID]/Push[ID]/Select[ID] ContextList
Show/Show[ID]/Push[ID]/Select[ID] ContextList
Show/Show[ID]/Push[ID]/Select[ID] ContextList
60 Chapter 5 Supported CLI Commands and Properties
Page 71

5.14 iSCSITarget Commands and Properties
iSCSITarget commands and properties let you perform activities related to iSCSI targets
such as setting and returning a CHAP secret, setting and viewing authentication and digest
methods, and viewing durable names. Table 5-22 provides an alphabetical list of the
commands in the iSCSITarget context and Table 5-23 provides an alphabetical list of the
properties in the iSCSITarget context. Both tables include a description of the command
or property, the global action commands that can be used with the command or property,
and the return parameter (if any). In Table 5-22, for example, GrantInitiatorAccess is
used with the global action command Do.
Table 5-22. iSCSITarget Commands
Command Description Associated Global Action Commands Return Parameter
GrantInitiatorAccess Grants initiator access to this target Do No Return Value
RevokeInitiatorAccess Revokes initiator access to this target Do No Return Value
Table 5-23. iSCSITarget Properties
Property Description
DataPDUInOrderPreference
DataSequenceInOrderPreference
DefaultTimeToRetainPreference
DefaultTimeToWaitPreference
DurableName Returns the durable name Show
ErrorRecoveryLevelPreference
Returns the data PDU in order
preference
Sets the data PDU in order
preference
Returns the data sequence In order
preference
Sets the data sequence in order
preference
Returns the default time to retain
preference
Sets the default time to retain
preference
Returns the default time to wait
preference
Sets the default time to wait
preference
Returns the error recovery level
preference
Show
Set
Show
Set
Show
Set
Show
Set
Show
Associated Global
Action Commands
Return
Parameter
Value
Value
Value
Value
Value
Value
Value
Value
Value
Value
ImmediateDataPreference Returns immediate data preference Show
InitialR2TPreference Returns the initial R2T preference Show
Command Line Interface User’s Guide 61
Sets the error recovery level
preference
Sets the immediate data preference Set
Set
Value
Value
Value
Value
Page 72

Property Description
Sets the initial R2T preference Set
Initiators Lets you access the array initiators Show/Show[ID]/Push[ID]/Select[ID] ContextList
IsChapRequired
MaxConnectionsPerSession
MaxDataBurstLength
MaxOutstandingR2T
MaxReceiveDataSegmentLength
Indicates whether the “CHAP is
Required” setting is set
Returns the maximum connections
per session
Sets the maximum connections per
session
Returns the maximum data burst
length
Sets the maximum data burst length Set
Returns the maximum outstanding
R2T
Sets the maximum outstanding R2T Set
Returns the maximum receive data
segment length
Sets the maximum receive data
segment length
Associated Global
Action Commands
Show
Show
Set
Show
Show
Show
Set
Return
Parameter
Value
Value
Value
Value
Value
Value
Value
Value
Value
Value
MaxUnsolicitedFirstDataBurstLength
Name Returns the target name Show
PrimaryAuthenticationMethod
PrimaryDataDigestMethod
PrimaryHeaderDigestMethod
RequestingMarkersOnReceive
SecondaryAuthenticationMethod
Returns the maximum unsolicited first
data burst length
Sets the maximum unsolicited first
data burst length
Sets the target name Set
Returns the primary authentication
method
Sets the primary authentication
method
Returns the primary data digest
method
Sets the primary data digest method Set
Returns the primary header digest
method
Sets the primary header digest
method
Returns the requesting markers on
receive
Returns the secondary authentication
method
Show
Set
Show
Set
Show
Show
Set
Show
Show
Value
Value
Value
Value
Value
Value
Value
Value
Value
Value
Value
Value
62 Chapter 5 Supported CLI Commands and Properties
Sets the secondary authentication
method.
Set
Value
Page 73

Property Description
SecondaryDataDigestMethod
SecondaryHeaderDigestMethod
Secret Returns a secret Show
Sessions Lets you access all current sessions Show/Show[ID]/Push[ID]/Select[ID] ContextList
Volume
Returns the secondary data digest
method
Sets the secondary data digest
method
Returns the secondary header digest
method
Sets the secondary header digest
method
Sets the secret Set
Lets you access the associated
volume
Associated Global
Action Commands
Show
Set
Show
Set
Show/Push/Select Context
Return
Parameter
Value
Value
Value
Value
Value
Value
Command Line Interface User’s Guide 63
Page 74

5.15 iSCSISession Properties
iSCSISession properties let you perform activities related to iSCSI sessions such as
accessing current connections and viewing session types and error recovery levels. Table
5-24 provides an alphabetical list of the properties in the iSCSISession context, a
description of the property and the global action commands that can be used with the
command or property, and the return parameter (if any). In Table 5-24, for example,
Connections is used with the global action commands Show, Push, and Select.
Table 5-24. iSCSISession Properties
Property Description
Connections
CurrentConnections Returns the current connections count Show Value
DataPDUInOrder Returns the data PDU in order Show Value
DataSequenceInOrder Returns the data sequence in order Show Value
DefaultTimeToRetain Returns the default time to retain Show Value
DefaultTimeToWait Returns the default time to wait Show Value
EndPointName Returns the end point name Show Value
ErrorRecoveryLevel Returns the error recovery level Show Value
ImmediateData Returns the immediate data value Show Value
InitialR2T Returns the initial R2T value Show Value
Initiator Returns the initiator for this session Show/Push/Select Context
InitiatorGlobalID Returns the global initiator ID Show Value
MaxConnectionsPerSession
Lets you access all the current
connections in this session
Returns the maximum number of
connections per session
Associated Global Action
Commands
Show/Show[ID]/Push[ID]/Select[ID] ContextList
Show Value
Return
Parameter
MaxDataBurstLength Returns the maximum data burst length Show Value
MaxOutstandingR2T Returns the maxoutstandingr2t Show Value
MaxUnsolicitedFirstDataBurstLength
Name Returns the name Show Value
SessionType Returns the session type Show Value
Target Returns the target Show/Push/Select Context
TSIH
64 Chapter 5 Supported CLI Commands and Properties
Returns the maximum unsolicited first
data burst length
Returns the Target Session Handle
(TSIH)
Show Value
Show Value
Page 75

5.16 iSCSIConnection Properties
iSCSIConnection properties let you perform activities related to iSCSI connections such
as accessing a portal and viewing TCP port numbers and connection IDs . Table 5-25 provides
an alphabetical list of the properties in the iSCSIConnection context, a description of the
property and the global action commands that can be used with the command or property,
and the return parameter. In Table 5-25, for example, ActiveiSCSIVersion is used with
the global action command Show.
Table 5-25. iSCSIConnection Properties
Property Description
ActiveiSCSIVersion Returns the active iSCSI version Show Value
AuthenticationMethodUsed Returns the authentication method used Show Value
ConnectionID Returns the connection ID Show Value
DataDigestMethod Returns the data digest method Show Value
HeaderDigestMethod Returns the header digest method Show Value
InstanceID Returns the connection instance ID Show Value
IPv4Address Returns the ipv4address for the connection Show Value
MaxReceiveDataSegmentLength Returns the maximum receive data segment length Show Value
MaxTransmitDataSegmentLength Returns the maximum transmit data segment length Show Value
MutualAuthentication Returns the mutual authentication flag Show Value
Name Returns the connection name Show Value
Portal Lets you access the portal Show/Push/Select Context
ReceivingMarkers Returns the receiving markers Show Value
SendingMarkers Returns the sending markers Show Value
Session Returns the session Show/Push/Select Context
Associated Global
Action Commands
Return Parameter
TcpPortNumber Returns the TCP port number for the connection Show Value
Command Line Interface User’s Guide 65
Page 76
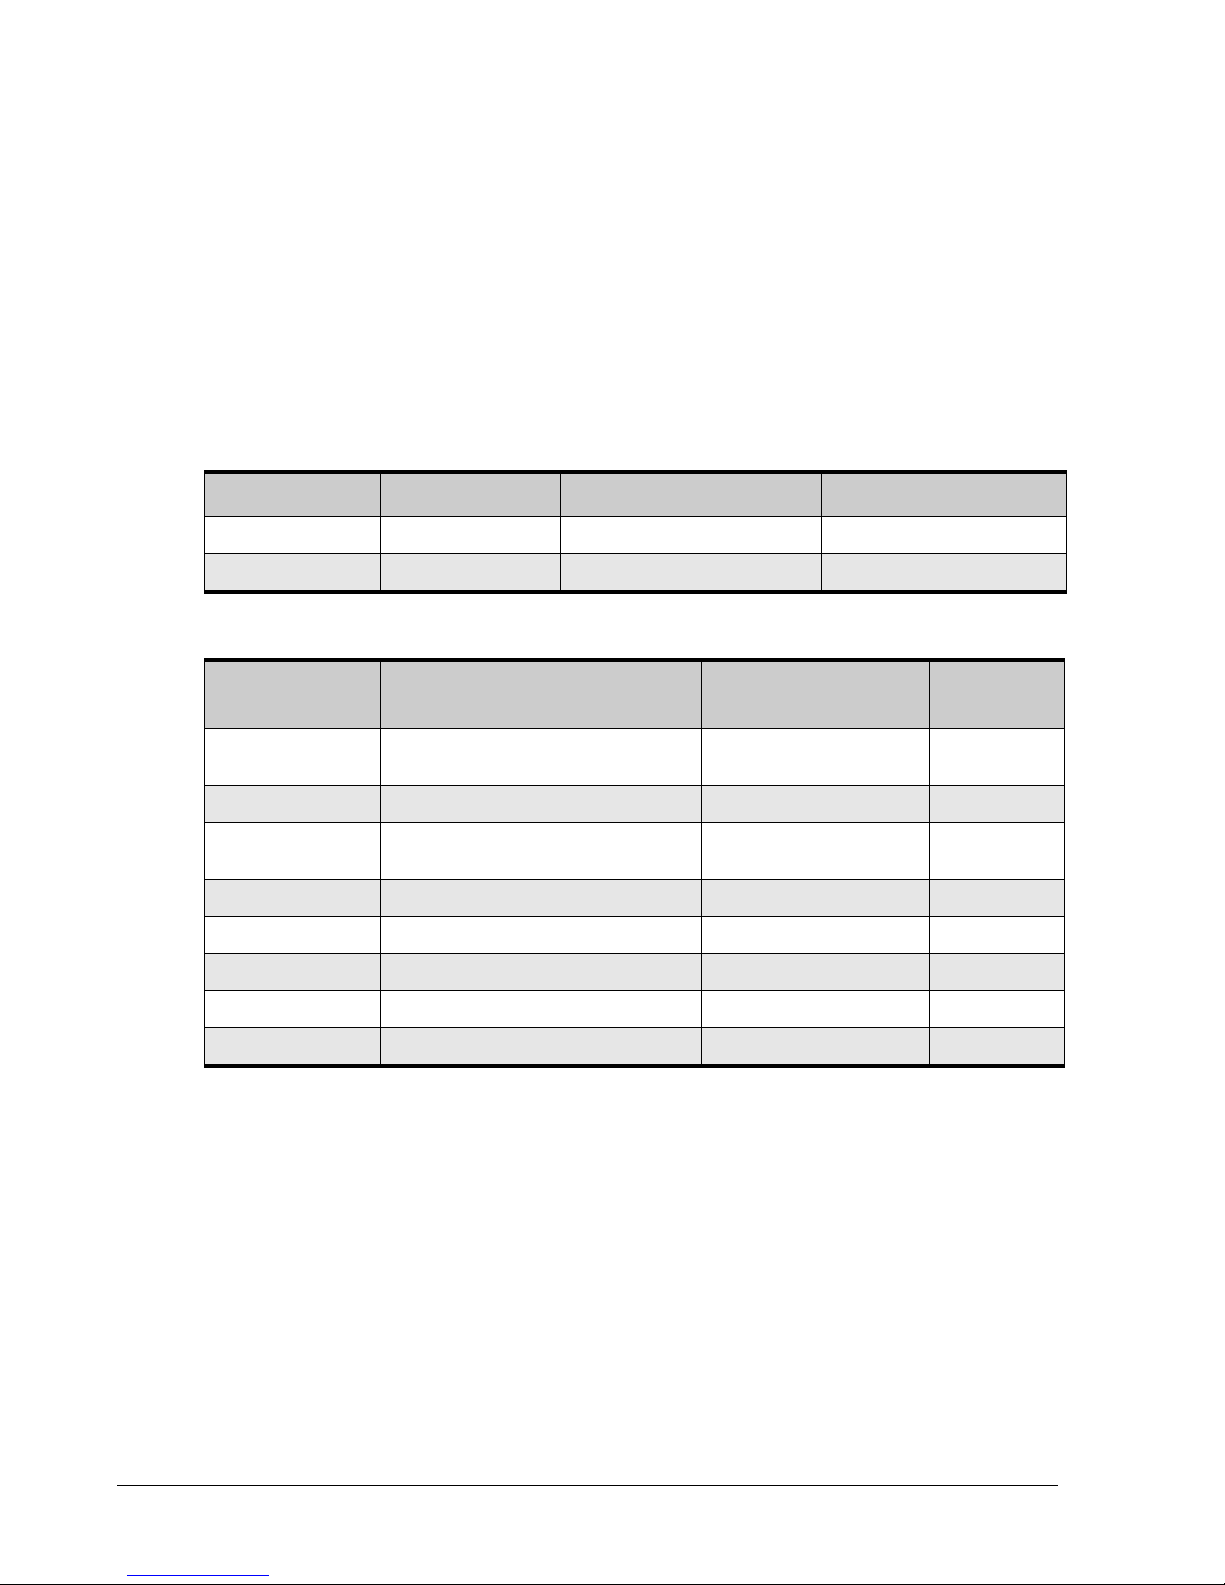
5.17 Portal Commands and Properties
Portal commands and properties let you perform portal-related activities such as returning
a portal’s IP address or ping a port . Table 5-26 provides an alphabetical list of the
commands in the Portal context and Table 5-27 provides an alphabetical list of the
properties in the Portal context. Both tables include a description of the command or
property, the global action commands that can be used with the command or property, and
the return parameter (if any). In Table 5-26, for example, Delete is used with the global
action command Do.
Command Description Associated Global Action Commands Return Parameter
Delete Deletes the portal Do No Return Value
PingRemoteIPAddress Pings another IP address Do Value
Table 5-26. Portal Commands
Table 5-27. Portal Properties
Property Description
Connections
DefaultGateway Lets you access the default gateway for this portal Show Value
DynamicRoutes
IPAddress Returns the IP address of this portal Show Value
LAG Lets you access a LAG Show/Push/Select Context
PortNumber Returns the port number of this portal Show Value
SubnetMask Returns the subnet mask of this portal Show Value
VLANID Returns the VLAN ID of this portal Show Value
Lets you access the array of connections currently
associated with this portal
Lets you access the array of dynamic routing table
entries scoped to this portal
Associated Global
Action Commands
Show/Show[ID]/Push[ID]/Select[ID] ContextList
Show/Show[ID]/Push[ID]/Select[ID] ContextList
Return Parameter
66 Chapter 5 Supported CLI Commands and Properties
Page 77

5.18 Initiator Commands and Properties
Initiator commands and properties let you perform iSCSI initiator-elated activities such
as setting passwords and viewing iSCSI initiator IDs, names, and passwords. Table 5-28 lists
the command in the Initiator context and Table 5-29 provides an alphabetical list of the
properties in the Initiator context. Both tables include a description of the command or
property, the global action commands that can be used with the command or property, and
the return parameter (if any). In Table 5-28, for example, Delete is used with the global
action command Do.
Command Description Associated Global Action Commands Return Parameter
Delete Deletes the Initiator entry in the storage system Do No Return Value
Property Description Associated Global Action Commands Return Parameter
Table 5-28. Initiator Command
Table 5-29. Initiator Properties
GlobalID Returns the global ID Show Value
InitiatorID Returns the initiator ID Show Value
IsAllInitiators
Name Returns the initiator name Show Value
Sessions Lets you access the array sessions Show/Show[ID]/Push[ID]/Select[ID] ContextList
Secret Returns the password for this initiator Show Value
Targets Lets you access the array of targets Show/Show[ID]/Push[ID]/Select[ID] ContextList
Returns the IsAllInitiators flag to
identify the special all-access-allowed
instance
Sets the password Set Value
Show Value
Command Line Interface User’s Guide 67
Page 78

5.19 AdvancedSettings Commands and Properties
AdvancedSettings commands and properties let you set and view advanced settings .
Table 5-30 provides an alphabetical list of the commands in the AdvancedSettings
context and Table 5-31 provides an alphabetical list of the properties in the
AdvancedSettings context. Both tables include a description of the command or
property, the global action commands that can be used with the command or property, and
the return parameter (if any). In Table 5-30, for example,
ResetTcpipUpperLayerCounter is used with the global action command Do.
Table 5-30. AdvancedSettings Commands
Command Description
ForceControllerFailover
ResetTcpipUpperLayerCounter
RestoreToFactoryDefaults
RestoreConfiguration
SaveConfiguration
ForceSystemRestart Forces an orderly system shutdown and restart Do No Return Value
Causes a controller failover to occur when a
bound pair of controllers exists.
Lets you access the Reset TCP/IP Upper Layer
counter
Restores the array to its factory default settings
Paramter: Boolean to include or exclude the
Management Port IP Address as one of the
parameters to be reset to factory defaults
Restores the system configuration from a local
file. Parameters:
filePath: String for the path to the file
onlySameChassis: Boolean to replace the
configuration ONLY if the saved data originated
from the same chassis
Saves the current system configuration to a
local file. Parameters:
filePath: String for the path to the file
Associated Global
Action Commands
Do No Return Value
Do No Return Value
Do No Return Value
Do No Return Value
Do No Return Value
Return Parameter
Table 5-31. AdvancedSettings Properties
Property Description
DefaultBackgroundTaskPriority Returns the default background task priority Show Value
iScsiPortNumber Returns the iSCSI port number Show Value
IsVirginConfiguration
SystemPolicy Lets you access the current battery policy Show/Push/Select Context
68 Chapter 5 Supported CLI Commands and Properties
Associated Global
Action Commands
Sets the default background task priority Set Value
Sets the iSCSI port number Set Value
Indicates whether the configuration is a virgin
configuration
Sets the configuration is a virgin configuration Set Value
Show Value
Return Parameter
Page 79

Property Description
TcpipMaxIpSegmentation
TcpipPmtuEnabled Returns the TCP/IP PMTU Enabled status Show Value
TcpipTimestampEnabled Returns the TCP/IP Timestamp Enabled status Show Value
TcpipTimeToLive Returns the TCP/IP Time To Live status Show
TcpipWindowScale Returns the TCP/IP Window Scale status Show
UserList Lets you access the user list Show/Push/Select Context
DefaultVolumeBlockSizeBytes
Returns the TCP/IP Max IP Segmentation
value
Sets the TCP/IP Max IP Segmentation value Set Value
Sets the TCP/IP PMTU Enabled value Set Value
Sets the TCP/IP Timestamp Enabled value Set Value
Sets the TCP/IP Time To Live value Set
Sets the TCP/IP Window Scale value Set
Sets the default volume blocksize of either 512
bytes or 4096 bytes
Returns the default volume blocksize Show Value
Associated Global
Action Commands
Show Value
Return Parameter
Value
Value
Value
Value
Set Value
5.20 SystemPolicy Properties
SystemPolicy properties let you perform activities related to the array’s battery policy.
Table 5-32 provides an alphabetical list of the properties in the SystemPolicy context,
along with a description of the property the global action commands that can be used with
the property, and the return parameter. In Table 5-32, for example, BatteryPolicy is
used with the global action commands Show and Set.
Property Description Associated Global Action Commands Return Parameter
BatteryPolicy Returns the array battery policy Show Value
Table 5-32. SystemPolicy Properties
Sets the array battery policy Set Value
Command Line Interface User’s Guide 69
Page 80

5.21 ExternalConnectionsManager Properties
ExternalConnectionsManager properties lets you perform management activities
related to external connections such as setting or viewing information email notification
settings and iSNS settings. Table 5-33 provides an alphabetical list of the properties in the
ExternalConnectionsManager context, a description of the property and the global
action commands that can be used with the property, and the return parameter. In Table
5-33, for example, EmailFromAddress is used with the global action commands Show and
Set.
Table 5-33. ExternalConnectionsManager Properties
Property Description
EmailFromAddress Returns the Email From Address value Show Value
Sets the Email From Address value Set Value
EmailNotificationEnabled Returns whether email notification is enabled Show Value
Sets the email notification enabled setting Set Value
EmailPassword Returns the email password Show Value
Sets the email password Set Value
EmailServerIPAddress Returns the email server IP address Show Value
Sets the email server IP address Set Value
EmailServerPortNumber Returns the email port number Show Value
Sets the email port number Set Value
EmailToAddress Returns the address where emails are to be sent Show Value
Sets the address where emails are to be sent Set Value
EmailUsername Returns the username to whom emails are to be sent Show Value
Sets the username to whom emails are to be sent Set Value
iSNSHeartbeatIpAddress Returns the iSNS Heartbeat IP address Set Value
Sets the iSNS Heartbeat IP address Show Value
iSNSHeartbeatEnabled Returns the iSNS Heartbeat Enabled value Show Value
Sets the iSNS Heartbeat Enabled value Set Value
iSNSHeartbeatSubnetMask Returns the iSNS Heartbeat subnet mask Show Value
Sets the iSNS Heartbeat subnet mask Set Value
iSNSServerIpAddress Returns the iSNS server IP address Show Value
Sets the iSNS server IP address Set Value
iSNSServerPortNumber Returns the iSNS server port number Show Value
Sets the iSNS server port number Set Value
iSNSServerSubnetMask Returns the iSNS server subnet mask Show Value
Sets the iSNS server subnet mask Set Value
NTPServerIPAddress Returns the NTP server IP address Show Value
Sets the NTP server IP address Set Value
Associated Global
Action Commands
Return Parameter
70 Chapter 5 Supported CLI Commands and Properties
Page 81

Property Description
SNMPNotificationEnabled Returns whether SNMP Trap notification is enabled Show Value
Sets the SNMP Trap notification enabled setting Set Value
SNMPClientCommunityString Returns the SNMP Client Community String Show Value
Sets the SNMP Client Community String Set Value
SNMPClientIPAddress Returns the SNMP Client IP Address Show Value
Sets the SNMP Client IP Address Set Value
SNMPClientPortNumber Returns the SNMP Client Port Number Show Value
Sets the SNMP Client Port Number Set Value
5.22 SystemStatistics Properties
SystemStatistics properties let you access the system statistics for an array. Table 5-34
provides an alphabetical list of the properties in the SystemStatistics context, a
description of the property and the global action commands that can be used with the
property, and the return parameter. In Table 5-34, for example, InitiatorsActiveCount
is used with the global action command Show.
Associated Global
Action Commands
Return Parameter
Table 5-34. SystemStatistics Properties
Property Description
InitiatorsActiveCount Returns the number of active iSCSI initiators Show
InitiatorsCount Returns the number of iSCSI initiators Show
StoragePerformance Returns storage performance information Show
StorageRedundancy Returns storage redundancy information Show
StorageUtilization Returns storage utilization information Show
TotalStorageCapacity Returns the total storage capacity Show
TotalAvailableCapacity Returns the total available capacity Show
TargetsWithoutInitiatorsCount
VolumeCount Returns the number of volumes Show
VolumesWithoutAccessCount
Returns the number of targets that do not have iSCSI
initiators
Returns the number of volumes that do not have
access
Associated Global
Action Commands
Show
Show
Return Parameter
Value
Value
Value
Value
Value
Value
Value
Value
Value
Value
Command Line Interface User’s Guide 71
Page 82
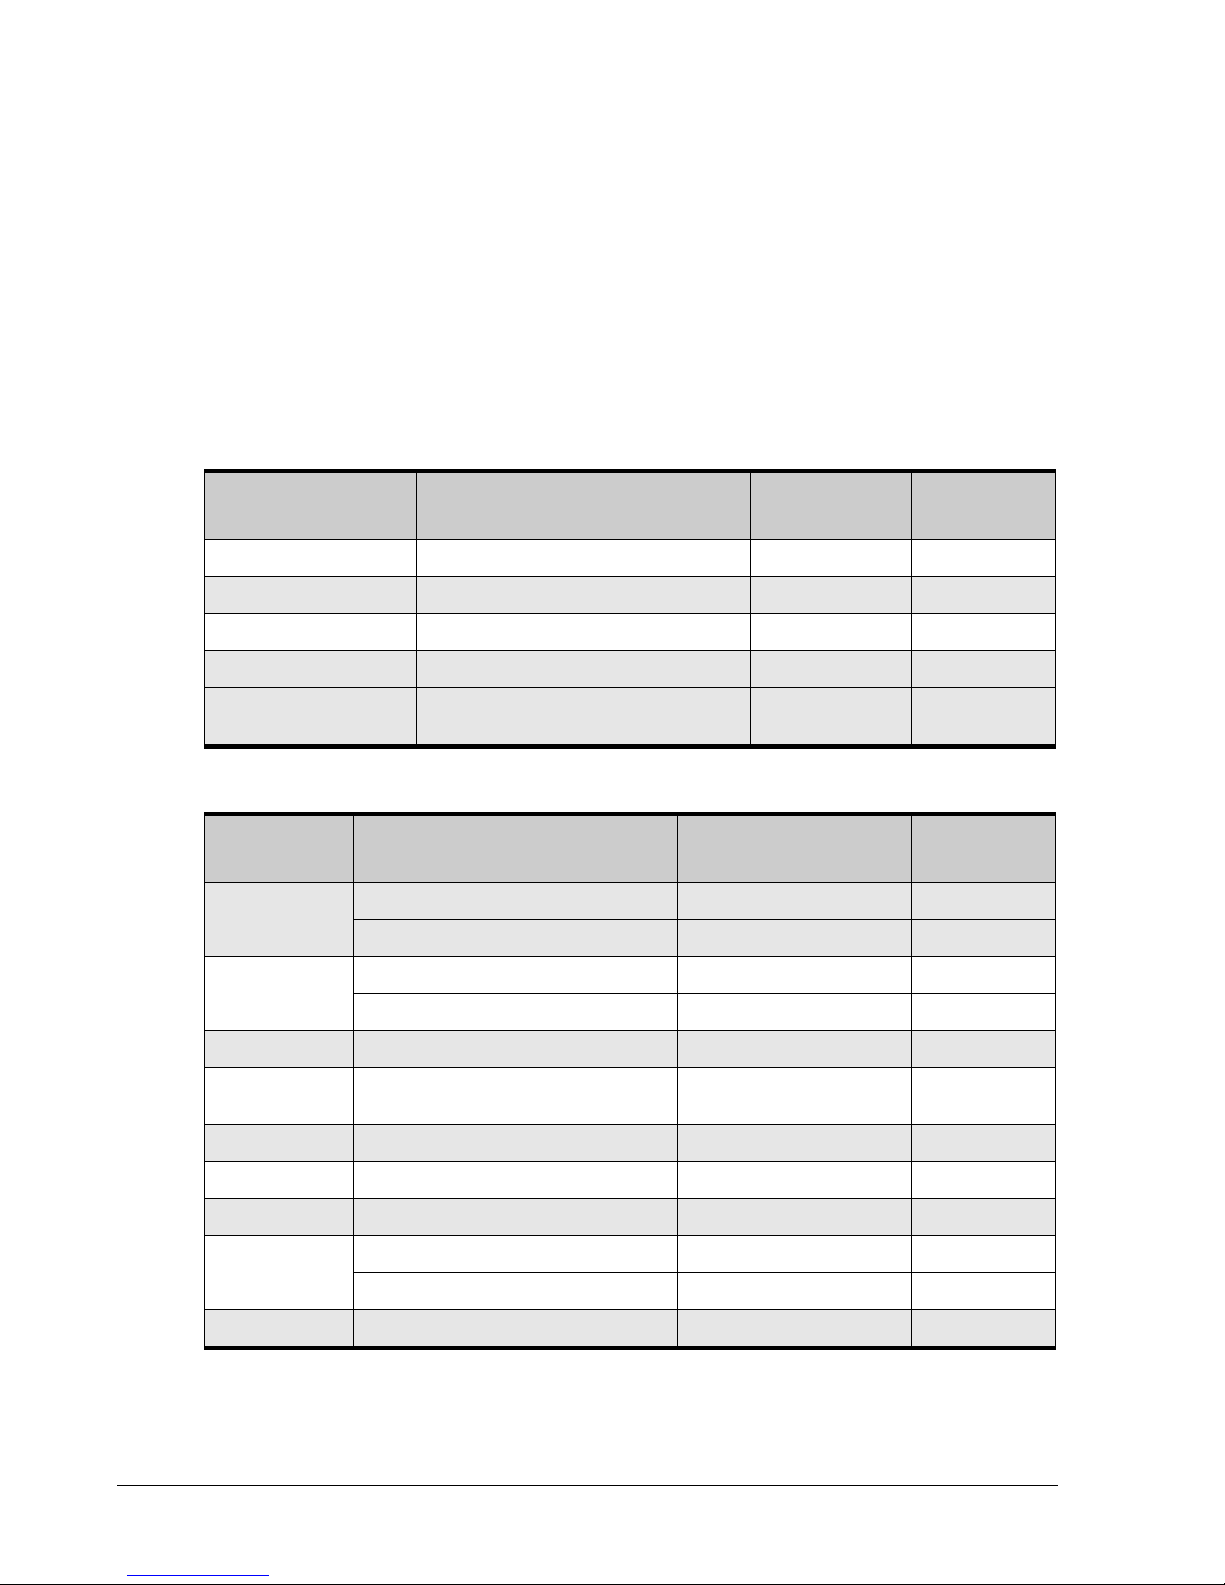
5.23 LAG Commands and Properties
LAG commands and properties let you perform LAG-related activities, such as creating,
disabling, and deleting a portal. Table 5-35 provides an alphabetical list of the commands in
the LAG context and Table 5-36 provides an alphabetical list of the properties in the LAG
context. Both tables include a description of the command or property, global action
commands that can be used with the command or property, and the return parameter (if
any). In Table 5-35, for example, CreatePortal is used with the global action commands
Do, Push, and Select.
Table 5-35. LAG Commands
Command Description
CreatePortal Creates a portal Do/Push/Select Context
Delete Deletes the LAG Do No Return Value
Disable Disables the LAG Do No Return Value
Enable Enables the LAG Do No Return Value
ReplaceLAGandChangeVLAN
Changes the VLAN Enabled flag by delete and
recreate
Associated Global
Action Commands
Do No Return Value
Return Parameter
Table 5-36. LAG Properties
Property Description
ActiveMTU Returns the Active Maximum Transmission Unit Show
Sets the Active Maximum Transmission Unit Set
AutoSense Returns the AutoSense value in Boolean notation Show
Sets the AutoSense value in Boolean notation Set
FrameType Returns the Frame Type Show
Associated Global
Action Commands
Return Parameter
Value
Value
Value
Value
Value
IsEnabled
MACAddress Returns the LAG’s MAC address Show
Portals Lets you access the array of portals Show/Show[ID]/Push[ID]/Select[ID] ContextList
Ports Lets you access the array physical ports in the LAG Show/Show[ID]/Push[ID]/Select[ID] ContextList
RequestedSpeed Returns the Requested Speed Show
VLANState Returns the VLAN state Show
Returns the administrative enabled/disabled state in
Boolean notation
Sets the requested speed Set
72 Chapter 5 Supported CLI Commands and Properties
Show
Value
Value
Value
Value
Value
Page 83

5.24 ManagementPort Commands and Properties
ManagementPort commands and properties let you perform activities related to an array’s
management port, such as viewing or setting the management port’s IP address or
hostname. Table 5-37 provides an alphabetical list of the command in the ManagementPort
context and Table 5-38 provides an alphabetical list of the properties in the
ManagementPort context. Both tables include a description of the command or property,
the global action commands that can be used with the command or property, and the return
parameter. In Table 5-37, for example, PingRemoteIPAddress is used with the global
action command Do.
Table 5-37. ManagementPort Command
Command Description Associated Global Action Commands Return Parameter
PingRemoteIPAddress Pings another IP address Do Value
Table 5-38. ManagementPort Properties
Property Description
BroadcastIpAddress
DynamicRoutes
Gateway
Gateway
HostName Returns the system’s hostname Show
HostName Sets the system hostname Set
IPAddress
IPAddress
SubnetMask
SubnetMask
Returns the system’s management
broadcast IP address
Lets you access the array dynamic
routing table entries scoped to this port
Returns the system’s management
gateway IP address
Sets the system’s management gateway
IP address
Returns the system’s management IP
address
Sets the system’s management IP
address
Returns the system’s management
subnet mask
Sets the system’s management subnet
mask
Show Value
Show/Show[ID]/Push[ID]/Select[ID] ContextList
Show
Set
Show
Set
Show
Set
Associated Global
Action Commands
Return Parameter
Value
Value
Value
Value
Value
Value
Value
Value
Command Line Interface User’s Guide 73
Page 84

5.25 NetworkRoute Commands and Properties
NetworkRoute commands and properties let you perform tasks related to network routes,
such as returning a route’s destination IP address or values that indicate whether a network
route is dynamic or usable. Table 5-39 lists the command in the NetworkRoute context and
Table 5-40 provides an alphabetical list of the properties in the NetworkRoute context.
Both tables include a description of the command or property, the global action commands
that can be used with the command or property, and the return parameter (if any). In Table
5-39, for example, Delete is used with the global action command Do.
Table 5-39. NetworkRoute Command
Command Description Associated Global Action Commands Return Parameter
Delete Deletes the route entry Do No Return Value
Table 5-40. NetworkRoute Properties
Property Description
DestinationIpAddress Returns the destination IP address for this route entry Show
DestinationIsGateway
DestinationSubnetMask
InterfaceName Returns the interface name for this route entry Show
IsDynamic
IsHost Returns the Is host Boolean value for this route entry Show
IsInitialRoundTripTime
IsModified
IsRouteUsable
IsSpecificMTU
IsWindowClamping
Returns the destination is gateway Boolean value for
this route entry
Returns the destination subnet mask for this route
entry
Returns the Is Dynamic Boolean value for this route
entry
Returns the Is Initial Round Trip Time Boolean value
for this route entry
Returns the Is Modified Boolean value for this route
entry
Returns the Is Route Usable Boolean value for this
route entry
Returns the Is Specific MTU Boolean value for this
route entry
Returns the Is Window Clamping Boolean value for
this route entry
Associated Global
Action Commands
Show
Show
Show
Show
Show
Show
Show
Show
Return Parameter
Value
Value
Value
Value
Value
Value
Value
Value
Value
Value
Value
NextHopIpAddress Returns the Next Hop IP Address for this route entry Show
NumberOfHopsToDestination
Reinstate
RouteIsRejected
74 Chapter 5 Supported CLI Commands and Properties
Returns the Number of Hops to destination for this
route entry
Returns the Reinstate Boolean value for this route
entry
Returns the Route Is Rejected Boolean value for this
route entry
Show
Show
Show
Value
Value
Value
Value
Page 85

Property Description
RouteIsStatic
Returns the Route Is Static Boolean value for this route
entry
5.26 ServicePool Commands and Properties
ServicePool commands and properties let you perform tasks related to pools of disks,
such as accessing disks in a pool or obtaining the name of a pool. Table 5-41 lists the
command in the ServicePool context and Table 5-42 provides an alphabetical list of the
properties in the ServicePool context. Both tables include a description of the command
or property, the global action commands that can be used with the command or property,
and the return parameter (if any). In Table 5-41, for example, CreateVolume is used with
the global action commands Do, Push, and Select.
Table 5-41. ServicePool Commands
Command Description Associated Global Action Commands Return Parameter
CreateVolume Creates a volume Do/Push/Select No Return Value
GetMaxVolumeSize Obtains the maximum volume size Do
Associated Global
Action Commands
Show
Value
Return Parameter
Value
Table 5-42. ServicePool Properties
Property Description Associated Global Action Commands Return Parameter
Disks
PoolName Obtains the pool name Show
PoolType Obtains the pool type Show
Lets you access the disks in a
pool
Show/Show[ID]/Push[ID]/Select[ID])
Value
Value
Value
Command Line Interface User’s Guide 75
Page 86

This Page Left Intentionally Blank
76 Chapter 5 Supported CLI Commands and Properties
Page 87

Chapter 6 Application Examples
This chapter provides examples of entering CLI commands on a command line. In these
examples, bold text indicates commands typed by the user.
The topics covered in this chapter are:
Section 6.1, Setting the Name of the System (page 78)
Section 6.2, Creating Volumes (page 78)
Section 6.3, Obtaining the Maximum Size of a Volume (page 79)
Section 6.4, Obtaining the Maximum Stripe Width of a Volume (page 79)
Section 6.5, Adding an iSCSI Initiator (page 80)
Section 6.6, Obtaining a Vector of All Controllers on a System (page 80)
Section 6.7, Restarting the System (page 81)
Section 6.8, Shutting Down the System (page 81)
Section 6.9, Showing the Status of a Controller (page 81)
Section 6.10, Navigating and Displaying System, Volume, and Drive Information (page 82)
Command Line Interface User’s Guide 77
Page 88

6.1 Setting the Name of the System
The following example sets the name of the system to Garnet. Systems are named from the
System context.
192.168.59.25 :: Set Name Garnet
6.2 Creating Volumes
The following sections show examples of creating volumes. Volumes are created from the
System context.
Example 1
The following examples are functionally identical. Both examples create a volume called
CAD that is 30,000,000 bytes (30 MB) in size and whose volume composition is mirror.
Example 2
Example 3
192.168.59.25 :: Do CreateVolume CAD 30MB mirror
192.168.59.25 :: CreateVolume CAD 30MB mirror
The following example creates a volume named Exchange that is 150 GBytes in size; has a
volume composition of parity; is created on disks 0, 1, 2, and 3; and has a stripe width of 4
and a stripe depth of 512 KB.
192.168.59.25 :: Do CreateVolume Exchange 150GB parity [0,1,2,3] 4 512KB
The following example creates a volume called resumes that is 500 GB in size and has a
volume composition of jbod.
192.168.59.25 :: Do CreateVolume resumes 500GB jbod
78 Chapter 6 Application Examples
Page 89

Example 4
The following command lines show examples of creating volumes. The first line creates one
4-wide Parity volume with a 512KB stripeDepth (chunk-size). The second command line
creates one JBOD volume.
192.168.59.25 :: createVolume my_parity_volume 10GB parity [0,1,2,3] 4 512KB
192.168.59.25 :: createVolume myjbodvolume 5GB jbod
6.3 Obtaining the Maximum Size of a Volume
The following example displays the maximum size of a volume called Exchange that:
Has a volume composition of parity.
Is created on disks 0, 1, 2, and 3.
Has a stripe width of 4 and a stripe depth of 512 KB.
192.168.59.25 :: Do GetMaxVolumeSize parity [0,1,2,3] 4 512kb
6.4 Obtaining the Maximum Stripe Width of a Volume
Example 1
The following example displays the maximum stripe width supported for a JBOD.
192.168.59.25 :: Do GetMaxVolumeStripeWidth JBOD
Example 2
The following example displays the maximum stripe width supported for a mirror
configuration.
192.168.59.25 :: Do GetMaxVolumeStripeWidth Mirror
Command Line Interface User’s Guide 79
Page 90

Example 3
The following example displays the maximum stripe width supported for a stripe mirror
configuration.
192.168.59.25 :: Do GetMaxVolumeStripeWidth StripeMirror
Example 4
The following example displays the maximum stripe width supported for a parity
configuration.
192.168.59.25 :: Do GetMaxVolumeStripeWidth Parity
6.5 Adding an iSCSI Initiator
The following example adds the iSCSI initiator named below as a known iSCSI initiator to the
system. iSCSI initiators are added from the System context.
192.168.59.25 :: Do AddInitiator iqn.1991-05.com.microsoft:hostname.domain.com
6.6 Obtaining a Vector of All Controllers on a System
The following example obtain a vector of all controllers in the system. This command is
issued from the System context.
192.168.59.25 :: Show Controllers
Controllers:
controllers = Controller[A], Status=OK, SlotNumber=0
Summary = 1 Controllers
80 Chapter 6 Application Examples
Page 91

6.7 Restarting the System
The following examples are functionally identical. Both examples restart the system. You
restart a system from the System context.
192.168.59.25 :: Do SystemRestart
192.168.59.25 :: SystemRestart
6.8 Shutting Down the System
The following example shuts down the system. You shut down a system from the System
context.
192.168.59.25 :: Do SystemShutdown
6.9 Showing the Status of a Controller
The following example shows how to display the status of a controller A. In addition to the
controller’s name (ID) and status, the following information is returned:
The number of ports on the controller
The IP address and status of the controller’s management port
The number of lAGs (if any) configured on the controller
The slot number, serial number, number of drive slots, and display name for the
controller
The current software version running on the controller and the version number of any
alternate software version configured for the controller
The board type and controller status description (if any)
The number of disks that make up the base pool
Showing controller status is performed from the Controller context.
Command Line Interface User’s Guide 81
Page 92

Controller[A] :: show
ID = A
Status = OK
IsActive = true
SlotNumber = 0
SerialNumber = 00001
DriveSlots = 12
NumFrontPorts = 8
DisplayName = Blade A
SoftwareVersion = 2.5.1.21
IsAlternateSoftwareVersionPresent = true
AlternateSoftwareVersion = 2.5.1.21
BoardType = 0009
BoardTypeRevision = XC05
I8kHwVersion = 1.0.0.0
I8kSwVersion = 0.1.0.0
MpuSwVersion = 2.5.1.21
BindFailReason = Bind_OK
BladeHealth = Healthy
BladeState = Bound
BladeType = SFF
PersistenceSetting = Unchanged
BatteryState = Failed
BufferMemDimmCnt = 2
BufferMemSize = 2048
SystemMemDimmCnt = 2
SystemMemSize = 512
SystemTime = 13:18:27
Ports = 8 Ports
LAGs = 8 LAGs
ManagementPort = ManagementPort [192.168.59.25], Status=OK
BasePool = [BaseA], 2 disks
The information shown to the left of the equals sign in the example above
are themselves commands that can be issued from the Controller context
if you want to view a particular setting only. For example, to return the
number of drive slots for the current controller, type show driveSlots.
6.10 Navigating and Displaying System, Volume, and Drive Information
The following example shows how to display system, volume, and drive information while
navigating through the CLI hierarchy.
192.168.59.25 :: show
ID = 192.168.56.134
Status = OK
Controllers = 1 Controllers
DiskList = 4 disks
PoolList = 4 pools
VolumeList = 2 volumes
TaskList = 9 tasks
iSCSI = 1 initiators, 2 targets, 4 ports, 1 portals
82 Chapter 6 Application Examples
Page 93

ExternalConnectionsManager = ExternalConnectionsManager
Name =
Identity = 192.168.56.134
AdvancedSettings = AdvancedSettings
SystemStatistics = SystemStatistics [0], Status=OK
IsHighAvailabilitySystem = false
192.168.59.25 :: select volumelist
VolumeList :: show
ID = 0
Status = OK
Volumes = 2 Volumes
VolumeList :: show volumes
Volumes:
volumes = [my_volume], State=Normal, Composition=Parity, Size=10.00GB
volumes = [mark1], State=Normal, Composition=JBOD, Size=5.00GB
Summary = 2 Volumes
VolumeList :: select volumes[my_volume]
Volume[my_volume] :: show
ID = my_volume
Status = OK
VolumeComposition = 4 extents
IsReconfiguring = false
Target = [my_volume], durableName=iqn.2000-03.com.D-Link:mynewvolume:6-001215-
00c000006-484daa3e3a95a6c1, sessionCount=0
Initiators = 0 Initiators
Tasks = 1 Tasks
Name = my_volume
State = Normal
DurableName = 600121500C000006484DAA3E3A95A6C1
CompositionName = Parity
NSPOF = true
Size = 10,736,369,664
StripeWidth = 4
StripeDepth = 524288
IsReadOnly = false
IsSyncCacheDisabled = false
Volume[my_volume] :: pop
192.168.59.25 :: show disklist
ID = 0
Status = OK
Disks = 4 Disks
192.168.59.25 :: select diskList
DiskList :: show disks
Disks:
disks = [0], Status=OK, State=Normal, Capacity=233.76GB, Free=230.09GB
disks = [1], Status=OK, State=Normal, Capacity=233.76GB, Free=230.09GB
disks = [2], Status=OK, State=Normal, Capacity=233.76GB, Free=230.09GB
disks = [3], Status=OK, State=Normal, Capacity=233.76GB, Free=230.09GB
Summary = 4 Disks
DiskList :: select disks[0]
Disk[0] :: show
ID = 0
Status = OK
Extents = 2 Extents
Tasks = 0 Tasks
FreeSpaceSize = 247,053,688,832
Pool = [BaseA], 4 disks
State = Normal
DriveType = SATA
PhysicalCapacity = 251,000,193,024
Command Line Interface User’s Guide 83
Page 94

SerialNumber = Y65N42TE
SASChannelNumber = 0
EnclosureNumber = 0
SlotNumber = 0
DriveNumber = 0
Vendor =
VendorModel = Maxtor 7Y250M0
ATAVersion = 7
ActualLinkSpeed = 0
SupportedLinkSpeeds = 0 SupportedLinkSpeeds
SATAQueueingSupport = ENABLED
SATAQueueDepth = 32
Supports48BitAddress = true
SMARTData = SMARTData [0], Status=OK
84 Chapter 6 Application Examples
Page 95

Index
A
Abbreviating commands · 20
AdvancedSettings commands and properties ·
68
Application examples · 77
C
CLI
context-specificcommands · 20
enumerators · 6
exiting · 18
getting help · 28
global action commands · 20, 34
installing · 8
members · 6
removing · 18
starting · 14
supported operating systems · 8
syntax · 27
CLI operating modes
completion code mode · 25
echo command mode · 26
exit script on error mode · 26
indication mode · 24
output mode · 23
overview · 22
stream mode · 25
Commands
abbreviating · 20
and properties · 47
concatenating · 21
context-specific · 20
editing · 21
global action · 20, 34
Commands and properties
AdvancedSettings · 68
Controller · 50
Disk · 54
DiskList · 53
Extent · 57
ExternalConnectionsManager · 70
Initiator · 67
iSCSI · 60
iSCSIConnection · 65
iSCSISession · 64
iSCSITarget · 61
LAG · 72
ManagementPort · 73
NetworkRoute · 74
PhysicalPort · 52
PoolList · 53
Portal · 66
ServicePool · 75
System · 48
SystemPolicy · 69
SystemStatistics · 71
Task · 59
TaskList · 58
Volume · 55
VolumeComposition · 57
VolumeList · 55
Completion code mode · 25
Concatenating commands · 21
Context-specific commands · 20
Controller commands and properties · 50
D
Disk commands and properties · 54
DiskList commands and properties · 53
Do command · 35
E
Echo command · 36
Echo command mode · 26
Editing commands · 21
Enumerators · 6
Environment variables, substituting · 31
Examples of applications · 77
Execute command · 36
Exit command · 37
Exit script on error mode · 26
Exiting the CLI · 18
Extent commands and properties · 57
ExternalConnectionsManager commands and
properties · 70
G
Global action commands · 20, 34
Do · 35
Echo · 36
Execute · 36
Exit · 37
Help · 37
List · 38
Mode · 38
Pop · 40
Command Line Interface User’s Guide 85
Page 96

Push · 40
RequireArgs · 41
Select · 42
Set · 43
ShiftArgs · 43
Show · 44
System · 45
H
Help command · 37
Help with CLI · 28
I
Indication mode · 24, 25
Initiator commands and properties · 67
Installing the CLI · 8
iSCSI commands and properties · 60
iSCSIConnection commands and properties · 65
iSCSISession commands and properties · 64
iSCSITarget commands and properties · 61
K
Keywords · 6
L
LAG commands and properties · 72
List command · 38
P
PhysicalPort commands and properties · 52
PoolList commands and properties · 53
Pop command · 40
Portal commands and properties · 66
Push command · 40
R
Referencing root items · 21
Removing the CLI · 18
RequireArgs command · 41
Root items, referencing · 21
S
Select command · 42
ServicePool commands and properties · 75
Set command · 43
ShiftArgs command · 43
Show command · 44
Special keywords · 6
Starting the CLI · 14
Substituting environment variables · 31
Supported operating systems · 8
Syntax of CLI · 27
System command · 45
System commands and properties · 48
SystemPolicy commands and properties · 69
SystemStatistics commands and properties · 71
M
ManagementPort commands and properties · 73
Members · 6
Mode command · 38
N
NetworkRoute commands and properties · 74
O
Operating modes · 22
completion code · 25
eco command · 26
exit script on error · 26
indication · 24
output · 23
stream · 25
Operating systems · 8
Output mode · 23
Formatted XML · 24
normal · 23
XML · 23
T
Task commands and properties · 59
TaskList commands and properties · 58
V
Volume commands and properties · 55
VolumeComposition commands and properties ·
57
VolumeList commands and properties · 55
86 Index
Page 97

 Loading...