

Page 1
Firmware Installation Guide: D-Link DI-524UP
Time required: 10 minutes
The instructions below outline how to update the firmware on a D-Link DI-524UP Wi-Fi router. By updating the
firmware, the router will have the option to become a Tomizone Wi-Fi Hotspot. IMPORTANT: You must have
downloaded the latest DI-524UP firmware from http://www.tomizone.com/downloads to your computer.
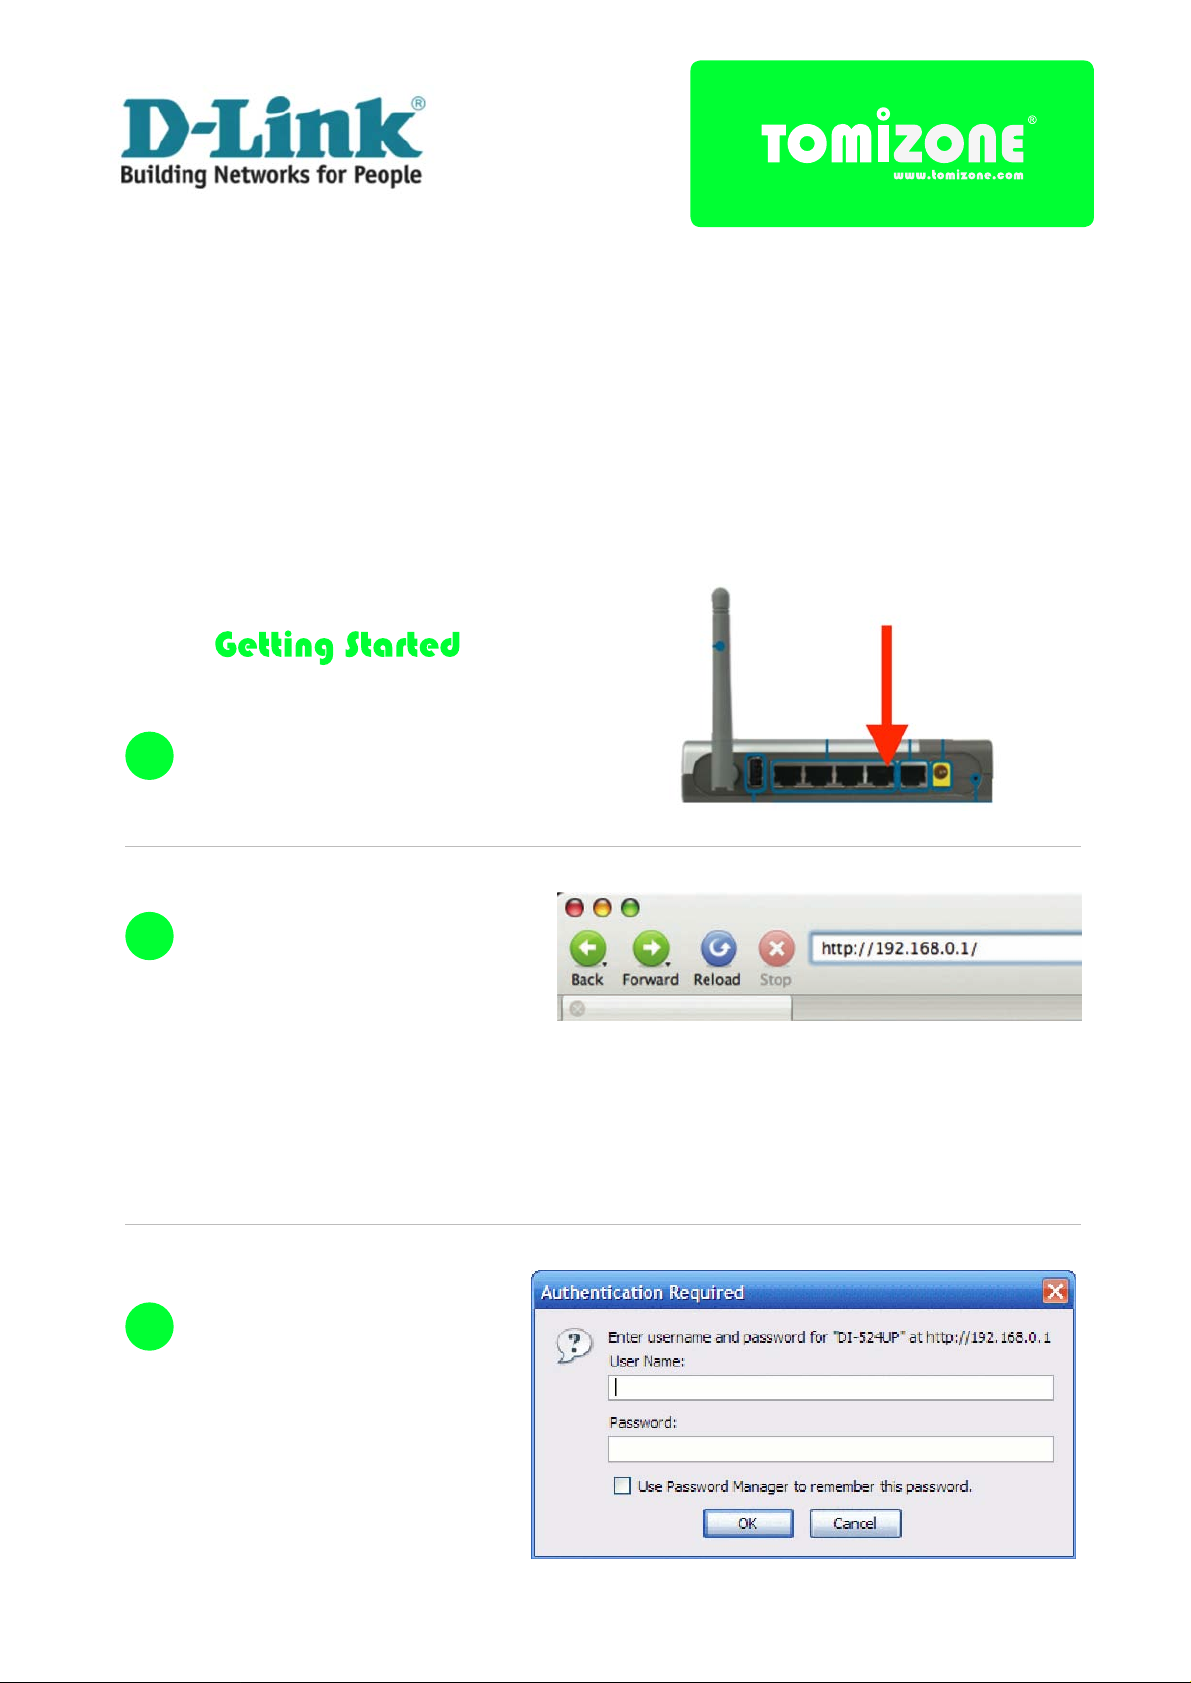
STEP
1
STEP
2
STEP
3
Connect an Network / Ethernet cable
from your computer to LAN Port 1 on
your Wi-Fi router.
Open your browser and type
http://192.168.0.1/ into the address bar.
Note if you have changed the LAN
address of your router from its default
value, you will need to put in the
appropriate address here.
If you find the default doesn't work but
you don't know what the right value is,
check your network settings and try the
IP address of your "default gateway".
Log in using the admin password of
your router (the user name default
is “admin” with no password).
Page 2
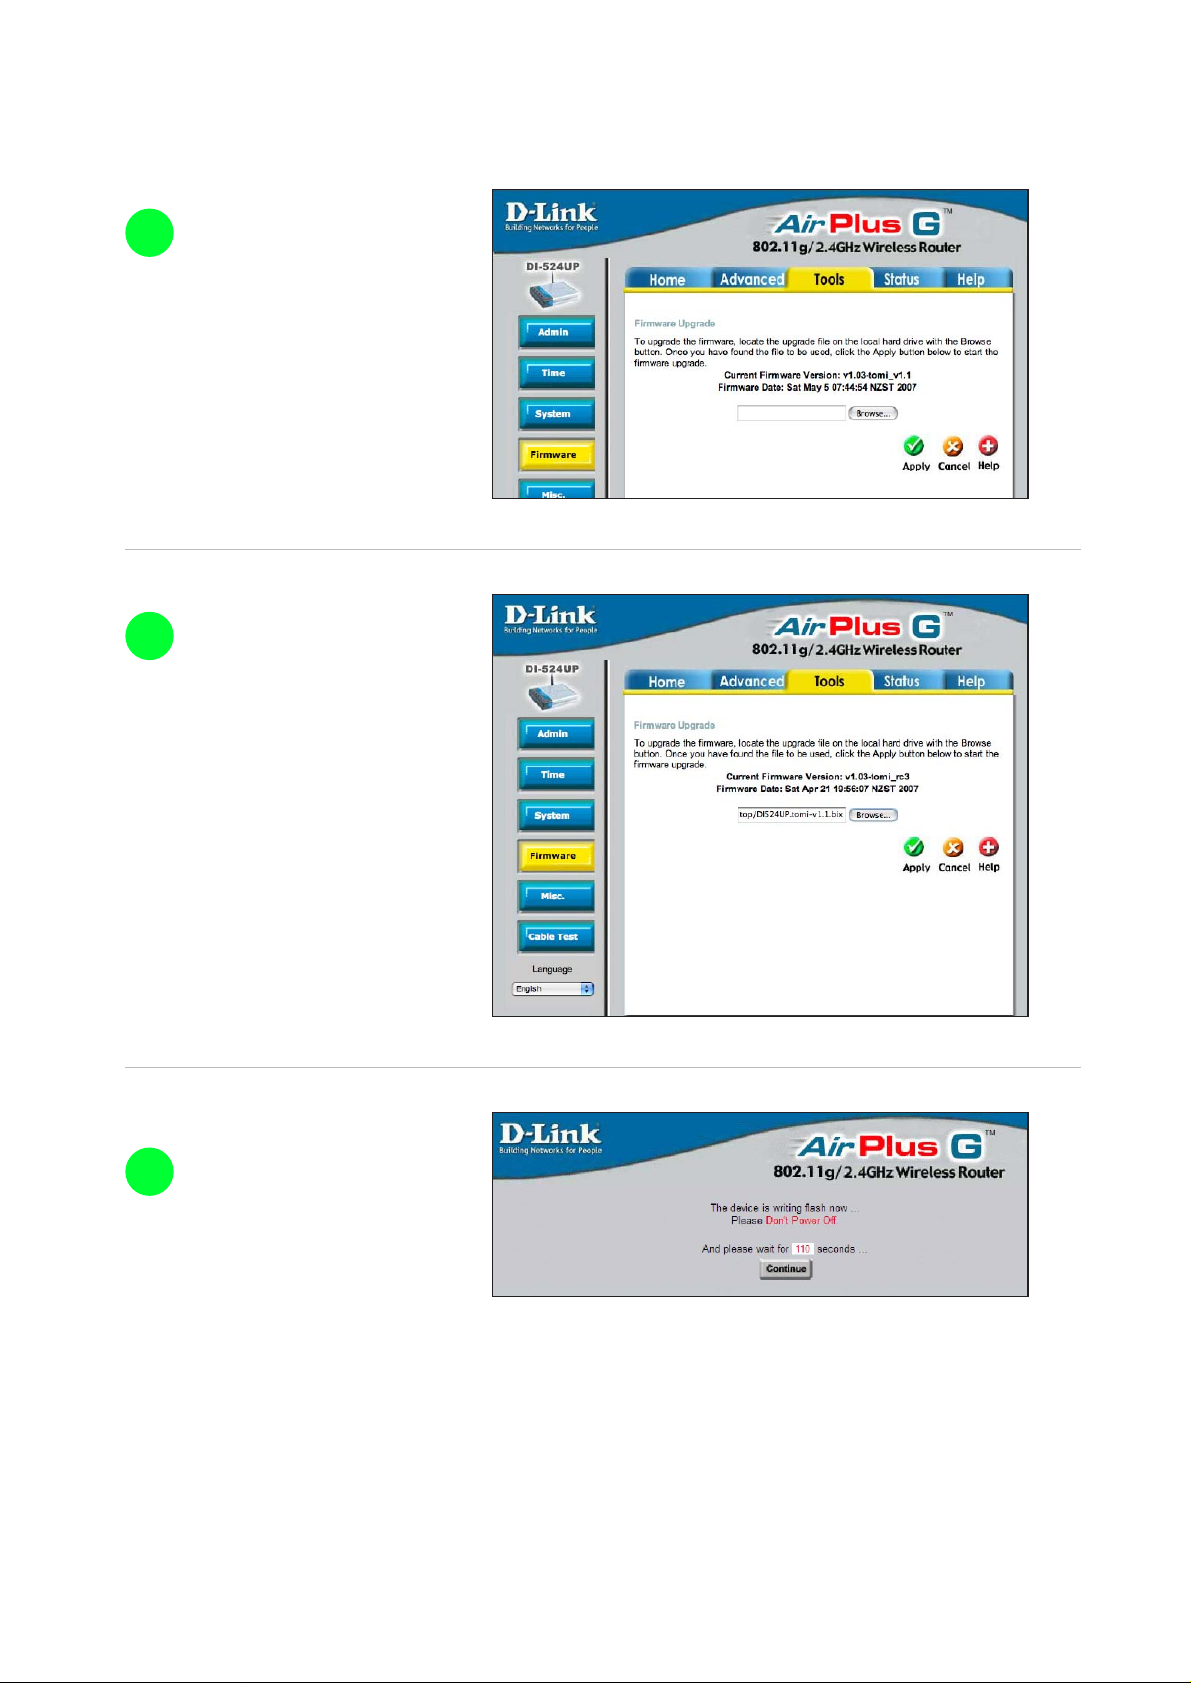
STEP
4
Click on the "Tools" tab, then
on the "Firmware" button.
STEP
5
STEP
6
Click on the "Browse" button
and select the file containing
the new firmware from the
folder you saved it in.
Click the "Apply” button and wait
for the counter to get to zero.
DO NOT unplug the router until
the counter reaches zero!
Usually when the counter reaches
zero, you will need to unplug the
power to the router and plug it
back in again (This is perfectly
safe to do, once the counter has
reached zero. – then go to step
2 and log back into the router and
continue with step 7 below).
Page 3

STEP
7
Click on the "Tools" tab, then on the
"Firmware" button. You should see
that the "Current Firmware V ersion"
corresponds to the one you
downloaded. Look at the part of
the version after the word "tomi".
THIS IS IMPORTANT TO ENSURE
YOU HAVE THE LATEST VERSION
OF FIRMWARE UPLOADED INTO
YOUR ROUTER.
STEP
8
STEP
9
Click on the “Home” tab to see this
screen. You should see a “Tomizone”
button on the left panel.
MAKE SURE YOUR ROUTER IS
CONNECTED TO THE INTERNET
VIA THE “WAN” PORT INTO
YOUR ADSL BROADBAND OR
CABLE ROUTER
Click on the “T omizone” tab on the
left to see this screen. Ensure that
the “Tomizone Wireless Hotspot”
is enabled. Nominate the SSID
name of your hotspot (you might
put in your city name or simply
leave it as “Hotspot”). Choose
which LAN port you wish to have
as a “Tomizone Port” – this will act
the same way as the wireless
system when ticked.
In this screen shot, you can see
LAN port 3 & 4 have been activated
as Tomizone Ports. CONFIRM
CHANGES BY CLICKING THE
GREEN “APPLY” BUTTON –
Now click on the “Activate” button,
which will allow you to assign this
router to your Tomizone account.
Page 4

STEP
10
To assign this router to your
Tomizone account, log in using
your Tomizone account name and
password (if you don’t have and
account, you can instantly create
one here by clicking “sign up now”
- MAKE SURE YOU REMEMBER
YOUR USER NAME AND
PASSWORD).
STEP
11
Ensure “Enable Tomizone Wireless”
box is ticked and set a name for your
Tomizone (you might put in your
cityOnce logged in, you will be asked
to enter the address and other details
of your Tomizone router so people
can locate it. Once completed, follow
the instructions to join the Wi-Fi router
to the Tomizone network.
IF YOU HAVE BEEN GIVEN AN
AFFILIATE CODE FROM YOUR
PROVIDER OR RET AILER, ENTER IT
ON THIS SCREEN AS REQUESTED.
After filling out the details and clicking
“Activate”, follow the instructions to
power “off” and “on” the router for a
few seconds to activate the hotspot.
ONCE ACTIVATED, YOU SHOULD
BE ABLE TO SEE THE TOMIZONE
ID IN THE WIRELESS CONNECTION
SETTINGS OF YOUR COMPUTER.
OPEN YOUR WEB BROWSER AND
YOU SHOULD GET A WELCOME
SCREEN FROM YOUR HOTSPOT.
LOG IN WITH YOUR ACCOUNT AND
START ENJOYING FREE ACCESS
ON YOUR HOTSPOT. OTHER
PEOPLE HAVE TO PAY. name or
simply put in Hotspot, the choice
is yours).
Click “Next” when done.
 Loading...