

Page 1
Quick Installation Guide
Firewall
This document will guide you through the basic
installation process for your new D-Link rewall.
DFL-870
Quick Installation Guide
Documentation is also available on
the D-Link website
Page 2
Package Contents
This DFL-870 package should include the following
items:
• 1 x DFL-870 Firewall
• 1 x Power cord
• 1 x Mini-USB-to-USB console cable
• 1 x Ethernet cable
• 1 x Rack mounting kit
# Connector Description
Mini-USB connector used for
1 Console
2 USB 1/2
3 Ports 1 to 6
connecting a remote management
station to access the command
line interface (CLI).
Reserved for future use.
Gigabit Ethernet ports that can be
congured to act as WAN, DMZ, or LAN
ports through the web user interface
(UI) or CLI interface. These ports are
pre-congured by default. Please refer
to Default Interface Settings below.
If any of the above items are damaged or missing,
please contact your local D-Link reseller.
Hardware Overview
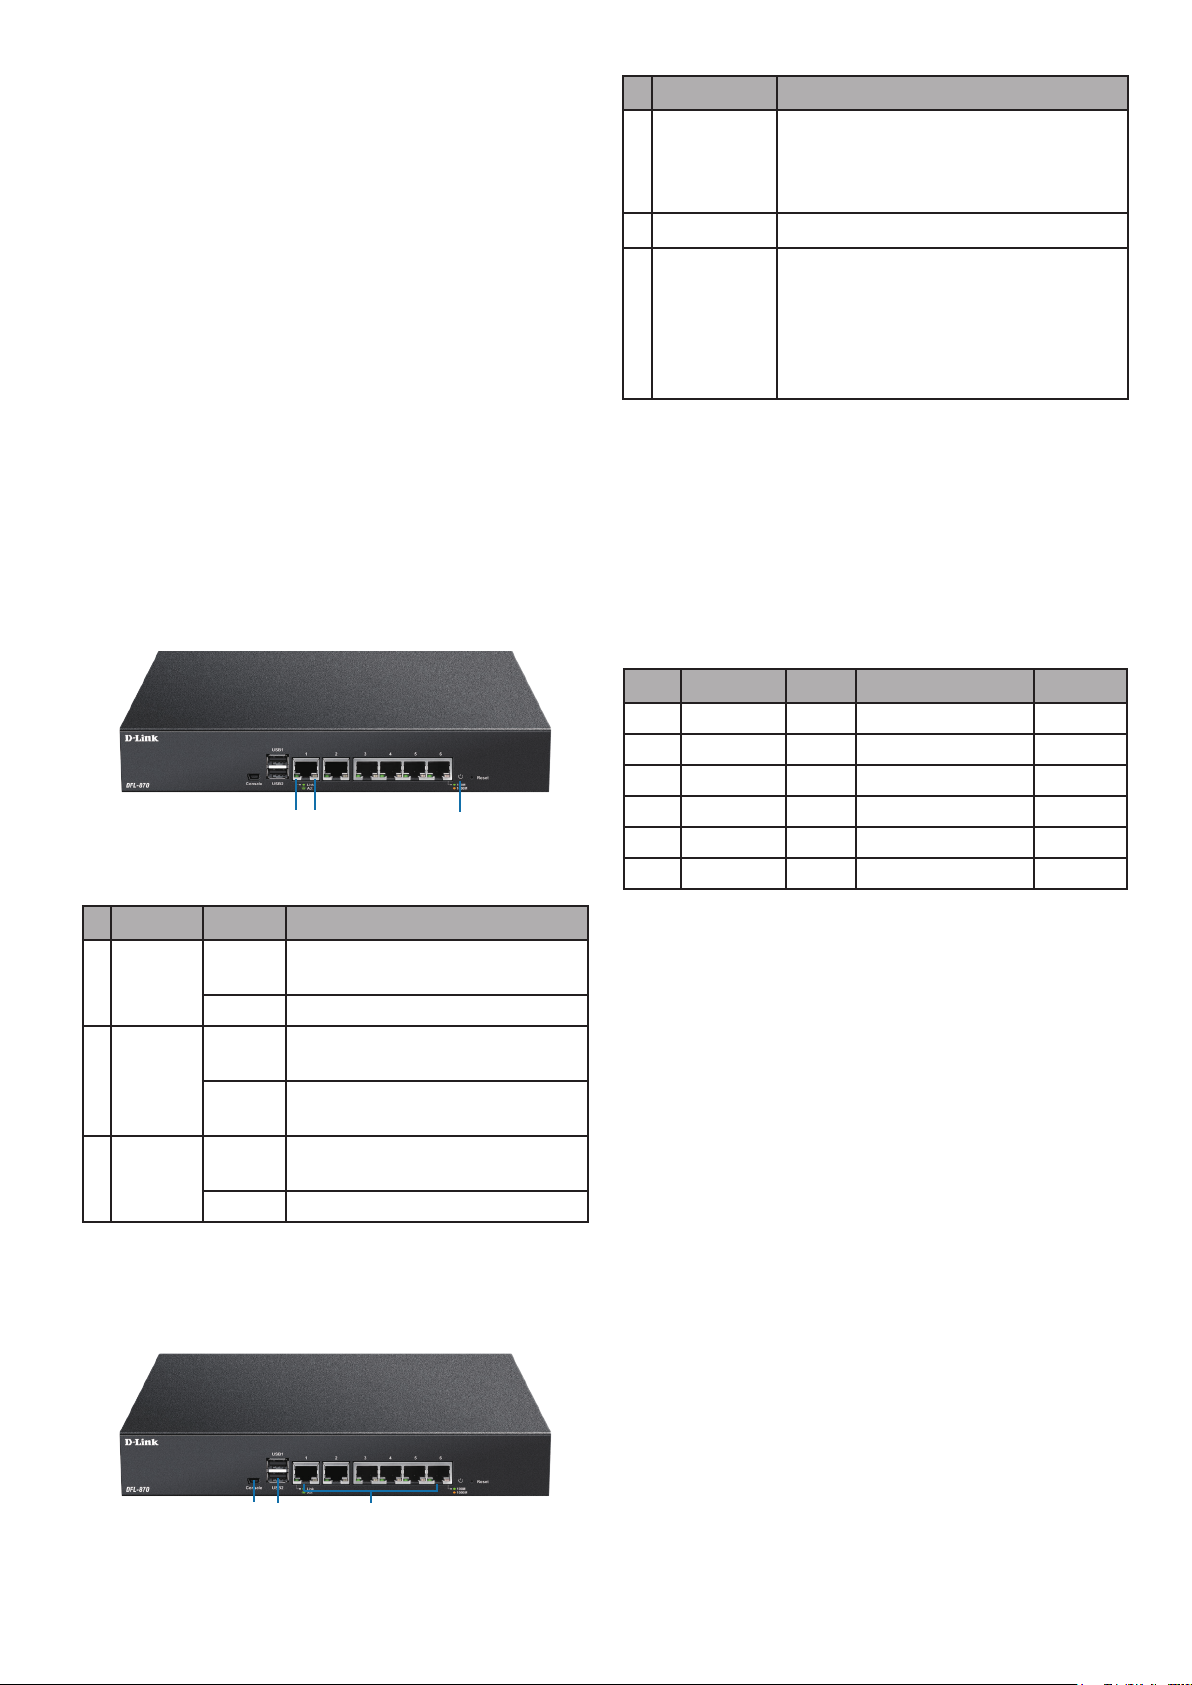
LED Indicators
1
2
Figure 1: Front panel LEDs
# LED Status Description
1 Link/Act
2 Speed
3 Power
Solid
green
Blinking There is trac on this port.
Solid
amber
Solid
green
Solid
white
O The device is powered o.
A connection has been
established on this port.
The connection is operating at 1000
Mbps.
The connection is operating at 100
Mbps.
The device is powered on.
3
Table 2: Connector overview
Default Interface Settings
The function of the Ethernet ports on the DFL-870
can be congured through the web UI or CLI interface
to accommodate dierent network requirements. By
default, these ports are pre-congured as follows:
Port Interface Type IP Address Web UI
1 WAN1 DHCP 0.0.0.0/0 Disabled
2 WAN2 Static 192.168.120.254/24 Disabled
3 DMZ Static 172.17.100.254/24 Disabled
4 LAN1 Static 192.168.10.1/24 Enabled
5 LAN2 Static 192.168.11.1/24 Disabled
6 LAN3 Static 192.168.12.1/24 Disabled
Table 3: Default interface conguration
Note: By default, the DFL-870’s web UI can only
be accessed from the LAN1 interface (port 4 on
the device) for security reasons. This can later be
changed through the web UI.
Hardware Installation
Safety Precautions
Table 1: LED overview
Interface Connectors
1 2 3
Figure 2: Front Connectors
2
A) Operating Temperature - In a rack assembly,
the operating ambient temperature of the rack
environment may be greater than the ambient
temperature of the room. The equipment should
be installed in an environment compatible with the
maximum ambient temperature (Tma) specied by
the manufacturer.
B) Air Flow - Make sure that the amount of air ow
required for safe operation of the equipment is not
compromised.
Page 3

C) Mechanical Loading - Prevent unsafe conditions
by avoiding uneven mechanical loading.
D) Circuit Overloading - Consideration should be
given to the connection of the equipment to the
supply circuit and the eect that overloading of
the circuits might have on overcurrent protection
and supply wiring. Appropriate consideration
of equipment power ratings displayed on the
nameplate should be used when addressing this
concern.
E) Earthing - Reliable earthing of rack-mounted
equipment should be maintained. Particular
attention should be given to supply connections
other than direct connections to the power supply
(e.g. use of power strips).
Rack Installation
Please follow the instructions below for how to
mount the DFL-870 in a standard 19” rack.
1. Attach the included brackets to both sides of
the DFL-870 and secure them with the provided
screws.
Connecting To The Network
When powering on the device, allow 1 to 2 minutes
for the device to boot up completely before
connecting it to the network. Please refer to the
instructions below for making network connections:
1. Using an Ethernet cable, connect the external
router to the WAN1 port on the rewall. Port 1 is
pre-congured as the WAN1 network segment.
2. (Optional) Using an Ethernet cable, connect a
switch to the DMZ port (port 3 on the device).
3. Using an Ethernet cable, connect other Ethernet
devices, such as a switch, to the LAN ports (ports
4, 5, and 6 on the device). These ports are precongured as LAN interfaces by default.
4. Connect a management station to the console
port on the DFL-870 using the included cable to
congure the device using the CLI.
Note: When connecting a PC to the console port with
the included Mini-USB to USB cable, Windows will
recognize the device and automatically install the
appropriate driver. When using a Linux or MacOSbased system, you may need manually download
and install the mini-USB drivers. To download these
drivers, visit http://security.dlink.com.tw and
proceed to Support > Download Software.
Figure 3: Installing brackets
2. Place and secure the DFL-870 into the rack using
the screws that were provided with the rack.
Figure 4: Mounting the device in a rack
Accessing the Firewall
The DFL-870’s web UI can be accessed using one of
the following browsers: Firefox 11+, Opera 11.6+,
Safari 5+, Internet Explorer 9+, or Chrome 18+.
Note: The DFL-870 allows both HTTP and HTTPS
connections from any management host. However,
for security reasons, only a secure HTTPS connection
is allowed by default. For more information on
conguring connection settings, please refer to the
user manual.
1. Connect the management station to LAN1
(port 4). Make sure that the management
station is congured with a static IP address in
the 192.168.10.2-254 range with a subnet of
255.255.255.0.
2. Launch one of the compatible web browsers, and
enter the default IP address https://192.168.10.1
into the address bar.
3
Page 4

Figure 5: Accessing the web UI
3. Log into the NetDefend Firewall web interface
using the default username and password of
admin.
Figure 6: Web UI login window
Registering a D-Link NetDefend
Center Account
To access the UTM Firewall service, an active D-Link
NetDefend account and subscription are required. Visit
http://security.dlink.com.tw/ to register an account.
A 90-day trial license for the UTM Firewall will be
available after registering. Additionally, you may also
download the user manual and the latest rmware.
Conguring the Firewall
For more information on how to congure the DFL-870
using the web UI, please refer to the User Manual.
For more information on how to congure the DFL-870
using the CLI, please refer to the CLI Reference Guide.
Additional Information
Additional help is available through the D-Link
worldwide oces listed in the appendix of the User
Manual, or by visiting http://security.dlink.com.tw/.
4
Ver. 1.10(WW)_210x297
2016/09/21
45600-0025
 Loading...